Transcripts
1. How to Find the Perfect Background: Hi friends, it's Tammy prayer. Thank you for joining me today. I'm so glad you could tune in. I have a time freedom technique and I want to share it
with you and it will rekindle the joy you
want out of creating your art desk and help you do
more of what you love best. Before I learned
about backgrounds, I struggled with the blank page. I would ask myself, okay, What is it I want to work on all while waiting for
inspiration to show up? And instead, when I
embraced this concept, I immediately felt
more accomplished. Step one was easy and I was
a third of the way done. I no longer second guessed my decisions and my
art flow improve. I want you to avoid
hesitation at the blank page and to start enjoying your
collage experience. Saving time can
lead to curiosity, experimenting, and
effectually more art. Now this course includes discovering what
backgrounds will always work in collage
and how to make your background
choices in seconds, learn what to avoid and what
to do with those mistakes. And I have some bonus material
making a master board, and that'll cut your
collage time down. Also, I have some
hand-drawn focal points included in the
resource section. And I want you to use those as you work through
your collage practice. And that's what I'm using
in the class today. Gain confidence in
decision-making and let go of searching for
the perfect background, your workflow will increase and you will love the results. As an artist on Instagram, my goal is to help others find their joy in crafting by
sharing simple art projects, encouraging learning, and
sharing gifts like happy male. The supplies are
simple and they're probably things you already
have around the house. Do you have card stock? Do you have glue
about paper scraps, scrapbook papers and scissors? Bring them out and
spend a few minutes making several backgrounds
now and save them for later or finish by adding your collage with
those mid layers and your own focal points. Take some time today to prep your future
backgrounds and share them with me in the
project section. I can't wait to get started and to show
you this technique. So join me in the next lesson.
2. Course Project: Your class project is to
experiment and to play M, to pull out all your
scrapbook papers, magazines and music sheets and book pages and put
them onto card stock. And maybe transform it into a collage if
you have the time. This project is so simple, I just want you to mass produce as many
backgrounds as you can. Experiment with focal
point and see how easy it is to have
multiples of backgrounds.
3. Supplies: Supplies needed for
the class include card stock or try
a Manila folder. And in one of my projects I
use some watercolor paper. You have any scrapbook
papers? I'm sure you do. You probably have a bunch. Scrapbook paper to have
any old music sheet music, magazine papers, old watercolor, gel plate prints, old
Maps, or book pages. Those antique pages look
great as background papers. Find a collection and bring
them out to play with. Find some glue, liquid glue
for heavy paper, glue sticks. I really like the Elmore's
craft bond, extra strength. Pair of scissors or
a cutting board. Find the focal points
and my resource section, cut them out on card
stock and save them. To practice our collages today. As you're building up
your collection of background pages,
save your scraps. They will make
perfect mid layer.
4. Testing Choices: I want you to take a moment and really take in this picture. It's from a calendar,
last year's calendar. And there's something I want you to pick up when you
look at this photograph, there is a focal point. There is an element that stands out almost like it's being
propped up on a pedestal. There is blur, background, blur. It's kind of like a white noise in the
background, isn't it? Because your eye
really focuses on the specific details of your focal point and the
backgrounds, just a backdrop. It's not playing a part of the photo other than
being the pedestal that elevates the focal point to its prominence and your eye
is completely drawn to this. You're not searching
out the background, you're completely drawn
to the snowdrop flowers. Now I want you to remember
this concept as we move into finding
background papers. Do you have a stash
of scrapbook papers? I want you to see something
that reminds me of that picture with the
snowdrop flowers. There's something about
this paper that is perfectly great for
being a backdrop, for being the background, the first layer of collage. There's a repeating
pattern here. Your eye isn't drawn to
any particular area. Even if you have a graphic
on your scrapbook paper, not one of the elements is
your eye completely drawn to? There's no focal point here. Scrapbook papers really
lend themselves to making great background
papers for collage. And the key takeaway is almost any paper will do
if you ever get stuck with that idea that the
blank page is so scary, I don't know what to do or
randomly grab a piece of scrapbook paper and
start collaging because I can almost
99.9 guarantee. Scrap of paper will always work. What about calendar
pages, magazine papers? I want you to notice if
you took any one section. It's a background paper because
there's no focal point. It's a repeating pattern here. The same with this. Taking a section of a photograph that is
a repeating pattern. There's no focal
point would make a great background paper. Book pages, music paper. Why will they work? There's no focal point. It's basically another
repeating pattern. They would make a great
pedestal to your focal point. Do you have any scrap
paper, watercolor? There's nothing here that says, Oh, this is the object
I need to focus on. This would make great
background paper about a map. A given there's no focal point, it's all basically a blur. It's the perfect background. So your takeaway is any paper will work probably
99% of the time. Now, I want to show you some background papers
I made recently. And they all have
that same concept. There is no focal point. There's nothing your eye
is completely drawn to. And here's a test
I want you to try. I have drawn several botanical looking
objects and test it. Test this method. Do you see the print or do
you automatically focus on this cone flower or
this fantasy flowers? I'm going to call
it any background. Any background. Do you understand
what I'm saying? The freedom you will
have in looking up different papers is just
at your fingertips. I want you to grab and go and automatically start
building a collage. Add some text. Your mid layer is
all that's missing. In this exercise. I have given you
your focal points. I want you to go and
create any background. And all you have
then to concentrate on is your mid layer and you will have a
finished collage. Now, I do have a help. If you have a paper that's
probably not the best choice. We're going to talk a little bit more about that coming up.
5. Is There a Wrong Background?: Now I have some examples
of maybe you're wondering, is this paper going to work? Is this really what
she's looking for, for scrapbook paper, for being a background
to my collage. Let's try our test. If I put a focal
point on this card, something else is
competing with my I. If I, if I put this here, then I see the eight and
the flower and the buret. They're all equal. And that's not a great choice. Now you may look at this. There's some focal points. There's things that
I am drawn to. I see the shells
immediately and they're actually on a
background paper also. But if I take my focal
point and lay it on top, I definitely see my focal point before I see this
background layer. And I'm going to suggest
it's because of the colors. They are very muted. They coordinate completely well. None of them is
overpowering the other. But your focal point
captures your attention. So this could work. I wouldn't say no to it. I do like that paper
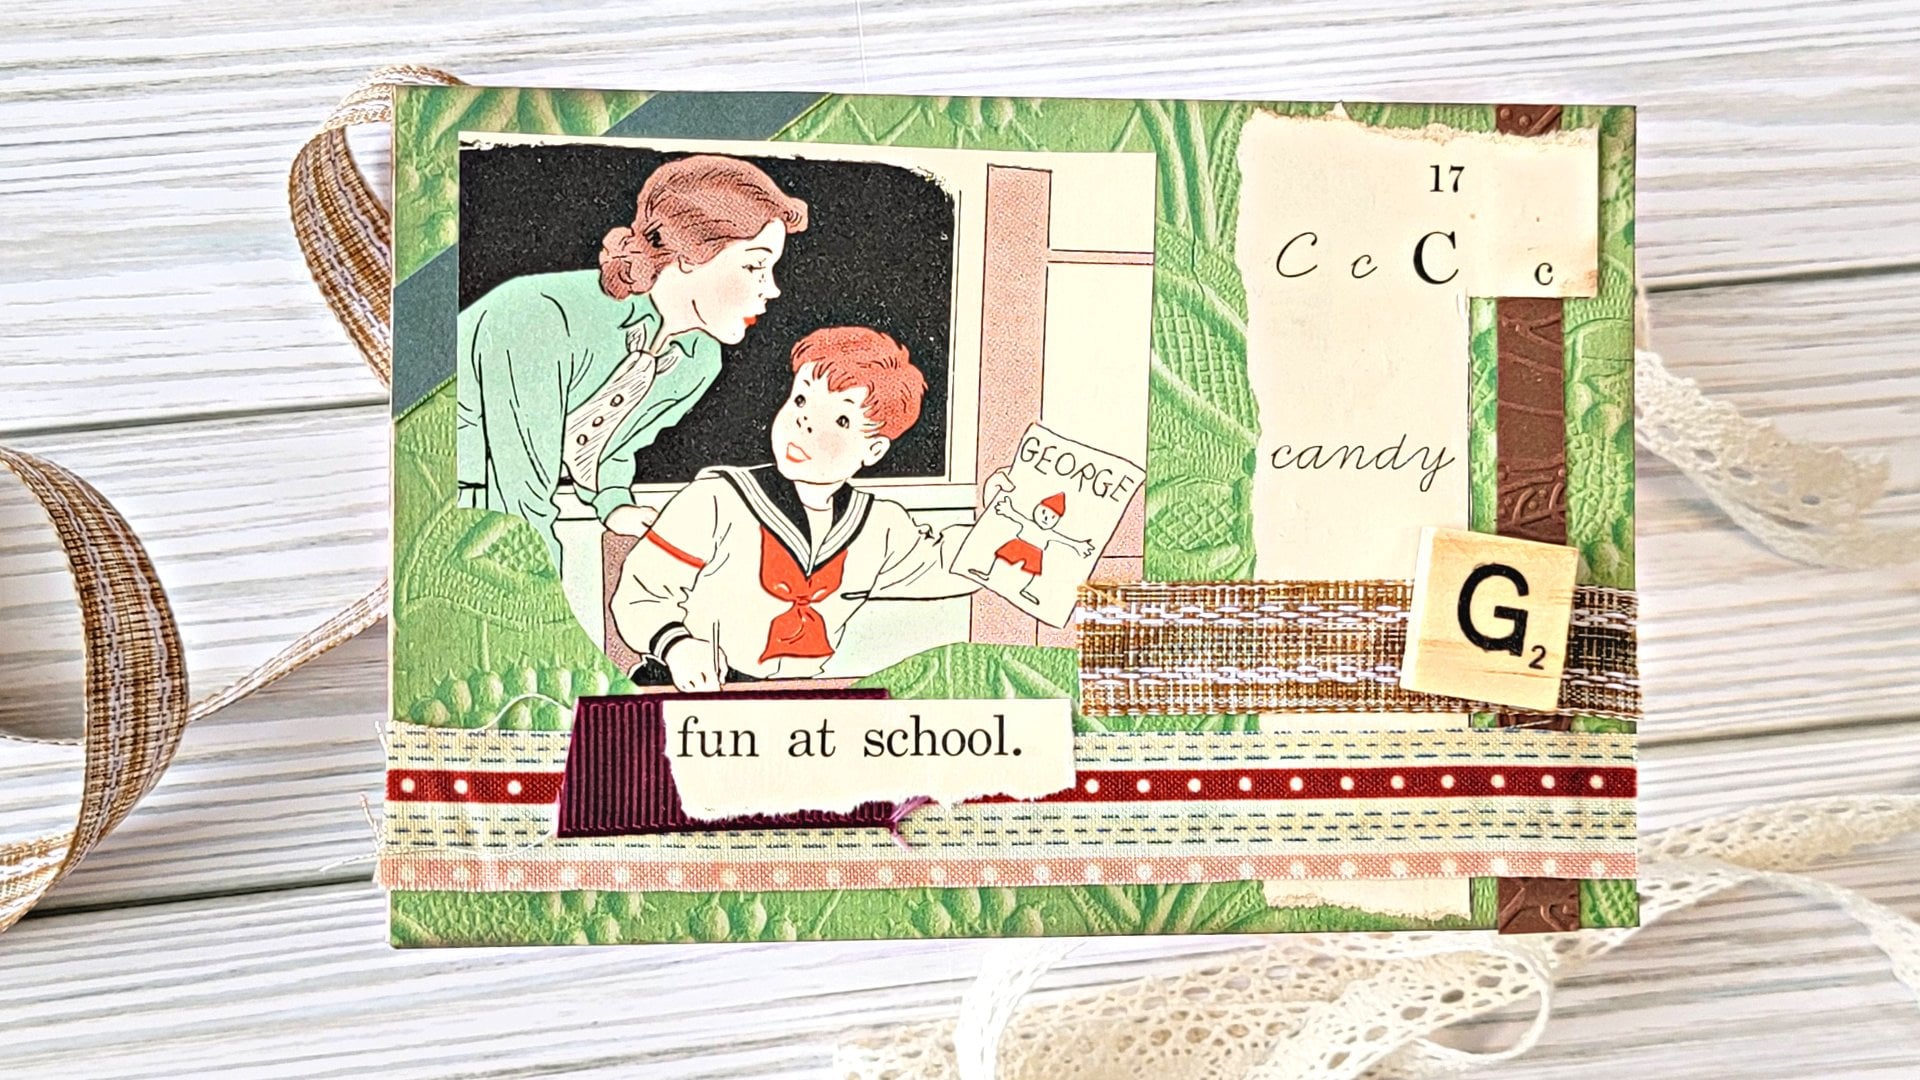
as a background. And here is a suggestion. This was a book page that my granddaughter had
painted some doodles on. But because the page was not completely covered with paint, your eye is drawn to a red
section, the purple section. This postcard, it's completely black
with some white text. And these bright graphics of
flags was really striking. Your eye is always searching
for where to look. But I did a trick
that helped mute the overall darkness of the page that competed with
the focal point. And I want to do that with
this card for you right now. What I did was take some vellum. Vellum is like a parchment. You may have some baking
paper or some actual vellum. And if you lay it
over your piece, you've completely muted
all the components. There's a layer of
neutrality on top of it. And putting your
focal point on it. It's still stands out. I focus here more than
I'm looking at that eight with a med layer being built in between
that and my focal point. This will work. Let me show you how easy
it is to make that happen. My glue stick, that's
all there is to it. I'm going to put some
glue here on my piece, making sure my corners are
well sticky, very sticky. And taking my velum here, I'm going to place it on. Does have some polka dots. This is acute pattern of a
vellum and actually that also helps to mute the darkness. It's giving a repeating
pattern to the project. And then all we have
to do is cut that out. So don't be afraid
or stay away from Using children's books pages. This is actually a postcard. Go ahead and use that. Go ahead and fix
mistakes, experiment. Make these work for you. There's nothing you can't
alter in the world of collage. This is a perfectly
good background now to use for your collage.
6. Prepping the Base Layer: I want to start batch
making lots of background. So I start with card stock. And one of my favorite
sizes is six by four. I like working small. And this is actually a
folded piece of card stock. I'm leaving the fold intact and I'm cutting
it six by four. And now I can have a card. And this paper was so large, it's going to allow
me to make multiple, even just postcards sizes. That's a fantastic way
of using your paper. For multiple projects. You could cut tags, you could cut it five by seven. You could cut ATC cards, three-and-a-half
by two-and-a-half. So I have my substrate. This is my card
stock ready to go. I do have some scraps. I'll save those if I need them. And I want to lay
down my base layer. I've chosen to scrap papers to place on top of my substrate
so I can have a stiff card. Maybe your card stock
is heavy enough. But I'm going to apply my paper here now
to my card stock. Remember I said any
paper will work. I'm going to go
for a six by four. This is 88 by six. We'll leave that at six and
we'll cut this at four. Now I actually have two pieces. How great is that? I know this is the same
size, six by eight. I'm going to trim it to for
sure is straight as can be. And I can make
backgrounds that quickly. All I need is a little glue. And once I attach
my scrapbook paper, my background paper, I have my first ready-to-go
background with no thinking. I have. How much
time have I saved? And I'm a third of the
way done with my collage. Knowing that scrapbook paper
is perfect for collage. And it will work. Look at that. A perfectly
good background. Let's try this. This brown. Let's two-sided decisions. Okay? I'm going to stick
with the brown today. Get the glue along my
edges really well, and align this up. Sometimes I cut it down
just a smidge larger so that I don't have to be so
careful about placement. But it's okay. It will work. It will work. I already have two
backgrounds done. Choosing the paper cost
me no time at all. And these are perfectly
good to go to collage.
7. Bonus! Create a Masterboard: Making a master board of watercolor is simply
just applying paint everywhere and then
cutting your paper to size regardless of where any
images are, lines are. That's why this abstract
is really simple. I'm going to take
the biggest brush I have and wet my
paper everywhere. And I'm looking for the sheen to show up
everywhere on my paper. I'm not stressing about the buckling of my
paper because this is just an exercise of plane. And that's my number one goal. Getting color on the paper and putting colors that I like. And this is how I
activate my watercolors. Zip, zip. And really it's because I
never know what I want to reach for next and
I want to make sure they're all
a little bit wet, I think because Valentine's
Day is coming up, I might stick with my reds, red colors, my pinks. Look at that, that rose matter
is so light on my card, my a sample card. It's actually quite vibrant. You know what, one
vibrant, vibrant color is? Opera rose. Look at that. It's so bright. I'm going to switch
to my big brush because this is a big board. I love clinic withdrawn colors. This is magenta. And I am just getting it out. In fact, if I want to smear more color around,
add more water. I liked the light effect
that I get just by playing. I'm going to put
that rose matter back onto this corner when I had started in
the opposite corner. That's just how I'm
gonna roll today. Meeting it in the middle. So, so faint right now. Where's that bright,
vibrant stuff? Well, I am in the rows
light section right now. This is not an exercise
in how to paint. This is how to put
colors down and let them bleed and meld
and just go everywhere. Fact, I think I might go
over here to permanent rose. Bit more. Red to the pink is totally good. Can you just play and your
colors all day like this? Not stressed, not worried. Yet. Spill and whose everywhere? Turn your paper if you'd like. It's all going to
be totally fine. One color, I really
love his quinacridone. Gold. In fact, let's do that. Can we spot drip? Splatter? Have fun with that. A bit more water and that quin gold and drop
it in the white areas. That looks fun. Let's give it half a
second to settle down and dry out while I open up
my fine tech and gold. My calligraphy friends make this up for their calligraphy
pens or dip pens. I splatter. Gold to me is just exquisite. This was scrap watercolor paper. I had used an edge
for something else. So this is oh, let's see, 99 by 9.5. Four-and-a-half. Four-and-a-half. By six-and-a-half. I would make a nice big card. Let's do it in multiple sizes. We're just looking
for a background. In fact, what is this? Two-and-a-half? Two-and-a-half? Yeah. And we could have artists trading card
right out of there. This is now a background. And remember the ideas
we talked about. What makes a good background? Just about anything. Or by six is what
we've been working on in our class
specifically today. And this will make a
beautiful background. This would make a great
artists trading card. This would make a great
artists trading card. And this is an
extra large cards, so we are stocked. That's a master board. We made multiple sized projects right here from one piece
of watercolor paper. And all we did was lay a
color down, an experiment. We picked colors we liked. And now I have four pieces ready to go
and some accent as well.
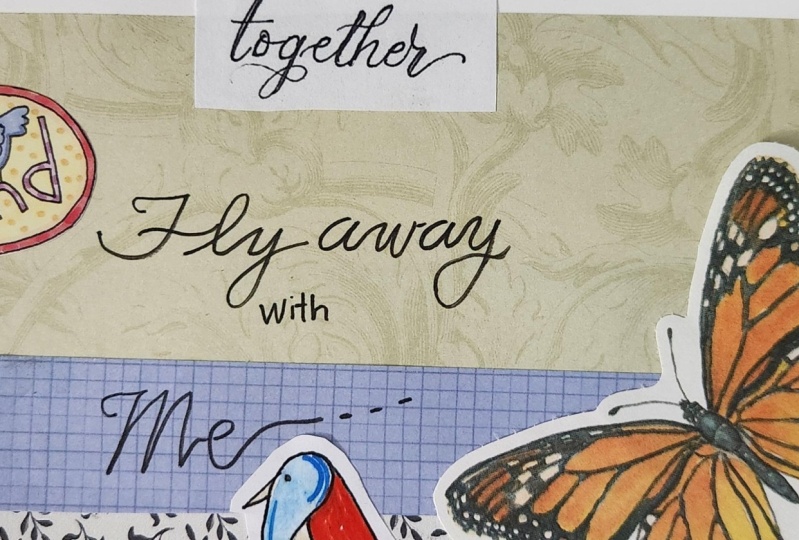
8. Finishing Touches: Now look at this. I have a pile of ready to
go backgrounds for collage. And I want to go ahead
and finish out one. This is one of my
favorite drawings. If we use those to want
to find my mid layer. I've saved some scraps. I've got map velum, the scrap from this. Oh, and don't forget
that coordinating back. I have painted papers. I have scraps from
my from my calendar, from gel plate printing, more calendar, scrap
of paper, book pages. All these little scraps might come in handy
for this effect. I think I'm really interested
in this music paper. What do you think? I'm also a very big fan of torn paper. I think that look is
really interesting. I just find it really freeing. I don't want to lose that cleft. Okay, now thinking about
my rule of thirds, I can use my line
up here and here. Lay that down. I do want something
from my wonder. We want a different text page. A little vellum. Vellum might be pretty. I think I'm going to cut this. I really think stripes,
strips of paper. So easy to work with. So that is really one
of my go-to looks. I don't know if I love that. So we'll save that. Are coordinating color. Maybe the blue or the green. Let's say that. I actually, I do like that. I think that blue and green is really a nice
coordinating color. Maybe more green. Let's look at this. They don't have to be along. What if we went short? Fact, I kinda like that better. Let's go short. All and maybe some
vellum over here. Are under the flower. What do you think? The flower needed? It needs it through the center. Actually leaning towards
wanting a long strip. Let's cut along one, letting it go from n to n. And here we go. Maybe one more green up here,
different color green. Do I need about that? And maybe my wonder
is just too big. I should trim that down, maybe go off center and
move this off center. What do you think? The flow of hello of
paper looks nice. There we go. I like that. It's taped. My
distractions away. And I think that looks
pretty darn good. I'm gonna leave that. Get a picture real quick. Let's start gluing down. I would like to have some
glue paper this time. So I'm going to use
a piece of paper. Alright, so what's
on the very bottom? This music was on
the very bottom. Let's glue that down first. Go. It was coming
just off the page. My text. Let's just off there. We won't stop band
up and saved saved. To lay down my strip of vellum. Remember it's longer than my my card so I'm not going
to glue all the way across. Realm can be a little stubborn. We really want that
glue to adhere. And how about this? We know this is on the bottom
and it's to the right. Coming off the right. Fair enough. That's going to work as well. Let's try my liquid glue. If your nozzle is
as thin as mine, you may have to get a pin open up that nozzle
where the glue has dried. I got a little glue
on the other side. It's all good. Do that warm hand press down. And my text is
coming off the page. Let's have it coming
off the page. Look at that. That was so quick. That was such a fast project because I had my bottom layer, my focal point and text decided, pre decided I could play with that mid layer and let my
focal point shine through.
9. Wrap Up: Thank you for joining me. I hope you'd got into
your paper stash and started making those background
decisions much faster. And I've enjoyed playing again at your desk as
you start creating, did you make a collage? Did you finish a piece? Please share it in
the project section. I'd love to see it
and encourage you and cheer you on as you found
more time to be creative. Because that decision
making has been cut down. There's no more fear of
the blank white page. And you'll be able to
share your art with others way more often. Any comments or questions,
please add them, can answer you on Skillshare or you can find me on Instagram. I'd love to see you there
and follow me on Skillshare. I'd appreciate that. Thank you for joining me. Have a great day.
 Tammy Prara, Making Matters