Transcripts
1. Clusters Intro: It's Tammy prayer, and
thank you for joining me. Today's class is for anyone
who is new to collage, but wants to learn how to start and have immediate success. I will show you how to take five little scraps and turn it into an inspired miniature
collage called a cluster. With clusters you can feel accomplished and
just a few minutes, the skills are in
the sorting and curating level
layering divisions and selecting a focal point. Many little decisions go into choosing those five
or six pieces of paper scraps and then having that piece turn out
better as a whole. Collage decisions are
emotionally based. What is your mood and what
are the supplies that you have that you really
want to work with? Realized that the
decisions you make today, you probably wouldn't have made yesterday and you
wouldn't make tomorrow. So what are the consistent keys? A sturdy piece of backing paper, three or four
coordinating materials, and an interesting
a focal point. The good news is
all those decisions on what is considered
coordinating and what's considered interesting is based on your mood, the moment. So just take the first step, then make the next decision. Before long, you will
be making art you are proud of and others won't be happy to
share in your talent. Your clusters can
embellish a card, decorated journal, or up
level a package or envelope. I have used them on
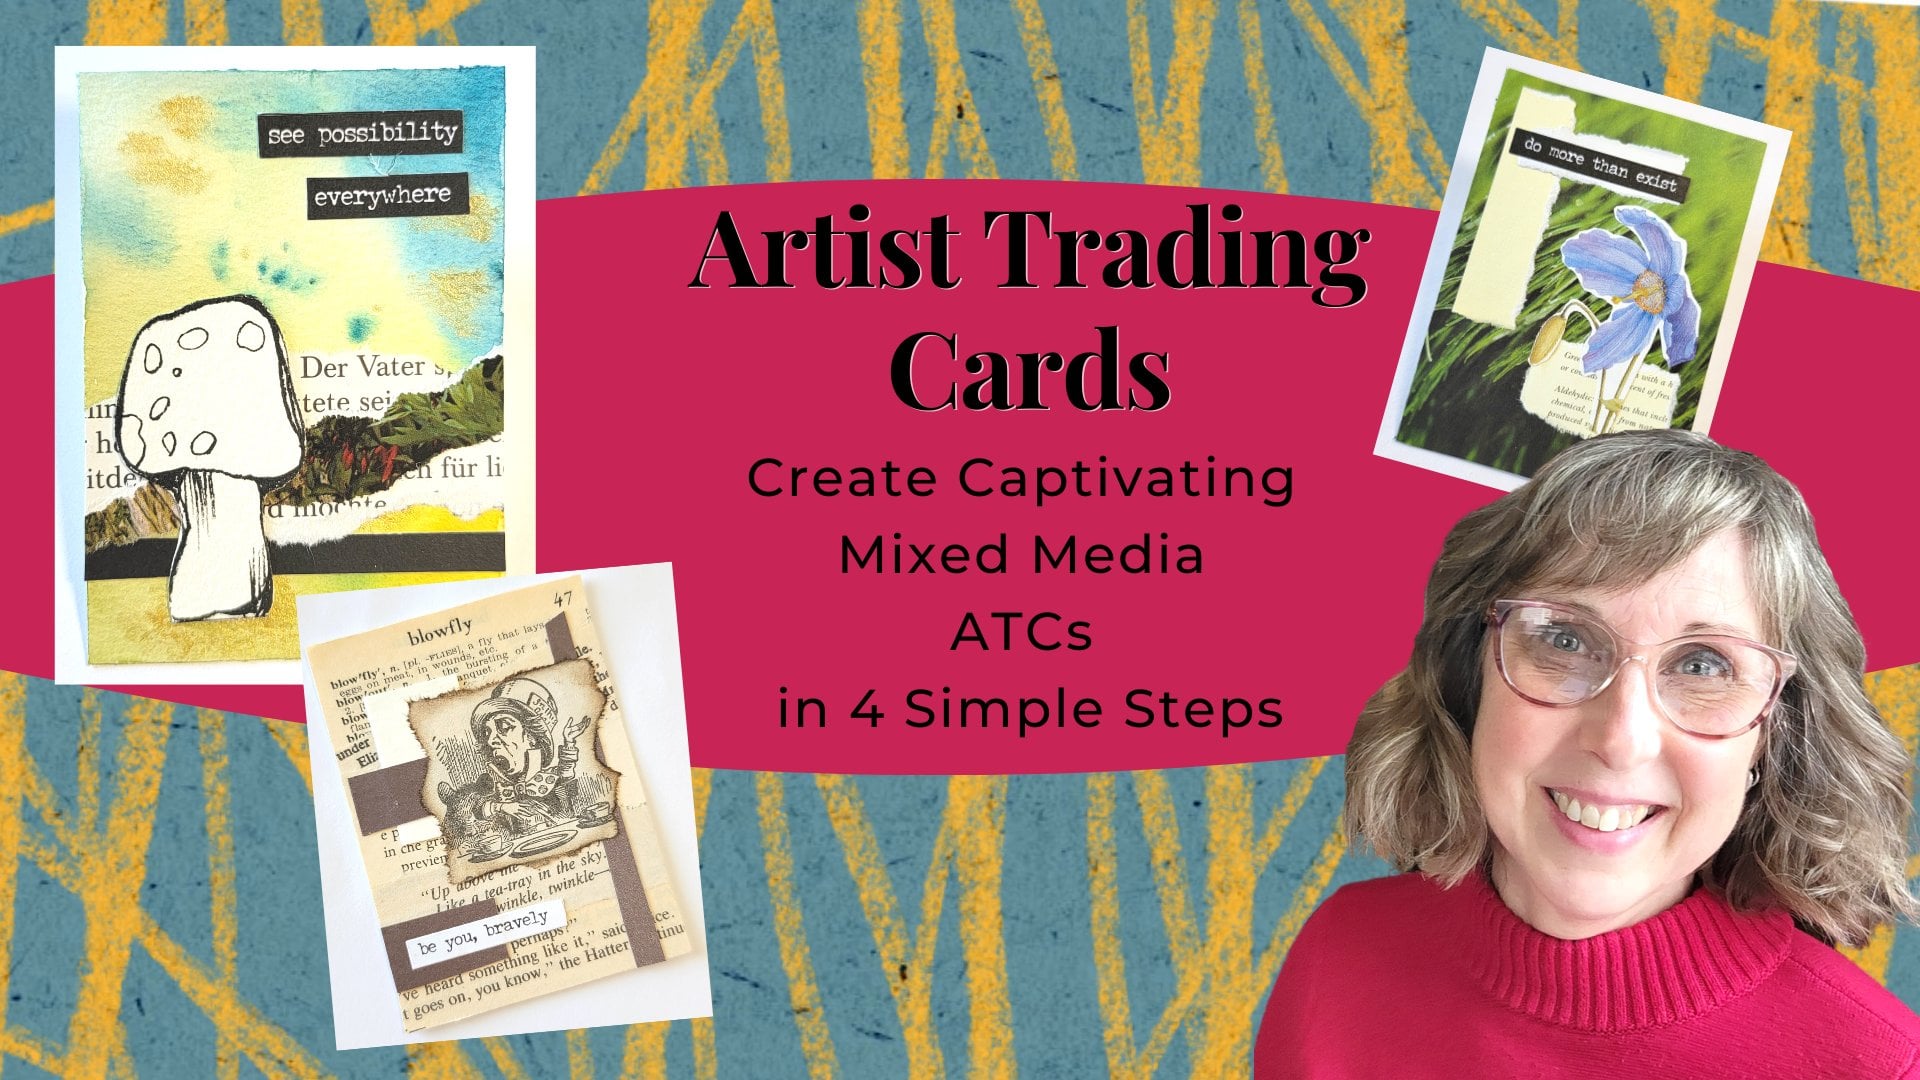
artists trading cards. And I've also sent about
unhappy male swaps. You can find my clusters and
ideas on my Instagram page. And I'd love it if you would share your finished
clusters with me. They're all on Skillshare in the project resource section. Looking forward to seeing
your creative clusters.
2. Class Project: For your final project, I would love it if you
would make a cluster, or at least get
your materials out to start to make your cluster. Because just taking
that one step is huge. When you are starting out, start coordinating the
colors and maybe looking at the textures and find
that focal point. That's always a fun inspiration. Start. Once you've
glued them down. Take a photo and when you're
on your laptop or desktop, send that picture to the
project and resource section. I would love to see it
and encourage you to continue your
collage experience. I know others are inspired by seeing photos
of what others are doing and not just sparks more
ideas and more creativity. So please take a moment
to share that with me. I'd love to encourage you and I will respond to your projects.
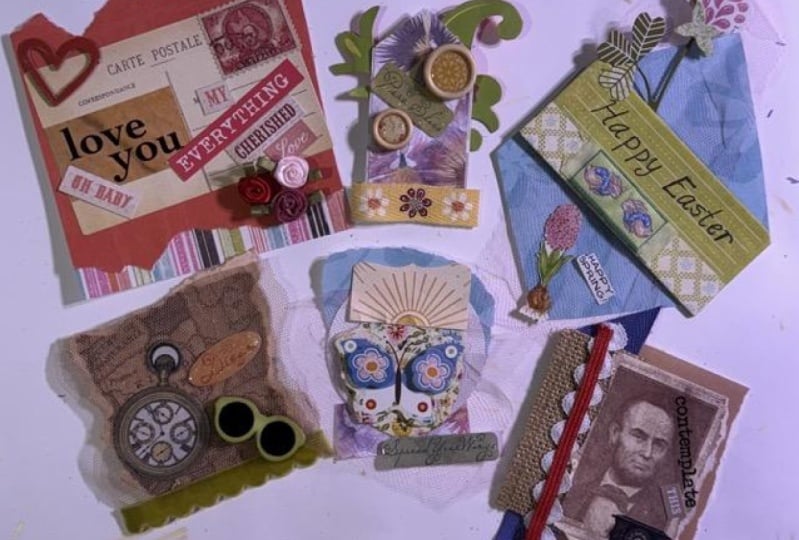
3. Supplies: Here's a sample of a
cluster and as you can see, it has a heavy back. It has a focal point. And then a couple of layers
of materials for collage. And so I want to
walk you through some of the things
you're going to need. Now, one is your Back
paper, something heavy, like a watercolor paper, piece of card stock
or cardboard. Even then things for
your focal point, do you have postage stamps, letter tiles, maybe
a button or two. These would make
great focal points. And then I coordinated
some scrap of paper. I have some greens all
together in a set. I have some blues. And I found some orange and reds and I kept them in group. The neutral, the grays. So as I'm building up my layers, I can remember
color coordinating. And finally, do you have
any soft materials? Don't have any fabrics, threads, ribbons, some of your
favorite colors. Things that could also work
as a layer or a focal point. Gosh, I have lace, I have some textured papers. All of these would make great
layers for our collage. Pair of scissors. I'm using my messy scissors. They can handle the glue
and they're still cutting. Okay. They're cutting. Well, the glue I'm using, I found on Amazon and
it's a very thin nozzle. I like using a liquid glue for putting multiple dimensional
elements together. And finally, if you want to make a card using your cluster, you just need some
scrap of paper. This was eight and it's 6 " across 8 " and
I folded it in half, so that turns it into
a six by four card.
4. The Basics: Today's focal points are
going to be very simple. I have a few postage stamps would make a great focal point. Some little letter tiles. Maybe you have a
decorative button. You could use a snippet of
ribbon with some text on it. Fake plastic buttons
that would make a cool focal point
or some wax seals. So many great ideas for that final piece on
top of your cluster. Now let's talk about layers. Here you can see I've used a watercolor card and I like
that as a very sturdy base. And the layers, I am choosing things that
are color coordinating, and then my focal
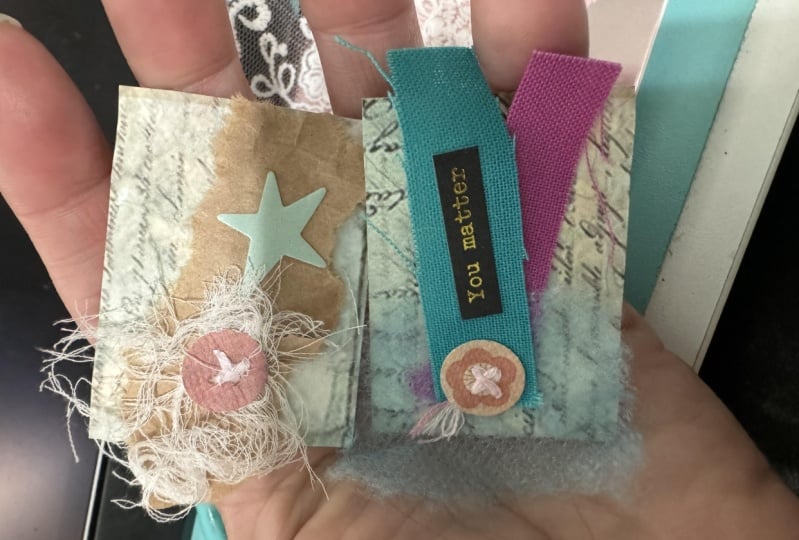
point goes on top. So a cluster is just something
that has three to five, maybe six layers to it. I always start with the base. And then there's a
middle layer that just compliments the focal point. Do you have any card stock
or heavy watercolor paper? Or maybe you have some heavy-duty card stock of a certain kind of paper
pattern that you like. So speaking about layers, pull out your
scraps and do dads, I have lays little fabric
pieces, some netting. I cut a little piece of measuring tape,
snippets of fabric. Pick your favorite colors. You have scrapbooking
paper scraps. What about your practice? Sheets of painted papers may be working on
some doodling ideas. This would make a great layer. We are looking to
color coordinate. So let's decide on
our focal point. And let's say we're
going to use this arose and a piece of watercolor
paper as the base. Going to go ahead and that off right now so that
I can work with placement and the different
layers and looks I like maybe this would be
great with more white. What else do I have
That's in whites? Or this pH would be kinda
pretty maybe this gray tone. That's interesting. I want to do any purple. I don't think so. Although this purple
is awfully pretty. Maybe another paper. How do these work together? These look really nice
together, actually. Some, maybe a slice of that. And what else do
we have in here? I do like that. So we're looking for colors that compliment,
that coordinate. And what's nice about
making a cluster as you can just easily
imagine them together because you don't need
very much at all. Maybe a little bit
of this blue thread. And now we have 12,345.6
layers right here. Seven, if I count the netting. And as you're working
with your piece, these layers would tend to
make more sense for you. What works and
what doesn't work, and what suits your fancy. At the very moment
that we're doing this. I actually want to just go
ahead and get this on here. I did decide to
use this netting, going to cut me a small piece. I'm gonna make that my very
far back ground layer. I like it when it hangs
off the edge just a bit. Torn paper is always welcome. In collage. We add one more, one more strip. Or just the gray. The thing about your
focal point is, I don't want to cover up
too much to use this blue. I don't know. Was it it's like, oh, it's a waxy thread. That's exactly what it is. It's a waxy thread and I'm
going to lay it across here. And then my next layer
will help secure that. Lay that down just a smidgen. Because my roses
need to pick out all the more glue will dry clear. And that cluster is done. I love how simple
making clusters can be. And I feel so accomplished. It just took a few moments and I feel so accomplished
and I really, I hope you try this too.
5. Example with Neutrals: I am going to work with these papers because they
really color coordinate. And taking out what I have
That also coordinates, I'm looking at these neutrals. I'm looking at these textures. And the colors all
are very similar. That's okay. Clusters just need the
smallest amount of materials. We're looking at, four to five to
six little pieces that come together to make the tiniest collage and start placing out the things
that I want to work with. One is getting my
card stock ready. It's over an inch. It's about 2 " by an inch, inch and a quarter. And I may even trim that down. I like this live to be my focal point text always works really
well as a focal point, these colors are just
so yummy to me today. Some days you may think
that is not working for me. I want something
really big and vibrant and see how I'm trimming just
about an inch of ribbon. That's all we need. Such tiny, tiny pieces. I really am drawn to this paper. It has, gosh, some
blacks and deep browns, some little bit of red in that. That looks great. And maybe a little off center. Maybe taking a bit of the black. Now the lace isn't
going to work. I do need something
lighter under there. This shell paper is so unique. A friend of mine sent it to me. And I just need the tiniest bit. And basically I'm
just experimenting. I'm playing with these textures and the colors and deciding, do I want to similar
colors together? Do I want a dark instead? And finally, the idea is
to have your layers show. I want to be able to see a
little bit of everything. And so maybe I will
add my shells. Well, maybe not. It
doesn't need any lace. Gosh, I don't know. Maybe some lace. 123456 layers already. I think I'm going to
leave the lace off. And that's all there is. And making a cluster, finding a few little
elements that work together as we build
these layers up. And then you're just glue down. That's how fast the process is. Taking the things that you like, things that are inspiring
to you in the moment. I'm always loved
neutrals and old pages and just really
cool things like that. In fact, I think I made this mustard color down here and put a put
my dark paper here. And my live right across that. Even at the final moment, I'm changing my
mind on the layers. But really it's,
that's all there is. It's just a something
that just fits in the palm of your hand and
becomes a mini work of art.
6. Example with Brights: This is my inspiration, a little bit of the word love. And I was really drawn
to this sparkly red. It's actually an
old Christmas card. If I cover up some of
that lettering and maybe even faded out a
bit with this netting. I am really in love with
this netting today. There I think I'm even
going to turn it because that sparkly red is just
inspiring me today. Actually, I think
I like the word love over there. Look at this. I've got two pieces
of fabric in here. So this red of the flower is calling
me as a, calling you. I, it's really inspiring me. A k and a little bit of that brown neutral love
to put a bird house. Her. And I wish I could
use that bird house, but I'm just not feeling it. And this is the little
too purple for me. So let's keep looking. About a bit of red ribbon. Well, that's working for me. I like that. Okay. I think I'm good to go. I'm going to my
netting down first. Little flower. I think I'm going to bring
it all the way out there. Red ribbon and my love ribbon. Oh, yes. I like how that
accidentally came. It's like the red became
a little border for that. I am going to trim
off some of that. And here we go. One more cluster.
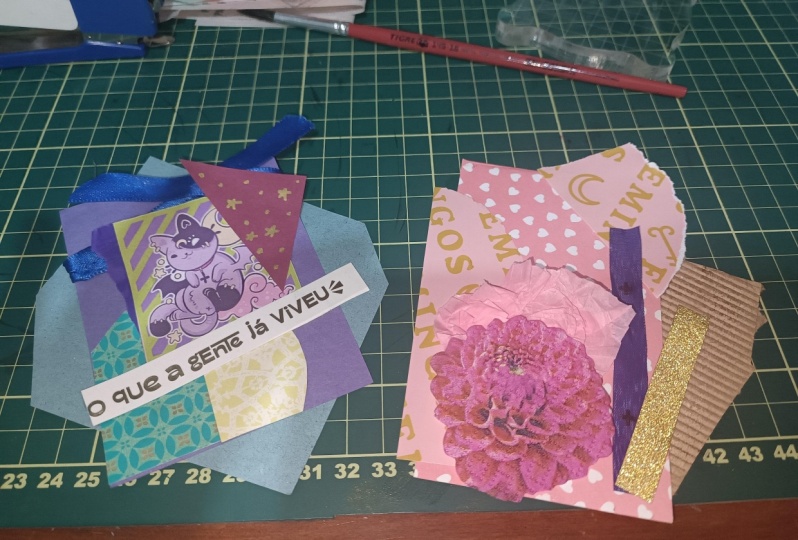
7. Bonus Lesson: So here's our clusters
we've made today. They were so simple, so easy to do. Now, what can you
make with them? My ideas include making a card. Now, I have some scrapbook
paper that are cut. Looks like it's
about six by eight. So that means when I fold it, I will have a six by four card. Let's kinda pretty together. Maybe the purple, gray. That's really pretty Oh, yeah. Can make that card. Let's see what else
we got it back. Oh, look at that. Blue. Isn't that pretty sad? A good combo. Blue is very similar, so that might work well. Let's see what else I really
liked this deep brown. Oh, That's really nice. Oh, how does that grab you? Well, I think this greens and yellows are so similar
it would get lost. But that really tempting
there for a minute. Then this looks really nice. Okay, So this is
what I'm thinking. If you take your scrapbook
paper and fold it in half. Now you have a note
card to write inside. Didn't know that was in there. Now let a little washi tape across that'll
solve that problem. And look, here's the same paper. So do I want Paul? Yep. So I'm going to put that aside and we'll just
concentrate on this one. Putting a little
embellishment on here. That took you just
minutes to do, right? Go ahead and you can
glue that on there. You could write Happy
Birthday or maybe your friend's name starts with S. You could put
this just for them. I love that idea. Especially when our,
when our clusters are flat versus a
dimensional focal point, when they're flat, it makes it very easy to send in the mail. So this is a two-sided
paper That's really pretty. Sometimes with a
two-sided paper, I leave the inside, peeking out the bottom. And you can put your
love here in the corner. Isn't that pretty? Just attach your
base to the card. I'm not going to bother with the very loose elements
of my netting. Do the warm hand press. Now you have a gift card.
8. Wrap Up: Wow, thank you for joining me. And did you really experience how emotional making
collage can be? That way we decide how to sort through the papers
and the materials and all the things we've
collected is really based on how we
feel in the moment. And that's what makes collage so spontaneous and intuitive. Please share any
ideas you've had with me in the discussion area. And don't forget to share
your project with me, either on Instagram or on Skillshare in the project
resource section. Let me know. Are you
using it in your journal? Are you using it on an
envelope or for a card? I would love to see the
creative ways you're using your collage clusters. Once you take a moment and
review this class for me, I really need that
feedback on how I'm doing and what more you
would like to know from me. So please hit the review button and give me your feedback. Now I can't wait for you
to see my other classes on collage now that you've
gotten your feet wet. So join me again and
I'll see you soon.
 Tammy Prara, Making Matters