Transcripts
1. Introduction: Hi everybody. My name is Jessica and I'm a professional artist and illustrator. You can't have a 45-year career in art making 25 of those as a gallery owner as well. Without learning a lot about art, art supplies or techniques in ART processes, good and bad. There is a saying that an expert is one who learns more and more about less and less until she knows everything about nothing. Well, I'm no expert. So I know something about a lot of things and I always want to know more. I think that's a pretty common trade among artist and fat. So I thought it would be a really good thing to share some of this stuff with you. And a good way for us to do that is by creating a studio handbook together. So that way you learn can be easily referenced anytime. So this class will be about hanging out in my studios with me, sharing what I know about art making. And your project will be to create your own personal handbook to record what you learn in your own style, in notes and pictures and by trying the demos yourself as we go. This class is just Chapter 1. So we will grow your project book over time until it becomes a best ever reference for you. I also hope you will share some of your pages to show how you record the information and maybe add notes of your own to the topics. This will be a great learning experience for everybody, including me because I've never done classes like this before. I know we're going to have fun because the favorite topic for all artists is to talk about art supplies and what they do, and how we can make them do what we want them to do. So I can't wait to get started. So let's get to it.
2. What You Need: Well, it took me a little while to figure out how to do that. I wanted to point out to you how to get the most out of a class on Skillshare class like this one that we're doing is you're going to want to, to get the information, be able to take notes, maybe stopped the videos so that you can go, Oh my gosh, I didn't know that, blah, blah. So I just wanted to point out, I know most of you probably know this, but I didn't know some of it. So I did a screenshot of how one of my other classes looks and when it's playing. So that I could suggest that if I have something on the screen that you want to save as a picture in your your notebook, your workbook. Do a screenshot of it, do a pause to make it stop, and then take a screenshot. Now on Apple, I know how to do that and I know that you can do it on other platforms. I just don't know how it is on other platforms. On apple with a phone, I think you, you do the up volume and the on button as your shutter. And this is the first generation iPad on this, it would be a home button and the sleep button. On a laptop Mac, it's Shift Command four. And then you can draw a rectangle around the part of the screen that you want. All of that creates photograph. Photograph can be printed out and put into your studio handbook along with your notes. So that is good to know. And what else is good to nose at right here is a little rewind replay button that goes back just 15 seconds and you can hit it more than once. But if she just said and then you can hit that and then it'll go back 15 seconds and I'll replay that part. And if you wanted a whole segment and you hit that more than once. Here is a button for captions. Particularly big drive me crazy. And so I hide the, but if I'm garbling and a lot of the time, I am because I have a pollen allergy that goes from November through March, analogy to Germer pr. And my yard is full of jumpers and so as my neighborhood and my village and so the state of New Mexico. So I'm not I sometimes coffin I'm not always have that clarity that I wish I would have talking to you, but that's life. That's a small thing. Um, so anyway, if you can't understand me, then you can hit that. And I will be captioned right there. This button up here enlarges the screen just big enough to take over worthy. The chapters are listed, so it's kind of a medium size. And then down here, of course, goes to a full size on enlarging the screen, fill whatever whatever size display you have if you're on a device or on a laptop or whatever. Okay. And on top of that, we have don't give me trouble thing. Oh, I know. Yeah. I'll because it's the last picture. Okay. That was totally embarrassing. I thought I'd put him in the other way around anyway. And you can't flip through your pictures if you've got them expanded. Just one more thing to trip you up, right? Anyway, under that whole screen area. And I'm not sure where are the zoos or if this is on a device. And I also know that on a device you can download the darn video and play it however you want to play it. But on the desktop, at least you have a transcript choice next to Projects and Resources. And the transcript is a word for word of the entire video. And not only that, this is really great, but it's timed, you know, at what point in the video is this? And so getting this out of here and somewhere else, I'm not sure how you do that, whether you can export it as a text file, I have to I have to look into that. But all of this just really helpful in clarifying what you're trying to learn in this kind of a class. Because I'll be honest with you, I am not going to pre-plan this if I did, I'd be a stumbling idiot. And so it's going to be a real pope, R3. I'm going to start, you know, each lesson in Emory College class chapter. But in each of those of course, there'll be a number of videos and I'm going to start them talking to you about something. But creativity is really a thing that, that it enhances your association with things. You know, you think of one thing and then that makes you think of another thing. Well, that goes on big-time. When I'm doing this kind of a deal, I'm sitting at my desk, I have all this media around me. I start to tell you about a thing and it reminds me of another thing. And if I can get my hand on it right then and tell you about that, I'm going to do that. So it's going to be kind of a poetry and kind of Amerik, round of information. And not all lined up in a row. And it's going to be better that way. It's more spontaneous and and who needs to be lined up in a row anymore anyway, right? And so I'm going to talk in a second about, about how to keep notes in a sketchbook so that they're fun and everything. But this is how you can pull them most out of every lesson in every class of mine on Skillshare and especially the studio handbook classes or I'm going to be throwing really neat facts at you. Kinda continuous basis. Now as far as supplies go, it starts out really, really simple because all you need to have something to write with and a book that you're going to want to have for your studio handbook. Now this really can be anything. If you want to watch some of the, of the class first and then decide how much you want to keep notes. In a decision that you want to make is fine if you want to use a binder so that you can rearrange pages since I'm not categorizing everything into lumps. That's fine. This is just kinda journal that is just writing paper where you've put notes of all possible future. I put no, it's about possible future projects. I never keep a sketchbook kind of thing in hair because when I sketch and illustrate things, this paper won't take any of the media. So all it takes is a ballpoint pen and that's what this is for us as an idea cancer and don't forget it, catcher and so on. So in our closing chapter, um, I'm gonna go over a couple of methods for sketchbook artist to keep their studio hand. Handbook. Not talking out lots of dam. Anyway, for right now what you need is either a notebook, a sketch book, something to write in it with, and as far as any other supplies, it'll be up to you. If I hit on a subject and you have those supplies, then you'll get those out to, to do the demo that I show you or to try the experiment that I tell you about. And it's up to you as you go. We all have studios full of having only knows how much different stuff. And so you don't need to plan to have any of it until you see something in one of the videos that I'm going to try that or I am going to make a whole sketch page about this. And I'm going to get out my watercolors are my pencils or my acrylics or my whatever it is a human to use. So without further ado, I'm going to close this supplies and information video. And we will proceed with the potpourri of wonderfulness of our tips in conversation.
3. A Great Little Re-Use Tool: I drink bottled water. Yes, I do. I do feel green guilt. But we're on a well system. Our whole water company is in the water has so much mineral hand, I filtered it and I've done every kind of thing. And when we come back to is I love Aquafina and water. And it had to weigh the green go with the amount of water I need to drink in a day because I live in the desert and I came up with, okay, I'll do other things and use the hollow use the recycling parts of bunch before recycling M. So I have a drawer full of these and they have turned out because of this saving of them taking what to do with them. They've turned out to be an absolutely wonderful tool. And I am going to show you just a few of the ways that I use them. And along the way, I'm going to be giving you some pretty good hints to Studio Tips. I have talked about making a, a good wash and watercolor in a couple of my other Skillshare classes. And so this will be much more brief, but you're only hope of having a good wash with watercolor is to have the same color paint and all the way along as you're putting on our wash. And so to dab back and forth into a pallet to do it with a wet brush, never going to get there. You're going to have a different value of paint every single time you do it. And so the way to do it is to put water in a container and then mixing paint until you have the color that you want. And you test that all of the read along. And so, and that works because then you got a pool of color and the pool of color is exactly the same color every time you go into it to paint your wash turns out smoothly. So when you work on small pieces or small areas of large piece or in sketchbooks, it just plain, don't need a lot of wash. And so here is where my little buddies or bottle caps come in really, really handy. And they work great for a couple of reasons. One reason is that you don't need very much Bosch, So you don't need very much water. Let me move these guys side. And so here's my my other beloved trustee tool, which is a bottle that you can get for like two bugs. Any place, any art supply at least. And It puts out one drop of water at a time as opposed to many. A lot of people what their palates for the MR. And I don't because I like to keep my palettes clean and I don't want all my paint wet at the same time, especially if I'm on on location because it all has to dry to packet up to go home. And so I use this to add drop of water to whatever I paint I want to use to revitalize or whatever. So there's one drop of water and I'm going to add several drops of water. There is a way to know exactly how much wash you make, but we can't talk about everything at once. So we want but we're pretending here that I just have like a tree trunk or something I want to put a CAR wash on. And so I'm gonna go and wet my brush in here. And I'm going to pick up paint and stirred into the US. And this is the way that you make a wash no matter what kind of container you are using, is that you use a brush to pick up wet paint and to stir it in. So you keep this procedure up until you think that you might have what you want. And then you're going to test it to see if it says dark, wash as you're desiring. And are you're going to just go onto here tested? No. Why? Because this brush is full of paint from here and it is not in any way going to give you a true test. So when you do test it, you're going to wash off the brush that you've been mixing with. So it's nice and clean. And then you dip it only in the wash and you test it. And if you like it, that's fine. And if you want more, then you mix in more color. I had another single drop there. Such a great thing to be able to do that. And stir a little more. And stir a little more. And I'm going to give it another test, cleaning the brush first. Okay. And then going only into the wash. I like that. Okay. It's not much darker. So you see you got a lot of control here. So at this point, you would move to what you're painting on. And here's the fun part, instead of your wash being over in here. Uh, we're also, by the way, it needs to be cleaned out and that's not always easy. Or in a separate palette like that. And you're annoying to go pick up your wash to keep working. There's all this drip factor going on here, big danger. So the beauty of these little dries, long as you don't drop it, you take your little wash to the work. So I have my wash right here where I need it. It's right. My hand. And I can make sure my brush stays wet. My wash goes on smoothly. My wash is all the same color. It might look right now, like it isn't. Because just the way I'm applying, thick and thin, but believe me, when you leave this, your eyes keep your edges. Azure, azure spreading them. As you leave this to dry, it's going to even out into a beautiful wash. And now do you have a lot of clean up to do outgrow your palate? No. You don't. You have just this little kept around sound and these little helpers, and not only for watercolor, watercolor washes. And by the way, you could also put a little dab of water color that you're not going to put in a half pan or waste a bunch on a pallet because you need the tiniest bit. All you have to do is take a tube of your watercolor in, basically like they do on a dot card from a paint company. Just put the tiniest bit in there and then you can go in and wet it and paint from it. And again, have it right there where you're working. And it's really a wonderful thing. It also works for acrylic. And when I acrylic, when I was learning acrylic, you a lot of the books those readings said just remember to forget about waste because you will be wasting a lot of paint, blah, blah, blah. Which never sits too well with me. But like in a case like this, this is a little work in progress and acrylic. And right here at my edge, i, and you probably can't even see it, but I can't. But there's a little bit of green up here. And so I needed the tiniest bit of touch-up paint in acrylic. And so rather than put a blob on my acrylic palette, I just put the tiniest, tiniest bit right here in my little bottle cap. And then I take my little brush. This is a little filbert brush. And I just I only need a tiny a spit and I can come in, do my repair here without any waste. Ok, that's really wrong because since I've got it. So you see how much pain I did not use is a wonderful thing. So we're going to be encountering these little guys a lot in my studio, magic and mayhem to sin and so on. Because they just come in terribly handy for different little hacks and things that I have done. So start saving them. Permanent Ziploc bag and a drawer and see how many ways you can think of. And of course, you know, it doesn't have to be just water. Tops. It can be, you know, from so refills from anything. You can have larger ones if if you had a need for a larger kinda operation like we were just doing, collect a lot of sizes in there. This little perfect dishes devoted to art.
4. Masking Fluid Magic and Mayhem: When you mentioned masking fluid to an artist, if it's an artist who's heard of it before, you might get a little ground, or at least row. And if it's a person who is not groaning, are saying arrow at somebody who is saying what is the hat? And the reason is that it's, it's a wonderful thing, but it's really irritating. What it is. Basically, it is a rubber cement thin down so arena, so late texts kind of thing. And it comes in a removable type and a permanent type. And Winsor Newton mix, both of those. And are the permanent I haven't ever used for much. It's like when you're going to put white there and you're going to leave it. It comes tented. Sometimes. This one is made by Grumbacher and it has a weird orange tent. And so you can see where you're putting it, which is interesting. And you might have noticed that the bilaminar says a tendinous, not lovely in any way. If I did not store this upside down, that lovely 10 would be when I encountered when I went into the top where air encounters the masking fluid, it dries and hardens. And so it becomes like you gotta pull this goo either the neck before you can get at the masking fluid. So someone clever shared with me this idea that if you store the bottle upside down, it's going to last you a lot longer because the air is going to be hitting the masking fluid here. And that's going to stay at the bottom of the bottle when you turn up right, in order to use some brilliant idea. And now that I do at my masking fluid, this lesson so much longer, these are a viscosity that you brush onto your page and it's kind of thick so you don't get real little detailed areas. There'd be hard to do lettering or anything. And so some folks per B0 is one, make masking fluid and a pen. And Dave lasts for a while. They don't last forever. Be and that's why they give you an extra nib. And this was a brand new ballpoint version that's made by Holbein and it is very hard to get a hold of. And it has ballpoint. And then this is squeeze the ball. So if you squeeze it, you can get some to come out in a fine enough line to maybe mask some lettering. So these are the kinds of masking fluid. There are other brands and they have needle Tips and Those are disaster because they clog. Now what is masking fluid for? It's for masking an area that you're going to paint over with watercolor. It seems like with any medium that we're talking about that it's a problem to get good backgrounds and no acrylic. And I am from with that too because I don't do it the way that people do who don't have a problem with it. And they do it by letting the background tone with the painting is going to be so they put backgrounds on first and then they see something that looks like a pumpkin or something. And then That's going to determine, and I don't mean to be disparaging here is just really off the tracks from what I do because I sit down and I want something that I know what it is already. And so putting backgrounds in is a rough thing because when you draw out your composition, you have all these beautiful shapes that you drew. And you want to put, in the case of watercolor, especially, which is transparent, if you want to put a color background back here. And then you let that dry and you paint your items, you're green or whatever your background color is going to show through. So to use, we're going to be purple flowers. There. Their color would be altered and I'm over here, I have a lemon blossom. And so that would be in some serious trouble. So the concept of masking fluid is to mask and save your white area. And so on. A painting like this or a page like this, I would be, I would be masking my white for my blossom here. Now I would not have to mask the green of the leaves are at the leaves because they're green screen shining through. A darker green that I'm going to use for the leaves is not going to be a problem. But the screen behind these little blossoms or buds and behind that lemon blossom, that's going to be a problem. I don't want green blossom unwell, white one. Here. These are blown flowers and they would be purple and they should be masked, but especially their centers which are white and yellow. And so masking fluid is for painting onto these shapes, filling them in, blocking them from the watercolor that's going to be coming to create your background. And so the painting them in is a kind of a GUI process. And the gravitas that you got from those artists to already knew what masking fluid was, was because one of the casualties can you can lose a brush completely if the masking fluid dries on the brush. Masking fluid is a rubber, It's like a latex. And so it is thick and it dries pretty quickly. And if it dries in the bristles of one of your good paint brushes, you're never going to get it out of there. So that's one reason for grimacing. And another reason is that dried masking fluid when you pick it back up, which we'll be talking about, can destroy the surface of the paper. Even some a 100 percent cotton papers have a hard time with it. And the other thing and you defined where this problem was is if you put masking fluid on and you should go away and forget to come back and finish the sketch, which is the story of my life. I always leave sketches to be done later. You may never get that off of there. And not only does it not come off, it turns is like really ugly brown color, at least this did, this is the Winsor Newton. And you can see from the bottom of the bottle where the army brown color came from. And so this is going to be a fixed that then I might not know how to fix. I don't know what to do with this. I had started to put some white acrylic or some gesture or something over it and that even the Jethro went right into it and looks horrible. So, so that's the reason for the grimace. But masking fluid does a marvelous job that can't be done by anything else. And so we get it and we use it, we put up with it and there are ways to use it which I am going to show you that are going to keep you out of most of that grandma's territory. So before we get started with our demo, you might be wondering, okay, I got that on here and it dried and I blocked my background and I put my wash on and then how the heck do I get it off here? And so that I will tell you and then we will be seeing in actually happened in real life. Any eraser will do. This is my socks, white vinyl eraser, but there's a specific eraser made for this. It's made on natural rubber when you feel it, it's like the like the soul crepes sole shoes is like that. And it's got pretty pointed corners and sought to remove it. And you remove it soon after you do not want it set because that other one is never, nothing will remove that. Dynamite won't probably remove that. But on fresh, freshly dried masking fluid and you have your wash on it is Dr. You've pick up this color picker up the eraser jar. And you just kinda go like that and you start a looseness that then you can roll with your finger and it rolls into itself and tenable ball and it becomes its own pickup eraser. That makes any sense. You do want to be gentle and you do want to, I mean, you can keep this going and pick it all up with it, but you do have a danger, especially on a cellular cellulose based paper, of really picking up some surface fiber and on some cotton papers as well. So it's a better thing to get a little start to gently use your finger to remove the rest of it.
5. Masking Fluid Part 2: I have my practice sketchbook here and I'm gonna do something just really simple so that we can be quick with this. And let's say, Oh, okay, My brother is a winemaker and he lives in wine country in California. And I notice that in the area were all vineyards like at the end of each row of graves was a rose bush. And this is a very simplistic way of doing the rose bushes. And they're there because they will be the first sign of, I think it's aphids, but powder and powdery mildew. Some other conditions that will wreck the grapes, but it will the roses, we'll catch it first and the they will know to do whatever they do about it. I don't even want to ask about that. But anyway, so this would be a green bush. And then there were these lovely little roses over it. It's a little roses like marry him or laying eyes to emphasize love the law. And now everyone does it, but I don't think she might have been a one the first. So what I want is the green rose bush and I want my pink roses on there. And in this case, I would probably be inking and still ongoing to do that. And be very quick about it. So here's our arrows. And this is my good old pencil, ink, watercolor. And love to use for most things. And then the rosebush or beyond here. And so what I love about Pitt pens as I can get right in there almost immediately, I can paint over. And I could also erase over them. Besides my masking fluid and my little drawing. I have gotten some other toys out here. And this is a synthetic brush. And everyone will say use only a junk brush with your masking fluid. And there is a reason for that, like I said, because masking fluid can destroy your brush. How ever I have, I'm trying to think of how long I have used this particular brush for masking fluid and it's years. I don't know how many years. And so you can use not a junk bros. You don't use your red sable, you don't use your expensive brushes. But you can use a pretty good synthetic. And it can last because you're gonna do masking fluid the right way. And I'm going to show that to you. So I have my brush, my trusty masking fluid brush. I have the masking fluid. I have my trusty little bottle cap that I used for so much. My dimension that before I have water in a cup that is not my watercolor, water in here will have soap and it will have masking fluid. So this should be a disposable. Something that you can throw out easily. Okay, pick up eraser can be at the side. This is Dial soap. It can be any kind of soap. And this just happens to be when they get this small l feel like I'm really happy with them and so are using for this in course one bar like this is going to last for years as well. But in order to keep your brush safe, you make it a soapy brush before it ever goes into the masking fluid. Okay, that's an important rule. This water an important role. And this is an important rule is upside down bottle. It's also a rule that you don't need very much masking fluid. And you see, even though I store it this way, opening it is a pickle. I had to turn the camera off so I could swear a little bit, even though I store it upside down, you see there's enough dried masking fluid got up into the cap area and I couldn't get divider or wrestle the bottle open. And I look in it and this bottles done for now as a big glob of hardened masking fluid. So you don't need very much, so you just put a little bit, and especially me with my roses, I hardly need anything here. And you close your bottle right away. If you want it to last. This one's on the way to the trash saw. It'll be all right. The next thing you do is you wet your brush and use suds, your brush. Lats. Good. Get it full. Read up to the pharrell, did it full of soap. And then and only then dip it into the masking fluid. And like I said, this is wide so it's going to be fewer real exacting a little hard to tell where you pull it. And sometimes, you know, with some pens it will move the ink. So you also have to be carefully out rubbing us very hard, sort of dabbing it on these little pink roses. Okay, and then now we get this washed out just as quickly as we can. And then we go back into our soap again to really sets our brush and wash it and rinse again. So again, I'm a fanatic about this, rents again. And then finally go into some other container of clear water that's off-camera but and there's our brush. And when I let this brush dry, it will be writing for me next time in really good shape. This wire I get rid of usually by taking a piece of paper towel and completely soaking into the paper towel. And I don't want this rather anywhere and now has rubber in it. And whenever it gets on would not be helped by. So that pretty much does it. I throw the paper towel out and then use one to dry my little holder here. And so that's the cleansing. And that is what's kept this brush viable for years for me to use. Now, cleaning maze out is easy to you. Just wait for it to dry, takes longer than what's on the page, of course, but you just wait for this to dry. If you haven't used a little reusable bottle cap. You can use a part of your palette and do the same thing. Once it's dry, you're going to be able to peel it out just the way we're going to be able to peel it off of our roses. This about 10 minutes to dry. I'm in a pretty dry place, but generally that's what would it take? So I've got a little of my green watercolor over here in my palette. And I'm going to go ahead and, and paint my bush, my rosebush. And you see that the paint is separating where the masking fluid is. And you can also see that I screwed up and I and I have gone over the lines with the masking fluid and of course it's going to block the paint there as well. And that's not a terrible thing, not because you can make up for that with a little tiny bit of green. But you wouldn't be able to do is put pink roses over this particular wash color. This is not my best rose bush I ever did, but for demo purposes it's not shabby. And I'm just going to pick some paint up to make it look like it might have dark and light leaves and make sure it doesn't get hard edges on me and then I'm going to give it that time to dry. So we had time for drying there. And like I say, this is not a masterpiece of a rosebush, but that's not the point. When I create masterpieces. You don't have time to wait around, I'll tell you. And so here I am going to use the pickup eraser. And I'm just going to start, we're going to come in close for this part so that you can actually see. So I would then take my finger and I would see if I could just finish removing it with my finger. And there you have a little Ngugi of of masking fluid with paint on it. And this is my my final warning is that these can be dangerous when you have mass a large area and you have paint dotted on it like you have here, is a really, really good idea without touching your watercolor. To dab that up with say, a Q-Tip or a very controllable brush that's a little bit damp. But anyway, to get it off, because in removing a large area of the dried masking fluid, you can get paint all over the rest of your page because it will rub off of there. And especially if anything damp is to hit it after you've removed it this way. So that is one rows. And here is my other annual see where my my mistake was in going over the line. But I'm going to come back in after I paint my pink roses with a fine tip and I'm going to put green back in and now it'll get a little shadow behind the rows anyway. And I'm not gonna do any of that because this is just a demo. But if this was my rosebush, that's what I would be doing. And it would be a lot fancier. T, This is the worst mistake though, because here I was inside the line and so that'll allow the green into the rows. And that I'm going to have to fix with my fix it when you go over the lines trick.
6. Fix-It for Going Out of the Lines: There are my rose bush from the masking fluid demo happened to provide me with just a perfect example to show you my fix it for paint where I don't want it. Watercolor where I don't want it either outside the lines here or inside a shape where I was trying to mask it. And the removal is easy if the paint is not a staining color. That's another piece of information, but some paint gets into the paper and stains it and you can never really get it back to white. Some doesn't. And I tried to use non staining paints as much as I can just because they make a lot of mistakes and have to fix them. I have a clean water brochure. So lovely little tip and I'm sure that I've squeezed it over a paper towel and I'm sure there's no pigment on it whatsoever. I have a tissue here and this works a lot better than a paper towel because it's just instantly absorbent and it doesn't have a texture either. So how do you fix it when you go out of the lines with watercolor? Here's how you take a, a good water brush like an EEG, which is constantly you don't ever squeeze it. It's constantly working moisture. So that is basically a nice clean, damp brush. And you go, and you start out here away from that edge because you do not want to get into this paint area. You'll create a blog. And it even worse thing to try to fix. So you start before you're even there. And this this brush is putting on a lot of moisture and not like that. Okay. And you go toward that line that it shouldn't be crossing and you jump right in there with your tissue. Now this brush, I am going to change this brush for a one-way. My career used ones because somehow that brush just got too much moisture in it. Okay. So doing the same thing going in here, being careful not to get into the outside of the rose. Like so. And coming in right with my tissue right away. Now watch I can do this down here again. And I did not feed any moisture out into the green. So that would have created this problem only worse because it would go on and make a hard market out there. So in this rose without that brush that was putting out too much water. First one I've ever had do that in the small in this brand and the small size. I don't know what's wrong there, but it's not good for this use. Now you notice this is not a 100 percent cotton paper. And between the pickup eraser and clean up that I'm doing, I'm losing a little my incline. But that's not a problem because it's easy to put that back. So there's my dampen and lift fix it for what got inside. That's not supposed to be inside. Most often this doesn't happen when you're, when you're masking happens when you're painting. And it's happened right here to remember kind of badly. So I'm going to see what I could do with just for the heck of it. So again, it coming in from the outside edge of where it's not supposed to be pushing. This, it's actually better to use a used brush because whenever you're doing a pushing thing, you're not doing the bristles any good. But that's not bad. See that is, I'm going to go back one more time. And I might touch is other light because this is cellulose based paper. And it is not going to take a beating. I have another little blob up here. So this is being a perfectionist. Lot of people blob everything on purpose. But when you don't wanna do that, it's good to know how to get the blobs out of your way. Here's my big one down here as well. So my fix it. We're going out of the lines.
7. Varnishing Your Artwork and A Surprise Gadget: Lot of a lot of my work has to be sealed. I, when I paint for my gallery wall are and people pay money and it can't fade in it. It can be blocked by water and so on. And, and I paint in acrylics and acrylic pens and watercolor. Watercolor that is not framed or glass. And so I end, I will go into that in some of my studio tip classes, but how to, how to do that. But anyway, it has to be protected. It has to be protected against moisture and against UV rays so it won't fade. So my favorite is a spray varnish by golden. Golden was a great, great company. This never blobs, is never as long as you're not too heavy handed. This puts a beautiful finish on everything. Actually, since I'm talking about this varnish, I did have a couple of pieces nearby that I could show you. This is an acrylic and it's done on cradle board. And this surface is the satin version of the Golden varnish that comes in a sadden and a gloss and Anna flat. And this has about two coats on, and this is now safe from any kind of moisture and a safe from the sun's rays. This isn't going to fade when it's exposed. And this is acrylic, but acrylic, here's a little tip for you. It isn't truly waterproof, it's water resistant. And some acrylics, you know, have so much polymer and that you could bet on. I'm not getting damaged by water, but you can take a wet brush and you can, you can dig up any unvarnished acrylic paint. So that being said, the thinner you use acrylic, the more delicate it is. Um, these, I use it fluid acrylic and also it's pretty much the same thing in the acrylic paint markers and paint pens. And so without the varnish on a, this would not have the protection that it would have to have. While we're on this subject. I've got a couple other things to say. Questions might come up. And one of those is varnish comes in a approachable also. And so why not use that? And some people do. And what it really depends on a couple of things. This has quite a bit of viscosity to it. And so when you use this kind of a varnish, you're going to have brushstrokes. And some people use that to their advantage if there's doing a print on Canvas, selling it as a Zhe clay and so on. And the artist will take varnish was somebody to it and brush away. And you know, when you turn it sideways and the light is going to show a brush marks and just gives it, Nobody's ready to cheat anybody, but it gives it more of a, of a real painting lock then just the parameters that have the other reason, the reason that I don't do it as two-fold, I don't do brush marks. My work is very smooth. And the other thing is that because certain acrylics are so much more delicate than others, you can be applying a varnish even with a soft brush and you can start to move your paint, we'll start to dissolve under. And that be like a really bad thing. But acrylic needs finishing and in sketchbooks, a lot of people aren't journals and so on. A lot of people know that too. If you were to use an acrylic on a page in a sketch book and not have a varnish on it. And in that case, you know, brushing is kinda it can't be spraying your whole sketchbook or maybe you can. I don't know. But if there's no varnish on it, when a book is closed and put away the next time you open it, there's a real stickiness factor and that is not something that you want either. So I hope that answers questions about whether you need to varnish work and what kind of varnish you can use. And also on the Golden varnish, you have UV protection. And that isn't always true on this, this type of varnish. And this is a watercolor painting. It's also on a cradle board if I tip it sideways so you can see right here that it's actually painted on watercolor paper, a 100 percent cotton watercolor paper. And it was after was finished being painted, it was mounted onto this with the acrylic medium to a thin layer. And then you put the watercolor paper on. It's gotta be at least 140. Best is 300. This was 140. Donna worked pretty well. And you put the painting on in your smooth it so that there's no bombs or lumps. And then any acrylic medium that comes out at the side. You're right there with a paper towel or something and you grab it. But then no glass and frame, this has got to be really protected. And this golden varnish does the trick. I put more coats on this than I, maybe three or four light coats as opposed to just a couple on the acrylic because the watercolor doesn't have any protection of its own. It's not even water resistant, not the least, as we all know. So all of that in order to say that I buy these cans of varnish and and they, and a lot of other spray paints come with a cap like this and so on day and you stick your screwdriver in here and I do flat head and try to get it off because again, ever pull them off, but and that does work, by the way, a flat head screwdriver in it kinda gets stuck on here and you can pop them. But I took it off and I went I don't know. I've seen them so many times, but that day I saw it differently and I thought, you know, when you're traveling around with watercolor, everybody always says you got to have a clean water and a dirty water. Which is true because if you only have a little water and you keep picking up new paint with the wash water, then obviously you're not going to have a true color for very long and I thought this is small. But if you're out sketching or something, What a great water container. And so there's a little, little bar of plastic hair. And I cut that off. It just worth just a little sharp scissors. I cut that off on both sides. And it gave me something like this. And let me show you how this works. And so you put water into the center, which is going to be your clean source water, and water into the outer edge, which is going to be your clean out. Don't have it as high. Obviously, they'll wash in to the other one. But there's four rows, my paint. Ok. So you dip into the middle for clean water to go and pick up some paint. And then after you've done your painting with it, you clean off your brush and the outside water. And that is leaving the water in the center store clean for your next pickup now, is that not wonderful? And if anything could be even more wonderful. Here's what it is because I cut that plastic off of there. Now, this is such a great thing for like in a coffee shop and and, and not only that, but she could throw that in your purse. That's not or gentlemen, you could throw it in your sketch bag or backpack. But anyway, you've got your brush rest and both jars of water, I'll Enron and it didn't cost you anything because it came off the cost of your varnish. I even did a sketch of this if I can find it in. I put it online and it got so many likes. 30. This is the little how to, you can copy this into your, your reference book if you want to. You can make a sketch just like it. I don't mind. It. It says the directions to and this is a handy dandy little friend for travel.
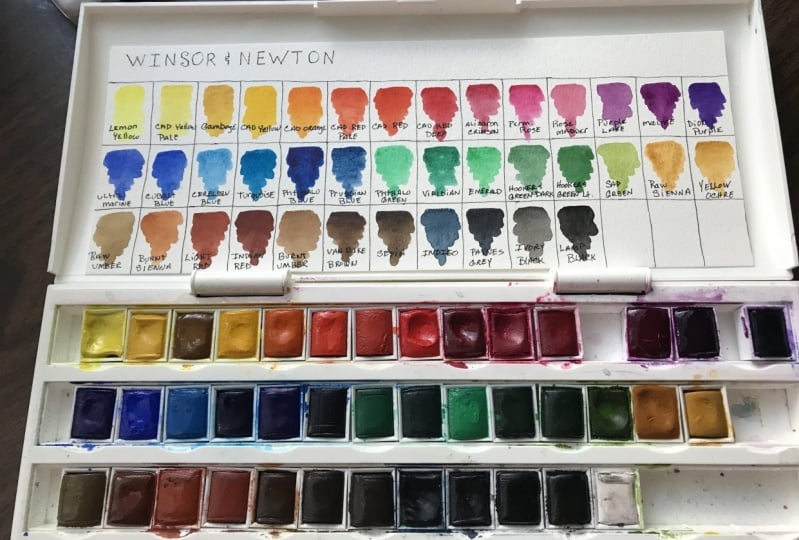
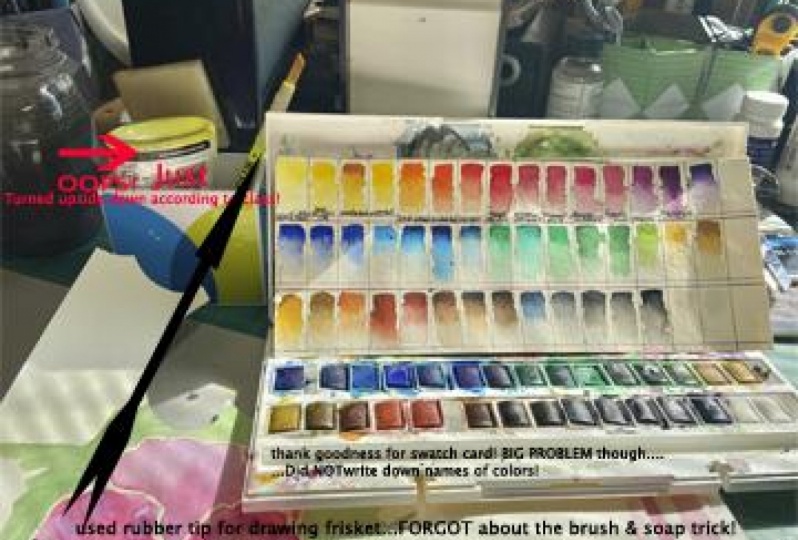
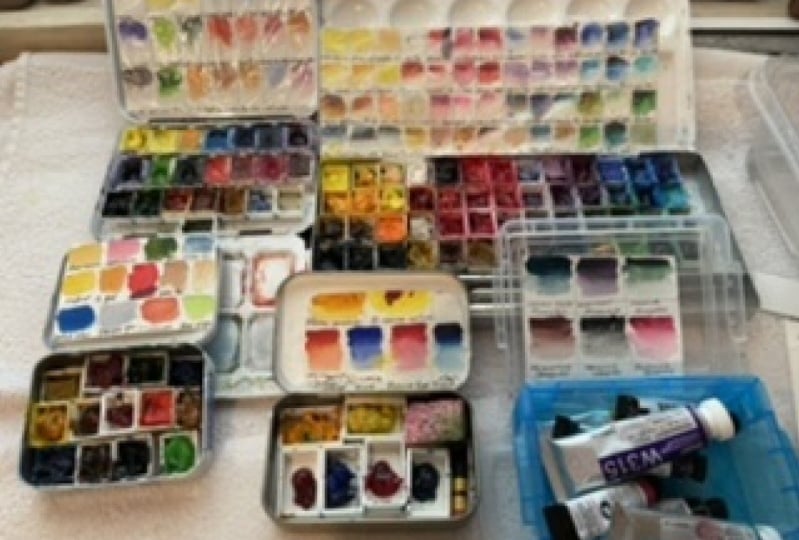
8. Color Swatch Cards: If there's anything more important than color and an artist's studio, I sure don't know what it is. I have a lot of paint and I have a lot of watercolor because watercolor is and has been my main stream media for almost all my life. And watercolor. Artists are a lot of them. They love this minimal color deal. You know, the three primaries. And you can mix anything from them and yeah, and that's all true. And that is all true. It's just that not all of us are really intrigued by that. And unless I was lost on a desert island, I loved that desert island saying unless I was lost with only primary colors, I would not be my route. I am a color junkie. I love color. I would go out and stand entranced in front of a display of embroidery floss embroidery. I don't do or embroider. See you. You can tell I don't do it, but it's the color, just mesmerized by color. And so obviously I collected wherever I can also color matches a very important thing when you do work for hire, you do illustration or graphic design. Color matching is just really, really important. And so these manufacturers all over the place have were all this effort into making these amazing Hughes. And I just don't see skipping out on it to prove to myself that I can mix every color. And the other downside when you are complete mixing person is matching it. And that is, I mean, you can get close and if the work is casual or if you're working on a landscape and it's not critical, then that's fine, but I can't come up with the same mixed color two times in a row. Not exactly. And so what I will do when I am after a match of some kind is I will go through several sets of watercolor that I have in my main palette. And you'll see this one in my class is sometimes only because it's tiny and I can grab it as little Winsor Newton thing. I can grab it and say, Oh, here's what we do without dragging these big guys out. But anyway, all of that leading up to the importance of color charts and color swatching. And a lot of people, they think that what that means is to sit down and, and it is what it means to them. And make 5 thousand boxes and see what this color does when you add this color over here and then put that whole sheet somewhere. And then they trot out with their, their watercolor box. And a lot of those colors. You don't know what they are when they're sitting in the pan. And this one is pretty simplistic. Still at all. I don't really know how warm of a blue that is. I don't have a real good idea when I'm grabbing, I'm grabbing something hair. Bigger sucks, get more amazing. This happens to be a confections watercolor. And since I'm talking about it, I will just tell you a thing or two about it. If it's on the market only incense and this sets have like really cool names like decadent pies and essence and Odyssey. They're wonderful and they come across like they would be a student grade paint in the phase scrapbooking market place. But they're not, they're an artist grade paint they even have nowadays the manufacturer even has pigment information, which is another family. It just doesn't interest me at all, but they have it for the people that it does interests. But anyway, this is a gorgeous set of colors, but I don't even know what that is by looking at it in the pan or that or that they all look the same or that or that. And so for me to be using this or that or that need to be using this money using paint set without a reference card would be nuts. I wouldn't know what I was doing. So the long and short of it is and it's too late for the shorter, but I know every set of pain I has a swatch card and it is cut to size and it is kept with the paint palette. Isn't gonna do me any good to go dig in through a drawer every time I need to use a certain paints that. And so this one is very simple. But you can certainly see here the difference in the two blues a lot better than you can see here. And then let's look at this one. Oh, and I didn't finish telling you how much I loved these. They are artist grade, but the other thing that they are, they're sort of like guage and watercolor had a baby. They are semi opaque and yet you can water them down to a really lovely transparency. The cover really well, or if you want them to and they wash really well. If you don't want them too. And they just have a palette that is out of this world which needed talked. I can show you. I mean, there are subtleties here that you just don't find anywhere. And when you are trying to color match in an illustration and get a very, very best thing. You have a great chance going into a set of these and try it out with a weird color to start with, if what you need is a weird color. And so I adore these, they're special use. I don't use them and every day on everything. But when I have a certain project and I'll go, I know where I can find the best place to start with a color in that box. And so when I find the closest thing I can, I mix from there, you know, maybe it has to be a little warmer. Meaning a little yellower or a little cooler, which means a little bluer. But if I'm starting almost there rather than from scratch, from scratch, I would not know how in the world to get something like that. Like a pink warm gray thing from three primaries. It's just not in this lifetime when I ever, would ever get there. So I rave about these paints, but here again, this is a piece of watercolor paper as V1 with a print on the back. And I use up things that way. But I cut it to absolute size and it just goes in on top of the paint. Sometimes paint gets on the back of this, but I don't care. And when I'm using it, I take it out and I put it so that I can reference it and see where we didn't know what they were down here. Here's a couple of beautiful blues as it, I didn't know what this was up here. These are greens and green blues, beautiful, beautiful. Like a bottle teal here who know, couldn't tell by looking. So the importance of color swatching and of keeping your swatch sheets in the same order as your palate. And with your palette, that same order thing is obviously important. Or if they were all over the place, you wouldn't know this. And we will make one of these are talking about these one day but these are half pans was magnet on the bottom. And this is a metal tin that came from a set of paints I bought. And this makes a set that I don't know what is inherits 60 some are more. That's portable and can be carried around for road trips and and sketching a little heavy because there are lot of pain in here. But anyway, that is, that's, and then I will show you my palette as some point when the computer's not sitting on it to give me screen mirroring, to tell what I do here. I make glass palettes and I'm not here to solve them, but I will provide. My website is where you can find anything I say that I make for myself. And this is, this is my main working palette in it. It's this big and it's on a, on a Ohel. I'm just going to move this. And you say, Oh hell and a skirt then a Skillshare class. Okay. I'll show you how to match up his hair. Okay, this is my main studio palette, and it sits here on my left eye all times right at hand. I keep it pretty neat. But this is you can't tell her this is a mixing cover. And I can't really tell her because I double decker. Yes. Okay. And this is more sloppy that usually as I really try to keep my colors pure. And so anyway it turns and I can get at anything I want. And all of that was just wonderful. But this is the main palette and it's made up of mostly him Graham paints. And there are honey based and I love them. They don't travel while, but they're really good in his studio. And so I made colored charts for both levels of this palette. This is the main one right here, and it matches like that. And obviously I don't keep these in here. I keep a right next to it. And then this palette here, slot a, Daniel Smith. And I have to handle it carefully because Daniel Smith falls anything I put an n. But here is this one. And so I in the computer, I made up a page and page layout software that match the layout of the palate and that way. And I, when I do sell these, I also put this with it. And that way, you know exactly what's where. So highly recommended color swatch cards, if you will, and cut to size for any set of paints you have and keep them in the set so they're there for you when you need them.
9. Binder Clips and Brush Catchers: Now here's another gadget that everybody knows about and probably everybody has them. This is a little larger size than some of the small ons. It's a binder clip and it does this. And then you squeeze it and our holds a bunch of papers together. Okay, But that's not all ads for, of course. And so one of the things that I use binder clips for is taking a photo of a sketch book like you're going to put it online and Let me see where something is actually finished here. And you wanted to lay flat and it doesn't ever want to sound, you're going to hold your your camera or your phone or whatever is steady as you wind and you're still going to have a slanted page in a picture. There's not great. So one thing I really, I've done a lot of things, at least scissors on all, at all of them. But even though they show up, the best thing is to use binder clips to hold both sides of your book, nice and flat. So you're going to even a MAMP if you want to be all perfection of okay, like that. And then your pages are nice and square it up. And when you go to take your do your photo of the LIGO have strange shadows. We have strain shadows and hair because we're in the greenhouse and the sun is hitting us wrong, but ordinarily you wouldn't end. So you can take your nice shot for your Instagram or your Facebook. That's one really great thing. But even more fun, is that they can be a little easel. And when you use only exam and you go and easel for what? Well and essential for like your color swatch card. And we get this out of the way. So you don't sit right there and hold that up. And how often do you work from a reference photograph or a reference? Anything drawing, illustration, lesson, anything that has any stiffness to it. You can have it held by your binder clip. And if it doesn't have enough stiffness to it, then just back it up to something. This is my little varnish or just back it up to something to arrestin. But this rule hold most things up that way, really, really expedient fashion. And finally, if you have these hanging around on your desk because you're using them for other things and you don't have a brush Ross, you can do that to keep a wet paint brush. First of all, keep the bristles up off the desktop. Another thing is that they won't roll onto the floor. Now, we have a better idea for that, which I also made, which is called a brush catcher. I made it from glass because I, although there are a lot of ways to have a brush rest, my aim when I'm working. I I don't have that thing where like slowdown and fit it in there so that you don't run the bristles and anything. I mean, that looks really easy when you're in a frenzy. It's not that easy. The other thing is, I'll be working with tour through brushes at a time and I'll be trying to I'll set them down and get them out of my way in a hurry and switch and all that. And so I came up with this, which I call the brush catcher because I throw my brush down. And you can see the role there and it'll roll, but it's not going to go anywhere. It's going to slow down until it totally stops. If you hear my dog barking is because she is being very obnoxious and and I just can't stop and do anything about it. But any way you can get a number of processes in this brush catcher. So it's a great thing, but I'm not here to advertise myself. So again, if you go to my website, you find out what my shop is currently doing and when it gets refreshed and all of the above. But anyway, if you don't have a dedicated brush catcher, then this can work in a pinch. And actually, if you have that careful move thing going on, you can get silver brushes on here as well. It's just not, you know, it's a little more concentrated of an effort, let's say. Nevertheless, useful.
10. Wrap Up and Sketching Tips: So we're at the end of our first chapter are first class. I'm going to try and keep these at about an hour. Because when things are information-rich, you want to just in time between before overloading the heck out of somebody. There's, so what I'm gonna do right now is just go through some kinda sketchbook pages of mine where I noted things and and whatever way I noted things. And this is for people who keep sketchbooks as art. This is a really fun way to create your, your handbook, because then it's just going to be illustrated and it's going to be so fun. So these aren't on topic L, but I'm just going to show you, you know, I might do a page that is just about this one was about preparing a planters for the gallery in the spring of 2017. And it's always the first thing I get to do in the spring or gardening. Maniac loved gardening. And the first thing I get to plan and do is the planters for downtown because we can take him in at night, so we don't have to wait till it's not going to phrase. And so this was just about that. It was about that I'm, you know, I have these fancy guys and I get to interchange the pots that sit in. And so the first thing I do in the spring is take those pods and plant them with whatever I can find it, the nursery and and and great new dirt. And I call this I always call this first dirt. My my first day of you something. This was on March 22nd, 2017. So that's that kind of approach. And then in the back of this same book, some people do, you know artefacts and lessons and things that you learned in a recipe format? And this isn't the way I usually do a recipe. Usually I'll have a pot and the center and I'll have all of the call-outs about what's going to go in it or whatever. And in the case of notes in your handbook, it could be done that way like a recipe, like, you know, here's how to use. For example, we'll be doing a little rose, rose bush to show masking fluids behavior. And so you might have your rosebush that you did here and you might have call-outs as to what what I told you to try to avoid the pitfalls of masking fluid. So that's an approach. And I, this is an early, early, early sketch book. But I have this incident where I used to use that old-fashioned kind of soaker hose were in the desert, so we have to be careful how much we water. So soaker hoses are a big part of what I do. And those ones made out of recycled tires, right? So stiff and you're trying to turn around and they, and they've come back to bite you and that's what happened is it hit me in the ankle and I started bleeding, not too much. And so that night I sat down with my sketchbook and I thought I'm going to make a whole newspaper article, lot of it and this was crazy. And these days I sold a paper that did this kind of a transfer from an inkjet print. I wish I still did, but that is not the truth. But I just did this whole thing as a mock-up and the Daily News, a woman injured while wearing flip-flops in a freak soaker hose it incident. But over here is a how to, you know, and this is a probability of one. I'm showing you the closest thing to how you could do a page about something that I'm telling you how to do. And this was about how to draw a realistic looking soaker hose here, which happened to be mace, will add it to our book if you ever want to paint these things realistically, I mean, that does look like that crazy rubber, right? You sketch the two parallel lines in, ink them with a Pitt pen so that and make it kind of squiggly so it's waterproof. And then you, I call this loop doodling, I'm sure are bitter words for it, but this is with the Pitt pen. And what I'm doing is pointing down in indelible texture here by what I call loop go to LinkedIn. So I felt this entire thing with ink doodles. And then I got out my watercolor pencil and block. And I filled in with watercolor pencil, filled it in dry. And then I got my water brush out and I didn't my wedding and my lifting technique that I talk about in a lot of my classes. And so what happened was the watercolor pencil melted like it's supposed to him became paint. And then when I lifted it and you're seeing a loop doodling in there. And so it's a really great way to get a weird texture. But if I had told you about that in the regular videos, this would be one of the ways that you could do a page in your studio handbook so that you remember it. You could draw the steps. And that was the reason I pulled this out anyway. I didn't even know I was going sideways like that. Here is this is not a how do you do it? But this format could be used that way and it's sort of a step to step to step format. And this was actually a to-do list that got to done. And and I just, you know, you put the little picture and you'll put the little description and pretty soon you have a really, really great page for your sketchbook. Again, not finished, I never finished thing. This is why I do not. I mean, there's so much I'm finished. These should be these colored foam balls. And I stopped I think because I want to do a texture on them and it'll probably be a doodle texture because, you know, sponge balls look. And so I'll probably use like zig writer or something, a colored permanent ink pen and I'll do the same thing I did on that soaker hose. Okay. And just one more. We'll be done. Here. I was I was taking notes and and how I do my watering wondering is this big around here every year there's that and morning glories every year I tried to grow morning glories and it never works for one reason or another. And so I have these different stories of these different things I have tried and watering also. So although this one is if I'm working for me for your spot, this was about putting wine bottles. I just don't know who drank that wine into what are called plant nannies, which are terracotta things and yes, stick them in the dirt and water the plant as it needs it. And this was important because I had until this past year and Airbnb house, so it was wonderful and I couldn't water every day when guests were there. So this water is when you can't do it. And then in my own yard, I have songs where I set up this is a nylon ribbon kind of soaker hose. So you didn't think you were going to be learning about gardening inherited you, but you never know, just goes to show you. And these are snap in connectors for hoses. So I have these laid out in all my different flower beds, so it's like its own. And then I have one liter hose and then I just have a timer. And I just plug H zone in the later hose and the timer, Let's run for 15 minutes or whatever. Well, I sit on the swing in the garden and drink sharpening, which is how I get my watering containers. So anyway, this is our first chapter of our wonderful studio handbook classes. And I hope you liked it because I had so much fun and I wanted to keep doing it. So I'll be looking at how many of you watch it and I'll be looking at comments. We're reviews. And if you like it, there's an awful lot more where this came from. Obviously, you didn't think that in 45 years I came up with an hours worth of info, did you? I know you didn't. So enjoy. I'll see you next time.
 Jessica Wesolek, Artist/Teacher