The Step by Step Series - Paint a Strawberry | Denise Hughes | Skillshare
Search

Playback Speed


  • 0.5x
  • 1x (Normal)
  • 1.25x
  • 1.5x
  • 2x

The Step by Step Series - Paint a Strawberry

teacher avatar Denise Hughes, Illustrator, Designer, Tutor

Watch this class and thousands more

Get unlimited access to every class
Taught by industry leaders & working professionals
Topics include illustration, design, photography, and more

Watch this class and thousands more

Get unlimited access to every class
Taught by industry leaders & working professionals
Topics include illustration, design, photography, and more

Lessons in This Class

    • 1.

      Introduction

      0:39

    • 2.

      Materials

      0:34

    • 3.

      Painting Stage 1

      4:57

    • 4.

      Painting Stage 2

      4:24

    • 5.

      Painting Stage 3

      3:45

    • 6.

      Final Thoughts

      0:33

  • --
  • Beginner level
  • Intermediate level
  • Advanced level
  • All levels

Community Generated

The level is determined by a majority opinion of students who have reviewed this class. The teacher's recommendation is shown until at least 5 student responses are collected.

50

Students

1

Project

About This Class

Hello and welcome to my new Step by Step Series of classes.

These classes are all about painting little and often. To develop as an artist you need to paint regularly but this doesn't have to be in the form of a big painting or a huge commitment. You'd be surprised at how quickly a regular, small painting can improve your practice. 

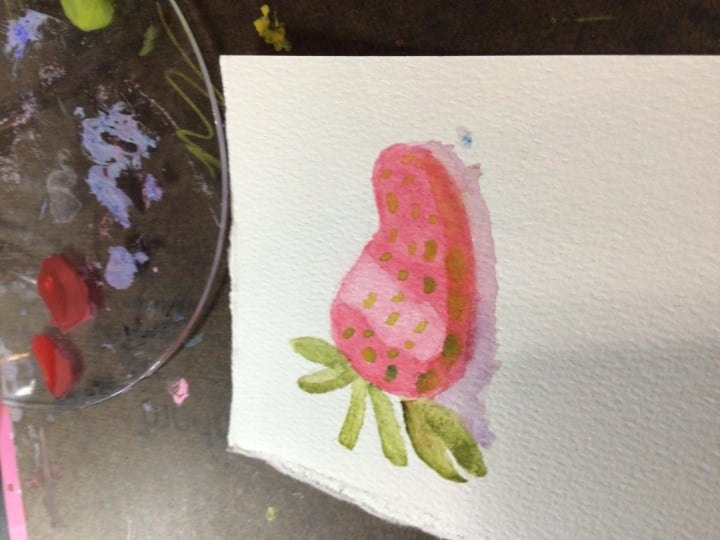
In this class you will join me in painting a humble strawberry whilst exercising your powers of observation. 

Happy Painting!

Denise

x


Meet Your Teacher

Teacher Profile Image

Denise Hughes

Illustrator, Designer, Tutor

Teacher

Denise Hughes is a freelance illustrator, surface designer and obsessive doodler who lives and works in Hampshire, UK. Denise works from her studio at The Sorting Office in Hampshire which she shares with 8 other makers and designers.

Denise has worked as a freelance illustrator for 10 years and currently licenses her designs internationally.  She is represented by The Bright Group International.  Denise combines digital work, watercolor and drawing to create her beautiful, contemporary images. 

Running workshops and sharing my skills with others online is really rewarding.

I hope you enjoy my classes.  


See full profile

Level: Beginner

Class Ratings

Expectations Met?
    Exceeded!
  • 0%
  • Yes
  • 0%
  • Somewhat
  • 0%
  • Not really
  • 0%

Why Join Skillshare?

Take award-winning Skillshare Original Classes

Each class has short lessons, hands-on projects

Your membership supports Skillshare teachers

Learn From Anywhere

Take classes on the go with the Skillshare app. Stream or download to watch on the plane, the subway, or wherever you learn best.

Transcripts

1. Introduction: Hello, I'm Denise and welcome to my watercolors step-by-step series. These classes will help you to develop and practice your painting skills regularly and short bite-size lessons. So even if you don't have a lot of time on your hands, you can still create beautiful paintings. Today, we'll be painting a strawberry. 2. Materials: You'll need some watercolor paper, some watercolor brushes, pencil, some tissue paper for blotting up water or removing mistakes. A jar of water. And of course, your watercolor paints. 3. Painting Stage 1: The first thing we'll need to do is draw out our strawberry shape. Now here I've done it in pen just to show you and give you an idea of the shape. But I want you to draw it in theory, light pencil. And the reason I'm asking you to do this is so that the pencil won't show through the watercolor. Once you've painted the strawberry mix up a dilute wash. of cadmium red to start with. And with this, we're going to paint the base of the strawberry color. So we're going to paint the whole surface of the strawberry. But we want this color to be quite light, because as you know, we always start with watercolor from the lightest colors going on to the darkest colors. So this color needs to be paid enough to be the highlight of the light shining on the strawberry. And once you've done that, you're going to need to let it dry. So you can either just let that happen naturally or use a hair dryer DICOM tank in. So now we're going to work a little bit more than the body of the stroke. And for that we're going to need a slightly stronger mix of cadmium red. We're going to apply this wash onto every part of our strawberry apart from where the highlighted area is. And whilst your paint's still wet, you then want to suffer the highlighted area. And we do this by putting some clear clean water on your brush. And then going very luckily back in and just touching those edges. And you can see that the paint will bleed over the highlighted area, just softening those areas that a little bit. And it just starts to look more natural and starts to blend in. Because the surface at the highlighted area is now damp. If you want to, you can pick up some of the darker red color and work back into the line around the edge of the highlight. So I'm just applying it here and you can see it's bleeding in really nice States, can get really natural feel to the edge of that reflection area. And now because I don't want the red to bleed into much more, I'm just going to dry that area slightly with a little bit of tissue just to stop the flow. We're going to paint the leaves next with a wash of Hooker's green. Don't worry about the shading at this point. Just get the wash down and cover up those leaves and the stem. At that stage while complete. 4. Painting Stage 2: So far, we have laid down the base colors of our strawberry with a highlight on the top. Next, we need to make our strawberry look three-dimensional. The way we create form is by using light and shadow to portray the shape of our object. Firstly, let's have a look at where the light's coming from. The light's coming from the right and overhead. And this is what produces the highlight that we've already included on the right of the strawberry. However, where there's liked their shade and the shade or B, where the light can't reach. And as a general rule, if you have a highlight on the top right, this will create a shadow on the bottom left of the object. Let's go ahead and add the shadow. With clear water, wet the area around the left-hand side and the bottom of the strawberry, mix up a wash of alizarin crimson and then drop the paint into the area and let it bleed into the water that you just put down. Now we're going to add shading to the leaves, mix up some sap green. We're going to start painting the bottom leaf here. Now because this leaf is behind the leaf that's in front here, the leaf that we're painting won't be getting much light. So we're just going to paint sap green over the whole leaf. And the place that will be getting the least light of all is this top corner here. So we're going to drop in another brush full of sap green there, just to darken it slightly. We know that the light is coming from the right and therefore the shadows affording on the left. So it's important that we paint the left-hand side of these leaves a little darker than the right. Wet the leaf with clear water, and then take your mixture of sap green and drop it onto the left hand edge of the leaf, letting it bleed towards the right. So the right side becomes the highlight of the leaf and the left side becomes the shadow. And then do the same with the next leaf. Wetting the left side fast. And then dropping in the sap green on the left side, letting it spread out to the right. Continue with the other leaves and stem until all the shadows on the left side and the highlights on the right. 5. Painting Stage 3: We're going to paint the seeds next, so you'll need some lemon yellow and a little tiny bit of Hooker's green. When you've got your mics ready, take a smaller brush and start dropping in seeds just quite randomly with the tip of the brush. Now because lemon yellow is quite an opaque color, it will sit nicely on top of the red color that we've used for the strawberry. Because the seed sit slightly proud of the strawberry surface, they will also need a shadow. Along the bottom and left side. I'm using Alizarin crimson to do this. Lastly, we're going to paint the shadow. You'll need some French ultramarine, a bit of alizarin crimson, and a touch of sap green as well. When you're painting a shadow, It's always good to have a little bit of the color of the object in the shadow, which is the reason I've picked it as written crimson. And you want to end up with this sort of slightly purply color. A little bit like this. Because the light is coming from the top right, the shadow will fall towards the bottom left. So the first thing you need to do is to wet that area with clear water because we are going to be working wet in wet. The shadow will obviously be wider at the widest part of the strawberry and narrower as it gets to the tip. I start adding in your shadow color. Congratulations, you're painting is finished. 6. Final Thoughts: During a small painting, each day is better for your growth and creating five big paintings a month. And your own personal style will develop without you even having to think about it. Join me again for another class in the watercolors step-by-step series.