Transcripts
1. Class introduction : Do you know that
Silhouette can take your character drawings
to a whole other level? Hi, I'm Omnia, a character artist
and illustrator. For the past years,
I taught myself to draw and managed to develop
my style along the way. One of the strongest
approaches to character design that I'll be sharing
with you today is Silhouette. We will learn more
about it and how to use it through the
project of the class. I'll be guiding you
step-by-step along the process with Procreate
app on the iPad. We'll first make
some silhouettes for our project character, and then we will develop
that into a refined sketch, all the way to blocking
colors, shading, lighting, and adding the final details to
finish our character. This class is perfect for
beginners and even for artists who want to try something new and
improve their art. So all what you need
to do now is to grab your iPad and pencil
and let's get started.
2. Class project : Hi, welcome to the class. The project for this
class is very simple. All what you need
to do is to follow along with me with
the coming lessons, and you will start to
make your own character. It doesn't have to
be complicated, it doesn't have to be
so fancy and polished, you just have fun
with the class, and try to do your best. We will first start with
making some silhouettes, and then we will choose
one of them to refine it, and to make our final sketch and all the way to the final
process of the class. You will simply upload
your final photo or even the whole steps, I'll be more than happy
to see that by the way, in the project section below. It will be a good chance
for you to share this with me and your fellow
students in the class. That's all for the project. Let's head to the first lesson.
3. Creating Silhouete: For the first lesson
in this class, I need to tell you more about the silhouettes. What
is a silhouette? A Silhouette is simply the dark image of any
object that you have, a character design
or a real photo, or any item that you have. Simply, why is this important
in the character drawing? It just makes it easy for
you to decide the character and makes it more
unique and readable. Because simply if you
start drawing right away and turn that into a black
silhouette like this, you'll be surprised that some items are simply
intersected with each other and your character is not that balanced
and readable. On the other hand, when you simply make a
character like this, and as you can see, the silhouette is really clear, that means that
your character is really balanced and readable. It's as simple as this. If you made a strong silhouette, it will end up into a really readable and
unique character. This is the tweak here. Whenever I feel that I
have an art block or I just can't start the
sketch of a character, I simply head to the silhouette approach
because it's easy and simple. Let's start making some
silhouettes for the character. Today I'm using Procreate. Simply I'm grabbing
this black color. You can just select any brush that you prefer that will help you make a good silhouette. As you can see here, I'm just trying to make some
lockings for the character. You can choose any
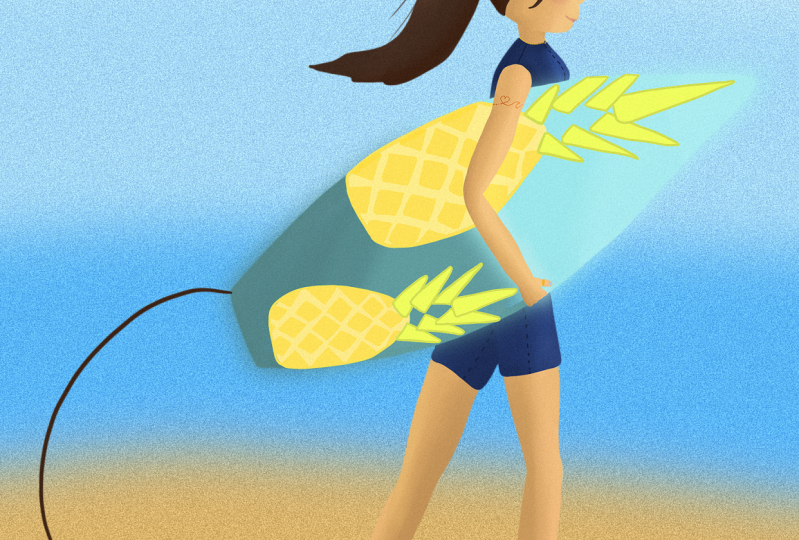
character that you want, it doesn't matter. For today's project
or for today's class, I chose to make a pirate girl. As you can see, I'm just trying to make everything clear, the pirate hat and
trying to make a simple pose for this character and maybe
she's having this word, maybe she's just putting
one foot on something, it's just very simple. You can decide anything at
this step because it's easier. No details, no
complications attached, just as simple as
these black blockings, and it's very easy. Let's make another one. At this step, you can make
whatever you want to do, it's just easier for you to decide what this
character will be having. [MUSIC] For me deciding
to have a pirate girl, it's supposed to have
some basic items, like a sword or like its hats, and any item that you feel that will deliver the message for
the person who's watching. I'm just selecting this, undertaking this a little
bit, just like this, and then continue locking
my second silhouette here. Keep it very simple.
Just imagine that you're having
a pencil on paper, and just some black
doodles like this. This is the second one. [MUSIC] Let's now
try again to make a third silhouette and
see how it will be. [MUSIC] As you can see I'm trying different
hairstyles here, trying to make different faces. Just imagine this,
you're squinting with your eyes and you are watching a character or a person, silhouettes
are easier. When you just see someone
that you know from, he's coming, he's so far and
you're seeing them coming, and you simply recognize
them by the proportions or something that he's
having or something, so you simply
squint and see, oh, maybe this is someone I know and maybe he's holding anything, maybe he's wearing a hat. This is the same idea
for the silhouettes, you're just imagining that
you are squinting and you're imagining a pirate girl or
whatever your character is. The third one is having the boots and the
sword as well, and the hat. These are my three silhouettes. Just that sample, it doesn't have to be polished, it doesn't have to take
a long time from you, it's just a very simple step. Let's head to the next lesson.
4. Creating Sketches: For the second lesson now, all what you need to
do is just try to create some sketches out of the silhouettes that
you came up with. Simply we take the opacity labor down and we will create
another layer above this. Let's now grab any of the sketching brushes
that we have as the default brushes in Procreate or any brush that you
like sketching with. Let's now try to read the
silhouettes that we made. I believe it will be
easier for you to try to read this
because these are your silhouettes and
you made it easily and they are supposed
to be unique and readable as I told you before. Right now, all we need to do is just to imagine and try to trace the silhouette that you're having and add some
details inside it. As you can see here,
let's just edit this outfit and now the boots. [MUSIC] Keep it
very rough sketch, doesn't have to be
polished, as I told you, just have fun with the process
and let's see what will happen and let's finish this
arm and finally the sword. That's our first sketch. Let's now head to the
second silhouette and see what we can
do with this one. [MUSIC] Also the hat. Now, the face, the hair. Very simple guys, don't
try to polish anything now because we
haven't decided yet which character that we
will be continuing with. [MUSIC] Just try to add some life to the
silhouette you're having. Some expressions,
some line details to the clothes and so
just very simple. Let's continue. [MUSIC]
Also the boots. [MUSIC] Now the other leg and let's keep going. Let's now head to the third one. [MUSIC] Also the sketching brush. Let's keep going. Start with the hat as well. Maybe like a feather here and the face and play a
little bit with the hair, facial expression
and keep going. You just try to read
what you've done in the silhouette
in the past lesson [MUSIC] and try to
keep it simple. Don't try to mix a
lot of things for you not to make the sketch not readable like
this silhouette. The other leg and now the sword,
and that's it. Now we've finished sketching the three silhouettes
that we have. Let's now head to
the next lesson.
5. Refining Sketch : Now that we've finished the three sketches for the three silhouettes
that we made, let's now just
choose one of them, and this is the one one chose. Now we'll be refining
this sketch. We will take the opacity down and then we will
create another layer. Now let's just
refine our sketch. In this step try to
make your lines a bit cleaner and clear as well. Try to take your
time a little bit, because this will make
it easier for you in your coloring in the next steps. You wouldn't need to go back
and decide what we'll be doing here and which item needs
to be edited or anything. Try to make as much
details as you want here, before coloring and proceeding
with the character. Let's keep going. Just trace the lines that
you've done before and edits any problems
with your lines, and of course enjoy the process. Let's refine this one a
little bit, just like this. Now let's work on the boots. Just keep refining, balancing
your character more, just like this, and
the other hand. Maybe let's add a
little belt here, like to be a real pirate. Something is essential
for pirates, I guess, just like this. The reason why I
prefer Procreate with sketching process of
silhouettes and sketching, because it's very
intuitive and easy to go back and edit anything rotated, scaled or anything very easily. Let's just change her
eyes a little bit, maybe something like this. Maybe make her
head a bit bigger, and rotate like this. Also let's edit this arm. This sword, it looks better now. It looks funnier. That's it. I believe our refined
sketch is now done. Let's now head to the
color blocking step.
6. Color Blocking : [MUSIC] Now that we finished
our refined sketch, let's head to the
color blocking. At this step you can choose any color palettes
that you want. For me I'll choose some colors from the palettes that I use lately just to make it
easier for us to keep going. I'll choose some
colors that I feel that they are going
good with each other. Also there are a lot of
online tools that you can use to get perfect
color palettes for you. Back and to be cooler
it's very nice and you can hit any keyword
that you want, and it will get you the perfect
color palettes for you. Because you can hit any keyword
that you want and it will bring you the perfect color
palettes for this keyword, so I believe it's very useful. These are the colors
I'll be using. Now the sketch will take the
opacity a little bit down. Now let's just choose
any solid brush. Let's take the size a bit down. Let's start with the face. I'll create a new
layer, just like this. Let's make the
outline for the face and drag the color inside of it. Make sure that the outline
is closed because if there's any part that's slightly opened
when you drag the color, it will just color
the whole background. Now the neck. Let's make another layer above the face
and start coloring the hat. Let's keep moving. Now, darker
color for this part here. Now let's make another layer for the hair, just like this. The coloring step is supposed
to be very fun because you simply see your character
coming into life. It just started from a
dark silhouette, black, or a dark color silhouette that didn't have any characteristics, that didn't have anything, and now it's coming to life
because you're using colors. Let's keep moving. Now the nose, and another layer for the mouth. As you can see,
when I want to draw something inside of something, you simply create a new
layer and you just tap on the layer photo and you
simply choose clipping mask. What this means, it simply
makes this layer inside of the layer below it so you
can just draw inside of it. Is very specific and easy here in Procreate and I assume that you
already know this. Let's now keep going
with her jacket , and the other arm. Now let's head to this
hand and this word. Feel free to head
to Pinterest and choose any reference
that you want for hands, for hats, for pirates, or any character that
you decided to do today. Reference will always
make it easier for you. Let's keep going. Now coloring the other hand. For her pants, let's
choose a dark color. Let's try green, I didn't like this color. Let's change it later. Now let's paint the boots and
drag this above the pants, just like this,
and the other one. Let's keep going. Now let's color this rock below her boots. Right the pants I
head to adjustments up there and choose
hue and saturation. I just keep playing
with the colors. I believe that's a good one. Let's now change the colors
of the boots as well. I feel they are better now. Let's create another layer for the belt maybe to give
this brown color. Now another yellow
layer for the buckle. Let's keep moving. The selection tool is actually one of the best
tools here in Procreate. It makes it easier
for you to change or edit or color specific
parts of your drawing. You will use this a lot. If we just flip this hat
and made it like this. Along the way, you will
just find yourself changing some details and
it's very normal. Try to follow what
you feel here about your character, to
make it better. Let's make another layer here below the boots
to make this dark part as an inner part for the
boots, and the other one. Let's keep going. Let's
change these colors. Just keep refining and
editing anything that you find not so clear or doesn't
serve your character well. All this will simply help you to make a unique,
balanced character. Now I feel that she needs
something here below this hat. Let's just make her hair
looks a little bit better and take the hand down. That's it. I think we finished our color blocking
for the character. Let's now head to
the next lesson.
7. Shading & Lighting : Now our character
is colored now, let's head to the
shading and lighting. In this step, you'll first need
to decide where the light is coming from, and then you need to start shading and lighting
your character. It's a very simple step. I usually start with, let's create another layer. Let's choose this
part of the hat and tap it like this,
and choose Alpha Lock. What will this make, it will simply lock the
pixels of this layer so we can color inside of it
to make our shadows. I use the portable
chalk brush and you're free to use any
color that you want. I simply choose a darker color of the item color that we're now shading [MUSIC].
Just like this. I'll keep selecting items, hit Alpha Lock, and keep going. In my case, I decided
that the light is coming from the top right part of the drawing [MUSIC] and
let's just continue. [MUSIC] It's a little
bit repetitive process, but it's very effective. It's one of the best
processes that I like after the coloring
because it simply takes up more into life
and it adds a lot of depth to your character and it just
makes it not flat anymore. It's something like
a 3D character and it's not flat anymore. So you just keep
selecting the items, make it Alpha Lock, or create another layer and mask
it into this layer. These two ways of masking are the only ones that you'll
need in this class. [MUSIC] Let's now make
this dark like this. [MUSIC] Now for the neck, let's make it Alpha Lock. Choose a dark color like
this and also for the face, [MUSIC] for the
nose, and the teeth. Also the eyes. Let's add some dark color inside of
these. Just added something. As you can see, our character is now changing and it's
getting more into depth. Now for the pants, we
choose a dark color and you keep adding
details inside the boots, the other leg, and
let's keep moving. Now for the sword, you also
add the dark color here in the opposite direction of the
lighting. Cute very simple. [MUSIC] Don't feel stressed now if you know
nothing about life and shadow just imagine
a source of light and try to make shadings for the opposite part of your
drawing for this light. [MUSIC] Now for this
part of the rock, let's add some shading
and that's it. [MUSIC] Now for the lighting, you can choose a
lighter color of each item or you can choose
something that helps your character pop like this magenta color I'm
using here for the hair. Just add something, like it feels different. [MUSIC] Also here for the eyes, [MUSIC] let's choose
something like this. A yellow color for the face. [MUSIC] Keep your
brush big, and soft. [MUSIC] Just some simple touches that will help your character to be more popping, and more clear. [MUSIC] Also this magenta
color to the hat. Let's now head to her arm. Let's give it this
light purple color. [MUSIC] Yeah, definitely added something.
This Looks cool. [MUSIC] I really hope that
you're following along now and your character has
started to get into life. Can't wait to see what
you guys are going to make and I believe your fellow students want to
see your progress as well. [MUSIC] For the other arm, [MUSIC] and the
other one as well. [MUSIC] Now for the sword, let's just choose a light
color like this and try to get into the metal effect
but in a simple way. Also for the hands. This yellow color, as
we did with the face. It feels really nice. [MUSIC] Let's keep moving. [MUSIC] Now for the pants, let's choose just a
light orange color or any color that you want. [MUSIC] Just draw
inside it like this. [MUSIC] Now for the boots, I chose this light purple
color to add some life. [MUSIC] Just some simple details and simple touches but it
definitely adds a difference. [MUSIC] Now let's make some
dark shadows here for the boots and I
believe that's it. That's it for the
shading and lighting. Let's now head to the final
lesson here in this class and add some final details that will take this
character to the next level.
8. Final Touches & Details : Now that we finished shading
the life in our character, we are now in the final step, which is the final details. This step is really
fun because you get to make as much details as you want for your character
to make it even more alive and
even more popping. [MUSIC] Now for the sword, I chose to make a
light pen stroke here just to add more
metal effect to it. For this hat, let's
just make it a bit old and to add some cuts.
It's a nice effect. Now for the jacket,
let's make something like this here and also here. These little details just
makes all the difference. Before we finalize
our character, maybe some messy hair here or there to add more life
to her curly hair. I feel she seems happy about
what we're doing right now. [MUSIC] I really hope that you're now also making the final details
for your character and you're about to upload
it after you finish. This will be so good.
Let's keep going. Let's now head to the
face and try to add some details like the lips. We've already got the
lips for the mouth. Let's choose this brush here. Just keep it light and simple. Let's now head to the belt. Let's make some holes in it just like a
real leather belt. Of course, as I told you before, you can just head
to Pinterest and select any reference for any part that you don't know what seems like
in the real life. You can definitely take
some inspiration from that. As you can see, I'm now
adding some details to her pants just like this. Now for the jacket, let's make some [inaudible]
stitches or anything. Any shape that you prefer, it will definitely
make a difference. It's like a texture. We're
now adding some textures to our final image. Let's add some light to
this belt just like this. At this step, you
can simply duplicate your whole file on Procreate to save a backup
for your character. Now we can just simply
group everything that we've done right now and flatten this. I've now duplicate and head to the Adjustments and
[inaudible] Noise and you can just swipe
your finger to the right. I can choose "Chromatic
Aberration". As you can see, it
adds some difference. Sunlight effect. Also hear in the Adjustments, we can choose this
"Gradient Map" and you will find a variety of other
alternatives for our character. You can just choose any of this and take the opacity down, but it will add some
touches, of course. You can also play with the "Blending Mode" for each layer. Let's now create
another layer above our final character and make the Blending
Mode as Multiply. With a soft hairbrush here, we can just keep going all along with the character
to add more depth here. Let's create another layer. From the Blending Modes, you just hit "N" that you're
having here in the layer, and you can simply
choose overlay. An overlay is always good for adding some light
for our character. You simply choose a new light
color and you'll start to make some touches for
the final character that we're having right
now, something like this. Of course, it depends
on the direction of the light source that you
chose before. Just like this. Let's now create a layer
below the character and try to make some shadows below hair. Let's [inaudible] with the
brush and now drag the colors. Let's now play with the
Gaussian Blur just like this. With the selection tool, you can simply edit this. Let's touch with the
background layer and you can choose any color that
you want for the background, maybe like this one. Let's keep going. I think that the boots just need
some details as well. Some holes for the lace. Let's make some excess
for lace of the boots. Of course, you can head to
our reference if you want. Now let's draw the laces. Let's make white dots
here in the eyes. Maybe some textures on
the sword handle here. Yeah, it's really nice.
Let's keep going. You can add some freckles
here on her face as well, so your characters will make
it more real and more alive. I thought of making a batch here on this hat as if it's old. Just like this and
some stitches. I also thought I can make
this copy and paste here on the pants and head to Adjustments Hue Saturation
to change the colors, to fit the pant's colors, maybe the rotation like this. Yeah, I like it. I really like it. Let's now draw some pockets
for her jacket. Let's keep going. Let's make another [inaudible]
masked layer in the boots here to add
some more details. As you can see, the more we add, the more alive our
character gets, so let's keep going. Now for our final touch, I'm adding a
multiplier layer here for the contact shadow. The contact shadow is
simply the shadows that separates items
from each other. It's very dark, almost black, and it appears
below things and in any place the two items are
contacting with each other. Truly adds a difference. Looks very nice and it gives more 3D look
to our character. Let's keep going. We'll make
contact shadows here below the jacket and here on
the pants just like that. Now the character is finished. You finished the class. Just feel proud of
yourself because you've finalized the class and I hope that you followed
along and by now you have created your
first character. I really can't wait to
see what you guys have done all along the class. You can simply upload that
to the "Project Section" below and I'll be
more than happy to see this and to
give you my feedback. Also feel free to leave any
questions, suggestions, or anything in the discussions
board below the class. I hope you enjoyed the class. It was Omnia with you. Also, feel free to share your character with me
on Instagram and simply tag me with this handle for
me to find it and I will be more than happy to share this in My Stories and in a post. Also, feel free to check
my Skillshare channel for more classes on character
illustrations with Procreate, Photoshop, and Illustrator. Hope you learned something today and see you in next classes. Thanks a lot and bye.
 Omnia Ali amer, Character Artist, Illustrator