Transcripts
1. Introduction: Creating music can be a
really soothing experience. I found so much fulfillment
through making music. And these days it's easy
for anyone to get started. Ableton Live is one of
the best tools for this. Is not only extremely powerful
once you know it well, but it is also easy to get ideas going once you
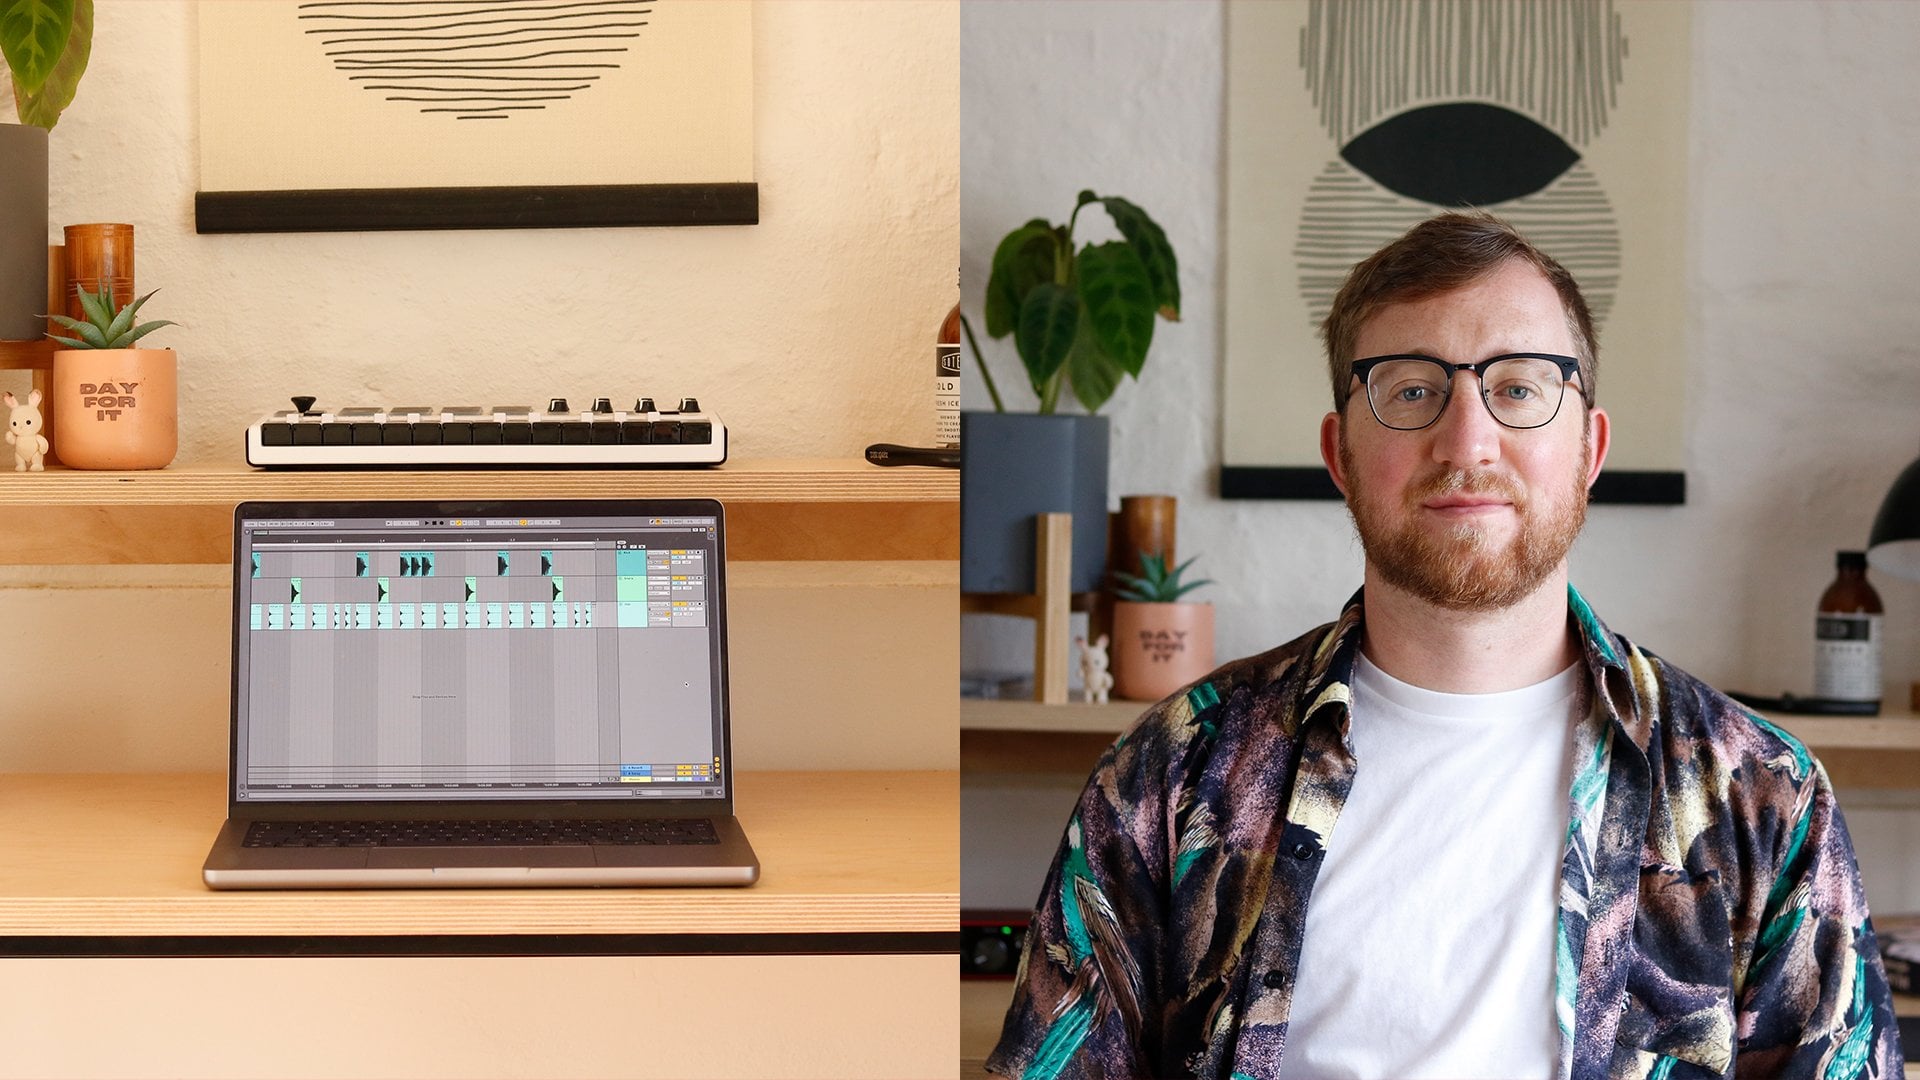
know the basics. Hi, I'm Jonathan and I
make music as mere game. I've been making music for
almost a decade now and has been able to find success
across streaming platforms, as well as use my Ableton
skills in a variety of work, including sample pack creation, commercials, and game audio. I'm best known for my
song Wednesday afternoon, which was shared to
Twitter by BTS in 2020 and now has around 7 million
plays across platforms. Welcome to my class on
learning the fundamentals of able to live while creating your first lo-fi hip hop song. Lo-fi hip hop is a great genre for those looking to get
into music production. As you can get started
with a basic understanding of music theory and
stuff able to enter. So whether you're a
complete beginner already are a singer, songwriter or producer
looking to learn Ableton. This class is for you. We will be covering everything
from the Ableton layout, working with audio and midi to creating drums and
writing chords, melodies and baselines
will then be finishing off with an overview of what it takes to complete
the final song, including arrangement,
mixing, and mastering, as well as exporting
the final layout file. By the end of this class, you will have created your first lo-fi hip hop song and built a solid foundation for continuing your musical
journey in Ableton. I hope you enjoy it and I'm excited to hear what
you've created.
2. Class Orientation: In this class we are going
to make the lo-fi hip bumps on all while learning the
fundamentals of Ableton Live. By the end of this class, I trust you will be
able to continue making lo-fi beats
in Ableton Live, as well as venture into
any other genre you enjoy. During this class, we
will cover the following. The Ableton layout,
working with audio, midi, virtual
instruments and effects, warping and transposing, programming drums,
writing chords, melodies and baselines, creating an effects rack,
some arrangement. And finally, we will look at a basic overview of mixing
and mastering techniques. We will only be
using tools within Ableton Live as it's
really important to get a good understanding
of the door before getting lost in any
other new plugins. The native Ableton
tools are more than capable of creating
amazing music. All you'll need to complete this class is the Ableton Live. We live in suites,
which you can get a free 90 day trial of at
ableton.com slash child, as well as the sample pack
I've created for this class. You can find the
download link in the projects and
resources section. Let's dive in to
the wonderful world of Ableton Live
and lo-fi hip hop.
3. Your First 5 Minutes in Ableton Live: When I first opened
up able to live and I found it extremely
overwhelming. So in this lesson,
I'm going to be breaking down each
section step-by-step, that you have a solid
understanding of the interface. When you open up Ableton
for the first time, they are five primary sections that you should be aware of. The browser section,
the arrangement view, the session view, the details
section, and the top bar. The browser section is the area on the left-hand
side of your screen. It's where you'll find
your loops, samples, instruments, effects,
and plug-ins. Next is the arrangement
and Session view. Their arrangement view
is this area here. It's where we'll
mainly be working, is where we'll start creating
older ideas for the song. And then of course, we'll create the song's final arrangement. You can click tab to switch
to the session view. Here you can see
your track levels as well as the master level. That's mainly what I use it for when mixing and mastering. Also the view you use when using Ableton for live
performance or deejaying. Some people use it to
get ideas for songs, but I still prefer to start my songs in the
arrangement view. The details section is where
you can see what effects or instruments are on each
audio and midi track. It's also where you
can see the details of an audio or midi file. Just double-click on
an audio or midi file to see us information. This is also the section where
you can apply automation, warping or change the
pitch of an audio file. The top bar is where you
set the tempo of the song, adjust the time signature
of the song and activate the metronome is also where you can play
or stop the song, as well as start recording. You can also use space bar
to play or stop the cell. On the right side of the top bar is where you can
activate your keyboard to play instruments or create different key or midi mappings. Now let's look at
two main shortcuts you should know
when starting out. I will go over more
as we progress. To make a new audio track, you can right-click
on a track and click Insert audio track or use the
shortcut on your keyboard. Command plus T on Mac or
Control plus T on PC. To make a new midi track on which you can add
virtual instruments. You can right-click
on a track and click insert midi track or use the
shortcut on your keyboard. Command plus Shift plus T on Mac or control plus
shift plus T on PC. Add an audio file
onto an audio track, go to the browser session, find the sample
or loop you want, and drag it onto
an audio track or just under the previous track. Add a virtual instruments, go to the Browser section, click instruments and
Dragon instrument onto a midi track or just
under the previous track. Add an effect. Click
on Audio Effects in the browser and dragging effect onto an audio or midi track. Now to add the sample pack
folder to the browser section, scroll down to the bottom of the browser window
and click Add folder. Find the folder you
downloaded, and click Open. Now it will always be here in the browser window
when using able to. Finally, let's save the project. Make sure your bpm is set to AD, which is a good tempo
for lo-fi hip hop. Then click File,
Save Live Set as, and locate where you would
like to save the project. I'm going to name it Skillshare, lo-fi hip hop June,
and click Save. Let's quickly go over some of the key things we've
learned in this list. The browser section
is where you access all your samples,
instruments and affects. The arrangement view as
the main section we'll be working in and where you create
the song's final layout. You can click tab to switch
to the session view. We will use this view for
mixing and mastering. Primarily. The details section is where you can see the effects or instruments on each track. It is also used to see
more information about an audio or midi file and apply automation
and pitch changes. The top bar is where you
set the tempo of the song, adjust the time signature of the song and activate
the metronome. And then the two main
shortcuts that we covered, we're adding a new audio track, which is Command plus T on
Mac or Control plus T on PC. As well as adding
a new midi track, which is Command
plus Shift plus T on Mac and control plus
shift plus T on PC. Awesome. I hope Ableton interface
makes more sense to you now. Next, let's move on to
warping and transposing.
4. Warping & Transposing: There are two essential
techniques that you should be aware of
before creating music. Inevitably, these
are warping and transposing and I were able to really shines above the race. These techniques will make
sure that your samples are in time and inky
with your track, as well as provide endless
creative possibilities. Pay. So firstly, let's go to the warp section in
your preferences. Makes sure that loop slash walk, short samples is set to auto. Makes sure that auto warp
long samples is on default. Warp mode is set to beats. And then lastly makes
sure that create fades and clip edges is off. Now let's drag any drum loop
onto a new audio track. Let's open up the
details section. As you can see,
warp is activated and live is warped the drum loop perfectly to the master BPM. There are also a few
different warp modes for various types of audio. The first one is beats mode, which is of course designed for drums and percussion loops. However, sometimes
use repeat mode on drums as it can also work well and can even sound more natural
than beats mode. The second mode is tones mode. It's for sounds with
obvious pitch content. However, complex mode usually
works for those sounds too. And then texture
mode is for use on sounds with obscure
melodic content. It's good for making
ambient sounds or experimental effects. And then next we
have repeat mode, which basically
works the same as turntables do when
adjusting the pitch. The audio is really pitched
to match the tracks tempo. So you won't get
any weird artifacts that normal warping can create. But obviously it doesn't
preserve the pitch of the audio. So usually it isn't a good
choice for melodic samples, but I do often use it on drums
of granting unique loops. And then complex mode
is what I usually use on most non
drum loops and is designed to open tie songs when deejaying or any
other complex audio. And finally, we have
complex pro mode, which is most suitable
for warping vocals. I mainly use beats, read pitch or complex
mode and all my music. But you should definitely
experiment with using different warp
modes on samples. Now I'm going to
show you how you can transpose audio to be in the correct key of
your track or to play around with
different octaves. Firstly, let's open up the details section
of our melodic loop. Let's change the warp mode too complex for the best results. Now, all you need to do
to adjust the pitch of the sample is to use
this pitch wheel here. Aside from dragging the
pitch wheel with your mouse, you can also type in specific
values in the box below. To quickly recap,
warping is used to set audio loops to the
same temperature song. They also various warp modes for different types of audio. And then transposing
is used to put audio into the same
key as your song. The warp mode will affect how
the transposition sounds. Both can also be used as
powerful creative tools. In this lesson, I hope
you were able to see how powerful warping and
transposing can be. Next, let's move on to
creating your first drumbeat.
5. The Drums: One of the main
characteristics of lo-fi hip hop is the drums, the key to a good drumbeat, sample selection, and groove. There are few different ways
that producers the program, they drums in Ableton. Some like to only use audio, sunlight to primarily use middy and some use a
combination of both. As you produce more, you will find out what
works best for you. For this lesson, we are
going to use a drum rack for the main drum hits as
it's a lot easier to change samples later
ad groups from the Ableton groove
pool and see how the main drum hits
are working together, creates a new midi track using Command on Mac or Control on PC plus Shift plus t. Let's
name this main drums. Now got two instruments and drag a drum rack onto the midi track. Now pick a kick your leg
from the sample pack. Let's drag that onto the C1
module of the drum rack. When you drag the sample in, it automatically decreases
the volume by 12 db, which is helpful
to create space to add more elements
and avoid clipping. Next, let's pick a snare
sample from the sample pack. Drag that onto the C-Sharp
one module of the drum rack. Now find a hi-hat you like and drag it onto the D1 module. To start programming the drums, we need to make a new midi clip. Do this by clicking and
dragging over 4 bar on the drum rack track
and pressing Command on Mac or Control on
PC plus Shift plus M. Now we have a
four-bar midi clip. Now select the muddy
and press Command on Mac or Control on PC plus L So that this area
will now loop all we're creating all the
initial ideas for the track. Most genres usually have a snake or clap on the second
and fourth beats, or on the third beat. Lo-fi hip up. The snare
is usually on B2. And for, especially when
working at this tempo. To start placing the snare, double-click on P2 to
create the midi notes. You can duplicate that
note by selecting it, holding Alt and
dragging it to beat. For. Now, select both
notes and do the same to duplicate them
across the next 3 bar. Now let's program the kicks. Usually there will
be a kick placed on beat one to
start off the beat. Feel free to experiment with placing kicks wherever
sounds good to you, or follow along with my pattern. Keep in mind that it's
mostly best to have a good amount of space
between kick hits in low fi. Onto the hi-hats. A simple way to start
getting the hat pattern going is to put a hat
on each quarter note. And once adding more swing
and velocity variation, it still sounds cool even
though it's so simple. To edit the velocity
selector note and reduce this
line at the bottom. Let's do this for every
alternating nodes to add more life to the pattern. I also like to make the hats hits a bit later than
the kick and snare, just to start adding
groove to the beat. I do this by selecting
all the hats, holding Command on
Mac or Control on PC, and clicking the right arrow
key until it sounds good. During this allows you to adjust muddy without it being
knocked to the grid. And lastly, let's
play around with the pattern to add more
variation to the hats. Feel free to experiment yourself
or follow along with me. You can right-click to access
different grid settings. Let's add more group to the drums by using
the groove pool. Click the hot swap
button next to groove. I'm going to use
this hip hop group, but you definitely
should experiment with these and find
what you like. The groove is now
applied to the whole beats programmed
in this midi clip. To add more movement
to the drums, let's add a percussion
loop from the sample pack. Drag it into a new audio track under the drum rack and name it. Percussion should have auto warped using beats mode. If not, click warp
on the audio clip in the details section and tap
into BPM manually here, you can also add the
same groove we used on the main drums to
this audio clip. Finally, let's do some
volume level adjustments to make the drum
sound more cohesive, as well as removed the low
frequencies from the snare, hats and percussion using an EQ. We'll also do a final mix of all the sung
elements at the end. But it also works well to
adjust the levels as you go as you can here I've made
the kick and snare the loudest of the
trauma elements. This is usually best
practice to recap, sample selection and groove are key to having solid
drums in your track. In general, adding your snare to the second and fourth beat. The third beat is a
good starting point. You can add groove to your beat manually or by using
the groove pool editing the velocity
of samples is another great way to add
laughter, your drums. The shortcuts we've
covered in this lesson, we're creating a midi
clip is in Command plus Shift plus M on Mac or
control plus shift plus MPC. Setting a section to
loop using Command plus L on Mac and Control
plus L on PC, we can duplicate a midi
note by using alt plus drag or Command plus
D on Mac and on PC, Control Plus drag or
control plus D also showed you how to adjust midi notes without them
being locked to the grid. We do this by holding
Command and using the left and right arrow
keys on Mac and PC, we would hold Control. I trust you had fun creating
your first drumbeat in Ableton and I started to
get a feel for the program. Next, we'll move on to creating your first
chord progression.
6. Main Piano Chords: Scale Mode & Creating Chords: Now let's move on to the
melodic content of the song, starting with the chords, which will create the core
emotion of our track. As a general rule,
happier songs are in a major key and saddest
songs are in a minute. I will cover some
basics of music theory. Within this lesson, we
will be able to write a chord progression and able to piano roll within the next list. There are also tools within
able to live that can help you create a great
chord progression, even if you have no
knowledge of music theory, make sure you download my
music theory cheat sheet within the resources
section that should further simplify
the concepts that cover before we start
creating the chord. So let's go over the
scale mode feature. This will help you to start creating chords and melodies in Ableton Live without
previous knowledge of music theory
within a medical app, you can turn the scale
mode on and off here. You can use these chooses to select the scale you
want to work in. The notes within
that scale will now be highlighted in the midi clip. Now, I'll show you how to
create major and minor chords, as well as seventh
and ninth chords, which are often used
in lo-fi hip hop. To show you the
co-creation process, let's use the most simple scale, c major, which actually just consists of all the
white notes on the keyboard. To create a major chord, start with the root note
of the chord you want. Here, I've chosen a C as the
root for a C major chord. Now, duplicate that
note by holding Alt and go up
another four nodes. Then duplicate this note and
go up another three nodes. This is the most
basic version of a major chord and it's
called a major triad. As you can here, it
has a happier sound. To create a minor chord, start with the root note
of the chord you want. Here I've chosen a D as the
root for D minor chord. Now, let's duplicate that notes and go up by three
notes this time. Then duplicate this note and
go up another four notes. This is the most basic
version of a minor chord, and it's called a minor triad. As you can here, it
has a sadder sound to create a C major
seventh chord. Duplicate the top note, and go up another four notes. As you can hear, this creates a more soulful and jazzy vibe to create a C major ninth chord. Duplicate the last night of the seventh chord and go
up another three nodes. This hasn't even fuller sound. To create a D minor
seventh chord, duplicate the top note
and go up by three nodes. Integrated d minor ninth chord, duplicate the last notes of the seventh chord and
go up by four notes. Another important concept
to learn to create more interesting chords
or chord inversions. Chord inversions,
or when you change the position of the
notes in a chord, e.g. moving the root note of
the chord and octave app. This will cause the code
to sound a bit different.
7. Main Piano Chords: Programming The Chord Progression: You can use these
formulas to create chords with any root
node you choose. However, to stay in
key makes sure you only use notes that
fit within the scale. You are working with this knowledge of scales
and chord so far, I trust you will be
able to follow me as a program the
chord progression, or even be able to write your
own courts without my help. Let's begin creating
our chord progression. Firstly, let's load
up our instrument. Go to instruments and find
a piano sound you like. I'm going to use
the upright piano, load that onto a new midi track. Let's name this
track main piano. Next, create a new midi clip
using Command on Mac or Control on PC plus Shift plus
M on the main piano track. And select the scale
we want to work in. I'm going to select the
D-sharp minor scale. As you gain more
experience making music, you'll find what keys
you like to work in. Now, I will program the
core chord progression. When in the piano roll, I usually have this blue
headphones icon enabled. This allows me to hear my midi
notes as I draw them out. As you'll see, this process can require a lot
of trial and error. However, that's part of
the fun of making music, and it's really
rewarding when you get something that works. And lastly, to make it more
interesting and add a mole human feel that suggests
the philosophies, note placements and
chord voicings. I also like to
sometimes experiment with this velocity
randomized feature. Here is what the
final progression sounds like with the drums. Let's go over some
of the key concepts that we've covered
in this lesson. The scale mode feature
allows you to easily see which notes you can use
within your chosen key. They are formulas we
can use to create major and minor chords
within the piano roll, as well as various
other types of quotes. To create a major chord, you start with the root
node of your code, then go up four nodes and
then another three nodes. To create a minor chord. You start with the root node of your code and go up three nodes and then another four notes to create a major seventh chord, you form the major
chord and then take the top note and
go up by four notes. To create a major ninth code, you form the major
seventh chord and take that top note and go
up by three nodes. To create a minor seventh chord, we start with a minor chord, duplicate the top note, and go up by three nodes to
create a minor ninth chord, reform the seventh chord, and then duplicate
that top node and go up by four nodes,
chord inversions. Or when you change the position of the notes in a chord and are another great way to create more interesting
chord progressions. It's also important
to experiment with the note velocities and note placements to create
a more human feel. By now, you should have a
much better understanding of how to create your
own chord progressions. Next, we'll make up in our sound more lo-fi using
an Ableton effects rack.
8. Creating a Lofi Effects Rack: In this lesson, we'll be
creating our own effects rack to add them or lo-fi sound
to our piano melody. A big part of the lo-fi hip-hop sound is using sounds
with warm texture, as well as adding noise
and a slightly H-field. Two effects that are
used to achieve this, a wow and flatter. These effects originally come from tape machines and turn. The wow effect is when
there are low frequencies. And the flatter effect is when they are high-frequency looking at lossy to anti-retro
color and sketch cassette, or two very popular plugins
for achieving these effects. However, we can
simulate them using Ableton stock plug-ins
within an effects rack. Let's create the effects
rack on the piano channel. Go to effects and
load up a shift. Right-click on it
and click Group. We now have a wreck. We're going to use
macros to control the frequency shifter
for the wow effect. Click the macro icon
in the top left. Right-click on macro
one and rename it. Wow. Next right-click on the mountaintop
within the shifter and assign it to the wow macro. We can now control the effects
amount with the wow macro. Play around with the while
macro until you get a vibe. I'm also going to
change the LFO to a sine wave for a smoother feel. For the flatter effect, rename macro to to flatter. Then right-click
on the rate within the shifter and map this
to the flats and macro. Now we can control the
effects right now, using the flattened macro. Play around with the flats and macro until it
sounds good to you. You can also expand
on this rack, but adding things
like saturation, distortion, compression,
pet reduction and so on. Let's save the rack
for later use. Click the Save icon in the
right corner of the rack, and I'm going to name it
lo-fi affects red Skillshare. Can now drag it in from your user library
whenever you need it. Again, Let's recap what we've
covered in this lesson. You can use macros within
an effects rack to control different
parameters of an effect. Wow and flutter
effects originally come from using tape
machines and turntables. These effects create
irregularities with an audio and help
achieve the lo-fi sound. You can save and effects
rack for later use. Nuts, you've just created your first effects and other incredible
feature with enables. Now let's move on
to the main melody.
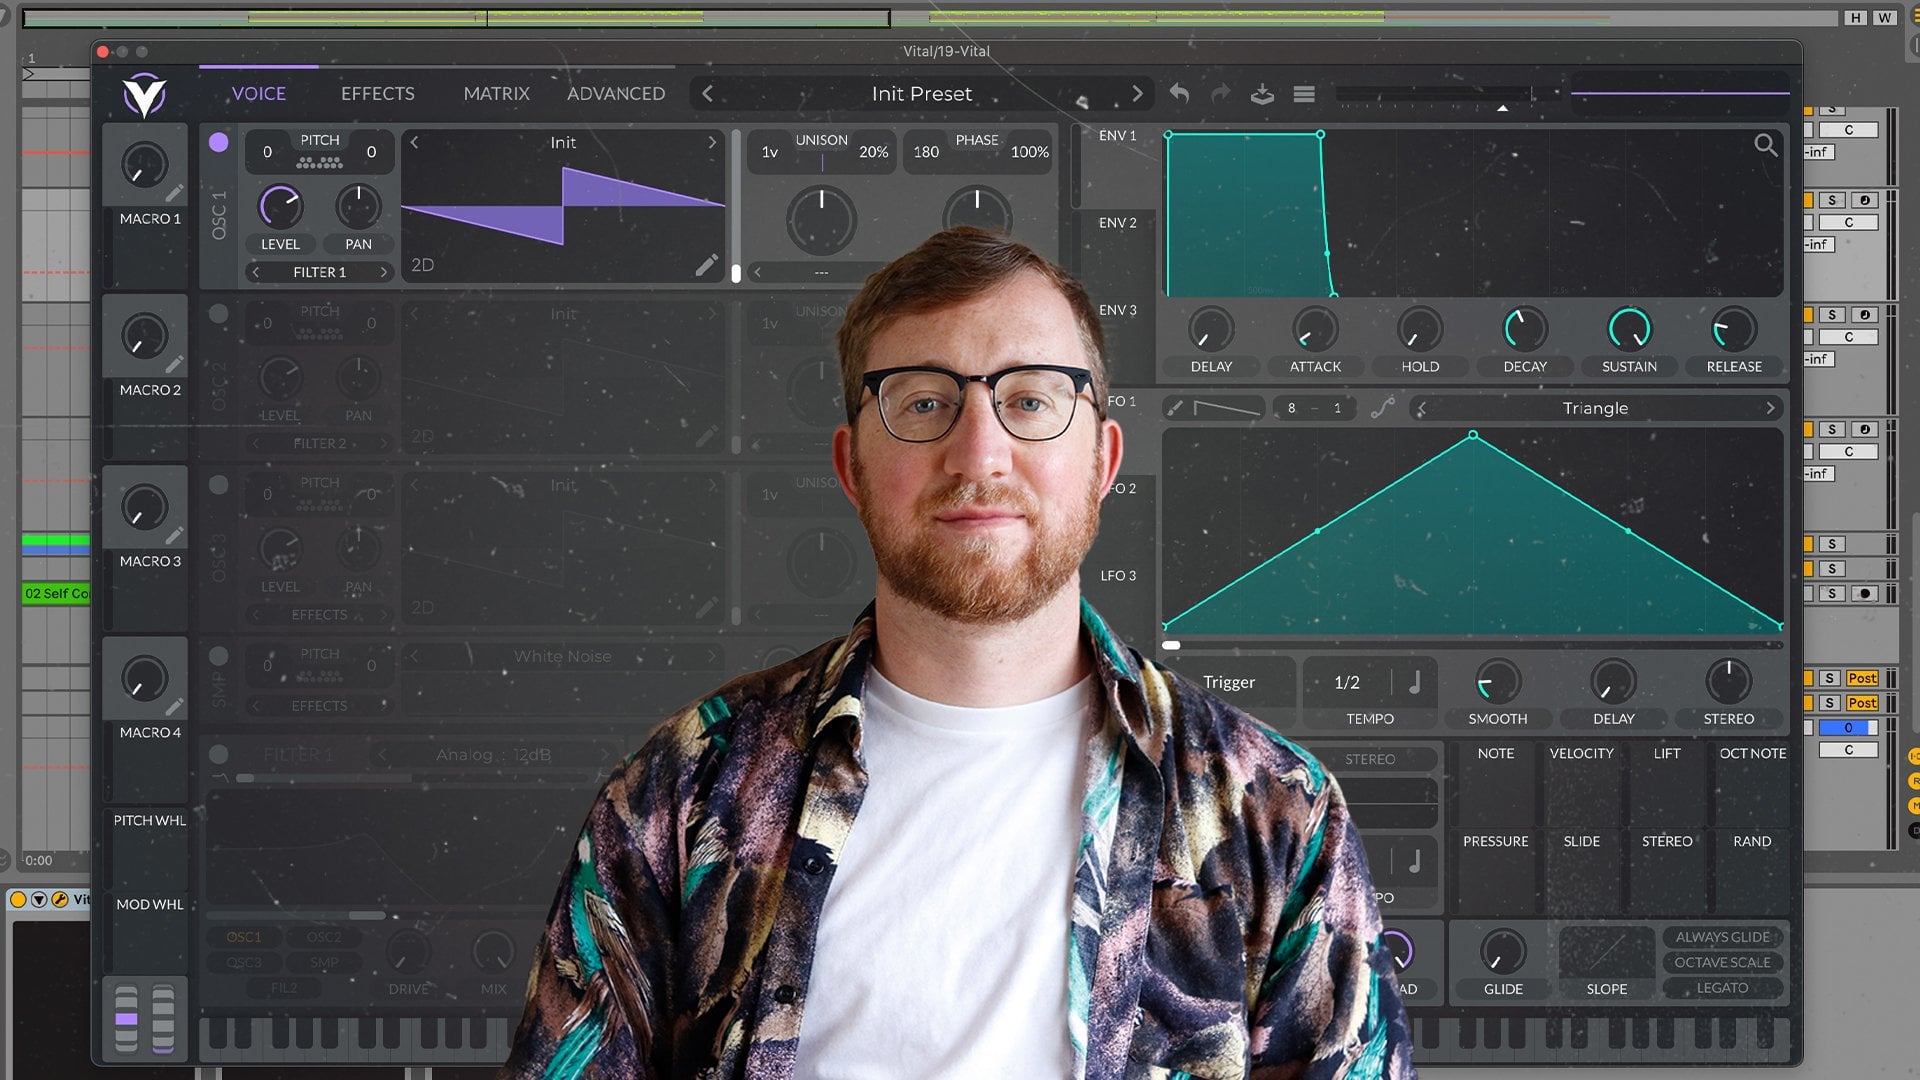
9. The Melody: This lesson, I'm going to
show you how to create a show pluck sound using
Ableton operators. The process of creating your own synth sounds
is called sound design, will then be using
the sound to create a soothing melody
on top of up here. Let's create our synth sound, duplicate the main piano channel and rename it to sentimentality. Open up the midi on
the sentence channel, select all using Command on
Mac or Control on PC plus a, then press zero to disable
all the midi notes. This now enables us to
easily start creating a melody using the original
codes as our guide. Then enable the first
D-sharp three note by selecting it
and pressing zero. Again. This is so we can hear what the center
is sounding like as we created next to drag in and operator from instruments
to replace the piano, I'll push up the channel
volume and velocity so we can hear it properly
while creating the sound. This is what the default
operator patch sounds like. Now let's design the sound. Click on this bottom oscillator, bring the sustain
all the way down. A short sustain as one of the primary characteristics
of a pluck sound. Set the decay to around 2 s or experiment
with it yourself. Then let's see if we can add some cool character
to the sound using the filter section alongside the filter option
that has drive. Let's see if a different
waveform works. I'm also going to tweak the attack to soften
the sound a bit. Let's actually remove
the drive as it's making this sound too harsh
for what I'm looking for. Now let's make the
sound more lush and interesting using effects. The most common effects I use on pluck sounds are
reverb and delay, as well as the wow and
flatter effects we used on the piano track in a
reverb from audio effects. One of my favorite presets
is the cathedral one. Great. So put it at around
17% weight for now. Just your taste for your track. Then let's tweak the settings of our lo-fi effects rack until
we hit a vibe we'd like. Lastly, let's add an eighth
note delay after the reverb, going to put the delay at 40 per cent weight
and 66% feedback. But again, adjust these to your taste or even
try other delays. Let's push up the witness of the reverb or bets
and then EQ out the lows of the effected sound before we start
writing the melody. Now onto writing the melody. Going to keep it straightforward for the sake of this class. And let's use singular notes from each chord to
start our melody. Continue playing around with notes from the chord
progression until you find the melody you like
or follow along with mine. Feel free to also use other notes from the
scale if you'd like. And lastly, let's tweak the note placements to add a more human field
to the melody. Make sure to save
the safe option, makes sure that all
your samples are saved within your
project folder. Now to quickly recap what we've covered
within this lesson, we can easily start
creating our melody using the midi from our
main chords as a guide. Reverb and delay are often
used on pluck sounds. The process of creating your own synth sounds
is called Sound Design. Ableton operator synth is
a popular tool for this. The shortcuts we
covered were Select all using Command on Mac or
Control on PC plus a, as well as the disable or
activate many notes shortcut, which is done by pressing zero. I hope you had fun creating
your first melody, as well as getting a taste of what it's like to create joints. And next, let's get
the baseline going.
10. The Bassline: The simplest way to add a baseline to your
track would be to just play each base note from the courts using
a simple sub sound. This can work if
there is a lot of other melodic content going
on within your track. However, for this
song, I want to create a baseline that has
a moral life feel. Firstly, find the
operator guitar, bass presets and drag
it under the melody. Are also often like to pick
my own color for the trap, which you can do
by right-clicking and picking a color here, Let's name the track base. Then select the piano melody, press Alt on Mac
or Control on PC, and drag the muddy to duplicate
it onto the bass track. Open up the muddy and
select it all again, then press zero to
deactivated the nodes. Activate the D-sharp to note by selecting it
and pressing zero. Again. That's not sounding low enough. So let's select all
the midi then press Shift plus the down arrow. This will shift everything
down one octave. Now let's play around
with the notes within the chords and see how it
sounds alongside the piano. And since I'm going to reduce the volumes
as you can hear, the audio is distorting
from clipping, which is when it
goes above zero dB. Once I've got the foundation
of the baseline down, I like to start adding more
variation with extra notes. Try experimenting or follow
along with my baseline. Blue. Blue. Blue. Finally, let's EQ out some
of the high frequencies from the base so it doesn't clash with the piano and synth. Let's recap some of the key ideas we've gone
through in this lesson. Again, you can use your
main chords as a guide to begin programming your
baseline for lo-fi hip hop, you usually don't want much
high frequency content in your base so that it doesn't clash with your
high-frequency instruments. The main shortcut recovered in this lesson allowed us to move a midi note up or down
an entire octave. We do this using Shift
plus the down or up arrow. We now have a strong loop going that includes all of
our main elements. Next, we'll be turning this
loop into a full song.
11. Arrangement: Turning the Loop into a Full Song: In this lesson, we are
going to be turning our four-bar loop
into a full song. We'll also be adding effects,
samples, fully samples, and automation for more
movement and texture, I found some arrangement to be the most challenging part
of grading the sample. However, there are ways
to simplify the process. The most straightforward way to arrange a song would be to start with an intro that goes into
the first main section, from their switches
into a breakdown that leads into the
second main section. And then finally
ends with an outro. Layout can work in
a lot of cases, especially if there are
enough interesting changes going on with the
instruments and drums. For this class, I'll be using the standard
arrangement formula, but lo-fi hip hop does often venture far off
from this layout. You can also use one of
your favorite songs in a similar tempo as a guide when working on
your arrangement, Let's create our basic layout. Markers are helpful
for this as they allow you to title each
section of your song. Firstly, let's move
our main loop two by nine and duplicate
it three times, creating a 16 bar main section. Then to name this section, right-click on the line below the line and click Add locator. Let's name it main section one. To begin the intro, Let's
duplicate just the piano chords twice and add a marker on
bar one and name it intro. Do the same thing after the first main section
and name it break down. For the next part, duplicate
the first main section, place it on both 33 and
name it main section two. For the outro, Let's just have the piano chords for 4 bar. Add a marker on bar
49 and name it altro. Now we have our
basic arrangement, which is technically
a full song. However, if we left
the track like this, it would be a rather boring
listening experience. To make the arrangement
more interesting, we can do the following. Add effects samples to
transition between sections. Use automation,
which is when you control the perimeter
of an effect instrument or track to change
over time within your song at field and fully
recordings for more texture, at more variation to our
drums and melodic content, create more melodic content to add in throughout the song. I will briefly cover
these steps now, but makes sure to experiment
with each one for your own song and see
what you come up with. For demonstration
purposes, I'm going to use sounds from
Ableton core library, which you can access here, as well as download
various other packs. I'm going to now add effects
samples to transition between different sections and then explain what I've done. Here is what the
effects sound like. Going into main section one, I've added a white noise riser from Ableton is called library as well as a full effects to bring us into main section one. I've also added a short-term fix hit halfway through
main section one, and then use the full effects again to bring us
into the breakdown. All these effects are copied
over to main section two. I often keep my fixed samples on warped for more organic field. I also added reverb and echo
out the low frequencies. You've probably
heard things like vinyl crackle and rain
recordings and lo-fi hip hop. Using field recordings is another great way to add warmth and texture
to your track. I've added a ray in and
train atmosphere recording. I've kept it on warped and placed it to play
throughout the track. I've also lead in a
vinyl crackle recording. I decided to keep
this warped and duplicated throughout the
track except for in the outro. This is what it sounds
like alongside the piano. As you can probably
tell, our main elements are still quite repetitive. Let's fix this by
adding more variation. We can achieve this by
doing things such as adding or removing elements
in different sections, adjusting notes within
our melodic content or switching apart drums. Let's go over the changes
I've made to the drums. The main change you
see is this top loop which comes in halfway
through main section one. As you can see, I needed
to edit the warping a bit to make sure it fits nicely
with my other drums. A technique I like to often
apply on top loops is to use this option here to control the transients
of the loop. It often helps it Fitbit
in the track and it's also a good way to make
a loop more your own. Make sure to EQ out
the lows of this too so that it doesn't clash
with the kickin base. I've also added more variation
to the main drum hits. For variation on a piano, I've added these extra notes at the end of the progression. Another method that can
work nasty is to add a second accountability that plays off the existing melody. I used R codes and the scale feature as a
guide to create this. For the sound, I use
this ocean pluck preset that is made with Ableton
is collision instrument. However, I did edited
quite a bit to fit better and EQ data lows. I've also added
background strings that come in during
the breakdown. I used Ableton
orchestral strings, which you can download here. For strings and
pads. I like to keep them quiet, simple,
and spacious. So I've used two
spaced out nodes from each chord we created for
the piano progression. Then for a bit more
interest antigen a third note on the last chord. I added reverb and echo
out the lows and submit, as well as keep the
strings playing as main section two comes in. Another great technique
to use for creating a smooth transition to a
new section is automation. Here I'm going to use an
auto filter to filter out the high frequencies
of the piano and then bring them back in just
before main section one, load and auto filter
onto the piano track. To activate automation, click the automation on button here. Now we can choose
which parameters from our device we want
to automate here, or by moving it on the device. Click the plus sign to create an automation lanes so you
can see the automation separately from the
muddy as well as multiple automation
parameters at once. Then select the last part
of our piano in the intro. Hold shift and drag down to bring the line
down all at once. Then let's edit it so the
higher frequencies filter out and then come back in
just before the drum start. Then let's copy over
the automation to transition from each
primary section. Let's recap. What we've
covered in this lesson. Song arrangement is when we take our main idea and turn
it into a full song. We can add or remove
elements to create different sections to make sure the song
doesn't get boring, we need to make sure there's enough variation
throughout the song. Effects, samples,
and automation are great tools for smooth
transitions between sections. If you're stuck on
your arrangement, you can use a reference
track as a guide. Great, I hope I was able to
make the song arrangement proceeds less intimidating
during this lesson. Next, we'll move on
to the final step of creating a song,
mixing and mastering.
12. Mixing & Mastering: In this lesson, I
will briefly be covering the mixing
and mastering process. Not going to go
too in depth into this topic that's outside
of the scope of this class. However, I will be going
through a few ideas that should help your thinking
when mixing and mastering your own music. He has some key
concepts that should simplify them mixing and
mastering process for you. Firstly, the musical
ideas and the vibe, but always the most important, especially in lo-fi hip hop. Use your ears over any
visual monitoring. If it sounds good, it is good. Use good quality samples. Do your best to make sure each element doesn't
clash with another, using things like setting
levels, EQ, panning, etc. From there we can
do most of the work with just adjusting
volume levels, especially as we've done most of the processing to each
sound as we went, have the main ideas as the
loudest and go from there, create a good kick in
pace relationship. You can achieve this
with EQ levels and using techniques like side chain compression if necessary, putting tracks like
all the drums, instruments and since
effects and Foley into their own groups can
also help simplify the process and keep
things organized. First, let's group our
tracks accordingly. You can group tracks by
selecting them and using Command on Mac or
Control on PC plus g. To set the final levels, I'd like to use this technique, switch to session
view by hitting tab, then bring all the
tracks down to zero. And slowly bringing each element starting from the kick drum, which is usually the loudest. You can select multiple
tracks at once using Shift to bring all the
levels down together. Here is a time-lapse of me using this technique
to make the trap. Here is what it sounds like once the final levels are set. Mastering is the final stage
of the production process. We can actually keep
this step quite simple if the mix is good, the primary aim of mastering
is to get our tracks to a similar loudness level as other lo-fi tracks and
glue everything together. We do this mainly with a
compressor and limiter. As you can see, my
mastering chain is quite simple and only uses
Ableton stock plug-ins, which includes an EQ saturated
glue compressor limiter. I'll then adjust as necessary depending on what
track I'm working on. Select a section where most of the elements are
playing together. And then push the
glue compressor and limiter until just before
the audio starts clipping. There should be a good
enough loudness level. But I also often use reference
tracks to test against. And finally, let's export the final song has a
high-quality web file. Make sure you have
the whole arrangement selected with the loop brackets. Then go to File, Export Audio slash video, or use the shortcut Shift plus Command on Mac or
Control on Windows plus R. It will be defaulted to
export the master track. Make sure the sample
rate is 44 100. The file type is set to web and the bit
depth is set to 24. For this song,
dithering shouldn't be necessary as the web
file we're exporting as the same audio
qualities as the samples we've used so far and
we're not downsampling. Jittering adds a bit of
noise to the final audio, but reduces artifacts when
learning the bit depth. You can also export as an MP3 file by
activating this option. Now click Export, name your track and save
it wherever you like. I hope this lesson
made the mixing and mastering process
less intimidating. You now have a solid foundation
for mixing and mastering your own music and
are able to cross the finish line of
completing a final track.
13. Conclusion: Well done on getting to
the end of this class. I hope you enjoyed it
and are starting to fall in love with Ableton Live. You now have a solid core
understanding of Ableton labs features and essential outline for creating lo-fi hip hop, as well as ways of
thinking that I hope will help you make
music more efficiently. Please do share the tracks you made it and go make another one. I'm excited to
listen to them all. You can connect with me on
all social platforms at fair game songs or listen
to my music on Spotify. Happy creating.
 Jonathan Fisher, Music Creator & Sound Designer