Transcripts
1. Midjourney Bsics For Designers: From the beginning of time, architects have
wanted tools to help them display the work
in a perfect way. Now we have artificial
intelligence and mid journey to
help us on that path. Welcome for AF architects. Mid journey essentials a
transformative journey into the heart of
AI driven design. I'm Brandon Gibbs, architect and innovator with cutting
edge experience at Zaha architects now leading a new generation of
architects in AI. And I'll be your instructor in this course while
we deep dive into the functionalities
of mid journey understanding its core as an AI tailor mate for architectural innovation
step by step, you'll learn how to simisly integrate mid journey
into your design process. From initial sketches,
advanced project modeling, discover how to
elevate your concepts with AI generated
visualizations. By the end of this
course, you'll not only mass mid journeys
technical aspects, but you'll also unlock a new realm of creative
possibilities, making your
architectural visions more vivid and achievable. Join us for this enlightening
experience where every module brings
you closer to the forefront of
architecture, technology. Enroll now and step into the future of design
with mid journey. See you in the course.
2. The Midjourney For Architecture Class Project: I'm going to go over
the mid journey basics for this class exercise. As you're going to
be able to live, interact and create your mid
journey scripts for you. Artificial intelligence,
empowering our architectural workflows. The exercise is going to be something that has
some clear objectives. And I'll also tell
you how I can get the most out of pretty much this course and the
exercise. So let's get started. The objective for this
course exercise is to learn and create and also adapt prompts for value
architectural content. That's with mid journey. Also to understand how mid
journey can work within the design process as well as to prepare students for
practical use of mid journey. The end product of
our class activity is going to be pretty
much materials for presentation because that's
what you're generating. You're generating elements
that could be a plan. A three render something that can inform your
design process. It's ideas, It's
giving your texts and your desires and getting
some output forward. The steps for the
class exercise is going to start with
prompt generation. This is going to be a
prompt that you start for modern two story home
perspective and cinematic style. In urban neighborhood or
suburban neighborhood. You're going to start from there and then you're
going to alternate. I'll give you some
options for alternating. The examples are
with environment. You can use urban
setting or for setting. You can alginate on the style which is
classical, traditional, futuristic or cyber punk, et cetera, as well
as the home details. You can change it
to three stories. You can make it a
stone base, wood, shingle facade, stealing
glass, structure, et cetera. I'm asking you to make two
alternatives to this, okay? The next step is going
to be to generate a plan instead of
the perspective. So you'll have a plan
and perspective. Finally, I would
like you to export a high rise of the
perspective and plan images. And you can put that
Ford class and give the prompts that you
use for feedback. You can improve your work flow and your understanding
of mid journey. Here's going to be how
you're going to get the most out of this class
exercise and this course. Definitely share
your class project and get feedback for those
images, for those prompts. Also, I'd appreciate if you can add a review
after completion. This also helps other students. Finally, share the class
with your friends. People that you also might know to be interested
in mid journey, you can both get
better together. It's always great building
skills and having good communities of skills
within your network. All right, enjoy the class.
3. How To Join Midjourney: It journey is an incredible tool that can produce a
lot of great images. Though I'm seeing a lot of
images that I've created here. The great thing about
this and what it is, is software that
produces AI text to image services is that it can do incredible types of
design from its library, from its database,
from open source and all sorts of images
and all sorts of. This is not just limited to
working with architecture. Of course, it can do images,
it could do 2d3d designs, It can even generate things that you wouldn't
have even expected. The benefit of this software is definitely knowing what you're doing when
you're creating. And that's what
we're going to be looking at in this course. We're going to go
ahead and start by really just going
toward the base of mid journey getting installed and seeing what it
can provide for you. The home page is not that
clear as it talks about code. However, you'll see like a couple of different
links which you're really going to be looking
for is a sign in. And currently the options for Mid Journey are going to be
going through a Discord, which you'll be signing
up for, log in. However, you also
will have the options for membership for myself. I now see that the base close, but there's a paid membership
for really participating. However, it does really great. So it's even worth if for a
short period to get involved, you'll have like
your mid journey log in where you see images that you've rendered. You
can rate images. You also have access
to the community. The base of mid journey is actually going to be
through discourse. We'll go over an interview
of that so you can get started and get some progress with your mid journey workflow.
4. The Basic Interface And Writing A Simple Text To Image Prompts: So this is the mid
Journey discord. This is going to be
where you're going to start to see others and the communities as
well as the resources, sort of like a web interface, however, based off discord. And if you've never
used discord before, the thing you're going
to see is that there are pretty much information places as well as interaction places. And there's a bot that
actually responds. That's actually how you put in your prompts to get your images. And you actually
in this process, also get to see a
community of other people, which is actually
pretty helpful. So, of course, you
can get your info, basic announcement status rules, get it started. You
can get support. But the place that's really directed for people
who are just new to Mit journey is going
to be the Newbies forum. And as you can see, you can see pretty much
what people do to get premsi image that just
put in sort of some words. However, the thing about it is to get those words to
get things you want, and the way you're going to
do that is using prompts, and it's going to
also going to be the way that you can actually be looking as you
research what to do. I'm going to go down through
a little bit more of the feature here
so you'll see that there's a lot of
different things that are you know, useful to explore. However, the thing you're
going to most be doing is work with prompts and you actually don't have
the prompt here. Your prompts are going to be pretty much open source unless
you pay a much higher fee. So just be noted about that. In the prompt window, As
we're looking down here, you see there's already a bit of a exclamation mark down
here over the cursor. And when we go to start our app, pretty much seeing
our text images. We're going to be
going through that. Before going to our renders. We also will definitely
look at some of the other different
options where you have where you
can show members. You can actually make
friends. So currently, I don't have too
many connections, but you can appear to be to be saving some of the
things that you see. You can connect. These are
actually called threads. You also can click on
messages you have right here. This is your direct messages. This is actually just
the Mj Journey thread. If you get to another
smarter thread, This is where you can have friends and also
be making message with others in the forum. You also have the ability
to look at your account. And again, this is the discord connection to the home page. So let's get started and do
our first maj Journey prompt. So we're going to
start with a mi or need prompt in the form, and we're just going to
start by typing backslash. What you see when you
type on backslash, you see several
different options. You have the ability to
change your settings, to describe something, and it will write a prompt for you. You also can blend to
images or imagine. Imagine is the typical
use for text image. And you also have the ability to look at answers or daily theme. And what happens when you put
this in here, for instance, if we start with imagine, which is the most common
one, you can also just type in imagine
it will create this. You could say
something very simple like imagine and you'll just say simple rectangular house with glass windows, and stone base. And you would just sort
of see this maybe as a massing instead in a sunny suburban plaza. And what you'll see is it'll tell you that it's
going to be working. I'll tell you that
it's waiting to start, it'll identify your name
as well as the image. And so the idea is mid
journey works and a queue. So you'll be seeing other
people's images going through, and we'll talk about exactly
what comes back and what you can do with it
from this point. As you can see, it's
gone through my image. It's given me like this
sort of blurry thing. That means it's working
on what we talked about. And as I sort of scroll down, you can see there's
nothing at the bottom. You see other things in
other people's images. That's because it's
still working. You see the percentages
on almost 100 and so it's sort been
running and rendering. So now you see images
that look pretty done, but it's actually in four parts. That's because there's a one, two, three, four relationship. And you have the ability to use these panels or these V panels. U panels are going to let you upscale this image
so you can download it. When you click on that, it
will just go into a new job, and it's actually running. So you click on it, you
can click Open in browser, and you actually can save that, and it's nice normal render.
It's just very simple. But you can also come
back and in your discord, what you can do now
with this image is also upscale even more.
You can zoom out. You actually can also
move up, down, et cetera. And the thing that you can do, of course, in terms
of going backwards, you also can just vary some of the images that you had
generated, for instance, if I wanted more of
the perspective view instead of just a front on view, I could be clicking on maybe V four to give me some
variations of that image, and it will go to the bottom because that's the one
that's been working on. Now, just make sure that it's going through and going in here. So what you can do is
go to the message, and it talks that it's actually
in process right here. So that's great that
you can just click on that and see
that going through. And the idea is it's
going in variation, and you can see the terms of it. So now you see a whole new set, and I actually press it twice. So again, it's good to always have a little bit of patience to sort of see what's going on. But still because of
the AI generation is it is going to be actually
producing different results. These are also very nice. Again, if I wanted
something along this line, it's nice to get a
image, just in general. However, what if we want to have a little
more specificity. So also, since this is actually a public threat where
everyone sort of sees image, what if we want to do it
a little more privately? Well, that is the
option for actually talking directly to
the Mid journey bot, which I can you do by
clicking on Md Journey, and though it's
still open source unless you have
paid the extra fee. The idea is you can always
just get started by talking to the AI in a
direct message here. And I actually have several
projects I've worked on, and we're going to go through
our own sort of starting to finish method of just generating
some images from here.
5. The Anatomy of A Successful Prompt Tool: Now we're looking at a
prompt that started from a word that I just copied
and I just developed, and I'll go into
that in a moment. But this prompt is simply
for a cinematic scene with a simple steel heck
clad hexagonal house, tall windows on a sunny day, in tall grass in a suburban neighborhood,
in Art Deco style. Asp scene nine v five. You'll notice that
this is what I put in, I use of the slash for imagine, and this is the images
sets that I got. Now I'm going to tell you how
I came up with this prompt, but I'm going to go
ahead and just look at some of these to
look at the details to see does it have it right? And sort of what really
makes a difference, like something is more accurate, maybe this one is
definitely more hexagonal than maybe
this one or this one. However, it did
interpret what I did, and it did it based off understanding the prompt
in a specific way. So what we're going
to look at in terms of what to do next from this type of information is how do you get a
particular prompt, right? How do you get it in
a particular way? And we're going to talk
about definitely some of the other types as well. But there's a particular way in which you need to
organize images. Your prompt to get a
particular results. Also note that you
can the sound silent from pretty much
sound options there because you can be hearing
that in the background. Let's go ahead and look at
what we have in our prompt. Here's an Anatomy of a Prompt. I'll break down the prompt
that we just went through. The first part of
it is a subject. Subject could be a simple
home, hexagonal form. Tall glass minot could be
like talking about a face. You'd be talking about
a product ideas, it's the subject and a very
simple part of description. The next set is where you talk about the details
and environment. Something like tall
glass, sunny day, people walking by, et cetera, cars, et cetera. Something
about the scene. The next is the stylization which you're talking
about cinematic scene, Art Deco style, some sort of
way of given attribution. The next step is about
the parameters aspects, 6095, which is the V five
of the mid journey engine. And all these together are
going to create this prompt, right, which will
give us that result. And we could of
course, adjust it, but the idea is following
the structure, right? If we go back into our
mid journey window, we'll see that pretty much
this is how it responded. If we change any of the terms, we would get a different form. For instance, if we went
through here and came with the same prompt and would
simply change, okay. Cinematic Steel,
hexagonal tower. Right? What if we didn't
put any other information? Let's see what thing we'd get. The idea is we were informing and directing the AI with our information
that was additional. We could take things away, can get even more specific. And we're going to go
into another tool, PT, which you can learn about in
my AI course from Chat GPT, for how to develop that
type of elements as well. The engine will automatically
interpret some of the other details from just understanding what
you might be looking at, some of the other
information from their record with all
sorts of other renders, probably millions,
if not billions. At this point. It definitely looks like it took
some of the ideas, but it's sort of taken away from what I was maybe
trying to intend. However, when I look at it here, you'll see that it's really following a lot
more of what I did. So that's something
that you want to achieve when you're
working with AI. I want it to definitely
be taking in some of the ideas that you're
trying to develop. Before we go into
developing the prompt, let's go ahead and
look at some ways of using some of the other
tools like the Blend tool.
6. Using The Blend Image Tool: We're going to start
with a blend tool by looking at an
image that we have. And I'm going to
go ahead and just type this in from here. When we click on blend, we
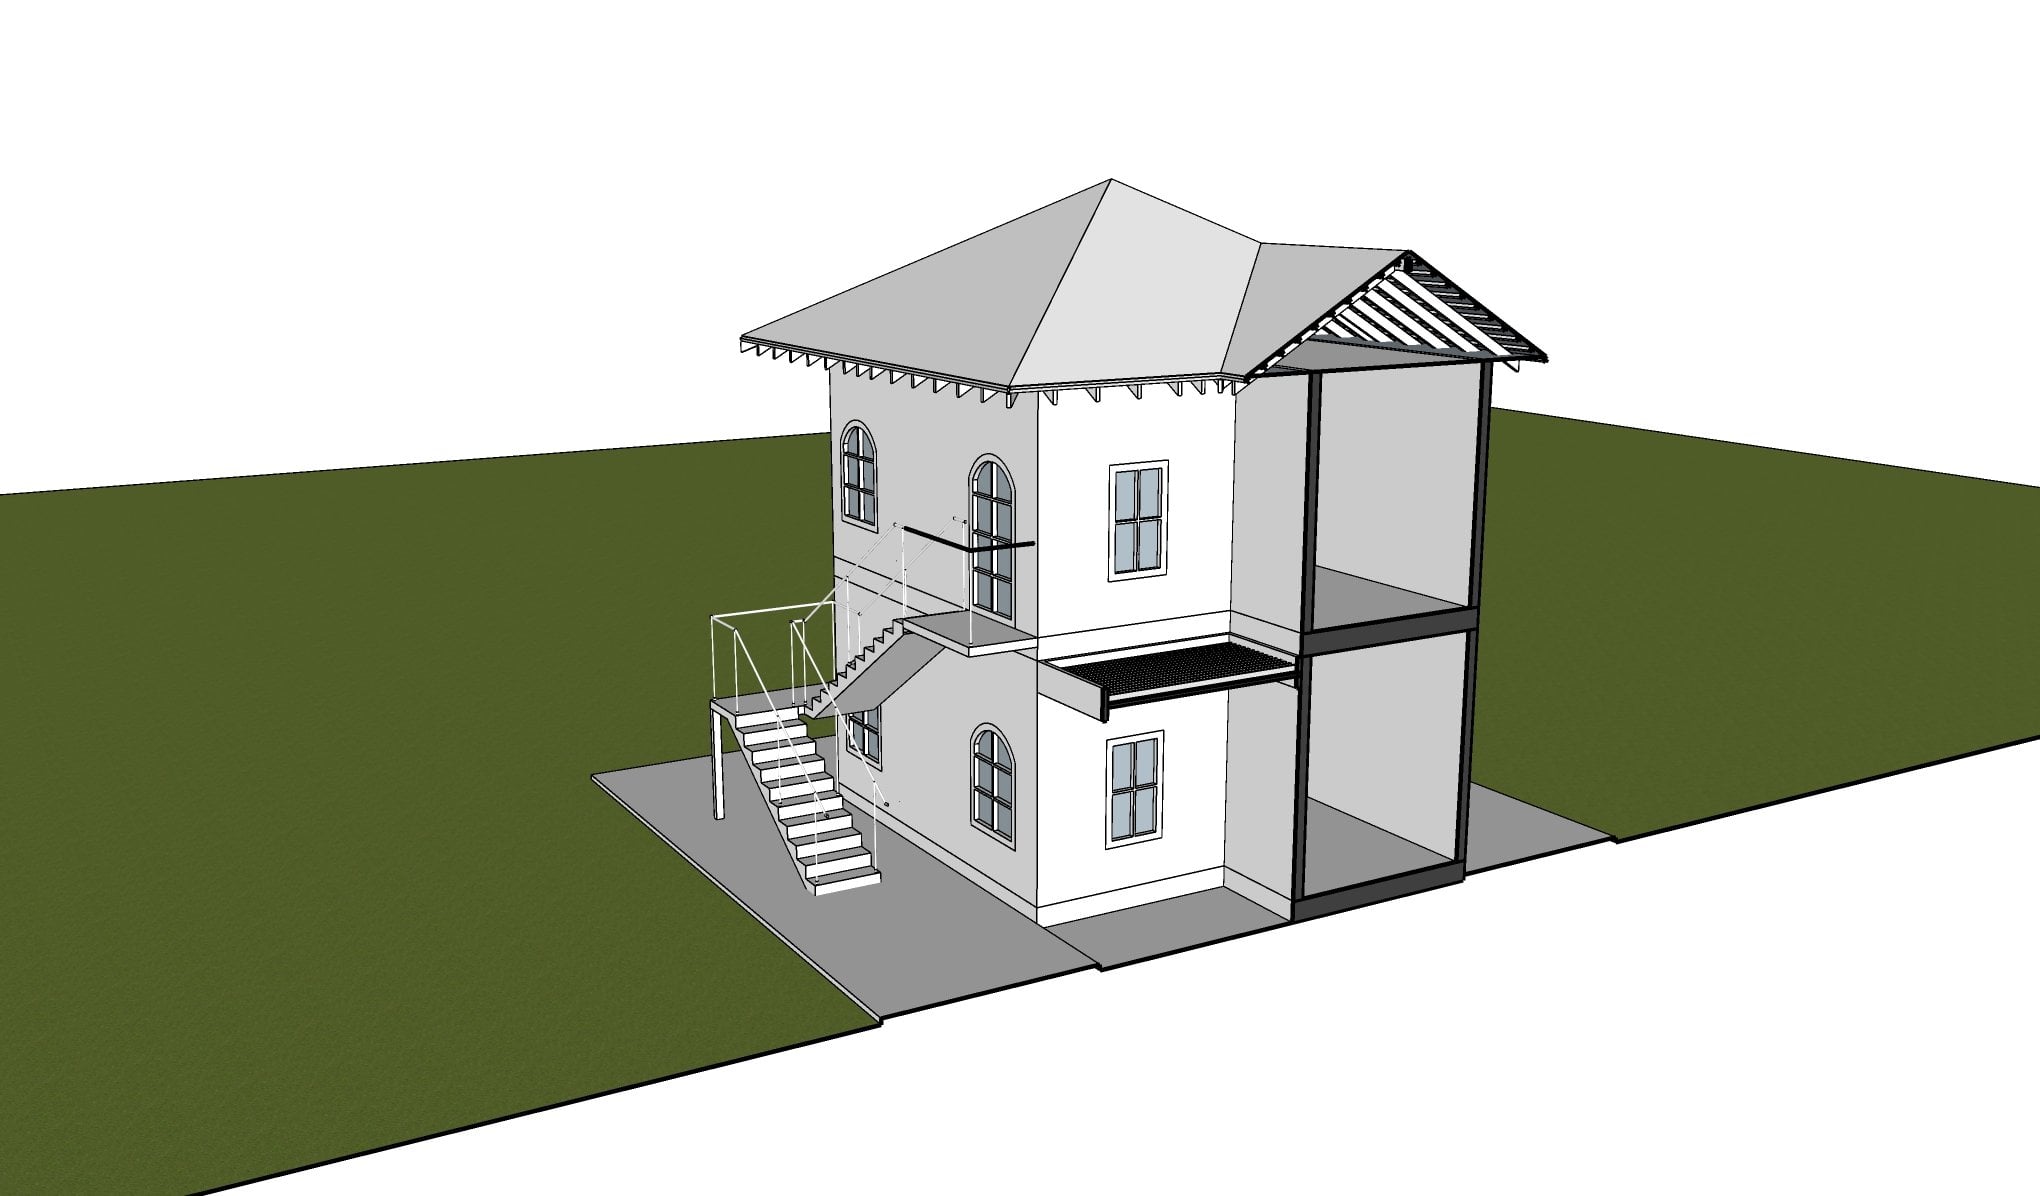
get to have two images. The idea is I made a sketch
up model of a tower. So it's a very simple massing, it's nothing major, and I just put a little
bit of levels on it. The idea with this is actually had the ability to
give some words with it. I also can blend it
with another image. I'm going to blend it
with the actual image that was created
with mid journey. Like this actually is my
glass tower that I asked for to develop as a
hexagonal structure, as a little bit
like Norman Foster. But there actually is
nothing that you have to put in to get this
particular image. So we're going to
go ahead and just click that in and
let it just blend those images naturally and you will see it create a result. I'm going to go ahead
and let that go. We'll just sit and
then we'll be able to see what does it do when
given that result idea. We just want to
make sure that we are getting that
particular set of blends. We'll look into the image, we could tell did it really pick up the image that we
gave it to start with? In here you'll definitely see some elements from
both of those forms. But it's not a perfect image. Like if you would give
an image to the program, it's not going to
directly blend your file. Another example
would be if I were to the image of a photograph. And if I was to take the
image of the model I had, it's going to have the
ability to understand, oh, I need to put these
two together and you'll see the two
images here as well. It's interesting, it's dealing
with developing something. However, it's pursuing
a style and it is pretty intelligent
and something that can help you as a designer. Let's go ahead and look at that final image and
we'll understand what's going on in terms
of what the generation is. It's, it's collected, it does show up, but
it shows two links. Just using that photograph
and using that model. It gave me a little bit of both. But again, it's not like
holding through that precision. You see the difference between
this and something like a varus is that it pretty
much was focusing on a blend, that's a common unit. Let's go back and here's what you can achieve
by looking at things like blend will show you another option of
just uploading your image.
7. Introduction To Various Prompt Ideas: As you can imagine, there's sort things that you can
generate using mid journey. So we already have a bates understanding of
what mid journey is, how to get it started. Let's go ahead and
from the discord app, create several of
the common prompts. So you understand
how to create images that are going to go
beyond Architecture props. We're also going
to look at how to auto generate your
props using Cat PT.
8. Generating A Landscape Image: Tide that we're going
to look at. We're just going to follow a simple path is we like to imagine
a simple landscape. So I'm going to
make a prompt of, and I'm just going to write
the text, a serene mountain. I'm talking about the
background at first. Mountain landscape
with a clear blue lake surrounded by pine
trees during sunset. You can see already in that set of texts that I've already just created a main image base, as well as a key element, as well as some of
the context and time. These are all going to affect
how that's going to look. We'll look at the one that
we already generated. You see this mountain landscape, and of course, it's
going to give us a standard box. It's
very beautiful. It's definitely incorporated
elements that we gave it. I'm going to make one
variation to style, so you'll see a different style. This is actually going to
be just a prompt change. Because right now it can choose any style. What have I said? In the illustrative style. But what we wanted to
do, and of course, always remember to
put your imagine, is we want to change the
way it stylistically looks. Okay. So we've said it at that particular time of the day. That landscape is going
to be a special time, and so it's going to have
special characteristics. Now that we want to
see it illustrate it, we get a chance to see what happens if it's going to just look a little
bit different. We didn't really
change the content. We just changed the style. So now as we look at that, we see that it's floating. We see that a lot
more line work, and this is a great background something can put in
the book or images.
9. Generating A Fantasy Character: If you want to create maybe
characters or people, let's create a mystical dragon flying over a medieval
castle with glowing eyes, scales that shimmer
in moon light. I'm going to put with
realistic style. Of course, make sure as to
make the imagined prot. So now we're going to see
how it takes this creature, which we just have
a simple descriptor of glowing eyes and scales
and the effect of shimmer, as well, of course,
the background of the medieval castle. We didn't say how
high in the sky, we didn't say if it's
close, if it's far, so it's going to be
very interesting to see how that will form, and that's going to
be an interesting way to see it generate. We're going to try actually
just a little bit of change, see if we can make
it a little bit more specific because we
have our dragon, there we are, have
that glimmering eye. Sort of has it sort
of attacking or figuring out maybe it will
attack from that background. But what we can do is if
I want to change maybe something about
the jagon itself, what have I said
the armed knight? Rider? Riding or a
arm knight riding, a mystical dragon. You know, just adding
a little detail of the detail of this image. What are we going to get? And we're going to
make sure that we, of course, type it in. Again that happens all the time. Definitely gives us more
time to examine our prompt. Because the idea is, we can have a relationship between elements, data B and AI generated. So the idea is, You know, we're not giving it a
box to generate from. We're definitely
give it a lot of free run for how
does it generate. But we're talking about
different parts of it uniquely, and we're variating these parts. All right. So here we are. We have our night, and
we've given them a sword. So immediately, you know, we have a totally
different image. We have a value and an effect. And you know, the ideas, this background image of this moon was added, we
can always take that out.
10. Generating An Urban Scene: Let's look at another type
of prompt that we can generate for just in general, if we want to see
something in the street, an urban prompt, maybe
even have a lot of people. Let's try that one.
And we're going to start with this one is called a bustling city street at night. With neon signs, busy sidewalks, which is pretty much talking
that there are people and a variety of
shops and cafes. So this is definitely
just a wide image. And I'm going to just
say photo real style. And so that's going
to be prey loaded. We're talking about just
that background image. Again, when you're creating backgrounds, you're
thinking about the time, you're thinking about
different contexts that would make that
really be complete. And so as I put this through, it's immediately going
to be dreaming up. What does it look like
for a busting city? What's a good example?
This immediately is focusing on the
lights. It's great. And even like maybe it's
Asha, maybe it's Japan. Maybe we don't even
know where it is, but we are getting closer to the image,
you know, the ideas. I can now get some
contexts to say, maybe I want this
to be English city. And I could come back in
here with that context. And now it's fully loaded and has a lot of different
options for where it is. If I wanted that to be
more of a English city, a busing English city
street at night, overlooking maybe a bridge. All right. And I just hate
that imagine. Save it here. And even in terms of the way
that the image is captured, a tourist family
in the foreground. And you say certain terms, maybe it will produce certain
types of people or so. But the idea is, you can actually get it
very specific, right? So now you see like
this dark setting, and now we actually
have changed, you know, towns and cultures. And so that's something that
can be generated with this.
11. Generating Artistic Image With Iconic Style: Let's look now at something
that's really interesting. When we start to think about
maybe putting abstract art. We'll actual look at how to create a portrait and
a historical scene. Those are some
interesting things you'd like to do with Chachi PT. Here's the way to create
our abstract art. We're going to start with
we're going to imagine an abstract painting
with vibrant colors, geometric shapes and
dynamic patterns. Okay. So this is going
to be letting it sort of read from this text
to determine the style. And it might be a little
more modern style. But we're going to
take that path, say, do we want to
have another look? Do we want to look a little
bit like a particular type of artist or a particular
type of visual family? And then, that's how we're just understanding
what it will generate. Again, we do have
it on fast mode set to sort of give us
particular images faster, of course, can go
a little longer. We can, of course,
also get our hires. But we're just definitely
trying to get to get that texture of what is that initial post
going to generate? Okay. So now, if
we like more like, maybe abstract expressionism
and we want to see a little more texture
of different materials, we could say very simply, let's in abstract
expressionism style with many lines and shapes. So that's going to be a little
more specific so it can, like, really target
what's going to be done. So let's go ahead
and put that one in. As you can see, again, dynamic, can mean a lot of different things
of different people. But if we definitely want to see more shapes and more
geometry in here, that's definitely going to
hit a different family, maybe not as data,
maybe not as plastqu, as just shapes that are
just maybe cut lines. It's going to have a different f. And so we can be
generating this, which would be an
excellent background or any type of texture
that you might need. So here's how we are now seeing. So more of a
geometrically based. So it's more lines. We, of course, again, we
could say very specifically, circles, squares, rectangles, and that's going
to help us generate it. Again, this is very
much abstract. So it's abstract, something. You could even just say, use this abstract style to
generate a character. For instance, if we would
even just sit the change. This is I think, a great way
to lead into what's needed when creating abstract painting. I'm going to look a
little bit historic. Abstraining. I'll turn this into abstract painting of
the Virgin Mardy. With vibrant colors. So this is obviously
something that's going to take a little bit of understanding from Tat
TBT to understand. Oh, this is maybe a catholic
painting or something. And it's going to use a style
and if I like this style, but I want it to be of an image, and that's going to
be how it's pointed. That's a great way to
understand what's going into how that style
is being developed. And so I just wanted to go into this by understanding there are different ways
to describe abstract. There's different ways
to describe any term. As you break it down, that's
how you will start to understand this world of
what Chat BT is doing. So if you look at this,
you can see how we both have created a character and a style for
how to show them. And the idea is of virgin having very much connotations as it's created from maybe Catholic
imagery, reverence imagery. Let's create another portrait.
Let's start from scratch. Let's imagine a
detailed portrait of a future st cyborg, metallic skin, glowing eyes, and intricate secretry, and comic book style. There we go. Definitely going out
there in terms saying a cyborg has a lot of
different contacts
12. Text To Edit With Uploaded Image Pt: What you can do in this method is you can bring an image in. What you can do is
you can click on an image and right click
Copy Image Address. What you could do
then is press imagine you could say again, look at that style steel tower. Glass tower with people
in several levels, glass balconies in
cinematic scene, cinematic city, urban scene, you could say urban with cars and planes in
the background. You could just say 169 aspect. These have gotten really
greater over the years. By the way, this is
definitely using the image as part of the
material, of the render. It is one way of
including it power. It's not going to
be a rendering. This edge, this is only part of what you can do with
a great program like this. So the idea, it's good to know what each thing
is capable of. It's good when you for sure have very specific forms that can be picked up by the
image generation. Also, you can also
can get it described by going to a software
like Chat GPT. We'll look at it now,
you'll see it sort of use some of my,
some of my elements. It didn't keep like a
particular consistency. It also didn't add too
much structure to it. However, it's still great
in terms of it's picking up what's happening and sort of rendering around in a
couple of elements. Like if any of
these I like a lot, I can just say let's go a little more in
detail from that. I definitely would say
something a little bit like the base sort of has
a little more consistency. If I would sort of see like this podium and
something rising up from it. And I sort of do a
variation on it, but you're not going
to see an exact one. And again, it's
really great to have like a clear character of form and you're
going to see that translate well by the AI. And so this is a great way, definitely if you're
saying I want to show several options to the client from a
particular starting point, that's a great way to see this. And it's just really
playing with massing. And again, it's developing those really clear prompts and you'll see anything that you
want to change is different. So these are two different
methods of sort of working with sort of
existing project and sort of getting that into the mid journey environment
and coming out with it. And obviously it gets even more interesting
as you start to see, hey, I like this, let me
see what it can generate. And you're just seeing
that and you're developing this and you could be putting that into your project boards, also just taking it back to
the design team and saying, hey, how can we help our
design a little bit better? Or what can we do to make
it really excellent.
13. How To Generate A Character: Create another portrait,
Let's start from scratch. Let's imagine a
detailed portrait of a future rustic cyborg, metallic skin, glowing eyes, and intricate secretry, and comic book style. There we go. Definitely going out
there in terms saying a cyborg has a lot of
different context. The idea is, we are
determining some key finishes, you could say to the image, because it's talking
about those eyes, it's talking about
how does this cc. Also, in terms of how
is that connecting back to pretty much a
comic book nature. I think this is pretty good. The idea is, we didn't exactly say about
emotion, what is it doing? We could simply come into
here and rewrite this one and start giving a little
bit of context, cyborg holding a
math book in class. Let's see how this see how
that one will demonstrate. So even though we we haven't really even described
the college classroom, so it'll be
interesting to see how does it show this image? We didn't even say
it's foreground, but we've given it a little bit of a zone
where to live, you know. And again, some of
the styletization is just in saying what
is comic book style. But you noticed that, of course, we could just break into
any type of stylism. U and really sort of
drive that image. And the ideas, I will definitely
work with how to show different characters and get good at describing what
that character is, how that character works, And now we can see
the generations where we've used
the same detailing, but added a bit of a different situation for reading a book, and that's going to be reading library, we have a new scene. We have a second variation, and because of how we've sort of just acted
to give us variations, these are all a
little different. We're going to show in a
few minutes of showing what happens when we choose
a consistent character. Is going to give us
a different way of choosing the same person
in different settings. A
14. How To Generate A Character with An Event: Another thing with
these characters is maybe if you're
creating an interaction. If you wanted to create
if we didn't try robots, how about trying maybe
two chefs, right? We could just say 22 fat Chefs. Fighting in a busy kitchen pots, pans all over the floor. I'm giving them an
interaction, a place, a surprise So this is like, like an event. So you have the idea of
these two fat chefs. So I'm describing these
fight these chefs. And again, T TPD will do
a bit of a spell jack, but it's good to always
go through that. I always develop these
and get these better. But this is now
what happens when you start saying can that character interact with
another character. And what's going to happen
as you even have there interaction of people
outside of the characters.
15. How To Generate Consistent Characters: It's very important when
creating a character, if you want to use
the same one again, that you have interface for
make the same characters. Of course, that if
you're creating comics, the same thing if you're
generating with AI. You actually do have
that ability when you use the tag CRF, will give you the consistent
character reference. You choose a image. I've
chosen one of the images, but I generate it,
and it will give me a consistent look every time
I generate this character. The first step is that
you're going to navigate to an image either through mid
Journey or through discord. Make sure that you
will just right click, click Copy Image URL, and they'll have it copied. The base image was a android and it has a particular
light up for its eye, so that whole tag
is already stored. If I wanted to see it
climbing a mountain, being a bartender, meeting its maker, that's
what I have here. Or if I want to just
say if I want to imagine and just see
and I've described it as friendly android selling
insurance on a sunny day, and I just do my CRF. And I have already copied
the link down as well. So I just keep that link. You know, I can even link
one of these images. You can find also in your if you generate it with mid
journey, that image, just go and right click, and you can always copy the mage URL or
com image address. And it will give you
that as a reference. So I'm going to go
ahead and generate this friendly Android selling
insurance on a sunny day. Just like these images do
have that similar look, you can tell it's the same
character, same family. You'll see the same
thing going on here. And you could do
this whether it's, you know, an android, whether it's a dog, a human. It can also have a effect
when you're talking about maybe a similar building that
you're saying, you know, if I have a modern building with a lot of lights and
glass, you know, if I want to see that building, and it will have a
character influence every time I generate
it as a new image. So here we are seeing this
insurance salesman of a robot, and it's dz portrait. But it's trying to figure out
how to for sure, calculate. And the more detail I
can add the better, it would be this thing. So if I want to make
this, of course, clearer. For instance, to see,
like that it's selling, selling insurance to a human, telling insurance
with paperwork. To a human on a sunny day. Then that's going to have
a showing that base image. But if I put my imagine tag, that might be a
little more clear. But again, it's going to be continuously giving me
that same character, and I won't have to really just generate from
scratch again, and it's a family of images. So again, whichever
type that you like, just copy the reference and use, and that's going to help you be maintaining that
similar look and feel. And that's, obviously a
great way to just have a story line when
you're going through. I help someone
someone wants to make a quick sort of generation like a
illustration or a comic. You cos a your own sort of dialogue and everything
outside of that. But this is based
off a portrait, so be mindful, that's
going to affect the way it shows
another pictures. If you sort of select
one of the images, you can also definitely
get that focused set here. But this will communicate a similar sort of look
and feel for each image.
16. How To Generate a Historical Scene: Okay. Let's go back over here, and let's go ahead and
create a historic image. What we're going to do
is start with imagine. Detailed scene of an
ancient Roman marketplace. Vendors, shoppers, and historical ure. So it's like we're
going back in time. We already know we're looking
for the Roman marketplace. So it's already describing how the details will
sort of build out. The idea is, it's a marketplace where people
are buying and selling. What's buying and
selling at that time? It's going to do some AI sort of research into history
to generate this. So it's going to be
very interesting to see how it sort of captures it. Again, we have the full
ability to break it down into if you want
to choose a wide angle, a clothe shot, it's
slick in here. Yeah, so it's showing a
standard marketplace, and it's great background image. Everyone's wearing the
appropriate attire, you know? We could even just say in terms of what it is showing now, detesting of ancient
Roman marketplace, when you know, maybe, you know, during an attack. Any of the many enemies
that would come, or you could even if
you wanted to say, maybe with attack from
one of their gods. All these things can be
generated and producing a beautiful result for
rendering this one again. You'll see if your
description was enough, or was it a little bit confusing enough for the type
that you're talking about. If you want wars
to be happening, you know, you can put
that in together. If I place that in again, I can say in a detailed scene of an ancient Roman
market place during an attack by Barbarians. Instead of just going
in the scripture, I'll say with with historic instead of just
historic architecture, with historic weapons,
and fighting. So the idea is it's
bringing a context, just like if you would
make a city alive. Are people doing
something special? Is it dangerous? Is it boring? You know, the ideas, these
all can be descriptors. And those are how we
build up the scene of what is essentially your
illustrative image. And that prompt
complexity is going to rich in the experience. You have that good
result from it. And so now that
we have this one. Now again, it's
definitely now starting. This is starting to show a
little bit of that change. The idea is we can see how you could easily
tell a story with this.
17. How To Automate Prompt Generation with ChatGPT : Now that we've seen several
different prompts and how to create things like
characters, scenes, art, let's go to our
engine of Chat BT, and I'm just looking at
the free verse and ideas, how does it help you
create a prompt? I would say before you really
just start telling it, help you create a prompt, make sure you specifically say what type of prompt
you're looking for. For instance, if I said, I want to create a
prompt for mid journey, with subject description and seen Then what you're
going to tell it to do is create several prompts
of architectural styles. That's an example. If you want to have
architectural styles, and we want to see for we could just say a regular
home for a cottage home. I would say, if you would
rewrite this prompt, I'm describing what
it needs to do. It's going to create prompts. I want to create a prompt style for mid journey with subject
description and seen, create several prompts of
architecture styles for a cottage home
using this format. Then it's going to really
talk about them all. So Shia fast is generating it. Ideas, I can have
several styles, and I can see you
look at the styles in general by themselves. I don't have to really
even do the generation, but the idea is the fact it. It just gives you all
both the scene and the description that you can
just be placing in here. So if we start the first
one, Qaint Cottage nestled. This is Victorian
Revival Cottage. Nestled in a picturesque
countryside karma, Victorian architecture. And we I'm going to
copy the whole thing. But you see that the scene, it divides it up, that's how you get it to
be more complete. Now when we put this back in, we make sure to remove the scene element because ideas seen and description
are one pre much. You can have periods or spaces within a
mid journey front, by the way, that does
not affect it directly. It's something that might
help you organize it. So now it's looking at creating our picturesque
countryside. Let's see how we've got here. This is a Victorian prompt
here for that cottage, and it's very nice, very nice. Mediterranean one. But We want to make sure
not to include scene. Though I don't think it will
have much of an effect. It's just to help us
when we come back to it, we'll see the prompt
that we had for it. This one is now taking
the same focus, but we got a list of prompts, and we helped to
generate prompts, create a list of prompts to generate images
around the house. We'll go ahead and
choose a style here. The same thing could go again, this is looking at
architecture interiors, but this could go the same thing that
we're talking about. One character. We say like let's
have a character. Let's generate some different scenes to see the character. Essentially going to
have it help us in terms of I definitely like the idea of writing and
controlling my writing. But the idea coming to a tool
like TGT helped me generate m some ideas if I have a writer's block or just trying to come up with
ideas for a team. So here it is right here, the Mediterranean
inspired cottage. Now, it's given me
different views. Some of these are actually
not really interior because I didn't specify that
sort of inside. So if I made this, create a list that
prompts to generate images inside the Mediterranean
Villa cottage house. That's going to produce an entire different
result, right? So again, the way it does it, I would say sometimes it sort of gets away from
the base prompt method. So you might want to reposition it if you
see that happening. For instance, if it says
envision, you know, you could just take away
the envision part, right? Um, I would say let's re and do that
before putting it in. Picture walls line with
bookshelves, filled with this. There, visualize a
cozy nook chair. It's worth taking one of these out and just putting
this here it says, convert the following
a simple prompt. A prompt for mid journey, following with subject and
description and style. You can do that for any of
these that you are working on. Idea will keep that. I don't think it will
give you a problem for all these verbals
that it's given you. But again, you can take
those out if you want. Again, I don't believe
that's affecting the pretty much the
Chacha BD journey effect. Sc with this one. This is, again, just
going through and now we are looking at looking
at inside of here. And the ideas, it's
talking about a study, so it's going inside, so that's going to help us to
get those interior images. But there are several
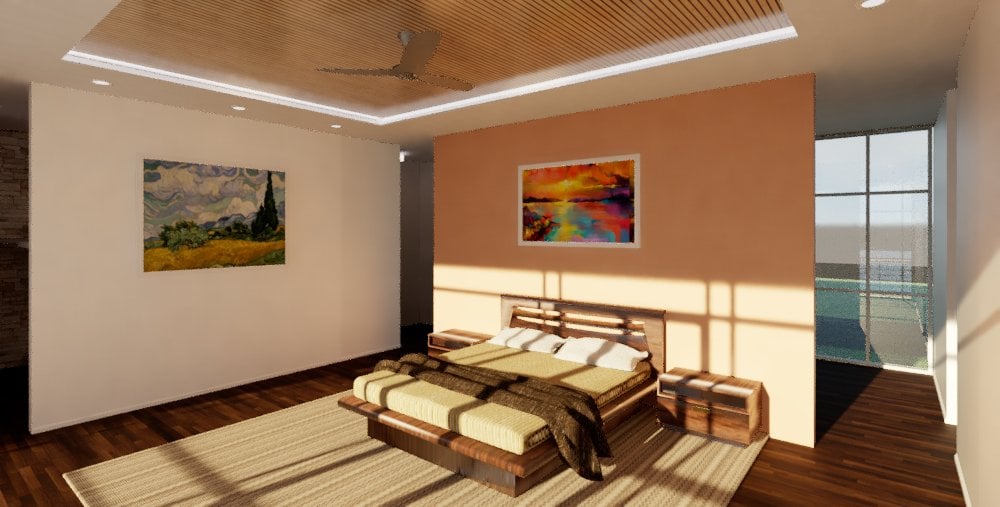
interior places that we can be looking inside. The study, we'll look
inside the dining room, we'll look inside the bedroom, idea, they're all going
to have that detail. So you could be
generating entire story. That could be done
the same thing when you're dealing with
a character or a scene. You could be generating
based off of that. So that's going to be
the level that you can get using engine like
this and with Tach PT, the ideas, instead of having to come up with each of these
spaces and then say, Oh, that space has
to be the style. You could be generating them all from the same sort of origin. And since when you're
log in the Tati PD, your searches are saved, you could be having
one thread just for generating a
character, a scene. A building and so
on and so forth. And those are all going
to be in your collection. So that's going to be
your quick start for getting anything you want
generated with My Journey, and also how to empower
that with Ta gPT.
18. Text To Floor Plans: One thing I want to definitely show people would really
have a really insight on what is possible with journey is also the fact
that it can develop plans. For instance, if we click on we could create something like imagine
a floor plan and perspective plan aerial
in black and white for 2000 square foot home with
a large modern living room and floors with tile on the kitchen with background of sites and parking,
parking and lawn. And just to just keep it
a little more simple, just like we said
in black and white. Simply simple, three D, drawing the render flat shade. This is one way to
just say, hey, look, I have a set of information
that I want for, may be a plan and let
me see what I can generate for the pretty
much mid journey way. It's going to generate something
based on what you said. You also can definitely
of course, change it up. We also can say, let
me just maybe bring in a plan just like we did
with our three D image, which of course is one
of the feature of it. However, we're going to see it generate some very
interesting options. It's following what we ask for. Obviously, some of
it's sort of trying to interpret a little
bit without color. But that obviously is a choice that we can
obviously refine. And again, we refine
different ways if you want to be open plan, if you want to have
several rooms, the idea is it can give
you this like super fast. And you could again, take it back to your design team or go ahead and find ways for that to be presented so you can get
some ideas toward design. It's not going to give you
a Cad file, but ideas. Your ability to say, hey,
look I have something, let me generate something,
let me go back and forth. It's going to be really great. And again, that's part of
the idea generation process. I'm not sure about taking
someone directly through it, but in terms of giving
yourself goals for bringing in like an idea,
it's going to be really well. This also works on
the level of room, we could say floor
plan for a kitchen in two D with a large island
and side cabinets, Modern side cabinets
with tile flooring, stone tile flooring, four by
four stone tile flooring. Let's just see that. It's a nice way to say,
let's look at both. A plan, maybe we can say, do it for me another
type of product. And the idea is it's going
to be generating that. And don't forget to make
sure you're typing. Imagine to get the
design from that. Again, this is pretty great. There is a, as you see this, you will actually be able to
go back into your collection and you'll see the different types that
you have generated. This obviously can be
used for developing both 3d2d and even elevations. Don't just be thinking
that it's going to only be three D or some other
type of limitation. But again, you're also seeing this developed like
in real time though, this actually does
create a three D. Again, it's really trying
to interpret it, it's something that's
really helpful for you. So the idea is you have to select what's the most value for
what you're trying to do. This one even includes
like dimensions. So again, this is
clever way of really developing something while
getting ideas back and forth. The idea is, it's a tool,
it's giving you options. You could be saying
different materials. You could say, instead
of your top floor, let's do a wood floor. It's giving you this
very quick access to getting these ideas. If you would be going
and getting ideas for solving your design problem, you come here for those
images to be generated.
19. Image To Description: If we would go back
and start to reverse engineer what we've
done with our program. It's interesting to
say what happens if we have the other options. Maybe if you want to describe an image that we brought in, it's actually going to be
helpful like we see an image, we say, hey look, this is
actually really interesting. I want to find out a
little bit more about it. We just put it in
and say, hey look, give us a description
that's going to be something that is useful. Just like you also can go into chi BT and see how
it describe it. You could also get
someone else's renders be a firm render and you could reverse
engineer it and say, maybe I could figure out
a way of using these. This is definitely
going to be valuable. It's not going to be exactly
what someone put in, but the idea is you have options
and you could say, okay, how could I inform my own
text to operate in that way? What we're going to
do is go and check out describing one of the
images that we just brought in, rendered out, that's
going to be this style. However, it was like a
combination and ideas. If we wanted that combined to start to really define something and we want to describe
something that we made, we could get some good language. However, this is
definitely a way to reverse engineer
something that we made. You can also describe
this in chat GPT. It's a great way of
getting that and figuring out how we can
create something even better. It's definitely a competitive
way of sort of, you know, cheat code for getting great mid journey prompts besides finding them
on the Internet. Actually, just reverse
engineer image.
20. Conclusion - Reviewing Your Images: Let's close off our
course by looking at the pretty much generations that we did that we can
do with mid journey. I'm going to go
ahead and reload. You can see everything
that you've been doing and developing. You can always find that
again in mid journey. Again, this is with a
Creative Commons license, so this is not sort of proprietary unless you've
paid that extra fee. But again, this is
great things that you can use in your design process, you could help develop things, increase your level of designer. I definitely believe
that your creativity is not just based
on what you create. So it's going to be a tool
and it's good to use it as a tool and help you
improve how Yes, it's great for getting
that fast result. And you can always sort
of reverse engineer for an engineer and just continue
to grow as you develop. And you also have the ability
to search the prompts and understand different
things that we're producing these at
different levels. I would go ahead
and definitely get a good exploration if
you are testing it out, you have the ability to
copy, to search images, to go through and actually just really improve your skill. I wouldn't do
everything at once. I definitely would say you
can develop lots of images, but you're trying to
definitely achieve something each of your projects. And so I would definitely
play around with it in your study phase,
different types of things. It could be simple, it could be even going back to the basics of developing something as simple as a set of blocks or a massing. And remember, you
can bring things in, you can take things out, you can play with photos or animals. It's all available in your mid
journey application suite. And I think it's going to
be something that helps architects at the
beginning of the day, at the end of the day, and the idea is it's
not going away. So I definitely invest
your time and you can create some incredible
tools to increase your workflow and
make the most of technology and design.
Thanks for joining me. I'll see you in the next course.
21. 010 Course Conclusion: Well, congratulations on
finishing this course on mid journey basics for architecture you
saw in this class. This is only the beginning of
your mid journey adventure. Where you can create not just planned elevations or content, but you can actually
create entire worlds and integrate that with
your existing workflow. It can make your creative
journey even more effective. Here's some things to
remember to save your time and make you more effective with using AI in your workflow. First, you want to make sure to plan out and save your prompts. This helps you keep a
track and also make sure you don't have to start from scratch for new projects. Also, you want to try several
scales of generation. That means maybe
generate materials, generate a building,
generate a massing. You don't always
have to generate the same type of thing
that's going to really help you maximize your use as a resource as opposed to mid
journey designing for you. Next, you want to research
other prompts and projects. This is also helpful with
reverse description for images. You can always up your game by finding out what is
going on around you, just like for typical project. Next, you want to
integrate mid journey with your project workflow. That means you want to use
it in a particular place. Whisk matter. Design
or design development. Adding it in and planning
it out is going to help you versus
using it randomly. I think it's really
valuable to have a good workflow and it will
make it more effective. Next, you want to connect
to mid journey community. That could definitely
be this class, but also it could be
the larger community for mid journey,
including read it. So always check out for that. Finally, you want to share your class work and give
feedback that includes this class share and find out better prompts and better things you
can be generating. Also give feedback for the class which includes giving review. So of course I can
improve it and give you the best class and
content in the future. This course is also evolving, so make sure to check back for more
tutorials and lessons. Thanks a lot for joining us on this mid journey basics
for architecture. I'll see you in the nice class. This is been Brendan Gibbs, your instructor.
Architect and innovator.
 Brandon A Gibbs, Architect & Innovator