Transcripts
1. Intro: Welcome to my Skillshare course, we're going to be looking
how to use Blender, a free and open
source software to make free D objects
look like two D. Now, this is a fantastic workflow. We're going to start by
modeling a simple game, and then we're going
to take this game. We'll be adding some materials. We'll be adding a outline
with a line modifier. This is all something that
is relatively simple. However, I do expect
that you have a little bit of
background with blender. So if you want to check out some other skillshare courses where I approach blender from an absolute beginner's
perspective, you're welcome to
check those out before doing this course, as this course kind
of expects you to know at least the
basics of blender. You don't have to
be professional, but you at least
want to know the basics of the interface, little bit of modeling
and things like that. You don't have to
be too advanced. So we'll be breaking things down nice and slow, taking
it step by step. And all of the
different resources as we're working
in this project, will be laid out in a file, so you can go ahead and look
at the different stages. Should you get
stuck on anything. So I will be including
a resources folder. Inside of there is going to be a starter file that
I've already set up. And the reason we have that
is so we have a reference, a front and a side reference that'll make things easier
for you when you're modeling. So this is going to be a
course that will take you, like I said, from how
to take a Fred object and make it look to
D. There's a lot of really cool applications
for when it comes to media, advertisement, ads
and stuff out there, companies that want
to do logos, maybe, anything that you can make in Fredy you can pretty much render out as a TD thing,
which is really cool. So if you want to learn
how to do that in this skill share course,
definitely give it a shot, and I really look
forward to seeing your projects on the end
of this Skillshare course, seeing what you're
able to make with it. So let's jump in.
2. Modelling Start: The intro of this
Skillshare course, I did mention that this is
a course that is intended for people who already know the basics of Blender at least. However, if you are following along and you don't know
anything about blender, I will just mention if you
did want to download it because this is something
that I cover in my absolute beginners
course on Skillshare, I'll just quickly
do an overview. So you can go online and
you can type inblender.org. Once you do that, you just
click on the website, and somewhere, you'll
see a Download tab, which you can click on. Now, once you're at
the Download section, you get the option of
just downloading the EXE, but I prefer to go down
here to this dropdown, and over here, you get
the portable versions. I prefer to go to the
Window portable zip because I use Windows. However, there is also
the option for MacOS, Linux, and a few other variables here. So you can check that out. But for me, I always download
the Windows portable, and then I just extract
a zip file like any other zip file and run
the blender file inside. Usually once I've
done running blender, I'll just pin it to my task bar. But that's just a
general overview, and if that's still confusing, I really do recommend
you check out my absolute beginners
course for blender, but I just wanted
to mention that. Now I also quickly mention, along with the
Skillshare course, there's going to be in
the resources a file you can download called
resources, 3d22d. And once you have
that downloaded inside of that, you
can open that up. You will see that there is something called
blend file stages. That's where I'm
going to put the progressions of this
course in there. So if you want to
look at different stages of this progress, then there is going to
be a color palette, a reference, and a starter
file that I've already set up. I recommend you just
drag that downloaded resource folder onto
your computer, Summer. In my case, it's
just on my desktop. So once you have that and
you have blender installed, you can then just go ahead and double click on
the starter file. And this is what's going to
open up, as you can see here. Now, this is what
I've set up in here. I've set up a front
and a side reference. I also up here
have a collection. Once again, if you don't
know what this is, I would definitely
recommend you look at my absolute
beginner's course. But essentially, here
we have a reference, and this is just a
scene collection here we can turn on and off. And then over here we
have our main collection, wherein at the moment, we have this default cube, which we can use to
model our Gameboy. So in this case, we want to go into our front
orthographic view. Now, if you want to do that
without the shortcuts, you can just go to view, and I'll quickly mention the
shortcuts in a second. But for now, I'll just
mention you can go to view, then go to your view point here, and in this case,
you can choose. So you could go to front, or you can go to View
and then viewpoint, and you can go to the
right orthographic, which is where we're going
to be working as well. But I always recommend
just using the shortcuts. In this case, one on the number pad will take you into the front
orthographic view, and three on your number pad will take you to the side view. If you have a
laptop, for example, you may not have a number pad. In which case, you can
go to edit preferences. You can go to input and you
can click on Emulate Numpad. In which case, the
conventional one, two, three keys all the
way through the nine and zero that sent
on top of your keyboard, they can be emulated
as a number pad. If it's easier for you, you
could always just go to view and then go to the viewpoint
and do it this way. So we're going to
be working in front and right orthographic
views most of the time. So let's start by going to
the front orthographic view, and we're going to
make sure that Acube is selected by clicking on it. You can also see over
here in the collection, it's orange because that's
where we have selected. And to do anything of this cube, we want to go in to object mode. We want to change
it to edit mode. And now we can actually
edit this cube. So what we're going to
do, we're going to make sure to press A on our keyboard. That'll select everything. So if you press G,
you can move it. And we're going to go G and
then follow that with Z. G, Z and constrain it to
the Z axis and move it up roughly in the middle of
our Gameboy and then click. And then we're going to go S, and we're just going
to scale it up after pressing S.
I'm moving my mouse, and I'm going to make
it the same width as the front reference image, and then I'm just
going to left click. And then I'm going
to go S, Z and scale it to match the front. Now, in this case, I can see
that I can't see through, so I want to be able to see
what's happening underneath. What I'm going to
do before I scale is I'll just go and enable
the X ray over here. And now, what I'll do is I'll just click
and drag so I can drag and select the top
vertices. So click and drag. And for now, I'll just get my
move tool here on the side. If you don't see this panel, just press T on your
keyboard to bring it up. So we're going to click
on the Move tool. And if this selection
here at the top, we're going to left
click and just drag that cursor till it
matches the top. Then we're going to
click over here. And I'll just drag
this one down of the blue arrow till it
sits at the bottom. Okay? So now we've
matched those dimensions. We're now going to press
free on a number pad. Once again, you can just
go to view and then go to Viewport or Viewpoint,
and then just go right. We're then going to go
ahead and click and drag to select these
front vertices here. So click and drag cause
we have Xray enabled, it should select all
the way through. In our right orthographic view, we're just going to drag on this green arrow and drag it till it goes to the
front of our reference, and then click and
drag to select these back ones and then go G, and let's move those verts in like so now this
is what we have. So we have this shape
over here matching the right view and
the front view. What we're going to do
now is we're going to go up here to our select option, and then we're going
to come in here and I'm just moving
in my viewport. I'm going to select
this bottom edge over here, as you can see. Then I'm going to go to my
front orthographic view again. And now we're going to go
over here to our Bevel tool. Click on it, and then click
over here and drag on this gizmo till we have something that's
roughly this size. Then come here to
your bevel option and then increase
the segment account. So there's segment amount here. So I'm going to go
something like 12, and then we can come here to
the width and just adjust it till it perfectly matches
our reference here. Okay? Just those simple sliders. And then we're going to go
and click on this edge. The problem is, if we
go onto the next edge, it deselects the previous one. So if we select the first
one and then hold and shift, we can keep working
our way to the bottom. So one, two, three, select
these edges on the corner. Then go into the front of a graphic view with
one on the number pad, and then go over to
your bevel tool, make sure it's
active, which it is, and we can see the gizmo here and we're going
to click and drag. And let's just go
about this much, and then let's go to a
bevel drop down here. We're going to go and
add a few segments. Let's go something
like ten this time, and let's drag this
width until it perfectly matches our reference image, and you can see that
now matches up. So let's go to the dropdown. And now we can see
this is what we have. So what I'm going to do now
is I'm going to go into my right orthographic view by pressing free on another pad. I'm going to go double tap
A to deselect everything. And we have this groove
running here on the side. So if we zoom in by rolling our middle mouse button in
the right orthographic view, we can hover our cursor
over this edge and go Control R or command R. You should see a
yellow line appear. And what you're going to
do is you're just going to double click to add it in. So double click with the left
click left mouse button. And then what you're
going to do is you're going to go over
again to your bevel tool. So it should already
be selected. So if you just move back a bit, you should see it
a little gizmo. You're going to click
and drag and just give this a bevel like that. Okay. And under the
bevel settings here, it should only have one segment. So now you can see
we have that groove. And now what we're going
to do is drop this down. And with this active, we're
going to go press E on our keyboard and then right
click and it is seal active. And then if you go
Alt and S, so Alt S, and you move your mouse,
you can see we can scale in along the face normal. So we're going to go
to go in a little bit like so and then click. Now we have a little
bit of a groove running through here
as you can see. I'm going to turn
off the X ray for now up here under
the X ray toggle, and you can see this is
now looking really good. So if you've made it
up to this point, you probably already know a
little bit about blender. If you struggled, definitely go ahead first and watch one of my absolute beginner courses that's really going to get you up to scratch and
you'll be able to completely understand
what we're doing here. As the goal, like I said here, is not an absolute
beginner's tutorial, but for people who already
know at least the very basics. So we now have the body of our Gameboy mate,
which is really cool. We're now going to continue, and now we're going to make all of these little buttons and the little screen
over here as well. But what we'll do is we'll
do that in the second part, so we don't have too long
of a modeling video. It's just a little bit easier
for students sometimes when these get broken down
into smaller segments. So I'll see you in the next
part where we model the rest.
3. Modelling Details: Come back to the second
part where we're going to continue modeling our game here, and what we're going
to do now is we're going to make the buttons. So what you want to do
is make sure, obviously, that you have your cube selected and that you're
inside of your edit mode. And what we're going to
do, we're going to go into a front orthographic view. We're pressing one
on the number pad, and we will now go
inside of edit mode, Shift A, and then we'll
add in a mesh cube. You can see it's now added in, and with it all active, which it should be because
we've just added it in. We're going to go S, 0.2, and
we're going to hit Enter. S 0.2, and then we're going to press free to go to our
right orthographic view, and we're going to go G and Y and just move it
forward like so. So G and Y, and then one to go back into
our front orthographic view, so one on the number pad. And then we're going to go
to our face select option up here, make sure it's active. Then click to select
this top face. You might have to just click your Mail Mouse button and move into the view and just click
on this top face over here, like so, and then go back to your front
orthographic view. Then you're going to press E to extrude and you're going
to follow that with 0.4. E 0.4. Then we're going to
select this phase over here. And we're going to press
E, 0.4 and hit Enter. And then we're going to
select this pace over here, and we're going to press
E for extrusion and 0.4, it enter, and then we're going to grab
this pace over here, we're going to press
E to extrude and then 0.4 and hit Enter. There we go. Now we have this. Select the middle phase
and then go Control L, and that's going to select
the whole piece of mesh, and then go into your front of a graphic view by pressing
one on the number pad. Come up here and
enable the X ray. Then now what you're going
to do is you're going to press G with actors, so press G. Move it roughly in place and then left
click and then go S to scale and left click again and just move it so it's in the middle of this
button on the reference, and then go S to scale a
little bit if you have to. We just want it to match
our reference here. So you can scale a little bit and you can press
G to move until you get it right about there
as the reference shows. Then you're going to go to your right orthographic
view and you can go G Y and move it back, so it's sitting inside here, kind like that,
out a little bit. Okay, so if that done, let's go to our front of
graphic view again. Double Tap A or go Old A
just to deselect everything, so it's all unselected. Then go Shift A and
now add in a circle. With the circle active, you're going to go
RX 90 and hit Enter, RX 90 followed by Enter. And then go G and
move the circle here, left click and then go
S to scale it down. And if it's not
perfectly in the middle, just keep moving it by
pressing G. Click as to scale, click and G to move, and just get that roughly in place, matching the reference. You can see there,
that's what we have. Then in our right
of graphic view, we're going to go G Y
and move it forward. Till it's in front of the
front of our face here, the front face of the game. And then we're just
going to go over make it our vertex
select option. You can see you can
now see the votes. And in our right view,
we're just going to go E to extrude and Y. So E to extrude, followed by Y, and we're going to extrude
in and then click. And then we're going to double tap A to deselect everything. Then holding in shift and Alt, you're going to left click
on one of the borders over here of this circle, and it's going to loop
select all the way around, and then you're
going to press F on your keyboard to F to fill that and now let's go over
and toggle out of our X ray, and this is what you should see. You can always come to
your Face select option and just click on this
face here to select it, and you can go G and Y and move it as much as
you want to adjust. But I'm just going to have
it just sitting above the surface of the game here and just
underneath the button. So now let's go into
front or graphic again. I'm going to toggle
on the X ray, Alt A to deselect everything. And now I'm going to go Shift A under the mesh options. I'm
going to add in the circle. I'm going to change it to
the vertex select option. It's still active down here
and I'm going to go R, x90, and I'm going to hit Enter. And then I'm going to
go S, and I'm going to scale it just about
this big and click. Then I'm going to
go G and just move it up roughly over here. And then in the front view,
I'm going to click and drag and just select
half of this. So you can see half of these
verts and I'm going to E to extrude and X. I'm
extrude along the X, and to about here,
I'm going to click. And then what I'm
going to do, I'm going to click on
this vertex here, not the very top one,
but the second one down. And then holding in shift and control at the same time
or shift and command. I'm going to just click and I'm going to keep working my way down all the way to
this one over here, but not the very bottom
one, just one above it. Then I'm going to go X, and I'm just going to
delete those verts. And now all we have is just
this loop of verts over here. And now what we can do is
we can go R to rotate. And we're going to
rotate it roughly to match our reference and
I'm going to go G to move. S to scale. And if yours isn't quite the right length,
don't worry about it. Just match one of the ends up. So I'm going to try and
match this bottom end up. I'm going to go S to scale, and then I'm going to
go R to rotate again. Click G to move, just roughly getting
it in place. As to scale maybe a little bit. Once it's roughly
in place, I can see up here it's
not quite matching. So I'm just going to click and drag and just
select these verts, and I'm going to go G
and just move them until they match up with the
reference, like so. There we have it. And now I'm going to select
the whole thing. So just these guys here. And then what I'm going to do is I'm going to
go E to extrude and Y and extrude it forward
along the Y and then click. So about that much, and then go Control L to
select the whole thing. Then go G and Y and
move it forward. And if it's easier, just press free to go into your right orthographic view
and then go G Y and just move it until it's just sitting like so
just embedded here. I'm going to turn off the X ray for now just to see it easier. Old A to deselect and then shift d left click on this
edge to loop selected, and then press F to fill
that pace. There we go. Now what we're going to do
is deselect everything. Click on a vertex on here and go Control L to
select the whole thing. In your front orthographic view, go Shift D to duplicate
and move it over. Click, G S to scale, click, and then go over
to your X ray toggle. And what we want to do here
is we just want to go G, and we want to move one
of these buttons in here. You can go ask to
scale it if you want, but I'm going to make
it about this big, just so it's fitting
neatly inside of here. And then I'm going
to go Shift D to duplicate and I'm going
to move this guy up here like that and click. Okay. Now I'm going
to turn off my X ray, but they're embedded in
there at the moment. So what I can do I can press
Z and go into Wireframe. And then I can
select a vertex on this button and holding and shift select the
vertex on this button. Then go Control L to
select them both. And then in your right
orthographic view, you can just go G and Y and
move them forward a bit. Click. And now I'm going to
go Z and go into solid view. Can see over here, they're
a bit two forwards. I'm just going to go G, followed by Y and I'm going to
move them back on Y and just embed them in here and then click, so they're
just sticking out. Now we've re used
an object here. Let's do the same
with this bottom base plate for the button. I'm going to click
select the vertex, Control L to select
it by itself. I'm going to go into the
front orthographic view, and I'm going to enable
the X ray up here. I'm going to go Shift D to
duplicate and I'm going to go G to move and move it
over one of these slots, and then I'm going
to go S to scale it. R to rotate just a little bit. I'm going to move it so it
matches the bottom bit here, about the right size
there. There we go. And then what I'm going to do is I'm just going to
select these top verts, these ones over here,
and I'm going to go G and move them up to
match the reference. And then I'm going to go into
my right orthographic view. With any one of these
verts selected, just go Control L
and then go S and Y, just to scale out on
the Y and then click. And then in the right
orthographic view, you can go G, Y, and move it forward, like so. It's sitting right
there in the front. And then let's go into our
front orthographic view and go Shift D to duplicate,
followed by X. Let's just move over
the next one and then click to add it in place
where the reference shows it, like so, and now I'm going
to toggle off the X ray. And you can see now this
is what we have so far. When we do this
sort of modeling, sometimes our face
normals can get inverted. Now, if you don't know
what normals are, Sort of stuff is
explained in some of my more beginner
courses on skill share. But essentially,
it's just something that blender uses with
the face directions. It comes in handy
when it comes to shading or particle
distribution. But it doesn't matter
if you know what it is. All we want to do
for now is just press A to select everything, and then we want to go Alt N, and we want to go recalculate outside and should fix any
of those normal issues. Now I'm going to go Alt A
just to deselect everything. And this video is getting a little bit long for
modeling section, but we can finish off pretty
quick with the rest of this. So what we're going to
do is to save time, we're going to select a vertex
on one of these buttons, Control L, and then
shift D to duplicate, move it over here, click
and then enable the X ray. And in this case,
we're going to go R, I'm going to rotate
one of these and click as to scale
to make it skinnier and let's move it up here and scale it until it matches
the end of one of these. And then I'm going to
select these bottom verts. I'm going to go G and
just move it till it matches this column like that. Okay. And what I'm going to
do with it's still active, I'm going to go Control L,
just like the whole thing. I'm going to press P, and I'm going to separate
the selection. P and then separate selection. Let's go back into object mode. Let's turn off our X ray. And now, this is its own object. For now, I'm just going to
click on our main cube, and I'm going to come to
this little I and hide it. Then click on our new cube
here, the duplication, and I'm going to tab into
Edit mode so you can press Tab or just come up
here and go into Edit mode. And then go Shift Alt,
holding those two in. Left click on this back edge. You can see it's open over here, and just going to
press F to fill that. Then you can go G, Y, and just move that face back. And you're going to just go Control L to select
the whole thing and gold N and just recalculate the outside normals, just make sure they're okay. Then let's bring back
our cube over here. And then in your right
orthographic view, you can go into Xray again, and let's just go
G Y and move this. You want to embedded about
this much into the game here, maybe a little bit more in, something like that. Okay?
Just sticking in there. I'm going to toggle
off the X ray. Okay, that's looking good. I'm going to toggle it back on. And then in the front
orthographic view, I'm just going to go
Shift D to duplicate, and I'm going to move one to where the next one
is in the reference, and I'm just going
to left click once. And then if you go Shift R, you can repeat that action, and let's go do that two
more times like that. Perfect. Doesn't
have to be 100%. A little tiny bit off
to reference is okay, but those sort of scales, you
shouldn't notice anything. So I'm going toggle
off the Rgon. Let's go back into object mode. Now let's click on our cube one up here, which is the game. And we're going to go over to our Modifiers, add Modifier. We're going to click
on search and type in B O and click on Bollan. Now if you don't know what
modifiers is, once again, you should definitely watch my Absolute Beginners
Skillshare course, but it just allows us to do
these sort of procedures. In this case, I want
to come here to the object that we
want to cut with. I'm going to go cube.001, which is this object here. So now if we go Z and go IFrame, you can see it's actually
cutting into here. So now with that done, wish to come to the drop down and apply. And now we can
actually click on this cube.001 and just press
delete to get rid of it, and then we're going to go Z and go solid, and now
we're back here. By the way, in wireframe, if your wireframe isn't
blue, don't worry. I've just changed mine in my custom settings.
Yours will be black. It doesn't mean there's anything wrong with your
version of blender, just in case anybody
was wondering. I just prefer blue outlines. Okay. So now we have
those grooves made there. Now the last thing
to model here, which is not too hard, is
just the screen over here. So what we're going to
do, we're going to go into our front
orthographic view. We're going to select our game, we're going to go
into Edit mode. We're going to go
into the X ray mode up here, deselect everything. Then we're going to go Shift
Alt and we're going to add in a plane. We
have it active. We're going to go RX 90, and we're going to hit
Enter and make sure you have your vertex select
option enabled up here. They want to go G, Z and move it up roughly to where the
screen is when a click. They're going to go S to scale it roughly the same
size and then click. And if you have to,
you can just come here and select these two
vertex at the top. G, Z, move it up, click, then select these
two and then go GX. Move them over and click so
they're matching the edge, and then select these two and go GX and move them this way. Now all we have to do is
select this vertex over here, holding in shifts like this
one and this one down here. And now you're going
to go Control Shift B or Command Shift B. And now we can create a
bevel just on those verts, and I'm going to go and move about this much and then click. Then I'm going to come
to the Bevel option, add in about 12 segments, adjust the width to
match the reference. And then I'm going to
click on this vertex here, Control Shift B. That's the shortcut, and
I'm going to click and drag and then just match
the reference here. And if you do that,
you can always roll your middle mouse
button to add in segments instead of doing
the numbers in the settings, but I'm going to go about this
much and then left click. And this one matches
the reference here. It's a bit bigger. Then we're going to go to our
face select option. We're going to select just this middle face here and we're going to go I and
the I will inset it. We're going to go about
this much and then click. Then go to your
Vertex select option. Come over here and select
a small group over here, and then press F free
on your keyboard and type in Merge and then merge at center and then come and click and drag and select these guys over here. Press F free, and
you should still see that last selection,
so at center. And then let's come over here
and select these guys here. You might have to hold and shift just to
select all of them. So these guys here, and we go F free, click
on Merge at Center, and then click and
drag over here, press F free, and you should still see the last option,
which is at center. There we go, and these guys
here are nice and square. But this one here, we're just
going to grab this vertex, and we're going to
go G Z and move it down till the bottom
edge here looks straight. So these two here,
make up this edge, and then select this vertex again over here and then go G, X, and move it over, like so until this line over
here looks straight. This line going up here. Then go to your
face select option, select this middle phase
and go S to scale it. We're going to scale this one about this big and then click, and then we're going
to go I to inset it, and we're going to go about
this much and then click. Now we're going to go Control L with that face selected to select
the whole thing. We're going to go to our
right orthographic view and go G, Y, and move it forward just
a little bit till it's sitting over here
outside of our game, and we go E to extrude and
just extrude it back into the game and then click
and there we have it. Now let's press, just
like everything, Old N, and recalculate the outside
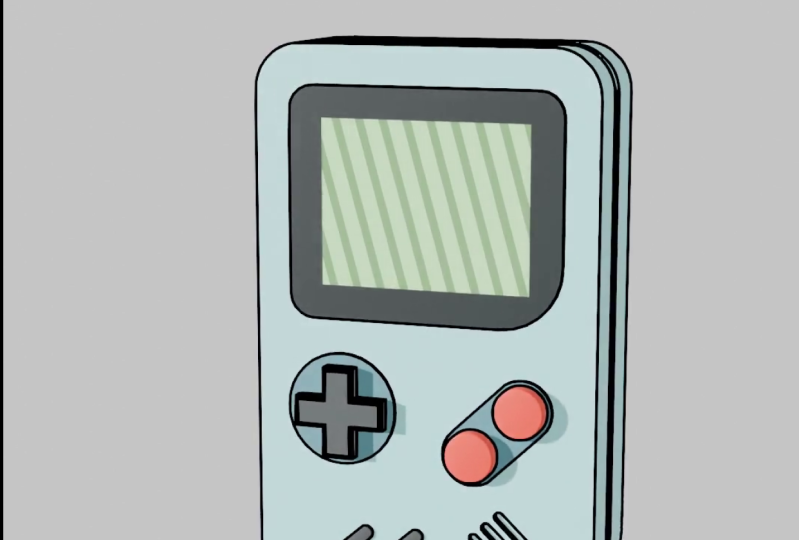
normals, turn off the X ray. And now here we have it. O Game Boy is now done.
We've modeled it. So what we're going to do in the next part is we're
going to be setting up our scene to prepare
ourselves for creating our materials and our line art. So that'll be the next part. I'll see you then.
4. Scene Setup: Now we're in part
three, we're just going to be setting up
our scene real quick, so it's ready for
when we want to do our materials and line work. So we're going to
make sure we go up, and we're going to
go into object mode. And what we're going
to do now because we've done with these
reference images, we can come up here
to our reference collection and click on this I here and turn them off in the view here, so we
don't need to see them. Now we just have our game here, a game boy here. And what we're going to do is
we're going to go Shift A. We're going to go to our
option here called light, and we're just going
to add in a sunlight. We have this light active. We're going to go over here
to our properties and you can see a little light bulb
and the strength here, we're just going
to make that 55, zero, then what we want
to do is we want to go over to our renderer and we want to make
sure the engine is EV, which it should be by default. That's all good. What you can do then is go into your
front orthographic view. Like so, and with
this light active, you can go R to rotate
it and rotate it, so it's kind of flat,
just like that. And then in your top
of graphic view, so to get that, you're going to press seven on the number pad, so seven on the number pad, or you can go to Viewpoint
and then just go to top. In which case,
you're going to go G to move that light
to move it over here, and then go R and rotate it in, like so off to the side. So here we have the light positioned just like
that at an angle. We can always adjust it later. But for now, that's
what we're going for. We're then going to come, and we're going to go into
a front or graphic view, and we're going to go Shift A. We're going to go to our camera option and add in the camera. And then what we're going to
do is we're going to just move away to kind
of like the side. So I'm just a normal view. We're going to go
to our move tool, and we're just going to
click on this green arrow and move this back like so, and then we're going to go
drag and move it up like this, move it back a little bit, and then let's go to our
camera properties. To change the focal length. It doesn't actually
really matter. I'll just leave it
at 50 or something. But we're going to change the
type here to orthographic, which means we no longer are
dealing with perspective, so it doesn't matter how
close or how far we are. We see it all the same. So with the orthographic
camera here. We want to go over
now to our output, and we want to go and
make the top value here on the X 1080. So this is very common in all
sorts of editing software. This is just your
frame resolution. So this is going to be 1080
by 1080, as you can see here. And then what I'm
going to do is I'm going to press zero
on the number pad, and that's going to take
us into the camera view. You can also go to View
Viewpoint, and then go to camera. Okay? Now, I went out
of camera because I was already in camera, but
that's how you could do it. And what we're also
going to do we to come up here to this dropdown
for the shading, I changed this to MATCAP when
I set up this blend file, but we're just going
to go to the studio. And in a camera view, if we press zero on the num pad, we can see that it's hard to see some of
the details here. So what we're going to
do we're just going to come here to the overlays. Click on here, and
we're just going to come to the wireframe under the geometry and enable that and just kind of bring down
the opacity a little bit. Now we can at least see some of these features here
a little bit better. What you could do as well as
just go up to your shading and just change the wire
color here to them, and you should be able to
see that better as well. Okay. That's awesome. So now we at least have a way of seeing this
a little bit better. What we're also
going to do is in our camera view, we're
just going to go Shift A. We're going to go to
this empty option here. Empty is just a dummy object, and it doesn't show
in the render, and we're going to
add in the cube. And what we're going to do is we're going to grab our camera. Holding in shift, we're
going to select this empty, and now we're going to go
Control P or Command P, and we're going to go
Object, keep transform. So now if we select this
empty and we go G to move it, you can see the
camera goes along. And the reason we have that
setup like this is later on, we're going to
animate this empty. But for now, if you press
zero on your number pad, you can go into a camera
view. We have a light. So if you press Z
and you go rendered, you can see that the sun
is now shining on here. Now obviously, there's no
materials on here yet, but we are going to
be adding them soon. So I'm just going to go
Z, go back to solid. Going to pres zero to go
into the camera view, and also just make sure that this empty over here
is in this collection, the main collection, so it
should be and the sun as well. If they're anywhere else,
just click on them and drag them into this collection here. But they should already be in the main collection.
So make sure to save. And in the next part,
we're going to set up our materials
and our line art, which is my favorite part and the most fun part of
this whole course.
5. Materials & Line Art: In this part, we're
going to be looking at adding our materials
and our line art. This is my favorite part by far, and it's very simple. So now let's click on our model. We have our object
mode here at the top. That's where we
want to be for now. And over here, you're
going to come to the side, and you're going to scroll down. You're going to come
to this little tab here called the
materials properties. You're going to click on it. And now you can just click
New to add a material. And what we're going to
do, we're going to double click here or just
click once and drag, and we're going to
call this material, the body B O D Y. Now it's always important that we name things as we're working. It just makes things
more organized, and we can quickly
make edits if we need to because we know what
materials we want to select. So what we're going to do
is we're going to come up here to our
shading workspace. This workspace is specifically set up so we can
work with nodes. Now, this tutorial
is, like I said, not an absolute
beginner tutorial, so I kind of already expected to know finger or
two about nodes. But as far as nodes go,
this is going to be very, very simple and not complicated. Up here in this view,
you're going to press zero on your number pad
to go to camera view. Once again, up here, you go to view and do it that way
through the viewpoint. But over here, what
we're going to do as well is we're going to
go Z on the keyboard. So press Z and then go over here and click on the top
option called rendered. And now what we're going
to do is over here, come to your
materials properties. We have the body, okay? We have that material selected. What we're going to do is
we're going to come over here and drag this up just by hovering over this edge and you
see the little area, it's going to click and drag. And over here in this node set up, we're going to zoom in. Now, by default, we have
the principled shader, and over here you have a color. You can, for example, come here and change the color
of your object. And you can give it values like metallic values to
make it look metal, or you can change the
roughness and reflectivity. There's all sorts of things
here that you can change. But for now, we're going
to keep this very simple. And we're going to go
Shift A over here. You're going to
see a search bar, you're going to click on it, and you're going to type in DF, and you're going
to get the diffuse shader and place it over here. Then you're going to
go Shift A again. You're going to
click on search, and you're going to type in shader. Space, two, and
you're going to go to the shader to RGB option
and click and add it in. Now we're going to
take this diffuse and we're going to plug
it into the shader input. We're then going to take
this color here and we're going to drag on it
and plug it into the base color of a
principal shader. And now, in your
camera view up here, if you were to move, you would see we now have kind of like a shadow
being cast at the back. The areas that are
white here it's because our light is shining
towards there, okay? If we clicked on this light,
and we want G to move it, or let's just maybe
make this up here. Let's just make the
transform pivot fred cursor. And with our light selected,
we can double tap R, and you can see if
we rotate that, the values change, but we're going to leave our
light where we had it. We're going to click
on our game here. What we need to do now to
add those colors in is we need to come over here
and select these two nodes, G to move them over just a bit, and now we're going
to go Shift A. We're going to click
on search, and we're going to type in ramp, and we're going to
click on the color ramp here and then place
it on this cable. So now it's connected here. And now this is the fun part. We want to come
here to the linear. We want to change that to constant because we
don't need a gradient. We just need one color
and then the other. And then we want to
click on this black tab, click on it, and drag
it up a little bit. And then click on this white
tab and drag it down a bit. And both of these are going
to get assigned a color. But we want to work
with our color palette so we're going to come over
here to this window here. We're going to drag and
expand it just a bit. We're going to
click here on open, and then you're going to go to wherever you downloaded
that resources folder. For me, it's on my desktop. And I'm going to go
ahead and click on it. So resources freed tto Di. And inside of there is this
Gameboy color palette. You're going to click on it and you're going to go open image. Over here, you can kind of roll back with your
middle mouse button. Do you see the whole
thing? There we go. And now we have a color palette. So all we have to do now is with this body
material selected, is we can come here and
click on the black value. I guess we have it active,
this little black tab. We click on this color bar, click on the eyedropper and
then click on this over here. See the top blue color here. And then we're going to
click on the next tab, and we click on this white bar here, click on the Eyedropper. And now let's select
the darker value of the blue. Like so. Now, if you go over
here in your viewport, you can see this
is what we have. The lighter value is
where the light is hitting the darker values
here are just one here. You can adjust these and drag them closer to each
other a little bit, but more or less they're
in the right place. By the way, with
your game selected, just right click and
go shade Autosmooth. That's also important.
Now, this value seems quite bright here. Now, we could come
here and change it, but actually what we can do instead is just select our sun. Come over here to
your light properties over here with a
lot of light bulbs, and just give it a strength
of maybe 25 instead. And that looks a bit better. So I'm going to go
into my camera view. I'm going to click
on the game here. Going to make sure we're
still in rendered mode, but going Z and then
going rendered. And now we have this
node set up ready to go. So the cool thing is
if we now come to our material properties and we go plus and we go new to
create a new material. We can now double click
on here and we're going to call it back plate. And what we can do now is
we can go over to our body. We can click and drag and select all of these
nodes over here. We can right click and go copy. So make sure to copy them. Click on the back
plate material, click and drag and select these two nodes
and press delete, then right click and go paste. And now what we're going
to do is we're actually just going to make a slight
value adjustment to this. So we won't actually use
the color palette for now. So what we're going to do
is we're just going to click on this
lighter value here. We'll come to a drop down, and we're just going to
make it a little bit darker in value and bring it a little bit more into the blue over here
just a little bit. And then we're going to
click on this one here. And we're going to make
it a lot darker in value and bring it a little bit more into
the blue over here. That's it. Now, what we're
going to do is we're going to come up
here and go into Edit mode with our
game selected. We're going to go to our
vertex select option, and then let's select
a vertex on here. Holding and shift, select the
vertex on this back plate. So any of these little back
plates under the buttons. And that's all we need to do
is just these two for now, and we're going to
go Control L or Command L. Let's go
to select only that. We're going to make
sure to select the back plate material, and we're going to go assign. Very, very easy. Now we're going to scroll back over here. We're going to come
over here and go plus. We're going to create
a new material. We're going to click and we're
going to call it button. And then space, and
we're going to go X. So button X. And then we're going
to we select a vertex on this X button here. We're going to hold
in shift and click here and then click on
this button over here. So we have a vertex here, here, and on this X button, and we're going to
go Control L or Command L. That's going
to select all of it. All the loose parts we
selected a vertex on. And we're going to go ahead
and we're going to assign that button X with it selected. Then over here, we're just
going to come and select the two generated
nodes, click Delete. We're going to right click
and we're going to go paste. Now we're going to
click over here on this light value here. When it comes to
the bar, click on the eyedropper and let's
select this gray material. Then click on this
one over here, click on its tab,
click on eyedropper and then select the
darker value, like so. And then old A to deselect. And there we have that assigned. Now one thing we're
going to do is, I think we have this a little
bit the wrong way around. I'm just going to drag this one, drag it up, and then drag
this one down, okay? And now you can see this is more of what we
have in mind, okay? So this value here,
the lighter value. In fact, if I grab
it and I click on it and I change it to a pink, just for example, you can see that's where the
light is heading, and then this is
just shadow color. So I'm just going to click
click on this one I made pink click on the eyedropper and just select this gray again. So we have this like that. And what I'm going to do is
I'm just going to click on a backplate and I'll just swap these two around.
Not a big deal. This is really,
really not a big deal at all, very easy to fix, and then just click on the body and then come and drag
it around like this. It. That's all there is to it. There's no big deal. So another thing we also
want to do quickly, just go to our world properties. We want to come
here to this color, and we just want to
drag the value up. There we go all
the way up to one. And that's going to kind of help with the color looking
a little bit better. We're going to come
here to the color, and we're going to
make it kind of like a green for now and drag this value down.
Now, this is optional. You can do that, however you
can make the background, whatever color you want, but that's what I'm
going to go with. Okay. And then I'm going
to go into my camera. And we're going to go back
to our materials tab. We're going to click
on our button X, which has already been added. And now let's keep working. So let's now go and click on the Plus, create
a new material. Let's call it button, red. We're still in edit
mode over here, and we're going to
go ahead and with the vertex select option, we're going to select the vertex on here,
holding and shift, select the vertex
on the next button, Control L or Command L, and then assign
that to the button. Come over here and select the two generated nodes
and press the let, right click and go paste. And then let's come here
and grab this value here. Click on it. Click
on the Eyedropper, and then select the light red. Click on the one down
here, click on its bar, click on the eyedropper, and
then select the dark red. And now we have the
red button added. Now, here's something I've
been doing the whole time. The whole time I've been
adding in or leaving in the principal BSDF which
is not really necessary. The only reason I added
in is that sometimes I'd like to give these colors a little bit of a
roughness value or a metallic if I want to make
certain kind of effects, but what we're going to do, in this case, we probably
don't need it. So we'll just go ahead, and we're going to
go to the body, and we're just going to
click on the principle, and we're going to go ahead, press X to delete. Let's plug this color
directly into the surface. Let's go to the back plate. We're going to also delete
the principle by pressing X, plug the color directly
to the surface here, and I'm going to go
to the button X. Going to plug that one in
here into the surface, and then with the
button red here, I'm just going to delete
the principle as well and plug the color
directly into the surface. But there might be some
cases where you want that principle in there if you're trying to do
certain kind of effects. But for now, I think we
probably don't need it, and our colors come through a lot better like that as well, because it's just either
this color or that color. There's no sort of like
reflectivity or metallic. But when we were beginning, we kind of kept that in, in case we needed to do something. I always try to
kind of keep notes in and not get rid of them
if it's not necessary, just in case I want to
make certain adjustments. But in this case, what we're
doing, we don't need those. So from now on, what we'll do we'll come to
that button red. We'll just select these nodes. We'll right click and go copy. We'll come here and add another
material. We'll go new. We'll double click
and call the screen. And what we're going
to do is we're going to come and
delete these two nodes. We're going to right
click and go paste. Then we're going
to select a vertex on this screen here
and go Control L, and we're going to go ahead and assign the screen material. And then we're just
going to come here and click on one of these tabs, click on an eyedropper, and then let's come and select
the dark value here on this screen over here. And then click on this one over here and then get
the lighter value. And now we have that, okay? But what I think I'm going
to do is swap them around. There we go. So now we
have that back screen. I'll probably come over here in this case and make
both of them kind of, like, really dark like that. And I'll probably turn
down the saturation just a little bit on
this one as well. Just bring down that saturation. And maybe bring the
value down just a little bit more
on both of them. Just like that. But we still want a little bit of
green kind of coming for you, but I want to get rid
of that completely. Mm. Maybe I'll just make it a bit lighter. It's just
one of those things. Honestly, it's
personal preference, sometimes with these
sort of things, what you're trying
to do, but that's what I'm going to go with, okay? Cool. Now we have that done, and we're going to go to
our face like option now. We're gonna select
this face over here, and we're going to
go plus and create a new material we're
called inner screen. And we're going to go ahead
and assign that material. We're going to select the two
nodes that are generated, delete, we're going to
right click and go paste. And with this one,
we're going to set it up a little bit differently. We're going to go ahead and
we're going to take out diffuse and bring it over here, and we're going to plug the BSDF directly
into the surface. And then we're going to
take our color ramp and plug that into the
color of the diffuse. So we have diffuse, the
color ramp going into here, and then we're going to
get rid of this shader to RGB by deleting. And then we're going to
go shift a search and get a wave and get a wave texture, place it over here, and
then plug the color into the factor of
the color ramp. And then we're going to
go shift a search and get a texture coordinate, type in texture CO, get
a texture coordinate, plug to generate it
into the vector, and then move it over
and then go shift a search and type in M able P, get a mapping node and then
place it on this cable, so it's now connected
for the vectors. And we're going to come
here to the Y value on the rotation and type in 45. So it rotates 45 degrees. And now all we have to do over here is come and click
on this one over here, click and let's come to the eyedropper and
select this light green. And then click on
this one over here, click on the eyedropper and
then select the dark green. And now we kind of have
our screen like this. Okay? Pretty, pretty
cool. I love it. So now we have our things
out of here, one more thing. We're just going to go to
our Face select option, deselect everything,
and go to go Shift Alt. Holding Shift and Alt and
we're going to left click to just loop select
this inside band. And we're going to go
to just the back plate. We're going to assign
that material like so. And now we have our
materials added. We're going to go back
into object mode. In fact, we're going to
save by going Controls. We're going to go
back to our layout. And now if we go Z
and we go rendered, you can see this is
what we have, okay. For now, I'm going to also
go up to my overlays. I'm going to turn off the
wire frame in the geometry, so we don't need to see
that in object mode. And now we have
our game boy here. So really, really awesome. So now we can go ahead and
quickly add our outline thing, which is really simple, which is going to really
make this look cool. So what we're going
to do, we're going to go Z and then go
into a solid view. We're gonna go
Shift A over here, and we're going to
go over and add in a grease pencil object. We're going to add in
empty. And now over here, you can see we have the G pencil up here
in the collection. We're just going to
right click on it. We're going to go new
collection and just double click let's just call
it lines and hit Enter. And make sure just to grab
that G pencil if it's not in there and just drag it
into that lines collection. So you can see here it's
inside of that collection. And then what we want
to do is we want to come to this dropdown
under the G pencil, click on the G Pencil object. Then we want to
come to modifiers. We want to go add modifier, click on search and type in line and select a
line art modifier. And then come here
to the collection, and then select our
main collection. This is this collection
that has the cube or the game in here. That's
the most important thing. So we want to make
sure it's selected. Okay, so we have that
now selected here. And then we're going to
come here to the layers. Click on layer. We want to come to
the material and just select the black material
that's already there. And then you're going to
come to the line thickness. Let's go with a
value of ten. Okay. And now you can see
there's some sort of line happening
here. Pretty cool. However, to see it properly, you need to go into
your camera view. So press zero to go
into your camera view. And the line art modifier only works from the
perspective of the camera. So you always need to
be in camera to see it. But now, if we go Z and we go rendered, this
is what you can see. So in Z and then going rendered,
you can see this view. And now you can also come here
and adjust the thickness. If I make this 20, you can
see it's 20 pixels thick. Or I'm going to come here
and just make it ten. I prefer to go
something like ten. And now we have this done. Really, really awesome stuff. So in the next part,
we're going to set up our animation and then render this out as a final animation. Just one last thing I'll do for now is just select a game. I'm going to quickly
go over to my shading. I'm just going to come down
to over my materials table. I'm just going to go to
the inner screen material. I'm just going to come
here and just make the scale on over here, maybe two or three on the game. So I might go with 2.5 just to make those bars
look a little bit bigger. I just think that
looks a bit cuter with the wave texture. But that's optional,
completely up to you. You can finest these materials
as much as you want. The color palette was more of just like a
rough guide for us, but now we have this done. It's all good. And
in the next part, like I said, animation
and final render. So I'll see you guys for that.
6. Animation & Export: So now we're in part five, which is where we're
going to be doing our animation and
exporting this as a video. Now, this is really simple. What we're going to
do in our main layout is we're going to
come over here, and by the way, we
are in object mode. We're to select this empty. And remember a few parts ago, we parented we're
doing a scene setup. We parented the camera
here to dis empty. So what we're going to do is
with this empty selected. We're going to come
here and drag up this bar here so we can
see our timeline better. Currently, we have one
through to 250 frames. We're actually going to
come here and change the end value here
to 150 frames. So we have less
frames. And down here, you can hold in
your middle mouse button and click to move it. You can also roll your
middle mouse button to zoom in or zoom out. And we're going to
click on this slider. We're going to make
sure it's at frame one. And on frame one, with
this empty active, we're going to go and press N
to bring up our properties. So N brings up our properties. We're going to go
here to the item. And when it come here
to the rotation, we're on frame one and
hovering over this rotation, we're going to press I,
and it now turns yellow. We're then going to
come to the end frame, which is frame 150, and now we're going to come
here to the Z value on the rotation and make it 360, hit Enter, and then
hovering over it, we're going to press I
to enter the keyframe, and now all of
these turn yellow. So essentially, if we go
to frame one now and we hit the spacebar,
this empty rotates. And if we get press zero on a numpad, we go into
the camera view. However, this is
starting a bit slow, speeding up and
then slowing down. This is a Bezier interpolation. So what we can do
is we can click and drag and select both
of these keyframes. Hovering over this bar, we can press T to bring up our set keyframe interpolation and we can change it to linear. Now we have one
consistent movement. So if we're in camera view and you go to frame one
and you hit the space bar, you can see here now we should have a perfectly
looping rotation. It'll just keep
going 150 frames, and then 150 frames, and it's perfectly looped. I'm also going to come
up here to the shading. I'm just going to
come here and make the color material just so we see these lines better
in the viewport. Like that. It's a lot better. And that's it. Now we have the animation. So let's also quickly just move through
our timeline here. So I'm just going
to drag through, maybe get to a point
where it's at an angle. And then I'm just going to go
here quickly to render and just render the image
as a test render. And there you can see
this is what we have. So now you're going
to see what this is actually going to look
like when it's rendered, and I'm very happy
with this result. So for me, that now means what I'm going to do is I'm going to go and close this. And what we're going to do
to render this out is we're going to go over to our output. We're going to go down
to what we call here our output folder. I'm
going to click on it. We go to my desktop, you can select any
destination on your computer, but for me, I'm going
to go with my desktop. Click on Except and then
go to your file format. Now, sometimes you can
render out as PNG sequences, and then you compile
that sequence together in Blender or adobe premiere. There's a lot of different
ways you can do it. But because this is a really
quick rendering thing, it's not very
processor intensive. We're just going to
go directly into the video format over here. So the FF mpeg video. Then we're going to go
over to the encoding, and our container type, we're going to
change to MPEG four, which is an MP four format. So now we have a destination. We have the type of media
we're going to be exporting. Make sure to save, and
then you're going to go to render and you're going to
click on Render Animation. And now you can see here
it's rendering frame by frame and formatting
it into an MP four. So when this is done
in a minute or so, I'll come back and
show you the result. And there we have it.
It is now complete. It only took like a minute, so I'm going to close this
and minimize this as well. And I'm going to
go to my desktop, and you can see here it is. Is 1-150 frames. You can call the video
whatever you want. But if you now click
on it and you run it on whatever media player
you have on your computer, you should be able to see
this looping animation here. So you can see, it is now a nice freedi effect that has been turned into
a toot looking effect, which I think is
absolutely fantastic. Now, in the final video,
which will be the Otro, I'll just encourage you guys to do a few extra things
on top of this project. I'm really looking
for you guys to take this concept and really run
with it and make it your own. But I will see you in the outtro we'll talk a little
bit more about that.
7. Outro: Congratulations. You have now finished this skill show course, and now I'm going to
challenge you guys to take all the things that you've learned and
make a project. So you're going to
start by actually making the game asset, turning it into a two
D looking render. And then once you've done
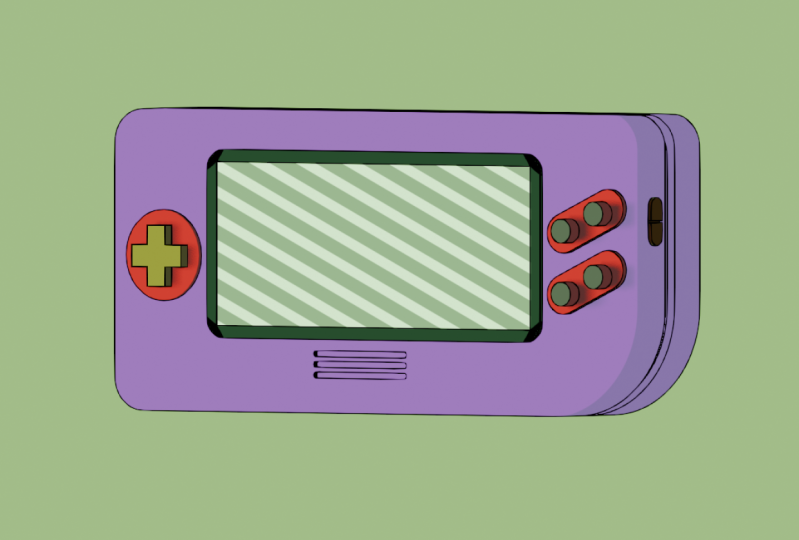
that, my challenge to you on top of that project
is to go ahead and take that workflow and apply it to your
own free D model. Maybe you can make
a couch, a chair, a little free D diorama, anything you want
to, you can go ahead and render it out
in the two D style. Looking really forward to
seeing your projects uploaded, what you guys are able to
make, and thank you for following me along with
this skill share course. I really hope you enjoyed it.
 PIXXO 3D, 3D Character Artist, MoGraph Teacher