Transcripts
1. 1 Intro: Hello and welcome to
my Skillshare class. I'm Andrew Andre and I
also go by pixel freely. That's my professional
working name. And what are we doing in this class is teaching you guys how to
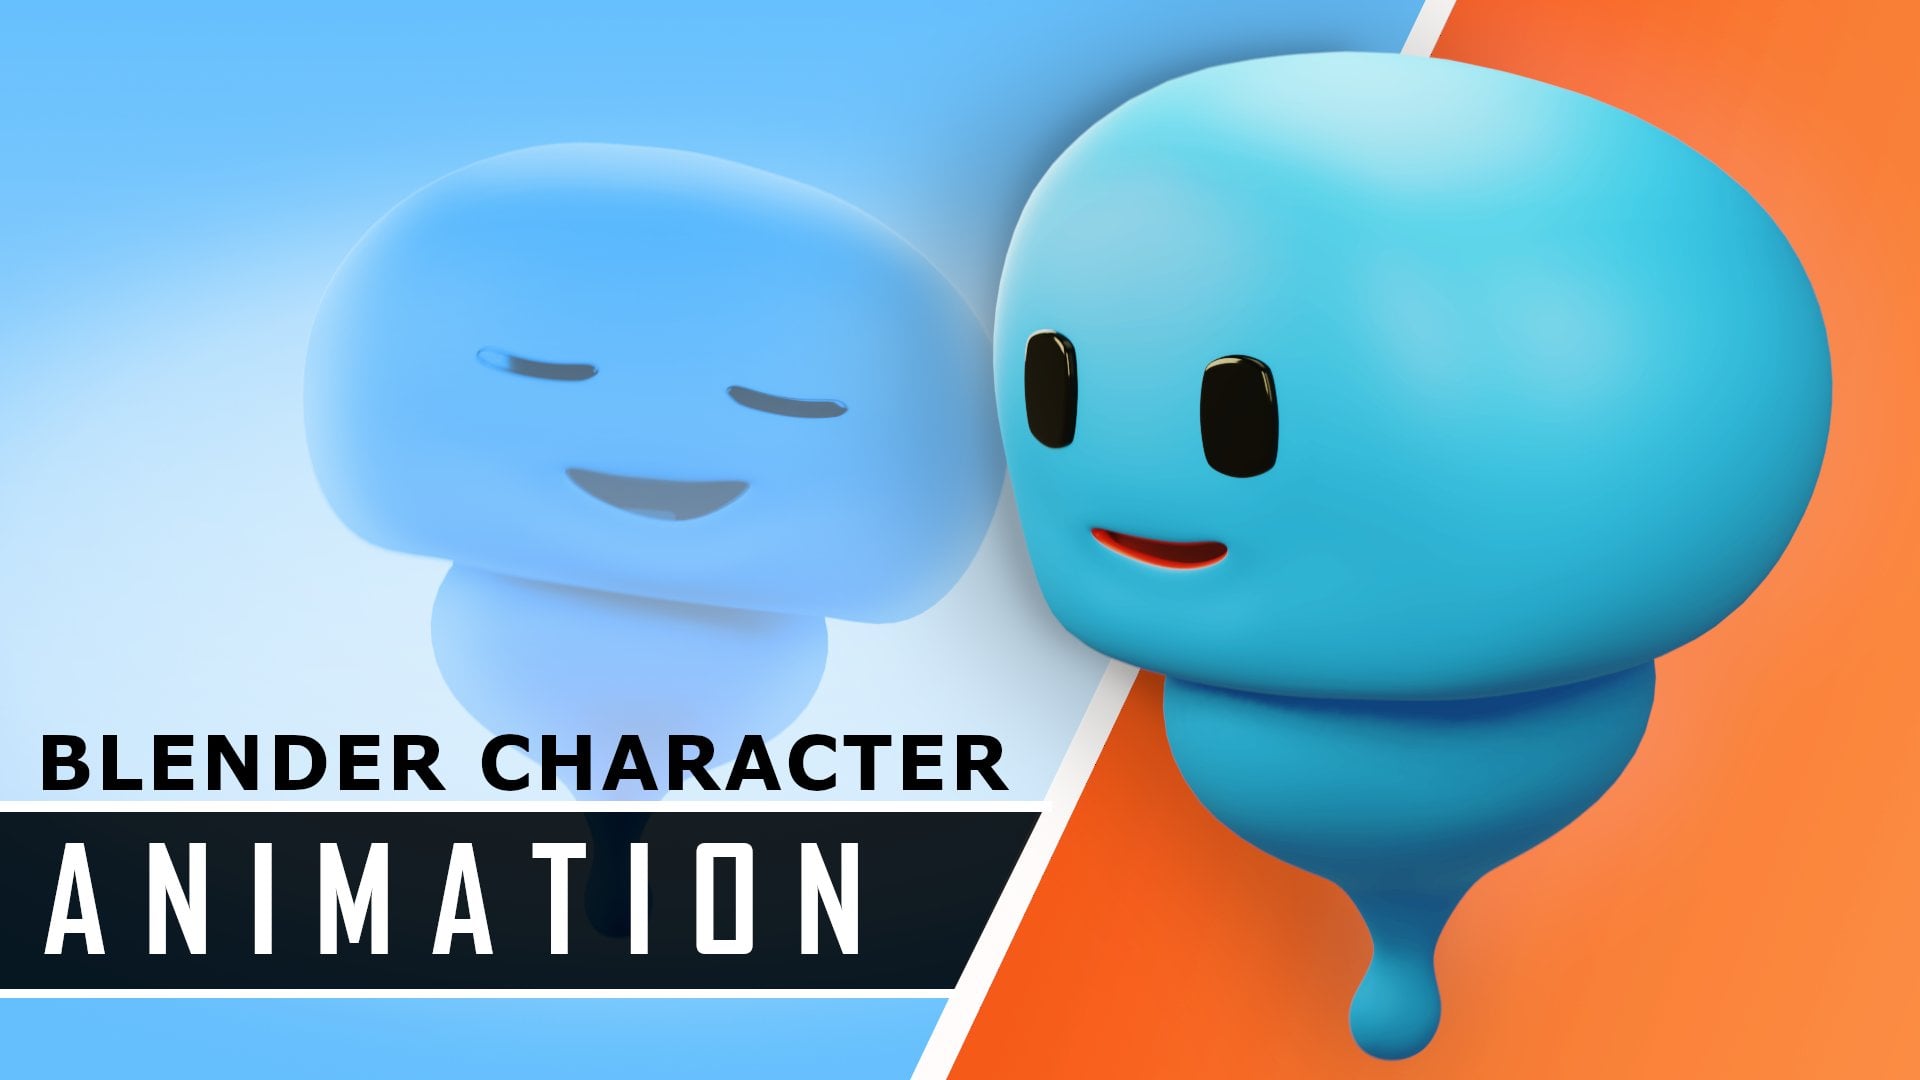
make this adorable, lovable little robot animation. We're gonna be doing everything. We're gonna be doing
the modelling. Somebody shaped key stuff,
animation, animation curves, setting up a virtual camera, adding some nice focal blur, all that really kind of neat
stuff now, blender is free, so go ahead and download
if you don't have it, what I would recommend is
that you at least have a basic understanding
of Blender. It will make it a lot easier
to follow this course. And if you want to
know where to look, you can look at some
of my other content on Skillshare that is addressed
more for absolute beginners. That means if you've never
touched a software or Friday, that'll get you up to speed. It's only about an
hour and 15 minutes. And then you can
come back and watch this or you could just
try and watch it. Maybe you'll be lucky, but definitely good to try and understand
some of the basics. First one I'm gonna be doing is with each stage in this class, I want to be taking the
blend file that we save, only putting it in
a resources folder. So you guys can
look at each stage if you get stuck on anything, you can see, for example, in part free we do modelling. Then you can go and
look in that folder and you can get that exact file. You can look through it if
you're stuck on anything. I want to be trying to make
keep it nice and organized, nice and simple for you guys. And each individual
file that we need as we're working with at the
textures out or blend files, hatred your eyes for
environment, lighting, all that stuff is gonna be neatly packed into
resources folder. Ideally, towards the end of
this, when you finished it, you'll be able to
take this information and build on top of it. And the ultimate
goal is for you guys to make your own project. After you've
finished this class, take what you've learned
here and build on that. So I'm really excited to see what you guys can
learn, what you can do. If you have any questions,
feel free to ask. So let's jump right into
Blender and have some fun.
2. Set Up: In this part we're gonna be
setting up a reference image. Now this reference
image is provided. I'm gonna be showing you how
to bring it into Blender, how to set it up on a
front and a side view. And just reference image
is gonna be really handy and helping us to
note what we're doing, especially if you have a goal or you're
working with a team. There may be a designer
or concept artist that has a specific idea or you just want to
have continuity. So having a model sheet
is a very handy thing. Now this one that I'm
gonna be providing, which I'll show you right here. It's into provided zip
folder with this course. You can see here it's actually just one that I've
already modeled, but it'll serve
pretty well here. It's nice and accurate. I'm gonna show you how to
bring that into Blender. So what you're gonna do
is you're gonna download Blender is a ton of
information on downloading it. And by now you should know at least the very
basics of Blender, as I've said in the
intro of this course, if you don't feel free to check out some of
my other courses. But what we're
gonna be doing here is we're gonna be taking that. And when you're in
Blender, by the way, I do have my screen
cascades enabled, so you can actually see
the keystrokes here. But what you're gonna
do is I'm going to press free on your number pad. That's gonna take you in to the right orthographic
view and a negative. Press one quickly
on your number pad. Nancy, take you into the
front orthographic view. Now if that doesn't
work for you, it may be that you don't
have a number pad. You might be using a
laptop and you just have to standard
numbers at the top. In that case, what
you can do is you can go to Edit Preferences. You can go over to input. And what you can do is go up
here to keyboard and you can type or press your
emulate the number pad. The conventional
numbers on the top of your keyboard will act
like your number pad. To keep that in
mind, I'm going to untick this because
I have a number pad. You can also go to
View and just use these options under the viewport for top, bottom, front, back. So let's go into front. That's going to be
one on a number pad. And what we're gonna do
is we're going to take that provided image that
comes to the course. You're going to take it, I'm
going to left-click on it. I'm just going to drag
it into the scene now. Don't drag it on
top of the cube. Just drag it in the scene here, maybe just on top
of the cube there. You can see it's been added in. I'll quickly drag
this out of the way. And there we go. What are you gonna do
is you're going to left-click on this to
make sure it's active. You should see over here in your scene collection to empty, which this has been
brought in as is active. You can press G to move it. If you press G and you follow that with a Z on your keyboard. So to z or zed key, you can move it down onto
z and let's bring it down. So that green line here
is resting on the floor. And then you're gonna go g x, and that's going to move
it along the x-axis, g, x. And I'm going to
move it. And you're gonna move it till it is. The front view of our robot here is nice and in the middle
of this cube you should see this blue line here in the front orthographic view on this model sheet here
or just reference, you can actually see there's a little faint blue line there. So if you just go gi X
and you move it around, it should be right
on top of there. So now the front is lined up. Let's go to our right
orthographic view. Let's take that same image
and just drag it in. It should automatically
be the same size. And over here you're
just going to press G, z and move it up till it is sitting right on that
green line here. And you can see we
have that green line there and we're gonna go G and we're gonna go why does time and move it
onto the y-axis? And you can actually
see over here, the green would be
going this direction, like so where previously
we went with the x, which was along like this. If that makes sense, I press free to go into the right
orthographic view again. And we're gonna go, gee, why? And sliding it, we're
just going to slide it. So it's in a middle of
the cube, it this way. In fact, let's try
and match it up with that little
blue line again, g, y, and move it right there. Okay, so now it's
nicely lined up. So now in a front we have
this and then our side. We have this one on the number pad and
free on the number pad. Now, this is really
good, but they're intersecting of this cube. So all we have to do
now is just grab them. Let's grab the front view, and let's just go G and then go y and move
it back on the y. Let's just grab this
one here and then go G and an x and move
it back on the x. Now it doesn't matter if you
press free now to go into your right orthographic view
or one in perspective mode, it doesn't matter how
far back you moved on those axes that we
just move them on, they should still appear. So now we can come
later and model with this cube and we don't have
to worry about these planes. So these references intersecting with the mesh that
we're editing. So now we have a simple
little scene setup here. By the way, if you
found this tricky, I'm going to be
providing each stage. So just blend file will be in, inside of the resources. So you can open that up and
see how I've set it up. But let's quickly save. Make sure to always say if
you go File Save As now, I have a specific
place on my computer, but you can pick wherever
you want to do it. And I'm just going to name mine. You can name yours, whatever, but I'm going to
name mine setup. And then we can go Save As. Now in the next part, we're going to start
modeling this little robot. That's gonna be quite fun.
3. Modeling The Robot: So in this part,
we're going to be doing the modelling
of our robot. In the previous video,
we were able to set up our reference
images right away. That blend file is available in the resources folder if you want to use the
one that I set up. But in this part, like I said, we're doing the modeling
and we're gonna be using the default cube that
is inside of Blender. So you can just left-click on the default cube and
you're going to make sure that you're in your
front orthographic view by pressing one on
your number pad. You can also just go to View, viewport and then go front. But just using the shortcut
keys is very handy. We are going to be primarily going into right over graphic, which is free on the
number pad and front, which is one on the number pad. So if the default keeps selected in the front orthographic view, we're gonna come up
here and we're going to toggle on our x-ray mode. So now we can see for it, we're gonna go G, z. We're going to move up
our cube till it's kind of just sitting on top of
that green line over here, just roughly in place. We're then going to press
Tab to go into edit mode. That's the handy
little shortcut. You can also just go up
here and do it that way. So let's everything active. And where you can
do that is just by pressing a, it will
select everything. We're going to go S Shift and z. So if you go S Shift
and z at the same time, it's going to scale on only
the x and y axes, like so. Let's scale it down a bit so
it makes it a bit narrower. So I just went out of orthographic view there
while I was doing that. So you can kind of see, but S Shift Z will allow
you to do that. Let's just make it the
same size as the railroad, the same width like that marble was going to do is just select these
bottom parts over here. We're gonna go G, z and
move them up like so. And then just click and drag and select these top
vertices and we're gonna go G and in z to
restrain it to the z. And let's bring it down to this point here where the
bottom of the neck is. When I press free to go
into an orthographic view. And what we're gonna do
here is click and drag and select these two
vertices at the back. We're gonna go G, Z and
bring them up to here. So now it's level
with that area there. It's certainly not looking like any sort of round objects. So we're gonna go
to our modifiers. I'm going to give it
a subdivision surface modifier when it come here. And we can also enable the uncage so we can see
how it actually looks. I prefer to turn that off, but you can use it if you want. And what we're gonna do
is we're gonna click and drag and just select these two, all of these vertebra
top and go x. And we're going to delete
only two faces, zack. And what we can do now is
just bump the levels of the subdivision up to two. And in the Render we're
going to bump it up to free. Like so. We're going to now tap
back into object mode. We're going to
right-click and we're gonna go shade smooth. Let's just quickly disable the X-ray toggle and you can
now see what we have here. So doing some very
basic modeling, we've been able to
make this shape. The only thing we need to
do now is in edit mode is just corrected because we've lost a little bit of
volume of the subdivision. An easy way to do that is to
come in here and go Control R. While you hover over one
of these edges Control R. And you can see yellow
line, that's a loop cut. And if you left-click once, you can now insert
it and you can move it and let's just
move it down a bit. Like Sorry. Now to tighten that
up a little bit, we're gonna get into our
right orthographic view. First, H deselect everything and we're gonna go S and just scale it up a bit and
then go, gee, why? And move it forward, just
trying to match it up, like so. And then our front view, we can toggle back on
the X-ray up here. We're just going to select these top vertices and
we're gonna go S, x and just scale it a
little bit on the X. So you can see what
we're doing here. We're just selecting these
bottom ones as well. And this time we're gonna go sx, which is scale it
in a little bit. So we've just now corrected
that little issue there is now all
looking the same size. You could come to the
side here if you need to and correct anything if it's not looking right,
but that's all okay. So let's tap back out. Let's toggle off the x-ray, and now we have that part done. Let's now make the neck
ring here and the helmet. So what we're gonna do
is we're going to tap into edit mode with
the body selected. And we're going to go to
our edge select option, Shift Alt, and then left-click on this edge,
two loops selected. We're doing gonna go
E to extrude S to scale and just scale it a little bit to create a lip here. And we're gonna come over here, control R or Command R. Left-click once and induced drag that up just to tighten
that loop a little bit. Now we can go Alt
a to D, select, Shift Alt and then left-click
on this edge here, the one that makes
up the corner here. And we're going to go
Shift D to duplicate it, right-click to let go. And then we're gonna go G, z and move that duplication
up just a little bit. We're gonna go to
Extrude and then Z in extruded up on
the z like that. Just a little bit. This guy into the right
orthographic view. In an orthographic view, we're going to turn on
our x-ray toggle again. We're gonna go G, z, G and Z. And we're going to
move until it's just lined up to our reference. And we have it more or
less in the right place at the front here we
can see it as well. Turn off the X-ray
toggle once you're done. And you can kinda turn on the cage on here just so you can see what
it would look like. Maybe turn on the x-ray again. So you can see here
it's all matching up. Pretty good. So while we still have
this edge active here, Let's go to Extrude and an S to scale and just
scale it a little bit. I'm turning on, I'm turning
to cage off for a second. And then Alt a to
deselect everything, and then Shift Alt and
then left-click on this bottom edge for selecting the bottom of that neck ring. And we're gonna go to
Extrude S to scale and just extrude and scale
it a little bit. We're then going
to come over here, control our ad in a cut. We're going to get left-click
twice just to add it in. And we're gonna go Alt.
And Alt S just scales it along the normals instead
of just everywhere. If you actually go up here to your displays and you go down, you can turn on the normals. And you can actually see
what I'm talking about here. Decent directional
points of the faces. If you've used
Blender for a bit, you should have a bit of
an idea with normals are, but that's something you
can learn more about in some of my other
videos on Skillshare. But for now I'm
just going to turn off that normal display. Okay? Now we have doubtless
quickly tap out right-clicking,
go Shade Smooth. Every time we add in
some new topology and edit mode or were
duplicates something, it doesn't always have
the smooth shading, I guess now, two ways we can
actually make the helmet. We can go shift a in object
mode and add in a UV sphere, or we can actually just do
it inside of edit mode. I'm going to go in object mode. I'm gonna go Shift a. And you guys can
do this as well. And you're gonna go
add a UV sphere. And let's get to add
UV sphere settings. Let's make it 16 at the top. And let's leave that. Maybe let's make it
14 at the bottom. So we don't want it to be
too dense with the geometry. We're gonna go G, z, we're going to move
it up under z. We can enable our x-ray. And then we're going
to tab into edit mode. And if all of this
typology active, make sure you press a,
just like everything. You can go S and scale it down till it's roughly
the size of the helmet. And then G, move
it forward a bit. Then go into your front
orthographic view and it should look
okay, in the front, it's more here at the back where we're going to have to
be editing it a little bit. In fact, what we're
gonna do with all this active in the right
orthographic view. We're gonna go R
and just rotate it. So these edges are lining up with the direction
of the flow here. We can now actually go to
our face select option, de-select everything
and shift Alt. And then left-click over here just between
these two faces and it should loop select
the whole thing. And then you can go x
and delete those faces. And then you can
just left-click and drag and just select all
of these bottom parts. Go x and delete faces. All we have now is just a dome. We can tap back out, disable our x-ray mode, right-click Shade Smooth
for that objects. And now we have
the dome in place. You can easily go
in here at anytime, just used to edge select, Shift Alt, click on it, and then go G and just move that in a little
bit to tuck it in. Very simple to correct
this little issues. One thing you're also
going to want to do is select the body again, tap into here, Shift Alt, click, left-click on this
inner edge that will duplicate it and then
go E again and an S, E to extrude S to scale and just bring it
in a little bit. So we have a closing
here, as you can see. And you can also do the same thing with
the bottom one here. Or you can just go control
are hovering over this edge, you should see the
loop Option left-click once and then just drag it down. Then left-click and then go Alt S and scale it out
just a little bit. And now it's tightened
that up a little bit. So this is more or
less the body here. And what we're gonna do in the next part is we're
going to start modeling a few of these little details on the body now that we have
the main body and place. So make sure to save as you go. And keep in mind all of these different stages that you're following along
with this course are gonna be inside of a
example file in the resources. Make sure to download that.
4. Modeling The Details: Okay, So in the previous part, we were able to model our
robot, most of the body. We're gonna be modelling a few additional details in this part. But I felt before we go any
further to make things a little bit simpler going
on in this course, we're going to just do a bit of Scene Collection
Organization here, as you can see up here,
this is our Scene Outliner, and we're just going to
organize that a little bit, create some different
collections, put some names on things.
It's really simple. So let's start with
these reference images. So let's left-click on this one holding Shift,
select the outer one. And what we're gonna do is
we're going to press the M or N on your keyboard and you're
gonna go new collection, click on it, and this
is call it rref, and this is stands
for reference. I'm going to click Okay, and now this has a
collection of here, you can see this
collection called href. We can actually
click on it. And if you come here to the eye, you can actually click
on it and hide it. It hasn't deleted anything. And you can see now that
those two objects in there, those two reference planes, they're actually grayed out. We can bring them in at anytime. So that just gives us the
ability to organize our scene. Let's just take the
camera and delights you select them and
it's just press Delete. We don't need them for now. So what we have here is our
main collection up here. And if we hide that, you can see that's all of the robot bits. So now that we have that, let's just go into a front orthographic view by pressing one on a number pad. And let's just quickly hide at that top collection so we can see the reference
image a bit better. Let's start by modelling these little hub
points over here. So I'm going to bring
that collection back and let's go Shift a. And let's go up to
our cylinder option. Let's go over here
and let's just make it half of that amount. I believe what you could do
if you want to make it half, that's actually going to be 16. But I'll just show you
a little trick here. If you type in the
slash key like that, and then you type in two and you press
Enter, it'll have it. So that's a little
operation you can do, but 16 is going to be half and we'll just leave that as it is. Let's just drop that down. And what we're gonna
do is we're going to tab into edit mode. Let's go up here and
toggle on our x-ray. We're gonna go S
with all of this active. I'm going
to scale it down. Silt matches the reference
images more or less. And then we're gonna go s,
z and scale it down into z. And then we're gonna
go G, Z and just move it up until it's
sitting about there. So you can see that it
looks right if you're going to outright
orthographic view, it matches up here as well. Now one thing,
obviously it's a bit obvious is that we
have a bevel on there. Let's go to our edge
or point select here. Let's click and drag
the top one's x, and let's click Delete face. And this click and
drag the bottom. How to bottom? Lot here is now active
and what you can do, a very simple thing
to do is you can go Control or Command B if you're using a Mac and then
you just move your mouse, you can see we're
creating a bevel. If you drag, as you can see, it becomes bigger, but that's
a little bit low poly. We need a bit more topologies. If you rolled a middle
mouse button up, you can see yours progressively
adding in more segments. You can also roll down
to do the opposite. So this is roll in to like that. And then just left-click
and that stops the operation and asset.
That's very simple. Let's tap back out
into object mode. Bits selected, you can just right-click and go Shade Smooth. What we could do is we
could actually reuse this. So we still have
that cylinder act. If you can see it's added
into the reference here. I'm just going to left-click
and drag and drag that into the main collection
where it should be. And this is reverse active
go Shift D to duplicate it. And let's move it
over here, roughly. Where does Hobbes? And what we're gonna do
is we're going to just disable the x-ray for now. I'm going to tap into edit mode and we're gonna go, in fact, let's just tap back out to
object mode first because our origin point is
now sitting in here, you see that little orange dot. What we're gonna do in a front orthographic
view is we're gonna go our negative 90 and hit Enter. So r minus 90 to
rotate it 90 degrees. If you press N on
your keyboard and go to your item and then go
down to transform it. You should see under the wider, that's a negative 90. And then we can add
tab into edit mode S to scale all of that down. I'm just gonna quickly
go into wireframe. So z, wireframe, make sure it still active and edit mode
echo S to scale it down. And then G, x and
move it along dx. Now, what we don't
want to do is move it up like this
because our origin point won't be in the middle. Let's just quickly
tap back out into object G to move
to whole object. Let's just move it over here. So it's roughly in
place, then tap back in. And now we can just select
these verts and we can go g, x and move them into
the body like that. How cool is that? Now we have that re-used. Now we want it to be
on the other side. So what can we do?
We could probably duplicate this and
bring it here, rotated, but that's
a waste of time. So let's go over here and we might even want
to edit it later, so just doesn't make sense. So what we're gonna do is
we're going to grab that bit. We're gonna get to a Modifiers, add modifier and we're gonna
give it a mirror modifier. You're not gonna see anything because this mirror modifier needs a reference point. So let's come over here
to the mirror object. Click on the little eyedropper. And let's just
select the body as a reference because it's
nice and in the middle, and now it's mirroring
it on the x-axis. And you can see the x-axis is this red line over
here like that. And that's exactly what we want relatively quickly we've
added in those two parts, makes sure that all of this mesh is on that
top collection. But what we can do now is model these little
fins over here. Okay, So let's go shift a, let's go to a mesh options
and add in a cube. We have this cube here.
We're going to tab into edit mode and move
everything active. We're going to go S, x
and scale it down on dx. Just like that. We're
going to flatten it. I'm going to go into our right orthographic view by pressing free on the number pad
and we're gonna go S, y. We're going to
flatten it onto why, just roughly like this,
go back into the front. What we can do now is we're
going to tab out into object mode and we're
gonna go G to move it. I'm going to move it over here. We're then going to
tab into edit mode. And when you click on the X-ray mode, when
I click and drag, select these top
first, I'm gonna go G, z and move it down. Now what you're noticing is
that origin point there is roughly where did this object here is the reason for that. If we can really tap into
our object mode later on, if you want to rotate this, everything is going to rotate
around that origin point. If I go RX, you can see it rotates around
that origin point. And also just want to think of somebody might be wondering, the reason I'm scaling this
in edit mode whenever I do scaling is because if you
do that in object mode, then it affects the transforms
over here you can see. And then what we'd have to
do later on and we'd have to keep applying the scale
which you could do, but it's kind of an
unnecessary extra step if you can just do the
scaling in edit mode. And that's kinda the
reason for doing that in case anybody is curious. So back in edit mode, we're going to grab
these bottom ones. We're going to take
them up to about here. Now, one thing
you're noticing is not matching up
with the reference. Okay? So originally I modeled
mine in a down position. But what we could probably do is model them in
a downward position. But I think just to be a little bit more on the
side of continuity, what we'll do is
quickly tab out. And what we're gonna do is press M to bring up
our Properties panel. And we're gonna go over to under the item to our rotation. And let's rotate
this on dx minus 90, minus 90 on the x. And Alice tab into edit mode. And I think that's a
little bit better. So we're gonna bring
this 1 fourth on the y. You bring just one forward here and then select these and go s, z and just scale
them down a bit. And it would have come here,
Control R to add in a cut, left-click once and slide it
up S to scale it up into z. And then what you
can do is you can go to your modifiers
and give this a subdivision
surface modifier and bump up the view
port levels to free. We're going to apply
this later so we don't have to worry
about to render. Let's tab back out.
Let's disable the X-ray, right-click and go Shade Smooth. And let's give this
a mirror as well. So we're gonna go
to a Modifiers, add modifier, and let's
give it a mirror. Once again, clicking on the eyedropper and selecting the body as a reference point. And now you can still come
in here at any point, select things
scaled and I'm just going to scale everything
under z a little bit. But it's pretty, pretty straightforward as you
guys can see here. Not complicated at all. Now we have those two
fins on the side. Let's go to this bit over here, which is just a little
outlet for the exhaust. I'm going to shift a. Let's just quickly
add in a circle, go to add circle settings. Let's make it 16 as well. We just have a Friday too. And if this one where tab into edit mode with
everything active, we're gonna go S
to scale it down. And let's just g, z to move it up, move it up to about here S to scale it down. We just want it to be
about the same size as the top of that outlet. And when to go to Extrude and z and extruded down like so. We don't have the X-ray
toggle enabled at the moment. We're going to go S and scale it up till it's the same
width as the bottom. And then Control R
to add in a loop, left-click twice and
an S to scale that. And then if you
want to, you can go Control B to create a bevel. And if you have
too many segments, just roll down till
it's only one segment in the middle and then
left-click and they have it. We can now tap back out. We can right-click
and go Shade Smooth. And let's give this
a few modifiers. The first one is going to be a solidify and that's
just gonna give it some thickness making either go into the negatives
or two positives. In this case, I'm gonna go into the positive, so
it goes inwards. This just has to
do if the normals, if you tap back in there, you can select everything
and go alt N and just recalculate outside or
recalculate inside. I'm not gonna get too much
into what the normals are, but technically
the correct thing should be going
into the negatives, not to, not to positives, but it's not really that
important at this point. We just wanted us to
have some thickness, minimize this, and let's give it a subdivision surface modifier. And there you have it. Very easy to model and
also very editable. You can at anytime come in here and edit some of this topology. So let's look at what
we've done so far. We have modeled the robot body. We have modeled defends the little outlet
here at the bottom. I think that's most of
the Major modeling done. But because things are
getting a little bit lengthy, what I'm gonna do is
I'm going to make the modelling of this sort of
like athletes in the chest. I'm gonna make that a
separate video because it's a little bit more
that goes on there. We're gonna be making the doors
that can open up as well. So the overall modelling
is now done for robot. Congratulations. Next part
is really just building that inward part of the robot and finalizing a few things
with two meshes here. But if you've gotten this far, congratulations, you've
actually modeled something. Pretty cool,
especially if you're a beginner and
always keep in mind, I do provide the blend stages. So each part of these things you're watching has to provide a blend file which you can look at if anything is
confusing, you.
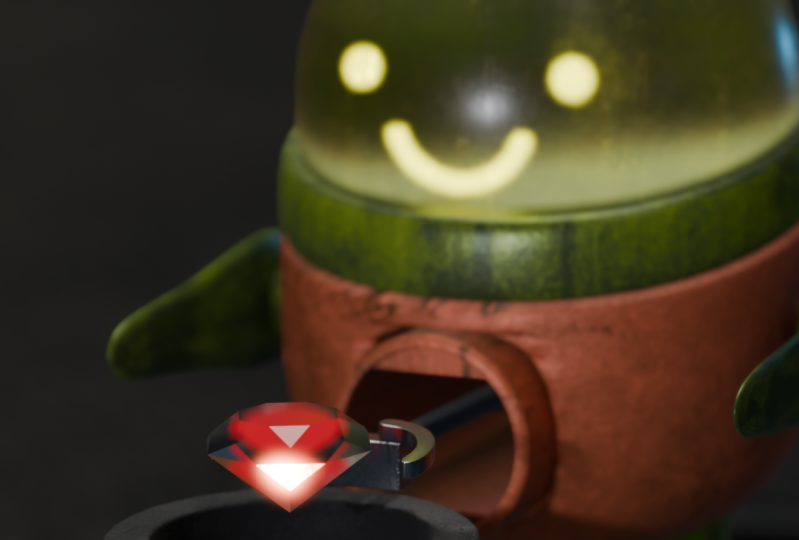
5. Chest Doors: Okay, So in the previous part, we were able to finish modelling some of our
details we're gonna be doing now is we're gonna be building the little chess door thing that opens up here in
the middle of the robot. So if you enable the
X-ray mode here, you can actually see
dirt is on dereference. Now what we quickly
wanna do earlier, we added in some new objects and they're actually in the reference collection
at the moment. So just click on them. So these arms here
click on them. Just take them and drag them
into the main collection. And the same with
this bottom part, which is in this
case called circle, will name these things
properly later, but just keep to the
collections organized. We only want to empties that are our references
into reference. So we can turn that on and off. So you should be able to see with the X-ray on that opening. So we're gonna go shift a,
we're gonna go to our meshes. We're going to add
in a cylinder and this time we're going
to keep it at 32. In fact, we might take it up to 36 because we need it to be nice and smooth around where
it's going to be cutting. So we're going to
drop that down. And what we're gonna
do is we're gonna go RX non-zero, and we're
gonna hit Enter. And then we'll go into a
Write of graphic view. We're going to tab
into edit mode and we're gonna go S to scale. And we're going
to scale it about the size that that
would be over there. We're going to tab
out into object mode. We're gonna go G, z
and move that up. And in this case I
want to turn off the x-ray and it goes Z and
I'm going go into wireframe. It should be a bit easier. And we're gonna go
G and just move it till it's roughly
in place here, right there from the side
and then get to the front. And the front, it should be roughly in the
right place as well. Make sure you go G, z and move it till it's
up in the right place. Like that. So nice
and in the middle. And nice in the middle here. And then you can tab in, if you need to scale the whole
thing a little bit, go ahead and scale it. But what we wanna do is when
I selected these back verts here and the right
orthographic view, and we want to go, gee, why and move it back on the why, as far back as we can without
penetrating for anything. And this is going to
be our cutter object. Now Shea, what we
mean we're gonna be performing a Boolean operation. Let's tap back into object mode. We're going to select our
robot here, the body. When it go, click
on add modifiers. I'm going to go to Boolean, and I'm going to click on the eyedropper and then
select that object there. Now if you select
this thing here, we actually want to be
able to see in there. So let's quickly
do a little trick. We're gonna select
the cutter object. We're going to go over to
Object Data Properties window go down to Viewport Display, and let's go to the display
ads and make it a wire. We also don't want this
to ever shown to render. Let's go to visibility
and let's turn it off for the renders. We don't want to do viewport,
otherwise you won't see it. So I just leave all of these
except turn off the render. We can now also
select the cylinder. We can right-click
and go Shade Smooth, make sure it has smooth shading. And then what we're gonna do is we're going to
whip that active. We're going to press
M, we're going to click new collection. I'm going to call this
cutter and just go OK. And now we have
a new collection. It should be under the
reference and this is dropped the reference
down for now, so it's a bit smaller
in the cutter here we have a similar 0 to, let's just click on
that, double-click this called cutter, so
we know what it is. Okay, if we're going to start
naming some things now, then let's select
our body again, and let's go over
to our modifiers. And let's on top of that, give this an edge split
modifier for now, just to clean up some
of that weird shading. So essentially
anything that is under 40 degrees and angle here on the faces will
get smoothed out, but anything over
it will be sharps. In this case, this is
a 90-degree angle, so it's going to be nice and sharp and that's
kinda just cleans up. That's funny shading
we have there. We'll deal with that a
little bit more later. But you can actually
notice now though, if you select the body and
you tab into edit mode, you can notice there's no
hole over there because this operation is a modifier and that means it's
non-destructive. We can still come in
here and edit our body. But this here is an
operation that is going on. So let's just come over
here to our cutter object. This is minimize
that here and also just hide the little eye here. We don't need to
see that for now. And now what we can
do is we can add in another cylinder to model the actual details of that hole. So I can go shift a, we're
going to add in a cylinder. We're gonna get our
X9 0 hit Enter, and we're going to just go
into Edit mode of debts, scale it down until
roughly the same diameter. Tab back out into
object mode and go G, z and move it up until it's
roughly in place there. So it needs to be
right in the middle. And then go to your
right orthographic view and go, gee, why? And move it on the Y till it's lining up with our
reference here. Okay, So if you now go back
into solid, you can see here, this is where we have
right-click Shade Smooth. It looks pretty terrible, so we need to add some more details. I'm going to tab in when
it gets wet edge select, we're going to go
Shift Alt and just left-click on this
edge to loop selected. And we're going to go
Control D to credit bevel. I'm going to create
one that's about this big, not too big. And we're going to roll our middle mouse
button wants to add in an extra cut and
then just left-click. Then we're gonna go to Face Select option and select
the face over here. Now we're gonna go into a
front orthographic view. Let's go back to x-ray, toggle that on and
we're gonna get e to extrude S to scale, and let's scale until it
matches up with our reference. Here, you can see there is where the actual
opening is and this is just like a rim might select the whole thing by pressing
a and just going s, just scale it up a bit more. Then selecting that face here in the middle again and
asked us to scale it down, just try to match it
up as best we can. And I'm gonna go E and extrude
it in the bath to here. And you can see it's close to the face at the back there.
We're going to keep going. Gee, why just moved
back and holding Shift, select this back face as well. So both those faces
are selected and you can go x and just go delete. Faces. This is also go to our selection option here and make it 0 points or vertices. Just click and drag to select
all of these and go GYN just moving back all the
way into robot like that. Again, nothing should
be sticking fruit. Let's disable the
X-ray tab back out, and there you go. So just some funny shading here. You can also just go give this a subdivision surface modifier. What you will have
to do is tab into edit mode and just go Control R. Inside of here. Control our left-click
and just slide. Then left-click again
just to tighten that up. Otherwise the sub-divide will
smooth that out too much. And you can also come here,
control our left-click and just drag about there. Just tighten that up nicely. So now we've modeled
this hole in the robot. Once again, you can select
the body, tap in and out. It's still all they're
very non-destructive. Well, we can do now is mortal the little doors that are
going to come up and down. So I hope this hasn't
been too tricky. Let's just also make sure this
new cylinder we added in, let's just go to the cutter. It seems like it's
added in the cutter, just going to click
and drag drag it into the main collection
and let's just call it chest outlet or whatever you can come
up with whatever name. I want to also select
the body quickly. Over here we can see it's
selected that says cubed. Let's just double-click
on that and call it body. And let's select the helmet. That seems to be a
sphere over here. Let's double-click on
it and call it helmet. And maybe these fins here, click on them, Double-click, let's call it thins. And this outlet here, Let's grab that,
double-click on that, and let's call it exhaust
color, whatever you want. I think I spelled
exhaust Rhonda. Just anyway. Yeah. I'll just gonna leave
it at that for now. Just so we have
general idea of what is inside of this
collection is like let's double-click on this
collection and let's call it body and just press Enter. And now we have
the actual infact. This is double-click on
it and call it a robot. I think that's more fittings. They're just call it robot and
it's just dropped it down. So we now have a robot and we have our cutter object. We
don't need to see that. And there we have our ref and that's all
looking really good. So I know that was a
little bit of a detour, but let's actually get into
making the little gates now. So taking the little
opening doors is actually quite simple. We're going to
start with a cube. We're going to go Shift O
under the Mesh options, add in a cube and
tab into edit mode. And if everything active, you're gonna go S Y 0.005
and you can hit Enter. So just making it really fun. You can also just go SY and do it just normally without
typing in numbers. But just make sure
it's nice and fin, in a tab back out
into object mode. And in your right
of graphic view, you're going to go G and
move it forward like so. You're gonna go into your front
view and you're gonna go, you're gonna go to
wireframe and see that little origin
point right over there. You want that to be right in
the middle of that cylinder. And you could, I add, we want
it to be pretty precise. So let's select this cylinder. I'm going to go Shift S, and we're going to go
cursor to select it. So he's gonna put the
cursor to 3D cursor it right in the origin
point of the cylinder. Then select the door
and go Shift S, but this time go
select it to cursor. Now this object is
perfectly centered to that. I'm going gonna go, gee, why? And moved forward on
the y to about here. And now we can go Shift
S and make sure to set the cursor back to the world origins or cursor
to world origin. So it's always there
right in the middle. And what we're gonna do is in
our front of graphic view, we're going to tab into edit
mode, go into wire-frame, select these bottom vertigo g, z and move them up just a little bit above that origin
point to about there. And they're gonna
select the top. I'm gonna go G is the bring
that down just to about here. And then a to select
everything and go S x and scale it down on
the x about that much. You've got a lot of overlap, but I'm gonna show
you how we're going to deal with that in a second. We also need to go
to Add Modifier and give it a mirror modifier. And this time we
want to set it to z, so enabled and disabled the x and we don't
want clipping enabled. So if we now go G, z and move it up, you
can see what happens. So you can kinda see where
we're going with this. So pretty cool. And how do we get
rid of this overlap? Well, we're going to
use an existing thing. Remember earlier we
added into cutter. Let's tab out of here. Let's give this a Boolean
modifier on top of the mirror. And now what we're gonna do is I'm going to go to Objects. Click here. Instead of using the eyedropper, we're just gonna go and
select the cutter because remember in that
cutter collection we named at cutter
object cutter. Now we have that and this time it's cutting a hole
which is not what we want. But if you select the
plate here you go, you can actually change it to intersect instead of difference, which is really cool. I'm just one more thing we
wanna do is just quickly tap in and this is just going to help with the
Boolean a little bit. If we actually come in
here, Control R and just roll in a few extra cuts
or loops like this. And in control are and
do it this way as well. That'll just, I just find that helps clean up
the shading a little bit. And if that's still
active, we're just going to go and give it a bevel modifier and make sure to drag the bevel
above the Boolean. That's very important. And then you can bring
down amount down. That just gives it a
little bit of a chamfer like that and we can see
it a little bit better. So also in edit mode, select the whole
thing and then go G, Z and just bring it down
to us a little bit closer. Now how do we actually make
animate at opening up? So what we're gonna
do is we can go to Object Data Properties. I'm going to create a shape key with this door still active, and it is active. And what are we gonna do is this shape here
creates a basis. Now the basis is the state
that it's currently in. But if you click here to
create another shape key, you can now go into
that shape key. And you can take this existing topology and you
can move it around. You can go G, Z and just move it all up till it's no
longer seen under here. And the thing that's
interesting about that, I said, as long as you
don't come in here and add in anymore topology, but just move around
existing topology. It'll now interpellate
between the basis, which is this one here,
and the new shape key. Alright, so I'll show
you what I mean. Let's tap out. And if you grab
that k1 and in now take this value and
you drag it up. Look what happens. See that. Now we have a slider
that we can control. Let's bring it down to 0,
double-click and just call it open doors so we
know what it is. And that was probably the
most tricky bits so far. If you can get to this point,
you're doing really well. What we're gonna do next
is we're just going to finalize all of
these different meshes. We're going to parent
everything to get her to an empty so we can animate
a little bit easier. And that part should be a
lot shorter than this one. So that's gonna
be the next part. Thank you for watching
and remember to check out the
provided blend files.
6. Finalising the robot: Okay, so welcome back. And in the previous part, we were able to make chess
doors that can open up. And what we're gonna be doing in this part is finalizing some of our robot parts and parenting
them all to an empty. So we can grab that one
empty or dummy object that isn't going to
be rendered and just use that instead
of trying to grab every little single part and
move around in the scene, we're gonna start with going
shift a and we're gonna go down to our empty options. Let's get a cube that's always a really
good one to choose. If this cube we're gonna go s, z and scale it down on the
z just so it's not as big. And we're gonna go G, z and we're going to bring
it up to about here. Well, maybe even a
little bit higher, just surrounding
that color there. It doesn't really
matter. You're not going to see this in the render. And then what we're gonna
do is we're going to take our body and holding shift. We're going to select the
dome and little gates, the housing that it's in. This bottom part, this
bit, everything here, just holding Shift select
all of it, Like I said, every bit with models
so far on this robot, make sure to select it
and holding Shift still, you're going to lastly
click on this empty. The empty is last thing
that's active and you can go Control P or Command P, and you can go Object Transform. Now if you select this
and you go G to move it, you can see everything
moves around. Now, you're going to
see something funny happening down there
because our cutter object. In fact, if we bring back our cutter layer or
collection, We move this. You can see that the cutter
shield stays behind. So all we have to
simply do, no big deal. Just select the cutter
holding and shift, click on the empty and go Control P, object,
keep, transform. And now the cutter will go along with that,
which is all fine. What can do here? We can actually select
a body here and we can go to our modifiers. And let's get to
the subdivision. Let's bring that down to two. And we're gonna go
to the drop-down and we're going to apply it. So now it's set like this. But what we're gonna do,
we're gonna go and add another subdivision
surface modifier and just put that at
the very top again. Okay, so now we can still
give it some subjects, but it's not starting
from a really, really low poly place. One thing you can also
quickly to just go into edit mode, Shift Alt. And just while you're
holding Shift and Alt, you can just left-click and just select some of these edges here. They're a little bit
unnecessarily dense to some of these ones here go x
and dissolve edges. We don't need so many of them. So that's a lot better there. You don't have to do that. That's optional,
but I recommend it. And then we're gonna
do is we're going to select the dome. We're gonna give
that a subdivision surface modifier,
just helmet here. And we're also going to
just select the fins here. Quickly. Tab in control are just
add in one more loop. Click left with left button once and you slide it up to
here and then go s, z and just scale it down a bit. Just a little extra
detail tab back out, come up to the subdivision, drop it down to two
and then apply it, and then give this a
subdivision surface modifier again and leave it as it is. Okay, and we're going to
now just grabbed a helmet. We're going to go
just to hide it. And in here, because we're
gonna be seeing fruit, a helmet and some points, we just need to select the
body tab into edit mode, shift Alt, and then just
click on this edge. So just this edge that makes up the inner part of the bottom of the body
not to neck ring itself. And then you can go S and just scale it just to
close it in because we don't want to be
seeing that when we're actually rendering and
looking for the glass. You can also go Shift Alt, left-click on this edge here, and then go G, Z and just
bring it down a bit. That's about all.
I can tap back out and go Alt H to
unhide that again. Now, eventually you'll
see why we did that. This should be it. I think that's pretty much it. Maybe select these
guys over here, just tap in to edit mode, select these verts
here and go S, x and just scale them and X a little bit to widen
them out and bring them just a little bit closer
as well to this blade, arm, thin finger here, That's a little extra detail. Tab back out. And I actually
think that is about it. We have the robot. That's all we have to do. The robot is now parented
to this thing here. And we can go and do some
animation eventually. But what we are going
to have to do in the next part is modeled the actual arm that is going to come out of here
when this opens up. So remember we gave this
a shape key over here. Under the Object
Data Properties, you can just go to that open
doors, scrapped that value. So we actually need a little grabber clothing to
come out of that. So that's what we're
gonna be modelling next, but it's actually really simple. So I'll see you in that part. And remember this blend file, like all the other stages, is available in the
project resources folder, which you can download it.
7. Modeling The Claw: Okay, So in the previous
part, we are able to finalize our robot. We parented everything
to an empty, um, what we're gonna do now
is just make a simple little clawed its kinda
come out of the robot. I just felt like it was
a little bit simpler to, to keep that as a separate
part to the robot. So we're actually going to
do is we're going go Shift a and rich can add
in under our meshes. Let's add in a cube. I'm going to tab into
edit mode and we're just gonna go S to
scale that down. No specific amount, just
going S scaling it down, just at first about that much. And what we're gonna
do is we're going to press Z and go into wire-frame. We're going to tab
out into object mode. I want to go G, z and
move it up to about here. So it's in, roughly in the
middle of where it is. I'm opening in the chest, it wouldn't go press
free on a number of path to go into right
orthographic view. And we're gonna go, gee, why? And move it almost
to the back of a robot here, all
the way to the back. And let's tap back
and let's scale it down even a little bit
more about that much. Okay, we're going to then
select these verts over here. We're gonna go, gee, why and move them forward
to about here. And then worry too much
about the exact proportions. We'll deal with
that in a second. Which one to get a
rough idea here. And then if that's face still active there, these four verts, we're gonna go Shift D to
duplicate S to scale it up just a little bit in
SX and skeletal Next. And once again, we'll
finalize things in a bit just roughly the size and
scale that I'm doing. And then E to extrude
that face for like this. Okay, What we're going
do now is we're going to tab back out into
our object mode. And what we can do
with this arm active. So it's active, we can press M, I'm going to create a new
collection list is called a claw got and I keep
calling it an arm, but I mean just same thing
as to claw and I go, Okay, and let's just
drag this claw. We're going to just
left-click on it, hold it, and then drag it. You can see that little
black barter we want to put it in between the
robot and the reference. Open it. You should see we
have that cube we added in. That's the actual arm. If you click on
it, you'll see it goes active and we're
going to double-click. It is called a claw. And let's just hide
the robot collection. This is also hide
our cutter object. We don't need to see it and now things are less cluttered. What we're gonna do when
you get to a modifier. So if that arm or claw, and we're gonna go
and give it a bevel. And let's come to the amount
here and bring it way down. So if you hold down shift, you can make it
smaller increments. So just dragging it down to its only a small little bevel and in bumping up the segments. And this is also select this
and give it Shade smooth. Let's go to our top
orthographic view by pressing Seven on an iPad, seven on the number pad. And I'm going to go Shift a. We're going to add in a plane, and we're going to tap into
Edit Mode S to scale it down, tap back out into object mode
and then go G to move it. And let's move it over here. And I'm going to go into
a front orthographic view by hitting one and
we're going to go Jay Z and we're gonna move it up till it's sitting
just above here. None of this probably
makes sense at the moment, but you'll understand
as we go on. So let's actually now bring back our robot on
that collection. So we can have that
as a reference. And let's select
a dome and we're going to press H to hide it. So H will only hide
it, not delete it. And we're also going
to just select our robot body and we're
going to press hey, h Once again just to hide it. And then we're also going to
just select this cylinder here that in cases the arm I'm going to
press H to hide it. Then when I press
seven to go back to our top orthographic, and what we wanna do is
want to make some claws or come all the way up
to where does Doris, but what I want to
go through the door. So let's select the
little plane here, tab into edit mode. We're still in that
top orthographic view. I'm going to select the whole
thing and we're gonna go R and just rotate it
a little bit like so. Then just select these two
verts over here we're going to eat to extrude R to rotate, E to extrude R to
rotate or we're just trying to make something
that looks like a claw. Okay. Just on one side, e to extrude
R to rotate, G to move. And that's all I'm
doing just like that. Then what we're gonna do
is we're gonna go and give it a mirror modifier. Click on the little
eyedropper and then select the actual claw object
as a reference. Now it's mirrored over here. So all we have to
do now is kinda visualize how we want
our portal look like. In fact, with these
two here selected, you can enable your
proportional editing. That'll just give you
a falloff gradient. It'll affect more of the verts. So if these two selected
proportional editing enabled, you're gonna go G and move it. And if you've rolled
down your middle mouse button while
you're doing that role, your middle mouse
button down, you can have less influence. So let's bring these two in
here and just make what looks to you like a natural claw
shape, something like that. When you're happy,
disable it and then go are just rotate
that make it nice. Even doesn't have to be perfect, just
something like this. And once you like what you have, you can go and give this a
subdivision surface modifier to smooth it out. And then on top of that, what we're gonna do
is we're going to add a solidify and have to solidify. Let's just drag it in
to the negatives in this case because we wanted to give us some thickness upwards. Once again, that has to do with the normals with maybe
different for you, but likely you have to bring
it into the negatives. And let's just go with a
thickness of about that much. And then what we can do, we can give that a bevel, bring that that bevel amount, bring it down, give it
a few more segments. That gives it a
nice chamfer there. And then on top of that, another subdivision surface
modifier tab back out. If this new object selected just right-click and
go Shade Smooth. We're also with this selected, we're going to press M and we're just going
to make sure that it's on that claw layer
or claw collection. So both the claw on that plane. In fact, this is cool. This part, fingers
even though they're not fingers prongs or whatever, you wanna call those parts. They're good, the grabbers. So what we're gonna
do when we later, when we animate
is we're going to rotate these in our animation. Some keyframes. So they look like they're grabbing whatever object
we want them to grab. Probably just one more thing we can do a little bit better in edit mode is just
come back in here, maybe move these out
just a little bit. Select these two on the end
of these two verts and E to extrude this one more time and an S to scale it just a bit. I think that's just looks
a little bit nicer. Now if this object
selected these fingers, we're going to hold down
Shift and select a claw and we're gonna go Control P object, keep transforms now for grabbed
a claw itself and we go, gee, we move it. You can see that moves along, and that is how we do our claw. So let's just press Alt
H to unhide everything. And let's just minimize
this claw over here. So now it's getting really need. In fact, let's just click
on the robot collection. Let's just right-click and
give that an orange color and right-click on applaud
gift that an orange color. And if the ref, whatever
is unnecessary, let's just make that blue
does this stuff we don't really need to see or use most of the time,
we'll make that blue. Two main collections here. In fact, I'll turn
off the roof as well. So two main things we want
here is just our claw robot. We can turn the robot off
and just see how claw, what we can do it the other
way around where we just get rid of the
claw and just have a robot also if this empty, then we added in the previous
part, just select it, make sure to press M
and also make sure it's on that robot collection. Things are getting
really organized and how we've made everything. Probably just one more thing. I almost forgot to
mention it with the claw. Just come to the drop-down, select that claw,
the actual claw arm. She might have to enable
the cloth for that. So make sure to
claw is selected. And in while you're
holding and shifts, click on the empty and then go Control P, object,
keep transforms. Now that is also
parented to the empty. So if we actually
selected the robot empty, here we go, gee, that arm
should follow along as well. It's just a now I'm going a little bit slow here and
repeating some things. I just want to make sure
everything is nice and understandable and I'll see
you guys in the next part.
8. Building The Stage: We're pretty much ready
now to make our stage. That's pretty much the
environment around the robot is going to make an animation a lot
more interesting. So we have the robot
out of the way, we have the chloride
out of the way. And we can now start
by going shift a and we're going
to add in a plane. And this plane active, we're gonna go S and it would
type in 25 and press Enter. So if we now press N on your keyboard to bring up
your Properties, go to item. You should see here, just scale transforms are all set to 25. It's essentially
25 times bigger. What we're gonna do is
we're gonna go Shift a and we're going to
add in a cylinder. And we're gonna go to a
top orthographic view by hitting seven on a number
pad and wouldn't go S. And we're going to
scale that up till it's just a bit
bigger than a robot. In fact, once again,
under your properties, under your transform,
Let's make it about 4.5. I'm just gonna go steal it says roughly about 4.5 over here. And here, That's the
hole that we have now. And what we're going
do is we're gonna do not a Boolean operations. We have a whole enough floors.
Let's select the floor. Let's go over to our modifiers. Let's give it a Boolean, and let's click
on the eyedropper and select the cylinder. We're now going to come to the drop-down and we're
going to apply that Boolean. Let's grab that
cylinder and go G, Z. Bring it down until
the top of it is where a floor start tab into edit
mode and go to your face, select, select the
top face and then go x and delete phase, and then select the
bottom face and go x and delete phase. Now, tap out and we now
have an opening here. Right-click and go
Shade Smooth as well. You can also select the floor, Right-click and go
straight to move. And this is pretty cool as far as a whole goes
in the ground, but we can add a little bit
more detailed than that. So what we're gonna do is
we're going to go Shift a. We're going to add in a circle, and we're going to go
tab into edit mode. We're going to go S to
scale it up as bad, as big as the
opening of the hole. And let's go to vertex lecture. We can see it a bit better. We're going to go E
to extrude and then z and extrude it up
just a little bit. And then E to extrude again and an S to scale,
bring it out a bit. An E to extrude Z and bring it down just so it's touching
the floor and an S to scale. And then we're
going to give this a subdivision surface
modifier and tap back out, right-click and go Shade Smooth. So now we have a
nice little border here and it looks a lot better. We're now also going
to go Shift a. We're going to add
in a cylinder, we're gonna get to a
right orthographic view by hitting three
on the number pad. We're going go, gee, why? And we're going to move
it over to the front, just in front of a robot here, tab into edit mode and
then go s shifts z, esh, shift in z, gonna scale on
everything except the z-axis. Let's scale it down
about this much. Oldest is gonna be,
it's gonna be the pipe where our item that the
robot's going to grab, it will be coming out of. And if you go back to your
right orthographic view, you can see we have
these grid spacing here. We want it to be about as high. So if you go GZ and you move it, we want it to be about as high as halfway where the robot is, or where you can see
this grid spacing here. I'm going to select
the bottom birds. Let's go into our X-ray. Let's just select
these bottom vertices. So we're gonna go G,
Z, bring them up, and also go x and
delete the faces. Then we can select the
top face here and go to Extrude S to scale and an eight to extrude
it up like this. Just give it a bit
of a lift and eat to extrude S to scale, and then eat to extrude, bring the whole thing down. And let's just go
out of x-ray mode. They're gonna go E to
extrude S to scale, and an E to extrude and extrude the whole thing down like that. And you can delete that bottom face if you want by going x and
deleting faces, as long as we have something
that's just like a pipe, you can model this
however you want, just have it roughly
about that height. That's all that really matters. Right-click negotiates, move,
Control a to apply to scale just in case you've scaled it in object mode and then
give it a quick bevel, bring that down
that bevel amount and give it some more
segments. There you go. It can be even
simpler than that, but that's what we're doing. Select all of these other
items here that we've added in anything
that's our environment, control a and apply the scale that's gonna be
important for texturing later. And in fact, let's grab
these three, these items, everything that we've just made except the robot.
And this is press M. Let's create a new collection
and let's call it stage, and then press OK. And now we have a
new collection here called status is minimize it. Let's right-click. Let's
give it a new color, green. So green is gonna be that. And this is left-click
on it and drag it and put it underneath claw. And also while we're at it, let's just go to our robot. And the robot you can see
we now just see the empty, but if you dropped
down under the Mt, we're going to see everything
that is parented to, everything that has
to do with robot is parented to that empty. And that's why it's
hierarchically under here. This is the hierarchy. So what we're gonna do is
empty selected. We're going to double-click
on it and let's just call it robot CON for control. And then just
minimize it and then also minimize the
robot collection. So there we have it.
That's our scene. And what we're gonna be doing in the next part is
finally our animation. And that's also where
we're going to be setting up our camera, make sure to save as you go. And as always, all of the blend files are
included with every stage.
9. Animation Part 1: We're finally at the part where we can start
our animation. Animation can seem a little bit intimidating and
oftentimes it is, but we're going to try and
keep this really simple doing is minimal
amount as we can. That's why we have
this empty here that all of our robot bits
are parented to, so we can control everything
a little bit easier. So let's start by pressing free to go into our right
orthographic view. And as far as this column that comes up, Let's
just select that. Let's just press N
on the keyboard, go to your item. And over here, let's
just give it a distance of freight negative
Fraser minus free. Make sure to type that in. In fact, let's just
go with minus 3.2. So we all know we're on
the same scale here. We have the distance
that we're moving. So robot is here. That's where Mt is,
and that's where our pipe is that we're
gonna be going towards its, Let's select the
empty on the robot, and let's come down
here to the timeline. So just hover over
here, you see it a little error,
left-click and drag. Just give us a little
bit more real estate. And what we're gonna
do is we're going to start by coming up to frame ten. In fact, I'm already on
as a frame ten down here. Just drag this little slider. Make sure you have
these transforms open. And what we're gonna do is
with that empty selected, we're going to go G and Z, and we're going to move
this down to pipe. We're going to put
our robot down here, just somewhere about here. Doesn't really matter. It's just about, Let's
have a look here. We've moved down the location
about 2.6 meters or so. You wouldn't be able to see it very easily from
looking from the top. And when you have it there
you can go and you going to insert a location and
a rotation keyframe. Essentially what it's doing
it is that these values here, the rotation, you can see the x, y and z coordinates and the
locations for the x, y, and z. Frame ten, anything we move here, we're gonna kinda
clamp it there. We're going to
hold it there with a keyframe if that makes sense. If you don't really
understand it, you can watch some of my
more beginner friendly tutorials at that from a
beginner's perspective, just check out out
on Skillshare. But we're gonna go on frame ten. I'm going to insert a
location and rotation. And now you can see our
location transforms and rotation transforms have the yellow value
here on frame ten, and we can see this
yellow marker there. But now I'm going to drag
it up to frame 4047. Let's go to frames for D7. In Frankfurt, E7.
We're gonna go G, z and move our little robot up till it's hovering
above the ground. By about that much. You can see everything here
in the scene for reference. And we're also going
to rotate it just forward ever so slightly. And we're gonna go I, and
we're going to insert a location and rotation
keyframe for 37. You can see now once
again it goes yellow. So between frame ten, if we go to frame ten and we press displays, the space bar, you can see between those two keyframes,
That's what's happening. It's interpolating
between those values. So let's get back to 47 and
let's drag it up to 44. And it's 44. What we're gonna do
is we're going to go R and we're going to rotate
it back a little bit. And also gonna go G and
slightly move it back and go I and insert a
location and rotation. And then we're gonna go to
frame 55 or about fame 57. Let's make it a frame
57. And we're gonna go G and sync it down a
little bit just to give it some anticipation,
some buildup. It doesn't just immediately, immediately move off,
rotated slightly more. And then wanna go I and insert
a location and rotation. So what we should have
framed our robots here, it pops up at 47, then it's slightly
starts leaning back like that to give it a little
bit of anticipation. And then it's going to
shoot off towards the pipe. So let's now go to frame
84 and frame AT for what we're gonna do
is we're gonna go G and move our robots forward. And we're also going to go are, and just rotate it
forward a little bit. Maybe it just G to move
it up just a little bit higher so that outlet there or where the opening is
in a chest is kinda pointing up towards
that pipe little bit. Not too much rotation, but a little bit more height.
So right about there. As long as we have that
clearance on frame 84, go ahead and press I and insert
a location and rotation. So now let's go to frame ten. Let's press the spacebar. Let's see what happens. And art guys, now it's all still looking a
little bit rough because we haven't messed around with
our animation curves. We haven't cleaned anything up. But we're going the
right direction. As you can see. Right. But it's looking very dead at the moment. That's fine. Don't worry about it. This is all about blocking
out and animation. Nothing looks perfect
right up front. Now what we wanna do between
frame to another frame, Let's just pick maybe a 160. So we need a few seconds
at 24 frames a second for just your standard
while it can grab the item that we're gonna
be making it grabs. Let's go to frame 165. In frame 165, we're
actually just going to go once again i and insert
a location and rotation. And you notice we haven't moved it
because it's just gonna be having a hold of pause
while it's doing that, but we are going
to add some noise to it later with modifiers. So it's kind of bobbing
around a little bit. But overall it's gonna
be in the same position. And then what we wanna do
is when it come to frame 195 and a frame 195, we actually want to come
here and grab the keyframe. So just click and drag
and drag that keyframe from frame 58 over here are 57 and then go Shift D to
duplicate it and then just move your mouse and drag
it all the way up to 195. So now from one 60-ish, 165, after that long pause, it's going to fall back to that position where
it was there. If we go to our graphic view,
let's just press the Z, go into solid, go to frame ten, and let's just see
what it looks like. Remember, it's going to look
rough at first. There we go. Bit of a pause is
doing its thing, and then it falls back. And we don't want it to just
immediately go down because it's still going to be closing attach while that's happening. So let's go over to two,
twenty, two twenty, once again, let's just drag
this one here to select it, Shift D to duplicate
and drag it. Got it to 20. And
you can see now it's this bar in-between because just like over here It's a hold. These values here are
exactly the same. So it's a hold. It goes back, a little
robot goes back as a whole. Then we want to go back in. But before we do
that, let's just give a little bit
of anticipation. So at 234 to 44,
we're gonna go G, move it up a little
bit, R to rotate it forward a bit and then go and
insert a location rotation. So it goes up for a little
bit of anticipation. And this has come to an end
frame value here we only have 250 frames, so
let's make a 280. Essentially, it's very simple. Our animation here starts
at one and it goes to 280. Now that's the value of set. And remember, blender
runs at 24 frames per second by default,
which is what we want. So just animations can
be a few seconds long. So let's come to frame 262. And then we're gonna go G, z. I'm going to bring
our robot down. This is cozy, go into
wireframe so we can see and just move them down
where he where he was, rotated them a bit and
then go i and insert a location and
rotation and on to 62. So now if we go to frame
one all the way back, Let's just stand back
and let's just play it. Unless you see what
all just looks like. It comes out the
whole guys back, It's doing its thing here. Remember you got to picture to the robot arm coming
out here, the claw. And then he pauses quickly
and it goes back down. So this is all
going to make a lot more sense later
on we still have to get into the animation
curves and due to claw, but it will get there. Just bear with me, make sure to save as you go. I guess what you're going
to do is just quickly drag your slider down a little bit
so you can select a robot, just click on some of
the different parts, go over to the modifiers
and to give us a little bit better performance
while we're animating, Let's just turn off the real time display
for a sublist modifiers. So in this case, I'm
just going to click on that little window
there, the renderer, as long as the camera's enabled, we'll still see
this in the render, but we just don't
want to see it in the real-time view port. So let's select the
body and get to the subdivided exact same thing. Any little of these bits, we can just turn that
off for the sub div will really help
speed things along. Okay, so I'm just
clicking those ones and that's already a lot better. If we now go to frame one,
we press the space bar, we just get a little bit
less laggy view time, real-time performance
into viewport. What we're gonna do next
is clean things up a bit. But what I decided to
do is just quickly select the empty
refund animating. And I actually think that
this little step here, just a little extra
keyframe on frame 45 in-between those two is not necessarily just
going to select it and go x and just
delete keyframe. So now what we have
with the space bar is this leans back
and goes forward. We don't really need that
little extra bit down because we're going to fix that
with the animation curves. Speaking of which, let's go up here to our animation workspace. All we have to do
here is come over to this little tab
here, left-click, and let's just make that window, a graph editor, come here
and drag it out a bit. Now, immediately you
might think, Oh, this looks really complicated.
How am I going to do this? But all this is here
is just another way of visualizing what we've already
done with our keyframes. In fact, if you come over to this little window here and you press N on your keyboard, go to your items, and you
should see the transforms here. Let's just select
that empty again. You can now see if we drag
here on the timeline. Let's just go to frame ten
where we added an a keyframe. You can see where it's
yellow over here. This is the exact same timeline here you can see
we're on frame ten, and this is just representing the negative and positive space of these individual transforms. Let's just come to the
drop-down here on the Object. Transform it to make
things simpler, let's just quickly turn off everything here except
the z location. We have to z location, that's this one right over here. The Z-transform on frame ten. If we drag this little slider
all the way up to frame 47, you can see our little
guy here is going up on the z transform over here because we only
have the Z enabled, you can actually
see the blue line. And so it starts lower. So this is the negative of Z. So you can see
here on frame ten, we have this keyframe and over here it's just
represented as a handle. If you click and drag
over that handle, you can see this little
controls come up here. You can actually
left-click on them. And you can drag
these and now you can smooth out your curve. Let's just grab this one here, for example, and drag it out. Let's just come up to
the next keyframe. Drag it up. So this keyframe
here is framed 37. So this is left-click
and drag over frame 47. Let's now grab this handle here, and let's just take it up a little bit and then grab this one and bring
it out a little bit. Now what we have as our little robots going
up to this frame, it's kind of dipping over a little bit and then
coming back down. So it's a little bit of over, over overhang on animations. Let's go to frame ten. Press the space bar and let's
see what it looks like now. You see that it doesn't just go up completely
and stopped, but it kind of dips back a
little bit on that Z height, so just sinks down a little bit. And that's a very simple way. We can smooth things out. You can keep going, you can select the
next keyframe. So every handle here is
just the next keyframe. And you can maybe grab this
little handle here and just dip that valley down a little
bit just to even it out. Now let's go to frame ten. Let's press Spacebar. Yeah, okay, so because he
accelerates from here, a little robot list
is actually grabbed a keyframe and actually drag
this one in a little bit. And let's see if that
looks a little bit better. So now it comes up,
dips down and goes. That's more like it. A titan that curve off
just a little bit there. Let's see what that looks like. And it dips back. Okay, cool. So what you can do, and I encourage you guys to
take your time with this, is you can actually
undertake these. And for example, one
of the things we did here is we wrote
edited on the x. So if we got our X quickly
here, you can see that, right? So let's just turn off
the z location and enable the x rotation. We don't want to z
location just to x rotation n exact
same thing over here. You might have to scroll back a little bit and then click on this little tab and just drag up just to make it a little bit more noticeable so you
can actually see it all. So just clicking, left
clicking on these tabs, dragging them up or
left clicking on this one and dragging
it down could just give you a bit
more visual space here. Exact same thing. But this time it's just
to do with the rotation. So let us come to frame 48. In the frame for the eight. Let's just grab
this keyframe here. And let's just grab
that handle and just drag this handle point out and this handle point just to give it a little bit more
width and smooth it out. Now let's go and see what
that rotation looks like. So you go to frame ten or roundabout there and
press the space-bar. Okay. So if it's not
looking quite right, maybe over here, it has a
little bit too quick of a dip, So let's just come
back and while we still have that handle and 37 selected, this
is crap, this one. Drag it in closer a bit. Let's see what that looks like. Okay, that's good up here, but down here it's just a little bit too much of a Ford jolt. Let's select this keyframe
down here on 57, that handle. And let's just drag that point out a little bit just
to smooth that curve. Drag it back space bar. Okay, so what I've
done here is I've just dragged it up even a little bit more and just a bit
closer to the next keyframe. And I've moved to next key
frame up just a little bit. So we get something
that looks like this. Okay, That's a bit smoother. So this is a lot of fun messing around with
this timeline. The curves here in
the animation curve. And the more you play
around I've done, you'll start to understand
how it all works and how it gives you that
little bit extra control. But what we're gonna
do now is we're going to do something that ad with a generator. We're going to use some noise to automatically
add a little bit of random variations to this
time just curve here. So that's actually
really simple. So let's enable all
of these again. And let's click on the Y
Rotation to y rotation. Let's give this guy a little
bit of sideways wobble. So what we're gonna do with
the Y rotation enabled, I'm gonna come over here and this window we're
going to press N, and that's going to
bring up our properties. We're going to go
to the modifiers. I'm going to go with
that y rotation active. We're gonna go add modifier and we're gonna give it a noise. Now you can see it generates
a whole bunch of noise. And that if we were
to go to frame one and press the space bar, you can see it's
going ballistic, but what we can do if we increase the scale to
something like 50. So it's nice, big, wobbly waves. You can now see this
is what we have now. It's nice. Steady waves that
are automatically generated on the why for us. And we don't even
have to animate that, but it's a little
bit too strong. So I'm going to come to the strength and
just make it point to we still want
those nice big sways. We just don't want to be
happening so intensely. So now he's got a little
bit of wobble there. And it just makes
it a lot nicer. And instead of making
all of this again, all you have to do
with this one now is click on this little copy, this little button up here, then click on the Z, and then click here on the
little Paste button. So now it's gonna give
us some a debt on the z. So it's going to
bob up and down. But let's come here to the
scale and make it 40 instead. And now let's see
what that looks like. It's gonna go up. And now he's also bobbing
up and down a little bit. And that's all happening as a generator. And
that's really cool. So now that we have that
added to our animation, Let's just quickly go
back to our layout. And just quickly this
is adding a camera. Just want animated yet, but just so we can have a bit of a frame to work inside of. So let's come into the front of our scene here
we're going to shift a, wanna go down to
our camera options. Add in a camera,
the camera active. If you press Zero on your
comfort, your number pad, you're going to go
into the camera view of your camera active
wherever it is. In this case, it's put
it into the stage, just make sure it isn't as such. If it's not, you can
just select the camera, press M and then move
it to the stage. But with that camera active, we're going to press G and
then middle mouse button once and then just
move your mouse back and it'll zoom
the camera out. Let's zoom to about here. Let's go to our camera settings. And let's give this a
really big focal length. Like a really should. We have a really shallow
view of our model here? If you don't know anything
about photography, It's worth looking
into it a little bit. But essentially
we're going to take this focal length here from 50, we're going to
take it up to 150. So it's a really shallow and you can see we're
a lot closer now. But if we still have a camera
active, we can go gee, middle mouse button once
and just pull the camera back till we're
something like this. And then we're gonna
go G and just move it till reframed
about here for now. Now, if you go to frame one
and you've hit the space bar, you should be able to see this. We will eventually
antiemetic cameras that kind of goes along with
our little robot. But now you can see what we're dealing with
here visually. And it's gonna look a lot
cooler once we've added some animation to
our camera as well. But what we're gonna do
now is we're gonna go onto animating this little door. But we'll do that in
the next part because it's a little bit of animations or we're getting a
little bit lengthier. But essentially we'll be
animating these doors here, opening up and closing and then animating a
little arm and we'll make a little diamond pop-up which is already
built into Blender. And a little, it's actually wanted to extra objects
that come with it, but I'll explain that
all in the next bit. But if you've made it this
far and make sure to save, because it's always important. And I'll see you guys in the
next bit where we finished off the animation
part of this course.
10. Animation Part 2: In the previous part,
we were able to do most of our robot animation. We're gonna do now
is just opening up, dislocate here this
little door and chest and animating a
little arm that comes out. Now, one thing I'm going to quickly do is just
select a robot empty Harris's quickly pop back into our animation and
I'm just going to click on the Y Rotation. Remember in a previous part, we added the modifier. I wanted to just come here
and set the strength to five. Sorry, 0.5, most definitely
do not set it to five. So 0.5, it's a little
bit more than 0.2. Let's quickly hit
the spacebar kinds of camera view actually. And now we've got a little
bit more wobble there. Okay, that's a little
bit more exciting. And maybe even just on the Z, I'm just gonna go in there and give it a strength of 0.35. Okay, just have a look at it. I just feel like it
needs a little bit more of that variation there. Just to make it a little bit
more exciting for our robot, that looks a lot better, slight adjustment, but
it looks a lot better. Let's go back to out loud. And now it's fun. Let's grab that little door.
You can see it's active. And let's come to frame AT, I think for MAT is a
good place to start. So we're going to come here
to frame AD over slider, just click there, and
then frame AT were to come to our object
data properties. And we're going to
take that sheet shaped key we created in
the earlier parts. And we're going to click
on this little button that's going to automatically add in a keyframe for
that value. You've added. You can see it's
yellow that indicates, and you can actually see
here dares to keyframe. And what you're gonna
do is you're going to take this and you're
going to drag it. Just pass a 100 to
about a 100 and free lot about their one hundred and three
hundred and five. We just want a little
bit of time there and add 100 and free, what you're gonna
do is you're going to drag this value all the way up to one. Maybe not
even all the way. Let's just go about that. Marcia can just see
it sticking out. And you're gonna click on
that little diamond there. It's going to add in
a keyframe again. And then what you're
gonna do is we're gonna create a hole because we
want it to stay open. So simple way to do that
is to click and drag over that keyframe Shift D
to duplicate Shift D, and then just move your mouse. And let's move that up to 190 for now and roll your middle mouse
button down just to shrink the timeline here. And then hold in your middle
mouse button and just move up and just click and drag over that keyframe again and
just click and drag it up to 20 there. Okay, so just before to 20. Okay. The only reason I drag it
to 190 is because I didn't have enough space there
but around about there. So let's just quickly
look at that. Let's hit the space bar. You
can see there it opens up. Okay, It's playing, is playing. And as he's starting to go back, it's still open and
just the last second before it goes down, it closes. So let's make that two Verde. Let's make it to
Friday. And let's come here to this
value and drag it all the way down to 0 and
click on the Shape key here. So now let's watch the whole
thing from the beginning. Drag it like that and just
watch. Okay, there it goes. It's opening up. Okay. And then it just closes as
a robot goes back down. So that timing there is perfect. You guys can adjust it a
little bit if you want, but I think that looks great. Now what we're gonna
do is the arm here. So see that robot arm. And let's just
select those prongs. And let's go to our modifiers. And let's just turn off the subdivision for that towards the end because it is
slowing things down a bit. So just in the viewport. And what we're gonna do
is we're going to go to the solidify that we added earlier and
we're going to give it a little bit more thickness. That's a lot more interesting. Now, what we're gonna
do is we can actually select that bar that
it's connected to. The bit that claw part itself go up here
to Scene Outliner. And you should see that is under the claw drop-down
because as we put it in, again, you want to make
sure that is active. And if you click on the
little drop-down under debt, you can see that the other
parts are under debt in the hierarchy
because we parented the prongs, those finger bits. We parented that to the
actual cool part itself. So make sure to close active. And what we're gonna do is
we're going to come to frame 120 because that's about not too long after
the door opened up. So frame 120, let's go to
our right orthographic view. And what we're gonna
do is we're gonna go, I am going to insert
a location and rotation just like we did with all the other items before. And then we're gonna go up
to something like 1 sixth. So that just gives
a second and a bit like about two seconds, just a little bit
less than two seconds of time for it to move
from here to here. So at 160, we're gonna go G and we're going to just move it in an orthographic view. Now we're going to
move it to about here. And we're gonna go and insert
a location and a rotation. And this is click and
drag over that keyframe. Let's go Shift D
to duplicate it, and let's drag it up to 200. So now we have a hold. So it comes out like this. It has a bit of a hold. And then let's go to 225 or 220, false get to 24,
right about there. To Twenty-four, Let's go
G and move it all the way back into our
robot, like so. And let's go and insert a
location and rotation for that. So now I'm gonna proceed, just go back into solid and let's see what that looks like. Let's go into our camera view by pressing 0 on the number pad. Go to the very beginning here, and let's play our animation. And let's see what
it looks like. A K. That's looking
pretty good. So what we're gonna do now
is we're going to also animate these prongs here, grabbing something, but first we have to make it
That's something. And to do that you
have to enable something in the add-on. So let's quickly go
to Edit Preferences. Go to your add-ons here. And by the way, this is not something
you have to download. It's already built
in to the package. When it come up
here to the search, I'm going to type in extra, and we're going to see
something here called add mesh extra objects. And mine is already ticked because I've already enabled it. But go ahead and make
sure you take yours. And once you've done
that, just close here. And it should now be able
to go Shift a and go to your mesh options and go all the way down and you're
going to see something called Diamond. And you can go to
just make it a gem. Actually, you can come here
and change the settings, but I'm going to leave
this gem just as it is. It looks perfectly fine. Now let us go into an
orthographic view, pressing free on the number pad. Let's go to G and move it
over here to where it is, column is a little pipe. Let's go S to scale
it down to about this much about the size of the
inside of the pipe like that. Maybe just a little bit smaller, then go Control a and
applied at scale. That'll make sense later
when we do the texturing. But what we need to do
now if the diamond is, we need to go way back in
the beginning of our scene. Let's go to frame a
and frame Friday. Let's go G and just move it down into here
somewhere and then go, I insert a location
and a rotation. And then we're going to drag
all the way up to about where to claw is resting over the area here where the diamonds
going to come up. So that's gonna be about 160. We're gonna go and insert
a location and rotation. In fact, let's move
to Diamond up, actually scale g, z and just move with diamond
up, we're still in 160. Move it roughly up to where
the claw is and then go i and into the location
and rotation again. So it should go up
between Friday and 160. And then what we
can do is we can probably click and drag
over this frame here and 160 then go Shift D and
drag it back to about 80. So our diamond is
going to come up here, like so before the
robot gets here. So you can either
leave it as a whole. But if you want a
little bit of movement, you'd come to 160
and then you can go G and move it down a little bit. In fact, maybe just go to 80, let's just go to AD and AD. We're going to go G, z
and move it up a bit, go i and insert a
location and rotation. So what it does is
it kind of comes up, but it's not just sitting still. It has a little bit
of movement in there. You could make it a
hold if you wanted to. But I think just
having a little bit of movement like that is okay. Maybe even on AD will
come here and just give it a little bit of a
rotation and then go, I insert a location
and rotation. So now it's popping up. And it's kind of like settling
down on a spot and it's settling down right about where that grabbers are
going to be in a claw. So what we're gonna
do now is we're actually grabbed
the claw itself, order to arm the claw arm. And now what we can do is
we can come here to frame 161 says grabbed that keyframe for the claw arm and
this has got a J, drag it forward a little bit, just gives a little
bit more time. Okay? And what we're gonna do
is we're going to grab those clause there. And let's come to
about frame 132. Or just as it comes
out of the chest, in this case, it's
a bad one for 36. And if you go, Are any
double-tap z, r, w, z, It's going to rotate
it on the local z-axis. So not a world space,
but the local space. And let's open that up. And let's go and insert a, just a rotation, not a location. And then let's drag back tilts in the chest
and then we're gonna go our double Z and close it, and then go and
insert a rotation so it's closed up in a chess. And then between these
two keyframes here, it opens up just as
it's coming out. So maybe just grab this keyframe at the frontier
and just move it closer and closer till it's not
causing any sort of issue with penetrating the housing here that
it's sitting in. So just needs to clear. Just dragging it a little bit forward will help with
that spacing there. So just as it's
coming out at chest, the whole thing opens up. And now it's staying open while it's grabbing
the diamond here. But it might be open just
a little bit too much. Let's just go back
to 136 and Cisco, our double Z and just
close it a little bit. Then go i and insert
a rotation just so it's fitting just where it needs to
be on the diamond head. Don't worry that the
diamond isn't moving along. We're going to work on that in just a second or if
some constraints. But you see what's
happening here. It's just opening the right time and it's about the width
of that diamond there. So what we're gonna do
next is we're gonna be using an empty with
some constraints. To make this diamond attached to this claw at a specific point and it'll go along,
we have the robot. So it might sound a
little bit tricky, but I want to explain
this step-by-step so you can see
exactly what I mean, make sure to save as you go. So what we're gonna do
is I'm going to drag our slider on the
timeline till our arm, our claw here comes out. And it might be
just a few frames off depending on how
you've animated things. So don't worry if it's
exactly the same frame, but come a roughly to
a shot where those claws or as much in the
both sides of the crystal. So we want this diamond here. Does gym be perfectly
or as much as we can perfectly in the center of
these two prongs here, right? My case that's gonna
be framed 160. So what I'm gonna
do is I'm going to select a diamond
and I'm going to go Shift S. And we're gonna
go cursor to select this. It's going to put
that cursor there exactly in the
middle of a diamond. We're going to go Shift a, go to our empties and add in an empty. We're
going to add in a cube. We're going to hit S
to scale and scale it down till it's just small. So just inside of
the diamond there. And make sure you
don't move to frame who want to be exactly on
that spot right there. We're going to go Shift
S and we're just gonna go and set the cursor back
to the world origins. Always important to have it right there in the world center. Now we could do is we
can select our diamond. We're gonna go to this tab here, which is our object constraints properties Add Object
Constraint and when it gives us something called a child of so essentially what
we're gonna do when it tells us diamond
with this constraint to be constrained to
a certain object. In this case, it's
gonna be empty. So at a certain
point it's going to attach itself to not empty. So let's now go ahead and
click on this Eyedropper. And let's click hover over
that empty and you should say, you should see there
it says empty. In this case it's empty dot 002 because it's the second empty we're adding into our scene. When I just left-click on it, you should now see
it's added that MTN. Make sure it's the empty
and then just select it empty and holding and
shift select the arm, the claw arm here, and then go Control P and
go object keep transforms. Now we've parented this
empty to this control here, or does this arm here to robot arm that comes
out of the chest. The clothing. And what we're gonna do now is we're going to
select our diamond. So what we're gonna
do is I'm gonna come here to this influence here. And currently it's set to one, which means it has
full influence over its attraction
to that empty. The empty has full
influence over to diamond, so it's completely
holding it in that place. So if we now drag
this down to 0, it will have 0
influence on frame 160, just as it comes
into that place. Let's just give it a value of 0, which means no influence. And click on here that little dot and that's
gonna go yellow. We've added in the keyframe. Then what we're gonna do
is we're going to just move up one frame. So one way you can do that, if the left arrow button
just move up one frame and then take this influence and drag it all the way up to one. And then click on here and
a shape keyframe again, click on the keyframe
button here. Now I've added the
value for one. So what's happening
the whole time? That MTS no influence
all the way up to 60. And then just the next frame, it has full influence and
a diamond goes along. See that? Nice, isn't it? I can see here
it's an issue that diamond is sticking out there. But don't worry if
that happens to you and you don't have
quite enough space, all you do is go to your
right orthographic view and just simply go in to your deselect
that arm there to claw. There we go, just that bit. And let's go to frame 124 where we can say
it's sticking out. And let's just enable
our auto keying here. So that's just gonna do
the know how we've been pressing I and then
we insert keyframes. That's just gonna do
it automatically. So now right, orthographic view, we're just gonna go G and move
this back and up a little bit more and then
rotate it just so it's a little bit more back. We don't want it sticking through it just so it's
clearing those doors. Okay. And then turn off the
auto keyframing on 124. So it's automatically
added in those keyframes. Now let's go to frame 0. Go to our camera
view, and let's hit the Spacebar and let's
see what it looks like. So here it comes. Here,
it comes out, it grabs, it has a full influence,
grabs a diamond, and it goes back and that's
pretty good, isn't it? Nice little trick there. Now, you can see
there's some areas here where it
penetrates, it goes, it goes Frodo and all
you have to do in those situations is just
grabbed that claw arm again. And you can just add
that point where it's a bit of intersection
enable the auto king. You may or may not have to
do this and then just go G and just bring it
down just a little bit. So now it's just goes down
at a point a little bit, just working your way through. It's going to happen
pretty quickly. You probably won't notice it too much if it intersects with just this closest,
you can get it. I just that little
adjustments there. But now you can see
what we've done here. And that's a really,
really cool way. You can use the child
off constraints. And I hope just trickier
hasn't been too difficult. If you struggle, make sure
to check out to provide a blend stages so you can see
exactly how I've set it up, but this is pretty much our
finished animation from here. It is a lot of cool stuff like adding some of our
materials are going to be animating the camera and a separate part when we set
up our lights and stuff. I think that's easy
enough to do so I'm not gonna include a camera
animation in here, but thank you for watching and I'm looking
forward to seeing you guys in the next part as we started wrapping
this project up.
11. Lighting &Textures: If you recall in
the earlier part, I was telling you guys about the project resources folder
inside of there is where we got our model sheet for the first part where we did
our modelling on what you're going to be doing in this
part is you're going to be going to that same
folder and I'm going to quickly show
you inside of there, you also going to see
something called materials. And it's going to be called
underscore packed file. That just simply means
that the textures that I'm gonna be
using, by the way, these are free textures and the public domain that
I got from poly haven. So definitely go check them out. It's a really good site.
They're all in here, which means it's not
referencing anything. So you're not gonna
get that issue where it can't
find the textures. So that should be
in there and you're also gonna be seeing long with all of this also
different blend files in here yet because I'm
obviously still making a course, so don't worry if
you're not seeing them. So going back to our blend file, I'm going quickly
show you how we can bring those materials in. The way we do that is with the append feature and blender, just gonna go to file and
you're gonna go to append. And then you're going to go
to wherever you've downloaded that project resources folder. And you're just
going to open that up and just look
forward to blend file that says materials
underscore packed file. Double-click on it and you can see all of these
different things. We want to simply go to this
one here called material. And you can see there's a few materials
inherit only one that we want once we want
are these ones here. So from Jim diamond
all the way down. So holding Shift as you go down, you can just select
all of these wants to gem the glass of green paint, the metal grid, old
pipe, and orange paint. You're going to go and
click on append and it's brought those in to
the material clipboard. You're also gonna go to file and you're gonna go
to external data. And I'm gonna click here on
automatically Pack Resources. So what it's gonna do is gonna pack all of those textures that are in there into your blend
file so they're in there. So let's just quickly go to UV Editing and you
quickly go to the drop-down up here you
should be able to see a whole bunch of textures
are now in here. You blend file is now
gonna be a lot bigger, but you at least have these nice quality textures in here. So let's just quickly
pop back to the layout. And before we actually get
into the actual textures, we do want to add some lights, and this is really
easy to do in Blender. So one of the common lights
that I like to use is, first of all what
we call a HGRI. So HGRI is like a high
dynamic range image. Once again provided
with this course. So what we're gonna do is
we're going go over here to our world properties. So that's anything to do
with like our environment. And we're gonna go here
to this color tab. Now, traditionally you
could just change the color here and your environment color would be whatever you set there. We're going to click
on this little tab. This little yellow dot
is left-click on it. And I'm gonna go over
here to textures and we're going to click on
environment texture. Then you need to
actually find a so click on open and then find wherever that downloaded
project resources folder is that came with the course, the same one where we've been
getting everything else. I'm going to quickly go wherever
that is on my computer, which isn't necessarily
going to be the same for you guys. But once you've found
it, it should be called Adam's place underscore
bridge for k0 XR. Now once again, this is also a free resource I got
off of poly Haven. It's completely
free to use the CC. So once again, big
thanks to them, but I'm going to go
ahead and just click on that e dot EXE file. You're gonna go open image. And if we now press
Z and you go render, you're going to
see that there is some light in and say now
let's quickly go over too, our Render Settings real quick. We do need to make sure we have EV enabled us to render engine, didn't want to take
ambient occlusion. We're also going
to come down and this is the most important one. We're gonna enable screen
space reflections. And we're going to
also drop that down. And because we're gonna be
working with a glass material, we need to enable
refraction because glass is a refracted materials. So click on that as well. Later on we're gonna enable the bloom and we'll
get into that a bit. But just make sure MD
occlusion, screen space, reflections and the
refraction are all enabled. And now if you press
Z got rendered, he probably wouldn't notice
a whole lot of difference, but when we start
adding textures, you're going to see how
it all works and we'll still mess around about
lighting a little bit. But let's start by actually selecting our robot
here to body. Let's go to our
materials down here. And by default it already has
a material because we use a default keeps you just click the little minus
there to get rid of it. And what we're
going to do is when we go to the drop-down, I want to get the orange
paint that we've imported. You can now see Derek supplied. We're also going to
click on the dome. We're going to go to the
materials tab, guard down, and then get the
glass dome material. We're then going to go and click on our ground, the ground plane. I'm gonna go to materials
and we're gonna go down and we're going to
get the middle grid. We're also going
to select our pipe when a go-to materials go to the drop-down and give
that the old pipe material. And we're going to select our tube or the tunnel that
is coming out of here. And we're also going to give
that same old pipe material and also this ring over here. We're going to
select that and give that the old pipe material. They're going to select
this bottom part here where our exhaust is coming out
of the thing just above it, I'm going to go
down and give that the green paint material, this bottom part here for now, let's just give that
the old pipe material and then these fins here, let's give them the
green paint material and also these parts
inside of them. Let's give that the
green paint as well. And just the door here as well, giving debt to orange paint. And then the chest
thing as well, it gives out the orange parent. Now what we also
want to do is we want to give this part here, the actual ring,
the green material. But at the moment
that's all one object. One material, but I wanna
quickly show you something. If you an object mode
de-selected body can actually go to your
materials properties. Go to this tab here,
click the little plus, and instead of creating
a new material, just come to the drop down
and get that green paint. And now if you tab
into edit mode and you come to this rank because it's
a separate piece of mesh. If you just
left-click and select a vertex and you go
Control L or Command L. It's going to select that
whole piece of geometry. And you can now with
that green paint selected, you can go assign, and now at assigns it to that, you can tap out and that
is how easy that is. So you can already see here, we now roughly have our
lighting in the scene. We have some basic
materials applied. We're still going
to keep working on in materials a little bit and add some quick eyes
and a Smiley face. But let's just also quickly just select our gem here
just before I forget, go to the material drop-down, there should be
something called gem and just select that
material there. Cool. So we have our
environment lighting, but we still want to add
some lights of our own. So we're gonna go
shift a. We're still in our render mode. So z rendered, we're
gonna go Shift a, go to our light options. We're going to add
in an area light. These are one of my
favorites to use. We're gonna go G, z, we're going to move
it up in the scene. I'm going to go to our
light settings down here, a light properties and let's
give it a strength of 120. And let's come to the size and make it free meters like so. Now at the moment
our environment light is a bit too dark, so we're gonna go back
to our rural properties. When it comes to the
strength of that nature, I'm going to make it 0.25. I'm going to press Enter again. Now, that's more what
we're looking for. Now we can get some
nice contrast here. So we've got a light selected. Let's see if we can increase
the strength of it. I think a 150, maybe a bit. Let's go back to your object
data properties of light, and let's make that 350. Okay, now depending on
how big your scene us, that's going to depend
on how much power you need it because it's working with the inverse square law
and some real world physics. So just keep that in mind, but you can mess around with that power for what we want
here is one main light that's just above here and to the front little bit and
pointing down towards the robot. So you can see that's already
starting to look nice. So we have that nice
dark background, which adds a bit of contrast. But this stuff here is just way too dark
like a tube here. So what we're gonna do, we're gonna get to a
right orthographic view and move that light active. We're gonna go Shift
D to duplicate it, move it forward, and then R to rotate it towards
the scene here. And if this one here,
we're going to take it and we're gonna give
it a strength of 200, so it's a bit less and we're
gonna make it slightly bluish and that bit
of a shadowy flight. We're then going to select that top light that
we have there. I'm going to make that
a little bit orangey, just slightly, a
little bit more light. Then what we want, we want
some nice rim lighting, some lighting coming
from the back here to make our little robot pop out. So what we can do that can grab that big light at the top. We can go Shift D to
duplicate him moving kind of behind a little robot here
and in R to rotate it. What's the back of the robot? You can go from the top
view if that helps. And you want to place
that light just off to the side there
and maybe even a little bit more back
with just wanted to kind of catch that corner there. And let's make that a
bit blurry as well. That's a nice rim light color. And let's just get
to the size of a light and make it too. Okay, so just you can mess around with this
as much as you want. Just move the camera Till that light that's getting
caught on the end there looks nice and just gives
it a little bit of a pop. Lighting is one of
those things you can customize however you want. This is where you
get to use your creative license and really make your scene something
unique to yourself. But already this
is looking great. So this is Save As we're going because in case blender crashes, we don't want to lose our work. So it's always good
practice to save. So let's quickly add just a few more materials before we go to the next video where
we're going to be finalizing a lot of this stuff. Let's select that done and we're going to
press H to hide it. Now inside of here we just
extruded the inside of the neck here just
to give it kind of like a closing here. So all we're gonna do
with this body selected, it's just quickly go
to your materials tab, click on the plus, and this
time create a new material. All we're gonna do is go
to this surface here. And instead of having
to principled shader, we're just going
to come over here. I'm gonna go up and
select the emission. That just essentially
means this material glows. The strength means how
strong it is and color. Well, that's pretty
much self-explanatory. So we're going to take the
color and we're going to make it kind of like a
greenish blue color. And let's make this
true length five. Now to see this, we
need to tab into edit mode and we need
to go Shift Alt and left-click on this
edge to loop select these verts and then go Control plus just to grow to selection. So we have this whole
thing selected and then select that material
and then go assign. You can now press Z and then go render to see
if it's assigned. And you can also click
on the material and just call it inner light, like sire, tab back out. Now this doesn't look very cool, but if we now go over to our Render Settings and we go down to bloom and enable
that. Check that out. Now we have this nice
balloon while we're there. This is Berkeley go Alt
H to unhide that dime. Let's come over here
to our collections. Let's just hide
our stage for now. So everything that is our stage, should it be on that
stage collection? This way we can just see
our robot and let's just go into our solid workspace. And let's just go into
a solid view quickly by pressing Z, clicking solid. Click on this bottom outlet
part here, tab in here. And what we're gonna do
is we're just going to go Shift Alt and just left-click
on one of these rings here. Shift D to duplicate and
an S to scale that down. And in press F to
fill it in, I guess. And now we just have this face. You can scale it a little bit
bigger than go over here, click on the Materials tab
and do the same thing. Click on the little plus, go New and let's
just call this out let light because this
is where the outlet is, where the exhausts come out
to propel the little robot. And we're gonna do is, once we've named Atlas, come here to the surface. Once again, we're going
to make it an emission. Want to take the strength
here and make it 35 when it comes to the color. And we're going to
make it really blue. We can now go Z and go rendered. And that should be, with that face selected. We should be able to select
that and go to Assign and net now assigns it to
that new geometry. Let's tab back out. If you now go into your
camera view by pressing 0, you can't really see anything. But if this little thing
selected as little hub here, if you press R to rotate
and you double-tap X, it will rotate it on
its local x, like so. Right now the reason we're
doing the local x and not to world is because
our little robot here is actually rotated. So if we were to just rotate
it on the X is normal. It will rotate it on the
world. Exit this one here. And we want to look at the
local x rotations are going, are double x only rotated
locally where if we went our x, it rotates it according
to the World position. So our double x and just rotate it forward and that just gives it a cool look. We now go into our camera
view, press the spacebar. At some point, we
should be able to see our little robot,
the bottom of a dairy. If you can just tab
into edit mode with that piece of geometry
selected in here, you can just go to
Face Select if it's easier just to click
on it and select it. You're gonna go G and
then double-tap z. So G double Z and move
that down locally. And keep going. G double Z, income of utility kind of see it sticking out and in tap out. We just want to
see that light can come here to the strength
and make it 120. Anything you can just to make it stand out nice and bright. Just bloom has a
little bit large. Let's go to our Render Settings. Let's go to the balloon
settings and let's make the radius a
little bit smaller. So something like 4.3. And now let's bring
back our stage. That's all pretty cool. One thing we can also
do is select this arm, inherit a claw, go to our materials, get
to the drop-down. Let's just give it that
orange paint material. But what we're gonna do is
we're going to click on this little seed
that's four there. If we click on F4, it makes
this its own material. So we can now click on that
and let's just name it metal. And let's come over to our settings here
under the materials. And let's go to the metallic and drag it all the way up to one and then bring
down that roughness, which we can do at the moment
because there's actually a map that is controlling
that and not a value. So let's just quickly go
to our shading workspace. In here you can see
the whole notes setup which you're not gonna
get into at the moment. But all we need to
do here is come to the roughness input for that metal material
and just plug it out. And then we can take that
roughness down manually like so that we can
come here and just plug out this color as
well from this color ramp. So we just have the white hair. This is make that a little
bit darker in value. Now we have a cool metal. Let's select those
arms on the claw, come to the drop-down, and let's find that new
metal material we just created using an already
existing material. If we now press Z and we're
going to have rendered view, we should be able to see
what that looks like. It's pretty cool, mess
around with this color here on the principled shader,
but something like that. Nice and simple. We'll do the job just fine. You can also select
this bottom part here, the little outlet. Go to your materials, click on the old pipe, come to the drop-down
and you can give it that actual same metal material, which looks a little bit better. But so far you should have something that looks
more or less like this. You can always try
out different things. Maybe select this ring, give it at same metal material. It's really up to you what you wanna do with it from here on. So what we're gonna be doing in the next part is we're gonna
be finalizing a few things. We're gonna be adding some, a bit of camera animation, giving it some soft focus by adding a focal point
for the camera. And we're also
going to be adding a quick eye and Smiley face, which is really easy to do, maybe make another
material or two, but we're just
going to be getting this thing finished off. And then we can finally, after that, render
out an animation. Hopefully this is something that you guys are really going to feel really proud about
and even build on top of, I look forward to seeing
you in the next part.
12. Last Touch: So in the previous
part, we were able to finish most of our materials. We're going to be
doing this part is just a few final touches. We're going to do
something about the eyes. I think adding some
eyes and a Smiley face. So this would be
cute. Then just some basic camera animation and some soft focus we're
gonna be adding in some focal blur, which
is really easy to do. So let's start by grabbing
our robots empty controller, and let's just go Alt G and Alt R. And that's just
reset the transforms. As long as we don't add
in a keyframe for that. For that, it should
just go back to where things were when
we play the animation. So just go G, Z and
just move it up. The reason for doing it is
we really want there to be, for it to be nice and straight. When we add in the eyes,
we're going to shift to a. Let's just add in a UV sphere. Right-click and go Shade Smooth and in your front
orthographic view, or it's gonna go G and move
it up S to scale that down. And if you want to
enable your X-ray up here to see
what you're doing. Go ahead and do so. I'm going to move mine here. Let's quickly go
to our modifiers. Let's give this a
simple mirror modifier. Click on the little
eyedropper analysts is selected dome as a
reference point. So now we have our
eyes, we can go to our right orthographic
view by pressing free. And let's move them
forward a bit so it is embedding them here
at the front summer. You could do this
however you want. And for a simple mouth,
we can go shift a, let's add in a tourists are
X9 had Enter and then go G, Z, move this up and S to scale it down, tab
into edit mode. And then you can go Alt S to scale it in along its normals. Left-click and drag
to select the top faces about that much. And then you can go
see, if you press C, you can get the
selection tool to select these two little
ends here as well. Press X and delete
only the faces. Then once you've deleted all
of that stuff at the top, you're going to press C
and you're just going to left-click and drag
to select these verts. Left-click and drag
to select these ones. And then what you're gonna do
is you're going to press F, and that's just going to
fill those with faces and modifiers and gives us a subdivision surface modifier. Tab back out, Right-click,
go sheets, move. Now in your object mode, you have a nice Smiley face. You can take this now, scale it however you want. Make it whatever size. Just places more forward
in the helmet here, that dome that all of this
is sitting inside of. So what you're really
going to see now, once we start adding
a glow material here, you'll really see
how this looks. Let's just select the eye. Let's go to our materials. Let's just click New, and
let's go to our surface. And once again, we're going
to make this an emission because we want it
to be emissive. Let's just make it
a yellowish green and let's give it a
brightness of six. Now, if we just save control
S to save, let's just say, let's go into a rendered view and you should be able to see this fruit to glass
material if you don't, we have this new
material, by the way, let's just double-click
on that and call it eyes. You should be able
to come down here if you're not seeing
through here. And make sure that this here, this under the Settings screen space reflections
isn't turned on. If you have that turned on, it will think that this is meant to be receiving
refraction, which is not so just make
sure that's not ticked. You should be able to
sit right for the glass, but it actual dome material,
the glass material, the dime that does
have the screen space refraction ticked,
which is accurate. Okay, so now what we
have to do is select that mouth as well as
a select that mouth, go to the drop-down and this
is get the eyes as well. You can call it eyes
and mouth if you wish. Snow need to really, it's fine. Now before we go ahead and get too crazy of this,
Let's just select this. I holding Shift
list is also select the fact I'm just gonna get
rid of the dome for now. Just click on it and
press H to hide it. Just select these objects here and don't play
the animation yet. Holding and shift select
the empty and then go Control P and then go
object, keep transform. So if I now go all to
H to unhide that dome, you can now see that that's all gonna go along
with our animation. If we now drag for animation, you can see those items
go along with our robot, and that's all
really, really cool. So let me think, what have we not done yet? I cannot, I think I
did previously as I selected my diamond
with my original. And what I did is I
went to Edit Mode. If all that active,
I went Shift D to duplicate and S to scale it. Then I went to my gym material here under the materials I click plus new and ice
called a gym dinner. And I made it a mission under the surface and they
made it slightly red and I gave it
something like five. Then I just made
sure that screen space refraction
was not enabled. I made sure to assign it. And now if you press Z
and you go rendered, you should see
something like that. But if you actually go
into edit mode and you still have that
inner part selected, you can scale it
way down, like so. Maybe bump up the strength. And now you have this
nice glowy effect inside of the gym. You can make this color
whatever you like, honestly be as
creative as you wish. I'm going to leave it as more like a reddish pinkish color, which I think looks fine, but this is already
looking really cool. Let's now quickly
animate our camera. Let's toggle off our x-ray. And because this is
a looping animation, one thing we wanna do,
we wanna make sure to cameras starts and
ends the same way. So let's go to the
very first frame over here, and lets us, with our cameras active
under our stage, we're gonna go G
and we're going to move it right about here. So this pipe is almost
off to the side here. And with the camera active on frame one, we're
going to press i. We're going to insert a
location and a rotation. We're then gonna click and
drag on this keyframe, Shift D to duplicate it and
drag it all the way to 280. Now, it starts and ends the same way in or anything
in-between here that we move will be different
in the two end frames, as long as the end and the
beginning of the same, it'll loop just like the
rest of our animation. We're also going to do is we're
gonna enable auto keying. So anything we do now
on a timeline and any movement of the camera is automatically going
to be keyed in. So we don't have to press i. But in this case, you have to be careful that you don't move
at someone we don't want to. Otherwise it's going to
add it as a key-frame. Let's drag for
animation till it comes up to about the point where
robots here at the top. For me that's at
about frame for free. And I'm gonna go G, move
my camera up like this. And then G middle
mouse button and just move in a little
bit by moving to mouse. So now you can see from
0 to 33 it moves up. Then I'm going to drag fruit
and let's come to about 72. And this is double-tap, are with our camera active
and just rotate our camera a little bit like that. And let's see what that
looks like dragging through. And then let's drag through
all the way till where Robert comes close up to it and it starts
opening the doors. So let's come to about 101. And then with the
camera still active, we're going to go gee, middle mouse button and
we're going to zoom in even closer like this. And we're gonna go G to move our camera off to the
side a little bit. That's being auto kid as we go. So you can see here, That's
what we have so far. Now he's doing his thing and what we don't want it
to start pulling back. So we have a keyframe
here, so let's just click on it one on 101, Shift D to duplicate it. And let's drag it to about here where the whole
thing comes to an end, about 160 from one 60-ish
roundabout here and onward. As the ribosome is going back, it's come to about 218. We're going to double-tap. Are we still have
the camera active, this routed back towards the
robot G middle mouse button. Let's zoom in a bit. And then it'll automatically pan back as a robot goes back. So let's go to frame one. Press the space
bar, and let's see what all of that looks
like at the moment. You can see here. I do apologize. There are some construction
works in the background, but they shouldn't be too long. And there we have it. We now have our little
robot camera animation. Let's quickly add in
a focal point here, so we have some nice soft focus in the background, I guess. So what we're gonna do now
is we're gonna make sure to turn off our auto King. We don't want that
causing any issues. Make sure that
buttons off and we're going to now give our cameras
something to focus on. You could choose
anything but having an empty or a dummy
object is ideal. So we're gonna go Shift a and we're gonna go to
our empty options. Let's add in a sphere. Let's go to our right orthographic
view by pressing free. And if that, Let's go G and move it forward to about
where the diamond is. We're gonna hit S
to scale it down. Now this is simply
going to act as a point for our camera to focus. And
let's select the camera. And let's go down to our camera settings
and we're gonna enable depth of field, come to the drop-down, click on the eyedropper and then
hover over that object. Empty dots are free
and left-click on it. And now that's the focal point. If we now press Z
and he got rendered, you're going to see
there's a little bit of soft focus in the background. But if you take
this f-stop value and you make it
something like 0.5, that becomes much
more intensified. So let's leave it at 0.5. But what you can actually
do, select it empty. And just as a test,
Let's come to about 140. And just as a test,
Let's just go G and in Y and move it back
and forth from the scene. You can kinda see if we remove that where
the focal point a. So it's just like a camera. So what we're gonna
do is we're going to have this animated. So we have a nice focus
where we want it. This is really
going to help with the animation and blend
things together a bit. It also makes the actual
character or subject matter that you're animating pop out from the environment
or the background. So we're going to come
over to frame one. Frame one, we're going to have that empty right over here
by the pipe and want to go, I am going to insert a location. We have that done. We're going to drag
over that keyframe, this added in Shift
D to duplicate it, drag that to 280. So now it's going to end and
start in the same place. Then we're going to drag
for animation, like so. And just as our little
robot pops up here, what we're gonna do
is we're gonna go, I, in fact, maybe just a little bit before that
come to about 26. I'm gonna go, I insert
a location and then drag up just as a robot
pops up and it comes down. And then we're gonna go G and move it over to where robot is, and then G and move it
back in the scene like so just to where it's right
in front of the robot there, I'm gonna go i and
insert a location. Here's what's going
to happen. If you can now go to Z and
then go rendered. At first it's going
to be focused on that thing standing out to pipe. Then just as a rubber pops up, the focus now goes
to our little robot. And as it's coming
up to that diamond, what we wanna do at about frame 100 is why we have that
empty still selected. We're going to go, gee, why? And move it forward
towards the front here where the focal
element is the diamond. And we're gonna go and
insert a location keyframe. Let's press Z,
Let's go rendered. And now you can see
what's happening there. And it's focusing a little bit
too much on that Diamonds. Let's go up to frame 140, or maybe even frame 120. And let's just quickly
fade back to the robots. We're gonna go G and move it back towards the
front of the robot. So it's nice and in-focus
and we're gonna go i and insert a location. So you can see here, just as the camera kind of the
robot comes up here, it's switching focus to
the diamond for second, and then back to our robot. And that's kinda what
would happen with a camera as things are moving around and
cameras auto focusing. This is something
that is trickery. It's not something
we're trying to imitate as much as possible what an actual camera would do. But now we're going to
just leave it there. Let's come to about
106 in frame 106, you're going to
go, gee, why maybe move it for just a bit? Then go, I insert a location. And then as the little
robot fades back, Let's just come to about 186. I'm going to go into the
location again for that. And then just at about 208
is going to quickly jump, focus and it's
going to sharpen up again, right where the robot is. I'm gonna go, I
insert a location and let's just leave it at that. Okay, then just goes
back to where it was. So one thing we're gonna do now is we're just going to press Z,
we're going to go rendered. And then we're going to save and make sure to save you
some cases crashes, and this is quickly play. Our animation. Blender might go a little bit
slower, a little bit laggy, but we're just trying to see
what this all looks like. Okay, that's looking
really good. Okay? So what we could do over
here, maybe at 180, this will actually grab that and we're gonna go
G and just move it more closer to the robot
and go into the location. This is something
where you guys can use your own artistic license, try and make it
something that you think visually helps with
the actual scene here. Also the advantage
of having this, as you can see the
background here, that's kind of a bit out of
focus so we don't really get distracted by
that environment. It doesn't have to,
we're going to have to put a wall there
to block that out. So it kind of just cheats
a little bit there, which is really cool. Now one last thing I
mentioned before we go into the final part is this. If you actually look
at these doors, these doors here are
actually working with a procedural material that is being applied with generated. It's generating it
over the object. It's like a box projection, which means it's not using the UVs of the actual geometry. And because we're using
a shape key for that, to open up, it's looking at it and kind of like a bounded
area, if that makes sense. So the actual shape key is just moving around our existing
topology between two, between the basis and
as open door shape key. But it's not,
doesn't have any UV. So what's happening is
the box projection is still staying in the same place. And that's why if we actually drag through here and
there's doors open, you can see that even
at the doors open, this texture stays in the
exact same place because it's being applied in fangled quickly just
go into the shading, just I can explain it. If that material, if you go over here to the texture
coordinate is being projected on the object
into the vector input. And it's all a box projections. So if that's a little
bit confusing, just study it out
a little bit more. Look online about textures and proceduralism and
you'll understand it. But what we could do to fix that, and I'll
quickly explain, is just come over here to
a material's properties and we have this orange
paint here on this door. Click on this
little number here, that's going to make
its own material. Let's just double-click
on here and this is call it orange paint underscore door. And now all we have to do is quickly go into
editing workspace. This is now its own material
gun to a front view. And with doors selected Cisco, you answer scoped
project from view. Select it over here
S to scale it up. You can actually come here
and press Z and then go into the material
preview and just scale it till that projection looks like it's the right scale. In fact, it actually going to
see anything till you come. In fact, let's just scale
it about this much for now and just place it over here just so it's about the
same size of the texture. And we're going to quickly go
into our shading workspace. And let's just come
to that new door, underscore paint and
let's just change all of these methods, projection methods
here from Box to flat because we're
using the UVs, not like a bounding box. So we're gonna go to each of
these textures individually, just changed it to flat
projection, like psi. Okay? They're all now flat. Now if we go z and
we go rendered, we can see that looks
quite horrible. But we also need to
come here and take the UV from the texture coordinate and plug it
into the vector here. Now that is better and the
scale there seems okay, So now if we go over
to the UV Editing or our layout and we
drag for animation, you can see the textures
now go along with that. Now it's actually is mirroring exact same
with the bottom. So you can see it's just
a mirror because this is actually existing
as a modifier, not an actual piece
of applied geometry. But we can get away of debt
and people shouldn't notice. In fact, this extra step
here is actually optional, but I thought I teach
you guys just so you can learn a thing or two about
these little issues. But for now I think
we've done enough in this touch-up part. In the next part where we're gonna be doing is
we are going to be animating,
rendering these out. And you're going to
have a final animation that you can share
with your friends. And I'm definitely encouraging
us to build upon this, make it your own, try some different
animation techniques and see what you can do. Thank you for watching, and I'll see you
in the next part.
13. Final Rendering: Welcome to a very exciting part. This has been quite a few steps we've been going through
in this Skillshare course. But what we're gonna
be doing now is rendering out our
final animation. And if you've made it this
far, congratulations. This is actually a lot
simpler than you might think. We're just going to be pressing a few buttons pretty much. Once you're sure you're happy with everything,
what you can do. So you can go over here
to your Properties panel. I'm going to get to
the output properties. Anything that has to have
outputting something, it lives right over here. We're then going to go over. And you can at this point
choose your format. And most of you are probably
familiar with resolutions. You get Hg for K2, K. And here you can
do whatever you want. This percentage
here, essentially, at the moment it's
1920 by 1080 and it's just saying we're
gonna do a 100% of that. You could technically
take that up to 150 per cent, make it bigger, or you can just
leave it at 100%, which is what I recommend, and then change
these resolutions. Now a little handy tip and
I'm not gonna do it here. Maybe it's a bit of
homework for you guys. But if you change this
resolution to something small or you drop down this percentage,
maybe it's like 25. You can actually render
out this animation had renders it a lot faster. So you get a little
preview animation and then you can decide what
you like, what you've done. And if you need to make
changes, you make it then before you invest
the time and energy into rendering out big formats or something that has
much higher resolution. And that can save you
a lot of headaches. So that's a little thing there you guys can
try out for now. I'm going to leave this at 100%. I'm going to leave it at
the default resolution. We've been working at
24 frames a second. You could change this,
but if you change it now, blender isn't
necessarily going to automatically update
the keyframing, so things are going
to look really fast. You'd have to change that first, but let's just
leave it as it is. And the frame rate here, that is what we already said. Don't touch that. Now one thing to keep in mind, as we have been adding in keyframes from the
beginning and the end, that data exactly the same first and the last keyframe
or exactly the same, which means we're going to
get what's called a step. And that step is essentially going to give us a double frame. So there might be a
little bit of a pause, but at 24 frames per second
of an animation like this, we're really not going to
notice that double frame. If you have a really fast-paced, short little animation in
some situations you can note, notice that double frame. So somebody might
be aware of this, but I'm not going to
be changing that. So just leave it as
that it's not gonna be dropping or adding a frame. And then over here
we have the output. Now this is right-click
on the folder and you can select anywhere on your
own personal computer. I'm gonna go to my desktop. Click Accept. Once you have that destination, what you can do now is you
can get your file format. Now, some of you may want to choose to do a PNG,
which is the default. So it's gonna be imaged
sequences that are gonna be exported to your location. And then you can take
those important to Adobe or whatever
programming like to use and compile them together
into an animation that gives you a little bit
more control and security. Because if it crashes halfway, then at least you can start from where you are
if they're sequences. But if you actually choose
something like a video format, then you kind of stuck having to re-render it if
anything crashes. But because we're
working with EV, even with a mid-range computer, you should be able to render
this out relatively quickly, even if you do do
a video format. So I'm gonna go the
changes to FFmpeg video. And then you can go
to your encoding. And under your encoding, this is where you choose
your container type. By default, it's set
to mattress soccer, but we're going to take
this and make it MP4 peg, which is essentially an
MP4 as we all know it. And that's in my opinion, one
of the better ones to work. Or if it's really stable, renders out quickly, you can
change the quality here. I just like to
leave it at medium. I think it works fine. And once you have that all set, you can go to file, and you can go save,
and you can go render. And this is the exciting bit. Have a bit of a pause. You can now click
Render Animation. And once you do
that, it'll render it out to your destination. So go ahead and do that. Have a ton of fun when you see the final results
shared with people. Keeping in mind all of
these blend files that I've been making as we go. And of course
they're all going to be in the resources folder. So if anything has
been confusing, just open that up, make sure to look at it and there'll be a
big help to you. I'll see you guys in
the final outro video. I'll give you a few more tips
and encourage you guys to do some of your own
personal projects so you can actually build
on what you've learned. But yeah, this has
been really fun. And I'll see you guys there.
14. Outro: Congratulations, you've now finished the Skillshare class. I hope you guys have your
own little robot animations already and finished. And it's at this point
where you're going to do the more important thing. And this is where I encourage
you guys to actually build on it yourself with
your own personal project. See what you can do. You guys can take this and
you can make it your own. You can tell a different story. All I wanted to do and to Skillshare class is
teach some basic ideas. Stuff like making the
lovable animation, how to use some different tools. But it's up to you guys
to take that and make it your own personalized things. So you can try changing the
animation a little bit. You can try different lighting. You can even design
your own robot. You can sketch out
some basic ideas. You can take what you already have and build on top of it. I'd really like to see
what you guys do as far as projects go and what we'll do in the project
resources folder. I'm gonna put a folder in there and it's gonna
have some stuff in it. I can give you guys some ideas. What you can do
with your project, what you can try out, some of the different
things you can do. And that's gonna be
really exciting. So once again, a big
thank you from me. Thank you for
taking the time and keep on learning and stay safe.
 PIXXO 3D, 3D Character Artist, MoGraph Teacher