Transcripts
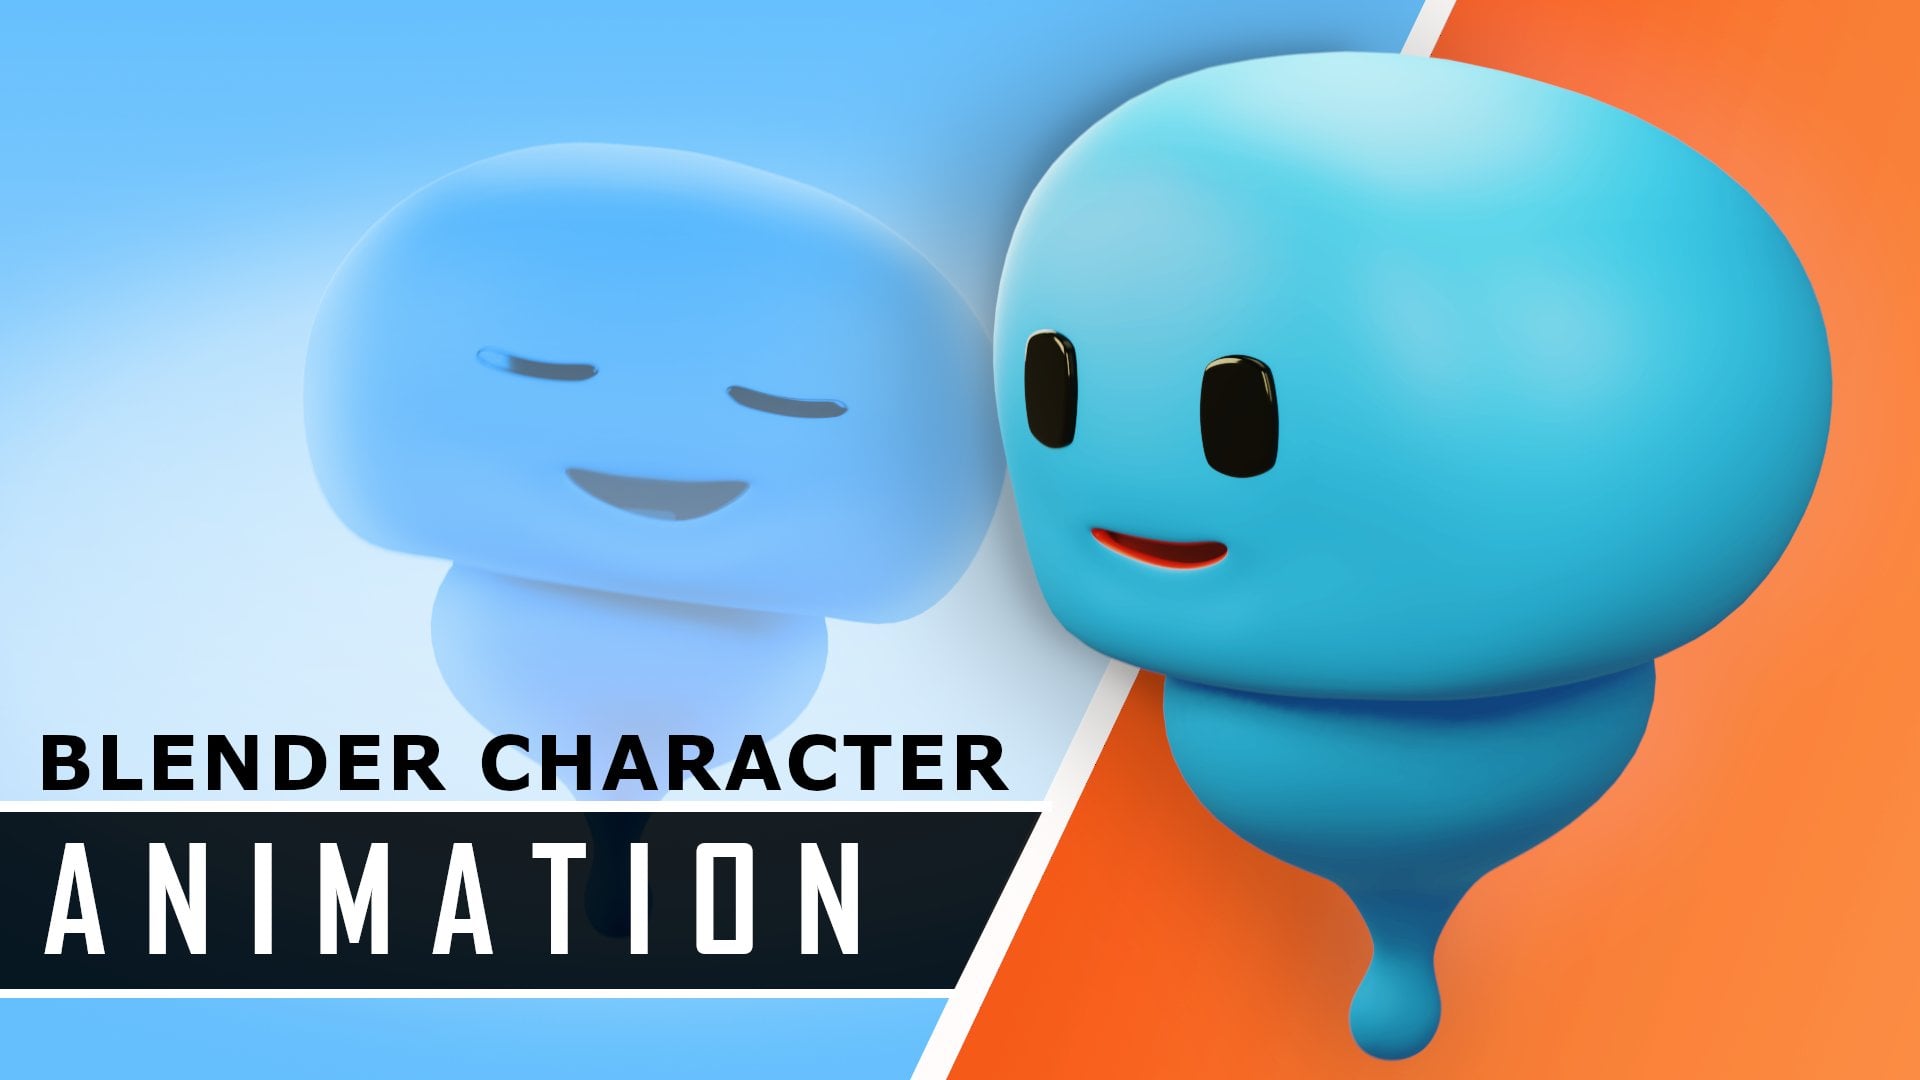
1. Welcome To The Course: Hello there and welcome to my complete character course where I'm going
to be showing you the complete process
from concepting all the way through to
final rendered animation. How to make this adorable
character in blender, which is a free and
open source software. Now if you're not familiar
with Blender or Friday, you can watch some
videos on Skillshare that address it from an
absolute beginners perspective. But if you already know some
of the basics of Blender, like the user
interface, navigation, and just some basic things
you should be able to follow along with this
course quite well. And I wouldn't be
including all of the different resources
and blend files. So you can see all of
the different stages, opened them up, see how I
did things if you get stuck. So if all of that in mind, I hope you guys
are going to enjoy this character
production workflow. Like I said, I'm
going to include all of the different processes, everything from
modelling particles, shape keys, animation, and
final rendering will be in this course and I
really look forward to seeing what you guys can do. So let's get right into it.
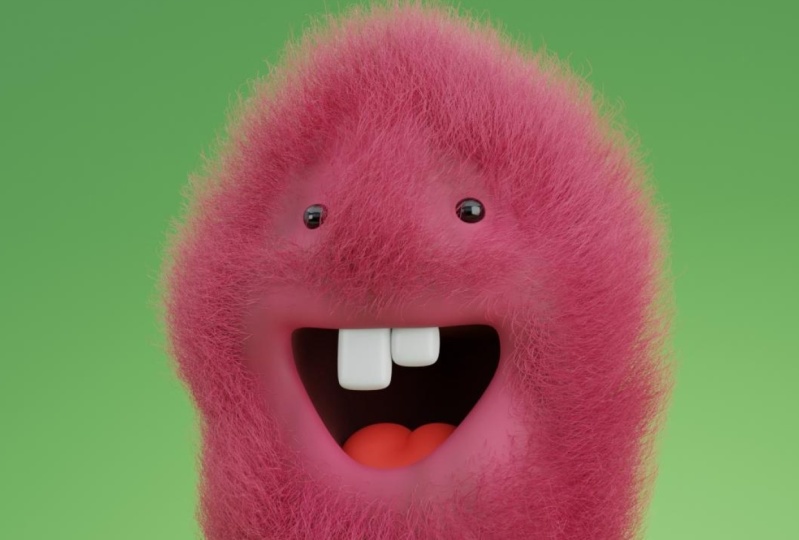
2. Model Sheet Overview: I'm just gonna do a quick
overview of my model sheet. If you don't want to draw a model sheet and
he just 20 years to one that I'm going to be
providing in the resources. Go ahead and do that. If you want to watch,
go ahead and watch. I'll just do a quick
overview and then we'll get into the next part. The model sheets are quite simple and you don't have
to go overboard with it, just keep it really simple. There are a few ways I like to do with personally and that's using either GIMP or Photoshop. Those image manipulation
programs are awesome. If you don't have
auto want to dozer, you don't have a stylus or digital pen or
anything like that, even just drawing out a simple idea and in taking a photo of it and sending
it to a computer, that is also fine. Don't over complicate
it, just keep it simple. So I was going to quickly
show you just an overview of what I did for this
particular project. I just went and opened up. So I've got that
on the internet. It's a free program
and I just had a simple background that I
added in with a bluish color. And then I added my first layer, which are essentially
I just drew a front on simple 2D image of my
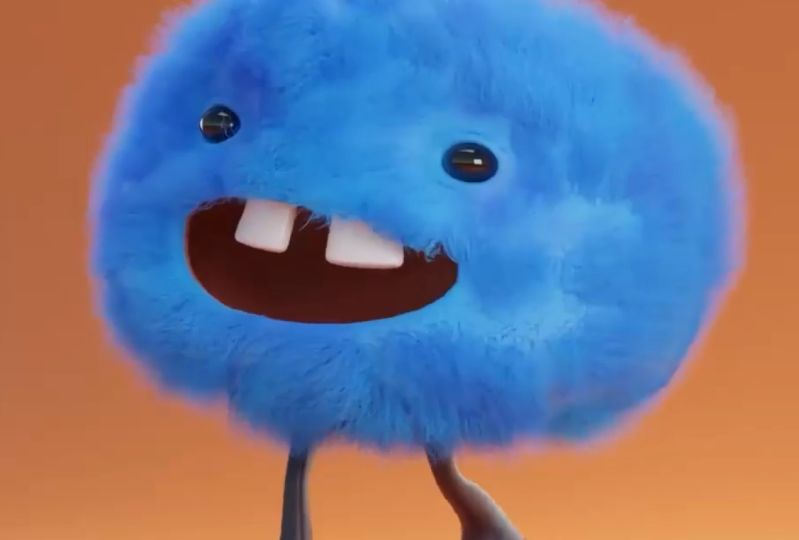
character concept. Essentially, if you
really look at this guy, He's just a bowl, pretty much just a
circle of thing. We have a little bit of
check some detail there. Really basic math, two teeth
and just two eyeballs. I mean, you really can't
get simpler than that. It's just like grade school
level drawing, very simple. And then I just added
these two little legs now just to help with symmetry. And this is not something
you have to do, but I simply just do 1.5 of it. And then I just duplicated
over deobda slide. So you don't even
have the oldest, longest you have
half of a character because we're working
with a mirror modifier, you only really have to draw half of whatever character
you're working on. So that is the front one. And then simply, I drew
some reference lines and reference lines or
what you can draw after you've drawn
your first image. Essentially, you're going to
find points of reference. In this case, I just took Ahead the bottom of the body and
just somewhere into math, let's talk what a mouth,
some basic points where the eyelids might
be or the eyebrows. We had a nice maybe to
bottom of the feet. So just basic points
of reference, whatever you feel you need. I just drew two lines out and then that gave
me some reference of where I should draw
my second side image. I've just created
a new layer and I just drew the image
from the side. And once again, I tried to
just keep things in line. So where do your eyes
would roughly sit? That's where half the eyes and where I have to browse.
That's what a browse set. And you can see the mouth, same kind of thing. You don't have to be
perfectionist about it. You don't have to get
it exactly right. This is just a really simple way to do it and I'm not
even a 2D artists. So if I can do something this
simple, You guys can too. So what I'm gonna do, I'm going to provide
to this file for you guys and
you can edit it, maybe erase some things, draw things a little
bit differently. So it's going to be in
the resources folder. And I'll also include the exported version
of this as well said, a PNG that you guys
can use as wealth. So just a quick overview of model sheets and how I approach it for this
simple character. And we'll get into
the next part.
3. Scene Setup: So in the next few minutes
I'm going to quickly show you guys how
to set blender up for reference images and how you can make things a
little bit simpler. So I'm using Blender
free point O to point of recording
this tutorial. And like I said, this is not an absolute beginner tutorial, but a real quickly
cover a few things. And we're going to be
going to our front or for graphic view by hitting
one on a number pad. If you don't have a number pad, you can simply go to
Edit Preferences. And then you can go to Input. And under keyboard you
can emulate number pad. And then just a
default one to 0 case it's hitting the top
of your keyboard will act like a numpad. So it's just important that you are in your frontal
graphic view. And what you can do is
you can simply find the provided model sheets that I have included with this project. So it's just model sheet dot PNG and you can grab it and just
drag it into the viewport. Make sure they're not
drag it on top of a cube, just drag it somewhere
in the viewport and little place that in there. Now what we don't want when you drag in a model
sheet is for it to be really small compared to the default cube
or really large. So what we're going
to try and do here is just have it around about here. So if you move the image showing us select
the image here and hit G to move it and just move it behind a cube and it's almost
about the same size. So if the image now inside
of the view port here, well, we're gonna do is
we're gonna go G to move it. And what I like to do is
take my character and have the fate of the reference
image sitting on the floor. So you can see this red
line here and a front view, that's our red axis line. And it kind of gives
you an idea of where the floor sitting. So we don't want our character over modelling it to
be sitting the loaded, though it doesn't really matter, it's just a personal
preference because eventually you can just
move the whole model up. But I like to just get a
roughly on that spot there. And you can follow
your red reference, your reference line if
you drew one underneath your feet and just kind of
see if it all matches up. So if you following
along with mine, yours should look
pretty much the same if you're using the
same model sheet. Now one thing you don't want
to have a model sheet is an intersecting with your cubed that you
couldn't be modeling with. In this case, we are going
to be doing box polling, so we'll be using
the default cube. So with that plane active,
we're gonna go, gee, why and move it
back in the scene just as long as it's out of
the way of our cube here. We're also going to go gi X and a front view again and
just move the model shoot over till our character sits in the middle of our scene here, once again, you can
look at the axis line. So you can see here's
the z axis line right in the front
of graphic view. And on your character is make
a middle reference line. Don't be too fussy about that. As long as you have it roughly in the middle, then you know, you have symmetry and just gonna make modelling
a little bit easier. So you should now have
your model sheets set-up for the front view. What you can also do is go to your top view by hitting
seven on your number pad. And you can go Shift D
with that plane active G, and then move it or just shift the and just
move your mouse, it should move it and then just left-click about here
just to place it. And then what you're
gonna do is you can go our Z 900 and you're
gonna hit Enter. So we've just rotated it on
the z-axis by 90 degrees. You can also hit N on
your property panels. Go to Item and with
this plane active, you should see here under
dizzy it is set to 90 degrees. So now what you can do
is you can hit afraid to your right off
of graphic view. So free on your
numpad and the feet should be the same because
it's the same model sheet. We don't have to adjust the
height of the side image, but we are gonna go g of y
and just move it forward till outside reference is sitting roughly where our default
cube is in the middle here. So we don't want it too much back or too much at the front. But if we also don't
want it to be right in the middle of ALC cubed that we're going
to be modeling with. So just keeping it out there, you should have a nice
side reference image and a nice front
reference image. Now one thing I like to do just to keep things a little bit organized is I like to
select my reference images. And within both active, I'm going to hit M. The M
and N Go new collection. Didn't just call
that collection ref for reference and then hit. Okay. And you should see under
your scene collections, there should now be
a collection called href and you can always
hide that if you need it. I just can make
things really handy. So you can just drop that
down to minimize it. And this is just the
default collection that still has to cube the camera
and the light and that. So you can just
minimize that as well. So that's how you set up a scene in blender
with model sheets. Now if this was a
little bit complicated and you don't want
to set this up, uh, we'll be providing this
startup while so you guys can follow along exactly
the way I'm doing it. And this is going to make
things simpler for you as well. So just check that out in a
Resources and we'll get to the next part where we start
doing some of the modelling.
4. Model The Body Part 1: So if you haven't already set up your own scene in a blender
from the previous part, what you can do is just
get the starter file that's going to be available
in the resources folder. So just go ahead, download that and open that up and
you can follow along. So I have my screencast keys enabled here on
the bottom corner. So you guys should
be able to see the keys that I am pressing, which should be quite helpful. So what we're gonna
do is we're going to start to move out default cube. So if the default cube active, so by left clicking on it, make sure your front
orthographic view, once again by hitting on
one on your number pad. And just to get started,
we're going to hit Z on our keyboard and then go into wire-frame by clicking on it. And if the cube active actually come to your collections and
just come to the drop-down. You should see that
the cube is active. You're gonna go G, z and
restricted to the z-axis. And you're gonna move
to cube up tails in the middle of the character. You're then going to
go S to scale it down. So let's scale it
down about that much, just getting it roughly about
the size of the reference. We're going to go Control a or Command a and just apply
any scale if we've scaled it in our viewport
and we're just going to hit Tab to go into edit
mode with that cube active. Or you can just come up here to this option here and change
it from object to edit. So inside of edit mode, what we're gonna do
is we're gonna go Control R or Command R. And we're just gonna see if
we hover over a face here, a yellow line appears,
just left-click twice. And then what you can do,
just going to click and drag and just select the
left side of vertices. And you're gonna go x
and just delete dice. So in your front view, you
should just see half of a Q. Now the reason for this
is quite important. We're going to go to a
Modifiers tab Add Modifier, and let's give it
a mirror modifier. Essentially anything
we do now on decide to gets mirrored on
the x-axis on the outside, which saves us a lot of time. Now one issue you're
gonna run into, if you don't enable
clipping over here, if you were to move to mesh, it'll just pull apart. So what we're gonna do
is when an able clipping and of clipping enabled, it should all stay together, which is really important. So we're just currently
have a cube, right? It's not really a character. So what are we gonna
do to fix that? So in wireframe mode, so z wireframe, I'm going to click and drag and just
select the bottom parts. So these ones here,
I'm gonna go G, z and at least, and at least take them up to the
bottom of the body here. We're then going to
grab these birds here. So you left-click and drag just, just like these two in a corner. And I want to go G and just move them up a little
bit about there. And we're going to
do the same thing with these ones here. Click and drag, select
those to bring them down. But still we don't have enough geometry to work with here. So what we're gonna
do is control R or Command R and add in
another loop, cut, double-click, click,
drag, and then select these verts G,
and then move them out. Click and drag, select
these bottom parts and then G, and move them down. So now I can see we
fill that out quite nicely. Then worry
about the side. It will get to that. We're going to now
come over here, hovering over one of
these edges control R or Command R again to
have the Loop tool. So you can see the yellow
line double-click. And this time what we're gonna
do speck in a front view, we're going to click drag and just select these
two verts and end. And we're gonna go G and just fill that out or bring
it out a little bit. Select these in the middle, bring them down to where it amorphous just above the mouth. Select days to bring him there. And you can see we're
filling in the space. So we're gonna come over
here, Control R again. And now we're going to
add a loop cut here. So just double-click and then double G and just slide it down to the bottom of the mouth. Click and drag to select these
vertices outside and then go G and then just
move them out. So just starting to form the
rough shape from the front. And then let's come
over here where the eyes are control are, you should see a yellow line
appearing in double-click. And then we've added that
in when it come here. Now control are over here and
Control R over this edge. Double-click against. Now we've added in all of those loops. So from the front, it's starting to look at k. You can say it's
sun to fill out, but from the side it's not looking at anything
like it should. So we're going to
hit freight to going to a right orthographic view. So free on a number pad. And I'm going to click and drag and select all
of these adverts. And we're gonna go, gee, why? And we're going to move
them back to about where the nose and
the lips would be. And then what we're
gonna do is we're gonna select the top one, just these top ones
we're gonna go G and just move them back. More. Double-tap are just
a slightly rotate them. So double tapping are just rotate them a little
bit like that. Then select these ones
G and move him back. Select these ones G
and just moving back, we don't want to
move up and down which one to move him back. Saying with these ones,
just move them back. And then the same
at the bottom here, describe some of these ones. Gee, why moving
back a little bit, double-tap are or just hit R by itself and the right view
and just rotate it a bit. So it's not looking that good at the moment,
but we're getting, it's getting too, is getting
the basic shape established. So what we're gonna
do is back into wireframe and decide
we're going to add some more geometry is
going to go Control R. You see a loop appears, double-click, double
genius of slides. We're going to
slide it up a bit. And then now what
you're gonna do, we're gonna select
all of these verts. I'm going to do the
same thing, g, y, and move him to the
back a little bit more. Then just select these top
ones so you can rotate them. G, moved them in a bit, select the top ones here. G to move him forward are
two of our tide of it. And you guys can
get the idea here. So we're going to select
these bottom ones are R to rotate him a bit, G to move men, select the very bottom one's G, move them are hidden. And you can see
we're just filling in that space now if we hit seven to go to a
top orthographic view, and we're gonna see
it looks two cube, so it's a bit too boxy. So what we're gonna do, if we come to one of
these corners here, these edges, we
can go Shift Alt. And it doesn't matter
if you're in Vertex, Vertex like Marge's going to
go shift all told him in and then left-click on an edge and that'll edge select
that whole edge, go to a top view again
by hitting seven and then enable your
proportional editing. Come to Georgetown and
make it connected only. Now what we're gonna
do is we're gonna go G and a top view. And it can roll the
middle mouse button to increase or decrease
the full off. So we're going to roll it down, some rolling to
middle mouse button while I'm moving my mouse. And we're just going to
bring that corner in. So it's not a sharp and let's do the same
thing at the back. I'm just going to
de-select everything by hitting a twice. Then we've got Shift
Alt and just left-click on an edge to loop, select it. Once again in your top view, hit seven to go to a typographer graphic
back into wireframe. And then with proportional
editing still enabled, you can go G rolling middle
mouse button if you have to, but also move your mouse
and just bring that corner in a little bit just
to round that out. And you can see we're starting
to develop that shape. So we need a little bit
more geometry in here. So we're gonna go Control
R over this edge here, but we're going to
roll it two times. So we're just going to roll
down middle mouse button. So Control R and enroll and
middle mouse button just once to add in two and then double-click.
And now we've added that. And so what we're going to do to smooth things
out a little bit. So we're going to just
find out this table f proportional editing. We're going to hit a to select
everything and we're gonna go over to this tool
here called Smooth Tool. By the way, if you don't
see the tools that you can just simply just hit
T on your keyboard. And it'll bring that up. So just click on
the smooth tool, then come here and click
on the little gizmo and just drag it. I left-click and drag and
hold a smooth things out, then smooth it too much,
but just a little bit. And now you can see we have
a much better looking shape. It's a little bit off. But what we're gonna do
now is we're gonna go back to off
proportional editing. Just go back to the
move tool and go into wire-frame and from
a front view again, so one on a number pad to
kinds of your front view. We're just going to select
these vertices over here. We're gonna go G, rolled and middle mouse button to
control the fall off. And we're just going
to bring to checks out and anywhere where
it's not quite right, just select dice
verts, G to move it, roll the middle mouse button, proportional editing
enabled and just adjust accordingly until
it fits the reference. You can do the same thing
and the right view. So hit Frage going to
write or for graphic. And you can select verts g, y, move them forward until
you fill in DEI spaces. Gy and maybe move these
verts thing with these ones. Just filling in those spaces, if anything is a
little bit too sharp. So in this case you can see that doesn't look quite right. You can just select
this vertex G and just move that
whole vertex forward. And just make things
look nice and pretty. So you don't have to do
it exactly like undoing. We're just moving things out. And at the back here it's
not looking too smooth, so we can just left-click and drag to select all of
these verts at the back, go to S Move tool again and
just lightly smooth them out. Then just select verts again
and just move them out. So just selecting these, selecting d's move mouth. And that's how we
can very quickly make the basic shape
of our character. Now, we haven't made
them yet, w i's, but just having the basic shape established is already
a big part of it. So make sure, especially
here at the front, did you select these verts here? Make sure to kind of match,
but don't worry too much. We're going to, we're
going to work now on the mouth and add a
few more details.
5. Model The Body Part 2: So in this part we're
going to continue modelling the body. So previously we just
made domain shape. Now we're going to
finish off by adding in the mouth and the eyes
and a few things like that. So just follow along with me and if anything is confusing, just look at the
provided example. Blend files that come in
the resources folder. They're going to be a
really big helps you guys. Once again, I do have my screencast keys enabled and
that should be a big help. So you can see what
keys I'm pressing. So while we're in edit mode, we're going to make
sure for now that our proportional editing
as disabled up here. And also just make sure you have the Move tool here just in case there's some times when you have some of these
tools here are enabled, you can accidentally
do something and that is not
what you wanna do. For example, online, make a cut or a bevel when I'm
trying to move something. So just having it on the move to learn just makes things
a little bit safer. So let's hit Z and
let's go to wireframe. And let's start by
making the eyes actually before we did a mouth. So we can see here that we don't really have enough geometry. So if I just go z, go wireframe, you can see
it's not really enough here. So what we're gonna
do over here, what I should be able to
go Control R or Command R. And once again
going to add in and not a loop, and it
would come up here, control are adding another
loop here, double-click. And now if we got to have front view and we hit C
and we've got a wireframe. We can see we have a little bit more geometry to work with. So one simple way you
can get started with DI is to roughly
see where it is. So in this case it's there and a closest vertex is going
to be just one over here. So if I select that vertex
and hit Z and I go into wireframe and able to
proportional editing now. And if that vertex active hit G and then move it so
G to move a role the middle mouse button
and just move all of the geometry and get that the
vertex is roughly or VDI. Like say, okay, I know it doesn't make too
much sense at the moment. We're just trying
to get a vertex. What do I do it like that. Now, don't worry if the geometry
has moved a little bit, but just like that. So we've one in the
middle of the day, you can go Control
plus or Command plus. And what that's gonna do,
it's gonna grow to selection. So the command plus
or control plus, now you're going to turn
off proportional editing. And now if all of that
activity you can go Shift Alt S, the Shift Alt S. And if you move your mouse now, you'll round that out. So we're gonna round it
out just a little bit. And then we're gonna go eat
to extrude and S to scale. So E and an S, I'm going
to scale it down a bit. Hit Z to go to wireframe. And in your front view, hit S to scale and
just scale it down G to move it and roughly
place it over DI. And what you can do now is
just individually select these verts and just
round it out like that. And now we've made
the eye there. It looks like K from the front, but from the side, it's
not where it needs to be. So if we got to decide
by hitting free and a number pad and we're
going to wireframe. You can see the eye is
the bird needs to be. So what we're gonna do is just select that middle vertex and the eye control plus to
grow to selection once. Then in your right
orthographic view in wireframe enabled
proportional editing. Then go gee, why? And move it back till
it's where that eye is. Bullying middle mouse
button to control a full off if you need to, and just bring it over there. Now what you're gonna do
is you're gonna select this vertex in the
corner of the eye. Just this one are right there. And you're right
view you're gonna go G and you're just
going to move it back. And you can also select
the furthest down here. Just move this cheek
back just a little bit. And then you can select the
corner and inside of the eye. So this one right here. And then your right view, you're just going to hit G
and H zone forward a bit. So we're just trying
to get the eye socket to line up with our
reference here. And then we're also
just going to select this vertex here and a forehead. We're going to move it
forward a little bit. And in anything that has kind of gotten lost in the details, we can just correct that. So select these verts here
where I tell them a bit, just bring it in and
we're just correcting anything that doesn't
look quite right. Grab the nose here, just bring it forward
a little bit. Maybe bring these verts up
on the mouth just a bit. And you can see we already have that working
out quite well. You can now select the
middle verte here and just hit X and delete that part. So now we have that sun to form. We don't have enough geometry, foot and mouth either
its environment. So I'm gonna come here. Control are adding the
loop that will click. Control R, add an
edge, double-click. And now and you're right, few. Save what that looks like a guy. So we might move to
this corner here. Just select that vert and
just move it in there. Okay, that looks better. And now my front view,
what we're gonna do, we're gonna go
back to our front. We're going to hit
Z, got to wireframe. And now we're going to
select a few faces. So what we're gonna do is
go to Face Select option up here, disable
proportional editing. And we're gonna select this
face here holding Shift, select this one, this
one, and this one. So to select multiples, we're just holding Shift. And then worry if it's not
exact same shape as the math, but we're gonna go E to extrude. So hit E and then S and
just scale it down a bit. And then what you're gonna
do is you're going to hit X and just delete faces. And at the moment it
doesn't look quite right. So what we're gonna
do is we're gonna go to our vertex select, select these two vertex
verts in the corner, go to a right view in wireframe and enable
proportional editing. Then go gee, really
middle mouse button to control a fall off and
just move that corner back. And you can select
these verts here as well just to move down back. And then select this vertex
in the corner of the mouth. So these two down here, and you're gonna go G
and you're going to move them up into right view. And then the front
view, you can go G and you can move them in. Like say, okay, you're going
to select these ones here. Are you going to move them in? And I'm just going into Wireframe when I need
to do is I can see. And I'm gonna move
these ones out a bit and then move
these ones here. And you don't have
to be exact bowling, precisely the modal shape. But just having something
around about here looks right, so if you wanted to
kinda mouth shape here, it's quite open. That's quite deliberate. We want that sort of
shape. It really works, but his character,
but you should see, if you go into the side view, it's not looking quite right. So what we're gonna
do here is if the top lip verts selected
there which can go, Gee, and how? Side view. And we're just gonna move
him back a little bit. Maybe move it just up like that. So all we're trying
to do is we're going back and forth between
these two views. And we're just trying
to make the math work. Now remember our model sheet
is just a rough drawing so we don't have to
try and match it up exactly on both sides. But once we haven't
roughly in place, we're going to come
here to the chin. I'm going to go Control
R or Command R. Double-click to add
in and not a loop. Then an aside view, we're
just going to hit C stood, bring it up to see
Select tool and just going to
left-click and drag. And just like these
birds here on a chin and we're gonna
go G and which kind of move them out while we rolled a middle mouse button
to control it pull off. So you can see now,
we've very easily made the harder
parts of this model, which is to mouth and the eyes. And like I said, you
can still adjust it. So you can Shift Alt loops like the eyes
here, for example. Just adjust them if they've
moved a little bit. So anything that's
moved, just adjust it. So now we have that I made
and we have the math nights. And what we're gonna
do now is just refine things a little bit. So if the I here, listen, I disable
proportional editing. We're going to go control
are adding a loop here. And now what we're gonna
do is we're going to go Alt S, the Alt S, I'm going to scale
it in on a normal, so Alt S and scale
it in on an OLS, just like that and we need
an eyeball for reference. So let's really hit Tab to
go into object mode again. So we want to go back
into object mode. And while we have the
model here, active, which can go
right-click and just go Shade Smooth for now as well. So let's go Shift a, go to Mesh Primitives
and add a UV sphere. And if this UV sphere
we're going to go right-click Shade
Smooth S to scale it, and then G. We're going to
move it up to the eye here. So just place it so it
matches our reference. So just hitting G and moving it and then going into the
right view and then go, gee, why and move it forward
so it matches to reference. So you can see it there.
Now we can select our model again,
having to edit mode. Now let's make some
simple changes. So Shift Alt, click
on an edge here to loops like the inner thigh and into front view we're
gonna go S to scale it up just a bit, move it up. So we want it just to be
around the eye like that. If any of them are sticking in, you can just enable
proportional editing. Select those verts and then move them out a little bit more. So it's very simple to correct those little issues with
proportional editing. By the way, you
can also hit O on your keyboard as a shortcut
for proportional editing. Let's for now to keep it simple, let's just keep
working like this. We're now going to go Shift Alt. Click on this edge
shift loops selected, disable proportional
editing, and then just S to scale it
just a little bit. Then A2 extrude S to
scale, just like that. And then we're gonna
go to a side view slightly, okay, to wireframe. And then E, and we're
going to extrude it in an S to scale
it a little bit. So now we have our
eyelid around it. You can also just select the corner of the
eyelid over here, these two verts enabled proportional editing G and just move it back
in a little bit. And in the corner of the
eyelid here as well, G and move that in a bit. And that's this kind of gives us this cute little cartoony
eye to work with. So I select the
vertex at the top, one at the bottom hit G to move. So all I'm doing is
some just hitting G to move with proportional
editing as I select verts. And this is the kind of shape
are going for. Very simple. And if we now got
to a modifiers, we can also give it a
subdivision surface modifier. And that's going to
smooth things out. So let's quickly tap back into object mode by hitting tab. Select the I. Go to Modifiers, add
modifier, give it a mirror. And in this case we're
gonna hit the eyedropper and select the body
for a reference. And we don't have
to enable clipping. So now just like
the eyeball g, y, move it back just a little bit and you can adjust it
as much as you want. But now you can see we have
that eyeball in place. You can select a
character tab into edit mode and make any
adjustments if you move the eye. Very simple to do so
just something like this is all you need
to do if the eyes, and if you get stuck, just
look at my example file that I'm going to provide and that should help us out a lot. Like I say, I really
was the hardest part. Let's quickly get to the mouth. That is really simple to do. So let's just bring this
down just a little bit more. And what are we gonna do
this is we're gonna make sure to disable
proportional editing, Shift Alt, and then left-click on a loop inside of here
to edge loops selected. The edges hit free to go. You're right orthographic view. And then you're gonna
go E to extrude. And you can extrude to add
just a little bit and S, just a skeletal little bit. And anything i e
to extrude again, you're going to get
to back like this. And then what you're gonna
do is you're gonna go to your edge select option here and have this be a
little bit tricky. So what we're gonna do
is we're just gonna go to a mirror modifier, just disable it into viewport, go back to Solid View. And what we're gonna
do is just select this top edge holding Shift,
select the bottom edge. They're both active
and we're going to hit F and S is going to create
a face between her. Then we'll select this edge holding down Shift,
select this edge. They're both active. I'm going to hit F to fill it. And then Shift Alt, click on this edge
and it'll loop select this little
triangular shape. And when go F and
it's going to fill that, then Control R. And you can see a loop here. So just hover over this edge,
control our double-click. And now if I added
an edge there, and now we can come over here, control are adding a loop here, roll once with the
middle mouse button, double-click and add
in a loop like that. Now, we can enable
our mirror again. And the way we make it hollow and inside here
it's very simple. It's got a face like option. This disabled our
subdivision surface modifier into view port just for now. And we're just going to select the top faces in the mouth. So holding shift,
just select any of the top faces e to extrude and in Z and just extrude it up on
the Z a little bit. And then do the same thing with these and the
bottom of so I'm just holding Shift and selecting
these six e to Extrude, extrude it down S to scale
it just a little bit. And then we're
gonna come in here and just select any
of these at the side. You can also just hit C to bring up the C Select tool
and just select them. And in a front view, go into wire-frame which
can go eat to extrude and extrude to decide as
to scale a little bit. And now we have that. Pretty simple. You can select two
faces at the back here, but holding Shift Control Plus to grow to selection
just a few times. So about that much. And then you can get
to your smooth tool and just gives it
a light smooth. And that's it. That's the inside
of the math done. We can also just come
here to the lip control are adding a loop, double-click Alt S, and just scale out along the
normals, just a tiny bit. And there we have to
map so we can now bring back the subdivision
surface modifier. And there we have it. That is how to model a
character set at this point, if you guys don't have
it exactly right, you can just come
in here anytime you want and just make little
adjustments, correct things. But really, it
doesn't have to be absolutely perfect
to model sheet. It's just there as
a rough guides. I want you guys to keep that in mind as you're doing
this tutorial. Once again, this blend
file will be available, so make sure to check it
out in the resources. So what we're gonna do
in the next part is I'm essentially just going
to show you guys how to model those legs real quick. And within that little part, we're willing to
take a few minutes. I'll quickly show
you guys how to add the teeth as well
along with that. So I hope you guys have
enjoyed this part. It's been fun. I'm looking forward to seeing
you guys in the next one.
6. Model The Legs: So in the last part
we finished off somewhat a modelling with
the actual head slash buddy. What we're gonna do now
is we're going to do the legs and they're
quite simple. So let's start by adding
in a Mesh primitive. So we're gonna go shift a. Let's go to Mesh options, and let's add in a cube. And we have this cubelets
S to scale it down. So just hitting S and scale
it down about that much. And then you can just hit G and move it to the right, the leg. In this case, it
would actually be the left leg, rhonda
character's perspective. But from your right
on the screen. Once you've done that, control a or Command a to apply
the scale for that cube. And we have an active, we're
going to tab into edit mode. And the modelling here is
really straightforward. So make sure
proportional editing is disabled and go into wire-frame. And what we're gonna do
is we're gonna select these top verts
and we're going to go S and just scale
them a little bit. Then just select the bottom
verts and S and scale down. But we're gonna go G and just bring those down to about here. So that's roughly where
our knees going to be when they're going to hit free on a number pad that go
into it, right? Or for graphic view. And we're gonna go G and
just move it forward. And environment, it's
not quite right, but we'll get there. We're now going to
select these verts at the front and at the top. Just moving forward
and in select these and move them back a bit. Now we need a little
bit of extra geometry, so we're gonna go control
are adding the loop here, grab these verts here and
hit G and moving toward, then select these
ones at the back and move them forward a bits which is creating a bit of a bend. Then we're just gonna
select these verts here, R to rotate. Once again, we're no
rights or for graphic. And an E to extrude. Grab these verts here, G and moving forward,
select these ones, G and move in here, Control R to add in
a loop over here, select these verts and
hit G to move them. And move these ones just there. Okay, so let's see what it
looks like at the front. So now we're going to hit one to go into a frontal for graphic. Then we'll select
these ones here. We're gonna go S, x and
scale down when the x, we're going to move up one row. I'm going to go S, x and
skeletal little bit along the X, just to create a little
bit of thickness. Let's go back to my right or for graphic view and a
foots, really easy. So we're gonna select
the bottom verts. We're gonna go E, z
and extruded down and dizzy to where the floor is. And it was simply
just going to select these frontwards here
or the front face. And a right view, we're
just gonna go E to extrude. And we're going to
move its board. And I'm going to select
these top verts. Once again, we are in wireframe, we're going to go G and just
move them down like so. And before we go any
further, let's go to our front view by hitting
one on the number pad. Select all of these bottom
verts like so just these ones. And then we're going to go S, x and just scale it on the X to make it a
little bit wider. We can correct a few
things, but coming in here, Control R or Command R, adding a loop here at the foot. And it went to come here,
Control R or Command R. And just add in a
cut in the middle. And then Control R or Command R over here,
adding a loop here. And then Command R or Control R and added
a cut along here. Not a little thing
that can do is just select these two vertices here, but holding Shift
while you do it. And then we're gonna enable
proportional editing s x and just scale it a little
bit on the X like that. That's just going to make
it look a little bit nicer. We can also select this
vertex at the front here, wouldn't go S, x and just scale that in the
x just a little bit. With proportional editing, say, make sure it has a
little bit of influence. You can maybe select
these two as well, just scale it just to
round that out a bit. And then if you hit 7 or control 7 or Command seven to
go to your bottom. Or for graphically, you can just select these
verts like this. And in our rotate
them a little bit. And then just like these
middle bit verts here, and just move them
out a tiny bit just to create some
shape to that foot. So what we're gonna
do now is we're going to hit a, just
like everything. Make sure to click on
the smooth tool and just lightly smooth it out,
but not too much. And let's just select
these top faces. Hit X and distillate spices. And then just like
there's top verts and move them up a bit as to scale, just make sure to tucked
up into the body there. And now let's give this a
subdivision surface Modifier. Tab out into object mode, right-click and then
go, shades move. And let's go, give it
a mirror modifier. Click on the eyedropper and then select a body as a reference. And now we can see the
legs are mirrored. So if you want it to match the reference little bit better, just go back into edit
mode and just move the vertices around with the proportional
editing is very simple. It's all the same techniques
we've already been using. And if you feel you need a bit more geometry in certain places, feel free to add it in. But I really liked
the look of this. It's cartoony. It's easy to do and it will
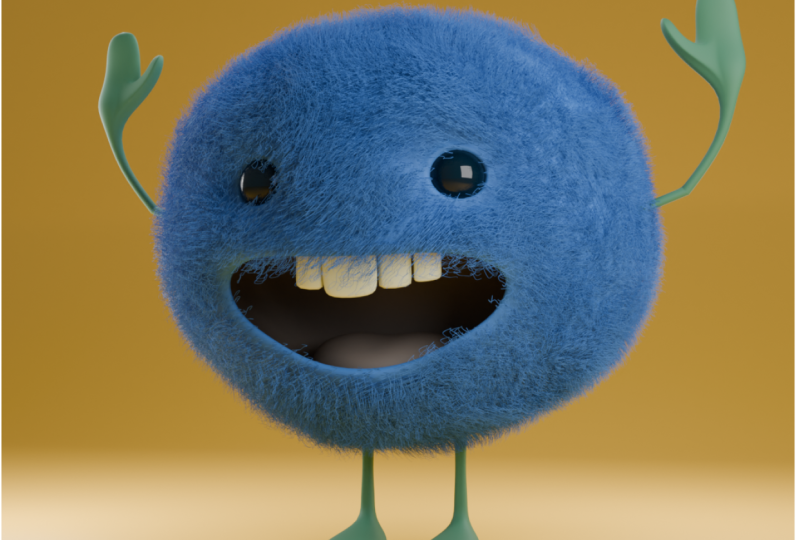
work for what we're doing. So for now that's our legs done. And now let's quickly add in a T if they're
really easy to do. So we're going to go Shift
a to add in a simple cube, S to scale down, and S to scale and
a Z a little bit. And we're going to get SY and flatten it on to
why a little bit. Control a and apply
the scale and then go G and move it
up into the mouth. Country right orthographic
view by hitting free and then move it
forward by hitting G, R to rotate it a little bit. And you can do this
however you want to. You don't have to follow
the way I'm doing it, but just place it in there, our Z to rotate it, just place it right about there. Then give it a subdivision
surface modifier. Haven't edit mode
and then go control our double-click
double G and just slide in an edge loop
and do it again. Control our
double-click that well, gee, light one up. And you can shape the
tooth however you want. It's completely up to you,
but that's how simple it is. You can also bump the levels up over here in the subdivision in. Once you back in object mode, right-click and negotiates,
move it as well. You have a tooth if you
want to duplicate it, instead of coming in here
and giving it a mirror, what I'm gonna do,
I'm just going to simply custom scale it. So I'm just going to
scale it in a view port, command a or Control. I apply the scale and then I'm
just gonna do it by hands. I'm looking in a
mirror because I don't want it to be
perfectly symmetrical. So I'm gonna go Shift
D to duplicate, move on over R to rotate it. And then I'm going to go
our z and rotate it on the Z a little bit and
then G to move it in. So we're just placing it
there and you can make these look a little
bit different. You don't want them to
be exactly the same. Make them a little bit unique,
a little bit different. And that's really going
to help with the design. So go to your right view, make sure it'll make sense. You can spend as
much time as you want and don't overdo it, just for now, place
it somewhere. But I'm happy with that. I
think it's a nice cool design. It looks really cute. And that's pretty much the modelling
for a character Don. We may add a tongue in lighter, but in the next part
we're going to add in a simple little rig and it's
going to be a lot of fun. I'm going to go through
it step-by-step. And this rig will enable us to manipulate and animate
our character. Once again, just keep in mind all of these
blend files are provided into different stages
in the resources section. So make sure to check that out if he gets stuck on anything.
7. Preparing The Model: So I know I said in
the previous part we will do our reading next, but I thought we'll
quickly just prepare the character before we actually get into
the rigging stage. So that's what we're going
to quickly do in this part, but just try and keep
up on once again, all of the blend files are
provided in the resources. So if anything is confusing, especially with the rigging, feel free to check it out
and see half set things up. So what we're gonna do to make things a little
bit easier for us. Our reference images, they sit in their own scene collection, so we're gonna go to that
other Ref collection and just on ticket or even just click
the little eye there to hide it
to whichever one, as long as we don't see
it in every port and it's gonna make things a
little bit easier for us. We're now going to select
the character itself. And what we're gonna do is we're going to apply the mirror now when we plan a mirror
becomes destructive. So what I mean by that, we
can no longer then go in and like extrude something and it'll happen
on the other side. So once we apply that mirror, it's kind of set in
stone, so to speak, and less wheat
delete half the mesh and apply it again, which
we don't want it there. So make sure any little
corrections you want to make waves at topology
now is the time to do it. So with me, I'm just
going to grab the cheek here and just bring that
in just a little bit. So this is completely not something you guys
have to follow. I mean, at this point, you can make it however you want to. Any little details or corrections you want to
make, you can do it. You don't have to follow
exactly the way I'm doing it. So make it look the way
you want it to look, clean things up, touch it up, look from the top,
see if there's anything that looks a
little bit up to you. But at this point, really, as long as it looks
roughly like this, you guys are into in the
right area where Thanks, You don't have to do too much more slowly as it looks like
this, you're pretty cool. So what we're gonna
do is we're going to tab out and we have
just a body selected. We're going to go to
a mirror and go to a drop down and go Apply. And now it's all one
piece of geometry. What we're going to also
do is we're going to come to as sub-divide and
just minimize it, but we don't want to apply that. That's very important. And
we have the eyes here. What we're gonna do
is we're going to also just come to the
jump down here and apply to mirror for
that when a tab into edit mode if
those eyes selected, and then we're going to
select one of the eyes. So select the geometry inside. I'm going to hit P
and you're gonna go separate by selection, tab, back out into object
mode and make sure while you're holding shift
to select both of these. So both the eyes and then type f free or hit F for
you and a keyboard. And then you can type in set
origin and then that origin to geometry and add an origin point for both of
these are in the center. Because originally
when we apply to the origin point for this was sitting over here somewhere. Okay, so now that is all done. Let's select a tape. The tape you can just holding and shifts
like both of them, sort of both active,
then go Control J or Command J to join
them into one object. And actually just
come up here to this collection and just
double-click on that wall. They're active and
just call it tape. And at this point you can
decide if the body's select the body and instead
of having a cube, let's call it body up here. And even the eyes, you can select both of them, just call them I thought l. And this one you can
just call it i dot r. And you don't have
to do this, but it's just good practice to
be organized like that. And I want to
select the legs and the legs once you're
happy with them as well. So make sure any corrections
you want to make before you apply the mirror
that you make them now, any way you want it to look. Instead, at this point, we
do it for you, apply things. Okay, so I'm happy with that. So I'm going to go to my mirror, not the sub div, and I'm going to
go and apply it. And that's now one object we tab into edit mode
as you can see. Okay, so one quick thing
as well we're going to do. We're just gonna quickly add
some placeholder materials, which is not our materials. This is simply our
view port materials. We're not gonna do any sort of material editing at the moment. So just like the body
and just go over to your materials tab down
here, just click New. You're gonna see material,
let's just call it skin. And all we're gonna do is just minimize the surface
here and the settings. Just go to Viewport
Display and just give it a color,
any color you want. I'm just gonna go to
blue, and that is simply just a viewport display. So it's good nothing
to do about rendering. It's just the way you're
going to see it in the viewport just makes
things a little bit nicer. I'm also just going to
select one of the eyes. I'm going to go New, I'm going to call it iss. And I'm gonna select
the other eye. And I'm going to come here
to the drop-down under the materials tab, and
I'm going to select I. And under the viewport display, I'm going to give
them a black color. Now bring the roughness
down just a bit. Once again, it's nothing
but a display color. I'm gonna select a TIF
on a go, new teeth. I'm going to leave
to Viewport, Display us what obviously. And then I'm going
to select the legs. I'm going to go new credit
any material and cold legs. And you can make it
something you want. I'm just gonna go a darkish, kind of bluish purple for
now and not to saturate it. And it's kinda
roughly going to be the colors that we
work with eventually, but it's just place holder
materials for our viewport. And just with the head selected, you can also just quickly
tab into edit mode. And with your vertex like
option and able to select a vertex in the middle
at the back there. Control plus or Command plus, and just keep doing that until
you grow your selection. Select all of the inside
geometry of the mouth. And while you're in edit mode, come here and click on
create a new material. In coal. Click on Assign
net new materials. Now SON inside the mouth. Just double-click on
it and call it mouth. And then come to the viewport
display and just make it a bit darker and give
it some reddish color. So now everything has a place
holder material and we can now get into our rigging
out character is prepped. Well, you had just
switch the legs as well. What you wanna do is you just want to select
them and you want to hit F3 and you want to
type in set origin, and you wanna go set
origin to geometry. That's all we want
to do there. I guess now everything is ready to go.
8. Create The Rig Part 1: So in the previous part, we did our scene preparation and now we're going to
finally make our rig. So try to follow along and
I hope you guys like ours. So what we're gonna do is
we're going to go Shift a and we're going to
add in an armature. So click on armature
and make sure the armature is sitting in
the middle of a character, so your origins should be in
the center of your world. You can check that by
going Shift S and just going cursor to rural origins. So that's sitting there in
the middle is the cursor. Then with that barn active, you're going to tab
into edit mode. So now you can edit the button, but go over to your bone tab by clicking the
little green man. And you're gonna go to
your viewport display. I'm going to change
it from octahedral to be bone, which is bendy been. And in edit mode,
we're just going to select this top knob up here, where do your g, z
and move that down. And this bone here is
going to be our root bone. So we're going to click on
it and we're gonna come over here to this little
bone at the bottom. And up here we're going to
change the name to route. And if this route by an active, we're gonna go Shift D to
duplicate and in z and we're going to restrict
it to the z-axis and we're going to move
it up to here. Then when it's like that top
nub and we're gonna go G, z and move it down. And let's just quickly
select a root bone again. We've had active when ago, Control Alt S. So Control Alt S or Command Alt S will allow you to make the
bone a little bit skinnier, just helps with its
display in the view port. And the same with this one, Control Alt S, and just do that, then select top nub and
then you're gonna go to Extrude and in Z and just
restrict it to disease. And there's an
extruded all the way up to the top of the head. And then you're gonna
go E one more time to extrude and hit C to restrict it to the Z and bring it up and
not a little bone. Click and select that
bone and then go Control Alt S and just
scale it a little bit. Okay, So this bone down
here at the very bottom, select that control alt S, make it a little bit bigger just so you can see the difference. And what we wanna do is we actually want to select
the barn at the top. Wanna go OLTP and we want to go disconnect B9 and Alt
P and clear parent. All that means is this
bone is not going to be connected to the spine, nor is it going to
have any parents relationships with
this bone anymore. When we get into
the constraints, I'll explain that
a little bit more. But what we're gonna
do is we're gonna select this bottom bone here. We're going to make sure under
our bones tab here to come up and its environment we
want to call that hip. And I'm going to click
on this middle bone and we're just gonna
call that the body. And I'm going to click on
the top bone and we're going to call it body IK, say body IK, body and inhibit. And then this one
here is our root. Now, if we quickly go
over here into pose mode and we select the hip
and we go G to move it, and just right-click to let
go once you've done it, so it just goes
back, it just moves, but this bind doesn't go along. But if we select the root
binding guy J and we move it, nothing goes along
with this needs to be bounded controls everything. So let's just hit Tab to
go back into edit mode. And this is select the
hip bone holding Shift, select the root button, control P and then
go keep offsets. And now this hipbone
is parented to this one which is two root barn and that has to overall control. Now later on when it comes
to deforming things, we don't want this bone at
the top to be deforming. And we don't want this
bone at the bottom to be deforming because they
are controlled bumps. We only use them to control out of bones and
move them around, but they're not
actually deforming the mesh of the character. So what we need to do in
pose mode is make sure just like this root button and
on the bones tap here, just guard down and untick to form and then
select the button at the top and then untick
to form for that as well. That isn't going
to be deforming, but this one is going to deform. The body to hip is going to deform that these
two have no deform. So let's go back into edit mode. Add in a few more bones. So let's quickly
make the leg bonds. So we're gonna go Shift a and it's going to add in a
whole new bunch and select that bone and move it over to the side S to scale it down, Control Alt S and just
make it a bit skinnier. And then G to move it down here. But what we're gonna
do is we're gonna select the top nub. I'm going to hit G and
F front of you and just move that down so it's pointing down and then go to
your right view and then G, move it forward. And we want that to be where
our knee is going to be. And you can select
the top of that bone and just place it there. Okay. So from the front
we should see this and from derived,
we should see that. We're now going to select
the bottom nub of that. And we're going to go E to
extrude and extruded down to our ankle band here. And then we're gonna
go to Extrude and extruded that little nub further down into the foot
and that's half foot button. Now we're going to
select this knob at the back here in the middle. And we're gonna go E to extrude and in Y and
restrict it to the y. And that's going to
be a control bind. But what we need to do,
we can just let this control button alt
P and we need to go clear parent and old PE disconnect button and let's
quickly name that barn. Well, we have an
active, so under our buttons tab,
Let's name that. What capital I, k
dot capital L. Now, the naming of the foot two dot
IK doesn't matter so much, but the dot capital L
is extremely important. It can't be comma dot capital L, It can't be little l, it has to be exactly dot capital L because
it's going to look at naming convention when we mirrored disk setup
over to the other side. So what we're gonna
do now is we're gonna select the foot here when you're going to call
it foot dot capital L, once again makes sure it's dot capital L. Select this lower bone and this call it
lower leg dot capital L. Then select this top bone
over here on the leg. Let's call it upper
leg dot capital L. It's very important. And then what we're
gonna do, well, we have that upper
leg bone selected. We're going to hold down
Shift and then select the hip and we're
going to go Control P, make parent, it wouldn't
go keep offsets. And now this bone is
parented to the hip. We're now going to take
the IK bone down here, the foot IK dot capital L and holding shift
we're going to select, while we have that active, select the ringbone Control
P and then go keep offset. So now if we quickly
go into pose mode, what we should have is this
bone down here to root bone. If we click it and go, Gee, everything
should move along. If we select the hip and we go, Gee, that should happen. And if we grab this, nothing's
going to happen because we still need to add
some constraints. So let's quickly do that. We wanted this leg to move around when we
move this IK bone. And the way we do that
is select the IK. And while you're
holding and shift, select the lower leg bone, then you're going to
go Shift Control C. So Shift Control C and you're going to
go inverse kinematic. And then what you
can do is you can select that layer button. And now you can go over here to your bound constraints
properties and see this chain length. You can bump that to two. And all that means
now is that this bone which is the foot IK bone, which has to control
if we click on it and we go G to move it, It's now going to have influence of two bones up the chain. So it's going to control
those two bones. Pretty cool. So by the way, if
you move anything, she's hit a to
select everything, then go alt Z to
undo the moving old are and Alt S just in case you've rotated, scaled as well. But now let's get back
to our edit mode. And inside of edit mode, what we're gonna do is we're
going to select this foot. So this footer.html
and holding shift, we're gonna select the foot IPA. I'm going to go Control P and
when it got to keep offset. And now if we go back into pose mode and we select
that foot IK and we go g. And we also rotate that foot goes along,
which is really good. So just hit a to
select everything, all G, hold Alt S and
that sets it back. Once again, this is an IK,
which is a control button. So what we wanna do
is we wanna go over to our bones properties
and just untick to form. So the foot that can have it to form the lower leg
and upper leg, they can have two forms, but not the IK that cannot
have a deformed. So each one of these
bonds here should have a dot capital L
extension at the back, so we can eventually mirror them over automatically
to the other side. And it also has good benefits
when we get into animation, which we'll touch later on. But there's just a few more
bonds we're going to add in. So back in edit mode, which you can go Shift a
and add an another bone, select this bone and
then G to move it, move it up to the eye. And this got S and scale
it down quite a bit. Zhe Xie, move it down and
we just want the bottom of that bone to be in the
middle of the eye. Here. Go to your right off
of graphic view by hitting fray and
then go, gee, why? And then move it forward. And there are other
ways you can snap this precisely to the middle, but at the moment it
doesn't really matter. We're not being too precise, that should be more than enough. Then go Control Alt S and just make the bone
a little bit skinnier. And in fact they are and just rotate it in our
right view like this. So R and rotate to top
towards the front of our. And once it's almost flat, just go s, z is 0. Now flatten that for you. Then go G and then move
it down to here, sort of. Nope, at the bottom, over here is in the middle. Like that. Now again, your front
view in entropy, mostly in the middle,
don't be too precise. And that's more than enough. So if that bone active, Let's just go to your bones. Tap, untick to form. Doesn't need to deform. And let's call that I dot
capital L. And once again, the dot capital L is important. And with it still active holding Shift and select the body bone, Control P and then
go keep offset. The. Now what we can do is add just one more bone that can
help us later with animation. So just select this little knob in the middle of the knee. Then go to extrude in y
and just extruded Ford. Select that bone and then go OK, OLTP and go
disconnect been OLTP, clear parent and
then go, gee, why? And just move it
forward, Control Alt S and just make it a bit skinnier. And let's just call that bone. Leg are get dot capital L. And we want to come here and untick to form because
it's a controlled bone. We have it active hold Shift
and just select the IK bone, this 1 first, then that's one Control P and
N go keep offset. So now that IK and out pose
mode will control that bone. And what we can do now is we can select our lower leg bone. We can go to our constraints, and we can click on
this little eyedropper, just select any
bone in our rig and then just come to the
bone, pull targets. It is bound on here, that's
going to be a target. So just type in leg target and they can see leg target dot capital L, That's
what we named it. And the role is going
to be messed up because the axes are not quite right
when we flip that around. So what we're gonna do is
we're just gonna come to the pole angle and just
set it to negative 90. And that should fix that. So you shouldn't see it
bending out anywhere. So if we now select the foot IK and we go G and
we move it up. Look what happens. And only can we do that, we can select this pole target and we can move that to control
the swing if the knees, which gives us a lot of control, which if you've moved anything, hit a to select it all g of
R or S and just set it back. So this video is getting
a little bit lengthy. So what I'm gonna do,
I'm probably going to break this into two parts. So in the next part, we'll
continue a little bit more with the rigging and just
finalize it just a little bit.
9. Create The Rig Part 2: This is now part 2
of creating our rig. So in part 1 we got a
little bit lengthy, getting close to 20 minutes. So what we're gonna do
now is just finalize a few things without
having to rush. So back in edit mode, Let's go back into
edit mode now. And in edit mode, we should now have our eyeball over here, which if you go
click on a bone tab, should be called
IAB dot capital L. And all of the other bones we've given the dot
capital L extension. So the first name doesn't
really matter as much. So foot, you can call
it whatever you want, as long as you know what
you're talking about. But the main thing
is that any of the bones that are
going to be mirrored. So that does not include the middle bonds because
they're in the middle. They don't need to
be mirrored, right? But anything that is
this side of the x-axis needs to be mirrored onto the negative side of the x axis. So what we need to do is
just make sure all of these bones have that
dot capital L extension. That's really important.
Then once that's done, you're gonna just
like those bones. And you can now go
to armature up here. And you can go to symmetrized. Now it's automatically created all those bones over
on the other side, and they should all be
automatically named dot capital R. So it's done that automatically. So if this bone was called
upper leg dot capital L is automatically named
that exact same thing. Well, if that dot capital R, If any of these
bones are missing, it means you didn't name
something correctly. So make sure to do that. Once again, check
out my example files of anything is tricky. So what we're gonna do is
quickly go into pose mode, and let's quickly
test a few things. So if we grab our
hip, here we go, gee, we should see it bending
like that, which is correct. And now if we select
this button at the top, we're not gonna see
anything happen. So we need to add a
constraint to debt as well. So what we'll do is we'll
select this top bone, which is a control bone. Once again, click on
this little bones tab you should have
deform on ticked. So if it act if you're
gonna hold down shift and select the body bone, Control Shift and see. So Control Shift C. And then we're going to
make that a stretch too. So if we now select that
controlled bone at the top, which is a body IK, and we go G and pose mode. We should see that happen
if we select the hip, we're going to see that happens, but we don't want it to
be exactly like that. So this is tab back
into edit mode. Select this bone at the top, which is our body
IK holding Shift, select the hip and
then go Control P or Command P and then keep offsets who have now
parented to disband. So now we have a
hierarchical system. So if we go to pose mode, This is our root bone which
we selected and we go, Jay should move everything. This is a hipbone. When we move it
should only bend out legs and the rest of the body. So you can see what goes along. That's correct. And this, these bonds here are
our IK bones for the foot. So we should be able
to select them and go G and move him R to
rotate the foot. And we should also
just be able to select these target bonds and rotate
the role of the knees, which is really important
when we're doing animation. So that's pretty
much as you can see. We now have a
powerful little rig, hit a to select everything, all the G, Alt, R, or S. And by the way, you can only
post things in pose mode. You can't do that in edit
mode and then go old, old, old S. Okay, so
just keep that in mind. So let's go back to pose mode. All of this is now calls. Let's do a little
bit of parenting. In fact, that's what we're
gonna do in the next video. We're going to actually get into white painting and parenting. We're going to add
our character and all the different
components to our reg. And that's pretty cool because that's when you
can actually start controlling and animating
your character.
10. Weights: Okay, So in the last part, we finished off our rig and
now we're gonna get into parenting our character to the rig and doing some
white adjustments. So what we're gonna
do is we're going to actually start with
the body itself. So select the body
of our character. And you can see here
some of the things we've already named and some
of the previous parts. But what we're gonna do
is we're gonna make sure to select a buddy and with it active and just in case you
haven't done it already. In the previous part, we
applied some of the modifiers, like the mirror modifier we applied to make it
all one object. So once you've done that, what you're gonna
do with the body, you're going to
hold, shift after you've selected the body
and select the armature. So you can see the
armature is also now selected or active. And with that done, you're going to go Control P and you're going to go
down to this option here. And that is called
with automatic whites. So it'll automatically add a
value to this geometry based on bread of bones a placed and it'll automatically add
into different barn groups. So just go ahead and click Automatic whites
and I'll quickly explain that a little bit more. So if you now select
the rig first and then holding shifts
like the character or the body in this case. And you go to your object mode here and you change
it to white paint, what you can do is you
can hold in control or command and then
left-click on a bone. So let's click on
the body bone here. What you're seeing now
here is called whites. So essentially the
warmer colors or more it is towards red
on the color scale, it is going to have
more influence. In other words,
the bone is going to control it more
and then where it starts getting yellower or green or a little bit orange, that's kind of in the middle. And as it starts getting
to the lighter values, like light green or
blue or even dark blue. It has little to no
influence at all. So if I now holding Control and just select the
top control bone, in this case you're not
gonna see anything. It's just blank
because that's one. Remember we turned off deformation and that's
the reason because that's just a control bind to tell the body
burn what to do. But if we hold down control and left-click on that
bone and we hit G. You can see here what I mean,
see the influence there. It's only influencing
the tuple lot but barely the bottom. Now that could maybe
be what you want. So in this case, if we hit G to move it, you can see it kind
of looks okay, and that's a little
bit cartoony, can give a little bit
of squash and stretch. But if you want it to
have more influence was bottom here,
hold on, Control. Left-click on this bone here. And then you can just
simply go up here to your brush, make
sure it's active. Make sure to set it to
add over here and you can hit F and that'll
grow to brush. And simply hitting Shift F will allow you to
adjust to strength. So Shift F and then
move your mouse, because let's make
it about point free and make it a
little bit bigger. So f, just acquire it. And before you start painting, just come over here to this
option called x symmetry. So now if I move
that burn active, I paint on the side
here a little bit. You can see it does it on
the other side as well, so we don't have to do
twice the amount of work. So what I'm gonna do, I'm just going
slightly paint just a little bit more at the top here just to give
it a bit more value. In fact, Shift F and just decrease the
strength even more. Let's make it 0.1, just so we have just a slight
bit of influence. Okay, so I've made
beaches and around the cheeks here
instead of the mouth. We can always adjust
it later, but now, hold on Control and then
left-click on the top button, hit G. And now you
can see it has a bit more influenced
towards the middle. Let's quickly do a
few more things. I'm going to go back up
here into object mode. And what we're gonna do, it quickly select our legs. So left-click on the
legs and they're, they're on separate objects. And then we have them
act of holding Shift and select the armature control
P again and once again, I'm going to go with
automatic whites. And now if we select
the armature, then holding Shift,
select the leg. So armature first holding
Shift and the leg, go back up here to object mode and then change it
to white paint. And now what you can do is
just hit Z going to wireframe. And you can actually see
the bonds at the moment. But if you, you can't actually enabled them to
see them with the x-rays. Let's just going to go
back into object mode. If that bothers
you, you can just simply select the armature. And you can just go here to
the armature properties here, and you can go under the
viewport display and just go in front and you should see the
bones for like an x-ray. So now select the armature again holding Shift and
select the legs. And let's just go back
into white paint. And let's holding Control
and select the foot. The foot over here to the
left foot, I believe. So you can see here
footer.html is selected. And make sure you
have your brush here. Make sure you have to
add brush like before. And what you can do
here, if you see this, it's not looking quite right. You can paint in a
little bit more value. At the moment it looks
kind of a keto diet is, but just check the
outer side as well. So holding control and
left-click on the other side. And you can see that looks
about right as well. You can also enable
x mirror for this just to make sure
as you're painting it copies over to
the other side, but I'm going to hold
down control and select the lower leg bone, see what that looks like. And it seems to be doing a
pretty good job with that as well as have a look at that. Once I'm holding a control
selecting the top leg, you can hit Z and then go into
wire-frame if that helps. So everything looks like it's automatically right
at quite well. So let's hold down control
and just select the IK here. And once again, you're
not gonna see anything. It just turns pink because
it has no influence. We turned off deformation
because that was a controller. So if you now hit
G and you move it, you can see that this happens. Pretty cool. I got at the moment, obviously there's some issues
going on here. Something is having too
much influence here, which is probably the
upper bone for the legs. So to fix that, we
need to go back into object and then select the
reg again holding Shift, select a body and this go
back into white paint. And then let's just
holding Control and select the upper leg bone. And you can see that's the thing that's causing a problem. So what we're gonna do is
we're just gonna go over here to our subtract. So go to the brush,
change it to subtract, and then you can
just paint it away. So just get rid of it
and make it dark blue. So I wanted to just get
rid of all of those values and make sure that bone at
the top has no influence. And because we have x
mirrored and able, enabled, if we hold in control command and we click
on the other side, the top leg bone. We can see that that has
no influence as well. So now if we hold down
control and select Auto one of these foot IN
case and we go G to move it. We shouldn't see the body
moving around like that. Okay, So that should
be the correct way. And let's hold the
Control and select the hip and then go
G and move it down. That's pretty cool. So you guys can now see
what's happening here. So let's make the eyes work
along with this as well. We're just going to go
into object mode again. Analysts select the eye and remember from the
earlier part we made the eyes their own objects
after we applied it to mirror. So let's select the first II, which is the left eye holding and shift select the armature. And then let's go
in to pose mode. And then what we're gonna
do is you're going to left-click on that I barn dot L and we're
gonna go Control P. And this time we're not going to go with
automatic whites, we're just gonna go barn. So it's just directly
parented to that Boehner. Now let's get back into
object mode and do the same thing with the
otherwise the resistive, right? I holding Shift and
select your armature, go up here into pose mode and
then left-click on that i, and now go Control
P and then go barn. So now if we click on this
top controller and go, Gee, look at as we get out, scratch, squash and
stretch with our eyes. I also follow along. We could also just click on this I bones and move
the eyes a little bit or double-tap R to
rotate if we needed to. But you guys get
the idea. So that's a very simple little rig to,
especially for beginners. And all we have to do
now is just go back into object mode and
just select your teeth. So I click on the teeth
and then holding Shift, select your armature
current into pose mode and then click on the body
bone and go Control P. And then with bone as well. Now, fix select
the top controller and you go G to move it. You can see the teeth go along. And in fact, if we now select
our root button down here, when you hit G to move it, everything should go along. The hip, should take everything
on the body down of it. And you can see how
that's all working. Pretty cool. Ha, and
that's pretty much it. I mean, we could do
some refinement, but this is pretty much a
little character rick done. And we've got the majority of how white painting
out of the way. So if we need to do a
little bit of refinement, we will, but this is pretty
much the white painting done. So what we're gonna do in
the next part is we're going to actually get
in to some shape case. So we can make the eyes to blink and maybe even
close the mouth, which can be really handy
when we're doing animation. And it gives us a way to kind of express emotion a little bit. And it adds a little bit
more life to our character.
11. Shapekeys: So in the previous
part, we finished off our white painting and parenting owl
character to the RIG. We're not going to get into our Shape Keys and
they're really simple. So what we're gonna do is
we're gonna go back into object mode mixture.
We're in object mode. And so far I've been
teaching you guys to keep an organized workspace. So since we are going to be working directly
with the regular, select it and make it active. And we're going to hit
M on your keyboard, so the M key, and I'm going
to click on New Collection. And let's type in
REG, endless go. Okay, and we should now see over here in our scene collections a new collection called Rake. You can right-click
on it if you wish, and you can change the color to whatever reason
if you felt like it. Let's go with purple and
then you can just on ticket, you don't have to see if we
want to bring your rig back, just go ahead and bring it back. We haven't deleted it. It's just on another
layer, if you will. Okay, so we have our
character active here. We're gonna select the
character because that's the thing that is going
to have the shape keys, in this case a blink. And we're gonna go over
to this panel here. So just square root
vertex groups it, this is our object
data property, but the thing we're
interested in is this thing here called
the Shape case. I'm going to real quickly explain that just in case
you don't understand. So when you click the plus here, it's going to add what you
call a basis to this mesh. And essentially that is
just a version of this. So the thing of shape keys, it's not modeling in
the sense of creating new topology were
not extruding or adding edges of points
or decimating the mesh. We're just taking the pre-existing mesh
and we're saying we're adding a shape key and it's
going to exist in this state. So all of these vertices on
the basis are going to be existing in 3D space exactly where they are now over here. So if we now click on the plus, that creates our first shape k. So if we now take
that shape key and make it active and we
tab into edit mode. And this is, for example, just turn off as a
start the X-Men or we don't want X-Men because
any move we make here, we don't want it to
happen on the other side. So it's going to undo that. Okay, So you should only be seeing that's if you
move avert here, nothing should be moving there. So for example, I'll
quickly explain it. If i now in this key one, move, this vert, and I'm just
demonstrating here, you guys don't have
to follow along. And if I happen to object mode, and I select this key one, and I grab this
value and I drag it. Look what happens. So it's now differentiating
between our basis, which is just 1 and the key one. So what we don't want
to do when we make Shape Keys is extrude anything, right? We don't wanna do that. We don't want to add in any
new topology like loops. We only manipulate existing
topology in 3D space. So that is some of the
key principles here. So I'm just gonna get rid of
that key one by undoing it, I'm gonna go minus over there and let's create
a fresh shape k. So we've got a K1 and now that key one active
tab into edit mode, make sure x mirrors off. And then what you're
gonna do is you're gonna click on
proportional editing. It's going to be handy here. And you just select
this top vertex on the island and holding and
ships like the bottom one. And then we're gonna do
is you're gonna go s, z to scale down on the z. And what you can do
is going to roll your middle mouse
button and you don't want too much fall off, or you also don't want too
little amount of fall off. So just about that much of rolling a middle
mouse button for the proportional fall off s, z, so SC and just shrink
it down like that. Then got your right buh-bye. Thank free on your number pad. And those verts still
active and you're gonna go G and just move
them forward a bit. And in any vertices that
are stuck in the eye, you just can select
them individually. An easy way to see
them as just to go to your modifiers and just for now, just hide the subdivision
surface modifier if that helps, by clicking on that
little window. And then you're gonna go
G and just move any verts out of the way that are
embedded into the eye. So this is going to be a
little bit different for you depending on how
exactly you modeled. But it's just the
same principle. Just bent all of these together and just make
it look essentially just model an islet in a closed
position, if that makes sense. So I'm just gonna close this
now and we're gonna do this very feminist because I'm
just doing it the Torah, but I would encourage you guys to spend as much time as you want getting it exactly the
way that works for you. That once you like it,
you can just enable the little window there
again on the subdivision. And now we're just going
to simply tap out. And let's go back to
Object Data Properties. And now we've got this
Q1, which we just edited. So if you grab
that value and you slide it, we've got a blink. How cute is that? So
drag it down to 0, double-click on it and
it's just called a blink. Dot L. It doesn't have to be capital L. It's not case
sensitive in this case. But what we are gonna do is we're gonna take that blink 10, so we don't have to do it
again on the other side. We're simply just going
to take that value and drag it all the way up one, come to this little drop-down
here and we're gonna go new shape from mix. And it's just key to now active. We're gonna click
on the little drop down again and we're going to go mirror shaped key topology. And once you've done
that, if you now grab the C02 and you drag that value, it happens on the other side. Now that's only going
to happen assuming that both sides are
topologically even. And because we use a
modifier, that is the case. So we use the mirror modifier
and then applied it. So now we can double-click
on this one and just call it Blinkx dot R because
that's the right side. Okay. So I called it clink. I wish I knew how to spell. I'm gonna go blink. There we go. And now we have the
left and the right. And if you want to undo them, don't click Minus or
you have to do is either click on them
and just drag back. Or you can just come
to this little cross down here and it'll
just reset everything, but don't confuse it
with these ones here. So now we have a way to blink our eyes and animate them
later on if we want to. So let's say you
wanna do to mouth, it's the exact same thing. Click on the little
plus keyframe. Let's just call it mouth. And let's tab into edit
mode of that new shape key. And let's do the same thing. So Shift Alt, click on an
edge here on the mouth. And in this case we will enable x mirror because we want it
to be even on both sides. And we're gonna go s, z. We have proportional editing enabled and we're just
going to scale that down and roll and middle mouse button to
control the full off, but we don't want it
affecting the eyelids. So just about that much. Then select these verts here, g, z and just bring
them down little bit. And just close the mouth. So this is kind of
something you guys can definitely figure
it out yourself. You don't have to do it step
for step where I'm doing it. Just closed a mouth in
a way that you like. If you don't want
it to be mirrored, you can do maybe a smile on one side of a
frown on the other side. And be as creative as
you want to create as many different kinds
of mouth shapes and emotions as you want. But I'm just showing you
guys the general principle. And the sky really is the limit. You guys can make it as unique, as interesting and to your
design idea as you wish. So I'm just gonna
make it like that. Now I'm going to tab
back out to object mode. And now I have a control here called mouth that
I can do so I can close and open the mouth
and I can blink the eyes. And that is how you
can very easily create these sort of things or
emotions for your characters. So that's shape keys
out of the way. Definitely not as hard as you guys might
afford, it would be. So what we're gonna
do in the next part is we're probably
going to get into some basic materials and a for systems to give
them some hair. And then we'll probably get into the fun stuff like sitting up
a stage and some lighting. And I think we might finish
off with the animation as the last video and even render
out a little animation. So looking really
forward to that, and I'm glad you guys have
followed along so far.
12. Materials: So in the previous
part, we created our Shape Keys and
we're now going to quickly just add a few basic
materials to our character. Now, in the earlier
parts of this course, we created some
placeholder materials. And these are the ones you see
here that a blue to black. So those are nothing more
than placeholder materials. Say if we actually
were to render this, you wouldn't see anything. It just blank white
because we didn't actually create the materials,
we didn't set them up. So what we're gonna
do now is we're gonna go and select the body. And to be able to see our
materials a little bit, we're just going
to quickly add in a lot and set up our render or even her later on we'll do lighting and staging
as a separate video, but just real quick, just
so we can see 4-bit, we do have a life
here in a scene. You can just delete
that just quickly go to your render setting first. So go to your Render Settings and we're just going to change the render engine two cycles. Yeah, you can't work
in EV if you want. But cycles is just a
better way to go for the, for this particular project. We're gonna go to the device. If you have a GPU, I'd recommend you enable it. If you have a CPU,
it'll take a little bit longer to render,
but it's fine. You can still do that.
So I'm just gonna go if GPU, since I have one. And under the sampling, if you go and enable
adaptive sampling and you can, that'll, that'll help lot and other
denoising you can enable denoising if you wish to and changed to optics of
that's available. But don't worry too
much about that. I'm going to go Shift a and just temporarily add in
a quick airline. Once again, this is not our lighting part
of this tutorial, so just rotate it
G to move it and got your light
settings here and just give us strength of a 90. Like I said, I'm not even
it's just so we can see it. So now we're going to hit Z
and we're gonna go rendered. So hit C and incur rendered and you shouldn't
Halsey you a character. Okay, so we're not too
worried about the lighting. Just going to go
written down to our shading workspace up here. Make sure to hit Z
again, go rendered. We just want to
see our character and then get you a little
materials tab here. And now we're just
going to add something to this place holder materials. So the first one is skin,
which you've already had it. And let's go for blue. I'm going to make
that a bluish color and that's all you have
to do really foot out. But what I like to do, because later on it's going to make
things look a little bit. When we add our hair
is I'm going to add a generator like
a noise texture. So I'm going to shift a click
on the search bar here and n-type noise and just
get a noise texture. And they can take the color
and just place it into the base color of your
principled shader. Now, I'm not quite happy with the colors that it
has by default. So I'm just going
to take the noise, move it over a bit, and
I'm gonna go Shift a, and I click on Search, and I'm just going to
type in color and then click on a color ramp and
in place it on this cable. And now if we take
these two values, sliders where drag them in
and we get more contrast. So you can click on the white
one and then click on a bar down here and change
it into a blue, and click on this
bottom one and then change that one into a blue. So changed the
values and you don't have to use the
same colors as me. Just what I personally
choose to use. It's now the skin looks a
little bit more interesting. I'm just going to take the
roughness and drag it up just a little bit so
it's not as reflective. And that's all I
wanted to do there. And we're not going to click
on the mouth material. And this is simply make that red and bring
that value down a bit. You guys can go for
whatever you want. Just honestly, the inside
the math doesn't matter as much just to get
something that you feel works with
your color palette, then select the teeth and we credit a place holder
material earlier. We're going to leave
it as white but just make it a little bit off, just a little bit yellowish. And then bring that
roughness standards to make them a bit
more reflective, to give the idea of wetness, then select legs and they have their place
on the material. And if these, I just like drawing with a darker
kind of color, I'm, it can be something
more into brown, maybe even a darker purple. Whatever you feel works. There is no right or wrong. But I would definitely recommend making
them a bit darker. It's really just helps with
the feel of the character gets a bit of contrast to
the body and the legs. And then lastly,
just select the eyes and we already gave them a
place holder material earlier. So we're just gonna make
them completely black. And we're going to
bring out roughness almost all the way down. And reflective, the reflective property of eyes or is really important because it gives
them an idea of being alive. If we make those really rough, this just a dead feeling
and kind of glossed over. So that's very important. It's not just for 3D. And 2D artist will tell you about reflections and the eyes. There are actually
a very important design choice when
it comes to making a character and making it feel alive and relatable
to the audience. So there's awesome
simple color ideas, There's some simple materials, and we're in cycles now. So if you don't want to see
it like this, just hit Z. You can also go to material
viewport here to down here. It's not going to
look quite as nice, but it gives you
an idea as well. If you're getting a bit
of lag rift are rendered, That's one option,
but I'm just going to hit Z and go into solid. So that's a materials go
ahead to make sure to save as you go and go back to
the land over here. And in next part
we're going to add some real simple hair or fur, if you will,
to the character. That is something you can skip. It's not, it's optional. You don't have to
have it to go on to the animation in
something like that. And it is going to be a
little bit more processor intensive with your rendering. But I definitely recommend you watch it anyway
and learn about particles and how
simple it is to add some for your character. So that's the next part.
13. Hair: So previously and a
part prior to this, we created some quick
materials, very simple ones. But the thing that's really
going to make this stand out is the hair particles. So that's really
simple to place. We want to apply
them obviously is the body, not the wrist. So just select the body mesh and simply go over to
this property here, that is where our
particles lives. So just click on that and simply click Plus with the
character active. And now you have a
particle system. Now by default, it's an emitter. So if you hit the spacebar, had animation, you can see
that, which is pretty cool. And there has deaf, There's definitely
applications for that. But the thing we want with particles is just a
hair distribution. Now, just in case you
were doing this with the mirror modifier
because you can still have a technically when
you're doing the rigging, you can go to source
and just use, click on Use modifier stack. But in this case, we're not
too worried about that. So what we're gonna
do here is when it comes to this thing
here called the number. Now, I need to tell
you if you're new to particle so
quickly explain this. This number up here
under the emission is not the amount
of hair status, just what we call
the parent particle. And essentially that means
that for each one of those, so there's one hundred,
ten hundred parents. Each one will generate a
certain amount of children, which we can specify. And the reason for that is
instead of having to edit, for example, like
a million hairs, which can be really hard. You might only have to edit a thousand hairs that each have one hundred,
ten hundred children. And so that is why to parent to child relationship is very
important with particles. So what we're gonna do if disk, in this case, it's just
set it way down to 300. And we're all going
to come here to the length and all
meters is crazy. So let's make it 0.1 as a start. And we can always
adjust it later, but 0.1.2 is appropriate
in this case. And what we're also going to do is we're gonna go down
now to our children. So that's the children. These are referencing
the parents. And we're gonna make
it interpolate it. And I can say each one of those is generating a whole
bunch of children. And over here,
under the children you're going to see
display amount. So to display amount is ten. So currently for each
of the 300 children, each one has 10
children generated, which means we have a total
of 40 thousand hairs at the moment to render
amount That's the mantle actually
render in a final render. So that will be 30000
and each of those free, a 100 will be making a 100. So what we're gonna do is leave the render amount
where it is for now, but we're gonna take to display amount and take it up to 40. If you start experiencing
lag when you do this, please make sure to bring
HDR display amount down. So you get a better
view port performance. But I'm going to set it to 30 and I think that
works quite well. Now one of the first
things you're gonna notice before you even get into making the
hair look cool. The first Michigan
notice it's a problem, is that the hair is distributed everywhere within the
eyelids, inside the mouth. So we need to create a
group for that to tell it where it's going to be applied in a simple
way to do that, if it's a character
active is to go to our object data properties. And at the moment, you can see here under our
vertex groups, we have quite a lot of
groups here because that is what the bone system is using. Say don't want to tamper
with that or delete it. But what you can do is you
can hit the plus here and create a new group and
just call it hair, even call it hair distribution, hair density, whatever you can even just leave it as group. The naming is not important, but I do encourage organization. And then what you're gonna
do, you're gonna go back to your particles and
you're just going to scroll down under the particle settings
to the vertex groups. And then under density, you can click here
and just make sure to choose hair if you choose any of the others, it's
going to look weird. So just make sure to
choose hair like that. And at the moment,
you're not gonna see anything because we haven't told that group which verts to use. So just go back to your
object data properties. Make sure to scroll back up
to your vertex groups over here and click on hair and then simply tab into edit mode. You can also go in to your white painting mode
and do it that way. I wouldn't recommend that
it's unnecessary to just go into edit mode and then hit a to select everything and
also make sure to scroll down and
select the basis. Because at the moment we're
just seeing it in the mouth. Key shapes and
click on the basis. So that's the original. And then we're gonna do is
we're going to scroll up to our hair and the vertexes
that are active, we're just going to hit Assign. So now if we go Alt a to deselect over here in the viewport and we
click on that hair. When we go Select, you can see it selects
everything, but that's a problem. We don't want everything
to be selected. So what we're gonna do is
we're going to de-select, and then we're going to click
on a vertex and the back of the mouth and go Control
plus or Command plus. And you should grow
dot selection. So however you do it, just make sure it is
to select all of the, sorry, geometry, the geometry in side of
the character's mouth. And then click on that hair
system and then go remove. So now and those are no
longer part of that group. And you can do the same
thing with the eyes. So de-select that and
then go Shift Alt. In fact hit Z and go wireframe and then go
Shift Alt and then click on an edge at the back of the eye
here to loop select it, and then scroll over
to this side as well. Shift Alt again, left-click
there to loops like that, then go Control Plus and
just grow to selection. So whatever you
now have selected, if you go over here
to the hair group, just hit Remove and then
the select everything. Now if you click on, you have that group active
and you click select, you should see only
the things that are going to have to
hares distributed on them are going to have the active display
there so you can see anything that's
orange here is active. Anything that's not, is not going to be
active or have hair. So now if we go back into
object mode, look at, at under particles again, if we go up there, roll down, scroll down of
emails, go to Act 2. Vertex groups. You can
see here it's using that. So you can also flip it
the other way around. But it's not need to do that.
It's kinda looks weird. So that's it. So now we have that sorted and that's kind
of a tricky part. The rest is just going back to our hair settings and going
back to our children. And we can now come over here to these things like the
roughness, for example. And under roughness
we can randomize. So we can go to Uniform and we can on uniform or can
drag that up a little bit. We could also go
to size and that's gonna make the size
a little bit random. So play around with that. You don't have to do any
sort of settings like me, just try some stuff
that works for you. You can go to endpoint a
little bit that gives you some randomness and shape. Okay? But another thing that's gonna
make the hair look a bit nicer if you go up to render, you can go over
here to B-spline. And then if you set
these steps up, it's essentially just
going to give the hairs more segments and it's gonna make it look
a little bit nicer. You can also just go to your viewport display
here and make sure under the strand steps
you can bump that up as well. So it looks nicer
in the viewport. Keep in mind that is coming at a cost of view
port performance. So I wouldn't recommend
going over free or four. So now if we scroll down again, all of these settings
here is what's going to make your hair look
the way you want. It's, for example,
the clumping allows you to clump so the hairs kind of stick to
each other a little bit. And the shape here as well makes them stick
together a little bit. But the randomness
scales here as well. You can mess around with them. All those sort of
things just gives you more control of your character. But you can also just scroll
up to your emission again. And then you can go to the hair length if
you feel things are a little bit too long our role
and just bring that down. But yeah, that's pretty much it. Let's quickly hit Z and then go rendered and
see what it looks like. It looks absolutely
dreadful because we need to actually control
the thickness of the hair. So that's really simple. Simply just scroll down to the hair shape under
the particles. And then you can come here to the root diameter at the moment it's set to one
meter which has crises. Let's make the point
1 and the end value. We can make it 0.01, like that. Now the hairs are a lot finer. Obviously we're
not seeing them as much because if you
think about it, There's not a lot of them. We obviously have to scroll back up to our children and under the viewport display
bump that up to something crazy to see
it in the viewport, which is a little bit
render intensive, and we don't really want
to do that at the moment. So just leave your
viewport display at 30. But you can also set your render amounts to
something like 150. So it'll render a lot denser. But there's one more
thing you can do. This can really make
this look cool, and that is to comb your hair. Just like you do in real life. You can comb the hair
of the character. So with the character active, just make sure to
save as you go. Particles tend to be
the finger can crash blender and then go over
here to your object. And this time we're going to go to something called
particle edit. And that's really fun. If you want to see you, uh, hairs and not just the parents, you can hit M to bring up
your properties panel. And I believe you can go
to View actually tools. If you go to Tools,
you can go to Option. And in under the
Options here you can go to under the viewport
display abled children, and you should now
see the children. So now if you go to your comb
over here and you hit F, You can grow to brush Shift. F also controls the strength. And now you can just
comb your hair's. So comb, comb, I'm just
left clicking and combing, just like he can do sculpting
or editing or painting, is the exact same
thing with the hair. So you can just come in
here and comb your hair. So this is something
that I don't really have to spend a lot
of time showing you guys. It's pretty
straightforward. I mean, you guys can come up with
whatever style you like. Whatever you feel
works for your design. And yeah, it's
really fun actually, this is what's also
known in the industry as grooming because you're
dreaming to character, but that is one
cool way to do it. And this is quickly go
back into object mode. And I feel like it's a bit
sparse here around the lips. So I'm going to tab into
edit mode real quick. Shift alt. Left-click on this edge here to ellipse
like that around the mouth. Object data properties,
backup to the vertex groups. I'm going to click on hair
and just assign that. So we get a bit more density
with the hairs there. But that's pretty
much it if we now hit Z and we got rendered, I could add, let's quickly
actually give a test render. So we should have a
camera and the scene. So hit 0, they are going
to camera view and move your camera by hitting G and then G middle mouse
button to zoom in. Doesn't really matter. Just a quick tests and pseudo go render an image and just
see what it looks like. And here you can
see it's already rendering quite quickly. And it's a little bit noisy
because it's still rendering, but you kind of get the idea. So a 150 here as
probably not enough. So I'm just gonna quickly
cancel that by hitting Escape. And let's just go over
to our particles again. And what I'm gonna do is
I'm actually going to take this amount and bump
it up to free a 100. And I'm also just going
to go to the hair shape. So I'm going to scroll down
to the hair shape and I'm going to make it point
to on the root diameter. And now I'm gonna give
that a quick render. Make sure to save before you
do any sort of rendering. So just save and then go render, render and see what
it looks like. And already that is
looking quite cool. We have a nice fluffy
character here. Now, obviously we
haven't done too much with the lighting and
the staging site. You know, it's going
to look a lot better eventually when we have some
rim lighting and stuff. But you guys can see this is
already looking really cool. So you now have a cool
animatable character with VR and materials. So what we're going
to be doing in the next part is
we're gonna create a nice stage with
some proper lighting. And then we can pretty much
get into a little animation and wrap this whole thing up. It's going to be really fun. Once again, all of
the blend file and the stages are included
in the resources folder. So make sure to get
a look at that. If you guys get
stuck on anything.
14. Lights & Stage: Okay, so in the previous part, we finished off our hair. So we're gonna do
now is we're just going to add some stage. So by what I mean
by stage is like just a backdrop or
something like that and then some nicer lighting. Now we did add in
a temporary line just so when we're doing
our materials and hair. So you can just
select that and just delete it by hitting
X and delete. So let's add in our stage, we're going to go Shift a
really good at mesh options, add in a plane, and I'm going to go S
to scale a plane up. About that much doesn't have
to be any specific amount, but just roughly that
big Control a or Command a and make sure it apply to scale when we scale
in the viewport. But I'm going to hit Tab
to go into edit mode. And you can disable proportional
editing at this point. And then you'd go to
your edge select option. And just like the
back edge over here. And you can go to Extrude and in z and restrict it to disease. I can extrude it up and in g, y and move it back a bit. You can ask select
this edge over here. And there's a nice key can
press called controlled BY. So Control D or Command
B will get you to bevel option and you can
move the mouse and rolled and middle mouse
button to add in segments. And let's make about that much. Hit eight is like everything, S, x and skeletal and exhibit. And then tap back
into object mode, right-click and shades move.
And that's your plane. That's all there is to it. That's pretty much the stage. Now, what's the camera here?
Let's add in a new one. So I'm just gonna
select the camera, hit X and a late. And let's go to our
front orthographic view by hitting one on
down number pad. And we're going to go Shift a. We're going to go to camera
options, adding a camera g, y and move it back and then g, z and move it up. Now let's go over to
our camera settings. I like to make the focal
length quite high, so 130 in this case, let's go to our Output
Settings and I'm going to go with a
square resolution. So I'm going to do
1080 at the top. And I'm going to leave the y as 1080 under the dimensions, were working at 24
frames a second. And that's how many frames
we're working with, 250, we may change
that later on, but as long as we have just
a camera setup like that, the camera active, he can hit
0 to kind of camera view. And if you feel like
you're too close in, what you can do is
watch the cameras still active and it
should be active. You can hit G middle
mouse button, just click it once and then
move your mouse to zoom out. Or you can just, you know, select the camera had
g, y and move it. That's why so whichever one you prefer and whichever
is easier for you, but just select the camera
and move it down as well. We just want something that
looks like this now you don't have to follow my
posing with the camera. You can do whatever you want. So try out different
creative things. But what I'm gonna do is I'm
gonna go over to my pivot, pivot transforms,
and you can do this to set it to 3D cursor, make sure that cameras
still active and as long as you're free to cursor
is in the center there, you can go our Z and just
rotate around that pivot. So that'll be really handy for rotating
around a character. So I'm gonna go
something like that. Just a nice side view
looks really cool. And then I'm going to
change that to transform pivot back to median point. I said that's just while we
were attending a campus. Now if we hit our,
It's not going to rotate around that but
just around the camera. So now we have a stage, we have a camera, a nice pose. We can also, while we're in a
camera view, hit Control B. And Control B will
allow you to click and drag it when you're in your
camera view to make a border. So Control be in your camera view allows
you to make a border. So when you hit Z and
then go rendered, it just restricts the
rendering to the viewport, which is optional, but it's
something I prefer to do. So now that we're
in rendered mode, so z rendered, we can't see anything because
we need to add some lights. And so we're gonna go
Shift a and just cut our lights at an area light g, z and move this one up because your light settings and
make the power 120, and let's make the
size two meters. The bigger you make that size, the software, the lighting,
just keep that in mind. So we're gonna go G,
Z and just move it up a bit higher so that we get some lighting from the top. We're also going to
go to our front view by hitting one that every life active we're
going to go Shift D to duplicate and move
it over to the side, R to rotate it in and
then hit seven to go to a top view and in R to
rotate in towards the stage. And I'm just gonna
move it forward in the scene a bit more
almost towards camera. And now we have some nice
lighting from the side. But what I like to do
is I'd like to add some rim lighting in
the back just to make the character pop so it doesn't stand filling of blends
into the background. It gives us a nice visual depth. A simple way to do that is
with some point lights, I go shift a cardio light options add in the point
lot that point lie to you. You can go G and just
move it over to decide, let's give that a
strength of 50 and let's increase that
radius a little bit. So if you now hit Z and the
care rendered with this one, we want to just move it just to the side
of the character, but almost back from the
camera's perspective. So just about there and
just move it up a bit. So what you should
see as kind of lights as a rim light
catching the side there. And you can just Shift
D to duplicate it. And just duplicate
and maybe two more. And what we're trying
to do is just break that blending there. We don't want it to blend
into the background. You can select
these lights and up the strength if you need to. But don't overdo it
with the rim lights. Just keep it nice and basic. And it's just a
really good way to make your character break
from the background. So, yeah, so I'm just duplicating a few
and that's what EPA just duplicating them. And now that looks really cool. What we're gonna do now
is we're just going to select out stage, which we haven't
given them materials. We're just going to quickly
go to Materials tab with that stage active, Let's just click on New and
there's no need to go into the shading workspace will
quickly just come over here and just work with
the base color. Let's make that orange. I just feel like orange is
a very good compliment, complementary color to blue. I may change that later
for the thumbnail, but I just feel like
something like this works. Okay, so maybe that's
sort of orange. And you can go to
your world settings and you can get to the color and just take that value and drag it up to make your
world a little bit brighter. Alternatively, you can click on the little color tab here and your world settings and give
it the built-in sky texture. And it just come to
the strength and bump the way down to something
like point free. So it's not too intense. Maybe even 0.2. Okay? And that's how I like
to set up my lighting. Now. While we're going to
do is maybe just grab the every light here and just go and go to the light settings, bring the size down just a bit, and just bump that
strength up a little bit. Make it a little bit sharper. K. And let's just select
somebody's bottom line. So I'm just gonna
move up a little bit. I don't feel like they
need to be that low. So this is one of
those things where It's really up to you to mess around with
it a little bit. But I'm, I'm just trying to make my character really pop from the background that we will see it better when the final render. But we have to defeat
here I feel like they're not blending in very
well to bottom. So I'm just going to select
the legs tap in here. And what you can do
is just select all of these bottom verts on the fate and make sure that you just de-select
these middle ones here, like Udacity, these
birds on the edge of the feet and you can go Shift a and then just create a bevel, just sharpen them up, and that'll just make them
a little bit flatter. That's not something
you have to do. That's just my
personal choice there. And I think that just looks
a little bit better there. So that is S stage. Let's quickly give
that a test render. So make sure to save and
let's go render, render. And this is not a
final rendering, but just singing what
a stage looks like. And already you can see this
is looking a lot better. It's looking on the lighting is lot better and a character really compliments the
background, LFTR orange. So what we're gonna do
in the next part is just a little bit of animation
with a simple walk cycle. And then the last video after That's just going to be us
just fine tuning things a little bit and then doing a final render for
this animation. So I'll see you guys
in the next part.
15. Animation: Now that our staging is out
of the way in this part, we're going to get in to
doing our little animation. It's going to be a simple
walking animation. So what we're gonna do is
also making it a Looper bull. So you could technically looped little video and it
should all be seamless. Another thing
ultimately mentioned, I'm not gonna be
getting into any of the advanced principles
of animation, would it be keeping this
as simple as possible? So just a walk animation. So not any anticipation or
exaggeration, just very, very simple, which is
really all you need for this sort of beginner
thing at characters. This is not like I said, an
absolute beginners tutorial, but more of a beginner. Two characters for those
who already know a thing or two about blenders
are just trying to follow along
with the animation. It's not too hard. And once again, the blend
files are provided to guess, boys checkout how
I've set things up. So let's jump right into it. The first thing I'm going to do, and I always encouraged this is to just organize the same. You can see we've added a lot of things during the
last few sessions, so I'll just clean
things up a little bit. So we're going to select the
backdrop and the lights. And you can hold down shift and click on multiple objects. We're just selecting all
of the stage objects like the light camera, background, that sort of things. And then once we
have them active, we're going to hit
M on my keyboard, create a new collection, and let's just call it stage. And then click, Okay, and now everything is
in a stage collections, so just come up
here to the scene collections, just minimize it. And then you can hide
it if you need to. So now it's nice and
organized and we're going to bring back our collection from
earlier, which is our rig. So this is take the rig and you can actually
left-click on it and just drag it above the
reference if you want. Don't have to. I just like to
organize it like that. So we have our collection
here with the character. And in our rig over here, which we will now bring
back by clicking the tick. And then we have our reference, which we had from
the very first one. And then it's obviously our
stage which we can pump. And so just having that
ability to bring things in and out of the scene
is very good way to work. It just helps you with
organization and it makes the whole process a
lot easier as well. So the first thing
we're gonna do is we're gonna come over
here to our timeline, and this is hover
over it and just click and drag it
up a little bit. And you can middle mouse button click on
a timeline to move it. So we're going to come to
frame one and on frame one. And what we're gonna do
is we select the armature and when it go into pose mode, we're going to go Control
F3 and that's going to take us into our left
orthographic view. So control and a
number pad free. You can also just go to View, view port and then go to
your left orthographic view. So the thing we're gonna
do is we're going to, in a left orthographic
view, select the armature. And we're gonna make
sure we're on frame one. And the first bone
we're going to work with is probably the foot bone. So we actually want
our right foot to be backs if we're
going to click on the right foot controller
over their spectra. So right foot back into
your left or for graphic. We're gonna go G to move that on frame one and
we're going to move it back in our scene and then
we're going to rotate it. So it will move it back by
hitting G and an artwork that I want to place
that one about there. And then select the
hip bone marrow gi and just move that
up a little bit. We're then going to take
the outer controller for the left foot
so that one there. Go back into your left
orthographic view. Um, you don't have to go in and out of the
views like that. I'm just doing it
to show you guys, but we're going to
take that controller and we're gonna
hit G and move it. We're going to move it
forward and an R to rotate and just move it about there and if you
don't want to stretch it, so what we're gonna
do is just move the hip a little bit down and forward just till we get
that foot down there. So just like that. Okay. It's not a hard thing to make. So just like that you can
see that's always done. So now on our left
or for graphic here, just hit a to select
all of the bones. And on frame 1 we're
going to hit I. And that's gonna bring our keyframe options and
we're just going to go to location and rotation. So now if you look over
here, you should see it. If you don't see it, just
middle mouse button, click on here and just move
up to see your keyframe. You can now see this
little orange keyframe. And we're now going to
drag a slider to frame 5. And on frame 5, what we're gonna do is
we're going to grab this left IK foot, a foot. And we're going to rotate
it a little bit more and we're gonna go G to move
it up, move it about there. And then we're going
to take the other foot IPA for the right foot, we're gonna go G and move
it back a little bit. And in R to rotate it, J to move it down
to about there. And we can move that hip just a little bit
back like that. And now when we
have that position, we're going to hit
a to select it all. And on frame 5 we're
going to hit I and insert a location
and rotation. So now if we drag
this slider back, you can see that's
what's happening. Okay, so now let's
move up to frame 10. And on frame 10,
we're going to drag the right foot IK back a bit. So we're going to select
the IK and go, gee, why? And move it back like this. Then select the left foot IK,
which is death one there. And we're going to
go G and just move it up and forward like that. So right about there. And just let the hip
and go G and just move it up and back a
little bit like that. Then I'm going to hit a to select everything
and unframed ten. We're gonna go i and insert a location and
rotation keyframe. So now we have that
first step in like that. And now we're just going to move one more time to frame 15. And from here it will be easier after this one
because we'll just duplicate the rest of them. But when it comes to frame 15, and it's at this
point we want to take our left foot, which
is just one here. I left foot IK and in our right and our left
orthographic view on and go G and just move it
forward and then rotate it. So bring it about there. And then we're going to
take this other foot, which is our left foot control. And we're going to
take that one and we're gonna go G
and move it back. And in R to rotate it. If I've accidentally
called them the wrong thing like left,
right and right-left. I'm sorry about that.
That's why I'm just giving it like that just
so you guys can see. Yeah. So I'm going in and
out of my left view, left orthographic
view, and in back into that view just so you
guys can see what I mean. So we're gonna take
that left foot IK and move it about there. And then we can grab
the hip and just go G and move it up a bit. So just something like that. Maybe move this one
and just a little bit. And R to rotate it down. Say once you have something that looks like that on frame 50, you can hit a just like
everything and then hit I and insert a location and rotation
keyframe on frame 15. So now if you go to frame one
and we drag a slider fruit, we can see that now from here
it's easy because all we have to do is duplicate
these keyframes, but just in the reverse. And if you can remember back to our bone setup when we were
doing the naming conventions, remember that dot capital L
dot capital R. This is one of the very important reasons
why we want to set it up so we can do what we're
about to do if you didn't set it up like that, this will not work. So what we're gonna
do is we're gonna make sure that all of
the bones are active. So make sure you hit a,
just like everything, we're going to drag the slider
to frame 1 and frame one. We have all of
these bones active. We're going to go Control C. So that's gonna copy to pose. And when it come up to
frame 20, been framed 20, we're going to go Control Shift and V. So now it's pasted it, but the way it's pasted,
the post here on 20 is in the reverse. So with that all active on
520 hit I and make sure to insert a location and
rotation key for that reverse. So now this one
essentially just the opposite if this one, okay? And what we're gonna do
now is we're going to go over to frame five, which is one up from that one. And again, we're
gonna go Control C with all of those bones active. Make sure they're active. Drag the slider to frame 25
and now go Control Shift V. And now we've just paste
it the reverse of frame 5. Make sure on frame 25 to go i and insert our
location and rotation. And now you can see we have
the opposite of number 5. And now we're gonna
move up to frame 10 and one more time, make sure all the
bonds are active. Hit Control C or Command C to
copy that pose on frame 10. Then drag the slider
over to 30 and go Control Shift V to paste the inverse and then go i and insert location
and rotation. So now we should see this. And lastly we're going
to get a frame 35. But in this one, what we're
going to do differently, this instead of grabbing the
last one and inverting it, which is actually
gonna come to frame 1. Make sure all of this is active. Okay, So a little bunch
active and engaged Control C, drag the slider to frame 35
and then just go Control V, but not control Shift V. We just did we just want it to
be the exact same parts. Okay? And then we're gonna go i and insert a location and rotation. And now it should
be complete loop. And the only thing
we have to do is come to the end
frame value here. Click on it and drag it all
the way down to frame 35. And then we're gonna go
minus one extra frame. And the reason we get rid of
one extra frame is because the frame 35 pose is the exact same as
the frame one post. And we'll have a
duplicate which will give it a little
bit of a stutter. So just dropping it over one
frame is all you need to. Now what should happen if we go to frame one
and we hit the spacebar? Is this a loop bubble
animation? Pretty cool. Now you can see the hip is doing a little bit of a funny finger. The wall we're going
to do is just go back into our left orthographic
view by hitting Control F3. And let's just come
over to frame 10. And frame 10, we're
just going to go G and move forward
a bit and then go, I insert location rotation just so it's not
sliding back so much. And then 15, we can also just clean that up
just a little bit. So you can just go in
and just adjust that just a tiny bit till
the hip feels right. So all I'm doing is if
the one barn active, I'm just going through
the middle frames and just making sure it
looks a little bit better. But what we don't
want to do is change the end ones because they have to be exact, exactly the same. So now if we hit Spacebar, I guess a little bit better. So one of the things
that's missing here, that's really making this look not as good as it could be. Is the head here just
as perfectly still? It's got no movement too. It's a simple thing to
do is just to actually select the top Control button. And if that active
just go Control I or command I and that'll
inverse the selection. Then just hit H to
hide those bones. And now I only have
this controller here. So all we're gonna do
with that active is click and drag and select
all of the middle keyframes. Then hit X and delete keyframes. And all we have is these
end keyframes, right? If the end keyframes go to your first frame and then go ahead one-to-one
different orthographic. So what we're gonna do on frame one is going to
grab this keyframe. We're gonna go G
and we would have their side and squish
it down a bit. And we're gonna go i and
insert a location rotation. And we're going to just grab it and they're Shift D to duplicate that keyframe and drag
it all the way to 45 because it needs to
be an exact duplicate. And all we have to do
is come here to frame 15 and then go G with that active and move it over to
the side and stretch it up a bit and go I and insert
a location rotation. And now we have a little bit of side movement like that and a little bit of
squash and stretch. And look at that. That already adds a
lot of life to it. In fact, you can really
exaggerate it a little bit, and it really depends on the
speed of your walk cycle. But yeah, up to you how
you want to do that. Maybe I'll do a little bit
more squash, not stretch. Yeah, but that's how you do it. You can also go to
your other side view like you're right orthographic. And then just tilt the
head forward a little bit and then insert
a keyframe that way. Try it out a little bit. But anything you can do
to add a little bit of extra life to it
is really handy. So now one more thing we're
gonna do is just go Alt H to unhide your bones and now
go back to object mode. And this is something
that's really fun. So this is for now hide our rig. Select the character mesh. And remember earlier we created these key frames or key shapes. We're simply just going
to go to the blink and we're going to
come to frame one. And with both of these blinks, we're just gonna select blink L. And we're going to go
give it a keyframe. And then the right one,
give that a keyframe. Then we are going to
go up by two frames. So just go to frame to drag
both of those up to one. So the first one and
give it a keyframe. Then the second blink, drag it up to one and
give it a keyframe, and then move up to frame 4. And then both of them give
them a value of 0 and click on this little keyframe
here and blink Tatar, drag it down to 0, give it
a little keyframe here. And now we have a blink. I can't, but I think
it's a bit too fast, so I'm just
gonna go to frame 1, select all of those keyframes
and we're gonna go S, and it should scale
it like that. And now look at that blank. Pretty cool. So you can now just select all
of these keyframes and hit G to move them and put
them wherever you want. So now you have a little
blink to your character. And what you could do is just duplicate these and
select them and go Shift D to duplicate them. And you can scale these one's
a little bit differently. So you have two little blinks. And you can offset the little keyframe
halves here just to make him look just a little
bit different in their speed and in
their movements. So they're not exactly the same. So both blinks are a little bit different and that's
just one little white to add a bit
of extra life. And if you guys wanted to, you can take the mouth and find a creative way to use
that in your shape keys. However, because this
is just a walk cycle, I'm not really
going to use that. So we don't need
to do any sort of complex emotions with the mouth, but that math is there
for you guys use and now you guys know how
to do shape key so you guys can figure
it out yourself. How to simply make
different mouth shapes, different expressions, and then incorporate that into
your little animation. In fact, that is one
of the challenges I want to give you guys.
For this course. We actually make something, not just copy something. So that is our
animation part done. I hope you guys have enjoyed it. If anything was confusing, please check out the
provided resources. And what I'm gonna do is
just bring back that stage. Don't a camera view. And yeah, that's pretty much it. So the next video is pretty much just going
to be finalizing things and rendering this
app as a final animation. Make sure to save, and I'll see you guys
in the next video.
16. Final Rendering: Okay, So we're now
in the final video where we're going to do a
little bit of rendering. So what I've done is
I've gone ahead and just add a few little things
that were just minor things. So nothing that I needed to
make a tutorial about this. A little bit of a change
of the animation. And there's a lot more you
can do with this animation. It feels a little bit kind of like stumpy,
like, like lean in, lean out like it just kind
of a little bit shaky, almost like not a normal walk, but it's just so cute
and I kind of like it. So I'm just going
to stick with it and keep it really simple, like we've done
if the animation, a few things I do
want to change Doe as just make sure
with the hair over here that if you go to your particle settings,
you scroll down. And if you are struggling a
little bit with your render, if it lags a little,
say for example, it's a little bit slow. You can just bump
this steps down here. It's one thing you can do and also just do in the
viewport display. And that'll be more to do with just real time performance. But if you want to bump
that down as well, just to help the view
port performance, that's something you
can keep in mind, but just keep that in mind because I know
that can sometimes be an issue for people who don't have very
powerful computers. And also just under the
children once again, adjusting the render amount here will really help with
your render time as well. So you can bring that
number down a little bit. And then if you need
to bring it down, seems a little bit fin. You can always just come
down to the shape and just bring that root diameter up a little bit to
cheat a little bit, but you need to be careful
with that as well. There's a bit of a balance, so I'm going to leave it
the way it is for now. And yeah. So if you're happy
with your scene and how you've got your
whole situation set-up. And the other thing I'll
just quickly change as well. I just made the blue a
little bit lighter blue. So not a lot, not a
lot of differences. I mean, this is pretty much
the exact same animation you guys just made. So once again, this
blend fall is available as well if you want to
check my example out. So the final blend
follow will be there if anything
has been confusing. But the way we
render this out as a final animation
is quite simple. We're simply just going
to go over here to this tab cold output properties. And this is something
here called the output. And you can click on this folder and just
select somewhere. So I'm gonna select my
desktop as an example. Now what you can do
is you can leave the file format as
PNG and it'll render out a sequence of PNGs
and you can compile it in something like Adobe
Premiere or After Effects. But because it's such a short
little loophole animation, we're just gonna go with the
FFmpeg video format here. And under the encoding, just make the
container type an MP4, which it works really well. Now these are the standard
quality settings here. You can change them
to high-quality, so that's just your bits right? Output and things like that. I'm going to leave them at
the default, that's all fine. But one more thing
you can do before we actually render this out that I think really add
something to this, but it is going to really increase render times just
to add some depth of field. So let's quickly go Shift a, go to our empty options
and add in a cube and just move it in front of the
character S to scale it down. Now you don't have to do this if it's slows things down a lot, but I'm going to
select my camera. I got to my camera settings and we're going to enable
depth of field. Click on the little eyedropper
and then select that empty is now active and bring
the f-stop down to 0.5. And now if we hit Z
and we got rendered, we're going to have that kind of soft focus at depth of field. Quickly turned it off. You can see what
the difference is. Now that does make
it really nice. In fact, if I drag it
down all the way to one, you can see that's way too much. But just having
that little bit of soft focus just makes it look a little bit
cuter in my opinion, because it makes it look
like it's something that really small that the
camera's looking at. But yeah, and I just, it's just something to me
that's visually pleasing, but feel free not to do that
if you guys don't want. So before we actually render
just as a final animation, tweak all your little settings. Position your camera
to why you want, tweak your animation, your materials,
whatever your lighting, even you can definitely
grab the whole thing and always adjust
that if you want. Just simply duplicating
a lot of shift day, rotating it, and trying to come up with something that works for what
you're trying to do. I'm not gonna do
anything more than that. I'm pretty happy with it. Just going back to
the Output Settings. Once you have a destination
file format type, we have to do is make sure to save your work and
you go to render. And in Render Animation, it'll render this out as
an animation for you. Now, I'm going to go
and do it that way. And it'll show you guys
what it all looks like. And there we have the
final rendered animation. I hope you guys have enjoyed putting this little
guy to get her. And I know this wasn't so much
about advanced animation. The main thing here
was definitely developing the character. But if you guys
have made it this far and you've made
your little character, I hope you have enjoyed it. And you can see here differ probably doesn't
look that great. And that's simply because
what's happened here is I have the optics
didn't noisy. But if you wanted to get
rid of the denoise or and put the samples
up a lot higher, you can always get a
much nicer result, but I still think it
looks pretty good and I'm really happy
with how it came out. So once again, check out
the resources folder. Older blend files
are in there so you guys can check
it out yourself, open everything up and see
exactly how I've done it. So yeah, if there's
any questions, feel free to ask and I'll do a little outro
video after this. Well, I'll just thank you guys
and mention a few things, including a challenge that
I have for you guys and some things you
guys can consider doing with your own projects.
17. Thank You: Thank you guys so
much for taking the time to watch my
Skillshare course. I really hope it has been
interactive and educational. And I hope you
don't feel like you were just copying something. So what I'm gonna do
is I'm going to give you guys a little challenge. I want you guys to
make this character, but I want you to take
the model shape and make it your own and try and
go for this type of idea, but customize it and
make it a little different due to proportions and the shapes a
little different. Tried different colors.
See what you can do with your hair settings
like the clumping, the different details
in the hair to combing, and then see how you can change your animation up a little bit, try different things,
try a little jumpy. Look at some references
on the Internet. So that's just one of
my little challenges. You guys definitely try
and take the concepts and principles from this course
and make it into your own. And I really look forward
to seeing some of the projects that come
out of this course. I've really enjoyed
putting it together for the community and have
an awesome time, guys. Thank you.
 PIXXO 3D, 3D Character Artist, MoGraph Teacher