Transcripts
1. The 3D Hot dog Class: What's up, guys,
Welcome, I'm back with a new Skillshare course. My name is Dave Reed, aka drug-free Dave,
other than Brooklyn, New York, I do 2D and 3D and today I have a
really exciting 3D class. We're gonna make a hot dog. Now. It's not all about just making a hot dog now the hot dog is cool. I think it looks great. I actually really enjoyed
scoping a hot dog, but it's less about
the hotdog and more about the steps it
takes to get there. These are the steps you're
going to take when you want to do more complex scopes, when you want to do characters
and things like that. In this class, we're gonna go over using the symmetry tool, constructing the hot dog using
a cylinder in two spheres. Just simple things that
aren't so simple until you get the hang
of it and sort of do it more and more often. As with anything with 3D, it can be complex, so I'm going to try my
best to break it down, make it simple, and just teach
you a lot of useful things that you can also carry on into your other scopes
moving forward. So again, it's not just
all about hot dogs, but it's all about using the tools and just
finding a way to have a smooth workflow so that
you can get through whatever you're thinking of sculpting in the shortest amount
of time possible, in the most efficient
way possible. I'm glad that
you're here to join me to make this hot dog. With that being said, let's
move on to the next video. That'll be the class projects. So thanks for.
2. Class Project: So for this class project, I just need you to make
a hot dog. That's all. It seems fairly simple. Now, like I said in
the first video, there's a lot we can
do with the hot dog. Hot dogs are actually incredibly complex as with
anything else doing 3D, because you can
always go more and more towards the realistic side. I like to push it as far as
I can on the realistic end. That way when I want
to do a cartoony, I know I can go either direction and I'm
confident with that. So for example, with the button, we do a little bit
of details like extra details with the buttons that you don't
really have to do. It all depends on what
you're looking for and what type of 3D scope
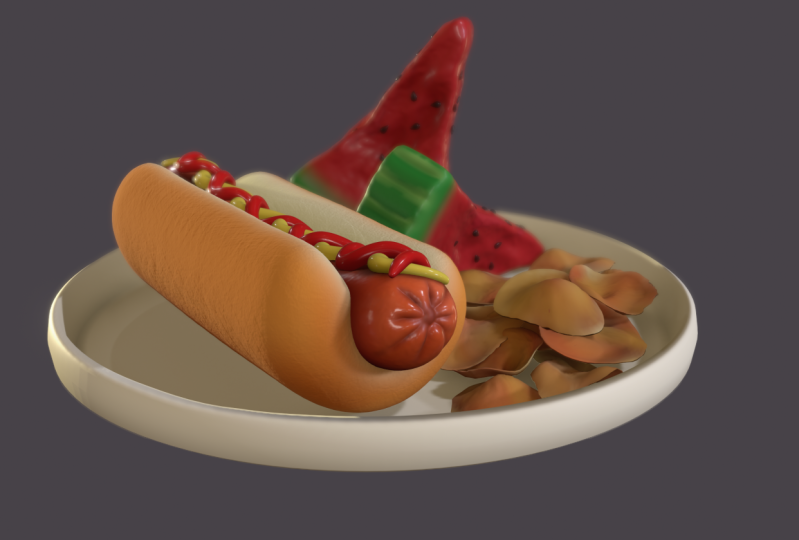
that you're going for. Add some toppings to it. I think that's a fun
extra that you can do. Ketchup, mustard,
relish, onions, grilled, grilled onions,
not grilled onions. Onions. Where do they? Crispy
onions, barbecue sauce. You can put sesame
seeds on the robe. So there's a lot of places that you can go with the hotdog, a lot of creative ways
that you can approach it. So that's what I want to see. You can just make a regular
hotdog and follow along. Or you can add to it and
do whatever you want. It's your hot dog, and I'm
looking forward to seeing it. So just remember to upload
it to the class projects so I can see it and so
other people can see it because I love
seeing your work. Let's move on to the next video. It'll be getting started.
3. Getting Started: A few things that we want to set up before we get started. So the first thing is, as
you see the grid here, that's because we
have perspective on, so we're going to
turn perspective off. It'll just be easier to model and use the symmetry
and things like that. So we're just gonna go to this little icon
here, the camera. And we're going to turn on
orthographic and see this. It'll snap cube, just tap front. And it should be a
straight white line. That's how you know that
you're in orthographic. Alright, the next thing
you'll notice that my sphere is sort of like a brown color,
brownish red color. And that's because I like
to work in mid caps. Yours is probably in PBR. It might be white, but I
think it's more beneficial to model in med cat because then you're
ignoring all the lights. So you can just concentrate on the clay or the mesh,
I like to call it play. So next, we just want
to pull our picture in. If you want to use a picture,
I really don't even want. I mean, I've eaten
enough hot dogs to know. But if you want to pull the reference
picture and just tap this little frame right here, you can go reference image. Then you can just tap the plus. Of course you have to save a
picture of a hotdog or save the one I've included
in this class. Then just go to photos. And then you can tap your
Hot Dog and press Add. And let's see, let's go to
transform. You can't see it. It's probably behind this panel, so we'll just go to Transform. There it is. Now you can move it around and maybe I'll just
make it small here, but any hot dog will do. And also just in case
you're wondering, my background is sort of
like this pinkish color. You can do that here as well. I forgot to add, once
you've placed your hot dog, just tap on the
screen and it will solidify where you've placed
your reference image. So you can just go here and this is where you
can change your color. So you just go again,
you just go here, and then you tap
on the color and then you can change it
to whatever you want, a gray or something like that. So we're going to turn
reference image back on. Okay? So now we're going
to delete this, this sphere because we
don't need a sphere yet. We'll make our own
sphere in a minute. So let's just delete this. So then we'll go back here
and we'll do cylinder. And it's a pretty big cylinder. So we can go ahead
and use this orange to just make it a
little bit smaller. And now the next thing that
we're going to do is go here and make sure you tap snap. And it should be on 90 degrees. If not, just tap on the
number and just write in 90. And what Snap does is basically it allows you
to move in increments. So if you want it
to turn it, oops. I've also learned that
if you want to do it, you have to do it on a color. Because if you do it,
if it's not on a color, it'll just move normally. But here where there's a blue, the blue line, then
you'll see that it won't move until it snaps
until 90 degrees. Snap can be very useful if
you just want to change things on a very set number instead of going like this
and try to get it right it right, so it's vertical. So you can untap snap because we don't eat
anymore right now. Okay, so let's make
it a little smaller. And I'm going to turn off edit. So we haven't validated it yet. Validating is basically just being able to use
all the other tools. Right now it's still in
its psych processing form. So there's only very few
things that we can do. We're going to turn off edit because we don't need
to edit it too much. We're just going to stretch
it using this red circle. So we'll just stretch it out. And we can make it smaller. Just stretch it out some more. Make it a little bigger.
Something like that. It's actually make it
bigger and smaller. There we go. Now you can move around,
anything like that. The size really doesn't
matter because we're going to make the been
around the hot dog. So the size really
isn't that important. You just want it to be
longer, like a hot dog. I'm going to tap front
makes I'd like to be right in the middle. So the next thing
we'll do is we're going to add those spheres back, or a sphere back. So we'll go here. Who add a sphere? Then we're going to
shrink it with this orange ring around
the whole thing. So we're going to shrink
it right until it's even with the rest
of the hot dog. So something like that. So you just shrink it
until it's pretty much even with the hot dog. And now we're going
to tap mirror. So we've tapped mirror. And now we're just going
to use this red arrow. We're going to move it out to
the edge and you'll notice that the sphere is
coming out on both ends. So right when you get it
pretty flush, then we're good. So we can go ahead and validate. We can tap on the
cylinder, validate. And then we have the
basic shape of that dog.
4. Merge & Bun: So now that our hot
dog is constructed, we can go ahead and merge
this cylinder and spheres. So we'll go here to the scene, will highlight them both
and we can box will merge them together
at around 150. I think that's fine. So we'll box the merge them. Now you see that
they are merged. So now we'll take
our smooth brush. Symmetry is on. So that way it'll, you
can see the little, the blue dye will be here
and on the opposite side. And I have my intensity up around 70 and my
brushes around 72. And I'm just going to
smooth out the ends. So it's just like so
it just looks like one complete smooth hot
dog pressing too hard. I don't want it to
get too distorted. So I do tend to smooth
with a high-intensity. So I don't need to
press that hard. Okay. So I'm gonna go back to front. I'm going to use
this little cube. It's easier to get to
the front that way. And I think that
looks pretty good. Pretty good hot dog. So now we'll go ahead and
make our hot dog bun. And we're going to use
this general shape of the hotdog to make the bone. So firstly, we're going
to use this sphere, which is our hot dog. And we're just going to tap the duplicate button right here. So we'll go to the top one
and we'll name that dog. And then we can name this
one bun with tap on that. And then we'll just
name this one button. So we're still on the button. We can go to gizmo, can turn symmetry off. So we want to make it bigger. We want to use the red
circle to just skinny it up or just shorten it up. Maybe a little bigger,
something like that. And I actually want to stretch out stretch it out
this way as well. Okay. So something like that, I
think looks pretty good. Once you have your hot
dog buns similar to this. Remember we're on
left on the cube. So we're looking
at the left side. So now we just want to trim
it to make the opening, which is gonna be sort
of a triangle here. And the way I like to do
that is just use trim, trim tool and we'll use polygon. And just to note the
symmetry option is on. Before we get
started, we want to make sure that we have
the right symmetry. So we're gonna go up here
to the symmetry tool. And right now we have x. But what we need is actually
a z and NOT x. And justice. Just to explain a little
bit about symmetry, I know symmetry can
be very confusing. But essentially,
when we're doing x, let me tap show plane. You don't have to do
this. This is just so you can see the explanation. So when I tap X, you
see the plane here. So anything I do here would
be mirrored on this side. Same thing for z. Anything I do here would
be mirrored on this side. So this is why we're
going to use this, because we're going to
make a cut on this side. We want the cut to
happen all along, all along the opposite plane. So if I was to make a V here, it cuts out the same V on
this side. So we want x. Hopefully that makes it
a little bit of sense. But if not, don't
worry about it, just make sure that
you have Z selected. And then we can just move
on to our our trim tool. Once again, I'm
going to hit left. No. Because you can't you can't snap to one if you're
in the trim tool. So you just have to
like go to gizmo, snap it and they
go back into trim. So now we're going
to use polygon. And we're just going to tap once syrup here a little bit lower attend bit lower
than the middle. I guess we can
just do the middle of the lower part of the button. So we'll make it
that there will make a dot up here,
something like that. And then we'll make another
dots in the middle. And we're going to tap
on these dots again. Just be sure not to tap on the green and to tap
on the white dots. A little bit more,
something like that. Then you can tap on the green. And you'll see that we have
the opening of our BUN. So as I was saying before, the symmetry is very important. And we want to smooth
down our button. You can see it's
not very refined, so we want to smooth
all this down. But since this part and
this part or both mirrored, it's easier if we just smooth this part and everything that
happens here happens here. So we're gonna go back to the symmetry option and
we're going to tap X. So now we have Z and X. Oops, let me get out of the view just so you can see
exactly what I'm doing. I'll just go to Gizmo. So now you see the blue
plane and the red plane. So everything that I do
here will happen here. And per the red plane, everything I do here
will happen here. So now we can go to smooth. And it just makes the process easier because
you're smoothing this side, but it's also some
of the genocide. And symmetry does take
a while to get used to. But once you do,
it's very useful. And the more that you
start sculpting things, the more that you will need to kind of understand symmetry. So it's good to just
play around with it and try to figure it out
on your own as well. Okay, That looks pretty smooth.
5. Toasted Buns: So now we're just going to
voxel Ramesh our button. And then we're going
to just smooth it to get rid of all these, these little bumps and things
will go to the grid here. And instead of multi-rate, we're going to go to voxel. Then we're going
to mesh it at 150. We're going to go
back to smooth at about 70 intensity
and about 70 radius. You can probably go a little
bit bigger for the radius. And just to note,
our symmetry is still these two planes, x and z. And then just smooth out
your bone a little bit more. Just get it nice and smooth. Especially around these edges because you want it
to be nice and round. And you also want it
to be nice and round. Down here. I'm gonna get rid of this grid. So I'm gonna go to this
little cog here and then just hit grid. The grid
is out of the way. I want to make sure
that this is nice and round here as well. You might notice these ribs. So I'm just going to
smooth over them as well. Okay. That looks better. Okay, so the next thing
we'll do is I just want to add a bit of a
bend in the hot dog. So we'll make sure we'll
tap on her hot dog. We use the gizmo and
we'll just bring it up. And maybe I'll make it
a tad longer hoops. If you get anything like this, that issue just
turn off symmetry. And you should be able
to stretch it fine. So now I'm going to
use the move tool and I'm going to
make it really big. And then I'm just going to
softly just sort of add, just sort of make a little
bend in the hotdog. Like so. Now we'll go back to our
gizmo and we'll just move it down into the bun. I think that looks perfect. Got to have that
little bend in there. I think we can start
coloring our hot dog. So we don't need it to be
on orthographic anymore. So we'll tap the little camera and then we'll just
hit perspective. And of course, if you
feel your hot dog is a little bit too
big or too thick, you can always take the gizmo and you can make it smaller. Then you can stretch
it out using the red circle,
something like that. So just adjust it
until you're happy. So now we'll go to
see which one is it, will go to the shading
window and run make capsule will just change it to PBR and then it'll be white. So let's color our hot dog. Let's clear the button first. And here I'll just click on this little sphere
over here on the left. And for the BUN, think we won't like
a lighter brown. It's definitely want to
turn the roughness up. So it's a bit softer. Maybe it'll make it a
little bit more yellow. Something like this. Maybe
something like here. So just a very light brown because the inside is
going to be more white. The inside is always, always
lighter than the outside. I think something like
this is a good color. So we'll just do pain all. Just a very light beige. And for the hotdog, hotdog will go back
here to our color. And I think we want a
little bit more reddish. Bring it down. So maybe, maybe a little bit more reddish, ten bit more reddish. Something like that will
bring the roughness down. Move this over so you can see it will bring the
roughness down. Maybe something like this. Alright, and it looks funny, but we'll add more color
to the side of the button. Now we want to add
a darker brown around the outside
of our button. So I'm going to
tap on the button. And I'm going to add a layer. And I'm going to call it toasty. Now we're going to
use the paint tool. We're just going to
go to like a darker, more urban type color like that. And I'm just going to turn
the paint all the way up. Now. I'm just going to color on here, but I'm just going to leave a line of code that n. And we're just
going to leave a line here. I'll just do a little bit of
a lighter color like that. So it's darker, but then on the inside, it's it's lighter. It can be a little bit thinner, I think, on top. Okay. So now I'm going
to use the smooth. Now I made a new brush. So this is something
really cool that you can do as you can tap on a
brush and you can do clone. And that's what I've done here. So you can tap on
smooth and then hit Clone and it'll make
another smooth thing. But what I did with this brush, as I keep the intensity
all the way down. So I still have the, have the radius, but the
intensities all the way down. So now it will just
smooth out the color. Won't mess with the actual mesh. Now you can smooth
out that color nicely, which is what we want. So just kinda been that
in nice and smooth. You can also just do it with
the regular smooth tool. You don't have to
make an extra tool. But I use this a lot. Another thing you can
do is take smudge. If you wanted to like
kinda just smooth it, make make the line a
little bit closer. Just sort of spread the
Colorado little bit more. You can do that with smudge. But I like to use smooth
again with no intensity. And just, just smooth
this out again. It's looking good. And if you think the
inside is a little white, you can go to the base. You can grab the
color that we made. You can grab the
color that we made, the really, really white color. I should probably made it
a little bit more yellow. So I'll just bring it down so it's a little bit more yellow. Here we go. So now which sits so it's
not as, not as white. We can actually make
another layer if we want and call it lighter. Then if you want to add a
little more white to it, you can just use the paintbrush. And to sort of paint
it in like that. Then the same thing. Just use smooth and just
smooth out those edges.
6. Hot Dog Details: So let's add some more
details to our hot dog. This is something I do with all of my scopes, pretty much. So I'm going to color
grab this pink color. And I'm just going to
make it a little darker. I'm just going to
drag it darker. Like so. So let's paint the
bottom of the hot dogs. I'm going to tap on the
hot dog and hit Solo. So now that we have
the solo hot dog, so let's tap the bottom. And I'm just going to color
the bottom of that dog. Compel you to go a
little bit darker, actually. Looks pretty good. I'll do a little bit
lighter on the sides. It's nominees that smooth
again with 0 intensity. And I'm just going to smooth
out that darker color. I like to do this with
all of my scopes. I'll bring out tap solo again so we can
bring back the bun. It just kinda gives a
little bit more shadows. Unlike I don't like to rely on the post-processing for all my shadows and things like that. So
that's all that is. But I do like to I'll just
take smudge and just just kinda bring that color
up a little bit. There we go. Say for example, here
you can kinda see how it gradients kinda harshly. So I'm just using,
I'm just using smudge is sort of just drags
up a little bit of a color. And then I'll use my smooth with 0 intensity to just like
just smooth it out. So I think that
looks pretty good. Also, if you're wondering
why your hot dog might look a little bit
different than mine. So for my for my lighting setup, I don't have any
lights on it yet. But if you tap this little shading window
down here and I'm using, what is it called? Piazza Martine luteal?
The one I'm using. Now I'm using yes, that's the one I'm
using, Piazza Martin. But you can these all have
very different looks. So you might be able to find
one that you like better. But for now we'll just use
will stick to that one. The next thing is hot
dogs usually have some little marks on the end. So let's take a crease and
let's see how this looks. We might have to okay, So our hot dog is 16 k. If we use crease on it to make some creases like this,
Let's see how they look. It's actually not bad. Actually not bad at all. But it's a bit hard to see. So I think I might changed
the lighting a little bit. So I'm gonna go
back here and we'll just change the exposure, put the exposure up, and I'll just change
the rotation. There we go. So now I can see the
end of that dog. Alright. So usually
these creases sort of come off
from the middle.
7. Lighting: So let's add some lights
to our hot dog here. I'm gonna get rid of this
reference image by going to the little picture here and
then just turning that off. We might bring it
back later if I put some mustard or something on it. But for now let's just
concentrate on the lighting. So we're gonna go to
this little sun icon. And let's actually turn the
environment off for now. So now I just have
a black shadow. So now we go to add light. And we have our
nice-looking light here. Let's just go to
go to the right. It doesn't really matter. I like to bring my light
a bit off to the side. So this is, this is just
a directional light. And there's two ways to mess
around with the lights. I'm not going to try to
get to in details with the lights because then I'll
just start taking forever. But this is directional light. And we'll just go with, we'll just go with white. Maybe a little
cooler for this one. And this is just a regular or irregular directional light. So nothing too crazy. The only thing that'll, that'll
change it is if you spin these rings, you
spin them like that. So this is just where
you figure out where you want some of the
main lights to go. So maybe just something
like this where one side is illuminated and there's some some some harsh
shadows on the other side. So let's just take two,
something like that. First. So now let's add another light. So add another light
and we'll just tap on the color of the light. And let's make this one. Let's go up with the color and we'll make
it a little more warm. So something like this. And with this light.
So that's this slide. This is the light that
we were just editing. And you can tell, Let's see if I can go to View. So you can tell
which light it is. See this one is a
little bit lighter, blue, this one is a
little bit more yellow. So that's how you can
tell which is which. So I'm going to
tap on that light and then I'm just gonna
use the blue too. You know what, we'll
just put it underneath. It doesn't matter
where these lights go. I'm just going to put
them near each other so they're easier to manage. It doesn't matter if they're far away from each other either. But they can get
kinda confusing. So that's why it's good to
sort of change the color. Because then you can
say, oh, this is the warm light, this
is the cooler light. So for this slide,
the warmer light, the more yellowish light. I'm going to spin it and
just try to get Let's see, maybe something like this. Just so it's kinda lighting up that shadow side because we don't want too much
shadows on our hotdog. I think that looks pretty good. Now let's choose, let's make, let's make another light. I think when we will just
stick to three lights, this light will tap on the color and maybe
we'll just go to white. So let's bring this light up. And let's try to, try to shine
it directly down. Maybe. Again, it doesn't matter
if it's directly on top of it because the
light can be anywhere. The only thing that changes
is if you change these. But I just wanted to directly
down on the hot dog. And maybe we will just
maybe we'll lighten it up and just turn down the
intensity on that light. So it looks nicely lit.
I think that looks nice. So I think that's
pretty decent lighting. I'm not gonna go too crazy. But now that I say that, I always get a lot of, a lot
of more examples and extras. So I think we are going to
add another light. Why not? I mean, we have it, right? You should add it. So let's add it. Let's, let's change
this light to a, let's make it a spotlight. Let's go crazy. So we'll
make it a spotlight. I'm going to move it down here. Spotlight. It does matter
where you place the light. See how see this cone
that is pointing out. Over Yonder, it's not
pointing out our hot dogs, so let's turn it
around on the hot dog. Now you can see it's
on the hot dog. Might even look nicer than the directional
light from above. It's kinda nice. Let's make it, let's
make it white. And see if we wanted
a little warmer. I think I like it white.
So we'll leave it white. It's got a nice
light coming over. Now let's see if we
take away this late. Let's just go back
to our lights here. And let's see what
happens if we take away. This is something that I
actually just have fun doing, is experimenting
with the lights. If we turn that off, now, it looks better
with that on. Actually. Looks better with that on. I like to just check the lights and just see what they're doing. Keep them all honest. So I think that's good, a good lighting setup. And I think the hot dog is
actually looking pretty good. Let's take a look at these. Let's go to our hot dog. So we want to keep these. I mean, they don't like
them. I don't know. A hide them again for
now. Grill lines. I might have to do
them again, but, but I think maybe I'll do
them all along the hotdog. That might be better. So let's go back to,
let's go back to crease. Actually maybe crease
might be a little. Let's do let's do clay. Intensity can be 50%. Radius can be See. I don't even see my will keep, will put radius at 50% too. Let's do sub. So it's now it's going to take away
clay. Let's color grab. So let's just tap on paint and then hold their finger
on the hot dog. And then we'll make
it a lot darker. Almost, almost just very char, charred colored chart color. Let's see how this Let's
see how this looks. Whoops. I'm not seeing anything. Let's go to add a layer. And let's call it grill lines, grid lines to get crazy with it. So let's make the
radius smaller. And let's make the
intensity more and make the radius
even smaller. Like that. Doesn't look like it took any out of the
oh, you know what? I think I'm on pain. I'm
on paint. That was dumb. I forgot to go back to Clay. Like a dumb, dumb.
I'm just to keep that in because I do I do,
I do stuff like that. Sometimes. There we go. Let's make this smaller. Now you can see that
there's an indentation. We can actually make it a
little deeper, I think. Okay, so let's see
if we can just make these lines and
that's really thick. Something like that. It's
not bad. It's not bad. So I'm gonna go to the
smooth with 0 intensity. Let's see if, let's
see how it looks. If I smooth, smooth
out the grid lines, I think that looks better. Smooth them out. It looks
a little bit more natural. I think these grid lines look a little bit, a little bit better. Since we did it on
a separate layer. You can take that layer and
you can lower the opacity. If you think it's too dark,
you can actually bring it up. I think I like them. I think I like it dark. Maybe I'll just lower
the opacity. A smudge. Something like that means a
pretty good looking at a dog. So that's just another
option that you can do. But I like how high these
grid lines as well. I think I just like
the plane I talk. Okay, So I think this
is good for now. I think next we'll come back and play around with post-process.
8. Post Process: Okay, so now we get to
the really fun stuff. We'll just mess around
with post-process. So we'll tap this little shutter button
and hit post-process. Now it starts to look like everything just looks really pretty with post-process. Let's go in and first off, let's turn the far blur down. Just so you can see
little more of it. I like it to be
blurred at the end, but I want you to be able
to see more of a hotdog. So something like
that I think is nice. I'm actually going
to set a view, a few that I really like. Like I think that's a
good view of the hot dog. So I'm just gonna go
into this little camera here and just hit Add view. And I'll just put, let's put main for now. That's so if I want to
come back to that view, like if I turn it, Let's say we want to make
another view like this. Then I can add view,
something like that. And I can always go
back to the view. Just tap on it so that's clear. Alright, so now let's go back into our
post-process options. All of these looks pretty good. I mean, honestly, the hot
dog looks pretty good. You can play around
with some of these, but I'm not really seeing
that much of differences. To be honest with you. Turn that up a little bit. Bloom, you can turn off and on. There's not really any lights, they're hitting it
like it'll just make this a little more gloomy. You see, you can see that there. But it doesn't really
need to be that intense. Okay. We don't really need too
much of these other ones. I think the hot dog
is actually looking pretty good without it. But I did want to go
back to the lighting. So when I go back
into the lighting, remember we turned
the environment off. I'm going to turn it back on. So this is quite bright and
it's a little bright for me. I like a little bit
more dramatic lighting. But you can go to the
bottom and you can turn the exposure down. I'd like to turn it
all the way off. That way you're seeing your
hot dog however you want it, and, oops, go back here. And then I like to just
bring the light up just enough to where it's
where I want it. So I just want to have
more control over it. So maybe even something
like that just to sort of fill in the dark
spots a little bit. But you can also go through, you might see something
else that you like, something more realistic
for your hot dog. I have some that
I've already made, but I'll go back to the
regular one that we used. I think this was it, right. I think that was it. I think I might want to add I think
I might want to brighten up. Maybe this one a little bit, make that a little bit brighter. And maybe maybe even this
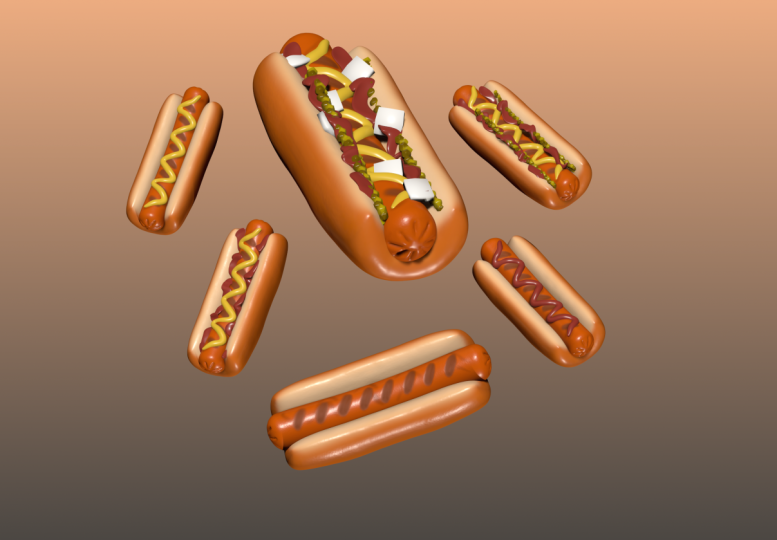
one a little bit brighter. I think I like that. Okay, So I kinda do want the hot dog would
just be floating. Remember you can change the background color to
anything you want here. You just tap on here and you can change the background color. But I want to do this. So I'm going to take the
hot dog and I'm going to duplicate it and then
duplicate the button. So I'm going to take these
two simple merge them. Now these are simple merged. And let's read it. It's rename it HD two. Okay, so now we
can take this one. We'll take the gizmo. Let's make sure we're on HT2. So we'll take the gizmo tool, make sure you're on HT2
and you can move it out. And let's go back to our view, our main view. See what we see. Okay, So let's move it out. And this maybe
let's move it back. Maybe we'll turn
it a little bit. Let me get it off. Snap there. Maybe we'll turn
it a little bit. Make it up a little higher. Let's go back to our view. So we'll bring it down
and then maybe we'll we'll make it smaller so it
looks like it's further away. Like that. Maybe I'll I'll duplicate that again and
call this one HT3. Oops. H s3. And we'll go
back to our gizmo. We're on HT3. Now we can just sort of maybe we'll have
another hotdog back here. Main view. Anyone have another
hot dog down here? Maybe even I'm going to clone this time. So I'm
going to tap clone. And then I'm just
going to move a clone. Let's see where it goes to eat. Maybe we'll make it really
small. I'll turn it. I feel like I want
this one to be more. You can really do this
anyway that you want to. I'm just having fun with it. So something like
that. So maybe there's just some other hot
dogs in the background. Why not? But I think it's I
think it's kinda fun. I do want to make a new
way to make a clone, another clone of this hot dog. Drag it way back, make it smaller. Maybe. I just want to get them
like sort of in-frame. Let's make some more. Let's turn off post-process. First of all, we'll turn
off for post-process, will make sure that we're
on our original been. So this is the bun on top. And let's go to the
grid right next. Almost said right next
door, right next to it. And let's subdivide it once. And I think let's
see how that looks. So I want to put some
texture on the bread. So I'm going to put a brush. So once you're in brush, go to your, go to the
little option here. It might be, it'll
probably be like this. So just tap on it and then
go to the brush Alpha. And that's the brush
off for that I included I'm actually not sure which one I'm
going to include. So let's try this 1 first. Let me figure out
which one I want to include upper right back. Okay. So I know the one that
I'm going to include, this one, I think it
looks pretty good. So we've subdivided
the button once. So the bun is 193 K. That's pretty big for urban. But we need the details. Now you can actually
subdivide it more. You can sub-divide it again. And that makes it really big. That makes it 775 K. So I'm
going to leave it there, but you don't have to
subdivide it twice. You can always just leave it at 193 and you can
still do the effect. That's still looks cool. But if you do want to sub-divide it, That's what I'm gonna do. You know why not? I'm
just going to save. And you should save.
Because it's good to save. Okay, so now we're on our brush. We have chosen the Alpha, the bread, bread sort
of textured alpha. And the intensity is
down to like three. The size is up like one ninety
two hundred pretty big. Pretty big. When it makes her
I'm on my button. So the other options
that we need is, let's go up here, so
we're on our brush. Let's go to these brush options. And the falloff is probably
something like this. So just tap on it and then
go to the straight line. And all of these
should be the same. You might have to switch
it to Screen project. But hopefully all of these
are the same as mine. But I'll just leave it here
for a second so you can make sure that
everything is the same. So now that we have that, let's just make a new
layer on the button. So I've tapped our
layers, new layer. I usually call this
layer texts for texture. Okay, So now we're ready
to go symmetries on. I think that's fine. Now, really lightly. I'm just going to go over
our bread and you see, you start to see
that texture there. So I'm going to really
softly kinda go over the bread of overt long ways, especially on the inside. Okay? It looks like, it looks
like it's symmetries, put it on this side as well. So I think it's
looking pretty good. Make it bigger. Just softly go over, whoops, there must have
been on the hotdog. Just softly go over
the rest of the bun. Try to do this really, really
lightly because it really, it really affects it a lot. That's why I put the
intensity down so low. You have to just do a
really light with it. Otherwise, it can
be a bit weird. Okay? So I think this looks pretty
good for our main hotdog. We have a little bit
of texture in there. And if we go back to our main view, I think
it looks pretty good. Let's turn on post-process. So post-process is now on. And I think, I think
this is pretty good. I don't wanna go too, too deep. Second, go crazy with details. But I think I really
like this for now. I do. I do want to add
mustered though. I think I'm gonna do
one more video where I add mustered, maybe
another topping. But I think this
is good for now. But I'll come back and
I'll, I'll do mustard. Because hot dog is really isn't the same without any
sort of condiment on it. So let's take a break, get a snack, and come back
and we'll do some mustard.
9. Condiments: Alright, so I've decided to
bring back the grill marks. So I'm going to tap on the dog. And let's just bring
back these grill marks. But let's, let's make
them really light. Let's make them lighter. Something like that. I think I think I like them
there but just lighter. So I'm going to stick
with that for now. I also two things. I also want to add some
texture to the hot dog now. So I'm going to add,
so let's choose our other are other texture. So we're still in brush. I think our brush settings
should all be the same. Except we're going to switch to the little one that looks like little droplets will
switch to that one. So let's do Add Layer texts, same as we did for
the bread or x, I guess for now let's
go text, texts k. So now we're back
with the brush. We have our texture. The intensity is really
low or brushes really big. And let's just see
how this looks. Because I liked it. I like to toast my hot dogs, so they get like a little
like bubbly and toasted. That's personally what
I that's what I like. I think that it looks I think
that looks pretty good. Of course you don't have to do. You don't have to
add the texture in. But I just wanted to show
you just in case you do. We'll leave it clean for now. I'm gonna make a new
layer underneath because this is another
thing that I wanted to do. So I've made a new
layer and let's call this one darker than I already
named something darker. I didn't. Okay. So let's let's use the little arrow thing
and let's bring it down. We can bring it down
underneath the grid lines. I just want to I just wanted
to make these creases a little darker because
it looks a little fake. So I'm gonna go to crease. Then I'm going to
grab this color. I'm going to go darker. And now I'm going to
use the crease just to just to sort of add some, some color to those creases. So something like that. We can take smooth and just make sure that
my paint is off. When I use this, when
I use the crease tool, we wanted to use the paint, but I don't want to
use it for the smooth. So just make sure it just tap the circle and then
just tap here. And that'll turn the paint
off for the different tool. Just smudge this a little bit. Okay, I think it looks
a little bit better. Just gives it a
little more detail. Okay, four minutes
in for this video, it was not supposed
to be that long. But let's see if I can get
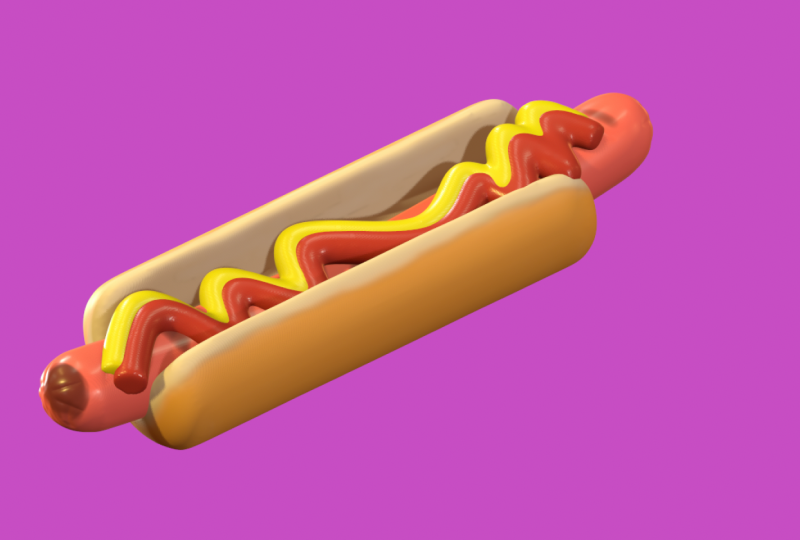
this mustard and, or ketchup. So let's use the tube tool. So let's choose the tube tool. And we have post-process on. We can turn it off. It'll just make everything a
little bit quicker. So let's use the
tube tool for this. We'll go to path. And I think we'll
just start here. And let's just do
like a nice zigzag. Can you hear this cat? And it's like, I
can't catch a break. So once you have a line
doesn't have to be perfect, but you can kinda
make it perfect if you, if you want it to be. You can add new nodes and
different things like that. So you can just make it as
perfect as you want it to be. I don't really need
mine to be too perfect. Something like that. And once you have your squeals, remember you can't move. You can't move. Once you start doing this,
you can't move it. But that's okay. So now we'll hit the green. And now we have
this sort of thing. Now we'll just tap on it. And let's see edit here. So we go to Edit, and now
we can edit our tube. So let's bring these down.
So they're touching. I don't think I wouldn't
be able to get this done in one more video. We will see I can only record so much because then
the size gets too big. And classes can only be
under two gigabytes. That's why sometimes
they break up a lot of after break up my classes. Okay. So we'll just
bring everything down. I probably could have just
dragged the whole thing down. There probably would've been
the smarter thing to do. But that's okay. We'll just bring all the points down until they're you know, they're making contact
with your hot dog. And I think spline might help. Supplying gets everything
nice and curvy. Which I love. Even the
bends are nice and curvy. So that's good. I might need to add some more points. See if I add a point here. I might need to add, you might
need to add some points in the middle. Just to. For example, if I
add a point here, then I can bring this up
and I can bring this down. Because you really
want to be resting. What do I have two points here? You really want this to be
resting on the hot dog, for example, here it's
a little too far. So I'm going to raise this up. Maybe raise this a little
to this end point. I'm going to push that down
because you really want it to be settled on into your hot dog. As weird thing to say. Here, I'll do the same thing. I'm going to add a point
that I can bring up. So to bring that point up, and then I can bring
this down a little bit. Bring this down a little bit at a point here, bring it up. Add a point here, and just bring this
up a little bit. So hopefully that makes sense. But yeah, that's
an easy way to use the tube tool with
edit and Spline. Spline really is a big help because it really
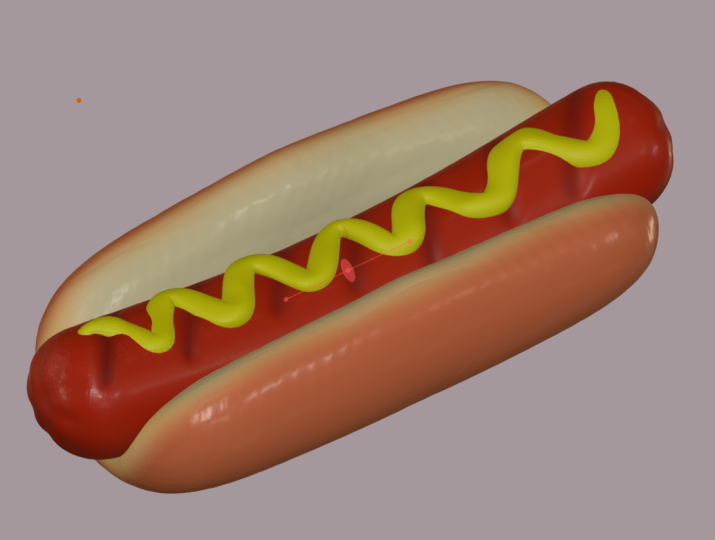
smooths out the curves. So once we have our, Once you have your your
little squiggles like this, and we can honestly go
ahead and just validate. It will validate once you
have something you like. And then we can color it. Let's make it yellow. So something like that. But we'll make it
a little glossy. Make it pretty glossy, glossier than the hot dog. So now for the ends
will just take smooth. And we'll just sort of smooth
out the ends. Like so. We can smooth out the other end. So I think I want the grill
marks to be a little darker. So let's just go
to our layer and just make them a little darker.
10. Final Touches: Okay, So one thing I'm
noticing from this side is I, I still need to bring
these up a little bit. So okay, so I still need to bring
these bits up a little bit. So I'm just going to use, Let's bring back my tools. I'm solo now. Let's use the move tool. So I'll just make the
move tool pretty small. I'm just going to drag, Let's make it a little bigger. Let's make it big enough
so you can just kinda drag any bits up that
kinda don't look, that looked to
deepen the hot dog. If that makes sense. And also, you don't really think you want these creases so we can
smooth those out as well. I don't think it gets creases when you
put it on a hotdog. So let's get rid of them. Okay. I think that looks pretty good. So I'd also like to this
is another detail thing, but on the hot dog, I'm going to make a new layer. And this will be the
mustard, mustard shadow. You can actually spoke the
way it's supposed to be. Most artists. Shadow.
Now on the hot dog, we'll just make a
shadow to go like around this, this mustard. And this is a
little tiny detail, but I think I'm
going to use drag. And we go back to the mustard. Want to drag this up as
though it, it makes sense. Because if someone like
squeezed it out of the binky, feel like that feels
more realistic. Okay, so let's go
back to the hot dog. And I'm going to tag this color. So I'm gonna grab this
color of the hotdog and just make it a little bit darker as we make
it a lot darker. And we'll take we'll make it
a little rougher. Actually. It doesn't need
to be that rough. So make sure we're on our
mustard shadow layer. Make sure we're on paint. It's okay if the intensity
is quite high because we'll, we'll do the smooth later. But now just go or
along the outside of your mustard can even go a little darker. And I noticed that sometimes for some reason certain things just I just want the shadows to look a little more uneven, natural, but
sometimes it's just, sometimes you just have to take these extra
steps to make things look even more realistic
or at least believable. Sometimes the
artistry of something might supersede the technical, you know, what, what it's
supposed to look like. But I always have, I always do these kind of extra shadows. I just think that they really
make a big difference. And I will just use smooth. And we'll just sort of
smooth, smooth them out. Okay? So now it has a little
bit of a bitter shadow. Even now I feel like it looks
it looks a little better. All right, So let's
turn post-process on and see how our
mustard looks. I think it looks, I
think it looks great. Let's go to our main view. Main views, okay, but I feel
like I want to see more of the hotdog like this. So I'm going to add
this view as well. But I think that's pretty good. I think I'm gonna
leave it there. If you can do a nice turntable. All these extra
hot dogs in there. But I think I'm gonna
leave it there. I just wanted to add that up, that extra detail because
I think it's important to kinda make it as
realistic as you can. And the great thing about
this is, there we go. The great thing about
this is you can always just take the tube. Let's actually, let's
actually bring it out to our hotdog and
rename it mustard. But let's say you
wanted to do ketchup. You can duplicate it. Bring this one up to,
you can turn one off. And that's the coldest ketchup. And then you can just change
the color to catch up. And you can mess around and
put some other stuff on it to totally up to you,
have fun with it. That's actually a
decent view right here. I was looking for that perfect. Perfectly safe
this view as well. Let's turn the lights off. Now we have our hot dog. So hope you guys enjoyed it. Make sure you save it. I'll see you guys
in the next video.
11. Thank You!: So thanks so much for
joining me for this class. I hope you enjoyed
it. I hope you made a hot dog that you're
proud of and I hope you post it to the class
because I really like seeing your work and I want to see what
you come up with. Feel free to keep
working on this. You can add some,
like we said before, some onions, some relish. I don't even know how
you would do that, but, you know, experimenting
is always fun. Barbecue sauce,
ketchup, mustard. I really love to see
what you've done. And again, I hope you
learn some tricks from doing this hot dog because yes, it's just a hot dog,
but you learn so much that you can
use moving forward. I'm also going to do
some more characters. A few people asked me to
do a Pokemon character, which I think it'll be fun. I just wanted to make sure
that I had some simple scopes. Even though they're not really simple once you get into them. But characters are
really, really complex. And there's so much that you can do with
them and there's so much that you need to know before you get into
doing characters. That I just want to try to do everything a little bit more well-rounded before I start
doing a lot more characters. But I'm gonna do them because I really loved doing characters. Be sure to follow me on YouTube. I'll probably do some extras to this hot dog and I'll
probably work on it. So look out for
that live video or just any video connected
to my Skillshare classes. I also have a list with all of my Skillshare related classes
and things like that. So there's some
extras. There might be some for classes that
you've already done. I might have done some YouTube
videos connected to that, so make sure you check that out. Youtube.com slash drug-free day. Also Instagram. Instagram.com slash
drug-free day. You can check me out there.
If you're into procreate. I have a Facebook
procreate tutorials group is called procreate
tutorials and guidance. So that's on Facebook.
You can find me there. Tiktok as well. Tiktoks,
really fun, so be careful. It's very addicting, but
I'm on TikTok as well. But I really appreciate you guys joining me. It's
been a pleasure. Be sure to reach
out, let me know what kind of classes you want, what kind of scopes
you wanna do, and just different ideas because I do take those ideas on board. And that's why I come
up with things that I learned myself and then
teach from my classes. So it's always a
pleasure with you guys. I'm so happy that you're
joining me for another class. I can't wait to see your work. Alright, keep drawing,
keep sculpting. I will catch you all
in the next video. Lash out.
 Dave Reed, 2D & 3D Illustrator - Brooklyn, NY