Transcripts
1. Introduction: Hello, students. My
name is Joe Velasco. I'm a professional artist. And say professional
artists because I have done so many shows,
one shows exhibitions. I do workshops right now. At the moment, I'm
doing it every weekend here in my Pujo here in Sydney. That's the reason
for this film where I'm going to show you how
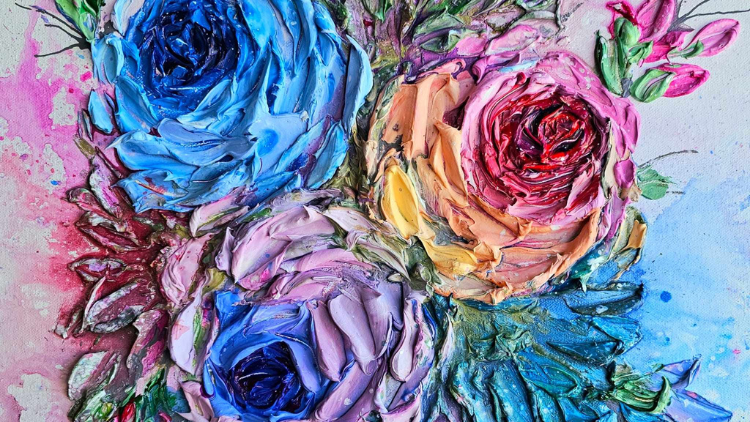
to do textured floors. This one here? Yeah. This is what I'm going to teach
on this workshop. And it, once it's all done, it's going to look professional. As long as you follow,
I try to follow intently what I
say or what I do. You follow it me. In the end, once you finish this workshop, you have a professional
looking painting ready for your signature of varnishing
and also for framing. Yeah, so that's what you're
expecting on this workshop.
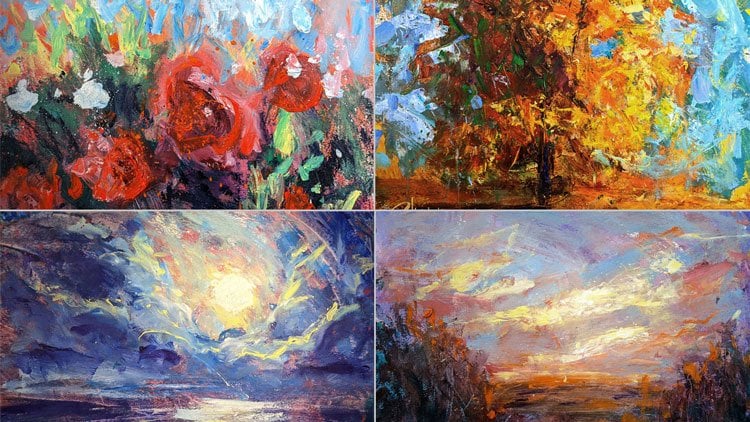
2. Technique: As I have mentioned earlier, what we're painting
today is textured roses. In particular roses, because
we can paint any flowers, but you know, it might
be too confusing. So I'll start with roses. I'm a very, very
experimental artist, like I experiment all
the time in my approach. So sometimes I make mistakes, sometimes I do happy accidents. And from those happy
accidents, I learn a lot. And this is what I keep and
I develop on that technique. And this is why this trick
that I'm teaching you pull. I'll say it. My trade
secret that I'm sharing to you that I
learned over the years. Text, I mix everything myself like except
the paint of course, but the texturing
paste. I do it myself. And I'll teach you how to
mix that during our course. Yeah, Yeah, that's my approach. Experimental approach
and carefree. You don't even have
time to think, Just keep on drawing
your painting. That's the style
we're doing today.
3. Required Materials: We talk about materials
that you need. Of course, you need a canvas, stretched canvas, prime canvas. And this one, I just bought
it from store, ready, made. Any art will say you, this is 500 millimeters
by 400 millimeters. But any size, of course, depends on how fortable you're working on your first lesson. Next is I'm using
palette knives on this one number three
and number number one, mind you, this shape it
to a very sharp edge, you can see, but you
don't have to do that. I do it because I need
it purposely for myself. Okay, this is what I buy for mixing palette,
for my color palette. This is what I buy just by from any hardware and front brush. You need that Yeah, share later on for splattering
my palette color palette, I just use a loose canvas. I cut it to the size
about an aforize. Because the purpose
of this is this one, you can strip off
the past later on, then you can wash
it and reuse it. You can reuse, you don't have to keep on buying a new palette. Yeah, we go to my colors. We use acrylic paint
for this session. Acrylic, you choose any
color that you want acrylic paint to suit the color of flowers
that you're doing. Now, as I've mentioned before, I'm a very experimental artist. I don't throw away
my old acrylic tubes or acrylic containers. What I do is I fill it up with fluid acrylic and
then cut the bottom. And then I use it for
making some shapes. For example, the stems. Yeah, I'll show you later on
as we paint, I'll draw this. It's a short cut syringe and
needles I use that as well. I'll tell you where
I'm going to use it on some small twigs later on. Again, this is a short cut
approach of pale water. Acrylic paint tends
to dry very quick. And once it is dry, then you have a
hard time taking it out from the brass
or from the palette. Very hard, because when it hardens it's hard like a stone. We don't do so much sketching, so we just draw
shapes with a chop. These are ordinary chop. Okay, The main ingredient for this painting is our
texturing paste. Yeah, that's why it's
called textured acrylic. Now I buy this from the shop, it's called molding paste. But sometimes it
becomes very expensive, especially when I finish
one jar in one painting, so it becomes very expensive. So I devise a way to mix it. Now to mix it, all
you need is glue. I buy this from your
local hardware. Acrylic paint. Yeah, any brand. As long as yeah, it's a reasonable brand. Powder, plaster price. You know, that plaster price,
you buy it again from any hardware
or alternately, for it to be smelling better, I use Johnson's Baby powder, So I mix them in such a way that it's a thick consistency. If I show you that's
the thickness, I'm looking for very thick. To make it thick, let's keep
on adding more of this, but make sure that you
have enough of that glue. The glue is for it to stick into the canvas and the crylic is for it to be pliable so you can work on
it easier, pliable. And I guess when you finish
you can roll it and it won't park because it's
more flexible or pliable. Okay, that's the materials
and we can start painting.
4. Drawing The Flower Outline: We start painting on the hands, I'll be using chalk
instead of pencil because it will dissolve with the water they're using on
the critic pencil. It will stay there and
it might show later on when the painting
is done and you still see pencil marks or pencil sketches that you might
find irritable later on. This one it will
dissolve in water. What I'll do, the round shapes, anywhere in the canvas, anywhere without even
looking Three shapes, 123 in the middle. Three shapes. And it represents the rose painting. So
it can be anywhere. As long as try to
leave the edges clean, you don't go through
the edges or else it'll become too dispersed. You want to compact in
the middle because you can always add on those edges. But at the moment we concentrate in this location
here of the canvas. Yeah, that's the rose. I'm looking at the rose, for example, from the top. It's not something that
you're holding here, but I'm looking from the top. Or a rose on the table, maybe you're looking
from the top. So I'm just going to do the leaves there,
leaves everywhere, like the twigs for the leaves, you know, something like that. So you don't really have to
draw every single petal, just throw the shape
and draw the twig. So that's my initial sketch. Okay, now you're ready
to draw the twigs.
5. Painting The Twigs: The first thing that
we draw is the twigs. The twigs that I've just drawn. Again, as I mentioned a while
ago, I'm very experimental. I don't throw away my
finished acrylic containers, instead I keep it. For this purpose, what
I do is fill it up with fluid acrylic
by using injection. Yeah, I inject fluid acrylic to it to the colors that I want, then I use it for
drawing the twigs. This is very unconventional
way, as you can see. Unconventional way
of painting flowers, all based from my
experiments in the past. That's one color of the
twig, another color, lighter green, maybe. Imagine nature. Just have them around the rose from the inside and not going through
the circle of the road. Okay, There another
container here. Just keep on adding
twigs, different colors. A Ti that's out. Yeah, I use as well,
injections syringe. You can use it, fill
it up with the p, the color that you
want. You can use it. Okay. Now you this is very
conversion to do this one, this one or this one. This one. Then use
your normal brush, long brush, and
just do your twigs. So use your normal
brush, that's okay. You go make your
twigs by using brush. This is the process of a quick process of painting the twigs in just a few strokes. I'm done with the twigs. You don't have to paint
it like individually. Okay, so that's your twigs.
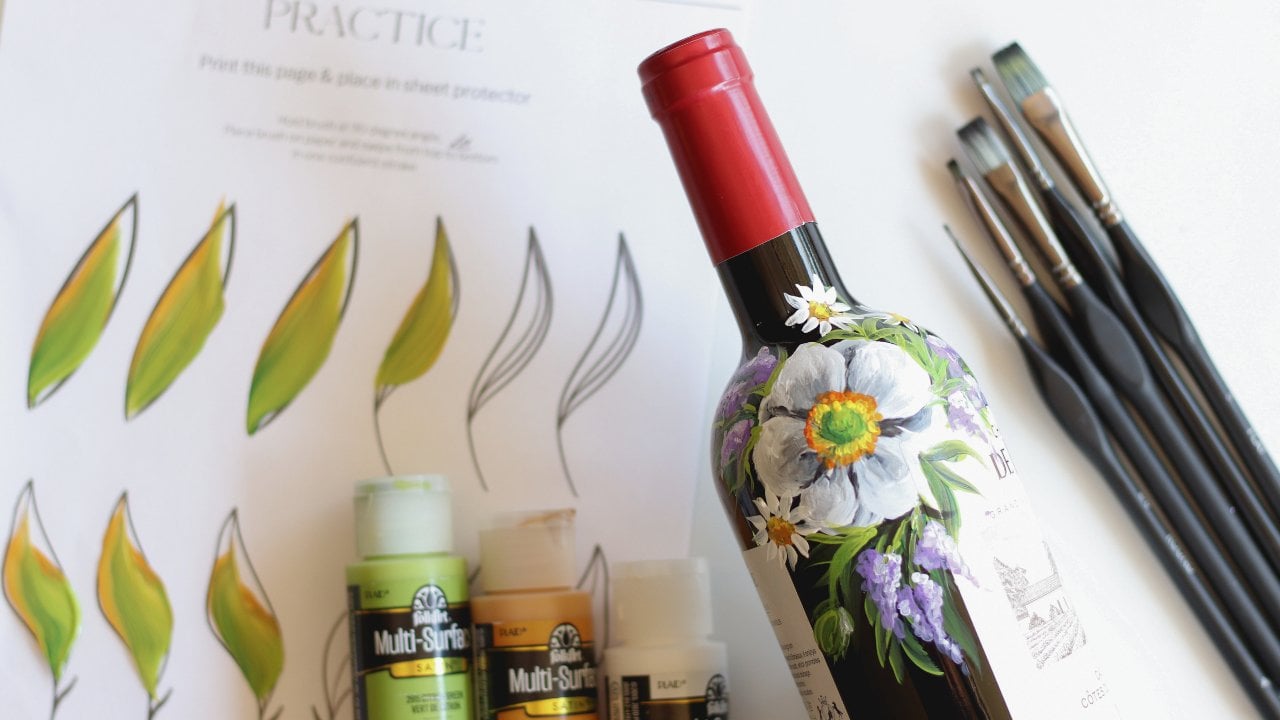
6. Painting The Leaves: I'm done with the twigs. Let's do the leaves. Okay, I'll be using number
three pallet knife. Okay, And here comes now my mixing palette
and texturing paste. Get that much? Yeah, that much. Put it in my plastic
pallet here. So mind you, anything that you use once
you finish using it on water, because this will
become hard very, very quick on water. It's okay, you can
clean it afterwards. Done with the texturing paste. Now I have to put some pastes. I'll just put a
little that much to she is that you can think of? To do the leaves. Yeah, I'm putting dark green, light green. You can even mix your green
with blue and yellow, purple and orange, whatever. I'm just using pre mixed
acrylic paints, doesn't matter. Maybe I'll throw in a
bit of this color here, what they call this Merlo
chance for a change of color. And orange, maybe any color as low as you give
it a hint of a green. Those are my shades
for my green. Now texturing paste, Pick any, just mix like so make it thick. Don't be shy with the texturing. Paste. Put as much as you can, put other color to
make it interesting. Maybe yellow, mixing it much, texturing paste there. Okay, and then to scoop it, always use the back part of
your knife, never the front. Then to scoop it,
scoop it towards, this is important to you have accumulation of
paint here, texture paint. Now to apply it, mind you, every leaf is one
stroke on one stroke. To apply it first down to one stroke, I
have one leaf, yeah. Maybe put the shade of color there to make
it interesting. Again, that's the shape I
made. Keep on doing that. Following you have to follow the direction of your twigs
or else it's everywhere. You should follow the grace of your twigs like so be orange, make it brownish a bit. Same place, it indiscriminately
along the twigs. Just to fill up that space, there can be a big twig, small twig, whatever
inside here. Okay, I'll add some
more texturing Paste. As I'm very generous
with my texturing paste. You can see, just be generous. Don't be shy and I have to
cover that all the time. It doesn't harden up on me. Yeah, texturing
paste again, plenty. And dark green, maybe black. There's a dark leaf. I'm doing more texturing paste. Just keep on adding leaves everywhere and
with different colors. Maybe white. Make it lighter, scoop it, and apply
smaller leaves. You can say, I can apply it this way or that way or
that way or this way. Yeah. If you keep on doing it, you'll know that anyway is correct way as long
as you do it right. Yeah, that's okay. I'm done with the Bs. Finish with the lives. I
have to finish palette. Dip it in water, it
won't harden up.
7. Applying Different Background Options: Okay, we go to the next stage, which is doing the background. You can see here, I
have a background. Yeah, very loose and
I call it flattering. Splattering with a fun brush. That's the fun brush, I'm
talking about loss of water. Yeah. What colors you
want on the background. Now, before doing so, you have to choose what colors
you want for your roses. These are the main things
I'm using for my background. Plus I'll add white and black, whatever Or some accents. Yeah. And to do that,
I saw it. The roof. This is my style of doing it, but you can choose any
background you do. But then it's a different
approach altogether already. Because you have to start with the background before the lives, But here the lives is
intact, touching the lives. I'm just sprouting
over it some water. And I slowly grabbed
that paint there. Okay, so that's my mixture. And I'm going to start, see the direction of my
font is not like that, it should be vertical, that's like so
platter everywhere. Mainly on the middle part, not on the outside, mainly on the middle part. I'm placing white, a clinic. This white is you just
buy it from any hardware. It's called the wall paint. I use semigloss or
eye gloss wall paint, that's already the
normal consistency. Again, I spluttered it somewhere here just to loosen up on the first splutter
color that I've done. It blends naturally. So those are the two
colors I'm using. I'm done with this rose color. I'm going to use
purple on my next one. Maybe, I think maybe place
it on the top there. This purple. Okay. We are
doing background colors, and it's all done by
spluttering, no brushing. Okay? Just let it
flow in your canvas. As long as your
canvas is very flat, then it will just
stay in the middle. Don't il your canvas or else it will flow to the edge now. And I use white again on the edges here
just to soften it. Okay. Very well. So
now I'm going to use blue paint. Start in the middle, I'll be worrying you,
covering your lips. So now next is the white paint, right? You're going to throw
some pig over there. And a bit of purple here. Maybe Just a hint of
purple. All right? I'm done with spluttering
as you can see. Like it's almost a
complete painting ready with all the flowers. You have the background,
you have the leaves. What's missing is the
flowers now, it's very wet. Since you're doing
it on your own time, I suggest you leave
it until it dries. Maybe you have to
leave it overnight. Even for this video, I have to wipe it dry
where I need to pay, just to expedite my process. But again, don't touch
this now on your own home, on your own time, because
this is a very nice outcome. Now, I'm going to remember
where the circles are, where my flowers will be. I'm going to wipe it dry or
not really dry but just dub, dub it like so with the tissue. Amusing tissues you can see because this is
very soft and very, very absorbant uptright hand towers but they're no good
even they're no good. So this is the best solve
and very absorbent. Wipe away the excess paint where your initial circles are
for your rose placement.
8. Painting The Flowers: We are painting roses here. I just cut the rose for my garden because I
think it's important that we have to see how
we're looking at the rose. In my experience, it's
better if we look at it sideways as we present it on
the canvas. Sideways like. So make a line or an
axis for the rose, the center of the
rose in parallel. In line with the stem. My stem is going this way. That's my first line here. This way. Second line
for the second rose. I call my axis for the rose. Yeah. Or the center
line of the ros. Then since I'm looking
from this end here, my petals, they are very
small and then becomes bigger as I see it
from the front here. A small petal, small. So I have the core and
then go bigger here. I call it solar
system ellipse shape, it is the core. And then go farther
away from the core, like the solar system. Mercury, Venus, pars,
Earth and so on. Yeah, that's the way I present my rose, the circles. It's good if you do it. You have a guide
to make your rose. Okay. Right now what I'll do this is magenta here or the rose, I'll go against it. So I'll put my magenta rose here, so that's the first rose. I'll do main color,
the rose color. And then on the core, normally
on the core it's darker. So I'll put like a darker color. I'll just kind of
mix it later on. Purple. On the dark part,
it's a bit muddy. So I tried to get
away from black, dark red, white. I'll place orange, nice
colored petals and yellow. So there are my
colors on my palette. Again, I'll grab
my palette knife, the small pallet
knife this time. Number one, my texturing paste. Remember, I dip my
texturing paste here. It's always, catch your clothes, wipe it, texturing, paste. Don't be shy. Okay, put
it in the corner there. Water. And I'm going
to start on the court. Okay. That's the color, main color that I'm using. I'm going to put red and I'm going to put blue or ultramarine blue
to make it dark. See darker bits there
now should be thick. This is important.
Your direction. Start on the core, say that's
the sun. Start on the sun. In your direction, goes around
the sun. Like so, Yeah. Following the shape of the ellipses that you just first drone, I'll
go around like that. Then I'm going to add pure
colors to make it stand out. Pure colors to make it more vibrant and
stand out, maybe red. Okay, so be blue in the
middle there on the shadows. That's my initial
core application, so I have still
plenty of paint here. I don't waste it. I ply it around
here in the shape, discriminately
because I'm working wet on the weight, so
it doesn't matter. This painting is
semi impressionism. It's free painting, right? I'm just going to
disturb the leaves there. See what happened there? Yeah, now this is
contaminated palette, so I'm going to grab
another palette. Going to make lighter
shades of the color. Pat. I want to introduce
other colors to it. I will make it that
color which is, becomes light purplish pink. Then again, the way
scoop it from the back only I'm using number
three, palette knife. I start with the direction of my solar system that
I was talking about, where ago I follow
that direction and I'm almost half
done with the rose. But what I'll do,
I'll pull a bit of the black one or
the dark ones here. Bring it out so
it's not so sudden, just bring it out following
the same directions like so. Okay. Now I want to add
another color here, a bit of yellow, white. It's peachy color. Yeah, more white maybe. And I'd like to apply it from this one because it looks good there. Okay. Remember this. Towards yourself?
Towards yourself. Yeah. You apply it
away from you now, I can't disturb the green now, I'm going there, but
I won't go inside. I just stay where
the greens are. All right. So one finished. Okay. I'll do it during the
same process I have done here but only different colors. On this one, I bed blue rose. Okay. I'm, I'm doing
the final flower. I'll be painting
it with purplish. Maybe you're thinking, what
color roses will I paint? You know? And here it's helpful
that use references, look at nature, look at the
flowers in the other gardens, or your garden, or
even look at photos. It's not bad to look at
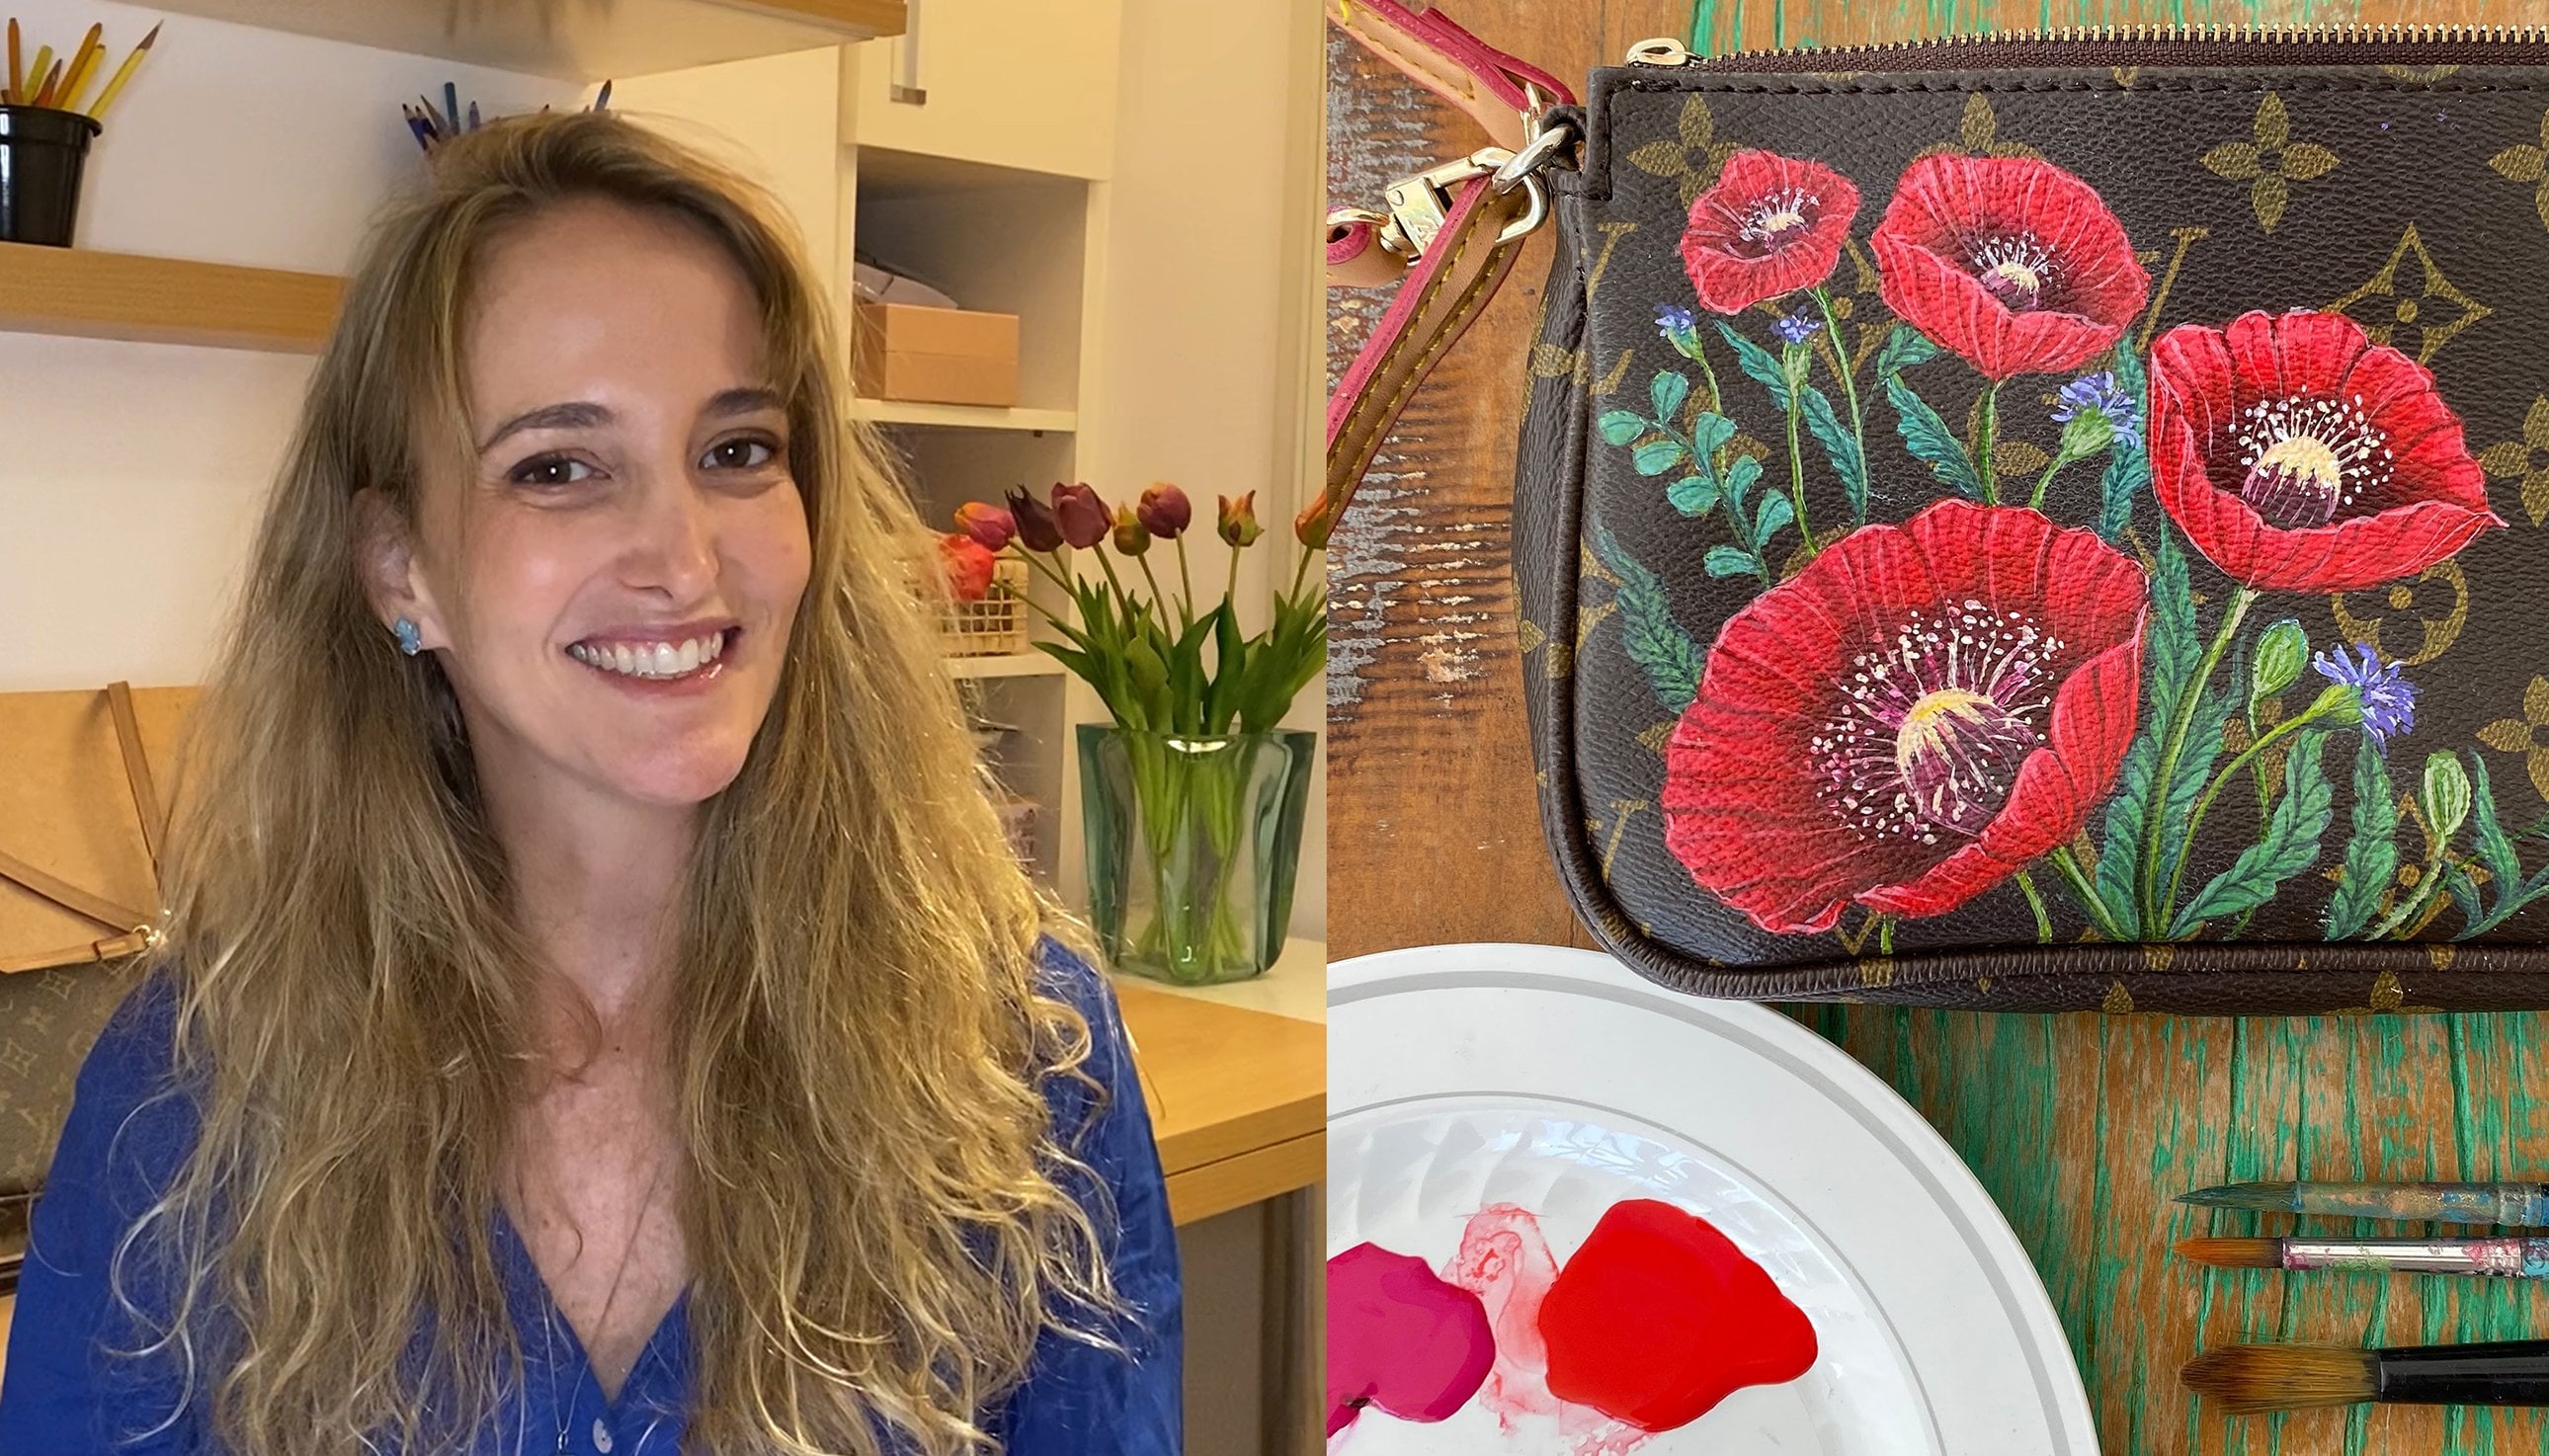
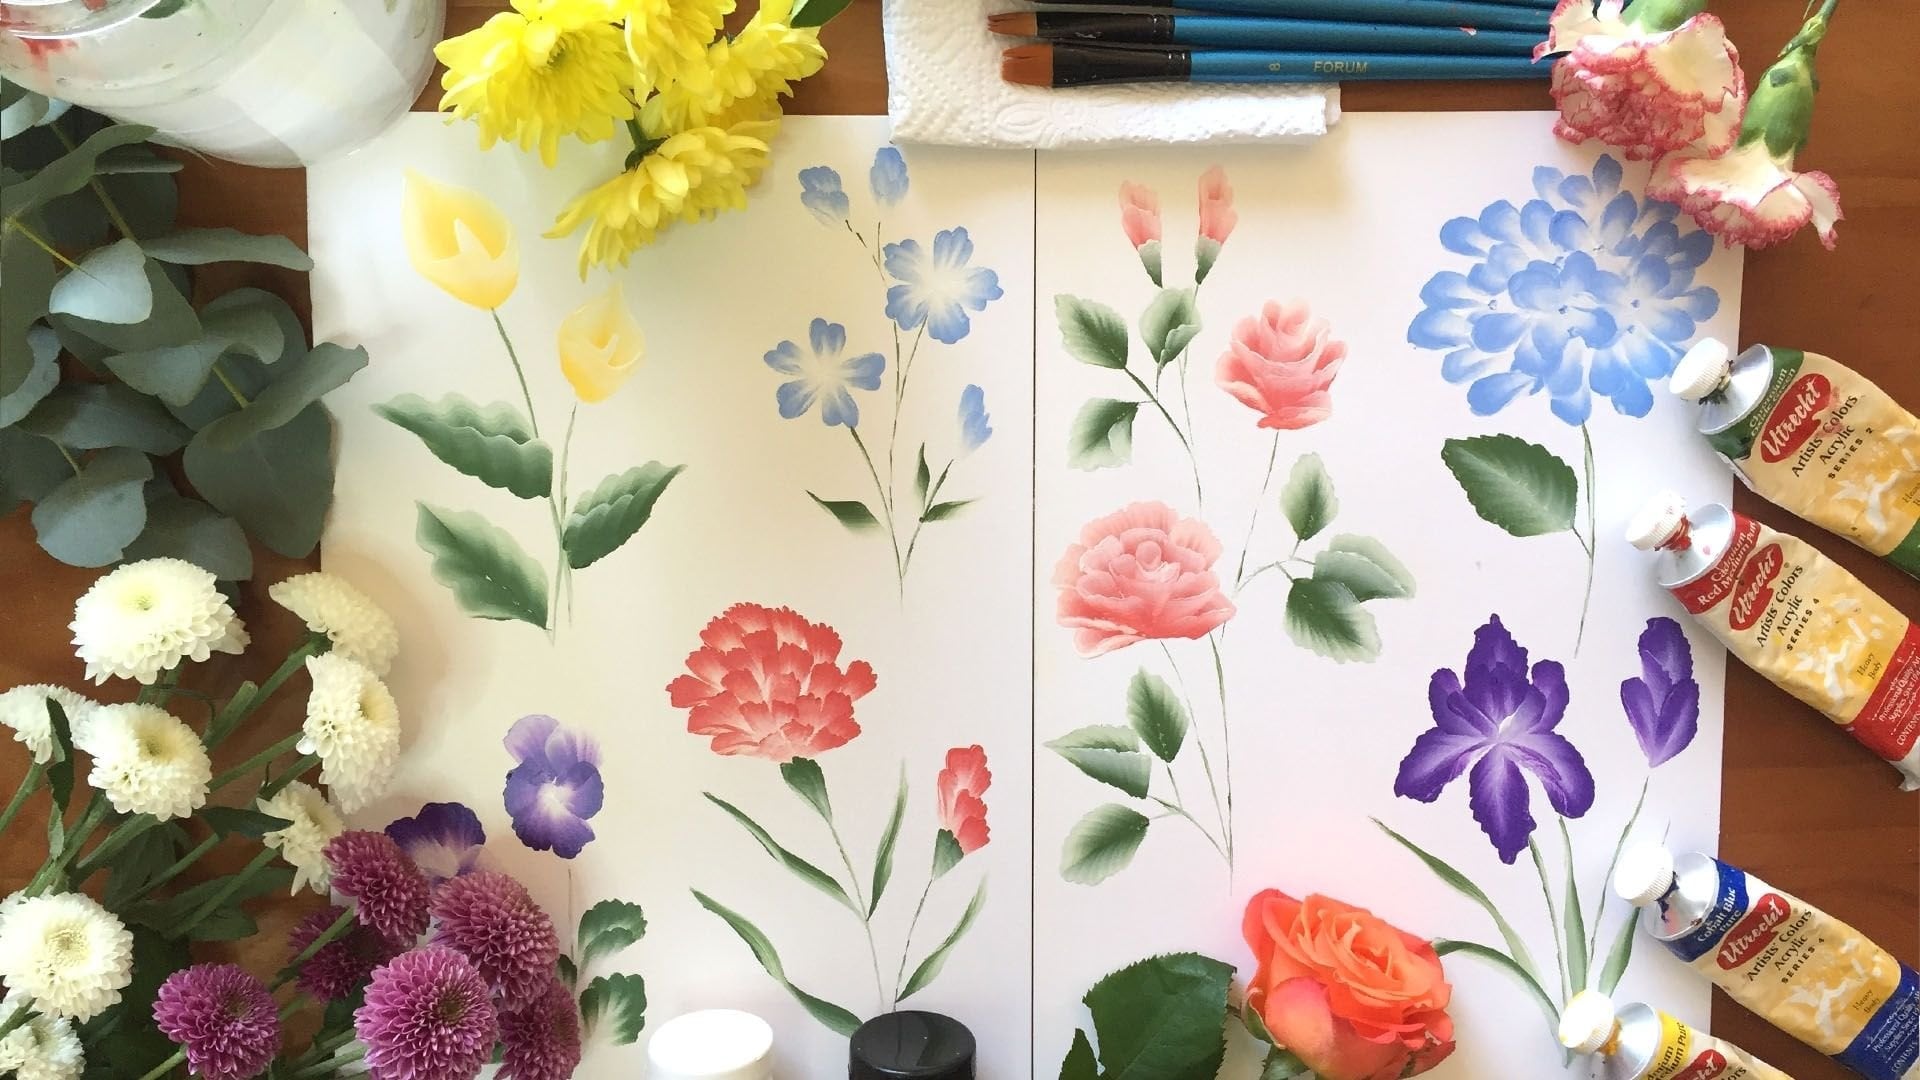
photos as your reference. As long as you don't copy them. Use them as reference
for colors and shapes and things like that because there's lots of colors. Flowers has millions of colors. Shapes, lots of shapes. Yeah. Be guided. Okay. Use references. Even great artists,
they use references. Don't think it's
only in your mind. No, use other references. Please listen to what I'm saying because it might
not be relevant to you. I think it's good
that you follow it because once you follow
what I'm saying, you can go wrong, especially during the shape of your petals. You follow the solar system that I'm talking about.
You can go wrong.
9. Painting Finishes: Okay. Yes. Almost finished. I'm just going to add some buds, small buds to
complete the picture. Like So one stroke, blue color? Like a stroke? Stroke? Yeah,
something like that. Yeah. Some little buds case. All of these are
just one stroke. Right. Then since
I have the buds, they should have accompanying
lives with them. Correct. Letter I would say just to show you
syringe needles. I use it as well for
my smaller twigs. You can put on any
color on your syringe. Bright green is good, but guess using a grayish green. This one here,
your thing around. Okay, last finishing touches. Just put darks on some
parts has an accent. Give it a bit of
a contrast, wit.
10. Outro: That has been our flu
workshop for today. I hope that you learn
from it and you can start your flat workshop
Painting journey from this. Yeah, as I've said a while ago, you can use any
call that you want. Just have to have
reference for your guide. And mind you, this is done by one of the workshop
participants. Yeah. If she can do it in 3 hours, I'm sure you can do it as well. Yeah, So good now
to your painting. And we hope to do more of this and see you in the next future.
 Master Artisan, Unveiling Mastery in Every Stroke