Transcripts
1. Making movie-like comics: Have you ever tried
to put together a comic story and you want
to make it look like a movie with all the interesting
film crops and angles. But as you're doing it, you felt like you didn't know exactly what you were doing. And when you're done, you
feel like it's pretty cool. But when you hand it to somebody else to read,
they look like that. And they're confused
about what's happening in certain
parts of the story. You find yourself needing to explain a lot of the
comic to them rather than them being able to understand the comic just
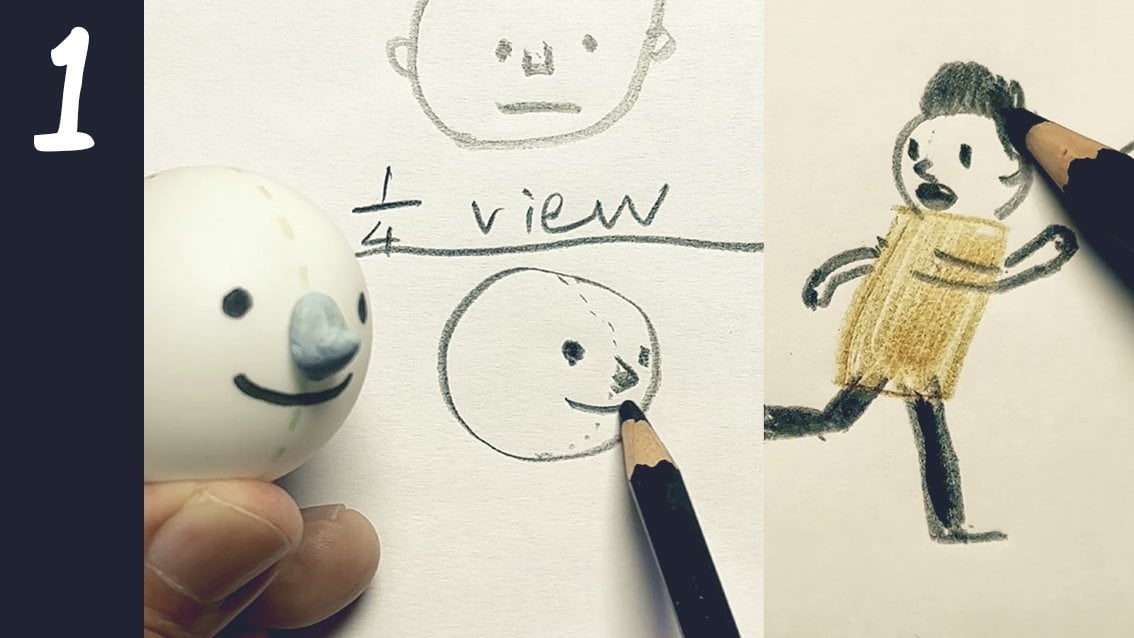
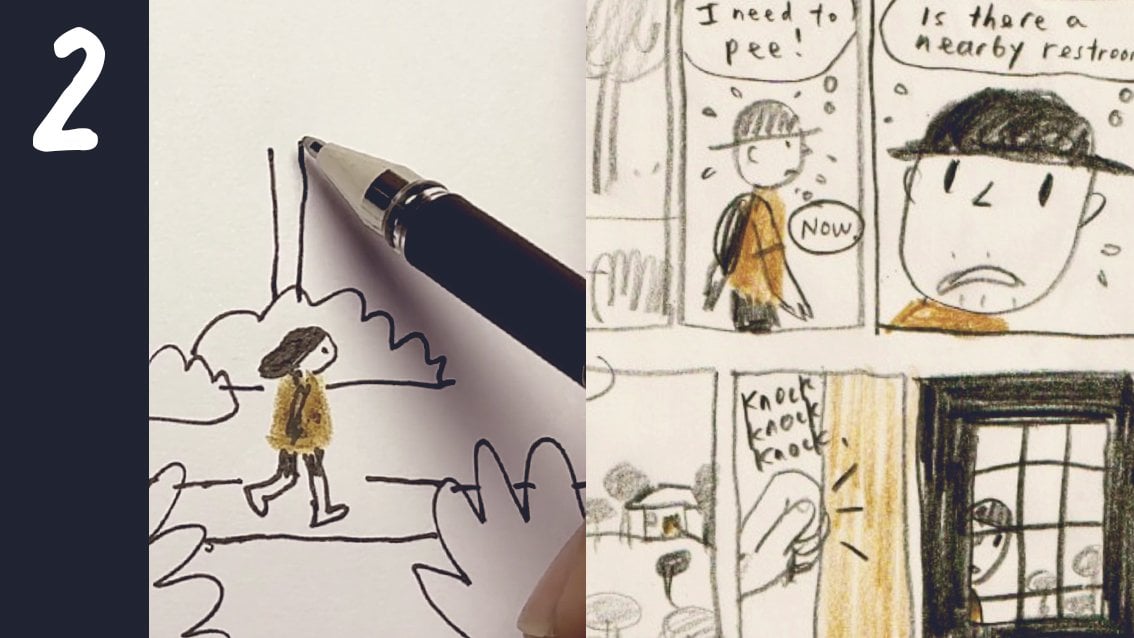
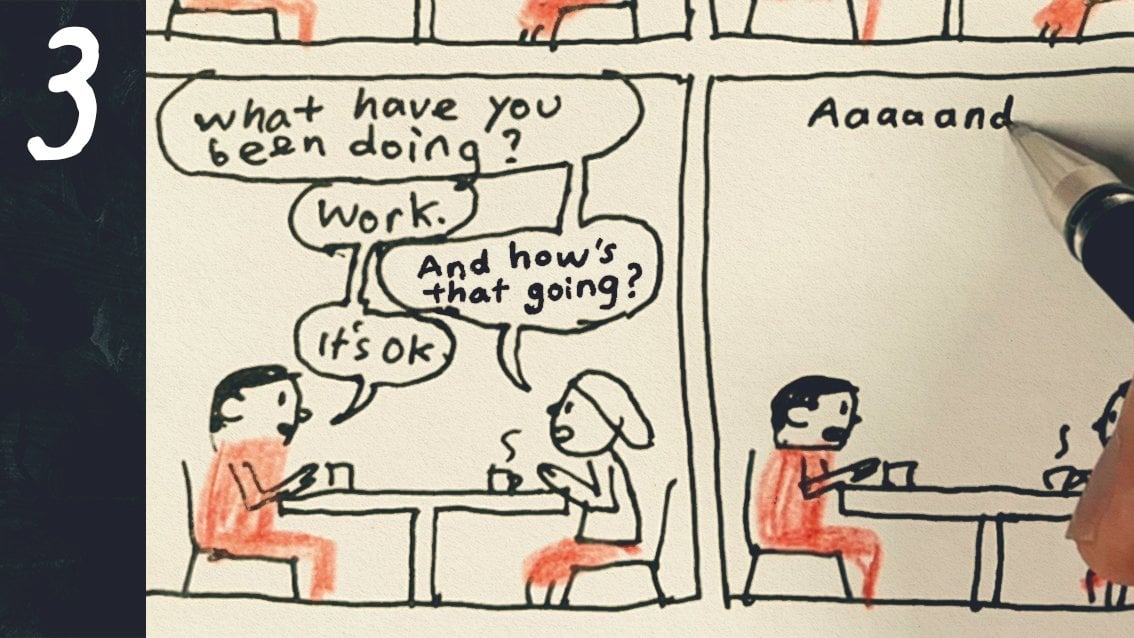
by reading the comic. That's part of my journey
as I learn to draw comics. I started drawing comics
when I was around 11 or 12 and I'll draw
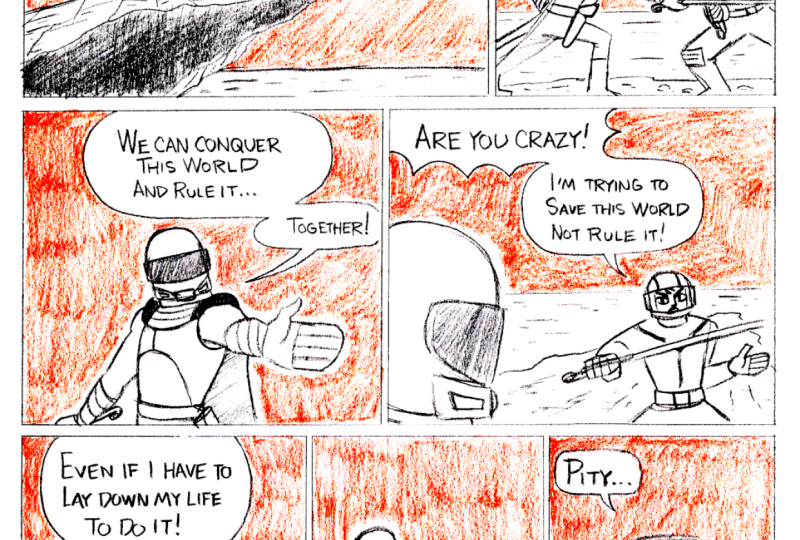
comics like these. This is some space
alien with superpowers. As you can see that
I was trying out different movie elements in it, interesting angles and such, just like I saw in
film or cartoons. It was a lot of guesswork, not really knowing
exactly what I was doing. Well, that's the fun
thing about being a kid. You just take the risk and
just go ahead with it. But I was putting in my
best effort into it. When I showed my mom, she
would say, It's amazing. But when I read it for
myself several years later, I started noticing that certain parts just
wasn't very clear. I didn't know where certain
characters were or it wasn't very clear what was
happening in certain panels. But I didn't stop
drawing comics. In fact, for the next 40 years, I just continued figuring
out what made comics. Clearer and more readable and at the same
time, interesting. I didn't take any
formal comic classes, but I did read a lot
of comics and I just kept asking myself why I also found it helpful to study
a bit what filmmakers pay attention to because comics and film are actually
rather similar. They use similar principles. I found that my comics slowly became more readable and I also knew what I was doing as I was doing them and now
I have comics published. So this is what I found. It is not enough to just
know how to draw well, though that is pretty helpful. It's also knowing the
basic comic principles, and we did cover
a lot of that in the previous comic classes, but I've saved some crucial
ones for this class. Other than that, I also found that it's really
important to have a certain process to go through as you're
doing the comic. Although I would say
that I'm not one that really likes structured
organization. But over time, I found that a
certain process is needful. In film, there is the director,
the wardrobe designer, set designer, script writer, director of photography
or art director. But as a comic artist, you or I, we have to embody all
those things and make the decisions of all these
people when we do our comics. If we're making all these
decisions all at once, that can be very
stressful because there's so much to
think about and as the comic goes
longer and longer, if you want to
attempt more pages, the stress just
increases, I find. Over the years, I've tried
out different processes and settled on one that I like, which I will share with
you in this class. The process helps me to think of one thing at a time so
that I am not overwhelmed. My name is Andrew and I am an independent freelance
illustrator based in Singapore. I've been doing comics
from the time I was about 12-years-old till now, I have comics that
are published, comics that I do for clients, and comics that I do just
for personal enjoyment. In this class, we're going to do a dramatic conversation scene. To do this, we're going to learn particularly
about establishing shots and how to use them with the other kinds of crops
within the same scene. And since we are focusing on drawing out a
conversation scene, we're going to learn a few
crops and angles that we can kind of film our
conversation scenes. I would say to make it look more cinematic,
more like a movie. And I will also share with you the process that I
use to help manage all the many
decisions we need to make while doing a comic
from start to finish. I think that will
help when drawing out comics with more
intricate story lines. This class is for you
if you want to further develop your skills
in telling stories through the comics
medium so that you can better use it to tell
any kind of stories, whether it be from your own life or from your imagination. But before you take this class, take note that this is
an intermediate class, and it's recommended
that you go through the first three classes in
this series before you take this class because everything that we're going to
learn in this class will be building on those
first three classes. If you haven't taken
those classes, go through those classes and then come back to this class. This way, you will
be able to catch up with what we're
teaching in this class. As for the materials, you'll
basically need a pencil, a dark pencil, like
a six B or a nine B, a mid tone color pencil. This is kind of like
a yellowish orange, an eraser, and some paper. I'm just using photocopy paper. You don't need a
lot to do comics. So if you're ready
to learn how to draw dramatic conversations,
let's get going.
2. What are establishing shots?: So, you know, when
we tell a story or when we hear a story, we want to know some
basic information so that we can make sense of it. Usually we want these
questions answered. Where, when, who,
what, how and why? I would say usually
the last two, how and why, not
the most important, but the first four,
I notice that I tend to need to know this
bunch of information. If not, I'll be like,
Yeah, tell me more. I want to know more before I can understand what
you're talking about. So here are a bunch of
pictures that I shot during one of my recent
outings with my friend Roger. And let's see how each of these shots answer
the questions. So we have this lamp here. It answers what
is in this place. We have flowers. We see
what somebody's wearing. We see who is in this place. We can kind of tell
what somebody's doing and what kind of beverage
they serve here. Get a sense of what kind of
activity is happening here, what this person is doing,
who this person is, happens to be me, what he's wearing, who
he's talking with? Yep, they're having a
conversation, looks like, but we can't exactly
be sure because we never see them both
in the same picture. But what do you
think is missing? What's the missing link? Do you feel like you know
enough of this scene or you feel like
there's something more that you're
itching to know. For me, the question that I want answered is
the where question, where are these people? So to answer the
question where I could include this final shot, and this shot provides
the context we need to put all the
information together. I kind of like it's the if I
were to think of an analogy, it would be a base
of the pizza that holds all the topping together. Without the base, well, there is no pizza. So this shot that
provides the context for this whole scene is called
The establishing shot. Oh, yeah, there's a bit
of W answered, as well, because of the hint of
blue outside the windows, but when doesn't seem to be too important for this
scene at the moment. Here am I at my studio. But if you keep on seeing
me like this, so close up. Or just from this corner
where my books and my tools are or just
at my desk like this, me beside my fake plant, you don't really get
a sense of where I am unless I do a wide
enough shot like this, and then everything makes sense. This is my studio. Um I should clean up the mess now that
you can see everything. The establishing shot is usually a white shot and white doesn't mean the panel in
a comic needs to be white. We use the word white
because it's a film term. Because to capture a big
scene into a small picture, you would need a lens
that has a wide angle. In a way, lenses are made
after the design of our eyes. So if you try to widen the view of your eyes so that you can see the whole scene around
you from end to end, that will be kind of like using a wide angle lens on a camera. And supposing you
want to focus on something in front of
you like this cup, you would actually narrow
down the angle of your view. So that would be a cropped
or tighter lens view. That would be the difference
between a wide angle and a cropped or
narrow angle lens. These are some examples of white shots that are
establishing shots. And what we can see is that
in an establishing shot, we can see a good amount of the environment or background. We can get a good sense of what this place is that the
characters are going to be acting in and many
times we can see the full length of our main
character from head to toe, though that's not
always the case. But we can clearly tell
where the character is situated within
the environment. When I draw comics,
I usually like to show the head to
the feet because the feet tells you where the person is planted
within this background. If you crop off the feet,
it's a bit harder to tell though in some cases
is actually good enough. But whatever you do, try not to put the
feet exactly on the base of the panel because the base of the
panel is not the floor. The base of the panel is the bottom of the
crop of the camera. Another thing useful about
establishing shots is that if there's more than
one person in the scene, for example, two
or three or more, we can clearly tell how far one person is away
from the other person. So when we go close-ups later, it's much clearer that they are interacting with each
other in the same room. Going back to the full length
thing, in some scenes, it's actually quite
impossible to draw or even film with photograph
the full length of a person, for example, a very
crowded room or, for example, a very
crowded cafe or a bar. You can't see people's legs, but the shot would have to capture enough information
that with one look, we can tell who is in the scene. How far they are from
each other and also get a good sense of what
this environment is, if it does those few things, then it would serve pretty
well as an establishing shots.
3. How to use establishing shots: Okay, so this is how I
would use establishing shots in a comic scene. For example, I'm just doing
a really small one here. I could open with an
establishing shot of a house in a forest. Just keeping it really simple. Then I could do another establishing
shot because I don't see anybody here. I could show a living room, person sitting on a sofa
and whatever you like, for example, TV, a lamp, anything that will
give the reader a clue that this would be the
inside of the house. For example, if I did
a window like this, I could also do the window from the inside and that would
help link these two scenes. So putting these two scenes side by side, the
reader would think, Okay, there's this house, and this scene is probably
in this house. So these are the two
establishing shots. We establish where
this house is, and then we establishing
that these two people, our main characters are in the living room and how far
they are from each other. After this, I can just
continue the rest of the comic with crop shots. For example, I could have this
person with the long nose. He's talking, and then
the lady is replying. And he is talking again. And we could have
the lady's hand talking and maybe his hand
also gesturing something. I'll add some speech
bubbles so that I kind of know what I'm talking
about. No pun intended. Okay, we have this person. So just draw on roughly, you can see that all these are really tight crops on their own, they don't make too much sense. We just see one person,
the other person talking, this person's head, these hands. But because there is an
establishing shot here, we can reference it and
know that this person is here and this person is here throughout the
rest of the scene. This is the classic
way of doing it, putting the establishing shot at the opening part of the scene, but it doesn't
always need to be at the opening of the scene. We can actually start
with person talking. Perhaps this time he's angry. And we can have
the lady replying, ah, looks like she's shouting. And we can actually put the establishing shot in the middle or even
at the last part. So for example, we have shown
these two cropped shots, and then we can go to the establishing shot
where we kind of show most of their bodies and their positioning in
relation to each other. And supposing if there's a cat in the room this
time we can add it. Perhaps there's a
door this time, and lamp is here. Gosh, this is a
really bad house, but you get the idea. It's a clock on the
wall and stuff. And after this, you can just continue with
our crop shots. For example, it goes to
the crop of the clock. You can even go to the
cat staring at them. Adding the conversation bubbles, so we know that they
are still talking. You can even hear the
conversation going on, you know, just without any tail. So if the conversations
happening outside of the panel, it could also be like this. You know, the lady is
here and the cat's here. So having the bubble
tail go this way, we know that the lady
is in front of the cat. And we can also change angles. This is just an example seen. It's not a real story, but you can get the gist of
what's going on, and it answers the
basic question. It answers the who
question with the clock. It can answer the when question. It can answer the when
question if you know, supposing it's a sunset scene depending on the
color or if you show the horizon with the
sunset and stuff, you can tell whether it's
morning, afternoon, evening, or even night and
what is happening. They are quarreling. You can
see what is in the room, also, the details in the room. These questions are answered. Let's see who when what? Oh yes, of course,
most importantly, the establishing shot tells
us the where question. Then, as I said, the how
and the why question, it seems to be less
important and of course, as the story plays out, we'll know actually how could
be how she feels. If you show lots of emotions, clearly, we can
know how they feel. When we're introducing
a new location or the character is
in a new location, that's when I would use
an establishing shot. Following that train of thought, if we continue this story to the lady decides to
walk out of the house. So I would go to an establishing shot because
now the character that we're following has changed
location and we want to know where
the character is now. And, of course, the
man didn't come out, so the man's probably
still in the house. And following that, after we have shown the
establishing shot, we can, you know, go close to seeing her feet walking or even just
her expression, what she's thinking to herself. And the second instance I would use an
establishing shot is when a new character
enters the scene. So for example, if she sees
a neighbor along the way, I would go back to an
establishing shot, and the neighbor is a bear. Oh. Hi. The bear says, Hi, and she says, Hi, something like that. So you can see the
full body and some of the background to tell that they're still
in the same forest. This would be an
establishing shot again. So this is an
establishing shot, too. And then after that, we just
go back to crops again. A new location can
just also mean the character has shifted
to another position. For example, if
continuing the story, yet again, the character has moved past the bear,
walked past the bear. I would use an establishing shot too because they have changed location and the distance
between them has also changed. Maybe he says Bye. Let's just give him a shot. He says, By and they
have changed location, so I'll go to an
establishing shot again. And we can go back to
the woman walking, and she is you know, and sometimes a white scene does not need to be
an establishing shot. Sometimes who just want to see that she is in
some big open area. So I wouldn't say this is an establishing shot because we already established
where she is, but this is just
a white shot too. It's also telling us where, but it has to show how
big this place is. So we put in an
establishing shot when the character moves
to a new location and when a new character
enters the scene. Okay.
4. Establishing shots for conversation scenes: U so here are some possible establishing shots in
a conversation scene. We could have the
outside of a building, keeping it really simple. And if you could hear
the conversation, you might hear it in
this bubble here without any tail because you don't
know where is it coming from, you're just hearing the voice. However, if you
want, you can add a bubble and point to
a specific window, and that's also possible. Establishing shot could be maybe through a window
through one of the windows. Sometimes establishing
shots can work as a pair. So you look at this,
you look at this, and the person is probably talking to
himself or something. Or we can have
another person there. So we can have two people
immediately and we can establish where
these two people are. Of course, an establishing
shot can also be an inside of a room. And if you know how
to do perspective, you just put a point there
with a square and then have all these angles just
pointing at this little X, you get a cute room,
then erase this. Then if you like, you can
just keep everything simple, just a side view thing, and then we have the person
on the sofa, door here. And if there's another
door here or window, of course, it needs
to go to the X again. And we can have another person in there in the other room, and we can have a ceiling fan. So this could be an
establishing shot. It's a wide angle shot. Oh, what is just looking
outside the window, no TV, mat, and a cat. There we go. Establishing shots can
be just two people standing in just a
big open landscape. Sometimes, if you're
a beginner drawing, I would suggest having a
very simple open landscape, have the horizon line, have some trees, make it
a park or just a path. And have just two people
talking there. Like this. Alright. Let me just
put the speech bubbles there just to show us
a conversation scene, drawing it very simply
and some texturing. Sometimes little small textures, just representative
textures is good enough. Just keeping it simple. An establishing shot can also be two people in
a car, supposing, if you want to
depict, for example, two people in a car, choose
a very simple angle. Don't choose some, you know, complex top down angle. If you are new to drawing, just keep it simple and clear. Keep it to how kids draw a car. Communicating clearly is
more important than drawing a impressive drawing that
communicates not clearly. We can also put the little X there and we can have
the road go there, and we can have street lamps and street lamps would also go. And we can have
buildings behind too. Oops. Sorry, this
one goes to the X. All angles that create depth
would go to the little X here that I would
erase there we go. So see these two people, they could be
talking in the car. And you can think of any
background that you like, whether it's trees or
bushes or whatever, fill it up however you like it. What else can we do? So
these two people talking, we could also rotate
the angle slightly. Okay, imagine if
these are two people, and this is my camera, I would be turning the camera
slightly this way. And I'll still see
these two people, but it would be like this. So this would be
three quarters view. This would be a one quarter view that we learned in
our previous class. And the path maybe is this way. It's up to you to decorate
your own characters, and they could be talking,
blah, blah, blah. So here are more examples
of establishing shot. I'm trying to think
of as many as I can. This would be an example of
a mid-shots Supposing in crowded bar or cafe
where people are just partying behind and they are at the bar, you
can't see their feet. But if I were to draw
enough clear detail, you would be able to tell
where this place is. For example, behind there is
the word bar or something. No, that's not clear. I don't know if windows look like that, but you get the point. A
5. Mid-shots for conversation scenes: After I've done an
establishing shot in a scene, I can continue the
story with crops, different kinds of crops. Here are some crops using
different camera angles that I think you'll find useful
when you are drawing out your dramatic
conversation scene. I usually find that
it makes my comic feel more like a movie. I'm going to show
you some possible mid-shots from different angles. For example, if two people
are standing across from each other and we
have the camera here. I'm going to show you how I can get different
shots by rotating the camera in this 180
degrees semicircle. Let's start with the
straight on view. A mid shot would be like
this, half of the body, make long hair, one
short hair just to make it clear how you want to place the speech
bubbles is up to you. And sometimes it's good to have some distinct thing
about their outfit, so it's very easy to
tell who is who give her some kind of scarf
here and long hair. We have these two people and the cameras right
now in the center. If we were to just
move it slightly here, actually, we move
it further here, we'll get interesting
shot where we could have a if you
can see her ear, a three quarters view. Remember our first class, and this would be a
one quarter view. This is a pretty handy angle. And of course, it can
be inversed as well. Like the camera can go here too. For example, we go really
close to this person. We could actually
do it like this. I remember the banana
shaped ear, side burns. We don't have to
show the whole head. We could go really close. And since his nose
is popping up, you can't really
see his mouth or if his mouth is
something like that, and you could actually
have the girl like that. This is three quarters
and this is one quarter. And the scarf there, so you can tell who she is really quickly. Usually when I choose this view is when this person is saying the important speech and
maybe this person's replying. For these two views, there are so many ways you could go up
and down with the angle too. In this same one, supposing we got our camera to go
really low looking up, we could actually
see his hand and then he could see the lady
with the one quarter view. The mid shot doesn't always need to be the top
half of the body. We could also play with the
bottom half of the body. Let's just use this
top as a reference. So supposing if we got bored of using this
shot all the time, we could actually just show
the bottom half of this, supposing she's wearing a skirt just for differentiation, right? So the speech bubble could
point at the mouth from there. You could have a
shadow. Of course, you could have things
in the background. You could have a horizon line and stuff in the background. Whatever you can fill it up. And this one, it would be three quarter view
leg, called the skirt. So the feet are
pointing this angle, and this feet would be pointing. Well, let's just get
the angle, right? And this feet would be pointing
this angle. I like this. This this is where you can kind of see what kind
of shoes they're wearing, whether it's sandals or these are boots or something you can put in the shoelaces. And in this one,
it's the other way. So we have the top half,
we have the bottom half. We could also do the
mid half of the body. For example, see, supposing if they're really
close to each other, and we could see their
body language, like this. Mid half of their body. So be creative and
play around with this. So these are mid-shots for conversation
scenes, possible ones. There could be more. You
can look at movies and TV and comics and find more. So we've been moving the
angle in this 180 semicircle. And supposing if
our angle is here, there's actually one more
shot you could try out, which is what you find in cowboy movies where you
have the legs here. I don't know whether this is a mid-shots. This
probably close up. You could have the person here and the person is talking
in between the legs, a more unusual shot. And actually, there's
so many other shots. That could be a very high
angle down and all that, but that could be more advanced. But there's one thing
you should note, and that is the
hundred and 80 rule, which you'll probably
find in film class, though I've never
taken a film class, but I imagine that
they will cover it. Supposing in our
establishing shot we have established that this guy is on the left and this
lady is on the right. I would actually only move
my camera between here, and here because when I do
it between here and here, this 180 degree semicircle, I will be keeping this guy on the left and this
lady on the right. But if I go past 180 angle, suddenly, the lady
is going to be on the left and the guys on
the right. Let me show you. So we have the guy on the left
and the lady on the right, and they're talking
and they're looking at each other in this angle. Right now we're looking
at them from this angle. So supposing if I
shift the angle here, past the hundred and 80 mark, the woman is now on this side, and the guys on the right. Although after some time, we
can figure out who is who, it takes a while for us to orientate what's going
on here, where they are. However, if I continue
with the guy on the left and the
woman on the right, same positions, I find
that my brain understands the scene a lot quicker
and it's less confusing. So compare this to this. So when you're doing the
close up crops like these, take note of the
hundred and 80 rule. Actually, let's make this a
bit more like a mid-shots. So it's less confusing since
I've labeled it mid-shots. There's the horizon line. They go here and there could be some background trees or
whatever. And here's one more. So this is just playing with
different camera angles. It gets a bit more
advanced as you know, move your camera up and down. If you're just
starting out, just stick to the straight on shots, which is kind of like this. H
7. Page 1 - Writing the dialogue: Now we're going to
get into the process of putting everything together, starting with writing
the dialogue. So I'm just using
simple photocopy paper and just a cheap smooth pen, something that I'm
comfortable writing with. For our final project, we're going to have
a proposal scene. Let's just give it three
parts, something to guide us. And this is just
for the first page. We're going to
have the proposal, and then we're going
to have the rejection. And then the response. We're going to have
two people talking. I find that it's good to
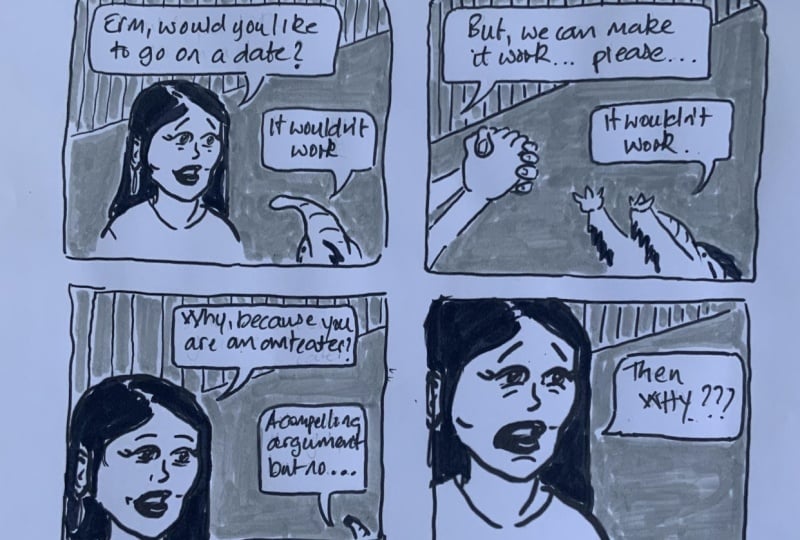
just write it all in just one go and don't worry about
mistakes. Just let it flow. You can always change
and edit later. These lines is just to separate the different people talking. So this is the guy talking. This is the girl talking.
That's the guy talking. Just check. Do this. Just editing it right now. May not be perfect, but
if you like it so far, if it makes you feel something, then just go with this. Just treat it as an exercise
and not a masterpiece. So why write the dialogue first rather than plan it
together with the pictures? What I used to do is
draw the picture, compose everything, and then
think of a dialogue here. Like, I'll write it here, and then think of
the next scene, and then think of the dialogue. Think of the picture, and
then think of the dialogue. So picture dialogue, picture
dialogue, picture dialogue. So this is what I used to
do, and it kind of works. However, I found that when I'm thinking of the dialogue
together with the picture, it does break up the flow
of the dialogue in my mind, because when I
write the dialogue, then I have to pause and switch my mind into thinking
about picture composition, and then I go back to
dialogue so there's a long unnatural pause
between the dialogue. I don't really get a sense
of the flow of the dialogue, the timing in between or the rhythm in between
the dialogue. But if I'm writing the
dialogue just continuously, I actually can feel the rhythm and flow of the
dialogue a lot better. Therefore, in this class,
we are practicing writing the dialogue first without
thinking of the pictures. We're going to be thinking
about the pictures next.
8. Page 1 - Thumbnails : Based on the dialogue
I have written out, I'll now plan the pictures
with a thumbnail. Thumbnails are well pretty
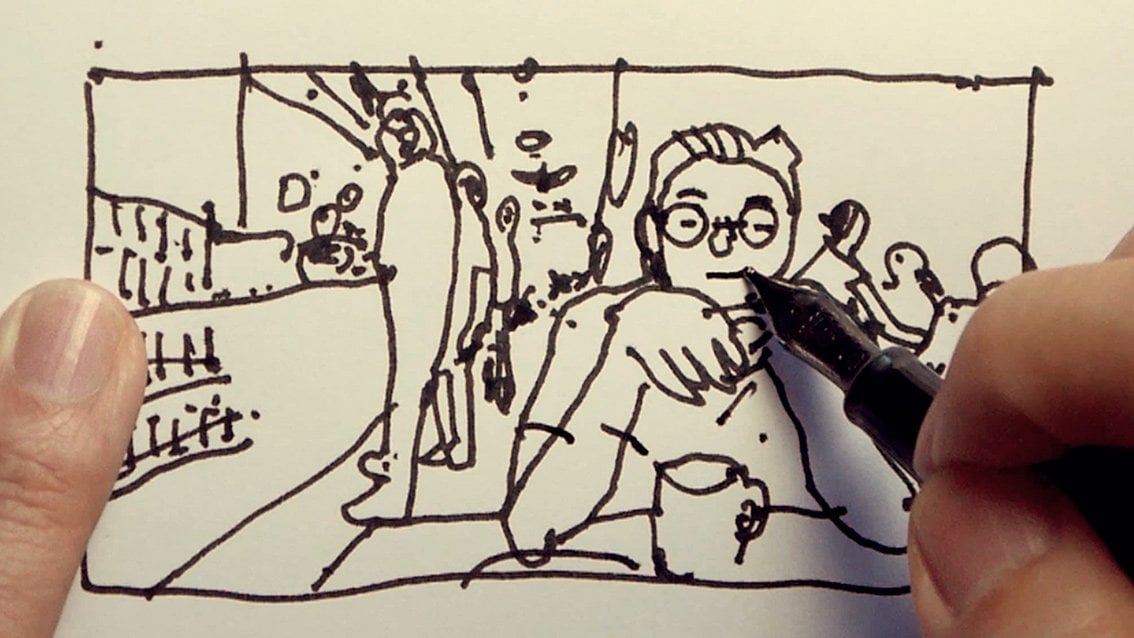
much the size of my thumb. You could see it as a miniature comic page just for planning. Because it's so small, it restricts me from putting too much detail in it because there's just not enough space
to put much detail at all. And because of that,
it forces me to just focus on the
broader strokes. There are many ways to do this. Presently, I find
that it helps if I number these
dialogue lines first. And then I plan where I want each dialogue line to
appear in the comic. And I do it like this, draw the bubble in the
panel I want it to appear and write
down the number of the corresponding dialogue line. I've split this dialogue
into two parts, one in each panel here, just so you know,
you can do that. If I want to pause between two dialogue lines
to be shorter, I place them in the same panel. If I want to pause to be longer or just give that line
a bit more impact, I might give that dialogue
line its own panel. So this is where we can control the pacing of the
whole conversation. I'll give this last line its own panel. I
want more impact. Next, I plan the pictures that would go with the
dialog for each panel. This is where I pay
attention to where the establishing shots go and
where the other crops go. So the first two panels is going to be our
establishing shots. So the building they're
at, the where location. And then this is going
to establish where the characters are and how
far they are from each other. From here, I can do
the close up crops, either mid-shots or close-ups. Note how simply I'm
drawing the people. Basically just a circle
and a simple shape below, and eyes, nose and mouth to
plan the angle of the person. No elaborate details
because this is where you might make lots of mistakes
and make lots of revisions. So keep it very
simple and quick. I know it's really messy, but when you do a thumbnail, it's actually for yourself
to see, in this case, for myself, and it just has
to make sense enough for me. As you can see, it's
really, really tiny. I find that writing the
dialogue and drawing up the thumbnails where most
of the planning happens, and that usually makes the
next part a lot easier.
9. Page 1 - Drawing the comic: So right now we have
the dialogue script, and we have the thumbnail, and there are a few
ways where we can draw this comic out depending on
your own personal preference. One way is I could just get a pen or a pencil and just
draw it out spontaneously. The other way is to get a
pencil and eraser and just draw really lightly and then
ink over the pencil marks. And there are other
ways like just doing a rough pencil sketch
and then using a light box and
tracing over with a pen. So there's so many ways. But for now, because it's
just a demonstration, and I just want to do
it really quickly. I'm just going to do
the spontaneous way. And sometimes a spontaneous way it's actually a lot more fun. That's how most of us drew
when we were smaller. We just went and just fleshed out our
imagination on paper, not worrying so much
about perfection. Okay, so as you can see, I'm not even using a ruler, so I'm going to spontaneous
route and just being really carefree about how all my
lines and marks appear. So one way I prevent myself from being too careful is I tell myself that making
the dialogue clear and making the pictures
clear enough is my focus, not how beautiful the lines are. Especially for those who
are still new to comics, I'll guide you with three steps that I usually do when
I draw each panel. So, referring to the
first panel here, it's just going to be just going to keep it
really, really simple. I can add some dimensionality, I guess, if I want to. Oops. So this is the downside
of doing spontaneously. If you press too hard, being too confident,
it's hard to erase. Sometimes these marks
can be rather beautiful, so you really have to be
okay with a bit of mess. Just go to put these two
little figures there. Second step, adding
in the dialogue. Now, instead of drawing
the bubble first, I write the words first
because the words is going to take up some space and I may not know how
much space I need. And then add the bubble
around the text. And don't forget the tale
of the speech bubble. That points to who's
talking in the panel. So those are the
three steps that I notice that I usually do
when I draw my panels, and from here, I'll just
finish up the comic and point out any small
tips along the way. So we can't see the
characters clearly, and now this one, thinking should I
draw the corner of the building or
just draw the top? But give some clues connecting clues that
there's a bush here, so I'm going to bu bush here. Write the words, then
draw the bubbles. So this is a smaller space. If you can't get
that small space, you can use a pencil. Looks like I've just made it a bit thinner than a pencil width. This one can be a pencil width. I usually make this
a bit thicker, and this is a bit thinner.
Helps with the eye flow. I'm just winging this
character design here. Will you marry me? Point to the mouth,
making this panel slightly bigger 'cause
there's more content. And remember, more content
means people will slow down. I like that this panel has just one sentence and
it's more impactful. Also showing the close up,
rather than the midshot, close up makes the
emotions coming out from the face a bit more
intense, so I find. This will be I'm so sorry, but I just can't. She's talking first, but
she's on the right side. So in order for us to read her dialogue first,
we put it on top. We read top first, then bottom, changing the pauses a bit. Sort of a double speech bubble. This little separation
here kind of creates a small pause between
these sentences. Makes it read a bit more
natural because in real life, we do make small little
pauses in between our sentences or in between
the phrases that we say. In this one, the text is
taking a lot of space, and the pictures are just
using the remaining space. So I'm doing the text first
and then the pictures. Hands can be
challenging to draw. So sometimes I find myself referring to my own hands. Okay. So if she was like
this, you know, when people are nervous
or uncomfortable, we might wring our hands. So that's what I'm
trying to convey body language. Last panel. We have to go close up because
this is an intense shot, and we can make the
words a bit bigger. Mm. What if What
if the last part? She actually removed her
her had so that she would, um, she would, uh, like that. Or She tore her
mask off like this. Okay, let's try that. And
we have the word here. Okay, so this is making changes spontaneously and just breaking out from all this
structured planning. I guess the next thing
would be just to check and make sure that all
this reads correctly. Okay. Seems to be fine. So this is the first
page, page one. I'll continue with the
coloring in the next video.
10. Page 1 - Coloring the comic : For the coloring, we're
just going to use black, a midtone, and white, just like our previous classes. So let me see how we're
going to do this. Okay, it looks like
I can just make this an evening scene sunset. I can have some
clouds in the sky. I'm leaving a white little space around the characters on purpose because just to have
the black touch the white to preserve the contrast around the main characters. The main characters are the
most important in the scene, especially when
they're talking and delivering some
information to the reader. So hopefully, at the same time, you're learning
something about drawing a comic spontaneously. It can be a bit more
scary for those for those who are more used to doing it digitally because
pretty much, it's harder to undo. But at the same time
practicing doing stuff spontaneously and on paper,
does train confidence. Doing it like this,
I have to be more decisive and know
what I'm doing. So when I first
started coloring, I did notice that, yeah, I will get this
opportunity of doing this guy against
this white face. So I thought this combination would be kind of nice because this is darker and this
will make the lightness, the whites of the skin pop up. If I color the face, only the face will
be colored here. And well, I don't know what to do with the
background or the building. So something has to be lighter and something
needs to be darker. Again, you can see that I'm making this small little
white gap around. This helps the contrast to retains the contrast
around the character. And it also looks a bit more natural when I'm using natural
media like a color pencil. If I'm using a computer, depending on what kind of brush I'm using a really smooth brush, having this little white gap
may look like a mistake. So it looks most natural if I'm using a like a very hand
drawn looking media. There's going to be a
shadow underneath her hand. I decided on placing
the sky behind the hands and everything
because this mid tone will contrast against
the whites of the hand and bring out the
hand a bit more clearly. Okay, so this so
this is my comic. Weed and weep.
Alright, so this is the first page of the
comic drawn spontaneously.
11. Page 2 - Writing the dialogue: So we have done page
one of the comic, and now welcome to page two or the second
part of the comic. In this second part,
we have more space to practice what happens when a new character
enters the scene. Like, how do we work in the establishing shots to make the scene clear for the reader? So I'm going to do it from
start to finish again, starting with the
dialogue script. In page one, the main character does a proposal, and he fails. So in page two, he tries again. As in the main
character could be revising the proposal or sweetening the deal or making
the offer even better. In any case, my character
is going to try to get her to accept his
original proposal, and it's going to result
in another rejection. And this is where
we're going to have a new character entering. This is where we're
going to put in our establishing shot. And then we're just
going to come up with some way to end it. Of course, this is
just a practice in doing a dramatic
conversation, so it does not need to
be a proper ending. You can leave it as a
cliff hanger if you like. Or if you can think
of a proper ending, feel free to do so. To do a proper ending, you might need a few more pages, and, well, you can
do that if you like. I've already written the
script off camera because I just wanted to just do it
without anybody looking. I just helped me
to focus better. I do find that it helps
when I write everything out in one go and preferably
with no distractions at all. This is so that I can actually feel the whole conversation
as I write it. I would recommend just
taking about 10 minutes, no more and don't overthink it. So this is what I wrote,
continuing from part one, where the girl reveals
that she is an alien. I started with a reaction shot and then the guy just
looks stunned for a moment. You can see that because
this is not a dialogue, I put it in brackets. This is just my own
way of doing it. Then the guy says, I don't care. Don't you see? I love
you just as you are no matter how you look or if
your DNA is different, and then he hugs the girl. Aligned to separate. So they're hugging
the girl says, No, I can't. Why not? And the girl says, I'm
betrothed to some alien name Brooks It has been
has been arranged. I'm sorry. Some
arranged marriage. And this is the new person. So the new person
comes in. New person. The new person says, Hi, sorry, but I just wanted the new alien to sound
really casual or earth like, then the girl says
goodbye and they fly off. Actions I just put
it in brackets. You can find your own way to
notate action if you like. Now I'm going to put in the bubbles and work
out the pictures.
12. Page 2 - Thumbnails: So I'm going to do the
thumbnails for page two, and this is going to
be a walk through. And although the
steps are going to be pretty much similar to page one, the scenarios in page
two will be different. So you'll be able to see how I solve these
different scenarios, and I'll also provide
tips along the way. So again, the size of
my thumb, no bigger. I put these numbers here so I can link it to
the bubbles here. Before I plan the pictures, I plan where I want
each dialog line to appear by drawing these bubbles. They hug here, and then
the girl rejects him. The person says, why not? I'm betrothed to this person, and then there's this
new person that says hi. The girl says goodbye, and then they fly off
in the last scene. Let's just plan it here. In thumbnails, I don't
have to put the spacings. Just a simple line will do. Remember, we just
want to keep it simple blocks of shapes and the whole point is
to do it really quickly. This one, I think I will
have a one quarter view. I'll work on his expression
in more detail later. I think he grabs her hand
here and then they hug here. I think the hug I want it
to be a bit more intense, so I'm going to go closer. If it's not clear,
sometimes I just notate it just write it because thumbnails can be a
bit messy and this is where the girl pushes him away. This is the rejection.
She talks first, so we're going to have to
put the bubble on top. And then up comes before down. Number four, we can have the three quarters view for the guy and the
one quarter's view. Just using a more
interesting angle. Of course, I can just
put them side by side, but just showing a more
interesting angle. Then this is where the
new character enters. New character, I want
to show his full body. I think the people in the
foreground could be close-ups, but so long as I want to show the new character
is a full body, he could be in the
background or I could the simplest way is to
show them all side by side. For example, if I pull out, this guy just comes
in from the side, this will be a new
establishing shot and this tells the reader where everybody is in
relation to each other. Remember the word where so the wear is important
in this scene. And then the can show maybe more interesting scene where there's this
guy standing here, his legs and then just like
the cameras really low down, and then we can have the go
being let off by this person. Or there's so many
ways to do this. As you can see, thumbnails are great for making quick changes, so no point putting
too much detail on it. You shouldn't put too
much detail into it. Let me see how best
to do this scene. It's the goodbye scene. I think what I could do is
I could be really creative about it and just show his expression because I feel like I don't
have much space to show his expression after, and the voice could
be just coming out. From the goal, but we
don't see the girl. So this is it could
come up from the side, but I feel like if
she's in front, it would be pointing down. This would be the goodbye scene, and we don't see the
go on this frame. But remember, we did
an establishing shot. We already know where the girl is situated in relation to him. So having the
girl's voice there, we know she's still in front. And then this is where we
can they're doing a fly off. I'm thinking it probably would need an establishing
shot because in a way, the alien and the go would
be changing locations. I feel like a
change of locations we would want to answer
the question where again. This guy is flying off like Superman just keeping
it really simple. Well, it was nice, but I
feel like this could come before this and although
this is a nice touch, I feel like, Okay, let me
just try something else. Well, let's not erase this
just so that we can compare. I'll just tear this
piece of paper here. Supposing if it ended with
they're flying off here, this is the railing, and it would end with actually, you can just say
she's saying goodbye. Perhaps that's clearer
because there are three people and goodbye
here would work. And then because
he's looking up, we can just have a close
up of him weeping. And I think that would
be a bit better. So sorry, bud. Goodbye, and he's
looking up, weeping. There's so many ways to
show him looking up, but this is from,
like, top down. I think I'm just
going with this. I managed to do this second
part within one page, but if you feel like
you need more space, feel free to take two pages, so you'll end up with
a three page comic. So now I'm going to do
it in the actual size.
13. Page 2 - Drawing and coloring the comic: So now that I've done
all the thinking and planning in this
thumbnail stage, I can just now focus on making
the pictures look nice. This clumsy part
here. Stick it down. I'm just going to
roughly get this size, so this is roughly the size, and I'm free to actually expand the spacings of these panels
more or less if I want to. It's the center. It's going to be four
rows of panels this time, so I'm squeezing a bit
more into this page, but that's where
you feel like you want more space,
add another page. I wanted to show you what happens if I just do a
lighter planning first. A reaction shot. Kind of
like him tilting a bit. So he's a bit taken
aback for now. I'm just going to do
everything really lightly to show you another way of approaching doing
the final lines. There are so many ways. This
one is a bit more careful, especially if you
are starting out, you don't have too
much confidence. So this one he's grabbing her hands and also
leaning forward, body language to show
that desperation. I'm thinking should I write the words in light and
then make it hard, but it's just a waste of time. I feel like I just want to
go ahead and just write it, so I'm just going to
go ahead and write it. Hope I don't regret it later
if I want to make changes. And how long is the
hug? So the plan? Maybe I want the hug
to be a bit longer, and then the push away. No, I can't. Why not? So I think he's leaning a bit back because he just got pushed. So we read this then
this, top, then bottom. Four rows can be a bit squeeze, so I wouldn't
recommend five rows. Okay, so it's going to be
the three quarters view. Okay, let's do a body
language that is in line with this
some bushes behind. It's the hair line. Hope
I spelled this right. I feel I should
color all these in. I'm just afraid that
you won't be able to see what's going on if
I make it too light. If I'm going to treat this
as a rough penciling, I want to make them
lighter because there are a lot of loose lines. One way to make
everything lighter, I can just go over with a eraser just to lighten
all the lines there. They become really faint. But I can still see
what's going on. Seldom do it this way. This is where I just trace
over it, see if it works. Remember, when we're
doing the blacks, make sure that
they're really dark, get rid of all the little
white specks inside. Okay, well, kind of works. If I were to do a careful
approach, usually, I'll do the initial
sketch with pencil, ink over with a pen, and then erase the pencils. But this is one of
the rare times. I don't know why I chose
a demonstration to do it. But this is one of rare
times where I'm doing a darker pencil
over pencil sketch. But let's see how it turns out. Maybe his eyebrows
should be down. No, it looks too evil. No, he shouldn't have eyes open. Okay, I'm pressing too hard
and I'm spoiling the paper. If I do it too much, I'll have to paste another
piece of paper over this. Oh, wait a minute. I have done it wrongly. Her face is supposed to be an alien face. What am I doing? I was concentrating. I guess it is a
smudgy alien face. Oh, dear. You're seeing
me make all kinds of mistakes. But it does happen. You know, it's because
when I did the thumbnails, I drew her as somebody
with long hair. Now we're going to do
the establishing shot because there's this new
character that comes in, and there's so many angles. I kept it to a simple
side view angle where we can just see the
distances just straight on. It's the simplest, actually. Let's just make this
alien a bit bigger. I'm just going to draw
it spontaneously. I feel more
comfortable that way, you can see that doing
the pencil first and then the lines is extra work. It allows you to be
a bit more careful. But I like the spontaneoty. Just that I have to
put all my focus in the drawing when I'm
drawing spontaneously. Again, there's so many
angles I can do this, but I'm just going to
do the simplest angle maybe pull back a bit. These two aliens are
in a new position, so I'm choosing to do
an establishing shot, so we can see how far
they are from each other. She's saying goodbye. The last part is just
his reaction shot. Close-ups are great for
showing expression. All right. Looks
like we're done. Let me see. Expression.
If you want, I can put in this. It makes us pause longer
in this panel and sometimes it just
adds a sound bites or just a bit more
impact to this panel. Let's just add in
something like, I'm putting it below so we
read this first and this and iFlo goes here and then it goes here because we're
going to this panel. So this like this
and then goodbye, Jay. I don't go here. Now to color the comic. My main focus is to use tonal value contrast to bring out the most important
parts in each panel. Giving this guy a scarf to increase his contrast
and also differentiate him from the girl and
adding the title. It's always good to check
through everything. There are bound to be mistakes. Adding small symbols. Alright, he already
said what his name was. So these are my two pages. And now, it's your turn to
your own spin on the proposal. That's.
14. Final Project: You'll be doing a comic that contains a dramatic
conversation. You have the option of
just doing part one, and if you're adventurous,
you could do part two. Here are the story points. We want to do a proposal scene. In page one, we'll have one person proposing
to another person. The proposal could
be a marriage, a business proposal or
can be creative about it. The proposal is rejected, and there's a response
to the rejection. That ends page one. It doesn't need to be a proper ending. It can be a cliffhanger. Now for the optional page two, the first person proposes again, perhaps with a better
offer or a better reason, gets rejected again, a
new character enters. That's where you do
an establishing shot and find a way to
end it somehow. You can refer to my comic to see how I played
out these points, but I hope that you
come up your own creative solutions
to these points. Use the process we have
covered to guide you through the comic
from start to finish, starting with writing the
dialogue, doing the thumbnails. And then drawing and coloring. You could use pencil and
color pencil like I did or feel free to use the material you're
most comfortable with. Remember that the focus of
this project is to practice including establishing shots
where they need to appear. And also trying
out various crops and angles for the
rest of the shots. And the goal is to produce a very clear and readable comic. References for the
establishing shots and the other conversation crops can be found in the
project and resources section. So after you have done
your one or two pages, take a picture and
post your comics onto the Skillshare platform
so that you can receive feedback from your fellow
classmates and from me. When you post, remember
that there are two uploads. One is for the thumbnail, and the second upload will be the actual image of
your comic or comics. I hope you had fun, and I look forward to
seeing your comics. Thanks for taking this class.
15. Bonus: Controlling time with panels: Okay, right now, I'll
explain a bit more about how we can adjust how readers experience the flow
of time within panels just by us controlling how big or small we make
the panels to be. For example, if I
want the reader to experience a
scene for longer, I could draw a
really white panel, and this could be suitable for a person sitting
on a mountaintop, looking at a really
nice expanse of mountain ranges with
clouds and stuff. And then if we want to
speed up the scene a bit, we can go to a regular sized, perhaps a square panel, and we can see the side of his face and maybe
his eyes are closed. And perhaps the next panel would be he remembers something. And he starts to run somewhere. So when I want to create
more choppy cuts, just like when I film a movie, not that I'm a movie maker. I'm just imagining,
the quicker cuts can be represented
by smaller panels. So perhaps his feet running. Well, this is not a
great pose of his feet running because he's already
have this foot forward. So I guess it would have
to be the other foot be better So can you feel the sense of time
changing in between panels? Does this feel
slower and longer? And as we get here, does it feel faster and faster? So this is what I would call controlling
time with panels. In Paul Pope's
comic Batman Y 100. Notice how he varies the
pacing within these two pages. For these panels, it's
like the filmmaker holds the scene a bit longer. But when it comes
to these scenes, it just feels like
things are more tense and things are
moving a lot quicker. So I find that these are
great for action scenes. If I were to run through this
action sequence in my mind, it would be like Look, he's huh So I noticed that my eyes linger on the bigger scenes
a bit longer. Is that the same
for you? So that was a comic with lots
of action scenes. But for comics with more
mundane everyday scenes, like in this comic
by Adrian Tomin or Tomini I don't know
how to pronounce this. I noticed that there isn't
that much variation in the size of the panels because I guess the pacing is
roughly the same. Maybe each shot, imagining
you are shooting a film, is just slightly longer, like 3 seconds versus 2 seconds. A conversation scene like this
or a telephone call scene like this could just be
using the same sized panels. So it goes to show that
we don't have to force in very big differences in panels just for the
sake of doing that. So whether I use
big or small panels or all the same size panels, it all depends on what
kind of scene I'm playing out and how I want my reader
to experience the scene.