Transcripts
1. Welcome Friend!: Hi friends. I would really love to invite you into my past. Growing up, I was surrounded
by Swedish folklore and the magic and enchantment
that filled my home. My mother made it a beautiful place to
explore the woods and just enjoy the magic of Scandinavian folklore,
Swedish folklore. I'd like to share that
with you growing up, we had books from Carl Larson and his beautiful artwork
surrounding our home, and the colors just bring a
sense of nostalgia for me. I created this class
to help you guys, the beginners to learn, procreate in a fun
and magical way. Swedish folk art is filled
with this beautiful symmetry. And these patterns, and some are very simple and some
are very intricate. It's hard to know where to
begin when you're trying out new techniques in procreate and trying to figure out
what you want to draw Next, let's do a little research. Let me show you first the book that started
it all for me. This is Carl Larson's
beautiful watercolor books. Growing up in my home. We have this book
and it's well loved. Some of the pages are
starting to fall out, but I still love rusing it. My mother's sewing tin had
this picture on the front. Any time I hopped into her sewing tin that
was there, again, this is the picture that I used to pull color for this class. This is one of my favorites. And you see some of the
symmetry designs right here. I always thought that it was more magical in
Christmas, but in fact, it is their daughter, Emma's birthday, and this
is how they celebrated. Can you imagine the magic of your family showing up in
your room? So beautiful. I love that his water colors include some of the
symmetry designs as well. That's what we're going
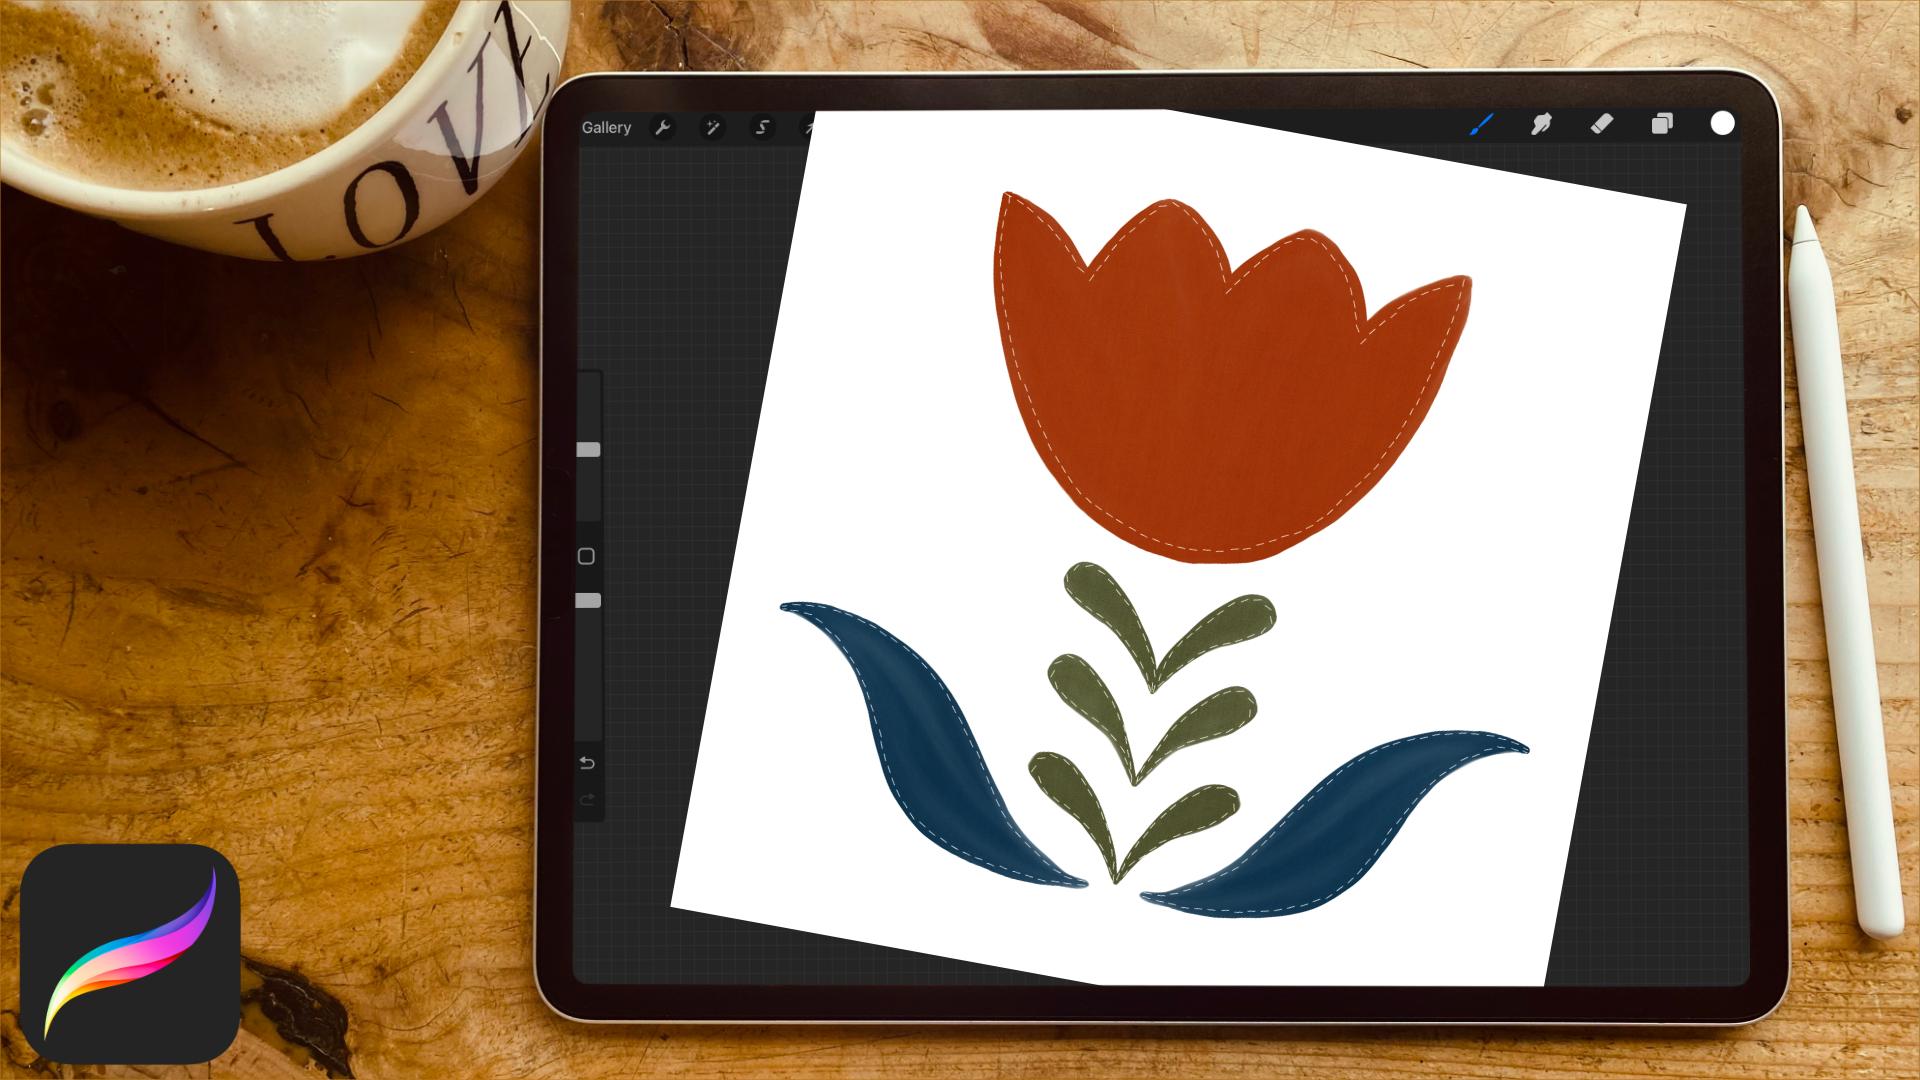
to be going over today. We're going to be making symmetry patterns that look like quilt squares in procreate. We're going to gather
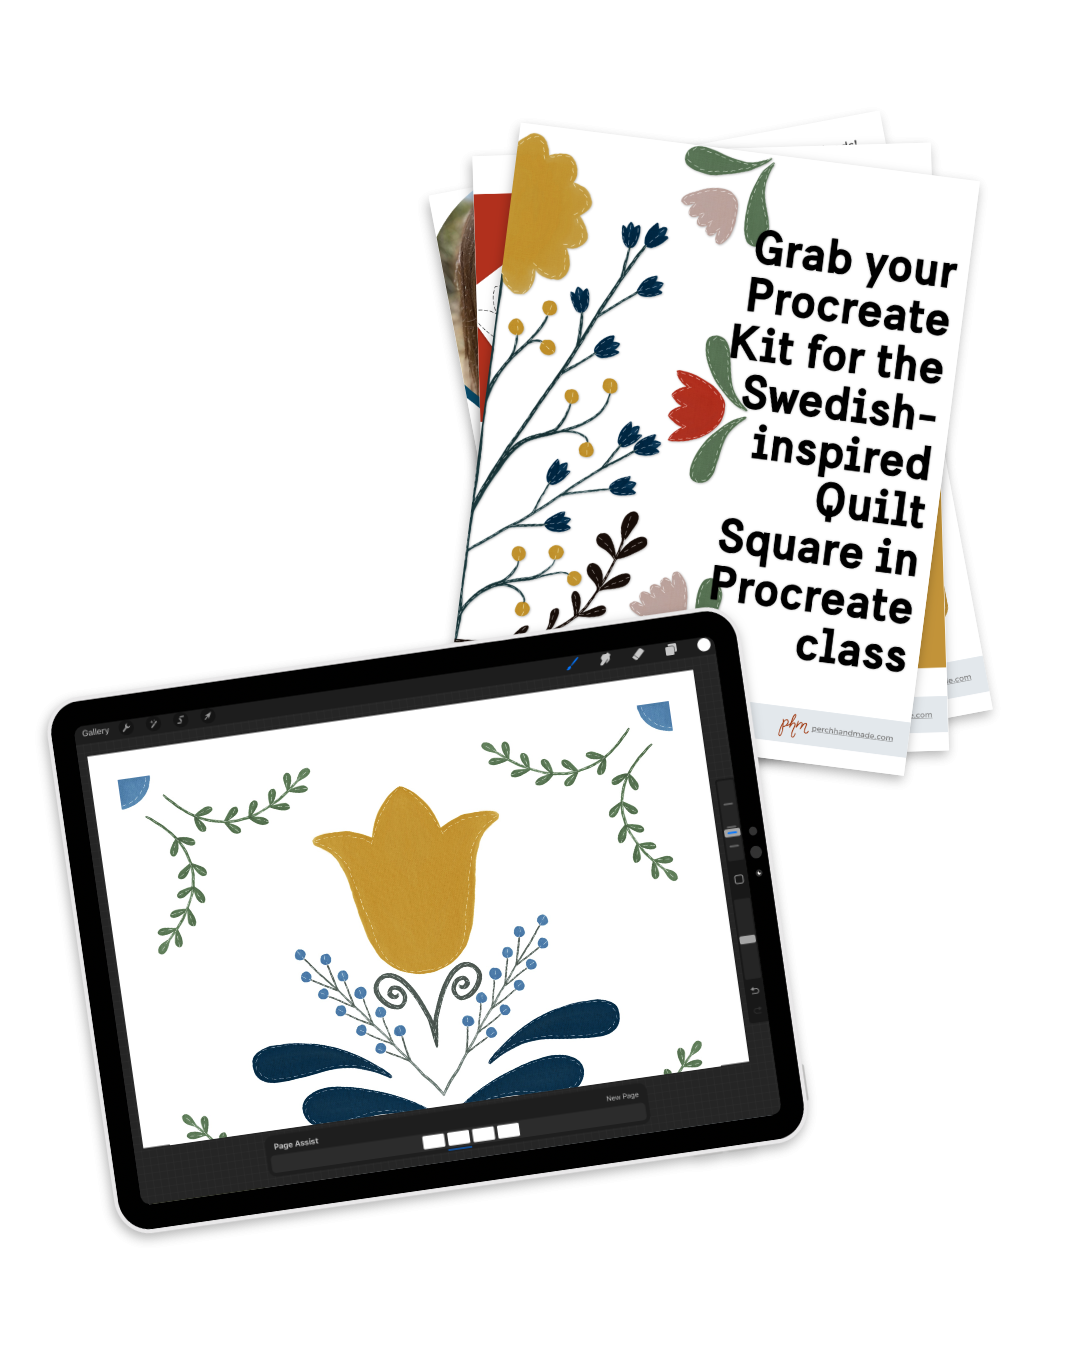
some inspiration off of Pinterest and I've
given you guys a download to look over
and has a procreate kit. And with colors, and stamps, and everything that you need to create the beautiful designs. Just so you guys are aware, this watercolor brush is from my per handmade
watercolor brush set, which you can purchase
on my website. But right now we're just using the one that I'm sharing with all of
you for this class. We're going to sketch out our quilt squares using
the procreate stamps. And it'll make it really simple to put them in there and add a few designs to create these beautiful
pieces of artwork. I'm Katie from Per Chan Made. I'm here to help you
along on this journey and walk you through the steps
in this begunner's class. Follow along in the next lesson and we are going to get started.
2. Resources & Downloads: For now, we're going to
work on just downloading your resources and make sure you have them all set up
in your procreate app. The procreate kit was created using the
Carl Larson painting. I pulled a couple of different colors
throughout the painting, that's why you have
the top set of red, green, yellow, blue, and so on. And then a little bit of a brighter set pulled off
of the birthday painting. In addition to the Swedish
folk color palette, you'll also get the perch handmade folk
art stencil brush set. That's a mouthful. This includes one sketch pencil, three detail brushes
including a watercolor brush, a stitching brush, and
a fabric texture brush, and 16 outline stamps for
creating your sketch. You'll also have
the link in the PDF to my Scandinavian
Symmetry Pinterest board for gathering inspiration. We are going to go over
how to use that and split our page to work and procreate and see Pinterest
all at the same time. You can pull your inspiration
by looking at Pinterest while you're drawing
your sketch out in procreate, grab your downloads. It will bring you into a Notion page that
looks like this. Where you'll be able to scroll down and click on the links. At the bottom of the page, there will be your files
and the Pinterest board. Pop those into your
procreate app. And let's get ready
for the next lesson.
3. Research & Inspiration: Did you grab all your
downloads? I hope you did. In this next part, we're
going to just look over the Scandinavian
Symmetry Ptra board that I created for you guys. Let's have a look. I love
all the colors that we have going on here. Different. These are pictures actually from Carl Larson's family home where you have all these
paintings up and around. I love all the symmetry
that's happening here. Some of them are
really just simple, but so detailed and
intricate and beautiful. And that's what we're going
to really work on today. I love this one here. Look at all of beautiful designs and the color that they
bring into their homes. It's just so warm and inviting with those blues and yellows. Have fun looking this
over on your own. We're going to pull a couple in, probably just one in for now, into our procreate
or onto our ipad. I'm not sure with some
of the non ipad Pro, regular ipads, if you
can split the screen, but I know it's in
option for the ipad Pro. And if you don't have
that option on your ipad, then just pull it up on your computer screen or wherever else to grab
your inspiration. And we're going to work
with some of these designs to help us create
our own artwork. We're not going to
copy any designs. I have to make that clear. We can't copy anybody
else's artwork, but we can use it as inspiration for creating our own artwork. Meet me in the next lesson.
4. Design & Sketch: For this next lesson,
we are going to work on building up our canvas and creating the beginning parts of our design and sketch. If you're brand new, I'm going to walk you through creating a
canvas and procreate. If you're not brand new, you
can skip ahead a little bit. But we want to create a
symmetrical canvas in procreate, that is a square shape. If we need to do
all the corners, they'll go into the
corners properly. Depending on how we
use the symmetry tool, it's going to be
even all around. I'm also going to
probably switch between the different options
in the symmetry tool today to get the look
that I really want. I'll show you how to do that. Let's get started. Open up your procreate app. We are going to hit the square. Hit the plus sign
in the corner here. You can hit the plus again if you want
to set up a new canvas. If we're going to
work in pixels today, we're going to keep
our DPI at 300 Way. If you send it off
to print later on, it's the best quality. I already have one set, not going to create a new one, but I am going to do it at 3,000 by 3,000 if
you want to do that. This way, it's just 3,000 by 3,000 I have 112
layers available, but we'll not need to use
anything close to that today. I have my square and
then I'm going to go to the wrench
tool right here. I'm going to hit
the drawing guide, Then edit drawing guide because right now it's
just on the grid. And I'm going to go to Symmetry. For now, I'm going to
keep it as a vertical. I don't know if you can
see the line there. Let me make it darker. You can increase the
opacity and the thickness. You can see where we're at here. I've already downloaded
my procreate kit into the design studio and we
make sure I'm at my colors. My colors are right at the top. Sometimes when they
go in to procreate, if you can't find them, they'll go all the
way to the bottom. And you can take a palette
and hold it until it hovers, and then slide it to
where you want it to be. Mine is at the top
right Now it's the opposite for when you
put your brush packs in. Those will go to the
top of the page. As you can see, I've got all these different brushes and stamps for this procreate pack, but we have the
symmetry turned on. I'm going to actually turn my thickness down a little bit, I don't need it quite so big. What we're going to
do is also bring in, I don't know if you
could see that, but if we tap on
this near the top, you'll have the three
dots and you'll tap here, hit split view. I'm going to open
my pintrausboard. I don't need this
to be quite so big. I can slide it
over a little bit. Try to bring up some designs
that I might really like. There's so many
patterns to look at, like I said, if you
don't have this. Option on your ipad. Just look, you can look at your computer screen or if you
have your phone available, look on something else to
grab your inspiration. But I'm going to look
at all of these. I like this design, but it's a little
much for today. I want to keep it simple. I think I'm going to do maybe something similar to this one. Sometimes you can zoom in on, it's not going to let me
zoom in to, there we go. I love this little design. I love that it's
not symmetrical. This one is fully symmetrical. But if you look at this one, there's different
pieces that go off, that are off, and
that's totally okay. But I'm going to stick
with this one today. Then I can go to my pieces. Here, let me show you. So I have them all set, and when you scroll up and down, you can change the
size in the way I have my board set up. I have to turn my paper
to get a better angle on the brushes If you want that bigger the
move tool and uniform. And if you pull from the center
during the top or bottom, it'll make it bigger here. You can change the shape of these once you get into the
drawing aspect of this. But this is really for
just placement to get the balance and the harmony
on your layout all set up. Another thing
that's really nice, let me make sure it's
set up that way. If you're hovering, I
don't know if you can see that changed something in my There is an option
in your preferences. That's how you can change when you're in your preferences, on your brush cursor. You can see that here you can
the different scaling and gestures cover the applicant to adjust the brush
capacity and size. Want that turned
on. Okay. Did you see how I get there to the
wrench tool preferences? Just your control and hover. I like that hover aspect
so that when you're here, you can change the
size in the moment. You're not coming
over here trying to figure it out. It's
just right here. Since this is on one layer, I'm going to do a new layer and I'm going to make sure
I hit Drawing assist, new layer, tap here. Drawing assist. That
way I have that on. If I need to change the size
on things, I can do that. I'm going to turn it
and move this away. Those are some of
the things that we can use to get started.
5. Building the Quilt Square: Let's move on to
actually creating our whole sketch and
work in the program. It's really important to make sure when you're planning
to get all the pieces down and really work
through how it's looking. That's why we're doing
the sketch first, which is really, for me, not something I usually do, But I found in this pattern
building and symmetry design, it really is helpful so
that you can see what you want to get down and
you work from there. I'm going to just slowly work through and I'm going to keep doing new
layers for things. That's my own
personal preference, but like this one, symmetry is not turned on. Drawing Assist, here we go. There's lots of different
options to choose from. You know what? I'm going to do something else onto this layer. This layer. I like these
little balls here. But I want to change up
the design that's on them. I'm going to bring that down. I'm going to just add
little flowers on. It's really fun because
they don't have to stick with the ball design. If you don't want to,
you can change it up. And I like having the flowers on there to have something
else to work with. You could do the same
with this flower too. Can change that up. There's a lot of different
options and it's really fun to some of them. You might notice, I have
two different directions. This one goes in one direction. It works for both directions. You can have the little
squiggles in there. I'm going to put that
on the new layer because I think I want
to make it bigger. Again, it up, right? This is all just
trying to figure out the balance for your
piece, like this one. I think I want to slide it up. And did you see, Oops, when I moved things I have snapping turned on and
magnetics turned on. That way it will get you if it's yellow center on the horizontal, or you can have center
on the vertical. See, I don't know if you
can see turning yellow and completely centered
is the yellow cross. That's a fun little
trick that you can do. I have the sketch
pencil in here as well, so that you can create
your own little pieces. If something that I have on there doesn't
quite work for you, like this. And I'm
going to take one of my little pieces here and add a flower in bigger, change color back to black. And this piece here, I think I just want
some of this happening, but I don't want it so big. Keep accidentally changing
the color with my knuckles. Now, it doesn't have to be
perfect because like I said, it's just going to be, this is just our sketch, the darkness and the lightness. That can all be fine, dandy. Okay. Next I'm
going to turn off, I'm going to do a new layer. And I'm not going to turn on
my assisted drawing because I want to do something
directly in the center, probably this piece here. I want to make sure that I have it and out correctly. Okay, because I did those
little flowers there. I'm going to do that again. I don't want it to mimics of big bring it down turn. And I'm going to maybe just keep the bottom ones
as those little balls. Maybe I'll do that that way. It looks like it's just
the beginning of the bud. For this next part,
I'm going to change up the symmetry to quarter symmetry so that I can get all the corners all
at once with one design. You do that again by going to your wrench tool,
going to canvas. Going back to drawing guide and editing your drawing guide. Come over to Options and
we want it as quadrant. If you have it in radio, if you only have one
design going in, that's another way to
get all your corners. Say I only have this piece
going into the corner, right. Turn on my drawing assist,
make sure that's turned on. Actually, I'm going to
do a new layer drawing assist because that's the layer that I didn't want
drawing assist on. If you come into radio, you're going to have it. It'll go to all of the corners. Let me show you real quick. Oops, larger. If you look, you have all of
your corners set. If you have quadrant set,
let me show you that one. I'm going to just toggle this
off so you don't see it. I'm going to hit a new layer. Come over to wrench tool
by canvas drawing guide. And I'm going to change
it to quadrant and make sure I can turn my
assisted on right here. If I want to put just
a flower in here, then I can pop in the design. It's gotten all four corners equally like both
of them though. Let me see, I like this one. I'm going to turn that one off. Turn this back on
since I'm still in quadrant to get my piece. Bring the size down a little
bit. Pop that in there. You know what? I also, let's see, I also have a circle on here. I wonder if I want
to try putting the circle in the corner
that's really big. This one might not work
quite as well because I can't get it equal. I'm
going to skip that. I can do it in a
different section, but I'm going to
skip back for now. I like how it's
looking right now. Let's look at that again. It's similar design in
the shape and feel, but it's definitely
my own piece. I'm going to turn off that screen because
I'm done with that. If I zoom in, you can
see all the details. I've got some nice
balance happening. If I wanted to, I could add
some more pieces over here. But I'm liking just the
simpleness of this one. If you're ready, we're going to hop into the next lesson
where we're going to start adding color
to our design and using that watercolor
brush from procreate, which really gives it and look. That's why I'm going
with the watercolor because it creates a look that the design looks like old
world style hand fabric. Okay, meet me in the lesson. I can say that, right? Meet
me in the next lesson.
6. Adding Color: Are you ready to add some color to this
beautiful design of yours? Let's begin by looking at
the color palette again. Actually, let's look
at Pinterest again. Let's check out
your inspiration. Right, let me show you again the colors they have
that they're using are these beautiful blues
and golds and reds. It just makes it so magical. I love looking at the artwork
that is in these homes. I think I showed you
this one before. Again, the blues and
yellows, greens, just the colors of the
earth and outside. And I know just the
beautiful landscapes that you might see
throughout these homes. I love this one that
someone painted on the chest of drawers
or their wardrobe. And they brightened
it up a little bit, but again, the blues, greens. This one's the greens and
the yellows and reds. All of these beautiful colors
create the nostalgia and the just old world charm that I would love to help inspire
you in this class with. You can also pick up the
Carl Larson book if you have one happen to your library
or look them up online. This is Carl Larson
and his wife Karen, and they're beautiful
little children. Just grabbing these colors, like this one is a
little more muted, but you still have the blues. The greens, The reds. It just creates these beautiful, magical designs and colors and really brings
it all home for me. I love this one. That's
a little bit brighter. Yeah, I love it. That's where all
these colors came in. Right. We are going to work on adding
color to your design. I am all set with all of these. If you don't have
a lot of layers, you can slide them
all to the left and pull them together because I don't need to change
this anymore. But sometimes I
like to use them. I will group it
and hold it down. I'm going to rename
it Original Sketch. I'm going to lock that
into place on a new layer. I'm going to open it up. I'm going to start
with the corners, since I'm already here. No, actually I'm going
to work my way through. I still have my drawing
assist set up as a quadrant. Remember the first part
we used as a vertical? I'm going to first turn it on, but I'm going to go back to my Wrench tool and
canvas drawing guide and change my
option to vertical. Now I'm going to work
through the colors and choose which colors
I want to start with. I'm going to go to my
detailed watercolor brush. I click on the brush and it's
got some nice brightness. And it changes colors
or fades a little bit. It creates a nice washed look. Like I said, I'm going to
go to my colors over here. Which color? I'm going to
I'm just going to dive right in with the green
for the leaves. I've got to decide, I think
I'm going to do this green. I have some sizes. I'm going to bring the
opacity all the way up. I have some sizes already set. You do that by tapping on it. I already had one set,
four of them set. It only allows you
to do four set, but if you want to set it, you find the percentage and
by scrolling up and down. You can change your percentage
and you can see the size. It's going to be here. I'm going to bring it up to 50% I'm going to tap
on it and then I'm going to use my finger
to tap it in place. I have different sizes set for different things
that I've been doing, but we're going to start
with this bigger one, since we're right here. And make sure I'm
on that new layer. It doesn't have to be perfect, but what I like to do is it all the way in
without lifting my pencil, going outside the lines,
it's totally fine. See how I have a
little space here. I can use a brush. I'm going to change
that out real quick. If I hold it, it's
going to go to the brushes that I
already am using. I can do some erasing, then I can go on
to the next piece. I decide if I want to have a stem going all the way
up the center or not. I think I will, but I'm going to wait to do that in a minute. But you just go
through I'm going to add new layers for every color. That way, if I want
to change them later, it's easier to change them. But I will pull them together to probably blend them
out a little bit. I'm going to do this darker, quite black, but it's almost
black for these pieces here, I'm going to bring
that down, I think. Yeah, the line. So it's really quite simple. You guys got a piece. It's just a really
fun, easy piece. And then, so what
I'm going to do is take and use
my blender brush. I'm going to hold
it, it brings up the same brush and I'm going to blend out
these pieces a little bit. It doesn't look so harsh and
it looks like one piece. Bring that size up. The blending out
your brushes are your strokes helps them to look more like
they're a one piece. These watercolor brushes
are translucent, then they blend on
top of each other. As you could see, itops makes a good effect
to take care of that. Another thing sometimes I like
to do is go to my recent. I don't have that there. I'm going to go to my
essential brushes. I'm going to choose
my monoline brush. Monoline brush is a solid brush, it'll get every piece when one stroke did you
see how I did that too? I can go to Re.
It'll keep the top. How many 12345678 brushes
at the top of your screen? All right? Yeah. Whoops. I'm going to pull in the next layer drawing assist
on and I'm going to pick, I think this yellow flower or yellow color for this flower. It's just really simple to go through, create your designs. These brushes fade
out a little bit. You can go back and keep working it to help blend in the moment, which is really nice. Like I said, it gives it that. Handed. Look, please don't feel like you need
anything to be perfect, because this is
trying to be like a hand cut piece of fabric, which isn't always
perfect when you have it down and applicating
it onto your cold square. Look at me talking about sewing in the middle of our
digital procreate class. Did you guys know that's
how this business started. Me hand making different
pieces of textiles, carry pouches and
different hats. That's how Perch handmade began, but I digress today
we're working on this which is a
lot of fun for me. I love making patterns
and you can take any of my other pattern classes on the various channels
that I teach on. For beginners, this
is a really nice one because you'll have this
beautiful piece of artwork. I know when I first began, it was a little
overwhelming to think about making these huge,
elaborate designs. It really scared me having
something small and beautiful, but easy to create
with a little help, really made it
possible for me to believe I could be an artist and I could
create beautiful artwork. Maybe you guys have
heard me say it before, but growing up, I never
believed I was an artist. And something inside of me just kept telling me
that I couldn't do it. And I had to push past that feeling to really
begin creating art work. Now I work on creating
almost daily. See how we have our
piece coming together. It's just really simple to create these
really fun designs. I'm going to go
with this one now. I'm going to keep it smaller. Work through sketches. Did I do that on a new layer? Might have forgotten.
I got it on the. Just talking away, See
how these overlap, the colors get darker. That's why we really need to blend at the end of each color, especially when they're
overlapping each other. Sometimes you want to blend even before they're
overlapping each other. I think I'm going to wait
till the very end to do that, so that I can turn
off my main sketch and see precisely what
needs to be blended out. That one wasn't quite on. I went off track and all of
that is okay to do, right? Okay. No, not a
clipping mask drawing assist and keeping
on that brush going. This is a different shaped leaf. I'm going to go with a
different grain color. Well, and I'm gonna
bring my brush size up, it's a little less work
to fill it in you. Since I'm already on this
layer with this shape, I'm going to create that
shape here as well. I'm going to right now, go into my drawing
symmetry tool, turn it to radial, because that's how we did these
leaves on the edges here. I'm going to fill
it in right here. Just as long as you're
paying attention to what layers are doing, what things you can tell
by how it's put out, how the pieces are
down on the page. Then you can switch between
your symmetry tool, while in the moment you don't have to stay on one symmetry tool for
one piece of art, you can change it up and
make it work for you. That's the beauty of
the symmetry tool. And creating pieces
of art work this way. All right? You can see the
line going down the center. I'm back on the vertical. I need to turn my drawing assist on again and pick a new color. I think I'm going to go
with this light blue. For this little blue bell here. I love blue bells. I don't know what. I guess it reminds
me of all the magic of this era and the, I think Carl Larson
growing up in all the Swedish
design growing up. It just brings me
back to my childhood and that's the great
thing about art this way. What it can do so far, look how pretty it's
already beginning to look. I'm going to put some
color into this stem here. I'm going do this guy, I'm going to bring it down. They want to do that again. Let's see a way that looks okay. Now I'm going to do
the new layer and I'm going to just turn
that drawing guide off and the new layer does not
have the assisted drawing. So that I can do
this piece here. Since the other stems
like that are black, I'm going to stick
with that black. This is where I have to decide. I think I'm going
to bring it all the way down and I'm going
to start from the top. Bring it all the way
down to the center. Yeah, just go from here. Okay. And we're going
to do one more layer. This one is going to be yellow
again for these flowers. Let's see how we, I need that somewhere
in between. Work that in a little
bit and I can work it again in a minute with
my blending tool. But right now I'm going
to put it this way. A little circle buds going. All right, I need to add some red into this
design because I just do. I'm going to go back to my
drawing system, turn it on, and I'm going to switch
it to quadrant and turn assisted drawing on
for that new layer. Okay, then I'm going
to go for the red. I'm going to go for
that little bit of a more muted
red for this one. Just fill it in. If you do pick it up and
put the color down again, you can always blend that out later with the blending tool. But it's going to take a little work to get
it where you want it. That's why I like to not lift up my pencil when I'm putting
color down with this brush.
7. Blending Color: How are you all doing with creating your sketch?
Is it coming together? Is the painting or your
design coming together? I'd love to know pop it in the chat and let me know how
it's coming along for you. We have our piece finished. I'm going to turn off
the sketch layer. We're still in quadrant, so I'm going to fix
up this piece here. Let's see, how big do I want
my brush to be for this? About 19:20 percent
works for this one. It helps to just blend it out. If you need to bring
the opacity down. I do that often coming
into this corner, I want to keep it a little
bit muted or lighter. I can just bring the opacity down while you're working on it. And it changes the
blend to a blend. Like if I did this
lay at the top, well, you can tell
as much right here. But it will blend it out even more than maybe I want. I like to keep the variation
and I don't want to keep it all one solid color.
I like the variation. Again, give it that
hand eyed look and how much pressure you put on your pencil changes
some of that as well. Keeping your pencil,
holding it at the end makes it so you have less pressure
going down into it. Okay. The red is done. If I look at all the other ones, they're all fixed as well. I'm going to use this real quick to clean up this
little edge here. Just a bit. Not much. But like I said, I
like the look of it. Oops, the lines to be cut
a little bit differently. Next, I've finished
on that layer, I'm going to lock it, and I'm just going to
work my way down. That's this one here. It's not assisted, so I don't
need to change anything. I'm going to just
clean up these edges real quick and blend. This one doesn't need very much. You just see as
you're working on it. When you zoom in how much blending or not
blending you need, this one needs a little
more help, but that's okay. Another thing that's
nice to do if you want to change it up how it
looks a little bit, is maybe use your blender
brush for shading. You can bring colors, lightness or darkness
down depending on how you got it set to go. I'm going to clean up just
this little edge here. There we go. And move
on to the next one. Move, there we go. And then those little guys
I think are doing okay, I am going to go to this next
layer and erase some of. That's connected. Then I will blend
out this area that, that's all set and ready. Okay. We'll have to do some magic
too, in a little bit. It looks like they're
all connected. Since I these layers. Yeah. I'll show you what
I'll do in a minute. Another thing it could
do is duplicate. Then it hides some of that
and creates a darker. I'm going to duplicate both
of those because I like the, the darker on that layer. There you go in this one, if you pull those two
together, it makes it one. What I can do is tap on one the above one and hit merge down and it merges
those together. This one is the underside one that I need to blend
into the top one. I'm going to just go in here, I want to know what's
happening. It's assisted. I'm going to turn drawing
assist off for a minute. And I'm just going to blend
this a little bit out. Blends it into the other piece. That's the only spot
I have, that one. And this one I can blend into those pieces. You might not even be able
to see what I'm doing here because it might not
be picking it up. But you can see the
junctions here. And I'm just wanting to blend them together so it
looks like it's one piece. I'm going to keep that
on the black layer on top because that's
just what I choose. All right, next layer,
it's still assisted. I'm going to go, that one
is as on the quadrant, so I'm going to change
it back to vertical. This one doesn't need much. It's looking pretty
good. Just a bit. Just a little bit of blending
is all that it needs. A little bit of clean up. Maybe just that one. Okay, now I'm going to go, I'm going to stay on the vertical assist for
this one because this layer is the layer that has the
radial and it has the vertical. I'm going to stay on the
vertical, assist for the center and use
my brush to blend. This needs a little
bit more help. That's okay. I'm going to pull of color up
there a little bit more. I love blending. I don't
love blending because sometimes it says you're using the same brush
that you worked with. Sometimes it blends it in a way. I guess it's just blending.
That's just what it is. And sometimes I just want
it to create the same look. And it doesn't always do that. This brush really does
create the same look. You worked really hard on making these brushes to make sure that some of
those happen that way. Not all of them do that, but
this one definitely does. Again, that's detailed
watercolor stroke brush. Oh, no, no. Sometimes. Oh, and that
was two fingers to undo that little
action I did there. I'm going to bring that down. Did you ever see me to
tap two fingers on there? That's what that is about. Three fingers redoes the action, but you're not going to see
it very much right here. Because it is. Because it was a tiny
little action. Okay. I still want to blend out
a bit more, get more even. Sometimes you could
just spend all day blending, but we're
not going to do that. Okay, we set and
we'll work down. Oh, now we need to change
it through radial symmetry. Radial. This changes the guide, the color of your guide. Depending on what
you're working on. Sometimes you need it color. I typically just keep mine at B, unless I'm working on a dark
canvas and I need it white. Those are typically the
two colors that I use. All right, we're getting
there, we really are. And see how you can see the size of my brush
stroke and the color. That is another thing
that I have set up in my preference. I've got my cursor all set up so that you can see it that way because that
works well for me, especially in
projects like this. Okay, what's the next
layer we're working on? I believe it sees blue guys, which these really do need. Yep, this one, I'm
going to go back to vertical and do a quick but that down in
size, keep it here. Just quickly, go through, blend, blend, blend. That's what this
part, it's all about. It's just blending, right? This one needs a
little cleaning up. Get it to where I want
it to be, but not much. Again, you can
change the size of your brush by
moving your fingers in and out when you have it on that setting they showed
you about the beginning. Here we go. This one, I need to bring that
size down because I want to clean it
up a little bit, end this a little bit too big. Two, bring the two fingers back. Okay. Are you guys
still with me? Did they finish this
one yet? Let's look. I think this one will go quick. Did I do this one?
I don't think so. Here we go. This
is our last one. And bring the colors
in a little bit more. Bring that, Pay up a little bit more so
I can get the colors blend the way I want them
to view. We're almost done. What has been your favorite
part so far in the chat? I'd love to hear or if you're struggling with
anything in particular, I want to know, because this community is great at
helping each other out. I just love to hear
your thoughts. Let's see. Okay, one more. Bring the size up for this
one, since it's bigger. All right, friends, that's done. I am going to turn
off my drawing guide. I am going to unlock this one. I'm going to take all of these,
slide them to the right. Depending on how many
layers you've used, you should be able to
duplicate this one more time. And I like to flatten it down. And sometimes I really like the darkness of that
that's happening there, You know, I'm going
to keep it that way.
8. Final Details: The next thing we can add, which I'm just going to
show you a little bit of because it can take
a little bit of time. But finding a white and
using the stitch again, use your assisted
layers. Vertical is on. Right now I can tell drawing assist slowly go over your piece and
create stitch marks. Sometimes it likes to make it a funky line
on the first line. You just have to figure it out. Sometimes I will actually plan
to erase one of the lines. I think I've got it
mostly working properly. This one is going to
do a sideways line. With this line I'm
going to erase, I'm going to bring that
side up to erase it. Then I'm going to come back
in here because just funny, funny little details,
you just have to work with this one. I'm going to go over and start. If I turn this off, you
can see that piece there. I'm going to get rid of
this line and that line. Just a quick little work around to get past that first line that
doesn't want to cooperate. I guess that's what I'm going to say it doesn't want to do, it doesn't want to cooperate if you don't have a
white background. If you want to change
the background, you'll see it, but you can change your
background to work for you. Or if it's a white background, then maybe you don't have to erase anything because
you can't see it. Anyway, do what works for you to get your
stitching on the paper, on the procreate canvas. Do you like how this
is going quickly? Do you like being able to
add that extra design in? I'd love to know. Okay, the next thing I'm not even getting
off of this layer, I'm just changing it up, the radial for the corners. I'm just keeping my
stitching on one layer. And then I'm going
to switch right now to quadrant for the, the red flower here. I want that one to the
edge so you can do it, however works for you. All right, and now I'm going to turn off my assisted drawing for the center book. This one, I'm just
tapping it down because it doesn't want to go
into a circle very easily. You can just tap it
down. A lot of fun. You'll do just what
you want to do. Have fun with this brush. You can do so many
other things with it. Okay, I have it all. I've got a little bug
who's bothering me. Okay, now that's my
stitching layer. I'm going to do one more layer. I'm going to change this layer. Clicking on the end,
that's a normal mode, and I'm going to
turn it to overlay. I'm going to turn off
my drawing guide. I don't need that on anymore. I'm going to make my color dark. Just go for black
because it's on overlay. It. Just overlay what I've already drawn, this brush. It's a big brush and have
the opacity all the way up. I can just add it in and you can see how the
design changed color. I turn it back, it gets
a little bit darker. But if I zoom in, you can see, can you see it? Can you see the texture
that's happening? It looks like it's fabric. There you have that design. We have a really
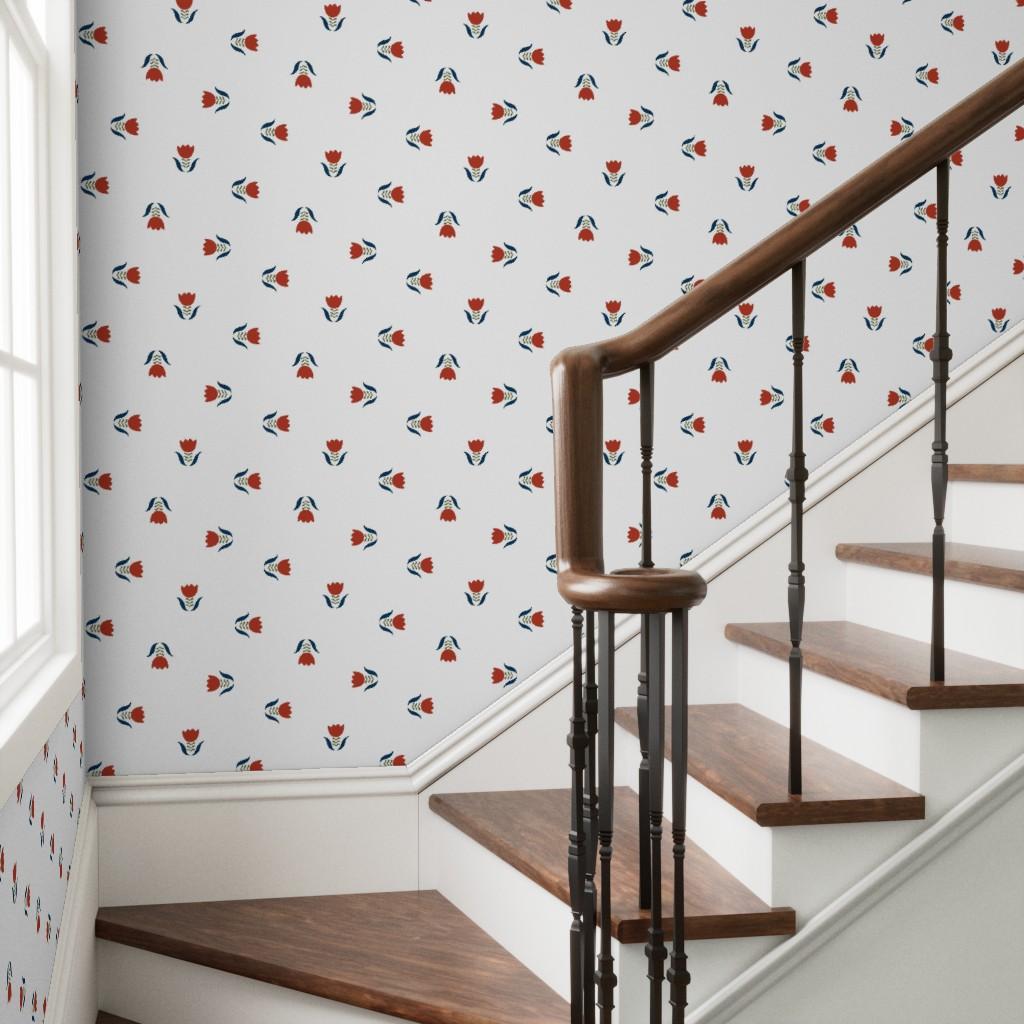
cute quilted square that you can add to any thing. And any design you can print it up or even put it
into spoon flour, which will be another class. Actually have a few
classes on how to do that in my various classes. I'll put links to
that in this as well.
9. Showcase & Sharing: I really enjoyed going over
this design and learning about Swedish folk
art with you today. I loved bringing you
back to my childhood and looking at the Carl
Larson books together. I have quite a few
Carl Larson books that my mother had
around the house. My sisters and I would pass the books around to
each of our homes and share them because we just
grew up on that nostalgia. And going through the
woods and learning about the different folk lores and
having that sense of calm. I guess that's what
this brings to me is it's a sense of calm. And I hope you enjoyed creating your Swedish folk inspired
quilt square in procreate. It's a mouthful together
and working with me. Katie, from Per Chan Made. You can find me
online at Per Cha Made.com I'd love to have
you share your designs, put it into a portfolio, put it into social media. If you are going to put
it on social media, use the hashtag creating with M. That's my
creative hashtag. Anybody who uses that hashtag, we can share to the
designs and look at what everybody is creating by
taking some of my classes. You can also share it
in the community and drop it into the discussions and into the projects section, because we all love to
see your artwork and we love being that fly
on the wall and looking at everybody's designs
and checking them all out. Please, please sign up
for more classes and, um, I really enjoy
teaching with you guys, for you guys and helping beginners get started
because we were all a beginner one time
and I really know the struggle that it
can be to get started. I can't wait to see
what you create next. Thanks for popping in by.
 Katie Simmons, Digital Artist | Perch Handmade