Transcripts
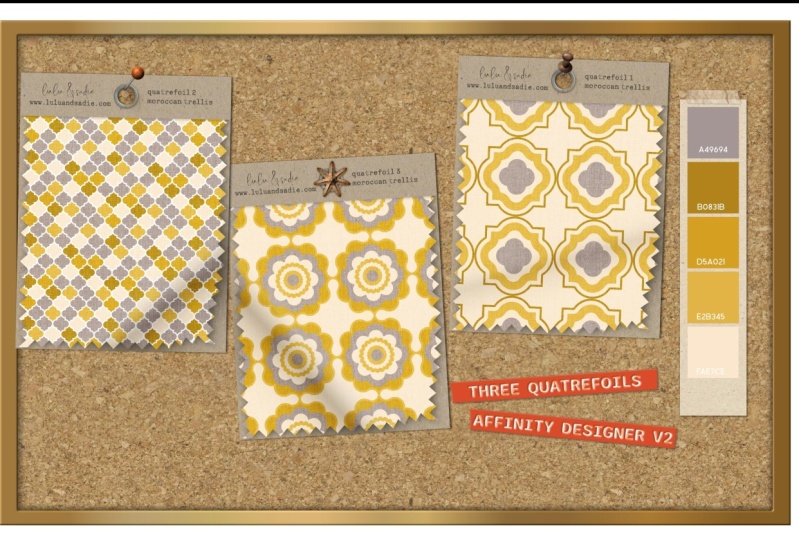
1. Welcome to Class!: Whether you love their symbolism or you enjoy their symmetry, quatrefoils are classic
motifs that can be both a sophisticated
and fun addition to your pattern portfolio. In this class, I'm going to show you three ways to
use vector shapes in Affinity Designer to create your own beautifully
symmetrical quatrefoil motifs. Hi, everyone. I'm Tracy, an illustrator and designer
from the Chicago area, and welcome to the next class in my pattern toolkit series
where we dive into specific motifs
and turn them into fully functional
patterns ready for your portfolio and print
on design projects. Quadrifoil motifs may
look difficult to create. But with designer and
a bit of pre planning, you'll be creating your own vector Quadrifoil
designs in no time. Throughout the
class, we'll look at how to use one or
more of the built in shapes in designer to quickly create a variety of
quatrefoil designs. Next, we'll use the shape
builder tool to take a group of overlapping strokes
and turn them into a complete
interlocking motif. Then we'll use the vector
flood fill tool to create a fun pattern of random
colors from her palette. After that, we'll
look at how to break up a single shape
into smaller parts, make minor adjustments,
and put it all back together to create a beautiful
scrolled quaterfoil. When creating our designs, we'll talk about how the size of the shape that you
start with will determine the size
you end up with, as well as how to
set up your canvas and your initial
motif for efficiency. I'll be using the desktop version of Designer Version two. If you're following along
on the iPad version, most tools used in the
class are available on the iPad with the exception of the move data entry feature. Now, I do want to note while this class is beginner friendly, it assumes some familiarity
with Designer Version two and the overall surface
pattern design process. Are you ready to add Quadrifoils
to your pattern toolkit? If so, come join me in class,
and let's get started.
2. The Class Project: O. The project for this class is to create your own Quadrifoil designs using the methods
taught in class. The easiest way to share
your project is to take a screen grab and load it in the class project and
resources section. I've shared step by
step instructions on how to share your project, as well as additional
information in the PDF provided with class. I'd love to see what you create, and sharing your
project not only helps future students see what they'll learn when they take the class, sharing a project
and leaving a review helps more students
find the class. Next up, we'll dive into
creating our first pattern, taking a look at how to use one or more built in shapes to create a single quadrofoil
motif. I'll see you.
3. Quatrefoil 1: Simple Built in Shapes: In this lesson,
we're going to start off with the simplest
approach to creating a quatrefoil pattern using a combination of simple
built in shapes. By taking an
intentional approach to creating and
combining your shapes, you can create a variety of basic quatrofoil designs in less than 10 minutes.
Let's take a look. I've created a 4,000 pixel
Canvas set to 300 DPI. It's going to allow me
versatility when it comes to using my final
design because it gives me options when
it comes to export and the various print on
demand sites that I use it on. I've set my color space to RGB because that's what my print
on demand sites ask for, but it also allows me to use these designs in digital
products that I create later. If I need to, I can
always convert to CMYK. I've also set up an
artboard so that I can save this to a pattern hab that I've created here in my assets. Saving my vector designs to my assets not only allows
me to test them easily, but to pull them into future
designs very quickly. Let's talk about the shapes
that we want to start with. One of the reasons I chose a 4,000 pixel Canvas is because it gives me a number of options for the size of my quatrefoil motif, which is ultimately going to determine the scale
of my final design. I want to create a
shape that's going to easily divide into my canvas, so that means I could
go with 250 500, 1,000 or 2000 pixels. If I start with a
250 pixel quatrefoil on a 4,000 pixel canvas, the scale of my final design
is going to be rather small. If I start with a
2000 pixel shape on the same size ardboard, it's going to be rather large. I want to create
something that's somewhere in the middle
but not too small, so I'm going to start
with a 1,000 pixel motif. Much like the size of
your overall motif determining the scale
of your design. The size of the largest shape in the quadrifoil is going to determine the final
size of your motif. While some quadrifoils are single shapes repeated four
times around a circle, many of them are layered
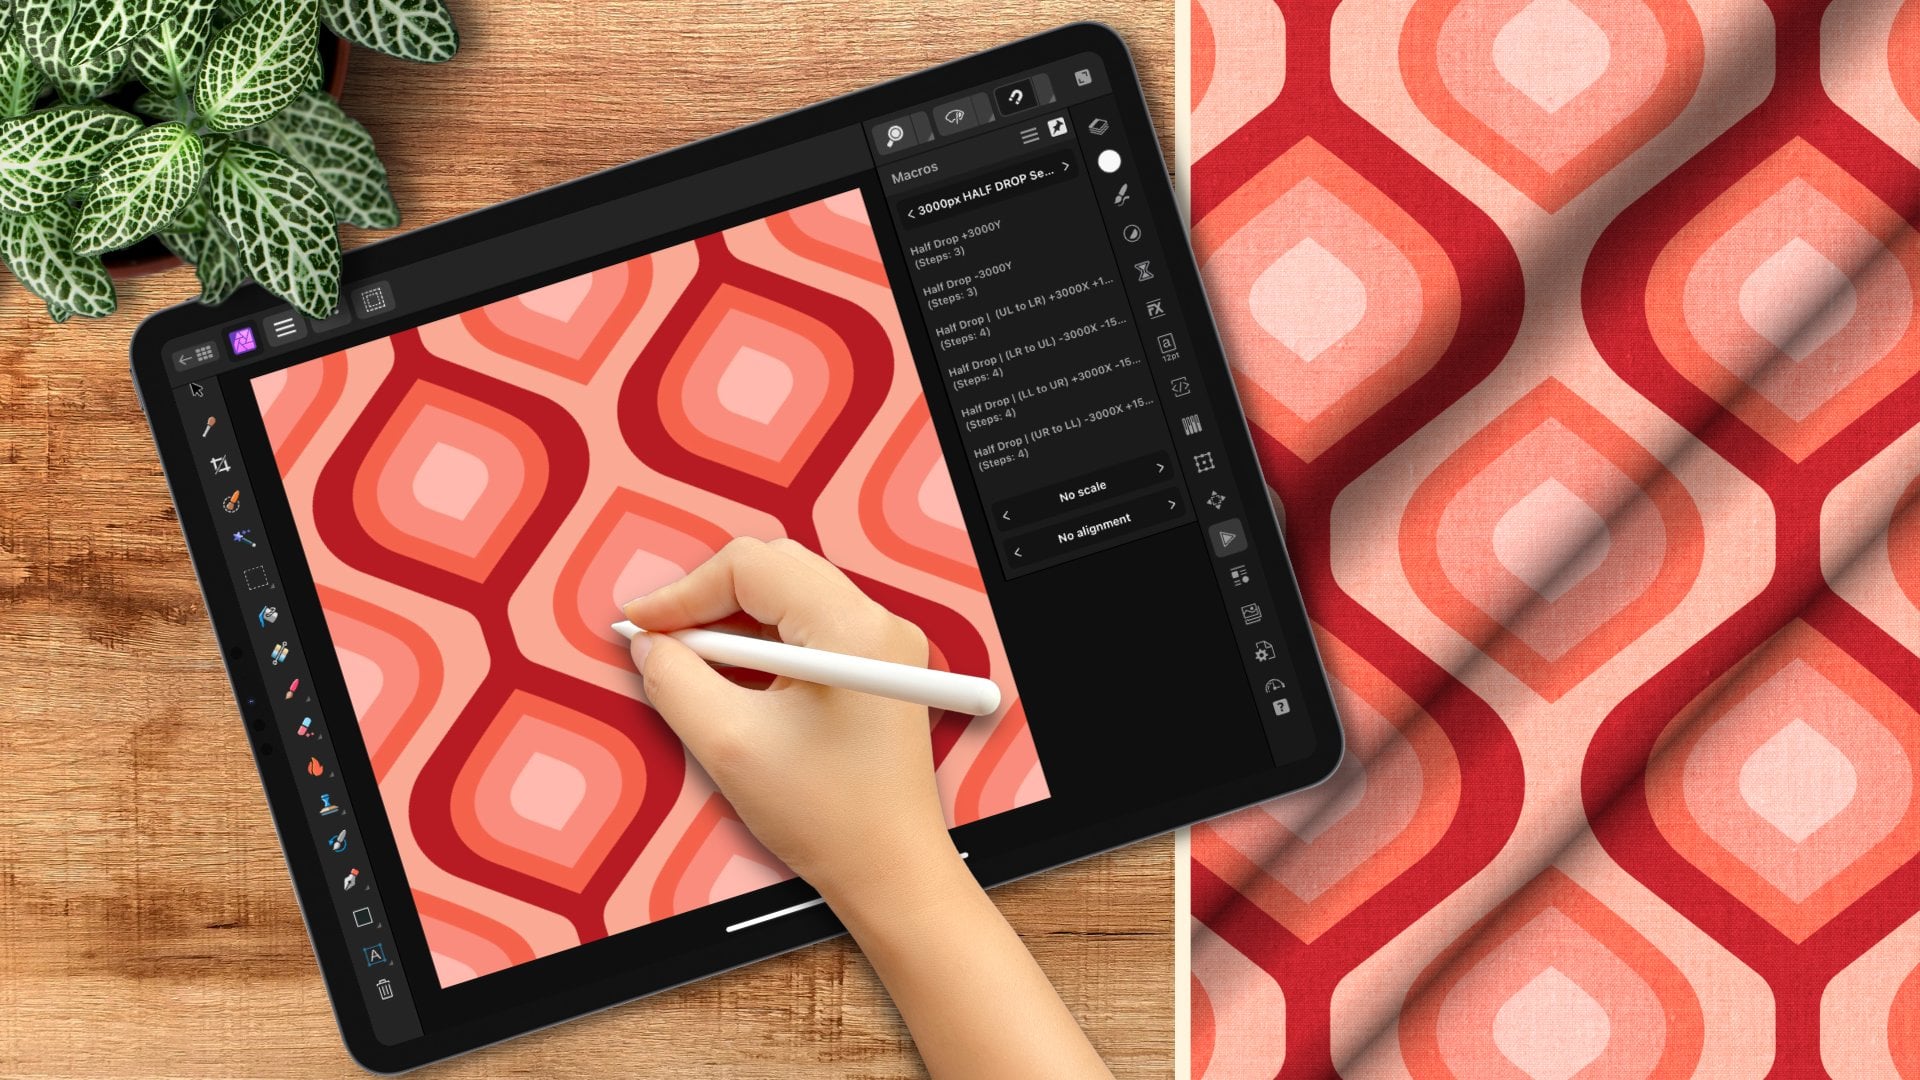
with smaller shapes peeking out between the leaves or the petals of the quadrifoil. I'm going to select
the cloud shape. I have a 50 pixel stroke
set to this ochre color, and I'm just going to command
click here in the center. Set my width to 1,000
as well as my height, and I'm going to set
the bubbles to four. I'll keep the inner radius 75%. The lower the radius, the more defined the petals will be. I can always change
this later if I want to, and I'll click Okay. In and of itself, this is a quadrifoil shape because
Quadrifoil means four leaves. I could add some designs
to the inside of this, tile it up, and I
would be good to go. That's my first motif. But I want to add
another shape to this to create a barbed quatrefoil. I'm going to select
my rectangle, and I will come on to click in the center of
this initial shape. Remember, I want my overall
motif to be 1,000 pixels. If I set my rectangle to 1,000, that quadrifoil shape is now sort of lost
unless I plan to tile this up as a quadrifoil set inside of a square,
which is not what I want. I want the rectangle to be smaller than that
quadrofoil shape. So I'm going to set it
to 750 pixels square. The higher that number, the more distinct the points
will be on the rectangle, but the less distinct the initial quadrofoil shape will be. So I'll go
ahead and click. Okay. Now, I want
to combine these, and I'm going to do that
using the Shape Builder tool. Shape Builder tool has a
distinct advantage over the geometric operations
up here at the top when it comes to combining
shapes because it can add strokes together as
well as filled shapes. I'll go ahead and select
my Shape Builder tool like it also hit
S on my keyboard, and I'm going to select both
of my shapes in my layers. At the top, I'm going to
choose plus for my action, and I'm going to set my
drag method to marquee. I'll just drag across the two until I get those diagonal
lines and release. And there's my quadrofoil shape. I'm going to complete
my single motif before I start tiling it up, and I'm going to do
that by creating a series of layers and using the contour tool to offset them and scale them down
with each duplicate. I'm going to start out
by making this an off light fill that I'll grab
from my palette here. I'll command or Control
J to duplicate that. And I'm going to turn that into this lighter color and
set that as a stroke. I'll grab my contour tool. I can also hit O on my keyboard, and I'm going to set the
radius to negative 50. Now, I want to change my
contour type on this to mitre joins so that it
squares everything off. I'm also going to make sure
that in my stroke panel, the join is set to mitre join. That way, everything
is squared off. I'll go ahead and
bake the appearance of that because I use
the contour tool. I want to make sure that if
I scale this up and down, it doesn't continue to shift. I'll go ahead and command or control J to duplicate that one. Go back to my swatches, and I'm going to set
this one to a fill to this slightly darker color. Again, I'll grab my contour
tool and go with negative 50. Again, I want to make
sure that my contour type is mitre because I
want that squared off, and I'll bake the
appearance of that. I don't need to worry about the stroke because
I'm not using one. Next, I want to go back
to my cloud shape. And I'm going to
create one of those four petal quatrefoils
in the center. I'm going to start with this
sort of dusty purple fill, and I'll just go ahead and
command click in the center. And I think 500 looks fine. I'll go ahead and click Okay. I want to duplicate that, and I'm going to change
it to the off white color and grab my contour tool
and just bring that down. Let's try negative 51st. I'll go with negative 25. And again, I want to change the contour type to mitre join, and I'll bake the
appearance of that one. Now, I could keep going with this and continue to add shapes, but I'm going to call this done and just group this
whole thing up, and this is what
I'm going to tile. But before I do
that, I want to turn that into a symbol so that I can go back in and make any changes I want to
one of the motifs, and it's going to change
the entire design. Can do that one of two ways. I can go up to the top to window and turn on my symbols panel
if it's not already on, or I can select the group, go up to layer, and choose Create symbol, and that's automatically
going to add it there. And you can see I got
that orange line, which means now
this is a symbol, and any duplicates I make of this are going to
be symbols as well. So I'm all to start
tiling this up. I'm going to bring this up to the top left corner
of my canvas so that half of it is off on the horizontal and half of it is off on
the vertical as well. Now, this particular motif
is not the kind that's going to tuck itself
meatly into each other. There's no way that
I can duplicate this and position it so that
it's going to interlock. Instead, as it's tiled, it's going to create
additional shapes. I'll go ahead and hit Enter. And again, my shape
is 1,000 pixels. So on the horizontal,
I'm going to key in 1,000 I'll go ahead
and choose duplicate. And because this
is a 4,000 pixel canvas with a 1,000 pixel motif, I should end up
with a five going across because this
one is off the edge. I need two completed
on the other side. So instead of just four across,
I need a total of five. I'll go ahead and hit
number of copies, four, and that's going
to complete my row. Now you can already
see where it's not going to interlock, that's going to create a
completely different shape. So I can just grab
this entire row, hit Enter, and on the
vertical this time. Hit 1,000. I'll go
ahead and do duplicate. And again, the number of
copies is going to be four. I'll click Okay. Before I started, I had added a rectangle to the
background because I don't like working on the
pure white background that affinity puts in place, which means I can take this and I can change
the color of it. And since I use this off
white stroke on the outside, I do want to change
it because it's not quite enough contrast
for it to be seen. So I'm going to try this
maybe medium yellow. I want to select that layer. I'll go ahead and click that. I like it, but I don't like
that it matches that color. You're not really seeing that
this is a separate shape, so I'm going to try
maybe this purple color. I like that. I like how that
plays with the stroke here. So I'm going to call that done. But remember, these
are set up a symbols. If I want to, I can
either use one of these or I can simply
pull in the symbol here, and as long as it sits
outside of the artboard, I can see it off the canvas. And if I make changes
to any of these layers, it's going to change
the entire thing. So maybe I want to change this one to the
darker yellow here. Let's see what it looks
like. It's interesting. I like the contrast that
that's creating, so, actually, I think I might keep that, but I no longer need this
symbol anymore. So I'm going to select
the symbol layer, not the layers underneath
and delete it. And that's going to keep
everything else on the page. At this point, my
pattern's done. I can go ahead and test this. Going to select the
Artboard layer. It's important to
select the artboard, not the layers underneath. And in the pattern hub that
I've set up in my assets, I have a subcategory
called Test patterns. So with that artboard selected, I can either drag this
in or I can go to the Burger menu here and
choose Add from selection. And as soon as that's in place, I can add a new artboard and
test this. So there it is. I'm going to move this over, grab my artboard tool. I have the size set
to document because I want it to be the same size
as what I started with, and I'll click Insert Artboard. And let me just move over here. I'm going to select
my gradient tool. I'll click on the
new asset I added. Now, of course, it looks
exactly like the other one. But the benefit of doing this is these handles will allow
me to then scale down, and I can just take a look at the pattern and not only make sure that it's
tiling correctly, but that when it is scaled down, there's nothing that
I want to change. So if something's not quite showing up enough, there's
not enough contrast. I can come back here and I can change it using the
symbol that I created. I actually like this, so I'm
going to call this one done. In the next lesson,
we'll look at using a group of simple
shapes along with a vector flood fill
tool to create an interlocking quatrefoil
shape. I'll see you there.
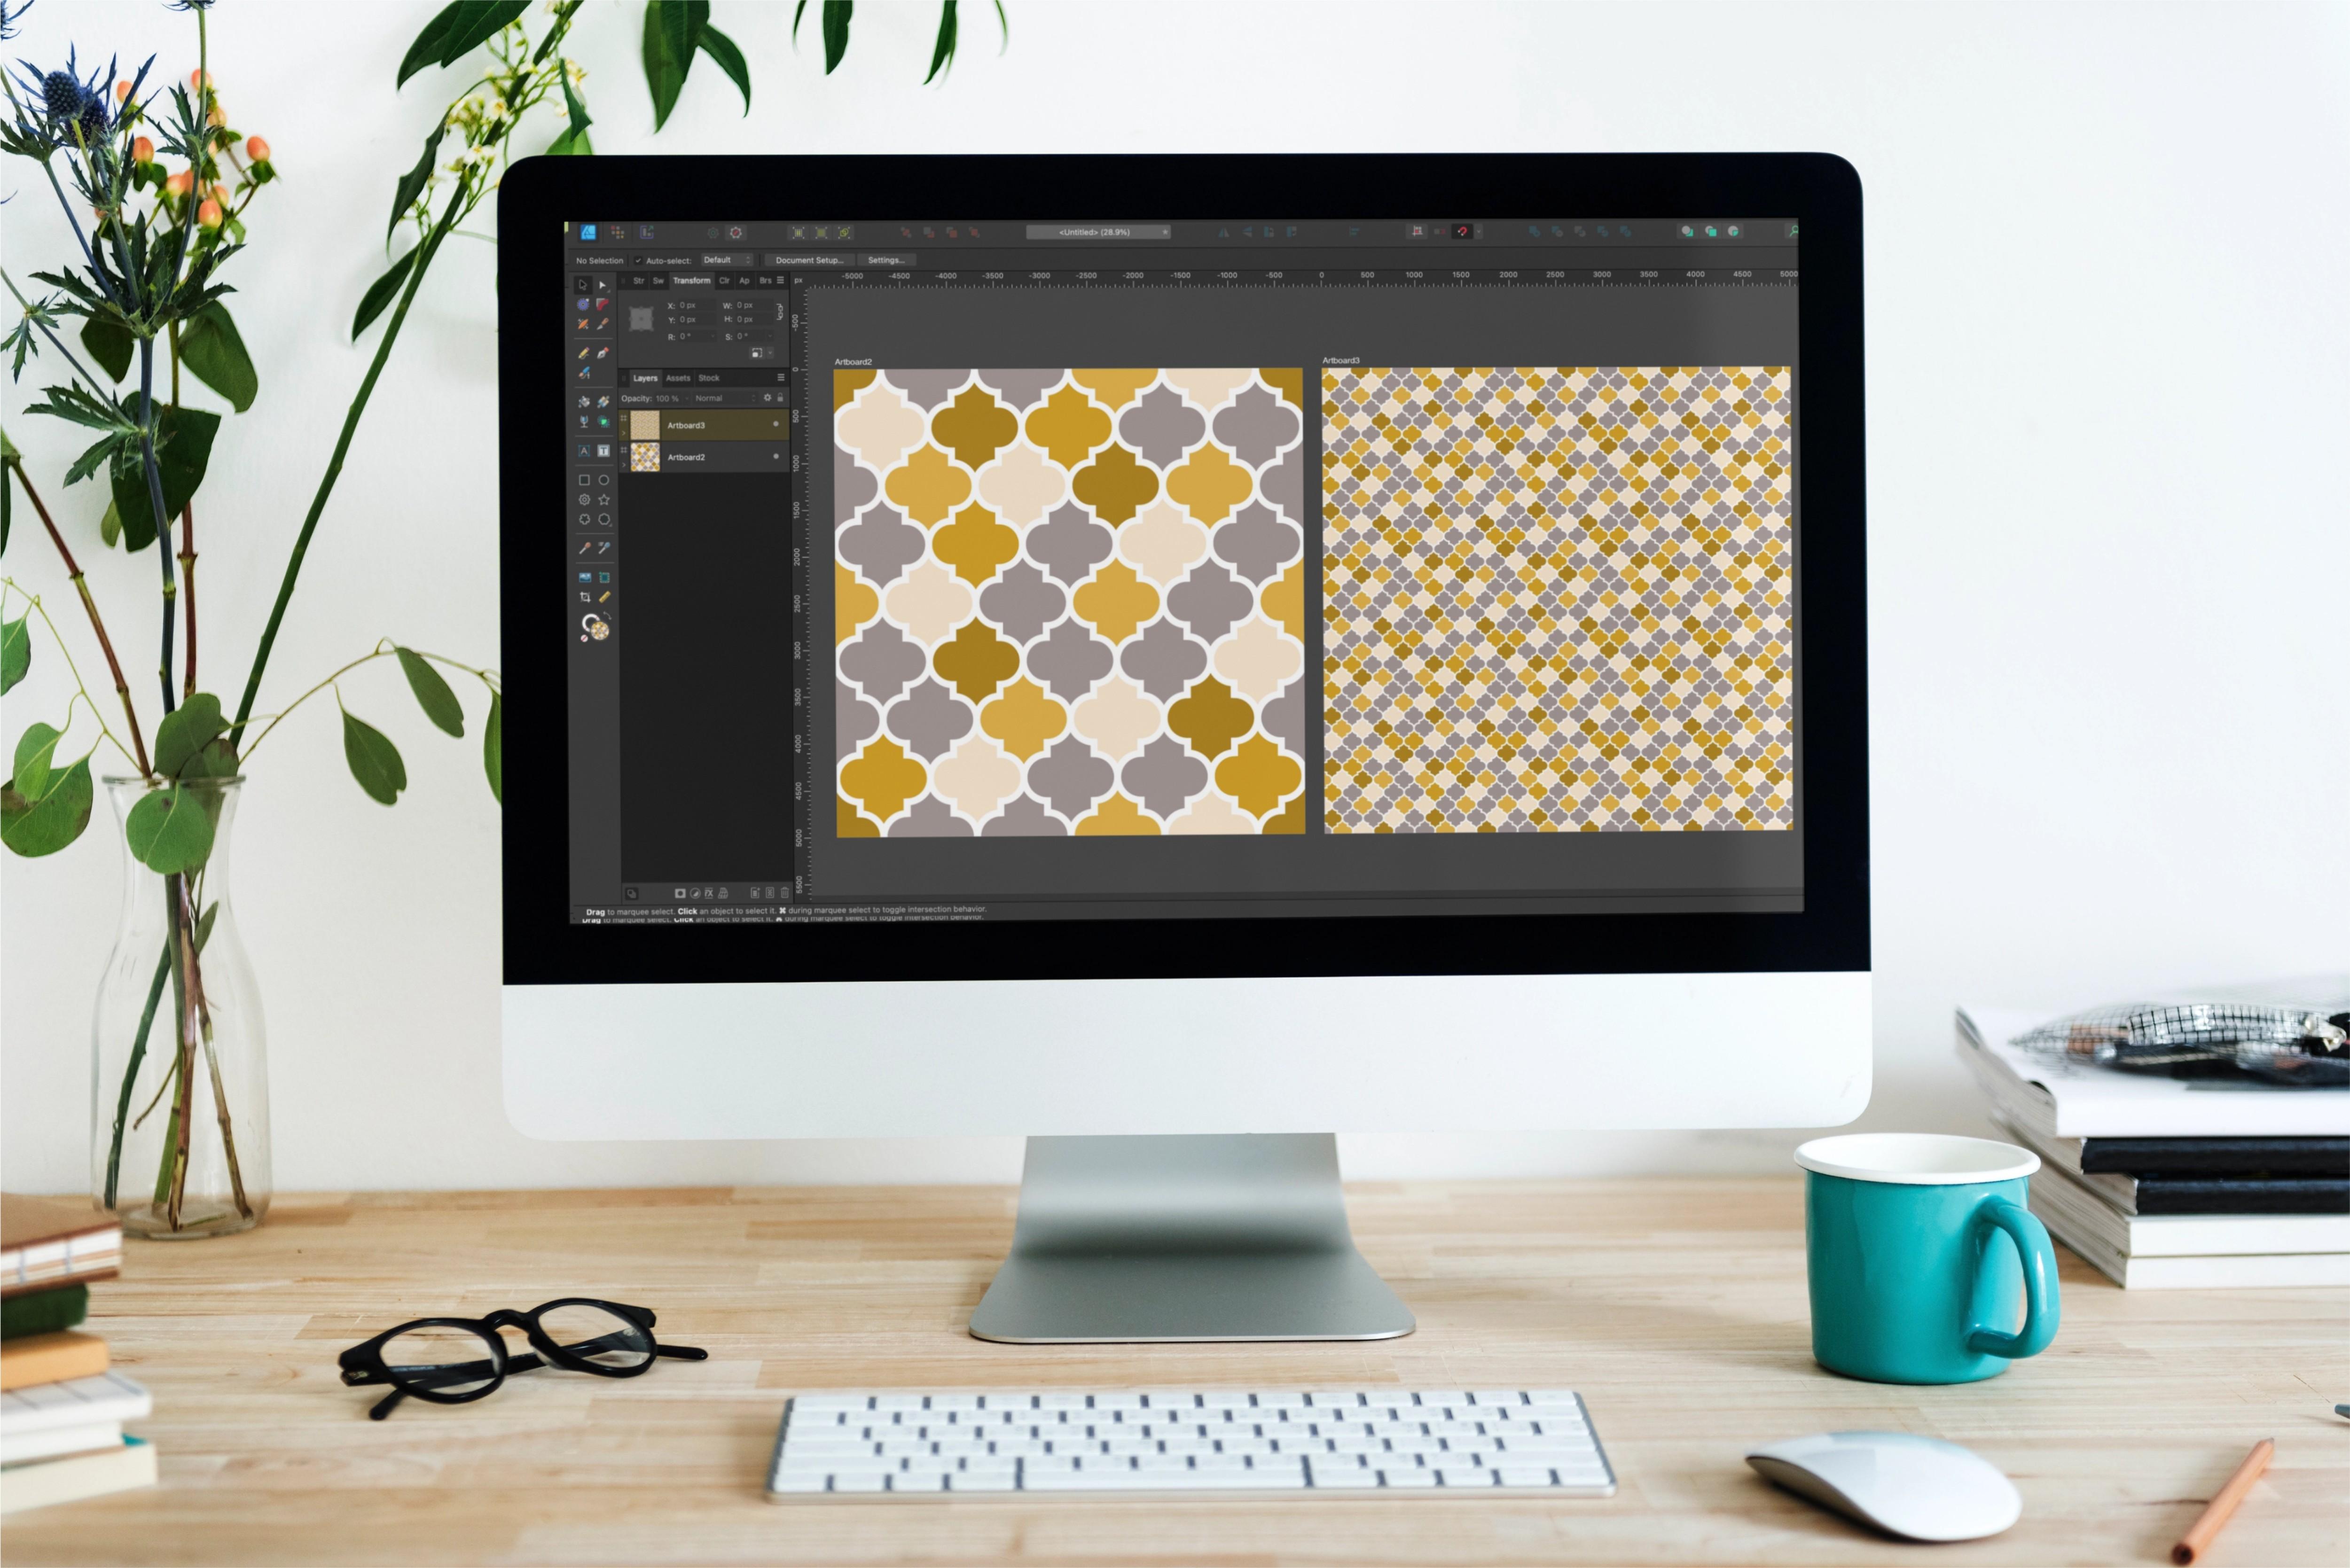
4. Quatrefoil 2: Interlocking Motif (Moroccan Trellis): There are many ways to
create a quatrefoil motif, each with a different outcome. In this lesson, I'll
show you how to create an interlocking design where each row fits nicely
into the last one, and additional shapes aren't
created by the gaps between. This is sometimes referred to as a Moroccan trellis design. We're also going to
look at how to use the Vector flood
fill tool to take a single colored
design and turn it into a multi colored version
quickly and efficiently. Let's take a look. In order to ensure your motifs
will be interlocking, you need to use
specific measurements for both the shapes that you use to create your motif as
well as the artboard itself. Shapes that you use are also going to determine
whether you create a tall skinny motif or
a squat or wider one. My preference is to create one that's wider, like
the one on the right. So I'm going to use
500 pixel ellipses and a 500 by 750 pixel rectangle
to create my motif. If I were to choose
something like 500 pixel ellipses and a 500
by 1,000 pixel rectangle, I'm going to end up with a much taller motif like
the one on the left. Both versions interlock. They just look different
once they're tiled. In addition to considering the shapes that
you start you also need to set your
canvas up based on the final motif you're
going to end up with. So in this case,
I'll end up with a 1,000 by 1,250 pixel motif. And if I want to
be able to export a seamless square canvas, I need to come up
with an artboard size that both of those
numbers divide into evenly while still maintaining a print
ready resolution. If I don't use an artboard
that both divide into, I'm going to end up
with non seamless tiling either on the
X or the Y axis. Want to stick to about 3,600 pixels or above because that's going to give me the
most versatility with all of my print
on demand sites. Now, in this case,
the only number that both 1001 thousand 250
divide into is 5,000. So I'm well above
that threshold. But if you're using a different
combination of numbers, it's a good idea to set a threshold that you
don't want to go below based on how you plan
to use your final design. I can always export in my final tile at a
lower resolution, but to create it, I need to set it higher at at least 5,000. And that's what
I've set up here, a 5,000 pixel square canvas at 300 DPI with a color
format of RGB. I'm going to create
3500 pixel ellipses and 1500 by 750 pixel rectangle. I've selected my Ellipse tool, and I'll click on my Canvas
to create my first shape. I'm going to hold
down Shift and Alt, and I'll click and drag to
create my first duplicate. And I want those two to
overlap at their strokes. While that's still
selected, I'll command or Control J to duplicate it. And I'm going to
drag this off to the side because I don't
need it right now. I'm going to zoom into these two and grab my rectangle tool. I want to hover over
the center until I'm vertically and horizontally centered on both of those. And Command click to create a
500 by 750 pixel rectangle. Now, if you need to,
you could always drag this to make sure that
it's centered perfectly. You want to do that
before you turn this into a full shape so that you know that the
alignment will be fine. Finally, I need to
create the peak at the top and the
bottom points, and I'm going to do
that with spare lips. The first thing I want
to do is convert it to a curve because I need
to access the nodes, so I can either right click on the shape and choose
convert to curves, or I can choose it from
the contextual menu. Once it's converted,
I'm going to go ahead and select
all of the nodes, and I'll right click on one of them and
choose break curve. You can see that
in my layer stack, that's created four
separate layers. My move tool, I'll
grab the top two, and I'm going to bring
them over and snap them into place on
the initial shape. I'll grab the bottom two
and do the same thing here. Now I need to flip these so they aren't rounded but
rather pointed. To do that, I'm going to
select all four layers, and I want to flip
them vertically and horizontally in my
alignment options in my contextual menu. If I do that with them
selected as a whole, nothing is going to
change because it's flipping the entire group
vertically and horizontally, not the individual shapes. When I need to do instead, is to go over here on
the contextual menu and choose transform
objects separately. What that's going to do is
keep all four curves selected, but it's going to designate
a transform object and put a bounding box
around only that object. Whatever change I make to this curve is going to be
applied to the other three. So I'll go back up to
my alignment options, and I'm going to choose flip
vertically and horizontally, and now I have the peaks
at the top and the bottom. Finally, I want
to combine all of these shapes using the
Shape Builder tool. So I'm going to click
and drag to select them. I'll go ahead and select
my Shape Builder tool. I want to make sure that
action is set to plus. Drag method is Marquee, and I'm going to keep cleanup
at all unused geometry. I'll click and drag
again so that I have the diagonal lions
over all of my shapes, and I'll go ahead and
release, and I have my full single quatrefoil shape. Going to keep the motif
itself pretty simple. I'm going to switch this
to this off white color, and I'm going to change the
fill to this purple color. I also want to turn this into
a symbol before I tile it. So I'll go ahead and
select the shape, and I'll go to my symbols
menu and click Create, and I'm all set to tile this. I'm going to bring this up to the top left corner
of my canvas, and I'll go ahead and hit Enter. And on the horizontal, I can
go 1,000 I'll hit Duplicate, and this is a 5,000
pixel canvas. But remember, I need to complete my shape
on the other end. So I'm going to put
number of copies as a five and click Okay. I can use this same
shape to go ahead and create the one that's going
to tuck itself in here. So I'll go ahead and hit Enter. And this time, I want to
go half of the width, so I'll do 500 on
the horizontal. And I actually want to do
half of the height, also. So I'm going to key in 1250/2. And if I hit Duplicate, you can see that tucked
itself in nicely there. So I'll go ahead and hit Okay. I can use this to
create the second row. So again, I'll hit Enter,
and on the horizontal, I can key in 1,000.
I'll hit Duplicate. And I only need four
duplicates to create this row. Now, I'm hitting
the insertion mode as behind just because I like to keep everything in order in my layer stack,
and I'll click, Okay. Now, these two rows are going
to create my full motif. So I'm going to select
all of the shapes, I command or control
G to group them up. I no longer need to do
anything on the horizontal. I only need to go vertically. If I hit Enter and I
go on the vertical, if you look at my
transform panel, the group is 1,875 pixels. However, if I click duplicate, and I key that in here, you can see that I end up with this gap here, and
I don't want that. What I want to do is move the exact amount of the height
of just a single motif. So in this case, 1,250. And you can see it tucks itself nicely into that first group. I'll go ahead and make
sure duplicate is on. And in this case, it's
probably going to take about four duplicates to
complete the entire canvas. You can always just
drag until you get to the point where you see
that the canvas is completed. Again, I'll just hit
insertion mode is behind. And now my initial group
is up here at the top, and this group is at the bottom. And you can see that I have some that are hanging off the edge. You don't have to clean this up. I actually just like to
clean these things up. So I'm going to
ungroup that last one. In my settings, I have select object when intersects
Marquie toggled on. It makes it a lot easier to select shapes that are
close together because I don't have to scroll over the entire shape I just have to touch
it with the marquee. So let me move this up a little. And I can just sort of
drag until it starts to select that very bottom
row and just hit delete, and I'll go ahead and
group up what remains. My tile is complete, but before I do any recoloring, I want to test it
quickly just to make sure that everything
is tiling fine. So I'm going to select the
artboard, go to my assets, and I'll go ahead
and add this to the test patterns
from my selections. And as soon as that's
in place, again, I'll add another artboard. So I'm just going
to move this over. Grab my artboard tool and
choose Insert artboard. Now, in this case, it's even
more important that you choose the document
size because, remember, I had to use a
5,000 pixel canvas, so something I wouldn't normally use, and I need to match that. Otherwise, I'm not going to
get it to work properly. I'll go ahead and
grab my gradient tool and make sure that
artboard selected. I'll go ahead and
click and add it. And if I scale this down, Everything is tiling just fine. Now that I know
that the design is okay and nothing needs
to be corrected, I want to play around with
the colors a little bit. If you recall, I turned my
initial motif into a symbol, which means that I
can easily change the color of my motif
just by changing one. So if I wanted to, I could go to my symbols up here
and bring this in, and I could open up the layers and play around with
the size of the stroke. So maybe I can
change this to 25. I could change it to a dash
pattern if I wanted to. I could change the fill
to something else, and it's going to
change all of them. It's fine, but I want to
take a different approach. I'm actually going
to use the vector flood fill tool to make a variation in the colors
between my motifs. So I'm going to bring it
back to where it was to that purple with the
50 pixel stroke, and I'm going to
select the symbol and get rid of it.
I don't need that. In fact, what I need to
do is turn off sink in my symbols because if I were to use my vector flood fill
tool on one of these, it's going to
change all of them. So I'll go ahead
and turn that off. Once I do this, when
I toggle it back on, any attributes that I changed while it was off will no longer be affected by that symbol on those motifs that
I made changes. In other words, if I change
the fill of select motifs, once I turn this back on, the fills on those
particular motifs are no longer going to be affected by any changes I make
to my symbols. I can change
anything else that I didn't touch like
stroke color and width. Sync off, I'm going
to select all of my groups so that all
of my shapes are selected, and I'll select my
vector flood fill tool. Now, you always want to make sure that you select
the tool first and then pick your fill because when you
first open a canvas, it's going to give
you a red fill. When you use it after that, it's going to give
you whatever fill you had selected last. So I'm going to go to my
swatches and I'll choose, I think, this golden
yellow color. What I want to do is randomly change the color
of select motifs, making sure that if
I change the color on one of the edges
or the corners, I change the opposite edge to the same color so that
it tiles seamlessly. So I'm just going to start
clicking around here. I think I'll do
this, maybe here. I'm going to do an edge here, so I want to go to
the other edge. And well, maybe
I'll do this one. I'm going to speed
this up and finish it, and as soon as I'm
done, I'll come back. That done, I've gone
ahead and added that to the test patterns
in my pattern hub, and I've added a
second artboard. I'll grab my gradient tool
and click to add that one, and I'm just going
to scale this down. Whenever I create something
like this with varied colors, I like to test it like this to make sure that at
a smaller scale, there's no clumping or
certain colors where there's big pockets or
the tiling is evident. So let me just take
a look at this. I'm not seeing anything
that's cut off because I didn't match
it on the other side, so I'm going to
call this one done. In the next lesson, we're
going to take a single shape, break it up and put
it back together as a barbed quatrefoil.
I'll see you there.
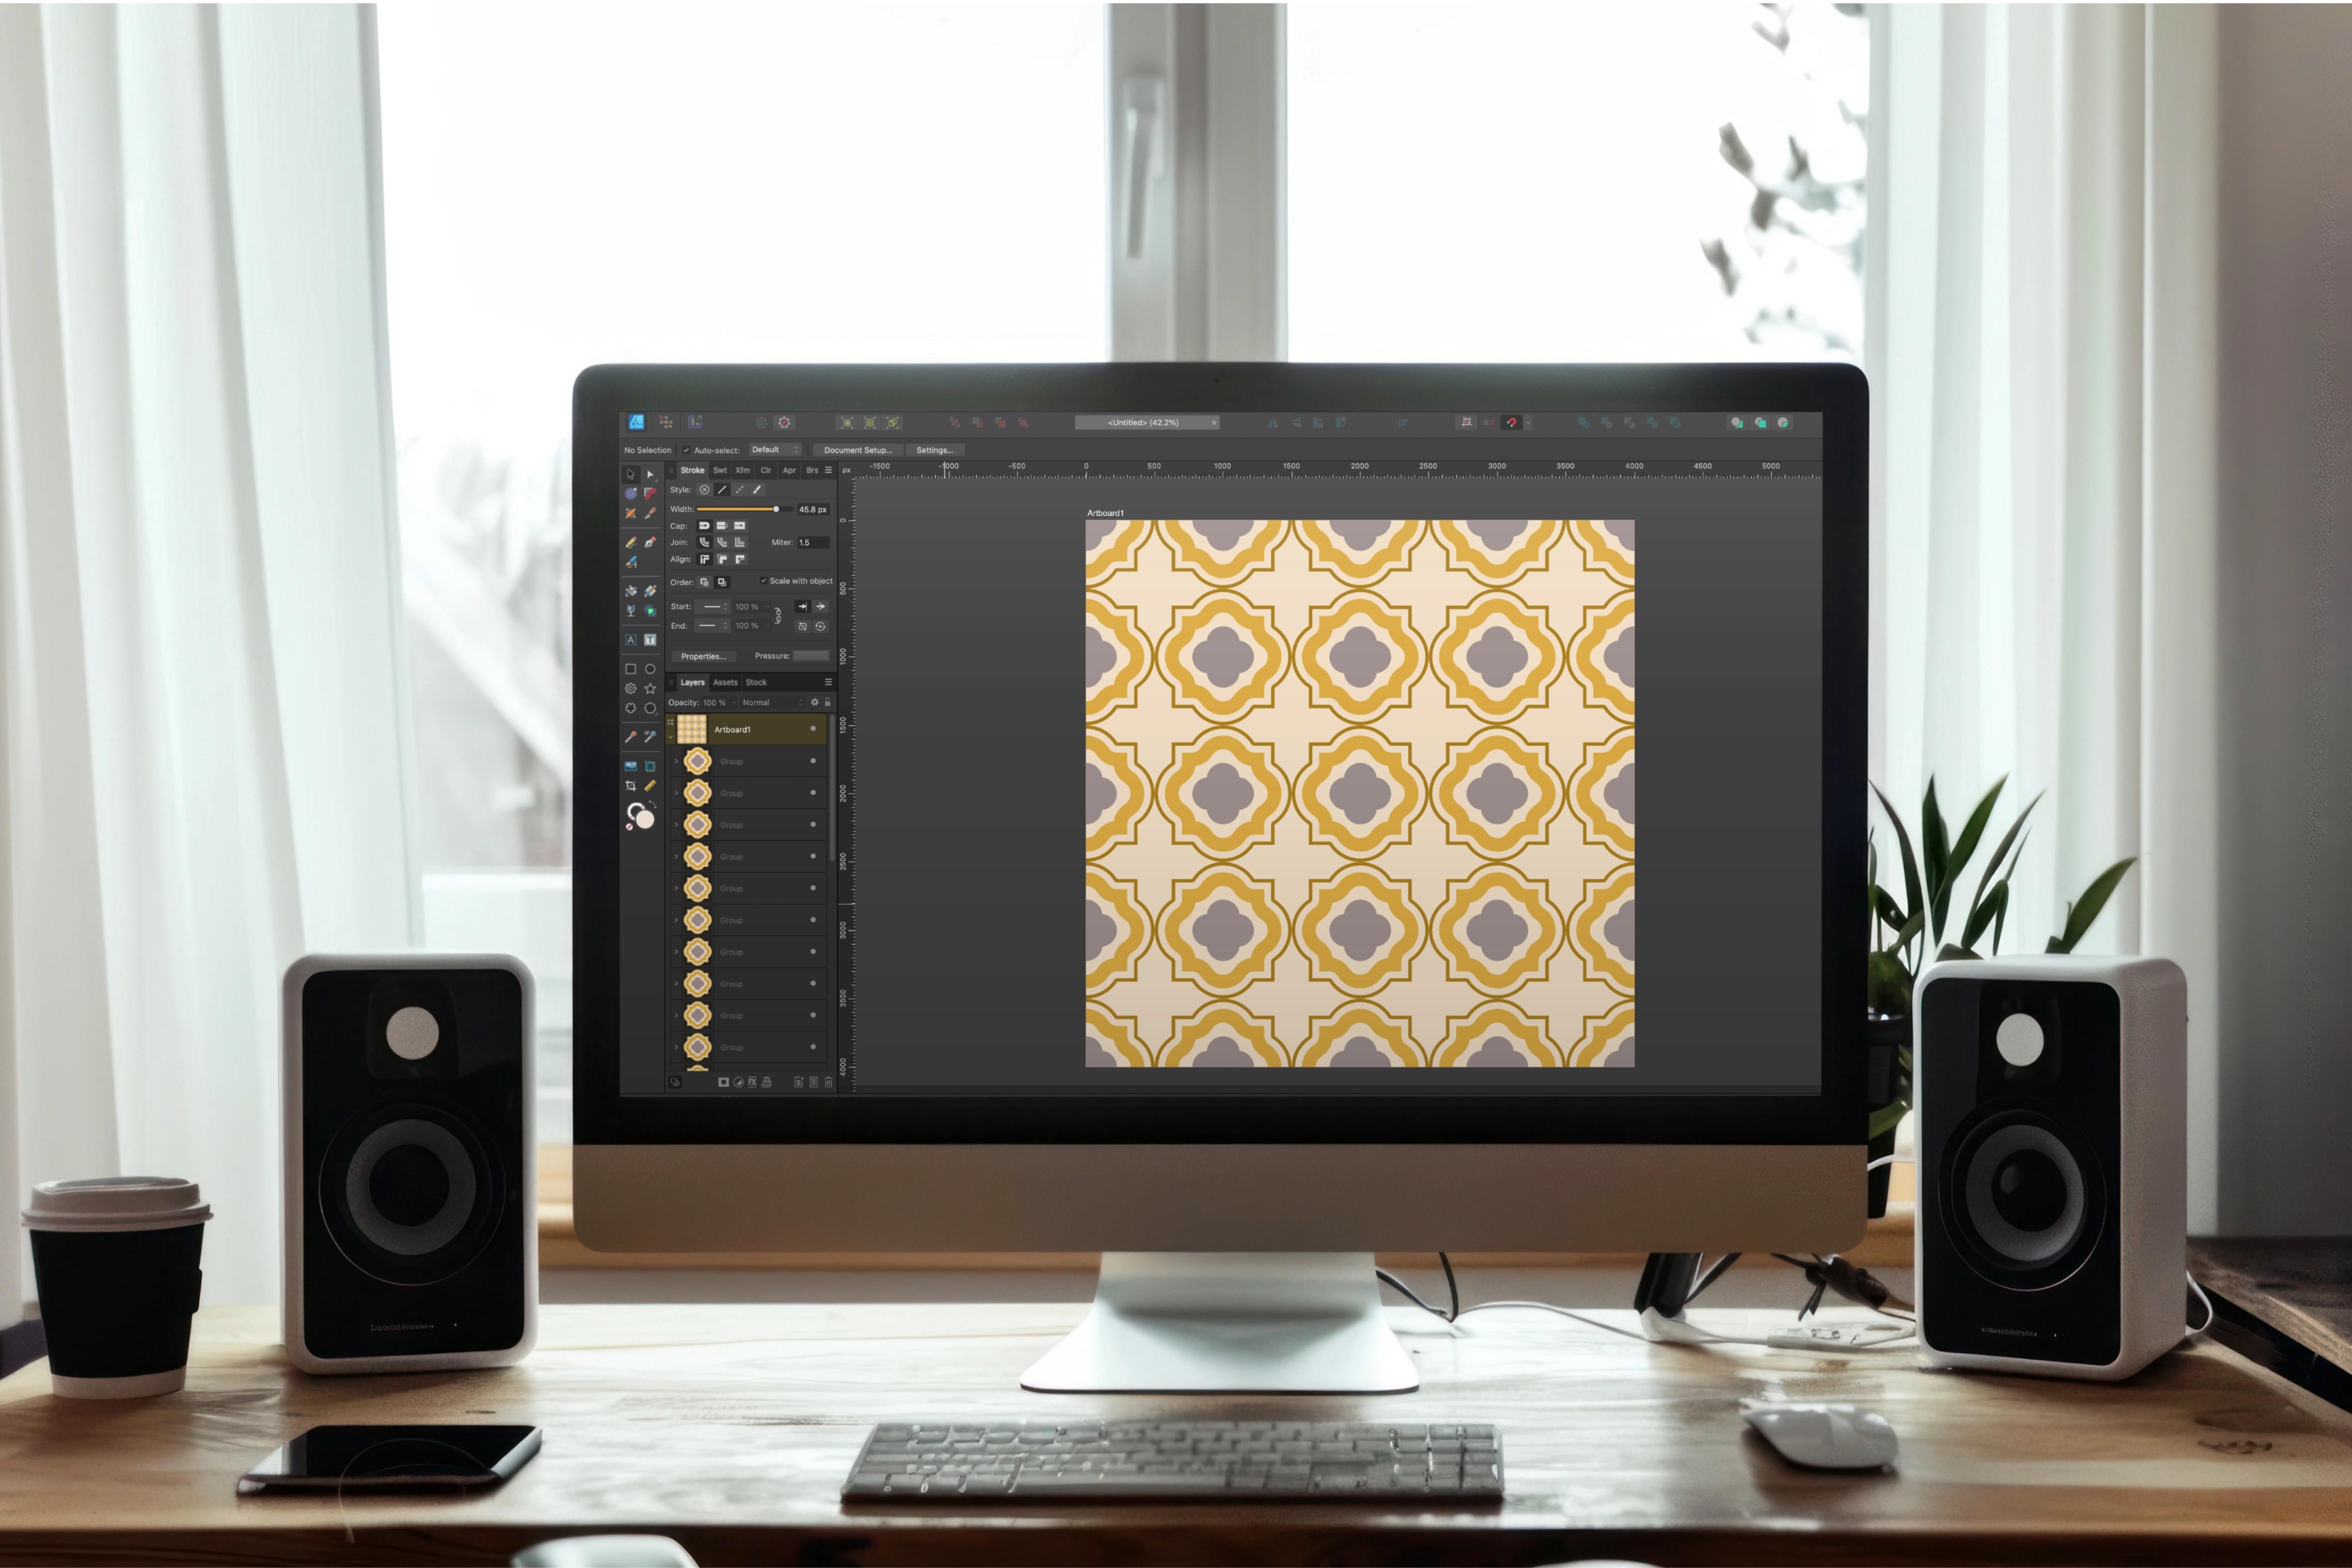
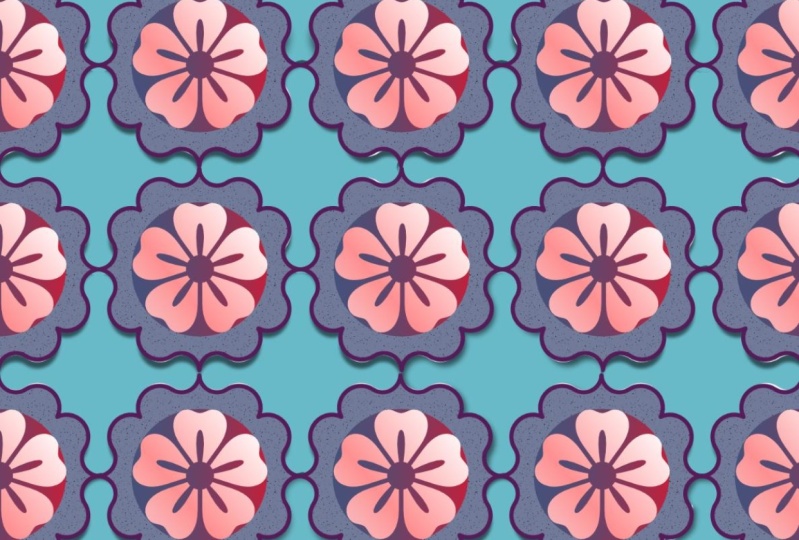
5. Quatrefoil 3: Scrolled Motif From One Shape: Wow. In this final lesson, we're going to break apart
a single cloud shape and put it back together as a
tlable barbed quatrefoil shape. Let's get started.
The motif we're creating in this lesson
isn't interlocking, so we have more leeway
with the canvas. I'm going to create
a symmetrical shape that's 1,000 pixels, so I need an artboard that that's going to
divide into evenly. I've gone ahead and
created a 4,000 pixels square canvas set to 300 DPI. I'll select the Cloud tool and command click on my Canvas. I want to create a cloud
shape that's 1,000 by 1,000 pixels with 12 bubbles and
an inner radius of 85%. You go too high with the radius, the effect isn't really seen, but if you go too low, it's more difficult to make it
look like a Quadrifoil. I find the sweet spot is 85-90%. The first thing I want to
do is to convert this to a curve so that I can
access the nodes on it. I want to take the
top, the two sides, and the bottom bubble and do the same thing I did with the
ellipse in the last lesson. I'm going to break them
apart and flip them horizontally and vertically so that they're pointed
rather than round. With my no tool,
I'm going to click and drag to select
the top three nodes. I'll hold down shift,
and you can see I get a plus sign on my no tool. I'll select the right three, the bottom three, and then
the three on the left. Going to go up to
the contextual menu and choose Break Curve. If you look at my
layers, you can say I have a number of
tiny curves here, and those are the ones
that I want to flip, so I want to deselect
the ones I don't need. I'll hold Command
down on my keyboard, and I'm just going to click on these four to deselect them. I want to make sure all of
the little ones are selected. Again, I want to flip these
vertically and horizontally. But if I flip this
as is, remember, nothing's going to happen
because they're flipping as a group rather
than individually. So I need to go to the
contextual menu and choose transform objects separately so that it designates
a transformer. I'll go ahead and flip
vertically and horizontally, and now I have my points. Now, if I zoom in, you can see they're a little bit disjointed, so I'm going to
correct those next. I'm going to select my node tool and select the entire shape. I want to select the nodes
that are on the inside here, so I'm going to click and
drag to select these two. I'll hold down Shift
and select these two, the bottom two, and then
the two on the left. I want to combine them again, so I'm going to go back up to the contextual menu and
choose join curves. I want to make sure
that they all join. Sometimes you might get
one or two that don't. And in this case, this
one here did not. If I zoom in, you can
see that I actually have two nodes stacked
on top of one another. If that ever happens, just
select the two nodes, go back up to the top and choose joined curves,
and you'll be all set. Once again, I'm going to select the two nodes on the inside, and I'm going to hold Shift down and do the
two on the right, the two on the bottom.
And the two on the left. I want to hit C on
my keyboard or I can go to the corner
tool in my toolbar. I'm going to click
and drag on one of the nodes and drag all the way up until I can't drag anymore. And that's going to round off those spots that
were kind of wonky, and now I have my shape. I want to select the shape and make sure that I bake
the appearance that way, if I scale this
shape up and down, those don't continue to shift. So I'm all set to go ahead and fill out the shape
before I tile it up. I'm going to keep
this pretty simple. I want to keep the
stroke the way that it is with this
lighter yellow color, and I'm going to keep
the stroke size. I'm going to add a fill to this. So I'll use this slightly darker ochre color
that I have here. And I want to select
my Cloud tool and just add a few
shapes on the inside. So I'm going to
select this sort of dusty purple color and command
click here in the center. I want one with eight bubbles, but I think I'm going to
set the inter radius to. Let's try 85, and I'll go
with 700 pixels for now, but I can always change that. I'm going to command or
Control J to duplicate that and change the duplicates
color to this off white. And then I think I'll
use the contour tool to bring that down slightly. I want to go up to
the contour type and change that to mitre joins, and I'm going to
bake the appearance so that doesn't
continue to shift. I'll select my
cloud shape again, and I'm going to go
back to my swatches and choose that lighter
yellow color. And I'm going to
command click and keep this set at about 450 pixels. I want to change the
bubbles, though to 20. And then the inner radius
to something like 90. I want it a little bit higher. No, I want to create a number of these are slightly
smaller with each one. So I'm going to command or
control J to duplicate that, change it to the
off white color. I'll go to my Transform panel and I'm going to
change this to 350. I'll command or Control
J to duplicate that, and I want to change that to 250 and change the fill
to that yellow color. And then I'm going
to do that one more time, making this 150. And again, I'll just change that back to this off white color. Going to group this entire thing up and save it as a symbol so that I can change
it once I have it tiled in case I don't
like how it looks. So I'll go ahead and command
or Control G to group it, and I'm going to
go to my symbols and create a symbol out of that. So I'm all set to go
ahead and tile this. I'm going to tile this
like all of the others. I will drag this up to
the top corner here. The size of this, of course, is 1,000 pixels square. And again, this
doesn't interlock. It's going to create shapes
wherever it meets up. So it's a pretty easy tile. I'm going to hit Enter and key in 1,000 on the horizontal. I'll click on Duplicate, and the number of
copies is going to be four because remember, I have this one off the edge, so I need to complete
it on the other side. I'm going to hit
insertion mode behind. I like to keep my layers
in order going top down, and I'll click Okay, I'm
going to select this top row. I'll hit Enter. And this
time on the vertical, I'll go down 1,000. Choose duplicate. The
number of copies is four. And again, the
insertion mode behind. And now there's my
completed tile. Remember, I turned
this into a symbol, so I can pull one in here above the ardboard so that it
sits off at the edge. I prefer to do it that way than play with one of the
ones on the canvas. That way, I don't accidentally
move anything around. And I want to try changing
a few things here. I think I'm going to take
this purple cloud shape, and I'm going to change
this to 750 or 800. Let's see. I think I'll go with 800, so it's
a little bolder. And I think for this center one, I'm going to change it to that purple color just
to see how that looks. I think I like that
better, but I'm going to keep everything
else the same. The other thing I want to note, I kept all of these cloud
shapes in the middle here. So if I wanted to change the number of bubbles,
I could do that. But I'm going to
go ahead and call this done and test this. I'm going to select
the artboard layer, and I'll go to my assets and add it to those
test patterns. As soon as that's done,
I'll go ahead and add another artboard
and test it. With that artboard in
place and it selected, I'll use my gradient tool
and click on that tile. And I'm just going to scale
this down to see how it looks just to see if I
need to change anything. It's tiling fine, and
I like the colors, so I think I'm going
to keep them as is and call this one done. In the next video,
we're going to wrap things up with
some final thoughts. I'll see you there.
6. Final Thoughts: We're at the end of class, and I thank you for trusting me with your time
and creativity. I hope you enjoy
learning more about creating quatrefoil
designs in designer. I'd love to hear your
thoughts on the class, so please consider leaving
a review as it lets me know what I'm doing well and where
I might need to improve. In addition to my
Skillshare channel, I also have a YouTube
channel where I share short form tutorials that compliment my suite
of classes here. You'll find the link
to it in my profile and in the PDF provided
with the class. Speaking of my profile, I have lots of classes in the
works here on Skillshare, including many more in the
Pattern toolkit series. So if you're not
already, be sure to hit the follow button
on my profile, so you're always kept
in the loop as to what's coming and when new
classes are published. And finally, I
welcome you to join my free community for digital creators the Creator Collage. We're a group of creatives
of all skill levels with experience in a wide
range of digital applications. You can ask questions,
share your work, learn new tips, or share your own all in a friendly, non
judgmental environment. Find out more at the Link in my profile or in the class guide. If you have any questions about what you learned in class, please don't hesitate
to reach out to me, either in the discussion below
or at the email provided. Again, thank you so
much for joining me here in class and
happy creating.
 Tracey Capone, Illustrator, Photographer & Designer