Transcripts
1. Welcome to Class!: Would you like to add more geometric patterns
to your portfolio, but you're unsure how to create them and they look
kind of complicated. What if I told you
that you can create three fun and colorful
geometric patterns in designer in less time
than it takes to watch your favorite television
show. Want to know how? Welcome to class.
Hey there, I'm Tracey, an illustrator photographer and designer from the Chicago area. Welcome to the first class
in my new series of short form surface
pattern design classes called Pattern Tool Kit. Each class in this
series is going to cover a particular
pattern theme, where I'll show you
how to create more efficiently by making the most
out of your digital tools, allowing you more
time to create. In this lesson,
we're going to use designer version two to create three beautiful
geometric patterns centered around the
humble ellipse. We'll start with a colorful, retro inspired pattern
made up of a series of petal shapes followed by a striking layered
bull's eye print. And we'll wrap things up
with a fun metaball design. All three can be used
on anything from fabric to your favorite
print on demand products. Throughout the class, you'll be introduced to, or
reacquainted with, a variety of Designers, efficiency tools like
the Shape builder, gradient and vector
flood fill tools. By the end of the class, not only will you
have three patterns to add to your portfolio, you'll have a better
understanding of how you can use those tools to create a
multitude of shapes and motifs. in Designer. I'll be using Designer version
two on the desktop. However, iPad users, you
can easily follow along, with the exception
of one key tool, the Move Data Entry feature. everything else
works exactly the same. Where there
are differences. I'll jump into the iPad
and show you exactly how to accomplish the
same task as the desktop. While this class is
beginner friendly, and I'll walk you through
the process step by step. It does assume some familiarity with surface pattern design and designer as we won't be going through the basics
or the interface. So are you ready to take a
simple circle and turn it into three beautiful geometric
patterns? Let's get started.
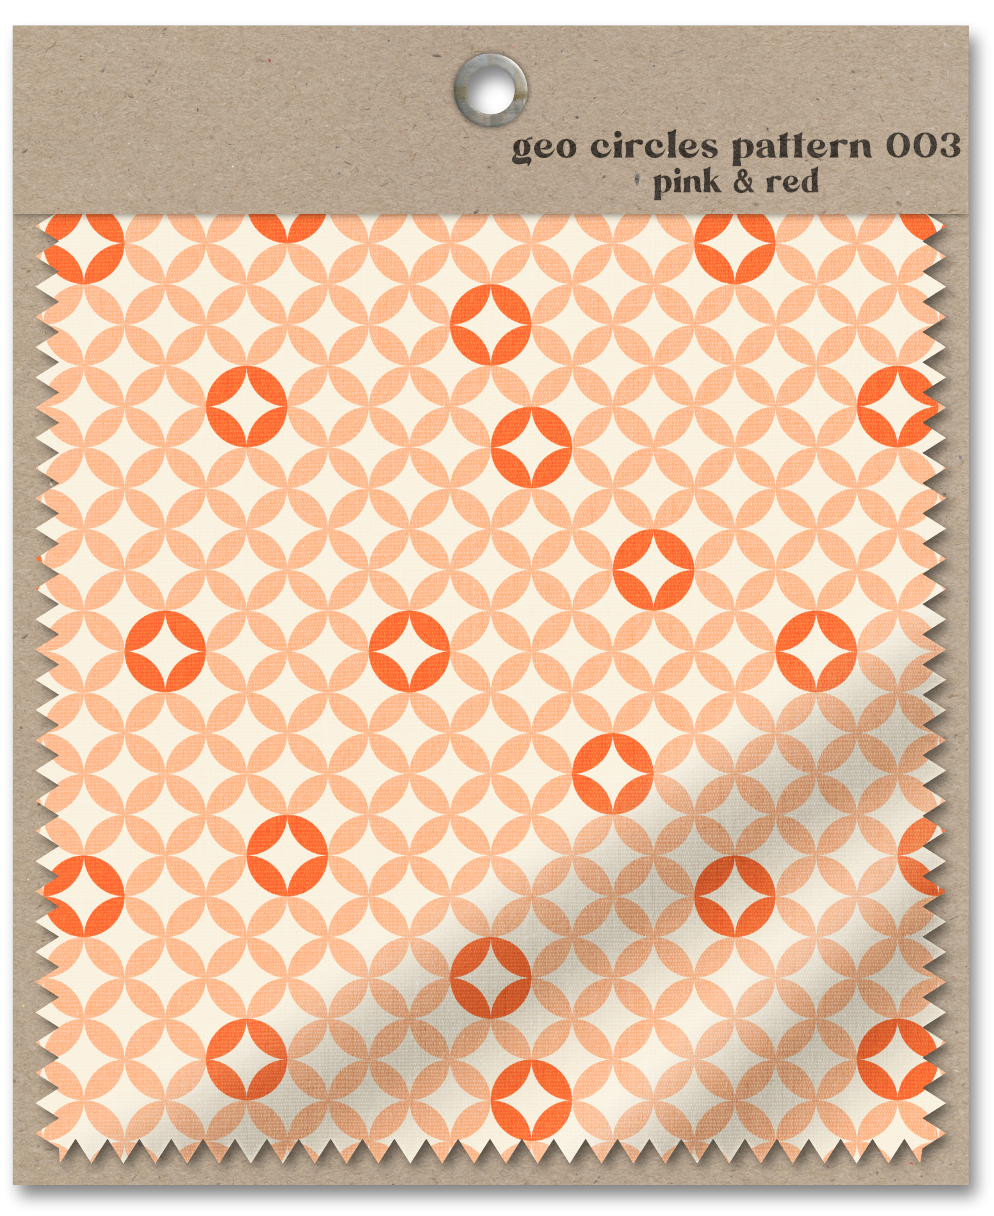
2. The Class Project: The project for this
class is to create your own circular
geometric patterns. Using the techniques
we cover in class, create the bull's eye, the metabol, and the circular
petal shape patterns. Keep things simple
when it comes to color and stick with two to four
colors for your palette. I've included two
great resources for color inspiration in the PDF class guide provided in the projects
and resources section. The easiest way to
share your project is to load a screen grab
of your patterns. I've shared step by step instructions on how
to share your project, as well as additional
information in the class guide as well. I'd love to see what you create. And sharing your
project not only allows future students see
what they learn when they take the class it, and leaving a review helps
more students find the class. Next up, we're going to start
with our first pattern, circular petal shape.
I'll see you there.
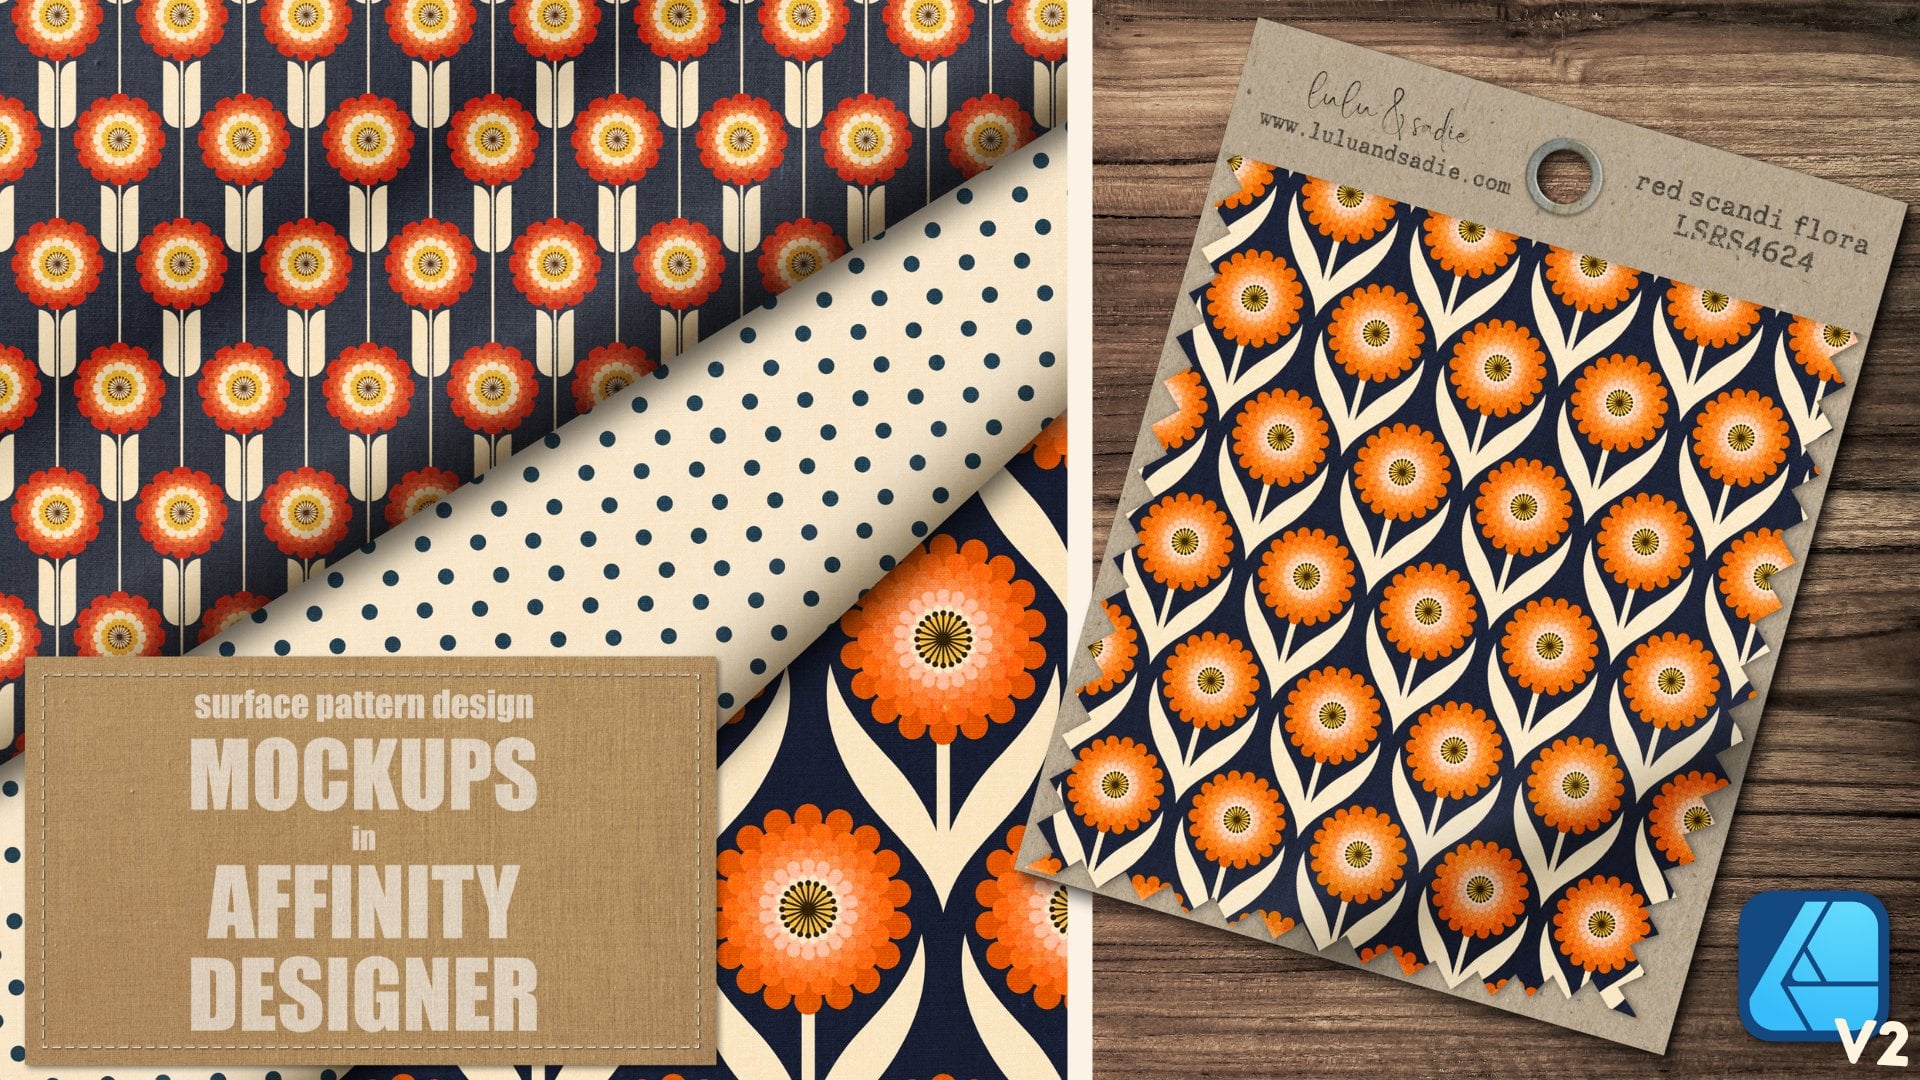
3. Retro Petal Circle Pattern: In this lesson, we're
going to create our first circular shape. And I'll show you how you
can intentionally create your motifs so that you can tile them across
and down easily, creating your seamless pattern. With ease, let's take a look. I have an Rdboard that's
4,000 pixels square. I find this size gives
me exactly what I need for most of the sites where
I upload my patterns. I also like that 4,000
pixels is easily divisible. That's going to make creating
the motifs and tiling them across and down
all that much easier. Now, I haven't created a preview panel because in this case it's really
not necessary. I am, however, using
a second artboard, which I've labeled
pattern tester, to test my pattern
after I create it using assets and
the gradient tool. Now if you feel more
comfortable seeing your pattern as
you create it and want to set up either
a pattern template or a preview, you can
certainly do that. The circles in this pattern are going to be
created by tiling a four petal shape with the four petals evenly
distributed at 90 degrees. On the desktop
version, I'm going to start by selecting my rectangle. I'll command click,
and I want to create a 500 pixel rectangle.
So I'll click Okay. Now the first thing I need to do is click Convert to Curves, because I want to be able to use my nodes and
I can't do that. As long as it's a shape layer, I want to select either of
the opposing diagonal nodes. And we're going to use the
corner tool to round them off. It doesn't matter
which direction you go because ultimately it's going to be rotated four
times all the way around. I'm just going to
start with these two, so I'll click hold shift
down and click again. I'm going to hit
C on my keyboard, or I could go up to the icon
here for the corner tool. And I'm just going to drag all the wheat in until
I can't go anymore. Again, I want to
bake my appearance, which is the same as
converting to curves. This is going to lock
those curves into place, so if the size is up and down, that stays exactly as is. So now I have a 500
pixel petal shape and I can begin creating my
overall four petal flower. There are two ways that I can create the final
three petal shapes. Since I'm on the desktop,
I'm going to use the move data entry feature
with my shapes selected. The first thing I want to do
is set my rotation point. So I'm going to go up
to the contextual menu and enable transform origin. And you can see that I'll get this little bull's eye here. I want to drag that up to
this top right corner, because I want to rotate the three duplicates
around that point. With it still selected,
I'm going to hit Enter. Now I don't need to move this
horizontally or vertically, so I'm going to go
right down to rotation. I can get designer to
automatically rotate it exactly the percentage I need by keying in the
circumference of a circle. So 360 divided by the number
of petals that I want. So in this case I want four. I'm going to click on
Duplicate. And then hit Tab. And that's
automatically going to rotate that first Duplicate. Now I already had one in place, so the number of copies
that I need is three. I'll just click and drag, or I can just key in three, and that's my petal shape. For those of you on the ipad, you'll need to use the traditional power
duplicate method, which can be made easier
using the transform studio. So I have my initial petal shape and I created it
exactly the same way, starting with a rectangle with it selected
with my move tool, I want to go to the
contextual menu and enable transform origin. I'm just going to drag that up to the top right
corner again. I'm going to long press and hold to duplicate
my first shape. And you can see it
here in my layers. I'll go down to my
transform panel and right under rotation I want to key in 360/4
and click Okay, that's going to
rotate that first duplicate and then I can long press and hold and
duplicate the last two. I have my full flower shape. Before we begin
tiling our shape, I want to change some of my
petals to different colors. That's going to
give some variation with the final pattern. I'm just going to be
pretty random about it. I'll go to my Swatch panel, and I'm just going to
leave one of these pink and maybe change these to some
of these red colors here. Once I'm done, I want to group this entire
thing together. It's important you group it. Don't try and add it together, because it's going
to change all of the colors to the same color. Now I have my overall
motif and I'm ready to tile this
across and down. Going to the transform panel, you can see that I have
1,000 pixel shape here. Now that divides evenly into 4,000 So I would just tile it
across four and down four, but that would leave me
a very large pattern. I actually want this
a little bit smaller, So I'm just going to
go to the width here. And because I have
these two locked, I'll key in 500. For this particular pattern, I don't need anything to go
off the sides of the canvas. This is going to be a
self contained pattern that stays inside the artboard. I'm going to drag this
all the way up to the top corner so that it's hitting both the
top and the side. And with snapping on,
you can see I get that green vertical line
and red horizontal line. Now with it selected,
I'll hit Enter. I want this to tile so that
they touch one another. So I need to move
this horizontally the exact size of my
shape, 500 pixels. I'll click on Duplicate. From here, I know that I need eight to go all the way across, because eight divides evenly
into 4,000 to give me 500. If you don't know the
number that you need, you can also click
on a number of copies and just drag until
you finish your pattern. So I'm going to click
okay to set that. And that's my first row, and I can use this to create
the rest of the pattern. I want to group all of
these together just to keep them organized, I'll hit Enter again, and this time I want to go down. We've completed the across, now we need to complete the vertical axis. So
I'll go to vertical. And again I have a
500 pixel shape, so I'll keep 500. I'm going to hit
Duplicate now it's going to be the same number
because we have a square. So I'm just going to
go right to number of copies and key in seven. And that's going to
complete my pattern. I'll click okay to
set this Now because this is self contained and there's nothing on the outside, this should tile just fine. But I want to take a moment
and show you how you can quickly test this using your Assets panel and the pattern tester art
board that's been created. I'm here in my Assets panel and I've created a subcategory under a pattern category
that I've created in my assets for circular
geometric patterns. What I want to do
is in my layers, make sure that I have
the overall artboard selected for the pattern tile. I'm going to click and drag
that into that subcategory. And then once it's in place, I can go over to my pattern
tester, click into it. I'm going to hit on my keyboard. That's going to engage
the gradient tool. And then I'll click
on that asset, and it's automatically
going to add it to the pattern
tester artboard. It's also going to give me these handles which are
going to allow me to size up and size down so I can see it
at different scales. I can zoom in and move around to see if
there's any issues, and I'm not seeing any. So this pattern is looking good. I'm going to call that done. When I created this pattern, I created it with a
multicolor petal. But if I had started
with something solid and wanted to add just touches
the color throughout, I wanted to show you a quick
way that you can do that. The first thing I
want to do is select the group that makes
up all of the petals, so not the overall layer
but the petals themselves. And then I'm going to select
the vector flood fill tool. It's important that you select the tool
first and then pick your fill because
it's always going to remember the last
fill you chose. So in this case, I
actually like the color. I'm going to leave
that as it is. And if I hover over, you can see that they
light up in bold. And I'm just going
to click and add color to change some
of the circles red. Now, while there are
no motifs technically hanging off the edges
of this canvas, it is self contained. If you were to fill
shapes like this here, where there's only two petals, you need to make
sure that you fill the other side to
complete the circle. Otherwise, when you
test your pattern, you're only going to
see these back up. Because I want to be a little
bit more random about this. I am going to try not
to go on the same line. I don't want to add too many, I just want touches
of color here. Maybe go right here. And then again, I want to make sure that I complete it up here. I'll do one more,
maybe this one. Now I know that the
pattern itself works. But if I want to, I
can test the pattern just to see how the multicolor
circles are looking. So I'm just going
to pull this in. Then I'll go over to
my pattern tester. As soon as it's there,
click into it again, engage my gradient tool
and select that pattern. And I'll just zoom out just to make sure
everything looks okay. I like the randomness of this. Again, I didn't want
too many of the red, I just wanted pops of color. I'm going to say this is okay. If I needed to, I could
always go back and either remove some of the
color or add some more. One final thing that
I want to note in this lesson is when you go
to export your pattern, you make sure that you
export the pattern tile. So the original tile
that you created, not the pattern tester. This pattern tester is
actually a bit map. In my case, the print
on demand company I use allows me to use
vectors or SVGs. If I were to export this, I wouldn't be able
to save it because the vector format is no
longer there. This is pixel. So I want to go up
to file export and make sure that I choose pattern tile as what
I'm going to export. And I can export it as an SVG or I can export it as
a PNG or J peg. In the next lesson,
we're going to use a single ellipse shape to build a colorful retro balz
pattern. I'll see you there.
4. Bullseye Pattern: In this next lesson,
we're going to use multiple ellipses to create a retro inspired
bulls eye pattern. The tiling is going to be
similar to the last lesson, but with a bit of a twist. So let's take a
look. When creating a bull's eye motif
like this one, you might think it's
pretty simple to create one using either power duplicate or the move data
entry in the desktop. And while it is easy to
create the overall shape, what's not easy is creating one that's evenly space
like this one. The reason being
that designers scale function in both move
data entry here on the desktop and
empower duplicate on both desktop and
ipad are cumulative. What that means is that what you said is your scale
percentage for the first shape is going to be applied to each
subsequent smaller shape. Let me show you what I mean. I've created a 500 pixel
ellipse and I want five total segments
that are evenly spaced at 100 pixels,
just like this one. If I select my shape and
engage the move data entry, I'm going to go right to scale. Now I know that I want
my first one to be 400, which is 80% of 500. So I'm going to key in
80% and choose Duplicate. So let's giving me
my first shape, and these are 100 pixels
apart, that's great. But if I keep going where I
click on a number of copies, the next one isn't
the same depth, it's not the same amount. And that's because
designer applied 80% to 400, which isn't 100. If I keep going, I'm going to end up with a shape
that I don't want. And that's going to be
the same with power duplicate both here in
desktop and on the ipad. Instead, I need to
create this manually. The first thing I want
to do is make sure that scale with
object is not on. Because as I scale down, if I have that on,
it is actually going to change the
width of my stroke. So I want to make
sure that's off. The second thing I'm
going to do is select my shape and I'm going to
duplicate it four times, because again, I want
one with five segments. I have them here in my
layers panel and I'm going to go right to
my transform panel. I want to make sure that these scale down
into the center, so my alignment point here
is going to be the center. The default is up
at the top left. Just make sure you click
here in the center, I'm also going to make
sure that this is locked, so I only have to key
in one of the numbers. I'll leave this top layer 500. I'm going to click in and
change this one to 400. I'm going to keep
doing that with each subsequent layer
until the last one, which is going to be 100 pixels. Now I have my evenly
spaced bull's eye, which I can use the vector
flood fill tool to fill it. I'm going to select all of my ellipses and then select
the vector flood fill tool. Or remember, always
select the tool first and then your fill, I want to choose some of these
reds and maybe this pink. I'm going to start with a
darker color on the edge because that's
going to give some contrast as I tile these. I think I'll go with this, maybe the pink here, and I'm going to leave
the center off white. But I actually want to fill it because we're going to
be tiling these and that's going to
create that circle there so I can turn
off my strokes now. And I'm left with my
bull's eye shape. I'm just going to group these up and now I'm all set to
start tiling this motif. I've pulled in an example of the pattern we're
going to create. This pattern is going to have a stacked row of
bull's eye shapes with every other row offset halfway across
and halfway up, so that the shapes
nestle into one another. And each new layer is going to be tucked behind the last one. Starting from the
bottom of the canvas, I have my motif here. And we're going to start
by creating a layer of bull's eye shapes that do extend slightly
beyond the canvas, with another shorter
layer just above. The reason we need to start
off the canvas is if we were to tile this within the canvas, we'd start seeing gaps
because it's a rounded shape. I'm going to take this group, What I want to do is start at the bottom corner here
with snapping on. When I get this top point where I want it on the left
side, This point right here, and this point here,
it's going to give me those vertical and horizontal
red and green lines, letting me know I'm exactly
where I want to be. With that selected, I'm going
to use the Move Data entry. Now I'm going to start here in the desktop and show you
how to create it here. And then I'll jump
into the ipad version and show you how to create
it using power Duplicate. I'll hit Enter, and I want
to move horizontally, 500 pixels, because again, that's the size of my motif. I'll key in 500,
Click Duplicate. And I'm just going to click and drag until I finish the canvas. And the last one is halfway off, because this one's going
to complete this one. That's the only layer that's going to need to
go off the canvas. I'm going to click okay, and I want to group
these all together. We're going to use this group
to create our next one. I want to hit Enter again. This time I need to go
250 pixels to the right, because again we're going to
offset to the right halfway. So I'll key in 250 and I want
to go up vertically 250. So I'm going to
key in minus 250. If you go down
vertically, it's plus. If you go up on the
canvas, it's minus. I'll click Duplicate. Now again, I need this to be behind, and right now it's in the front. So I'm going to go right
down to insertion mode here. And click Insert
New Items Behind. When I tab out of there, it automatically places them behind that first row.
So I'll click okay. Now, because I use
that longer row, it's giving me an extra one here that's just
hanging off the canvas. So I'm going to get rid
of it. I don't need it. This is going to be
the overall motif that we now tile all
the way up the canvas. I'm going to group these
two groups together. I'll just label this
final bulls eye. All right, so I'm going to
use a data entry again. We'll click Enter. Now we don't need
to go horizontally because we've covered the
canvas at this point. I need to go vertically. -500 I'm going to duplicate. I chose 500 that time. Because we're working
with two rows again, I want this to be inserted
behind the last set. So I've changed this to
insert new items behind. From here, all I
need to do is click and drag until it
completes the pattern. And I'll click okay. Now, again, because I had an
extra row there. If I go down to this row here, you can see that I
have an extra one hanging off the canvas. You don't have to remove them. I just find it's easier
just to clean stuff up. Since this isn't e mail
on the canvas at all. I'm just going to delete
it. That's our pattern. Now we can test this, of course, by going up to pattern tile. I'll add this to my assets. I'll go over to my
pattern tester here. Engage my gradient tool and
just click to add that. And that's tiling perfectly
for those of you on the ipad. Because you don't have
moved data entry available. You'll need to use
power duplicate and manually talk your
layers behind one another. But I'm going to show you
a quick way to do that. I have my first layer
of Bull's eyes here. And I created them the exact same way that I did
in the desktop. I'm going to duplicate that
and go to my transform panel. And I want to move this
on the X axis plus 250 on the Y -250 Again, I just want to offset these. I'll go to my layers panel. And I'm going to drag this
behind the last layer. Again, I have that
extra bull's eye. So I'm just going to click
on it and delete it. Now I can group these two together and that's
what I'll tile. This next step is
going to be a lot easier if you lock
your layer panel open. So make sure that the little
thumb tack is lit up. That's going to keep the layer stack open when you need it. First thing we need to do
though is duplicate this. Go down to the transform panel. Again, I don't need
to move horizontally. This time I'm going to move on the y axis -500 because
we're going up. I'm going to go to my layers
panel, drag that behind. Now I don't need to go
to my transform studio. As long as I keep this selected, I can long press and duplicate. Drag that down, press
duplicate, drag it down. And I'm going to keep doing this until I complete
the entire pattern. Again, just the same as
the desktop version. You can test this by creating a separate artboard
and pulling it in with the gradient tool
to scale it up and down and see if everything
works just fine. So while it's more of a manual process for those on the ipad, tools like the transform
panel and power duplicate, and even the ability
to lock a panel in place will help exppedite
the process greatly. One final thing that I want
to show you is if you want to change the color of
your bull's eyes at all, you can easily do that
using select same. Let's say that I want to
change this outer ring here to the darker
color in my palette. I'm going to select one of
them within my layer stack. So I've opened up this group and I'm going to click on that. I'll go up to the top here
to select same fill color. And it's going to
select every one here that's that same red. And then I'll click on that
and it's going to change it. I can do that with any of these. Just select one of them. Choose select same fill color
and then you can change it. Now, I don't need to test this because I know that the
pattern itself works. If I like the color and
I think it's good to go, I would just call it done. In the next lesson,
we're going to take a look at creating a
fun metabol pattern, which is made up of a series of ellip shapes. I'll
see you there.
5. Metaball Pattern: Metabol shapes, which are used a great deal in logo creation, also create a really
fun pattern for anything from fabrics
to journal covers. In this lesson, we'll
take a look at how the shape builder
tool can help create a metabo botif from a formation of ellipse shapes.
Let's take a look. So once again, I've
pulled in an example of what we're going
to create here. These are metabols, they
look like little barbells. And they can be created
a few different ways. In designer, in this lesson
we're going to create them using a formation
of ellipse shapes and the shape builder toll. I do want to note
that whatever you see me do here in
the desktop version, the process is exactly the
same in the ipad version. I'm actually not going to
jump into the ipad for this one because it's
exactly the same. We're going to start out simple. The creation of the metabol
shapes is a little bit more involved than the
other two patterns. So we're going to start out
creating a single metabol, and then we'll create a
formation that we can tile. Now the first thing to note is that whatever size ellipse you start out with is going to determine the size
of your final shape. Of course, the
larger you go with your initial ellipse,
larger your shape, You do want to make sure that whatever size you start
out with is easily divisible into your
canvas because that's going to help
you tile it correctly. So I'm going to select an
ellipse shape and command click and start with
a 500 pixel ellipse. I'll click okay. I
also want a stroke. Now you can see on the final
pattern, there is no stroke. What this is going to do
is provide the spacer needed to determine the amount
of space between shapes. Once the pattern
is created or once the formation is created,
we no longer need it. The color of your stroke
doesn't really matter. What is going to matter is
the width of your stroke. I'm going to set mine to 50. The higher the width, the further apart
your shapes will be. And of course, the lower,
the closer they'll be. One very important
thing that you want to make sure in the
stroke panel here is that your alignment is
set to center on your line. If you send it inside, it's not going to provide
any spacing because the entire stroke is on
the inside of your shape. If you set it to outside, it actually creates issues
with the shape builder. I'm going to set it
to Align to center, and from here I can
create my formation. I'll click on Enter to
get the move data entry. I'll key in 500 because
that's the size of my shape. Now I need four total, so I'll select these two. Hit Enter again, and this time I want to key 500 on the vertical, so I want to drag
across to select these. And when I do that,
you can start to see the metal ball
formation here. So when I use the
Shape Builder tool, I can create one either
this way or this way. Before I do that though, there's one final step that I need to take when it
comes to the stroke. In order for the stroke
to act as a spacer, I need to convert it
from a stroke to a fill. In other words, I
need to expand it. Let me show you what
happens when I don't. I'm going to duplicate this shape and I'll grab
my shape builder tool. I have this set
to freehand drag. That means I can draw freehand and my action is set to plus. When I start here
and drag across, it's created that shape. But if I turn off
the stroke on this, you can see that there's no gap. And that's because I
didn't expand my stroke. I'm going to get
rid of those three. Let's go ahead and select
these four shapes again. Go up to the top here, choose layer and expand stroke. Now you can see it looks
a little bit different. I have these crossovers here. The Shape Builder
tool is going to work exactly the
same way though. I want to have it set
to plus and free hand. Now the direction
here doesn't matter. I'm just going to click
and drag it this way. I'll drag across now. At this point, everything else beyond this shape
I can get rid of. It was just there to
create the spacers, as well as the guides
for the metaball shape, And I'm left with
my final shape. So let's do that again, but this time create an actual formation. The more ellipses you start
out with in your formation, the more opportunities you
have to make metabol shapes. I'm going to start again and do command click and again
create a 500 pixel shape. I'll turn my stroke back on. It's still set to 50 pixels
and aligned to center. This time I want to create
three across and three down. I'll click Duplicate two copies. I'll select all three of those and create three
copies down as well. Okay, so now when I select
and drag across all of these, you can see that I have
more opportunities for some additional shapes I want to create the one
that I used for this one. Again, I'm going to go
up to the top and I want to make sure
that I have layer. I can get it too. There we go. Layer, expand, stroke. I'll grab my shape builder. And this time I want to
create a diagonal one this way and then a
separate one this way. I'm going to click
and drag across. You want to make
sure that you're staying within those lines, that you're not
hitting anything here. And I'll do the same
thing in this direction. And I want to do it in
two separate moves. So I have two separate shapes,
again, everything else. I can get rid of. That was
just there to provide guides. And when I select
these two shapes and turn the stroke off, there's a nice space, it's actually 50 pixels, because that's what
the stroke was set up between my two shapes. And this is what
I'm going to tile. A little bit later
in the lesson, I'm going to show you
how you can create some variations in your
formation as well as the color. But before we do that,
let's tile this one. So it's going to end up looking
exactly the same as this. I'm going to select my two shapes and group them together, because these are going
to work together. Now you can see on
this final pattern, each layer is tucking
itself into the last one. Now unlike the bull's eye
pattern where we had to manually offset them
to get that to happen. Because of the way this
is created and because of the numbers we're going to
use to move our shapes, you don't have to
offset anything. I'm going to start at the
top left corner here. Again, I want this point here to be on the left
edge and this one here. And when you have
snapping on, you can see it'll tell you exactly when
you're at the right spot. If I go up to my transform, you can see that I have a
1,450 pixel shape here. That number is actually
not important. That doesn't divide
into 4,000 Easemently, what matters is the
number I started with. The other thing that matters is that I have a square shape. If you see anything other
than the square shape, you might run into
some difficulties. So I'm going to hit Enter now. I created a 500 pixel
ellipse to start with, and I have two shapes, so I'm going to offset this
horizontally, 1,000 pixels. I'll click Duplicate. And then I need five, all the way across to complete my canvas.
I'll click okay. And if I select all
of these shapes, a good indication that you're on the right track is that when
you select the entire row, there's as much space on
this side as there is here. I'm going to group those
and hit Enter again. This time we want to go down, we're going to key
in 1,000 again. We started with a
500 pixel ellipse. Then we have two shapes. I'll click Duplicate,
and then number of copies is the same as going
across, and I'll click okay. And that's our final pattern. Now if I want to test this, I can grab the pattern tile. Go to my Assets, And I actually
have one here already. I can just click,
that's my pattern. Before we get into creating variations in the
actual formations, let's talk about creating
some variations in color. There's a few different
ways that you can do that. I'm going to group all of these together and select that group, I'll select my Vector
Flood Fill tool. Now the easiest way to create color variations is to use your Vector flood fill tool to fill in some of these shapes. But there's a couple of
things to keep in mind. I already have the color
select that I want. I'm going to do this sparingly. I just want pops of color. If you do any changes to
anything on the edge, you need to make sure that if you change something
here, for example, you change the corresponding
one on the other side, because you need that
shape to be completed. That's the same thing
at the top here. When it comes to
anything on the corner, because this corner shape repeated in four
different places, you need to make sure that you complete it in four
different places. I tend to avoid that
particular shape. The other one that you need to watch out for is if you have a shape that goes off the
top as well as the side, you need to make sure that
you fill in the color here on this side as
well as down here. Otherwise, when you tile it, you're going to see some
shapes that are cut off. As far as the color,
I try to avoid that, I stick to the outer
edges and just make sure that I get the
duplicates on the other side. I'm just going to click
maybe here and here. And then I'll go ahead
and test this again. I'll grab the pattern tile, grab my move tool
and drag this in. You can see I already
have one there. And then once it's in place, I'll click and I
like how that looks. I think that's nice and random. I don't have too much patterning
going on there again. I just wanted to pop a
red against that pink. The other thing
that you can do to create some variation in color is to grab
some of your shapes. I'm going to select
one of the red ones. I'll use select same fill color. I'm going to go to my swatches and flip that from
a fill to a stroke. So I'm going to turn
my stroke on there. Now one important
note about this, in order to maintain the
spacing that you have in place. In this case, you do
want to align to center. You can always change
the size of your stroke, so it's a little thinner, but that's another way that you
can play around with color. You can also use your contour tool to
have some fun with us. So I'm going to change this entire thing back to pink and I'll show
you what I mean. I want to ungroup everything here so that I have all
of my shapes separate. I have a lot of
groups going on here. All of my curves are separate. I'm going to command
J to select them. I want to change them to the
red fill that I just used. I'll grab my contour
tool, I'm selecting that. I'm going to click and
drag so that's slightly smaller and it's maintaining
the overall shape, but it's tucking it
inside the original one. I'm going to group these up
so that the reds are grouped, separate of the pinks. Now they drop themselves
down in the layer stacks. I'm just going to drag them up. They're above all the pink. Then I can do the same
thing for the pinks. I'll just group
those up as well. Those are just a few ways
that you can play around with the color of your
metabol shapes. Have fun with it. Just try out different colors,
different patterning. Let's talk about creating variations in the
actual formation. Now the first thing to
note is that the more ellipses you start out
with in your formation, the more opportunity
you have to create metabol shapes and
different formations. Personally, I find starting with nine gives me plenty
to work with. Let's take a look at some of these just to create some
different formations. So I'm going to select
these first nine. I've already
expanded my strokes. I'll grab my shape builder
tool and again I have a set to plus and free
hand on this one. I'm just going to
keep it simple. I'm just going to click
and drag, in this case, create a three prong
metaball shape. I'll just drag that
over there again. I don't need these
anymore for this one. Let's try something
like a five prong one. I could go through and do that
same shape I just created, but then go through here and
create a four prong one. Then finally, let's
grab this one here. I'm going to rotate
this 45 degrees. So I'm just holding
shift and rotating. What this is going to
allow me to do is create a vertical and horizontal shape. I can grab both of those. Then for this one I'm going to create some
metabol shapes, but I'm also going to create
some freestanding circles. I'll grab my Shape Builder tool and I'm going to click and drag and create
a metabol there, as well as here. Then I can click into these individual circles and it's going to create a curve
for each one of those. I'll select my move tool
here. Just move that out. I don't need my strokes anymore, although that creates a
really fun formation as well. I could tie this one as well. This is an example of several metabolic
patterns that I've made using variations in color, as well as flipping things
from fills to strokes. I've also played around with the actual spacing between my shapes that provides
a tighter pattern. You can create different
formations just like we did. Here's some with the
ellipses kept separate. In this case, when I offset, I didn't offset so that it
was next to one another. I offset so that
it overlapped and it created that wavy pattern. And then finally, on this one, instead of working
with a filled ellipse, I worked with a doughnut shape. You always want to start
with an ellipse shape, but it doesn't have
to be the filled one. You can start with a
doughnut shape as well. And then I've ended it by using the Vector Flood fill tool to add some red pops of color
in some of those holes. So it's a matter
of experimenting, just play around with
different colors, stroke sizes, so that you
can get different spacing. You can start with different
size ellipses to get a larger pattern and just have fun with it and see
what you come up with. Next up, we're going
to wrap things up with some final thoughts.
I'll see you there.
6. Final Thoughts: We're at the end of
class and I thank you for trusting me with your
time and creativity. I hope you enjoyed
the first installment of the pattern tool kit series. I'd love to hear your
thoughts on the class, so please consider
leaving a review as it not only lets me
know what I'm doing well, but where I might
need to improve. Plus, leaving a review
and sharing a project not only help future students see what they learn when
they take the class, it helps more students
find the class. If you share your
project on Instagram, tag me at the handle
on the screen as I'd love to share it
with my own followers. In addition to my
Skillshare channel, I also have a Youtube
channel where I share short form tutorials that
compliment my suite of classes. Here you can find
the link to it in my profile and in the guide
provided with the class. Speaking of my profile, I have lots more classes planned for my
skillshare channel, including many more in the
pattern tool kit series. So if you're not already, be sure to hit the follow
button on my profile. So you're always kept
in the loop on what's coming up and when new
classes are published. And finally, I
welcome you to join my free community
for digital creators through creator collage. We're a group of creatives
of all skill levels, with experience in a wide
range of digital applications. You can ask questions, share
your work, learn new tips, or share your own, all in a friendly, non
judgmental environment. Find out more at the link in my profile or in
the class guide. If you have any questions about what you've
learned in class, please don't hesitate to
reach out to me either in the discussion below or
at the e mail provided. Again, thank you so
much for joining me here in class and
happy creating.
 Tracey Capone, Illustrator, Photographer & Designer