Transcripts
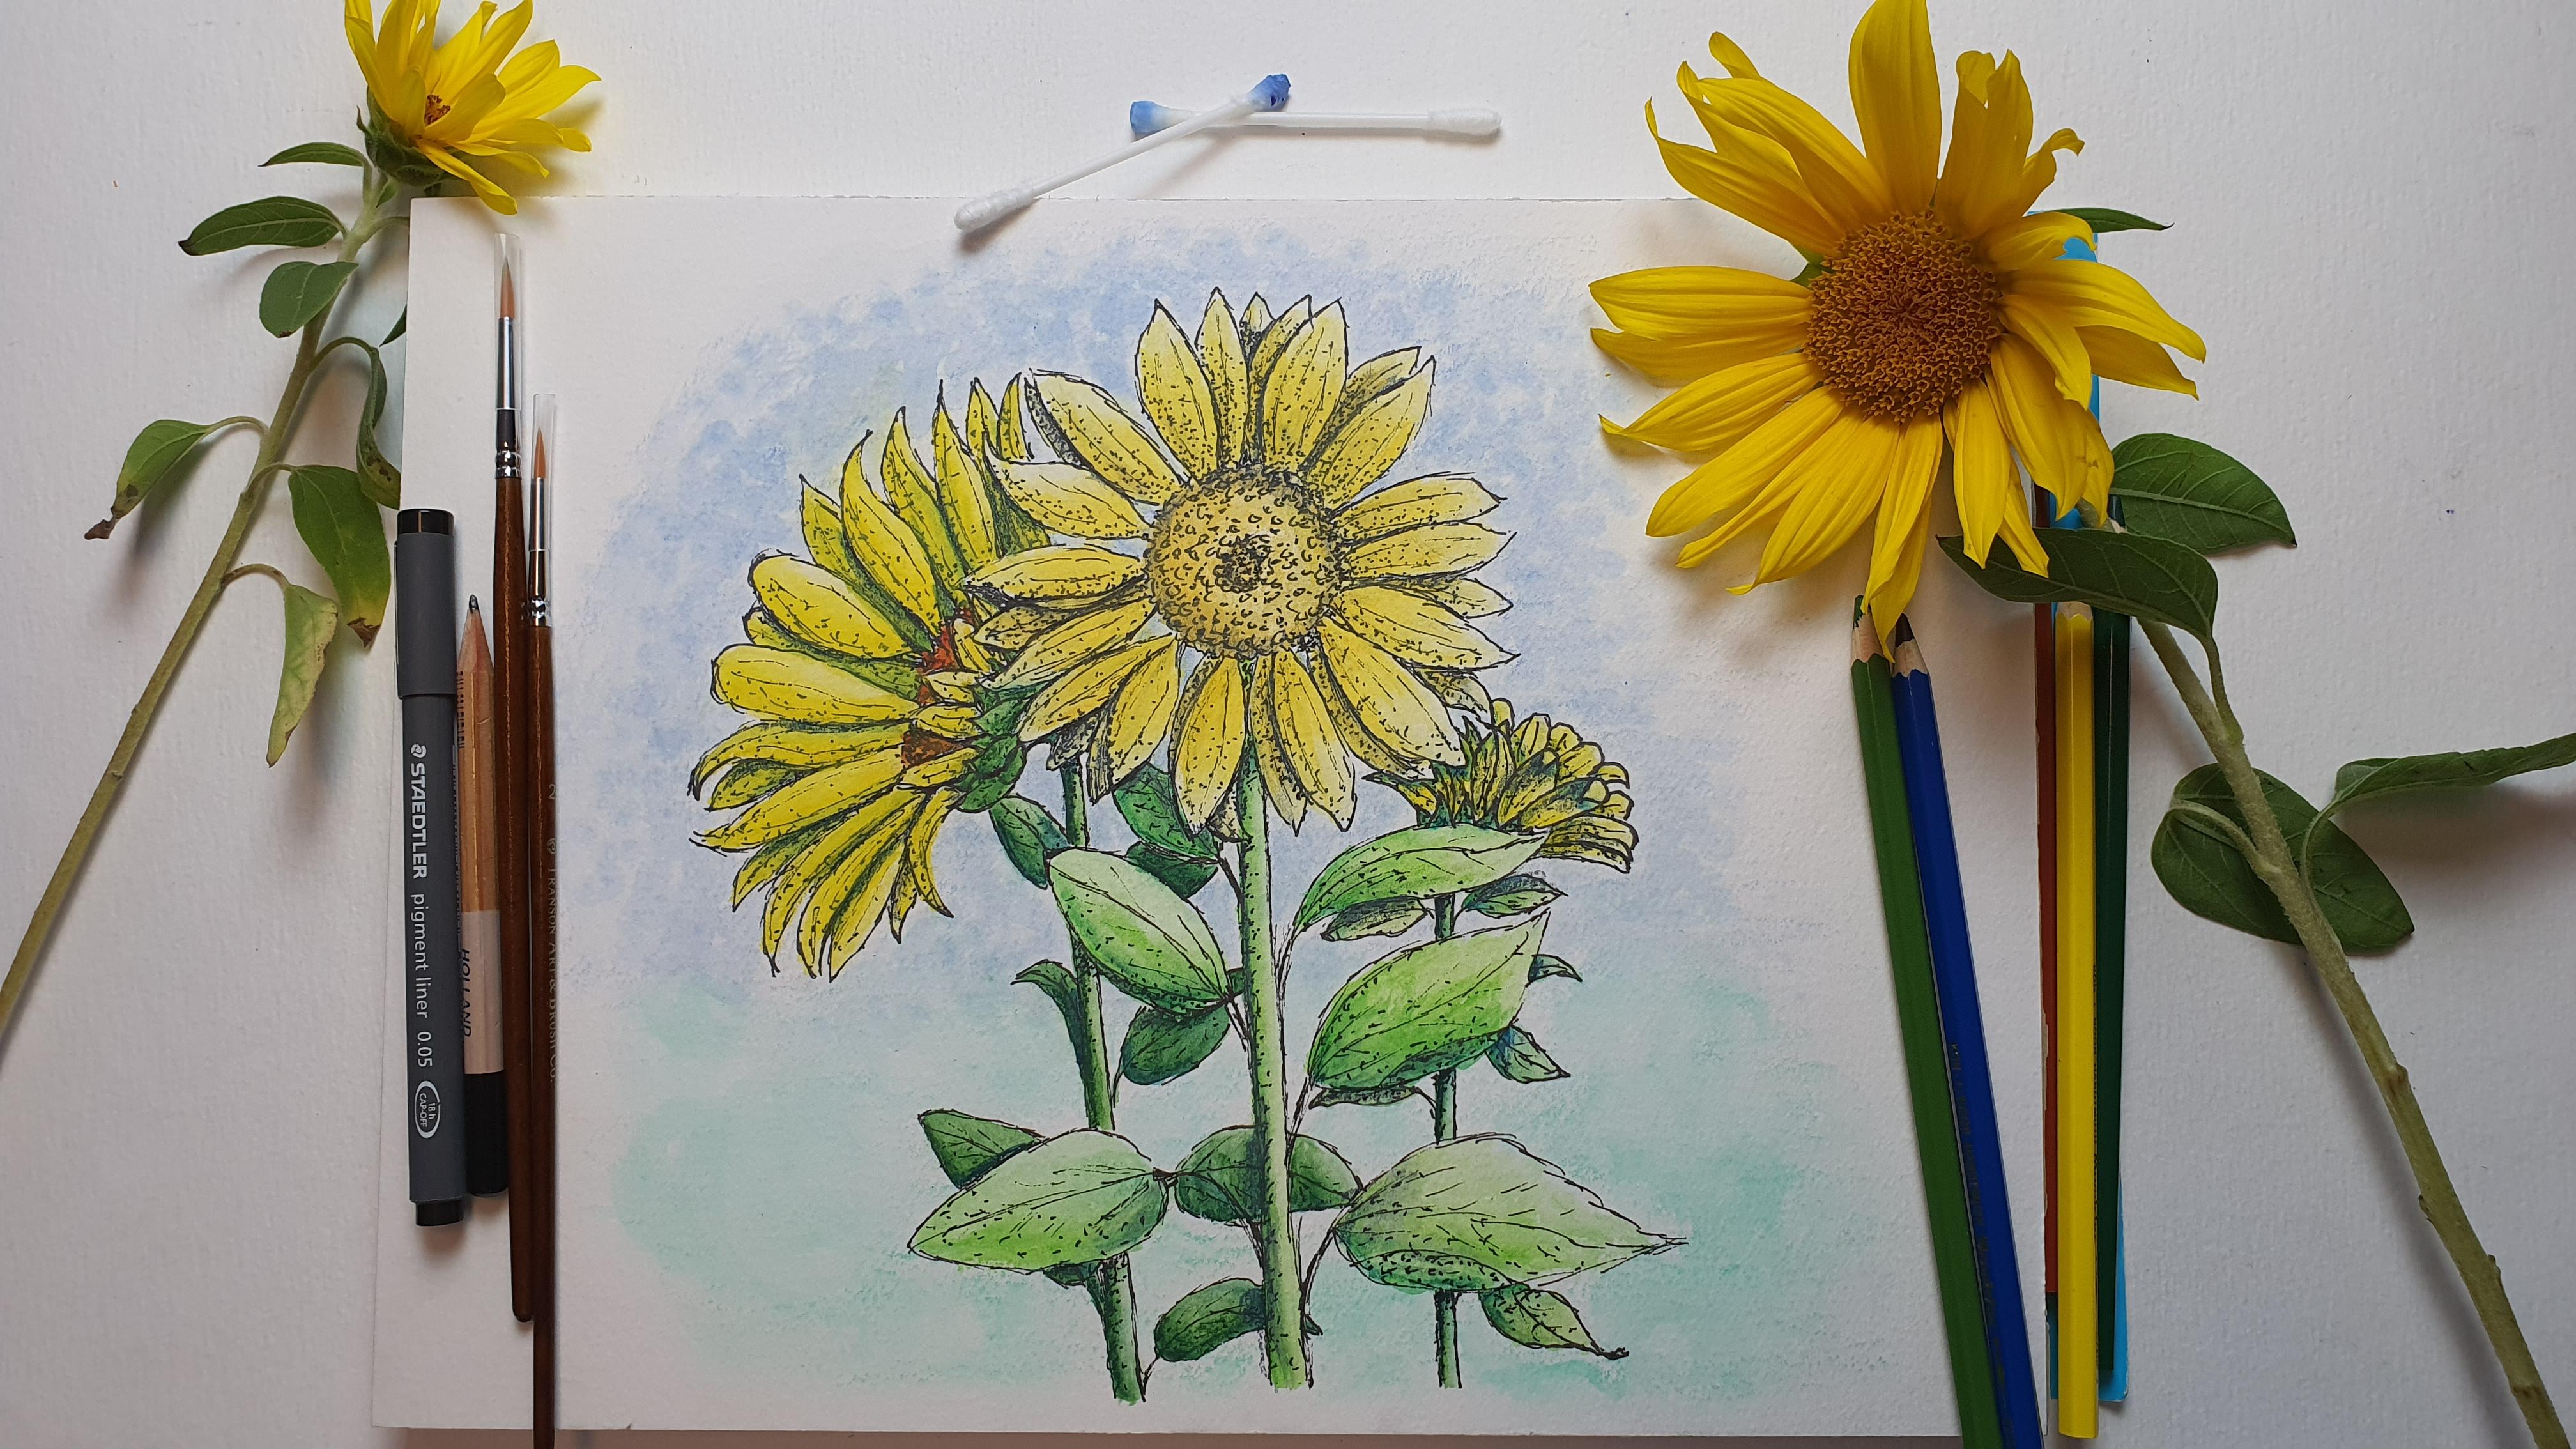
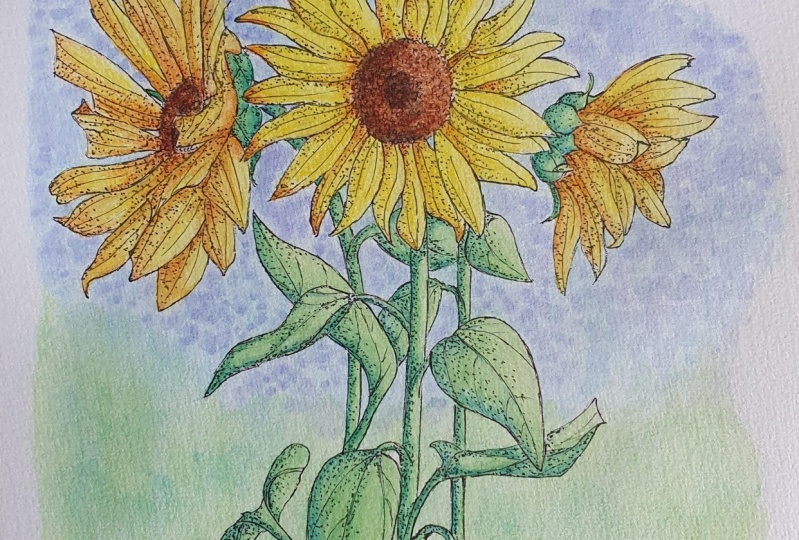
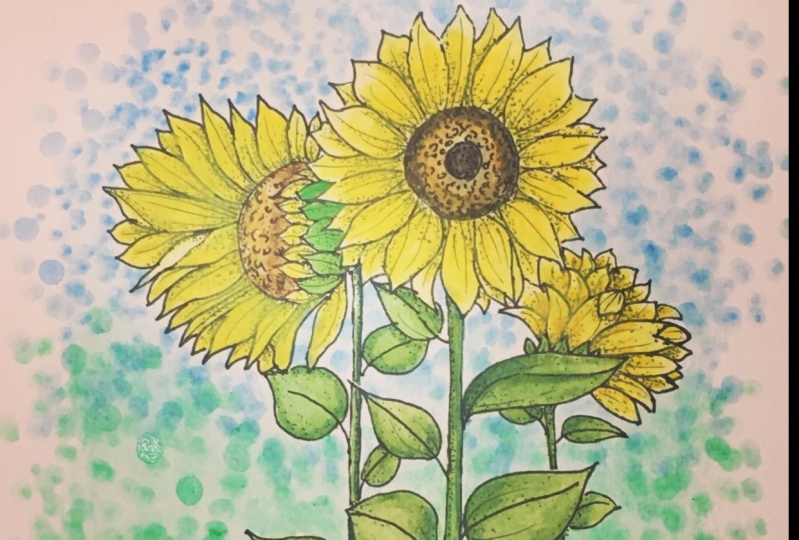
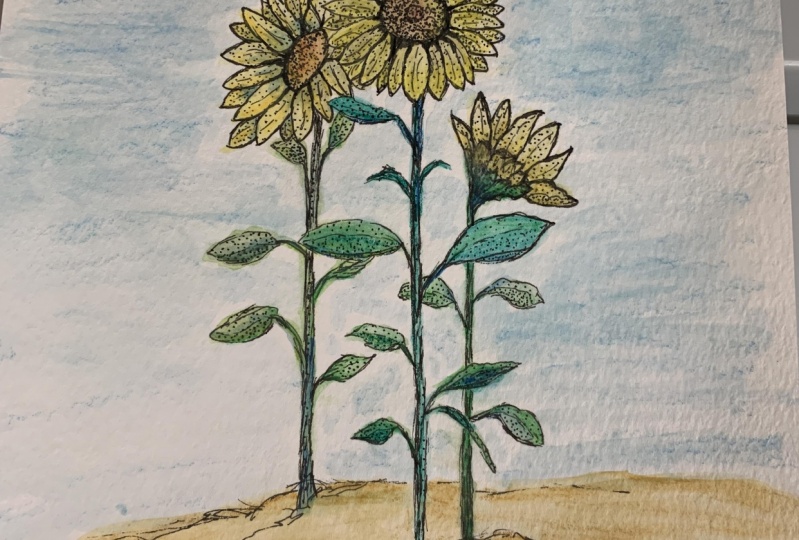
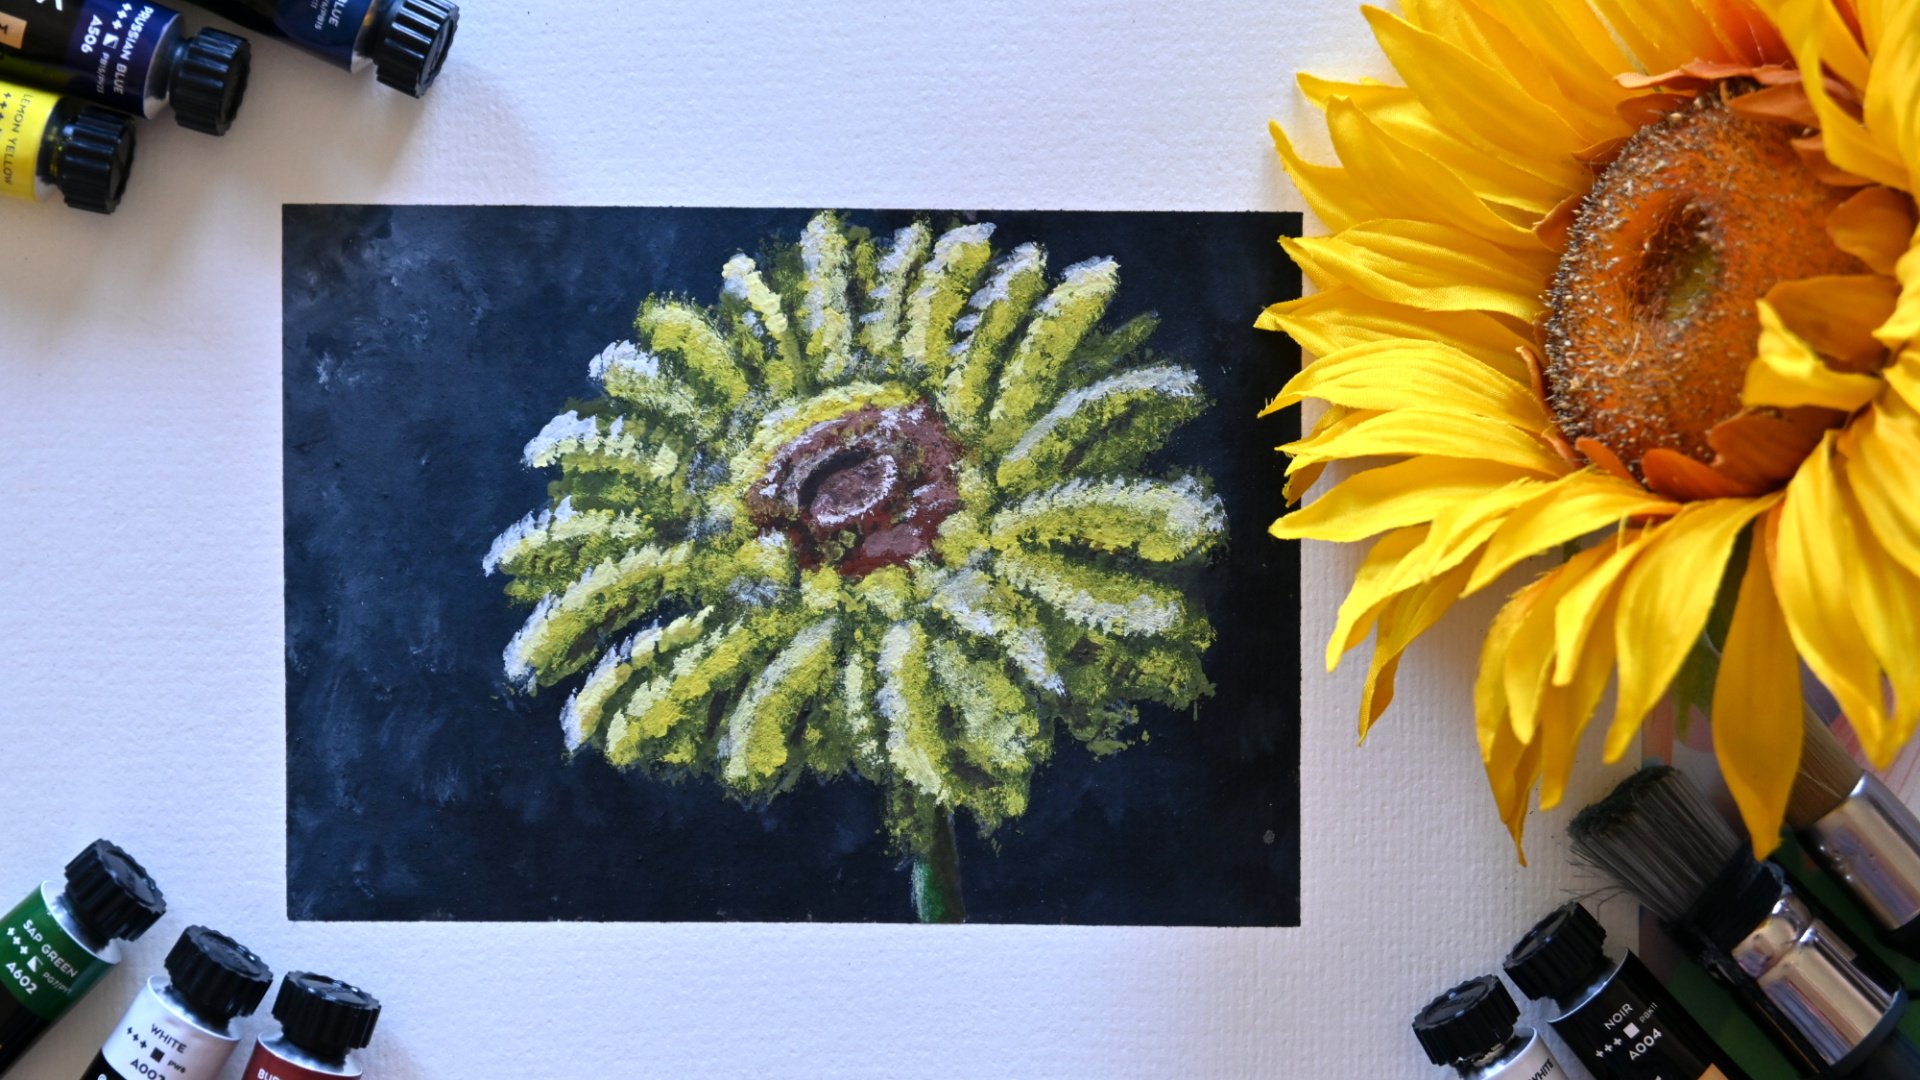
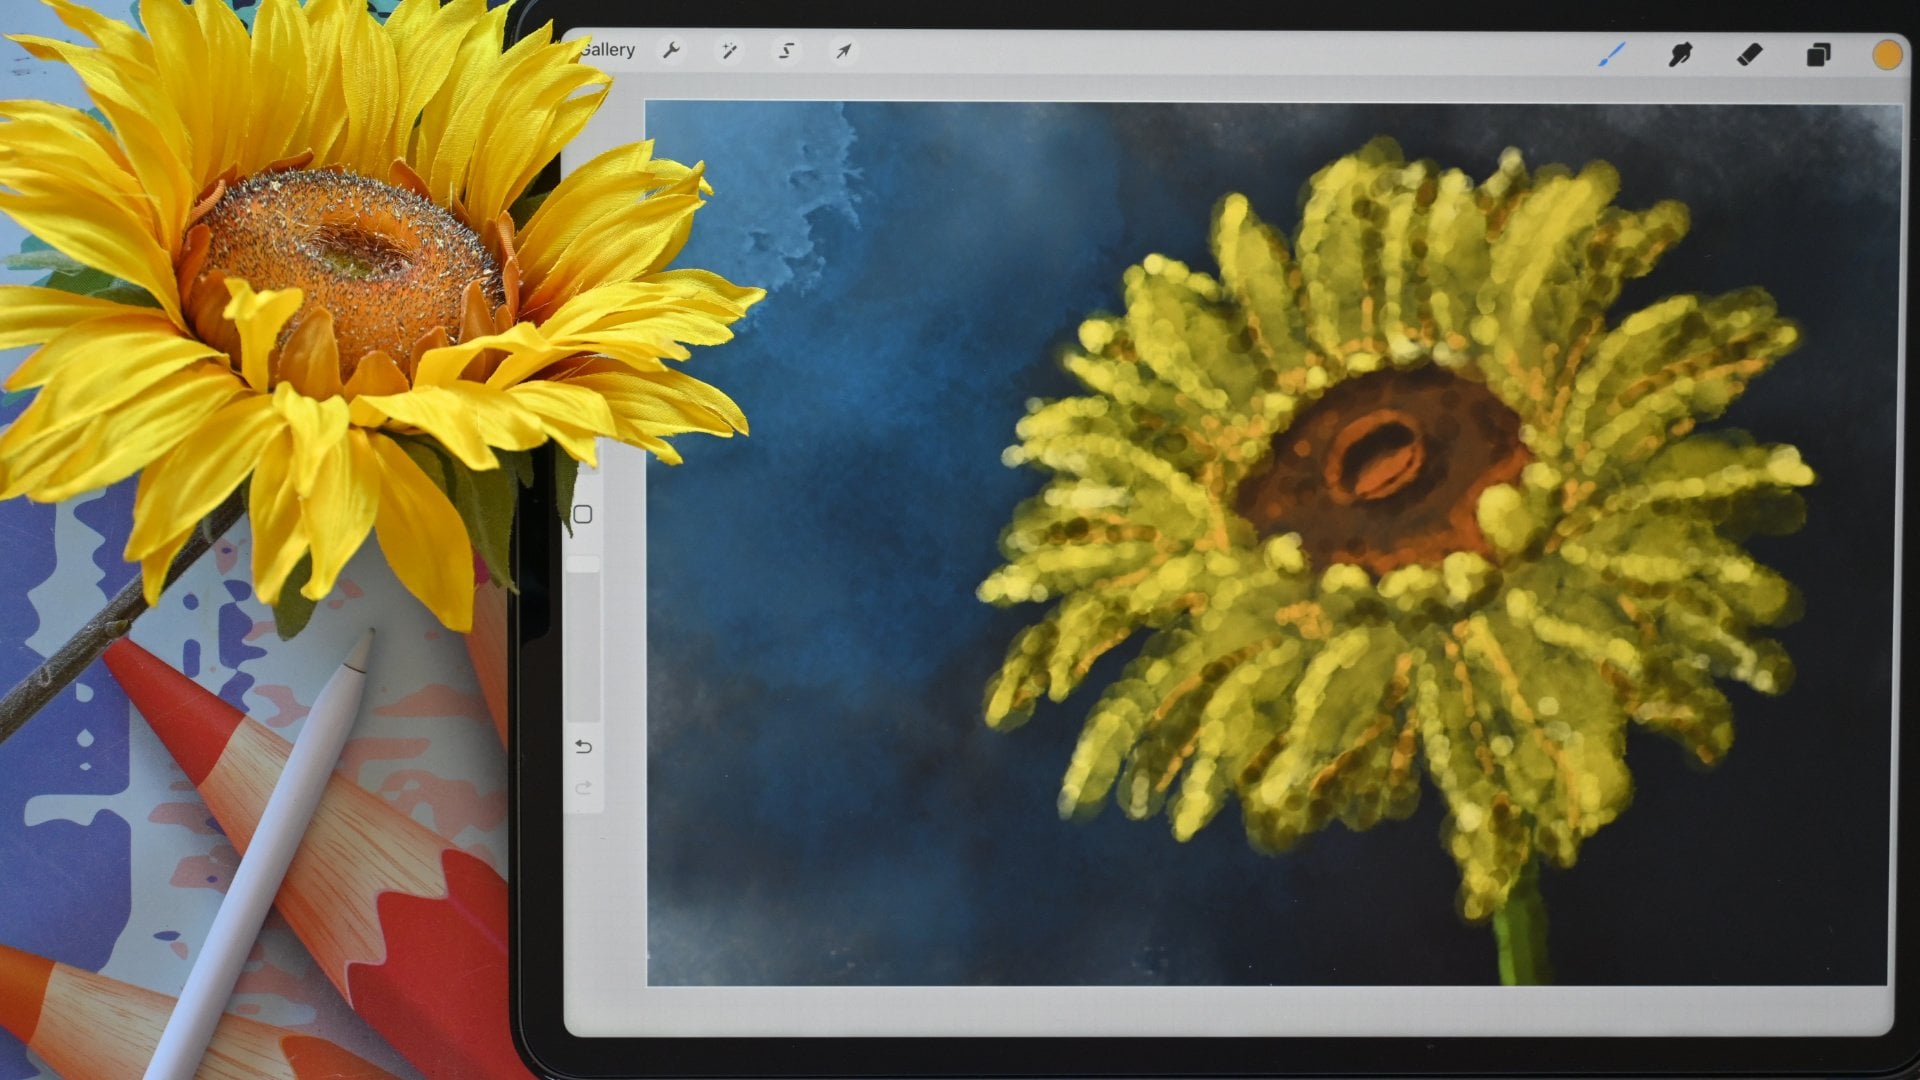
1. Introduction: Hey, welcome to my studio. My name is Benjamin L. Comma and I'm an artist and illustrate the from the Netherlands. Now I can tell you all kinds of things about myself. But I guess that's not what you came here for, did you? You came here for an art class. So let's dive in and discovered together what this odd classes all above, the disarmed class is about painting a sunflower. Well actually we're not going to paint one sunflower. We're gonna paint a few sunflowers. And what we're going to use for painting this sunflower is watercolour pencils and watercolor pencils are really fun to use. And you see a few of the materials we need for this art class. And what we're gonna do is, I'm going to show you from the beginning to the end how to first of all, sketch and I'm showing you that in my sketchbook. Then we're going to look at how to sketch the sunflower. We're going to look a little bit at composition. What would be nice compositions? How you set up this? And once we've come through that by just using a pencil, once we've gone through that, we're going to just pick up some watercolor paper. And then we're gonna set up this whole sea like I have here. You're just going to learn how to set this up, how to draw it, then how to use the fine line or to bring in all the lines and all the effects I have with the fine line. And then the next step would be just use watercolor pencils. And how do you use them? And what are the various techniques? And not even we're gonna even go beyond the basic techniques. Even learn a few more advanced techniques for the effects. And we're going to learn a little bit about the light and shadow to how you're going to bring that into your painting. And once we've gone through all of that, then you will end up with a beautiful painting like this. Now if you want to join in this Add class, then I would say please do so and watch the material lesson where I explain what materials you need and you don't need expensive materials for this art class. This is cheap paper. I use some various watercolour pencils ranging from cheap to more expensive, and just use a regular fine liners, simple pens or even some simple brushes. Cheap, no need for expensive materials. If you have some watercolor paper and you have just even a small set of watercolor pencils and you have waterproof liner. And I think everyone that has a regular pencil at home, then if you have those materials, you can join in no knowledge needed. You don't need to know how to draw exactly and things like that. I'm going to explain that. And we're going to just go step-by-step until we reached at the end this beautiful painting. All right, now we know what is art classes all about. Now I can keep on talking and tell you all kinds of things about it for a long time. But let's not do that. Instead, we want to get to work, don't we? So I would say, join me in this art class and I'll see you inside.
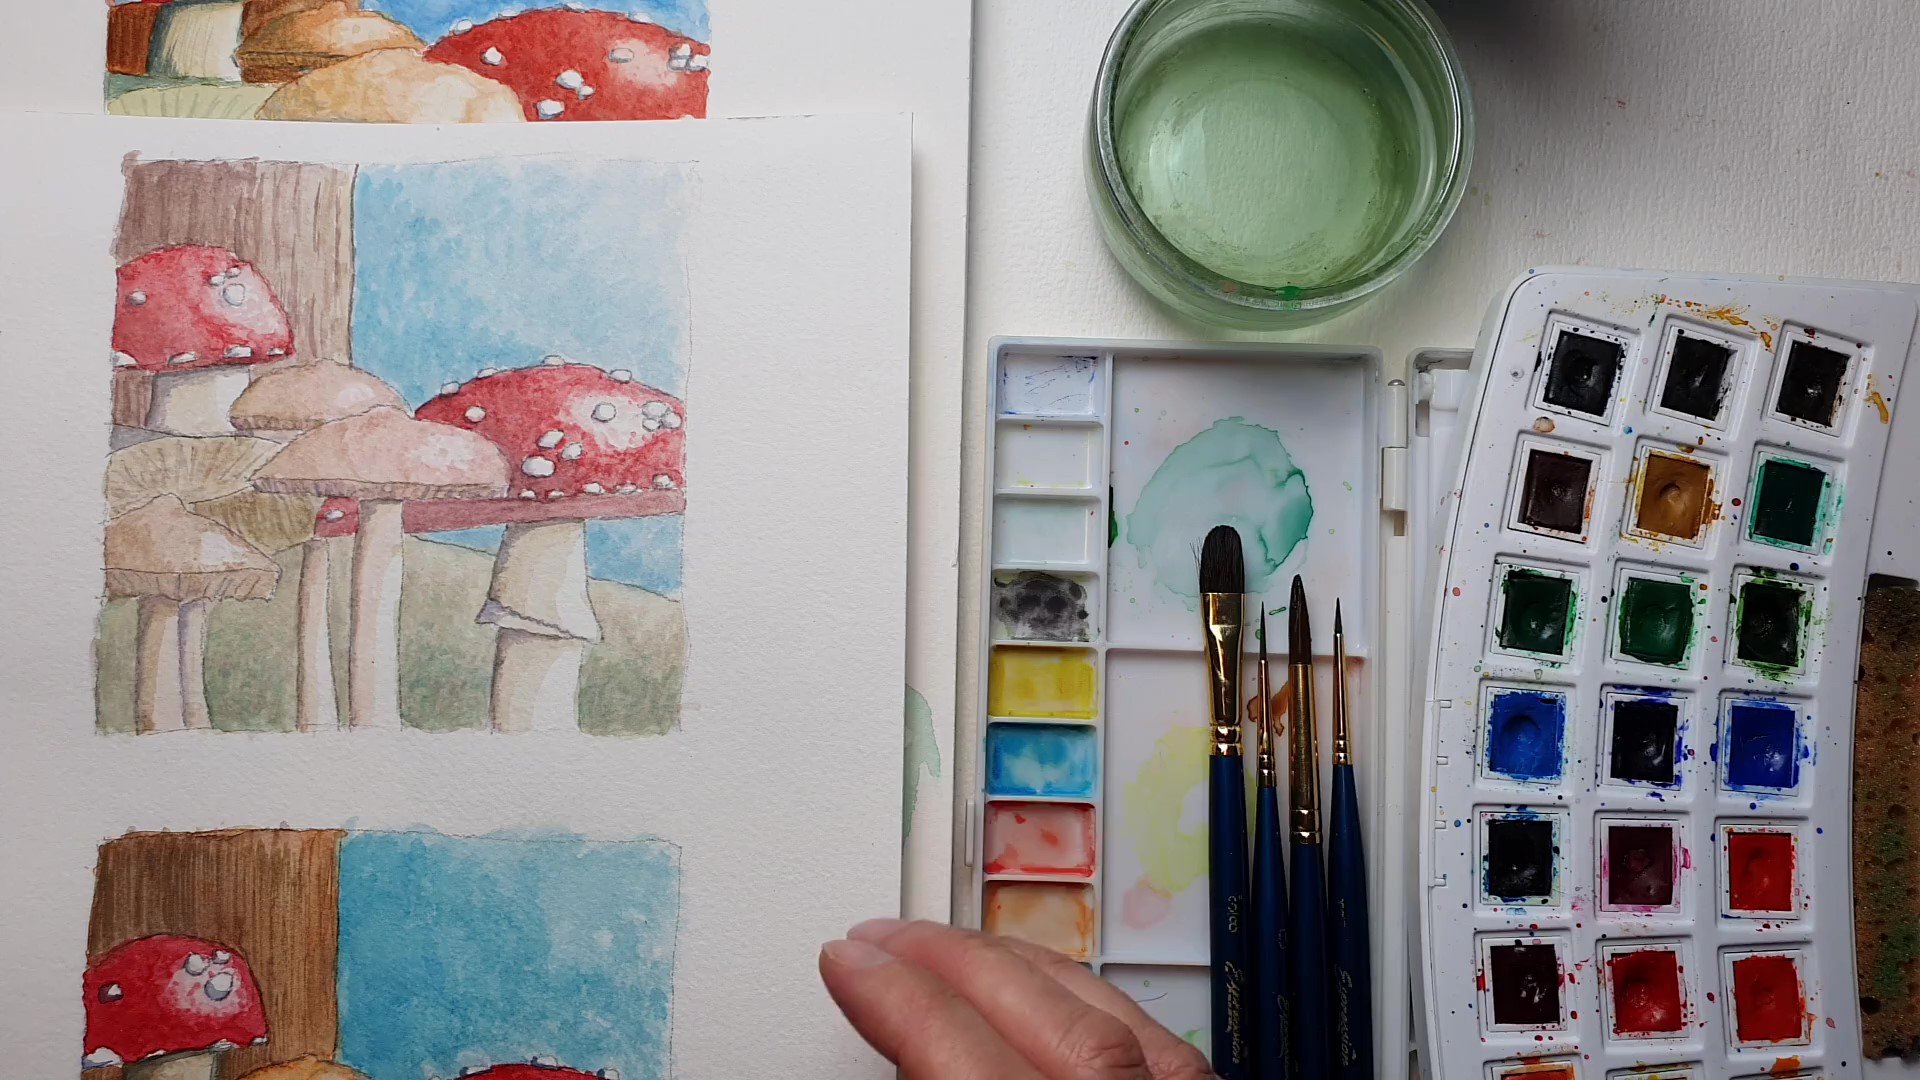
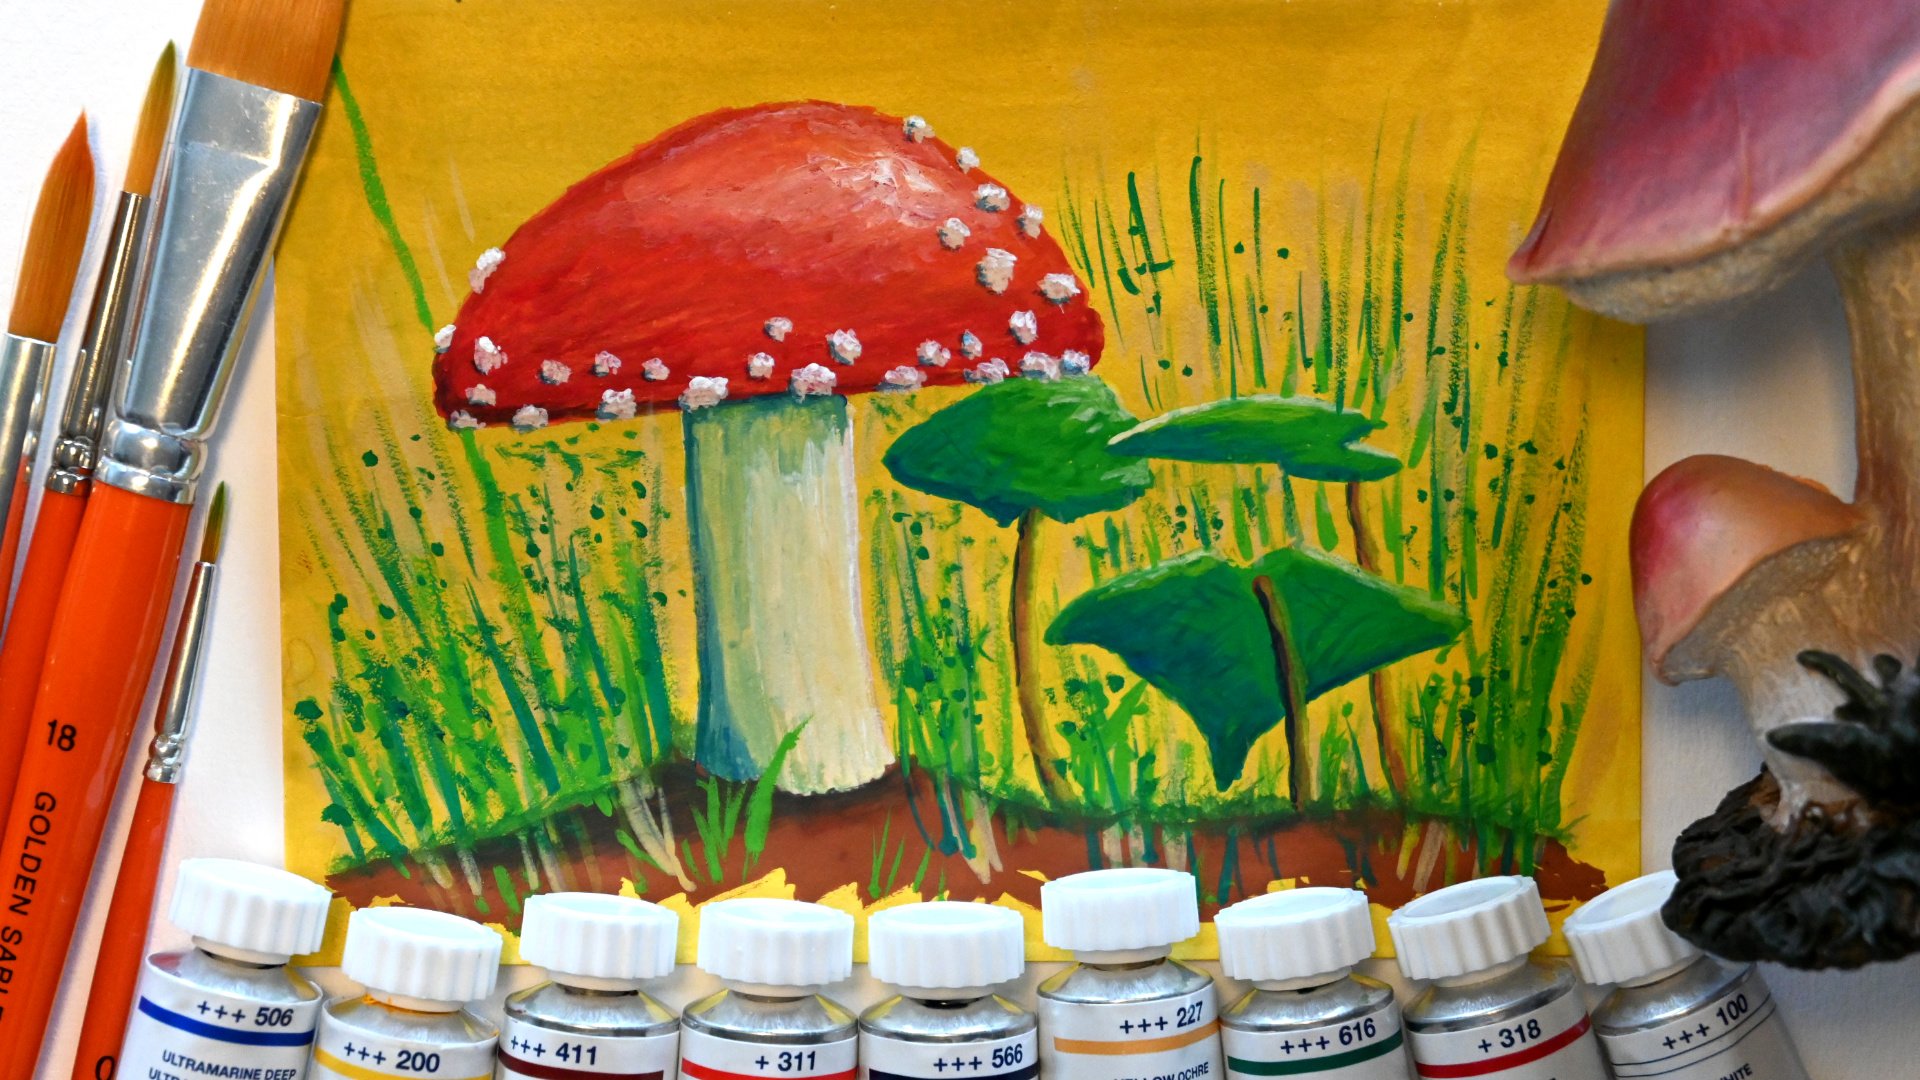
2. Materials: Welcome to this first video in his art glass that you know, we're going to paint a sunflower with watercolor pencils, but we're going to need a few things to do that. And we're not going to use only watercolor pencils, but also use some in a pan. Alright, you see a whole bunch of things laying around here. And that is looking nice in the video, but don't worry, you don't have to buy all of this stuff, get all of this stuff. Let's go through some of the bare essentials and I just cut it laying around Iranians picking up some stuff. The first thing you're gonna need is a pencil and just a regular pencil and graphite pencil, HB, please don't go to 2B or 4B stat will smudge and do the entropy is just the best for this art class saddled with. So that will be the first requirement. And I'll put it aside. If you use a pencil and also watercolor pencils, sharp and it might be nice. You may need some eraser and once you start erasing, you create a mess and don't wipe it off with the hand, but use a soft makeup brush or a feather for that. Like this. We're getting through these materials and we're getting less and less material slowly, but surely. The next thing, what we are going to need is of course, some paper. And what I'm going to work on the paper, watercolor paper, or which could use to is mixed media paper or multi technique pay paper. And these are just some brands I'm using, but you can use anything you want. And that is just a smooth kind of paper. This is bit smoother, but we'll take watercolor, pencil, and ink very well. Or you could just use a simple block like this at picked up at a very dollar stove and nice, has a nice texture and basically works great for the project we're going to work on two. And might just as well show you that one. Here it is, that is on that paper. This is not a project we're gonna work on. This was just an extra little car die mate. You can also use some more expensive paper like nanomolar Britannia. This is hot press paper. You can either use hot press papers very smooth, that will bring out colors very nicely, or you can use this kind of paper. This is natural white watercolor paper with a fine structure and the thickness, I would say 300 grams or a 140 Elvis is really nice to work on. So do that. I have a glute block and that means that 50 is block. And here's the project we're actually going to work on. And glue clogged means that every paper is glued and later when you're done, you can just take it out. If you don't use include block, then what you can use some masking tape. You use masking tape and you can taper off the edges and put it on a flat surface tape of the edges. And once you're done, the easiest thing to do is to get a hairdryer and go around the edge and low dry it until the tape just let go by itself that it's easier to get rid of it. So you may need that to soda paper and you don't need to buy expensive paper. I'm going to work on cheap paper on purpose. So this is very student quality paper and as you can see, you can create something beautiful with it. So, but if you have more expensive paper, then please do so. I'm going to use fine liners, but you're not restricted to find liners. You can use something like this role during art pen of a fountain pen. But if you use a fountain pen, makes sure your ink is waterproof because we want to work with water. And if you use a regular fountain pen like one of these, the ink will go everywhere where you don't want it to go, so you can use it but then gets something like let me see, like this. Carbon ink by platinum that is waterproof. Ok, but some fine wines will do. And what I'm going to use is I'm going to use a really thick 1.80. And I might use a 0.50.3 are probably only used 0.81. So one fine line should be enough. That's it. You could use that. And then of course, you need some watercolor pencils. And I got some various protocol pencils here. I think there might even be a box under it. What will be enough is a satellite. This, this is just a chipset. Barack was some colors. As long as it has some yellow, green, and some blue, then you're all set. You could work with that and I'm gonna demonstrate various techniques. Also, if you, I'm going to show how to work with a very limited palette of colors and also when you have more of them. So you could get a simple thing like this or like this. The coincide Mandela's great protocol pencils. If you want to go a bit more expensive, you can buy these sets and then you get a bit more color variation. You get some more greens. That is nice. Or what we're gonna do two, I'm going to use you could have something like good student quality watercolor pencils. And then that gives you the option to have way more colors like that. So there's 48 colors in there. Or if you want to go really bit more expensive gets something like current dash, super common soft. Or the ones are we using to these fangled watercolor pencils, very high graded watercolor pencils, quite different. I'm going to demonstrate using a few of them in a painting so that you see the difference between when you use the student quality, I'm going to use your sum small limited palette and I'm gonna use the large pellet with a lot of them, the higher quality so that we can see the difference C and our getting room because we're getting aware of all this stuff. So we've covered that. So basically paper, watercolor, pencils brand doesn't really matter. Did we prefer the brushes now, you of course need some brushes. I'm going to use these cheap brushes. Just picked him up somewhere and I'm gonna use a 42 round brush. You could also use a 63 or four, you will, that would work fine too. Okay. That's it. Now. Now this is empty, of honor. Now, of course, what you're going to need to add some water jar or a container, whatever filled with some water. And what you need to is just a little piece of scrap watercolor paper. And it could be from the same block you using a bit of scrap paper. We're going to use that to. And what I'm going to use two is a plate to demonstrate some just a regular plate, whatever plate, China plate. And the last thing, I think almost the last formal last thing, cottons swaps. These are cotton swabs, cotton bots, Q tips called different in different countries. We're going to use those to bring in some useless to do some effect. And then the last thing you could use, but you don't have to just some regular color pencils. Brand doesn't matter. Photon touch ups or there is a failure or extra video with some touch shops. And that is basically it for materials. So most, The main thing is a pencil, watercolor pencils, and some paper and brand and everything. It's okay just if you get some pens. Because we wanna work with pens, make sure they're waterproof. Like these are called pigment aligners. These archives are k4. They don't go react on the water, they stay nicely on the paper and you get no smudge status requirement. And for the rest, rent or whatever you have laying around. And if you have to go buy something for this art class, don't run out and get some things spends. Just get a set like this qualifying liner that is will prove cats some cheap brushes, get some cheap paper and then your set and you're ready to go. Because I think most of us will have sharpeners and things like that laying around. All right, that's it. And that's all you need. And once you have some materials, I would say let's go to the next lesson where we're going to start sketching.
3. Basics 1: Composition: Welcome to this first lesson in this art class. And as you already know, we're going to draw some flour. So I picked to some flowers. And is, this is a young sunflower, this isn't even a younger one. And what we're gonna do with it, we're gonna make a composition with it. But before we can do that, work it all out, we of course, need to sketch, draw this sunflower and I'm going to put it aside for now. And I'm going to show you what you are going to need for this. So you need some sketch paper that can be also regular copy paper, that's fine too. You're going to need a pencil, preferably an HB pencil. I'm usually to be for the video. You may need a sharpener Dan, perhaps we're going to need an eraser for make errors. And if we arrays, I prefer to use a brush. Disease may come brush to get rid of the rubber we make so that you don't smudge your drawing. Ok. Well, let's start. So I have two sunflowers. Here they are. And what I wanna do first of all, when you're going to draw something, you need to just determine how are you going to draw this. And there's a really nice, cute little one and there's the larger one. And of course this is not a big full-grown sunflower yet because just dabbling fit on this video. But I picked this just to have a little bit of a difference too in the sunflower. And what we're gonna do is I'm going to decide on the composition. And let me do that on this side. On this side, let me start here. And when you draw something, and we're going to use that pencil is best to start on the left side and then work this way so that you don't smash everything. And to prevent things matching, what you can do is if you draw, put your hands on a paper and move that paper on, so don't slide it like that, but pick it up and move it along and start drawing. Now for this video, I'm not going to do that. That takes love time zone, just kind of sketch quickly. But if you need to and want to preserve your sketch, you can do that. Alright, so we've got these two sunflowers and let me say, I'm gonna make a composition with it. And what I would want to do is the site of that composition. We have the big one. And I would say, well, the big one I wanna do upfront. So that would be, I'm just drawing there then, as you can see, very roughly, I'm just making a little sketch of what I want my composition to look like. And then you would have that one, that would be the first one. Then I have this really nice, cute, smaller one. What we're gonna do with this smaller one, we're gonna tip it like this. And I would say a second one coming right there. And that's a nice straight. Sunflowers always have nice straight stocks. So drawing in that nice stock. And then that sunflower would be. Around there, that would be my second one. And what we could do with this flower now we can tilt this too, but pick up a bit of a different angle. So this one we do really from the side. And this one we could tell us a little bit like this kinda preferred few. They call that. And that would just be really close to this one and probably will do that right behind there. There you go. And that would be my composition of sunflowers. And we may move things around a little bit of course, but that is just to get an impression, I had to do a few of this and say, okay, Let's see if I have some flour from the front and I'll move that to the side right there. And then I'll take that second sunflower that comes that free first few that would come right behind it here. And then I have that little one. I would put that say right there, a little bit lower. And you could do, demonstrate that too. That would be a great composition to, so you have your choice of compositions and you could just out of debt and find something that you like. These things have leaves, of course too. Find something you like. You could also bring one of them a higher and lower to get some interesting perspectives on it so we could move this one lower a little bit. So let's go with this composition and say, okay, we have that composition where we have the first one from the front. We take that second one, but we move it lower. And we have the third one and we move that bit closer there. And then we have this one rupee up front. This one will be a bit back, this one will be back. And there you go. Now that would be an interesting composition two, then this one would cover a lot of that one, perhaps a little bit of this one. And that will be interesting to, so we have three compositions and you can move things around as you want. And that is the first step. So if you have some flowers, is gonna make a conversation. If you have a photograph, you can of course, work from a photograph. And I photographed all these flowers so that you can use them to. And if you don't have access to the real flower, then of course you can just use the composition that is in the photograph or start moving things around two. Also, we have 123. And I would say we're going with, I liked this one. Let's go with this 13. This one is nice too, but we're going, let's go with this one. If you prefer a different one, then of course, move these flowers around and do the mesh you please. Okay, so I'm picking this one. This one will be my composition and what I'm gonna do is I'm going to work out my composition here, just a quick sketch and then I'm going to move to the watercolor paper.
4. Basics 2: Sketching: Okay, so I'm picking this one. This one will be my composition and what I'm gonna do is I'm going to work out my composition here, just a quick sketch. And then I'm going to move to the watercolor paper and draw it there again to see if this works. So I have this and this is just to get used to drawing a little bit. And especially if you haven't drawn before, if you can't draw anything and things, you could actually skip this and move to the next lesson. But if you have never drawn before, of course, you need to learn a few things and let us observe this flower. The flower has of course petals and it has a heart, and it has the stock with leaves. We're going to ignore the leaves for now a little bit. And we're going to start with, if I wanted this from the front, that would look like this pretty much and I gotta hold it. Then the first thing I would do in my composition, I've chosen this one is to determine how large I'm gonna go. And let's say my composition would be this flower, my total composition would be this big. That would be my told, this will be my paper. And then I have to decide where are these flowers kinda go. And if I'm gonna go with this flower pretty much in the middle, then I gotta find the middle of my paper and top. And let's say this flower with a roughly go here. And you have that stock going on. If you want a lot of the staff to be shown, if you want just a little bit, then what you could do is you could move this a lot bigger than would be the first one. And I'm drawing just square. This is pretty much if you would call around this, this would work out as a square, pretty much. That's the nice thing about most flowers. The second flower that would be tilted a bit like this and I would come behind him. Still would be I'll have to put it straight. As you can see. It would still be not straight, but it's tilted slightly. So that will be tilted slightly. And let's say that would be back here. And then what I'm drawing is another box. And I'm going to say, came my first flower stays within this box. My second flour must stay within this box. And I'm going to draw this box likely through it. So I kept the whole box. I'm not drawing a stark yet. I'm leaving that with that, leaving that yet. And then I'm going to go for the third one. And I said, Well, the third one, I'm just going to draw from really from the side. So that will be then there would be a rectangle here, behind here. Let's say I will own this behind their eyes, roll that rectangle in and then this one pretty much goes. And you get that part where the stock and the flower is are connected. That will be around here. Now if this one, let's take a look. Tilting it than what I would see him tilting it a bit like this. Then as you can see, I want to see the stock coming out of it here from the back. But not totally from the back, but a little bit right there. But damn wouldn't be my basic composition of this flower. Okay, I'm going to draw on purpose this into, so this will be my composition. The next thing I'm gonna do is with this flower. So this has a heart and these petals. And what we're gonna do, this one. So I have drawn that rectangle. I'm going to find the middle of the rectangle and the easiest one of square radium. The easiest way to do that is go from one corner to the opposite corner down like that. And do the same on this one or down. And now I added medically have founded the heart. And what I wanna do next. When I've found the heart, I wanna make a straight line through the middle and a straight line through the middle here, dividing the square into four parts. And now I have four squares. That's it. That would be the basic structure. And let's continue with that. Now there's a hot in here and there's this petal and this petal of course isn't square. So what do I start with the outside? And I have this square and I'm going to, I'm going to zoom in now so that you can see that a lot better. So I have my square. One we're gonna do is this point here to this point here, I am going to connect again with a line. If you need a rule with this, please go ahead and take a ruler. She can manage without do so. And I'm gonna do the same for this and this point I'm going to connect and I'm gonna basically draw inside my square, draw a diamond. And then I go from here to here. And I do the same here. Here. Now, this basic construction will help me to draw a circle in, and we're gonna demonstrate that. So now what I want is this outside circle. And I have this square, a square with the diamond in it. And I'm going to focus on this part here. And there's a line here, that line I've drawn here. And what I wanna do is I want to find about half and just put a dot there, kinda do the same here in this triangle up here. About half we're gonna put, we're gonna do that here too. And I'm gonna do that there are two. So now I have defined this up in all kinds of paths. And the next thing I'm gonna do now I can draw a circle one. We're gonna do this point here, the end. I'm going to draw a line just a little bit straight up. Then I'm gonna make a curve until that point and this one a bit stray too. And I'm going to draw a curve like that down here. We're gonna do the same bit straight coder and draw that curve in same here. Orbits straight and go to that point and meet 101. And our need to turn your paper around to make it easier, please do so to just turn it any which way you want. And let's do the last one n-bit straight and draw in that curve. And now you can see I have this beautiful circle here. And that is my dad is the outside of this flower. Now we also have a heart. And let's look at this heart. And let's say OK, the petal, this heart. Look at half of the heart. I would say the petal is about twice, at least twice as big as the heart. You can also of course use something to measure. You can take your pencil, put it on there. And I'm going to put the denser carefully. This would be about the heart and I'll put it there. And that is definitely twice, a bit more than twice. So to make it easy, what I'm gonna do with this one, so I have this line here that would be here today. I'm going to define a line in three parts. And roughly, and this part, this will be the, this will be my petal, this will be my heart. And what I'm gonna do with this point, I'm going to draw a straight line until I meet that cross, that cross I put in first and then I'm going to go down and I'm meeting that cross and I'm gonna do the same there. And that saves, this, saves me a lot of measuring by using one of the points. And if you have drawn in the support lines as well, then it's very easy to draw this in. So what I did, I divided this line from the heart to the top in three equal parts. And I'm using the top, the, sorry, the bottom third to draw a straight line in, and then from there draw a new rectangle. So now we have a rectangle in an, a small rectangle in the larger rectangle. And with the small rectangle, I have these lines and we're gonna do the same as I did here. I'm gonna go from this top point to, they're going to go from this bottom point to dare. And I'm gonna go from this bottom point to that point. And then I need this one. Then I'll have this very small part. I'm going to define it in half again. And this helps me to draw in that same curve idea of they're just repeating myself really. And this would be the heart. And this would be, these would be the petals. And now the petals, I can look at this and what I'm going to just kinda do. We're going to observe, see what I see. And what we're gonna do is we're probably not gonna do it totally accurately, measure everything up to the millimeter, but just kinda go with probably about where it is. And I'm gonna just first of all, recognize some major petals. And I would say this petal here is upfront of everywhere, of all the others. And that will be on this, pretty much on this line. And I'm gonna just throw in a petal that meets the heart. And I'm going to regard that shape and pretty much about the shape that the petal has a ego. And let's see some more patterns. This battle, this battle will be in the same, pretty much in the same line here. So let's draw m, o and I've done this petal wrong now see, that is why we have erases. Okay, let me get rid of this petal right away. Forget about this battle. Overrides. The petal, needs to go, of course, until the end. And that is the same with this petal. Until DNS. There you go. Now let's see, that would be a pet or here pretty much straight down. And I'm going to draw that into and make that curve a little bit. And just, I'm looking at the flower and what I observe, that is what I'm drawing. Now, this may take a little bit of practice, of course. And what we're gonna do Next, we have these petals, and since this is a rough sketch, let me see there's a petal right there. I'm gonna roughly sketch in that petal. There's a petal trading a mineral, but it's behind there already done there is we have this petal then there is a petal in between again. And there's all kinds of petals behind it. There is a petal behind this one. Now we're gonna do this one. Doing this one. Now, there's a petal right there. And let's see, up there is a petal behind it. Some of it I can see hybrid cars. You can see it pretty well. So I have to take a look and we have to petal. There's a bit of an open space there. Let's see, here's a petal here, not right there, but just off the site and there's a petal right next to it. And I'm drawing in these petals and then there's a petal behind it occurred. And then there's all kinds of petals here behind it. And we have a petal right there. Now what you can do with these petals will show you in a minute. We'll do it a little bit different. But now I'm just drawing in all of these petals right there and there's a petal here. There will be a pet on here and one there. And of course, I'm drawing this one that is not totally in the middle, but just after middle and would be one there. And now you can already see that is starting to look like a sunflower. Let's see, there's one behind it. We've got that. All right. That would be the first and I'm looking at this. That would be the first one. I'm looking at this now and I see the heart has pitiful open space and the rest. I'm going to put in all dots, just dots in the middle and there you go. Now that will be the first one. Okay, that will be the first flower. Now what we're gonna do, I'm gonna look at here the stock right away. Let's do that. That is reasonably thick. And we're going to just draw in some of these leaves. And let's look at one of these leaves. And this leaf here. Can you see, now you can't, let's do this leaf. I'm just going to draw one of these leaves him. Move it a little bit so that we can see it really good. And the leaf would have a little bit of stock and go through the middle and then get the shape. And I'm just observing the shape it has and that would be the leaf. Now as you can see, this leaf is already covering this flower, which is pretty interesting. I might just ignore this leaf. And I'm going to put a leaf of here and put that right there. Then I'm gonna go for this leaf to just bends over and like that and then a straight. And I'm going to draw that in and so on. Here's a leaf, but it's a bit flat and the same for this leaf here. Pretty much profit. Also a bit flat. And you could go do this leaf here which goes down like that. And then we need one more leaf. Does it leave behind it? Interesting leaf, and they go withdraw that. And then there's the last leaf. And I would be pretty much roughly about it for this flower. And then we're going to say, okay, we have ignored this leaf. Basically we drawn this leaf, this one, we ignored what we could do that and let that go behind this flower. Now, that would be roughly this flower. And now the next thing we do is do it from the side. And from the side. You can see will be a bit more tricky. And what I'm gonna do first with this, see what I see. I see this middle part here and I can't draw that behind here. So now I'm going to say, okay, this one, I'm gonna again divide up. I can pretty much see it goes there. And I'm gonna just need the middle of it. And that would be here, the middle. And with this one, what I'm gonna do is I'll have to observe this 01:00. Am I holding it like that? And I'm just going to look at the camera above me. And I'm seeing that we have, that. We have a lot of petals around it. We have that heart. And the heart. Not an oval, a perfect circle, but more an ellipse. So I'm gonna say okay about here. There would be pretty much the heart. And from there I am drawing some lines and those would be my petals and what I do. So this is my heart and the heart. I gotta get myself boundary and this will be pretty much my boundary around there. And from there I could draw petals. D's will be full petals. Ms, You can see I'm just drawing it in bits roughly. And once I get to the edge of this would be shorter, but they all disappear behind this one. And that is good. And then we have to have some of the in-between to make it really look like a sunflower. And there we have that hard. And we're just doing it like this. Good. And then later on we're gonna work with ink. We're going to just go stage by stage and ink and ride away so we can see it really well. And that will be del one really quickly. And the sidewalk now I know the sidewalk, I want to stay inside this box and it's growing here. So I'm going to look at the sidewalks. Okay, we have this part here that would be like that roughly. And then we have these leaves coming out and they'll bend a little bit. And this one would be pretty straight and I'm keeping that inside that box and making about half and half here, half circle, around here, half circle. And there you go. And then you will draw in the leaves and they would get some interesting shapes. This one goes behind it. Here, you wouldn't see much anymore. And this one is pretty flat. And then there's some in-between. And that would be the flour and that would get stuck to around there with some leaves on it. And we're just going to throw in a couple of these leaves as much as we can see them. And then we would need leaf there too. Alright, if here, this one here, they're broken up leaf, we let it disappear behind this leaf. Good, and we need to do the same here to this one does have some leaves, of course. Let's draw in a few leaves. Here's a leaf that disappears behind the flower. Then we're gonna do this leaf here. See that? And I'm just observing what I'm seeing. And there would be a leaf going up straight like that. And there will be a leaf here. And now we have to hold and then would be Leaf going like that. That leaves behind there are right, and that, that is good. Ok. I'll put my flour or moments on water. Alright. That would be the first sketch. And I'm not gonna say, okay, do I like this composition? I'm going to say yes. It's a bit cluttered now of course, because we drawn everything in one thing as you can see, smashing and little bit there because I didn't use that extra paper to put my hand up to save myself some time. But yes, I like this compensation. So that would be the rough composition. Withdrawing this 1, first 1, this is the one we're focusing on. This will be the front one. And we've done this one pretty accurate and done all the circle, square dividing this up and making sure we can draw this. Now, this one we started already sketching a little bit and this one to just what are we observing, what are we seeing? And that is what we call a draw. And of course I want to say in my final composition that stark as way too thick, so we're going to pay attention to that. Okay, so that would be the first one. So what we did was we just looked at some compositions quickly and say, okay, how do I want to arrange these flowers? And I pick the third one. And that was the arrangement I worked out here, rather roughly, but already showing you some techniques. So the next lesson, we're going to expand on this a little more, but I would say practice this a little bit. So start with a boundary where you want to stay him. Then I said, OK, I have this flower and what I could have done differently, let me zoom in from the, if this is debt composition up here, the first flower I could've drawn in as a total rectangle and said, OK, with square, this is going to be my first flower. And I could have done the same with the second one, say, OK, that has to stay inside this boundary. And I could have done the third one too and say, All right, it needs to stay within these boundaries. Then you get all boundaries and you don't go outside of it. And you don't have to. The major one we did up here, the most important what you could do the whole composition to S boundaries. Alright, so practice this a little, do this rough sketch of this. And once you've done that, make also some compositions. Arrange the flowers perhaps even differently than I have and make a quick sketch, say, okay, it looks roughly. This doesn't there's nothing accurate about it. This is just to get an overview. Then we did a rough sketch here and said, okay, we do like I do like the composition and I'm gonna work with this. I'm going to use this as a base composition to work on the next step. And the next step would be on my watercolor paper. And that would be of course, a lot bigger, larger than I've done here. So enjoy practicing, and I'll see you in the next lesson.
5. Drawing the main Sunflower: Well, welcome to this next lesson. Previous lesson, we worked on a little bit of composition. We draw this and we've talked a little bit about this. The next step we want to deal with, of course, we do want this to get onto our watercolour papers. So that will be the next step I wasn't going to do is with this. I'm going to use this as a reference a little bit. I'm going to put that aside where you don't see it. And I'm gonna get my watercolor paper. Now, here's a water color paper. Now, the, I do fingers what I'm going to use for now, not idea. Let me say what we're going to use for this lesson. I'm going to use watercolor paper. This is with a fine structure. Don't use that rough stuff. Stuff you making yourself hard. Now if you only have rough vertical paper, of course, and perhaps you should use it if you don't want to buy anything. But I prefer using a more smooth one. This is not smooth, smooth. It still has some structure to get some nice effects later on. And we're going to use a pencil again, HB pencil preferably, you may need eraser and get your sharp and I'm using that brush again. And what I have to is this little arrays are here. This is a pencil eraser and that is just for more accurate erasing. Okay. I'm putting that aside and of course I'm going to need my flowers, but I still have those. And there you go. Now, the easiest thing to do would be to turn this paper as I have now. But that is working, not working with the cameras. So I'm gonna go turn it like that. But if you want to, you could use it in the landscape. And I'm just gonna put it like this. Sorry, here you could use portrait. I'm gonna put it landscape. And what I'm gonna do now is I will draw these flowers in. And what I wanna do for the nice thing would be to have a bit of a one on one composition. So her, let's see where endo, perhaps you, then it needs more space, but you could, let me see that flower. You could definitely turn it other way around. But what I'm gonna do, I'm just going to use not all of my paper, but around this part probably. Now here's that first sunflower, that big one. And what I want, I want that big flower. I'm gonna just draw it as big as it is. I will, could do small end with really long stocks. But what I wanna do, I want to focus more on the flower. So there's the flower I would go here. And what you can do if you have the real flower, the easiest thing to do, of course, is put it down and roughly trace its size. But I'm not gonna do that with that. I'm just going to say, OK, I have this flower here. And I know it's a square, so I'm gonna decide where I want my square to be and what you could do. You could do it smaller, larger. It's up to you. I'm, I just even go larger and I'm gonna go with square. I am not going to start out here at the top, right there. And somewhere on my paper, it doesn't even have to be the middle. I'm gonna draw a square. And what I'm gonna do this, I'm going to observe the edge of my paper to draw this line in. And again, if you need a ruler, please do so. And then I'm going to observe this edge. And we're gonna say, okay, and need to observe this edge and I'm going down. And then I'm not gonna say, okay, I'm neat, about the same height here as I have here. And you could measure that. I'm going to say that surround here. And I'm observing now the etch edges again. And I noticed I'm ongoing pit down. And there you go. Now, my flower would be my first flower. This one would be this big. Okay, and what we're doing in this lesson, we're going to draw this flower only and then we're going to write way, put it in ink, and then we'll go back and draw the other flowers. Now what I'm gonna do if this flower is pretty much the same as you can see. I'm trying imaginary to see where this line would go. I'm doing the same there. And that helps me a little bit. And to find the middle and then we wouldn't need a line there, and we will need a line there. And as you can see, they're not accurate science. It's just pretty much about. But I want to go Now, I'm going to observe. And we said, okay, with the last one, we did the petals About a third, but I think the petals are longer than that. So what I'm gonna do, I'm gonna define this in three parts. Again. That will be around here. And that's what I work for this petal. That would be a pretty long panel that would work. We do that and I have discovered. And then we're going to do exactly the same and put that straight line in. And where it meets, I'm going down till it meets that one. And I'm going down and that would be my first the heart. And let's draw the heart in right away. And again, we're going from those corner to corner is exactly the same as I did find these half's and draw in pretty much the heart. And there you go. This one should go down a little bit. And there is that circle of the heart. And we're gonna do the same here. And say, okay, there's a small heart in it that should be pretty much around there. And it's getting smaller. And we can divide this up to, but I'm going to draw at heart and right away now that's would be, this would be the heart of my sunflowers. And it would have all of those dots in it and let's put them in right away. Get the idea. Ok, this is a sunflower agar. Good. There would be the first one. Now. Now I wouldn't need to bigger one, the bigger circle because I want to say, okay, I need to define the boundary because the petals, I don't want to go outside of their boundary. And let me see. Can I zoom in for you? Yes, we just that just gets in. That works. Okay. So the next one, what I'm gonna do is exactly the same as I did here with the small one. I'm going to find these corners. And draw a line, we're going to find these corners. And again, draw a line. These two corners draw a line in between them. And this, and this corner there. And there you go. Alright, now, good. I have now these corners then I know that's the middle is around there, around there, around there. Now if you do it totally accurately, you would actually define this in three parts again and found that, find that third part. But that is just so much F, no, not effort, but takes such a long time. And if you find about the middle, as we do here, your circle gets perfectly nice too. Straight than around the curve here, two bit straight, and then curve it. Same here, bit straight, curve it fit straight here and curve it. Bit strain there, curve it, and a little bit there, curve it. And we need a bit of a curve there. And there you go. This is the boundary of our flower and the petals. Good. That is the first one. So we have our first steps and now let's move to the next step. The next step is of course, throwing in these petals. And let me see, I'm going to move this now to the site and I'm going to put that pet, that flower here. And It's a little bit too big to get into the focus, but that's okay. What I'm gonna do next is I'm going to look for petals now. And the major one, I have already decided that one of them comes here. This will be the heart of one of them. Let's draw that hard line in the second one I'm seeing. So if this is one, there would be one not neatly in this would be around here, that would be a second petal, this pattern. Then I'm seeing this path or that is about the same angle as there. And I'm drawing in this petal, then I see this pattern. And I'm saying, well that is pretty much almost again, straight on deadline. And then I'm seeing a petal here that is not straight but just above it. And I'm drawing in that heart IN until I'm meeting in there. And that is slightly different from the previous one because the previous one we did just quickly, but now we want to go a bit more accurate. And these are my major petals. Let's see, I've done this one then I have this pattern and as you can see, my flower is already, it needs water. So there is this potato here that is not totally accurately in the middle. That would be this battle. And I'm, I just throw that one in. And this one goes right in between this one and this one. There's one in, and there we go. Then we have this petal, then we have this petal. And this petal ICO is to move a little bit. This petal is about there, and there's a petal right behind it, but there is a petal next to it, not starting in the middle but just off the middle. Then we have this petal. It is not in the mid of, but just again off the middle. Then there is a petal just over the middle manager. And then we'll do this Pareto. And that one we can do in the middle. Let's see, we have done, we have this petal, we've cut this one in between those two. Alright, these would be my major petals. And what I'm gonna do next, I'm going to draw in the shape of these petals. And I need to observe. And what I observe this petal is that one side is making a slightly a curve. And next pattern, it's basically doing the same, the next one. So that would be that major pat on ongoing for this petal. And I need to look at it. This is a pretty straight petal. I'm going to draw in that pretty straight to make a nice point at the end. And there you go. That is the next one. Then we have this petal and give it a slight curve, but not on that side. And I'll trading a bit, this is a perfect petal. This has on one side a little bit of the curve, and then this one is straight. This one causes fading. We might just do it as irregular. Sea. This one goes a bit like this and the other side is smaller that you get the petal like that, then we have this petal. Now in reality it will just be a perfect pattern, pointy. Okay, and now skipped a petri dish too. I draw here in this one. And there you go. And as you can see, I'm not at the end. This is not, this is figure. This is not meeting the heart, are not like that, but outside of the heart, you need to create at the bottom a little bit of a body. And now we have this one. This one is on that side, curving in a little bit. So I'm just throwing that into. There you go. And as you can see with this, we're trying to do it much more accurate. We are going to go for this one. This will be pretty much a perfect pattern. Where here now we're here, let's say this petal here. Taiwan is, let's give that a bit of a fault. And what I did is you draw your petal like you would normally. And then part of it, I'm going to fold and we're just going to draw in a line and that suggests that there is a bit of folds there. Now this petal here is rather what it Fenner. So I'm just gonna do it a bit Fenner. Now we have that pet policy withdraw. We set this one is in the middle, but these are and this one is in the middle. Pretty much that's right. And with a bit of a fold tear. And then we have another pattern that is right there. And we're going to draw that in a ego. And i'm going to one site, two anomaly and the other side's I'm drawing as I observe it with a little bit of a pointy part and you can't see that, sorry, there. This side, I don't like. So that's too much in there. This one needs to go correcting my Arras. And now I'm drawing it. Again as I want it to be better off fault. There, there you go. Now. There you go. That's good. Where are we? We've done this petal here, pretty much. So the petal here, I'm going to this petal here, I'm going to move that aside. I'm the wise, I'm not seeing. And what I observe is the petal Coase like this. Okay? And we're gonna do this pedal, you pretty much straight petal, okay, and I've done will be my major petals. And what I'm going to do if the next petals, the others, I'm going to just look at it and say, okay, I've done this one. I'm C1 right behind it. And I'm just going to draw that one in. And right there and then I'll see there's one behind here. Could they go? And then here, there's one behind there. There's one here that want to be this one. And it would be around they're good. And then we have one clearly in-between these. And let's see here two. I'm just drawing these in and here's one. We've got this one. There's one here that is pretty much behind it. Then we have DES there's actually two. You can see it. I want to lift it up. See there's one behind it and moving it over to the side a little bit. And that would be around there. And then we have one petal going behind and it actually comes down there. That's, that gets an interesting petal. Then we're having this petal here. Thus one behind it. There is one in between. These two. There is nothing here really. There's one behind that. I'll draw that then, then we have this petal nothing here and we're back to this. And there's really, if you look well, one in between their two and here now it's not, okay. That would be it. So that will be all my pendulum, just observing what I'm seeing. And now the next thing I wanna do is, so I have this here. I have the stock. And the stock would come right about. Moving this up in the middle, going from the middle and drawing middle line. This is my middle line. And my stock would be. While around hair cut. And that would be a stock carnage. And now I'm gonna move. And now I'm going to look at my flour and can say, okay, what do I see this leaf here? Pretty close. So that comes out of the stock and would make that shape and I don't need them to be on the exact place I'm just serving. This could be a bit lower, but then you get so much space between here. And I don't want that for this composition. And I'm just saying, OK, that leaf is on this side a bit flat, but really not on this side. There you go. That is that first leaf. Then there is a small leaf behind there. You don't see that one. But what you do see is this leaf. We see that just a little bit that would go around here. And what I will do is this is the middle. And I will just draw in that leaf. There's a leaf here like that, that is that leave behind it. All right. Now there is a basically because it is not getting water at the moment. All these leafs go anywhere where they were at the beginning. So I'm doing with this lead on pulling into bid out. And I'm saying, OK, that would be around here. And I'm just following that hard line going like that. There will be this leaf. This leaf would go like that. And then I see that this part will be a little bit and I'm drawing that just in like that. And then it's going out. And it makes that shape the ego that would be the next leaf and make it slightly smaller like that. And then I'm drawing this leaf that is here up and then pretty much straight like that. And with this, I'm going up making that point here. And I'm doing this again, but again, this is a bit folders and that would be that leaf. Okay, so I got free leaves on this side, that would be pretty much enough. Then I need some leaves on the other side. And with the leaves on the other side, I've got a slight problem, as you can see, because they're all not going to well, so I'm just picking a leaf. This is a good leaf to pick this one here. And I see that with these leaves, one is up and then about here in the middle of the next one starts and I'm picking this leaf. And let's see, can I move you up, tear that leaf. I'm concentrating on Si Cai dura. Yeah, that's a nice that one. And that goes like that. And there you go. That would be a bit too small, bit larger. K, Nice. Now, what you can do also if these leaves, now we're going to do, let me put this one here, move this over. I'm going to draw these leaves and I'm just drawing them freehand and under saying OK, I'm following this hotline. But what she could do also with your leaf, but let's do this one, this one on one to draw here. And what I could say is, okay, the first thing I gotta start somewhere and that is in-between. These, these are half in-between. And I'm drawing in this first line. There it is. Then I'm going to say, okay, this leaf is not straight but a bit down. And what I could do is the same as here. I could draw a boundary box. I could do that with all the leaves. And I'm going to say, okay, this is my boundary box where that leaf is going to stay in. And then I'm going to observe the leaf. And I'm gonna say, okay, the back of the leaf pretty much is half circle. So I am just drawing in half a circle and I've got a drawing my middle now in the middle is here. And I got to observe this was bit half circle and then it just tops edges. And then I would have that leave too. So you could draw all these leaves in first as here and make boundary boxes and say I'm going to stay within these boundary boxes. Now for my drawing, I don't wanna go all the way down, so I'm just gonna erase this bit here. And I'm going to stay within. And that would be, there you go. That would be the first sunflower. The obvious one, the easy one from the front. And I'm gonna give this water now. And we're not going to draw the other ones. For now. What we're going to do, you can draw this 12. And then once you have done that on your watercolour paper, or if you can use mixed media paper on your mixed media paper, of course. And once you have done that, you come back. And we'll come back to this and incus right away. And we'll do that in the next lesson. So draw this sunflower and I'll see you in the next lesson.
6. Outlining the main Sunflower: Okay, we're ready for the next step. We've cut this flower now and now we have to add some Intuit and inking, as we've discussed with the materials you can do in various ways. But what we're gonna do is I'm gonna work with fine lines. And for this step, I'm going to use a thick fine layer. This is 0.8. If you have a 0.01. that's fine too, or a zero-point seven. But what do you have to make sure of this? This, this, I've got a pigment liner is that it is waterproof because later on we will work with color pencils and add water, of course. So then you make sure that the ink is not going to flow to because you want the ink to stay where it is. Ok, so for this step, what we're going to do this simply as I'm gonna trace what I've drawn. And I'm not going to trace like you would normally trace and let me go for a minute, go back to my sketch book. And let me draw a box here. Let me get a scrap piece of paper to demonstrate and that will be better. Okay, I'm getting this scrap piece of paper and I'm going to draw a box here. So now I'm gonna draw a second box right here. Now, if I've drawn my subjects with, and I want to use the my ink for outlines, my pen. I have two choices. The first one would simply be to trace this box and get this effect. Then you would have, your subject would have to be pretty accurate to get nice lines. And eventually, whatever you draw will look a little bit static. Perhaps like coloring page. We want to add some life to it. So what we're gonna do a sketch. And what we do with sketching. I have the same box and instead of drawing a line from point to point, I'm starting to draw small lines like this. They overlap the previous line. And you get a bit of a rough idea. But essentially, you get the bar, not exactly the same box. You get your subject, whatever you drawn, but your lines will look a bit more lifelike. And let me demonstrate all of the flower to, let's say I will draw a flower Lab. Imagine I have drawn a flower already. So there would be a heart. Then there would be some petals. And you would draw in your petals and that is what your flower would look like. And then it ends up looking with life of comic, perhaps a comic page. And that will be that flower. But if I sketch the flower, so imagine I have drawn a flower in pens already. And I will sketch that flower in. And I will do these petals again. And you can see I'm already bringing in a lot of variation and my lines. And I will draw these petals. And now you can see. The difference right away between the two and this not even very accurate and nice of course, to just, just a quick sketch. So I haven't done any basic sketch before that. So there you go. And you can see that this looks very different. It is very static, more comical like, and this is very much more lifelike already and makes it easy to, because if I make a mistake somewhere with this, let's say I would do a circle. I start at 1 and I have to end. And if it's not a perfect circle, then I can't correct. But if I draw a circle sketching and say, oh no, I'm going off the wrong way. I can, correct. And I can say, okay, I have my circle and allows me for correction and it allows me to go over a few lines again and get a bit more lifelike, interesting subjects. So we're gonna use that sketching. So short motions, not straight lines, but short motions. Now if you prefer this, of course, co-head here, you're welcome to do that and do these nice steady, tight outlines instead of these more rougher. But for the flower, We're gonna go more rough. And let's see, we're going to start at this side and working our way to decide. Or we're going to start with the heart. And we can now, now let's work this way depending on what you use. Of course, this dries pretty quick, but as pens that take time to dry. So what you would do is work from left to right, top to bottom to make sure your hand is moving away from where you've been. And if I start here and then move over it, chances are that I smudge. So I'm starting, this would be the highest one and I'm starting with this petal. Now, take care to note, we're not gonna do this hotline. And I'll show you in a minute why we're not gonna do this hotline. But I'm gonna do these petals and are making short sketching motions. And let me do this one too, so that I can eventually do this one behind it. There you go. And let me do this one to say now, it doesn't matter where I start or end. I just need to make sure that I'm not going over where I've been and allowing it to dry a little bit. And I want to do this petal. And special goes in front. So let me draw that petal in first. And I'm just noting where everything is and what I gotta do first. Now if this, again, as I said before, you could take a clean empty sheet of paper. And put your hand on it and draw a freeware there so that you don't see much that much, but I'm going to just erase everything in a minute. And there's this petal and there's a little petal behind it. And then we have, this is one petal but it's folates and petal behind it. And then we're going to draw in this petal. And these are two petals actually. Because this was the petal. One behind it. Came there. And then we'll do this later on now moving up here. And I'm sketching in all of these petals. And I'm a bit of shape and now I'm going to stop. I'm gonna do to hot first because otherwise I need to go back and move over here and I don't want to do that. I want to make sure I don't move over my ink dot. Let's take this flower with it. First of all, let's take a look at it. Let's see how this hard is. This height. Of course it's not a perfect circle because there's all these dots. And there's, if we move up, it's not even dots. It is, has all shapes. These little hot of the flowers that make up the hot little shapes in it. So what I'm gonna do is I'm gonna not go round, but I'm gonna go a bit rough around the edges like this. Make a bit of a wave motion. And I can do that because I'm not drawing, but I'm sketching. And then the middle, I'm going to do say make a bit of this wave motion. And there you go. No, I gotta take the odd with it. And we're gonna take a look at a heart and say, Okay, there is still Dotson there. And I'm going to just some thoughts. I'm putting my pen up right now and I'm adding some dot-dot. So I'm going to the hot here. And we're gonna do a lot of dots and this heart, I'm gonna vote random. I might as well do first, drawing in circles around a few. And I'm not doing them everywhere. I'm skipping a bit here and there. Around the edge. K. I might come back to this later on and see what it looks like. And now I can continue with this one that is fine. And this one coast over it and then this one goes behind it. And this one is the major one. And that one goes there. And now I'm going here, make sure I don't see much this one. And I'm gonna go work on the hair, making sure I'm adding a little bit of shape when needed. There too. And then the last one there. All right, that would be this one. Let's add some dots, summands. And I'm just saying, okay, we'll leave this like this for now. I'm moving it up and we're gonna work on some of those leaves have led us to the stock first stock data. And now I'm gonna do is leaves. There's one behind here. And this leaf, I'm gonna do that middle line for sure. I'm gonna do this leaf. And at that folds to it. And that's that middle line to it. And let me do this leaf. Okay? Let's do this one. Now we can do this psi two. And we can do this one and do this one. Of course, it fall in there and a folder there. And then the last one, let's make sure it comes out of that stock. And you go and I'm adding stock here. I'm adding a little bit. Here you go. It's good. That would be it. Depending on your pen, you're going to need to let this dry for awhile. And once you haven't tried it. Of course you can erase, and now this is a fine line and which tries fairly quickly. Erase everything, only the flower for now. And then we have a young sunflowers. And now I can do this too. So you may, if you're gonna do this before, you may want to test this beforehand to see how quick your ink draws and just draw a little bit at a dry and then see what happens. Okay, we're gonna get rid of all these smudges. Another nice thing about this paper is that it is glued so it's not gonna go anywhere. If your paper is not clued, you might want to tape it down with some masking tape used for painting and stuff like that so that it won't move around. There is my sunflower, at least there is first part of the sunflower. Now let's take a look at the sunflower. I'm gonna see if I want something there. So I think I might want a petal. On this side, this is 0, here's a bit 0. We could do a petal, now we could leave it to its gut. Ok. brings a bit of variation in it. All right. Now, for I have done is these hearts. And if we take a look at the flower really closely, we see that actually there's no hard line or there is some little lines, but the major ones I CR2, each petal has two major lines and some have in the middle a bit, but EC2 or free in the middle. And we're going to do a little bit of variation with that to make it look nice. To start with this one, we're going to add just two lines to it like that. Now you can do that with pencil first and then trace it. And we're going to just add it like that with this one, I'll do one in the middle. And this one gets to, this one gets a line. This one, I do free. This one gets a line there. This one gets only two. And I'm varying at a little bit. It's not the same. Every time. This one. I'll do in the middle. One of them, one higher up. This one other you like that. This will now follow the shape a little bit. And this one I'm not gonna do only up there, down there. That one. And this one will do two again. And as you can see, I'm roughly sketching them. I'm not pressing my pencil really hard. Sorry, my pen. I'm doing it rather lightly. And they go curd. That's already looks a lot better. And I, with these leaves, of course, particularly good-looking at these leaves. What happens if I take this as an example? I see that there is a middle line, but there's a line coming out of it too. And of course, you have these veins going every over the under there. Let me do that with this one. That has feigns coming extra feigns coming out of it here too. And that adds just a hint of fans. Because I don't want to get all the attention. I'm just now adding a hint of faint things, but I'm doing that pretty lightly, but still nice and convincing so that you have some vanes here to. There you go, good. And that would be my flower. Well, that would be part of the flower. Alright, so that's the sketch of this part of the flower. Now we're going to move that second flower and the third flower behind it and make complete that composition. So what we're gonna do in the next lesson, we add those two flowers. So you can practice this. Practice, this, draw this. It's not practicing anymore. Draw this. Once you've done that, I'll see you back in the next lesson.
7. Drawing and outlining the back Sunflower: Alright, if all goes well, you've done this and we can just move on to the next one. The next one we have here in our composition, we know that is this one here. And we're going to draw that a little bit behind the first one and just a little bit lower. So what we're gonna do is, first of all, just gonna take my pencil. And we're gonna take this flower and say, okay, where do I want it? I want it right there. Pretty much the same as I have here. Okay, so now we're gonna make it ourselves really easy with this one. That one would be around here. We're putting it down a little bit one, so k then a ghost-like here, goes here. This will be the back. The stock starts. This would be pretty much back of the flower. This will be my ends, right? Good. I'll put it down right here. And move this over L, but putting this flower down so that we can still see it. And we're going to use this angle pretty much like this. Ok, so I've cut this now and this will be my boundary box. My flour, flour is going to stay within this boundary box and then the stock comes right here. I can draw that stock already. And there you go. And this would be meeting up. So now I've got to determine the middle. See where I'm going to start. The middle would be going to add these cross hairs. This will be the middle. This is while I meet. And I wanna see, okay, I'm gonna turn this flower a little and I want to hold it like this. And your angle, and my angle probably is going to be slightly different. But let me start up serving. I see the stoke meets the flower here and I can't see that. And then we have this big part here, all these leaves and what we're gonna do for now, I'm just going to draw in that shape like that. So this is where my, this is what I see here. And I see there's all these leaves in it. And they have had point and then it will go like this points and they'll go like that point and low like it, that's now here, you wouldn't see much. So I'm just going to draw in a little bit. And then there's the leafs in-between it. Okay, now, that would be pretty nice. And I'm down here, even there's one down there. I'm not going to draw an okay. That looks great. And what I'm gonna do with this right away, I'm going to take my pen and I'm going to draw in these leaves and we're gonna start with this one. We've had a point and I'm going to let it go like that. Then I'm gonna draw in that one. And we're going to draw in this one. And with that point, and why I'm doing this is because this, this motion, this ID is in my hand. Now call muscle memory a little bit. So if I go on with the rest, I might not remember exactly the motion I made. And let's see. It would be hair to one. That is it. And then type would be the stock. And there you go. And that's true in the stock or the stock is way to Fiqh. So I'm going to make it thinner now. And that is a nice one. Alright, so that would be this flower and I'm gonna put my pen. Okay, again, I'm only my flower like this and now I'm going to observe, OK, I cut this base, ready? Now, let's see, we've got this base. So out of this base, what I'm seeing, I'm seeing some leaves coming out. I'm starting with this leaf. And that's a short leaf. And I'm gonna do the same with the next one to it. And I gotta move, let's say around. This would be pretty much rounded and I gotta move not straight, but these go at an angle. What we could do here, we could make another circle and say, okay, I want these leaves to stay in this area. Okay, I'm just throwing in some of these leaves him holding enlightened this so that you can see, okay, I've got the shortlist, the row cutoff, and now they're getting slowly, but surely they're getting longer. And this is pretty much this leaf here I'm now doing is a lot longer already. Got to make sure I'm doing this row now. This leaf disappears. We're going to add this leaf here with that curve. Lived right down and make sure I draw my leaves out of this heart and not outside of it. Then we have some leaves there. And we have a leaf behind there and we've cut straight leaf there. Okay, we're gonna do it like this. This two. And now I'm going to say, okay, what do I see? Turned, I have this little bit and now I see that hard there. And that would be in there would be the heart. And out of the heart come these petals and I'm gonna draw in just the petals I observe and not go outside of the boundary I made for them. Okay? And I'm going to look there. And I see it as a petal there, as a major petal there. And then there's a petal coming out there, K, Let's start with middle petals. And. They're not pointed as Ds because day bends. So you get slightly different shape except for, for example, this one, this has that nice shape. We're gonna just follow that. And then we're going to do it like this. So you get that shape in it. And we're gonna do this one, will do the in-depth between petals later on is a petal that is pretty much banded to. And here, what do we have here? On this side? We have this petal here that moves like this. Okay? And these all bends a little bit and one disk goes pretty straight again, OK. There's some, oh, there we go. That would be some of the major petals. So let's see. We have now this petal bending of this petal going off like that. Alright, now let's see inbetween back here. There is a pattern we have in this battle, this battle here, there's a petal back there, then there's one behind it. There is one comes in front of it. Let's see. These are basically all petals and we're moving petal in-between there too. And there's a petal phi1 one, right there, two, okay, and that's enough for now. Let's see, there's another one. This one if curving out a little bit. Let's add another one to adjust for the form. And let's see, we're moving one. What we could do one there that says, let's not do this or not. We're not doing this one. We're adding this one and that is enough good. Now that would be this some flour part. And what we're gonna do next is smooth it away and let's look at it for a minute and say, okay, these are pretty long, these are a lot shorter. And let's see if we look at that. That is not the idea. These are longer. So what we're gonna do is I'm going to make them longer. I'm going to add one in there. And this one, I'm gonna make longer. This one, I'll leave this one because my circle probably wasn't perfect and now I'm way more happy with this. All right, that is my second sunflower that is behind this flower. And you could do it smaller. You can do an even larger if you wanted to. That is of course up to you. And let's save some leaves. We want some leaves, some, yup. So we have a leaf going from here that is going there behind it, and you won't see much of this leaf. Same here. There's a leaf back to it. There you go, but we want a leaf out of it. This one. Off around. Now again, you could do all these boxes with it. And you can sketch right through as long as you don't draw that in, make sure you only draw what's up front. Let's add a leaf here. That one comes in right there. Okay? And let's add a leaf. Pi and his hair coat. Now, that is nice, and we have those leaves now. Then we only need imaginary a leaf here. And that would go right there. So you can draw the whole leaf as long as one we're going to use Inc., We're not going to draw in all of that so I can put this one away again. Kept my pencil and what I'm gonna do first with this one, I'm gonna do those leafs. I'm starting with this leaf. And I'm doing this on purpose. Make the petal a bit strong so that I remember what I've done now. I don't have to draw that. I do have to draw this. And there you go. And I'm going to draw this leaf. And that list pretty much comes out of their ego. Ok, this leaf here. I've done this leaf now wanna do this leaf. And that goes behind it and you won't see the rest of it. And now there is this leaf. And that goes a little bit there. K. And there you go. Those would be tos will be my leafs. So I got that down. If you have slow drying, aim to make sure you let it dry. And now I'm going to start with the rest of this flower. And let's see, I'm kinda get that wasn't petal here. That wasn't petal here. And we had petal going there and having a petal here still. And we're having pets or going out of it. And we're having a petal there still, then we're seeing part of the heart. So I'm just gonna at that n2. And then we're gonna do this. Petal Ham makes sure we're only doing the petals. And remember, we're not doing the middle lines, we're only doing the petals for now and petaled behind it. And now we've got to wait for a little while. And now I'm going to, let's see, I'm going to start here now. Do this part. Start with this petal. That's a bit cutoff. And we have this petal make sure goes all the way to the heart. And we have this petal. This petal, We need to thicken a bit. Then there is this petal. Then let's see, we're having this petal is the easy one. We done that. Let's do this petal and this petal and this petal before it. And then there is pattern behind it. And let's see now this is a curved petal and right behind there is another petal. And right here there's a petal cutoff to, okay. And that will be this. Now we leave this to dry a little bit and then we just take a razor and I can start at the bottom and one side, move, remove all my pencil. You can see now it looks right away way better than it is. All of this. Let's get rid of all the pencil. Now's your pencil would cause well, not smear as much as mine does because I'm using my HB pencil for the video, but no, I'm sorry, I'm not using an HTTP and pencil. You're using HB, I'm using a to B and that's smudge is just so much easier. Okay, let's see if I got rid of everything. Continuing my mess. And we've got to some flowers by an app. Good. Alright, move to, let's see. We're going to add some heart and it seems like I've made a mark here, so let's make use of Denmark. Here. We're having mark here of going through the middle of this one gets to that one, gets one, this one. Let's do too close to each other. And let's give it this 112 Ds we're giving to. This one gets one, this one gets 21 there. Let's do free on this one. This one will go through the middle side and a bit on the top. And let's add a little bit there. This one goes like that. And as you can see what just making that up a little bit. And there you go. Now. Onward, continue here a little bit. And that will be the second sunflower. Now I got to bring in those seats are the seats aren't there yet in mind, but okay. And that would be it. That would be a heart. And later on we're gonna work with colorant gift. It is definitely a different color. Adding a little bit of seats. Top there. There you go. That's the second one behind it. I see I haven't erased this properly. So let's do that. Alright, curve would be this one. Okay? This lesson, we've cut this one now. So I would say, going, draw yours. Then erase all of your pencil marks and then you have, you are left with this composition. Nice. Now we only need that flower here. I'll do that in the next lesson. So you do this one. And then once you've done that one, I'll see you in the next lesson.
8. Drawing and outlining the little Sunflower: Welcome back. We're gonna do the last one, the last one we had here, sorry, this one, this one we've done and now we need that last one behind there. And we're going to just take small little flower, the baby, some flour. And I want to have that around here. And you can't tell it like I do in each trait because sunflowers grow straight and I wanted it to be here. Let's put it here. Now if this one too, I can make it myself a bit easy and I can say, okay, I'm drawing a rectangle. This is where that flower needs to go in and this is where the stock will go right down there. Okay? So this is my boundary box. Okay? Now this one we're gonna do from the side so we can put it down from the side. And we're going to observe what is happening. First of all, I still want to find the middle and that goes there. And I could have known that since the stock is there. Let's draw that stock a bit thicker right away, but not as thick as DES it is of course, a smaller one. So we'll have that. Okay. Now let's see, with this one, we're starting here with a little square and that is basically more or less goes here, but that disappears in that other flower. So when don't see much of it. We're seeing some of these as we've seen with the other some of these leaves coming out and that's about it. The rest we do not really see. We're going to focus on the petals right away. And I'm holding it like this. Now what do I see? I see this pet off from here. And with these petals, you see that some of the unknowns and the outer ones aren't as long. Okay. Well, had to sharpen my pencil in between. I see it's almost gone. So this larger ones and they're shorter one. Let's start with this one here. Then there is one right here, and there is one behind it, right there. And then you have these once curving off like they're decide what is only here is basically dead flat one here and that's it. And then we'll have that one moving behind. But let's start now with this one. And I'm drawing, looking at that and that comes to me a little bit. So I'm drawing that folds, this is folded to me. I'm exaggerating a little bit as you can see. So there you go, and you get the impression that it's a little bit folded. I'm gonna do the same with this one. So I'm going to make it a bit square on the top and I'm going to give that a little bit of the fault. And this one, there's two, there's one that is pushed that I have done. One is gonna go like that and the other one goes right behind it like this. So we have this petal among them. Do now, take my pen and I'm making sure that's starts zooming in with it. It's okay, there's my flower. So I have drawn this. And what I'm gonna do first, I'm going to draw in as I did there. Is that hard again with those pointy parts? And I'm gonna draw in one there. And you would see a little bit there. And you basically would see some of it dare to, that's good. And what I do now is I'm gonna draw in these right away. And I want to make this a bit more pointy. Now I'm gonna draw this one and make that pointed to. And then there is a leaf going there and right behind it, there is a leaf like that. And now I've got that straight away in my ink already. And now there's this one now my just, just do that too. And that is just like this. And there's more behind it, but we'll draw them with the pencil again. Okay, so we got this part now, and now we're seeing that there is one there, but you don't really see that anymore. Let's see where we end. We end up out there. And you can hardly see that. So ending with this one, let me do that for you now you can see it better than there's one going there and then there's one going there. And let me check. Then I see there is one behind it. I am just drawing that in with my pen right away. And now I've got a look here. And I see some petals behind their tilting it a little bit so that I can see it. Pick petal there. Now, we're removing this petal here. We see this petal we're doing. Alright, that goes back to then there is a large one here that goes there and then we have these behind it. There. Put like that. And then I've got the watch and say, okay, I see one there and I'm doing that one like this. And that's the one behind it. See? Just one inbetween and let's do a big one there, okay, that will be good enough for this one. Starting with this one. Then you have these 1's going to the back or folded. This one has occur. This one not this one is in front of it. And there we go. And we've pretty much, let's put this one into. There would be this little sunflower behind there. And let's leave it like this. And let's look at the leaves. Now there's a leaf. So if this is stock, there's a leaf coming straight here. And let's add that to their ego. Then there's C leaf up there and we wouldn't see this little leaf here. We would see, we would see this leaf and bit of it. And withdrawing that in like that. Good, that would be a leaf right here, which we only see the end of. And then there would be, there is no leaf here. There's this leaf that is down here as one to one in the back. Let's draw that in making a curve. And there we go. There's another leaf, then there is this leaf. And I'm drawing it in. But that is again behind it so you wouldn't see much of it. Then we have this leaf here. But that would be all behind here. So then we get to this leaf, this will be the last leaf we do. Let it curve and let it go down. And I'm going to leave that leaf, that leaf, I'm going to leave like that. Then there would be one here, but that would basically behind and that is it. So we have these leaves. Good. Let's put that on one runway again. Start with a stock, of course, Troy it, where it is. Good, that is there. And then we're going to start with the leaf on top. That is this one. I'm sketching that leave in same here. I'm sketching this live in k and appropriately, I would say you haven't seen me doing this, but this could be a skip. This one this is behind and I did this one on the here. And there's one behind, you wouldn't see that, but you will see a little bit of this. And then we decided that bit of leaf points comes out of there and this leaf, okay. This one you wouldn't see, but this one you do see. And there we go. And this one, this you don't see that. Is it alright, that dad is it at this all of it. Let me make this one slightly longer. Meets with the rest. Good. Then only we, the only thing we could do, and we have a leaf at C, we have this leaf coming there now that's good. That might be we take to a leaf right here. And we're gonna do with this one that would come from here. And I'm just imaginary drawing elif in like that, good. That would be dead leaf here. And I would see a little bit of the leaf right behind there. That's good enough, good with this leaves. These leaves we've cut now. And this should be dry. So let's first erase this again and get rid of all the pencil. Now. We clearly see what we have made and clearly see that we're missing something too. Alright, now that's good. And that would be this. A bit more there. Alright, now the sunflower up here, we gotta do something about this. We haven't done any nerves on this one. So let me add again some, some from the centre, some not from the center. And I'm sketching these in again. This one behind there. There is one that is better. And now this, these leaves here add just some very faint nerves, veins. And the veins, they are nerves as Dutch thing that's English. Getting on your nerves. Something else than a vein, right? And that looks right away a lot better. And we'll do that with these two. And I think I'll have to erase a little bit there. But let's stuffed derive a gay rights. And I'm going to let this dry. And that is flour is zoom-out. And there we go. Pinch-off, mess around here, get rid of it, not their head. K. C. If this has dried by now, some smudging on here. And we get rid of this matching here. And there is our pen sketch of it. Now of course, it needs to get some color, but before we give it some color, I want to add some shape to it with the pencil. I have this one going on a little bit and I'm going to just check, see if I've done everything. I think I've done everything, so there will be it for this lesson. Alright, we've got the sunflowers ready. So we have one front, one in the back. And we're going to continue with this. Alright here a little bit. Let's and that's a little bit of a lying there. Alright, good. Have fun doing this one. I'll see you in the next lesson. We're going to add some shading.
9. Shading through stippling: Welcome back. Now, you should have this and we can continue with this. We could write away, take are what are called pencils and work on this. But what we can do, we can add with ink and little bit of shading, and that is what we are going to do next. So let me put this aside for now. Let me get that scrap piece of paper which we did some scribbles on before. Now we have this square here and wish the square lets imagine that sunshine's here from this side. Now if that would happen to this square, then obviously decide if the square here, we'll get a lot of light. And of course, this side will get hardly any light, and this will just be bits in the middle. Okay? And that's all you need to know for now for light and shadow, light shines where it hits first. That is really bright and where it doesn't hit, where it can't comment gets darker. No, you can't do this with lie like I did with this pencil. I can shade it in. Get night nice tones Now I cannot do that with pen. You could do that with pen, but it takes a really, really long time. We didn't want to do that because we want to add color. So I need to find a quick way to draw this in. What we're gonna do. For this, we're gonna use dots. And what we're going to do if it does, we're just gonna get that same pencil. We have nice thick pencil. And what I'm gonna do is I'm going to start at the opposite way site and I'm going to just add dots like this. And the more dots Siad, The more you think that there is shade. And there you go. And then slowly and surely. Here we're gonna do as dots. And the closer we get to the light, there's hardly any dots. And as you can see my doubts because I'll go very quickly, turn into stripes a little bit. And few there here and there. Make a bit of a transition here at some more here. And we're going to just go and up and down. Let's go over that. Remember what Elias Little bit where there's no light a lot? Yep. Okay. Let's get our flower with it and there is our flower. Now we're gonna do the same here. We're just going to pretend like comes from this side. So opposite from the light there. A lot of darkness and close to the light areas. A lot easiest way to do is we're gonna do is I'm going to go right away with my pen. And we're gonna look at this petal here. This petal. And we'll say OK, at the base. And we're gonna put it up, right? Just put in these dots. At the base there is a lot and then slowly, I'm stopping with it. Same here. At the base. Doesn't look like comes from here. So there's going to be less there, but at the base there's gonna be a lot of dots. And this one, I'm going to add some more at the base. All right. And that looks pretty cool, doesn't it? Okay, let's move to the next one now, this petal, this petal here, and what you can do to you could put these petals, imagine life comes from here. So if I do this petal, then the light would basically hit most of the light there and the least light will hit there. And that is what you could do if all petals dislike here to this, we'll get a lot of light, but light there. This one light comes from here, so it hits around here. And then the second is Docker there. And you could do that with every petal divided up, every leaf stock even I'm just gonna do it in my head and I'll talk you through it. So I have done this one. So that means at the bottom I'm going to ask most of my dots and then I'm gonna go easier on the dots. And just a few random, they're a bit more at the bottom. And that sits, now this one here. I'm going to give way more because that one is a Gao around that is in the back. So I'm gonna give that a bit more. And now you can see there is some variation to, let's do this one. Then. We said a love here at the bottom. And now I notice that this petal isn't complete, so I have to add that bottom line. And we'll do a little bit and there's a few here. Let's go for this one in the back. Deck ads of feasibly more dots. And then a little bit dots there and around the edge. Let's add just a few more dots. Let's do that here too. Where there are these edges, we're going to add some dots and there you go, good. Now, behind here would be dark, Dan would be a lot of light. Let me draw it like that. So in adults would come here and you can do a lot of dots around hair day go. And with this one or light hits mainly there. And the more I get to the bottom, the darker it gets a little bit map. And around this edge, I wanna do some more. Okay. Same with this one. Yep, connected the dots, not up top there. And slowly, when we get to the base of this, I'm going to add some more of it. And around this side too. Okay. And then we're gonna do, let's see, there's a petal behind here, this petal. And we're gonna give that quiet a lot of dots. And this one, we're just gonna add some dots for. We know that shadow IS, But span the warmness could know this petal here Around DH, we'd get the dots. And that's good for that one. This one in the back had adding this dots. And now I'm gonna not gonna put dots on this part, and I'm gonna do that on purpose. So that stands out around yet should have it now the petal behind it. We're gonna give quite some dots again. And let's see, there's something missing there too, and then we need quite a few there. Okay, good. This one is missing to this one. Light shines here a little bit. Let's not do too many dots on it. This one, if the light comes from here and light could hit a little bit hair. If it's some dots around the edges, Dan. And the rest is gonna leave wide-open. And this one is in the back, the petals, some who may show tip moves into T2 by adding quite some dots. Okay, now, that's nice, but we're gonna do now. We're going to continue with this in a minute. We're going to add up hand around the edges. Shadow is, we're going to add a little bit of a line. But only of course we have petals touched petals. So I'm not there because there is no petal there. But there is a petal touching there. And they're a little bit here to behind there. Kind of are a little bit. And that's it. Okay. I'm bringing a little bit more depth in it. Okay, good. Here too. Inside the line and outside on that petal two. And then round down a little bit more. It would be a bit, OK, let's continue here to him. And to be quite some ham. And as you can see, even in the parts where I haven't been yet, this right away looks. So if we're talking about deeper pots and not deeper parts, and now let's continue. Let's see you do this 1 first, that is really behind it. Okay, and then we've this petal light comes from here. So the light would hit here first. And then I'm gonna add some random and a bit more down there. That's good enough to make sure you clearly see the difference between that there's a pet along the red and the petal above it. Let's see, we have this one here that has folded a bit. So I'm gonna add some dots, right that at some dots up there, and that's good enough. Okay, cut the mono here. We need some dots on this one. And let's not do that part there. That's why some light would come. That's mainly due, it's Around DH, and this one on life comes from here. So this bond will be. Lights. So I'm just moving our dots around the edge DE hago. Now, there's a petal here that's pretty much behind it. Lets the other way. And the same for this one. There's a lot of dots but not there because light would be hitting there. Now, this one light is coming here. And the same would go for this one. The light would be there and there too. So let's add a shadow Around DH. And there you go. Now that's our sunflower dots on it, some shading on another later on, whole add color to it. And then the whole thing of course, starts to look pretty much different again. And I'm just looking at it and say, okay, I want to have some dark spots at some of these pots K. Make sure I erased that, then I'll miss discipline is very delta's around that. And hockey and there. Okay. Now, our BY debt, good. Ted is some flour. All rights. Let's move to this one. Okay, let's see. Let's do the stock first. The stock on the light comes from here. Now this would be pretty dark. And around this etch, I would add some dots here and deaf focusing mainly on that edge, but not many like this status good, might as well do this stock to buy up. Dad doesn't leave blocking the light, so that would be quite some shadow. Same HER2 and the same here too. Okay, you have seen that looks great already. I need to let this dry and I can move my hands, but I'm going up like this now here to this would have shading a lot. And there you go. Same here to stock, hey, would be shading and then slowly but surely has less than, less than that would count here to update as to shading. And that wouldn't be much shade that. Okay. And we've got an F and a lot of dots here, still. Good. Alright, the step, let's do the little flower now, moving from this site and they'll do Deliver Flowers, do this one. Now, here's the easy part. Life comes from here. And let's start with this one. So this will get a bit of light, not just won't get much light. Same hair. There won't be much lights in there. But there will be sunlight and discipline to on the edge hardly any light. Let's see. This is one big petals, so some lights. But not much light down there. Same here. Light comes from here, so this will be lighted. Less light down there as you can see, I'm a being a bit more spatially here. So I wanted the attention to be of this one, focused on this, this one we do, but we do a bit less. Same headlight comes from here. This part will be in shadow. Now this one here totally be in shadow, but let's make sure we're not going to go as dark as we've done on these pots. Around the edge a little bit, this one would be pretty much gone and swallow. I've done this one, then I can Terman determine how much I want on here. Alright, this one is gone to pretty much back here a little bit, this one. And this one is gone. Okay, that would be this one. Now the light still comes from here. For this one, that means not much light up there, but a lot of light on this area. This one would catch bit of const shadow there and there you go. And this one we need some disc will be enlight, participle be less light, OK? At some random dots here and there. This one we need to do. Shadow here. Light of that. Good. Now let's see why these lines are and we're gonna do the same as we did on the other one. Who had lice, sorry, where these petals overlap, we're going to add these lines so that you can see it better. Some dots that this would be overlapping ponds, This would be overlapping. This will be here and here. Okay. Alright, How about dance? That looks pretty good. Now we have these petals on the Hare course. Catch too much lives, but we just gonna play some random dots here and there. This will be a shadow or do that live at not so much. The pinch attention goes to this one. Now let's tease lines a bit where they overlap. This one. Okay? And then there's these lines here. These petals. Make them just a bit more obvious. Okay. Good, that's a good flower, but let's do some leaves. Let's go for this leaf is and the back. So we're going to just add some dots everywhere. Same here in the back. This one is in the back, but catching light there still. This is in the back. So let's see this one. This sun light coming there, but the rest is in the back. This to half of it in the shadow. This one is under there. So let's give that some dots. This one is up here, but catching sunlight there. This one will catch most of the light. This one wouldn't catch too much light. This one will be blocked a bit by this one, but still cutting some light. There. We have c, this one on the hair. Come, this one on the hair. Gone to, good. Might this one back here. Now gone to add a bit of random. Now let's focus on this one. Some shadow lines around desk. I'm shadow here. And let's do it at first here, some shadow, a little bit. And this line would need to be a bit thicker. And this one would need to be with thicker. Ok, good. All right, around here it faker. And this one that is good. And we have these major big leaves still we done all the small ones. Let's move to the big one. A life comes from here, so these will be in shadow and this folds here. I'm going to give quite a bit more shadow. Same for this, the light will be hitting in this area. So what adults would come here? And the same for this one and this is a fold. So what does various behind their Diego AT won't catch much light around this edge a little bit. And that's good enough. This one folder to your pull too. So we're gonna go shadow and then at our major shadows around here. Okay, good. So I'm random here of this one we still need to do. Life comes from hears of this pi would be enlight. This pot wouldn't be bit random here. Now we only have this flower left. That's it for this, this flower. Light would be coming from here. Digital catch some light per pound. They're much, much disputes be catching a lot of light. See this one rupee that won't catch, this one wouldn't catch much too much light needed route. These back there. On the hair up much light, but this one will be light. It's not much light here. Now, these would be in shade and debts it or leave it at that. Okay. So that's some more around this edge of the stock. Okay? Pit that leaf k. Now we got some definite sum, light and shadow going on, and that would be it for this part of the lesson. I'm going to leave it like this. So we have added some shade with some random dots, not, not random controlled random dots. Let's call him that way. We did this a little bit, some stippling and we stippled dot, dots, you call a stippling really. So stippling, we did some stippling, although stippling would be way more than we do, which is use it to signify, Hey, look, there's light coming from a certain part of the shadow on the other side. But the one thing we still need to do is this heart. If the light is coming from here. Now we've done it already in this hot here. Let's add some darker hair so that, that heart comes out again. This heart. If that would be light on this one, the light would be coming from in here. So then this side will be a bit darker. The light major life would be hitting, but this would catch some decide would get some shadow of these petals. So we're just going to add that in. And that's it. And then there would be some shadow page, random Madonna too much. Well, I'm going to do too much. We're gonna do it around. That's psi to bring that bit deeper. Good. We'll leave it like this. Don't touch this anymore. There's good, alright? Or just want to have a little bit there. And that's it, good, okay, that would be this lesson. We can move to the next step. I think the next step would be adding our color. And there will be in two stages, but of course, data is for the next one. Now, add your stippling to it. And once you've done all these dots to stippling, then I'll see you in the next lesson.
10. Painting with Watercolor Pencils 1: Welcome to this lesson where we're going and finally, we are gonna paint this flower. Now makes sure the paper is clean. What do you need for this lesson? We of course need to finish sunflower. And now I see that my sunflower has still some pencil markings on it. So let me get rid of dos and do that. You need, of course. Then some watercolor pencils. Now for watercolor pencils, you have a choice. And what I'm gonna do is, I'm going to just start with a set of 12. These are Coen or mandalas. A3s are reasonably priced, pretty good ones. You could use a satellite this Farber, costal, Oberth, doula. I'm also 12 pencils. These are quite more expensive, quite a bit more expensive than these. And what I'm gonna do, I'm gonna use a set of 12 and show you that if you only have a limited option and colors, how are you going to handle that? The next thing, what I'm gonna do is I want to switch to another set. And that is the Farber Castile Goldfarb across. And these are studio quality that column really student quality pencils. So actually now the different, they're quite different, different set from this. This would be a good set, affordable, really good set that is very affordable. And then the third thing, what I'm gonna do, and to show you, I'm going to use then this set, these are the fan go watercolor pencils. And these are top range pencil. So these are really good. Comparable to these Farber Castells, our tutors or BAU would say that fan girls are actually even a bit better. So then we have a bit of a range. So we do a limited set students set, and then we do a really top range set. And then you can see how you can work with those. And depending on what you have, you can just follow along whatever you have, doesn't matter. Just follow along with what you have. Now the next thing you may need is a paper towel if something goes wrong and I'll probably Let's see. I'm not sure if I'm going to make mistakes, make mistakes. Of course if I do, I'll show you that how to use it. If not, then we'll do that at the end. What you may also need is of course, some brushes that is handy. I'll get them windmill water, Of course, I ever did in a little jar of water. And you don't need a lot of water for watercolor pencils. And of course your brushes. What I'm going to use this just a cheap set of brushes. I got from probably from China's somewhere you can pick up in any store. Sba will cooperate and allow me to open it. And that is just a set with arrange. Now, the size which I'm going to use is this one. That's the number four. And I'm going to use a smaller one. And let's see, I have a number one, number two, let us pick up, pick a number two. And but he also could use a five or six would work fine too. And if you have a two or a three, that would be great. If you only have one brush. That works fine to then get this one. This is a round brush for, I'm going to use that you could use a five or six that might speed up things a little bit. What we've, this one, we can work nicely and accurately and this is just a cheap brush from China, so, but it works fine with watercolor pencils. If you have expensive brushes, Dan, fine too, but I just want to demonstrate this with regular materials anyone could get. So you could pick this up in any store. Just makes sure that if you pick up some brushes that they are suitable for water color and not acrylic and oil only if the acrylic and oil only daily work with this. But if you have watercolour brush, it works a lot better. The next thing we're going to use this, you may need a scrap piece of political or paper, and this depends a little bit on your watercolor pencils. And I'm going to use this plate, just regular plates. And depending on your watercolor pencils, but I'll explain that as we go. And we're gonna use a cotton swab that is like this. Cotton bought cotton swab, Q-Tip, whatever they're called in your country. We're going to use this to for some effect. And I think that's a valid water. Yes, we cut the water Now, of course, and the flowers, I need the flowers. So I still have these flowers. And here they are. They're still good. And I'm going to just look at the flower a little, little bit. And then I'm going to say, okay, I see some colors and I'm going to try to bring in those columns and I see a nice bright yellow, bit more brownish yellow, then there's green here. And not a bright green and as a very pale green. And we're going to see if we're going to manage to do the pale green that will be challenged. Probably we're going to go a bit darker with it just to get a better and nicer affects. Alright, so let's start with these. I'm gonna start, let's see, I'm going to start with this flower here, not the main flour. I'm going to start with this flower right there. And then I'll have this limited selection of colors. So I have to work off that. And of course, I definitely need yellow, orange just a little bit. And I need a light brown, That would be this one. And we're going to need green. And I see that in this set, there's two greens in it. And so we're going to use the greens and the rest of the colors. The other column we need to is a dark blue. And there should be a dark blue in here too. That is it. These are the colors we're going to need. And we're going to work with now since I have two greens. Most likely let me check the Father Costello box. That has two greens too. So we're just going to make use of probably two greens. But let's start with this screen and then let's get going. Okay. Make sure that your watercolor pencils have appointed. They don't need to have a sharp point and you could do them really sharp, but there's no need for that full watercolor pencils just as long as they have a good point. Now, let's get started. So let's see if I have this flour. I need to decide where light comes from, of course, and we did that already with the stippling, we did. So the light we said comes from here. So let's go for what I'm gonna do. I'm going to start with these leaves. And since I have one pencil, what I'm gonna do, I'm gonna draw just as a regular pen. So, but I'm going to draw the whole flower, sorry, petal, one petal. And where the shaders at the bottom, let's say the bottom and around the site. And we're going to use some. And on this side, I'm not gonna do anything with, and I'm gonna do that basically with every petal. And we've already decided where light and shade is. I'm going to just put a nice layer of color on it. And let's see, here's 12. This one gets a bit more comma. And see I'm turning my pencil around once in a while so that I keep a sharp tip. And I'm doing the whole flower, the whole, this whole flower. Normally you could do the whole thing really, but work, since we are going to work with different kinds of watercolor pencils. I'm just gonna start with one. So everywhere where we decided that there is shade, that is where I'm adding this pencil. Now we have this one to this we do at the bottom these. Okay, now, that's good. Now you have a choice now to introduce this or leave B and go to the next color. And we're gonna go simply right away to the next column. Now the next color I'm gonna need a little look at this flower. Is that hard, of course, and at heart we said is a bit darker yellow. So I'm gonna use my yellow and brown. Some gotta do this yellow, where that heart is and you don't see much of the heart anyway. And the next thing I'm gonna do, I'm just going to mix in this brown a little bit, not too heavy, but a bit of an application of this Brown. And that is really all we need there. Now you could bring in a little bit of just a little bit of orange, but not too much. And let's see, we need some around. There. Good. Alright, and we're going to leave that. The next column we need is that Green. And I'm gonna see what happens with an amused. And we're going to use disagree. Let's see, dad is a petal, so I don't wanna do this screen. This is not a Pareto. This is not a Pareto. This is good and the Someone's green. And as you can see, this petal on purpose, I'm not calling with the whole petal, I'm just going with a part of it and this screen to just behind there and just a little bit there. So I'm gonna leave that now in the same green I'm going to use on the leaves. And I'm gonna do one side of the leaf, the stock, I'm gonna do one side, put behind the same with this leaf. Here, leaf and then the stock on one side. Now this is not his leaf, this is one of his leaves. And most likely by using different brands, we're gonna get some variation in colors too of this. Good. Now I think this is pretty dark already, so I'm gonna just leave it if you have a lighter one. We're gonna do that in the next one to mix in a very dark color. But I'm gonna use this dark color a little bit around the edge of a leaf, around that edge. And where the shadow is, little bit there, that will be good. And let's see. There's, of course these leaves still shadow there and a little bit there. And we have this leaf. And of course, this little leaf on the bottom. I'm going to bring in a dark color pit around the edge and where the shadow parties around the edge and there's some shadow and around the edge here too. Good. And let's say you want a bit more on that one, okay? And that would be overcome to Duke. And as you can see, we're not gonna do the whole thing. And if all is well now what we're gonna do is get this brush and, and I think I'll put that aside somewhere. That brush and R, The next thing you need is your water. Now normally, don't put your water as I do. Okay. Do not do this. Since I have some paper leftover, I can do that. And since I want you to see what I'm doing, I'm putting it there, but normally you would put it aside of your drawing, of course. So do not do this. What I'm doing, put it aside and then if you spill and it won't spill on your paper. Okay. I want to just get this brush, dividend, dip it in water. And if you have a new brush and it's probably going to be stiff. So you want to move it around a little bit until it gets really soft. Now not touching this with my finger but on my near c, That is nice and soft. Don't touch your brush part with your fingers because you have oil sonnet. Okay. And now we're just gonna start, and I'm going to start at the top, the top swans. And I'm just going to start painting and I have quite some water. And as you can see. This moves around really nice and picking up a color. And I'm just distributing it. And as you can see, it's light is there and it's dark in there. And you go, make sure I get everything with it. Good. And that needs to drive if you have too much water and just let it dry for awhile or what you could do, you could pick up your collar and then pick up water and then orbit to the side to get rid of that first main axes mean water, but then you would have to do this a lot more depending on your brush. Okay. And at a certain point you will notice that your brush just doesn't pick up color anymore, doesn't move around, and then it's time to wet it again. You couldn't very wedded with every petal you do, but you don't have to, since it's picking up. If you have a reasonable brush, even a cheap brush like this is picking up quite some water and as you can see, you don't need to dip it in all the way anyway. Just dipping in the tip would be enough. If you do petal by petal, that would be a way that would be more than enough. And I'm picking this one. Okay. So then you'll get some nice light variations. We've hit. And I'm doing this one here. See if I have still enough water. Oh, yes, it does. And I'm just moving around that paint, picking it up from where it is. I'm pushing it to the other side. But as you can see, when it dries, you get these lighter parts in it and that is what we really want. And if you have a lot of water like this one has done, I'm just moving to the next 1 first painting that in and I'm picking up some of this water here again, might added on this edge a little bit. Good. Epics, the brush picks up that color a little bit. So you can make use of that. So I'm picking up the color and I'm pushing it to the side where there is no color. And let's do that again here to just painting with the scholar. And even when you put down a little bit of colon, you can still move it around well enough to get to the part where you don't have any color. Then the last bits here. Alright, and then there's some more yellow and we're gonna do color by color, of course, were not coloring by number. We're coloring by color here. And if I look at it and I picked up the scholar and I noticed that I might miss something there, then I can still add a little bit there. Okay, let's see this one step. And then the last one there. And that's it. Good. So that would be the first sunflower. Looks nice, doesn't it? Already right away, get some lighter parts, some darker parts. So if you only have a little selection of colors, you can still go a long way. And we're gonna go do this heart now. So I'm going to clean my brush for thoroughly debited cans, psych, get rid of most of the water since these are just small parts. And this one, I'm going to start at the top. And I noticed that I have quite some water, so I'm gonna move to the next ones. First before I go back to this one. And that allows me to get rid of that water. Nice. And that's all we need for that color. And we're going to just leave it like that. Make sure I get rid of most of my water and I'm gonna do the green. Start with the bigger petal. That's a nice green for this. And move that around. Pick up most of the pigment, which collects everywhere. There's a little bit left. Making use of the tip of this brush. If you press harder, of course, with the brush tended picks up a lot more of a pigment. If you press carefully, then it only picks up the tip and you can move into small, tight spaces too. Good. It looks pretty nice, doesn't it? And I'm gonna go for here's a little bit, pick that up and move that there too. And I'm going to go with this stalk. And as you can see that the light effect works great. And it gets a bit of that. Okay, oh, look like, and hence in real life, so one site really nice. And Peter Drucker and the other side's bit pale. And it looks, it's not, not as pale as what the flower is. Of course this is quite pale, but to be honest, it wasn't darker when I picked it. It just loses color slowly. The lease we're a lot darker. Two, since it has been standing for a few days already for filming and waiting to be filmed. And of course, the whole filming didn't go in one day. That just took a few days, so they go. So if it is a bit dark or it doesn't matter, I think I did stop pretty much. I'm gonna go with the leaf. And now, as you may see, I spilled a little bit next to it. And I'm just going to tap that up with this paper and I'll show you in a minute how to get rid of more of it. Let's continue. I'll let that dry sand with this, you get that really nice effect. Going from nice dark to very light, then is really nice here. Deep color and then pushing that up a little bit, picking up pigments. And I'm pushing it towards the edges a bit more. And let's see, do I have enough still? Pick up a little bit of water to do this one. See around there. Could not too much water on this tighter spaces because the more water you take, then the water will start flowing away into places you don't want it to go. Have a bit of a bigger spot like here, then you can use a bit more water. And of course, by using, as we do, the smaller brush, you do have, maintain quite some control over wherever fingers. And I want to get a little bit there, too. Nice. Alright. Let's see, I forgot to do one. Let's do that one right away. Round stock and pit there. Let's see around the edges here. And this edge to and around there, a little bit of the darker green came, not gonna do it yet. I'm going to start with this one again. K. And I'm picking up their color and I'm moving it around and blending it a little bit in so that I won't be left when it drives with harsh edges. And there is enough water in this brush to do this here, to pick up even this one. And by doing two columns, as you can see, you get some very interesting nice blends. K. Now I need to pick up a little bit of a color and move that there. And then I'll continue with painting this part with more water. So I'm blending in the two colors. And I can then do the same. And the thing I'm happy with this, this looks good. It's very tempting to just keep on going with this, but we're going to demonstrate some different ones too. So let's see. Now we're gonna look at it and say, all right, I like this. Do or not. I know I made this mistake there. So what I'm doing now is I'm going to clean my brush and I'm going to get it to wet. But I'm going to wet that part where I spills, spreading it out a little bit. And we're just gonna take a clean cloth, kitchen towel, and we're gonna just debit. And I'm gonna do that again carefully, not pressing too hard until most of it is gone. And I see that I spilled green color there. And when I'm gonna do the background, that green color is going to move for. I don't want to go. So I'm going to just get rid of it like this. Alright, good. And if you want to lift color, let's say we want this to be a bit lighter than it is now we can lift that color up and then it will go into it lighter than that. Or she could use cotton for this two. Okay? And by using this bigger tau, I'm going to spill a little bit, so I need to pick that up again. And then you get some lighter parts of the other way you could do this is goes the other way around. You get your pencil. Don't do this above your work. So I'm using this plate now. And you go, if your brush, you pick up color and then not let me put this away. And then you're going to put that color down again like this. And then you get, as you can see, a nice way darker thing. So I'm going to make use of that around some of these edges. I'm going to put some dark color, picking up that pigment. And we're gonna paint that pigment right in. And that will give me a bit of a darker color too. Now if you have more colors, we're gonna demonstrate later on, then we can add just a slightly darker color. Okay? Alright, we're not gonna do any more with this. We're going to do that. Alright, NOC, X3, wherever those wouldn't work, the roof this blue, I'm going to add some shadows now this needs to be dry as Looks nice already, but I want to add a little bit of shadow here and there. And I need to let this yellow dry now. So I'm going to start down here, although this is pretty dark already, but I'm going to demonstrate that now there's two ways to do this. And one way is, depending on your color, on the pencils or use some of them will put pigment down like this one easily on a plate. Say there's a lot of pigment there. Now, put this aside. If that doesn't work, what you can do next is if you've got. Piece of scrap watercolor paper. And you can just color a little bit. And then you're going to wet your brush. And now of course, it has picked up this color. And what I'm gonna do next, I don't wanna do that with this. Then I can move to color, see around wherever I want to. Now I don't want to use a big brush for this. I'm cleaning my bigger brush and I'm gonna go to the smaller brush, number two. And what I could do, you could, if you have a number one that is good to or if you are using a number six, perhaps you knew 100, use a number. Free. Now, what if you have to use it? So I'm gonna pick up this color. Now, you can see it's nice and blue. And what I'm gonna do carefully is with this blue, I'm going to add some shadow. Where shadow would be moved is slightly around. Nice and there's going to be shadowed there until I noticed that my brush color is current and then I'm picking up some more until there's nothing left. Let's see. We haven't done this one. Shadow right there, under there. And definitely up there. And I'm going to do that to this one and I'm going to switch. Let's say this is two blue, of course I'm gonna move that shadow around and blended in a little bit. And the other way to do this is just as I did color your plate and then start moving and now I can pick up my color on the plate away and you get, basically, they're the same effect. And I want some shadow there, shadow on the top. And then I can just pick up this plate again, little bit of water. And I can move the pigment, and now it picks up the pigment. And we can do this one and I want it more shadow right here and that one a bit darker. Nice. And now I'm gonna do carefully my petals so the petals that are deeper and we're gonna do is like this one, had some of the blue picking it up. When I have these petals, pit of a shade where the shadow line is there to this pat on the back to now this is way too strong, but we can correct that with some yellow one, it came picking up some of the pigment to this one here would be just a little bit of shadow here to some shadow there along this edge. And the more you pick up this pigment then of course, you can imagine, the more blue it will become. And of course blue and yellow is blue. This column blue turns a little bit green. Could've picked caret or black for it to what? This gives us a nice variation. And now C Move, blend this in a bit more. And by blending in, If I have done something already, I'm just picking up some clean water, clean blush some water. And I'm gonna go over the place carefully where I've been. And I'm blending that darker color a little better with that yellow C And that looks already way better. This one picking it up and I'm trying to move that up a little bit. I'm gonna do the same with this. All right? Now, that would be the way darker parts. Now I got some nice deeper tones and I got some lighter tones. And of course now these dark tones are a little bit too dark to greenish. We're gonna pick up the yellow again. And we're gonna do the same depending on your pencils and these are nice and soft. So Ds I can pick up really well. And if you can't do that, what I'm doing, then use the paper. They put the pay for a site, clean my brush wells so that all that blue is gone. And I'm going to mix this painting a little bit. And I need some water on my brush. Brush loses shapes. But if you add some water, then this goes well. And I'm going to add just a layer of yellow on this very greenish stuff. Makes that, that's okay. I'm just planning in that color by adding some more yellow pigment a bit better. Now, looks way better. Write some more yellow here. Okay, and I'm just painting. Okay. We're going to let this dry. So okay with the next one and then show you how you could do this just slightly differently too. So this will be one way to add your deeper towns, get some shadow, gets some depth to it. And it looks pretty nice, doesn't it? Alright, so that's it. That's the first one. In the next video, we're going to move to the next one. We'll use some different colored pencils, watercolour pencils. And I would say probably here depends on here, you could watch the whole video through and then do it, or you can just start with your own colored pencils, watercolour pencils and do this one, okay? And whatever choice you make, I'll see you in the next one anyway.
11. Painting with Watercolor Pencils 2: Welcome back. What we did this one, I did this one. The next thing I'm gonna do with this one here, and I'm going to use different watercolor pencils and when to use this student grade for it. And with the student grade, I have 48 pencil, so I have a lot more choice. And what I'm gonna do, I'm gonna pick up you really light yellow. And I'm gonna pick up a bit stronger, darker, yellow and I'm not picking up del one that looks yellow, still. Go to the orange sides. We're not gonna do that. We're going to pick up these two. And then we of course needs ONE very dark blue and that would be pretty much this one. And with two code farmers, there's no colors on it. Sorry, no dust numbers on it, but not any kind of put this aside, not put this on my worth any names on it. So that will pretty much be dark as blue. And I need some greens and I got quite some choice here. So I'm going to do with this one. We're going to pick up light green and I'm gonna pick up definitely this darker green. This will be a nice combination. Ends I need no heart here, so that is all the colors I need. I don't need the heart. So if I will do the heart, I will pick up very light brown here and mix it in with that yellow and get some more shade. But we're gonna do that here later on. Now we're going to focus on this one. When we put this all the way. So I'm picking these colors. Now the only difference, what I'm gonna do is with these petals. What I'm gonna do, I'm getting this very light yellow. And instead of like edit their only do a site, I'm going to color everything in every petal there is with this very light color. And I'm gonna make sure I'm not doing green is supposed to go. And I'm not gonna press really hard with this as with the other ones, put down a lot of pigment. Putting them first application, go everywhere and that's it lightly. And then the next one, what we're gonna do if the darker one, we're gonna do the same. And I'm going to do bottoms only of every pattern. And not my shading. I'm just gonna disregard shading. I'm gonna do only the bottoms of these patterns with this color. Those I'm gonna definitely do, those are darker. So that said, Alright, that's what I'm gonna do. I'm gonna do a nice application of dark. If this. Alright, the next thing I want to pick up that lightest green. And I'm gonna do my green parts. And with this one, I'm gonna do half because I want that faded effect. Same with the leaves. Only do them partly except for this one. I want that one to be darker. Is one more leaf, I think. Kurt, did I have here? This one is start at the top because this, this leaf casts a shadow onto the leaf under there. So I'm going to start that one only the top half, and there will be it. And I'm gonna take that darker color and only do a little bit around. Shadow would be. And blend that in here a little bit at the bottom. And that's good. And we're going to switch screens. I'm gonna see if I have an even do have really dark one. And for this, this one going to add a layer where the shadow would be. And right at the edge. Just one layer. Dark colorant can remove some of the dark color in there to exit somewhere. Have free covers NOW, some have two colors now. And get my brush again. Clean it, make sure everything is out and I'm just going to start working and start with just petal here. And I'm going to go from petal two pattern. And as you can see, pretty much getting the same effect as with the other one. It's more controlled with this one. So having a dark color at the base and we are now having a lighter color. Okay. That will be my k can go to the green, the green there. And now you could get the little brush for this. Since this has a nice and firm tip. If you don't have that nice and firm tip it, then go for a smaller brush. And we're gonna do the stock first. And moving from the shadow. And I'm moving it from the shadow and moving it down to get that nice faded effect, strong edge, faded effect. And the next I can go to the lease will do the same from the dark. I'm pushing it to where does nothing and you get this nice light effect. I want this to be blended a bit more. And there you go. Same here I'm picking up the top color and I'm moving it down so that I get this dark and light effect. And you can see right away that these are very different colors. These are much more muted colors, I would say, and whenever I use this one, I would say, always call these retro collars and they are a bit ritual called fibrous. Some of the original things farmer Costello made years ago and then brought them back into a new set. So these are indeed bit retro colors, but very nice. And now you can see that you could mix up. If look at this color, this mix is quite a lot closer to what the real flowers then this is. And still we're making some nuances and we're working with what we have. So if you have the opportunity to have more colors than I would definitely experiment with it on a piece of paper. And just make some swatches SO a little bit and see which colors would be closest to what the flowers in real life. Good, that's it. Now the disadvantage of these colored pencils, and you may see that right away so that they blend not as good as the coincident. The corners are very pigment that still it looks good. Alright, and that's, that's it. I'll leave that to dry now and pretty happy with that right away. So I'm not going to do a lot of work. This is a bit of a background flower anyway, so I want the attention focus to be more on here. So I now have some new answers in color. And the advantage of this having this light, really light colors is that this looks now further away and this looks closer to what we are. So you get a bit of depth. Okay, I will picked up w. And this blue has a reasonably SharePoint. And what we're gonna do if this is dry and it dries pretty quickly. I'm going to use this blue to bring in some shadows. I'm not like here I did painted them. I'm not going to paint in the shadows. So I want some shadow along this edge here. And I'm sure you can see I'm bringing it in. I want a little bit of shadow around that edge and I'm just coloring now. And there you go. I want some shadow, mainly rounded edge there too. And you have the choice. If you have a set of colored pencils in the same ranged, and you could do this with actually a colored pencil pen. Paper is a little bit wet stale, so that to my font ij that is color blends in a little bit. And let's see here two now here would be some shadow and I'm gonna do that here quite carefully. I rounded edge coloring that just a little bit, get a bit of dark tone around the bottom two. And we're not going to use the water. So I want some here to little bit, because they won, that battle is folded. So once a shadow on the bottom, that is good. And very lightly, I'm using this pencil now. Really lightly. If you let it all dry totally first, then this won't work as well. And that's it. I'm going to leave this. And I might go back to this flower. And just along some of the edges. Any bit of the shadow color here. With this column. You need a nice dark blue for it. I wouldn't pick a black tau then rather pick a very dark gray. Because if you pick a black, it's very unnatural. Because shadows arms just black shadows have even shadows have some tones in it. So now you look at this, looks really nice. And then my two someone, this bottom two of which are there. And around when is petal meets it today. So how about that bit here? Casts shadow. There are two shadow cast. Alright, and I can see that right away adds some nice depth here. Two bit, just a little bit. Okay, it's going to stop. Put aside, I might use that later on again. I am going to use a different pencil. Ok, good, that will be the second set. Basically what I'm gonna do now if this, I don't like this blends here. So I'm picking up my pen ansi of penn push and see if I can get a bit more blended. Although that would be tough to do with these pencils, but works. That's a nice blend, okay. Now, if you go too often, too wet, then the paper eventually will damage. We don't want that. Although we still have quite a while for that to happen C, And now I'm blending in that color a bit nicer than what I have k. I want some of those there. And that's it. Alright, good. Let's move this a little bit here. Interesting shape going on now. That set for this one. Okay. I'll clean up, I'll get rid of my pencils. And I'll clean them up pencils. And when this is Dr. we're gonna move to the last part and that will be this flower. So, yeah, either work on this one now with your parents, your watercolor pencils, or move to the next video and I'll see you there.
12. Painting with Watercolor Pencils 3: With this one, we didn't do the same as here bringing the X-ray yellow. I don't want this with this one. I want this one to keep hit with pale. Go to the back, this one more to the front. And I guess a nice depth ideas. So this one will leave bit, also the yellow, a little bit more pale and picked up on purpose. And very light yellow to This is nice and strong, or going to the next one. And for the next one. I'm going to use this set and left me, unlike put a little paper under it. And now these are 60 colors. So a lot more again, what I'm gonna do is I'm going to use very pill and a very strong yellow. This is really a very pale yellow. And what I'm gonna do next, I'm going to use a bluish green is a very dark bluish green. And I'm gonna get this tray out and there's more colors under it. And I'm gonna go again four, quite a bright green, mixing that in with a darker green. This is called permanent Deep Green and this is permanent yellowish green. And let's see. Then for the heart, I'm going to go with this yellow. This is an ochre color. And I might mix in some of this yellow ochre and this yellow color lights or might use these two for the heart. And I got my shadows ready. Okay, what I could do to the shadows with this one, there is a bluish-gray in this wonder would work very nice for shadows too. So I just demonstrate that one. That's the colors I need, I think for now. Yup. Alright. Put this aside. And let's start again with this one. This is the last one. And I'm starting with this very light, hardly to see yellow. And I'm just kind of paint that whole flower rather quickly. And of course, only the petals and not the heart. That's not the idea. I've got this stale. Let's see, we wanna get driven now it's, Well, if that our quiver that you could remove that, but then we'll have to wait awhile again for it to dry. She can do I'm doing this. Not too accurate, just quickly. Very pale yellow and I would work great for the highlights two Now of course, with this one, since this is the largest one, I have a lot more room to work with. So if you have one color, you could really start. The edge here, around here, and then move it really there. And then you would get a very strong highlight effect. But if you have more colors than of course you, so if you only have the one color, I would only do the edges like here and there. And I'll demonstrate with this darker yellow here. So I would only do on this petal that side under here. And that will be pretty much it. So about a third, I would color and then move it. Or we're doing basically the same now, but we're just using an extra support color with it more or less. And we've colored pencils. You can go blend two colors at least. And some scholars, most colored pencils, or to call a pencil I use blend actually free callers at once. Now one thing you don't see me do is you haven't. Not too much is to go over once you're done with another color, I rather pick that up from my Plato works way better because not every watercolor pencil does react well to if you go back in with another pencil on top of it, you might ruin what you have made and get very muddy colors. This is yellow M2. And of course, we don't want one multi-color, so we'll just preventing that. So I'm gonna do every paddle. Pretty much the same nice application. And if I would be coloring, then this will be, and we would fade this away just if I would just be regular coloring. This would look pretty nice array. You could use your multiple pens for coloring too. Although I can tell you that regular color pencils do layer much more beautiful than these. But your regular color pencils do not give you this rate effect. Too much. I'm just sticking to the bottom. And as you can see, even if they're on there, I'm not gonna give them too much yellow on most of my halo to be on the hair on one, spread it out. And I'm not measuring exactly that 1 third is here or not. Let me do a little bit on the edge. And there's basically not too much, but just a little, that's a little bit that, that one there, good. Alright? And if you have only one column, do it like this here. And I have that support color if you only have one, leave it like this. These ones, I'm done with. The next one is this one. And I say I'll have to sharpen that. So let me do that. I'll be back in a second. And right there I am. Took a little bit more than a second for me, but free, we just took a little bit of time with this one stock. I'm going to do really the same thing as I have done. Only do that edge with this collar. And then get really dark color. And do even less of the edge, a bit more data. And these are pretty creamy, so they should plant quite a lot. And what I want someone, and I want to be some green leaves. Let's go with the same as we've done 50 orders, where there's no lights or giving it some color. This one. Of course, we have these leaves. We're gonna get yet. Definitely another tone than with the rest, because these are again, different colors. That will make an interesting composition. Ok? Now I'm gonna go here. Almost forgot you. Yes, now we're gonna do is shadow, this one, this one, and at the edge, this one only at the edge. This one and this folds parts. This one is has a folded part two. So I'm going to get dark and do DH there. All right. And let's see this side two. And from here we do this one. And this one. Let's add, I'm going to add some dark color. Likely, very likely. Okay. And that will be that car. Now the last thing we're gonna do is the heart. And then you use that yellow ochre. And then as you can see, light yellow ochre is just right to tend. We want for the heart because at heart and bringing that back again, definitely has the bright yellow. This is darker yellow seeds. So you get that darker light ochre here. Now she doesn't have those done. You do the same as we did there go a bit darker with mix it in with some brown. And what I'm doing now is just around the edge at a darker color and do that in the middle to low, and that should give an interesting bland c. You will have enough yellow here. The more is, the more, in this case, the better. Since we want this to be spreading out quite a lot. So let's add a nice some pigments. Good. All right. Let's go brush, make sure it's clean again. And let me just you can see I'm not putting my brush here because then I have to go all the way there. I might spill water is on this side, but this is for the video, not a handy side. So I'm going to move this thing, hold this fame, and whenever I need it, I'm going to get it. And now, as you can see, I'm moving around this stuff and you get a whole different effect here. Pick that one up right away. Yellow around. Totally different yellow and these colors. Make sure tell me if my hand, I'm not touching the other one. And now I noticed that I completely forgot this petal there. And now I haven't anymore. Picking up that collar that was air. Moving this into that point. And as you can see, you get a whole different effects on this one. Totally different kind of watercolor pencils. This is way more controls work. And actually with this one, I have the advantage to them can lay. A second application of color. As you can see, you get a whole different effect. Hold different color with this one. More light and we're going to leave that to dry. I'm gonna kept my brush ready, clean it, and go for the stock out of water. Now there's water again, allowed us water and you can move your brush over the colored pens, sorry, the watercolor pencil. But basically nothing happens. So you're just painting, painting, but the columns will stay. Alright, and let's go for this leaf back here, mixing those colors nicely. And go with this leaf to eat some more water. You can probably see the difference to this color of watercolor pencil. X way more like a paint and really moves and blends and makes that gradation from dark to light very nicely because this one is very controlled. What I'll call a pencil dataset Fund, which is, as you own, the really bright colors like here. We're going to have to do a little bit more effort, but we will do so. My star shade around spilled their fix that later on this list, the last one. And this might have been slightly too large. I have an area to move it all around, picking up some of that cold air, moving it in their eyes, fixed on era later on. That will be it for this. No, one more leaf down here. Almost forgot it. Thank you for reminding me that I should have done this one. And there you go. Now, as you can see, and blends on these color, pencils are really subtle, really blending nicely, not giving up that brides in one go, but allow you to make some gradation springing, even a little bit of texture if you wanted to. Just a whole different kind of coloured watercolor pencil. Good. Now I have this and the only thing that is left to do is the heart. Of course. I'm going to go around here first. And then I'm going to go into the middle. Okay? And that would be its, well, let it dry and that would be almost it. Alright, good. Now I have some nice shadow light effects going on, on this major flower buds. I wanted that halo to be way more stronger than it is now. So I gotta do something about it. That's what I'm gonna do next is going to get my plate going to put down this color. As you can see, this is totally different. So core pencil, what color pencil on is a bit harder to do this. And if you don't manage to do this, you can always do what I did. Pick it off the tip and then put it on to the plate and put it down. But I got quite some pigment already. It's also wet. And we're gonna get that dark, that yellow I used lambda. Then you could do this, of course, on your paper to pick it up from there. Alright. And I'm gonna just put it on here, turn it around and show you what will happen with this. And there you go. There comes color. Adding some water. There you go. Now we've got color and what I'm gonna do with this, I'm just going to add some layers of this on it to make sure I get way more yellow than I have and I still have all those well, preserve my lights places a little bit. But I'm just adding and nice. I think getting some really dark. Pretty much most of them. And this is slightly definitely wet. Sum here. And now what I'm gonna do next is while this is a bit damp, gonna get a very dark color, the dark yellow color it in. And that blends in more or less automatically since this is a bit wet, still. And that is for the bottom and the back. A nice yellow. And their ego. Now this depends on your watercolor pencils. Some watercolor pencils do very badly when you wet an area. They're just crumble basically. So this is just testing if this will work. If this doesn't work, then wait till it's dry. And yes, apply basically another layer. And now we get some nice light. Even going into a little bit into the highlights. And there you got to get that pigment around a little bit. Right there. K. Now, depending on your color pencils, you have really strong and you do this what I did, strong collars and of course this gets bright like here. I will do that with those again. Okay, good. Well, if that dry, that's good. So I'm pretty happy with this as getting better. Alright, good. And have to pry this completely, wait for this to be completely dry. But as you can see, quite different. So there's free brands and they're all having their own colleagues, their own strengths and weaknesses, of course, because this one pops Really strong colors Coen or has really strong pigment cause this is more retro and this is more subtle and allowing you to get all these nuances we don't have here. Basically, this is just one blend of columns with sunlight we brought in of course, but this blends really nice as you can see. And that takes that pigment very strong and then moves it beautifully into the lighter areas. And even these petals are pretty much about the same size. And as you can see, that light effect on here has come way better than it did on this. Okay, that's it for this one. Let's not let of course won't go further with it. And the next step would be, I like the heart is like it is. I'm going to add another color and that was here, bluish-gray and bluish-gray. I'm going to use for some extra shadow. And then we'll go pretty much there at the edge. And their bids on this form. Basically, I'm going to add another layer of this stuff on that semi-dark T2. And with my wait for this to dry a little bit more. So let's start with this and we're gonna cut this small brush so that I have a bit more control arm has to plan this in really quickly as you can see, picking up that pigment just little bit, moving around and blending it in a little bit with this cause creating, as you can see, some beautiful, nice shadows. Giving the impression that there is some shadow. Say nice, they're nice, good, and let it dry like that. And now I'm going to go to these petals. And with these petals I'm gonna say, okay, this is a petal that's in the back. So I'm going to use this color to give it a shade. This petal is in the back, this battle is in the back. This petal, this definitely, this is in the back. Here. This one is in the back. This is folded and that is in the back. And that one is in the back. And this is folded again. And we're going to do at the beginning a little bit of this color to just this one isn't back to want to have some depth going on. Now if this one, I'm going to do the same only around that edge and in that middle. Alright? And now I get that small brush. And we're going to blend this in making, as you can see, a bit of a circular motion with my brush, some water, and then get a nice shadow there. These two same as with the leaves. Just planning and not spending lots of time on it. And that's it. I think I did. Alright, good. And now it's getting some nice, subtle depth, some shadows on it. This one. Let's press that a little bit better than this okay. Occurred. And that would be our last sunflower. I would say no. Nice having some different kind of pencils, getting some different effects because of that. Having some really strong colors, unless bit muted here, what some muted vintage colors. Here's some muted spot, also, strong, but not as fibrin does this fiber and one still beautiful and we're going to keep it like this. We could do a background with this and you don't have to. You could say, alright, I'm happy with this. I'm going to stop and I'm going to leave it like this. You could do a background with this. And if you want to do a background with this, I would say don't watch the next final lessons where we're going to work on a background. If you don't want to do background, then this is finished. There is another extra little video, just a time-lapse, where I'm doing the same flowers, but in a totally different way than what I've done here. Doing them with a brush pen, a totally different pen, and then doing color, but not what I do, what I don't have the slightly different. So you get an idea how things would look differently to. And those are again, a totally different brands of watercolor pencil still giving totally different colours. Alright, so it moves to the next one, or I would say, thank you for being with me in this art class. I hope you learned a lot. I'm looking forward to what you will create and I hope to see you in another art class or in the next video.
13. Painting the Background: You decided to watch this last video. We're gonna do a little bit of a background and we're going to play with, and that's where this cotton swab comes in. And I'll show you what to do with this one. And what we're gonna do is we're going to first pick some colors and backgrounds and this and blue behind it. And we're going to use some hear, some green light green behind it. So I have to pick my colors and I need to make sure I have different ones. And when you use this set for it. And let me open it. And while I'm opening it, let me put my yellows away and let me go for a nice ru, the brightest blue, what are you called? You called an assumed glue. And don't wanna zoom blue. I do want to sky blue, kings blue, younger than sky blue. Here. A sky light blue now, Dennis, and nice color. And I'm gonna do that with a regular sky blue and others to sky blues are flood. That's one under normal. I just put this one we didn't use the bluish green. No, this one. The green create induced Taiwan. The next, what we're gonna do for the background and when to use very light green color, and that will be this one. And that is called emerald green. And I might mix it in with severe green lights to greenish cause then will push the hole to the background. Don't think I want this, what this is. Now, these two. And this one goes here. The ochres go there, the light goes there, and the really dark green goes here. Then I have cleaned up, put all my finger away too. Alright. You can vote. And then what we'll need for this lesson is a disk depends again, on your colored pencils. We either cannot do it with this one or we're gonna do it on the platelets. Try it first with this one. See what happens now. First, we're gonna do really simple. The delegate dabbed rush this one. And I'm gonna get that light, that skylight blue. And I'm just going to coalesce. I'm going to go around the koala. Missy, I wanna go till about here. I want to be sky and above force. And this is a very sort of blue, but we're gonna do that with another coupler. So pick your lightest blue you have. For this. And also of course, there's sky in-between here. Alright? Sky there. Use a light colon, or we could have done this slightly different to what we do here. We meet a point straight. What we could've done too, and that depends on paper, whether that is really thick. And stock well, on floor novel demonstrated what we could've done too is we could have wet, it's our background. Then pick up the color and start pushing it in like this. Then it blends in. It just flows in our water and creates a nice background. As you can see, we could have done the two, so we could have wedded everything and then pick it up from the tip and allow it to go into that wash. And then you get a very nice background to why haven't chosen to do that. You could do that him. You could wet the parts and then go with the color pencils. I've chosen to use them as you would use colored pencils like this. What I'm gonna do here, this is that theory green, light green, more to the bluish. I'm going to use that one here. And again, you could do the same blended in with make it wet and then let that all blend in. I just wanna go the same way a little bit with here, there's chi F done around a little bit. And I'm going to do on the second slightly darker color. Okay. Good. Just put more around the edge. You can see I'm pressing slightly more pigment down. Later on we're gonna do something with this guy anyway. Alright, that's good. Now, next thing is around Victor brush, and this is around a small, but you could take a big brush for this. Of course. You could take a big brush for this. Let's start bringing in color. And now this is going to be tricky since it will pick up a bit of that yellow most likely. And there we go. Okay. Those parts and let them dry k. So if you have a bigger brush, please do use the brush. You can use that. Going on the outside or making a bit of a circular motion. Planning my watercolor pencil. And as you can see, for now, pretty much trying to stay away from the flower, just creating an interesting bit of a pattern. I haven't been there. Now you say that's very light and I agree it is light. Let's go there too. And we're gonna do something about that libraries you can see that creates a very interesting effect already. And we're gonna make sure I'm don't go in my water. So it would have been better refine worked from my left to my right. And as you can see, creating an interesting pattern wash by doing this right here, I can move in circles again. I got the room to do that. Where there's not the room to do that, then please don't do it. Because the only thing that will happen is that you will go into your other colors, snow and trusting, isn't it? Good? Let's do that down here too. Just removing this around, creating beautiful background, picking a water, moving that pigment around with this brush. And using enough water for this, so that I can really pick up that pigment and move it around. As you can see, a lot. And now you get a nice subtle backgrounds and this part, careful. Now, nice. Let's take a look. Pretty nice. That's a nice so-called wash. You could you could leave it like this. That is up to you or bring it to the next stage. And what we're gonna do next is I'm going to leave that then rough texture there and let this trial level bits. And what we're gonna do next is I'm going to get this paper. And I'll have to move things over a little. What I wanna do is look at this. I want to take a darker blue color. And that is not right. So undoes, remove this, I lose something and move this around so you can see it nicely. And you go. And are we going to move this like this so as you can see what I'm doing. And then once this is dry algebraic, or I'm gonna work upside down them. So what we'll do is with this called pencil. I'm just going to put down some of this. And you could do this, of course, same on the plate. That is your choice. You have. I'm just gonna put down a nice layer of this and then we're gonna take that cotton S4, take some water, dividend and water, and pick up the pigment that is unhinged. You see, I'm just moving it around and I've got some of these pigments and want to start at the edge of the flowers. And I'm gonna do this, I'm going to depth until that basically is nothing more to Deb and see you get a nice effects and we're going to dip it in collagen, sorry, in water. Pick up their color and start close to the edge. And if you tilt it a little bit as should come some off again, but not much. And pretty much do that again. And this is nice and wet gift that a little bit of an idea of randomness to. You could also do this with your brush a little bit. Terrorists tell someone they're spreading this out. And they can see you get a nice effect. And let's do a little bit of the edges. We still can. And I think it might just go one more time. And there's still some pigment left. A pressing that haunt this time. Carefully in-between that dairy, we should be able to pick up some more. And at a certain point, of course, all the pigment is gone and the cotton swap as basically damaged. Pretty much too. But for now we got there. And we're not gonna do that on that bottom only on this blue here. Think I'm fine. Yes, we can do a mix in a little bit. However, that price. And we need to go there a little bit too. And I think then I'll need to move over a little bit. Fine. Could pit on the edges pit and between them. And they're a little bit. And then I think I'm fine. How loud here looks good. I'll have to tune it. There is some color still on it's trying on these edges here. All right. I would say that's pretty much it. Okay. See one more time. Become a bit of color. Right there in those places. Kind of bit over it carefully. Between pit there. And let's see, a little bit. And a little bit. And I would say pit down there to get a bit of transition. And that's it. Good. Let me move this out of the way. Let me turn this around again so we can all see it nicely. And dare we go. Now that looks very nice. You could, if you wanted to do it down here, I don't wanna do this unlike the effect it has down here. And I will have some of an effect up there that's a little bit adding just or for cut and with a little bit of a cotton swab, Q2 cotton bought at a little bit of an effect. And that is, it notice is pretty dry. And what you could do this, you could add another layer of yellow hue wanted to, and we could bring in a little bit more shadow. Or we could just leave it like this. And that is a choice. You can make you safe. You want this brighter. Could bring in a little bit more yellow with the, with the watercolor pencil, you could even do some strongest shadows like we've done here in the back. Or we could just leave it a bit more subtle, like it is like this. I think I will leave it like this and we get a nice, some nice tones. Some bright yellow here, some mutable yellow there, some different yellows and greens and all these colors are differently. That would be basically it for this. Now we've done a nice background. We've done the flowers. So I would say, we're going to leave it like this for this lesson. X1 extra bonus video or demonstrate working combining your watercolor pencil with colored pencils. That will be next after this. But if you don't wanna do that and you watch it and you can decide what to do of that. You can decide whether you want to do that already. You want to keep it like this. And then again, I'll say either watch that last video if you wanted to or make your own. And if you make your own, then I would say, have fun, enjoy it, creators. And even if you do watch the last few, you still have to make this, of course. And once you have made this, then you can go to that little extra, there is just a little extra lesson. I'm going to demonstrate working with colored pencil with this a little bit. And brightening up some of the college is showing how you would do that. That's just a little extra. Ok, enjoy it, have fun. And I might see you in the next video and is not. Thank you for being with me in this art class. And I hope you learned a lot, and I hope you will enjoy creating some beautiful, some flowers.
14. Touch ups with Colored Pencils: Well, welcome back to this final width of extra video. The extra video will be about touching up your watercolor painting with some colored pencil. Now if you have colored pencils and if you're lucky enough to have the same brand, desire to live in the same colors. That is great. If you have some different colors, that doesn't really matter either. But if you want to touch up some of this than let's, let's do that. I'll show you the effect of that. So what I'm gonna do first, this is all derived by now, get this box. And what I wanna do, I wanna get that nice bright yellow and a bit of a dark yellow. And that is what I wanna do. Some touched up with the green. I'm very happy with him this, I'm not gonna do that, but I do want some extra shadow. So you could take either a very dark blue or what I'm gonna do, I'm gonna take that bluish-gray. Now with this. With this, we need to make sure that your the tip of your pencil is reasonably sharp. A sharp shouldn't get it. So you need a nice sharp tip not to point in any breaks off, but just a nice tip on it. And I'm going to use this force, just some extra shadows on it. I'm going to use these for some extra color Snap. This one is nice, so I'm not gonna do that. So if you have nice bright what college, you don't even need to do that. What I wanna do with this one, I like how the lease and the star car, that is good. But these I wanted these petals to become a little bit more bright. And then I can touch that up with basically just a colored pencil. And you can just go over the work. And I don't want to go really into the lighter parts just down here a little bit in the back. And as you can see, and it's adding a layer of colored pencil. And that gives me that nice vibrant color. Way more fiber then What's the water column could give me? And as you can see, if you do it right. And just adding a layer, hm, not pressing really hard. And it blends in really nice weighted nicely. The downside is that you get a little bit of a wax finish on it. So if you don't want that, you need to get either they're more coyly pencils or just completely don't do this at all. Nice. Right, finish where I want that. And still maintain that light effect. That is nicely now you get a nice taper collar. Now I have this deeper yellow and I want to use this for these petals a little bit in the back. Add some color to them and make them slightly darker. His one touch up. You can just color over some flour. It around these N is in the middle. And very likely over here. You can see him holding a pencil like that so that I can his minimum pressure. And these petals around the side away from the sun. You can't get rid of this. That's gonna be hot. So you make a mistake. You're not really happy with it, then. You have to live with it. Okay? And so simply you can go over your watercolor painting. A watercolor pencil painting has become water column I now, with a bit of a sharper point, you can add some nice, extra more fiber in details. And there you go. It's nice k. Using this one to blend in a little bit. A little bit of rounding motion, same brush, not really pressing hot, just getting a bit of blending it in there. And there we go. Now, lastly, have this shadow on this one. I have the blue equation. You can use a dark blue, midnight blue kind of to. And what I want is around the edges, I want a little bit of color. I'm not pressing really hard. A little bit of depth. Do the same. Now if these petals in the back, carefully add some shadow, same as I did with the pencil, but now I'm using a colored pencil for it. And by doing that, I'm suddenly creating more depth. So wherever there is an edge and where it is touching another pencil. And just get a nice subtle depth. Gonna do that with this. Just around shadow. If I'm at some of this, cause pencil to get a little bit of extra deep tell. Just a slight think, I'm fine with this. This one to this one. Okay. This away a little bit. Bring them in. And there you go. So then you can use your pencil just for some touch ups and say, just some nice deeper shadows around the edge. Okay, and that's good. Now we're calling it done. We could go on for hours, of course, are we not going to do that? That's good. So you can use your colored pencil to just bring in some cities some depth from shadow. And just use a colored pencil or you have to midnight blue for the shadows and try to find the same colors. If you want to touch up a little bit and bring this a bit bright. And now you can see clearly that this flowers now suddenly become quite a bit brighter than it was before. And that is just a nice little extra touch-up to get some more definite and get some more stronger colors if needed. Because of course, water column mutes down a little bit depending on the brand you have. And now I will say this looks really nice content with this. And I'm looking forward to what you create so you don't have to do this step, but if you want to, it's there than do it. And adds a little bit of more depth from color to it. Alright, that's it. Well, I enjoyed doing this. I enjoyed giving this class. I hope you really enjoyed receiving the class, and I'm looking forward to what you will create with your watercolor pencils, with your ink and perhaps a little bit of colored pencil in it. So thank you for taking this art class and it knows, I might see, and I do hope to see you in another art class of mine.
15. Class Project: Create your ownSunflower Card: Me. Bam. Now, I want to come. Okay. That's my guess.
 Benjamin A, Art Teacher, illustrator Art by Benjamin