Transcripts
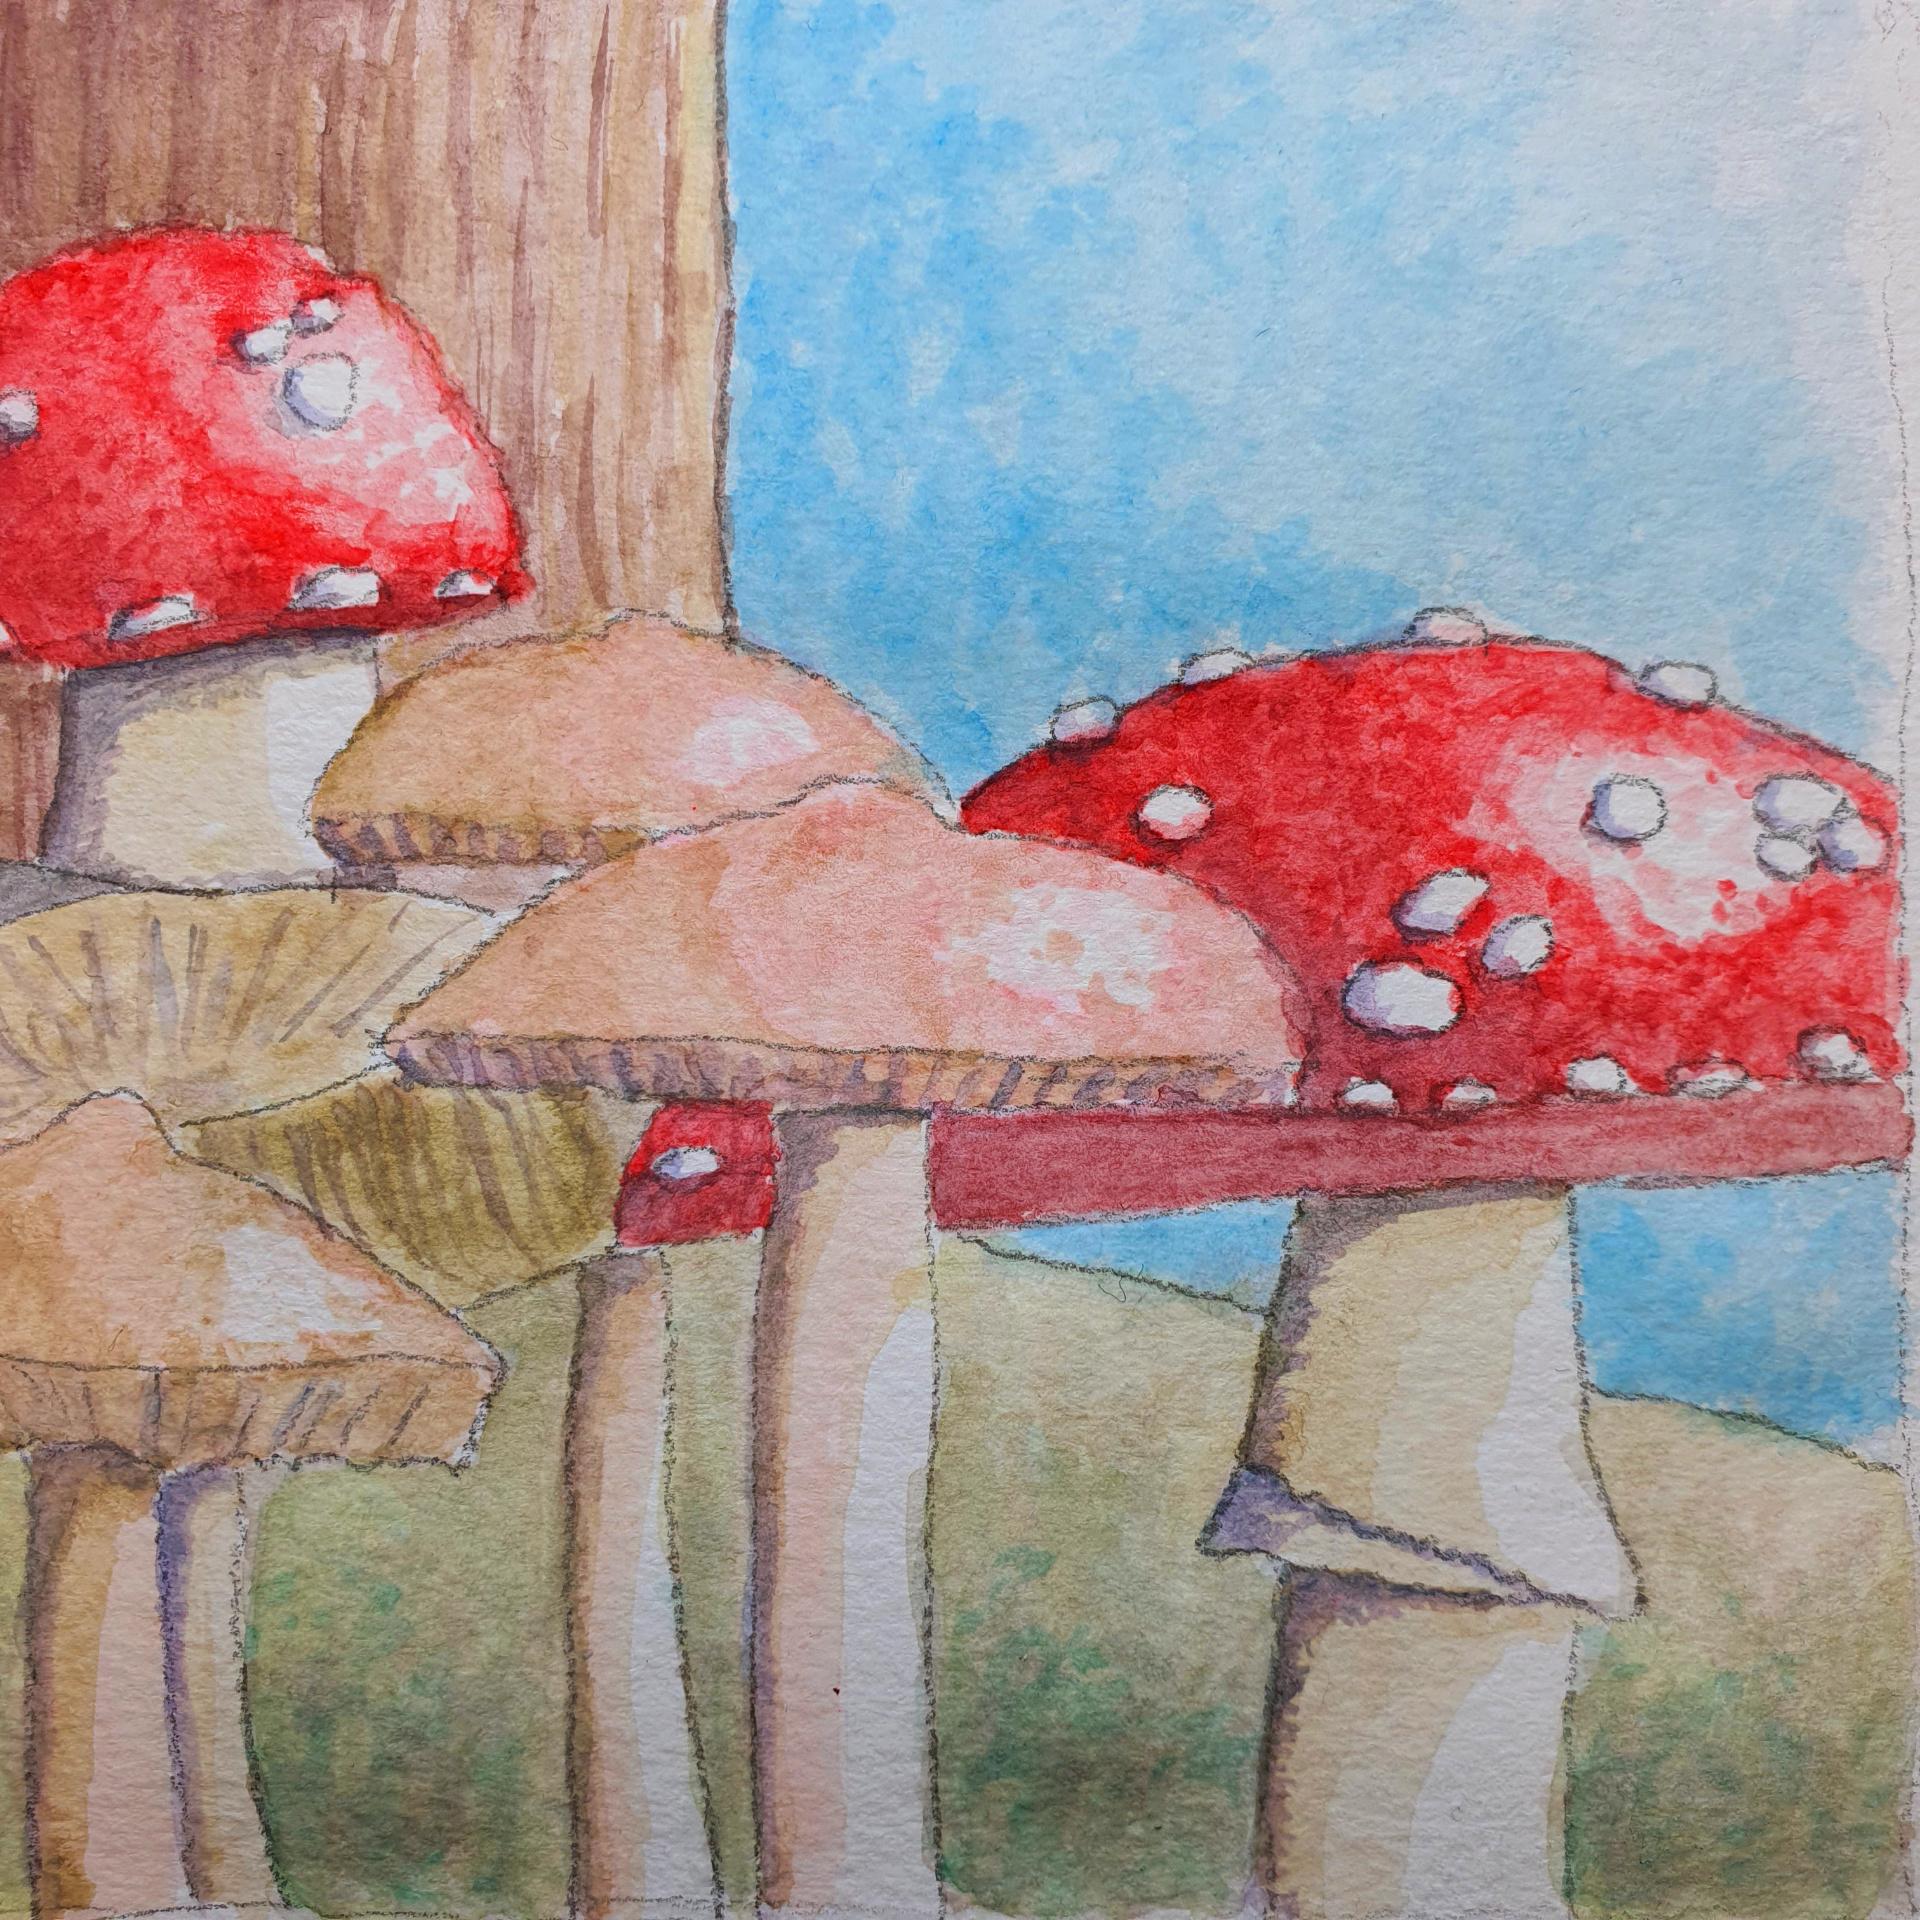
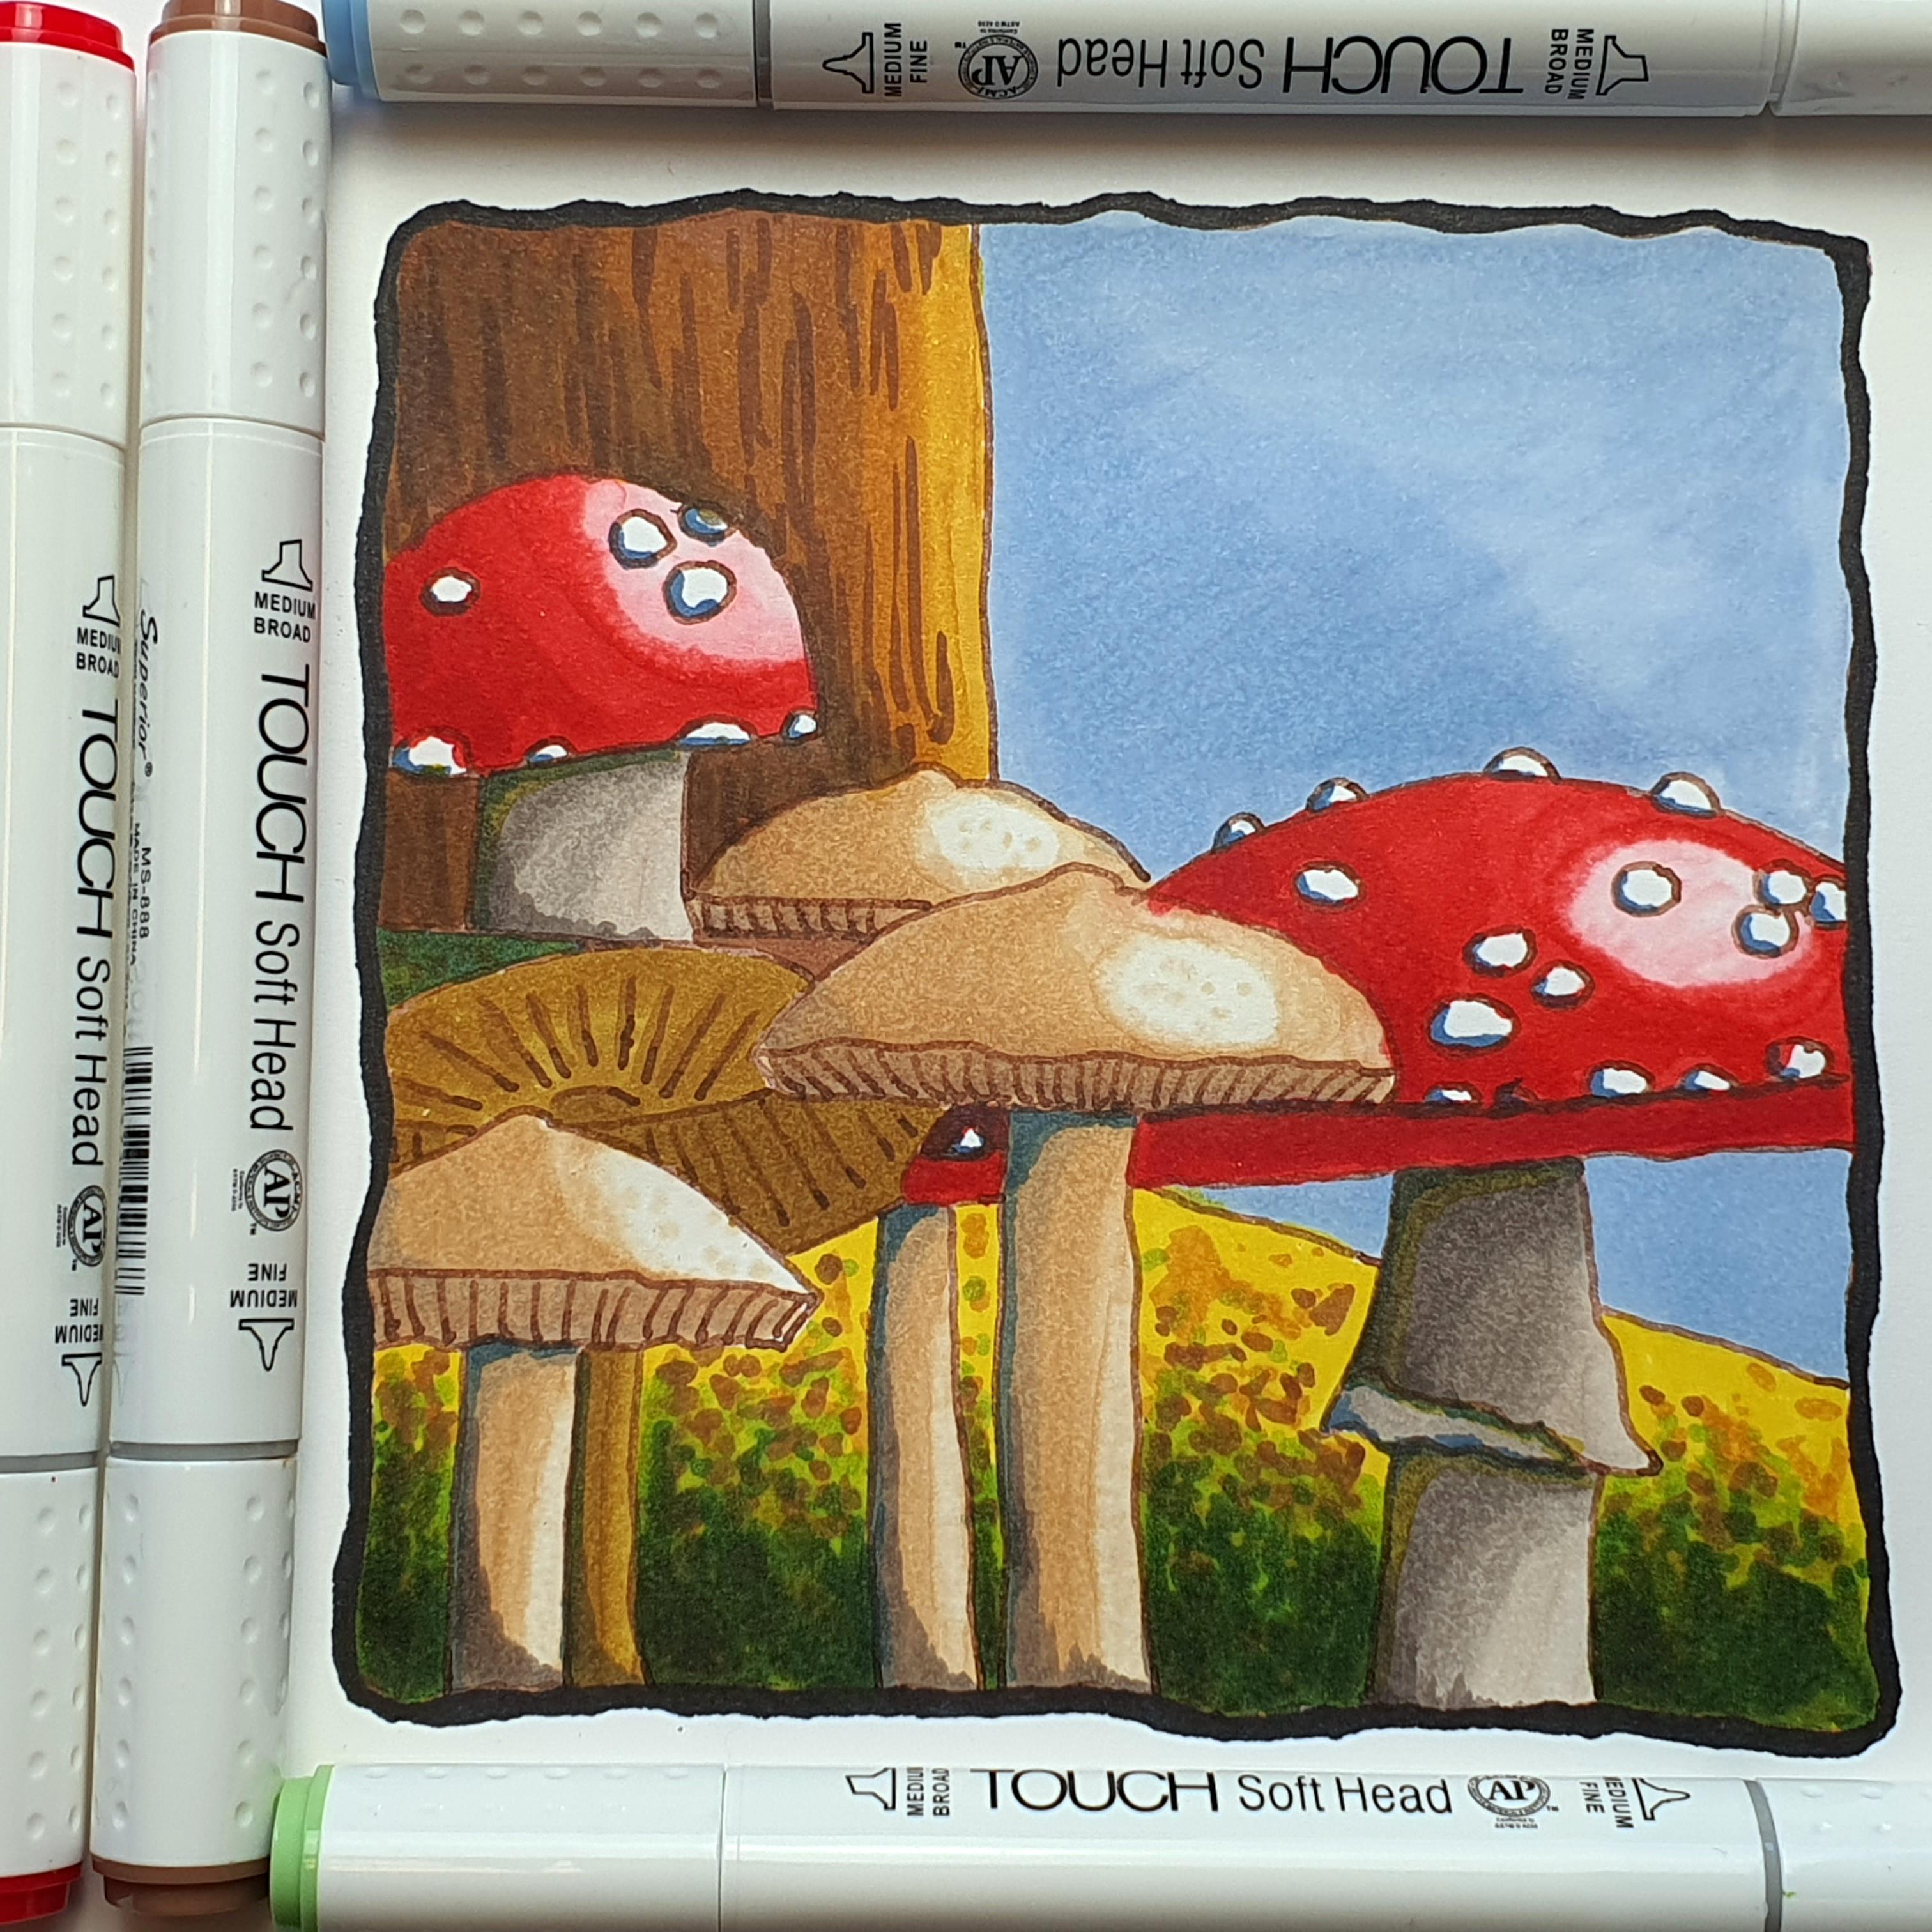
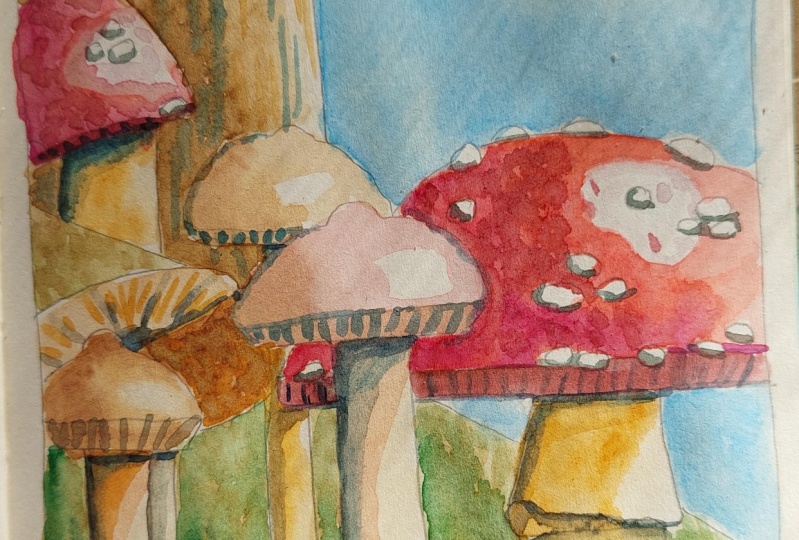
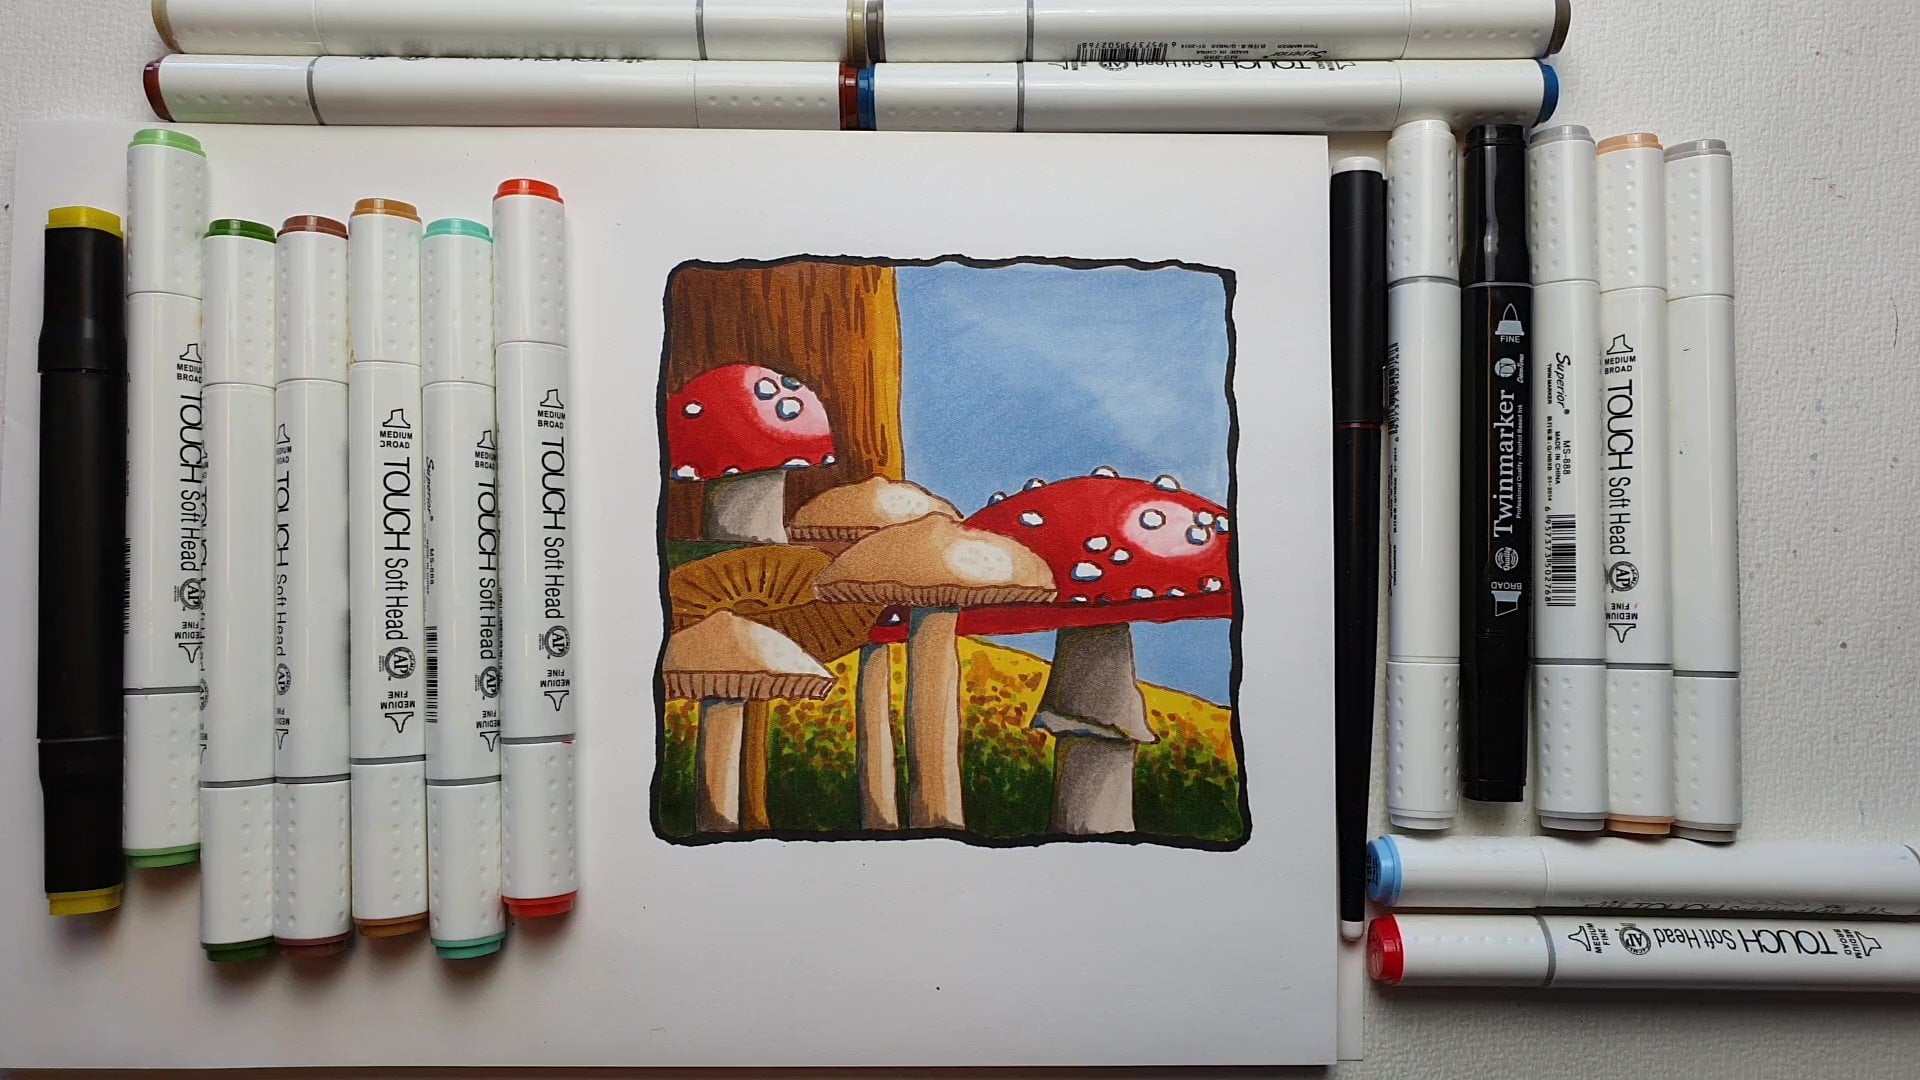
1. Introduction: Welcome to this next session in the art class from idea to finished illustration. And as you can see, or actually going to finish our illustration in this session, we're going to be water color painting. Now what are called painter for many people is really intimidating. But I've developed some techniques which are easy to pick up. And even if you're a beginner, you can do this. If you're more advanced, you might still learn something from this art class too. So I'm going to show you how to take our previous information we have, how to build on that and arrive at the finished illustration. But before we do that, of course, I'm going to show you some basic techniques. I'm going to show you how to pick up your paint, how to mix your paint, how to bring it to the paper with various techniques, wet and wet, dry on wet, wet and dry blending. I'm going to show you all of that and we'll show you how to use brushes and the various effects you can get with them, the various ways of painting. Also, I'm going to go into a little bit of what happens when you make mistakes. How can you correct mistakes afterwards? How does paint react to the water? How you can use these brushes effectively, how you can make some of your colleagues. All of that will be covered in a basic steps. Once we have the basic steps, we're gonna work on the illustration itself. And I'm going to just take you step through, step through this illustration. How to get this from just a blank piece of paper to a beautiful illustration. Well, I'll be using pretty cheap paint so that everyone can come along cheap paper and cheap paint to show you that you can even make were very cheap paints. A beautiful painting. What you of course don't have to work with cheap and you can use more expensive paper, more expensive paint too. And some videos also meet demonstrating using during paint. And also a video of me using professional artist quality paint T2. So that will not be videos where I take you through every step and talk you through it, but I'm just going to show you how I'm using it. And so you get an idea how to use that. But I'm mainly going to use the cheap paints so that everyone can join in this session. So I would say move to the next video. I'm going to explain some more about materials and then we're just going to finish our illustration in this session.
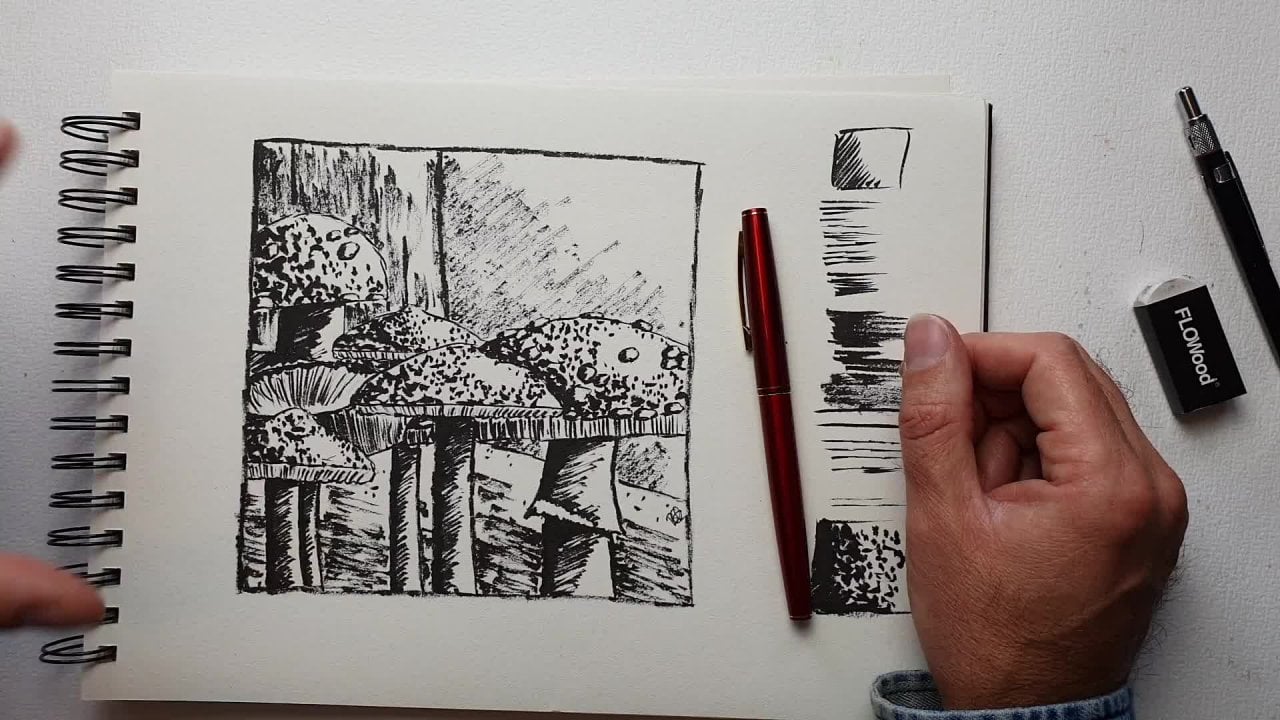
2. Materials: What will you need for this session? And that's a good question, isn't it? So let's go through that. You're going to need a few things for this session. And you see some things here already. We're gonna paint in this session with water color. So we're going to need some watercolors. But before we do that, we first need to transfer the image we've created to the paper. So you need to do that. And you may notice that my little bit smaller because I fit it to on it for a reason that will be clear later. So you first foam need to have disk drawing engine. It transferred a drawing to watercolour paper. And what I am going to use is cold pressed watercolor paper with a fine structure. I wouldn't recommend using the rough structure when you're starting out. When you have experienced, of course you can do so. You could also use hot pressed water colored that will react a little bit better. And I'm using student quality paper just to make sure that everyone can go along. But if you have more expensive paper, of course, do use it. You won't see me using it in this video. And so aside from that drawing, which you need to then transfer to the watercolor paper. And there's other sessions for that. You also need this image where we have done the light and shade so that we know where our columns go and especially where the lighter colors, a dark house, and where we need to take in account. We want the highlights to be. So you need that image two. And the next thing you need a site from the paper up brushes. And what I'm going to use is I'm going to use a round brush eight. And I have underside mop bras 204 mop does is a free a free quarter or does it three-eighths inch? One? I'm gonna use eventually aligner. That is a, this is a 0. If you have a smaller one or it largely run, that's okay. And if you don't have a line or you could use a round brush and then use a round brush one. And that is for the brushes. And the brushes will do whichever brush you have cheap brushes as long as it, watercolor brushes don't buy. General-purpose brushes. Stages don't work as good with watercolor. The next thing you need is I've got a tray like this where I can mix, mix my paint, but you can also use your simply a plate to do that. So if you don't have a tray or plate will work fine too. And of course you're going to need some water. I have to Joseph water. I have a jar which are used to mix the paint. And I have a cup with more paint where I clean, rinse my brushes. Another thing you won't may need is kitchen towel. When we make a mistake, we can dab it away. I'll show that probably later on. I might do too much paint on somewhere of fin, so that's handy. And of course the last thing we're going to need paint. Now I'm going to use a cheap watercolor paints set. Just I picked up somewhere else. It doesn't even have a brand, artists, whatever, cheap stuff. And we're gonna do two here. That's why you see two of them. And I could have just taken another set. I have like this. And it says the Newton, but there's no wins to Newton in this, in this old paint, expensive paint, very expensive page, you get great results. But since I want to make sure everyone can join in this session, regardless of the pains you have, I'm going to put this aside and I'm not going to use that. So that goes aside. Bye-bye, expensive paint. And I'm using that cheap pain. But what I will also do in a second image, I'm going to use this set, not the set, various sets with fungal fan go, paper royal talents fan go. Yes, it's called Fraunhofer in Dutch. So fun go. And I have a couple of those sets. I have the whole range of tells. I will use that too in a demonstration on another one. But we're going to start with the chief pane so that everyone can come along. And that's the materials. So if you have these materials, then you can move to the next video.
3. The Basics: Welcome to this lesson. We're going to do some practice in pain. So before we're going to work on the painting like this here, we're just gonna do some practice. And I'm just going to show you what to do with these brushes and how to make sure paint a little bit and how to go about that. Yeah, so let's let's start to add now a mostly with what are called paint. I use it round brush and speak. We're using fled brushes too. Do great washes. We're not gonna do huge washes, so we're just going to use the round brush. And brush is of course, used to pick up the paint. And what I have here is two jars of water. One is to clean my brush. And once I've cleaned it, I use another jar to mix my colors and what to do simply, I wet my brush. So I have this round brush eight and I just wet it. And I debit a little bit and I'm going to wet one of these colors. I'm just gonna pick the color. Let's pick the screen down here. And I'm going to wet it a little bit. And as you can see now the brush picks up. I'll show it here paint already. But I wanted more, so I want my brush or more. I really wet my paint. And then I'll place my pickup the paint and place it on this tray. And from here I'm going to work, I'm not going to work directly with the colors, but I'm going to dilute them or show you the code directly. So I picked up the direct color and now you're going to get very strong color. As you can see here. Pretty nice, pretty strong disadvantages of doing this is that you get a Bolts color right away, so you cannot bring in the nuances, the tone she want. And secondly, your paint, paint is gonna go disappear really hard. So instead, what I'm doing here is a put paint on this tray. And I'm going to dilute it a little bit with water with when I'm starting to paint a pickup some new water and just go through the paint an hour just to stroke and 50 strokes. I'm just working from left to right. And as you can see, this is a bit lighter than what I have here, quite a bit lighter. This also will dry a bit, perhaps a bit quicker. Progress about the same drying time. And as you can see with a brush show, I'm just starting from left to the right and I'm the smearing it out and you can go a long time. Now what I'm doing here, simply bringing a layer and this is cold, wet and dry. My brush is wet and my paper is dry. Now if the other one, this is more cold, dry, although it's wet still, it's just picking up directly that will be dry on dry. Now as you can see, this is a nice code, is a very strong color, but this one, I can't build up layers anymore. And that's to color won't kept much darker. But with this one, I can build ablaze so that you can, as you can see up here, you can get this gradation from dark to light. Here. This will be tricky to do. But with this, you have all the controller wants. This is dry. I can just put on another layer, but I'm going to leave this to drying out. And the next thing we're gonna do is I'm going to wet my brush. And I'm just going to pick up some clean water. And I'm going to add a little square here like that. There you go. Now you already see that my work wetter, my water is already slightly green because I've picked up that strong color, but that's okay. The next thing we're gonna do is from wet to wet. Now with watercolor paints, the nice thing is, if I'm going to pick up this paint and put it in here, it's just going to spread out, but it's going to stay within these borders. And I'll just add some more. Let this paint move and you can even help to paint a little bit. By doing this. They reverse. This would be called wet and wet. Now, with this illustration we're gonna do, we're gonna mainly use wet on dry, but we're gonna do some wet on wet too. Now will leave this to dry. And as you can see, this will dry quite differently. Now you could pick up some paint directly again here, add that in and then get some really dark tones. And if this dries, that will let it dry, you get an have very different effect you could use is for nice textures, things like that. Now for this illustration, we want this effect. We want to have some control. But this is great. If you do large painting and you don't want all the control you need. So that's that. The next thing you could do is you can also mix colors. Now you can mix columns in two ways, and let's do that. Let's say we are going to work with this green. And I'm just putting the screen down here. And this will stay wet for a little while. I'm cleaning my brush, picking up some clean water. And let's say we're going to mix in this brown here. And you can see I'm making first puddle there. This is enough. The next thing I could do, I could go from this side. And I could let them meet. And let these two colors blend in and as you can see, the going in each other. So this collar meets this column and I'm just letting this dry too. That's the next thing you could do that you can do this was wet and wet too. So let's demonstrated, let's see, I have enough covered there. And let's go a bit wet. And as you can see, I didn't clean my brush completely. But good enough. I'm going to put in on this side that paints cleaning my brush. I'm diving at a level where picking up this collar and letting these two colors basically means I'm not going to touch this part with my green. I'm just letting these colors blending together. Now here you can see is blend in very nicely. And the last thing we can do also, let me clean my brush a bit better. You could mix colors. Now let's say I have this green, nice dark green. But it's just not the tone I like. I want this to be a nice bright green instead of this dark green. So what I can do with that, and I'm going to pick a yellow. So I'm moving this out of the way a little bit. You see here it's got some yellow, so I'm going to pick up some yellow. Then you go and clean the brush. And what we're gonna do now, I'm going to mix these two colors together. And as you can see, cleaning my brush, I want more of that yellow. You could mix it also directly from your pet. But as you can see what happens here, you get your colors contaminated. So I get some green in there to resolve that. You just take faithfully a dry tissue and pick it up. So as you can see now, these colors mix nicely. And now instead of having that darker green as you can see here, I've got a yellow green now you could do this another way to, and let's do that to. You can also do this with layers, and that's the thing we're going to make use of a lot now see this is drying already nicely. And you can also do this of course, with a dark. If I wanted this dark at and I put in a darker color like black or blue and mix that up. And the last thing that demonstrate that is, I'm going to do that with that yellow. I'm gonna clean my trail a little bit. They go. I'm gonna pick up yellow. And what we're gonna do is I'm going to add a bit of yellow and I have some like I have a hair in it. You just pick it up and throw the way. A vow. So what we're gonna do, we're gonna leave this to dry. And then I'll show you what we'll deal with that later on. So I've got this yellow and leave it to dry. So I've got these calls now. These are pretty much dry already. And if you want them to dry quicker, you could use a hair dryer and go over it and let them dry. And as you can see, these mixed nicely to a little bit. This is trying, This will live to dry, and this is blending into each other. This is dry. Now we're going back to this one. The next method we're going to use is glazing and placing just simply means I can make a gradation of colors, tones. So I'm gonna go back to that green. That same green. And I'm gonna make stronger color here. Picking up some water. And with this, I'm gonna go over this. And let's say we're going to go about to farts and we're going to leave it like that. I'm going to leave this to dry. Now we're going to get a strong line there, but we're going to work that away later on. And that is called layering. We're now glazing. It's called or putting a layer on top of a layer to get some differences. And this technique we're going to use a lot to get all these nice tone values with the same colors and we can even mix in a different color. I want to pause this video for a minute. I'm going to take out my hair dryer. I'm just a regular hairdryer. One we'll do is just I'm gonna drive. I might just as well demonstrated why not. I'm having it on you could put it on its hots and having it on the middle one and putting it on one makes a noise. And I'm just gonna drive lowered like this. And you can move, she can see paint around to where you want it. Alright. Almost you over there. That's good enough. And what was just John? We've gotten rid of the water in the water color. So now what is left is only the pigment of the paint on the paper. Now, this still, if I would go through brushed his still reacts to what I'm gonna do next. That's always the thing of protocol. And what I'm gonna do next, I'm going to add one more layer. And it's picking up the scholar. And right there, I'm gonna do one layer. As you can see, I have these strong lines and that's okay. I will work these away in a minute and show you how to do that. Alright, I'm going to blow dry this again. But this time we will put the video on pause because you don't want to see me do it all the time. You can also let it air dry. That's what it's called air dry. Just let it dry until it's dry like this I've done there now dry and but that takes a bit longer. So if you want to speed up the process, you can use a head, right? If you're not in a hurry, then you can do a layer than wait until it's dry and then move to the next layer. Okay. Dr. took a little while but almost dry. I'm going to look at this 1 first. So this one I put a yellow color, a light yellow color, Andre. If I go over that with that green color, it's going to influence that green color, of course, because it's kind of mixing with each other and you get a nice bright green collar. Now compare that to the green we have here. You can see some nice sprinkler and that works pretty much even better than doing it light-like here, you keep the same tone, but now we're mixing colors. So cause influence each other. You could also do under here a blue color than the Greenwood get dark. So you can influence your collars that way. C and now we're layering. And if I leave this to dry, I have a nice bright green. And we're gonna make use of this technique to in the next session. Okay, for now, we have this and this should be dry pretty much. Now, don't do what I do on your non-work. I'm watching it because if it's wet and of course your finger will pick up the paint. Yeah. So only to that one is really dry. Now I have this and I really don't like this. This, this, this looks nice. This looked nice, nice blend. You've got this obvious edges. Now sometimes you want this obvious edges, but when you do an illustration like this, you don't want those edges except for where they are supposed to be edges, but not on the work itself. So what we can do next is we're going to use this brush is called a mop rush and over mop. And this is a free eight or free eight inch. The size doesn't maximize size. You could do smaller. Smaller or larger than k. What we're gonna do with this one, we're going to use this to blend. You can paint with this too, of course, but I'm going to use it to blend. And what I'm gonna do, I'm gonna pick up some of the Clean Water Act going down the side to get rid of it a little bit and we're gonna take this pay for. I don't want it to be wet but you can use it wet but went to correct for the long. Wanted to be super wet, just damp. And what I'm gonna do now, I'm going to go over this edge. And since it is water color, it will react to the water. We're gonna put over it. And as you can see, it reacts. And that edge I can work away. See here too, when you do the same here, now if you have it super wet, you're gonna light these colors a lot, which we don't want. I just want to have these edges away and get a nice gradation from dark to light. Now, a girl, we can also use this to do some texture. And we will do that in the lesson. Now, there you go, come are these edges, and we'll just leave this to dry. And then you could do one more. This is dry. We could do one more. You could do one more layer to soften it a little bit, but we'll let it dry now. Okay, that's pretty much the techniques we're going to use. So we have in You could do dry. It's called dry when you wet your your paint a little bit and put it straight on the paper. You can do the wet paint like we've done here, pick it up, mix it on your tray, then put it on the paper or you can do make something wet and then you're paying your paints and let it flow and again, you get this effect. All right, now we've got some brushes. So I've demonstrated irregular brush already. Then we have that. I'm using the round the most and we have that mob brush to paint a little bit and some effects like here in the sky, we might just move, move to the mops brought directly. And the other two I have is I have a small one, a small round, that's one. Or you could even use a 0 and I have a liner. This is a 0 aligner. Now you see the difference between these two. This one is used and let me demonstrate, Let me wet it, pick up some of the pain that is still here. And this one you can use to make nice and thin lines here. It keeps on going. Picks up a lot of paints, day go. And as you can see with the paint starts to grow and it gets less, less strong. So that's the liner and we're gonna use that to bring in some details. But if you don't have a liner, you can use this small brush and let me demonstrate that you will see the difference right away. It's a bit harder to control, but it works. It's a bit thicker. It doesn't go as long and still goes pretty long day ago, but it's a bit harder to control. This one is very easy to get fin lines, but this will work too. And what we're gonna do with this, we can use that to bring in some shadowing things. I've picked this, if I want this one to be a bit dark on a certain place, I can darken that a little bit. You get the shadow effect, or you could use it for textures. And let's do this. And then I'm just dabbling in some textures. And if you leave this to dry a yoga, you get that effect that you see right up here. And that's enough to live on. So if you have a liner, yes, you can do very nice details and you could even outline something with this. Let me pick just totally different color here, that Brown there. And you go, and you could use this to even outlines something really nicely like here. And we're gonna do that with shadows. No, you can do this with this brush to pick up that same car. Let me clean it. And let me demonstrate on this, but it's going to be a bit harder. You need some more control. And as you can see, the paint dilutes quicker than on the other one. Okay. So then you can make a bit of a shadow side right here out of this one. You get this little thin, very thin lines. So that's the difference between this one. And that's what it's made, what's called a liner. So you can do right. Things like hear those shadows there. And some of those lines that you can do that with this one too. It's just a bit trickier. So if you have a liner, use it. If you don't have a line, I just used a la, the smallest brush you have. And so as you can see here, it is, tries already nicely and you get a bit of a pattern in here. And if you do that with a different color, let's do that. Let's pick up the screen. We have mics in the wrong screen at just a little bit of blue here. And if I add some blue to green, so you get a nice dark green. And we'll come at some, some more spots right here. And then you can see, you can bring in with this brush. Really nice to bring in a certain pattern if you need them. And even here, bring in a little bit of more shades. And we get a bit of a shading effect, like if it is light here and dark there. So that is what these brushes can be used for, okay? And that is mainly what we're going to do. These are the techniques little bit. So I would say pick up some rashes and just on a blank piece of paper like I've done, just start painting a little bit, just try to get some. Gradations like here, this mixing in some patients, getting this and for this I would really get this brush with this color. And I have of course messed up my color, but that's okay. Let's use this light color. I would add on top of this one more layer to make it a little bit more nice. And you still keep that going from dark to light. But it blends in a bit nicer. Degas still goes from dark to lighter, but now you smooth it out a little bit. Now, mistakes, let's say you make a mistake and this is dry already. We're going to do that. If you have a mistake, what you can do, you can pick up some clean water. And let's say I made a mistake here. And you're going to wet this part where the mistake is, let's say this is the mistake. And we're going to save a kitchen towel and I'm going to debit in. And I'm going to clean my brush again, pick up some clean paper. And this is the way you can correct a mistake. So now it's going away. It will never go completely away again. But enough. This is enough again for this to put on another color to cover this and not have to green influenced the different color. So that is how I correct my mistakes. And if while you're painting and you're still say I'm painting here. And there you go. And I want to say, okay, I need some highlights, for example, then you can debit up right away while it is still wet. And you, of course, you get these edges, you want perhaps to work them away a little bit. And that's it so you can do it right away to, okay, and that's how to click to clean up your mistakes. Let's call it aware to correct your mistakes, the better. Okay. Well, that's it for this. Less than I would say, yes. We've covered a bit of a basis. So a bit of how to mix your paint, how to mix colors. So you can mix various colors and you can do this science. You can do so many drops like this. We're gonna do it by eye a little bit and say, okay, I like how this color looks, so I'm gonna use that. And we're going to use some cards and we're going to mix a little bit, but we prefer not many were gonna lay a more so that you have more control over it. Okay. So we've got the wet and wet, we've got layerings of glazing and different brushes and correcting even see in this dries up nicely as you can see other stiller line there, I would normally work that away. See you get a bit of a pattern already in it. Here's O2, you get a pattern. You could go over this with a wet brush again and mix it in a little bit more so that it won't be as strong. And like we're going to do in our painting, then you get more of an effect here. But also seeing leaving the stronger ones here gives you a nice effect. Alright, that's it. I would say practice a little bit. And if you know how to do this already, of course, then you can move dive into the next lesson right away, what you were just going to start painting. All right. See you in the next lesson.
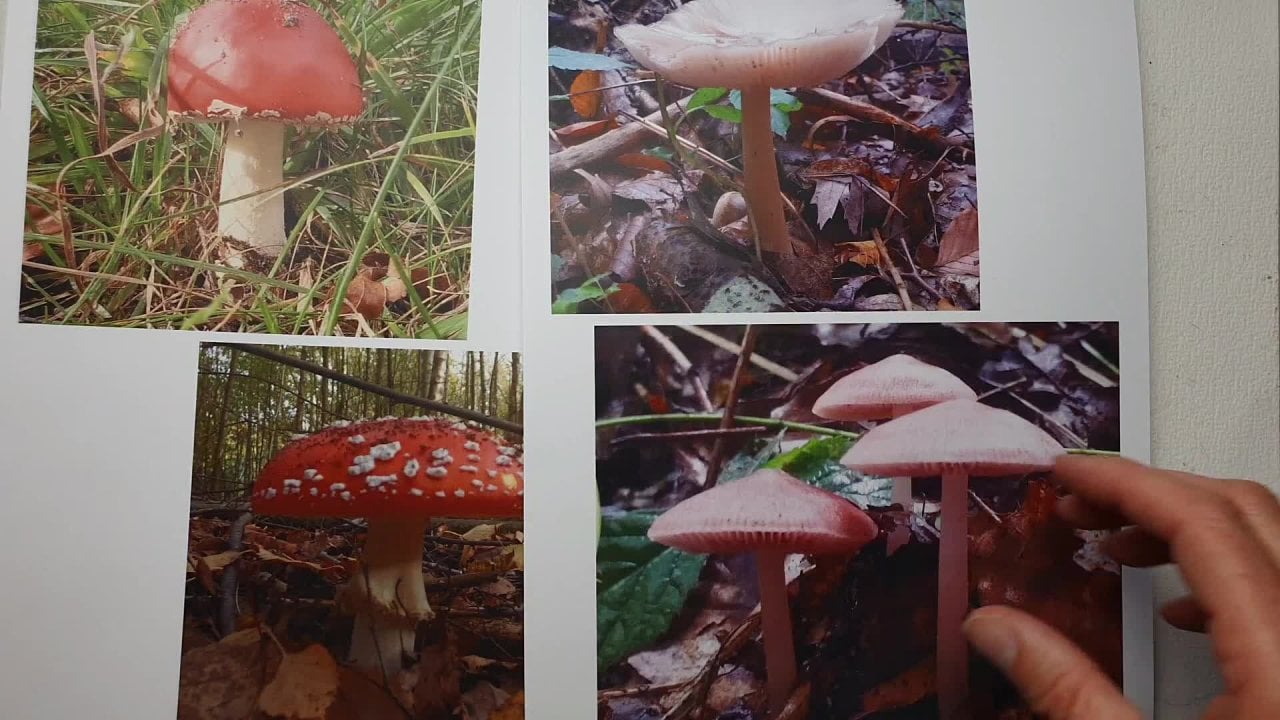
4. Watercolor Painting Step 1: Welcome to this video. We're going to start painting one thing of saying the materials we're going to use, of course, a little bit, the photographs, and that is in a separate booklets, Book of notes you can find with this class. And we're gonna use them a little bit, but I'm gonna put them aside and I'm just going to take you along and tell you what colors I'm using, but I'm putting them right there or I can see them. So they'll have a good idea. And I'm also having my light and shadow image inside, but it's off-camera. You can't see it, but it's I can clearly see it. Alright, I got everything ready, arrive. I got my round brush. So let's start painting. I'm using the chip set first. What we're gonna do, we're gonna work in some layers and the fingers with water color, it needs to dry so I can pause my video. But in real life, that takes time, what you could use to speed it up a little bit is a hair dryer. But the disadvantage of that is that your paper might buckle a little bit. But if you want to speed up the drying process, you can use an hairdryer to dry it. Just don't put it on the hottest setting, somewhere in the middle and then you can dry your painting, your lives too. So I put, I'm pausing my video and so that seems that I'm going really quick. But in real life you may have to wait awhile. Alright? There's all kinds of techniques you can use with watercolor, painting wedges gonna grow along with it. And I'll show you some of those techniques. And we're gonna just start simply with a technique that is called glazing. So we're gonna put some layers on top of each other. With this one, we're not gonna, we're gonna mainly used techniques dry, wet and dry. So the paper is dry and we're going to put on wet paint. You can also wet. You're painting a painting and put in your wet paint and that will be called wet and wet are gonna mainly start with yeah, we're going to do wet in to lie, not a certain way. So you can take on this painting. You can start with the background and then work your way to the front. I want to start just with domain parts. So that would be this one here. Then we'll go to this one and we're just going along and I'm starting here, I'm showing you that while we're doing that. So I'll walk you through the whole thing. Okay, let's start. We're gonna start with this one. And this is getting a bit of brownish, pinkish color. So what I'm going to start, I'm going to put on my lightest column and then work towards the darkest color. That's too we work with what column, what to call it cannot go if you use a very dark color and you want to go light on top, almost impossible. So you have to work the other way around. You start with your lightest colors and then slowly built them up stronger. So what I'm gonna do, I'm gonna take this really pink color here and we're gonna start with dead. So I'm going to wet my brush and let's see. If I move this over a little bit. And put that just might be able to see it. I'm wearing my brush. And what I'm gonna do first, I'm going to wet my this paint a little bit. And now this is wet. You could also pick up some drops and just drop them on there. And I'm picking up the Spain and putting it in one of these little slots here. And as you can see, that as really a pinkish color and picking up quite a nice amount of color. Picking up some water, picking up the pain again, and I'm making a little pool of water here. Now, this F3 mushrooms have the same color, so let's do them. And what I wanna do is I want to make sure there are some highlights according to my drawing. So does highlight, highlight, highlight here. I don't want to touch that. I want to paint that in literally. So I'm picking up some water, have that paint, and I'm starting with this pink really pin, this is going to be really a pink collar. And there you Kohonen painting just this whole mushroom in. But I'm not touching this parts on going around. And there you go. And I'm leaving this part untouched. And later on when we fill in the rest, you're going to get a really nice highlights. So let's do this bottom two. Okay? And that's the first part here. Now if the water color, if I would do now, do this one here, then this paint is going to flow into that and I want to make sure that is not happening. All right. That's the first one. Now, I've got enough paint leftover and then pick up that paints. And I can do this one too. And I'm making sure that I'm painting in a highlight here too. K, that will be basically my first layer and I'm, I just leave this to dry. So, alright. If you go outside a little bit, that's not a problem. If you go outside a lot, then you can pick up that tower and pick the paint up, press it on there and it picks up the pain and you can clean away your paint a little bit. Okay. Well, that's a nice color, isn't it? Pinker mushrooms. Let me see, this is dry enough by now, so I'm picking up a little bit of water so that I can pick up the remainder of the paint and do this last one. And I gotta make sure I do exactly the same. Leave that part open for my highlights. There you go. That's the paint. Ok. Now, we just need to leave this to dry. But I'm definitely not going to wait for this to dry. I'm just gonna move on to the next one. We're going to go up there. So I'm cleaning my brush in that picture until it's nice and clean. And I'm picking up some water here. And I'm gonna work with this red one now. I'm going to make just a pool of red. I'm going to read it first. Pick up some of that paint. There you go. Nice. And nice red color and picking up some water. And I can start painting now this one will be tricky. I need to take into account this highlight here, and I need to make sure that I am of course not touching those white spots. I'm starting up here. And it's gonna paint around. And as you can see at the beginning, it's quite wet. And what I'm doing, I'm dragging this oldest wet paint. I'm dragging that over. This totes too. And they go and by doing that, the dark color stays there. And the more wet color, sorry, the more like the color it's all where of course, the more fainted color, lighter column comes in there. So let's make a little bit transition. There you go. I want to go around to support a here. A little bit lightly like that. All right. That would be, that totes too. I think that is good enough for the first layer. Might close this a little bit. Day ego. Alright, good. And let's say that this is dry already. Another way you can see something is dry. You just move your paper and if you see water, the water shamed still on it, the reflection then is not dry. This is definitely dry. So I can do this part to picking up slightly a little bit of water, then pick up this paint. And I'm gonna paint this one going around than white spots. I don't want that. And I'm going to pull that paint and I'm gonna check the round part, highlight part is there. I'm only at this stage. I'm only looking at the highlight. I don't care about the mid tones and the dark tones yet. I only care about the highlights that is the most important. And I'm, I pick up a little bit of that paint again so that my brushes loaded again. Go around these things. There's white spots and a go now are getting in a nice layer of this red tone K. And that's it. Good. Okay, now went on to outside my area a little bit, so I'm picking up that paint right away. Alright, good. Okay. Let's say, yeah, I'm leaving that wide, like their work away later on. Alright, that's, that's so we've done now these parts already. And let's continue. We have done the pink disciplines should be okay to that is a kind of a brownish color. According to photograph a live we're gonna make it a left very light brown, brownish color. So I'm leaving that red for now to dry, cleaning my brush, picking up some clean water. And lets see which one we're going to. This is probably a greenish color. Green, brown. Yep. So and if you don't know a collar normally, you would have you can make a color squats, watch and a color swatch. Looks basically like this, where you paint a little bit of all the colors. But what you could also do it, you could just take a piece of scrap paper as I have here. And I'm just going to put that color on and say, yeah, that's a nice light ish, brownish color, good for this. So I'm mixing in this color and I'm using pure colors at the moment. So this is probably a kind of an ochre that would compare to, let me see a bit of CAPM. Let's go. This would be close to shape EA or row, something like that. There's, there's no names on this set. I'm just calling out names, so this is just a read. And for the red, if you have a set, I would probably use SHE have madder lake or madder lake or mammalian used that column but a bit darker. So madder lake, a deep madder lake would be really perfect. And for that pink, Permanent red file, as Rawls would do, any of those colors. Alright, let's continue. Yeah, we're making this light brownish color. And I'm gonna put that on this one. I'm going to give this one on purpose, perhaps slightly different color then that he is in real life is really pale. I don't but I don't want him to be, I guess, pale. And I'm just with this one. And I'm not even going to worry about light and shadow darkness. I'm just going to put in that first layer. And that's it. I'm going to let that dry and we're going to put that color right on down here to where this would have its stem and just one little layer. And God, letting them dry. Alright. And that's this layer. Okay, good. Let's go for the scholar to picking up a little bit of it for this stem here, for those pinkish ones. Now let's do them the same color we can do with this one. That same column. We're going to put on this and we're going to look at unlimited again, look at the picture and we're gonna bring in basically those mid tones, not touching that highlight. But I'm going to use a little paint and I'm going to smear this really out so that it gets like you see here. There you go. Very, very light tone and picking up some water again. And I'm doing the next layer here to same principle. Very light tone of Edison pushing this water all the way. There you go. And I'm leaving that to dry and I could do this one probably, no, I will touch that part so it would flow over. Let's not touch that part. We're gonna go back to the Pink. And let's do a layer of that pink. So you clean your brush and then pick up the water. And let's see. This one would be from the pink one. And I'm looking at my image, light and shadow image I've done to make sure that I'm not touching the highlight areas. So and we're putting in that layer, layer there. Now, let's see what that be dry down here. This wouldn't be dry, so I'm not gonna touch that for now. All rights. And slowly but surely running out of areas where I can paint. And then I have to pause my video. Let us all basically draw dry. We can do this pink too. That wouldn't be a problem. Yes, We Can. This wouldn't flow over. So let me pick up that pink and do this layer carefully around the edge. Okay, that's it. Ok, now, of course you wouldn't have all these strong outlines as I have them. And I'm hoping to be able to let them go later on. Alright, ok, that's it. I'll let that pink dry. Let's see, I just wants less highlights here, so I'm going to fill this all in. Okay, good. Let's draw, let this dry. Let's see that strike this is pretty much dry, this is pretty much drag. So what we're gonna do, I'm gonna clean my brush. And now I have my first layer of this red. I'm going to pick up some more of that red. Make a nice pool of red hair. And I have some rats and one we're gonna do next. I'm not going to study it. We're going to start with this one. And we just add another layer of red. But now I'm going to look at my picture and I'm going to say, all right, I'm gonna go only that part. And there you go. So basically really only half of it adding another layer. And I'm going to leave that to dry, picking up some of that paint. And then we're gonna do the same for this one. On a bring in some of these nice red right here, and this one is a bit faint. So what I wanna do with this one, I just want to give this one and not a layer of death threats. Not that one. That one is nice and red, but this one, I want to give a bit of a layer and bringing in a little bit of spots in that highlights that will make it interesting later on. Alright, I can pick up bit of paint again. Give this another layer, Vega, and this is what they go glazing you put layers over layers and you do it now if the same column. But later on we're also gonna mix in simply a different color. And there you go. Well, let this dry again. See this is now good. Push this a little bit further. Alright, we're leaving them to dry. And we have, these ones are dry already. This one is almost dry. This one is D's are dry. Cleaning my brush and I'm gonna bring in the next color on this, or mixing in a pink with some of that same API we have on here. So some of that CPR collar and flick on, put on a layer here of that sepia color and let that mix with that pink. So light layer C, and now we're getting slightly different or careful that it should be pretty dry already, but alright. And we're not gonna do DevOps, we're going to leave that. So if I do this one, then the paint is gonna flow through there. I don't want that. Alright. And I'm going to bring a few spots like I've done there to break up that highlight a little bit. Alright? And I'm doing this one, picking up some of that safe, making a bit of pool of paint here again. And let's go for this one. Now this should be pretty dry. And I'm gonna spread this out. Careful not touching that highlights. Alright, and we've got the mics here to getting an interesting mix of color k. Now what I wanna do with this one, I think it's pretty strong silver. When do I pick up my paper towel? Carefully? Touch, take away some of these paints. And that's bad and now I'm going to bring, spread it out a little bit. So I picked up some of that pain that is two ended a bit too heavily for my tastes. Okay. And that's that part. We can't do that part yet despite this drying, but I could do this part here, picking up some water first on my jar and I'm picking up a little bit of that paint so that I can do this one, but not too much paint on a preserve again, that highlight. And now we're going to let that dry. Okay, good, and that's a nice mix. Those are pretty nice already. Okay. This we're gonna leave like this but it's dry. What we're gonna do, I'm gonna leave these color. I could do that here now too. So I'm cleaning my brush, picking up somewhat a here, picking up a little bit of that paint. That safety. I'm not too much. And do it like that. And follow terrors, uh, highlight right there. And that's it. Now I see that I might need some red there still. Or basically push up. Now I'm gonna do some Red Dead later. Okay, I'm not touching that highlight again. Now I can do something with this one. This, I don't want to have too strong collars. I want to leave it like that. But I do want to add a bit of a shadow layers on picking up that same CAPI again. And I'm bringing and say, I'm not touching this part. I'm bringing in layer here and just a layer of CAPM there. And there you go. And I'm leaving that to dry and might lend this in little bit. I'm just dotting so that they get a bit of a nicer translation and that's it. Leaving this to dry, that should be nice. And later on we're going to add some strongest shadows. For now, this is good. Let's see, this is dry, this is not dry. Here is not dry. This should be pretty dry. We can go here with that same sepia, picking up a little bit and waiting my brush picking up a little bit of that sepia, that's not enough, a little bit more. And there you go. And I'm gonna add a layer over this pinkish showed that it gets less pink but still stay pink. And I want to make some API again. And I'm gonna do this one in the back and making sure you don't put my hand on that. And I'm painting in this with that, say PR covered too. And then I got this more interesting blends. Now you could. What you could do to you could mix paint to get this pink, mix in some of the brown and get a different color, but then you don't get the same glazing effect. So then you get not layering effect. Then you get the paint on at once. And then this. Now at some points you can still see this pink shining through really clearly. And that's the whole idea. We want. You go. Alright? And we've done that one now we can do this one to have some, say PR that is left. Paint this over so that it will be a bit less pink. And we're going to leave that to dry matter, whether you, the wetter, you make your brush, the wetter everything of course will be. And the longer this needs to drive. Now, cut a lot here. Not touching this part. I'm not going to touch that, but this is still drying. This should be pretty dry. So I can do this with the pews, CAPM, making some new sepia. And I'm going to add the first layer on this one. And there's no, there's no highlights and stuff here yet so that I can just paint in. And now we're just going to let that dry. Alright, good. As that, letting that dry, and that's it. Good. Now. Now I have that safe ps, this is pretty much dry. I wanna do one line here, bringing in shadow line around that corner, but not here on the top. And around that, that latter, that dry, that is good. Okay. For this one, I want to have a little bit of a dark area there. And I'm going to use this color here. And I'm going to say that should be close to probably a madder lake, something like that. That might be and it could be really pink too. And if it is to drink, as you can see there, this is not gonna work. So I'm not gonna do that. That is a pinkish color. I'm going to pick up a red. And since I only have one rats, and we're gonna make a pool of that red. And there you go, nice pool of rats. And we're going to clean my brush. And I'm going to pick up some gray preferrable Payne's gray if you have that. And this probably on this one is the black, but it's not really black. So I'm going to use that soft black and I'm mixing in some of that black with this color and that makes me a darker tone of red. And that darker tone of red can look at that as a nice dark red C. I'm going to put on there. Now if your paint set has a darker reds, I would say use that instead. And what I'm doing now I'm bringing in that. Layer, that dark spot there. And I'm gonna do the same with the same color. Picking up a little bit of water here. I'm gonna do the same here two. And adding in that dark color so that we can create with that. And that's the whole idea. A light and shadow affects. All right, good. Now you see I have not done this. I have not done that. We're gonna do that with this color in a minute. Okay, let's leave it like that and let's let them dry a bit to what I could do if this picking them up. And I might just as well carefully do just a little layer. I'm going to now could have switched brushes for this. All right, I've got this dark column, let's say now that is still drying. So let's not touch that now as you can see, when this dries up, cut that nice pit on the hair to doing that a little bit rough. You get this nice white and light and shadow thing going on here. And we may tone this down later on with a little bit of red, but we'll leave it for now. Okay. And you can see we're getting already so dark and light spots. Now this one I could work on two. And I'm just gonna give that won an extra layer of that sepia. And that's bringing in that dark tone like that there. Yeah. And while I'm on it, I can do this one too. Dark tone there, and this bottom here, this would be dark too. So I might as well do that. And I got a hair in my brush. If you have a loose hair in your brush, just take it out. Because it's annoying and spreading your paint where you don't want it to go. Okay? And the same with this one. Let's go till that edge. I'm creating a bit of a light and shadow effect already. And let's blend this a little bit in. There you go. Now, it starts to look pretty nice, doesn't it? And while I have some of the CAPM and might do a little line extra here to just on the back and create even more layers of depth. And that's what we all do, the illusion of depth. Now I can do that here to pick up a little bit of water. And I'm starting with bringing in this dark tone. Let's say P2. Alright, Day. And I'm doing the same right here. If this one carefully around the edge. Good, alright, that is nice. Let's see what we do next. What is drives that dry? No, this isn't this isn't dry. So let's leave that to dry. Now at the stage where still a bit too much here, I'm letting dry everything everything needs to dry. Okay. For a moment, I gotta stop. I got to pause for a moment to make sure all of this is dry, wants this is dry. All we back. And let's do that in the next video. I'll let this dry and I'll stop here. I'll let you do this to. And once you've done that, let's move on to the next video. Video. Let's move on to the next video together.
5. Watercolor Painting Step 2: Well, welcome to the next video. We're going to continue with this. Let's see, everything on my paper is derived. And what I'm gonna do, what I want to do is I need to do a little bit dark area here to get that transition. So I'm picking up that same API still have left. And I'm just painting in the line and I'm looking at the picture. I have and I do this bottom part two. And there you go. Now. Okay, that stat. Alright, I got that. Let's have two dry. Now. What we're gonna do next, I'm looking at this toads to these two. And I don't like the transition. That is not soft enough, soft, pick up that mug brush. You can do this with a round brush too, by the way. And I'm letting it. What I'm gonna do, I'm just gonna go over again and I'm gonna take that paint and push it in the other paint a little bit carefully here to just a little bit that might be too strong there. I'm blending away. Just a little bit Adeline. Bed of those transmission lines. We have. Okay, and now I'm going to let that dry. Now that should dry a bit nicer than what it was before. And let's do here just a little bit. So just with a wet brush that could be around brush or brown brooch, there could be a round brush or a mop brushes I have. And just softly with a little bit, go around those edges that blends and not too strong because then your all your pain goes away. And I'm going back to my round brush cleaning it. And I still have some of that dark color I made. And I want to bring just a little bit back here. And that is good and all around there. And let's leave this to dry now. Alright, good, cleaning my brush. The next step we've done that we've kind of worked on this one, bring in some shade there too. And that is that say PR color. Let's create just a little bit more. And I want this to be darker than that part. So I'm just adding a layer of that sepia might create a little bit more. And put that in here, the ego as a better color. And while I have that color. I want to do a little bit here too, because I haven't done that yet. Bringing in that shadow line. And there you go. Alright, leaving this to dry. Ok. I'm going to swap brushes here. Now I can do this. Of course we haven't done that. I want that with that darker red color, so I have to make some of that. So what I did, I picked up that regular red color. And I want to have that's a bit more. I added in a little bit of black or Payne's gray in this case to create a darker red column. Notices I can see that right away that's too dark. So if it becomes too dark, then U is picking up your lightest color again and mixing that in. And say you have a nice color and that looks like a nice deep red. And I'm gonna do that parts down here. I'm going to need a few layers for that. And while do not do the back because then that is going to flow in here. Again. And a little bit under they're pushed it up a little bit to get a bit of a transition, good. And we're going to let that dry. Alright. So might just as well do some wet and wet here. And that means it's basically picking up the dark colorant, adding it, not just the color, adding it in here so that we speed up the painting process. A little bit nicer to, alright, good. And now we'll just letting that dry. Ok. Alright, now, to base costs I think are fine like this. So what I'm gonna do next and we're gonna get this liner. And if you don't have the line or take the smallest brush you do have. And what I'm gonna do next with my regular brush, let me clean that for early. I wanna make a nice darkish blue colour. And with this set, I'm probably going to have a problem. This is a light and this is probably going to be purple while this might work, this is a close to an aquamarine, ultramarine deep, probably might, might work. Okay. And I want this darker. So what I'm doing again, I'm picking up. Some of the black and mixing that in so that I can see I get a nice darker tone of color. There you go. I'm gonna show you, I'm going to do this liner brush but a wet that pick up the paint and this picks up a lot of paint. And let me see which dry. This should be dry. And what we're gonna do, we're gonna use this to bring in a line shadow, just around, picking up some more of that paint. And there you go. Okay. I'll set and that's what I want to do with this one. Picking up some water, picking up this column. And I'm gonna do it down here to create that little brush, make it a little bit rounds at that edge. And push that right there you go. Now that this looks nice, I'm gonna keep on going with that. I'm gonna do that down here too. And I might just as well do little bits that back here too. All right, and let that dry. And you can see that looks like a nice shadow effect. Now can't do it here yet. So I have to wait. But I could do it around there. Become somewhat. And then this color I made. So if you have an indigo, you can just use that for the analysis of great color for this effect. Alright, I can do that. No, not there yet. I can do sum. If I look at a photograph, I see all these lines. So I might do that with this color too. And at just some lines here and there. And it is called aligner. So that shouldn't nice work nicely. And I'm gonna do the same here. But in my case, there is still this pencil left, so I would need a lot more paint to get rid of this pencil if you haven't done it well and have done it lightly, then you don't have all these pencil outlines. Thursday should be pretty much with the first layers. They might be gone already. At some stronger wants that too. And here in the middle. Okay. And I could do it there too. That should work fine here. Push it all the way down. And there you go. That's good. Okay, and that's that. So now we're getting a nice some shadow and light going on, on this illustration. And once this is Dr. we're gonna do the same here. And we're gonna do some around these spots on C dot is dry. So let me pick up this color and what we're gonna do if the spot's going to give them just a little bit of an edge to spring into some shading like that. Not down there. What I can do, just one. They go it around here. Just continuously picking up some of that pains. And I need some order. Again. I can do the same. And with this one or letting it dry. That one, I can give a little bit here and a little bit there. Okay. And I might do this one right away to and then it is dry ones, I need it. And now you get this nice shadow line effect going on. We're doing it there later on to, we can do this one, I forgot. And that just brings out these spots really nicely. Ok. This should be dry to let me make a little bit more of this color. Picking up some of that blue and black. And that should be nice again. And what we're going to do, I'm going to bring in some of these rips here. And there you go. And you see I can do the same here. Bring in some of these rips. And I've done those. Alright, so I would say this is pretty much dry enough to get a little bit of this going on there. Okay? And that is nice. Alright. Make it this. A little bit rough, more natural. And I'm going back to this one. I'm letting my brush and omit a one some more here. And do the same as I've done there. Push it just a little bit to get that more interesting effects. And I'm sure this is pretty much dry enough to ads that line here to push in there. It's around and a bit more natural adding a little there too. Alright, that's a nicer shadow. Okay, I'm leaving this too dry. And let's see, let me do this one. More bit of staple stippling, pushing it a little bit. And this one we do two. I need some more on that bottom. Okay. Just a little there. And let's see, we could do this one too by now. Should be fine. If there is still paint left. Yes, there is still paint left. Pushing in a little bit of that here. Fifth, I, we're letting them dry. Alright? And that is some shadow tough going on. That's looking nice. Alright, let's leave it like this. This, we are going to let dry this. We're going to leave like this. We're gonna leave like this does looks nice now. And we just only have to do a little bit there. And we want to have a bit of a shadow line. Probably just do carefully a bit of dark color on there. Make a bit of a distinction between those. All right, now, let's leave that to dry. When I leave this to dry, this is pretty much almost dry. So I'm going to take a small brush now. That one brush or to brush you could use, I wanna do this part here. And I still have some paints on wedding, this brush. I still have some paint left, so I'm just adding some water to it to activate that paint. And I campaigns in the first layer here. Right? And now we notice that this is rather, rather perhaps a bit too pink for my taste. So I'm going to correct that. I'm going to see create a nice red color. And now I'm going to add that in. And that is the thing, nice thing about watercolour paint. You correct your mistake like this. This is wet in wet, that is called because my layer was wet. Now I'm putting a second color in it and I'm leaving this to dry. A little bit more color here too. Okay, now that's quite nice and interesting. We're gonna do next around here. Now this is that spot is very wide. So what I wanna do is we've got small brush pick up a little bit of this, but I'm going to first add a lot of water so that it becomes a show that on your test stroke, a really light color like that. I'm picking up some of that light column going on the edges here. And we'll carefully adding in some of that colour there. Now that looks much natural. I'm leaving some white on purpose just is stippling right there into C. And now you get this nice transition. I'm going to pick up that pain to and we're gonna do right here, same there. And they're a little bit, push that in and make sure I'm leaving some white that's work away some of these edges by going over it a couple of times. All right, and look at that. And I'm leaving this too dry too, and now that looks way more natural. Let's see how about that? Is that dry already? Can I add some fewer R2 that we give it a try? Yes, I can. Alright, and there you go. And later we're going to add that dark color to its own, leaving this too dry. And while I'm at it, a little bit of red color in here, get even a nicer blends of colors. And let's do that down here to push that up a little bit. Alright, let's not touch this anymore. And in just a few spots here and there and there will soak in and that creates a bit of a pattern. So I'm just picking up that rationally made and just pushing it in, creating a kind of interesting pattern. Alright, get more on this edge perhaps. And around there too. Okay. It's a minus looking quite interesting except for, let's add a bit more dare. I would say that is pretty much told sues, the way i 1and around here, we want to go there, get some of that pink. And I'm watering down really a lot to the same as here. And that is pretty strong. Still. Do it adhere to pushing this in today or letting it disappear? Okay, you can have a little bit of a pink color to it, and that's way better. Let's pick that up and do the same here. Painting this in, and then I'm getting here. And I'm adding a little bit of that. Right? To tone down this highlight slightly, it's just a bit too strong. That highlight, Alright, good. Little weight on the top. Let's go here too. And now we're getting a nice color, okay, that is looking pretty nice now, the only thing I need here is some of that dark color, but I don't feel that might be red. Let's Dries. I'm picking up that dark color, adding it under their good. And now I'm done with that piece. Bits. Alright, cleaning my brush. Good. Alright, that looks pretty nice. I'm gonna leave this to see dry, but I can work on this part. Okay, I'm gonna leave this to dry or not while I'm working on, but that will be for the next section. We're going to do the tree and we're going to work a bit on the ground. Okay, let's do that in the next part.
6. Watercolor Painting Step 3: Alright, welcome back. Yours could be dry minus still drying there, but I can work on the tree while doing that. Alright, for the tree we need some brown. Of course, there's a nice brown there. We're gonna pick up that round brush again, pick up water. And I might do that as well on here. On the big part of going to need some brown. This might be a strong Brown Brown, which I don't like. So what are we gonna do with this brown? I'm going to mix in clean my brush and mixing some yellow. If we could clean brush, pick up yellow and mix that in and tone this down just a little bit. And now I might get the color I like. And definitely the color I like. See, I'm not going to, this is a very light color. So with this, I am painting in that tree. And I'm kind of work from one side, pushing it all to the other side, creating that sense of highlights. So you need quite a, a wet brush for this. And by doing this day, go see and creating a nice brown dark there and the rest is quite light. I need some of that color down here. And I'm basically pushing that car up there too. And now down here I need more of that pure brown color. And a little bit. And dare to K. And that's it. Now, the nice part is that this part, this ground is not touching the tree. So I'm leaving the story, my first layer of the tree to dry in the seed that creates that nice highlight right away I see some little bit of mess in here, a little bit of dust, but I'm going to leave that in because if I try to take it out, I might have a problem. So let's clean this brush. On the bottom. We're going to go over a bit of green and brown. So when we do our pick up that same brown I have and I do it in this pool here. And I'm just going to add a green to it. And this brown, that's compassionate. I'm gonna say this brown is close to fund Dyke brown. So probably wrong burn off on dyke, closer to the phone, Dyke brown, this one. And then there's some green. Let's see, I wanna make a kind of an olive green. Let's pick up that light green and mix that in here and eat more of that profusely. And there you go. Now we're getting a kind of a brown green, more of an olive green. And there's a hair, I don't want a hair in it. Alright? And I'm going to use this color, this brown, green, so closer to an olive but on the darker side. So best is to get some fun Dyke brown and use it with some permanent yellowish green or a permanent green, light green and mixed them together or pick up your olive If you have that, you could do the olive green two. And let's go. He has that is a nice color that work for a base. And we're just going to put down the base of the ground, picking up their collar, moving it in. And again with this, at the moment, I'm not too worried about Highlights, Shadows and things. Down here. I'm going to just start at the bottom. And we're going to work my way up. And then create automatically a bit of a highlight anyway. And we're gonna do this bottom part a lot darker later on. This is just the first layer. Alright? And that's creates this on the hero on definitely have some more. And there we go. Good. Okay, and while leaving this to dry now let's see. I can go up there. Yes, I can go up there and I pull up, put in a base layer. We're going to add some shallow there later on anyway. Alright, and now it's starting to look like a watercolor illustrated illustration of what a collegial straight at what? A watercolor illustration. So this needs to dry current. This is dry. I can do that down here and we're gonna go for that back here. I'm going to take them up. But before I do. So Caracalla clean my water in a minute. Let me do that first. I'm going to pause this video. I'm going to let this dry and I'll be back on student in the next section and work on the sky already. A first, a little bit of a layer. And then we're gonna go back into the tree and the ground and give that some more color.
7. Watercolor Painting Step 4: Alright, I've cleaned my water and rinse my brush, but that water I need to pick up. And I've cleaned it a little bit. And let's see. What we are going to need is some blue here. We're gonna use that brush, okay, and as you can see, probably we've set the colors are a little bit muted. Now for this autumn scene, that works pretty well, doesn't it? Chipset. A woman say to Euros, probably. So $2 or something like that. And you can get great results. I'm getting that my brush and I'm picking up that really light blue. And that's going to work rates. I already see that that is a nice color picking up a lot. And if there's mob brush, what I'm gonna do is I'm gonna do this. Yeah, see that? Alright, careful around those spots and around that tree in the tree. And that's why we have this towel. Get rid of it. Alright, and this is a dangerous technique, isn't it? All right. A little bit dare. You could put it straight now and here I'm just push it in a little bit like that. All right. I need some paint, picking up some water, some paint, and just keep on going. And as you can see, where I started, it's a bit dark. Okay. I gotta clean that the brush fell. You did see that and are picked up some of that color. Work that away, clean the brush, dry my brush a little bit now because I want this color to really come there you go. Pushing that around that. Okay. So if you paint starts to flow from one color to another discovery, if your brush again like this and that background color, that blue, we're going to dark and debt for sure. But for the first layer again, the light blue is pretty good. And there's the last bits. Okay, around this edge slightly. And let's leave this to dry. Ground this a little bit. All right. I'm going to let that dry, put at Brown, that brush away. Let's see, I can do it in the tree nut on this side, but don't go and work on this side of the tree. And for the tree, direct alone brush we'll do whereas the regular around branch, let's clean it. And I still have some of that color left, which are used in the tree, but it's not dark enough. So what I do is pick up some water, some of the darker color and mix that in here, get a little bit of a darker color and over debt and our have to make sure I'm not putting my hand down there. Nice. I'm bringing in. Another layer and I know on categorical around till around there to preserve the highlight I got in it. So and around here, I'm gonna do the same as I did. There can be a bit of an interesting transition. There you go. And pick up some of the core needs to go nice and dark. Alright? And that's it. And we're going to later on, definitely add some more there. Okay, and let's pick up this color. Do it around here to, well, we can just paint this in nice and dark. Alright, good. Well I have this column. Let's add some water to it. And let's add the same color to the ground. And we're picking up this column here and the bottom. So we're going to create a mix of colors underground or going to do is or not kinda touch this and you can see I'm still, yeah, let's call that a bit stippling. Not really painting anymore because I want to create, on the bottom, I want to create a bit of an effect. Let's say yeah, leaves him. Autumn Leaf kind of effect. It's not really autumn leaves, but the ideas there. And let's add a little bit up there to here to lift a dried it. This brush is almost dry. Picking up now some color painting that in and a little bit there. And good. Alright, this is interesting bit of water. And just a little bit there. Okay, and let's let that dry. Okay. And that is nice. The only thing I don't like is around this tree, so I'm going to pick up a bit of this with reasonably wet brush, pick off some of this collar and pushed the color, whether it's a little bit and then move it, inherit but not to the edge. That ego and I like that way better. Good. Now I can leave that to dry. The nice thing about what a coloring you can correct some things. Okay, now we're getting a nice transition here. And we're letting that dry. Okay, that's it. This needs to dry. This should be pretty much dragon, so I want to swap brushes again, kind of pick up that mug, brush, wet it, pick up some of that color. And here make a nice thing and to work on to some other delight, we've done that here a little bit. This needs to be light, so I'm not going to touch that. This needs to be darker. So what I'm gonna do, I'm gonna start at the edge of the tree again. And I'm pushing in some of that color. And when I get here, I'm pretty much going to stop it around this edge, it around their careful around there. And if you put it straight, you have some more control. I'm still using that same motion. And I want a little bit around here too. Okay, and now let's pretend does light coming this way and bringing that in a little bit, okay. But they're a bit around the edges here and I see I've gotta get rid of it. Okay, good. And that will be my sky. Now I need some with a color down here. This is pretty dark. Morph that color. And I'm gonna do same here at some of that color. Writes. Good. And that's that. All right, we're gonna leave this to dry. That shouldn't take too long. And then we're going to add just a little bit dark pure the pure colored, they're a little bit more to get that nice transition from light to dark. Alright, now this is try to, let's work on that a little bit. Let's pick up that could darker screen. I have dab. Let me use a little brush for that. I'm picking up this dark green and I'm adding it there a little bit. I don't have much room left, so I should clean some colors out. So what we're gonna do with this very small brush, I'm gonna do this. Bring in some green on the grounds. I'm just letting this brush basically dance. Touching it very lightly. Maybe creating the illusion of grass or definitely will spread this out a little bit too. There you go. Some more here, two k. And this is what a doubt, a little bit. So I want some of that HER2. And since this is water down nicely, a minus, well, fill up a little bit here. Wedding it, it's quite light now. Adding that around there and making a bit of a roundish motion careful when you are at edges. So I'm using a strongly green first and then I'm using a quite the same color, quite water down to mix it in that color. There you go and you get a bit of an idea. There's some greenery. Perhaps someone leaves. And I need to go up there a little bit. And same here, my green is almost gone. Pick up a bit of water to act to fade that green again. I wanted to hear a little bit stronger. Alright, good. Well, can I leave that to dry now? Okay. And then you get allowed to disinfect? I'm going to let it dry. And one is dry. I'll see you in the last session where we're gonna do a little bit of detail and we're going to treat, creates some shadows there. And let's perhaps some other ways and yeah, we'll do that in the next session. So I'll see you as I do this and then I'll see you in the next session.
8. Watercolor Painting Step 5: Welcome back. Overlooked this a little bit and said, okay, I want to do few things. I want to add top blue hair, add a little bit of dark brown there. And let's see. And then I'm pretty much happy. Normally you would work away the lines. I'm going to leave them here. And with the second one, I'm going to get rid of most of these lines and create a different one here. But with this one, I'm going to just leave the lines and that is ok because they work well for this stay there or they're not they're not in the way I'm they're not annoying. So we're going to just leave them there where they are and let's continue them picking up that mug brush. I want to have some of that blue, nice blue, strong blue. And that will be that last layer IN needs around here. And a bit around there. And stippling in that little bit. And that's it. Cri, than I want some of the blue, this very carefully, Alonso start Bluetooth. And I want a little bit blue, just there. And that's it. Ok. On this edge. A little bit more and a little bit there. Okay, let's leave that to drive. We get this nice transition from light to dark. So yep. And we'll leave it like that. It looks pretty nice. Okay. What do we want? We want the tree or the tree. We're going to go for the big brush again, make sure it is clean and pick up that Brown we had. We still have some mixture here and we don't need much. So I'm going to get that last in. I'm gonna make that last transition to about, let's say here. And then we have to let that dry again. And then we're going to add some details so that this will become a tree. And let's add a little bit spots, get a bit of transition going, they go, and we need that same color around here. Good. Alright, and that's it. Well, even the tree like that. Let's look down here. What do we wanna do here? I wanna brighten that up a little bit. My well, before the call is you can't really bright and adult, but I want to change the URL to shift the color a little bit. And we're gonna do with this with a yellow. So I'm gonna pick up hello and I'll have a little bit of a problem. I need to clean this first and some going to clean this part. I'm going to wet it really good. Take a towel. And we've got a you could rent that too on the dirt on the water by the way, but then I would wins everything and I'm still need those colors. One, we're gonna go on some detailing, so clean my brush. Well, get this yellow color going. There you go. Really a lot. I want K, make it nice and right, and I'm going to just paint yellow over this specially there and create a bit of a more autumn 5p C. That does the trick. And we're gonna do that right here two, and as you can see, I'm starting at the top now because I don't want to pick up that green and bring that over there. Clean my brush again at a little bit more at the top. Alright. And we're going to let that dry. Picking up a little bit of yellow again. And I'm gonna do it, right. They're bringing that yellow. Not gonna do a deaf. I'm going to create shadow up there. But we don't want to shadow down. Well, we will have some shadow down here in a minute, but for now let's really get that yellow going and do the last part here. A bit more data. Alright, Now this can dry carefully. Okay? And that isn't much better color than we had and this is quite wet. Well, let's leave. We can pick some of that color up here and there to create a bit of a highlight, picking up their color. Trying my brush and just on the top, she could see scraping of their color. And I'm creating a highlight by doing this with dry brush. There you go. Okay. And we're going to leave pick that up a little bit more here two, and leave the rest to dry. Okay, good. And we're gonna leave this to dry. I'm gonna work up there that is dry. We'll leave that colour there. There's nice detail a little bit. We're gonna get that liner. Make sure it's clean and I'm picking up some of that Brown. Really nice strong than each somewhat a day. You go. Nice pool of water with that, this strong dark brown. And with this liner. And we're going to add three lines like more I have here from these lines. And I'm working from the bottom to the top pie, definitely need more Loftus. And then just pulling lines. There's random. Alright, let's do it down here to a little bit. Show I don't touch anything else that is still, it's pressing Really. Like me. And I wanna do it round this etch to create that brown edge. Okay? Okay, that line a little bit. Look, now that's looking really a lot more like a tree. Let's leave them to dry a little bit on the HER2. Okay? And now this tree has a nice transition going from a dark to form a line, sorry too dark. And I did this on purpose. A little bit darker to get nice effect. Alright. And that's it. That's pretty much hit that one. We need to do that one. And we're going to pick up that small brush hair, clean the small rush water. I still have that dark color hair a little bit. And I'm going to create a shadow. And I'm gonna create shadow dare to that line I don't like so I'm going to work at way, at a little bit more of a line there. Might just pick up some more. And do that. Here. There you go. Alright, let's leave that to dry. Let's see. The rest is nice. Might want to have some Shadow. Dom rush. Just a little bit. And I want this to be chateaux too. Good. On there to a little weights goods. Now, Nice. I wanted to have some lines on this one. I need that line. And that color pruney isn't strong enough anymore. I'll get that color dark blue. We had that a query niche as some like to it as more relaxed day eco Livermore. And now I got a nice dark color. And make sure this liner is nice and wet so that I can paint in some lines like that. And that looks good. And I'm going to do the step. And I'm going to add some more lines here to inbetween the ones I already have a finished possible o k, And now that looks a lot better. Okay, nice. Well, I might time bring back some of these there. There you go. Good. And that's it with this nice column. Let's do a little bit of a line there. Yep, that is it. And let's create. Dark spots on the hair to okay, and that looks grades now it looks good. Bit data. Alright, this just, just the detailing points. I don't like creating our little bit more shadow. To shadow a cost shadow we still have. So I'm gonna create a bit of a cast shadow. Might be a bit too much, so I'm going to correct that. Okay. Alright, gives, looks good. This one still needs a little bit of shadow. Bring the shadow back to this one. Okay, that looks good. Let's add a little bit of hair, pick up some water, and some of the work on this a little bit, make that a bit darker. Or out HER2. Now you get a nice transition, okay? Alright, it's bit more down here. That's at chateau in hair to little bit. And then of course, there are two. Alright, let's leave that like debts. Let's not mess with data anymore. I'm keeping this brush, that line. And I want to push this away a little bit too strong here too. So with that, let's line, I'm just bringing in some what color and I'm pushing that away a little bit and now I'm just leaving to dry. Don't app it. If I do that, then my color is gone. I'm just leaving it to dry. And that's creates a nice effect. Okay, good. They'll shoot dry nicely. Cut the line here. This should be dry, or we're going to do that. We're going to add a little bit of more lines. Let's go with a light, this light brown. This probably is yellow ochre. And let's add a nice amount of it. And let's add some more lines on the tree. Bringing pitiful a lighter affects. Hey, that looks nice. Let's see what I do. I need some there. Push that up a little bit. And that's shoot. I got to stand up for a minute and see how that looks. I cut it, look at it from the top and I say, that looks pretty good, doesn't it? There's only a mistake there. I see. So let's see if we can correct that way. Going over that with the brush Couple of times, smearing it out a little bit. Let's see. Yes. Good. Okay. We got some shadow, dad. Let's go for clean brush and pick up some of the shadow and just know that layer there. And what I want, I want here is to be Dhaka. Okay. I'll leave that to dry the rest. I'm pretty happy with o to say some there. So that dark shadow color here. Yes, that is bad. Okay. Now that is back to and for the rest. I think we're pretty much done. We just want to have some shadow down here. Okay, and we're gonna take this little brush, clean it, not sure where it hasn't been. Pickup that dark color I have. And I'm going to on the bottom at some of it. In, pushing it into the vivid and like that. Adding a really dark layer C, we can do that here too. Although I just down here. Her2 a bit more there. Okay, and now we get a darker layer. Nice. Let's see, I'll leave that to grow. I want to bring in some more clean here. Okay, I'm gonna pause my video. Last step, I'm going to leave this to dry and want to bring in a bit more green on the bottom. And that's pretty much it. We could do some grass or not just let's not go into the details. Let's leave it. Yep. Just bring in some green wellness drag. I'll see you back when this is dry. Okay. For you to just take a second for me but longer. Let's see. I want to bring in some of the dark green and I mix it with that ochre i have here still create a nice blend. Just different kind. Green, as you can see, more to start all over again. And I'm going to use that and just paint it in. I'm using yeah. Bits as if I'm making grass, but I'm not really making grass. Because if I wanted to make, really make grass than I need a lot darker color than this. I'm just painting in that extra layer here. A bit of a dark tone at the bottom. Okay, good. So yes, you get a bit of the grass idea perhaps, but it's not really crass. It's a bit faint alone. Okay, I wanna keep it a bit faint. Alright, good. Shadow there, some light here and some darker here. And I'm done. Now. And we've got some nice Blue's going on here in the sky. And let me stand up for a minute and let me look at that blue. I think that works, doesn't it? We could do a bit of transition. We might try that, okay, that because it's a bit too strong. So what I'm doing, and we're gonna get this mob brush, clean it, probably all blue in it. And it's reasonably well now. And I'm going to press it over here and I'm going to create quite a wet layer during this. But doing that should tone down that transition a bit, Create, a bit nicer. Let me stand up. Yes, that is a good, nice mob, wet brush. Going all the way on working away. That in my opinion, a bit too obvious ly, and we're gonna do the same here. Reasonably be wet, pushed this line. Oa, okay, and let's leave that to dry and then we get a nice status and way better transition then we had yep, that looks good. Okay. This is going to drive. I'm done. And we're not going to touch this anymore. This is good. We'll cut some nice attention on the toadstools with that column. And we've got some nice variations here. So grounds a nice tree in the background. And we're going to leave it like this. Illustration is done. Well, that's it. I'm happy with the illustration. Great, great light and shadow going on here. Great colors, some different causing damage in the mushrooms totes too nice sub-tree here of ground and a nice effect in the sky. And I said, OK. And then considering this as just €2 paint, as you can see with to Europeans and some regulars at cheap quality find structured cold press paper and when there's not high-quality, just reasonable but not expensive, either. Left those materials, you can create beautiful illustrations and dishes would go in a book. This good, nice, Great. Okay. I'm gonna do this video too, but I'm going to speed that up. And we're gonna do that with the fan go paint I have, which is of course a lot more expensive because one of these pens is yes, expensive as this whole thing. And let's see what that ends now, I'm expecting that to be stronger in color and more bright because of course I know the paint, of course. Okay. It's going to be different for sure. It's might be a bit stronger paints, but this is pretty decent and it's not about the price of the paint. What do you buy, expensive or cheap materials. It's all about the techniques. And if you know these techniques, as you can see, you can create something great with it. And even if something goes wrong, I showed you how to correct some of these mistakes and make sure you get a nice painting even with cheap, reasonably priced paint. And you're gonna get with these techniques, if you manage that with this cheap stuff and you move on to more expensive stuff than your result is only going to be better. All right, that's it. Yeah. Okay. Work on liquid here. And you can watch the next video if you want to. And I'm looking forward to what you will create.
9. Painting with Student Quality Paint: Welcome to this video. In this video, I'm painting the autumn scene with Royal talents, Van Gogh, watercolour paint. But I'm not going to talk you through the whole process. But what I wanna do is I still want to give you some of the colors I'm using for the toadstools, the tops, the read, I'm using permanent reds and for their free similar mushrooms, I'm using Naples yellow for the top and the stems. And for that in-between mushroom, I'm using burnt sienna with a mix of green. And then for the tree, I'm using burnt sienna. And then for another layer, the next layer, MAFFT turn my paper for that one. Then for the toadstools, I'm pulling on a Permanent red light on the top. And for the stamps I'm using, Let me find it a row number. I'm using a row number for these free similar a mushrooms. I'm doing it a little bit different. The one in the middle, I'm using Naples Yellow, some more Naples yellow. So I'm keeping that lighter. The other two, I am using yellow ochre, bit of yellow ochre on the stamps and also on the top. And then for the one that is left over, I'm just adding some more layers of the same color I used. And that was let me go back. That was the burnt sienna and a sap green a little bit more. And then for the shadows, I'm using IndieGoGo quite a dark blue. And for the tree, I'm using fund Dyke brown for the tree, I am using fund DAG brown mixing that in. Then for my grounds, I'm using some yellow and some raw Oceana and then also on its some olive green and light oxide reds. And then for my sky finally, I'm going to use Cyrillic than blue or I. Those are all the colors I'm using in this autumn scene where I'm painting with the Royal talents fan go paint. Okay. Okay. Okay.
10. Painting with Artist Quality Paint: Welcome to this video where I'm painting with Schwinger watercolour paint. And this is artist quality paint. So contrary to the first video where I talked you through, we use just cheap quality paint. Then I use some student quality paint. Now this is artist quality paint. And again, I'm not taking you through the whole process because we've done that already. I'm just showing you how this looks and how I'm doing this, but the techniques are pretty much the same. Now would want to give you the colors and the numbers and the names. But unfortunately I don't have those because this is a rather old sets being used for many, many years already. So I don't have that information, but I'm pretty sure that they're close to the colors of the thing go. But the only difference I would say that under told two that's on the left in-between the mushroom on the front end that total on the back, that mushroom in-between there. I'm pretty sure I'm using some kind of olive green on it is more olive green and the other colors, really some reds, yellows effect there might even be standard just Permanent red and just a permanent yellow color. And some are provably in there and fun Dyke brown too. But I'm not a 100% sure. The difference. What I'm doing here too is if you can see with the totes too, I'm using a darker red on it, some styling with a bright red and that I'm pulling more of a yes, a permanent dark reds. I'm not sure what the color is, as I said, but it's a very dark color I'm putting on there might even go tools, a brownish red To get a totally different look. And as you can see when this is finished, it looks different previous ones. So while that's pretty much what I'm going to say with this video and you can just continue watching we painted this scene. And if you have artist quality paint and you probably can get close to this. Well, thank you for being with me in this class again in this session and I'm looking forward to see you in the next session. What we're gonna do a totally different material than watercolor paints.
 Benjamin A, Art Teacher, illustrator Art by Benjamin