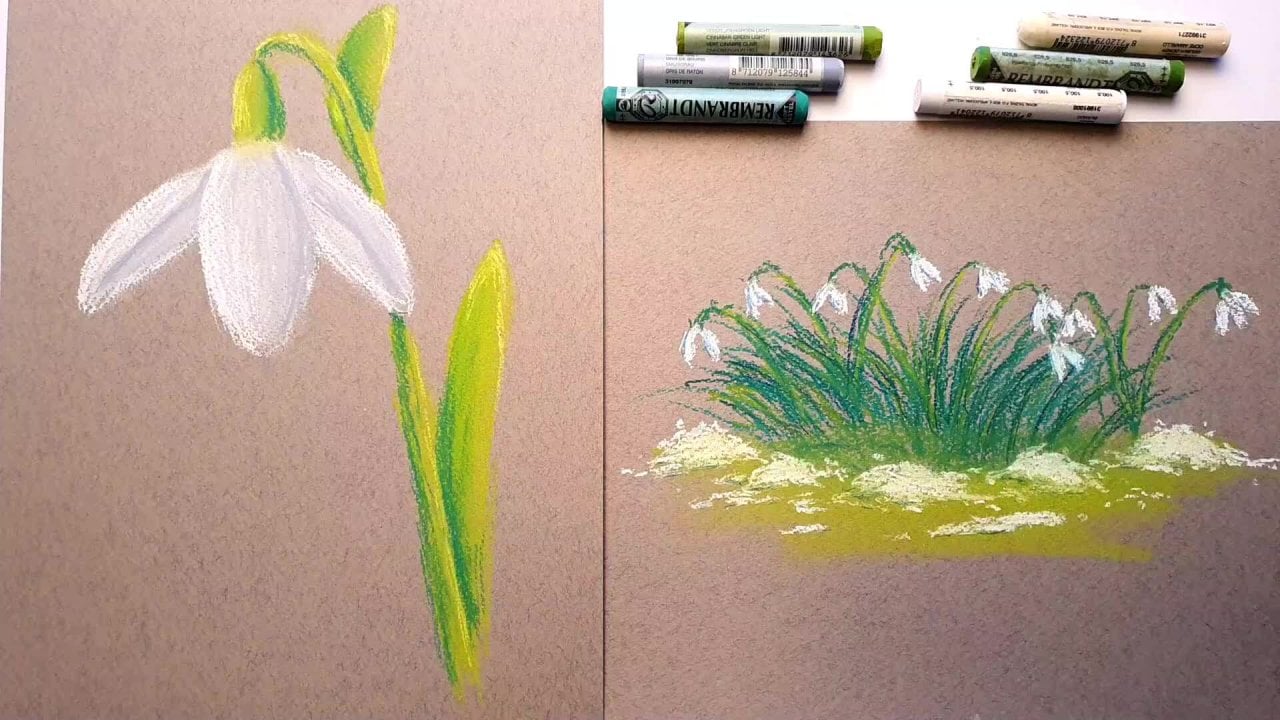
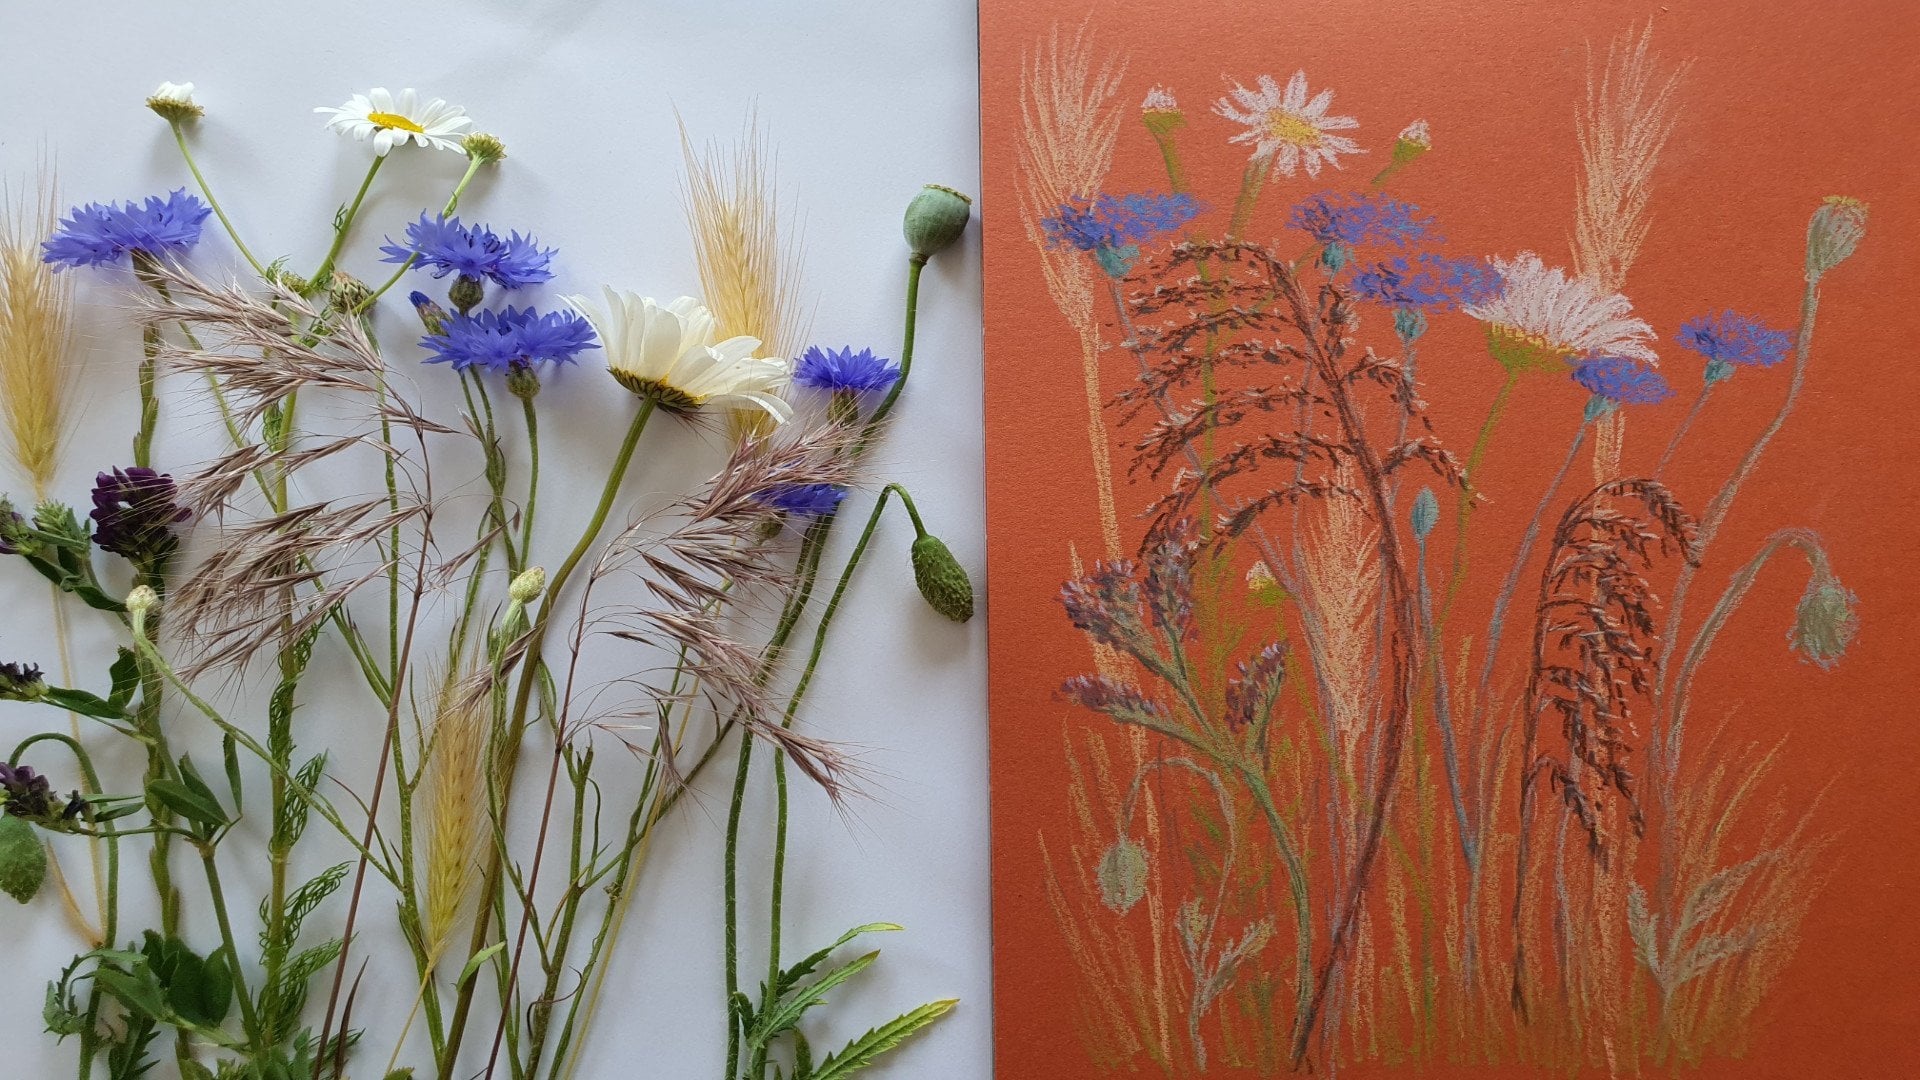
Transcripts
1. Introduction: This is another session in the art class from idea to finish illustration. And what are we going to do in this session? In this session we're going to work with finalize who actually got to make an illustration. We're going to work do this illustration. And we started out with some ideas from those ideas. Who made a composition? From those composition, we made a drawing and you're going to need that drawing with this session. So if you haven't done previous sessions than I say, go back to those before you jump into this one. And with this finished drawing and the information we have from the shading drawing, we're gonna create this illustration and I'm just going to show you how to use these pens. And even if you have never used pipelines pens before, no problem. You can go along with me. I'm going to show you how to use different techniques. And we're going to have a lot of fun in this next session. So I would say, yeah, come along with me and we're gonna create this illustration and get our idea to actually a finished illustration.
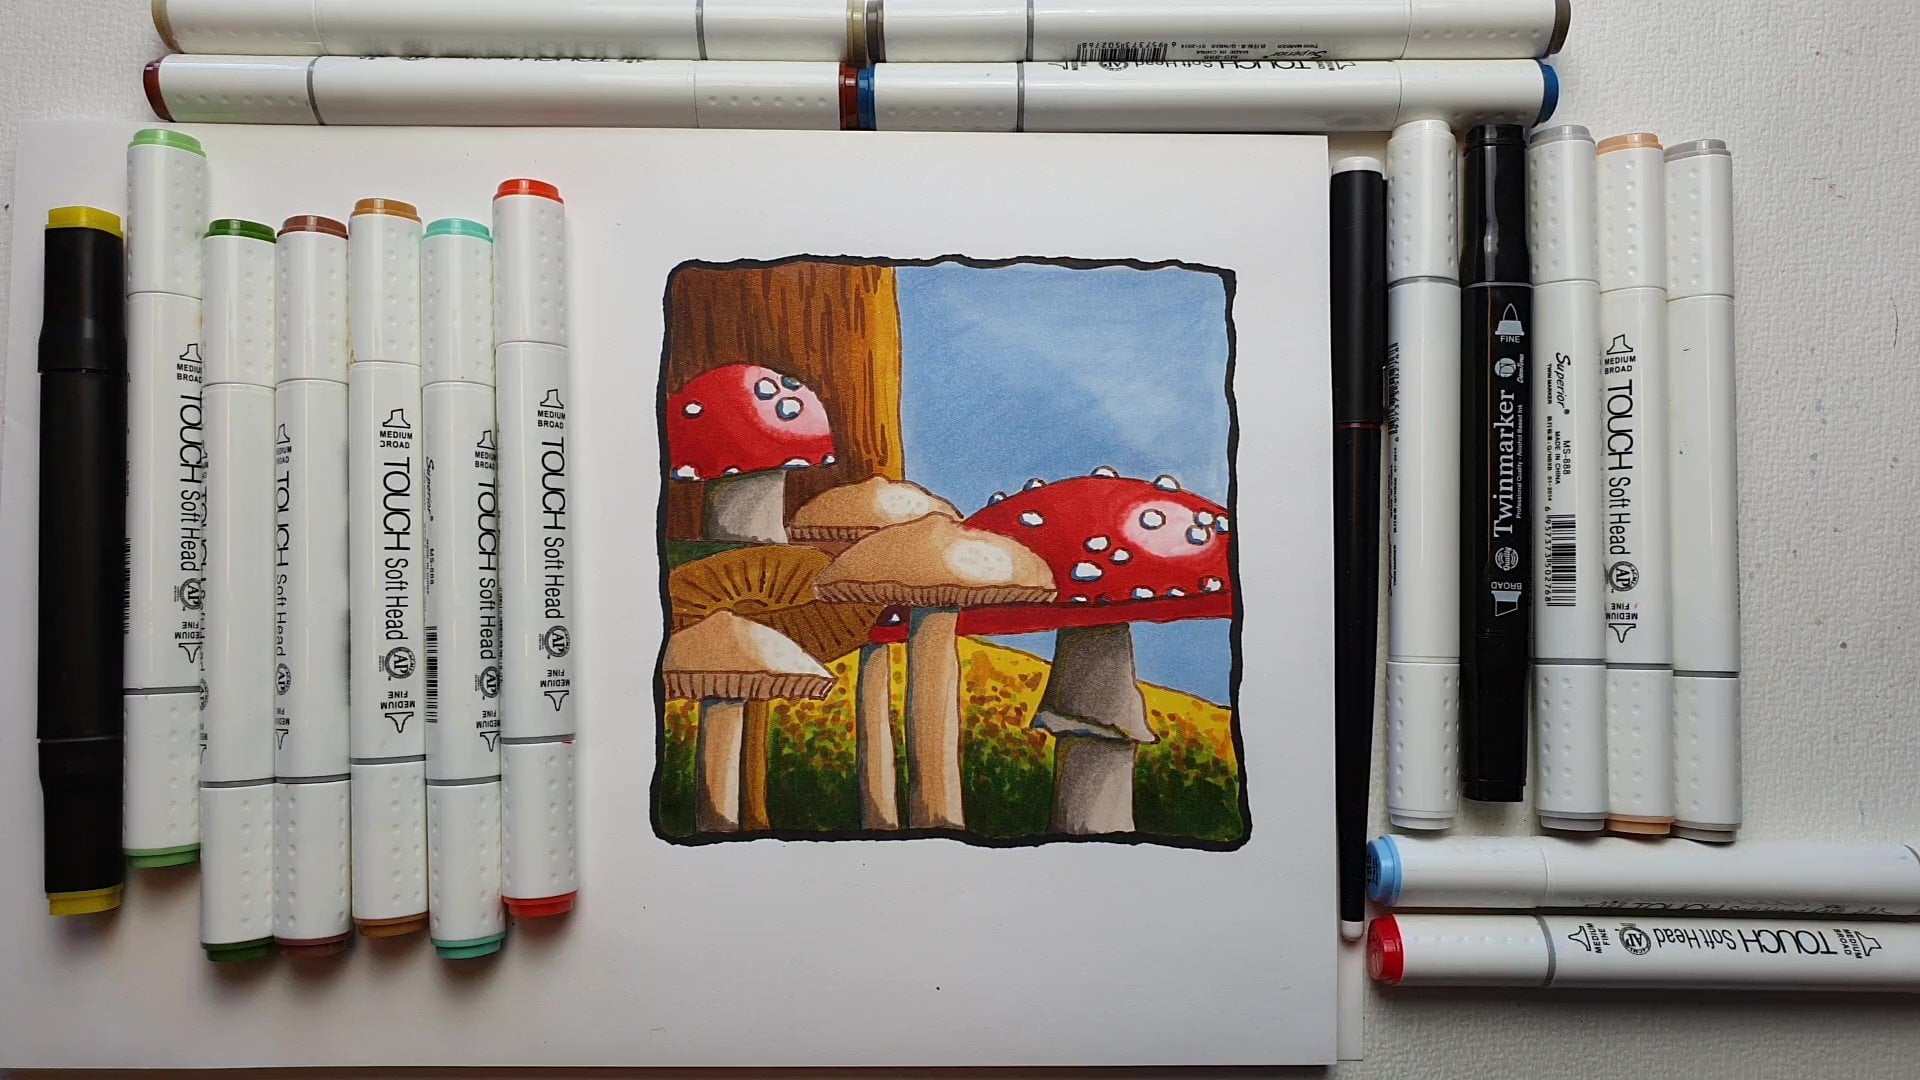
2. Materials: Welcome to this lesson. We're going to discuss some materials first because we want to draw, we need some materials. What do you need? Is you need, let me see. These are not really materials, but just says did you need this finished drawing and transfer it to a different paper where you can work from. And especially if you're going to work on more sessions, I would keep an original. Then you're gonna need the shaded version because we're going to need that information that is here to put it into our actually drawing. Then you're going to need, of course, paper, cartridge, Partridge paper to the call it steal copy paper cartridge, paper, sketch book. You can use any sketchbook, or you could even use watercolor pen and paper if you wanted to. Although we're not going to work with water, but looks nice that kind of paper. And I'm just using sketch paper, what you need also as fine liners. And I'm using a two from a set. I am using a 0.05. and a 0.3. fine liner and brand doesn't matter. You could also use a different range of 0.8 and 0.5. for example, or 0.30.1. That would work too. I'm just using the 0.05. and the 0.3. cause you need to draw this show. You might need a pencil and eraser and brush things like that. And I will use a ruler to And did I cover everything like this? We're pretty much, I would say so maybe you need to sharpen your pencil and that will be. All right. You can move to the next lesson. What we're going to actually start working on this.
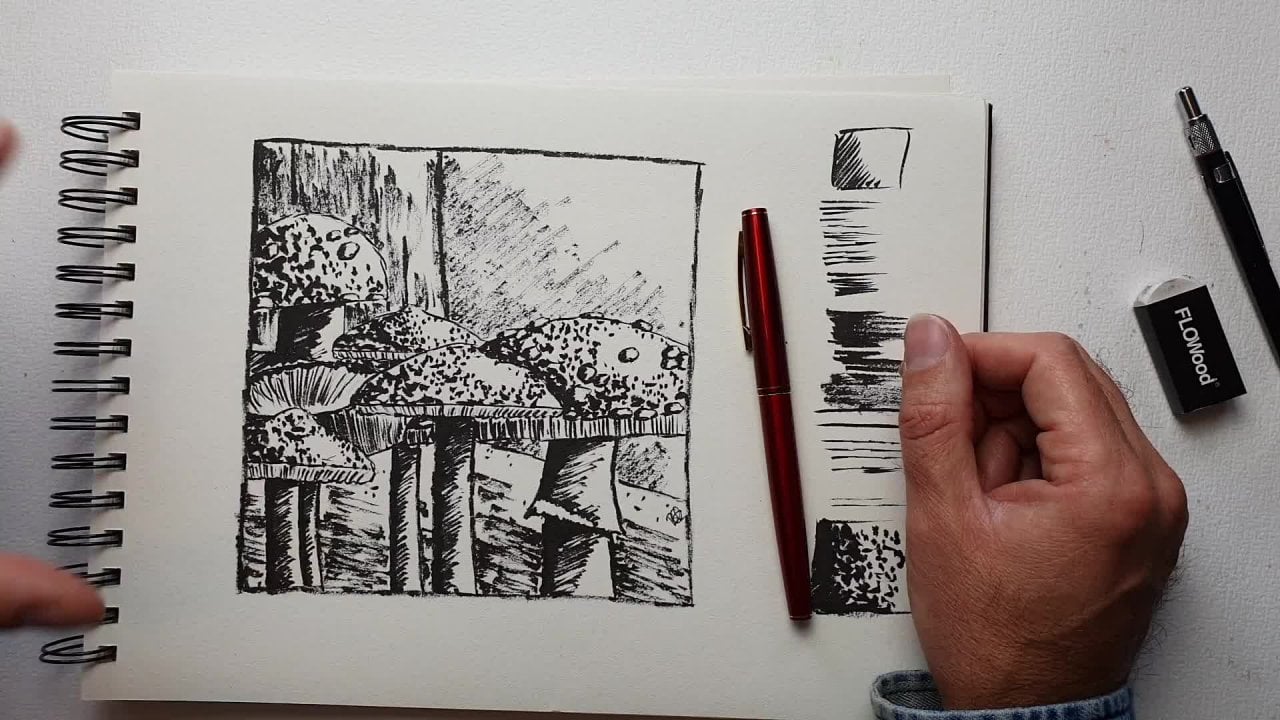
3. The Basics: What we're gonna do in this lesson is we're gonna ink this drawing. And if all is well, you've done some previous sessions. So we have practiced a little bit. And if all goes well, you'll have ended up with either destroying the shaded drawing or you have ended up with destroying. If you don't have these drawings and encourage you to go back to previous sessions. And what you also need is destroying. Now I've copied this drawing already and there's a video also shown how to copy it to new paper. So I've copied this finished composition onto this drawing where I'm going to draw it again. And what I'm going to use for that is destroying here. I've done. But if you have this one that is fine too, you can use either of them. I'm going to use a ruler and I'm going to use a set of fine liners, but I'm not going to use all of them. I'm going to take the 0.05. and the 0.3. fine line. I'm going to use dose too. If you don't have a 0.5 0 points or 0.3, you can use a different range like a 0.8 and 0.5. use 0.3. and a 0.01. can oscillate a little bit with that. As long as you have to, as long as you have two different fine lines, different thicknesses. Alright? Well, if you have used fine line is before, then probably you can skip this session if you know how to sketch with them. If not, I would say stick with me for a little while. And let me see how I can use this pencil to demonstrate something before I'm going to draw this one. Now there's a few ways you can draw with a fine liner. Or if you have an fountain pen, you could use that to, even an ink brush is up to you, but I'm going to use fine lines for this. And let me demonstrate that with you. I'm going to just draw two boxes. And this will be my demonstration boxes. And where we're going to just work on that. Now, if I take that 0.5. fine liners, two ways I can do this boxes. The first way I can do this with a continuous line. So I can draw from 1 to another. And you get this out a little bit of a comic book effect, very straight, clean lines. The second way you can do is you can sketch. And that is instead of going from 1 to another, you're gonna interrupt yourself. You make slow small movements like this. Down to and down here two, and down there to. You're gonna get a bit of a rough idea. But it also looks a bit more natural, I would say lifelike, this great for comics. This is great for sketching and bit of nature we are going to use this way. The next thing we need to know is we need to know the hatching. And if all is well, if you have this, you know how to hedge a little bit already. And basically with a pen, it's the same way as you do with a pencil. You do them under an angle and you draw these lines, you can draw them slow or you can draw them fast. Depending on your experience. If you just start out, I would say draw them slow. If you are already experienced and you know that you can draw them rather quickly. Alright? That is all we need to know for this lesson. And with this information, continuous line first, sketch in line with knowing how to sketch. And if you want to practice a little bit, go ahead and do that. And that is the first aerosol. So the first video, if you know how to do this or don't know how to do this, then practice this a little bit and then move to the next video.
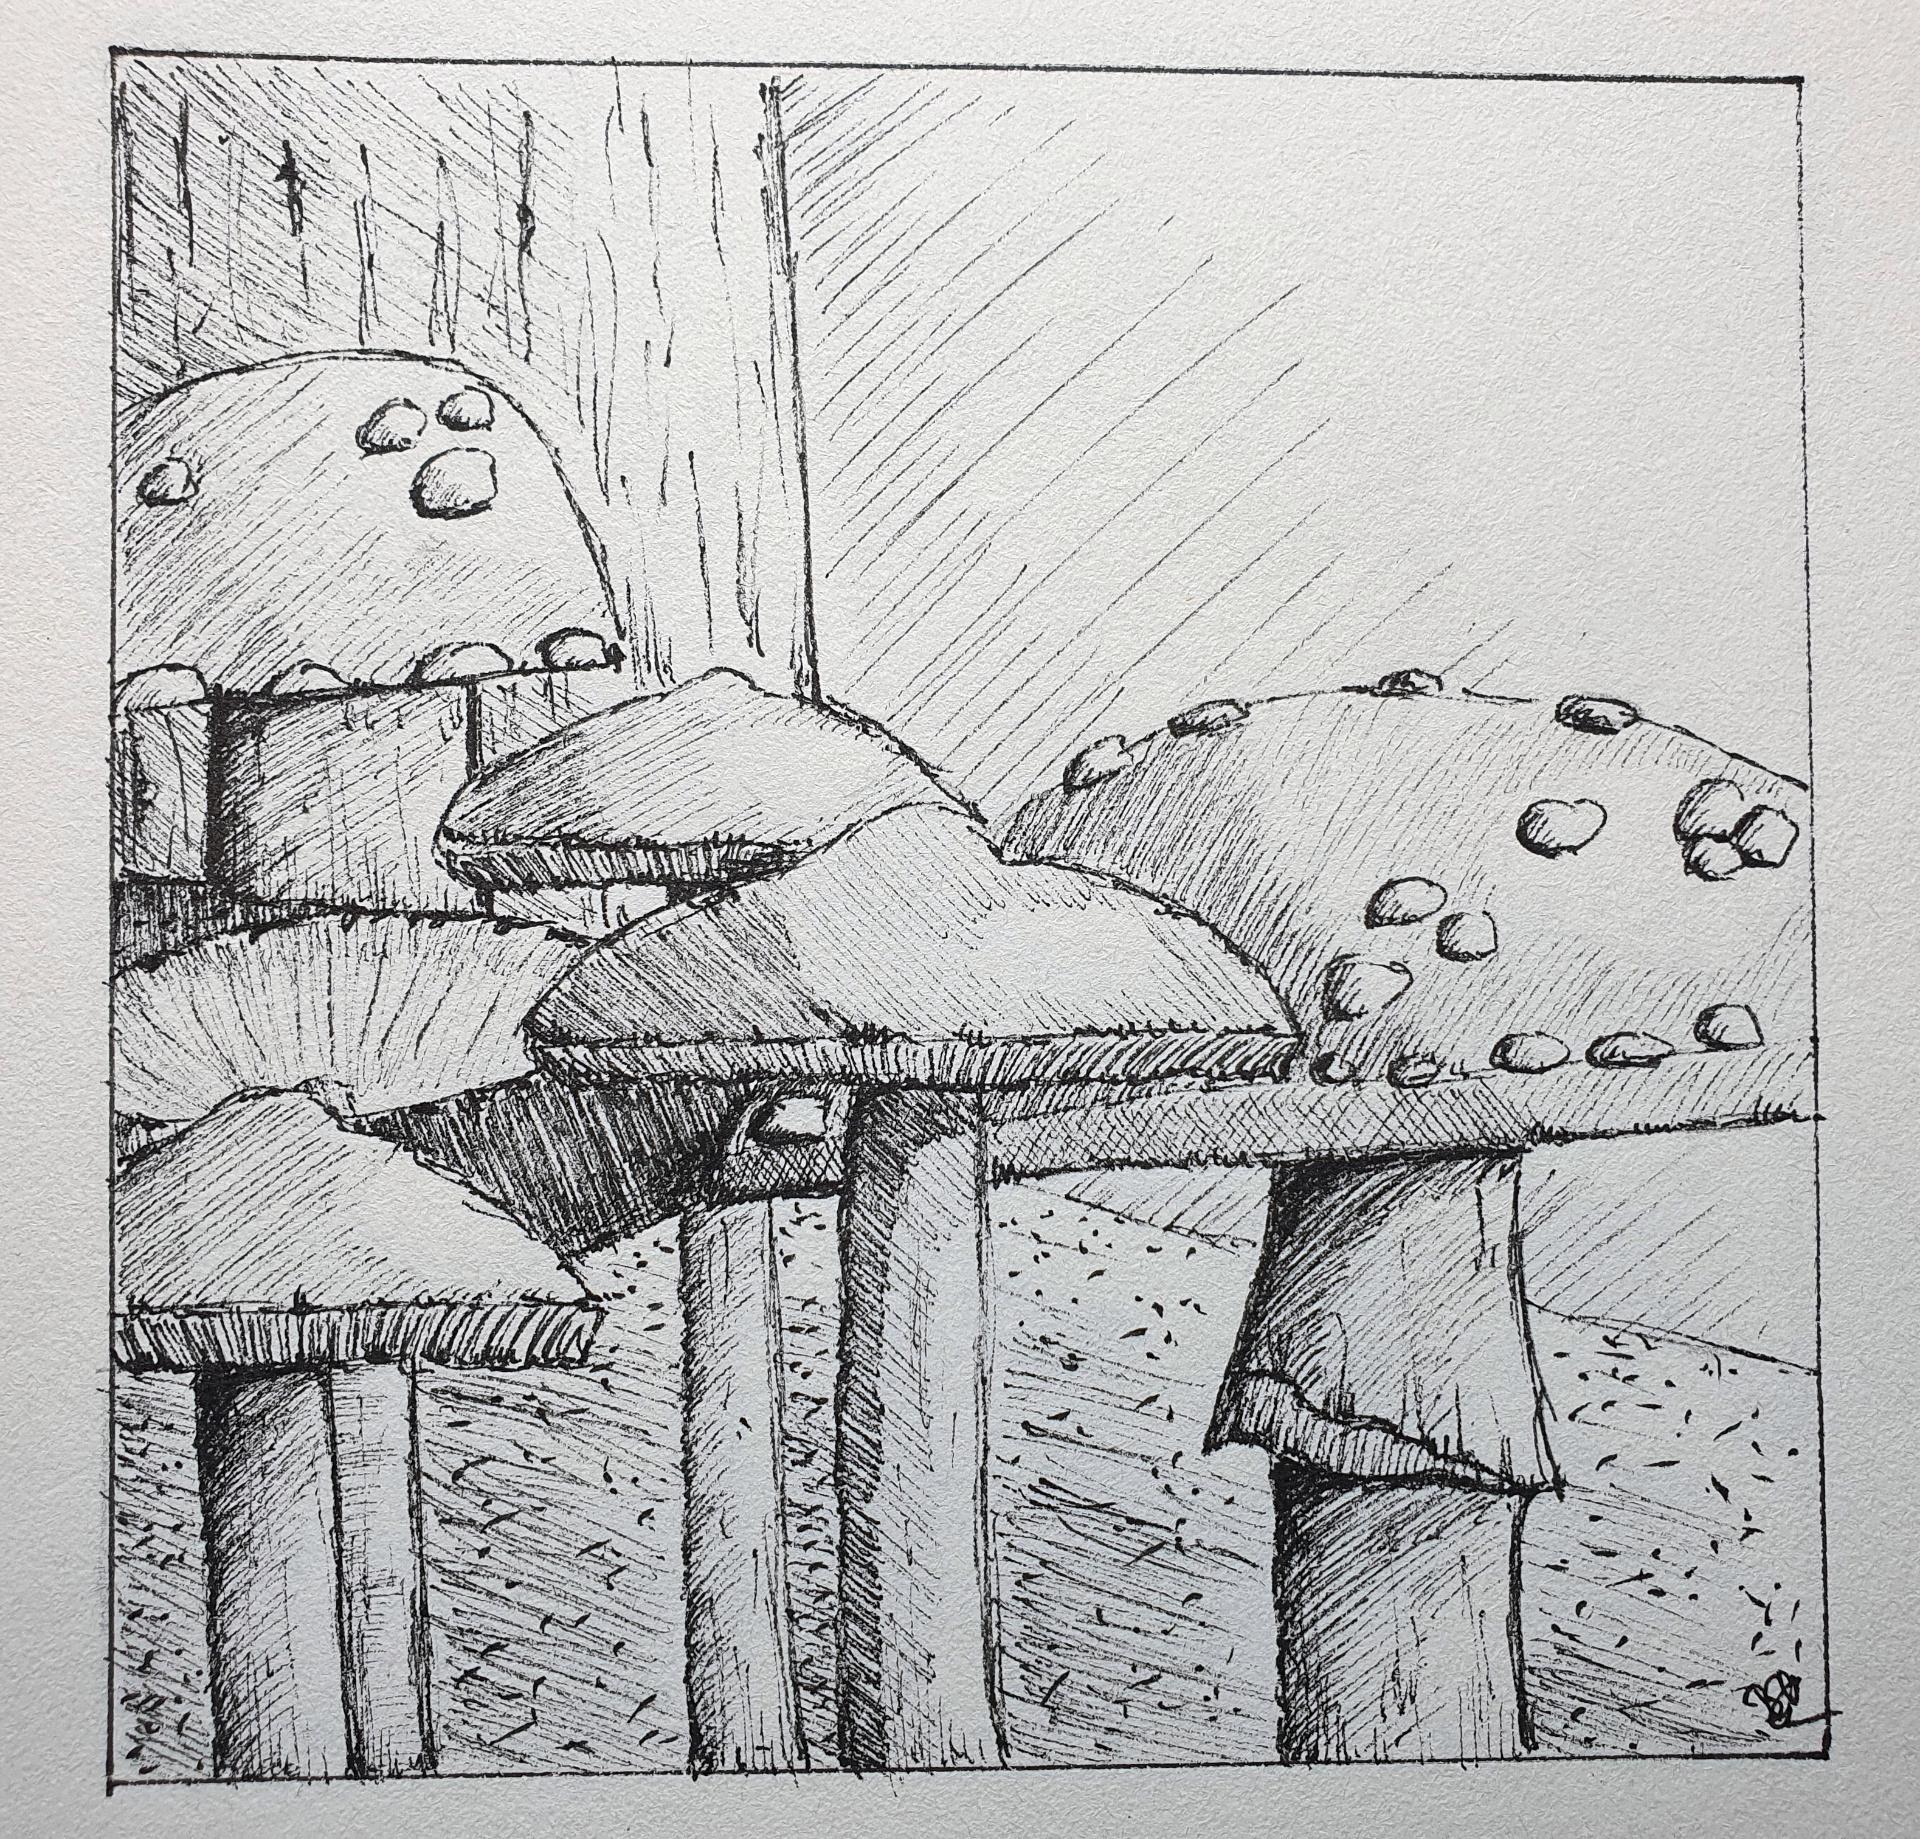
4. Drawing Part 1: All right, welcome to this next video. You've eaten. Notice already or practice this a little bit. Oh, now we're going to work on the artwork. What I wanna do is I want to do this, the box I wanna do straight. So I'm gonna use a ruler for that. And just go from 1 to another and draw a nice neat line, gonna do the same here at the bottom two. I want to frame this rather nicely. Now if you set this up and pencil later on, you can erase all the pencil strokes like these that go out sides does not a problem. Now let me do this 1 first and let me let the inks and dry a little bit before I'm going to go over it again. And to be really safe, I could go outside of the box. Now, you may have to test that a little bit. And I'm going to switch hands. Not sure if you can do that, then wait for you. Needs to be dry. Alright, that's my frame. I'm going to work inside of this frame, basically the same frame as here. I'm going to use this picture as a guide. I'm just going to stick to the same light. I'm going to do the same, but, um, I do a little bit different with the background and I don't hear or see or we end up. What I'm gonna do, I'm gonna work from my left to my right. I'm right-handed or left-handed. You would work from the right to the left not to smudge your work depending on your ink. Some things drive very quick, very quick drying, Inc.. Other things may take a while to dry. So you may need to take that into account, make sure you don't smart your work. What you could do to is to prevent this from happening, put a paper on the your hand and then work from there. Alright, let's go, let's give this a star. What I'm gonna do, I'm gonna work the outlines. I'm going to do those first. So basically trace everything but with that sketching motion eyelid here. So let me start off here. And I'm making these short motions and create this totes too. And I'm using the 0.5. By the way, the fake one, doing the outlines with the fake one. And you're going to end up with, It's a bit rough looking work, but don't worry, as soon as we are going to work on the shading, this looks a lot less rough, tentative OB now. Alright, and I'm Take this one with me right away to and that ends there. So I'm just going to trace the whole thing. Stop there. Do this line. And I might do the tree. And later on we're going to fill in those lines on the tree T2. And then we have this one here. Stop there for now. I'm do this part later on. So I'm going to stop there and we're gonna return to this one. To that one in the front first a little bit. And this out more than a half. Note a straight, nice line, but a bit of wobbling in it. To make it look a bit more interesting. Degas, let's do this one. We did half of it. Let's do the rest. And now let's do this one a little bit too. And bring in some variation to so another straight line for the little bit of wobbly there too. And let's go here. And there you go. Now let's finish this. I have put this stem in front of it. Let's see. Now this stem is behind. So in this only to do this part, first, k, And now this is back again, noticing that I made a mistake. So I'm correcting it while drawing it because this is that fungus behind there. So, right, that's it. And that's my composition almost now I'm going to work on this side. First, do here. And let me do this one too. And there you go. And this one I'm going to do post spots first because they are not, some of them are a bit over the edge. And now I draw the edge in and do that one. Ok. And I start there. Make sure I don't go with my hand over that part. And let's see some here. And I'm almost done with this first part. And I see I did forget a piece there too, so let me draw that in like that. Okay. And the last bits, and I would say that's it, that's my drawing already. Okay. And let's check now, I forgot one thing that is two things here that are these drips here. And they're going straight and then under angle more and more and more. And I go from the top so I don't so much over there. And you could just wait for it to dry if that needs to be the case. But if you have to wait for me for everything to dry and this video will take a long time. All right, there's one line I miss, and that's it. That is the whole drawing. Okay, the next step we're gonna do is add some details on that next step, yes, and code check where we want all our light and shadow to go. So I'll see you in the next video.
5. Drawing Part 2: And welcome back. Yeah. I wanted to have a little bit more of a line there. Sorry. I missed it. Okay. That's it. Now I'm going to just take a look at this drawing. So this is where I want to end eventually. And we're going to say, okay, let me do those. Bring in those light spots and those dark spots with a pencil. And we can just erase that later on. So this one is about their bit more nicer angle. This one has that spot there and it's light, it's darker there. This one here. And then the core shadow is there. This one is light around here. We said, you don't have to do that exactly as you did there. Just as close as you can get. So that would be here and then this will be enlight t2. And here it is dark, and here it is nice and light, and this is somewhere in between. Then we gotta do this one. And that works like that. This one has that here and this light at here pretty much. And this one where we were gonna do differently to distinguish between the two. And this one only gets highlighted area. Now, this one gets a shadow area, a midtone, and a highlighted area that I do all of them and this one behind there, we're going to just leave. And now here, this one we need to do the ego and that needs light at two. And then of course we need to do, to fight a tree into three parts. Highlight mid tones and the dark core tone shadows. And we're gonna do the same here. Just going to draw in a line highlights. And on the hair there's the dark tones going back there to, Alright, that's it. So I now got all of that in and we're going to switch limbs. You know, I'm not gonna switch pens. I have done this and we're just going to bring in some detail. I want to bring in a little bit of detail on the tree. So I'm just making some lines here to lead that look a bit more like a tree back here. Okay? And on the ground, I want to have some lines here and there and even continue a line like that a little bit. Okay? And I'd say, so, that's it here a little bit. Ok. Now it looks a bit more life like ok. So that is my preparation. And yes, let's see, I've got all of it in. And then we're going to start. Now I've got this preparation ready. I'll start in the next video, we'll start to bring in our shadows. And by bringing in shadows, we automatically get Li2. So I'll see you in the next video.
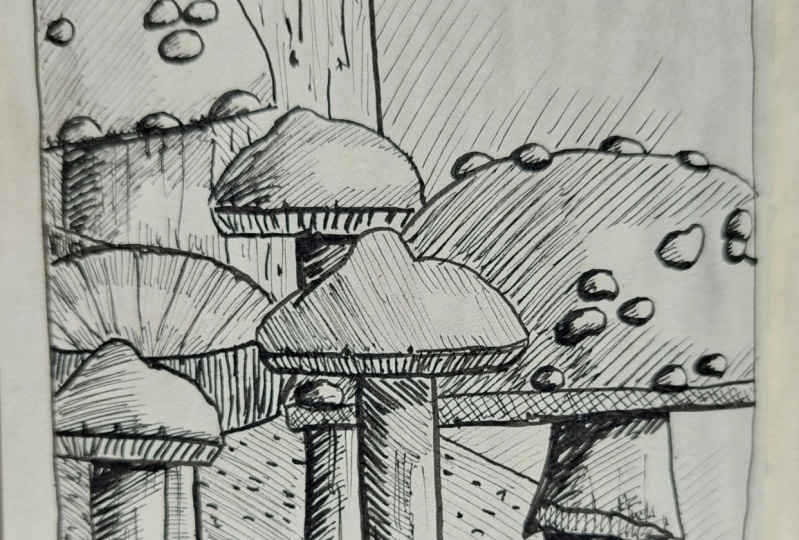
6. Shading Part 1: Yes. Welcome back to the next video. I'm going to switch pens. I'm gonna put this 0.5. side. I'm going to go to this 0.3. I wanna do my hatching with the 0.3. such get a nice effect from some thicker outlines and some finner, nicer refined shadow. And let's see what we can do. We can do it in two ways. Startup here. And what I'm gonna do, I'm gonna just bring in my mid tones and do them all the way. And then I'm going to add some extra lines to my dark tone, my core shadows. So I'll put them under an angle. And as you can see with my head Shing, I'm using sketching now too, and I'm doing it rather lightly. So there's two ways I could do my head shingles, Do it in there, and really press like this, which would suit this very nicely. But in this lifeline I'm just pressing really lightly. You get a nice refined shadow from that. And now I need to do this one again. And there you go, around there a little bit. And now I, when I erased that later on, we can a nice core shadow here and we get a nice midtone there and a highlight there. Another highlight needs to go a bit further. And since I've used sketching, no problem to go and add some more there. Now if you had done one line, then you're gonna get a transition to the other line if you're not careful, but with the sketching, that's okay. Alright, that's the first part. I'll leave it to dry. And we can go down here right away. And we're going to put on our midtone in first all the way. And they're too. And now I'm going to add that dark zone. And there you go. Now, that would be told Stowe, stew the first toads to what we're gonna do next, this should be dry. I'm gonna add a little bit carefully of shading on the white spots like that light coming from here. So you get some shading on the white spot just as I've done here. And that would be on their 12. There you go. That looks nice. And the next thing we're gonna do, what's gonna switch pens again, I'm going to get that fake one. And wherever there's really a cast shadow. So under here, which the faker one, I'm just going to add a bit of a line and even go around the edge with some hedging a little bit thicker so you get a nice core shadow. And I do the same here around this sides. And I'm using the thicker, fine line up for that, which is add some. Cast shadows here too. Just a little bit to make them pop a little bit more. All right, that should be that totes to. Alright. Let's do the tree. Now. If tree I'm not going to use the same direction, I'm going to switch direction. And here I've used the same direction, but I want to switch direction in the shading. And I'm going this way now to get a really difference between three and is toads to, and we're going to bring in here, I can do a core shadow right away and ACO. And by going the opposite way, you notice that this is a different part. And let's see here I'm gonna do now the core shadow will do that MIT shadow first. And I'm sketching in a little bit some psi one psi, throwing it to the other side. And I go a bit further down. The line is here, not there. And down here, let's see two. The line would end about there and down here a little bit too. All right, and now we're going to bring in some of my core shadow here till this line. And it's going over it again. And that would be my tree and I'm going to leave the tree like this, Scott, the ground, I'm going to leave light here, but it has a cache shed of this one. So let's see, we want to go really dark here. And let's do it straight ahead, Xing just vertical. And we're gonna go over that again. And there you go. Good, nice, nice and dark. Alright, let's that. Soo, let's do this one. Why not? Let's see, we can do this one. Same as we did this. Yes, we can do that. So we're gonna start with the midtone that going all the way from this part, up there and down there a little bit. And now we're going to bring in that core shadow. Good. All right, and now we have those ribs here. And let's go with the same direction shading as we've done with the ribs a little bit. There you go. And now that is nicely shaded too, and the rest were not gonna touch here a little bit. Ok. And now it's handy to work on this one and go the opposite direction of this one and hatching. So this we, this, this way and now we're gonna go this way again. And I'm gonna do this 1 first, making sure I'm not touching that one. And unlikely bringing in the mid zones around there, a little heads up here and some straight lines again. And now I know that down here, I need to have my core shadow. I'm making sure I'm not touching that part, although pretty much that's try making it a little bit longer down had a guy and you kinda nice transition will do that here too. All right. And the next thing I'm gonna do is rips, standing at an angle slowly move into its vertical. And then going the opposite angle. And there you go. Alright, Looks good. Leave it like that. Now I've done this one. Now I know that this big one I want the opposite way. So this way again, and let's just do that right away. Now down here, that's missing line. And we're gonna do this a bit thicker. And this I'm going to cross hatch down despots. Alright, that looks good. Okay. That is that bit. And now I'm just want to shade that one a little bit and get that thick append and create a bit of a shadow line there. All right, and let's keep on going. This one. That's the shadow here. I'm making sure I'm not touching those white spots. I'm leaving them alone for now. And this way, we're just bringing in light and shadow into this toad stool. And now I just need to bring in the core shadow. And following that line. There you go. My doing this strong map. And then we need core shadow here two. Alright, so that's it. And I'm gonna do this bottom. And I did that with cross hatching. And let's see, until where are we gonna do crosshatching? We're gonna go all the way with the head Xing. Alright? And I'm going to go this way here with the cross hatching. Making sure you clearly see that is pod, but I'm going to stop right there. There you go. And then you get the light effect in its, ok. Well, let's do all these spots. Gift him a little bit of shadow. You can see we're doing this rather quickly. Okay, here are a few more. Alright, that's it. Let's switch to that thicker pen again. And a bit of a cast shadow. Okay. Alright, well, let's continue with this one then. We can go the same direction down here. Start with the core shell and that no, sorry, not the Midtown. And then we're gonna do to cause you gotta follow this line. And we go. And let's add just a bit more to. It's the ego that looks good. And hours. Now, let's go continue with this. Let's see, let's do this. There's some shadow here and I'm gonna do this a bit straight like that. Following this angle a little bit so that you get parse in it. All right, and then we're gonna do this one, k n. So I'm gonna do my cosh, following deadline and going right at their missed some there, let's end at in k. And there you go. That would be this one. Now let's switch pens. And let's do, bring in a little bit of around here, even here. And there you go. Nice. Do the same down here two. And at the edge here. That makes this pop. There you go. Now this looks good. Let's do just a little bit around that bottom and around here. And let's do some here to get that line a little bit. Go in, you go now you get nice. She can see you get a nice depth like this is now deeper, but this is even deeper than that. And there's a bit of an edge there and you can clearly have that edge. And what we're gonna do a little bit around this edge, had a little bit here to a line there to get that edge just a little bit stronger. Okay? That's it for this one. I'll let you do this first. Let's do that. I'll let you do this first. Once you've done that, and then everything is try. I'll see you in the next video where we're just going to continue.
7. Shading Part 2: Ok, well, let's continue using that 0.3. pen again. And let's see, I'm gonna do this 1 first, 1 in front. Then once I've done this, then I can determine how dark or how light I want this one. So let's give this one, it's mid tone all the way first. Let's add a little bit there. Okay, and now let's add its core shadow right there. Good rips. We're gonna do the same as their follow the direction we've pulled in. And I'm gonna go horizontal and vertical, not horizontal. And now I'm going to go under an angle again. There you go. And that's the one that we have, this one here. We're going to shade that one in and a little bit less there. C. And we're needs some core shadow around that edge data. You go making that slightly further Diigo, Nice. Okay, and now let's take that 0.5. pen again and a bit of an edge down there. And around this edge E2. Then you get some nice shadow effect. And what I wanna do here is decides, I don't want to do a bit more. And I want to go a little bit there. Okay, that's good. While on it, let's do this one and this one are shaded like that. And I'm just going to do that. I'm going to alternate the length of the lines a little bit, some shorter ones, and some really long ones, some shorter ones again. And you go and all we need a bit of a line here. Okay, good. And let's add just a bit of extra there to make it look nice. Okay, that is dead one. Let's say we need this one now this one we said, we're going to shade that all the way but lightly. And I've done that here quite lightly and I'm going to just continue that. But let's see how do I do that. Let's follow the shape a little bit. So this is round, so we're gonna make around motion straight and then very lightly. And I'm not doing that middle part, I'm just doing these rips and let's do it like that. And then let's give that middle part little bit straight like that. All right. Get up here and let's do the edge is a little bit stronger because the edge wouldn't be really delighted. And thus, make sure you follow the same angle still. I'm just adding a bit of an edge, as you can see, a little bit between the length of the lines. And you get a nice edge and then you get this lighter part here. And for these ribs, I'm just gonna do the same, but we're gonna do this nice and dark. Bringing a good core shadow. You go on here to get, I just add an extra bit around this edge and I'm creating a bit of an shed out. That thicker line. That's at a bit of a darker sides, right? On the day you go get this difference between this one and I want to let go of this one. And let's go nice and dark here too. Good. And now this one is in the back and let's go even a bit darker with this one. Okay, good. And we'll leave it like that. Let's see what's next. These guys on the shade is just simply like this. Might add a little bit of an edge. Can a bit of a nicer different edge data. Now we just need this one. Let's go with the opposite side here. We've done that there too. So I'm gonna go shade in the mid tones. And as you can see now, just working from the bottom, making it myself a bit easier. Because of the angle. This is easier to go that way and this one just makes it easier to go from the bottom. And now I just need in that score core shadow. Okay? And that's that I'm going to switch pens to really make this core a bit better. At here. Just a little bit of an edge. There you go. Alright, good. Let's do just a little bit more, and let's do that here too. All right, and you get the idea that this is a bit around that. Let's see, now this one would go, we would trace that they would come here and let's just add a really dark part there. And now that is clear to all right, that would be it except for to ground here. And for need something on the sky still. Alright, good. That will be for the next video. You do these two. And then once it's dry, you go to the next video and I'll see you there again.
8. Shading Part 3: Okay, well, that's that only we need some ground. So let's get that 0.3. make sure I have 0.3 to turn my paper a little bit so that it can do an easier etch. Let's see up here. And I'm going to just add lightly the lines here. Here too. Just to have a bit of a ground. That will be this will be here between the ok. And then I'll just continue right there. Making a bit of a grounds and back here too. Okay, that's it. And I'm just going to bring in my course shadows which were just about to. And as you can see, I'm doing this, followed this lie. I'm really roughly area. And that line goes around deck. Right? If you do your submit lower, fine too. Okay, that's it. Then I'll have some ground. C18 somewhat there. And I want, of course, that bit of shadow, core, shadow right there. Two. Okay, well, that's for my ground, that is good. My sky and we're going to do well. So I have brought in the lightening of the sky and what am I do? I might just follow that around. And let's do that. Let's do the same as I've done here. And try to, I'm trying to do long lines and spread them apart as you can see. A lot. Now, not do them close. I'm gonna do the same here too. And I'm going to add some core shadow around here, bringing them just a little bit closer. But still, I should say, not too close and I think that is good. That is good. Next thing what we're gonna do is we're going to leave this to dry, dry low enough. And then it's just basically erasing everything and just checking and see if we like it this way. Or if we perhaps want to add some more shadows and things like that. And while I keep them talking, I know that I can safely erase it there because I haven't drawn anything there in this corner at all. For a while. Same here. I know I can safely erase this part. And this should be drive-by now two. Alright. And that would be it. For this one at least. I think so. Let's get my brush. Must be somewhere. Here is K. I needed my edges a little bit better. Let me show you a holds your paper thermally wherever you erasing. Otherwise, you get wrinkles, wrinkles and rips and tears and thanks. You really, really, really don't want. Okay. Alright, good. My desk is a nice mess to right away and there it is. Let's see if we can change anything. So my du or as my 0.3. here go this way. You see that? Alright, I'm just adding another layer, HER2. How about I want to do that here too, till they're a bit better. K, that is nicely a little bit, alright, k. And now what we're gonna do, the last thing we're gonna do is, let's see, do I like my tree like that? I don't like my tree. We're going to do something about that tree. And we're going to just add some are just random, basically lines on the tree. To make it a bit more like a tree. Now that's better at the edge two. Alright, that's dead. And now I'm gonna take that thick pen. I don't wanna do if the grounds guy just stippled a little bit into Cat. On that grounds are totally different effects. I'll also add Eris. Highlights, still do dams. And as you can see, I'm stippling. Not doing stippled, but moving the pan around a little bit like this. I might take a little bit, a little bit. Let us demonstrate it. This will be pure stapling. Could do it like this. But I'm just stippling and once in a while, I'm just making a little bit of moving, movement. I'm letting my pen slide over the paper a little bit to get this, this kind of effect. And don't slide all the way to do it. Carefully. And even there a little bit status the ground. Alright, now you get a nice transition between toadstools and the ground. Okay, the next last thing we're gonna do is add a little bit of detail with the fin pend again on the toads to just some randomly lines at the bottom here. Here too. And even a bit, if some, even some little, I'm doing that, but even making a little bit of a scribble like that to bring in some texture into this toadstools and especially this part of the toads to, well, you may wanna do if this one, if this just another layer I kinda go around. Otherwise I smush it there. I'm just adding one more layer here, making a bit dark and I like that better. That is nice. But if a distinguish distinguish between the part and I'm just going to add a bit of a random lines and stop. I can go up here. Just a little bit of random lines there. Now this should be dry. I can do it right there and a bit there too good. And the next thing, what I want to do, the last thing around these edges. So if this is the edge, what I'm doing is I'm just scribbling in a little bit like that. Say creating a nice etch and some long, some short CNI and get a nice edge. I'm leaving that edge here. And we're gonna do the same with this h2. And now that looks good. This edge, I need to do a little bit. And there you go. Alright, let's do it with this one too. Yeah, just a little bit. Perhaps not all the way, just skipping a few parts here and there. And even do it up here a little bit. I'm not gonna do that here. But on these, actually, that looks pretty nice. Just some scribbles here and there. And we'll do the same here to scribbles on the bottom and add a little bit of shadow there to get this clearer. And then add some scribbles on this edge two. And let's see it. And we need to do a bit there to scribbling the edge in. Alright, that looks good. And let's add just a bit more shade. And there you go. How about that? I think we're gonna leave it like that except for this one is not nice and straight either. We're going to add this to it. And here too, but not on the top, but again on the bottom. Just some marks here and there. And that, with those marks, that makes it look a bit more lifelike. Alright, let's do a little bit around these edge too. O K. Well, I think we'll leave it like that. Alright. That's it. Okay. So look it if I think that is pretty nice displays and did, alright, there would be a toast to the toadstools, the fungus, everything. Let's see, let's create a little bit of a dark edge die as we need to do that to get that clear what that is. And the rest up here with perhaps this one. And between these two a little bit, today you go. And now I think we're set and done. Looks good. Except for down here, seems to be floating a little bit. Let's add just a few lines under their student here, two, there two, and on this one, even at the bottom, k. Now, good. You want to do that there too? Now let's yeah, yes, no. Should we do yes, we do it here too. And just a little bit, lines and the bottom k. And now we're gonna put that pen down. We're going to stop because we could keep on going, but this is done now. You can sign it. Of course, if you find a corner away, you can sign it. I can sign my pen and I can sign it right there. Daguerre signs just a little signature, and that's it. So now we've got a nice ink drawing of these toadstools we did here. And we went from some phase scribbles from the finished drawing to the shadow and light method we did, and now we finally worked it out into an ink drawing. Okay. Another is just inking with a fine line we've done. And in another video, we're going to ink this two. Same one, what we're going to use a brush pen, which is totally different if we're gonna do that. But this one is ready now, alright, so I would say, have fun doing yours. And if you want to really be adventurous, changed the light. I have my light coming from this side, but you can change that completely if you wanted to and pork or from this side, that side, that whatever direction you pick and enjoy it. And yeah, I'll love to see what you create with this, how this project will look when you do this. Okay, that's it. And that ends this session on just using doing the torch to know the mushroom scene with find Linus going from idea to a finished illustration. And this is definitely a finished illustration.
 Benjamin A, Art Teacher, illustrator Art by Benjamin