Transcripts
1. Introduction: Why use a regular, usual paint brush if
you can create your own and can get a special
effect in your Gh paintings? I have your interest. My
name is Benjamin Alcoa, and I'm an illustrator, artist and art teacher
from the Netherlands. And in this class, I'm going to show you
how to wash paint. But as you probably have
seen from the title, we're going to go wash paint
in a slightly different way than usual while painting in the usual way with
gash is a lot of fun, and gash is one of
my favorite mediums. Why not take to a
whole other level, Do a little bit crazy with
it and create some brushes for great effect and change the whole outlook
of your painting. In this class, we're
going to paint a postcard, a summer postcard. And we're going to create
a beautiful sunflower. Well, not in the usual way with the nice details and all the
great colors and nuances. No, we're going to create a catchy different style with wash paint,
different style. You may not even
have a styling coach yet, and that's no problem. Whether you're a
beginner, intermediate, or even in an advanced
level of coach painting. This is still for you. Everybody can come along and follow me in
this adventure with Coach in creating a slightly different
than usual coach paint.
2. What do you need?: Welcome to this part
where we're going to look at the materials we need to create this summer
flower, this sunflower. We're going to use some
unusual materials. And in this part, I'm going to just take
you through everything we're going to use and the
alternatives you could use. So let's start
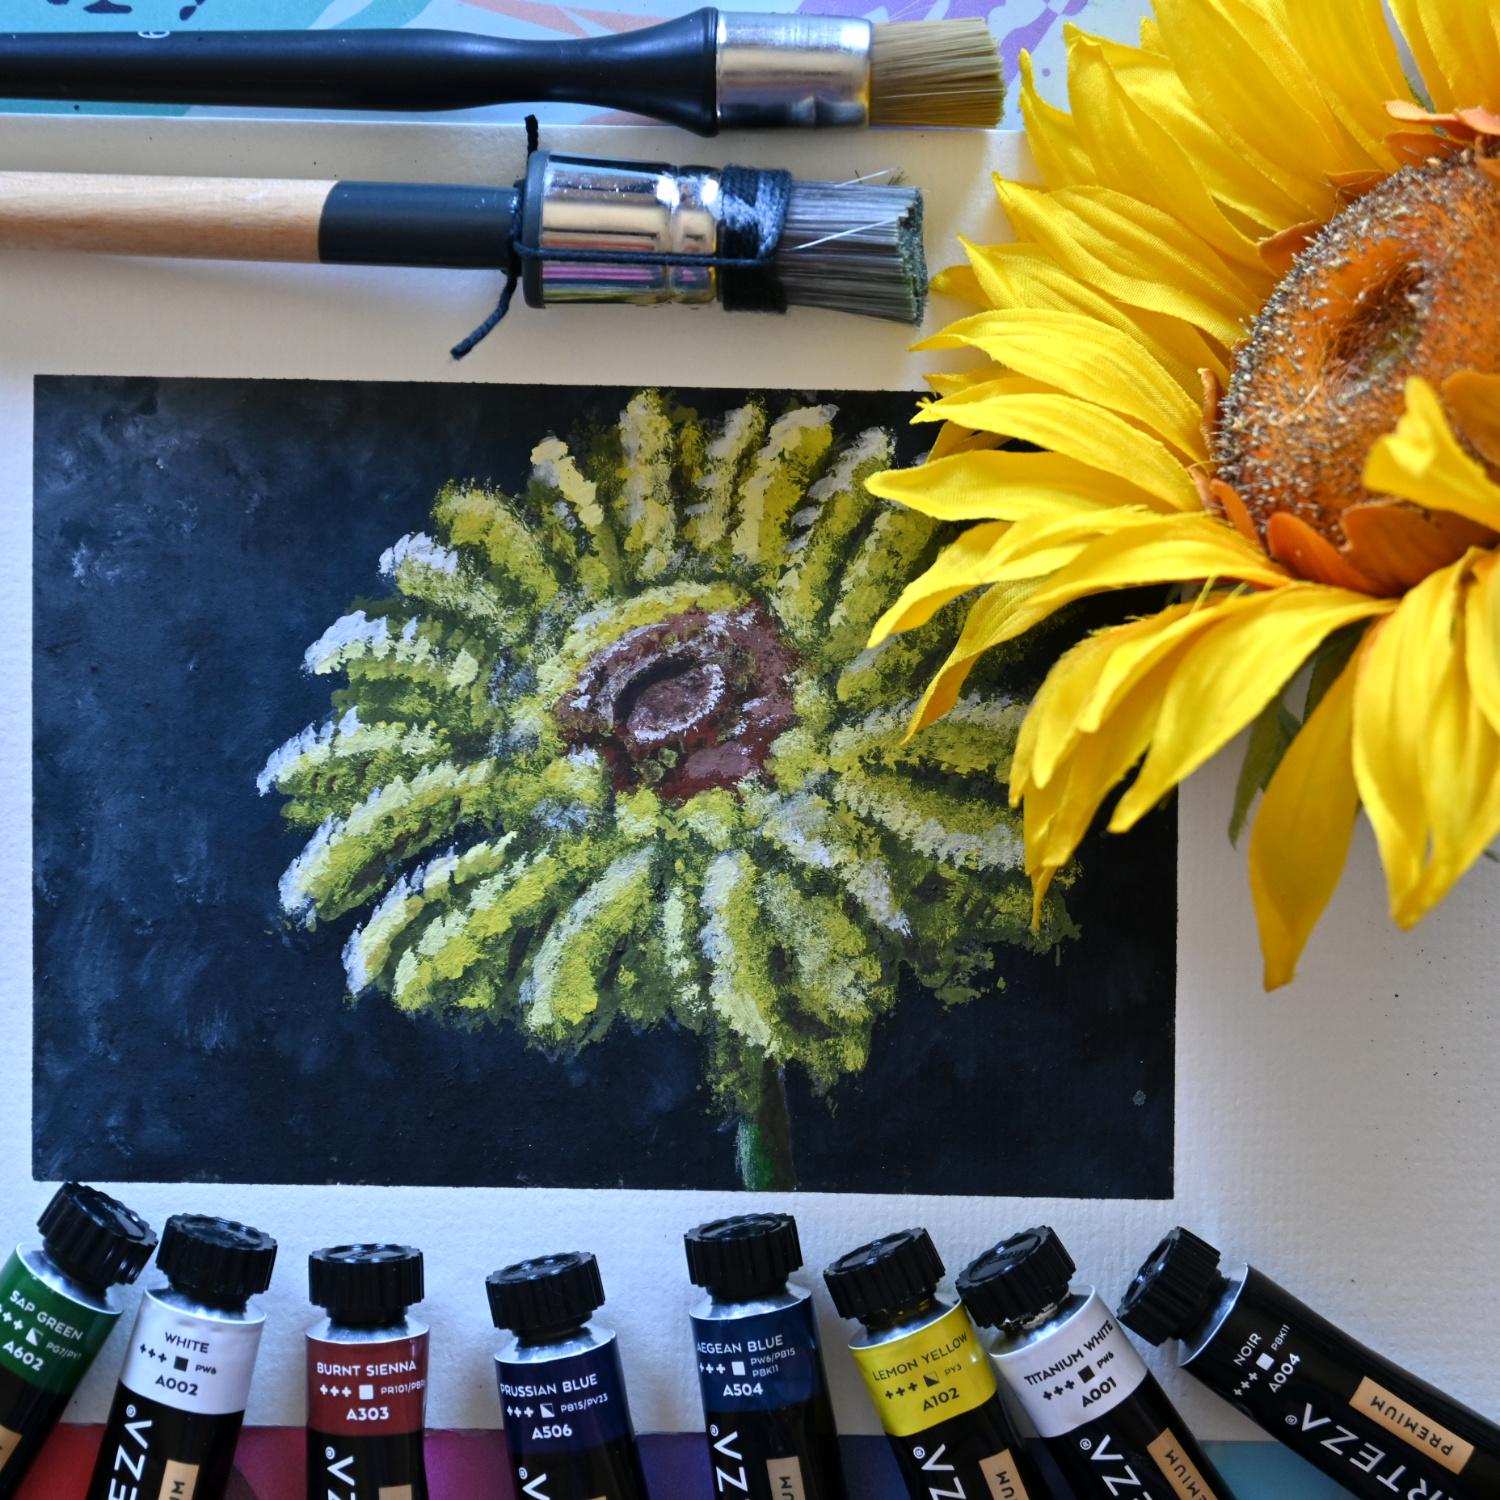
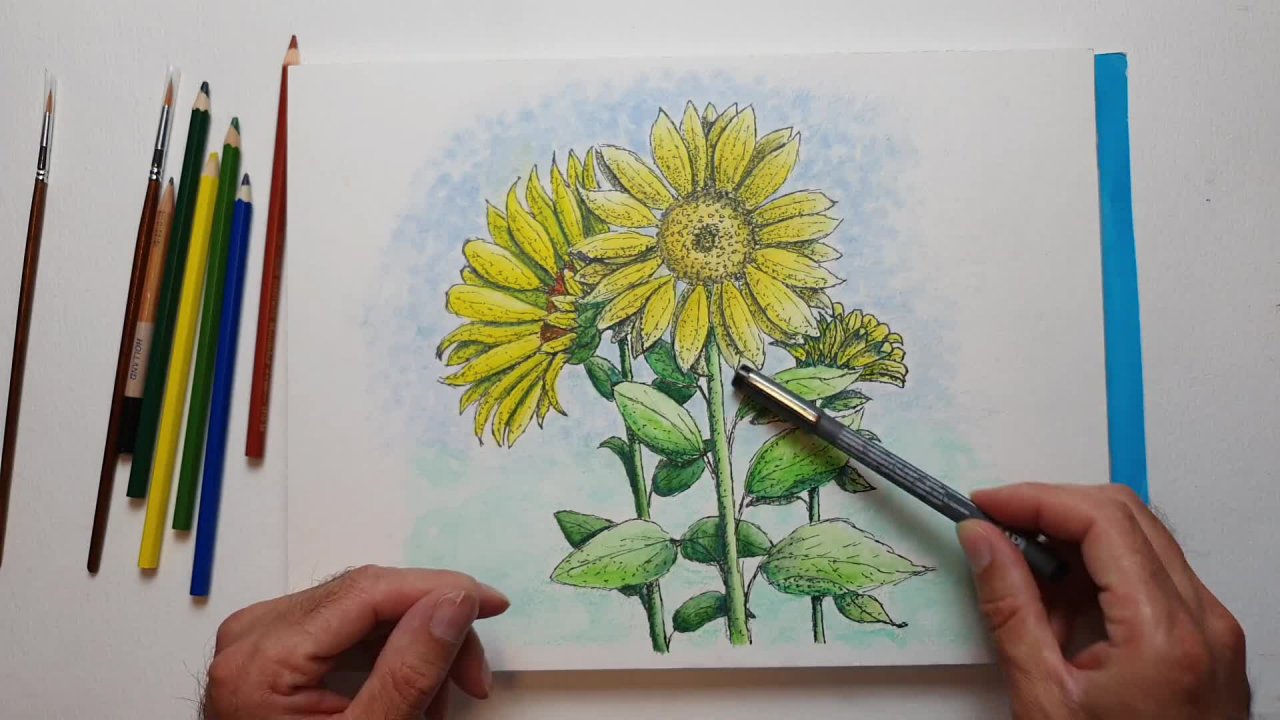
with that. You see the finished painting here. This is what we're
going to create, and as you can see, very
interesting flower. So how do we arrive here? Now, the first thing you
see, we need some paper. There's some options
you can use. I'm using a, we got to find it. Here is a glued block of
regular watercolor paper. Cold press. This is
very inexpensive stuff. It's glued around
the four sizes. That's the first
thing you can use. And if you use that
kind of papers white. And we want to create a
very dark background, so we need to paint that on it. Alternatively,
what you could use is black paper like this. You could use it to
black watercolor paper. This is very inexpensive stuff. If you want to use some more expensive black watercolor paper by a royal Tylan for example, It has a little bit
more structure to it. I would say 300 grams. That is 140 L B pounds.
Don't go under it. Yeah, this is the same. Don't go too light. Alternative Fame. What you could use is some
black crafting paper, but make sure it
is nice and thick. Otherwise it's not going
to work. All right. That's the paper, that's the first thing you're
going to need. We paper comes paint and
I've got some paints. I'm using a quite limited
selection of paint, Not even all of these
colors I have here. I think I'm going to
throw that one out. This is what I'm going to use. I'm going to use a white. You need a titanium
or a regular white. That's up to you.
Which one you have. Then we're going
to need a black. I've got that too. I'm going
to put in there a black. The next thing of
course is a yellow. I'm going to use a lemon yellow. If you have a light, very light yellow, lemon
yellow and a mid yellow, yes, please do use that. But if you only have one
yellow like me, that is fine. The next thing what
we're going to need is some green, a sap green. Again, if you have a dark
green and a light green, I use them, but I'm
going to use only one. I'm going to show you
how to mix the pain. There will be a lot of mixing. The next thing is
a burnt sienna. Again, if you have a lighter
brown and a darker brown, that's fine too with
it more colors. But if you only have the burnt
sienna and that is okay, then the last thing, I
have a prusi blue here. If you don't have
any other blues and a prucan blue, that is fine. I'm using agent blue and that
is a bit closer to indigo, I would say a slightly
different tone. But a polution blue is fine. If you just have a
blue, that is fine. And the only thing we're
going to use that for is a little bit in
the background. And if you look very well, you may see some
slightly blue tones. And that's it for the paint. These are the colors
we're going to use. The next thing we
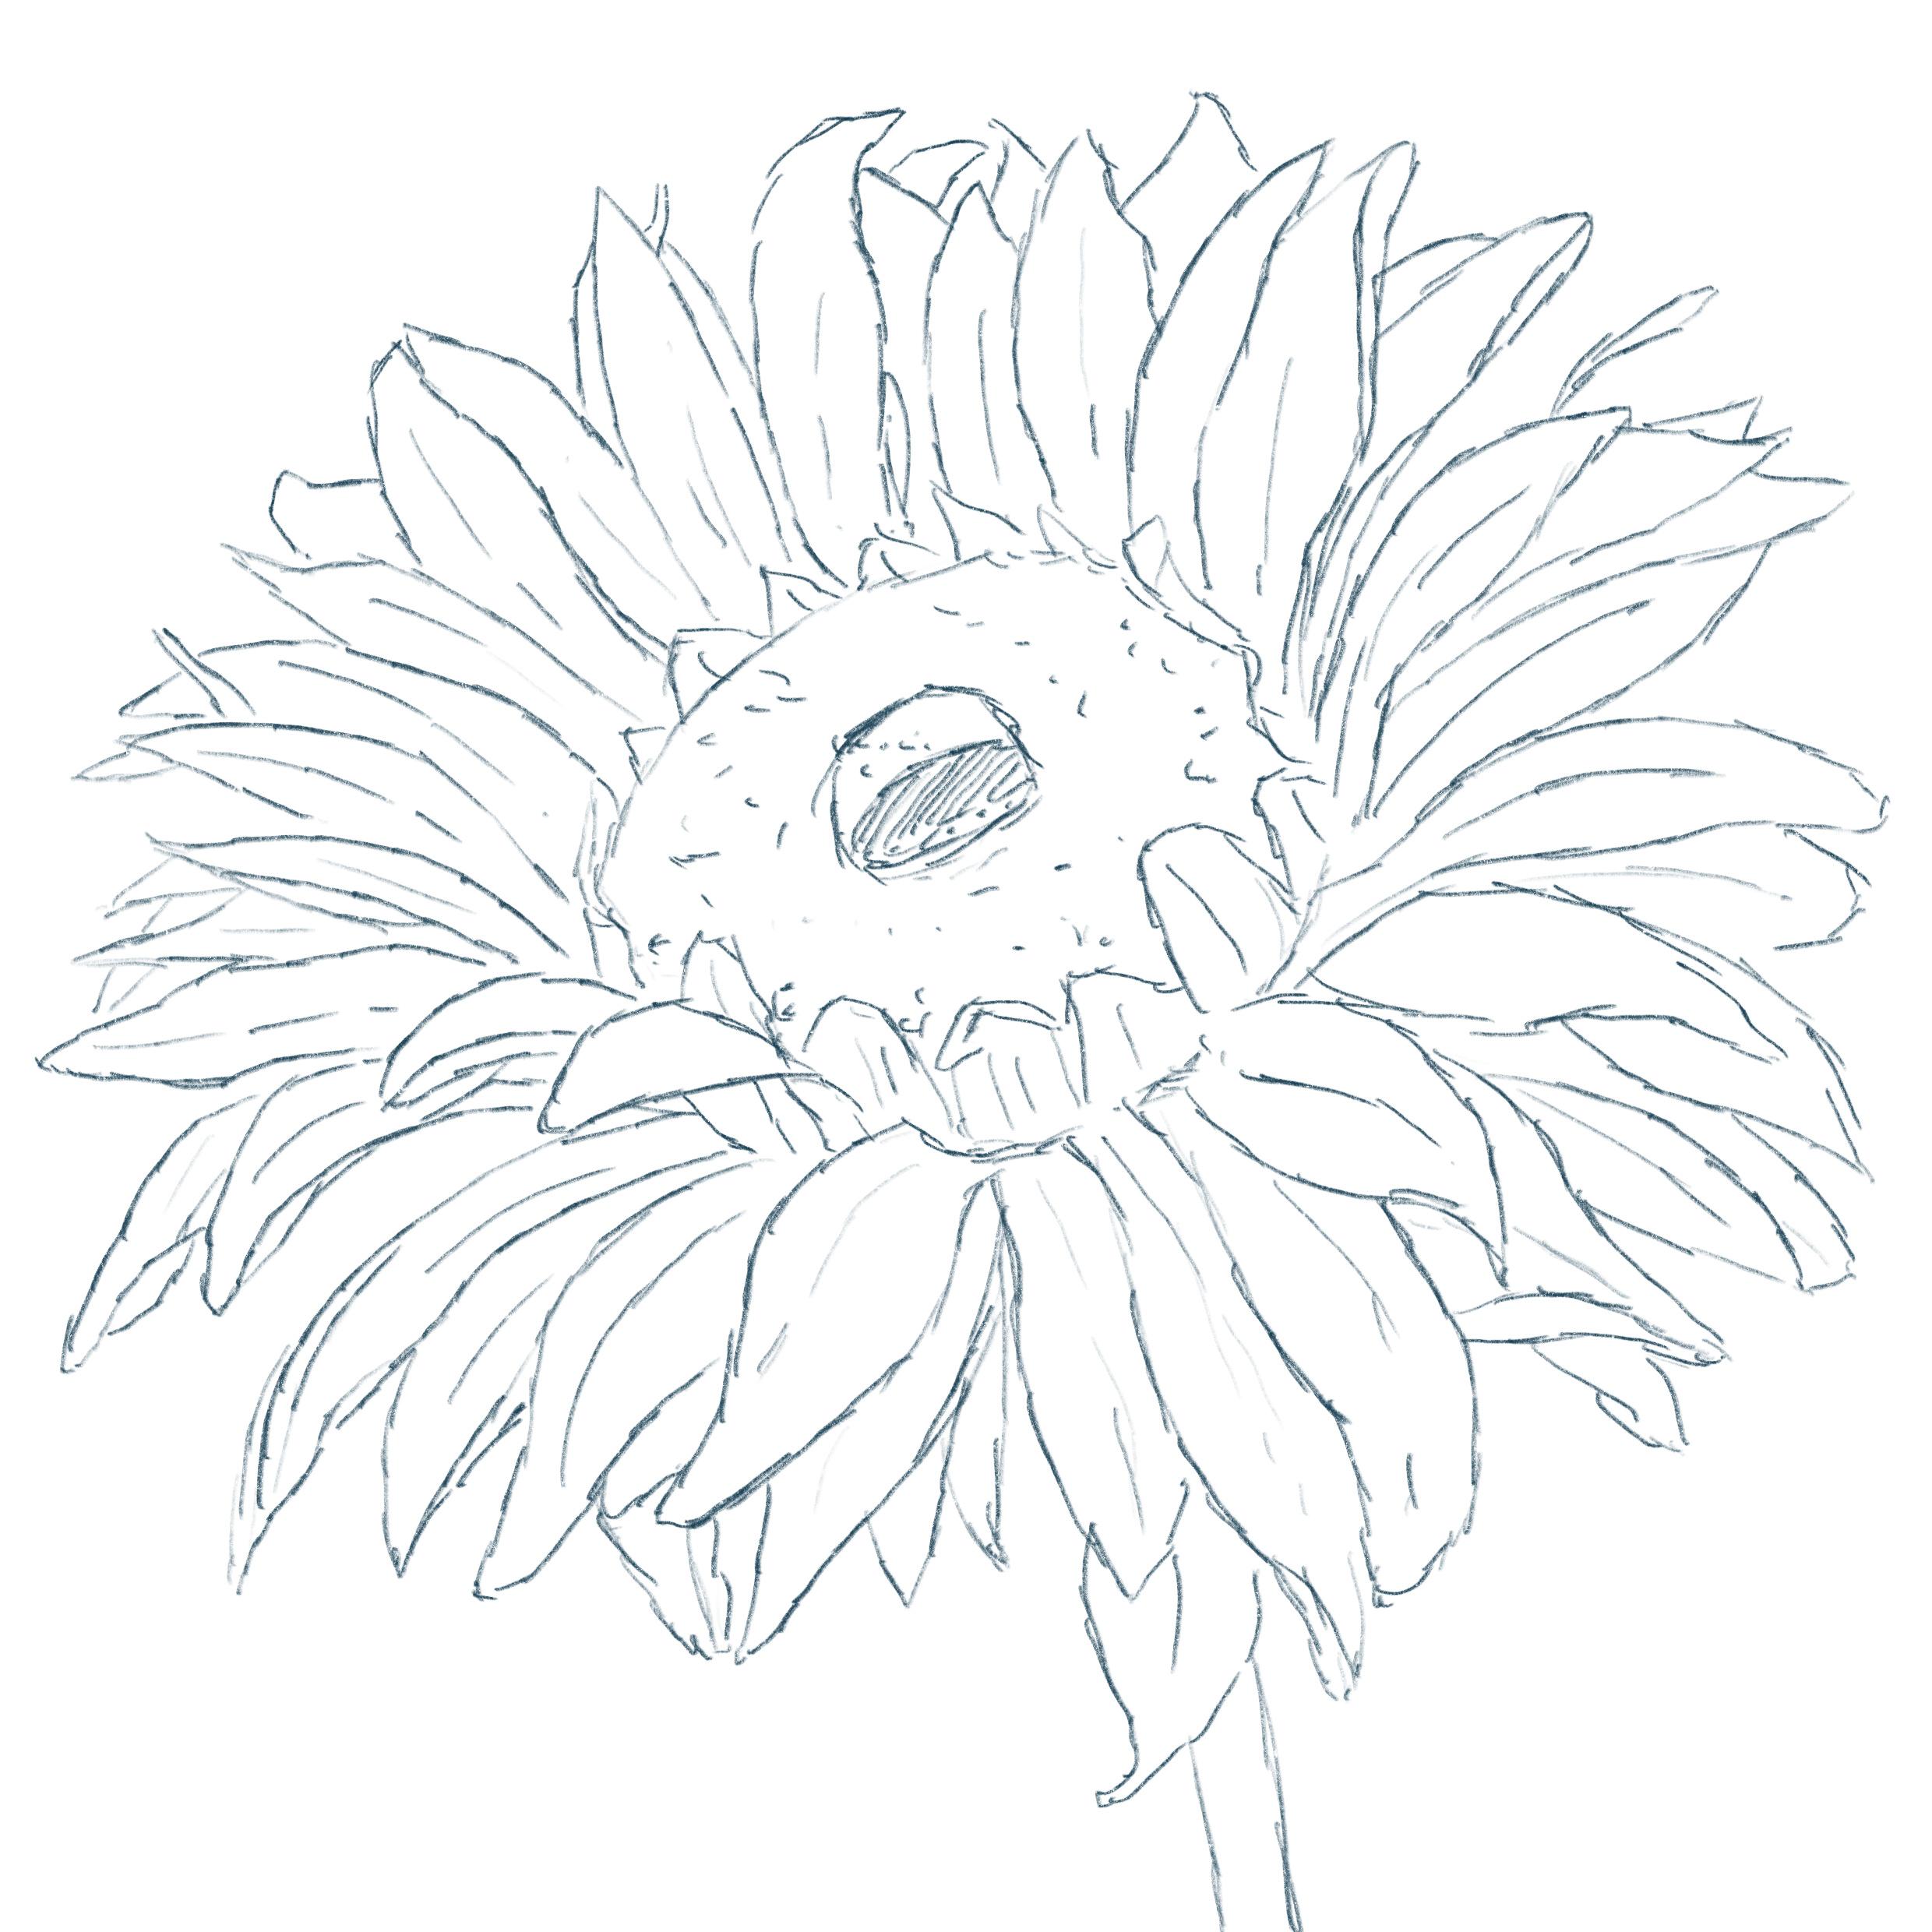
need is this sketch. The sketch you need
to print on a paper, and there's various
sizes applied so that it will fit
nicely on a postcard. And we need that, but
we can't transfer, of course, this to a black
paper. It's going to be hard. We're going to use a little
bit of a trick for that. For that, you need
a white pencil, preferably a white pencil. If you don't have
a white pencil, then what you could use as
well is something like this, a white soft pastel, and there should be a
white in it somewhere. There it is. A white
soft pastel will do, or if you don't have
soft pastels at all, let me take this out of the way. You can use something like this soft pastel pencil and
then the white version. If you don't have
that, you can use a very simple piece of chalk work to preferably
a white colored pencil. Doesn't matter which brand, just a white colored pencil. If you don't have to pick
some of the alternatives. All right, put this aside again. The next thing you need
are two bowls of water. You can see here, one, we use forensic one to
pick up clean water. Then you need something
to put paint on. I'm using a glass tray. You can use a regular plate, one of these plastic things, there are a metal plate. As long as it's a plate where
you can mix your paint on, I'm fairly, fairly large. Areas to paint on, so don't
get something really small, it needs to be really
thick and it needs to be nice to mix the paint
on A plate will do too. This is a glass cutting
board, Actually works great. Let's see. And then some extras you're going to
need are some masking tape. I'm using a sensitive
masking tape. We need a sister. The final thing we
need, the final thing. The other thing we
need is you need a regular pencil or a pen, or what I'm using is
something like this, they call an eternal pencil. It's more of a graphite, strong graphite,
almost metal pencil. It's still a pencil, draws something which is fairly hard, not a soft soft pencil, but fairly firm pencil
or a pen would work too. All right, and then the
last thing is brushes. Now we're going to
use, as you can see, probably slightly
different technique. I'm not going to show
you yet, of course, how we do this and how
we're accomplishing this. That's for the next lesson. But what you need is
some paint brushes. Now the first, if you have it, you could use dear
foot stip. Or stip. I've got a 38 fun and a 18 fun thick one and a,
and a thinner one. If you don't have
those, don't worry, you could use
stenciling brushes. Those are these brushes, these are a bit too thick. The smaller you can get
them the fine thick one, a medium one, and a
really small one. Stenciling brushes, If
you don't have those, what we're going to do actually, is then we're going to create
our own brushes for that, you're going to need
some old paint brushes, round paint brushes,
something like this. And then I'm using around five. And if you have a thick round, like a 12545, that's
fine, a paintbrush. And as you can see,
we're really going to change the shape of it. The next thing we're going to use are some hardware brushes. Just you find at
the hardware store just some painting brushes, regular painting
brushes for your house. I'm going to use a brush, five. A small painting brush,
a really old one. I'm going to use two.
Here's the second one. This is a size eight, this is a size six.
You could go smaller. If you find smaller
than six, that's fine. If you have a little
bit larger than 68, around ten is fine too. Just a regular brush
used for painting. And as you can
see, these are not the regular brushes anymore
because we're going to change the shape of them to
be able to accomplish this. And then there's one
last thing you may need. If you have glued
paper like I have, you need a regular table knife. If you want to speed up the
drying process a little bit, you may want to
use a hair dryer. Just simple head dry like this. Any hair dryer
we'll do now brush, if you don't have old brushes, just get a simple set like this. Very inexpensive with a
small brush, a medium brush. And if you have one
with a large brush, that's fine, then you don't need the regular painting brushes. All the regular painting
brush is really stiff and that creates
some nice effects. All right, good. Last thing you may want
to use is the photo, if you want to, of the actual
sunflower that I used. Okay? And for the colors. But I've attached the
photo with this class. But it's not an obligation. If you only want to use
the sketch, that is fine. That's it for the materials. Now we know what we need. Next thing is we can start preparing our brushes
and our paper. See you in the next lesson.
3. Preparing Brushes and Paper: In this first lesson, we are going to
prepare our brushes and our paper so that
we're ready to paint. We're going to make some
special brushes for this class. And we need to prepare our
paper in a certain way so that we can actually use
it and make a postcard of it. Before we start painting, let's dive into
preparing our materials. You see some materials
here already. We're not going to
use everything, but I'm going to
take you through how to prepare them
and how to use them. The first thing is if you have some dear food staples,
they're called Staples. Or dear food Staples, they're basically brushes like
this with a slanted site. You can stipple with
them under an angle and you can use this to
even paint a little bit. If you have a three
eighth and a one eighth, something like that, the size, you're fine to go,
you don't need to prepare any other brushes. The next thing you could use are some stenciling brushes.
I got two of them here. This is a size four
and a size six. Now, the size six will be great for the background size, 44. More or less the
painting. If you have smaller like these, the smaller the better
you could use those two. But if you don't
have any of them, and what I'm going
to do is we're going to prepare
our own brushes. And you see I've
already cut a brush, just a old brush I had
into a dear foot stipple. It's about the same,
cut an angle under it. And what you could use is an
old brush as I have here. If you have a very old brush
here, this is a brush. Five, that's a nice size. Smaller is good to just
take your scissors, you go under an angle close to where the hairs
are in the shaft. And you just cut in one. Go like this, and this
is probably going to happen with yours
too. You miss a spot. I got a little ball
under here on purpose, so that I will make
a mess on my desk. But you could use a bin to just do it above the
bin. And there you go. This would make a perfect
one, nice and sturdy. As close as you can
get, not too close, then you don't
have any bristles, any left that you don't want that I have now cut size five, that is nice for a larger one. What I got here are two just
from the hardware store. Some regular painting brushes,
some synthetic brushes. Either brand new I got
open them. Here you go. The other one too, and I'm going to show you. There you go. I don't want to use
them like this. If I stipple like this,
they're a bit rounded. I'm not going to get
nice stipples in this. Brush is going everywhere,
I don't want to go. This one is even soft. I'm going to actually
do the same thing. I'm going to cut these
things into a foot. Slip under an angle
relatively close. This might be a challenge
to get those bristles. They're quite sturdy. I may need to cut them straight first to get them all
off. There we go. All right, now I'm getting a strange brush I got
cut it under that angle, see if I manage that. Well, if it's not perfect, that is actually not a problem. Now, this would work nicely. I got it too much
under an angle. I'm going to cut it a little
bit less under an angle. You could use a
knife for this too. Of course, instead
of some scissors. These are really static, these hairs. There you go. Now I've got interesting
stippling brush, and this should work nicely. See, this doesn't
spread that much, this will stay sturdy. I think I might want to have slightly more of
an angle right there. If it's got a strange
shape actually, like this, that
doesn't really matter because that makes an
interesting shape. But what I want to feel is
I want to make sure like here's a little notch I
want to get rid of that. Don't like that,
I'm cutting that away so that no strange nudges. I'm going to do the same
with this large one. Let me cut it straight. First, imagine that. Did you ever think you would
cut your painting brushes? And this one should be
pretty sturdy already. I think I've cut it slightly
under an angle already, but I want to angle it
slightly more there. I think this is good enough. That will work, right. That's the preparation
of the brushes. I'm going to clean my desk a little bit, get
rid of this mess. Now, I've got three of them, actually I've got four of them. This one to put aside. I want to have a small
one for the details. I want to have a nice large one. This is a brush eight,
painting brush eight, So not a regular brush eight, because a regular brush
eight is not as large, just a painting for your house. And I've got a brush,
this should be a six. Well, you can see they're close. Just somewhere in between
and a really small one. So as small as you can get
in the hardware store, I would get them a bit
larger and then I would get an old paint brush
or a really cheap one, like here in a set like this. You buy these four,
what is it, $1? And you can cut this up nicely. The little one
there, and that one. Then you cut two
nice brushes too. And then a large hardware
brush that would work. All right, so I cut my brushes, I'm going to clean this mess and we're going to move
onto the paper. Now that we have
our brushes ready, we can move onto the paper. Now if you have
some black paper, you're almost ready to go. If you have postcard size, then you're really ready to go. Otherwise, you need to prepare your paper on the right size. I'm going to use regular
what color paper in case you don't
have black paper. I'm going to show you how
to do it and what you need for this is
either a postcard, you go, that's a postcard. And now we have a sneak peek
already into the next class where we're going to do this
or you need just a ruler. Now postcard is ten
by 15 centimeters, or four by six in. You could measure it. Or what I'm going to do is I'm going to get
my masking tape. I'm using sensitive masking tape and I want to tape
nicely around it. So I'm going to go to this site a little
bit or go in the middle. Yeah, I'm not going to use
those scrap pieces anyway. I'm going to pull a piece and I'm going to
put this on top of here. I'm going to align
it with the top. There you go. And I'm going
to do that on my site to put that paper here,
right around there. And I'm going to align it with the other side so that it's
a little bit straight. And now I'm going
to take the rest. I'm making sure I'm aligning
it with this side again because I don't think my
postcard is completely straight. They go mind that I might end up with a slightly smaller one. That's okay. And I'm going
to do the same here. Stopped in the wrong place. Well, I think around
here is fine. And there's my postcard here. We're to go. If you
have the black paper, you do exactly the same, tape it off on the size
you want it to be. Then we're ready to go. Now I got a postcard size. We are ready to paint, but painting is for
the next lesson. Now we've prepared, I
was going to say canvas, but in this case it
is just simply paper. And we've prepared our brushes
and we're ready to paint.
4. Creating a Background: Get your brushes. Get
your paper, get water. Get something to mx some, because we're on a paint in this lesson and we're
going to start right away. We're going to start
with the background. Now, I've set
everything up already. I've got two bowls of water, one for rinsing, one for using, although in this class we're
not going to use much water, so I might actually end up
using them both for rinsing. I've got the brushes. I want to start with the largest brush, make sure it's
really clean after cutting so that there's
no bristles left. Sliding a couple of
times like this, but not above your paper, of course, then
you create a mess. I'm using a plate, glass plate for mixing. I'm going to use in
this lesson the black. I might add some white to it, and I'm going to use a blue. For the blue, you could
use a very light blue. I want to play a little
bit with the colors, but I'm going to
use the light blue, but I'm going to use GM blue, Pri blue towards the indigo. This is more indigo color
if you don't have that. A prus blue is fine too, you just get a
slightly different color for the background. We're going to use
fairly wet paint. For the rest, we're going to
use pretty much dry paint. Let's start the large brush. What I'm going to do first,
I want to take this. What I want is a variation
from light to dark. If I look at the sketch, if I can find the
sketch. Here you go. Here's the sketch
we're going to put on. Later on, the sketch is
going to be like this. It fits right there. The light would come a
little bit from this side. I would make D, where the actual flower is
slightly lighter, pick a little bit of black. I'm going to wet this brush. And I'm going to take that paint I need for
this bit more water. But as you can see,
I'm right away. An interesting effect,
and that is what I want. Picking up a little
bit more water. There you go. This is what we're going to
do basically in this class. We're going to use
stippling methods to create some
interesting backgrounds. This is really interesting.
I'm picking up water again with this paint. There you go. Go over it again. I'm picking up water again each time I
pick up some water. As you can imagine, what's happening is the color
gets lighter and you get a interesting gradation from dark to light picking up water. Now again, this painting very differently from what
we used to switching, I can hold here if you're
only left or right, then you don't need to
switch hands of there goes, that creates a very
interesting background. All right, I want
some more black. I'm going to look at the
reference again and we'll say, okay, the flower is
still about there. At least I want to keep
on going with this. Picking up a little bit of
water and some new paint. I'm going to do this again. I would say till about I've got one third of my paper
left with nothing. Obviously, there's enough paint still in the brush
to keep on going. I want to cover everything. Now you also see the
difference between black. Now if you have a black paper,
what you could do instead? You could take that blue and that white and mix
that a little bit and start painting right from this side light and leave
it dark right there. You could bring in some interesting variation
in color there too. What I want to do is to keep
going here on the there too. Over it again, I'll
leave that to dry, make sure that pretty
much the white is gone on top to all right. Now I'm going to
take that blue paint that is lighter than I expected, which is often the case. I'm going to wet my brush, pick up the black mix, this with the black, basically
create as you can see. A whole new tone with it and I like some
variation blue in it. I'm going to go over here too so that I can get that color in and not suddenly have
some blue somewhere. While cut black everywhere
else and need somewhere of that blue at the edge. I really want to make
use of that blue. I'm wetting my brush, mixing that blue nicely. There you go. Yes,
that is what I want. Sure, I use that
white for this one. There we go. Now this
is fairly thick. Spread this out,
that blue color. I'm here there. I have an interesting
background. Let me move that blue into
the black right here too. All right? I want to
move it right there too. Now, depending on your Gh, this might either cover
a lot or just a little. Let me add some
black right here in the corner since I have some left. All right, there we go. We're going to take that blue. I've got now titanium white, but you can use
regular white two just a little bit might I'm
going to get some water. I'm going to mix this in
with these two colors, the black and blue, creating an interesting gray. I want to add that to the
edge here just a little bit. All right. Now that's that. Okay. I want to
do next this now. I can leave this to air dry
or I can take my hair dryer. And I'm opting for
the hair dryer since that goes a lot quicker, putting it on the middle, heat to dry this. All right. That is dry enough
so you don't dry your pain. You want to look
at my background? I need definitely some
black. Where's my black? Here it is. Bring
down some more black. Wetting the brush. There you go. This is definitely
thicker than before. Using less water, more paint. But I will spread this
out. There you go. And I'm going this side got some more of mine as well. Do it here, right?
That's better. Cover it with a second
layer that I get a nice dark color
behind my sunflower. And I'm going to get
some of this blue. I think this might be
well enough to get this in a little bit, not too much. I'm just dabbing it in the
water so that I can get slightly more paint in it. I might want to go blue here. Get a nice variation. I can see a nice variation
from the dark blue. And I'm going to get that
white there with the brush. The color that is on the brush, I'm going to that in to
the white and again, that nice thick paint on it and make a little bit of a transition
between the colors. I think this is looking
good, all right. In some white here and there. So that I can get a little
bit of a variation. Pick up some of that blue. Do that around
here. There you go. I think I've got a
interesting background. If you don't like these colors, you could use purple with this, you could use pink depending
on what your preference is. You could basically create
any background you want. This is a nice background. This is a good looking one. Pick up some of the paint
here and that it in here for a little bit more variation and I'm going to be
done, this, is it good? I'm going to leave
that too dry or well, I'm going to help
it a little bit too dry and see how it dries up. All right. So that spot
there is not totally dry. But it will dry when
I'm cleaning my palate. And that's what I'm
going to do next. I'm going to clean this brush. I'm not going to use
this one anymore. So I'm going to clean
it and I'm going to clean my palette since I
want different colors on it. If you have more than one
pallet, yes, just use that. Since this is the end of the lesson, I can
clean all this. All right? And if you need
to clean your water too, then please do so.
I like this now. This is a nice background, this is not even black, but it has some
variation going a little bit from light
to really dark, and some little spots here and there with
a different color. I like that. Now you can probably see that my paper is buckling
a little bit. If I press it, you can see that I can press
this a little bit, that's not a problem
once we tear it off. If you let it dry and
it's still buckled, you can turn the paper around and then wet it a little bit on the back and go over it
with a iron ironing it, and then it will
go straight again. But often if you turn it
around, use the hair dry, it might straighten
out to all right, but for the painting, it doesn't really matter that it's
buckled a little bit. Well, that's it for this lesson. We've prepared our background. The next thing is we're
going to paint our flower. No, we're not going to
paint our flower because we have no clue where
this flower goes. So we need to draw
the flower first, and then we're
going to paint it. I'll see you in the next lesson.
5. Transferring the Sketch: For this next stage, you're going to need
a white pencil, the paper we've prepared. Or either the black paper, if you're going to use black paper. And you're going to need
the sketch I've provided. And as explained
in the materials, you're going to need a
pencil or a pen also. Right. Let's transfer the
drawing to our paper. To do that, I've got
the sketch here. We're going to start
with the sketch. I'm going to put
my painting aside. As you can see, I've put
pretty much everything aside, and you want to make
sure that painting is nice and dry while
we're doing this. Next step, It takes a
little while to dry too, so it has some time to dry. What we're going to do
next is the back of this, we're going to make all white, and I'm going to show
you something for this. You could use a set in the
materials, You can use chalk, you can use pastel pencils, You can use soft pastels. You can use a white
colored pencil. And I think the white colored
pencil works the best. And I'm going to show you
that prepared a little bit. I've done, of course,
some tests to make sure we've got the
best one possible. And it's right here.
As you can see. I wrote down what I
used. Here it is. This is what we're going
to do. I've transferred the back here with
various materials. I can turn it around
and can see what it is. This is just simple
yellow pencil. We've got some
pastel pencils here. We've got some chalk here, just a regular piece of chalk. Some soft pastel, which
you can see smears a lot. And here's the white pencil. I've used various
brands and it really doesn't matter which branch
you have, it works fine. I'm going to use
the white pencil because I like that
the best, nice, crisp, and you don't smear
it as this see, you can smear the
Z and then it's pretty much on my fingers
and most of it's gone. It's going into your paint. And this will stay where it is. And I like that I'm going
to use the white pencil. But the alternatives
are possible too. What I'm going to do with
that is very simple. I'm going to color
the back like I've done here for the front, coloring the back
with the white. I need to make sure I pretty much know
where I need to color. I'm going to take
a pencil for that. Get a box till there. I'm holding it up
a little bit so that the drawing comes through. Now I know that right here, pretty much in this box, there should be white. I'm simply going to color this. I know it's the flower is here. I'm not sure if you can see it. I doubt it. I can see
where it's going down. This is what we're going to do, basically color the whole back. You can use short strokes, really long strokes up
to you as long as you cover pretty much
the whole back. Let me check. That goes
well up here a little bit. We're going to transfer
all this pigment to our black paper. In a minute they go, okay, I'm going to
do this a few times. I'm going to speed this up. And I'm going over just a
few layers so that I make sure that I get the
most white on my paper. Before I speed up, we can say, well now you might never have used a
white pencil actually, in your colored pencil drawing. Now it's coming in really handy. I think I've got enough on it. The next stage is we're
going to transfer this to the paper we've prepared. Let me check that it's nice
and dry. That should work. Now, I need to
center it right now to hold a little bit to the light and make sure
gets where I want. What I could do
also, I could cut it out and that makes
it slightly easier. Since I have a scissors
laying around the brush, I might as well cut this out, leave some space for some tape. There we go. Now I can see pretty much a
little bit better. What I'm going to do and
where this should go on, the flower should
go around here. I want it. That is pretty
good. Let's check it. If I'm still on
it, on the paper, right, I could cut it. Definitely. I'm not doing the sites close about the
bottle. There you go. And then I know exactly
how it fits in. That's nice. I don't
want it in the middle. I want it a bit off to
the side like this. That would be nice. And
what I'm going to do next, I'm going to get some tape. I'm just going to
tape it down just simply to make sure that the paper doesn't move
when drawing on it. The next thing I'm
going to get a pencil. You can use any pencil. You
can use a pen for this. And what I'm using
this pencil here, this is an eternal
pencil, they call it. The only reason I'm doing it
is because it's very hard. You can use a hard pencil
boil point whatever you want. And we're going to transfer, I'm going to draw
the major things, shading, that shading, I put
there, the major things, not all these little dots, the flower and everything. I'm not even going to
do these middle lines. Going to ignore those. Pressing fairly hard
since I got it stock. See if you can see it. There's my transferred. I'm not sure if you can see it. Well, we'll see putting it
back and I'm continuing. Well, I'm going to speed this up since you understand
what I'm doing. Well, I do think I've
got everything and I'm carefully loose this
again. And there you go. There's my sunflower Right
now I know where to paint. Well, that's it for this lesson. In the next lesson, I was going to say, we're really going to
paint, paint it already. We're really going
to paint the flower.
6. Blocking in the Flower: We've got a drawing,
I've cleaned my palette. I've got my water again.
I've got a brush. Various brushes, so
I'm ready to paint. We're going to do the flower. In this lesson, we're going
to continue stippling, as we've done with
the background. We're going to do
the flower too. Let's start that
sunflower yellow of. We need yellow petals for that, we're going to use
the lemon yellow. I've got the lemon yellow. Now if you have a mi yellow, I didn't want to
take so many colors, but if you have that,
you could use that. This is way too light. I want to preserve that
light a little bit. What we're going to do is
I'm going to take my black. It should be the
black, going to put down a little bit of black. And I'm going to
mix in some black. For that, I'm going to wet my brush just a little
bit. Pick up some black. Pick up some of this color. Mix this in, there we go, create a darker blue. Let's see, Might be slightly
too dark. Not a problem. Some yellow. Again, until I got the
nice yellow I want, I think I can work with this. This will be my darkest
yellow right away. And this I'm going
to use as a base. So I've got this brush loaded up and I'm going to stipple in these leaves with this brush. And I already see what's
happening with this rough brush. I'm never going to preserve
all the beautiful petals. That is not the idea. Anyway, this is going
to be some stifling, so you're going to get a total
different look in the end. I need some water to get this
paint going. There we go. I'm trying to follow
them as much as I can and make sure you
cover them nicely too, so that we won't see
that white in the end. Later on, we're going to try bringing back some
of these details. We still preserve the
shape as much as we can of the sunflower that it obviously later on it
will be a sunflower. And there we go. I'm now using the side of the
brush a little bit, but I keep stippling. Remember, we're not
allowed to paint in this, only the stippling motion. There we go. And that will
basically be my first layers. May we add a little bit of water to get that
paint flowing again? So if it dries too much, add some water to it so that it starts flowing again again. Now I'm using the
side of my brush a little bit where
there's larger parts. I'm just basically the whole of the brush for these petals
that go over the heart. I'm using the side
again. There you go. Now I definitely need
some paint right here, picking up a little
bit of water. Again, I need to add some petals right there.
And there you go. There, there are the first
layers now vols well, since this is slightly wet, we should still see that white
a little bit through it. If you haven't done it took, you should see the white. If you don't see
the white anymore, that's not a huge issue. All right. Right there we go, a
little bit more there. And I think I've got the first
layers of this sunflower, my dark color nicely down
there we go a little bit here. Good. Well, we can leave this to dry. You're
welcome to do that. We except I'm not
wanted to dry yet. Hang on, I need
some paint on this. Okay. So you can
leave this to dry. I'm going to speed up. Otherwise this class is
going to take quite a while. All right. That
should be dry nicely. Next thing I'm going
to do is do the heart. I'm going to use the same color, but I'm going to add
some burned hanna to it. There you go. Take that
brush, get some water. Now you could clean brush, but if that helps a
lot with this brush, you need to thoroughly clean it. Then there you go. This is the heart to pick
up some of that paint, stipple that into the heart shape, we're going to bring back. It's the nice thing about ah, we can bring back
anything we like. I'm using the side of the
brush again. There you go. And what we can do is you can keep that sketch you've made, you can put it aside,
keep it handy, keep your eye on it
for the next sections. All right. Well, there you go. The last thing I'm going to do is I'm going to use some green. I've got some sap green, that's a very light green. Put that down a
little bit and with this brown color in
it's still in my brush, picking up some of the brown, mixing that with the sap green to get an
interesting darker green. See that is a nice darker green. I'm going to do start with it. There you go. There's
the base of my flower. This brush won't need anymore. That is done for this section, so you could put it away, you can clean it, do
whatever you like with it. Now, we've blocked
in the flower, that's the proper term for it. We blocked in the
flower, whole scene. We blocked in with paint. Now we know where the major
parts are, the major colors. Now we're going to bring
some variation tones in it, lighter and darker tones, to make it more interesting. Because this just, well,
what does it look like? It looks like a flower, but something that
we just put down. We want to make this,
of course, nicer. And we'll do that
in the next lesson.
7. Detailing through dark and light Colors: Welcome to this lesson. We're going to add some
details to our painting. Let's see what we're
going to start with. Well, let's take a
look at the painting and then decide what
we're going to do first, I'm looking at the painting
and I'm looking at my paint. I see I have a lot
of brown left. What? I'm going to
use this brown, I'm going to take some white and it can be the titanium white. Whatever white you want. And I'm going to take
this smaller brush, I want to wet it. I want to take that
white and mix that in the black with the brown. Make a good mix. And you can see what happens, not all of it. I got nice something here. There you go. And I've
got now a lighter tone. And what I'm going to do
with that lighter tone, I'm going to do a little
bit in that heart, in that lighter tone there. Now, if I re the light and
the light would shine here, I actually might get some
lighter tones around there too. And I'm going to stile them in, Bring in some definition. I might get a few lighter tones here and there. I'm
just stippling it in. Later on probably going to bring back some leaves of them because I can still see them where they're
supposed to go. That would be this is
looking nice, isn't it? Simply like that. I'm want
to clean this brush now. This brush, I can
clean pretty well. I want now a darker tone. What I can do now is
put some black down. I got some black still. Pick up some of
that black and mix that in that brown
that's still there. And I got a nice darker tone. Mix it in a little bit more. Here. There you go. Not too dark That is scratching because my
brush is now very short. What I'm going to do is
now I'm going to bring back basically this part
here, this small part here. And I might do around
this base here, a little bit darker tones
to get some variation. But I'm starting with
bringing back that part here. They go into the heart. And with the dark brown, bring back a little bit of
variation here and there. And I think that is good
enough for that flower. I'm going to clean that brush. I'm doing that in only one ball. I'm keeping one bowl
clean and the other one, as you can see, it's
getting pretty dirty. Let's see, I want to pick
up some of that light can, but I want to squeeze out water a little
bit from this brush, otherwise it's too wet. And make sure I'm going to
add a little bit better. Right? There you go. And we're going to basically
leave that to dry. And that will be my heart.
Let's clean the brush. Now the tricky part comes, we're going to need that yellow back and I'm going to add
some yellow to my palette. I'm going to have a
damp brush pick up that yellow and I'm going
to look at my drawing. I need to have my drawing
pretty close for this part. I'm going to see where I
want to bring some leaves back because there are now
one clutter of leaves. I don't want that
around the edges a little bit of the leaves and where I can still see a little
bit of the drawing, I'm going to add some of them. This is going to be
a very rough stage. It is not going to be a very
nicely detailed flower. It's going to be not
really abstract, but more of an impression. Now, you can already see right back that there
are leaves here. I'm stippling in part
two around the bottom. What I might want to do is bring back these leaves a little bit first, there you go. Let's check the drawing and some leaves right around there. Depending on your paint, you may need to pick up paint. Often see this brings already
back some definition, however you can do it. According to the drawing
very accurately, or you can do like I'm doing, just giving that impression again that we're
having some leaves. And once the paint runs out, you can add a second
layer, thinner layer. This should be some light here. Let's see, there's
a nice leaf here, I can still see that. Want to bring that back? Pretty much like that. Let's bring back a
few leaves, totally. Here's one, so that we get that impression
of sunflower leaves. Let's see, here's a nice
thick one too. There you go. And working as you can
see, pretty dry for this. Let's do this one
a bit more too. There you go. See. And now we're bringing back
some of these leaves. Let's one here. Too few complete leaves. And the rest just
around the edges. Let's see, there's one here too. We're stippling back our leaves. Let's see, Let's pick
this one above it. It at the base
here. There we go. And we're doing one here too. And when the paint
is running out, I'm adding in different
details there. There you go. Let's see, where
does one go in here? We add that one in St. A little bit there. And we
need to bring back one here, a really detailed one, detailed, really light one. I mean, pick up some
paint and the rest. I want to deal with left over
paint to get that effect. Now you get a nice
effect if you have too much paint on the
ones popping out, some of them really strong, the other ones a bit less, you smear of your paint. And then there's
less paint on it, but it still give off a little
bit of paint. There we go. Good. Maybe around this heart here a little bit. And add some paint
here and there. Bringing a few of these petals really in front of the others by adding another layer of
paint, like this one here. I think I like that some
of these front ones here. I want to be a little
bit more obvious. They all right, good. Let's clean the rush and
let's get some green. We've mixed it up that
very dark color there. Put down just a little bit of squeezing the water
out of my brush gets. Fairly dry picking
up this paint. And I'm going to add just
a light color there. You have this nice dark color and you have this nice
light color there. That's all I need for that one. All right. And I got to
clean my brush again. The middle, the heart, I'm probably going
to leave like this. I might add just a
touch of yellow, a little bit wet,
yellow here and there. The next thing I'm
going to do go to take tower this off again. I don't want it much, but I want a little bit left. See you have now a little
bit of yellow left. That's what I'm going to
do with this. All right. The next thing is we're going to add a little
bit of high light. At some point, I want
some light yellow. So I've got this yellow,
I'm adding white. I should have some
yellow one here still mixing with some yellow,
pale light yellow. There you go. And
again, fairly dry at some of these edges give the impression of
leaves a little bit. They go, see, now we're
having the impression of leaves because we
cut the free tones. Now the really dark, the light and the yellow light. Yeah. And the regular yellow see, and that makes it a lot more interesting were
on this side too. Now we can bring in a
little bit of definition to in these petals. This petal, I'm
going on the top. That petal on the bottom petal on the top. And there you go. I don't want to do everything.
Just some of them. See this petal ad edge, and then this one on top, perhaps a little bit there, and I want to do a few here. There you go. I like that nice. Let's bring in a
definition petal here too. Very carefully. Maybe around
this edge, there we go. For those little ones around here, those other ones there, I'm going to touch them up and add in a little bit of light color there. Now, we're going to
clean this brush. There you go, carefully. Again, what I'm doing is, you see that pressing
out the water like this. I don't want to do
that on a towel because then it gets really dry. I want a little bit
of wetness there. I'm going to get
this white here, carefully there. I want some white.
That's it, no more. There you go. And now I want to create a little bit of
an edge around here too. Perhaps a few spots
here and there. And slightly an edge, if I can manage
that right there. There you go. Now I'm getting a little bit more definition. This might be slightly
too strong here, so I'll adapt that simply away. I'm doing that here too. I'm left with a lot less go. I like that and
clean that brush. I should have some black
still some dark color here going to activate that with that damp brush and bring
that edge back again. Nice, cool. All right. I had some black here and there carefully to bring in some deeper shadows, Just a little bit
more definition to distinguish between
some of these petals. Slightly better here too. I might even bring in a
little bit of black to create a little bit of depth
there. All right? I'll like this clean my
brush, pick up some white. I'm squeezing it again. I'm going to pick up some
of that white is here. And let's bring some highlights
on the top of some of these petals. Like
I've done there. There we go. I think
I'm okay with that. Right, a little bit there. To create just some more interesting
definition that we go. I think we're pretty much done with this. I'm
leaving it like this. We have our slightly
different than usual gouache flower now, but we need one more step of
it's not a postcard, is it? Carefully, get rid of this tape. I need to determine what's
the top. This one is the top. You could write F
to the painting of that's on this
one. Goes over that. That's two, then. This one is under it. This one we need first. Now, if you have regular
masking tape and it sticks on the paper, what you could do is you
could take the head dry, really dry the tape, and then it loosens by itself. But this is sensitive
tape, this goes off. There we go. We've
got our postcard. We could stick this in
the frame as a painting like this. That's it. Now if you have paper like me, it's glued all around and
you've never used it before. What you need next is a knife, just a regular table if
kitchen table knife like this, somewhere on this
paper, there's a gap. Either it's a gap,
most of them have it. Either at the top or the
bottom where you can stick the knife in a slide or
it's one of the corners. And I know it's with this one, it is this corner,
I'll show you that. See that corner is
loose by itself. Always what you do is with
the blunt side of the knife, not the shops, the blunt side, you just push it in,
then it needs to grab hold of it
and you start just pushing it like this
all the way around. There you go. Depending on the brand you use. This one is cheap, it's
letting loose easily. Some are really stuck
and that's the way you get your paper off. Your glued pat there is our Don sunflower in a slightly different than
usual style for sure Go style. That ends this class
too. Now we're done. We've got a nice painting of this sunflower
different than usual. Probably not a
totally detailed one, but we don't want to
spend hours painting. We just want to have some
fun creating some postcards. And now we've got
a lovely postcard with a nice summer scene on it. That's it. Next up is the
project. So I'll see you there.
8. The Project: Well, thank you for
being with me in this class and taking it and
arriving at the project. What are we going to do now? We've made these brushes, and I only have
one of them here. We've created various brushes, and we've only done one flower. So for the project, what I
would love to see you do is pick another flower
created in a similar style, this stippling style,
bit impressionistic, not too realistic,
but having some fun. And create another postcard. Perhaps not use the
same background color, but look at the flower
and see if you can find a matching color for the
flower on the background. Create the background and then
paint the flower onto it. You may need to sketch
it or trace a photo. Doing it in the same
way we've done. I would love to see
what you create. That's basically it
for the project. Well, enjoy creating
another flower.
 Benjamin A, Art Teacher, illustrator Art by Benjamin