Transcripts
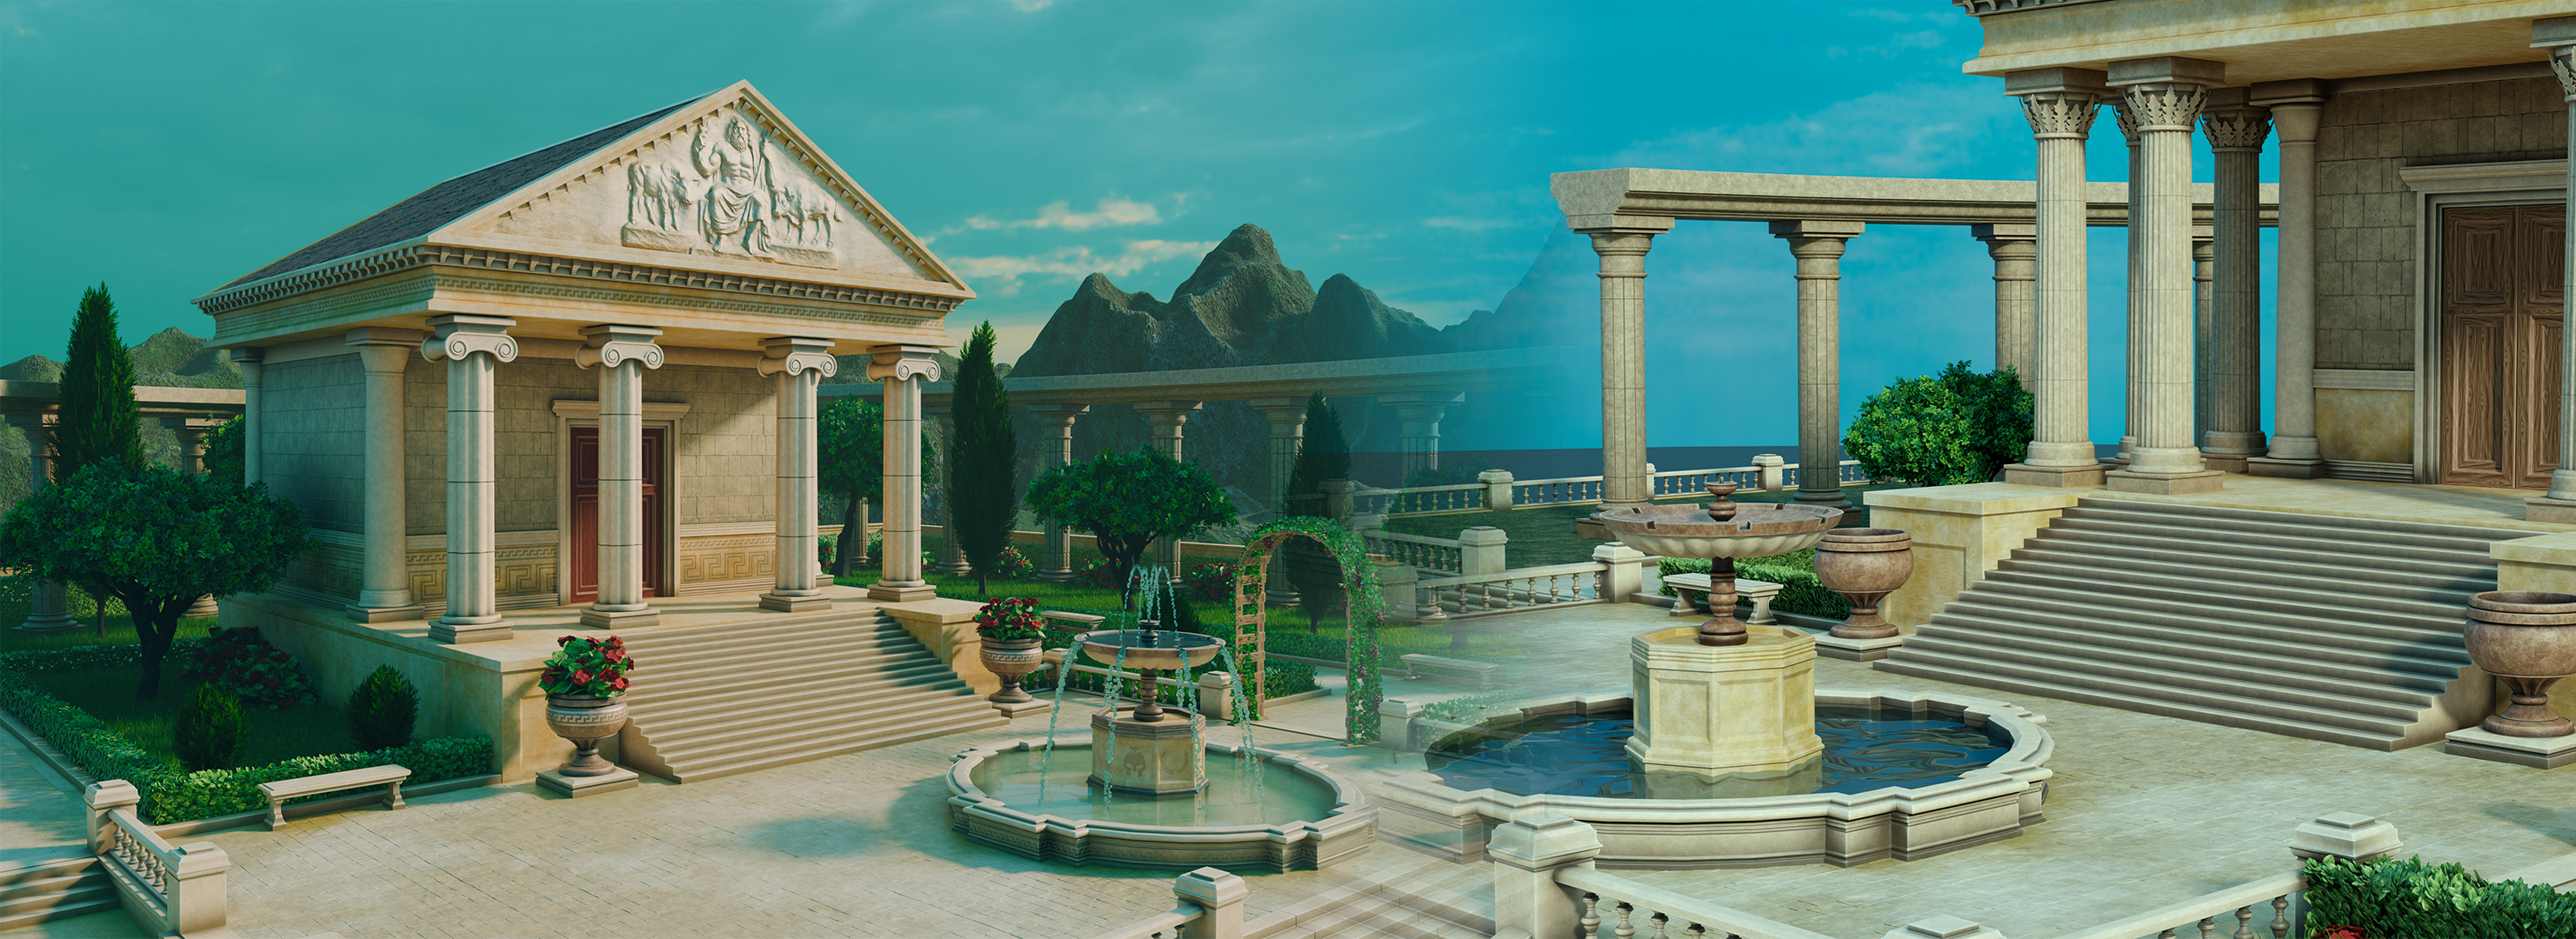
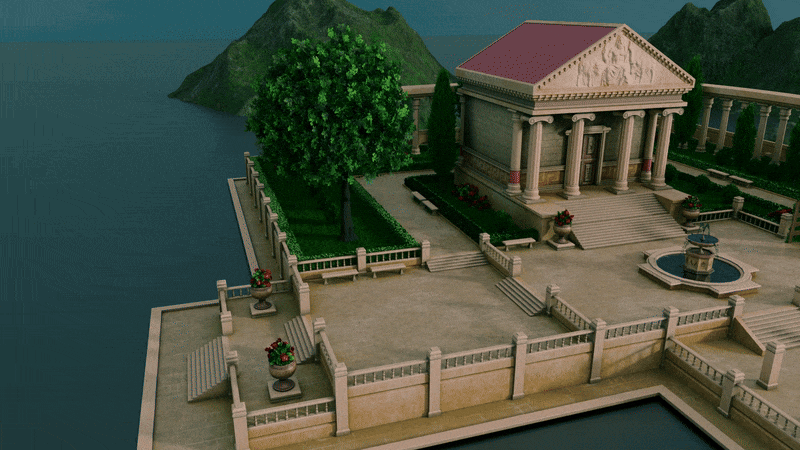
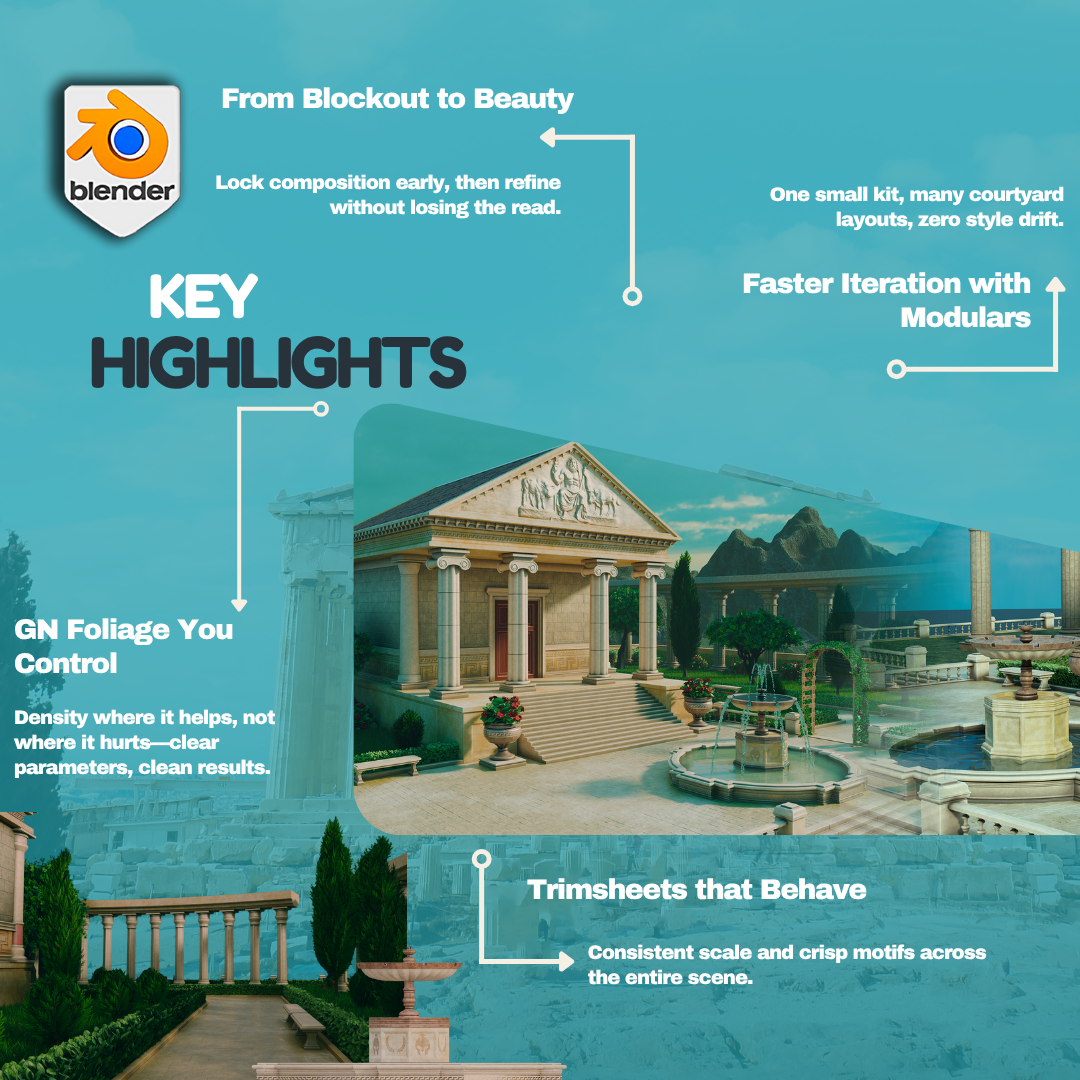
1. Introduction to Greek 3D Environment: In this workshop, we are
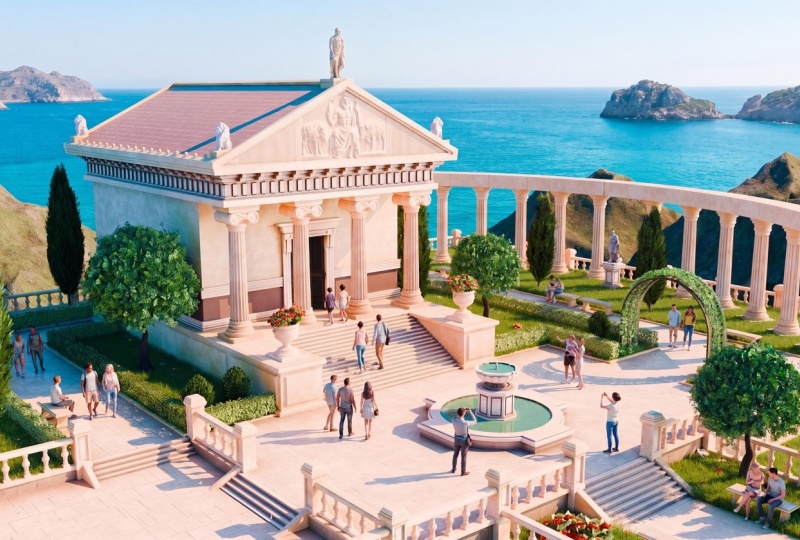
going to build a complete, stylized Greek Temple and
garden environment in Blender. By the end, you will have a portfolio ready environment and a practical repeatable workflow for stylized word building. Hi, everyone. I am Rosefield. You may know my work with Tudor
from the Arabic Acid Pack and the cyberpunk downtown
pack. Here is what we will do. We will work like environment
artists, elegant columns, carved stone elements,
ivy laced arches, sunlit paths, and sculpted foliage that ties the
whole scene together. We will block with clean
proportions and human scale. We will model modular
pieces for fast iteration. We will keep UVs disciplined
so materials behave. We will layer stylized shaders, direct foliage with
geometry nodes, light for mood and readability, and then unify the look with
a tasteful compositing pass. We start with the blockade. I will show you how
I lock composition, halfway flow, and
focal points early. A human scale reference stays in the scene
from the first minute, so stairs, columns, and planters read correctly
without guesswork. Next, we build a modular
architecture kit, column sets, arch modules, trims, low walls and planters. The goal is smart topology
that deforms and bevels predictably and UVs that accept trims and decals
without wrestling. This kit approach lets
you iterate quickly and try lay variations in
minutes, not hours. We will unwrap with
clarity and use a trimsheet approach
for repeated motifs. Decals add storytelling
detail to plaques, vases and stone surfaces without blowing up
texture memory. We will set up a simple but
effective lighting rig, warm sun, control bounce and contact shadows
that ground forms. To finish, we will push a cohesive post look
in the compositor. Gentle contrast
shaping, color balance, and a restrained bloom bring
the stylized re together. I will give you the exact
node setup so you can match the final look and adapt it for future scenes. Who is this for? Beginners who want a clean, guided pathway into
environment building, self taught intermediates who want to speed up
modular thinking, tidy UVs, and better
foliage control, and anyone who wants
to ship a finished, stylized environment rather than collect half done pieces. You will download a
tidy course pack with the environment blend,
the modular kit, trims and decals,
foliage node setups, and reference sheets
with human skill right beside your assets. The idea is simple,
remove friction so you can focus on
learning and creating. The end, you will
have a complete Greek Temple and garden scene, a reusable modular kit, and a presentation ready render you can proudly
add to your portfolio. More importantly, you will have a process you can
use again on plazas, courtyards, ruins,
and town squares. So if you are ready to build stylized worlds with
confidence, jump in. I will see you in
the first lesson.
2. Master Blender Viewport Navigation and Scene Orientation: Hello, and welcome to stylized Blender
free D environment, Greek temple and
garden Workshop. So in this course, I'm
going to show you how I approach larger
environments in blender. We'll create some modular pieces that can fit together
using the grid, allowing us to quickly
block out an environment. We'll build it in a way
that allows us to stay flexible so that we can easily
make changes at any point. I'll show you some
techniques on how to build fast and efficient while also keeping the
scene optimized. I'll show you how to set up some nice lighting,
some foliage. We can add to the scene to
make it feel more alive and how to create both a still
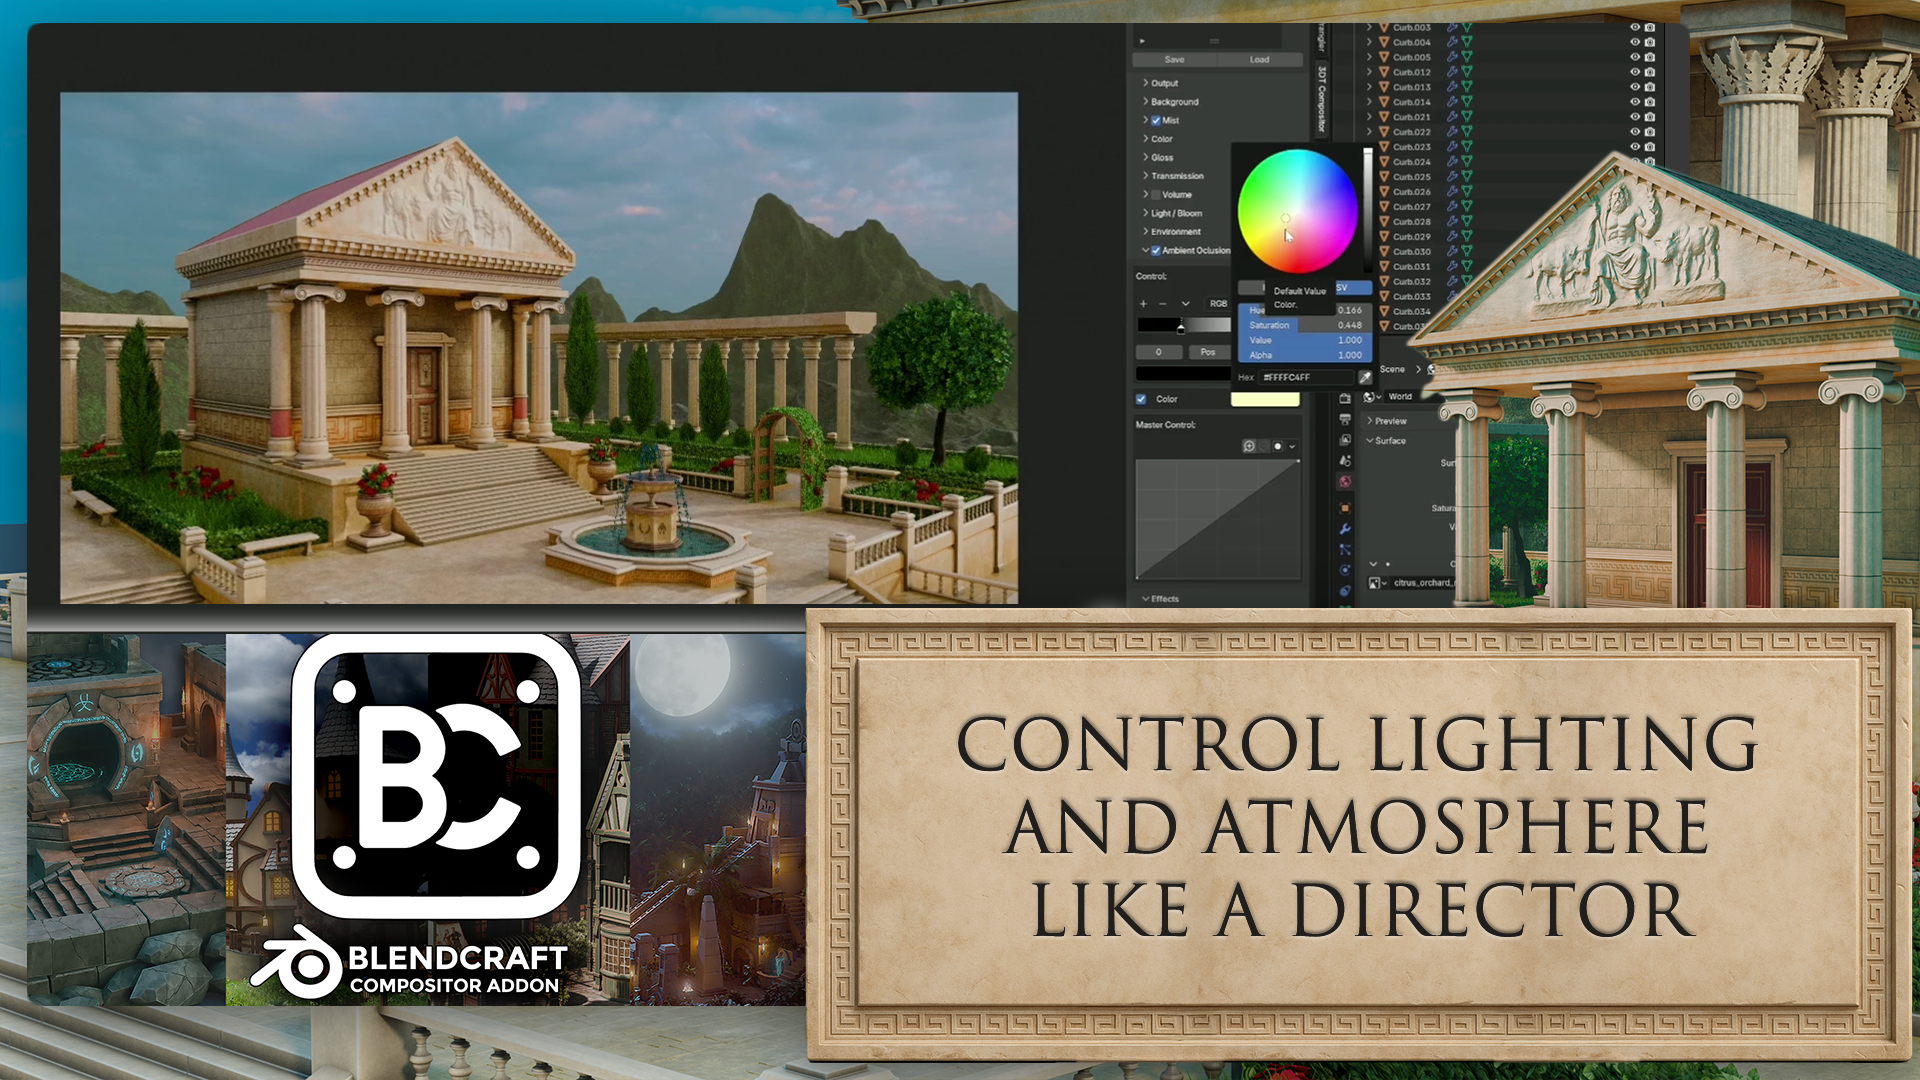
render and a turntable render. We will also go into compositing so that we can change the
final look I've ever seen. Now, this will mostly
be a modeling course, and most of the textures
will be provided, but we will be going
into a little bit of texturing when we make
changes to those materials. So I hope you enjoy this course and you
come out of it with a better understanding
of how to make stylized environments
in blender. So before we start,
I'm going to play you a quick video on the
basics of navigating blender and making
sure you know how to use the viewport and the different panels and
just know your way around. So if you're quite familiar with blender and
you've used it before, you could probably
skip this next lesson, but if you're
completely new, then stick around for
this short video. Welcome, everyone to the
basics of blender navigation. Now before we begin, it's
important to understand how the axises work within blender. So we can see at the
moment, we've got a green line going this way and a red line
going this way. This is called the Y axis, and this one is
called the X axis. We also have one
that is the Z axis, which we can't see right now. It doesn't actually come in with blender viewport as default. But if you want to
actually set it on, you just come up to the
top right hand side, where these two
interlocking balls are, and just click the Z axis, and now we can actually see so how do we actually move
around the blend of viewport? There's a number of
ways of doing this. One of them is over on
the right hand side here. You can see if are over here, it's the zoom in and Zoom out. I can actually left
click and move these up and down then to
zoom in and Zoom out, or I can use the actual
mouse to actually zoom in and zoom out using
the actual scroll wheel. There's also another thing
you can do with Zoom, which is holding control shift and pressing the middle mouse, and you'll see you have
a lot more control over zooming in and zooming out. Now the next thing we
want to discuss is actually rotating
around an object. So how to do First of all, we'll bring in a
cube with Shift A, bring in a cube. Now, if I press the
middle mouse button and move my mouse left or right, you can see we can
actually rotate around. Unfortunately, though, we're not actually rotating
around this cube. So to actually fix
that, we need to center our view onto
the actual cube. We basically want to focus our view onto this actual cube. So to do that, we're
just going to press the little dot button on
the actual number pad, and then you'll see that we
actually zoom in to the cube. If I scroll my mouse wheel out, you will see now if I hold the middle mouse button
and turn left and right, we're actually rotating
then around the cube. And this is important because if I actually bring
in another cube, so if I duplicate this
cube with Shift D, move it over, so bring
in my move Gizmo. And now you'll see if I
rotate around this cube, I'm not rotating
around this one. So it's fix that just press
the dot button again, zoom out, and now
it can actually rotate around this
cube, as well. Now let's look at
something called panning, which means that we're actually going to move left and right. And we do this by holding the shift button, holding
the middle mouse, and then we can actually
scroll left and right around our
actual viewport. So now we've actually discovered how to zoom in and the
different ways we can actually do how to rotate around an object and
how to actually pan. We can also come up to
the top right hand side here and use these buttons here. So again, remember we're
looking at the Yaxs, the X axis, and the Z axis. If we come to our Yaxis
and click that on, you will see now that you've got a front view of the Y axis. If you click the X axis, then we can change it
to that red X axis, and finally, the
Z axis, as well. Now, there are
other ways as well that we can actually look
around the viewport, and these involve using
the actual number. If I press one on
the number pad, it's going to te me into that
white axis or front view. If I press two, it's going to actually rotate
that slightly. And if I press two
again, it's going to rotate it slightly more. Now, if I press
the eight, it will rotate it the other
way, as well. Now, to go into the side
view or the X axis, we can also press three
on the number pad, and that will give
us that effect. We can also press seven to
go over the top, as well. Now, what about if we actually want to go
to the opposite? So instead of going from
the bird's eye view, we want to come to the
underside of our model. Well, that's actually
quite easy as well. All you need to do is
press Control seven, and that then will take you to the bottom view of
our actual model. We can also do the
same inside view and on the X axis and YXs. So, for instance,
if I press one, I'm going to be
going into Y axis. If I press Control one, I'm going to be going into the opposite side on
the actual Y axis. Can also find these
options just in case you forget the top left hand
side here under view. So if I go down to view and
go across the Viewport, you can see here that this actually tells
me exactly what I need to press to
get the viewpoint that I've just
actually explained. Now, we also have the button on the number pad, which
is number five, a number five button
in blender toggles between perspective and
orthographic views. Perspective view offers a more natural realistic
viewpoint with objects appearing
smaller as they get further away, mimicking
human vision. Orthographic view removes
perspective distortion, making all objects appear at their true size,
regardless of distance. Useful for precision
modeling and technical work. The other thing that number
five does, for instance, if I come to my cube, at the moment, I am able to
actually zoom into the cube. However, if I press number five, I will not be able to
actually zoom into this cube no matter
how far I zoom in. I'll still be able
to move around it by pressing the little
dot button, like so. But if I actually
want to actually work on the inside of an object, I can quickly press number five, and then I can
actually go in and work around the inside as well. Now, if you're working on a
laptop or something like that or a tablet and it doesn't
actually have a number pad, you can also use,
if I press five, the actual squiggle key, which is under the escape board on the left hand side
of your keyboard, and that then will
give you pretty much the same options
as we had before. So we can click the right view, we can actually click the back and we can
click the left view, for instance, the opposite
to what we had before. So instead of pressing
one and three, we just press the
little squiggle line, and then we can actually view
whichever side we need to. Now we're nearly at the end
of this short introduction, there are a couple more things
that you can actually do. If you come over to
the right hand side and you see here where we've actually got the name of the actual parts
within our scene, we can also grab them from here and then press the
little dot B to zoom in. So I can grab this one,
press the little dot B, and that then will zoom us in. The other great thing about
this is we can also come in, shift select them press
a little dot button, and then we're able
to actually rotate around both of these
cubes. Alright, everyone. So I hope you enjoyed this short introduction to the
navigation within blender, and I hope from now on, it won't be a struggle
navigating around the viewport. Thanks, lo, everyone. Cheers.
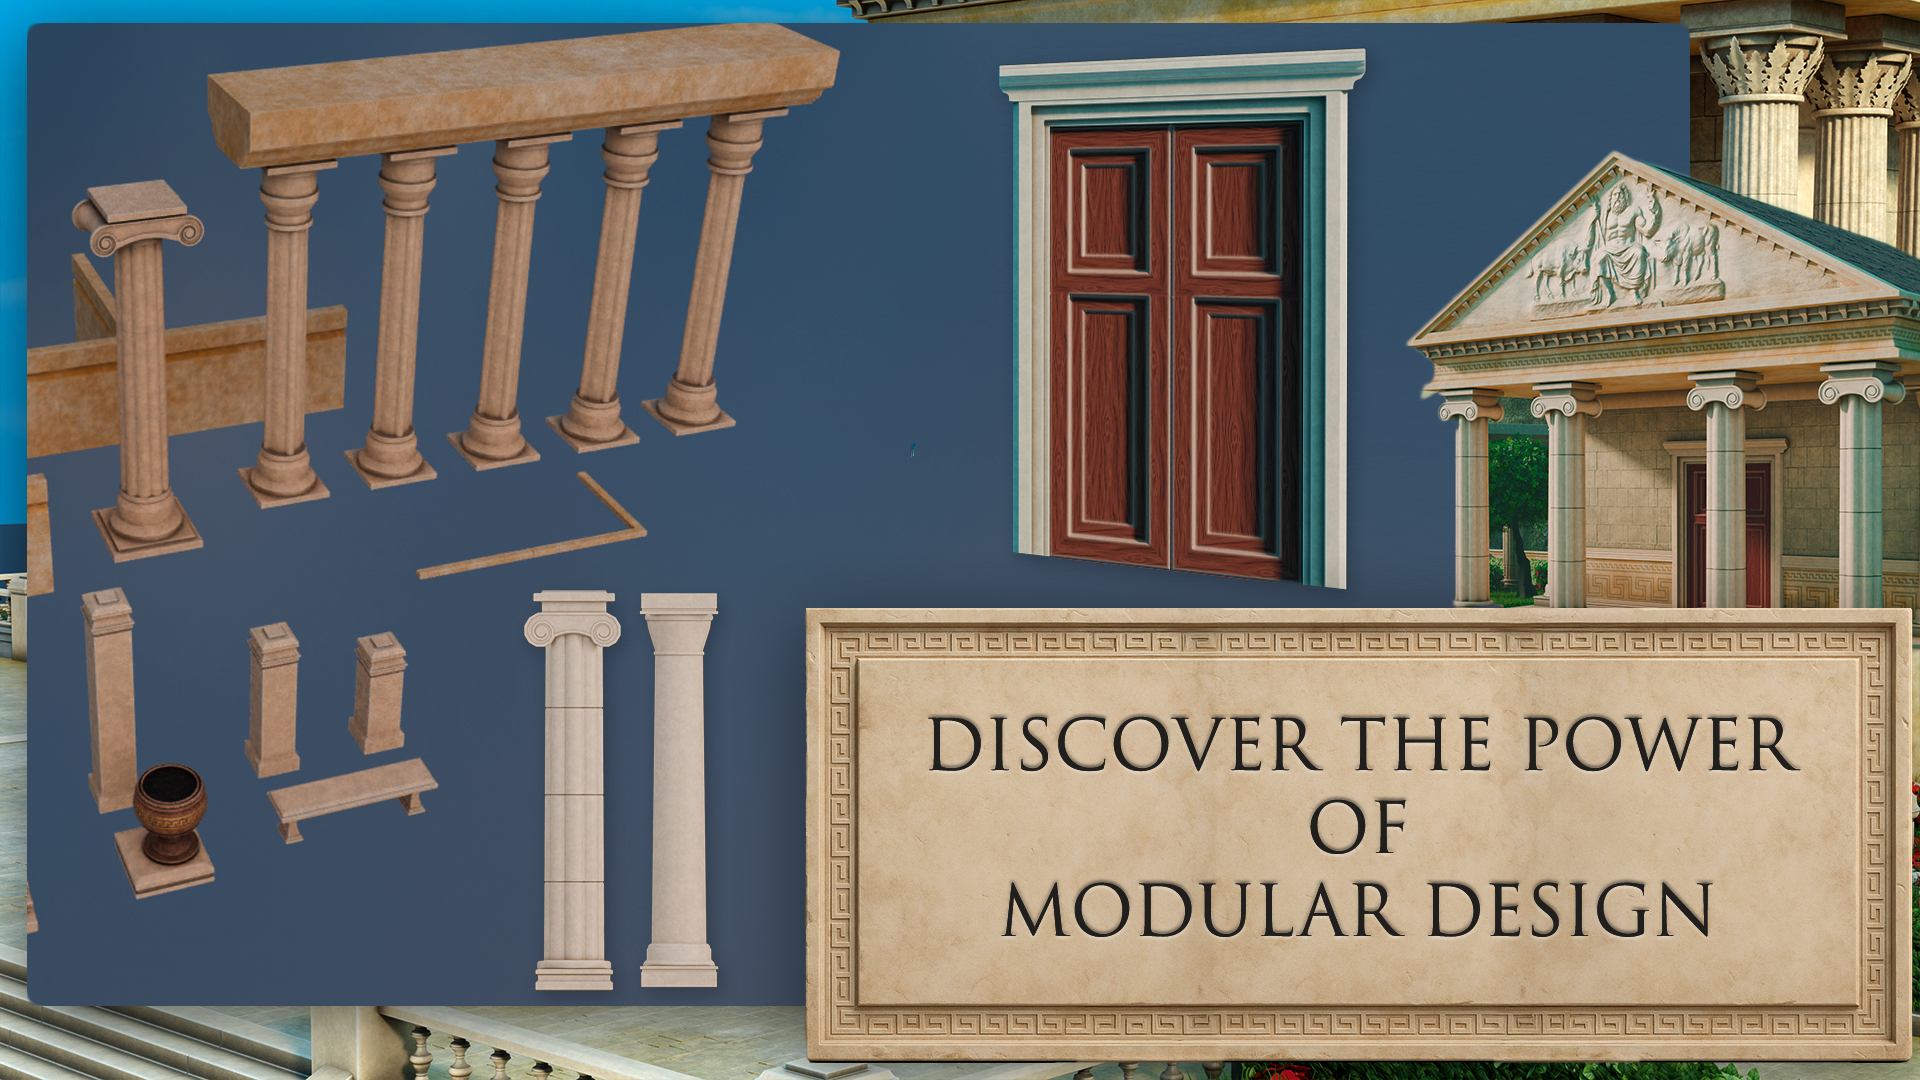
3. Import Stylized Assets and Customize the Blender Grid: Hello. Welcome back to stylized
Blender Fred Environment, Greek temple and
garden Workshop. So if you look inside
your course files, you will find a
blend file called freediTudor Greek
course Resource Pack. And inside this blend file, we have a few things
we can use to help speed up the creation
of their environment. So we're not going to
have to worry about creating any new materials
from scratch really. We have some here. So we have
some wood and some clay. We have different types
of marble we can use, as well as grass and some dirt. We have some trim
sheets over here, so we can use these
to add some, like, decoration to our models, make it look a little bit nicer. This is going to be very useful. So we can just use
this stone sculpture at the top of our temple. Saves us going in and
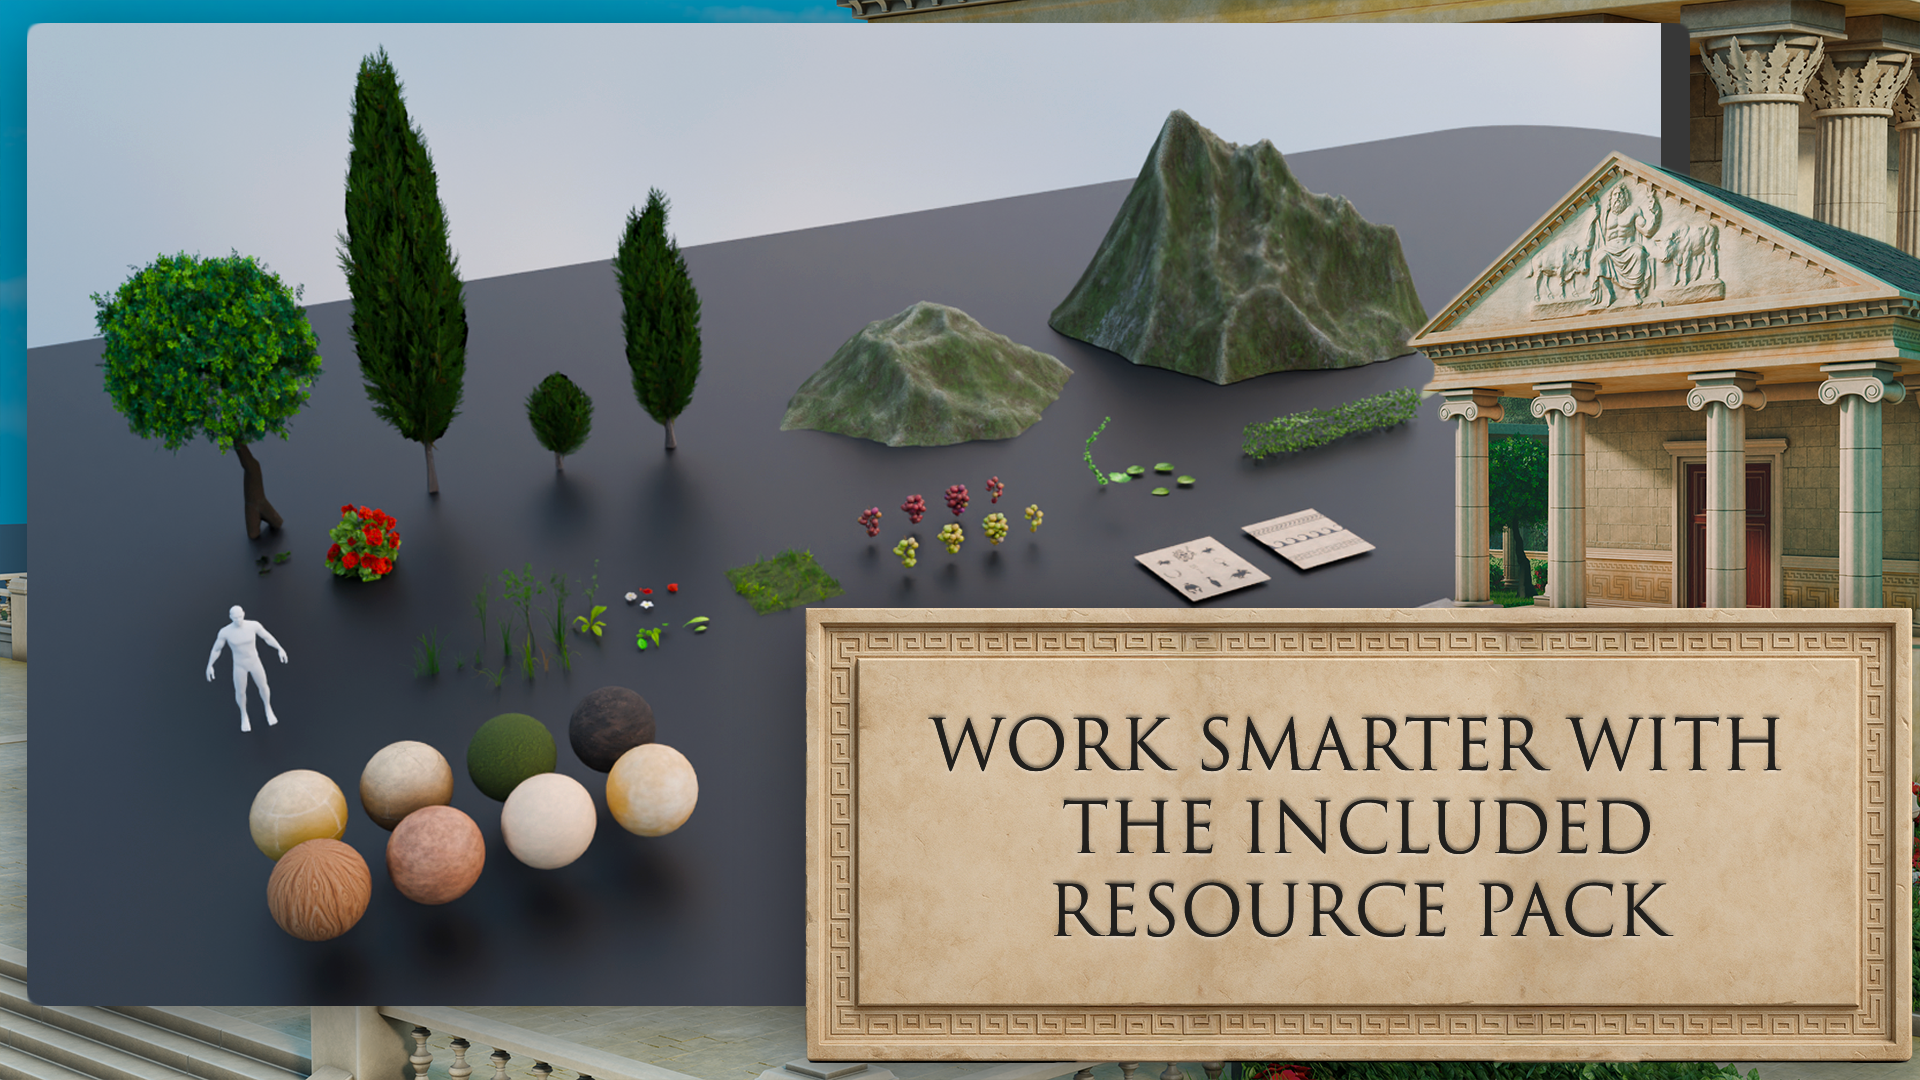
sculpting this crazy detail. Now we also have some foliage
we could use as well. So we have these flowers. We have these hedges. Now, this is a geometry node. So we can customize the leaves. We can go into edit mode, and we have this
shape underneath it. And if I drag out this face, it creates new leaves, which is really cool. We have ivy over here. So if I isolate this,
I'm going to edit mode. This is basically a curve, and we can move these points around to just shape the ivy. So very powerful.
And we can also customize what the leaves look like with these
settings over here. We have some grapes,
we can just throw in. We have our grass. So this plane has some settings
here to adjust the grass, and it's the same as
the hedges, really. If I were to drag
this ear shape, it will just create
grass along the plane. And then if I went to, like, control scale, yeah.
So there is our grass. So I'll do that. Now, we have a human reference. We're going to use
this all the time when we're building out objects, so we know how big stuff
actually is in comparison. This tree is very
useful as well. It's another geode. We can create all different
kinds of trees here. And these cypress
trees are just static, so we can throw those in. And we have some
mountains as well to go into the backgrounds,
which would be nice. Now, I'm going to show you how to bring stuff
into our scene. So I'm going to go to
File and then just hit New and I'm
going go to General. Don't Save. Okay. So this is
our default blender scene. So to bring stuff
in, I'm going to go to File and then append. And then we want to navigate
to your blend file. And then we look for
the objects folder, and then we're going
to search human. So we have Human here. We can
click this and hit append. So this comes in over at the same location as it was
in the other blend files. So we're going to hit Alch I'll bring it to
the world origin, and we can just move
him to the side here. Now, one thing we should set up before we start is if we
have a look at ER grid. So Egrid in this view is fine. We have 1 meter squares
that we could use. But if I go into top view here, now we have all these
little squares, and if we zoom in even more, we get even tinier squares,
and it just keeps going. We don't want this
because it's going to get quite confusing, so we only really need the 1
meter grid for this scene. So if we go over here
to scene properties and we go to units and
then under unit system, we're going to
change this to none. This will allow us to change our grid settings
in the overlay. So we now have access
to this setting here. So we can change the
subdivisions to one here. And then when we zoom in, we only get these
1 meter squeeze. So yeah, our scene is
ready for our environment. I will see you in
the next lesson.
4. Build Stunning Reference Boards with PureRef and AI Tools: M Hello. Hello. Welcome back to stylized
Blender Fred environment, Greek temple and
garden Workshop. Okay, so in your
resource folder, you will find a PURFL with all the images that you'll
need for the course. I've provided the
main reference. This is the scene that
we will be building out. I've also included
reference images of the different assets
that we'll be making. Each image has the human
reference next to it, as well as the grid. So we can see this wall
is 4 meters by 2 meters. I've also included
some real life photos. They're always useful
to have So yeah, there is our Pure f. If
you're new to this program, I'll play short video explaining where to
get it, how to use it. If you know about
Puref then just feel free to skip
to the next lesson. Welcome, everyone to our in
depth referencing guide. And it's very important that we actually use
references in pretty much any kind of modeling or environments that we're
actually going to be work on. So before we actually
do anything, before we put any cubes
down or anything like that, it's really important
that we have some really, really decent references
to actually work with. So the first thing I want
to recommend is that you can use something to actually put all
your references on, like Photoshop or even word. But what I'm going to recommend is that you use something called pure so if you go to the site,
that's called purev.com, you will actually open
this, and from there, you can actually
click Get Pure Rv, and that then will take you
to this download screen. And you will see at the moment, you've got 157 or custom amount. You can actually put this on zero and actually
get this for free. So it's completely free, and you can come back and
make a donation if you like, and then all you need to
do is click Download. So the only things
we're going to talk about pretty much for
reference in here, are going to be free except
our mid journey part. But there are other alternatives
like Dlly and a load of others out there that you can use instead of mid journey. Once you open up pura, then, this is what you will be
greeted by this screen. And if you want to right click, you can actually drag
this around to any of your screens or you can actually
make it smaller like so. And it's a really, really
good program this really, really handy, highly
recommend getting this. So now let's actually think
about getting our references. And there are a few
sources that we use to actually grab
references from. But generally, what you
want to do is you want to build up a kind of
reference pack if you're going to be a hobbyist or a professional in three D modeling or environments where
you're going to see things perhaps on
Pinterest or sketch up, and actually, you want
to save them in a file. So I know people with
thousands and thousands of images that they've
saved over the years. And whenever they're
coming to a project, they'll then dive in
and actually find all of the images that they've got on that particular thing. This could be a samurai
warrior or a Chinese bell. Also, a lot of people
I know as well, who are working
professionally at this will go around museums. They will take their
own actual images, and then they'll also upload
those to the file as well. First point of
call if you're not actually got your own database yet is probably going
to be actually Google. So let's open up Google, and you can see here
that at the moment, I'm looking for a
Victorian delivery truck. Now I'm going to do is I'm
just going to go through these and get some nice
references like this one, for instance, and then
I'm simply going to right click and I'm
going to copy image. Then what I'm going to do is
I'm going to go over to PEF, so I'm just going to open
it back up, press Control. You'll see now that I've
got my nice image in here. What we're also able
to do with Pure vs, we're able to also pull it out and make it bigger if needed, which is really, really
handy when we're putting in lots and
lots of actual images. Now, the next thing
I recommend you do once you've actually
got an image in there, is what you can do
is you can left click and drag it
over somewhere. And then what you can
do is you can press Control N and you can
actually make a note. So let's call this
Victorian Trucks. Let's put it trucks.
Now, within my scene, I might actually want
a Victorian lamppost as well as part of the scene
or something like that. So let's actually
look at the next one. So the next point of coal is actually going
to be Pinterest, and let's actually put
in a Victorian lamppost. So let's try that. Like,
so let's see what we get, and we can see we've got many, many styles,
especially this one. This one's actually really nice. This one's also really nice. So what I'm going to do is I'm going to actually take this one, I'm going to right
click Copy Image, go back to my PUEv and then
drop the images in there, like so, and maybe make this
one a little bit bigger. What I tend to do is I gather a load of images for
each of these things. When we're actually building a scene or even just a model, you want to grab as many
images as possible. I'm talking hundreds
of images here. And especially if
you're doing a scene, you want all of
the little parts. You want everything
down to the lighting, the environment, the trees. You want to grab references for absolutely everything because it will make your
scenes just really, really look so much better if you've got some
really good references. So now let me show
you this is one that I'm actually working
on at the moment, so if I come over and load reason and I'm just going
to load this one here, and you'll see at the moment,
I have all of my props. I have all of my main
buildings that I'm going to be looking out
to use as references. I have a ton of doors. I
even have a load of foliage. I have all my windows. I have my lights over here, and I also have, more
importantly, all of the lighting. In other words, it's a scene. So what time of day
is it going to be? Is it going to be, you know, early in the morning, or
is it going to be at dusk? Is it going to be a night scene, or is it going to be midday with that sun beating
down on my scene? Just make sure it actually
matches the scene. There's no point having a
scene like this, for instance. So this one here, if you've got a log cabin out in the snow, you really want it to
match your actual scene. Now, before moving on,
there are a couple of other places that we do go
to use for referencing, especially something like
sketch up, which is really, really great because you can actually come into
an actual scene. And then what you
can do is you can actually rotate
around it and really, really check out how a model is put together like
something like this, which is one of our actual own. But you can see here
how easy it is then to get a good idea
of what actually incorporated in this scene you can actually do from
there then is we can actually come down and we can actually get some screenshots of this or even right
click and copy image. There's also, let's
say, if we wanted to do a Victorian truck, for instance, to keep the same theme as
what we've been doing, you can see that
there's no end of actual Victorian or vintage
type vehicles on here. Not as many as what
there is on ArtStation, but still a very, very good place to start looking
for reference in. That leads me on to my next one, which of course is ArtStation. This simply is one of
the biggest resources for referencing or for looking
up artists in the world. So let's put in a
reference of Victorian, for instance, and let's
see what we actually get. Let's search artwork,
so we're going to search artwork and let's see what it
actually comes up with. Should be lots and lots of
things to work with here, especially good, if you're
looking for actual lighting. So you're looking for lighting effects
like this one here. And again, we can take these actual use them for references. And the best thing is about
ArtStation is we can also come down and look at things
that may be our concept art, so two D or actual three D, and we can also come down as well and look at what
subject matter it is. So it could be automotives, so Victorian automotives, or it could be architecture
or something like that. So the possibilities with ArtStation are
pretty much endless, and you're able to grab
tons and tons of really, really high quality references. There are, of course,
hundreds and hundreds of other places you could probably
go to grab references, but I'm showing
you these because as far as references go, these are some of the
best places to go. Let's move on then to one of the things that we
really use a lot of now, which you want to thought
actually would come into it as far as
referencing goes, but it actually is
really, really handy. So let me introduce
to you now Chat GPT. So here is Chat GPT. You can see that we
have Chat GPT four, but we also have 3.5. 3.5 is actually free, and it is actually good enough
to do whatever you want. You really don't need
to pay for this. It's also free. So what
I'm going to do is I'm going to go to message,
and I'm going to type in, give me ten different buildings for a Victorian town scene. Something like that. Let's click Enter and let's see
what it gives me. So you can see now it's given me a lot of things to
actually work with here. And the best thing about
this is you can also say, give me ten more. And it will just then go
ahead and give you ten more. Now, these things
are really handy to use because then I can simply take these ideas and it'll
also bounce other ideas to me, and I can then go
into Pinterest. Or Google search and actually look them up or try and find
something like this. And I can kind of get
ideas and design my scene around there using all of those things and
especially Pure Rv. We can also take them in
to our actual Mid journey. Now, again, our mid
journey is paid for. I think the lowest amount is
$20 or something like that, but there are many, many
free things out there, but I will still show you
what we actually do with our AI based image generator. So you can see at
the moment, this is the image that we've
actually generated. I know we've called it is
Victorian era delivery van, and this is what
we actually get. If we go to my images, you will see that
we've generated a ton of images about
all of the things. Especially we use this as
well to generate textures. It's not just there to actually generate images and ideas
and things like that. You can actually use it to
generate transfers that are going to go on Windows or
adverts or actual textures. And we do use this, especially
for things like curtains, because it's really,
really easy to get that look that you're
actually looking. You can see, we've got a lot
of ideas for living rooms, we've got a lot of ideas for bedrooms and
things like that. What we can also do
in mid journeys, we can also go and explore. And what you could do
is you could up with a search prom Victorian. Let's put in carriage. And then we can also
get ideas from this. So if I put in
Victorian carriage, you can see this
as what comes up. Now, if we come over to here, we can also see if
we click on here, this is the actual prompt
that somebody put in, so you can actually
take that prompt, maybe change it around a bit, and then get your own
images rather than just simply copying
other people's images. It's a great place to start to actually gather
your own images. The other thing is
about mid journeys, I can come in for instance,
let's just go back. And then what I can do is I
can hold the shift but down. I can grab all of
these, for instance, and then what I can do is click the download button and
download all of those images. And the best thing is
about PUREv is you can bring in multiple images
at the same time, so you can just drag, drop them, and then they'll all appear
actually next to each other. So really, really
handy things to have. So, lastly, then, to sum up, don't do what I did
a few years ago, where I just dive straight into blender and not even think about references and just
find references if I had to while I'm
actually building something. Don't do it that way. It leads directly into building a
beautiful grade box, as well, all this, because first of all, you grab all of your references, you make sure
everything's set out. You can go and find some more
references if you need to. You know, if you suddenly
have a spark of inspiration, you want to make
something on the fly, then grab some more references
for but to start with, grab all of your references, have them really,
really nicely laid out, and spend, even half a day to a day grabbing all
those references. You can then save
the pura that as well into individual files, and then you'll have all
the other references around that particular
build in there, ready to use maybe on another
project in the future. Or everyone, so I
hope you found this useful and I'll hope you'll
take my advice going forward. Thanks everyone. See you
on the next one. Cheers.
5. Essential Blender Modeling Tools Extrude, Bevel, and Bridge: Hello. Welcome back to stylized
Blender Fred Environment, Greek temple and
garden Workshop. Okay, so before we
start modeling, let's learn how to
model, you know? So if you're completely
new to Blender and you haven't done any
modeling at all, then stick around for a
short video on, you know, the basics of modeling and
using object mode, edit mode, moving around faces
and vertices, you know, everything
that you'll need to build a scene in Fred. Now, if you're quite
familiar with modeling, feel free to just skip
to the next lesson. But yeah, stick around
for this short video. Welcome everyone to the basics
of modeling in blender. And this is a short
introduction just to get you started on a few of the
basics in modeling. So the first thing I want to
do is bring in a primitive. So the way that we're
going to bring into primitive is press Shift and A, and then what we're going
to do is open up a menu, and you can see that
we've got all of these things along this
actual primitives menu. But the one we want to focus
on is the actual mesh. And from here, you can
see we can bring in many, many things like cylinders, cubes, planes, and the
one we want to bring in just for now is
going to be our cube. That we brought our cube in
the next thing I want to discuss is object and edit mode. And you can see at the moment
over on the left hand side, we're actually in something
called object mode, and this means basically we can manipulate this whole object. So if I press G, I can actually move it around
my viewport like so. If I press S to scale, I can actually scale the
whole of the object in. But the thing is, we
don't really want to work in object mode necessarily, and a lot of the
time, we're actually going to be working
in edit mode. So we can come up to
the top left hand side and put this in edit mode, or we can actually press the tab button and jump
into Edit mode that way. You will notice once we've actually gone into Edding mode, we have a lot more
options to use, and more importantly,
we have a lot of the topology now to
play around with. The first thing you'll notice the difference being is that we have now these three options
up at the top left side. If you have over them, it will say vertex, edges, and faces. Now, vertex is going to be
these little points here. The edges is going to be these edges of my cubes
or any of the edges. And finally, we've
got the faces, which is actually the
whole polygon face. Now, you can also instead
of clicking on these, press one on the keyboard, and that then will jump
you into vertex select. If you press two, you
can go into edges, and three is going to
take you into faces. From here, we can actually
manipulate any of these parts. So you will notice
at the moment, I've got a gizmo here. Now, if you don't have
the Gizmo available, coming over to the
left hand side, and you have this little
button here that says Move, or you can press Shift Spacebar and bring in your
move tool like so. So now because I'm on faces, I can actually pull
out this face like so, if I go to edges, I can
actually grab one of the edges and pull
this out like so. And if we're on vertexes, I can grab this vertex or grab the second vertex
with Shift Select, and then pull this out like so. Really, really easy to actually
manipulate things once you know how to select
each of these parts. Before we go too much
in the weeds with actually modeling in
this actual Edit mode, let's just jump back into
Object mode for now. What I want to show
you is how we can actually move this
actual cube around. So as well as moving it
with the actual gizmo here, we can also press G
and actually free move this object around or we
can press G and Y, too. Let's put it along the Y axis, move it around or the X axis, for instance, and move
it this way or even the axis and move
it up and down. To drop it back
where we started, let's just right click like so. So that's actually moving the location of it's
not a cube anymore, but let's just say it's a cube. We can also scale this in
as well with the S but so we can scale it in or
scale it out like so. Now we can also
press the S button, hold the shift button,
and then we have a lot more finesse
on actual scaling. Can also scale this
up by, let's say, a factor of two, S, two, enter, and there we go. Of course, we can scale it
down pretty small as well. Now the next thing I want
to discuss is rotating, because if we rotate it with
R and just rotate it around, we haven't got a lot of
control over how this rotates. What I want to do instead is, I always want to press R, then attach it to an axis,
which might be the Y, so the green one, and
then rotate it either by free hand or by actually inputting the
value under our number pad. So if I want to rotate it, let's say, by 90 degrees, press the end button,
and I've rotated this round by 90 degrees. Now, if I want to
rotate it back, I can press O Y, the little minus button
on the number pad, 90, and then we can rotate it. Now there is something else
that you need to know. We also want to reset
our transformations, and this is one of the most important things within blender, because if you don't reset
your transformations, Blender still
considers this a cube, even though it's not
really a cube anymore. So what we want to do to reset our transformations
is press control. A, all transforms. Then you'll notice that
the orientation has moved over here because it will always move to the
center of the world. From there, then we
want to actually reset our orientation as well. So we want to right click
set origin to geometry, and then it's going to
put the origin right back in the center
of this object. Now, it's also important
to know resetting the transformations will also impact things like UV mapping,
things like modifiers. Basically, if you ever
have a problem in blender, always make sure that you
reset your transformations, and then most of those problems
will definitely go away. Alright, the next thing about resetting our
transformations, it makes it really
easy then to get something back to how
we had it before. In other words, if I press
S and scale this down, and then let's press R and Z and rotate it round this way. Because before this, I
actually reset my rotations. What I can now do is press Alterns and put it back to the scale
that it was before I did anything and
then alternR and actually reset that
rotation as well. So really, really handy, once you've actually reset your transformations in
what you can actually do. Now, moving on,
we're actually going to be looking now
at duplication. So if I come round here, I'm able to actually
duplicate this. If I press Shift
D and then press the Enterbo it's
now a duplication, and I can move this over
to the right hand side. So now we have
actually two objects. Now, what if you want these two objects actually combined, and you didn't mean to actually duplicate it in object mode, for instance? Well, that's easy. We can just shift,
select the other one and press Control J, and now they both actually
join together, as you can see. So if I press tab now, we're able to come
in and actually work on them both
at the same time. What happens if we want to
actually split them up, so we don't want the objects
to actually be together. That's all easy. Just make sure that you select
one of them first, and then all you're
going to do is press L just to select everything. So all of these faces, then you're going
to press P. Come down to where it says selection, and now if I press tab, they're both actually split off. Now, of course, using
the same command, if I press tab, I can
actually come in, grab a face, for instance, press Shift D. I
can actually also duplicate things with
inside Edit mode as well. So we might want to duplicate
all three of these. Shift D, I can actually come in then and actually
duplicate them like. It also means, though,
is that these, when you duplicate them in edit mode will be part
of the same object, of course, because in edit mode, they're not actually
classed as an object. They're clustered as
the same actual part. Now, for the next
part, I'm going to bring in a brand new cube, and I'm just going
to show you some of the basic modeling
techniques within blender and go through
a few of the options. So here we have a
brand new cube, and the first one I'm
going to show you is, if we come into Edit mode, we'll always be working
in edit mode to show you these things, make
sure you're in Edit mode. I'm going to grab the top face. And what I'm going
to do is press E, and that then is going
to extrude this out. Now, sometimes you will
need to extrude something out and it will need to be
along A axis, for instance. So all I'm going to do is go
to Edge ect, grab this edge, and then what I'm going
to do is press E, and you can see, because it's not
tied to an axis, it's floating around everywhere. However, if I press the Xpon, you can see now it extrudes out, following along
that actual axis, which then makes it
really, really easy to manipulate it where
I actually need it to. One we're going to look at is
something called beveling, and then all I need to do is come in and I'm going
to grab my edge. So I'm going to press
two on the keyboard, grab an edge like so,
and then I'm just going to press
Control B like so. And you'll notice now it's actually bevelled off that side. You'll also notice down on
the left hand side here, we have something called
an operator panel. It will be closed. Just open it up, and from here then with the actual bevel, we're able then to
turn the bevels down, for instance, turn them
up, move how the shape of the actual bevel is going to be and all that
other good stuff. Pretty much anything you do in blender is going to give you
an operator panel like this. We're not going to go too much
into this, but basically, the moment that you press Tab button to come
out of Edit mode, this is going to disappear, and then you're locked in
with the actual shape that you've chosen or the
insert or the extrusion. So just bear that in mind. So the moment I press tab,
that actually disappears. What about if we want to bevel off vertices and not edges. So for instance, if I come to a vertice like this
and vertice like this, press Control B, you'll see
that it bevels off like this. But if I come to one that are the
opposites of each other, press Control B, you'll see
nothing actually happens. However, if I press
control shift and B, then we're actually
able to bevel off the actual verts like so. That's another handy
tip for actually bevel. Now the next modeling
technique we want to discuss is
actually edge loops. So how do we get more
geometry onto this? So, for instance, I want to
bring some edges on here, I can press Control, and that then will bring me
one edge in here. If I left click then, you can see that I can put this either this side or this side. But let's say I want it
right in the center. I'm just going to right
click on the mouse, and that then is going to
put it right in the center. Now, the other
thing I can do with the operator panel
again is then come in and turn all of these up to give me more
actual edge loops, and I can even move them
to the on the right. Now, I can also, if
I press Control Zed, come in, press control law. I can actually scroll up on the mouse wheel to give me as many edge loops
as I actually want. Or if I want a little
bit more fins, I can actually type it out
on the actual number pad, so I can type out 120, for instance, and
have 120 edge loops. To cancel it at any time,
just press the escape board, and then that will
cancel it out. The next modeling technique
I want to show you requires two actual blocks
or two cubes like this. And all I'm going to do is I'm going to come in and I'm going to select opposing
faces like so, and then I want to actually join these together,
for instance. So all I'm going to do,
I've selected them both. I'm going to right
click and come down to it says bridge faces. And now you can see I can
actually join those together. Now, if I press Controls
and just go back a minute, you can also do this
by coming in and let's say grabbing
this and this edge. And what I'm going
to do instead is, I'm going to press the F bone like so and come
down to the bottom, as well, and then
grab both of these and press the FBne like so. Sometimes bridge will
not work because bridge has to work with two edges
and nothing in between. In other words, nothing
selected there. If I come into this one
now and try right click and come down to it
says bridge edge loops, you will see select at
least two edge loops. So we can't actually
join over from there, and that is when it's a good
idea to use the FBN instead. Now the final modeling
technique that I actually want to show you is
something called insert. What I'm going to do is I'm
going to grab this face here. I'm going to press the
ebon and then you can see you can actually
insert this as in, and from there, you can actually extrude it out if you want to. You can also then
press Control B and bevel it off if you want to. And you can see now
it's really easy to use all of those techniques
that I've actually showed. Now, lastly, the
last thing I want to show you is the insert again, but this time we're
going to grab this base and this base, and if I press I,
it's true you can actually insert them
both at the same time. Now, the best thing
though about insert is, if I press the I and
then press I again, we can actually insert them separately from
each other like so. Now, I see a lot of
renders on Facebook and other social media that kind of look really,
really blocky. For instance, if I press tab
now and go into object mode, you will see this actually
looks pretty blocky. But there's a really
easy fix for this, so it doesn't actually
have to look like that. All you need to do is once you've actually
finished, right click, come up and where it
says shade auto, smooth, and that then will shade it off based on the actual angle. So really, really easy
to either shade flat, shade completely smooth like so or shade auto smooth like so. If you actually are struggling
and you actually want it to shady a little bit
smoother than what it is, you can come over
to the right side where this little triangle is, go down and open up the normal, and from there, you can
actually increase this and shade it even more smooth
based on a higher angle. The default is always set to 30. So make sure you set it to 30 in case you
actually overdo it. The last thing I
want to show you in this introduction is the actual cursor because
I think it's very, very important to
actually modeling. So what I'm going to
do at the mono is I'm going to make another
cube with Shift D, and then I want this cube on top of this
cube, for instance. Now, if I move my
cursor over here, so shift right click. And then what I can do is
I can press Shift desk, and I'm going to go selection
to cursor, keep offset. And that then is going to move the exact center of this cube, all the orientation
to my actual cursor. Now, how would I get this
then on top of this cube? I would literally
grab this cube. I would first of all, right
click and set the origin to geometry just to make sure that origin is right
in the center. So I would then press Shift
Desk cursor to selected, and that then is going to put my cursor right in the center. And then I would grab this
cube, and from there, I'm able to go Shift
desk selection to cursor, keep offset, and now that cube is right
next to this actual cube here. From here then, I can
actually bring this up, and let's actually
just have a quick play around of everything
that we've learned. So you can see now if I pull this going to join them both together
then with Control J. And then the first thing
I'm going to do is come in, grab this face and this face, and we're going to
right click then, and we're going to come
down to bridge faces. And then I'm going to
bring in some edge loops. So let's bring in two
or three edge loops. Left click, right, click. And then what I'm going to
do is I'm going to press Alt Shift and click
just to select all of this edge going
around here and press the S but and pull
it out like so. From there, then, what
I'm going to do is I'm going to bevel off
both of these tops, so I'm going to grab this
top, shifts this top. I'm going to press Control B and actually bevel
them off like so. From there, then I'm going
to bring in an insert, so I'm going to grab
the front top here. I'm going to insert this
with the eye button like so. And then from there, I'm
actually going to extrude out. So I'm going to extrude
this out like so. Now, let's say I want a
bigger piece on the next bit, I'm going to press
Shift D. Pull it out, so this is a duplicate
of this face. I want to press the S but to
make it a little bit bigger, and then I'm going to press E and pull that out
along the axis. Finally, then what
I'm going to do is grab this one and this one and going to right click then
and bridge faces like so. You can see just how
easy this really is now to actually start
building out some really, really complex models with everything that
you've just learned. All right, everyone, so
I hope you enjoyed that, and I'll see on the
next one Cheers.
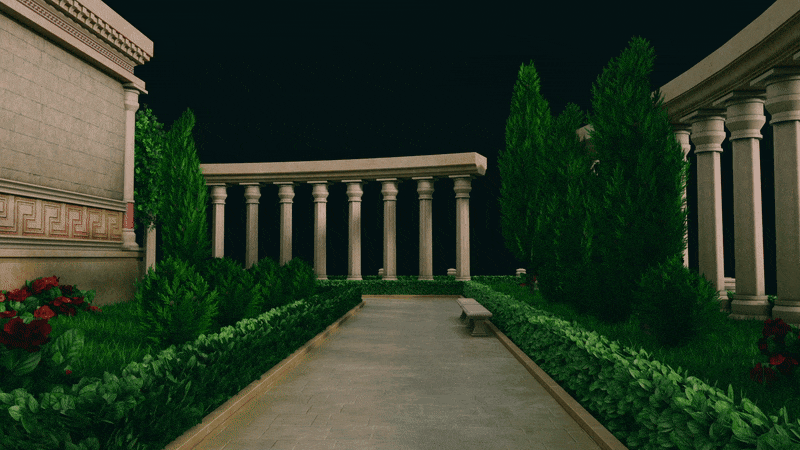
6. Greybox a Temple Path with Solidify and Bevel Modifiers: Hello. Welcome back to stylized
Blender Fred Environment, Greek temple and
garden Workshop. Okay, so now it's time to start grey boxing
air environment. So I'm going to start with
this area at the frontier, the floor, and then
I'm going to build this little path that goes all
the way around the temple. Okay, so in blender, I have deleted
everything else in the scene except our
human reference. So let's start by hitting Shift
A, and let's add a plane. Now with this plane,
I'm going to change the dimensions to 4
meters by 4 meters. Remember, you can
get this menu back by hitting N on your keyboard. Now with this, I'm going to
add a validify modifier. And I'm going to
change the thickness, and then I'm also going
to add a bevo modifier, change this to 0.01. And under shading, I'm going
to hit hard and normals. And then with this, I'm going to hit Control A and apply scale. Now you can see where
I've done this before. I'm going to just
reset my cursor at the moment. You should be here. So I'm going to do
is go into Edit mode on the plane and select
this bottom vertice, and I'm going to hit Shift
S and cursor to selected. So this will bring our
freed cursor to here. So in object mode, we
can right click this now and set origin
to freed cursor. So now the origin point of the tile is on this corner here. So now with this, we can hit Alt G and it'll bring this to the world origin and have it set up nice and perfectly on 00. What I'm actually going
to do with this one is I'm going to bring
this to the side, and I'm going to
duplicate it with Alt D and bring this just
along on the x axis. So by dupicating with Alt D, instead of shift, we
create an instance. So any changes that we make to this mesh will affect
the other mesh. So with this plane, I'm going to hit Alt G to bring it
back to the center. And now, if we go up here
to our snapping tool, we can select grid. Now, if we go into top
view and we hit G at wall holding Control,
when we move this around, it will stick to the
grid so with this, I'm going to Alt D
again and move it on the X while holding control and bring it 4
meters across like this. Now we want five going across and then three going up. So that's what
I'm going to do here. Let's go into top
mode. And remember, duplicate with Alt D and then
just move it until we have. Five planes going across. Now we can select all of these
and Oct again and move it up until we have five by three. Now this is where
is the PUFL here. This is this area
here at the front. All right, let's go
back into blender. And let's take this
middle one here and opt and we can move it to here and one
more the here. So now we're going to create
the path going upwards. So let's grab this
plane and duplicate it, move it along the white. And now if we hit Shift, it should repeat
that same action. So let's do it, so
we have one, two. Let's go to six, one, two, three, four, five, six. Now, if we look
at the reference, this one starts at
this corner here. So let's grab this one. Come to top view, Alt D, and we can move it,
so it's just by here. And now we can move it so it lines up going
all the way around. So I'm going to do is Alt D Y, move it up like that, then
shift to repeat an action. Now we can opt D again, X, move it along here, and then shift to repeat
that action again. And there is our path
going all the way around. Now we also want one
going down here, so I'm going to grab this one,
Alt D Y, and move it here. And then down by here, we have an area, but it
goes down some steps. So we'll do that later on. Yeah, here's the
start of our path. The next thing you
want to do is put all these into a collection
so we can stay organized. So I'm going to hit A,
so we select everything, and then I'm going to
deselect the human and hit M, New collection, and
we'll call this path. There we go. Now if
we save our work. And then one thing I
want to do as well is if we go onto this
down arrow here, and we can turn on cavity. And with cavity turns on, it just gives nice highlights on the edges so we can
see a lot better. Yeah, there's our path, and there's our tiles. And the way I did this
with the bevel modifier, so we can see, you know, just how the tiles line up. And we know this is 4
meters, this is 4 meters. And it becomes a lot
easier when you're building everything else
with all the walls, and you can just see if it
matches as you're making. In the next lesson, we will
make some curbs going around the edges so that
we can separate the path from the grass areas.
7. Curve Based Path Edges Using Snapping and Instancing: Hello. Welcome back to stylized
Blender Fred Environment, Greek temple and
garden Workshop. So the first thing I want to do is I'm going to
go into Top view, and I'm going to
select there a path. And I'm going to
hit GX eight and GY eight just so that
it's out the way of the world origin when we
bring in new objects. And let's get started
on creating the curbs. So I'm going to reset the
world origin with shifts, and then I'm going
to add a cube. Now for the Z axis, I'm
going to put 0.125. And for the Y, I'm
going to put 0.15. And I'm going to keep
the X as 2 meters. Though here is our curb. Now we want this to be up here. So I'm going to just bring
it up a tiny bit so that it's on the red line and maybe make it a
bit water as well. So we'll bring this
down a little. So the height doesn't
really matter. As long as it's like
2 meters across, it should stay modular. But the Y and the Z you can
kind of play around with. I'm going to duplicate
this with shift D and just move along
the X 2 meters. And I'm going to
duplicate it again and rotate it on 90 degrees. And we want to bring
this over here. Then we want this
corner to be matching. So I'm going to
select them both. Perhaps Control J to join them. And let's go into edit mode. And up here in the snapping, I'm going to change
this to face. I'm going to select this face. Press G, then Y, and then hole control while having your mouse
cursor over this face, and it will snap to this face. Then what we can do here is maybe we delete this face
and we delete this face. Now we can to Edge select and press Alt and left click to
select this edge loop. With the same face
snapping we just did, I'm going to hit G
x and snap it to this face here. So
now it's in line. Now what we can do is if we hit A and then M and then
merge by distance, these should all be joined here. Oh, we need to add an edge loop. I'm going to hit
Control R over here, bring in an edge loop and then
GY, snap it to this face. Now let's merge them all again. Let's check over here. This
all should be merged now. Now we can just build
in this face here. And now we have a corner piece. Now we can check if this
all lines up correctly. But wait. Let's first
do the origin point. So this one, the origin
points in the middle. We want to go into edit mode and select
this edge on the left, and then shift S
cursor to selected, back into object mode and
set origin to free Dcursor. Now with this one, we want the origin point,
going to top view. We want it to be we're
going to wireframe. We want it to be on
this point here. So I'm going to cut
back into solid view, and I'm going to
go underneath it, going to edit, select
this face, Shift S, cursor to selected,
in object mode, set origin to freed cursor. Now, these should hopefully line up perfectly on our tiles. So before we do anything,
let's select both of these and press M and put them into a
new collection called curbs. Now, I'm going to move these
both over to take the way. And let's bring back
our grid snapping. And let's rename these. So if you want to find
an object in your list, just have it selected and then press the period key
on your number pad, and it'll just snap
to that object. And we can double click
this and rename this curb. And like this one, we will rename this
curb underscore corner. Now let's let's do
this one first. So we will duplicate an
instance with Alt D and then press Alt G to bring it
back to the world origin. Now we can go into top view. And let's fill in
these edges here, not the corner ones, but we want the ones just offset
from the corners. So I'm going to hit G hold
Control and bring it here. Now we can duplicate with volt D again and just do the same
that we did with the path. Maybe we're going
to hit Shift R to repeat action to
speed it up a bit. And let's bring in
this corner piece. At the Alt G. Now, we
need to rotate this. I'm going to go Azi A -90 and
bring this to this corner. Now let's grab this piece, D Z 90. Go to top view. And let's move this here
and duplicate these, so they go all the way up here. Now we can grab. You
can grab all of these. You select the corner one.
So just the straight ones. Alt D and then move it up on the Y to here.
Going to need one. But we could have a corner piece here
instead of a straight one. So I'm going to delete that
one and bring this one up. Al D Y to here, and then rotate on the -90. There we go. We want a
corner piece over here. So I'll D X to the
corner, AZ 90. No, we want -90
-90. There we go. And then I'll D Y, bring
it to this corner. Z minus Z 90. And we want some Oh, we could do more corner
pieces around this corner. So describe this one
D Y to this corner, and then Az -90. Now that we want
Az 180 for this. There we go. And then
DX to this corner. And then we'll rotate it until we get it right and
pressing wrong buttons here. Alright. Solid
view. There we go. Azzi -90, there we go. Now we want one by here. So we'll go Oc D Y and then
rotate it until it muches. There we go another
corner piece here. Now we want some
straight pieces. So let's fill in
this corner first. O D Y. Rotate. Say by here. We could bring this one across. And then RZ, is it 180? No. Just keep rotating until you get it right. There we go. We want a load of
straight pieces. So let's grab this one. A D X to here, and then D Y, and then we can do Shift R
all the way There we go. Let's grab this one and
duplicate it to this corner. We can grab this one and
move it to this corner. I'm just grabbing
these because it saves us from rotating. So we can have one here. And then any more corners?
We have a corner here. Then we're going to
have steps here, so we might have to change
these for straight ones. So we'll delete these and we'll grab corner pieces for here. Grab, we'll have
a straight piece here, and then a corner piece. Let's grab this bottom one
here and we'll put this here because then it might
go down this way a bit more. So we have these corners, let's do the inside corners. So we want this one Alt D
and move it to this corner. Let's grab this one, Alt D
two. No, we don't want that. We want this one. Alt go to this corner. And now, I think it's just
straight pieces left here now. Yeah, so we'll just
get the straight ones. One, two, three, four, five, six, seven, eight. I'll duplicate these up here, and then fill in this gap here. And then we can do the
same with the top. So Oct Y, and then
fill in the gaps. And side. And let's
grab these ones. I'll do X over here. I'll be missing any We got
over here we need to do. So let's deselect these two. Come on. There we go. And let's duplicate these
and bring them over to the left and duplicate them
again to this side. And then we will fill
in the gap here. And I believe that's our curbs. Now, we can delete
these middle ones because we will have steps here. And we could probably delete
these middle ones too, because we'll have steps
going up to the temple. We will delete these ones because we will have steps here. And we might need to change these to if we have an
area going down here, we might have to have
straight ones on here, but that's up to
you if you want to go that far, like
down, you know? Yeah, I should be fine for now. There's the blockout
of our curbs.
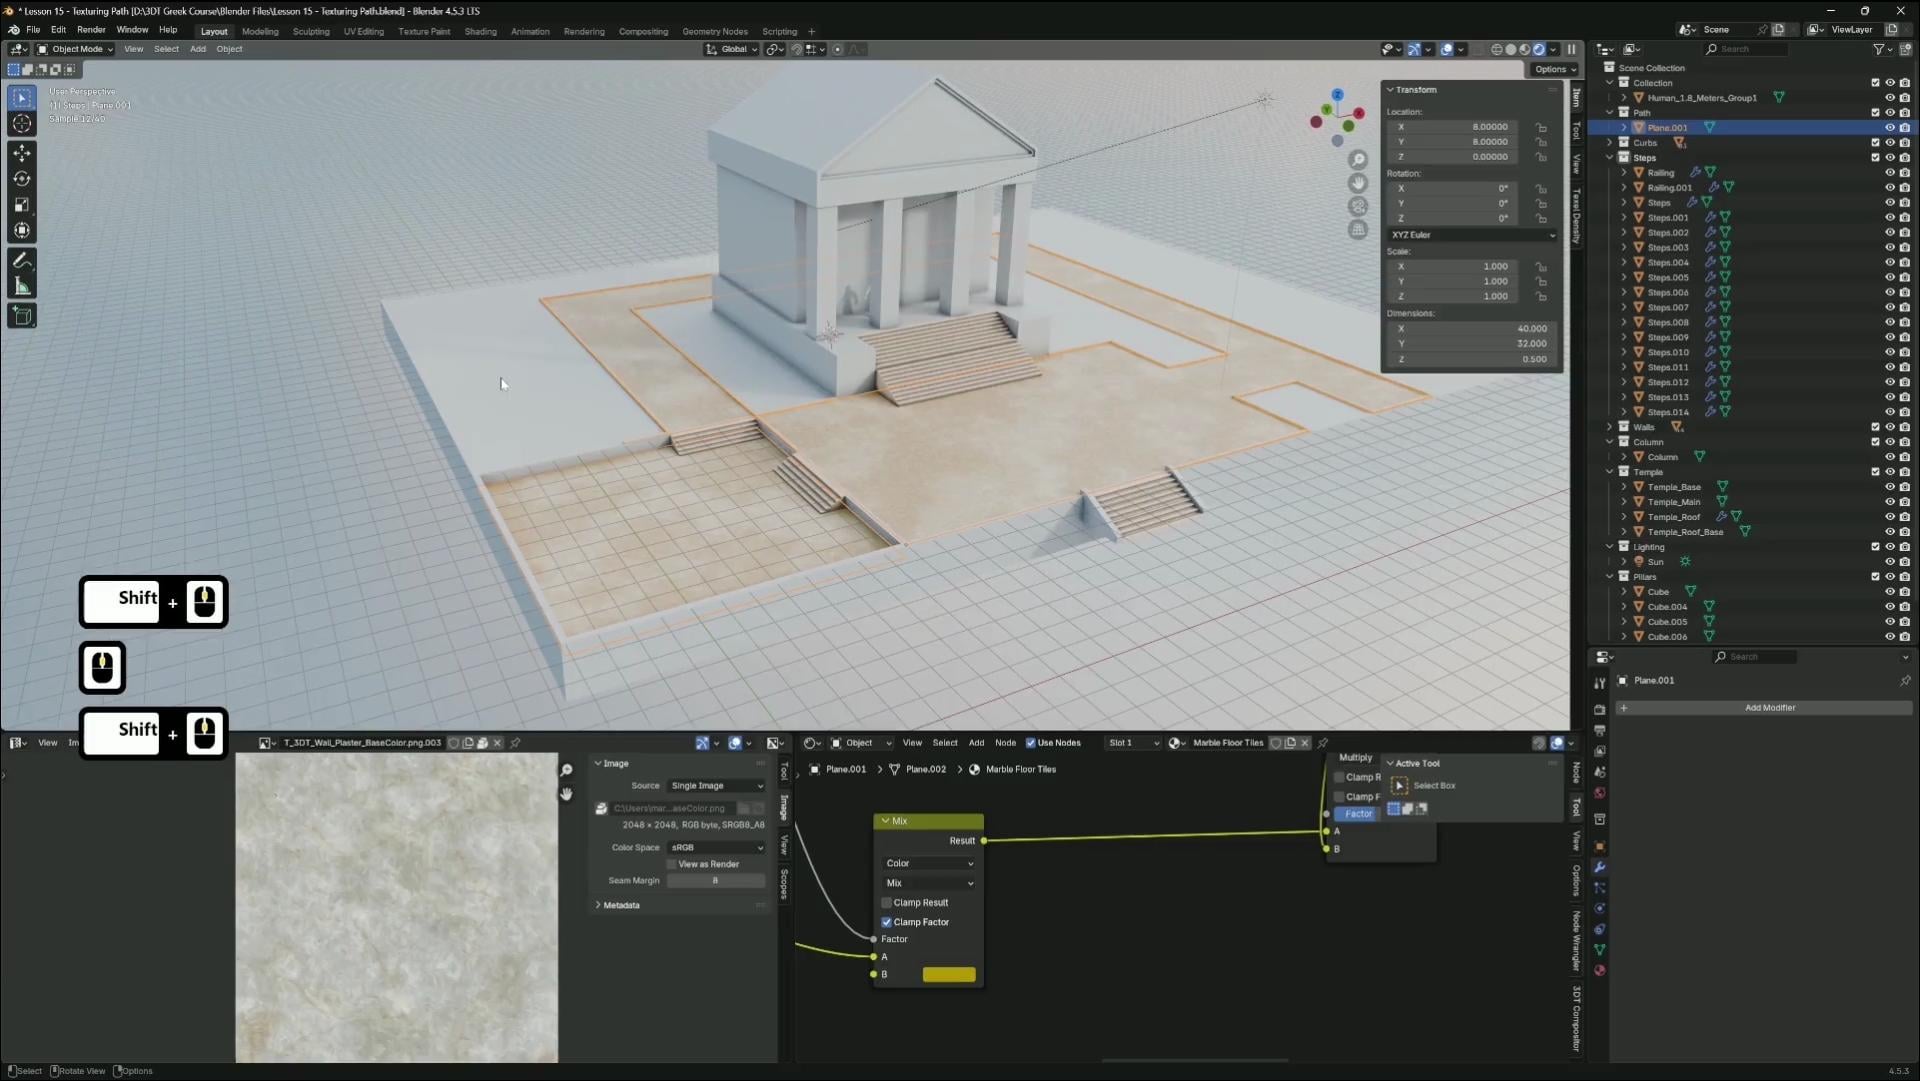
8. Model Temple Steps and Railings with Precision Snapping: Hello. Welcome back to stylized
Blender Fred environment, Greek temple and
garden Workshop. Next, we're going
to make our steps. So let's hit Shift S and
cursor to world origin. And let's add another cube. And let's go to front view. And I'm going to hit G Z one so that the cube is
on the ground plane. Next, I'm going to
go into Edit mode, and I'm going to
select this edge and hit Control B
to give it a bevel. And once you left
click, there'll be a little menu at
the bottom here. And under profile type, we're going to click
Custom, and under preset, we're going to click steps. Now we're going to have
to add more segments. So I'm going to add 16
segments and then just increase the width until
it's as close as you can, so it looks like some
steps, a bit more maybe. There we go. Next, I'm going to select everything with A and go up here and
select freed cursor. Then I'm going to hit S Z one, not S one, S 0.5. I'll scale it down towards
the free D cursor. Now the steps are 1 meter high. Next, we want to select
this vertice down here, Shift S cursor to selected, go into object mode, right click Set origin to free D cursor. Now we can move this across the way and duplicate
an instance with Alt D, and then we'll hit Alt G to bring it back to
the world origin. And now we can just go and
place this in our scene. So holding Control, I'm
going to put one by here. And we can duplicate this one, GX two to move it
across 2 meters. Next, we can duplicate these
two and move it across the Y to here and we will
duplicate these two again, move it across 2
meters on the Y, and then we can move it up
by 1 meter with this one, we'll move it down by 1 meter. G s minus one. And we can have some
steps by here too. So we'll select these
two OD Azi -90, and we've rotated around
the free Dcursor, so I'm going to undo
that and go up here and choose medium
point we'll go with. And then Azi -90, go into top view and then
move this one to here, and then we can
have one by here. So we'll just duplicate
these Old to here. And these are steps on
this side. Nice and easy. There we go. Another thing we could add at this point is the little side pieces on
the side of the steps. So let's reset our cursor again, and we'll add another cube. With this one, I
think if we just go into top view and we can
just do this manually. So if we move it here and we can use face
snapping for this. So if you go to the
face snapping and if we hit GX and hold it over this
face, it'll line it up here, and then GY and snap
it to this face, and then GZ, and then snap
it to the bottom face. Now with this, we can
go into Edit mode, select this face and
then just move to here, and then select the top
face and could bring this down to around about a
good height to here. And then we can select
this edge and just bring this one down to here. What we could do is
also select this face, and we'll hit E to extrude. And we could bring it to back
here, I'd say, looks good. And now with this, we can
add a mirror modifier. So what we could do, actually, instead of a miror modifier, because this is two objects, we can just duplicate with
Alt D and move it across. If we hit GX two or GX four, I might need to
go a bit further. So we can just do
this face snapping. So if we move it
to here and then press GX and snap
it to this face. It's nice in place then. We
do have some clipping here. So what we could do,
select the original, and then we could just move
it to the side a little bit, just so it's not clipping
through on the faces. Doesn't really matter.
Yeah, there's our railings. Now, I might want this
edge to be further back. So I'm going to go into
edit mode and alt lick this loop and just hit GY and bring it before the curb.
I think that looks nicer. There we go. Here's the
blockout of our steps. So one thing I would like to
change is the temple steps. So I think these need
to be a bit wider. So I'm going to
select these two and duplicate them and
move them across. I need grid snapping back. So if you go back to
grid GX, hold control, and then we'll duplicate
these Alt D, X, hold control is
start of our temple. And the last thing we want
to do is select all of these because we
forgot to do it. And we bought new collection
of M, name this steps. And we could hit F two on this one and rename
the steps if you want. Try and be more
organized than I am. And yeah, I think that
I'll do for our steps. Maybe we should
also put these into our steps collection just to stay nice and
organized. There we go. What I could show you
a cool little trick to rename all these objects
is if we select them all, and we'll make sure this
one is selected last. And if we hit F and
then we can search batch rename and then make
sure selected is selected, and we will choose setName method Nu and we'll
name this steps. Hit Okay. So the main one should
just be called steps, and the rest should be
0.01 0.02, et cetera. Then these two railings. We'll name the left one railing then we can just do
this one manually. 0.001, I guess. There we go. Now it's all organized. I'll
see you in the next lesson.
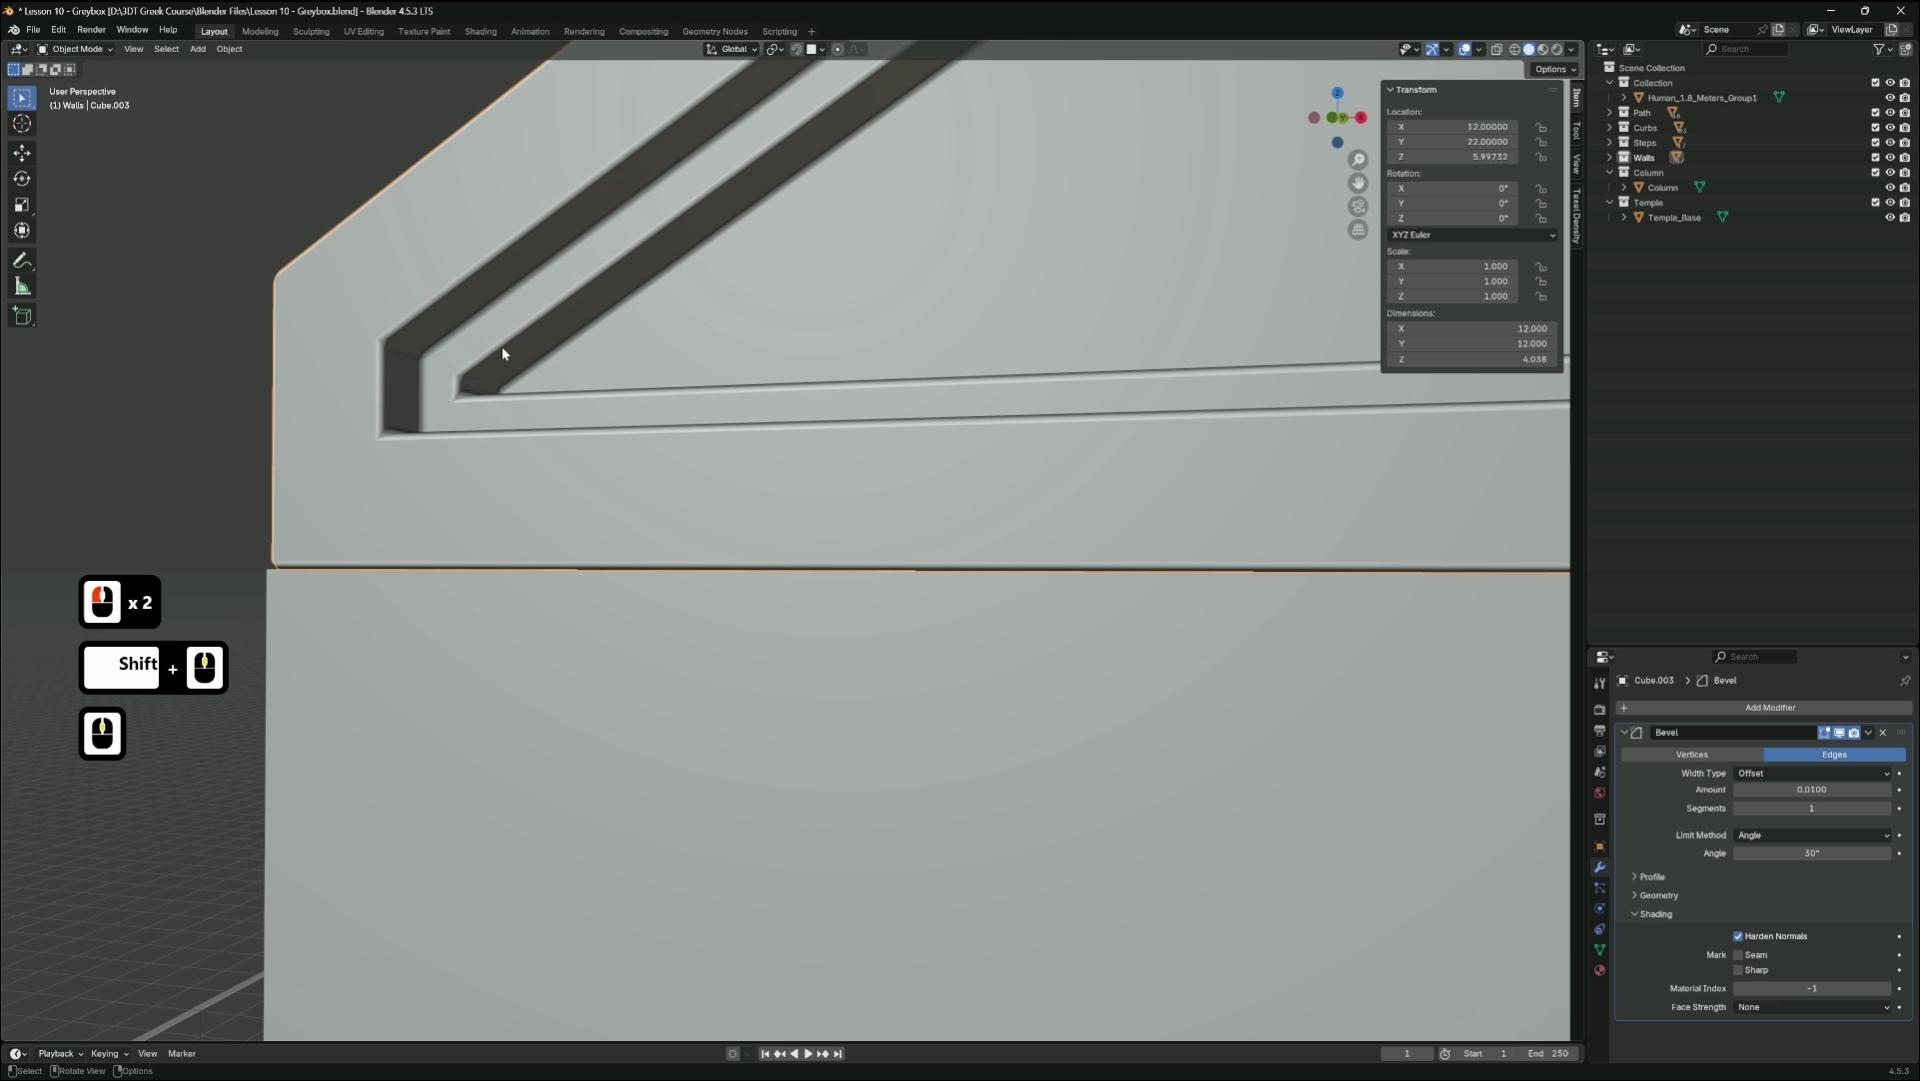
9. Build Modular Walls and Corners with Clean Geometry: Hello. Welcome back to stylized
Blender Fred environment, Greek temple and
garden workshop. So in this lesson, let's
start creating our walls. So it's pretty much the same
as we did with the curbs. So let's add a cube and G one to bring
it up to the floor. And we want this to
be 4 meters on the X. And then 2 meters
on the Z is fine. And then on the
Y, let's try 0.5. That's probably too
thick. That's 0.25. I'll be a good
size for our wall. And we want our origin point to be the bottom
left vertice here. So Shift S, cursor to selected, and then right click Set
origin to Go No fret cursor. No, we don't now we can reset our cursor to world origin, so we
don't forget about. And move this to the
side F two to rename this wall and M new
collection walls. There we go. Now we can Alt D, lt G and make sure we got a grid snapping on and we can start moving
this into place. I'm going to move it along this edge here all
the way to here. So let's start by going to here, and we need to bring
this down by 2 meters. I'm going to press GZ minus two. Now, it's going to
snap into this, but we will get rid
of this later on, let's just ignore this for now. Actually, what we can do
instead is let's delete this. And let's go to our original
and go into Edit mode. Instead of having origin here, I'm going to choose this edge and then Shift S co selected. So when we choose an edge,
it goes in the middle of it. So now we can go into
object mode set origin to three Dcursor and this should
line up a lot better now. So Alt D, Opt G back into our grid and move
it to this corner here. Now we also want
some corner pieces. Let's 50 this and Old
G. We're going to top view and shifty
again and then Z 90. If you remember the
method we did with the curbs and we joined
it, we'll do that again. We'll select them both. Control J into edit mode. We'll grab this face and
then with the snapping, we'll choose face and then GX, hold control
to snap to this face, and then we'll delete this face and then
delete the inside face. Next, we will move
this edge loop. So I'll click this edge
loop in the middle and we will snap
it to this face. So GY hold control, snaps
it in line with this, and then we need
an edge loop here. So control, and then GX hold
control snap to this face, and then hit A, M, merge by distance. And then I'll click this loop, fill in that face and double
check it's all connected. And there's a corner piece. So now we want our origin should be in the middle
of this bottom face here. If it isn't just selected and it's selected and then
origin to Fred cursor. This is our original,
so we'll have to rename Wall underscore corner and just move it out
of the way, Alt D, Alt G, and this one
can go to the site, we need the grid snapping again, so choose grid snapping up here. GX, hold control,
move it to here. This one can be corner. And we also need
to bring it down. So we'll select both
of these GZ minus two. And we can see already that
this might be too thick, because the curb is
actually, you know what? We'll leave this for now because now that
the walls are in, I can see that we won't
even need these curbs. So we can just delete those, and we get some clipping
with the floor. So what I'm going to do is
go to our original measures. And this is the main reason
why we did instances, so we can just make
quick changes like this. So I'm going to select
these top faces. If we go into front view, we can see that they're
in line with the grid, and we can just move
it up a tiny bit, just so it's above just
the tiniest amount. So now when we go back, we don't have that clipping
with the floor. So now we can just go around and duplicate our walls
and place them in. So I'm going to just D
moving with control. And for here, I'm
going to go straight across all the way to the end. And on the right side here, we're going to have some grass. So I'm going to go
maybe two walls across. So we'll go here, and then you can do Shift
R to do it again. And now we want some
street pieces here. So D Z 90 on the top view. We'll move one here
and then Old again, move it up to here and it's
starting to take shape. Now, do we need one here? This will be covered up, so we could just leave that. We don't need just
keep a gap and now. And now with this,
we want to actually delete this one because we
want a corner piece here. So we'll bring the
corner piece over. And make sure this is correct. Go over one more
meter and then RZ. If you hit RZ and
then Hole control, you can snap it while it rotates instead of trying to guess which number
it is all the time. Now we can get this one. Alt D RZ 90, bring it to here, and then we will Alt
D Y four and then shift R to bring
it all the way to here until we need corner piece. RZ flip it that way, GY. Is that correct? I believe so. Yes, should be. No, wait. We want to go further
because we're going to have grass
at the back here. So maybe we go a bit
further up here. Should we have four
meas or eight meas? I think four meas
should be fine. And then we can just
fill this gap here. Now, it's just about
going all the way around. So we can just duplicate
these straight ones. I'll select these
and duplicate them at the top to move up here and then fill in
whatever gaps we have. We'll keep going GX there, and then I'll shift
R A why do we want? Let's go. So it's the same. We've got 8 meters this side, we'll have 8 meters this side. And then we can, we'll get rid of this last one and
put a corner piece again. Oct X and rotate. We'll select all of
these octeX like Ross, and we'll go to this corner. So OcteX have this corner here. I guess we can just fill up
this gap with more walls. So AltiX here, and then I
believe this is our last one. Do we need more walls? Yes, we do. We'll have walls
going across here, too. So let's select these two. Now we have some snapping here. So we're going to have to
think of how we can fix this o. I will try and figure out a
fix for this later on because I'm not sure what we
can do about this right now. I'll figure it out as we go. But we'll just fill
in this gap up here, so I'll de remove some
walls up in here, and that should be fine. Just to be safe, let's fill in these gaps in case we
get gaps later on. We don't want to deal with them, so we'll
just fill them in. Underneath the steps
should be okay. We will need a wall
going up the back, but we can do that
later on once we get some more objects in so we can see where to place
the back walls. But for now, this is
really bothering me. Maybe if we swap these out for straight pieces,
it might fix it. So I'm just going to
move this out the way a sec and put a
straight piece in. Move it on the X. So
that's fine there. Reduplicate this one, DY, move it to here. We still get snapping. Yeah, we still get clipping. So we can just cover this
up with it's a lot better. We've fixed the
snapping on this side. It's just that they're
all the same height. So we can ignore not for now. It'll be covered up
by another piece later on, and we can
delete this one. And there is our
blockout for the walls. Is everything in the
correct collection? We can collapse
these collections. So we'd have to keep
scrolling through, maybe bring the stain a bit. And these we can select objects, they're all in the collection. Everything's organized and
we're ready to move on.
10. Fix Modular Wall Clipping with Mirror and Merge Tools: Hello. Welcome back to stylized
Blender Fred environment, Greek temple and
garden workshop. Okay, a quick fix that
I'm going to throw in here is the clipping that
we had with the walls. So in order to fix this,
we need pieces like this. So for here, you can
see this is a T shape, so we need to create
a separate T shape. And then if you want it to
be modular in any direction, then you could also
create one like this. So I'll just show you how
to create pieces like this. I'm not going to use this
in my scene because the only clipping we
have is by here, and this will be
replaced with if we look see these
little columns, they'll be on the
corners anyway, so we won't be able to see
the clipping in the scene, but I thought I should show you guys at least how to get
around these problems. So let's say we have this
corner piece that we made, and we'll duplicate this, and we will duplicate
a straight one. And we want to move these
both to the origin points. So I'll just delete these
and press Alt G on this one, and Alt G on this one. And we want this
to be this side. So it'll be GX minus four. And now we need to join them up like we did with
the corner pieces. So let's select this face. And we want this
inside face here, and we're just going
to move this over here and delete that face. And then we go into
Edit mode on this one, and we want to delete this face. So now with this, we can join them both together, make sure the corner
piece is selected, so we don't have to reset
their origin point later on. So this is the main piece. We'll join them together
into edit mode. Alt click this loop, and just turn on
face snapping and then GX hold Control,
snap to this face. And there we need to just
merge everything together. So M merge by distance, and there's our T piece. Now, if a snapping is
really bothering you, you could just place it
here like I have here. And also, you know what? We'll just commit seeing
as we've gone this far. So there's our main piece, we'll ob D and then
move it into place. We need the grid snapping. GH control, that goes
there and then rotate it, and then it fits perfectly here. Now, from my scene, I don't
have any cross pieces. But in case you want to do something yourself
and just make it up. I'll show you how to do a
cross piece, so we need. Oh, we could do this with a
mirror modifier, actually. So if we go into
the modifiers tab, add a mirror and make sure it's on the right
axis so that it's across. We'll make sure clipping
and merge is on. And then we just
apply that mirror. And we've got some
duplicate faces here. So we'll just select
everything merge by distance, and there is our cross piece
in case you want to use it. So yeah. Have fun. Be creative and just
don't be afraid to just do whatever you feel like doing when it comes
to building the unit. You don't have to keep
it the same, you know. So, there we go. I'll just
move these somewhere, like the way. There we go. And let's double check they
are in the collection. We will need to rename them too. So let's rename this wall and then we can
rename this wall X. And these need to be renamed as well because
I didn't rename them, but underscore.001 and this one Wunsce Dt 002. There we go. You guys have
separate collections for these if you wanted. I think we'll be fine keeping them in just one single
wall collection. There we go. That should
fix your snapping issues.
11. Model the Temple Base with Bevels and Face Snapping: Hello. Welcome back to stylized
Blender Fred Environment, Greek temple and
garden Workshop. So in this lesson,
I'm going to start building the base of the temple. So we're going to
go back to Blender. I'm going to hit
Shift S to bring my cursor back to
the world origin. And let's add a cube. Now let's press GZ one to
bring it to the floor. Let's go into top view,
and let's just bring it. First, let's go into Edit
mode and select this vertice, and we'll put the
origin point to here. So cursor to selected and then set origin to free Dcursor
and then we'll hit Alt G. Now with grid
snapping turned on, I'm going to move it
to right by here. Now with this, we
want it to be across, so it's much in on this side. We need to measuate
the distance here. This is 2 meters, two, four, six, eight, ten, 12. We want it to be 12 on the X. There we go. Now we want it. There's 2 meters, 2
meters to the path. So how many meters is this one, two, three, four, five, six, seven, eight, nine, ten. So it'll be ten on the Y. And the height should be fine. Now, we also want it
to extrude this way. So I'm going to do
is going to edit mode and put it in an edge loop, and I'm going to hit Control B on this edge loop
so we can bevel it like this. And we want to use
face snapping now. So I'm going to go
to the face snapping and I'll click this loop, Gx and snap it to this face
then the same with this one, GX control to this face. Now we can go into face
mode, select these faces, and then hit E Y minus two,
and I'll bring it here. Now, here we can delete
these curves and also we can delete we look
underneath these steps. There's curves here that
we don't need either, so we can delete those
and bring our steps back. And there's a start
of our base here. This might need to go further. We went to ten, didn't we? This is two, four,
six, eight, ten. So what we can do is bring
it another 2 meters. So I'm going to select all these faces and
just hit GY two, there we go, there's
the correct length. Next, what I'm going to
do is go into Edit mode, and let's select these faces. I'm going to hit
Shift D, right click and then hit P and
separate selection. Now, if you go back
into object mode and we try and select that face, it might have to hide the base. So we have this piece here. I'm just going to
move this up for now and then bring this back. And with this, this will be the starting piece of
the roof that we can use. So we will deal with the
roof a bit later on. I don't know why this is
selected here, but yeah, we will go to the roof later on. It's a bit more complicated. But what we could do is start
adding the columns as well. So this one's really easy. We'll reset our cursor
and just add a cube. This one doesn't really
need to be modular. We can just place
it in manually. So we'll just put G Z
one to bring it up. And we can just do this by hand. If you just select, press S and shift Z and
you'll lock it on the Z axis, you only scale it
on the X and Y, and we can just bring this
down to maybe this amount. And if we select
the bottom face, we'll put the cursor
to select it. And then we can just right click Set origin to free Dcursor. Now with this, we
will first rename it to column and put it into
a new collection column. I'm just going to
move this to the side somewhere. It's over here. We also should rename
this rename this temple underscore base and put this into a new
collection called Temple. In the next lesson, we will start putting this column object around our scene and see
what else we can make next.
12. Build the Temple Structure with Edge Loops and Inset: Hi, welcome back to stylized
Blender Fred environment, Greek temple and
garden Workshop. Okay, so next, let's start
on the temple building. So you can grab this face. Go into Edit mode,
and I'm going to delete these edges
with Control X, and back into object mode, and I'm just going to duplicate
it, bring it down a bit. And let's go into Edit
mode on this one, and we're going to extrude
this face to this face. What we can do next is
first, let's get the height. I want the Z to be six, and then let's bring
it down to the floor. Now we can just
shape this by hand. I'm going to choose
the back face and bring this forward a bit. Now let's select the side faces. Let's go into front view
and scale it on the X, and just bring it in about here. That should be fine. Now with the front face, we want it to go a bit further in. So just around about. It's going to top view, and we need to hide this top
face at the moment. Now, if you're going to
edit mode with this, I'm going to bring it
to this line here, I think. There we go. And maybe just bring
this tiny bit more. Allright. Now let's bring
back the other face, the top one and edit mode. Screwed this down a little bit, so it's about like 1 meter so let's put this on line so we can see and bring it down. Now with this, we can just
bring it down to this face. Now let's duplicate
this top face, shifty going to
bring it up a bit. Then we want to P
separate selection. What I'm going to
do is bring this down to the face and I'm going to edit mode and just
extrude it up a little bit. I'm going to put an
edge loop in the middle, select this edge. It's going to the front view,
and one, two, three, four. About 4 meters high, I'm going to bring it up just
so it's on this line here. Next, I'm going to select these two faces and
before we inset it, we need to apply a scale. I'm just going to control A, apply scale back into edit mode. Hit I to inset it just a
little bit and extrude it in. And let's insert it again. I'm just keeping an eye on
this edge so I don't want it to overlap when it
gets a bit smaller, that should be fine. Let's extrude this
in a bit more. This is too much. I'm going
to point to face mode. I'm going to alt click this
face loop and just bring it forward on the Y a bit
and select these faces, bring it forward on the Y. And what I might do here is Alt click this inside face loop. And if we hit Alt S, we can adjust how thick it is. And I don't like how I
don't like how small this edge is here because
once we add a bevel modifier, it might not work so well
if it's so close together. So I'm just going to
quickly test with a bevel. Put it to 0.01. I'm just shading
hard in normals. And the bells working fine,
so that should be okay. Maybe if we just select these two bottom faces and just bring it up
on the Z a bit more. And you can see here where the
bebles getting smaller and smaller as this edge
gets really small. So I just undo that. And I think that will be fine. We'll see how it looks
later on when we add some lighting because we might I do want this to be a bit thicker.
It looks a bit thin. So what we could do could do is lift everything. So
it's going to front view. I'm going to go
to wireframe mode up here and in edit mode, going to vertice mode. We want to select everything except except these
two verses here. I'm going to shift select these. We want to go down
to this corner. Anything below this we
don't want to select. Let's select these as well, so we have the top corner here, and then we can bring
this up a bit further. I think this looks a lot nicer. Now with this, we can select
this inner edge loop again. Hit olds. We have just
more room to play with and it looks a bit
nicer, more thickness. I think that should
be all right. Now, this isn't straight. What we can do to fix
this is if we select this edge and we go to
appear to edge snapping, let's turn off the bevel
so we can just see. I'm going to hit Gx and hold
control over this edge. Now this will straighten it up. Let's do it to the other side. Select this edge. GX, hold
control over this edge, and it will straighten it out. Now we want some
placeholder pillars, just so we can see a bit better
how our seene is looking. So I'm going to shift
right click here to about three Dcursor here
and let's add a cube. And on the Z, we
want this to be six, and let's bring it up and
snap it to this top face. We need to go onto
face snapping again. GC hold Control. And
for the X and Y, let's put this to 1 meter. We can just move
this back a bit, it's under the lip here and we can do it about
the same space on the edge. Let's bring it to a bit here. Now we can just duplicate it, but duplicate, move on the X
and bring it to this side. Did I duplicate this twice? No, I didn't. Let's have
ones in the middle. I'm going to go halfway on
this line, bring it across. One to here, and
then one to here. I think that's a good
spacing in the middle here, and then we can have
the door in the middle. We might want a bit
more room, maybe. So maybe we can bring this
front face back a bit. And what we could do is,
do we have a reference? Yeah, Let's bring
this guy over here. I'm going to bring him to
the front so we can just see how much room we have. I think there's plenty of
room. Yeah. Yeah, there's a blockade of a temple building. Next, we'll go on to sorting
out our lighting setup.
13. Set Up Stylized Lighting with Sun and Skybox: Hello. Welcome back to stylized
Blender Fred environment, Greek temple and
garden workshop. Now it's time for us to
set up our lighting. So let's go into Edit and preferences and click
system on the left here. And you want optics and
to choose your GPU. Now, you might have
different settings based on your system
and what you have. You might have to
choose your CPU, if you don't have a GPU. You might have to choose Cuda
if you don't have optics, but go with Optics
if it's there. We're going to go to our
render settings over here and change this to cycles. So now we want to
change device to GPU, and we want to
tune on denoising. And I'm going to choose
optics with a denoiser. Now we can speed this up a bit by changing the
samples to about 40. That should be fine. Now we want to go into
our rendered view. And let's add a light
and we'll choose sun. I'm going to go to the top
view and move this over here. G to just bring it up a bit, and I'm going to rotate this, so it's like pointing at the
temple, maybe up a bit more. And that should be fine. I'm going to bring it
maybe up a bit more, rotate it on the Z
a bit until we get a nice nice contrast.
There we go. Now, the shadows
are a bit harsh, so I'm going to go
into light settings and change the angle. Let's bump it up to five. So I'll give us some nice
softer shadows here. Now let's add a Skybox. So let's go to File
append and let's go to the resource folder
and choose the blend far. Now we want the world folder. And stylized Skybox.
Let's append this. Now let's bring this up and
we'll go into Shade Editor, change this to world. If you click this, you
should see stylized Skybox. That's bright. Right. You can adjust the
hue saturation and value of the skybox, if you want to change
it up, you know, bring the saturation down or up. You can change the hue
if you really wanted to, or you can make it darker by just changing
the value a bit. I'm going to leave
this as it is, because that's what I used
for the scene last time. But the light, I might bump
this up to strength for free, just so we have more contrast between the light and
the shadow a bit. So yeah, there's our
basic lighting setup. Is there anything
else I'm missing? Yeah, that should be fine. You if your scenes a bit laggy, you can change the samples
here. I'll speed it up. You know, Less samples
means less rendering, it should, even with one
sample, it's quite right. Now, this material, it's very just white and bright and it's hard to
see what's going on. So I'm going to select our steps. Let's
start with the steps. And let's go to object
under the shaded type. Let's add a new material
and call this gray box. I'm going to add a
ambient occlusion node. And a color ramp a
ramp like this in. And with this black bar, I'm going to bring this
up at a bit here for now, and maybe bring the white down. So click this white arrow and just make this to,
like, a grayish color. Now I'm going to select all of these objects like
making objects. Make sure the steps are selected last and Control
L link materials. We need to do some
manual assigning here. So all the white ones. Then make a gray one and
control our link materials. And now we have
some nice shadows, so it's easier to see
how we're lighting. Now, I might bring
this down a bit. Doesn't need to be super
intense. That should be okay. And maybe bring it a bit brighter. That
should be all right. And there is our
basic lighting setup. Another thing we
need to do is fix our collections because we
didn't do it last time. So I'm going to open up
this walls collection, and we can see that
the sun is in here. So let's move this to a
new one called lighting. And the temple is
also in here, too. So let's just go into
solid viewfin select these we'll move these to temple and these ones I'm going to put into a separate collection
called pillars. We should also rename
them, shouldn't we? So if you look at this, white box where it says walls. It's got a gray
square around it. That means it's an
active collection. So any new object that we add to the scene will be added
to the walls collection, so I'm just going to
click this one up here, so I'll go into scene collection instead and double check. It's just all the walls, e. So the pillars we can leave
because we'll replace those, but the temple we should rename. So this one is the roof base, so temple roof base, and then temple Roof. Temple underscore. Roof. This one is Temple base, and then this one we
could just name Temple. Just leave it as temple.
I'd be fine, I guess. And I think that's it. So we have our basic
lighting here. Then we can start with
filling these holes and add some grass and then we can start building
the railings, add the columns, and
then after that, we could start wrapping
and doing some texturing, switch it up a bit. I'll
see you in the next one.
14. Fixing Scale and Object Links for Uniform Scene Setup: Hello, and welcome back to stylized Blender
Fred environment, Greek temple and
garden Workshop. So we need to fix some issues
that I've just noticed. So if we look at our wall and look at the
scale, it's not uniform. So this is going to
cause us some problems when we unwrap it and add
some textures and stuff. But if we apply the scale, we'll get this warning, say, make single user and
apply transformation, which means it will no longer be linked with the duplicated
instances in the scene. So if I was to apply
this, you know, any changes, they
don't update these. So just go ahead and
apply the scale. And what we can do then is
open our walls collection. And I'm going to select
all the walls here. And then shift select this one, and then we have to hit Control L and link object data, so they're
all linked again. But now the scale of all
these are messed up. So what we can do
is just hit Alt S and that will clear the scale
and should fix everything. So now we need to double
check the other objects. So the steps are fine,
the tiles are fine. The column is fine.
They're all one, one, one. Now these curbs. So we'll do Control
A, apply scale, hit apply, and then we need to select all of our curbs, curb, but, bu bu curb, and then Control L,
link object data, and then Alt S to fix the curbs. And then the corner
one we need to do, select all the corners. Control L, link object
data, and then Alt S. What's left the wall corners. We'll control a
apply scale apply. Then wall corners, you'll
select these, control L, link, Alt S. And this one, I don't have any
duplicated ones of this, so I can just control
A apply scale, and I'll sort that one. And then this one row
A, apply scale, apply, select Control L
link object data, and then Alt S. I
think that's fine. Now let's double check these as well because we don't
have them over here. So these are scale
111, they're fine. Temple base, we can just
apply scale on this. We can apply scale on these. This one apply scale. Apply scale, and then
the roof apply scale. And everything you're now
seeing should be uniform. Is there anything
else I need to fix? I think that's it
for this lesson. Next, we can actually
start adding some grass. We're filling this area
at the front as well. And then we can start
doing you know, after we do the
grass in this area, we'll move on to unwrapping
and doing some textures. I think that'll be more fun cause we've done a lot
of blocking out so far. So yeah, I'll see you
in the next lesson.
15. Filling the Courtyard with Modular Walls and Grass Geometry: Hello. Welcome back to stylized
Blender Fred environment, Greek temple and
garden workshop. Okay, now let's start
filling in these gaps. So for this bottom left area, I'm going to use
these wall tiles. It's going to the top
view and duplicate with Opt and bring it across. Now we're going to need
grid snapping again. So let's go to grid, and now we can place it here, and let's just
fill in this area. So GX, and then shift, select all these OD
Y, and then shift. And then we want to
bring them down. So let's select all of these and I don't want to bring
it down all the way. I just want it
halfway. G Z -0.5, and I'll bring it halfway
between these steps. I think it looks a lot nicer
than going all the way down. For the grass, I'm going to duplicate this
piece with Shift D, and we'll move it over here. And if we go to the
object properties here, we can change the
viewport display color. So we change this to like a
green and get a bit darker, then up here in your
overlay settings, you can choose you can choose
object instead of material, so you'll use this object color. And this is only in the
object like the solid view. It won't change it in
the rendered view. Se fault for separating and
just knowing what's what. So with this, we can just
move this over here. And I'm going to
go into Edit mode, and I'm going to change
the snapping to increment. So if we move this edge
or holding control, it'll snap to the grading
a lot of increments, and we can just have more
control over where we put it. So I'm going to move
this over here. Now we want to add an edge loop so we can extrude this way, control, and then I'm going
to move this edge to here. So now we can extrude this
edge to this end over here. E and then X, hold control, and I'm running
at a screen space here. Hold that GX, here we go. Now with this, we
can add edge loop here and move it into place, select this edge, and extrude it on the Y. Gonna
keep moving it over. Now, if you accidentally like left click and then try and move it when
it's like halfway, it'll just snap in increments like this, we don't want that. So it's probably best to just
go back to grid snapping. And yeah, we'll stick to grid snapping, so it
stays on the grid. Now with this, we can
duplicate in edit mode. So if we duplicate this face, shift D X, and we'll
move it to here, and we want to grab
this edge here, grab this edge GY we'll bring it to here so
we can put an edge loop into here and then extrude here. And we can just duplicate this
face and move it to here. And then we can
duplicate this face. Oh, we need to fix
the edge here. So if we press forward
slash, we can isolate this. And is this connected?
No, it's not. So select both of these edges, and then I'm going to hit
forward slash again so we can see the scene and
move it on the Y. So it's like here. Now we
can add edge loop here, bring it to this corner and
extrude this edge on the X. There we go. And
then edge loop here, h X, hold control, and then extrude this edge on the Y and go into object mode, press M, new collection grass, and we will also rename
the object to grass. There we go. Now we can
start next by well, we will get to texturing. We'll throw in some textures. So before we end this lesson, let's just get some
materials into our scene. So let's go to file, append. And in our blend file, we want the material folder, and I believe we can bring
in multiple at once. So let's find the marble. We'll go in marble wall tiles. We'll go with marble
wall damaged, marble white and marble floor.
So all the marble ones. We're going to append
all of these at once. And we'll start
unwrapping some objects and throwing some
textures on them in the next lesson. All
right. I'll see you.
16. Accurate Texture Mapping with Seams and Sharps: Hello. Welcome back to stylized
Blender Fred Environment, Greek temple and
garden workshop. Okay, so before we start adding some textures
to our objects, we need to learn
about unwrapping. So I'm going to play you guys a short video on the
basics of UV and wrapping, the difference between,
like, seams and sharps. If you're quite
familiar, you can just skip to the next lesson. But if you're completely new, then stick a rein
for the short video. Welcome everyone to the
shut introduction to marking seams and Sharps
part of the course. Before I give you examples of what I'm
actually talking about, let me just briefly
explain what they are. Seems you can think of like
seams on a piece of clothing, like a shirt or
pair of trousers. The main job of Seams
is to make sure the texture that
you're trying to place on your mesh
goes on correctly, but more importantly, gives you control of how that
texture will look. Sharps are more like seams, but serve an entirely
different purpose. We use sharps to
give us control of how sharp and soft angles
are on or measures. This makes them look realistic. It is also important we do this not only for
rendering and blender, but also sharps carry on through to other software
or games engines we want to use like substance painter or unreal
engine as an example. So with all that said,
let's get started. So here we are in blender
with our starting cube. Now, if I click on my cube
and go to my UV Editing, you'll see that the cube is basically unwrapped
in this actual way. So basically, it
unwraps like a present. Now, if I come across and
I grab this cir cube, and I press Shift D,
and then we press Shift spacebar to bring in our Gizmo, and we
move it across. And now let's say I want to
alter this cube a little bit. So what I'm going to do is I'm going to press the tab button, and I'm going to go
into Face Select, click the top face Shift Spacebar to bring
in the move tool. Bring it up so. Now, let's say I
want to unwrap this. Now if I grab this
with L just to grab everything and I press
the U button for unwrap, you'll see that it unwraps
exactly the same way. Even if I reset the
transformations of this, it will still unwrap
exactly the same way. Now, let's mark some
seams and see how that has an actual effect
on our actual unwrap. Let's grab the top and we'll
come down to the bottom. What we're going to do is
we're going to press Control. Then come down to
it says Mokens. Now, it's important
to remember that it's controlee to mark
seams in facelet. But if, for instance, we're in Edgec if we come to this edge, if we press Controllee, you will get this option
up as well, Mxms. But you can also right click in Edgeet and you can also see we can mark seam
this way as well. So for now, though I'm not going to actually
mark this scene. What I'm going to do
is I'm going to grab the whole thing with L, like so, and now I'm going to
press unwrap and you can see it unwraps
completely different. Now, let's bring
in some textures so you can see what
exactly I'm talking about. If I press S tab,
I'll come up to my materials panel up here and I'm going to
give this material. So I'm going to come across
to the right hand side, click on my material button. So let's now bring the material
I've already prepared. So if I come across
this little down arrow, come on down, you
can see I've got one here called wood, and
let's click that on. Now, you can see
what's happened. We've actually applied our
material to this object, where you can see, it's
pretty much a mess. The top of it looks fine, but the bit going around the
side is all bent and skewed. So if I zoom out and
I press Tab now, you can see that the
reason is it's not actually UV unwrapped correctly.
So how do we fix that? If we come up to Edge set
and we grab this edge, and now I'm going to do is
I'm going to right click, come down to mark Seams and now grab the
whole thing again. I'm going to press you, unwrap, and now you'll see it
unwraps absolutely fine. You can see that
woods looking really, really nice actually
on this mesh now. So what this does, the seams do is actually gives you control of how this actual texture
is placed on this mesh. You also need to take
into account that this is basically
an infinite loop. So if I come round and I look
at this pace and this face, you can see that
they're going round. If we have no seam, when I
talk about infinite loops, it's basically going
around and around and Blender doesn't actually
understand how to unwrap it. So you'll end up with
that mess we had before. Now, the other thing to
take into account is, if I turn this board around, for instance, swan going to do, I'm going to come over
to the left hand side, the viewpoint of my UV editing, press A to grab everything, 90, spin it round. Now, the other thing
I want to show you is that where we join these
actual seams up is also really important because
you'll never ever get it perfect on here where
there's an actual seam. Let me exaggerate
this a little bit. What I'm going to do is
I'm going to press tab, I'm going to make
this a lot smaller and I'm going to move it into the center of my UV map and
then I'm going to press tab. Now you can see that
these edges don't line up whatsoever against
this other side. So this texture here doesn't
line up with this texture. The reason is because
we've got a seam down there and that is the actual
break in the texture. Yet if we come round to this
side, and I spin this round. So if I grab it or Z 90 and now go to this
one where we can see, you can see that these
line up perfectly. And the reason is
because obviously, there's no seam there.
The seam is here. So you need to take that into account on your own measures and objects that when you're
applying textures and materials, try and put seams where
you're not going to see them. So if it's on a door
handle, for instance, try and put them on the inside where no one's actually
going to see them. So always bear that in mind when you're actually
marking your seams. So now let's discuss sharps. So if I bring in
a new primitive, so if I press shift A, I'm going to go across the mesh, I'm going to bring
in a cylinder. Now, you'll notice
that this cylinder has all these little
edges around there, and let's say you want to
make a cup or something, the last thing that you want is all these hard edged
faces in there. Now, there are things we
can do to sort this out. So the first one we can do is we'll bring in another cylinder. So I'm just going to move
this one out of the way. So shift Spacebar, bring in my gizmo, move it
out of the way. Shift A, bring in
another cylinder. And this time, I'm going to
come down to where it says, add cylinder and turn
up the vertices to 100. And now, you'll notice that
we do have a round edge. But the problem is
that we've brought in 100 vertices to
actually achieve that. And that's not
something we want. We want to use as
few polygons as possible while still getting
a really good looking mesh. So how do we achieve that? Well, there are a number
of things we can. First of all, we can come
across to this right hand side, and what we can do now
is come to where it says normals and
click on Otostmo. Then we can right click on the viewport and
click Shades Move. Now you'll notice it's
actually been smoothed off. But the problem with this is, if I turn up my autos move, you can see if I turn it up
all the way, it goes really, really funky, and that is
because at 107 degrees, Blender decides that these edges along here needs moving off. So it doesn't give
us a lot of control. If we do this on the other
one, if I grab this one, right click Shades
move, Atos move on, you can see again, even with
lower amounts of polygons, we're still able
to smooth it off. But if we turn this up,
we're still going to end up with the same problem
as what we had before. So how do we solve
that? Well, if we come in now, press
the tab button. Come to the top, grab the top, shifts
like the bottom. Press Controllee
because we are in face leg and we'll come
in and marker shop. And now you'll notice
if I press tab that now it's got
Hard edges on there. This gives us control. So this is why we
actually use shops. No matter what I turn
this up to 180 degrees, which is the highest it goes, it will not get rid of
those shops that we mark. We can also mark shops
around the edges as well, Server grab this
one and this one. And now because we're in Edge
select, we can right click. Come down, mark a shop, press the tab button,
and now you'll see you've got hard
edges on there. So it's very important
that you mark sharps, where you're going to
actually want hard edges. It's also important that
you get into the habit of marking shops when you're
actually marking seams. Then what happens is,
when you join two objects together and you turn up
the autosmooth if needed, you're not going to end up
with some measures like this. Every one. I hope you enjoyed that introduction to marking scenes and shops and as
they say, on with the show.
17. Texturing the Floor and Curves with Bevel and UV Techniques: Hello. Welcome back to stylized
Blender Fred Environment, Greek temple and
garden workshop. Okay, now that we
have our materials in the scene, should we start? I think what'll be call if we actually start with the floor. So we'll click our
main floor piece, and we'll go into Edit mode, and we'll hit A. Oh, what we should do really is
Actually, it'll be fine. We'll just hit U and smart
UB project and hit Unwrap. And we'll pull this up. And I'm going to make two windows here. So we have the
shader on this side, and this one will be UV Editor. Now we have our island here, and I think that's all we
need to do for this piece. So if we go into let's
go to rendered view, and we'll just choose
marble floor tiles. And now we can have a
look at how they appear. So, our floor tiles. A nice. Should we rotate this? So
let's click the main object. I'm going to edit mode, and we'll select the UV Island, let's rotate it 90 degrees. So with this, what I might do, actually, let's go
back to solid view. Okay, so we're just going
to delete this one. We don't need this
anymore. And let's select our path objects, and we will just control
J to join them all. So that should be fine. Now, what we can do is press
A to select everything, M and merge by distance. So now, if we go
into isolated mode, it should look like this without the little
gaps in between. So it's just like it's
all one flat plane. This is merged over here, but this won't be a problem because we won't
really see this corner, so we'll just ignore that. What we can do now is
going into top view and I'm going to press U, and I'm going to
project from view. Now we want to hit
N in the UV editor and bring up our Texel
density checker. And we're going to choose make sure all
your UVs are selected, and we're going to change
the Texel density. So I'm going to hit 512. And it just scales up the UVs, and 512 is the perfect kind of It's like the sweet spot
for like two K textures, and it's like the right size for the textures that I
made for this course. So now we go into the rendered view and have
a look at our floor tiles, yeah, they're
looking a lot nicer. I much prefer to look at this. If we go into the viewport
shading material preview, and we click this
disabled show overlays, get rid of the grid, and let's focus on this
object a lot nicer. Smooth the way. And we
can have a look Yeah. So it's going to rendered view. And there is our floor tiles. So how much time do we
have left 5 minutes? Let's smash out another object
while we still have time. What should we do next? Well, let's do something
simple and quick. So we'll do the We
will do the curbs. So let's bring our
overlays back. And I'm going to well,
we can do two at once. So we can select both of these. And what I'm going to do is actually add a
bevel modifier. So bevel and then
amount to 0.01, shade into harder normals, and then Control
L copy modifiers. What we can do then
is select them both. U, smart UV project,
unwrap, it's all fine, and then select all
of our islands, set it to Once you choose five, 12 once, you can just press a set TD button if
it's got it here. That's the right size and
with this, we will have. Let's go with I think marble
wall damage would be good. I imagine they're on the
floor so they're going to get more damaged than just
the marble white. We go with marble wall damaged. Let's go into a rendered
view so we can see. I'm going to hit Control L and link materials,
they're the same. Now we added a bevel
modifier to these curves. But even though
these are linked. The modifiers do not carry over. So these are still flat. So we need to select
all of our curbs, select objects and then
shift select this one, and then we control L
and copy modifiers, and we should have the
bevel on all their curves. Now we have a look and rendered, and it's looking very nice. Yeah. So in the next
lesson, what could we do? Maybe start on, well, we could do the
steps and the grass, we'll get some grass texture in. We could do that. Yeah, I need to keep remembering
about these ones as well. We'll do those because
they're quite simple objects. And then we could get to
work on the railings. I will see you in
the next lesson.
18. Unwrapping Steps and Grass with Smart UV and Texel Density: Hello. Welcome back to stylized
Blender Fred Environment, Greek temple and
garden Workshop. Okay, next, we're going to
start texturing our steps. So I'll select my
steps over here, and we're going to go into
Edit mode, select everything, hit U, and hit Smart UB Project, and Unwrap, we'll select all of our islands and
set Texel density. Now we can choose the
marble or white material. So I just need to
append it again, find the resource folder. Okay. And go into
material marble white. Let it go, we'll apply this material going to rendered view, Let's
have a luxury. Okay, we also want a
bevel modifier on this. 0.01, I might
thicken this a bit, so I'll go like 0.02 and then
shading to harden normals. Now with the linked duplicates, the modifiers don't copy over, so we need to select
our steps and we'll select all objects and then Control L, copy modifiers. Now with the bevel, you can see here with
these steps that there's quite significant
gap in between. What we could do is
go into edit mode and we could hit Alt S to scale it up on the normals a
bit just to close it. Just like that. No, we don't
will sort the little gap. So that's how steps done. Also, with the floor, we can remove this
solidify and the bevel. We don't need these
now. So it's just flat. We don't have a gap here
with the bevel or anything. Next, we can just throw
on the grass texture. I will go to Edit mode on the
grass, select everything. I'm going to go into
Top view and for this, I'm going to project from view and then we'll set our textil
dentity With the grass, I'm going to go with 128. I was looking at the
size of the texture and I think 128 just looks better. You'll see now when I put it on, I just need to
append and look for our grass materials append, and we will apply
this material here. So this is the size
of the grass at 128. If I stick it to
512, we can compare. And I just think it's
a bit too small. The tiling is,
like, too obvious. Even though, this will be covered by actual
pieces of grass, I'm still going to stick to 128 for this one. Have
it nice and big. And I like that look
at that. It's nice. So, there's our steps. There's our grass. We can do these pieces as well. So I will just go into
Edit mode on this. U SmtUVPject wrap, select
all of our islands and 512. With this, we'll go
with wall damaged. There we go. And then double check all the
collections are okay. Yeah, we're all fine. We don't need to
rename or anything. Yeah. So yeah, we'll get to
work on the railings next. I'll see you in the next lesson. One last thing before we go, um, I will choose this, and I'm going to grab
this face first. I'm just going to
bring it forward a bit, 'cause I want it to be, further than the bottom step. And I think that'll be fine. We won't have to re unwrap
it because we just moved it a tiny bit. That should be okay. Anything else we should do? No, I think that's everything. Right. Yeah. Now I'll see
you in the next lesson.
19. Modeling Decorative Railings with Bevels and Arrays: Hello. Welcome back to stylized
Blender Fred environment, Greek temple and
garden workshop. Okay, now let's start
with our railings. So I'm going to shift this
cursor to world origin. Going to bring her a human
reference with Al G, bring him over and then bring
him forward a little bit. I'm going to select a
column piece, Alt G, select a wall piece, Alt G, GZ minus two
to bring it down. And with a column, I'm
going to hit Alt G GX four. And this is a bit too thick. So I'm going to
change the scale. So instead of 0.6, let's see what it's
like with 0.5. Is this now linked? These
look like different sizes. I must have duplicate
with shifty. We want ALD, GX four and
apply the scale on these. Now we want to add a cube. So Shift A adds a cube. Let's change this to four on the X and control A apply scale. Let's select this edge. Shift S, cursor two,
selected object mode, Right Click, set origin, two, three D cursor,
and then hit OG. Now we can bring this face
down all the way to spring closer and bring this top face down to just the top of
his foot to about here. So like this, hit a shift D Z and bring it
just above his knees. Now, let's select
everything S Y and bring it in just so it's a bit thinner than the wall
piece underneath like this. Now we can. We will select
these two edges and Control B, add a little bit
of a bevel here. We'll just select
these bottom edges. Control B, add a bevel here. And maybe with this menu, we can increase the
segments to three, and you can play with the profile shape to
get a different kind of curve maybe that will look nice. Now with this, let's
add the bevel. So we can double
check, amount to 0.01 and shade into
harder normals. Now, because of this
bevel, we might have to adjust the bevel even
more to bring it down. So it's like there we go. So it's nice and smooth.
Go to like here. I'm at 0.004. Let's go with 50.005. Now we can select
these two top edges, and I'm going to bevel this and let's adjust
the profile shape again. So it's like, nice and
round outwards like this. Now, let's shade smooth on this. And we could try by selecting
these two edges and marking Shad and if we bring it
down on the Z a little bit, actually, what I will
do is add an edge loop here and Control B and just add a single bevel to
very close to this edge. And then let's select
there were sharp edges. If we bring it down on
the Z a little bit, we can kind of create
this kind of shape here just to add something a bit more
interesting to the top. Now we want the cylinder pieces. So let's add a mesh cylinder, change this to 16. And we'll hit Alt G. And we
want this to be on this face. So I'm going to bring it
up and then snap it down. It's good to face snapping. Snap it down to this top face. And it's going to edit mode
and just Alt, S shifts. So it's like nice and thin. We need to bring this over
so we can see S ShiftZ. So it's like just fill enough
to fit onto these pieces, and we want to bring this
top face down, don't we? Bring this face down, and then we can snap it
up to this face. Now with this, we
can add an array. Change the count to eight. You want a constant offset
and I'm going to choose 0.4. And it's going the front view. This line in the middle, we
want this so it's equal, move it so it's in the
middle of these two pieces. Now we can start
shaping our cylinder. So let's first shade the smooth
and let's add the bevel. Let's go quite small on the bebl because
it's a small piece. So first, let's check our scale in object
mode. It's all 111. You know, apply your
scale if it isn't. Put the amount to 0.0. Let's go 0.05 0.005, actually. 1005. Now, let's
add an edge loop in the middle and Control B and put the segments up so you get the loop in
the middle again, and let's move this to here. I'm going to put
an edge loop here and an edge lopeeglopa. I'm going to alt, click
these two edge loops. We need medium point. S, scale it up to about here, then go to individual origins. We're going to scale this in so we get a nice shape like this. Now we want an edge loop
here and an edge lopea, select them both
with Alt left click and individual origins
and scale them in then what we could do is select this
edge loop and bevel it, add some segments, so
it's nice and curved. I'm going to add one
edge loop here to keep it asymmetrical
and scale this in, nice and thin, and then we can bevel, it's nice and curved. Maybe we could select this
edge loop and bevel this. To curve this. I'm going to
keep the curve, quite tight. And we could move this up and down to get a different
kind of shape. So if you move it up, I
quite like this kind of shape and we can move
this edge loop down. Yeah, I'm happy with
that. Now what we could do to tighten these bevels up is I have to hide the bevel
modifier, as you can see. I'm going to select
this edge loop and right click and Mac Sharp. So now we get this
kind of creasia and we could have
a crease as well. So I'm going to select this
edge loop, right click, Mac Sharp and let's
have one here. So MAC sharp now with this, this looks a bit too smooth.
What if we mac sharp? You know, that's
too sharp, I think. I'm going to undo that
and just bevel it tiny bit. Play with the segments. We'll go with this many and
have a nice tight bevel here. Now, we want to make these
edges a bit more noticeable. So we could add a
small bevel here. Nice and tight so
you get this kind of shape, and here as well. So let's select this one and
this one, very tiny bevel. Or we could mark these
sharp, actually, and get this kind of shape
and mark this one sharp. And then she put
her bevel back on. Yeah, so I'm going to
remove this sharpness here, so clear sharp on this edge
loop, bring her bevel back. Yeah, because we were marking
sharps to the bevel off. So I'm going to undo
all the sharps, I said, clear it sharp, add our bevel again, and now we can see what we need to adjust. So this edge here, I've left click it. You can't seek the
bells in the way, but we could try, we
don't want to scale it. If we bevel it and add a tight bevel, we
have more control. But then we may as well just
mark it sharp at that point. Yeah, we'll have this. So I'm going to select this edge loop, Mac Sharp and this one, Mac Sharp I'm not sure
if I like it or not. You know, we'll roll of it. That's mark and this one
sharp as well, so mac sharp. And yeah, I think
that will be okay. What we could do with this
top face loop is S shifts, so like scale it out a bit, so it's like more towards the
edge of the railing piece. And are we happy with the shape? I think that's right.
Yeah, we'll go with that. You can just experiment with your own kind of shapes,
you know, do what you want. Because every time I've made these debate
like three times now, and every time I'm like G I
don't like it, I'll redo it. But, you know, I'll just I'll
live with these, I think. Okay, so next, let's let's select these
first and then select this one
and hit Control J. Now, this might
affect our bevels. No, we want to undo that first, sorry, and apply array modifier. And what's the bevel
on this, 0.05, and this one is 0.05. So they're the same.
So select this one, select this one, Control
J, and there we go. Now, we can go into edit mode, A, U, Smart UV
project, and unwrap. Now let's go to materials, and I'm going to add two
materials to this plus icon. And the top one, let's
choose marble wall damaged, and this one will
be marble white. So now we're going
to render view, it's the marble wall
damaged by default. So all we have to do
is go to edit mode, and with L, we can
select all of these. And we can hit a sign
on the marble white. So now we have some difference between the railings
and the cylinders. And the sssons already
getting pretty long. So in the next lesson, we will first, before we forget, let's rename this railing. Now, we name these
railings, didn't we? So I'm going to rename this
to steps underscore railing. And then this one to steps
underscore ailing 001. Now with this, we can
rename this back to just railing and then new
collection railing. In the next lesson, we're
going to move this over. In the next lesson,
we will start placing it a rain Dow scene.
20. Placing Railings and Columns for Scene Layout: Hello. Welcome back to stylized
Blender Fred Environment, Greek Temple and
Garden Workshop. Okay, so the first thing we
need to do is select railing. I'm going to Edit
mode, select it all. We didn't do the textil density. So let's just set the TD to 512. And let's get nice and
close so we can just double check and let it render a bit
so we get some more detail. And that's looking nice to me. Okay, so I'm going
to go to solid View and let's Alt D and Alt G, and there we can move
this into place. So let's go to our
grid snapping. And then we can just move
this around where we want it. So I'm going to place one here, and then OpdXODX four. And then we can opt again, X, move one to here. And let's have a look
what's going on here. Now, I'm just going to double check. I'm
going to grab this. And let's move this
to this corner here. Now, these pieces, they don't really need to be on the grid. So we can just
move this by hand. I'm just going to
see how it looks when we have a column
at the end here. Yeah, we'll have a column here and then we on
this side. That's fine. I just wanted to check what
it would look like with the steps so we can move this across and then shift
all the way across here. Now, we don't need these steps, not steps, the curbs, I mean, I'm going to
delete this one. And delete this one and bring some straight pieces in
to fill in this gap. Cty, move it down. This one's a corner, so we
want just to grab a piece Oct Y, like this. Okay. Did we have curbs
on the edge of these? Yeah, so we don't need I'm
going to hide these a s. And we don't need
the curbs here, I'm going to delete these and then grab this straight piece
and fill it in here. Now we can move these across, wait, delete that H.
Yeah, we have them. Now we can go to the
end here not to eat Y, not X, and then shift.
Shift R. Hello. Now, we didn't do
corner pieces with the railings because
the corners, we're just going to have
columns covering up, so there was no point in doing
the corner pieces as well. But this, you pretty
much know what to do. Jot D and just put it
into place. White. And we can shift all the way up. Now we can grab all of these front pieces and then duplicate these and
move them to this end here. Now we've got, I see. We're going to keep these
just a bit further back for now because wait,
wait, ignore me. We'll just move it I thought
there was a curb here, and then it was going to be
more space behind the grass, but now, this is the
edge, never mind that. We can't select all
of these side pieces. And then move them
to the other side. Now, where else do we
want error railings? We want them to go
let's have a look at reference. How did
I have them here? So I had one here going in
front of the grass, one here, and then one going
into the temple, and then some on this side. So let's go back to blend. So we want one here, grab this piece, and we'll
duplicate it over here, and then we'll
move this to here, and then we can grab
this piece here, de one to here. Now we don't need
the curbs and here, so we'll delete
this corner piece, and this is a corner piece. So we'll delete that and add a straight piece from
somewhere's grab this one, rotate it 90 and
then GX to here, GY. Now we want to duplicate these
two and I'll D x to here. And let's add some here. So let's delete this
corner. We don't need this. We'll have a straight
one here, I'll DY. Like so, and then I'm
going to grab these two. I'll D Y, move it to here, and let's fill in
this gap at the back. I'll de X. Like so. I think that's it for our railings. How
much time do we have? We could do these as well, but let's model
them make first and then we'll place them in our
scene in the next lesson. Let's go into rendered
view and have a look. Yeah, it's really starting
to fill out there and look really nice. Very nice. I'm thinking what I
could add down to here. So I might end up
doing like a plane. That's like a base for
the whole kind of thing, and then we can have a nice little turn table going around. So if I show you what I mean, I'll just add a plane, and I'm going to
scale this up to S ten. That's not enough. I'm just going to go to
the top view and just move it and scale it up like this, SX, scale it out like this
and just kind of place it. So it's like something nice like this and I'm
going to go solid view. I'm going to move. What we could do is I'm going to move these
at the wayside, bring them over here, bring
it to Y or something. GX, so these ads in the way. I'm keeping the column here because we're going
to do that next. But I'm going to hide these two, so
they're right the way. I'm going into the top view. I'm going to go into wire frame, and I'm going to
select our whole scene and make sure we're
on grid snapping. And hopefully, this
doesn't mess anything up. It all seems to be okay. So I'm just going to move
this out the way a bit more. And let's just double check
everything still on the grid. So, if we were to
grab our wallpieceOG, and let's just move this
on the grid to like here. Yeah, it's still is it, though? I don't know if it
is. Is that in line? It's hard to tell, right, I'm gonna turn off the grid so. It doesn't look
like it is, is it? So we might have
screwed that up a bit. So I'm going to undo that. Spring back hour. Yeah, so everything's back into
place where it was. And I'm going to deselect. It's good to hide this plane. And we move everything. So all you might
have to do is, like, select everything
and then, like, shift select, like a piece that's on the grid somewhere.
Just double check. Is the origin on the grid here? Yeah. So now, if we hold
control in grid snapping, it was because our bottom
plane was selected last, and that was off grid
with the origin point. I moved everything
else off grid as well. But because this
is selected last, it's using this as the grid
point, if that makes sense. So we just move
this out the way. Just so it's not in the way when we're trying
to model stuff. Then if we hit Old H, bring this back and we'll just move
this we keep it on the grid, we won't have any issues then, then we can just move this over a bit more,
maybe move this up. Maybe this can come
in a bit and then GY then we can just move this to a new collection called I don't know, foundation
or something. No idea. Then we can just
rename this foundation. Then The walls are 2 meters, and we're not really
using them a lot. So what if we were to
bring this down on the Z, keep it, move it
on the grid down. And we might actually
end up building, like, another area here. And then have more steps
going down even more. I'm going to do that
in the next lesson. I'm going to build this
front area just so we can right now, it's just a rectangle
and it's a bit boring. We'll add some variation just adding something at the
front a lot area here. I'll see you in the next lesson.
21. Expanding Modular Scenes with Walls, Steps, and Paths: Hello. Welcome back to stylized
Blender F D environment, Greek temple and
garden workshop. Okay, so let's start by adding more areas to our scene to make it a bit more of
an interesting shape. So this is like the beauty
of modular environments because we can just quickly
make changes, you know, using this kind of
linked object data, you know, nothing set in stone, and we can just shape, you know, we can just change
it up whenever we want. So I'm going to grab a
straight wall piece, and going to top
view, duplicate it. And let's bring it
out to about halfway. To here and O D X, move one on the other side. Now let's grab a
corner piece and OD, bring it to here, we'll grab
this corner piece and D, bring it to here. Now we want these steps. Let's bring them forward. And then we can go
down by GZ minus one. Now we'll grab these as well and Alt D G minus one and bring
them forward on the Y. So now, we could build some steps
going this way as well, maybe. So if we grab these Alt
DX along the grade, let's delete this railing. Now, this floor goes
down half a meter. So this is technically off grid, and this is 1 meter. So if we want to kind of connect the floor here because these
are different heights, we're going to probably have to create a new
piece to fill in. Actually. Actually,
no, we don't. What we could do is
grab a wall piece here. Actually, let's grab
one going this way. So we'll grab this and move it. Say two here, maybe, maybe GX GY, I mean, we'll move it like halfway
here in the top view. Oct Y. I'll have one here, and then I'm going to grab
these Oct X and move it here. And we want GZ minus one. And now this goes to the floor. Yeah, nice. So now we can
grab. What should we do? I'm not going to use a corner
piece because it'll end up going like 4 meters this way, and I want it to
be a bit smaller. So I'm just going
to What can we do? This is only 2 meters long. I'm going to just rotate this by 90 and I rotate
this by 90 C -90. Now, it's cases like
this where modeling smaller pieces can
benefit you when you come into these
problems because this is way too large. This is one of the downsides
when it comes to modular, you're stuck to the
pieces that you have, let's delete these
let's just move this over by 2 meters and I'm
going to delete this, and I'm going to grab
a corner piece and Oct X, move this to here. Now we can go G. No, wait. Let's grab a straight piece. I'm going to move
this to like here. Yeah, so we can delete these
and just grab a corner. We'll grab this
corner over here. DX, TY, I mean, and then bring it here GX. And here now, we want to bring these down
by G Z minus one. Yeah. Okay, so now we
have the floor here. We can move this
edge GX, to here. Now over here, we can move
this edge GY to here. Now, I'm going to I'm going to select these steps and
Shift S cursor to selected. So three D cursors
here and let's add a plane to top view. I'm just going to move
these edges on the grid. So we fill in this
gap. Do you white? And then we can in edit mode, we can duplicate this
face and, like, move it. So it's like let's move it so the bottom right corner is on the wall here and then
we can move this edge, move this edge up so
that fills in this area. What we could do is select A path and join all
of these together. Control J, and then
we can go top view, a project from view, select their Islands, set TD, if you're going to render view. We need to delete this
extra material here, and then we have the floor
tiles on these pieces. Now, these walls can come down, so we'll go GZ minus one. Let's go back into solid view. And now we can add some
railings across here, so we'll grab these railings. It bring it here, Alt Y, select them both. And then I'll D X to here, and we'll move those
down GZ minus one, and we'll grab these
two lt Y, GZ minus one. And we want these two OTG X. Bit over GZ minus one.
It's looking good. And we can just duplicate this
Z 90, move it into place. I'll D Y, move that into place. And it is the extra areas. I think it just
adds a bit more of an interesting silhouette
on the whole scene, you know, instead of
just a rectangle. It adds some more
height variation, makes it look a lot nicer. Cool, cool, cool. Next, we'll do the columns in the next
lesson. I'll see you then. One little thing that I missed was because this floor
is half a meter down, this wall needs to come
down by half a meter, so GZ -0.5, then these steps can go GZ -0.5, and there we go. Then we can add
some columns here. Could even add an archway
here if you wanted to. I could look quite
cool, I think. So you access and for
building era columns.
22. Modeling Marble Columns with Bevels and Smart UV Mapping: Hello. Welcome back to stylized
Blender Fred environment, Greek temple and
garden workshop. Alright, now, time to
move on to the columns. Now, it will be the same
kind of technique that we use for the cylinders
on the railings where we have a cube, and then we're going
to add edge loops and just scale them in and, like, kind of create
the shape, you know? So I'm going to move
this to my screener set so I can look at it
while I model this set. And let's go to
our column piece. Now, Let's go to front view. Moving to the side a bit. And I'm going to I'm
going to move these to OptiY I'm then move it
to the floor just so I can I have something
to look at while I'm modeling like this piece so we see how it looks
next to other pieces. And let's go to the front view. Now, first, let's
add an edge loop. I'm going to move this down
to where his shins are. And then I'm going to
add an edge loop here. And then another edge loop just above the
middle point here. Now, we can scale these two in. Let's go to individual
origins and hit actually, let's just hit S here. We have this shape here. With this, we need to
scale this one as well. What we might actually do is add an edge loop to about here, just weird like the middle
of his faces, I think. Then what we could do is
add an edge loop here. And I'm going to Shift
select this face loop, and I'm going to face mode, right click and extrude faces along normals.
It's good to hear. And what I'm going to do,
I prefer to model with the bevel arm so I can see
how thick I need to go. Let's go to 00.02. Let's try that.
0.002. Add a normals. I'm going to move this
up by hand or sec. So 0.007. That should be okay. Now with this, I'm going
to keep this selected, and I'm going to
Alt Shift select this face and this face loop. And if we hit let's do S, shift Z, and we can
bring it in like this to create this
kind of shape. Now with this, we can add an edge loop here,
bring it down a little. We're going to control
B to bevel it, and then go to face mode like strewed faces along normals
and extrude it a little bit. Now we can select this
face and I'm going to inset it with I and then I'm going to move
it up a tiny bit. So we get this kind of shape. And then I'm going to inset it again and then just
extrude it up, so we have a little
square on top. Now, I'm going to add an edge
loop in here and I'm going to scale this edge
lip in quite a bit, and then add a bevel and then let's add
some segments to it. And then we could
play with a profile shape to bring it in all eight. Actually, eight is quite nice. No, go do that. I just like a curve
going inwards. So I'm going to play
with a profile shape. And have the curve going
inwards like this. And now we can shade
smooth, smooth that. Or you can shade flat and have that kind of kind of
crease in the middle. I'm going to shade smooth
and have it like this. And I'm actually going to I'm going to delete
these edges with Control X, and I'm going to do this again. Going to bring it in
even more, bevel it. I'm going to add some segments
so it's a bit smoother. It feels really
sharp in the middle. Maybe because we
scaled it in too much, so maybe if we bring
it out a bit more and then scale it like this. Just adjust the shape until you're happy, then do it again. I'm going to have
it like to here, and then scale it in. Control B. So it's nice and smooth. We'll go to like here.
That should be okay. And what we could do is just adjust the shape a
bit, maybe scale this up. We could have a little ridge here. I think that's quite nice. Now, this looks too
thick compared to the rest of the bottom. So I'm going to shift
select this loop. It's going to front
view, go to wireframe, and I'm going to select
everything up to this point. So make sure not to select this Face stoop here.
We want this deselected. So now, we S ShiftZ, we can just add some thickness
to this and keep an eye on the bevel because if
you go too close to the edge, the bevel will break. So we'll go to like here. Maybe a bit thinner. And that's looking
nice. I like that. Now we can going to edit mode A U smart UV project and wrap, A, and set TD. Now this, I might go for the marble white it'll have some
contrast with the walls. So it's going to render view. And here we go.
Here's our column. Now, we could start adding
this around our scene. So let's go into top view, and let's move this to the side. Before we move anything, this is column already and
we have a column collection. So we don't have to
worry about that. Now we can have a look at these. So these are shaded smooth. And the reason being is that we haven't copied the
pebble modifier over it. So select this column last, Control L, copy modifiers,
and that fixes that. Now we can just start
duplicating and move them over. The beauty with these
pieces is a lot quicker. We can opt X, we don't have to hold control or we can just move
them into place. Now, this is quite tall, so we're going to
have to think here. It might be worth, actually. Changing these up a bit. So what I'm going to do
is going into front view, going to Wireframe, going to Edit mode and select
this top half, and I'm going to bring the
bottom of this to this line. So this is 2 meters high, and then we have this on top. Now if we have a look at our columns over here,
we have this height. Maybe that's maybe
that's too high. Let's adjust it. I'm going
to move this over and then move this
down to the floor. Let's grab face snapping,
move it to this floor. It's not snapping
for some reason because we're on edge, not face. Then we want this to be
above here, don't we? We can go into Edit mode
and move this up like so. Now, I think it's worth
having two columns. So I'm going to shift this
piece and move it over. So this is its own piece, and we can bring this down. So I'm going to do Alt and move this over to FCN and bring it over to these shorter walls. Now here, we can snap it
down to this face GY, and then move this
into place here. Now, it's up to you if you
want to keep them as tall, but I think if we want to edit mode and
bring this down to here, we can have a little
variation in the columns, and it'll make our
lives a lot easier. So I'm going to rename this
column and the score small, and we need to rename this one
to column the score small. We're running at of
time on this lesson, we'll begin the next lesson with just filling a Docen
with these columns. If we just go into
rendered view quickly, and we can have a look
at how they're looking. I'm going to have
smaller ones here. AttX. It's looking quite
nice, I think. I'll see you in the
next one where we fill a Docen with some columns.
23. Duplicating and Positioning Columns with Face Snapping: Hello. Welcome back to stylized
Blender free D environment, Greek temple and
garden workshop. Alright, this lesson
would be nice and easy. No new techniques. You already know everything.
We're just going to delete these and we'll
move these forward. So opt y. Let's go back to if
you go back to grid, will that make any difference? I don't think so. GZ one. How is that looking? Yeah, I'm just gonna
do this by hand. So if you hold shift
when you move stuff, you'll have more
control over it. Now we can grab this,
move it over here. Now we need small piece here, so OT top view. Them, so they're all
kind of in the middle. Now we want these ones. So with this, we can just go Op D X minus four
and then Shift R. Now with this, we can go T Y
and then move it over here. Make sure that's
nice in the center. Now with this, we can do tY, four, and then Shift R, then we can select all of these. And then Alt x, the top view. Move it. So it's in
the middle here. Now with these, we can do lty
Y minus four, shift that. Now with these, we can go
from here, grab these. We don't need that last
one. Okay, OcteX so here. And yes, we did
need that last one. GX with that in the middle. These should all be lined up. And then Actix four. Now are we missing any
yet on the inside? So let's grab our
smaller columns. And then Oct, move
this over here. Get it nice in the middle. And then oct Y four, and then Shift R. And let's grab this one and then
Oct move it to here. This needs to go up by GZ one. And what we can do
is just go to face snapping and snap it
down to the floor here. No. Move this in the middle. And then Alt Y four. That's weird. GY four. There we go. And then Shift R. And then Alt X minus four. And then AltiX minus four. Now, it's up to you. Do you want even shorter pieces,
shorter columns? So it's down to here. I
think that's a worth doing. What we could do is I'll
select this one and go into the object data and
then just click this button, so it's like a new user. I'm going to Oct and then OG it's over here and
just bring this here. Now we can go into
Edit mode with this, bring this down here, and then we can shift select these and then shifts
like this one last, Control L, copy
Link object data. Now while we're here,
we should rename this. This one is column small. This should be column
small really shouldn't? I'm going to rename
this column medium, there we want to select go to select and then select inked and then select
linked object data, and then we hit every batch rename and then find
we just want set name, new column underscore medium. Now if we check over here, these are all renamed correctly. Now the column small, we will select
linked object data, every battery name,
column small. Now, all of these are renamed. Nice. Now we can do Alt
Y four on this one. And then we can
select these two, and then Alt X, move this over, going to top view, get it
nice in the middle. And I think that's
it for our columns. Oh, we need some at
the back as well. So let's select these ones No these middle ones
because they're smaller. We want these. And then tY, go to the top view,
and then move it down. And then we are R gaps. So AltiX minus four
and then shift, and let's go into rendered view. And the RR columns.
A nice and sold. Now, Okay, so we duplicate
these from the floor here, so these ones need to come up. So I'm going to do GZ 0.5, and then we can do Alt D
Y four to have one here. And now here, A, let's sort out this. So I'm going to
select our Basie, and I'm going to
select these faces. And we can just
move this forward. So GY like so. So it's in front of
this railing and it's in front of this
curb and that'll be fine. Nice. So there are columns. On the next lesson, I'm not sure what we'll do, but yeah I'll see you
in the next lesson.
24. Temple Base Modeling with Inset Detail and Shader Tweaks: Hello. Welcome back to stylized
Blender Fred Environment, Greek Temple and
garden Workshop. Okay, so before we start, we made some duplicate pieces, we made some variations
with the columns. What I want to do
is I'm not sure if we re unwrap them after
we made some changes. Now, I don't think
it makes much of a difference because a lot of
this is, like, procedural. But just in case I'm
going to select all of these and just A U
Smart UV project, unwrap and just reset our textil density
just so we know that the textures
are all correct. Now, what should we do next? I think I'm going to
go into solid mode and let's start on our
base for the temple. So with this, I'm I'm going to go into Edit
mode and add an edge loop, and I'm going to bring
this up to around about, so it's It's just above
this step here, I think. Now I'm going to
select this face, and I'm going to control
click all the way around. We don't want to do
that. So we want to select this and select
all of these faces. Do we want to go, so we want to start from
the front face. So delete deselect this one, and we'll go from here all
the way around to this face. And I'm going to make sure
the scale is uniform. I need to apply my scale
back into edit mode. Going to face mode, right click extrude
faces along normals, like this and make sure
offset even is selected. So now we have a little
lip going around the base. Now what we could do
is I'm going to add an edge loop here and
move it up to about here, and I'm going to
select this face, these faces, and this face. So now we can extrude faces
along normals like this. And we want it. So it's the
same as this lip, really. So we can adjust it by going. Make sure the offset even is selected
after you extrude it. And I'm going to with alters, just adjust it like this
and make sure offset even is selected again.
So now we have this. Now, let's check with a
bevel modifier, bevel, and we'll bring this
down to range about 0.15 shade and hardened
normals that's looking nice. Next, I'm going to select these two faces and I'm
going to inset them with I. Make sure we're on individual
origins and then hit I. Now, we're having some problems here with this edge loop
in the middle of the face. So what we could do is just select these bottom faces
and inset these instead. I'm going to go to about
here and then make sure individual origins
are still on and S X, just to bring it
in a little bit. Now with this, I'm going to inset it again to
round about here, and then I'm going to
hit GY to bring it in. So we have this little
shape going on here. Now, are we happy
with this size? What I might do is Alt Shift
select these face loops. And if we hit SX and then
SC, we can kind of shape it. So it's more like more longer on the vertical
rather than horizontal. And then we can
adjust the deepness of this if this is too much. We could go GY and then
bring it in a tiny bit. I think that's quite
nice. I like that. Now we can go into
Edit mode, A, U, SMAT UV project, wrap, select all our islands, and then set TD. Then with this,
we're going to add. We're going to change this
to marble wall damaged, and let's go into Render Vw. And this is the
start of our temple. Now, we can't really see
what's going on here. So it might need
changing a little bit because it might be because
of the brightness of the scene and the angle of the sun because it's
pointing straight at it. If I rotate the sun around, does that help? Not really. We need to figure out how to
make this look a bit nicer. If I select this and this face, we bring it in on the Y. And I think that
looks a lot nicer. We have this contrast
with the shadow now, so it's a lot more noticeable. What if we adjust the bell, we tighten it up a bit. We could make some adjustment
to the shader maybe to have some edge highlights.
Et's have a look. So we want to find our bevel
nodes up here with bevel. We could maybe
adjust this color. So if we lift up the value, if you lift up the
value, you have more of an edgeway on the edge. So this is by default. I'm just going to
bring it up to here. It's a lot more
noticeable by here. I'll move to say it
the way. There's like a white kind of highlight on the edge. So you
can adjust that. If you want to a
different kind of look, it will adjust the
other meshes, as well. It's very subtle,
but I think it does make a difference when
you have the whole scene. We might need to
adjust the exposure. So if we go into the
render properties here, and then is it color management
exposure if you bring the exposure down a
tiny bit to -0.8. I think it's not so harsh
then on the brightness. We just the gamma, bring
the gamma down to 0.9. That's a lot nicer to look at. We can see what's going
on a lot more there. See, there's a of error base. What we could do is
grab the roof base. Let's go back to solid view. What I'm going to do with
this is let's bring up the reference photo and let's
have a look at the temple. You've got one piece here, and then it's another piece here. I'm going to do Okay. Is for now, we'll finish
this in the next lesson, but let's just add an edge loop and bring this
down a little bit. So it's about a
quarter of the way. And let's isolate this. What we want to
do is select this face and this face loop. So we have this top half and going to hit Y
on the keyboard, and let's select
everything with A, go to mesh, cleanup
and fill holes. So what this did
when we press Y, it split this half
from this half, and we use the
fill holes to fill in the faces on the inside. So now with this, we can
add a bevel modifier. What we can do, so it's
consistent is select this one and Control L.
Copy modifiers, and then we have this kind
of gap in between here. Now we might have to apply the
scale if it's not uniform. Now, we could make
this a bit thicker, but we'll see when we get to this roof and we can match it all up and
adjust the bevel. So it looks really nice.
In the next lesson, we could do something
with the temple maybe and then the walls
are a bit complicated. We'll do those later
because we need to model them at the same time
so they're consistent, it's a bit more complicated. But if we do the roof base, then the techniques
you'll learn from this should help with this. I'll see in the next lesson.
25. Decorative Roof Geometry with Bevel and Array Modifiers: Hello. Welcome back to stylized
Blender Fred Environment, Greek temple and
garden Workshop. Okay, so our temple roof base, let's start with this. So I'm going to grab
our temple roof. I'm just going to move
it up a little bit. And I'm going to grab
the top face of this, and I want a bit more room. So I'm going to
grab this to go up. And how fixed we want this. It's pack in the grid. I want to bake this distance, eyeball it. I'll be okay and you can move this top piece back down to
the face with face snapping. Now with this piece, I'm going
to add another edge loop in here and we want to move it around about want it thicker than
this bottom piece, but thinner than this
piece, if that makes sense. So round about here. Now, let's isolate this and we'll click
this face and then Alt click this face loop and then hit Y. Now
this is separate. And now we can
select everything, mesh cleanup and fill holes. So now we have faces inside. Now with this, what we could
do is alt click this loop, and I'm going to hit S shift
Z to bring it in a tiny bit. Like this. Now, let's have
a look at a reference. So what we want to do is add an edge loop into
the middle here. And I'm going to Alt
click this face loop and extrude along normals
outwards like this and make sure
offset even is selected. Very nice. Now I'm going to add an edge loop in
the middle here. Control B to bevel,
just one segment. And then with this,
we can hit S, 50 to bring it in like this. Now, is this the right shape? Let's have a look at
the temple again. So if we have a look, it
goes straight and then in straight out straight. So we need another edge
loop in here and in here. We'll select both
of these, press S shift Z so that it kind of
strains up these edges. It's going to the front
view and we can see. So this edge is straight,
and then it goes in and then it's straight again. So we just adjust the scale.
So this is straight here. It's looking really
nice. I like that. Cool. Now we might we
might need to bring I'm going to select
this edge loop and this edge loop and
press S. Should C, bring it out a bit more so
we have a bit more room. Now what we could do is let's have a
look at our reference. And we have these little
smaller pieces going along, and we're going to do that
with an array. So let's make. It's going to be a
cube and then a bevel, and then we're going to
change the profile shape. So I'm going to shift right click here and then add a cube. It's go the front
view into edit mode. We'll scale it down and then
scale it on the little bit. Now with this, I'm going to just move it forward in object mode. Go back to edit mode,
and now I'm going to I'm going to put an
edge loop in the middle here and just move
it up a tiny bit and an edge loop here and
move it back a tiny bit. Now with this, we can control B, and we'll bevel it like
this, add some segments. Go to about five and then
bring the profile shape in, so we get this kind
of shape here. Now let's add. Let's add a bevel first off. We add the bel 0.00 0.01 first, and then shading harder normals. And then right
click Shade Smooth. And let's go to side view. We'll bring this back on the Y. So it's like inside a bit bit, but like poking out
here. Go to front view. And let's snap it up to this top face here and then bring it forward
on the Y a bit more. Are we looking?
Yeah, that's nice. Okay, I'm going to quickly look at our reference, see if we've done this right. Yeah. Okay. So we want
it to go up a bit more. Let me double check. So this is the bottom of the roof
base, and then it goes in. Okay. I know what we need to do. I'm going to take the roof base and I'm going to Edit mode, select everything.
Scale it on the Y. We want this to be in front
and we'll scale it on the X. So it's like slightly
larger than these pieces. Might do it a bit more, SY
tiny bit SX just like that. Then with this piece, we want
to go up to the bottom of the roof base and then move
it forward. It's like this. Then we can bring this face, both of these faces down a bit to isolate this and
choose the back faces, and then we can move
this back into the wall. We can snap it to this
face. It's like this. C. Now we can go to the front
view and I'm going to bring this to the side here
and let's add an array. And let's go for
constant offset. And let's make this
a bit smaller. So I'll go with 0.45, and then let's add
some counts all the way we want this to be
even on both sides. I'm going to go 26 and
move it on the a bit more. This is nice in the middle
and it's even spaced. What we can do with this now is, we can opt AZ 90 and
move it on the X. Now we want it to be we want it to snap it
to this face here, and then let's move
it back on the Y, GY. Let's go with the side view. We want it to be GY about here. Now with this, look
at array side view. What we can do, we'll
keep the array the same, but we'll just move it back so that it's even in the middle. With this, we can just add, let's bring it back on
the X a bit more GX. It's underneath the
roof base. There we go. Now with this, we can I was going to say
use a mirror modifier, but I'm going to take no, I won't use a mirror,
I'll just do it by hand. I'll just do Opt AZ 180. Let's go to front view, GX. Move it along here, and
then we want to snap it on the X to this
face and then go to Control free and then
move it back and look, is this even GY? About here. Now with
this front one, go Alt D Z 180, and let's move it to the back, so we want to snap it
to this face on the Y. Now GX, and move it so
it's in the middle. It's looking good. Okay, cool. Now, this face is
way too far back. So I'm going to select
these two places and go G Y and just bring it back here. I like it looking at the back? Is it too much? Feels off at. I'm not sure what it is. Maybe this needs
to come back a bit further. Just want to side view. It's definitely different.
It looks different. I mean, it's not too bad. It's the back. I mean, it still looks okay, I think. Maybe this needs to come
a bit further back. I'll select these
faces and bring it forward on the Y, it's here. Cool. Now what we can do is
This is temple Roof base. I'm going to apply the
array on all of these. Single user, we'll apply that. Now if we what we could do is we want these to be
linked duplicates, don't we? So I'm just checking the position of these
because it looks like these are too far, so we need to go Gx
and bring these in. This one's fine.
Yeah. Okay. So now, we've made this a single user. What happens if we select these? And we need to deselect, select all of these,
make sure this is last. If we hit Control L and
L link object data, what's going to happen? This, what's going on here? It's got a bell array. We need to remove
the arrays on these. Remove the array. Okay. Now if we were to go into Edit mode and scale this, these
are all linked. Keeps it more optimized. What could we do?
In the next lesson, we will start to unwrap these and get some
textures on them, and then we can start
with the actual roof. I'll see you in the next lesson.
26. Creating Stylized Roof Tiles with Inset Faces and UV Mapping: Hello. Welcome back to stylized
Blender Fred environment, Greek temple and
garden Workshop. Okay, so continuing
with the roof base. Now, if we look underneath, we see this line is
kind of straight. And if we look at the
back, we can see here now, it's all kind of
shifted, you know? So what we can do to fix this is I'm going to select these faces, and I'm going to go GY, move these and so we have a nice kind of
straight line here. Now, with these faces, I'm going to keep
this where it is. And maybe we can let's go to side view,
let's have a look. Now, we have a lot we have this metoroom here.
I quite like this. So we need to bring
this back a bit further. So that looks even. So now with these faces, we'll bring it back
so it aligns with the faces underneath like this. I hope this is making sense. Now with these two
faces on the roof, we can move this
back to about here. And now we can see
here with these, we can move this back, so it's
just underneath the roof. Here. That looks a
bit more consistent. We can even go a bit further. So it's like inside
this face here. Yeah, there we go.
Now with this, we can what we could do is we want these to be joined with the
rest of these pieces. So what we might need to do is just so we don't screw
anything up with this, I'm going to make
sure these are all single users just by
clicking these numbers here. Now we can select these and
select the temple roof base. We have this piece here and
I'm going to hit Control J. And maybe we could
fix the origin point. I'll just right
click Set Origin, do geometry for this piece. Now, we can go into
Edit mode and hit A U Smart UB project, unwrap. And for this, right, first, let's select the islands, set TD, and then we
can have a look. Yeah. Now, let's add. Let's change gray box to marble wall damage, and we will also
add marble white. What will be easier instead
of trying to select? Let's go into material preview, instead of trying
to avoid there. We're going to Edit mode,
deselect everything, and marble white, select. So these are already
marble white. But in case it's
different for you, what we could do
is just do this. So I'm going to set
all of this to marble. I'm going to set it all
to marble white now. So we have this
kind of going on, and we will have
going to face mode, and I'm going to hit
L on this piece. And let's go with
L on this piece. And we will choose this as
marble wall damaged a sign, and we will have it like this. Now, we could try marble wall damaged on this piece as well. So let's see how this looks. I mean, it's up to you
which material you want. Maybe we could go with
the marble white on this one. That
might look better. We'll have a trim here, so that might look nicer
later on as well. We have some contrast with
these pieces and this piece. So that's the temple
roof base stunt. Now we can get to work on
the actual temple roof. But first, let's check
the name of this. Temple roof base.
That's all fine. Okay. Temple Roof. Now first, let's select these two faces and make sure individual origins and hit I and then I again, and it'll inset them
both separately. And we don't want
to go too far in. We'll just go to about here. And I want to
thicken the top up, so I'm going to select
these two faces. And if we hit GG,
what's going to happen? We can't do it like that.
So I'm going to go SX. Let's go to medium points
SX So it's like this. Let's go to front view, and
we need to bring it down on the Z so it's flat
again, like that. Now with these two faces, we can go into face mode, right click, extrude
along normals, so we extrude it in
just a tiny bit. And I'm going to scale them up individual origins and then just scale it
up a little bit. Just a tiny bit and then maybe
move it down a tiny bit. So we have this tiny, little edge. It's going inwards. So it's like over it,
if that makes sense. Now with these, I'm going to
hit P, separate selection. And then with these two faces, we're going to rename this
temple underscore, roof tiles. These are going to
be our roof tiles. So now with the roof tiles, we can we could just
go into Edit mode, A, U, and what if
we just do uniform? So we could do angle based. Let's look at our UVs for this. How does this look? Yeah,
I think this is fine. So let's append. I'll append, male marble. Law tiles, wall tiles. Yeah, so I'm using the
wall tiles for the roof. So let's assign this material. Marble wall tiles. Right? Now, where are our tiles. We might have to go into
rendered view to see them. I know what we got to do. We've
got to select everything, select the islands and
set text or density. Now we can see our tiles. So I'm going to do
with this is I'm going to I'm going to click
this button here. So it's new material,
and I'm going to rename this marble roof tiles. So we're using the
wall tiles as a base. But we're going to just
change it up a bit. So it's like a
separate material. So let's bring this open a bit. And we want these tiles
to be a bit bigger. So if we go to this mapping
node on the left here, would it be this one or it
might be the lower one because it's under this
displacement map here. So the scale, we can adjust the scale
so it's a bit bigger. So let's go to 0.8, so they're a tiny bit
bigger, maybe 0.65. Yeah, that's nice.
And then with this, we can change the color. So maybe this first
mixed node here. We have a yellowish color. What if we change this to, like, a red and's bring
down the value a bit. And what we could do is
also change color here. So we will change this to like
a very dark, kind of red. I think that looks nice. Yeah. So there's our roof tiles. Now, we could experiment
with this a bit, like say we rotate this
90 degrees, not on here. We want to undo that
and rotate our UVs. So if you go 90, you could
have them like this. And what else we could do is maybe adjust the scale
of the displacement. So in this mapping
node, we could scale it on the a bit more. We scale it on the X. Yeah,
I'll scale it on the X, so the X is a bit smaller
and then select everything, and then we'll just
rotate it again. So it's like long going down this way, and we'll
have it like that. Now, we will rename
renamed roof tiles. That's all good. Now, what's going on here. I
think we're okay. If we bring this up a tiny bit, we can close that gap, have a little bit of
shadow going over it. And with the roof, make sure it's a uniform
scale. We have a bevel. Why we increase
this bevel a bit? Now, our bevel is broken. So we need to figure out why it's broken. I'm going
to isolate this. And let's find where it's like, really close to an edge. It might be this here. So what we could do is alt click this loop and Alt click
this loop and delete those faces and
see what's causing our it might be this edge here. So if I was to
delete these faces, do I bubble come back?
Now, where is that? It's because it's not
enabled in the viewport. Okay. So we have our Bbble back. So let's undo that. Okay. So now if we re enable our
bevel, yeah, it's fine. And we can put this to
0.02, 0.02. That's good. Now with this, we
can just control A Smart UV project, and wrap, select their Olans, set TD, and then we'll choose
marble wall damaged, let's look at rendered view. And there's the start
of our temple roof. Now, this looks a
bit thick here. So what we could do maybe is add something
a bit more interesting. I'm not sure what we could do. We could sort this
black face as well, maybe just insert it like
this and then scale it in. And then we'll do A Smart
UV project and wrap, set the TD of our islands. You could have something
like this, maybe even select this face and this face and just
bring it up a tiny bit, it's the same thickness as
this middle piece here. Yeah, it looks a lot nicer. Now, I think next we could start with the stone
sculpture at the front, we'll see you in
the next lesson.
27. Blending Materials with Node Mixing and UV Unwrapping: Hello. Welcome back to stylized
Blender Fred Environment, Greek Temple and
garden Workshop. Okay, now let's start with our stone carving at the front. So I'm going to go
to Rendered view. And first, I'm going to hit File append and look for our stone carving
material and append this. Now with this, we want
to select the roof, add a new material, and choose stone carving. Now, with this, we need
to go into edit mode, select these two
faces and hit a sign. Now we can adjust UVs. So I'm going to go
to front view and hit U Project From View, and we're just going
to scale and move our UVs until it
fits really nicely. So I have to scale it
down on the exhibit, scale it up until
we get a nice size. I'm going to go to, like, here, maybe scale it on the
Y a bit like this. And I quite like that. Okay. Now, this stone is obviously I'm going
to scale it on the I'm going to
choose these faces, scale it on the X a bit more to widen it a little
bit. There we go. Now, this stone is very different to this stone,
and it's very obvious. So I'm going to do is going
into marble wall damage. I'm going to copy these notes, not this last notes,
but everything else. I'm going to select this control C to copy,
go into stone carving. I'm going to go up here
and Control V to paste it. Now, what we want is we want to get the
color from this mostly. So yeah. What we can do is we
can delete these. We can delete these and delete these two.
This one and this one. We only have the base
color delete this. This is a bit more simple. This is just like the
color information. Now we need a mixed
color node, mixed color. And I'm going to plug
this one into the top, change this to add, and we want the color
from this one here. So I'm going to move
this down to here, plug this one into the bottom, plug this one into
the base color here. Now over this, we can
put the factor to maybe like point we
keep it at 0.5 for now. Now, Now, our normals
are backwards, so we need to go into solid view for now. Move
this out of the way. And in our overlay settings, we're going to go to facial orientation
and check that on. Now, anything that's red, it means your normals
flip the wrong way. So I'm going to select
every red piece, going to Edit mode, A, Alt N and flip. So this will fix the normals. I need to Okay with this piece, we're going to just
recalculate outside instead. There we go. Back to pnded view. And there is our stone carving. Now, I want to adjust
the color on this. I want it to be a bit
brighter and more white. Like, it's been worn down
by the sun a bit more. So let's open our stone
carving material. And I'm going to zoom, go all the way to the
top and top left, you will see a little node
called ambient occlusion. You got the color amp here.
And then this little arrow, I'm going to click it,
choose this color, and just drag this
down a little bit. And the further down,
the more white it'll be. So I'm going to go to the
top and just slowly scroll down until we get a nice contrast between
this area and this area. So the value here, value of, like, let's go 0.5. And I think that
looks a lot nicer. Another thing we could do is, if this is looking too smooth, we could scroll out, and then I'm going to
scroll in to the bottom. And oh, we did this
in the last lesson, didn't we adjusted
the normal strength, I think. No, we didn't. No. I'm going to
choose this to 0.8 and it just adds a bit of shadow
to the stone carving, makes it pop out a bit more. And there we go. There's
our stone carving for the temple roof. In the next lesson,
we can get to work on this main part and add a door and add some decoration
going around the sides. I'll see you in the next lesson.
28. Modeling and Texturing an Arched Marble Doorway: M Hello. Welcome back to stylized
Blender F D environment, Greek Temple and
garden workshop. Alright, now let's start
on this main piece. So let's focus in on it a bit. And let's go to
solid view first. And where is our
human reference? Let's bring him over here and bring him up and
snap him to the floor, and we'll zoom in on him. Now, I'm going to just hide these pillars at the waiter sec. Now, let's go to front view
and select this piece, and let's add an edge loop. And I'm going to bring this down maybe to where
his neck is, maybe. Yeah, we'll go to here. Now, with this piece, we want put an edge
loop in the middle. And first off, I'm going to bring our guy in
the middle here. And with this edge
loop selected, I'm going to hit
Control B to bevel, and we want a nice big door. So let's go to here. Maybe we can bring
back the pillars. And scale it on the X. So it's like to here. Do you think that's a good size? I think that's a good size. Now we want to go one,
two, three, four. Let's go to 4 meters up. Let's add an edge loop, we'll just bring this
up a little bit. I'm going to let's isolate this piece and let's
delete these faces. Now, we could also just delete these so they don't
cause us any problems. Next, we can select
this edge loop, and I'm going to look
at my references. So yeah, so we want edge loop
here and edge loop here. So let's go back to a Blender. I'm going to add an edge loop here and just bring it down. Now we want to bevel
this edge loop. So it's the same
thickness as this here. Let's control B and get
a similar kind of width. Now I'm going to select this face loop
and this face loop. I'm going to hit Shift D and
then P separate selection. Going to go back into
object mode and try and select maybe we can hide
this and select this. Now let's go into Edit mode, select everything to
face mode, right click, extrude along normals, and
we don't want to go too far, just a little bit like this. Now we can add, first off, I'm going to
select these inside faces. Select all of these,
and we can delete these so let's get
rid of these faces. Now we can add an
edge loop here and an edge loop here and
select these edge loops. And let's control B
and add some segments. Let's go to about four. Yeah, let's go to maybe five. I'll go with four
for now. And then we want to deselect everything. Let's maybe select
this edge loop. Yeah, I think we need one, two, I'm going to undo that. We want an odd number, I think. Right now we have four.
I'm going to go to five edges and just
bring it to here. I'm going to select this edge
loop and this edge loop, and this edge loop
and this edge loop. We have like the second one
down and the second one up, second one down,
the second one up. That makes sense. Now with this, we can hit S shift Z to bring it in and create
this curved shape. We want to scale it in
like this and then we're going to Alt Shift
click this edge loop, and Alt Shift click
this edge loop. What we could do now is control beta bevel
bring the segments down so we just have the minimum amount
to just create a nice curved shape like this. Now let's shade smooth
and let's add our bevel. Add the beble shade into harder normals and
let's put this 2.01. You might need to
go a bit smaller. Let's just drag this down. We also need to apply the scale. Now we can adjust the bevel. I'm going to go to
0.012, that'll be good. Now let's go to
the front view sec and we could
straighten these out. I'm going to select these
faces and these faces. I'm going to hit SX zero, and I will straighten it out like this and do the
same for these faces. SX zero. I'll straighten these out. Then we can bring
back our main piece. And we can add I need to apply the scale
on this piece as well, and I'm going to add
a bevel to this. So bevel, and let's put it to let's first shade
smooth and then shading to harden
normals and adjust the bevel to round
about 0.02. B. Now, let's go into Edit mode, A, Smart UV project wrap, and select there
were islands set TD. Now with this, we can change
Greybox two, wall tiles. I need to append them again. Append search marble wall
tiles and choose wall tiles. Go rendered view. Now we need to select everything and 90 on our UVs to rotate
them around the right way. Now I'm going to just
check our reference. So these are quite bigger. So what we could do is instead
of 512, let's try 256. You know, 256 is nice. Now, what did I have
on the bottom here? So I had marble
wall damaged here. So let's go back to Blender
and let's isolate this. And I'm going to select this
edge like this face loop, this face loop, and
this face loop, and go to the materials, add a new material, choose the marble wall
damaged and hit a sign. Now, for these faces, we need to set our
TD back to 512. And let's go back to our
scene view and have a look. Now, it's looking very dark, and that's that's because
of our origin point. The marble wall damage has
a little gradient on it. If I scroll out
and bring this up. Now, if we look at the
looking for a gradient. This gradient texture is
just at the top here, and it uses the
object coordinate, which is based on your
object's origin point. So what we could do with this is if we click Options up
here and choose origins, this will only move the origin point when
we move objects. If we hit G and then Z, it will move the
origin point up and down and you can
control your gradient. So I'm just going
to bring this a bit lower to about here. And I'll fix the gradient issue. Now, with these pieces, we can go into Edit mode, AU SMAUVPject and then we will set our texel
density to 512, and maybe we could choose
marble white for these pieces. And how is this looking? Maybe we could adjust
the bevel just to 0.01, just so it tightens it up a bit. There we go. We need
to add the door next, so we will do that
in the next lesson.
29. Solidifying, Lighting, and Animating a Temple Door: Hello. Welcome back to stylized
Blender Fred Environment, Greek Temple and
Garden Workshop. Okay, now let's start by
adding the Temple door. I'm just going to look
inside here a sec. Now, if you want to
have an interior, now, because the normals
are flipped on the inside, it won't render
in a game engine. So what you could
do if you wanted, like an interior is if we
take's going to solid view. If we take this piece,
it's like, one sided. So what you could do
is add a Solidify. I'm going to move
this above the bevel and give it some thickness. And you could go to
whatever thick you want, make sure even
thickness is checked. Now we have a look at
this in rendered view. Now, you would have
to you would have to apply Solidify
and re unwrap it. So maybe this is
a bit too thick. Maybe, no, this should be fine. So if we apply the Solidify, and what we can do
is we will just do A U Smart UV project again and we will
deselect everything, select the marble
wall tiles and set TD 256 and rotate them by 90 degrees and then
deselect everything, select marble wall damage, select, and then 512. We need to select
the islands 512, and then you have
an interior for your temple. Nice and easy. Now, you can just like
if you wanted to, you could add a light. So a light, a point,
bring this up. You could increase
the power, I guess, increase the power, you have
a nice little light inside, so you can do whatever you like. Now it becomes a lot
more complicated. If you want doors
to open and stuff, you have to set the
origin point to, like, to where the
hinge would be, so it rotates around the origin. But I guess I could show you
that because I know a lot of people in air discord have been asking
about interiors, and it isn't really,
like, complicated. You just need something that's
double sided like this. Okay, so let's get the
start on our door. So back in solid view, and let's hide these
pillars out the way. Now we want to add a cube. Let's put have a cursor here
with shift and right click. Let's add a cube. I'm going to bring this
up, or we need to go into options and
de check origins. Bring this up, Control
Z, snap to this phase. Now I'm going to
select this phase and snap to this pace here, then this phase we can snap to this phase then this phase
can snap to this phase. So now with this, we want
to bring this forward, and let's scale it on the Y. And with this, we want
it to be just a bit thinner than the
actual like wall here. So check both sides and S Y. I'm not the scalar
inside out, right? I'll go to, like, here.
So it's like a nice, like, it goes inwards,
you know, on both sides. So it look quite nice. Now, let's just bring
this forward for now. I have a look at our reference. Okay, so we have these
like square shapes. So I'm going to but now what we will do is actually delete
delete all these faces, so we just have a plane. It's a lot easier to work with. And I'm going to
add an edge loop in the middle and an edge
loop in the middle here. And what we can do here is
select this edge loop and this edge loop and hit Control B and create
a bevel like this. Now with this piece
and this piece, we can hit I to Inset, and then GY to
bring it in a bit. Now, do we like the shape or
do we not like the shape? Let's have a look at
our reference image. We do not like the shape, so I'm going to Control
Z and insert it again. And then I'll bring
these pieces forward. And then with these faces, we can we're going to
hit Y to separate them, and I'm going to just
move them forward a bit, and then I'm going to I'm going to hit A to select everything and just move it forward
in edit mode, so it moves it forward
from the origin point. Now let's add a mirror modifier, and we want this on the Y. So now with this, we can
alt click this edge loop and this edge loop and
this one and this one. And I'm going to make sure
clipping is enabled and E Y and bring it until it
snaps to this edge here, and we can select
the outside edges of this middle piecea. So select all these edges
going around. One more. And then E Y until it
snaps in the middle. Now, I'm going to
select everything and hit GY to bring
it all in like this. Do I want to go too far
because it will, like, merge the faces in
the middle together, so we can double check. Yeah, that's all fine. So now with this, we
can move this back. And check how it looks. We can bring it
back a bit further, see how it looks on this
side. I think that's okay. Now, if you wanted this to open, you would let's isolate it. You would need to
select this edge, shifts wait before we do that, we want to apply modifier, and then we can do
shifts cursor to selected and set
origin to Fred cursor. Now, if we were to
go to where is it? Transform pivot point, free
decursor, not free Dcursor. We want individual origins. It will rotate around here. So even if I put the
freed cursor over here, it'll rotate like this. I don't know this temple
door would open like this, it would probably be
split in the middle. So if we were to go
an edge loop here, and then I'm going to
go into the front view, go into Y frame, go into face
mode and select this half. I'm going to hit Y to
separate it like this. And I'm going to back
into solid view, and I'm going to hide this face, and I'm going to fill
in this face here. I'm going to go this vertice, this vertice and hit F. And then I'm going to try
and keep the topology clean. So I'm going to choose these
and click what N. Okay, so I'm going to delete
this edge, actually, with Control X or actually let's undo until
that edge goes away. I'm going to alter click
this whole loop and click F. And now just so we
can keep our quads, I'm going to choose this, this verse and click
J and then J on these two and J on these two. So we keep our quads here. Now lt H and then Shift it'll isolate this
side and we can do the same. So we have an edge here. So if I were to, I don't know where
this edge came from, so I'm going to delete
these vertices. I delete these vertices
and then fill in this whole face here and then J J on these and then J and
then J on these so now, if you wanted them to open how they probably
would in real life, we would need to make
these separate objects. So I'm going to alter H
to bring everything back. And in face mode, I'm going to press L over these pieces and hit
P separate selection. Now with this piece,
now these are separate, you can choose this
edge, shift S, cursor to selected, and then right clicks origin
to really cursor. Now this one can
open this way and now this one can open
this way. Let's go back. And now if you really want it, you could just rotate one door, so it's slightly open, maybe. Have it like this. I'm going to undo that for now and
in the next lesson, we will start with the
door frame going around.
30. Modeling Detailed Temple Doors with Mirror and Bevel Tools: Hello. Welcome back to stylized
Blender Fred Environment, Greek Temple and
garden Workshop. Okay, so back in solid view, let's select the door, and let's isolate it. Now, this side is fine, but this side there's
a face missing. So I'm going to isolate
this one door and just fill in this face and then
connect the vertices. Now we can select
both of our doors, and let's unwrap them. Smart project, unwrap. And let's also add the bevel. So 0.0 let's go 0.015, and then shading to harder normals and then
Control L copy Modifiers. Now we need to select all of our islands and set it to 512. Now, in the original,
I had wood, where I was playing around
with the different materials, and I think I prefer the look of the clay material.
So let's select this. Let's go into rendered view, and let's select clay. And I'm going to create
new material with this and rename this clay
underscoll door, and we'll select it on
the other one as well. And we can play around
with the color. So I'm going to go into scene view so we can see everything. This is looking
quite nice already, but if we zoom out, we zoom to the textures here. We can find the color
information here. So if we bump up this factor, it becomes more colorful
and we can change this to a reddish hue so that it
matches the roof a bit better. This is still very
orange looking, so we could play around
with, have a look. Maybe this color here.
What if we change this? Yeah, so make it a bit red. If we make it darker, now,
we want it nice and bright. Now with this, we can play
around with the factor. We don't want it to be
like too saturated, so we can bring
saturation down a bit. Looking with the roof. Now, the roof is being affected by the light
of the sky a bit. So it's more like a blue issue. Or if you were to remove Scene world scene lights
uses the other Skybox. So yeah, this one
is going to be a bit tricky to match with
the different lighting. We, we added more of a
bluish tint to the door. No. I'm just going to go here and just have
this color going on. Now, what we could
do here is add another material and then choose Clay door and then I'm going to make a new
material out of this, it's Dor 001 and I'm going to go into Edit mode
and select, not that one. We want this middle piece here. Then maybe this face as
well and then we'll hit a sign on the clay door 001. Go back into object mode. With this material, the 001, we can just bring the saturation down to zero on both of these. Add some color variation. Now we need to do it the
same for the other door, add material door or one or select these faces
and this middle part and then hit a sign then we want this face here
that we missed, t sine. Now, I keep forgetting
there's another side to this, so we'll assign these and the other door as well
we need to go behind it, select these faces
and hit a sign. Now, I don't like how this
is transitioning here. So what we could
do is I'm going to isolate these and go back
into solid view for now. And I'm going to select
I'm going to go into Si view and I'm going to
delete the back half of this. So I'm going to delete vertices here. I'm
going to undo that. We don't want to select
the middle edges. So si view. Let's
move this down. So we want to go to here, avoid that middle edge, and then delete vertices.
So now we have this. Now with this, we can
let's move everything forward away from
the origin point and add our mirror modifier. At Mirror axis Y, move
this above the bevel. And we need to do the same for the other one
copy Modifiers. There we go back into edit mode. I'm going to select
these middle faces and then hit Y to separate them off, and then extrude inwards. We need clipping
on the modifier, clipping on this one and
clipping on the other door slep them both and then
with these faces G Y to the middle and
X delete faces. Now we can hit A, Al ten, recalculate outside, fixes that. Now let's hit L on these middle faces to
select them and then H. Now we can I'lt click these
edges, like these faces, I mean, and then hit Y, and then E, to through them in all the way to the
middle, delete faces. Now we'll hit L on these. And hide the make the way. Now with these inner edges, we can select them
all and then E, bring them in on the
Y, X, delete faces. Now we can hit Alt H to bring everything back, select
everything, Alen, recalculate outside,
and then G Y, bring it all in until
it clips like this. Now we can apply our mirror, make sure the
thickness is correct. Yeah, we'll apply the mirror. Now with this, we can A, smart UV project and wrap, set the TD It's going to Render View,
see what's going on. Now we have this. Now, I think
that's fine for outdoor. I'll go with this, yeah. We can add some decals in
the middle later on to make it a bit
more interesting. So let's go back to solid view, and let's select this top face here on the temple
and then shift S, curse it to selected and
let's add a plane then. Let's go into Edit mode,
actually, select X 90. Now in object mode, let's
hide the store right the way. Let's bring it
down to this face. And then in edit mode, I'm
going to snap the edges to the sides so we get
the nice size here. And let's bring this
forward from now. And with this, I'm going
to make it a bit wider. So we want it to go to here, and then with the top face,
we'll bring it up a bit. And then with this face, we can add an edge
loop in the middle, Control B to bring
it out to here, and let's add an edge loop and
bring it up to about here. And then we can delete
this middle face. We don't need this. Now, with this, I'm
going to hit well, what if we added the
mirror modifier now? Add the mirror on the y axis. We need to bring this
forward on the origin point. Okay, so now we have this. We can hit A, E, before we do that,
let's apply clipping. Then A E Y, bring to the middle
delete faces, and then A A ten recalculate
outside. Now we have this. Now we can bring
these faces in a bit. I don't need to make this much. That's first moving object mode, so it's in the middle
of the door frame, so we know how thick
it is. So here. We could hit Alt G. No, not Alt G. You'll hit OTs
and then select it to cursor and then bring it down
to snap it to the facia. Now with this, we can
bring it forward. GY like that. Now, what I want to do is we'll extrude these faces along normals, just a
little bit like this. Then I'm going to
add an edge loop and I'm going to scale
these along normals. All of these faces, right click, scale along normals
and then we want offset even. Like that. Now we can hit Alt S to
adjust the thickness of this and then make sure
to offset even so. Now with this, I might bring
these top faces up a bit, going to wireframe, vertice, select all these vertices and
just bring out a tiny bit. Now with this, we can
select these edges. I'm going to Control B to bevel like this and then I'm going
to bring the segments up. Four should be fine. Now we can Alt click this edge and I'm going to
add a bevel here. And it's up to you what
kind of shape you want. I might keep it like this as well, so it's nice and curved. Then I'm going to select these two faces,
bring them up here. Now what you could do as well is maybe we can delete all of these edges with
Control X to dissolve them. We need that one there. So
this outside edge here, we need to keep that edge there. But this one all the way
to this one Control X, so we have more
room to play with. And we could maybe add
bevels on these corners, and I'll just bring it down to one bevel, so it's like this. Maybe if you wanted to, you could insert this face
and bring it in like this. If you wanted something
in the middle like that, we could have some Greek
texts going along. Let's add there a
bevel, see how this is. Is it bevel? Do we
need to apply scale? No, we're fine. Amount 0.0. Let's go 15 on this then
shading harder normals. And then I might bring
this face forward a bit so it's not so deep. With this, actually,
we could hit Y and then bring it forward. It's a tighter edge here. Then right click Shade Smooth. That should look nice
for our doorframe. If you wanted to, you could
add maybe Edge Loops in here. Control two edge loops. And then it might be getting too small of
detail if you did this, but you could maybe control B, these edges and then
extrude them like upwards. You have this kind
of shape going on. I'm not sure if I
like it or not though Maybe if I undo that and
actually undo the whole edges. Could maybe just insert
the face once like this, bring it out like that maybe. So it's like that kind of shape or undo it and extrude it out. So you have that kind
of shape going on. What might be better actually
is to duplicate this face. So it's like separate and
then bring it forward a bit. And then these bottom edges
will snap to the floor. So G, Z, snap to the face, and then these edges to go into front view
and just bring it out so it's going
into this top piece. And then with these faces,
we can extrude them in. So they go inside like this. Now let's hit
recalculate outside. Now I don't like this
transition here. We could bring these faces in. So we go GY, bring
them into about here. Gives it some more interesting
look on the sides there. And what I might
actually do here is increase this face so it's
a bit thicker on the top. Look nice. Okay,
maybe a bit more. So okay. Now let's bring
back our door so we can see. And let's hide these
pillows out the way it say. Let's going to a render view. And with this one, you'll
A U, smart UV project, wrap, and then set
our TD to 512, and then we'll add the
marble white to this one. Then later, I might actually find some Greek text
to use as a trim, hopefully, or we just add a
pattern that we got already. There is our door and door frame and door
materials all sod. I'll see you in the next lesson.
31. Designing Decorative Marble Pillars with Bevels and Materials: Hello. Welcome back to stylized
Blender Free D Environment, Greek Temple and
garden workshop. Okay, so with the door and the door frame,
I've renamed them. So this is door
left. We got door right and then door frame, and then I put them
into a door collection. Now I'm going to start with the pillars on the corner here. So I'm going to chef
right click here. And let's add a cube. Now with this cube, I'm going
to put it all to 1 meter. And then trollle apply scale. Let's bring this onto the floor. I'm going to bring this
face down to around about. Let's get our human reference. Just above his foot to
where his ankle would be. And there with this, I'm
going to put a edge loop. And I'm going to
extrude these along the normals a bit and
then offset even. Now I want this outer face
loop to be like 1 meter wide. So we're going to have to change the X and Y back to 1 meter. Then we can make this, just range it off to
0.15 or something, put it back onto the floor, control a apply scale. Now I want to add a cylinder. I'll add a cylinder. I'm going to change the vertices to 20, then let's bring this up
and snap it to this face. Now in edit mode, I'm
going to go S, shift Z. Scale it in. Let's go nice and thin actually
to arrange it here. Now let's add an edge loop
here and bring it down a bit. Let's add another
one. Now let's add. Well, let's move this face up. So what we want to do first is I'm going to
duplicate this piece with Shift D and then hit
RX 180 to flip it over, and then I'm going to snap
it upwards to this face. Now with this face
on the cylinder, we can snap it to here. Okay, so now I'm going to
select this face loop, and I'm going to extrude along normals until we get to
towards where the edges. Now with this piece, we can move this edge up and then we'll
move this edge up. And what could we
do with this edge? So if we select all of these and then extrude the
long normals, we'll get this. Now we can press A and then S shifts to
bring it all in a bit. Now with this edge,
we can bring this up, so it's more more like an angle. Now let's do the top. So let's add an edge loop in here at the top. Now, what can we do? Let's have a look
at the reference. We got this kind of shape here, so we'll do something similar.
Let's go back to Blender. And I'm going to
select this face loop, extrude the long
normals like this, and we can select this edge
loop here, bring it down. Now, with this piece here, I might just go into front view, going into Edit mode,
select everything S, shift C, and bring it closer in. Now we need to get
the right kind of thickness for everything,
so it all looks nice. So I'm going to select this edge loop and
bring it a bit further up. Maybe we can bring these in with Alter S. Let's check the
underneath faces a sec. So I'm going to select
these edges and Control X. So we just have a
flat face here, and we'll do the same
with the top. Control X. Now, let's select
these face loops and S shiftZ, we'll
bring those in a bit. This one, we can maybe
bring it down to here. We'll bring this one
a bit further down. Maybe we should have
it all a bit smaller. So we'll select all these edges and bring them down like this. With the top, we could maybe
bring this fervor down, and then I'll add an edge here, control B, and then I will extrude these along
normals, bring them in. Now maybe we could have
some curves on these edges, so we'll bevel these
to about here and then increase the segments.
Three or four should do. Now, I'm going to bring this edge down a bit
further so it's a bit thicker. And I might bring it all down. So I'm going to go into
wireframe and select all of these vertices except the top one and just bring
those down a bit. He's just looking. It still
looks a bit too thin. So what we could do is
just select everything. S, shift C, make
it a bit thicker. Let's bring it to the
edge of this piece. So nice and thick. And we will have to delete this and just
duplicate this again. Should we make
this a bit bigger? I feel like it's a
bit too thin, maybe. Yeah, so let's
select it S Shift C. And what I might
do is I'll select this face loop here
and bring this down, so it's a bit thicker like this. Right now, let's
duplicate X 180, and then we'll bring it
up to the top face here. Now I'm going to
select everything, Control J to join it. Right click, Shade Smooth, and then let's add
our bevel modifier. Let's put it to 0.015 and then
shading to harden normals. Now we can see here we need
to bring this one down a bit, so the bevel snaps into place. Let's have a look
at the top here. I'm going to play around
with this bevel amount. Okay, so what I
will do here is I'm going to select all of these
edge loops and Control X. So we have this, and I'm
going to bring one back, scale it up a bit until we have a nice kind
of looking bevel. Might have to bring
this up, maybe bring this face loop up a bit
to make it a bit thicker. I think just like this
looks a lot nicer. Yeah, we'll go with
that maybe we bring the stain a bit.
That still snaps. So Am I happy with this shape? It looks a bit bigger on the
top than it is down here. So I'm going to select in WY frame mode
all of these verses. We don't want the top piece. So what we could do is I'm going to hit L on this top piece and
just hide it at the way sec. And then I'll select these and then S C to bring
it in a tiny bit. So the top is thinner
than the bottom. Now, how does this
look? I'm going to select everything bring everything back.
Select everything. S shift C will make
it a bit thicker. Like so. Now with this, we can select all of this,
S shift C and bring it in. Maybe a bit bigger
than that to here. How is this looking?
Can we bring this edge down a bit
further with Snapping? What if we mark it sharp?
How does that look? We could get away
with that, yeah. Now what we could do also
is bring this edge down. Yeah, actually, we
can remove this sharp clear sharp here. And if we bring this
edge down on the Z, it should snap. There we go. Now, I want to bring this
face loop down a bit further, just so it looks
a bit more even. And I'm going to select all of these face loops on the bevel we did and bring those down a bit. So we have a matching thickness on either side of
this piece here. And then, Hey fire, can
we bring this down? No, we'll keep it there
till where it snaps. Then you can experiment
with this piece. And now with this, we can go into Edit mode, U smart UV project and wrap, select all the islands
and set TD to 512. Now with this, I'm going
to add the marble white. Let's ad marble white. Let's
go into rendered view. See how it is. Okay, so we'll let it render a bit and see how these
edges are looking. Now, what I'm going to do
is add an edge loop here, and I'm going to go to
around about just above where this piece is here and I'm going to
control be at bevel, just one segment like this. I'm going to put it just above this piece and then
extrud on long normals, a little bit and offset even. And then I'm going to
re unwrap it and then set TD. Now we have this piece. What I might do is
add another material, and we'll choose
the marble white, and then we'll click this button to make
it a new material. I'm going to assign it
to this face loop here. Click Assign. Now,
I might actually bring this face loop down a
bit, so it's a bit thinner. Now I'm going to re
unwrap it, set TD. And with the marble white one, we'll rename this to marble red. And let's make this
like a red color. So where is E Color information. So we want to go to here. Now, let's try this one here. So if we choose red here. We don't see anything happening. I wonder why. Is there
any different story? Let's go to material preview. There is a bit of a difference. It's just not a lot. You bring this down a tiny bit. I'm going to preview this a sec. So it's adding red, but something
else is happening here. So what's over here? This
is the gradient texture. So this might be what
we need to adjust. I'm going to bring
back the material and then what we adjust
these colors here? So what if we put a red here? Yeah, okay. Let's go
back to render view. Let's choose some red colors. So go like a pinkish color here and then more of a saturated
red at the bottom. Now, I'm not sure
about this transition between the two materials. So what we could do here add an edge loop here
maybe and then select this. What I'll do with this
because it's quite close to the corner is I'll shift D and then extrude
these along normals, so they're separate
from the pillar. And then I can hit
Control plus on the number pad to
expand your selection. Then we can just hit Smart UV project unwrap and then set TD. That's looking quite nice. Okay, maybe we should have it's a marble
white does that look. Yeah, we'll have
marble white on it. And maybe we could also bring this face loop up so it matches this piece a bit more.
So it's like this. There we go. Now
what's going on. Is this the ambient
collusion probably? So if we move it over
here, it's like, yeah, the ambient clusion making it a bit darker,
closer to the roof. Anyway, I'm going to let's
go back to solid views. And we can just delete these. We don't need these now. Are we happy with this
thickness of this? We could. Are these all joined? Yeah, I'm going to just select
these S shifts a tiny bit. Then I think I'm happy
with this thickness. I'm going to bring
it over on the X. And let's go to the front view. I'm going to bring it
so this line edges, lines up with the edge here,
so to about here, I think. Now we can bring this forward. And let's have a look. I want this to be in the middle here. And let's double
check on the inside. We have this poking through, but we can get to that later if you're doing
like an interior. And how far do we
want it to go in. We go to about here. It's a bit too wide on the base. So I'll just bring it to here. I think that will be okay. Now we can op D Y, bring one to this edge, and make sure it's
close to the edges. So GY over here. I'm going to select
both of these. Op D X, bring it to this edge. Bring it to the edge here. Now, let's have a look
in rendered mode. How does this look on the top? So these are overlapping here, so let's move them back, so it's lined up with this. I think they'll look a lot cleaner like that.
It's a rendered view. Now we have this. Now,
we need to rename these. So I'm going to
select all these and select this one last because
this was our main one. And then every batchyname typed a set name new
I'm going to call this Temple underscore Hill I'm going to do underscore A because we'll have
two types of pillars. Is that okay? Then M, and we'll just move this
into our pillars collection. Yeah, there's our
first set of pillars. The next pillars, we'll do a lot later on because it'll have
a more complicated shape. But I think next we can get
to work on our walls here. I will see you in
the next lesson.
32. Adding Wall Profiles and Fixing Geometry with Bevel Modifiers: Hello. Welcome back to stylized
Blender Free D Environment, Greek Temple and
garden Workshop. All right. So before
we get to the walls, I'm just going to zoom
in on the doors sec. And where we create
the door frame. The sides of the doors are now like inside the door frame. So I'm going to select both
of these and just make sure we're on median point and
just scale it in on the X. And then we could scale
it down on the Z as well. So I'm going to shift right
click from my cursor here, and choose really cursor
and then scale it on the Z. Then if you're going
to rendered view, I'm going to make
a little change to this front design here, so selected them both. I'm going to select these faces, and let's inset them. Then I'm going to bring them
forward on the Y a bit. And then I'm going
to Inset again, and then just bring
it back on the Y. Just until we get this
little shape in the middle. This little square kind
of ridge going along, I think it makes it look
a little bit nicer. Okay, back in the solid op. Let's start on these walls. So I'm going to move these
out of the way a bit, and let's choose our
walls and hit Alt G. I'm going to move these
out the way a bit more. Just move these out,
spread them out. This a little bit of a gap in between so
we can get at them. So we're going to select them
all and go into edit mode, and we're going to put
in some edge loops. So it's in the middle. Now we have to double check. Now, the loop isn't going
all the way around on this, which means there's a face
that we have to get rid of. And I believe it's in
the middle for me. So I'm going to hide
these out the way. And there's a face here.
I'm going to delete this. And there we can put
edge loop in the middle. It's probably the same
with these ones as well. So you're going to hide
these there's a face here. Yep. You can get rid of this edge loop
and put a new one in. Put this one, are
these faces, right? There's one there. Might be another one. Yeah, there's
one there as well. Now, I'm going to select all of these edge loops
on the front view, let's bring it up a
little bit like this. I'm going to go into
X ray view up here, and I'm going to select all of these bottom faces and
hit Y and then hit H. So now we need to
fill in these faces. So I'm going to select the short edges
here and just hit F on them and then fill in
this middle face here, and the same with these ones. Now, I'm going to
select the edges, but we don't want to select these side edges
where they connect. We just want the ones
that are that we can see. Mostly these long edges here. All of these on this one. Okay. Now we're
going to bevel them. Hit Control B. We'll
bring in a bevel. And then let's check out scale. Yeah, 111, yeah, we're good. Okay, so I'm going to undo that. I want that little
menu down here. So let's add some segments,
maybe about four. And then we want it
super lip still. I'm going to just change
the profile weight so it's like curves
inwards like this. Now we can hit Alt
deselect everything. Got to front view. Now we
want to hide the top faces. So let's select all of these. Hits then we'll bevel
these edges again. So grab these long edges here. Now, with these ones, we want to fill in those
faces, actually, first. My bad. So we want
to fill them in. Now, we bevel all the edges. So grab all of these. The reason we're doing all of these at the same
time is so they actually match with the same bevel when they're
next to each other. So I'm going to hit Control
B, bring this in a bit. And I'm just going to
change the segments to one on the bottom one. So segment to one, play with the whip a little bit. We can hit Alt H and
see how that looks. Do we need bevels on
these? I think we do. So let's add the bevel modifier. Amount to 0.015 should
do shading harder nulls, and then we want to select
all of our walls up here. So let's close these
elections that we don't need. Lick walls, select objects. Now we can Control L, copy that modifier across. So now they all have bevels. Last thing we need to
do is select them all, go into Edit mode, U, smart UV project and wrap. Select the islands, and
then set TD to 512. And then we will add our
wall damaged material. So marble wall damaged, and then we can hit Control
L and Link materials. And let's go into rendered view. There we go. There's our walls. It's getting nice and close. Now, if you wanted,
you could maybe have separate materials
for the top and bottom. Do kind of want to keep the wall damage on the top, though. So what I might do instead
is with the railings. Let's go to with
our main railing. It's over here, so
we'll select this one. And let's just get rid of the wall damage and just
have marble white all over. I think that looks a lot nicer
in contrast to the wall. Nice and easy walls. In the next lesson, we could
probably make some benches. We need to make some
benches and then the flower vases
at the front here. Then we need to do the pillars that go round on the grass, so we'll get to
those soon as well. I soon in the next lesson.
33. Building and Placing Stylized Marble Benches with Mirror Modifiers: Hello. Welcome back to stylized
Blender Fred environment, Greek Temple and
garden workshop. Alright, so let's make a bench. So I'm going to move these
walls out of our way, Shift S cursor to world origin. I'm going to grab
our human reference, hit Al G, move him over a bit. Now let's add a cube. Now with this, 2 meters
on the X is fine. So I'm going to scale it
down on the Z and on the Y, Now, with this, let's
get it up here, where his knees are. Now, I'm going to add
an edge loop here. And let's select this face loop and extrude along normals a
little bit and offset even. Now I'm going to select
this edge loop here. Hit Control B to bevel, and let's add some segments. Let's say, four segments, I'm going to have the pl
shape 2.5 now with this, we can select this face
and extrude it upwards. Now I might bring this vase up a tiny bit and this one maybe down a little bit. I'll just leave it with it. Now I will add another
cube and scale this in and I'm going to snap
it up to the bottom face. With snap it up. So the front view. Might bring this down a little bit lower. Now with this, we want to
get it down to the ground, and then we want to
bring this vase up here. Now let's bring him
over to the side. And this might need to let's
go on to medium point. Scale it on the exit a little
bit, make it a bit thin up. I'm going to add an edge
loop around about by here, and then another one
in the middle here. I'm going to select
both of these face loops strewed along normals and then select this face loop strewed
along normals. Now I'm going to
add an edge loop here and then scale it in. Like this, and then we can bevel this edge to get a nice
curve in the middle there. Now I'm going to add a
mirror modifier to this. So Mirror X, and
then for the object, I'm going to choose
this bench here, and then we can
apply that mirror. Now we can join all of
these together, Control J. Now, I'm going to hit
Control A or transforms, so the origin is like the floor. Now we can right
click Shade Smooth and add the bevel modifier, amount to 0.01, shading
harder normals. And here is our bench. So let's U SmitUBPject and wrap, set the TD to 512, with this, we can add
the marble white. There we go, rendered view. There's a bench. Nice and easy. Now, I might actually I might inset this top face a bit and then just
bring it up on the Z. And maybe if we mark
it sharp as well. Mark sharp? How does this look? I might bring it up a bit more. And then I I might bring
this face loop out, so I'm going to hit SX, bring it this way and then SY. Bring it this way. And then we can bring this
face down a bit. Might have to scale it up a bit. So we just have a little bit of a more interesting
shape on the top. Scale it on the X
a little bit more. Scale it on the Y till we get, kind of sharp edge here.
And how does that look? Yeah, cool. Now
we can hit F two, rename this to bench. And hit M and New collection, we'll call this props. Now we can this aside, we'll hit Alt D to
duplicate an instance, and then Alt G. We'll
go to grid Snapping. Actually, we don't really need grid Snapping
for the bench. We can just place these
in wherever we want. So I'm going to go
to face Snapping and just snap it
to this face here. Go to the top view.
We'll have a bench here. And this is where you can just kind of do what you want now. Just put it wherever you want, put one maybe like
here. I'll D Y. Maybe if we go up
here like this, and then I'll DY,
I'll have one here. I'll DX, have them over here. Bring this to the
middle a bit more. It's like in the
middle of the temple. You could have maybe
just have one by here. And then I'll D Z 90. We'll have some I think I do. Okay. Here is our benches. And the next lesson, we'll do our little flower pots that could go at the
front of the temple. I'll see you in the next lesson.
34. Modeling and Texturing Realistic Flower Pots: Hello. Welcome back to stylized
Blender Fred environment, Greek Temple and
garden workshop. All right, so let's
start our flower pots. So we shall add as I'm
going to start with a cube. We'll start with the base first. Now, let's bring
this to 1 meter, and we will apply the scale. And I'm going to bring
this up to the floor. Let's grab this face.
We'll bring it down a bit. Now we want to add
an edge loop in the middle or Control
B to bevel this just with one segment like this, and we will extrude the long
normals, bring it inwards. And then I will insert this top vase and just
bring it up a tiny bit. Okay. Now, let's add a cylinder. So either a cylinder,
let's go four at 24. Now with this,
let's scale it in. Let's bring it up. Let's
snap it to this vase here. And we want to have
it a bit wider. And then we'll bring this up to round about this 1
meter mark, I think. On the reference, it goes
all the way up to his head. It might be a bit too
big, thinking back, but yeah, we'll just go to, like, his neck area, and
have a big flower pot. Now we want to add
some edge loops. So we'll have one
in the middle here, and then we want
one here as well. Now, let's first scale this bottom one in
to range about here. And I'm going to add
an edge loop here. I'm going to hit GG
to slide it down and, like, straighten this
bottom out a bit. Now, with this, let's bring
it nice and thin, actually, and we can bevel this to get, like, a rounder shape. We might even have to
scale it even more, really small and then
bevel it or widen it out. Yeah. So I'll go to, like, this size, and we can add, like, another Edge loop
in here and, like, bring it down on the Z and
go to this kind of shape. I'm trying to get the
same shape I made before, but I find it so hard to
get the exact same shape. So I might bring
this down a bit. A you know, I'll leave
that where it is. Now we want to make
this a bit wider. And we can bevel this
edge to get a nice around middle like this. Now I'm also going to have an edge loop
in here at the top. I'm going to bring
this face up a bit. I'm going to bring this
up like this and then bring this edge loop
up a bit as well. I'm going to, let's extrude
normals on this face loop. And let's bevel
these edges here. So these edges we'll add a bevel it nice and
round like that. Now, we could also I'm going to bring this
up a bit more and like, add an edge loop here because
I don't want it to be, like, connected to this
bottom piece here. So I want to extrude these
along normals and I'll bring it down on the Z. I'm just going to add a quick bevel
to this so we can check. So add a bevel. Yeah,
this looks a bit tight. So we shade that smoothes. So I'm going I'm going to delete these
faces that we extruded. And we can fix this by clicking these edges and just going
in bridge edge loops. And I'm going to hit
Shift D to separate them, and then we'll extrude
these faces along normals, bring it down. Just having it separate, it
prevents the beble from, like, going all weird. Maybe we could build
these edges a little bit, bring it down on the S. So we have this kind
of shape going on. With this, we can, inset it and then just like
extrude it down. And then we can hit Y on this face here and
then bring it up, and this will be like with dirt for the flowers to go onto. Now let's play around with
whatever's going on down here. So I'm going to add, like,
a small edge loop here, and we can extrude this along normals like this and
then bevel these edges. Like that. Cool. Now I'm also going to
let's extrude these two. Should we go with
these? Yeah, right. Extrude along normals. And then we will select this edge loop and scale
it out a bit like this. And then we can bevel probably
all three of them, here. So we got that kind
of range shape? No. For these edges here, I have a kind of interesting
kind of shape. So what we want to
do is we want to select every other
one like this. So just keep on going
around and selecting these And then one more. Okay, now, I'm going to
hit Alt S to extrude to scale along the normals and see what kind of effects we get. Okay, this is
looking a bit sharp. I'm not sure if I like this. So I might actually,
like, separate. So let's undo that for now. I'm going to, like,
select all of these faces and then hit Y to, like, separate them
off, like this. And then what we can do here is what we I'm just going to
test the seg if we like, scale these in, and then we
were to bevel these edges. We get this kind of
curve shape going on. Now, we might have to play around with the angle
on the bevel, maybe. No. Oh, I know what we could do. We could say we had one, we'll have one
edge in the middle here, and then just, like, bevel these outward
edges like this. So they're all smooth. I don't like how the bevels
looking at the moment, so let's have our
flat faces back. Alright. So let's
select every other one, and we'll try and get
that shape again. We might have to go
into the limit method, weight for this object if I can't get it right
with this bevel. Okay, so we want
this kind of shape, and now we want it to be we want these like outer
edges to be smooth. So select all of these
and, like, add a bevel. And let's bring the
segments down to just three like this
and get it like this. Okay. So I'm going to select
this edge loop. Let's hit S Z zero to straighten
it. No, don't do that. Let's scale it out a bit and then scale
this one out a bit. So it's like a
smoother transition going down, if that makes sense. Let's set this out
like this bottom edge. We'll move this down on the
Z. So it's like inside. Now, we might have to
select this edge loop here, and we can press ES and
scale it inwards like this. And then with this
top edge as well. So we'll select the edge
loop up here, move it up. Actually, what we could
do move it up a tiny bit, and we'll select this
inner edge here, ES, scale it inwards. So it's like inside.
Close any caps. Okay, this is a bit too tall. So why if we just scale
it on the Z a bit? Like this? Yeah, cool. Now, I don't like
how sharp this edge. So maybe if we just dissolve this edge and dissolve this edge,
what do we get? Okay, we can put an edge here, S zero, straighten it.
While we scale it in. Scale it in and then
bevel it like this. So it's like, nice and smooth. All right, let's play
with this angle. Yeah, let's bring the angle. Okay. So let's change the
angle method to weight. And now we need to choose
we want our bevels. So we want this edge loop. We'll change this to one. Now we can have Mm. We'll choose this like
inner corner edge here. Change this to one. Here we start looking.
Change back to zero. Yeah, we'll we'll mark sharp on this. We'll
mark that one sharp. What else? What if we were to grab this edge here
and hit Control X, we could have a little
crevice in the middle there. And we'll put the bevel
weight on this edge then. So just one. How does that look? Maybe if we just control
X, move this down a bit. I think that'll do.
We don't have to overcomplicate things
with this, really. All right? I will add
I'll mark this one sharp. I mark sharp here. Now we could mark these
sharp, so mark sharp. Yeah, I think that looks nicer. So we'll select all
of these edges, and we'll mark all of
these sharp in the middle. It's always a bit complicated when you're
messing with, like, trying to get the normals to look right on, like bent faces. Okay, how many more?
A couple of more. Okay, right. Right
click Mac Sharp. Yeah, it's looking nicer. Now let's play around
with the shape over here. We could try making the
sharp, see what we get. Yeah, co mark the sharp. Now, we could have an
edge loop in here maybe, and we can extrude this face loop along normals,
bring it in like this. And I will select
these edges and put the bevel weight to one.
How is this looking? Right now, we need to select these edges on the inside
and mark these sharp. Now, the shading by
here is horrible. So what's going on here? This is bevel weight one. Where have you put this to zero? Mmm. I'm gonna hit GG
and just slide it up like this and play
with the bevel weight, see Oh, we can, just slide it and have more
control over the bevel. So I have it like
0.25 there. Okay. Now here we want this
bevel weight to be one. Or you can just play around and have it like tighter
if you want. And we could put an edge
loop in here, bevel this. Come on. Here we go and then
extrude the long normals. Like this. And then
we will select these inner edges
and make sharp. And then these edges, we will splay the bubble weight. Like so. Okay. So there is our vase. Let's add bevel to this. So I'll just use
the modifier Bevel 0.01, shading harder normals. Now, this can be, so we need to apply the
scale on the vase here. So apply scale. Everything looks
okay. Okay, cool. So we'll have to rename
this to flour part. Flow apart, underscore base. And then this one
could be flow apart. And what we could do is if I was going to appear
into it, but I won't bother. But we can select both of
these AU, SmiUPject and wrap. Select their islands. We'll go with 512. Okay, so what
material do we want? The bottom one, I'm going to go with the marble white material. And then the flower pot can be our original clay material. So where is it? I might
have to append it. So I'll go to file, append, find the resource file
material and search clay. Oh, there it is. Clay. Okay, and apply it to our flower pot. Okay, going to RenderView. And there is our clay. Now we can also add Did we bring in our dirt?
I don't think we did. Okay, so file, append. Let's find our dirt material
and add it to here dirt. We'll select this
vase and a sign. Yeah, cool. There we go.
There is our flower pot. Now, we can let's go
back to solid view. We'll select both of these. Act's the top view, and we'll move it over here. So I'll go GY, GX. And then I'll DX. I'll
have one over here. Awesome. Now, these might
be a bit too small, so we could just scale it up. Let's go to medium point
nope individual origins. Okay, let's just do these
ones. We'll delete these. We'll select both of
these and then go to medium point and we'll
just scale this up. It doesn't really
matter too much. There we go. And Olde X. There we go. There
is our flower pots. Let's have a look
and rendered view. Okay, so in the next lesson, I suppose we should start on the pillars that goes around
the back of the temple. I'll see you in the next lesson.
35. Modeling and Texturing Realistic Flower Pots: Part 2 : Hello. Welcome back to stylized
Blender Fred environment, Greek temple and
garden workshop. Alright, so let's get to work
on the background pillars. So to save ourselves some work, I'm going to select one
of these pillars and shifty and OG we'll just use this and
change what we have. Now, we need to select our
flower pot and the base. And I'm going to add all of these to the props collection. So that's all sorted. These can go over here now. Now with this, I'm
going to first, let's bring this up
to the floor and then control a ball transforms. Now, in wireframe, I'm going to select these faces here and
just bring them up to, like, the top then I'm going to select all of these faces, and
I'm going to hit Y. Now I'm going to
I'm going to select one and then miss two
and then select one. So miss two, select one,
just all the way around. Actually, we don't
have the right number. So instead, what I will do is I will select I'll
select the front two. No way, yeah. So I'll select
I'll select these two. And then I'll select these two. Then we can select these two. And then we'll select these two. Yeah, so it goes like, two, one, two, one, two, like
deselected sense. So it's like even
all the way around. Now with this, I'm
going to hit S shift C, and let's bring them
in to about here. We can select all these,
like, sharp edges here. And this belves give us some segments to make
it nice and smooth. So now we have this
kind of shape going on. No, this isn't this is
looking a bit sharp here. So let's undo that, like I said. We might need even
more segments. Yeah, there we go. Okay, this is still looking a bit I want this to
be a bit smoother. What I might be the bevel angle. Let's bring the angle. No, we won't mess with that.
Okay. I'm going to undo it and just add a bigger bevel,
so it's, like, wider. Add some more segments. So it's nice and round. There we go. Now with this, we
can select all of these faces and hit S shift Z. Let's add some thickness to it. Okay, now we can I'll
select these edges, like these faces here, and I'm actually going to
delete these faces. I don't know why
they're there. And I'm going to select this edge loop and just scale it in like so. And the same with this edge
loop here, scale it in. And we might need to
bring this up into here. Okay, so now we
need to add a cube. And we're going to
keep this at 2 meters, and we're going to
bring it all the way up and snap it to this top face. Now we can select
these two edges, and I'm going to let's
move this stain a bit. I'm going to bevel these edges. And I'm going to choose custom on the profile
type and a preset. I'm going to choose
cornice molding. And I'm going to
increase the segments to the minimum amount we need to get the shape that we want. So it's like, nice and smooth. I think it's 19. Yeah, I'm going to go with 19 on this and then just
increase the width. To about here, maybe a little bit more we
could get away with. Actually, I want
it to make sense. I don't want it to be, like, top heavy, you know,
so we might go to, like, let's go to like
here. Yeah, that will do. And I'm going to
bring this vase down. And then I'm going to
join this object to the pillar. George, yeah. Court. Now we might need to
shade smooth on this, yeah. So sorted. Now we can
add an array modifier. And so it should
match up perfectly, if this is 2 meters across, and by default, it's
perfectly modular. So now we can just add
more to the array. Now, what we can do is first, let's rename this to pillar, underscore array,
I guess, we'll do. Now we can add it to our scene. So I'm going to
this first Alt D. Yeah, we OCD and
rotate this by -90. And let's move it
over here a bit. Now, let's add a simple
t four modifier. Now with this, we can
add some bend to it. So I'm going to choose
bend, and then axis is Z. Yep. Now with this, we
can play arranged. So I'm going to
place it over here. I'm going to increase the
count to maybe like ten, maybe a bit more to 13. Yeah. And I might actually
lower this to 40 degrees. I'm just going to place
it nice and close to the wall here with the top view, and I'll just get this
centered on the Y. And then I want one
at the back here, but we're going to need
more room on the grass. So what we will do is select
we want all of these pieces. So we want to move all of these walls
forward by 2 meters. So let's select all of these. We want this one, this one. And is that everything? Nope. Okay. Yeah, so we want all
of these G four, I believe, GY four. Then we want to grab this
one lty four, Aldi y four. And then the same
with the columns. And over this side,
we'll fix these. So Aldey four, and then the railings What
happened there, GY, four. Yeah, okay. D y four. Now, with the grass, we want to select these
edges and then go GY four. Now, we're missing. Are
we missing something? No, I think that's fine. Okay, I'm going to reunrap this, so top view, you
project from view. And then what was
our textil density? Was it one, two,
eight? I believe so. Yeah, one, two, eight, right. So now that we have
room, I'm going to op D on these pillars, and let's clear the rotation. Z 180. Yeah, we want to go this way. I'm going to change
the angle back to 45, but then increase the count. So it goes all the
way along here. Now we want to place
this somewhere where it looks nice and
pleasing to the eye. Going to go nice and close to
the wall. Come back, right? GY. There we go. Here's this looking.
It's going to top view. I want this rotation to be nice. We go here and then GX. Have it nice and centered. Was throwing me off here. Okay, so there's more space on this side of the
temple with the grass. So it's like messing
up the symmetry a bit, but we'll just kind of eyeball. Yeah. Okay, cool. That's fine. Now, we need to add a material, so we can select this piece and smart UV project it and
then set the TD to 512. And going too the materials, we'll need to remove all of these and just
keep the marble white. And we can add all of these
to our pillars collection. So pillars, this check
it out in rendered view. Beautiful. Okay. The next lesson, we will start the temple pillars.
I'll see you then.
36. Creating Spiral Temple Pillars with Curve Objects: Hello. Welcome back to stylized
Blender Free D environment, Greek Temple and
garden workshop. Okay, so now let's start
with the temple pillars. So let's move all of
these out the way. And we're going to use our
extra curve objects add on. So if we shift A under curve, you should see spirals, and we want logarithmic. Now, with this, we want
the turns to be three, and I'm going to put
the steps to 12. I'm going to put the
radius to 0.0 0.03, maybe 0.003, and the
expansion to 0.1 or 1.1. Yeah, no, 0.1. Now let's zoom in on this. Yeah, this is what
we want. Yeah. So turns free steps 12, radius point I add 0.003, but it only shows 0.00 there, and expansion to 0.1. We want direction
to be clockwise, and we want the rotation
on the Z to be 90. Yeah, there we go. Now we can under the
curve properties, we can go under geometry and
we can extrude this a bit. Now, we need to rotate this. So go into Edit mode and X 90. It's going to front view.
Now we can adjust extrusion. So we have something like this. Now I'm going to
convert this to a mesh, but I might make it a
little bit thicker first. So where is our curve extrude. Make it a bit thicker like this. Now let's convert to object. Convert to mesh and then we
want to flip these normals. So the steps was 12. So we want to add a circle. So let's add the mesh circle and choose the vertices to 12. And then Rx 90. Now, where is our circle, right? Let's scale this down. And we want to match the vertic. So this top one is
much into this corner, so I'm going to rotate this and scale it until
those vertices are touching. Now in Edit mode, I'm going
to select everything, press E, and then S, scale it in until it
reaches this edge here. So now let's going into
Xray. Now we have this. So we have this kind of
curve shape going on here, and we need to join
the vertices up. So in object mode, I'm going to join these with Control J back into Edit mode, and we can start
merging vertices. So I'm going to merge
these, so at last. We're going to just merge them, so we just keep this
outwards curve. So we want to do these No, I might undo this and
let's double check. I might merge this one to I'm going to add an edge
loop into this face here. I'm going to move this
up to around about here and I'm going to merge
this one to this one. So merge at last. I'll
have this like this. Okay. Now, I might actually
put an edge loop in here as well and then move this
over here a bit with GG. So we have this triangle here. Now this can get
a bit confusing. So now we want to merge this inside circle to the
disease going around here. I'm going to merge this to this and then these
to the middle circle. It's going to look
very messy at first, but hopefully it doesn't
get too confusing. We want this one to this
one, merge at last. Now here we want to C
we dissolve this edge? No, we can't. We need that. So I'm going to
delete this edge, and now we can fill in this phase So now let's run an edge loop
through here, right? So what's going on here? So we have some
overlapping faces. So I'm going to hide this face. Yeah. So let's just
delete these faces. And let's double check. Okay, that should be okay. So now we can fill
in this face here. So if we put an edge loop,
we have this going on. So, if you have an edge loop going all the way around,
then it should be fine. That was a bit complicated.
Right. Okay. So I'm going to select everything
and go SY zero. Now we can in edit mode,
I'm going to move this. Well, we need let's
make it bigger. So round about this
size should be okay. And I'm going to move it
on the X in edit mode. So rain at here. And I'm going to move this
edge up a bit. So that it's straight. And now let's add
a mirror modifier. Now we need to control
A all transforms. Now let's let's enable
clipping on the mirror. And with this edge, I'm going to just bring it across on the X, like so, and I'm going to
extrude this edge on the X. Now we can start by we can
fill in this pace here, and then I'm going to select this edge and then just
hit F all the way around. Until we get to this point. Now, from here,
we're going to need an edge loop, bring it across, and then we can hit F,
add another edge loop, bring it across,
and then we can hit F and one more to here. Let's give it some
space to about here, and then we can
hit F and then F. Now we can select these faces
and this triangle here, and we can extrude
this in on the Y. Then we can select
this outer edge and extrude this on the Y. Let's turn off X ray. So now we have this
kind of shape going on. We can fill in the circle here. Now, we could add a
subdivision surface modifier. That gives us a
nice smooth shape. Now, what's going on
with the shading here? You might have to Shade Smooth? Yeah, okay, shade smooth. Now we need to add in some
edge loops to kind of, like, tighten up these, like,
corners and stuff. So we can add an edge loop here, maybe go to two, and just
place that in by there. I'm going to add an edge
loop here and like, drag it towards the edge, and it'll kind of tighten it up, and then we can put one along here and move it
towards the edge. It creates like a
tighter edge here. You're basically controlling the curvature with
some edge loops. Now where else do we need? We could put one up
here move this up, so we could have one here. Place one here by there. Now we can put some edge loops in by here and tighten
this up a bit. And how is that looking?
Yeah, that's looking nice. Cool. Now we can well,
what should we do? What if we were to
select this edge here and I'll just
select this bottom edge, and I'm going to go into
proportional editing. And let's try moving this up. Let's adjust our radius. Like, I'm just going to
move this up for now, and then I'm going
to apply our mirror. So let's apply the mirror. Now, let's select this edge loop in the middle and give this a bevel and some
segments, nice and wide. So we have this kind of shape. Nice. Now, we could select this
edge loop at the back, and then lt Alt S, turn off proportional edge alts, bring it in a tiny bit. I don't like how
this edge is moving. So we undo that and
scale it on the S, scale it on the Z, just
to bring it in a bit. M I know what we need
to do. We'll undo that. And we'll just ES
scale it in a bit, and then we will scale it
a little bit on the Z. S. I want to bring it so it's not like poking
out at the bottom. Then we will just E Y
and then bring this out. Now we can add an edge loop here and bring this
towards the corner. Tighten that up. Nice. Now, in Edit mode, I'm going to bring
this forward on the Y and let's add
another mirror. We might need to put this
above the subdivision surface, and then we want this on the Y. Now with this, we can
just move it forward. Let's turn on clipping.
Bring it forward so it connects left click and
then we can adjust our width. That should be all right. We'll sort of size out when we get the
rest of the pillar, but we'll continue this
in the next lesson.
37. Designing Greek Inspired Pillar Scroll Details: Hello. Welcome back to stylized
Blender Free D environment, Greek Temple and
garden Workshop. Alright, so I'm going to grab one of the
older pillars again, and I'm going to hit Shift
D and then Alt G. Now, let's bring this up
to around about here. Now, I'm just going to
hide this at the way. And I'm going to
select I'm going to select this as loop
and then Control plus on number P to, like, expand selection until we get these vases and
let's just delete them so we don't need these. We want this. I want to grab
that circle face there, move right in my way. Okay, let's bring back
the Greek pillar piece, and let's just scale this up until it's like a
nice kind of size. Maybe scale it on the Y. If I skip it on the Z, I don't want to do it too
much, I'll distort it. But yeah, that should be okay. Now, let's grab this edge
and just bring it up a bit. And this whole piece, I'll select with L. And I'm actually going to
rotate this, I think. So I'll flip it over, and I'll bring it down. And I'm going to
select this face, I mean, and this face
and scale it on the Y. So it's like behind
this little dip here. And I might bring this face
down, so it's like inside. And I think that's looking okay. Now, let's change
the design here. So, let's select this face loop, Control plus, and then
we can move it up. So let's move this up to just
underneath here like this. Now, let's select these faces, and let's hit Y, and we will do some
kind of design here. So what should we do? How about if we if we
select everything, and then we go to select
and then check deselect. Now we will need
to get this even. So that's looking okay. What if we S Shift Z? We need to turn off
proportional ds in S Shift Z brings in. Yeah. So what I might do is I want this to be like 11. What if we select
every other edge do we have the correct number or it's not an odd to eight? Yeah, select every
other edge and then S shifty and we'll
bring this in like this. Then we'll select
the outside edges. And we will bevel these
to make them nice and smooth like this. Now we can hit Control
plus and then S, shift Z, make it a bit thicker all the way
to the edge here. Now we can close
in the gaps here, so I'll just scale them in. We can bring this
face down a bit. Maybe we can make this even
thicker round about here. Yeah, cool. And we'll scale this edge in
this whole face edge, like a full face loop inside
here. I need to delete that. Let me let me get
inside here, right? Select this face loop.
That can be deleted. We don't need those, and now we can just select this
edge and scale it in. Okay. Now, I'm going to add two edge loops into here and I'm going to select these
face loops and hit Y, and then I'm going to
hit H. So now we can select these edges and
hit F to fill these in. I'm going to hit
AltH then with L, I'll select these two and then ShiftH and then we can
fill in these faces. So if we bring everything back, we have a nice little
groove in the middle here. Now with this, we'll have to apply the subdivision modifier. So let's do the mirror
first, apply the mirror. And with this, we
could actually select this edge loop and scale it in a tiny bit and then
give it like a bevel. Just to add some more
interesting shape to it. Kind of looks like
a scroll, you know. And then maybe scale this up a tiny bit more,
move it down. Not too far. Around about here. And we'll bring this
ace down inside. And maybe just bring it up
a tiny bit. Tiny details. They don't really
matter that much. Right. Now we can join, apply the subdivision here. Now we can join this to
This has a bevel modifier. This might screw us up a bit. So we might actually
have to apply our bevel because I don't want to go in and do
all the weights manually. So let's just apply the bevel. Yeah, we'll be fine. Now
we can join this together. And now we can A U
Smart UV project, and wrap, set the TD to 512. Now let's take off all of these materials except
for marble white. And we bought F two, Temple, underscore pillar, underscore B, we called the other
ones A, right? Now we can also hit M. Move this to the
pillars collection. Let's have a looking
rendered view. It's looking beautiful.
Now we will Alt D, and we will move
these into place. So I can just use face Snapping with this and move
it into place here, we'll move it to the edge. Let's get a closer view, right? This isn't even big enough, so let's go to edit mode, and let's scale this up so
we get the right size here. Okay. What I might do with this bottom piece is
selected with L X 180, and we can scale this up a
bit more and bring it up. Now, let's bring this and
snap it down to this face. Now let's check the top here. So we can shift right click the floor here and then
use the freed cursor. And let's going
into Edit mode A. And if we scale from the
freed cursor, we can go up. It's good to front view. We
get the right height then. There we go. Now we can delete
these placeholder ones. And this on the Y. And let's just
duplicate this across, so we'll go shifty, not shifty. We want Aldi Altex. By the OdiX and then dix. And we finally have our
pillars done. Nice. Hopefully, the spiral
was okay for you. I mean, I got a bit confused, even after watching,
like, the tutorial twice. So hopefully you guys
managed to do it. Let's have a look
in rendered view. Yeah, it's really
coming together now. Next, we can start with the little archery
here and add our ivy. I'll see you in the next lesson.
38. Building an Archway with Ivy Using Geometry Nodes: Hello. Welcome back to stylized
Blender Fred Environment, Greek Temple and
garden Workshop. Okay, so let's start with the archway next.
This one's very easy. I'm going to move this light
out of our wait a sec. And let's put a freed
cursor around here, and good to add mesh, and we'll choose a cylinder. And for the vertices,
I'm going to choose 18 and then hit Y 90, and we will bring this up. Now, let's grab our
human reference, and we'll bring him over. And let's turn him around,
put him in the middle here. With this, we can
bring this up a bit. And I'm going to
delete these faces. And then we want to delete
the bottom half faces. So we're left with
this kind of shape. And now we can
select these edges and extrude them
down to the floor. And let's scale this on
the X, just a little bit. Maybe a little bit more. I'll go to, like,
this kind of size. And with this, I'm going to duplicate it and then just
hide it out the way for now. So with this piece,
I'm going to add an edge loop and then
Control B to bevel, and we'll go to around
about this thickness. Let's delete those faces. Now let's bring the
other piece back. And I'm going to hide
the first piece. So we just have this. With these faces,
I'm going to add three edge loops here and
free edge loops here. And then I'm going to bell
these edges so that they're the same kind of width as the other faces going
around on the top here. So now with this, we could delete
every other face. And we will delete them. And let's bring
both pieces back. So with the archway piece, I'm going to let's
add a Solidify. For the thickness,
we'll go 0.08. We want minus No, we'll go 0.08 on this one. And then on this one, we'll
add a Solidify again, and we'll go -0.08, so
it goes the other way. Okay, and there we can add
error bevels to these. So we'll add a bevel with
the bevel, we'll go to 0.02. And then shading
hardened normals. And with this piece,
we'll do the same. So Bel 0.02, and then
harden normals. Co. Now, I might make these
pieces a bit thicker, so I'll go into edit
mode and select these inside edge loops and hit SY SX and bring it into
about this thickness. Now we can apply the
solidifier on both pieces, and we can select them both. We could join them together at this point and then
go into Edit mode, AU Smart UV Project, and then hit Unwrap. And let's open up our UV editor. Now let's go into rendered view. And we might have to, let's go to File append and
bring in the wood material. So that's a material,
wood append, and let's supply
this wood material. Okay, so at the moment, it's looking pretty nice. Wood grain seems to be
all going the right way. I want the grains to be
following the longest edge. Let's go into edit mode, and let's play with
this texel density. Let's try 512, see
how that looks. His might be a bit too small. It's tiling already look. So maybe 256 with this 128. I think 128 might be
the best looking one. It avoids any repeating
patterns on the one face here. So we compare that with 256. Yeah, it still repeats. So we'll go with 128 for this
and have nice big details. And then we can hit F two,
rename this to Archway. And then we'll move this. I guess this could go into our props collection because it's just a single piece really. Then let's just make sure
we'll control all transforms, right click Set
origin to geometry. Now let's go into grid Snapping, and then we can just
move this on the grid so that it's perfectly
in the middle here. And there is our archway. Now, let's quickly
add some IV to this. We could go to File pend we want to go into
the object folder. Where is the object folder here. And we're looking for iv. Let's search ivy and we want this ivy node here.
So we hit a pend. It's going to solid view. And we'll have ivy here, and it will import
the leaf as well, because the leaf is dependent
on the geometry node. So if we click the iv and
go into the Modifiers tab, you'll see this IV
geometry nodes, and you can change the
seeds of the leaves. You can change the scale,
the scale randomness, the scale fall off,
and the density. And well as the
resolution of the stem, you don't want to go too
high with this because it'll just increase
your polycunt. But if you want more
detail, you can increase that and increase the
radius if you wanted to. But for this scene, the settingce that
you get as you employ it should
be fine for this. So you don't have to really
play around too much with it. But the way this
works is basically, you want to add you want
to add a curve object. So if we go over
here and we'll shift a curve and let's
add a Bezier curve. Actually, what we
could do actually is if we select our archway, it'll just be easier
doing it this way to get the exact shape. We can select this edge
all the way to this edge, and then shift D. So we have this shape edge here, and we can hit P
separate selection. And then with this curve, we can right click and
convert to curve here. Now with this curve, we
can add Geometry Nodes. Add modifier geometry node, and we click this, we
should find IV node. Now we are the leaves. So under collection on leaves, we'd have to click
this and click leaves, and that brings our leaves here. We might have to play
with the radius. So I don't think the
settings are the same. Let's check with this
IV node over here. Yeah, so I'm going to
select this object over here and then select
the original IV node and then hit Control L
and copy Modifiers. And then that should have
copied over the settings. But it seems to be a lot
different in comparison. What is the scale
on this object? See, this is 0.2,
this isn't uniform. So maybe if we just change
this to 0.2 0.2 0.2, we get this strange shape here. We might have to
go into edit mode and scale it up like this. But let's just undo that. We'll go back to
our uniform scale, and we'll just play with
the setens, I guess. So we could bring the scale down to about as good as 0.15. And then this radius, we
want to bring this down as well to about 0.01. And we might have to
change the density maybe Keep it at ten for now. Let's keep the tensity at ten, and we can adjust this
curve in edit mode. So we'll just bring
this down a bit. And now let's place
this into our scene here and just like
move these points to, like, shape the ivy so it's
nice and close to the actual. You might have to,
like, hit Control X on some vertices so we get
a smoother transition, and then you can
select two vertices and right click subdivide
to bring one back. And then it's just
about playing with these points until we get it
nice and close to the mesh. Make sure none of it's, like, sticking through so it's
nice and above these faces. It's hard to see the
vertices sometimes. There we go. Okay. Now let's go into rendered view of this and see
how it's looking. Yeah, we're going to have
to bump this density up. What if we were to go to 50? Then let's change the
scale randomness. Bring the scale down. Let's turn off face orientation
on the overlay. Okay. Not bad. We're getting there.
What we could do now is go into Edit mode on this and hit A and then shift
D and then move it back. And we could, just move some points, so
it's a bit different. Might need to subdivide
these vertices here. So we have a point in the middle here and play around with this and just move them around, so it looks a bit more natural. And then hit A, shifty X. Then just keep bringing it in like this and just
cover up the whole piece. Now we can hit A
again, shifty X, and just cover up the
whole archer here. Maybe shift X again. Now we can just play around with these individual pieces to get some more randomness
in the shape. Might need to move these
forward a bit like this. Okay. Self looking
rended for you. Now, we still have
a lot of gaps here, so I'm going to hit
A on everything, shifty X again, and we'll just duplicate
that one more time, move it back, and that
should be enough. Yeah, cool. And now we
can go to File append. And let's go to the
collection folder, we want to import the
grapes collection. So over here, we should
have some grapes. And with these, you
can just, you know, bring them over place them in. We'll have to scale
these down a bit. And you can just place these
in your ivy like this. Just bring them all over.
So I'll just shift select, bring them all over here, scale them down and place
these along the ivy, like so. It's going to the
top view. And we'll just place them in
line with the archway. And then we can adjust
the Z like this. And then we can
select all of these. We can hit Alt D. Move
this back in a bit. Yeah, there we go. Hit Alt D to, like, duplicate an
instance of them. So Oc D Y, bring over to this side, and then just a little
tweaks to move them in. You might want to move
it on the X as well, so they're not like symmetrical
with the other side. Like here, you could go in here, move this down, and
then just check. They're all nice and organized in a way that looks
kind of natural, you know, can rotate
them as well, get some variation
on the grapes. Cool, cool, cool. Now,
let's check in render view. Could add some more on the
top, if you wanted to. I'm going to keep
them on the side. I think that makes most
sense. Yeah, cool. There is our archery. You could play around
with set ins to get much nicer looking ivy, increase the randomness
of the scale. Change the scale here. We bring this, we want it
nice and thick. Yeah, cool. And if you wanted to make the stems look a
bit more natural, you could, like,
go into edit modes and just, like, subdivide. It becomes a lot harder to see, but you can select
these and then, like, subdivide so there's a vertice here and just add
some bend to it, you know, maybe have one coming off, like,
to the side a bit. I give that time to render. And here is our Ivy hatway. I'll see you in the next lesson.
39. Modeling a Classic Fountain Base with Bevels and Materials: Hello. Welcome back to stylized
Blender Fred Environment, Greek Temple and
garden Workshop. Alright, so now let's
start with the fountain. So before we do that, let's
select our Ivy over here. And I'm going to rename this
to Archway Underscore Ivy. And then we could put this into we could make a new collection and
put this into Ivy. And then I'm going to
hide this collection just so it's a bit more
performance friendly. So we'll disable it
with a check mag. And then with the
grapes, as well, we can turn these off.
Where is the grapes? So like this, hit the
puro key. It's here. So grapes here. These collections are both
in the walls collection. So we can click these and drag
them to scene collection. And this ivy node, as well, we will choose and
move this to ivy. Now, this should
be all organized. We can turn off leaves
and turn off grapes. Now, let's add a cylinder over
here, so choose cylinder. And for the vertices, we want this a bit more. So let's go to I think
24 should be okay. Now, let's bring out a guy over and get the
right size for this. So it's going to edit mode, and we'll scale this
up to about this size. And let's scale it on the Z, and we'll snap it
down to the face. And let's get the right height. So scrub this face and bring it down to around about
where his shins are. Now, to make our lives easier, I'm going to delete
this bottom face. Now, with this
face, we can inset it and then extrude
it down a bit. Then I'm going to hit Y on
this face to separate it out, and this can be our water. So we could actually
separate this by selection, rename this to water, and we'll just hide
it out the way. Now we're left with
a shape like this. Okay let's add an edge loop in the middle here and
Let's move it up a bit. Now let's select this
face loop and actually, before we do that, I'm going
to dissolve this edge. What we want to do is
select these faces here and then do the same
for the other sides. So we will extrude
these out along faces, Extrude along
normals, like this. That should be fine like that. I'm going to select these
faces and then hit sx zero. To straighten them
out. And then we can hit SY to straighten
them out this way as well. And we'll do the same for these. These will be SY zero, and then SX strain
it out like this. And then these will be SY, no, SX Zero, and then SY. And then SY zero SX. So now we have this
shape going on. Okay, now I might increase the thickness of
this with S Shift Z. Now we can add an
edge loop in here. We'll move it up a tiny bit. We'll select this face loop
and extrude long normals, just a little bit,
and then offset even. Now, with this face loop, we could extrude it up. So we also want to select
these faces as well. So we'll select these
and then E, bring it up. Now with this edge loop,
we'll give it a bevel. And with this bottom edge
loop, we'll give it a bevel. And then maybe we could add some segments to this to get
it, like, nice and curved. And then we could also
add a bevel on this edge. So now we have this
kind of shape. Now we could also add something more
interesting on the top. So what if we add an edge loop here and bring it in like this, and then I'll select this
face loop and these faces. Actually, what if we just keep the circle and then
we extrude this up. So now we have this
kind of shape. Now, let's right
click, Shade Smooth and add the bevel modifier. Shading harder normals,
we'll put this to 0.015. Now, what I might do is select these faces and
then hip Control plus. So we select it all the way, and we might need to
shift select these faces. And then we can go into the front view and kind of
adjust the height of this to how we want it to
be It's looking nice. And I might actually
delete these faces. So we'll delete
these on these ones. Now we can select
this outer edge loop, and I'm going to
just make it a bit taller like this. Now
let's bring this back. I'll bring it up and then snap it down to the face like here. And let's compare the size here. That looks like a
good size, yeah. So here is the start of
our base of the fountain. We hit Altage to
bring the water back. We can bring this up a bit
further. So there's our water. And with this, we can AU
Smart UV project and wrap. Let's go into rendered view. We'll choose the marble white. Marble white. Then we will set TD to 512. And let's have a look at this. Let's compare it
to the reference. Now, the shape is a bit
different to what I did before and it's a
lot thinner as well. So we were to go to Should
we adjust this shape a bit? I think this is fine, how it is. You know, what we
could experiment with is going into front view. Let's isolate it,
go into wireframe, make sure X ray is turned on. And I need to go to box
select here and then choose these bottom
faces with this, we could add the wall
damaged material. Marble wall damaged and hit the sign, and we can check now. It looks a lot nicer with two
different materials on it. There is the start of
our fountain base. Next, we'll do the middle piece that goes in the middle and then after that we'll
do the top piece. I'll see you in the next lesson.
40. Detailed Fountain Base with Bevel, Snapping, and Materials: Hello. Welcome back to stylized
Blender Fred Environment, Greek Temple and
garden workshop. Okay, so with this base, we can see at the
bottom, there's, like, a horrible little gap. So to make this a bit nicer. I'm going to isolate this.
Let's go back to solid view. And I'm going to select this inner edge around the circle and go
to Edge Snapping. And I'm going to bring this
down on the Z and snap it to this edge on the outside,
so they're the same level. Now, hopefully, if we
shift select this loop and we could try bridge edge
loops, see what happens. That seems good enough. Okay, cool. Now, we
don't really need to unwrap it because it's
going to be on the bottom, so you won't really
see this, so we could just ignore this. But it gives a nice
little better transition if we're going to propaganda. Like, it looks a lot nicer with the curve here on the bevel. Now, there's a seam here. I'm just going to ignore that.
That won't be noticeable. But we might have to adjust the. It's going to solid view.
Yeah, it's smooth here, but there's an
obvious seam here. That's okay. Now, let's
add another cylinder. So cylinder, and I'm going to
choose let's go for eight. I have a nice little lock
to go on in the middle. I'm going to hide
the water right away so we can see the ground. I'm going to snap
it down to here. We'll bring this face down. Let's have a look
at the reference. Okay, so I'm going to
scale it all on the Z, like on a shift Z,
so it locks it. Make it a bit thinner,
make this a bit higher. I'm going to bring
this guy closer. If I bring the water back, we get a better idea of how tall it will be
good to, like, here. Now I will add an edge loop here and then extrude these
faces along normals. Actually, I might bring
this face up a bit. It is a bit thicker here, add another one to about
here, and then extrude. Where do I want this extrusion? I'm going to delete
that, and I'm going to bring these faces
down a bit, actually. And then, hit S, shift Z on these faces to
make it a bit thicker here. I'll add an edge loop in here. Now this is going to mess up with the corner here
if I extrude these faces. So I'm going to shift D here, and then extrude it upwards. So that I can bevel this edge here and just give it
a nice curve here. We could also just add
something at the bottom, maybe extrude these
faces along normals. Now we will add an
edge loop up here. And I will extrude these long normals and then make sure we
have offset even, and we might need to
scale these in a bit, so I'll hit S Shift C, make it a bit thinner
actually, like that. I'm going to select
all of these faces. Then I'm going to hit
I and then I again, and then I'm going to
spring it up a bit. Now with this, we can hit Alt
S to bring it in like this. Now let's check with
the bevel because this edge here might give
us problems, but we'll see. Add the bevel modifier.
Yeah, it's okay. So we can bring this down a bit all the way to about 0.0 0.01, shading hard and normals, right click, shade smooth. Now we need to W these
faces, we'll mark sharp. And we could also mark
sharp on these edges. Yeah, that looks nicer, so we'll select these
and mark sharp on these. Right click Mac Sharp. Cool. So what materials
do we want on this? So I know for the middle part, we will have wall damaged.
Let's check the reference. So these two are
the clay material. So let's go to Bender
and SAU SMATUVPject RAP. And let's set our TD to 512. Now let's add it'll be easier to add the
clay material first. It's going to rendered view. So there's our clay material. Now in edit mode, we want to if we isolate this and
go the front view, we'll turn on X ray,
so we can select these faces and
these faces here. Yeah, C. Now we can add the marble wall damaged
and then hit the sign. We didn't get these
faces up here, so I'm going to select
these to solve for s. I'll select these faces and then hit a sign, and now
let's have a look. Cool. There is the middle
part of our fountain. It's coming along nicely. Next, we'll start
with the top piece. I'll see you in the next lesson.
41. Curved Fountain Top with Precision Beveling and UV Mapping: Hello. Welcome back to stylized
Blender Fred Environment, Greek Temple and
garden Workshop. Okay, so let's do the
top of the fountain. So let's add a let's
add a cylinder. And we'll set the vertices to Let's go with 18 on the vertices. And
I'll move this up. And I'm going to bring
this face down a bit. Now let's first, let's
duplicate this face. We'll bring this up.
We'll press P selection, and we can just hide the
sake of the wave for now. Now, we want to get this
curve kind of shape going on. So what if we bevel
this face like this? And now we could just
a profile shape. I'll just leave this
at the default. And what we could do is we'll delete this
bottom face here. Now I want a few
more edge loops. I'm going to put edge loops in the middle of each
of these faces. And we're going to scale these in like we did with the pillars. So add edge loops
all the way around. Now we want to select them
all the ones we added. We might have to
delete that pace, but we'll see what happens. So let's hit Alt S, and we'll scale it in
like this nice and tight. Now let's just delete
this top face. Okay, so now with this,
let's check what's going on. So we can Alt click this top face here,
and then just delete. So now we have this
shape going on. Now we want to select
all these outside edges, and we'll give these a bevel
and curve it off a bit. Takes a while to
select them all. Almost Control B, lava bevel. Let's add lots of segments, so it's nice and curved
go as tight as we can before we get
any vertice overlap. Let's check the middle here. Th should be fine as it is. Now, we want to select
these inner ones here and we're going to
mark sharp on these edges. Select all of these. Okay. Almost there a few more. Okay, right click
and Mark Sharp. Now, let's shade this smooth. Now, do we like this shape? We could add a
subdivision surface if we wanted to be
a bit smoother. Now we need to kind of
close up this middle. So what if we select this
edge loop and scaled it in and maybe we could
bring it down a bit. We could also add
like an edge loop in here and bring this down. Cool. I like the look of
that. It's looking nice. Now, let's AU Smart
UV project unwrap, and we'll set the TD to 512. And let's try some different
materials on this. So maybe we'll go with the wall damage, see
how that looks like. Yeah, court. And we got
that little highlight in the middle. That's
looking very nice. Now we could also bring back
the other face we made. Let's go back to the solid view, and we'll bring this down just so it's like inside
covering this face here. Now we can go into edit
mode, extrude it up a bit. Now we want to inset this face. So I'm going to inset it and
then extrude it downwards. And then scale this face
in a bit like this. Now we want to have
edge Snapping on. I'm going to put
an edge loop here, and then on the Z, I'm going to snap it to
this inside edge. So this edge is the same
height as this edge. Now what we can do is I will select this edge loop
and this edge loop, and I'm going to hit
Control B to bevel. Just give it a single bevel
like this. That will do. Now we want geode loop here, and we will bevel these
to be similar width. Now let's delete this face, this face, and this face. And you want to select these vertices and
then hit F to fill, make sure you get all
four of them like this. They'll select these
vertices here, F to fill, and then we want these bottom four vertices
here to F to fill. So now we have, like, a shape that will allow the
water to flow out. And we basically want to do
this for the other faces. So we delete these three and then just fill in
the faces like this. So we have the bottom
piece, and then we have the two side faces here. Like this, and then
we'll do the same here. You could speed this up by doing a mirror modifier
if you wanted to. But I'm just going
to do this manually. And then one more, fill
in the bottom face here. And then this one. Cool. Now, let's right
click Shade Smooth, and we will add our
Bevel modifier. So add the Bblezo 0.01 should do for this
shading harder normals. No less grab this face and let's inset it,
bring it down a bit. Now, is there a face? Yeah,
there's a face underneath. So let's isolate it. And let's I'm going to just
inset this face a little bit. And then we could dilute this face.
Yeah, that'll be okay. Now with the top face, we
have room to bring this down, and then I'll inset it again,
bring it down even more. I want to be careful
as we inset this, these vertices are
going to overlap. So we'll just go to like here. And then how does this
look? What's going on in the middle here?
Right, so let's undo that. So we go to the here
and let's inset it. We don't want these vertices to overlap, and now we
can bring this down. So now it's a bit more curved. We could go further, really add some exaggeration to
this depthness here. Now, we could What if we were to mark sharp on
these how does that look? I'm not sure if I
like it or not. What if we were to make
this, scale it up, just kind of adjust the curve of this shape. That should be okay. Now we want this to be
a bit tighter up here. So what if we select this
edge going all the way? We don't want these
middle edges. So we'll select these
edges like here. So these all the
way up to the gap. So those, cool. So let's mark sharp on these. No, I'm going to undo that. Maybe if we scale it in a
bit, we move it down a bit. There we go. We have
that snapping from the bevel. That's looking nice. I might actually clear
sharp on this one so it's smoother and just have sharpness on
the inner circle. Now, let's have a look. We need to select this
edge loop and scale it in. And now we can AU
Smart UV project and wrap set TD to 512, and then we will add
the clay material. It's going to render view. Now with this, I'm
going to edit mode, scale it on the Z, and
then we can bring it up inside the other mesh. So it's a bit thinner. There
is the top of our faintin. We can adjust the size later on once we add the middle piece. Where is everything?
Why is it only curbs? That's weird. I'll see
you in the next lesson.
42. Layering Fountain Shapes with Edge Loops and Detail Extrusions: Hello. Welcome back to stylized
Blender Fred environment, Greek Temple and
garden workshop. Okay, so let's do
the smaller pieces. So let's add a cylinder. And where is it? It's all
the way. What did I add? I added the circle,
right, Mesh cylinder. We'll stick with 18 for
this and let's scale it in. Let's move it into place. Let's snap it to this face here. And let's bring this face down. And let's As shifts. We'll make it a bit thinner. Now we will let's add an
edge loop in the middle, Control B, and we'll
move it to like here, and then add another
one in the middle, and let's bring this
in nice and tight. Let's actually scale
these faces in. So S shifts, we'll make
it nice and thinner, and then we'll extrude
outwards later on. So let's bevel this, make it nice and smooth. Let's go to like
here. Let's extrude these faces along normals. And then we could
bevel these edges. Add some segments, make
it nice and curved. Now we could add some edge
loops in here and in here. I'll move this one
up a bit to the top, and I'll bevel this twice. So we have two
here, and now I'll select all of these and then bevel these and
extrude along normals. Now these are going at a weird
shape, so the undo that. And then I'll just hit E
and then S and then shift, and then I'll extrude
it straightwods then. Now we could bevel these edges. So let's select all of these. And we'll keep it
nice and simple. We'll just make these curved. So add some segments like this. We'll do this kind of shape. Now, let's right
click, Shade Smooth. Let's add the Bevel modifier. So search Bevel and
it's looking nice. Okay, so let's go to 0.015. I don't think it's
going to change much, but shading harder
normals, there we go. Now with this top
face, let's isolate. I'm going to just
select all of these, and we could just move this
upwards into the face here. There we go. Now, to
save us some time, I'm just going to duplicate
this face and bring it up and snap it down to this face
here. We want to make this. Okay, so let's go
into wireframe, Xray mode and make
sure on face select. Let's scale these top
faces in like this. Yeah, C. And let's
go to solid view. Now with this middle face,
let's select these faces, and we'll scale
these in on the Z. S shift C to bring it in. Let's delete this edge here. We don't need this.
Yeah, it should be okay. Now, let's select these faces, and we'll scale these in and
let's scale this face in, and we can just extrude
this downwards on the Z. And yeah, we'll just
have it like this, and then that'll be where
the water shoots out. Now, this shading is
looking a bit gross, so I'm just going to
add an edge loop and bring it like this, even the topology a bit and it helps with the
stretching a little bit. Now we can select Well, we might need this
to be a bit thicker. So I'm going to As shift C and make the base a bit thicker because it doesn't look like
it's strong enough. That should be okay. Maybe
scale these two down a bit. Let's go into edit mode,
scale it down like this. Not too small. We'll
go to, like, there, and then we'll bring
it down into this face here and make sure this is
snapped down to this face. And how is that
looking? Now, let's bring back everything.
Everything disappeared. We we hit I'll t H. No. Where is all of our collections? We need to unhide all of these, so the eyes are back on. Okay, how is this looking? I think that's okay.
Yeah, now we just need some material, so
we'll select both of these. A, U, Smart UV project, unwrap. Select daything, set TD to 512, and we will select
the clay material. Going to rendered view. And we need to hit Control
L and Link materials. Now, do we want
the clay on this? What if we actually tried
the marble wide on this one? How would that look? Okay. And we could add something a bit more interesting
on this face here. So what if we scaled this
face in and extrude it down? And we'll just have
something little like this, and then we could just
A, smart U project, wrap, and then set
the TD back to 512, and then snap this
one down to the face, bring this one down a bit. We need to bring
this down. Like so. And then we'll snap
this down to the face. And then that should
be our fountain all good and ready to go. Nice and easy. Next we
will do the water shader. Then maybe we could
do the water, do some particles coming out and then we'll have
it flowing down as well. It's going to be a very
simple particle system. I'm not going to go into
doing the ripples on the water because that's
a bit more complicated, but we'll have something to show some water flowing
it at the fountain. I'll see you in the next lesson.
43. Creating Realistic Fountain Water with Shaders and Bump Maps: Hello. Welcome back to stylized
Blender Fred environment, Greek Temple and
garden workshop. Alright, so let's do
our water shader. So with this object selected, this little plane
here, let's add a new material. We'll
call this water. I'm going to move this
up and zoom in to here. So with this principle BSCF, we can set the roughness
to, like, 0.15. This IOR value I put to 1.333. Now with transmission,
we're going to want this to be one so that
it's like transparent. Now let's go into rendered view. Now we can see it's
coming together. We just need for the color, what I'm going to add
is a layer weight node, and I'm going to
add a color ramp. And I'll plug the facing into the factor and then the
color into the color. And for this black arrow, we'll choose like a dark blue. We'll go to, like, maybe
this kind of color here. And then with the white arrow, it'll change to, like, a light, this blue, like this. And what I'll
basically do is, like, when you're looking at it,
it'll add depth color. Like, from this angle,
it's like a dark blue. But then, as you look at it
from more of a shallow angle, it'll turn to the lighter color. It's very subtle,
but it just adds a bit more of an interesting
look to the water. It's a bit flat, so
I'm going to add. It's a wave texture
and a color ramp. And we'll plug
these in and we'll preview this node
by Control Shift and left click and we can see what the
wave texture is doing. We'll keep bands. I'll choose X to Z, and we can pull in this
black, pull in this wide. We can't see anything
here. We increase the scale let's go back to X. While we try rings. We'll
pull this back to default. Now we can change
the distortion. So let's go to maybe ten. Now, what if we chose the Z? Yeah, I think this
is what I wanted. Okay, so detail roughness, we'll put that to Max. We'll increase the
scale to about ten. And what have we tried? Now, we'll keep sine on this. Play with a distortion a bit more to get more like
a ripple effect. We can play with a detail. I'll have the detail
down to one and then detail scale we can play with I'll just
leave that as one. So with this, I'm going
to add a bump note, and we'll plug this into here and we'll plug the
normal into the normal. Now we preview this, we could slightly see
we pull this up, we can see the effect it has. Now, I'm going to go into my render sentence and turn on denoising so we can
see a bit better. We might have to go into
the material preview. With this distance,
let's bump this up. What if we just scroll up and
see how high we need to go. Seeing any change. What if
we drag this black arrow up? The problem here was this
is going into normal. We want this to go into height. We can disconnect
this from normal. Now we see the effect happening, so we can drag this back down. Now, it's looking
a bit too sharp. What if we bring
the scale back up? Now, if we go back
into rendered view, this should look a bit nicer. We can bring the distance down. We don't need it to be so high. Just a tiny amount. We'll go with 0.1, and
now it's coming together. I'm going to put the scale
back up to ten here. And with this black color, we can lift it up so the
effect isn't so strong. If we go to white,
it's completely flat and we can just
drag it down a little bit just so we like a slight
effect on the ribbles. And this is looking
a bit too unnatural. I'm not sure if I
like this. So what if we bring the distortion down? We can play with
different settings, like bands, and then
we can choose Z. This is looking a bit better. Now let's reduce the scale to, like, something like 7.5. And I think I like
the look at that. I will check the
value on this white. So this value is 0.79. We could lift it up to, like, 0.85 Now, with this face, we can go into edit mode and
duplicate it and bring it up and we can fill this top
piece, and we'll scale it in. Now we want it to be just over these gaps here where
the water will flow out. So just a tiny bit. And then with this outer edge, I'll click it and then
extrude it downwards, so we have, it's not like
floating above, you know. Now it's created a face
underneath, I think. So we're going to have to delete this bottom face if
there's one there. I don't think there
is. It's hard to tell. Yeah, I think
there's a face there. We'll delete faces. There we go. And with this middle piece, I might actually bring
it up a bit more. Yeah, I'm going to
bring it up just so we see more of the
shape above the water. And what we can do is
select these faces here. Well, we could extrude
this downwards, actually. And if we hide the water
rate the way for now, the select this face and just
snap it down to this face here and just a smart
UV project wrap, and then we'll set
the TD to 512 again. So that's soiled. Now we
can bring the water back. And this is what it
looks like so far. You can play around with
the wave texture to get, like, a different kind
of look if you prefer, try and get it to be a bit more subtle because we
will have, like, water flowing, we'll be creating kind of like
the water moving around. So I think this looks okay. Now, I also want to add going
to mesh, add an icospe. And with this, let's
delete that sin, and I'll do it again
so we have the menu. So icophe with this menu, I'm going to put the
subdivisions to one. And let's add the water
shader that we made. And we can shape this to make it look more like a
bit more rounded. But we also want it to keep it low poly because
we're going to be doing a particle system where
we're going to have like, you know, like a few
hundred to maybe 1,000 coming out
of the fountain. So we want to keep it as
low detail as possible. Now with this wave texture, I'm going to hit Control
T and then just move this into object so that we
get a consistent size. And we can play around with
the scale on the mapping here and bring the scale down to around about 0.25 and I'll fix the scale
issue with the texture. So we can shape this move, and this will be used in our
particle system later on. You can go into proportional
editing and like a circle is scroll out and just give more of a water
drop kind of shape. So it's a bit irregular.
It's going to be moving so it's going to be affected
by gravity and stuff, you know, that we'll
do for the water. Now, we'll rename this F
two, it's called water. We call this fountain, underscore water
just so we know. Now, these fountain pieces, they have bevel Modifiers
except for this piece, which has a subdivision
service modifier. So if we join them, we'd have to apply modifier, so we could just
keep them separate. And I'll just do every
battery name type, set name, new method fountain. Let's just click Okay, and
we'll have fountain 01 oh two. Should be fine. Do we
select this piece as well? Where is this? This is in the curbs
collection for some reason. We'll call this fainting,
top fan whatever. And then we can
select all of these. This one isn't renamed Diva, so let's just be
proper and organize. We'll select them all
manually and then batname and then set
fainting. And then we'll go. Do we have a
fainting collection? No, so nucleection fainting we can move the water into
the fainting, as well. Where is it? There it is. Then this kosphere
we will move into a new collection called
water particles. If you wanted, you could
create some variations, scale on the Z, scale
on the X or something. P, separate selection so it's separate and then
we can do it again, and then this one we could
have really tall like that. That will be our
water particles. In the next lesson, we'll get
to adding these particles to a particle system and
have some flowing water. I'll see you in the next lesson.
44. Animating Water Streams with Particles and Shaders: Hello. Welcome back to stylized
Blender Fred Environment, Greek Temple and
garden workshop. Okay, so name for the
water particle effect. So I'm going to select
this and then do shifts selected to bring the freed cursor to
this point here. And let's add a plane. And in Edit mode I'm gonna
scale it down all the way. So it's like inside this here, maybe bring it up a tiny bit. And I'm going to
rotate it on the X, just a tiny bit, maybe by
ten degrees or something, just so it's not going straight up, it's going to the side. Now we can add, if we choose this particle properties over here and click the plus icon, we have a particle system. Now we can hit Space
bar to preview. Okay, so with the frame start, I'm going to choose -50 so that it's already starting
when we hit play. And for the end frame,
I'm going to put to it'll be like 300. Now, for lifetime, we'll
come back to this. Everything else should
be want random order. Yeah, so velocity. So let's choose
velocity to be 3.5. Maybe maybe three. Okay. Now with the rotation, we will want randomized to be
one. What else do we need? We need render, so we will
render as collection, and then we will choose the
water particles collection. This is too big. So for
the scale at the top, you will find, where is it? No, it would be under
render and then scale we choose 0.015,
that should be fine. We could choose scale
randomness if you wanted. I'll just put 0.1 or
maybe drag it up. Actually, we could put it to one and then increase
this to 0.02. Yeah, I like that.
Now, what else do we need? The lifetime. So it's going underneath
the fountain. So with lifetime,
we could try maybe ten. Now we need a bit more. So let's go with 2020
is just a bit too much, so we're going to go with 19. Yeah, 19 is perfect. Now in edit mode with this face, I'm going to duplicate
it three times. But each time I'm going to
rotate it by 90 degrees. So it'll be shifty S 90, shifty AZ 90, and then AZ 90. So now we have four
streams of water, which means we also need
to change the number. So what if we went
to three phase ands? That's 300. We want 3,000. Yeah, I quite like that. Okay, so I'm going
to pause this. You can bring this
here by, you know, just choosing
timeline and to here. Okay, so let's go
back to the start. And I'm going to Edit mode. Actually, we're
completely new object, so I'm going to shift
and right click by here and let's add
another plane. And we will rotate this. We're
going to Edit mode X 90, and we can scale it down. And we don't need
it to be this tall, so we'll just go down to here, and then we can widen
it, bring it down. So it's like matching the water. Now with this, we can
go into particles, press plus, and then we can choose the old particle
system that we use for this. We could rename this
like water top. So this will have
water top here. Now with this, we can
use the same settings, but then I'm going
to click the two. Now we can rename
this to water sides. And we obviously need to change the velocity
on this, don't we? So we'll go to velocity normal
and choose this to one. Now in edit mode on this face, we can do shifty, make sure we're rotating
around freed cursor. So AZ 90 or the freed
cursor is over here, so we're going to have
to and do that and then choose this piece shifts Shift S, cursor is selected. Now, on this face here, we can shift D, but before we do that, maybe we should move it
back a little bit. So it's inside the
water a bit more. Now we can shift the Az 90, shifty AZ 90, and
then shifty AZ 90. So now we have water coming
out of all sides with this, we're going to have to
increase the number again. So what we went to 6,000? And that's looking good to me. Now, do we want to increase
the scale a bit on these? We could go into these, go into Edit mode
and scale these up. Maybe we choose medium
point again, scale them up. And is this going to affect
the water shader at all? Yeah, it does a lot
bit. I just a scale here, doing both
at the same time. Do we want more? You could
have more to make it a bit more crazy, go ten phasins. Ten phasins on there. We could go like six
phasings on this one. Now, if we go into Render view, it's not going to look very nice it's trying to
update every frame, you know, it's just
going to stay like this. Even if we turn on,
even the noising, it's not gonna do much. But we can pause it and then have a look at it
and, like, still. And then this is what your
water will look like. It's looking a bit
dark, if I'm honest. Maybe we could go into
the water shader a bit. Where is our shader window. And this dark blue, maybe we could lift
this up a bit. We could go all the way
actually on the value. Yeah, I quite like that. Okay, so if you're going
into part preview, it should look a lot
easier to preview it. Yeah. It's looking nice. And we can double
check on the timeline. It goes all the way
to 250 and then repeats and it doesn't
look like it skips, yeah. So it looks like it's
repeating, you know. So they were water particles. Hopefully it wasn't
too complicated. Now with this big floating
water particles over here, it's stop error animation
and went to object mode. Now with these, we can just
move them out of the way. And if you wanted to, I think we can just like disable
this collection, and it will still render
over here on the fainting. Okay, so if you wanted to
have the water moving, what we could do is adjust the phase offset
on the wave texture. So if we scroll this up, we can see it kind of
ripples and moves. So we can animate this value. So we went to the timeline, and if you're going
into edit and preferences and under animation, make sure your default
interpllation is set to linear. Now with this phase offset, I'm going to go
on to frame zero, and we'll type zero
on the phase offset, and I'll hit I while having over it to
insert the keyframe. Now we want to go to frame two, 51, so it's just after the end. And let's choose something
like we could try 15. And then we can hit I,
so it turns yellow, and we'll have a keyframe
on the last frame. So now if we play this, you'll
see the water is moving. Now, as it gets to
the end and repeats, you're going to
see the frame skip where it's not like there. See, I wasn't, like, fully loop But for something like this, we'll have a turntable
going around, so we won't really
notice it, hopefully. So we'll just keep it like this. There is a way to get it looped. You'd have to match the
scale and the phase offset, do some math so that
it loops perfectly. But I've been tinkering and I can't really seem
to do it myself. But that's just one way of
getting the water to move. I will see you in
the next lesson.
45. Detailing Temple Surfaces with Trim Sheets and UV Masks: Hello. Welcome back to stylized
Blender Fred Environment, Greek Temple and
garden Workshop. Alright, so let's
start by adding some trim sheets to our models. So let's go to File and append. And in the collection folder, we want to bring
in the trimsheets. Now, I'll bring over
these planes here. Now, all we really want is
the Alpha mask of this. So let's choose our
temple piece first. And let's go to UV Maps. And I'm going to
add a second UV map to control the position
of these trim sheets. So let's rename
this map to Trim. And let's open up
our Shader editor. We can close this timeline
for now and bring this up. Make sure the marble
wall damage is selected. And make sure your
UV map is selected. With this, we're going to we can just a UV Smart UV project just so it brings it
in smaller like this. Now we can close this
menu here and we can open up the Trim one
Alpha so that we can see. And I'm going to
scale all of these down and bring them into
the corner the way here. And then I'm going to
select this face loop here and then go U
follow active quads, and we'll choose length
and then hit a Now, with these UVs, we
can scale these up. So we're only scaling the
ones that we selected here, and we can just
move this so it's like over the pattern like this. Now, let's add it to our Shader so we can
see what's going on. So let's add a UV map. And we will choose Trim. Now we're going to use this
to control our mapping. So we'll plug this up to vector, and then we want
an image texture. So image texture,
we'll plug this in, and then we will choose
the Trim Trim one Alpha. Now, the pattern is black,
so this will be zero. So we want this to be inverted, so we'll add a
invert color node. And then we can plug
this into a mixed color, and we will plug it
into the factor, so this is controlling the mask. Now, with this screen node
going into the base color, we can plug this into A, and then we will plug the
result into paste color. And then we can move
these over here a bit. So now we have this gun. Now, this white color will control the color
of the pattern. So let's go with, like, a dark, reddish color like this. And I quite like the
look of a soft light. I thought this was quite nice. Now we can play with
a value to get, like, a different kind
of effect going on. Maybe play with a saturation. So I quite like this color. Now we can go into
Edit mode and select these face loops and adjust these UVs to
make it a bit bigger. Move it on the Y a bit, like so, and now we can go into our scene view
and have a look. So there is the basics
of trims nice and easy. Now with this, we could also add to our maybe we could add
something to the bottom here. So if we adds add a UV map
again, we will call this Trim. And then with Trim
selected, we'll go to A, smart UV project, just so
we have everything here, and we can scale this down into the corner just like the way. Now we will select
this face loop, and we'll go, follow active
quads, choose length. Okay, and we'll
scale these UVs up, rotate it, maybe -90, and we can choose whatever
pattern we want here. Maybe we could go
with this top one. I think this looks quite nice. We could have it by here, let's have a better look, maybe scale it up a bit
and then move it up. So now we have this going on. Cool. Now you can change the different
blen modes if you prefer. We could
tricolor Burn. I'll give us an interesting
look might want to bring the saturation down on
this though, if you now. That's a bit too intense. You could try multiply,
Multiplies is always nice and bring the saturation down a bit and
have it like this. Yeah, I think maybe
multiply is the way to go. We can always make adjustments
later if you prefer Maybe we'd go back to softight
and see how it looks. Could try linear light maybe. Of light definitely gives a
kind of worn kind of look, so it's not so intense, you know, I might try that. Now, we will also be using
a trim on this piece, but it's the marble
white material. So what we could do is just we could hit Control C on
these five nodes here, and then we can go
to this piece here and choose the marble
white material. We will bring these
nodes out a bit. We can just hit Control V
to copy these in and then plug this up to A and then
this into base color. So that should add it to the
marble white, yeah, cool. Now with this, we need to add
a UV up and call it trim. Now this will update here. Now we can just go to AU, make sure that UV map selected. We'll just go with
Smart UV project unwrap and scale it down. Now we will select this face
loop in the middle here, go to U, follow active quads. You can hit Okay, and we'll
scale these up and -90, and then we can scale this
up onto this pattern. And have this going
around the top, like so. Maybe move it on the
wire a little bit. So it's in the middle,
nice and perfect. Yeah, so this is looking a bit too faint
with the marble white, so we might want to go
with multiply on this one. Let's see how that looks. Yeah, and then maybe bring
the saturation down. So it's not too strong and
we'll have it like this. We can play with
a value, make it a bit brighter, make
it a bit darker. Trying to get it to match
the door at the bottom. So we'll go to something like sing round about here would do. And there's the
basics of our trims. Now, we could also
quickly copy this again. Actually, for the clay, I'll do it in the next
lesson because I'm going to show you how to mix the
metallic value as well. So in the next lesson, we will do our flower pots.
46. Adding Metallic Trim Sheets Using UV Maps and Bump Nodes: Hello. Welcome back to stylized
Blender Fred Environment, Greek Temple and
garden Workshop. Okay, now let's add our trim
sheets to our flower pots. So let's add a UV map on this, and we will call this Trim. And let's open up our UV editor. We'll go to Emo, selected, select all the islands, and
we move them into the wide. Now, for this piece, I'm going to select
these three faces, and I'm going to right
click and mark a seam here. So now we can select
these face loops and going to hit U
and then unwrap. We'll go with, let's try formal. So now we get this
kind of shape. Now we want to select
one of these faces. Let's go with, like,
this one here. One that looks mostly
like squarish, you know, and then we can hit A, and
then follow active quads. We'll go with length
average and then hit Okay. Now we can add 90. So I'm going to undo
this. Let's undo this. Actually, we can
select these again, and we'll go with you and
then unwrap conformal again. Now we want to have try
minimum stretch Angle based. Maybe angle base
is the way to go. And then let's rotate
it on 90 degrees. And let's find the middle one, it should be straight. So with this face, so I'm going to select
these two faces. And with these vertices here, I'm going to go S Y zero, and then these three, I'm
going to hit SY zero. And then on knees, I'm
going to hit SX zero. And SX zero, probably on
these as well, SX zero. So these are perfectly
straight now, hopefully. So if I were to select
one of these faces and then hit A and now go to
U follow active quads, this should be license
straight on all the faces. Okay, so before we can test, let's choose the clay material. And we want nodes. So let's go to the marble, and we will copy
these notes again, Control C. Go to err clay, control V. We want this into
A and then this into color. And then we can play
with error islands. So let's scale
these up. I'm going to go on to this
top pattern here. And let's have a look
at error Sam and see let's get it
as big as we can. And now we kind of
just want to adjust it so that it looks
like it's seamless. And there we go, that
should be good to go. Let's have a look
all the way around. Yeah, the pattern goes
all the way around. Okay, cool. Now, I'm
going to choose for this. I'm going to go
with maybe if we go with overlay or screen.
Let's go with overlay. Let's see how this looks. Now with this color,
I'm going to go a metal goldish color, bring the value all the way up. Now overly I'm not
sure if I like that. Maybe if we try if we were to go with screen
screen could work, maybe bring down the value, something like this, give it some more saturation,
change the hue. I want it to be a
nice goldish color. Right, we'll start with this.
Maybe bring the value up. Okay, so now from
the invert color, we could just plug this
into the metallic here. So now we have the
metal going on. Now I'm going to add
a bump note so that it looks like it's
on top of the clay. So we can add we can
add a bump note here. And then from this invert color, we can plug this into the height and then plug this
up into the normal. And now it should look like
it's rising above the clay. Now we can increase
this distance to like 0.1 to really exaggerate that, and now it's like
a slight little normal detail over
the top of the clay. Now, you could also do
the same for this here. So we're going to wall damage
and add the bump node. Bump. And then we will plug. Instead of going from
the invert color, I'm going to go from the
image texture into height. So we'll be using
the black color. And now if we plug this up into normal and change
distance to 0.1, it should look like it's
engraving inside the stone, and this should update
this piece here. Now I'm going to just
copy this bump node, and we could add it to the
marble white, as well. So we'll add control V here, plug that up to
normal, and go from the image texture into height. And this should update here. We're getting nice
and close, we can see it's engraved
into the stone, just adds a bit more detail,
which is quite nice. Na for the decals, we will
do in the next lesson, we'll add them to
the faint in here and we could add
them to the doors. I'll see you in the next lesson.
47. Enhancing Props with Decals, Mirror Modifiers, and Arrays: Hello. Welcome back to stylized
Blender Fred environment, Greek Temple and
garden workshop. Okay, for the decals, it's pretty much the
same as the trimsheets. So let's start with a fountain, and we will choose our
marble wall damaged. And let's add another UV map, and we will rename this decal. Now let's go into
the Shader Editor. And we want to copy
these nodes here. So we'll shift bring
them over here. We will choose decal
on the UV map. And for the image, we will
choose trimsheet two Alpha. Now we can plug this one into A and then the result
into base color. Now we have this going on.
So we have our decals. So we can change this maybe
maybe bring the saturation down and we all change this to multiply and maybe a
bit more saturation. Make it a bit redder,
like a brownish color. I'm trying to get it to match
the clay on the fountain. So maybe less saturation, maybe bring the
value down a bit. Does it get like a brownish
color so much as this? Okay, so now we can
go into Edit mode and select all the islands
and bring it down. Now we can change the image
up here to trimsheet two. So this is all the way. Now, these faces, I'm going
to unwrap them separately. So just unwrap angle based. And the reason I'm doing it separately is so
that they're all the same size in the same location when they
get unwrapped. So now that, these
are all unwrapped. I'm going to select every
other face like this. So every other one is selected, and then we can hit A
over the UV islands, scale them in, and maybe we
could choose this leaf here. You can scale it on the Y if you want it to be a bit taller. Not too much because
it will stretch, but we could go get it
as big as we can get it, and that should add it to
the other faces as well. We can select these faces. And then we can move these. Maybe we could have
the helmet like this. I think that looks
pretty cool. Now we can add the bump node again. So we're going to have to mix it with this bump node maybe, however, I'm going to
test quickly, right? We go from the image texture, and we're going to have to mix it with this image texture. So we want it to go inwards, so we don't need
the invert color. I'm going to add a
mixed node here. And what do we want? We want to move this
from height into A. And then if we go from this into B and then plug this
into height, what do we get? I think this has worked. Let's double check
all of our objects. That seems to be okay. Let's double check this. Yeah, this should all be fine. So we have the bump detail
on our marble decals now. Cool. Now we can go to
our door and just do the same as we did
for the fountain. So we add we add our UV map. We will go with
decals to edit mode, select everything,
scale the UVs down. Into the corner here. Now we want to select
the right material. So ClaydeO is the red, I believe, and then Claydor
is the grayish one. So we will add the
decals to this. So let's copy the nodes over. So let's go to
wall damaged here, and we will copy these
nodes for our decals. Control C, we'll go to
Clade and then Control V, and then we can move these over, this into A here, and then this into base color. Now, let's unwrap these faces. Go to you. We want to do
them separately, don't we? So unwrap unwrap. Now, do we want the same or
do we want them different? If we do them the same and choose something
that looks nice. Now, we have a problem here where if we try and
fit this guy in, it's going to overlap
with the other ones. So we're just going
to have to choose something like tall
that we can fit, like something tall
and thin like this. Now, maybe we could
do them different. So what if we were to have
maybe this face could be maybe this guy could
work, we scale this up. Could have him
like this. Now I'm going to just delete this door. And then with this
door, I'm going to select I'm going to select this edge for now and then
shift S cursor to selected. Now with this, we can
add a mirror modifier. We'll add a mirror. Now, if we right
click Set origin to free Dcursor and now we can apply the mirror and let's
undo that because it merged. So we want to untick
merge and then apply it. So now we can press L on all the pieces on
this side of the door. Make sure we select everything. Yeah. Now we can go to
P separate selection. And we can put the origin point
onto these edges again. So cursor is selected. Go into Object
mode, right click, set origin to freed cursor. So the origins on this side, and for this one, we will
bring it back to this edge. So shifts cursor selected, right click, origin
to freed cursor. And there is with those, nice. You're going to have different ones on this
if you wanted to. But also, because
we mirrored it, the decals are
mirrored, as well, which is quite nice. If you want it, you could
add more trims going around like these edges here on the faces
if you wanted to. I'm going to keep it like this. I don't want it to
be too detailed. And before we finish
off this lesson, because I keep forgetting to do it is I'm going to
go into solid views, and I'm going to
choose this object. And I'm going to just
select one of these. We'll go shifty, move it
up here or something. P, separates selection. And with this esco set
origin to geometry. And let's add an array and
we will up the count a bit. Maybe move this on the factor X, so we get, similar to
what we had before. And let's rotate
this and move this in so it lines up
with this edge here. I'll go to like here. I want it to be so it's not intersected
with this bottom edge. So we put it here,
that should be good. We can play with the X.
Let's put the X to two. Yeah, and then we can
increase the count. I'm going to leave a little
gap here, so I'll go to 16. Now with this, let's check where the origin
point is on this here. Okay, so it's down here. So I'm going to right
click Set origin to Geometry on this. So with this, we can move
this backwards a bit, so it's inside, like at here. Yeah, that's perfect. Just
inside like that, core. And now let's add the mirror. And under mirror for object, we will choose this object here, and it should mirror
to the other side. It's going to rendered view
and have a look at that. Now, we could bring these in
a bit, actually, like this. So we don't want it
to go too far inside. We could actually
scale these down. No. Yeah, I'll leave
it at the same scale, but just adjust it
until it looks nice. We have some details going
up here as well now on the roof and our
trimsheets are all done. Now, I think that's pretty much all the
hard stuff out the way. From now, we just add our
foliage and the flowers, and really all we got to do now it's just placing
objects in the scene. So we're almost there, yeah. I'll see you in the next lesson.
48. Creating Realistic Hedges with Geometry Nodes and Manual Layout: Hello. Welcome back to stylized
Blender Fride Environment, Greek Temple and
garden Workshop. So the past couple of lessons, my screen caskes over here, like, crashed, so they
weren't in the videos. But I don't think I introduced any new keybnds or anything, so hopefully obviously it wasn't too confusing,
but they're back now. So I'll keep an eye on that. Next, we're going to append some objects from
the resource folder. So let's go to append and
go to the Object folder. And we want flower Pack 01. And we also want to
select Bush, as well. So I'll control click to
select Bush and Flower Pack, and we'll bring these two in. So let's move these
just like the way. And let's start with
this flower here. So these are the flowers
that go into our flower pot. So with this, we can just hit Alt to duplicate instance,
and we can bring these over. I'm going to go to solid
view sec and snap them to this face here and move them in. These are massive,
so scale them down. And just place them inside
your flower pot like this. Now we could rotate it a
bit and scale them up. Maybe scale it down on
the Z a bit as well, so they're more like rounded. And what we could do is let's go to material
preview mode. Because I have so much OCD
about these kind of things, I'm going to select these faces that are going inside the pot, and we can just move them a bit. If you want to go into
this kind of level of detail and make
everything look perfect. I might have to hit L on
these petals. Can we do that? I'm hitting, but it
doesn't seem There we go. And just move it, so it's
not like intersecting with the vase underneath. Don't have to worry about the back ones because
you won't see them. Yeah, that'll be fine. Now with this, we
can press Alt D, but I might actually
rotate these around, so like these flowers are
facing the front a bit more. So Alt D X. I'm going to move these
to this face over here. Let just check. It's all good. Maybe you rotate
them a bit more. Like so and then just
rotate it. Come on. I press some wrong buttons
again, right? A Z. And then we'll rotate it around just so it's different
from the other one. Maybe rotate it this way. And there we go have a
looking rendered view. So there is our flowers. Here, maybe we could scale
these up a bit more. So we'll go to
individual origins, make them a bit thicker. I'll move this one up
to the side a bit. Yeah, okay, that's looking nice. Now, let's have a look at
this bush geometry note, so I'll zoom in a bit. Now, as you can see,
there's gaps in this, and that's because the
Viewport density is only 100. It's just to make it
a bit less laggy. If I put this to 300, This is how it'll look like
in the render as well. Now, we could adjust the scale
on these leaves a bit to, like, close those gaps. So if we go to, like, just
a little bit like this, we'll have no more gaps
in the middle then, and that should look nice. Now, the way this works,
if I go into Edit mode, it's basically just a cube and let's say I move
this face forward. I will just add more leaves like this. It just
generates more. So what we can do
with this object is, let's go to material preview
so it's a bit smoother. And we'll select this
and we'll go with Alt D and then move
this over here. Let's go to top view, and let's place it just in here. I'm going to choose
the Viewport density back down to 100. Because we don't need
it in the Viewport. Now, we can go to edit mode, and let's try Let's
go into Y frame. Now, we could probably dissolve these edges here just to
make our lives a bit easier. I don't think we
need them there. So control X. And let's double
check in rendered view. We need to bring this up.
Yeah, so it should be okay. Now, might have to go to Xray and then go into Edit mode and
then choose that face. And let's bring it so
it matches to here. We'll bring this
face over this side. And obviously, we need
to bring it down to the ground like this. Just adjust it. That will do, I think. Now
if we go back to Edit mode, I hope you can see this
wireframe on your screen. But if I go to solid view, that might be a
bit easier to see. Now, we could try
extruding this out here and then extruding
this face like this. Now, we just have to make sure it's like the right thickness. So move these faces on the X. Like so now we can put an edge loop in
here and go down to this distance and then extrude the face this way
to this corner. And then we put an
edge loop here, and then we can
extrude this face all the way to this corner. And it's just about going
around, putting in edge loops, sliding it to the end like this, and then extruding the face
out to build out your hedges. I want to see this bows my
mind how easy it is just to get all these bushes in with John if you
know it is crazy. And then we extrude
the stamwards here. Okay, so now we need to
get it to this side. So we could hit Shift D and
then X to bring a face over here and then extrude this
to the corner like this. And then we could hit Control, slide it up, then we
all extrude this way. Then an edge loop in
here, slide this over. Then we might have to
bring this face back a bit and then bring
this edge back a bit. Then we'll go from
here all the way. Now we have to adjust
this a little bit. So let's try and grab the side face here
and move this on the X, so it's behind the curb
that should be okay to go. Now, instead of going, yeah, we could just go around like we've been normally
doing like this. And then extrude a face here. Now, if it's getting a
bit too laggy for you, what you can do is turn down
the density on the leaves, the render density, and then increase your scale
to close the gaps. You'll end up with,
like, bigger leaves, but, you know, the smaller
and the more leaves you have. Obviously, the more
performance it will take up. So you could also, like, do it by making these
thinner as well. So if I pull this in, it's technically less leaves
as well, you know. So it's all on what you
can handle with your PC. I'm going to move this
edge back so it's a bit straighter and then extrude this face out to this
corner down here. Now, this isn't straight, so I'm going to hit
Y. There we go. Now, I might bring
this face, come back, right this face, move it in
on the X. It's a bit thinner. Now, let's bring back our stuff here I hit the wrong button. We weren't fainting yet C. Now, we add an edge loop in here, bring it all the way to the end and extrude this face all
the way to the corner. So E, all the way down here. Now we add an edge loop
in here, slide it across. Like soap and then grab
that face to this corner. I might move this face
in a bit more GX. I might move these faces
in a bit more as well. And then finally, we can
add an edge loop here, bring it out this direction, and just much it up to
the corner to here. Now I also want one
behind the bench here, so we'll go to the end and then extrude the face out this way and go all the
way up to the wall. So now we can double check maybe if I go to
material preview for this. And these are
looking a bit thick, and it's even starting to
lag a bit for me as well. So maybe we bring this down
to ten on the Viewport. And what I might do is disable
some other stuff as well. So I'll disable fountain. That might help, hopefully. Now, this water particle
is still there as well. So I'll select
this. These are in. These keep going into the curb
collection by looks of it. Okay, so we'll move this to fountain as well because
I'll take the way. Maybe if we actually put
the Viewport density to one, how are we? I'm still getting a bit of
lack here. Doesn't help. I'm recording as well, so I'm going to hide these
flowers like the way. We'll just have to keep
on pushing through, okay. So I'm going to have
to turn this up so I can see what I'm
doing with this. So I'm going to go to 100. Now I'm going to try
go back to solid view. I'm okay in solid view, so I'm going to move this face and just kind of adjust the thickness
of these hedges, make them a bit thinner, we'll cut down on performance
a tiny bit. Okay, probably should have used my human reference
at this point, so I could see how tall they actually were in
comparison to him, you know, just moving these faces in to make it a
bit easier on my computer. Now, this face loop I
might have to select and then move the whole face loop
towards the fence a bit. There is our hedges. We need some over here as well, so we could select a face here, shift D, move it on the Y
to this corner and then E. And then at an edge loop, we could bevel these
edges to the ends here and then extrude
these faces out. So E Y. Then I'll
just add one here, and then extrude this face out. So EX then I'm going to adjust these faces
to make them a bit thinner. Git, then this one
can go in as well. G. Yeah, these bushes,
you definitely want to be careful when it comes to performance because
it will get very heavy, very quickly if you do too much. But this is a part where
it's all going to start slowing down once we add foliage
and the trees and stuff. It's one of the dan
signs with Blender. It doesn't like lots of objects. But it's looking
nice. Very nice. Next, we can add some grass. I'll see you in the next lesson.
49. Grass Meadow Setup with Geometry Nodes and Collections: Hello. Welcome back to stylized
Blender Fred Environment, Greek Temple and
garden Workshop. Okay, so now that we
have our Bushes in, I'm going to select this and
we can rename this to F two. Yeah, we can keep this as
Bush one. That's fine. And let's move this
to a new collection called Bushes and Create. And let's disable this
Bushes collection for now. I'll turn this off. There we go. And now we can
move around again. Now, let's find our flowers. And let's move these into
the bushes, as well. That gets rid of
that. Now, what we could do is under the
overlay settings here, we can choose on statistics, and we have an idea
of how many polygons in I have seen, keep
an eye on everything. Now, my flaws are
not present today, so we need to bring them back. Where are they? Path?
We can turn that on. You can turn on collection,
bring a reference back. Okay, and we're good to go. Okay, so next, we want
to add the grass, I think we should go with next. So let's go to file, append, and let's find grass. So it might be this object here. Let's just double check. I know it might be
called meadow, as well. No, so let's go with grass. Is it this one? Append.
Now, let's have a look. This is our grass material,
so it wasn't this. I'll double check a sec. Okay, so where we duplicate
an instance from the Bush, it obviously linked to this
and updated this as well. So we're just going
to delete this here. We've got it over N scene
anyway, we don't need it. Now, it's a weird name in the
What we're looking for to append is cube 033
very organized, yes. Right. So now this brings
in our grass meadow geode. Now let's go to render view on this and we
can have a look. So this is our grass. So
we go to the modifiers. We can adjust everything here, we can adjust the scale
scale randomness. The Viewport density
sound 500 on the render, so we can have a look 500. This is how thick
it will be. So I'm going to choose 30 again. Now there's other stuff you
can have like okay, so stems. So this is for the
stems of our flowers. Now, I'm not going to have any flowers in the
grass on the scene, but if you want it to, you could just increase this density. So if I put like 100 here, you can see you have 100
flowers, we put to one. We just get like a few. So it's up to you if you
want that on your grass, I'm going to have it to zero. And what I'm basically
going to do is copy this geode to
this grass object. So I'm going to select
this and then select this. Control L, and then
copy Modifiers. And now we have grass in
air sea, nice and easy, just one click, and it
should be the same settings. So we're getting nice and close. I'm going to turn on
the bushes again. Let's find bushes.
Let's turn this on. And then I'll
increase the density up to 500 so you can have a look at what
it will look like. It's going to take a while
and turn off the overlays. There is a grass. So, have a play
around with that. Add some flowers if you
want. Next, we can add. Let's have a look
at the reference. What do we need? We need to
add some of these trees. These trees here, they're much higher poly
we'll do those last. These ones are a bit lower poly, so we'll start with
these cypress trees first and get these placed in. I'll see you in the next lesson.
50. Placing Cypress Trees and Structuring a Natural Scene Layout: Hello. Welcome back to stylized
Blender Fred Environment, Greek Temple and
garden Workshop. Okay, so now with this grass, I should probably turn
this back down to now, it's on FTE, so I might just disable this
in the Viewport like this. So I turns off, and
then we can disable the Busch's collection. So
now we're back with this. Okay, so now let's go
to File and append. Now, let's type in Cyprus. We can select all of
these cypress trees and then hit append. So
now we have these. And now, this is pretty simple, we just hit Alt D to
duplicate an instance, and then with face Snapping,
we can put one here. My as well go to
solid view for this. We'll put one in
the middle here. Now, let's have a look
at the reference. We've got one here
and then two here. Let's go back to
Blender and ltd Y, move one to here, and then we
will Alt D move these OTX. Now these are looking
a bit too big. So let's select all of these and make sure we're on individual origins
and let's scale them down. I'm going to quickly
bring back my hedges a sec, so we can see. Yeah, that's a good height. I'm going to turn this back off. Now let's grab the let's
grab the big tree. So Opti and move this over here somewhere.
I have one by here. We could have the X
move one over here. Now I might just adjust them a little
bit, it's like this. Maybe we could have
another one here. It's really up to you what
you want to do at this point. Could move these benches
in the middle a bit more. Now we could add
these smaller trees. So I'll Opt I'm going to put one probably
in the middle here, and then OptiY, I'll have one
on the corner around here. Now let's quickly
turn on the bushes, make sure that none
of it's intersecting, and we can just adjust where
we want these trees to be. Maybe have this in the middle. No, I'll have it in
line with these trees. And then we could maybe
have one of these big ones. I'll put it by here for now. Well maybe I'll delete that.
I won't have one there. But I will have one
of these medium ones. I'll put it here in line with
this grass here. Like so. So there is our
cypress trees now. Let's add. Got a file. Actually, let's add all of these cypress trees
to a collection. And the small ones, we need to adjust
these a bit as well. So let's go new collection. We'll call this cypress
and before we hide them, we can just adjust these a bit. So it's like this. And
that should be okay. It's looking a bit cramped.
That should be fine. Cool. Now, for now, let's just hide this collection.
We can hide the bush. And we'll go to file, append, and let's try tree, bring in the tree object. Now here we have O tree. Now let's Alt D, and we can bring
this over somewhere. Now, I'm going to undo that
I duplicated everything. But the way this works is you have, you
know, your Goode here. Now, if I let's isolate this, and I'll go into rendered
view so you can see it. Now, the resolution here is like how detailed you
want the trunk to be. I'm going to keep it at two because we look at
the poly count. If I do it to three, it bumps
all the way up to two K, like 200 K. So I'm going to keep it at two.
You could try one. One gives us an
interesting look, but two, it's a bit
fuller with the leaves. And what are we going
to do with this, if you change the levels, it changes the
amount of branches. So you can change the length of the branches,
the length randomness. You can get any kind
of shape you want, really, just by messing
around with values. The roots, the levels is
how many roots you want. We won't see the roots, so we
can just keep that as one. And yeah, you can adjust the displacement of the noise
on the leaves and stuff. You can choose the
density of the leaves. I'm going to keep
these settings. And the only thing
I'm going to change is like the seed on each tree so we get
different looks. This one's quite nice. So let's go back to scene View, and let's hit Alt D X, and
we'll bring this over. Now, let's bring back
our cypress trees so we can see where they are. I'm going to go to object view. Going to top view, and
we can move one by here. Now, what have I selected here? There's two here. So I have selected a
cypress tree somehow. I'm going to undo that quickly. Right, yeah. So selected there. So just select this
tree and move this in. I could have one maybe here, could move this over a bit. And then we can hit
Alt D and then Y, move it to here and
then change the seed. So it's a different tree. Now we could have one here, maybe, change the seed. We could try changing the levels down to five, maybe or four. Now, we'll keep it at six, then we could change
the split count. And then what's Max split count. We just play around
with settings, you know, change the
length of the branches. So we're going have
really long branches for this one next to the temple and rotate this around a bit. Have something
like by there. Now we want to make
sure these are all actually down into the grass. So I'm going to select these
and bring them down a bit, just so the roots are inside. We could scale this up,
have a really big tree. Now we could select
one of these. I'm going to make both
of these a bit bigger. And it's just a bake plate, like moving them around, getting your whole scene to
look nice and tidy. Because I imagine these like temple gardens,
everything was, like, planted in, like, a nice kind
of organized way, you know. I might actually delete this
tall one here and move in a tree on the X here.
Give it a random seed. Let's try 33. Just to
change it up a bit. GY, move it, like in the middle of these
benches look quite nice. Maybe we could
scale this one up. Have a big tree over here. Like so and then maybe grab like one of these
medium cypress trees and move it over to here. And then we turn on our bushes, as well, we can have a look
at how it all looks like. It's looking very cool. Now, if you've got
a rendered view, we can see how it looks. It's coming along very nicely. Now let's also add our grass
we can have look at it. It all like appears.
Where is our grass? Grass. A well, we can just select this plane here and then turn
on the modifier. And now the Viewport
density is a bit lower, but we get an idea of
what it will look like. Now in the reference, I had these trees here by playing
around with the settings, and I'm not sure what
settings they were, but hopefully we can
play around with the settings and try and get something that
looks similar to it. I'm not sure what I would need to change to get it, though. Maybe if we lower trunk height. And then we increase the
length on these branches, maybe change the angle. What's actually
happening over here. This is quite a cool shape. So we could bring something
over to here maybe. Maybe if we just have like a medium cypress tree instead,
and just have this here. It's good to solid
view. Move this back in the middle a bit like this or maybe
on the corner, have it on the corner,
maybe scale it on the Z, so it's like thin and
scale it down like this. And then we have a
looking rendered view. Now, I don't like how it looks
with this tree over here, so I'm going to delete this and instead grab one of these
trees, maybe this tree, and then pde move it maybe maybe just to the middle behind these benches
will look good. And then we can move these
benches to the side, so it's a bit more in
the middle, you know. And if we zoom out,
we can have a better look how it all looks. Now what we could do to fill in the empty space in the grass, we could add some of these
red flowers in there maybe. If I go to Solivu and I'm
just going to turn off this meadow and let's duplicate
with should we Alt D? Yeah, let's just D it and
then scale in object mode. Scale them up in object mode, and then we can place
these around as well to add some
color into our grass. So maybe one by here, and then Alt D, we can have one in this corner maybe
and then rotate it. Maybe Alt D and then
have one over here. And then I'm going to
do is I put one here. And I'm going to have some
hedges going across here, so I'll duplicate it
again, rotate it, maybe, scale it down like this, and then duplicate one
on the other side, rotate it on the Z, like that. Move it on the
expit and then I'll move these forward like this. So we have a little bush
at the bottom, like that. It's up to you how detailed
you want to go with this. Maybe we could have
one here as well. I'll D Y on this and move
on the X, so it's here. Just add some randomness. We could have something
here, maybe some more of these small cypress
trees on the back. We could have one here, and then I'll X one by here could be good we'll have
a look in rendered view. Looking very cool. Now, what else do we need to add?
Let's have a look. Is that it? Well, we just
got the mountains, really. But before we'll
do the mountains, we'll do the turntable render. So we don't want the
mountains to be in the way. So we're going to do
a turntable render, and then I'll show you how
to do a render like this, which could be like
your main image. And we have, like, multiple renders that we could use then. So yeah, there is our trees. Now we should probably put all of these into a collection. So before we finish
up this lesson, let's select all of these trees. And this one, we'll hit M New collection.
We'll go to trees. And then we could we
could click on this, find out trees
collection, disable it. We could disable the cypress. We could disable bushes, and we've got a
nice clean scene. Now, everything's
been going into our curbs collection here. So I'll select leaves, drag this up the
seen collection. I'll grab meadow, drag that up. Flower can go leaf
summer summer. Okay, Trim sheets can go. Now, is it just curbs? And then tree can
go into tree here. Now, let's double check these. So leaves, grass, flower. Now, by moving
these collections, did we screw anything up? So let's click on grass. Grass meadow node. So these need to be
flower and leaf, I think, need to go into grass. Let's double check. It's going to render
view. We need to bring back bushes, I say. Okay, so this is fine. If I add if I add
flowers to this, let me just double
check it's using flour. Okay, yeah, we should be fine. Yeah, we're good. So we
could disable leaves one. Let's bring back trees a sec. Yeah, I'm just double checking the collections are all linking to the
Geometry node. So everything seems to be okay after moving the
collections around. We can disable
everything now and disable all of these
foliage collections. We don't need those, and we'll disable this grass in
the Viewport here. Next, we'll set up our scene for doing
a turntable render.
51. Scene Cleanup and Layout Polish Before Turntable Rendering: Hello. Welcome back to stylized
Blender Fred Environment, Greek Temple and
garden workshop. Okay, so let's set up our scene ready for a turntable or render. So with this bottom floor here, I'm going to shape it so we get a little outline
going around the scene. So to do this, I'm going
to go into edit mode, and I'll put an edge loop
here and then hit Control B. So we'll bevel this edge. Let's go to top view for this, and maybe we want to
turn on X ray as well. And we'll go like 2 meters
from the edge with this, so I'll scale it on the X. So it's like 2 meters
away from the wall. And then we can put an
edge loop this side, and we have it like 2 meters
away from the wall here. Now we can grab this edge here, and we need to grab this one, and I'll move this so
it's 2 meters here. Now, with these bottom edges, I'm going to go like 2 meters
away from these steps. So I'll move this GY here, and then the same
with this edge here. So we'll go Gx and move
it across like this. Now we want some
edge loops up here. So I'll hit Control here
and then move it to here. So we got 2 meters
away from here, and then we can put an
edge by here as well. And then these back edges, we could grab all of these and then move them forwards
on the Y about 2 meters. Now, with these faces, we can delete these lead faces. Now I'm going to select every face and then
I'm going to hit I to inset it so we can create a little edge that we can
use for a curb for this. Then we want offset even
what we try offset relative. Yeah, we want offset even. Now, I'm going to hit Control
I then with these faces, I'm going to hit Shift D and
then P separate selection. So now with this curb here, we could turn off X ray and we can extrude it up just
a tiny bit like this. And then we can hit A U
Smart UV project wrap. We will set the TD to 512, and then we can give this
the marble white material. Then with the floor here. I'm going to select it, and then we can re enwrap
this piece as well, so we just want angle based. Then we will set
the TD to one, 28. Then we can give this
the floor tiles. I'll give this
marble floor tiles. With the path object,
I'm going to select these islands and
I'm going to set the TD to 256 on these. Now if we go into rendered view, we can have a look at how that looks and I'll move this down. Now let's check out
face orientation, we'll check this.
That seems okay. We've got the
marble floor tiles. It looks a bit
weird, doesn't it? Maybe we need to control
it and apply the scale. And I think that fixed it. Yeah. So we want to do the same
with the curb as well. We'll apply the scale on this. My we go fix the shader here, and we could also add
a bevel to the curb. So we'll add a bevel 0.015, and then shading
to harden normals to give it a little bit
of a curve on the edges. So there is like EA base done. So now I seen is like
sat on top of something. Now, what else could we do to improve the
look of the scene? I might actually move
around these trees. So what I'm going to do is
turn off face orientation. But before that, if we
look here on our fountain, I need to flip the normal
on this top face here. So I'll do alten and flip with this face. So
that fixes that. Now, these trees they're all going to be red as well because they're just flat
planes and they're all twisted in
different directions. So there's nothing we
can do about those, but it should be okay. So we can turn of
face orientation now. And the first thing
I'm going to do here is I'm going to move
these flower pots. So I'll select all of these. Let's go to object, solid view, and then we can
duplicate these move Alt then we can move it to here. I'm going to top view.
I'll have one by here. We can rotate it on the Z by 90, and then we'll do Alt D Y. And then we'll rotate
this on the Z by 90. So we have some color over here. Now, we're missing
some columns here. So I'll select both
of these Alt D Y four. So we have them here. And I might also duplicate this with Alt D and
bring it up to here. And we can have one
like in the middle here and then duplicate it
to the other side as well. So now we have just something
in this area to fill it up. For here, I might
grab some benches. So I'll grab this bench Al
DX. Let's go the top view. And we'll have one
round about by here. We'll bring it down
to the face and then Al DX bring
it this side here. Okay, we'll get in there. Do we want this bench
here? Yeah, we'll keep that there may as well. Right. Next thing I want
to do is the grass. So if I zoom into this grass
here and we turn it on, now, I want to change
the scale of this grass. I want to go to
the scale of 0.1. But then I want to boost
up the randomness to 0.7, so we'll have a really
crazy randomness going on. Now, if I turn off this, we've got much taller grass now, and it's all a bit
more random as well. It looks a bit more exaggerated
because I really want to show off this grass because
it's so it's so detailed. But we have a problem here
where it's filling out. And if I turn up the
render density to 500, it's going to poke out
out of the hedge here. So what we can do is I will bring this
back down to Ferdi. And we're going to duplicate
this grass plane here. So I need to turn on my
overlay. We'll duplicate this. And then with this duplicate, we're going to remove
the grass modifier, and then we'll press H
to hide it out the way. So now we have a grass layer underneath grass if
that makes sense. So with this, we could let's turn off the modifier for now. So this piece, which is there a grass piece, with
the Geo Node on it. I'm going to select it
and select the bushes, and then we can
isolate these now. So now if we go into
Edit mode on this, we can move the edges
back behind these bushes. So the grass is like,
inside the hedges. So you want to
select all of these and just move them inside. It would be nice
if this geometry node had an option to, like, hide the surface of the object, like this
plane, you know. So we wouldn't have
to, like, duplicate it and then have like two planes sat on
top of each other. But the reason we duplicated it is because if
we move these edges back, there's obviously going to
be a gap underneath this, so we'll have a second plane underneath just
covering up that gap. So I'm just going to go
around the scene and fix these edges and just keep moving them
inside like this. Now we need to with this one, we can just go S shiftZ. It'd be a lot quicker
to just do it that way. And then we need to grab
these edges as well. So GX and then GY here. And then we need to grab
this one, this one. And then this one on this side, and then the back ones. So this edge is fine, these edges. So GY. And then I think
this vertice, yeah, this needs to go
to the side a bit, so GX to here. So now, if we go back
to our scene view, and we can press AltH to
just bring everything back. And let's turn on I'm gonna hide this
at the way and then grab our grass,
turn this back on. And I'm just going to
bring this up on the Z, just a tiny bit so we
don't get clipping with the plane underneath.
Now we can tag. And now you can see we need to bring
these hedges forward. So where is the so it's
underneath, isn't it? I'm going to select
this ace loop on the bushes and bring this
closer to the fence a bit. And then we can grab
this grass here and move this edge a bit further
forward, as well. So that will fix our grass
from, like, spilling over. Now, what else do we need
to do we fix the fountain, we've fixed the grass. With the cypress trees, I did a little test render
earlier, and, like, they just became a little
bit too dark for my liking. So I'm going to choose the
cypress leaf material. And where we have
subsurface scattering here, I'm just going to bring
this value all the way it looked a little better
when it was a bit brighter. Another one was these
background pillars. So we have marble
white all over it. And with the white
on these big pieces, it stands out so much compared
to the rest of the scene. It's a bit too bright,
and it kind of looks too much like
the default material. So I'm just going to
add a new material and choose the wall
damaged material. Then we can go into edit
mode and just hit L on this top piece here,
and then we'll hit a sign. So that we'll have the
marble wall damage material. Now, another thing
I wanted to do was just move these pillars inwards a bit so they're not like going into the
hedges so much, you know. So this one needs
to come forward. So we'll move this
like this just forward a little bit.
So that fixes that. Now, another one was right, we've done the flower
pots, the benches. I'm just looking at my notes
of what I wanted to change. So more particles
on the fainting. So in the render that I did, this looks like it's just not enough, and it's
hard to see, really. So you could either
scale up you can either, increase the scale under render, maybe to, like, 0.04. Maybe that's too much
so like 0.03, maybe. And then we can
increase the density. So we got 10,000. Let's
just go to 20,000. And then we'll have
to press space and just let it
kind of drip a bit. And then that should
look a bit nicer. Now we can do the same here. So we'll go to let's go
to 10,000 on this one. And then increase the
scale to 0.03 0.03. And then we'll just get
error animation going a bit. There we go. This might make
it a bit more noticeable. Another one was the the layout of the trees I wanted to change. Now, yours might be
different to mine, but I'm just going
to go through and change make some changes. So I'm going to turn off
this grass to speed up. So just disable
and Viewport here. Now, I'm going to delete, I don't want this tree
here as too much. I'm going to duplicate
these, like, red flowers here with ltd. I bring them on the X. It's
going to the top view. And I'll have these
on this side as well. And then I'll Alt D again. Rotate on Z by 90. We want medium point
up here, Azi 90. And we'll have some in the
back as well, like this. Now this is fine here, but I'm going to
duplicate it with Aldi and bring one to this
corner of the temple as well. Now, with these bushes here, these are the small
cypress trees. I'm going to move
these up the way. And we'll grab one
of these flowers here and I can go in there. And then we'll do Old Y. We'll move on this side
and just rotate it a bit. Now we want this to
be like by here. I'm going to move this one a
bit up round a bit by here. Now we could duplicate
these and fill in, like, this little space here. So that's that side
done this side. I'm just going to have
one of these by here, these small cypress trees. I'll just have one
in the middle. Maybe we can move this
bench over a bit as well. So that's that side sorted. Now I'm going to just delete
these flowers out the way. I'll keep this
cypress tree around about here so it's like
in line with the path. So now we have one
by here as well. And we're trying to make
it a bit more tidier. Now, this one this
could be deleted. Let's have a look. So now
we have just the tree. I'm going to move
this forward, so it's like on the end here, and let's double
check the trunk. So let's make this
bigger, much bigger. We want it taller
than these pillars. Bit smaller. Just a tiny bit smaller than the temple. And I'm
going to bring it up. So we have some
more of those roots showing. Yeah,
it's looking good. Now, we want more of these
small cypress trees, so I'm going to duplicate
like these middle two here, and then do OcteX then
we'll bring these over. We can fill in this
space in the middle here and then we
can have a look. Maybe we could go like three. So we'll do another one, cDY. We'll have three
by here like this. Now let's grab these
flowers again. These red flowers,
and I'll move one by here and then OcteX. I'll have one by here as well, and just rotate it a bit. We have a flower here. We could keep that there. Maybe we could, like
duplicate it and have a big bush of
flowers in the corner. And then we can
grab these and then duplicate and then move
them to this side, and then we'll give them a
bit of a rotation like this. And now instead of
these trees here, I'm going to keep this
one here, that'd be fine. Then this big tree, I'm just going to
delete this one, and then I'm going
to delete this one, and I'm going to copy this tree because I want something
close to this size. And this one can go
at the bottom here. And let's just change the
seed, so it's a bit different. We'll move this
cypress tree forward. Now we can go into top view. I'm just going to
make sure this is in the middle a bit more. Now we can go to the top view. I'll have a cypress tree here. Yeah, that's a tall
one. That's a tall one. These are medium ones, okay? So with this medium one, I'll
have one by here like this, then this one by here, something like something
like this, we'll do. Now we can duplicate these two smaller
cypress trees and then move them over
to fill this gap up. And I much prefer the
look at this setup. I think it's a lot cleaner. It looks a bit more organized. It's up to you what you
want to do with yours. But I'm going to go with
this for the trees. Now, what else? I think
we are good to go. So Yeah, I think
that's everything, so I can go into
rendered view quickly, and then we can just
have a quick look. So everything set up now, what we need to do now is like, add a camera and then we'll set up the
turntable animation, and then we can start
rendering out some images, and then we can get to Compositing and all
that fun stuff. Now with the Compositing,
I would recommend, like, taking a while
on it, you know, like, do one first, and then maybe, like, do, another one like
an hour later or something. And it's like when you
give yourself like a break from looking at the
same image and come back, you can always see like, this looks off, I'm going
to change this. I always like to take at least a whole day really
of doing compositor. So when we get to that, just like just play
around with it. We'll see how it is
with the compositor. It's quite fun. I will see
you in the next lesson.
52. Animating a Turntable with Path and Track To Constraints: Hello. Welcome back to stylized
Blender Fred Environment, Greek Temple and
garden Workshop. So in this lesson, I'm going to play a short video on the basics of using a camera, how to bring them
in, how to, like, render from different
kinds of cameras. And we'll show you
how to bring in, like, a turntable and set
up your camera on a circle. So yeah, stick rains
for this short video. Welcome everyone to our
camera setup, Complete guide. And as you can see here,
we've got a fairly, fairly large scene,
and we actually need to bring a camera in
to actually render it. So what I'm first of all, going to do to
bring a camera in, I'm going to press Shift A, and within our primitives menu, you will see one
that says camera. Now, normally, the camera
will always come in. Whereabouts you've
actually got your cursor. So if I delete that
camera out the way now, shift right click and
put my cursor over here, press Shift A,
bring in my camera, and you'll see there it is. Now rather than go
into my camera, so to go to our camera, we're going to press
zero on the number pad. That then is going to
zoom into our camera, and from there, then
we're able to actually come over and open this
little panel here. To do that, we just press
the end button to open it. And then what we
can do is we can click this camera to view, and you'll notice
that it goes fairly red around the outside
of the camera. And from there, then we're
able to scroll our mouse wheel out and put our camera
where we actually want it. We can also hold Control
shift middle mouse, and what you can actually
do then is really, really get a nice, smooth zoom in and zoom out of our actual
camera, as well. So all of the basic functions of moving around the
actual Viewport work exactly the same way
with the camera as long as we've got camera
to view turned on. Now, what if I told you, though, there's an easier way of
actually doing this, as well. So all I'm going
to do is I'm just going to delete my
camera out the way. And then what I'm
going to do is I'm going to press Shift A, and I'm going to bring
in another camera. I'm going to position myself in the Viewport of where I want
my camera roughly to be. And instead of zoom in
to the camera with zero, what I'm going to do
is I'm going to press Control Alt and zero. And then what it's going
to do is it's going to put the camera in the middle
of the Viewport for me. And from there, I normally
zoom in two, three times. And then why there is, I
click camera to view on. And now I'm able to position my camera where I
actually want it, which is a little bit
easier than actually going to the camera and
moving it into plate. Now from here, I want
to discuss a few of the camera options that you can actually do with the
camera, as well. So what we need to do
with the camera selected, so just make sure that your
actual camera is selected, so you can see mine
is selected there. Pre there on the number
pad to zoom back into your camera and get the view that
you're looking for. Let's press camera to view, although you don't
need to take this on to do these options. And if we come down to
the right hand side now, we have one that is
the actual camera. Now if you're going over to
the right hand side here, we'll see we have a type
called perspective. And if I click this little down, you'll see that I also
have orthographic on here as well and panoramic. Now, we're not really
going to discuss panoramic because that is really taking it up a notch when it
comes to actually rendering. So we're going to keep this
pretty simple for now. So we do have perspective
and orthographic. And basically, perspective is basically as though you're
viewing this yourself. Orthographic to keep it simple, basically means it
has no depth to the actual scene that you're
actually trying to render. Now, as well as that, we
can actually at the moment, zoom in and zoom out
with our actual mouse. But I recommend
instead of doing that, just change the
focal lens slightly, and then that will
be able to zoom you in and zoom you out and get probably a
better perspective on what you're
actually rendering. We also want to talk
about the shift X and Y. If you want to move your
camera left and right, that what you can do is
you can come up to item instead of moving this around left and right with
your actual mouse, what we can actually
do now is move the location of our
camera like so, and I find this sometimes a
little bit easier to use, especially when we're
going on the z axis rather than moving my mouse
with shift and middle mouse. I find it a little bit easier because it will be more exact. In other words, if I actually
take off camera to view, you will see if I
come to my camera now and I go to the item
and I'm moving this up, you'll see it moves
out perfectly. Alright, so going back now, let's go back to the camera. And let's now discuss our
clip Store and the clip end. Basically, if you want
to have a lot of things outside of the scene and you don't want to actually
have those rendered, what you can do is you can
actually change the clip end. This is the most important one, and let's put it to
something like 20. And what you'll see is
everything disappears. Now, if I start turning that up, you will see that the camera clipping actually
starts to increase, which then shows you the
actual buildings of our scene. And if I turn it up, so far, what I can do is I can actually start rendering
the entire scene. But anything in the background here won't be actually rendered. So it's extremely handy when you've got a load of
assets over here. You've got a scene,
and you don't actually want to
render those parts. Okay, so the next
thing we want to discuss is actually
coming in and naming our cameras because if we have multiple
cameras in a scene, and we want to take
different renders of them. Let's say we're doing
shots and we want one shot to be coming out
of this corridor somewhere, want another shot going around the roof or something like that. It's important to know
how to actually change the view to render these pots. So what I'm first
of all, going to do is I'm going to
come to my camera, make sure it's selected, go
over to the right hand side, where all my collections are, press the little dot button, which is on your number pad, and that then will
take me to my camera. Now, let's add in another
camera after this. But the first thing I
want to do is just rename this camera to camera long shot. And then what we're
going to do now is bring in another camera. So I'm going to press Shift
A, bring in a camera. It's gonna come over
there. And let's say I want the shot
to be down here, so going down through
this alleyway like so. I want to press Control Alt and zero to bring
my camera there. And then going to Ja
Zoom in a little bit, go to view and we
a camera to view. And then what I'm going
to do is just set my camera up where
I actually want it. Next of all, I'm going
to put it close up, so camera close up shots. Like so. And now I'm
going to turn this off. So now we have two
cameras in the scene, one short range and
one long range. And at the moment you can see
the local camera over here, it set, if I click on
this, too long range. The moment I click on
this and press zero, you will see it takes me
to my long range camera. Now, if I click on it again
and click to short range, it will take me to my short range camera
or any other cameras, you can have as many cameras
as you want in the scene. Now, what about
render so if I set this to camera short range, and I've got my camera here, the moment I go to
Render Out Image, you will see that it won't be rendering out the camera
short range image. What it will be doing
is rendering out the camera long range image. Why is that? That's
because we also need to change the camera
in the actual scene. So you can see here we
have camera at long range. And if we click this, we also
have camera short range. And now, basically,
I can render out this actual short range like so I've come up to
render render image. Let it start up,
and there we go. Now it starts rendering out this actual
part of the scene. Now, the thing is, you've got to remember that when you've got loads of cameras
in your scene, this part here
controls the Viewport. So where you're looking
in the Viewport, which camera you're
actually looking through, and this part here controls
the actual render. So just be sure to switch
them over and just be sure also to rename your cameras when you've got lots of
cameras in your scene. Now, finally, the next
thing we want to discuss is how to actually make
a quick turntable. And the reason we're doing
that is because many, many times people want a
turntable of where they're actually going to
be going around their scene or their
actual assets. So the way we're going to
do that is, first of all, make sure your asset or your scene is in the
center of the Viewport, so you can see where
these crossing lines are. And then all you want to
do is press Shift desk and you want to put
cursor to world origin. That then we'll say
cursor to the center. And what I'm going to do from
there is I'm going to press Shift Day and I'm going to
bring in an actual curve, and the one I'm going to
bring in is a circle. From there, then I'm
going to press the Sp and just pull the circle out
where I actually want it. And now what I want to do is
I want to tie my camera to my actual circle because
I'm going to use my circle to actually
animate the camera. So the way I'm going to do that is I'm going to grab my camera, grab my circle, Cross Control P, and then I'm going
to go down to where it says, follow path. And you will notice
now you've got a little bit of a line where the actual camera is
to the actual circle. Now, it's important wherever you want your camera to start, so you can see at the moment
this is on actual zero. So we want our camera probably to start
somewhere around here. So the first thing
I'm going to is grab my circle and
rotate it round, so's rotate it round, and then my camera is going
to start roughly over here. But what I need to
do, first of all, is move the camera
to this point here rather than it rotating away
from the actual circle. So the way I'm
going to do that is just press tab on my circle
to go into Edit mode. And then I'm going to
grab this little point here because this is where
the camera is attached to. It will always be attached
to a point on here, and then I'm going
to press shifts and then cursor to selected. Next one I'm going
to do is press tab, and then we're going
to go to my camera. And what I'm going to
do is press shifts and selection
cursor keep offset. That then is going to
put my camera there. Now, you will see if I press the space booard now because
it is following this path, my camera actually shoots around there like so before it begins again at frame 200 or 800
or whatever you set it to. Let's now set this back at zero, and the camera should be
exactly where they'll put it. And now what we need to do is we need to if we press zero, you can see, it's not actually looking at the building
or anything like that. So the next thing we
need to do is make sure this camera is looking
at our actual scene. So the way we're going to
do that is pressf day, and you're going to bring
in an empty and plain axis. And at the moment, you can see, I've put this in the wrong place because it came
where my cursor was. So what I want to
do is delete that. And then what I want to
do is press Shift Ds and cursor to world origin. Shift A, bring in an
empty plain axis like so. And the reason we're using a plain axis is because it won't be rendered out at all
within the render, but it is something which our
camera can actually follow. So now I've got my
plain axis in there. I recommend that
you pull it out, so keep pulling out till
it's pretty big, like so. And then what we're
going to do is we're going to come to our camera come down to where it says constraints just above
the camera image. Add constraint, and the
one you want is Track two. And then all you want to do is click this little pipette here, click on your actual empty, and now you'll see
that your camera is pointing at the actual empty. Now, still, this isn't
very good because we have a problem in the cameras looking completely in
the wrong direction. But if you zoom out enough, what you can actually
do is you can select your empty and you can
pull it up like so. You can set your circle then, and you can also
lift it up like so. So you can actually really start to mess around
with this and get that perfect
viewpoint what you're looking for. So
something like this. And then all I'm going to do
is I'm just going to press the S board to
expand the circle, pull it out, and now you'll see we've got the perfect
place where we need it, just need to pull it up a
little bit more, maybe. Let's pull up the empty a
little bit. And there we go. And now if we press space bar, you can see that we've
got a term table. So one more thing before
we actually finish this, we obviously need to
control how fast the actual how fast
the actual camera is going around the circle. So all we need to do to do that is we will select our circle. So if I come out and
select my circle, over then to the right hand side where you've got
your circle options. And then what you want
to do is come down to where it says path animation, and then you can turn this down or up to whatever you like. So let's put this on 800. Let's put the
evaluation time on 800. And then if I go
to my camera now, press the zero button,
press Spacebar. You can see now that
we have a render, which is going to
last 0-800 frames. Or we can change this to 600, so let's say 600, 600, like so. There we go. Now it's
gone to 600 frames. Then when it gets to 600 here, it'll just carry on over the 800 because we obviously
have 800 frames here. So last of all, just
change the amount of frames to match the amount of frames in your
path animation. And what will happen
is it will get 600, and that then should
restart the camera. So you can see there's
no break in it. It just actually
carries on in a circle or a turntable around
your scene or asset. All every one, so I hope that's a lot of
information for you. I hope it made sense, and I hope it gave
you a good rundown of how cameras actually work. Thanks a lot. See you
on the next one. Cheers
53. Smooth Camera Rotation with Refined Lighting and Denoising: Hello. Welcome back to stylized
Blender Fred Environment, Greek Temple and
garden Workshop. All right, so let's start by adding some cameras
to have scene. So let's go back to solid View. And I'm going to select
something in the middle. So we probably want to
rotate around probably this, like, roof piece here. So we will select we will select this so the
origin point is up here, and then we can do
shifts cursor to select. And now with this, we
can add our circle. So we'll go to curve and then circle and then we'll just
scale this up like this. And then we also want to
add a curve, not a curve. We want an empty plain axis,
and we'll scale this up. And then for these side pieces, we don't want these to
be like in the way, you know, so we'll
put a wireframe. We can select everything, and we can just move this
all the way up here. So it's like in the sky
where we won't see. Okay, so now we
could add a camera. So we'll add a camera here. Now, that's coming
in the middle here. So let's just move
this up for now. Now, I'm going to select
a camera and then select the circle and then we'll
go Control P, follow path. Now we want to select a vertice on our circle
so we can snap it. So we'll select this vertice, shifts cursor to selected, and then we can select our camera and then shifts
selection to cursor. Now we can hit zero on number pad to go into
the camera view. And if we Zoom At, we can click our circle and we can
scale up the circle at. Now we also want to do
something with the camera, so we want to select the camera, click into the Constraints tab. We want to choose Track two, and we will pick our
plain axis here. Cool. Now if we press
zero, we can have a look. Now we can bring the empty down. We could increase
the focal length of the camera, so I'll
select the camera. Maybe we could try
30 millimeters and then we can
scale up the circle. So assuming we can have a look. Now, let's move the circle up so that we're looking
down at the scene. And then we want
to bring our empty down until it's in the middle. Now, let's bring
in our timeline. So I'll drag this
up. Go to timeline. Now, I was playing
around with a speed. 600 is, like, nice and smooth, but a if we go to the circle and then we go into path animation and
then choose 600 here. This is this is how
slow it will be. Now, we're having
frame drops here so we can actually tell if
this is the speed it's going. So if you choose
playback and here, and where it says sync, we want to change this
to frame dropping. So it will drop frames in
order to keep the right speed. So this is how
fast it will turn. Now, this is nice,
but for hundred well, for 600 frames, it's up to you if you want
to go that many. It's just going to take
much longer to render. So you can do that if you want. I'm going to just go for 300, so I don't have to wait
so long with cycles, it does take a while to be fair. Not as much as it used to.
Like before it used to take me like an hour to render a
frame on my like 1050. But it's a lot nicer these
days with denoising. So yeah, this speed is alright. Now, we need to change I need
to change this to 300 here. So for me, it will
go like this speed, which is just not too bad. Now, what I'm checking here is, I'm watching the animation
go around and looking for parts where it goes
off camera a bit. So we can now just
adjust the circle by, like, scaling it up a bit. We can move it up a tiny
bit and then, like, adjust the empty to bring
it down and just go all the way around and
check if it stays in the middle as much
as it can, you know. And I think this is looking
quite nice, actually. So, yeah, there is
our turntable setup. Now we want to set
up the compositor. Now what I noticed
with the compositor here is that if we hit setup
compositor and then okay, we might get it says successful. If we go to Mist, we have
no miss settings here. And the reason for that
is because it's looking for it's looking for the world's properties
with the name world, but we've got stylized Skybox. So if we rename this to
world with a capital W, hit Enter, and there we
have these settings here, sla should fixed name. Now we just need to
render out an image. So we'll render an image
from our turntable, and then we will
do the compositor. And then once the
compositor is all set up, then you can render
the animation and they'll they'll look nice. I'm just going to go into
my render properties here, and we can close Viewport. So under render, I'm going
to go with 100 samples. You might be able
to get away with 50 if you want to lower
it and speed things up. We can have denoising. I don't think this matters
because the compositor will override it. Nay, for look, I'm going to
keep this as base contrast. Now, let's have a look of a
lighting before we start. So this is already
looking quite nice. Everything is quite
visible already. We can always adjust it by
rotating the sun a bit. So maybe if we go into this
kind of view and rotate it. So it's like pointing towards
these pillars a bit more. We can have a look
at the shadow. We can rotate it up
and down as well. And I kind of want
the shadow here to be just touching the roof of
like the top of the door. I think that looks quite nice. Maybe bring it down
in a tiny bit. And then we can
always, rotate it on the Z so we get more of
the shadow of the pillars, like covering the door as well. And you can always play around with the angle in
the sun settings. So I think free as a
srenth is fine for this. For the angle, we could try ten if you want softer shadows or like 1.5 for some,
like, harder shadows. Now I'm going to go
with, let's go with. I'm just going to stick to five. I think five is a nice number. I quite like it. Now we can go into a double
check render properties. What else do we need? You can play around
with the exposure. Can maybe bring
the exposure down, so we have more of
like a medium value, and that'll give us more room to play with the compositor. A Gamma should be okay. I don't even know what Gamma is, to be honest,
compared to exposure. I don't know, it just gets
brighter and darker to me, but I'm sure somebody
could educate me on that. But all I know is to have some nice medium values
of the lighting, and then we can have more flexibility with
the compositing then. So now, I'm going to double check in the
output properties. Now this is 1080. So 1920 by 1080. And then we want PNG. And
now we can just hit render. So I'll hit render
Image up here. And then we'll see
how fast this takes. It says here, the amount
of time it takes. There's the samples here. We've got one sample and
you can tell how fast it's going to take with how
fast the samples go up. I'm just going to pause it
until it's rendered and then I'll see you in about 2 seconds.
54. Advanced Compositing and Color Grading for Turntable Renders: Hello. Welcome back to stylized
Blender Fred Environment, Greek Temple and
garden Workshop. And this is what I've got. So now, now that we have this, we could go to our
Compositing tab, and there we can start to
play around with this. Now, I need to remember how
to zoom in on the compositor. Okay, so it's Alt and V to zoom in and then just V to Zoom out in the compositor.
It's very weird. Now, we can start having a
look at this compositor here. So we have presets. So you can load the default, like the default settings. You can press a
plus icon and then press Save to save a preset. For output, this is
like your resolution, your file path of
where you save it. If you have a Bloom pass, you can save that
separately as well. Now for background,
you can choose to have a transparent
background if you wanted. You could have an
image and choose any image that's inside
your blend file. I'm going to go with none
so that we have the Skybox. For mist, I'm going to use
mist on the other render. But for the turntable, I don't think I'm
going to add mist. We just want it to be, clear
so we can see everything. So I'm going to
keep that checked. For color, this is like your
base color pass, so you can, lift up this curve to, like, increase the brightness
of the color textures. And you can change
the saturation. You could maybe bump this up. You could try 1.3.
That's a bit too strong. So I'm going to go
with 1.1 maybe. Now, we could adjust the value, so this will be the
brightness as well. So maybe like 1.2 on the value. Nay for gloss, anything
shiny in your scene. So this should be
like the water, maybe the metal on
the flower pots. So we could, like,
try bringing this up, and it just brightens
the water here a bit. You can play with the
brightness values here. So I'll keep this at zero. Nay for metal glint, if I choose wine on here, now, we're quite zoomed fire. So for the turntable, I
might zoom us in a bit more, but this will give us a
little glint on the metal and any reflections
from shiny surfaces. So I'm going to just put
0.1 on the metal glint. Then we can close these ones. Now, for transmission, this would be
anything transparent. So we can adjust the color of the water here if you
want to brighten it. And then we have the
lift, gamma, and gain. You can always adjust
that. You could try the gamma, see what happens. Yeah, it affects the hedges,
as well, if you look. So we could have
this up like this. And then you can always,
add some color to it as well and see how the effect is. So this makes the
water really blue. It's quite nice. So I'm going to keep it like
round about by here. Now, let's close. Well, if
you choose light level, it gives, like, a more light to it as well
by the looks of it. So we can, really
bump this up and have like plasma
water or something. Right. So I'll keep this at
zero and close transmission. Now, for volume, we
didn't add any volume, but this will allow us
to affect the density of it and stuff. Light and bloom. I think this is like
emission textures. So we haven't used any emission,
so we can ignore this. For the environment, this
will affect the Skybox. So we can adjust the
brightness here. You might have to exaggerate
it because there's not much going on. But, if we lift this
up or lift it down, if we bring the lift
all the way down, we get this cool kind of background going on,
which I quite like. If we bring the gamma down, you can have
something like this. Now I might go for, like, quite a dark kind of blue, something easy on
the eyes, you know, and then we can adjust the gain. So this will make
it even darker. This could be cool,
like a core background. We can always,
double check how it looks from the other
angles later on as well. Ambient occlusion,
let's turn this on. And let's check color. This
will be the color of it. So I'm going to give it, like, a slight darkish blue color, like, just by here,
just a tiny bit to adjust the kind of shadows, give some blue to the
shadows, you know, and then we can bring we can either bring
this arrow in to, like, increase the
contrast of it. So maybe like to
hear would be good. But then we could also click
this and bring this up. So it's not so intense. So this would be like default. And then we can just slide this down until we get a nice, like, contrast in our scene.
Something like this. Now, what if we bring this white down as well? What happens? If we go all the
way, we can see how it affects, I might
just keep this. I might bring this down
a little bit and then maybe tighten this
up a bit as well. I quite like look of this. Now we can adjust the
value of this one, make it darker or
make it brighter. I'll go to here.
Name usar control. If we move this,
if we bring this down, it will be darker. So it's up to you what
kind of look you like. I'm going to just bring
it down a tiny bit. So we have ambient occlusion
in the crevices here. Now we can close
ambient occlusion, but do we want to add
more saturation to this color? Don't
want to go too far. Maybe like to here
would be nice. So we can close environment.
Now we have effects. Now we have diamond Shabn I'm not going to use that
one. We have box haben. So you can increase
the factor in this menu to
strengthen the effect. So I'm going to keep
it nice and low. And then I'm going to
add soften on top of that and just increase
the soften a little bit. We can have anti aliasin, so we'll fix up any, jagged
diagonal lines in the scene. And then we have color balance, so we can adjust the whole
lift of the whole scene. So I don't see much changing
here with the lift. But with the gamma, we
could try with this. I don't see much going
on that's weird. Oh, we need to check this box. That's why, right. So we can bring the gamma let's bring the gamma up
and then bring it back to white and just a tiny bit of blue gives it a
nice cool effect, and then we can adjust
the gain a bit. Now, I think this
lift is too high. I go to hear maybe adjust the
brightness on this gamma. Something that
looks nice to you. It's going to look slightly different on different
monitors as well. I'm looking to my other monitor and it looks
completely different. Now we have ARGB curves. I think this is just like
a basic color curve. You can add a lot less
curve here to increase the contrast or maybe bring the shadows up by
bringing this one up here. You can see the effect.
Just play around with it until you get a look that
you quite like, you know. You can always see
the difference, and I think it looks better
with it off, to be honest. I might keep this color
balance off, keep this off. Now we have hue correction. Now we have this, if we
drag up this red point, it will increase it will boost all the reds in the scene, which
is quite cool. So I'm going to move this
to like here somewhere. And then we have the yellows. So this will affect
our, our walls. We can choose how
saturated they become. So if I move this to
arrange bat here, and then with the greens, we could push this green
up to make it more saturated and bring up some
of these light blues as well. And then I don't see
many of these colors, but we could try playing
around, see what changes. Okay, so we'll keep
that like that. Then brights and contrast, this will be like everything. So we can do, like,
a final adjustment here with the contrast. And then hue saturation of value is pretty
much what it says. So I'm going to bring
this down to one. We can always, like, try with different
saturation values. And then you can change the
hue if you want to go crazy. But I'm going to turn this off. I'm not
going to use this. And then denoise. We
just click that on, and suddenly it's all
just magically smoother. And then I'm just going to keep this as accurate and use HDR. You can see the difference
here. We won that on. So now, is there anything else
I want to change to this? Maybe the color I'm going to bring this color down a bit because it seems
a bit blown out, you know, it was
a bit too bright. I think this looks a bit better. Now, what else do I want to do? Maybe I will turn
on color balance, so we have this like bluish kind of tint to the gamma here. I don't want to go too crazy, so I'll bring the saturation
down to like 0.2, maybe even like
0.14 or something, and we can see the
difference here. Adds a nice blue, dreamy effect. I don't know. It's quite cool. Now, if you're happy with
the look from this angle, we could press the
plus icon here. We can rename this to Turntable. And then we will hit Save. And now, if you press load defaults, this
is how it looked, and now if you hit load on this, this is how it looks
with compositor, and it completely changes the
look, you know, your seene. So just try different
combinations of stuff, see what
you come out with. Now I'm going to do a
couple more test renders. I can see it from other angles. We got one from this angle. We can do another one from this angle or something,
do a quick render, do one from this angle, and just check each
angle and then you can adjust the compositing
as you go along and stuff, if there's anything
that points out. In the next lesson, we will set up the render settings for
an actual video animation. I will see you in
the next lesson.
55. Optimizing Blender Performance for Smooth Scene Rendering: Hello. Welcome back to stylized
Blender Fred Environment, Greek Temple and
garden Workshop. So if your scene is getting a bit heavy at this point
with all this foliage, there are some things we
can do to help, you know, help get around this, you know, and help keep an eye on, like, how heavy the scene
is getting and stuff. So I'm going to play you a short video on performance
and optimization in Blender. Welcome everyone
to our performance and optimization guide. And a lot of times when
you're dealing with really, really complex scenes
or even simple scenes, if you've got a low end machine, you will come across
things like da out of memory or Blender
actually crashing. And there is lots and lots of ways we can actually
deal with that, and I think it's important for all of you guys to actually know what things we can actually do to stop
this happening. We probably won't be able to
get rid of it altogether. There'll still be times
when Blender crashes, but we can do a lot
to actually increase that performance
to get our scenes where we want them to be
and more importantly, render out beautiful images. So the first thing we're
going to discuss is RAM. And now, if you look down at the bottom right hand side here, you will see one
that says memory, and you will see
one that says RAM. Now, the most important
thing is that, first of all, you understand
now to bring these on. So what we're going
to do is we're going to go up to preferences. We're going to go down then to interface, and under interface, you'll have a status par and you can actually click
all of these on. So we've got system
memory and video memory. And these are some of the
most important things. So let's just close that down a minute and let's
actually go through these. So basically, you can see
here that down the we've got how many triangles we've got in the scene and how many objects. These directly correlate
most of the time to how much performance
your computer will need to actually
run this Blender scene. So the more faces, which are polygons you have in your scene, the more performance
you're going to need. Same thing goes for
the amount of objects. If you've got a ton of
objects in your scene, then it's going to
come at the cost of actual performance. Now let's move on
to the actual RAM, which is how much RAM your
actual computer actually has. And I recommend a
minimum bare minimum, you need 8 gigabytes
of RAM to run Blender, and it comes down to the more, the better the performance
from your machine. So I would say aim
for 16 gigabytes. Now, also, we have something
that's also very important, which is called V RAM. And this is normally
the RAM that comes with your
actual graphics card. And basically, the higher
this is on the graphics card, the much smoother time
you're going to have. So I tend to see problems myself is with the actual
memory on your computer. If it's too low, you have
problems in the Viewport, and where I see the problems
arise with the VRAM is normally when
you actually come to render out complex scenes. The next thing we
can do to actually limit the amount of
performance needed is actually put everything in a nice neat order in collections and make sure everything's just
named correctly. What we can do from
there, then we can close certain parts
of our scene down. Which means that we can either render them out a
little bit at a time and then lay them on top of each other or especially
in the Viewport, what we can actually
do is close parts that we're not working
on at the time, especially in large scenes. And then this then again, will limit the
actual performance. Also, it comes down
to your CPU as well. You CPU, the better
it is you know, the better time you're going
to have with all of this. But let's now say
we've got all of that sorted and we're still
having some problems. Let's now go into a few of the options that we can
actually mess around with. So what we're going to do is we're going to go up to edit, go down to preferences. And the first thing I
want you to look at is system and on the system, make sure that you've got this
set to whichever you can. So it can be QDa, optics
X, or one of these. Just make sure it's not unknown. And then once you've got the one selected which you want to use, just make sure both
of these are ticked on and Blender of them will
take advantage of those. Also make sure that
you haven't got undue steps set at
250 or something. This has a huge actual
impact on performance. So if you're really,
really struggling, I recommend turning these undo
steps down to five or ten. But the problem, obviously, is that you're not going
to be able to press Control sad and go back very
far if it's set too low. So I recommend all of these things. I'm
actually showing you. Try and play Miranda a bit
till you've got, you know, that kind of perfect setup, and then you shouldn't
have or you should have less problems
in the future. All of these other things we can mess around with as well. I don't recommend these unless you're absolutely
really struggling. I think you should keep
these what they're set to. This is the only one, and
this Tikton is the only one, as far as I would go on here,
messing around with those. Alright, so let's
close that down and let's now come over to
the right hand side. And you can see
here at the moment, if I scroll up, I'm on
Blender render engine cycles. And it's important to know
that to have an easier time, it's much, much easier
to put this onto EV, which is basically
a real time render engine like unreal or
unity or something like that then makes it much easier if I come to
render this or click on my Render view to
actually move around the scene while it's
actually being rendered. So the thing is, if
you're on IV as well, there also are some
things that you can actually turn off to
increase performance again. But normally with IV, unless you've got a
very low end machine, you shouldn't have any problems. If you are having
problems, however, just make sure that Viewport Denoising is
actually turned off. This is one of the
heaviest things, actually, Denoising both on Blender and cycles that actually really increase that
performance needed. So you can turn the
Viewport Denoising off. You can also turn the ambient
occlusion and you can also turn the bloom off and especially screen
space reflections. Make sure that is
also turned off. Now, pretty much everything in EV you shouldn't need to mess
around with anything else. Once you've turned these off, you should have a
much easier time. Now, let's move on
over then to cycles, which is a little bit different. So if we come over to cycles, you will see even my machine, it's quite a high end machine, or it was maybe two years ago or something,
sometimes struggle, especially with large
scenes like this with a lot of textures and a lot of
sand and things like that. So if you look over
here at the moment, I actually have, in my
view port Denois on. The first thing I recommend
doing is turning this off. This then will increase
performance no end. So once you've turned that off, it's going to take
a little bit of time to actually apply
that, as you can see here. And then you can also turn the denoise off in
the rendezvous, but I don't recommend
that because then you're going to end up
with a very grainy render, and that's maybe something
that you don't want. Now, you can see already that I'm really, really
struggling here, even with the
denoise turned off, because this is
quite a large scene. It's got a lot of
displacement on there. So I'm just showing you
just how pixelated that is and just how long
we need to wait. I'm going to do now while I
actually fix a few things. I'm just going to put
this onto material mode, and that leads me on
to my next point. So when you're working in
Blender, it's important, even though it looks really, really nice to be working
in Blender cycles, it actually comes
at a huge cost. You can see already working in material mode over here
is actually really, really helping me
navigate around my scene. Now, if you're
struggling even more, what you can do is
you can come and put this just on object mode, and then you shouldn't actually have any problems whatsoever. It's also important to know before you click
this render Bn, so the render image boon, make sure that
you're on wireframe. And the reason is because
you don't want to be rendering out the
scene, you know, in cycles on Viewport shaded and then
render it out again, that is more than likely
going to lead to a crash. So what I always do before
I actually hit that render bone is put
it on wireframe. This is the lowest amount that Blender needs to use in
the actual Viewport. It's also important to remember that everything comes at a cost that you
put into blender. This could be things
like geometry nodes, porticle systems, simulations. Some of them have larger
costs than others, but everything down to the smallest object
has some kind of cost. So when you've got a scene that's just crashing
all the time, it's generally down to something that's quite a large
cost on performance. Now, the other thing to note is when you're actually bringing in textures to your scene,
it's important to know. So if we go to this
one, for instance, and we go to our shading panel, this is quite a complex shader. The more complex
the shaders are, the much higher performance
it's going to need. The other thing is, when you're actually bringing in textures, be very careful that
you're not bringing in really, really
large textures. So I recommend four
K be the maximum. But honestly, if
you can stick to two K textures or one K
textures or much better, it's going to make a
much easier time for you making large scenes. This is why a lot of game
companies, especially mobile, use only 512 or one K texture so they can handle the
performance and keep that optimization pretty high. The other thing is
about textures, if you're using
seamless textures, that is better than
using something that you've gone out and you've painted in substance painter. So it's just much easier to use seamless
textures because they can be used over and over again and limit
that performance. Also make sure on
the right hand side here if you come up
to this ear arrow, you can see that light and our scene lights
and scene world, make sure they are
turned off as well, because they will also
cost you performance. And last of all, before we move on to the
cycles part of it, if you come over to
your actual world, if you're using a HDRI within, we're not on this one,
we're using a sky texture. If you're using a HDRI, that's also going to come
at a cost of performance, and it's quite a large cost in comparison to something
like the sky texture. So if you can make sure that you're using something
like the sky texture. As you can see, it's
just one node here, and I know it's very
nice to use HGRI. But if you need to
control optimization, try and learn how to use
the sky texture instead. Alright, so,
finally, then moving over then to our cycles, we can see, first of all, that device I'm using is my GPU. It's always better to use
your GPU over your CPU. It will make it much, much faster because
it's relying on a lot of VRAM from your
actual graphics card. And as we discussed moving down, we can also turn off the denise. This is one of the
best things you can do to actually
increase performance. Next thing you can do is you can come down to where
it says light paths, and all of these come
at a cost as well. The lower you set these, the better it's going to be. I recommend messing
around with these last. So last of all, after you've done
everything else, this is what I would be clicking off or turning down,
especially caustics. They're also quite high
on the performance. Last of all, let me show you one of the best things
you can also do, which is if we've got
it on rendered mode, we're on actually cycles. We've turned on denise again. You can see how nice
this actual sand looks, but it comes a huge cost. So just remember this
comes a huge cost. Now, if I come over and down
and just scroll down here, we have one that says
simplify click that on, and then what you'll have access to is all of these options here. Now, one of the main
things we can do here is the texture limit and the
maximum subdivisions. The maximum
subdivisions, if you go over that subdivisions
in your modifiers, you can actually reduce
that or override that over here and simplify and turn them down
to one or something. That then will reduce the polygon count right
across you seen wherever it's over six or five or whatever you set this to increase
in performance. And one of the last
things we can do is we can turn down
this text limit. If I turn down the text
limit to something like 256, you'll see after a while, what it'll do is it'll
turn down all of those textures right across
you scene down to 256. So even if they're four K or eight K, if you turn this on, you can turn them all
down and then you'll see, look how grainy now
this actual sand looks, look how blurry these looks. And the reason is because
we've turned down our text limits all the
way down to 256. The other thing is,
if you're having problems renting out your seam, you can also come
in and turn them down in the actual
render as well, which really
significantly helps with crashes cuda out of memory
and things like that. Alright, the last thing
then we can do is, especially when we come to
actually rendering now, is you can see here that
if you hover over here, it says, use compact
VH structures. It uses less RAM,
but renders slower. So if you are having
problems with crashing, I recommend turning this one on. And if you go to the next one, you'll see a hover
over this, it says, use special type
VH optimized for curve uses more RAM
but renders faster. Turn that one off. Also, turn persistent data off if
you need to, as well, because what it means is that
Blender is caching all of that data of the scene to save on basically
having to redo it all. So if you turn this
off, what it's going to do is a fresh start every time, and it's not saving so
much in the memory. I don't actually know whether this one is bet to
turn on and off. Again, I would have a
play around with it. Something that is a little
bit more sophisticated, so we're not going
to go into it here, but you do have the option
that you might want to look into of baking out your scene. So, in other words,
you can actually bake all of your scene out onto a UV map for all the lighting and all the textures
and things like that, but mainly for lighting, to make sure when you
come to render it, everything is already
rendered out, and then all it's going to do
is render out the objects, or the textures and
without the lighting. So that then makes it much, much easier on your machine to have a fast render
without crash. So last of all, what
I want to say is, if you're building large
scenes within Blender, try and use the shader
panel more than actually bringing
in actual textures. That also is going
to save you a lot of performance and optimize
things really nicely. The only problem you're
going to have, obviously, is if you're sending things into Unreal or Unity or
another game engine, you obviously won't be able
to use those materials, so you will need
textures for those. This primarily is based on rendering and building large
scenes within Blender. All right, everyone, so I
hope you found that handy. I know if I was
just starting out, I'd really want to know
this stuff because it would have made my life so
much easier in the beginning. All right, everyone.
Thanks a lot, cheers.
56. Creating a Polished Turntable Animation in Blender: Hello. Welcome back to stylized
Blender Fred Environment, Greek Temple and
garden Workshop. Okay, so now we have
our Compositing setup. We can have a quick
zoom in, and obviously, we need to bring our IV in and our grapes, so
we can fix that. And I was thinking we could
maybe put a tree in by here. I'm not really sure, but we can quickly do that
before we do anything. So we want our IV, so let's turn this on and make sure the eyeball icon
is turned on, as well. And our grapes. We will select this and
open the grapes collection, and we want to turn
on all these cameras. So these were off by
default, but it looks. So we'll grab these grapes and have a quick zoom
in on these grapes. Now, we might actually have
to scale these up a bit, so I'm going to select
them all and just go to individual origins and just
make them a tiny bit bigger, so they're a bit noticeable. That should be okay. Maybe
we could duplicate one of these red ones and just bring
it up on the Z like this, so it's sort of mix it
a bit better, you know? And was there anything else? Should we have a treat w here? Maybe like one of these
small trees or something, I'll go O D Y and maybe
bring this up to here. Yeah, we'll go there
with that tree. So give something next
to this temple to fill in this gap
here. I'll be cool. So now let's go back
to camera view. And let's go to frame one. Now we can increase the focal length on
our camera to zoom in. So I'm just going to
slide this forward. Maybe we should go back
to solid view for this. And let's increase the
focal length a tiny bit. Till I here. So we want to
fill in all this empty space. We don't want to waste it,
and I have the ivy up here. I needs to go into
heaven up here. So let's go back to our camera and I'll do a quick turnaround. And everything seems
to be within frame. Yeah, this should be
fine for a turntable. Yeah, perfect. Look at that. Doesn't go outside
the edges at all. Nice. So we'll go
back to frame one. Now, we'll go into
render properties. For the turntable, uh I'm
going to just start at 50. I'll go to 50 samples. We should be okay with the
denoising with 50 samples. But if it's still a
bit blurry at the end, then maybe you want to increase
it, but we'll go to 50, so it doesn't take forever
to render, you know. And we will keep
everything else the same except for the output. So under file format under here, we want to choose FFPEG video. And for the encoding, I'm going to choose MPEG
four, so it'll be an MP four. And then output quality, I'm just going to
put high quality. I'm not going to bother
going any higher, and that should be good to go. Now, for output, you want to choose this and
choose where to save it. So I go to a folder here. I have a renders
folder I can put in. We can name this turntable.
And then hit Accept. So it will save as
like turntable.p4. And there we can just go
to Render Animation here. So I'll see you
when it's rendered. Okay, so here is my render. As you can see, it's
turning around, just as we expect it to, and it should loop
around when it gets to the end
here as it repeats. Now, everything's looking good. Now we have these leaves falling from the tree,
which is a cool effect, but I will show you how to disable this with the geometry
node settings if you don't want that because it looks
a bit out of place because it just kind of
disappears and restarts, so we'll probably get
rid of the animation. Unless you want that,
you can have some, like, scattered leaves around
on the floor to, like, make it look like it
blends in a lot better. I've left my human reference
inside the fountain, so I'd have to
remove him, as well. Another thing I might change is, like, I'll go into, like, the shader for the grass and the cypress trees and just
make them a bit brighter. I think it's all looking a bit dark in these shadowy areas, you know, this tree I
might scale up a bit. Just like little adjustments. So, I might go into
the compositing and just play with the
shadows and just make them a bit brighter and maybe increase the saturation on the marble and the
stone roof here. And that's pretty much it. Yeah. In the next lesson, we will set up our camera for our still render in front
of the temple here. I will see you in
the next lesson.
57. Still Camera Setup and Foreground Design Composition: Hello. Welcome back to stylized
Blender Fred Environment, Greek Temple and
garden Workshop. Okay, so for the falling
leaves animation, just click your tree here, and at the bottom,
you'll find particles, and just put the density to zero and do it for the
other trees as well. And that will just get rid of the animation
so it's not there. Nay, for the still render, we're just going
to add a camera. And then we want to go to
scene properties here, and we want to
choose under camera, we'll choose camera 01. So this will be the
active scene camera. And you can tell
by this icon here. If we look at the other camera, so it'll be under Bezier Circle. If we want this to
be an active camera, we just click this
green icon here. So now with this, we can put our Viewport where we want it. So like roughly around here to match the composition
of a reference image. Then we can hit
Control lot zero on number pad to bring the
camera to our Viewport. Now if we go to view here, we have camera to view. Now when we move
around the Viewport, it will stick to our
Viewport camera. Okay, so I'm going to put
the focal length to 30, and then we can move
our Viewport a bit. I'm going to turn off this grass so we can move a bit smoother. Now, where do we want it? Now, what you could do
is click your camera here and then go down to Viewport Display
composition Guides, and then you have
different overlays. So you can see here,
if I hide this circle, the way on this plane axis
here, we have this grid. This is like FDs. We have
some other ones as well. So you have like center
and then diagonal, core one, you got golden
ratio, quite nice. And then triangle A, triangle
B, it's all very useful. So I'm just going to
click on maybe foods or I'll go with golden ratio, I think, and just use it. It could be used as a guide to just fit everything in nicely. So like, we want, like, the top of these pillars to be, like, flowing with
these lines, you know. So maybe we could go
I also want it to be quite high enough to
actually see the grass. So if we go too low, it'll just be covered
by the hedges, so I'm just going to
adjust things until we get to a nice composition.
I could look quite co. Now, we can adjust the
focal length a bit, maybe go down to 28. We can fit more of
the n in like this. I think I'll go to here. So now we have the fountain is in
line with this line here. This temple is in
line with this. We have some empty space here. Like, these are flowing
with the middle lines. We have the space here
with the archway, and then the space
here it's quite nice. Now, I don't know
about this tree. I might for this shot, I might replace this tree or, like, make it a bit smaller. I don't know. Because it's looking a bit too out of place for
this composition, so I'll move it on the Y a bit, maybe just bring it down
to here or something. So then we get this end of
the marble here is in shot. Now all we have to do
is go to File, append, and we want to find
our resource file. We'll go to Object
and search Mountain, and we can bring in both
of these mountains. Now, if we make sure to go to view and we'll
turn off camera to view, I'm quite happy with this setup. And before I forget,
I'm going to move the human reference
out of the shot, maybe bring him down so he
doesn't cast any shadows. Now, if we zoom out, we'll have these mountains, and what we can do
is go to top view, and we can bring
them quite far back, and then we can scale these up. And then I'll bring
this one around here somewhere and
then this one by here. We'll go back to camera
view and have a look. Now, let's check on front view. So this is in line with we want it to be in line with the
ground, really, don't we? So if we bring it down
to here and now we can see now we have this empty
space at the bottom. We could fill this in with, like, a plane and then add
some mountains on top as well. But let's get these mountains in where we want them first. I'm going to move this on the Y. And I'll have it just coming off the edge
of the screen here, and then you can fill up
this empty space here. And with this one, I might scale up a bit and bring
it forward on the Y. So this one could be just poking through like here, maybe. And then I'm going to
duplicate this with Alt D. I'll bring it in on the X, and this is obviously too close. Both of these look a bit
too close, actually. So let's push this back. Let's push this back
and let's rotate this guy around. And
let's have a look. I'll move this one until I get
shape in shot that I like. Then this I might scale up
a bit more and have it go in somewhere where I like it. Now, I might duplicate this
guy and rotate him around. We can scale him on the
Z a bit and then put him somewhere maybe by
here would look nice. And then we have this here. Now we think about
this empty space here. So let's scale this up a bit. And we'll bring
this down to here. So let's just add Let's do Shift S and then
cursor to world origin, and I'm just going
to add a plane. I'll go mesh plane. And we kind of want to fill in this space here just so we
have something at the moment. And then we can
see how it looks. So I might bring it
down a bit more. Just something
like this for now. It's got a camera view. So it's looking a bit flat, but we can use this
as a reference. So if we grab maybe
this maintain, I'll scale it on the Z a
bit more and scale it down. And we could just fill
in the space here, maybe scale on the Z a bit more. We'll add some layers to this. So I'll do Old, scale it down, scale it on the Z, so
it's not so intense. While we don't have
to do it all the way, we can just bring one. Maybe if I go, I'll
have this one behind. I'll do GX here and then
bring this one forward. I'll do then GY here, and then this one can
come to the front, maybe make it a bit smaller. Then we have something here. Now, we do have some flat
area at the back as well. So what we could do is Alt D, rotate this around this
way, place one by here. You'll have to come over a bit. This one will come
over a bit as well. I think, I think that's okay. That should be fine
then. This side. That should be okay.
We're not seeing any flat surfaces, I believe. Yeah, just a little bit. We need to bring
this mountain down, but then I'll scale it on the Z. Yeah, so that'll be right. Now we can just do
some test renders. Okay, so this is
the result we got. So obviously it's using
the same compositor of settings from the turntable, and it's not what we want, so we will do a different
preset for this shot. We also want to make sure we're not rendering on
frame one up here, because obviously we need
the animation to be, like, in the middle of
it with the fountain. Some other things
I might change, we obviously need
to add the mist in, so we'll adjust the depth
of the mist and I will also move some trees around for the shot just so it
looks nicer for this image, we will do all that
in the next lesson.
58. Balancing Camera Composition with Mist and Lighting: Hello. Welcome back to stylized
Blender Fred Environment, Greek Temple and
garden Workshop. Alright, so where are we? So these trees, I'm going to move this on the
Y. So we have one. Maybe maybe we could
get one here somewhere. I don't want it to be
blocking this here. What if we scaled this up a bit? We'd have to scale both
of these up, wouldn't we? So we could try scaling
these up just for now. And I'm just going to
double check over here. Going to move this
to the side a bit. This tree here, we
want this back tree. I'll grab this and move this on the Y so it's more in frame. And then I'll duplicate
both of these and go D Y, and they can go on the side
of this tiny tree here. Now I just want to adjust the spacing of these
trees, really. Maybe this could come
towards the edge a bit more. I'm going to turn off overlay
a sec and have a look. Did I duplicate this tree? No, do we need this tree here for this
shot? I don't think we do. It might look better
if we deleted it, and then I'll move
this on the Y a bit. So now this is next
to the temple. Now, maybe we could add, let's go into rendered
view and have a look. I'm just having to
look at the balance of the red with the
green, you know. This should look
quite nice, actually. What I might do
instead is move these. So these trees I will have
on the left of this archway, so then I can move this
tree forward a bit more. So I move these on the
Y and we'll pack these in quite close to each
other, like this. And then maybe bring one more of these small cypress
trees to here. And then maybe we could
bring this tree forward, and I'll make it just a tiny
bit bigger, not too much. And then I'll just move this mountain maybe towards
the right a little bit more. And this tree here,
should we have another tree at the back? No, I'll keep this space empty here and just
keep this tree here. Maybe bring these
bushes back a bit more like this and
grab this one. We'll move that to there.
And these benches, we'll move into shot as well. So we'll go GX, move
them this side. Cool. Yeah, so maybe we could grab one more cypress tree and
move it to the side of this. We want this to be like
I'll move this on the X, so it's like in line and its should look a lot nicer when they're
closer together now. Let's want GGY here. Yeah, that should be cool. Have a quick check
in rendered view. Now, we could play with the
lighting if you wanted to. Maybe we click the sun here and put the exposure
maybe to let's try 015. Maybe you put it to one.
How bright does it go? Okay. We went 1.3 on the exposure just to
exaggerate the sun a bit more. And now, I'll just
quickly go to Solid view, and where is our
camera it's here. So let's just click camera here. Right, and then we
can zoom in on it. So if we go to show Mist. Yeah, so we click
Show Miss here, and then we can
see with this line how deep the mist goes. So if we increase, would it be under
scene settings? Or world settings,
mist pass, depth. Let's put this to,
like, one, two, five and see how
far that line goes. Should we push it
past the mountains, like 130 just to be safe? Yeah, just so we can see that, white dot at the other end. And now I will hit Render Image. Okay, so here is our new render. Now we can just
hit load defaults to get our default settings back and we can start doing the compositing
for this render. We will do that in
the next lesson.
59. Mastering Scene Atmosphere with Mist and Color Grading: Hello. Welcome back to stylized
Blender Fred Environment, Greek Temple and
garden Workshop. Okay, so now let's start by
compositing our final scene. So let's turn on mist and
we'll expand this down. And I'm going to drag this black arrow
backwards a little bit. So we can choose
how far the mist is from the beginning
of the camera. So I want it to,
like, just touch the just touch the
back of the wall here. I go to about there. And with this mist here,
we can adjust it. Let's give it a
slight yellow tint. Then with this white arrow here, we can bring this down to adjust the transparency
of the mist. So just a little bit, something around by
here, maybe a bit more. Something like this. So next, we will open our gloss. No, before glass is color. So let's have a look at color. So for saturation,
I might go 1.05. And then for value,
let's try 1.2. So it really brightens
up the colors. So we'll close color,
now for gloss. Let's just bump
this up a tiny bit. And that should be fine. Maybe contrast to one.
We could try that. That closed gloss.
Now, for transmission, transmission, I'm going to
bring this curve a tiny bit. And for the lift, we could try like
a bluish color. For the gamma, we could try a slightly less bluer
color, something like this. And then for gain, we could try maybe bringing
the color to here, but then bringing
the darkness down. So we'll go to, like, something maybe a bit brighter than that. We'll go to like here.
That should be cool. Now, for volume, we can
just check that off. Light bloom, we don't
have to worry about. Now for environment.
Let's open this up, and let's bring this curve out. Something a raindebt like this. Y for the lift, I'm going to give it
like a bluish tint. And then for the gamma.
Let's give it like a yellowish tint,
something like this. And then for the gain, we could probably leave
this as it is. Could add some more brightness. Actually, if we lift it up,
it makes the sky a bit bluer, which is quite nice.
We bring it down. Yeah, we want it to be bright, quite bright because the
sun is quite bright. So you want it to kind
of make sense, really. What if we adjust this
gamma a bit more? What if we were to bring it up so it blends in with
the mist a bit nicer. Okay, so that should be
fine for environment. Now, ambient occlusion. Let's turn this on, and let's
bring this black arrow in. And then we'll check color. And then for the color, maybe we could try a value
over here somewhere. Something like this maybe
and then for master control, we can adjust this curve. So if we bring it out here, that could look quite nice. What if we were to bring this
black in more and really exaggerate it or bring it back. I'll leave it to
around about 0.2 ish. That should be okay.
Maybe even bring this curve up a bit
tighter. Right? So that should be okay
for ambient eclusion. Now we can compare it by
turning it on and off. I don't see much here going on. Right. What if we
bring this value down a tiny bit, we could
try bringing it up. I think I prefer
the brighter look. That should be a lot nicer. Now, for effects, I'm going to go with box
sharp and then soften. And these values should be fine. Maybe 0.2 on the soften. We will have color balance. For color balance, we could
play with a gamma here. So let's give the gamma like a bluish tint,
something like this. For the lift, let's try. So maybe we could lift it a bit. Yeah, we will lift it a
bit. Something like this. And then for gain,
maybe we could try a yellowish
color for the gain. But not too much. We
want it to be subtle. Right here is perfect, I think. You could see these values here. Now, that is color balance done. How do you be curves? Should we play with
this? Maybe we could just boost out a tiny bit. Something like this
would be okay. I for hue and contrast, maybe we could just bump
up these greens a bit. We could bring
these yellows down, a tiny bit, very subtle changes. Maybe bring this blue down, and then this blue
up a tiny bit maybe. And that should be okay for the AgiB curves and
the hue correct. Now, brightness and contrast. We don't have to do much
here. I think just 0.1 on the brightness and then
0.2 on the contrast, just to give it a
tiny little bump and then hue
saturation and value. The saturation, maybe we
could try something like 1.025 or something,
just a little bit. Then for value, you get adjust this value
to something nice. I will go to 0.8
on the value here. Then we'll check on denoise. And then accurate UeHDR. Now, to finish off this final render after
Compositing here, I'm going to go to here
and change the resolution. So I'll put star and then two. So it'll go to 3840 by 21 60. So this will be a four K image. And then I'm going to go
to render properties, and I'm going to bump up these samples this
will be Mac samples. It might not even
use all the samples. I'll keep going until Blender decides it has enough
information to denoise it. I'm going to go with
300, nice and high. It might take a bit while, but we'll have a
nice render of this. So, I will see you
in the next lesson.
60. Polishing Your 4K Render and Final Environment Adjustments: Hello. Welcome back to stylized
Blender Fred Environment, Greek Temple and
garden workshop. So yeah, we made it.
We finally got there. Here's our four K render and
with this, we can, like, really zoom in and analyze
some tiny details. Now, there's always changes that could be made to
make it look better. Like maybe the
ambient occlusion on this white marble material
could be toned down a bit. It could be, you know,
a bit too strong. Maybe these, like,
water particles. You could, scale them down,
increase the density. Kind of remove the saturation a bit so it's not
such a dark blue. It's never going to be perfect, but you can always go
back, make changes. You know, I've added, like, a row of walls here
at the back to, like, separate it from
the mountains behind. And I did, like, move the
sun around a bit as well, and just did the lighting. You can always go
back and just make little changes until
you're happy with it. So yeah, hopefully you've come out of this with a better
understanding of how to approach larger
environments like this and build it in a way where
all these pieces kind of fit together and you can
always make changes really quickly and trying to
keep it nice and optimized. Ho hopefully your
scenes didn't get too heavy once we added
all this grass and all the trees and stuff. But been a lot of fun. I'd like to know your feedback
on the course, you know, how well my teaching was, and, you know, any criticism I'm always looking to improve. From here on, you could, if you wanted to join
the Fred Tudor discord. Now, I will leave an invite link in the course files for you. Yeah, so you can just join. You can show me your work, if you have any questions
about the course, if you're stuck on anything,
you can ask the questions. I can do my best to
help you through that. So yeah, if you've
made it all this way, congratulations, and I
hope you enjoyed it. Take care, everyone,
and happy modeling.