Transcripts
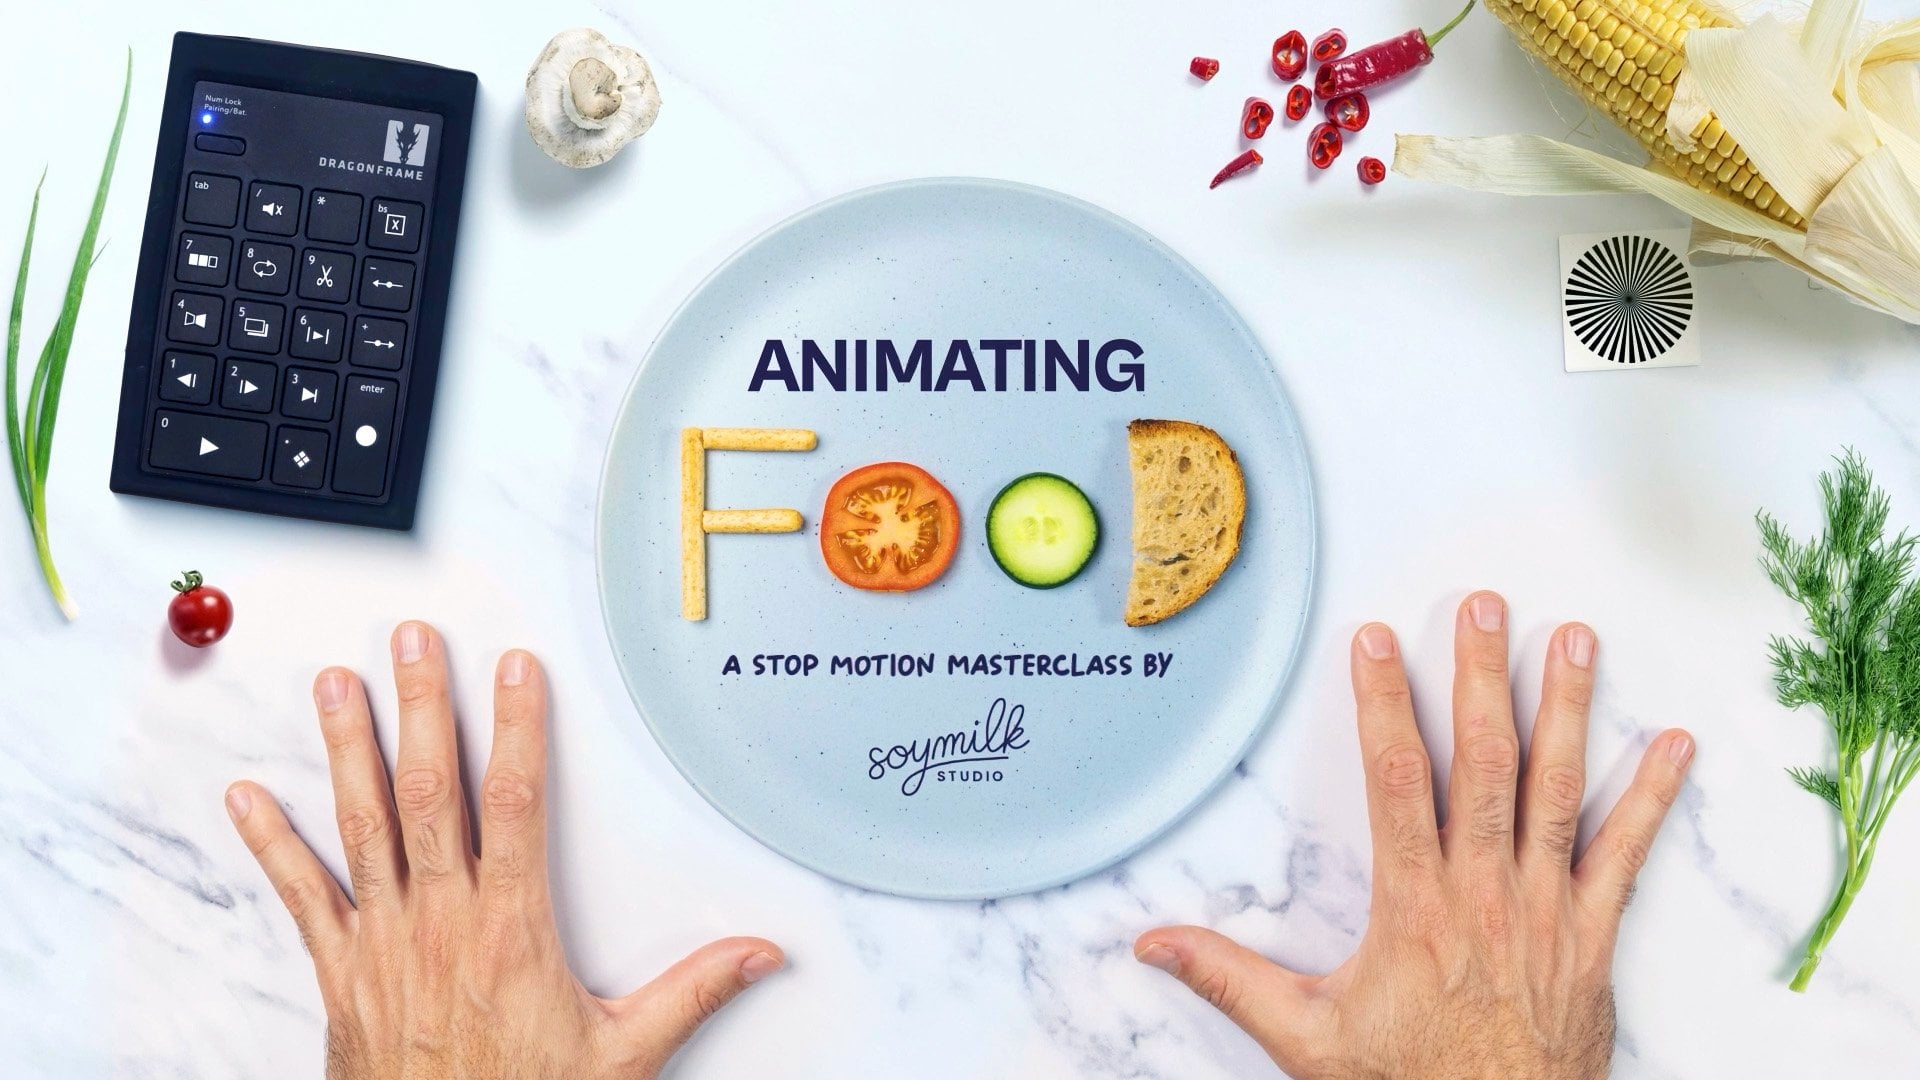
1. Trailer: Brand, Brand A. Hello. We are Jenny and Paul, A start motion do based
in Bordeaux, France. Jenny's designer and
I'm an animator. Ten years ago, while
living in Australia, we joined a skills and
funded soy milk studio. An animation studio specializing in mixed media animation. Where we mix our love
for the handmade with the latest digital
tools and techniques. We have worked with
different clients and on various projects from music
videos to short films, TV commercials,
social media content, and even museum installations. Regardless of what
screen it ends upon. One thing we try to
keep consistent is our passion for storytelling and the tactile
aspect of our work. We also make sure to allow time for personal projects
and short films. Our passion for animation is something we just have
to share with others, whether it's online
or in person. And we believe stop motion is the most fun and accessible animation technique out there, producing unique results and
with endless possibilities. In this skillshare workshop, you will learn how to create your very own start
motion animations to share on Instagram without the need for expensive
cameras and software. All you need is
your smartphone app and some asso items
to animate with. We'll talk about our inspirations
and what got us into stop motion in the first place where start motion
actually came from. It's different types now
it's being used today. Then we'll talk
about the equipment you'll need and some tips and tricks to avoid splurging
on expensive gear. Next we'll show you how
to set up your very own stop motion studio by
stabilizing your camera, placing your lights correctly, and understanding the ins and outs of our Fabrice
stop motion app. To achieve professional
looking results, we will put theory to
practice with an exercise designed to teach you the basic principles of
stop motion animation. We will then take you step by step through our
entire process for creating a stop motion video for an ethical
brand on Instagram. From coming up with ideas with the mood board and
the storyboard, to executing the animation and polishing it off
with final edits, color correction, and
our top expert tips for best results on Instagram. This workshop is designed
for anyone looking to create creative content
for the social channels. It's perfect for brands,
influencers, creatives, and content creators looking to add that magic of stop motion to the visual arsenal,
ready to animate. See, you're in the workshop.
2. Values and Inspirations: Because we work as a Duro, our style has matured quite naturally and is really
unique to our collaboration. Jenny brings her visual baggage, and I bring mine with her background in product
design and craftsmanship. Jenny adds that organic and
handmade element to our work. And her sense of
color and simplicity is a great complement to
my technical knowledge, which is more focused around storytelling and the
animated movement. This crossword between
my digital background and her craft skills is where we like to spend most of our time to explore
ideas and be creative. Finding your style takes time and it's a never
ending journey, a topic that could be its
own separate workshop. Our advice is to explore as many techniques
and styles that inspire you until you can really identify what
you enjoy most. For example, a few years ago we ran a style business
where we created short animated
wedding films that couples would scream to their guests at their
wedding receptions. The goal of these
films was to create a love story and
wow their audience. Making each film
was a lot of work, but our couples trusted us completely with
full creative freedom, allowing us to explore
many techniques and really hone in our style and perfect
our skills and craft. The wonderful thing
about stop motion is that you can use
pretty much any object around you and bring these inanimate objects to life with just a
little imagination. The sources of inspirations are therefore endless
and will help you reconnect you to
your inior child and that sense of fun,
play, and wonder. The application for our work
has evolved over the years. And while there is a great
variety and satisfaction in having all these
different avenues for our animations to be shown, we are now yearning for more meaning and impact
and have decided to pivot our client based to more ethical brands with whom we share common
goals and values. The natural world that surrounds
us is a central part of the shared values and plays a big role in our inspirations.
3. What is Stop Motion?: Now we got introduced and you
know a bit more about us. Let's define what stop
motion actually is and explore what the
medium offers in the different types of
stop motion you can do. In its essence, stop motion is an animation technique
where objects are shot one photo at a time with the objects being moved
between each shot. When you string these follows together and play them quickly, it creates the
illusion of movement. A great example of
the word stop motion, also known as stopping the movement is
found in the work of English photographer and pioneer of motion, Edward Moybridge. Moybridge is known for a series of photographic experiments. In one of these experiments,
the horse in motion, he wanted to find out if at some point during
a horse's gallop, the four hooves would leave
the ground simultaneously. The challenge was to
catch the horse in the photo so quickly that his
movement could be frozen. Moybridge had the
ID to high wires, to multiple cameras across
the custom made track. The horse would then break the wires as it was
galloping past, triggering a series
of photographs. The result, a succession
of frames that would influence
the development of cinema as we know it today. Yes. As proven by more bridge, horses do fly more bridge. Went on to experiment with the popular optical
gadgets of the time, the Zpracoscope,
the Phantoscope, the zotrope, or the stroboscope. Despite the complicated names, these gadgets work in a
similar and simple way by creating the
illusion of movement. Using a series of
images played in succession to create
a moving image. Exactly how we are able to
see movement out of steel. Images remains a hot
scientific topic to this day. This visual phenomenon, also known as the
persistence of vision, or retinal persistence,
was studied by Greek scientists and deserve the attention of a
certain Isaac Newton. This is the core of
More Bridge's work and animation at large. Three main principles
that we need to keep in mind to better
understand the craft of stop motion are image
repetition and speed. We will explore each in the
next videos, but for now, let's take a look at
the different types of stop motions out there and talk about which one will choose for our
specific purposes.
4. Types of Stop Motion: The great versatility
of stop motion has allowed many techniques and
various processes to develop. In this video, we
will take a look at a few different
types so you can get a good overview of the possibilities that this
wonderful medium offers. Claymation, clay,
plasticine, and other malleable
materials naturally lend themselves to stop motion. Thanks to the ease of use, you can shape and form clay into anything your
imagination can picture. It's only natural that
many animators chose this material to give birth
to their ideas and stories. Popular examples are Wallace and Grame by Hardman and Bristol. Or Marian Max by Astron
director Adam Elliott. Clay also opens the door to
more complex character based stop motion with the use
of articulated dolls, molds, and armatures to see how far stop
motion can be pushed. You can dive into some of
the behind the scenes from Wes Anderson or like
as feature films. The amount of work and skills required to make this film is just mind boggling object. Another widespread
technique, which happens to be our technique of
choice for this workshop, is the manipulation
of existing objects. This style allows you to be very creative and diverse with
your choice of objects. A pencil does not have
to represent a pencil. You can become
anything you want. A great example of this is
the body of work of Pez, who uses a multitude of objects from everyday
life to fill his films with visual
surprises and eye candy. Literally, pixilation.
In pixilation, the object to animate is
yourself or not a human being. This technique can be quite physical and requires
plenty of patience as you are taking images
while maintaining a different fixed posture
for each photograph. Resulting in human puppets that can perform in amazing ways. The forerunner of
this technique is the legendary Scottish animator Norman Mclaren as
sin in his work for the National Film
Born of Calendar Cut out another interesting type of stop motion using
collage and cutouts. Here you can recycle
old magazines, newspapers, cardboard, and other kinds of
flat materials to create entirely new two
dimensional scenes. The comic animations
of Terra Gillum are a good example of what can be achieved with this
experimental technique. Paper asin previously for the cut out style paper can play an important part in
any stop motion thanks to its versatility
and form origamies. And three paper forms
are an essential part of our work and can allow you to
create entirely new worlds. Some other techniques
worth mentioning are Lego, loved by kids and adults, and a great introduction
to the world of stop motion silhouette,
great for storytelling. And one of the oldest
techniques Ain in Lotti Ringer's amazing work, The Adventures of
Prince Ahmed from 1926, thought to be one of the oldest
surviving feature length animated film paint on glass. Animating paint can
also be achieved by manipulating slow drying oil
paints on sheets of glass. The best known practitioner of the technique is Russian
animator Alexander Petrov. He has used this
technique in seven films, all of which have won
prestigious awards. Sand, Another
beautiful technique that plays with light and form, pioneered by Carolyn Leaf, an undergraduate student
at Harvard University, in 1968, she created her
first film, Peter under Wolf, by dumping beach sand on a light box and manipulating
the grains to build figures, textures, and movement
frame by frame. Again, this is just a
taste of what is possible with stop motion animation
out of these techniques, which is your favorite. Leave a comment below
and let us know. In the next video, we will
get down to business and talk about the gear and materials needed for you to
start animating.
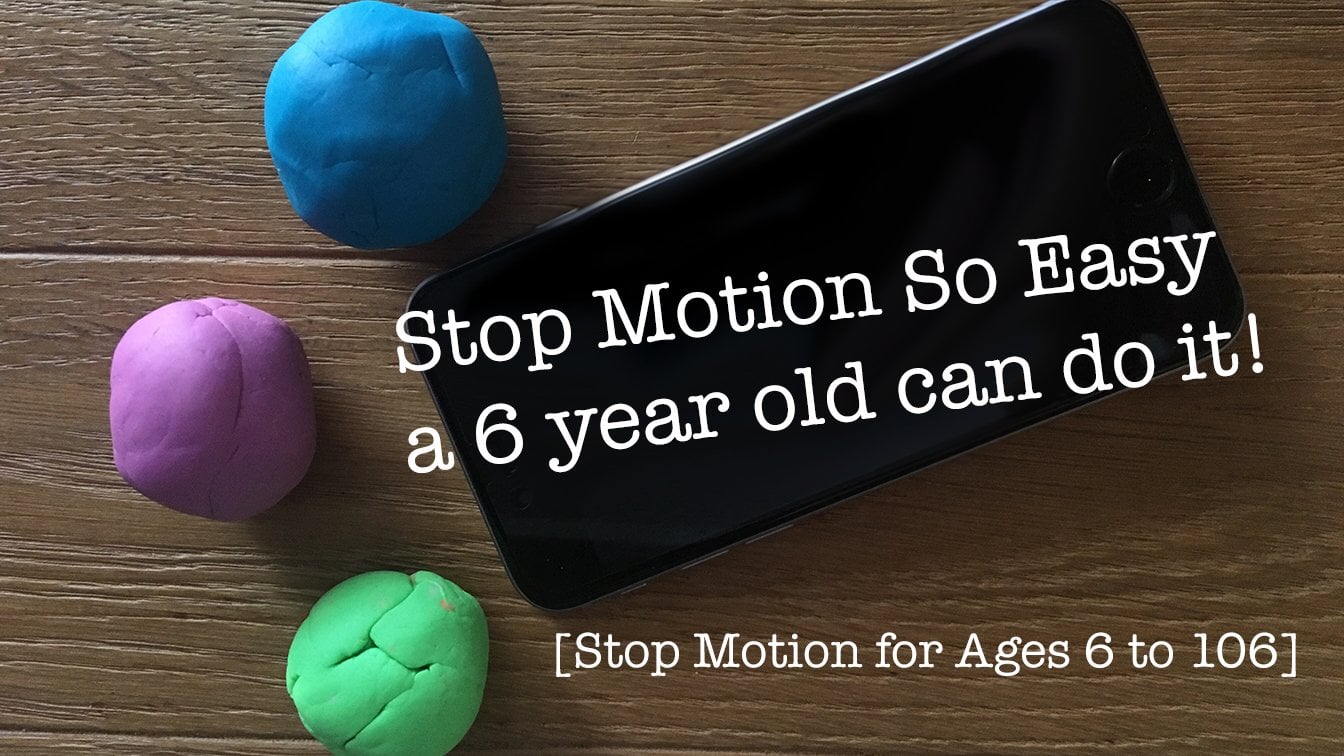
5. Equipment: Before we get started, we need together a few items. In the past, you
had to invest in expensive cameras and softwares
to create stop motion. While it can be still the case, if you want to go pro, it's
no longer an obligation, especially when getting
started with smartphones in our pockets that combine supercomputers and high
resolution cameras. All we need is the write app
and a few inexpensive items. To get started, here's
what you will need. First, we need the smartphone. Both iphone and
Android will work. Next, you will need to download and install a stop motion app. There are a few at there, but we recommend one
called Stop Motion Studio. There is both a free version, Stop Motion Studio, and a
paid one, Stop Motion Studio. Fro again, either
will work here, but we recommend you
purchase the pro version, which costs less than
$10 Well worth the price some kind of light
to light your scene. This can be a desk light or another artificial
light in your room. We suggest you avoid natural
light like a window. We'll explain why
in the next video. A large cardstock piece of
paper for your background. This is optional,
but if you have some headphones like the ones
that came with your phone, that have some buttons
to control the volume, this can come in handy. Last but not least the thing, a stop animator can
never have too much of sticky putty to
all things in place. Do you have all
these items ready? Great. In the next video, we'll put them to use and set up your very own
stop motion studio.
6. Studio Setup: Okay, let's now run through the preparation of a
basic stop motion set. We will also share our tips and tricks for each
piece of equipment. There are four basic elements
to any stop motion chute, a space lighting camera, and a software to capture
and review our animation. In this video, we will look at the first two
elements that have to do with the physical
set up of your, namely space and light. A very important principle
for a successful piece of stop motion is that everything we do must be under our control. You need to become
total control freaks if you aren't we already? What do I mean by
that? Let me explain. Starting with the surface
we're going to animate on this is usually a desk or
a table top of some kind. While a desk is something
we can easily control, it can sometimes be unstable. We have a bit of a woble to it, that's when the control
freak mode kicks in. A solution is to stabilize the wouble with a
piece of paper. You can also tape down
the legs of the desk to the floor to avoid any
accidental movement whatsoever. To create a clean shooting area, you can use your car stock
piece of paper and create a seamless backdrop by taping it to the shooting surface
and the wall behind it. You can also invest
in larger paper rolls like these if you
shoot bigger products. Let's now take
lighting, for example. While it could be tempting
to set up your desk next to a window to take advantage of that beautiful natural light. This can actually create
some issues in your video. Sunlight coming through a window is, by nature, unpredictable, and will constantly be
changing due to clouds passing by or just the time of the day changing the
lighting conditions. If you have a
window, you need to control that light by
blacking it out with curtains or a blanket
and replacing that sunlight with consistent
artificial lights. Which lights to use?
You may ask, well, for our purposes, any lights that you have available will do. Lighting is a huge topic and
can be a course of its own, But don't worry, we'll keep
things real simple here. If you have two
available lights, the more powerful
under two can serve as a key light will help
light your subject. And the other less powerful
one will be your feel light, used to fill in the
information in the shadows. If you have just one light, then you can use a piece
of white cardboard to act as a reflector and bounce some of your
key light back onto your subject pro tip. If you have the choice,
LED lights are better than incondensing bulbs to avoid flickering and will stay cooler, which definitely
helps if you work with materials that are
more heat sensitive, like clay for example. We also like using
aquel lights because of their flexible bodies
and the fact that you can clamp them
pretty much everywhere. Lighting is all about
experimentation. Play with the placement
of your lights, the orientation and
their intensity, if they are dimmable, great. We now have a good set
up for our stop motion, with our set and lights up. Next we'll talk about how
to work with our smartphone and the accompanying app to shoot our stop motion animation.
7. Setting up the App: Okay, let's now run through the preparation of your
camera and some settings. You recommend for the
stop motion app you will use for a camera. We'll use our smart phone built in camera to
take our photos. A good habit is to clean your camera senses
before every chute to avoid any fingerprint smudges that can affect your
picture quality. A critical step here is to also stabilize your camera so
it doesn't move an inch during the T. The best way is to secure it to a tripod with
a clamp or phone holder. You can then further secure
your tripod by taping or gluing it to the floor to
avoid any accidental bumping. You can also place a sandbag or some other heavy
bag on the tripod. A rice bag, for example,
works really well. Again, this step is key, as the slightest change
in your camera position can ruin your video completely, forcing you to
start from scratch. We've been there not fun
if you don't own a tripod. There are a couple of hacks to stabilize your phone
with household items. If you shoot an upright video, you can use a mug and have your phone rest inside the
mug or lean against it. Books and tape can also be handy when trying to secure it. If you shoot from overhead, you can use the
edge of a table or a chair and shoot
down to the floor. Or use a kitchen cupboard when your phone is
nice and secure. Interacting with it
by taking frames and previewing your animation
via the touch screen, cause some micromovements that will show up in the
finished piece. After securing it down, you want to avoid touching your phone as much as possible. Here are some different
ways you can do so. Use the timer function to
have the phone take pictures automatically based on
your desired interval. Use the volume button on your wired headphones
to take pictures. Use the remote camera
function and control all the manipulation via a
secondary phone or tablet. Or use a Bluetooth remote
to trigger the camera. Again, the key here
is to always be in control and minimize
the risk of accidents. The last element
of our preparation is the software or
app we will use to capture the frames of our video and preview
our animation as we go. Our app of choice is
Stop motion studio by a company called Cat
Eater Quick Name. There are alternatives including an app called Live Flaps, which is also worth exploring, especially considering
how it uses a more native vertical format
better suited for socials. Both live flaps and stop motion studio have
three options. But we prefer stop
motion studio because of its features and cheaper
one off price of 999. As opposed to live flaps, which costs 499 per
month or 690 per month. If you go with
their yearly plan, we obviously recommend
a one time fee of Stop Motion Studio Pro. Otherwise, you can try
both free versions to see what suits you best. Whichever app you use, they both work in a similar way. And again, our guiding principle here is to always be in control. So with that in mind, let's dive into the app and show you the settings we
use for best results. Okay, so let's launch
Stop Motion Studio. The first screen we see is the gallery where all of
your videos will live. This is also the screen
we will come back to when it's time to
export our video. Let's create a new movie. We can now see a live
image of our set. This is where all the
magic happens at any time. If you get lost
in the interface, you can click on the
Question mark button to get a quick overview of
what each button does. Let's go ahead and first set up our general settings by
clicking the gear icon. The first option from
the left is our speed. Just like our third
principle, remember speed, this is where you can
adjust how fast or how many frames per second your
videos will be playing back. I'm going to choose
12 frames per second. For now, we can always
come back to this menu and adjust this on the fly
to get the desired look. Next up is an important option, or we can set our
aspect ratio or the crop that will be
exported out of the app. Since we are exporting
to Instagram, you will want to select
either the square format or the portrait format to maximize screen
space on Instagram. To get the best resolution
from this format, we will next click
on the four K button and make sure our quality
is set to four K. Up next are the
playback options, again, because we are
focusing on Instagram here. And we know that by
default Instagram will loop all videos. We want to take advantage of this and make our preview a loop playback to simulate
how we'll play back on Instagram. That's it. Just click Done to confirm
these general settings. Now let's finish up by clicking
on the camera settings. This is where we will set up
all of our camera controls. Again, our guiding principle of total control here will dictate that we want as much
manual control in the camera settings to
avoid any flickering. First up is the
camera selection. This is where we can select the type of camera on your phone. If you have a recent phone, chances are you will be able
to choose from a number of lenses rear front wide, or tell which is
your zoomed in lens. Pick the one that best suits you seen Up next is our camera mode. Depending on the mode you pick some additional
menu items will be available to control
focus and exposure. Let's look at each one. As you guess we want to
avoid auto mode entirely. As it will continuously
adjust focus and exposure and cause
image flickering. Al allows you to tap your screen once to set and lock
focus and exposure. Allows you to lock focus but
control exposure manually. And gives you complete manual control over
exposure and focus. Next is our white balance. This setting depends on
your particular scene and it's lighting conditions. Try to different options, incandencent sunrise, et cetera. And pick the one
that looks best, the one that gives you
the most natural whites. Depending on the mode you
have selected earlier, you will see some options for
manual controls over focus, SO exposure and shutter speed. This plus icon is digital zoom. You can apply to fine
tune your framing. This can give you fix
lited results quickly. So be gentle if you
use it, or better yet, use your telly lens
in the first menu if you need to get
closer to the action. The last button gives
you handy options to mirror flip your camera, which can be useful for
overhead situations. Great job. We've covered a lot of ground. You've learned all about setting
up a space for shooting, lighting it correctly,
securing your camera. And how to use a Stop
Motion Studio app. We are ready to animate now. Lights, Camera action.
8. Let's Practice!: All right, we are finally
ready to make things move. We are going to put
our new font knowledge to the test and
make this bad here. Move by itself, spin around, and then exit the frame. So go ahead and grab any object around you that
you'd like to see move. It can be a mug, a
piece of clothing, or food item. Anything
will work here. To start with, we
are going to take an empty frame
without the object. The idea here is that
we have a bit of time passing before the object
slides into the frame. The exact time is up to you. I'm going to make it 1 second long because we have
set a frame rate, or speed at 12
frames per second. This means I need to take
12 photos to make 1 second. I could do this manually by taking one photo after another. Or a better way is
to tell app to hold or pause this photo.
I can do this easily. If I go to my timeline
and tap my first frame, a pop up menu will come up. In that menu, I have
a pause button. I can then set how many frames I want to hold this
particular frame. Let's set a slider to that
12 and tap down to confirm. You can now see a little
number in the bottom left of our frame telling us how long
this frame is passed for. Let's go back to a live frame
and take another picture. But this time I'm going to introduce my vase
here into the frame. I want to be very gentle
with how much I move the object here and only have it show
slightly in the frame. Remember our second
principle, right? Repetition. The
more frames I take, the smoother my animation
is going to look. Let's continue on and
take more frames. One thing that can help us here is to turn on
our onion skin. What's an onion skin, you ask? Well, onion skinning basically
allows you to overlay your previous frame
with the current frame creating a ghost image. This can be very helpful
to ensure that you are moving your object at roughly
the same amount each time. You can actually click on
the onion skin button. And it will allow you to
switch from seeing just one frame earlier to three frames
up to five frames earlier. You can control how visible that previous frame
is by sliding a single slider up and down
just below the slider. You also have a grid button, which will help you center
your object in the frame. Very handy at any one time. We can tap the play
button to play back and preview animation and
see how it feels. It can happen sometimes that your hand was
still in the shot when you captured the frame or you didn't move back far enough, leaving a bit of
shadow in the shot. In that case, you'll want
to erase that frame. Don't worry. Super easy, just go back to your timeline. Tap the frame you
want to get rid of and just tap the let. Okay. I have now got my object right in the
middle of my frame. Let's make it spin. I want it to spin three
times on the spot. The best way is to make it spin once and then copy
your spinning frames two times to save some time.
Let's start with the spin. Because the vase initially
came in from the left, I want it to rotate
counterclockwise to keep its left
to right momentum. The trick here is to again, move in a similar increments
to have smooth motion. If you think of a clock phase, depending on the speed
you want to achieve, you can choose to
move in 5 minutes increments for a slow spin, or up to 15 minutes
increment for a quick spin. The important thing here is
to have the last frame of your spin end at one increment
before your first frame. To create a seamless loop, a common mistake is having your object move
while it rotates, creating an unwanted jitter. Use your onion skin
here to try and stay as centered as possible
while spinning. To duplicate my spin,
let's go back to the timeline and slide back to our first frame of the spin. Tap that frame and choose
Select in select mode. Slide all the way forward
in time to your last frame. The selected frames will
be highlighted in blue. There's no need to include the life frame in
that selection. Once all the frames of your
spin have been selected, tap that last frame
and select copy. Now tap your life
frame and paste. Repeat that paste action
again for your third spin. Now you can press play
to watch the magic. There you have it. The
vase is spinning around. I can now pause
the last frame for maybe six frames before
the vase exits the frame. Same process. I go
to my timeline, tap the last frame, choose pause and adjust it to
be six frames long. Now I can go back
to the live view and finish my movement
towards screen right, so the object exits the frame. Let's play our animation
now and it's done. And make sure
everything looks right. If it doesn't look
perfect, don't worry. It's just practice for now. It'll take a few trials
until you get more comfortable with
the app and leave the whole stop motion process. Let's now export our stop motion so we can
share it around. Let's now head back
to the gallery screen where we can see all of our projects in the top right
and select your animation. Then tap the Share button
and choose Export Movie. You can then choose
different Share options, E mail, air drop,
Instagram, et cetera. With this practice
under our belt, we are now ready to
get serious and take on our first proper
stop motion project. See you in the next video.
9. The Brief: Now that we have got the technical and
practical details out of the way with
our practice shoot, we can now focus on the creative possibilities
of stop motion. For our first project, we decided to pick one of our favorite brands of
the moment and create a short stop motion to promote their Eos and one
of their products. We want you to tag
along our process so you can learn all the
different steps that got into a successful stop motion
video and apply it to your own brand or future
clients you may have. Our very first step
in a brief is what we like to call the discovery
and research phase. This is where we learn as much
as we can about the brand, its values, and its products. We dig deep here and spend a lot of time on the
client's website, their social accounts,
and chat with them directly to really understand
their needs and wants. For this particular example, we picked a local brand that
we would love to work for. This is actually a great way to get started with
professional work. If you send your
dream client a video you made of their product
and you do it well, there are chances that in the future they will actually
pay for your services. Our spec client here
is called Copan. It is a family owned
natural cosmetic brand based in the
southwest of France. Their particularity is
that they have found a sustainable way to use an abundant natural
and local resource, pine trees in their line up
of natural cosmetic products. One of their product is using powdered pinecone seeds
to create a body scrub. This transformation
from pinecone to power is perfect for stop
motion video and has strong potential to create Smi catching visuals while still showcasing the natural
values of the brain, which also match with our own brain values
and target audience. With that in mind, let's talk about five ingredients that you should aim to have in every stop motion
video for Instagram. Is it under 15 seconds? Keeping your content
under 15 seconds is key to catch the
viewer's attention. Are you using four
by five dimensions? Four by 5.9 by 16
for stories are vertical ported formats that take up the most screen
space on Instagram, allowing your video to
really stand out it loop. If you can create a
seamless looping animation, you can extend the viewing
time of your video tremendously and save yourself from a lot of extra
animation work. Is it creative and engaging? A question we always
ask ourselves is, can this idea only be
done in stop motion? If the answer is no, then we need to
rethink our concept. Make sure your ideas
fits through the medium. Does it showcase the
product and message? Is there a clear messaging
or story in our idea? And is the product
on screen long enough to communicate what
it is we are promoting? If your idea can fit in all these five ingredients,
then you have a winner. As mentioned, for our brand, we want to focus on that product
transformation and it's linked with the source
element, the pine cone. The best way is to find
that creative concept is to brainstorm with someone
and bounce some ideas. Collect inspirations from
a variety of sources. Go outside, step away
from the computer. Always refer back to
that discovery phase to see if your ideas are a good fit with the
brand and its values. In the next video, we
are going to create a moodboard and a storyboard
for our animation. This will help refine
our concept further and solve some of the visual and storytelling challenges
of the video.
10. The Moodbard: Now that we understand
our Brennan have an idea, let's develop the visual
look and feel of the video. We first need to make a list of the elements we're
going to source. Again, we can refer to our discovery and research
phase here to see what the Brenda has done visually in the past on
their Instagram account. What colors do they use? Their style of photography
and prop styling, and all of that will influence the art direction of our video. Some brands are specific brand guidelines that
you need to adhere to. These documents are really helpful and will
often be given to you by their team when you get hired on professional jobs. Here are the items we'll
need for our video. The product itself in our case is small glass bottle
of the powder, large colored card stock
paper for our backdrop. A variety of pine cones, pine cone seeds,
pine tree branches, maybe some sand from the beach. Before sourcing these items, we can first collect them in
a digital form and create a collage or moodboard to get an idea of how
they pair together. It's a good idea to also include the brand logo in the Moodboard, as that can often appear
in the video as well. Another thing we'd like to do
during this Moodboard step, create a dedicated
Pinterest board and collect as many visual references as
we can to get inspiration. This can be video photography, artworks, college animation. All of this will help spark visual directions and
ideas for our video. Next up is a very important
step of storyboarding.
12. Let's Animate!: Let's now put our plan to
action with our storyboard. As our guide, we made
another document called the Shot List that has each shot listed with its
exact duration in frames. We know how many
frames we need to shoot to save even more time. It's also a good idea
to batch our shots. Do all our front view shots first and our top
view shots next, so we don't waste time
setting up our camera multiple times by going back and forth
between the set ups. Let's start with our
front facing shots. Here's what we'll achieve
for this first part. First, a view of the
product from the front. Remember the lock up, the
set elements will come out of the frame and the bottle will start rotating in its own, as in our storyboard. Then it will transform into a pine cone and shrink in
size while still rotating. To begin, we'll set
up a lock up image. This will serve
for our first and last image, our loop animation. Our bottle is well placed
in the center of the frame. Don't forget to use
the grid here on the left interface to center
your object properly. Then we'll add the
other set elements, the pine cone to the
right of the image, the sand here at
the bottom left, and some seeds here and there. After some adjustments
in cleaning, we're ready to take
our first image. I'll directly extend this
first image as seen in the previous exercise by pausing it for six
frames, half a second. For my second image, I'll barely move
each set element delicately outward
from the framing. I'll remember to go back to my interface and
take my picture. I'll repeat this operation until all elements completely
leave my frame. Remember our second fundamental
principle, repetition? The more images I take
during this exit, the longer the movement will be. In my case, I took about 1,000 images to remove
all the set elements, which amounts to 1 second on screen when we work at
12 frames per second. Once my images are captured, I'll finish with a
little sweep while being careful not to touch my
bottle in the center. We can now move on to
the second part of the animation with
the transformation of the bottle into a pine cone. Firstly, I'll activate my
onion skin option to be able to rotate my bottle while staying as centered as possible. I'll slowly rotate the
bottom frame by frame, ensuring to keep a similar range of movements between each shot. After about a quarter of
a turn of a rotation, I'll non create an in between image between
the bottle and the pine cone by
sticking some pine cone scales onto the
bottle using sticky tech. One or two images may suffice to transition
between these two objects. The faster the
movement, the more effective this image
usually works. Now I can remove my bottle and replace it with my
larger pine cone. I'll use my onion skin again
to align these two objects. The base of a pine cone
is not entirely flat, so I'll use sticky tack
to keep it upright while continuing my rotation
in the same direction. I'll gradually
change the size of the pine cone until it's
the smallest in the batch. There you have it all. Front facing shots are done. We can now move on to the
third and final part of the animation wave,
the top down shots. For this part, I'll change my smartphone position
to film from the top. Once my camera is
securely positioned, I'll send to the pine
cone in the frame. I'll also try to ensure that
my imation continues to rotate in the same movement
as my previous rotation, that is counter clockwise. Here's what we're going
to try to reproduce. The idea here is to
gradually reduce the pine cone into
seeds and into powder. And then to redraw the shape of the bottle with the same powder. To complete the loop, let's
start with the scales. I'll arrange them in a
circle around the pine cone. At the same time as it
continues its rotation, I'll spread the scales
outwards and initiate the same rotation
movement so that the scales accompany
the pine cone. I'll also replace
my small pine cone with an even smaller one, possibly more closed to
make it disappear further. I continue my circular
movement and gradually I'll replace my scale with
seeds, then with powder. For even more precision
in your manipulations, you can use tweezers. Once we've reached 100% powder, I'll continue the
movement until forming a circle around the
center of the image. This circle will serve as an anchor point
between two parts. This is what we'll see with the disintegration of the
scales into powder and the transformation
of the powder into a bottle To achieve a
very clean bottle shape, we'll start with the end and first create our final image, which will then animate
in a circle of motion. Then to achieve a very
clean bottle shape, we'll start with the end and first create our final image, which we will then animate
in a circular motion. This technique, known
as reverse motion, is widely used and allows for a clean and controlled render to better shape and
manipulate the powder. I can also use a credit card here or any other rigid
support for this. The onion skin technique
will also again, be effective here to
trace the bottle shape. I'll also add a pause
on the last image of the bottle to ensure it's clear and visible to the viewer. There we have it, our
animation is progressing well. We just need to add
the final touches, see in the next video
for those final tweaks.
13. Finishing Touches: To finish things off
with our animation, we are going to take a peek
at our timeline again. And play our animation
to see if we need to do some
editing by removing frames or moving them
around in our opening shot, for example, we can copy the frames where
our set is leaving a frame and paste them in reverse to create
a smoother loop. Here it is. Before
that added here it is. After a lot better, right? When the movement
seems too slow or odd, don't agitate to delete
frames and see how it feels. You can always tap the undo button if you don't
like the result. You can also add in some fad ins and fade
outs directly in stop motion or
experiment with filters. While this could be a
lot of fun to play with, we actually recommend doing color correction
outside of the app and in your native OS for better manual control
over these adjustments. But first, let's export our video and save
it on our phone. Let's head back to
the gallery screen. We can see all of our projects. Tap select in the top right
and select your animation. Then tap the Share button
and choose Export Movie. You can then choose
the Save Video option to save it directly
on your phone. Once it saved to my camera role, we can open it up natively on
our phone and choose Edit. In this edit view, we are going to tap on the
little dial button here. We can adjust our
exposure highlights, contrast colors, et cetera. Try to be subtle here
as you don't want to alter the image
and colors too much. We just want to boost it a little to give the
video more pop. Next we want to select the Crop and Rotate menu to
further adjust our video. Here you can straighten
the image micro, adjust the vertical or
horizontal perspective. Or even flip or rotate
the image 90 degrees. The most important
setting for us is the crop option on the
top right of the screen. If we select the vertical
crop option first and then pick the eight
by ten aspect ratio, this will effectively
crop our nine by 16 portrait video
to a four by five, which is perfect for Instagram. Adjust the crop vertically to refine your composition
and make sure you have everything you want
in the frame it down. And we are now ready to share
our video with the world.
14. Share your Video: Let's now export our stop motion so we can share it
with the world. Open up Instagram and tap on the plus button
to create a post. You should now see your
recent photos and videos. Select your animation. By default, Instagram
will want to crop your video to a one
by one square format. To avoid that, we want to tap the Zoom button
on the bottom left and force it to our
original four by five ratio. You can now hit next. Here you have the options to add filters and trim your video. This shouldn't concern
you as we have already made our
color adjustments in the previous step and also edited our video in
stop motion studio. What we do want to absolutely adjust is the cover image that
will be seen on our wall. By default, Instagram will pick the first
frame of our video. This isn't always the best
image for a thumbnail. So make sure you
scroll your video to pick the best frame
of your animation. You can then click next. This is where you can
add your captions, ash tags, et cetera. You know what to do here.
Just make sure to tag us at Soy Milk underscore Studio so we can see your stop
motion animations. We love seeing what
you come up with, and we'll be more than happy to give you feedback on it, too.
15. Thank you!: All right guys, we really
hope you add fun animating. Thank you so much for taking
this workshop with us. We hope that you now have a better understanding of the
amazing out of stop motion. And that you feel inspired
knowing that you can create engaging animations
all by yourself. With very little equipment, but plenty of ideas. Remember that the
only limitation we stop motion is
your imagination. Once you have your animations
all done and exported, we would love to see
what you came up with. So feel free to post
your animations on the workshop page. And if you have any questions, we are always here to help. If you're not already, feel free to follow us on Instagram. We would love for
you to tag us at Soy Milk Underscore Studio so
that we can see your work. Thanks again and
see you next time.
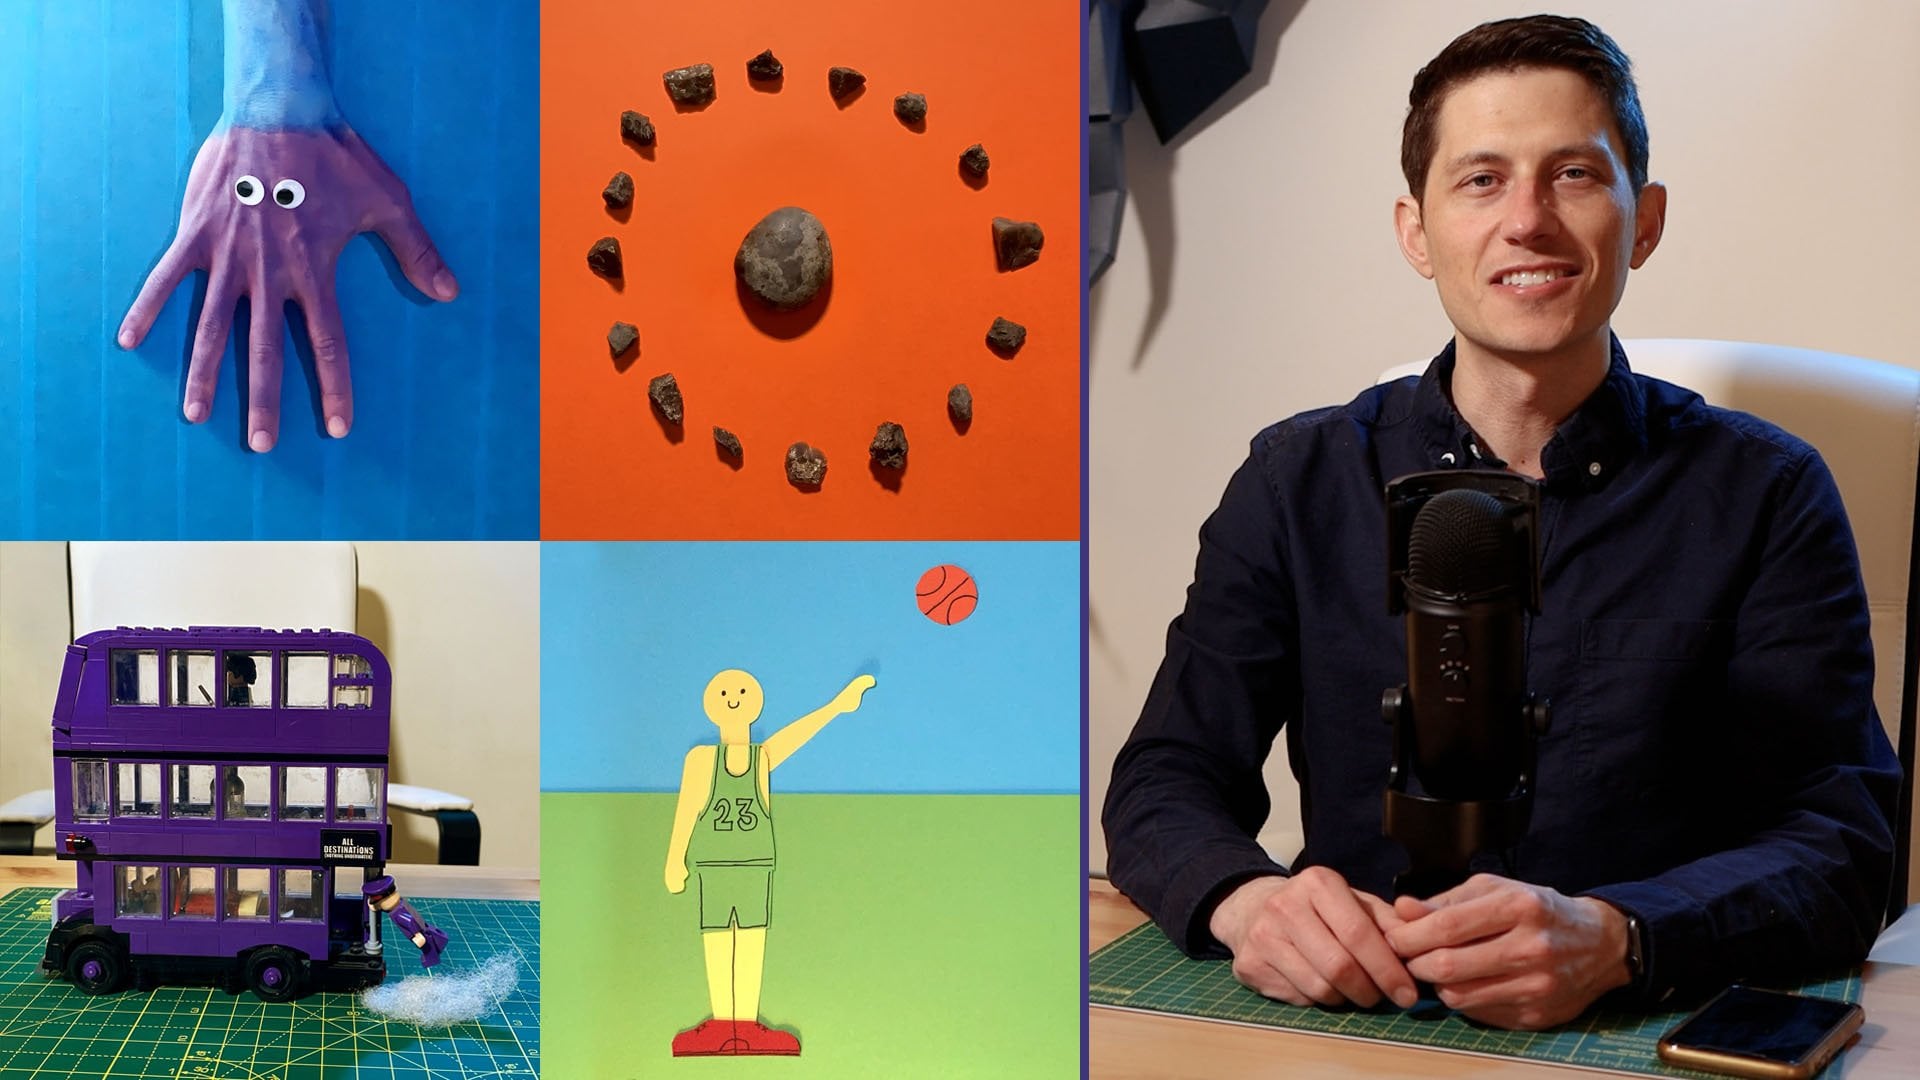
 Paul Lalo, Creative Director/Motion Designer