Transcripts
1. Class Trailer: Ever wondered how to make
food not just look delicious, but move, dance, or
even tell a story. Hi, I'm Paul Lalo, co founder of Soy Milk Studio, and welcome to a world where food becomes your
creative playground. In this course,
we're going to turn your favorite ingredients
into start motion stars. I'll show you how to take
food from being just static to spectacular
using simple, accessible tools,
professional techniques, and a bit of imagination. You'll learn how to master the essential software dragon frame, along with tips and
tricks for lighting, composition, and timing.
And it won't stop there. I also take you through
creative techniques like replacement animation, giving animate objects life, and animating in reverse
for stunning effects. By the end of this course,
you'll know how to bring even the simplest
of ingredients to life. Food isn't just
something we eat. It's something we can animate,
transform, and reimagine. H. So, what are we waiting for? Let's make food come alive. One frame at a time. I'll
see you in the course.
2. Getting Started: Welcome to the World of Food Animation: Mm hmm. Hello, and welcome
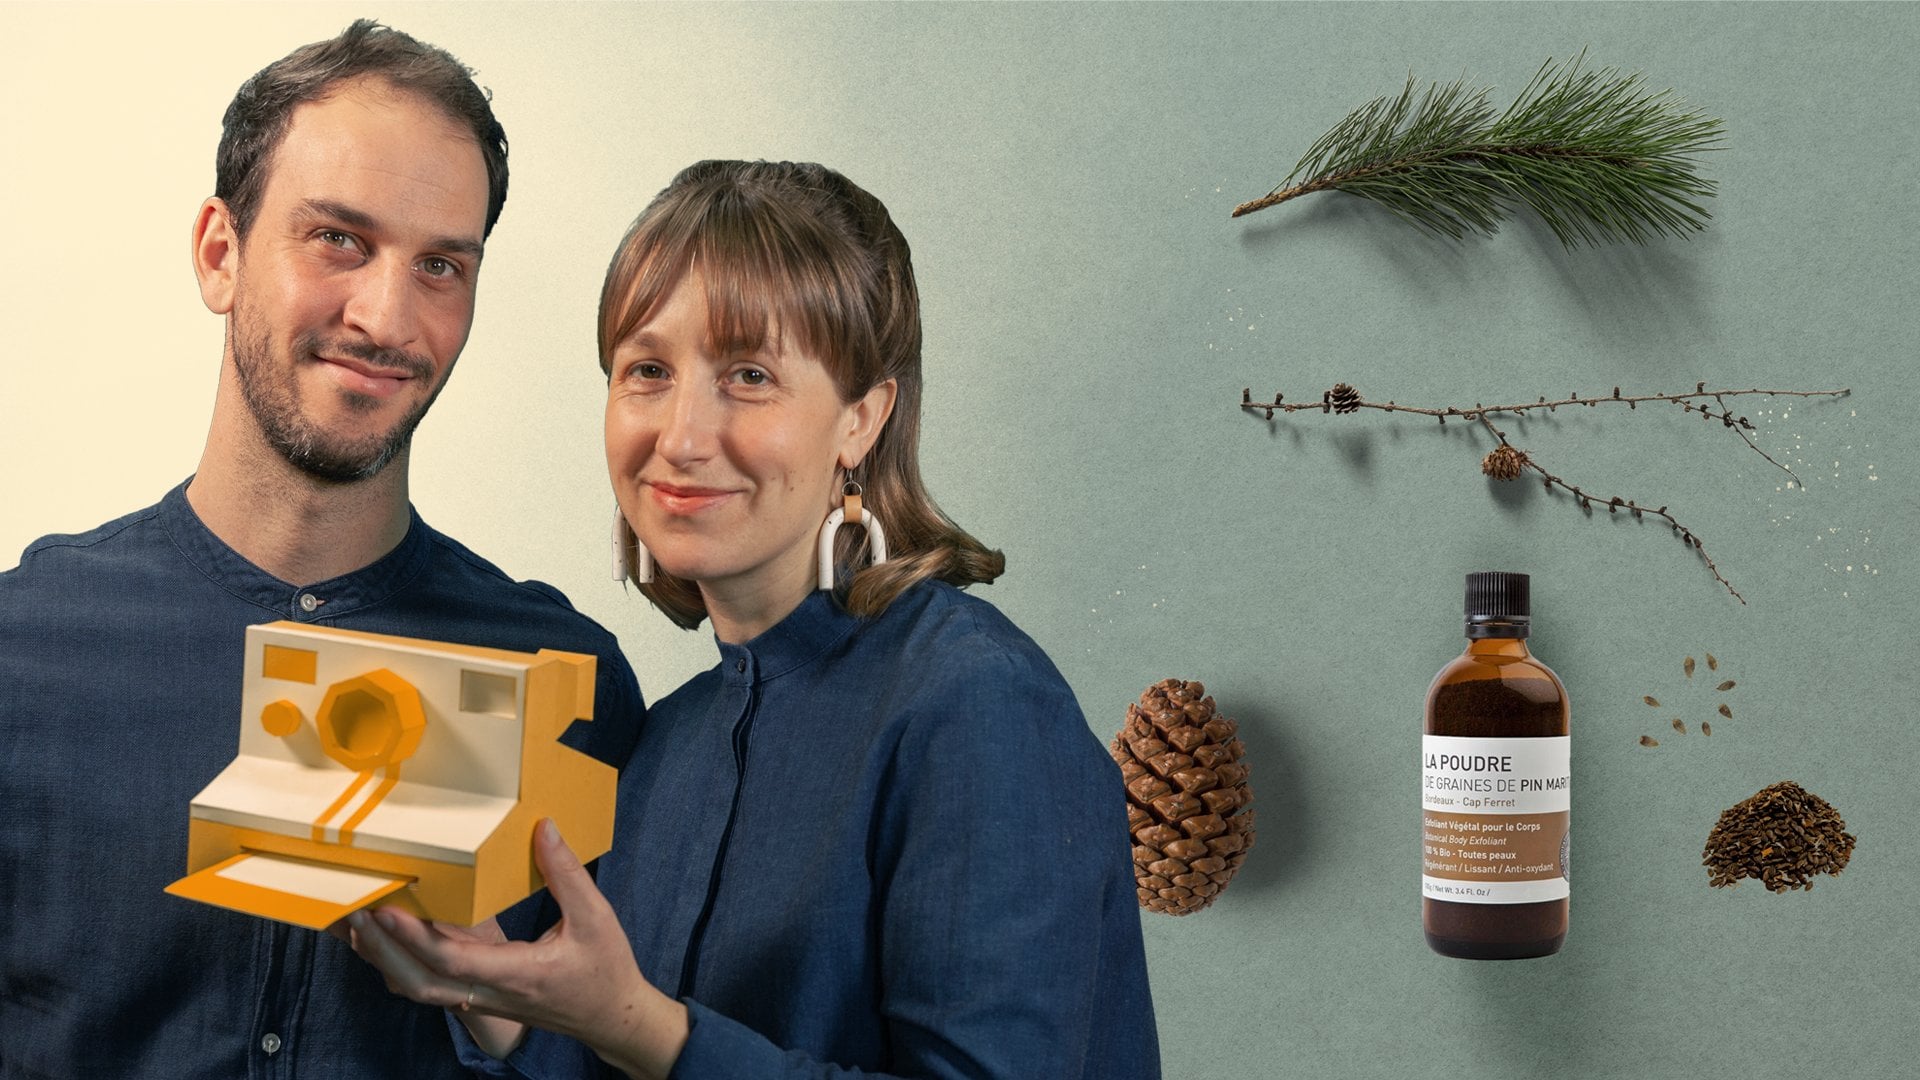
to Animating Food, a Stop Motion master class. I am Paul Lalo, co founder of Soy Milk Studio animation studio based both in
Australia and France. My partner, Jenny
and I specialize in Stop Motion animation
and motion design, creating bespoke videos for brands, institutions,
and beyond. Stop. So a little bit about me first. I've always loved drawing,
storytelling and animation. I was actually training in Australia as a Toti animator in the Disney style of frame
by frame paper animation. However, as the industry
shifted to digital animation, I found myself working more
and more on computers. This led me to lose
that initial connection to animation until one day, Stop Motion reignite that spark. And that's when things got
really exciting for me. There's just something
truly magical about bringing objects to life
through Stop Motion. In this master
class we'll combine two amazing worlds,
food and animation. This fusion will allow
you to transform everyday food into visually
rich dynamic creations. I'm thrilled to show
you how this medium can elevate your work
as a photographer, food stylist, or content
creator to the next level. To begin, let's quickly define what
stop motion animation is. Stop Motion is a
filmmaking technique where individual frames are captured and between each frame, the objects in the scene
are moved slightly. When played back in sequence, these images create the
illusion of movement. Think of it like flipping
through a flipbook, for example, one of these. As you can see in this one, when I flip through each page, there's a slight change in
movement in this bird, right? If I play quickly, we
can see some animation. Start Motion has been around
for a very long time, using everything from high budget feature films
to TV commercials. But what's really exciting
is how it has become versatile and popular in
today's social media world. As content creators,
it allows us to add magic and creativity
to the ordinary. For instance, food
can move, transition, and transform in ways that are impossible with other techniques like steel photography or
traditional video, for example. W Stop Motion, you can bring recipes and ingredients to life. You can create playful
engaging content, tell brand stories, and add
a unique edge to your work. So what are we carving today? By the end of this course,
my goal is for you to have a solid foundation for cutting your own food
stop motion videos. So here's what's on the menu. First, we'll talk about
the basics of stop motion with an overview
of the principles and how they relate
to animating food. I'll also show you a few top notch examples to
get you inspired. Next, I'll introduce you to the essential tools and
equipment you'll need. This includes cameras, lighting, and, of course, dragon frame. The software we'll
be using today. Then we'll move into the
shooting process itself. I'll give you tips
and tricks for capturing smooth,
seamless movements. I'll also show you a live
demonstration of how to shoot various food stop
motion scenes and how our principles discussed
earlier come into play. Lastly, we'll finish with
a bit of post production, how to edit your
frames, adjust a tempo, and export the funnel video for sharing on your
favorite platform. Alright. Now we've got
the menu laid out. Let's roll up our sleeves
and get things cooking. We've got some food
to bring to life. Before we jump in, let's talk about an important
topic frame rate. Frame rate, AKA
FPS or frames per second refers to the number of individual images
captured per second, FPS. In cinema quality stop motion, a standard frame rate is
typically 24 frames per second, meaning 24 individual photos are taken for just 1 second
of smooth animation. This is a lot of
work. It creates a very natural look to our eyes, which are accustomed to
seeing in real life. However, thanks to the
persistence of vision, another important
animation concept, we can achieve a
pretty good result with half the frames
and also half the work. That's why 12 FPS is often
used in stop motion. Creating a slightly
choppier stylized look that adds character and also
charm to our animations. For this class, we
will stick to 12 FPS.
3. Stop-Motion Essentials: Welcome to the world
of Stop Motion. Since we're talking about Stop Motion in the context of food, then let's continue with
our delicious analogy. If animation is like
cooking up a meal, then just as every great
dish needs the ingredients, every successful stop motion needs key principles
to bring it to life. Let's break it down and discover our five key ingredients. Timing and spacing.
Timing refers to how long an action takes,
determining its speed. Fewer frames make movements fast while more
frames slow it down. You can think of timing
as your seasoning, too much or too little, and
the whole flavor changes. You need just the
right amount to make your animation
smooth and engaging. A common beginner mistake is not taking enough
pictures for a movement, resulting in an animation
that is zipping by too quickly or just
goes unnoticed. Remember our frame rate,
12 frames per second. We need those 12 frames to
create 1 second of animation. A good habit is to
think about how long an action should
take or even time it out with a stopwatch
to make sure you are not under
or over animating. There are some pretty cool
frame based stopwatch apps on your phone like this one
here from Anime time, which I find
particularly useful. With practice, timing will
become second nature. Spacing is a distance an
object move between frames. Wider spacing creates
faster motion, while closer spacing makes
it slower and smoother. So let's animate this pieces
of candy as an example. The timing for all four
candies is the same. 2 seconds or 24
frames at 12 FPS. As you can see, I'm using
the same timing and spacing. Moving each piece of candy
at the same increment, resulting in a constant
or linear movement. But what happens if we change
the spacing for each candy? I'll keep the top one
as a constant spacing, but I'll make the
second one start closer together and gradually
increase the spacing, all while respecting
our 2 seconds timing. The third piece here
will speed up quickly, then decelerate to a slow stop. The last candy will start slow, spied up in the middle, and
then slow down at the end. This gradual increase or
decrease in spacing between frames is called easing
in or easing out, also called slow
in and slow out, another key principle
of animation. Can you spot the differences
between the candies? Their timing is the
same, 24 frames, but their spacing
varies greatly. I hope you can see how
crucial both timing and spacing are when
controlling motion. These two ingredients are
by far the most important, and they always go hand in hand, just like salt and pepper. They both take a lot of practice to fully understand and master. So don't worry, just
keep practicing. Arcs. In life, most natural movements follow
a curved path or an arc, rather than just straight lines. Using arcs and animation creates a more fluid
and realistic motion, mimicing a natural flow in
physics of real world actions. Because our human bodies are made out of joints like elbows, shoulders, and knees, things
tend to move in arcs. Otherwise, they look a little
bit robotic or mechanical. So arcs are definitely a really important principle to make fluid pleasing
to the eye motion. Let's take this popcorn
explosion, for example. Can you see how the corn
moves in a smooth arc, adding a sense of
gravity to the motion? If I was to animate using
straight lines instead of arcs, this is what
it would look like. Not as convincing, right? Squash and stretch. This technique
exaggerates objects to show flexibility,
weight, and impact. Squashing an object makes
it seem compressed, like when hitting the
ground, for example, and stretching shows
extension like doing a jump. Take this apricot, for example. Can you see how it squashes and stretches during his jump? As you can see here, I'm
manipulating the apricot, trying to get some squash and
some stretch. Anticipation. This principle prepares the
audience for an action. The common example is a
golfer winding up before its swing or how a character
crutches before jumping, building expectation and making the movement clearer
and more engaging. The formula is usually to build the anticipation
by going towards the opposite way of
the main action. The faster the main action, the stronger the anticipation. With objects and food, this principle is
also very common. Take this puff pastry
roll for an example. See how it moves slightly to the left before
unrolling to the right. And finally, follow through. Follow through occurs
after a main action ends. Parts of the object continue to move before coming to rest. This adds realism showing that objects don't
just stop abruptly. Similar to how anticipation
prepares the action, follow through
completes the action. A nice example of
this would be with this banana peel coming
to a gradual stop. When we combine these
five ingredients, we get a stop motion
animation that is just as satisfying to watch as a perfectly prepared
meal is to eat. We will examine some of these ingredients alongside other stop motion techniques when we get to the production
chapter of the course. But first, let's talk
about the gear you'll need and the software you
will use to make it happen.
4. Gear Up: Tools of the Trade: Welcome to our studio.
In this section, we'll dive into the
essential gear and software we need to create
high quality foot stop motion from cameras to lighting and the magic
of dragon frame. You'll learn how each
tool contributes to smooth and professional
looking animations. One piece of gear I
think we all should have is a black t shirt. I recommend wearing black or
dark clothes to make sure there are no lights bouncing
from you while you animate, as this can cause unwanted
flicker in your animation. For stop motion animation, a DSLR or mailss camera is ideal due to its
high quality image. It also offers manual
control options and the ability to
shoot in raw format for better post
production editing. So some features to
prioritize are manual focus, which allows you
to keep the focus consistent between your frames, manual exposure settings
to control your ISO, shutter speed, and aperture. This ensures consistent
lighting and image quality. You also want to make
sure that your camera has a live view mode, which helps you see each
frame in real time, ensuring precise composition and control over your animation. Some examples of cameras
often using Start Motion. The whole cannon range is great. We also have great support
for Sony and Nikon. They all work really
well with dragon frame. I personally use cannon. My first camera that
I've bought this one is the 550 D. This one
has actually served me for a great number of years when I first started
Start Motion. I still use it as a
secondary camera. So now in Dragon frame
five, since five, you have the option to
use multiple cameras, giving you multiple
angles, which is amazing. It's a feature that people have been requesting for a long time. And I think you can plug
in up to five cameras. So if you have multiple cameras, you can definitely
set them up and have multiple angles of
your animation or even use them as part of
your making of videos, which we'll maybe talk
about a bit later. So 550 D is what I had. Then I upgraded to
a five D MAC two. Which is quite an
old camera now, but it works great
for Sub motion, has really good
quality and support. And now recently, only
a few months ago, I've switched to
the new on EOSR, which apparently I'm
yet to test this fully, but it gives you full HD quality on your live preview
inside of dragon frame. So whichever camera you have, just make sure you go on
the Dragon Film website and check the list to make
sure it's there. It should be. If it's not, you can
still contact them, and they'll reply
pretty quickly, and they can add your
camera to the list. Okay, so up next, we're going talk about tripods. Tripods. A study
tripod or a C stand is also essential to
keep your camera fixed in place during
the animation process. You want to look
for tripods with heavy stable legs to avoid any unwanted camera shake or use sandbags to
secure them in place. Some people like to
actually hot glue them or tape them to the floor to make
sure there's no movement. The reason for that is if by accident you bump your tripod
and you move your camera, it becomes really difficult to bring it back to
its original position. You basically have
to start over, and that's really frustrating,
and we've all been there. So yeah, make sure it's solid, secure to avoid that
kind of headache. Okay, you also want to make
sure that your tripod has adjustable legs and
adjustable height, okay? This just allows you more
control and more option when it comes to maybe shooting down or raising your
camera a little bit, gives you a bit more
freedom, basically. You also want to make
sure that you are locking all of your axes. So you know how a tripod
can do this sort of things. Just make sure you just tighten really hard again to avoid actually moving the camera
and again, running your shot. So that's it for tripods. Next up, we're going to
talk about some tips for setting up your
camera. I finally. Okay, so now some tips
for your camera setup. Again, we want to have
some sort of setup to be able to shoot
from a top down angle. The reason is that
in food stop motion, there's a lot of overhead views of ingredients being assembled, your dishes, recipes,
all that sort of stuff. So make sure you have some
sort of setup so you can have your camera above
your working surface. That can be, again, your tripod. A C stand is a very good option, or you can use some sort of
system that I've got here, which there is a auto
pole from wall to wall, and then I've got a
couple of magic arms to hold my lights and my camera. Allows me to basically have
no tripods in the way, which in a small place
like we have here, is quite handy to again, avoid any bumping any
accidents during the shoot. Also want to have some
sort of USB cable that you can plug
into your camera. So any USB cable will do here. If you have the budget, I recommend these orange
ones that you can see in my studio kind
of hanging around. They are called the tools, if I'm not mistaken,
and they're known for being really
reliable and strong. So they just again, we want to avoid losing connection during a
shoot with your camera. So they have handy
little cable bits and pieces here
to make sure that your cable doesn't
hang and disconnect. So they're very,
very good brand. So that's for the USB cable. You also want to have
a dummy battery, AC adapter to power the
camera to avoid, again, changing batteries
mid shoot and risk running your shot by touching the camera and
disturbing the frame. So if you have normal batteries,
these kind of come out, and you can replace those with a dummy battery
that goes in here. Whoo. And that basically allows you to have the
camera running nonstop and no issues there
with the battery. We basically in stop motion, are becoming like
control freaks, and the idea is to have the ultimate control
over everything, so we avoid any problems. That pertains to lighting, as I said, weing dark, closing curtains,
consistent lighting, and anything to do with securing our objects and our camera. So that's it for
our camera tips. I hope that was
helpful. Up next, we're going to talk
about lighting. As Good lighting is crucial for food stop motion
because it enhances texture, color, and overall appeal. So here's what to
consider for your setup. Lighting types. We've got
soft box lights or LD panels. These provide diffused light, which softens shadows and
even lights the scene. Consistency is key, as even
the slightest change in light between frames can cause that unwanted
flicker we talked about. Aim for low heat LED lights to avoid unwanted changes
in your food items, as nonid lights can generate too much heat and actually
melt parts of your food. So more tips for lights. You want to avoid natural
light at all cost, as the light during the day will fluctuate and cause
some flicker. So make sure you
control your lighting, close your curtains and
avoid any outside light. You also want to use some
field lights to brighten darker areas without
overexposing parts of the food. Make sure your lights are
always connected to power, and I actually recommend
against using flashlighting, as we are going to take
a lot of pictures, and the flash will be
quite hard to work with. Aside from the camera, tripod, lighting,
and dragon frame, here are a few more essentials that will make your
food stop motion smoother and more polished.
Clamps and stands. Use these to secure
lightweight props or hold food items in
position between frames, especially for
those mid air shots or objects that need
to remain stationary. Tweezers and small tools
for precise adjustments, especially when working
with small food items like seeds, garnishes or herbs. Blue tech or double stadia tape, keeps food objects
in place without them moving unintentionally
between shots. Backdrop and surfaces. Experiment with
different textures and colors for your backgrounds. Theise can be wooden boards, marble countertops, or
clean white surfaces often work well for
food animation. None of you've covered the gear. Let's take an overview of dragon frame and
see how it works.
5. Working with Dragonframe: Dragon Frame is the
industry standard software for Stop Motion animation, used on the biggest
Blockbuster films by pros or obvious alike
for homemade ego videos. Dragonframe was
initially created by the Caleri Brothers for their
own advertising projects. One of those projects is this amazing commercial for United Airlines called Dragon. This particular spot has really inspired me to
start with Stop Motion. I just love the look of it, the cutouts, and the
transitions are just amazing. Let's see if you can spot the dragon that inspired
the name Dragon frame. There it is. That's where
the name comes from. It's no surprise
that this ad has won a lot of awards. It's
just so beautiful. Where you go in
life is up to you. There's one airline that
can take you there. United. It's time to fly. Despite multiple
new versions and a growing list of
features added regularly, dragon frame has always remained affordable and
extremely intuitive. PlagonFrame allows you to
control your camera remotely. It captures frames, and you can also fine tune your
animation in real time, making it ideal for
stop motion workflows. Key features include onion skin, which lets you see the
previous frame overlay with the current live view to help
precisely position objects, frame by frame playback, allowing you to instantly
review your animation to ensure smooth movement and taste test your
progress as you go. And advanced keypad control, which enables you to take shots without actually
touching the camera, preventing accidental shifts and ensuring consistent framing. Before purchasing dragon frame, just make sure that your camera is supported by the software. You can go on their website and see the camera list and make
sure that yours is there. So now let's open Dragonframe and take a tour
of the interface. Okay, so let's open
up Dragonframe. The first thing you'll see
is this pop up window that basically allows you to
create your project. And the way things are
named in dragon frame, we call them scenes and scenes
can have multiple takes. So I'm going to create a
new scene or a new project, and I'll name this one Food. I can also set my
frame rate here. So remember, from
a previous lesson, we are going to work at 12 FBS, so 12 frames per second. So I'm going to set 12 here
and I'm going to press Okay. Tacon frame will ask me
where I want to save this. I'm going to choose the desktop and just save this
on my desktop. Once I save my project, they'll create a folder
for me called food. In this folder, I'll
have other subfolders. The way dragon frame works
and it's really smart and you should know just
the back end of it. Basically, when you take a
picture in dragon frame, it'll save two pictures. I'll save a low res version for easy and fast playback
while you're working. And it also save a high
res version for you to finalize your video and
do some post production. So when I press saved, it also opened up Dragon frame. So here is the software
where it looks like. If you're familiar with
multiple workspaces, like you have in Light
room or DaventreRsolve, you'll see that dragon frame is kind of set up the same way. We've got multiple icons
here at the top that allows you to go back and forth
between different workspaces. We're going to have a quick
two of those in a second. But the first
workspace you'll see in the main workspace we'll be working with is this
animation workspace. Animation workspace, we've got a live view canvas here of what's happening
from our camera. And you can see if I wave my hand here, we
are indeed live. Another indicator of whether
or not you're alive is this red line that goes around
the live view window here. Um I'm going to go back to
this animation workspace, but let's have a look at
the other ones first, and we'll go back to this one. The next one is this one here that we can access
via this camera, and this is called the
cinematography Workspace, and this is where
we'll do all of our adjustments of our camera settings
and image settings. Next up, we have an
audio workspace. This is useful if you're doing character
or lip sync work, which we won't do in this class, but it's good to know
that it's there. And we also have a DMX workspace where we can set up lights. So if you lights have DMX ports, can actually animate
lights dragon frame and use keyframes on them
and do really cool things. Similarly, if you go
to Next workspace, that's the AC motion
control workspace. So if you have motion
controls or camera sliders, you can plug them into
here and also animate camera moves and do
really cool things like dollies and tilts and pans. You can have multiple axises and pretty really
advanced stuff. As I said, dragon frame is a really powerful tool used
in high budget feature films, so it's got a lot
of nice features. We won't touch on those, we
won't get ahead of ourselves. Let's go back to these two
main workspaces that we'll be using this
catography workspace and the animation workspace. So in the cinema workspace, we are going to adjust
our camera settings. So here, I've got controls over the Zoom of this view, right. If I click on this one, it'll
fit the view to my window. And this is a cool
space because I can not only adjust my
settings of my camera, I can also take test shots. So for example, if I click
on this test shot button, I'll take a picture
of my scene here and I can zoom in and see
details of that picture. It basically allows you
to view that picture. You can also view this picture
by right clicking on it and opening it up in your
application of choice. So you can open up in Photoshop, or you can reveal
that picture in the finder and see what
it looks like here. Okay, so you can see, I've got two pictures that
are taken here, both a JPEG and a CR three, which is a raw format. And I'll explain a
bit why that is. Okay. Let's go down the
line from these windows, and we'll cover a
little bit in detail what this workspace
allows you to do. So first up, we have this
histogram that basically shows you whether or not your camera is overexposed or underexposed. So if you're familiar
with photography, you might know what
a histogram is. So if I overexposed my image, you can see the graph
is going to the right. And if I do the opposite gets really
dark and underexposed, you can see the histogram
is already to the left. So pretty handy to
have that here. And as you can see, I'm already jumping down into
the camera settings, and this is where you
can adjust your camera. The cool thing about
dragon frame is that you can remotely
access most of your camera. So I can adjust here. The first slider is
the shutter speed. So you can see if
I go to the left, you can start seeing
some seconds, so I can have it open
for multiple seconds, and I can dial in
my light exactly. The slider beneath
that is our F Stop. And because I'm shooting down, I'm actually going to go
quite high on my Ftop. I'm going to go to F 16 because I want to have
most things in focus. And the bottom slider here you might recognize is your ISO. So I recommend keeping the lowest possible ISO that you can just to avoid any
grain in your image. And because we're working with fixed cameras and
control lighting, we are actually able to bump up the shutter time quite a bit and allow for more light
to go into your sensor. But this way, avoid bumping
ISO for no reason, right? So this is where you play
with your a triangle of exposure and try to find the
right exposure settings. Again, a test shot to have
a look at that image. You can also turn on
an AB comparison of images and see what they look
like from one to the next. So pretty handy.
Moving down the line, we've got a drop down
here for picture style, so I can adjust
the picture style. I like to stick to
standard or neutral. Then we have image quality. So this is quite
an important one. Just make sure you've
got that setup, right? I like to always shoot at
raw plus, large fine JPEG. So I like to have both formats, a large fine JPEG to
work quickly with, and a raw one that allows
me to have a lot of flexibility in the editing
phase of a project. One is white balance, and here I can set the
white balance of my image. So again, you want
to avoid anything on auto when doing stop motion. I like to set mine to color temperature because I can control the temperature
of my lights. So I've set all of my
lights up at 4,600 Kelvin, which is a daylight setting, and I can set up exactly
here and dragon frame, so that keeps the lighting and the color temperature
quite consistent. Again, because
we're shooting raw, even if I make a mistake here, I can always go back and adjust temperature
after the fact. But it's always a good idea
to set things up right from the get go and avoids
you have to do multiple, you know, edits afterwards. I can also control
the flash here. This is something I never use, and these ones here
a bit more advanced. Again, I won't bother
with these ones. The main ones you want to use is picture style, image quality, and color temperature,
and of course, your ISO, aperture
and shutter speed. Okay, so once you're
happy with your test shot, and again, remember that red
line, you can see that this red line is showing
up here, so I'm in live. And if I click on the test shot, I no longer have a red line, so you won't see my hand here because I'm seeing a test
shot of the live view. So if I click on
this camera icon, I'm back in the live view. Another thing I can do in this workspace that I like to do is click on this cross hair here and that's the focus check. And once I click on that, I get this rectangle and I
can move that around. In this case, I'm
going to focus on this focus card here
and double click. And once I do that, I have, I think it's like eight time
Zoom in L at my scene here, and I can actually
remote control my focus. So if I click on the
three arrows here, it'll do a very
strong adjustment. But on the two arrows, I can do smaller increments and even
smaller on that one arrow. Can really nail that focus. If I flip my focus card here, I've got even a more
precise diagram here, and I can fine tune. I get quite OCD about this. I want to make sure my
focus is just right. But again, because
we're working at F 16, I do have some leeway
here in terms of focus. To get out of focus check, all I have to do is
double click again on that image, and
I am back out. This is all we
need to know right now about the
cinematography workspace. Let's now jump back to
our animation workspace. Let's go back into the
animation workspace. As I said, this is where
we'll do most of our work. Similar to the previous
workspace on the live view, we've got the option to zoom in onto whatever we're doing, and I can use my hand
here to move around. If I go all the
way to the right, it'll fit that view
to my workspace. That zoom in is something
you do quite a lot, especially because
we're working sometimes very small items, like food items, like, you know, I'll be working with, like, chickpeas that are very small. So it's good to be
able to zoom in into that area with
your live view. Other tools I have here
is this mask button. That allows you to create a temporary mask on
top of your image. So I've got mine
set up as a nine by 16 because I'm working
in a vertical format. By the way, my camera
is set to portrait, and I can set that up
also in view portrait. You can see that set up here. Just so you know
that this mask is only for your
previewing purposes. Dragon fame doesn't
ever crop your image. You always get the full sensor of your full frame camera if you've got a
full frame camera. Um, this is only to know for you where the edge
of your frame is. So when you do your composition, you know exactly that
is where my frame ends. And you can change,
again, that mask to different formats. If you're doing a square or 16 by nine, you've got
those options here. Next to that mask, we
have aspect ratio lines. These are things for title
safe zones, things like that. We've got grids
that we can adjust. So in the right hand side here, all of these options
are adjustable both in their Alpha
and transparency. So I can adjust the
transparency of that grid. But I can change I can also change the settings
of that grid. So if I want to have
less or more lines, I can do that here. Okay. And that works pretty much the same way
for every other options, like the broadcast, the aspect ratio, I can
also change that here. I've got basically more options
on that right hand side. I can also rotate my view if my camera is
upside down or flip it, that can come in quite handy. And beneath those buttons
is where our timeline is. So far, we haven't
taken any picture, so let's take our first
picture in Dragonframe. If you buy Dragonframe
from their website, you'll find the option to
have it ship with a keypad, which I definitely recommend. You can do everything
on your keyboard, but having a keypad is just so much more handy
because you can have it right by your side and just avoids you to go back and
forth between your computer. In the past, they used
to have wired ones, and now they've got a Bluetooth
version, which is great. It also comes with
a protector because these things tend to be dropped a lot, so
I've dropped a few. I've broken a few. So having some protection on
it is a good thing. So I'm going to take
my first picture, and to do that,
it's nice and easy, all I have to do is
press Enter either on the keyboard or on my keypad.
So let's take a picture. Okay. So as you can see, in my timeline, I've got a first picture
here at the bottom. And the camera is my live view. If I click on the camera,
I am back in Live view, you can see the red line
is showing back up. If I click on the picture,
I can see that picture. I can turn off all
of my grid lines and masks just to make
that more easy for you. Okay, I can also zoom in
on that picture, as well. Right now, we only seeing a preview version of that picture. That's why it's
kind of pixelated. If I want to see a
full raised version, I can click on that button here that looks like a diamond, and it'll show me a preview of the full rays version
of that picture. Or I can right click and
Reveal in Finder and it'll show me that JPEG image. Okay. So again, two formats, I've got JPEG and a raw
version of that image. If I don't like my image, I can delete that image by
pressing the backspace or the elite key or I can right
click and just hit Delete. And that image is gone. So it's not actually
completely gone. Dragon frame will keep
that saved for you. If I click on the bin here, it'll open up the bin tray, and I can see my image
is here and I can put it back into my timeline. I can also temporarily
hide my frame. So if I go hide frame, it'll hide that frame
from the sequence. Okay, let's hide. And let's take another
picture. Why not? Let's do a bit of movement here. Okay. Let's do another one. Can't help myself. Already.
I'm already animating. Oh, one thing you might
have noticed just then, when I take a picture,
you can see there's a black screen here
called capture Blackout. And that's because I've got this set under my preferences. If I go to capture, here is the option to
use a blackout screen. By default, I don't think
you'll have this selected. I like to do that because I get quite obsessed with flicker,
as you might have noticed, I've talked a lot about flicker
in my previous lessons, and having your screen, usually your screen is right next to where
you're working. So I've got my laptop
here to the side, and sometimes the light
from the laptop that is the screen light will actually show up a little
bit on the scene. And because that light and
that screen always changes, it might create a
bit of flicker. So something to look out for. If you do want to avoid that, make sure you've got the
capture blackout set on. Okay, so I've got
a couple of frames here and you can see there's
already a bit of movement. I can play back this movement by pressing the space bar
or play on the keypad, and you can see here we
got something moving. At the bottom, we've got
options for playback. I can loop my playback. So if I press Play it'll loop that there is also an option to add a black
frame after playback. Instead of going
into the live view, that can be helpful because
sometimes something different will be
happening here and that can kind of mess up the preview. That's pretty
handy. Then we have an onion skin option here, which we'll talk about
a little bit later, an option to reverse playback. So you can see here I'm
playing in reverse, and we'll talk about why
you want to do that, why you want to animate in
reverse in a later lesson. And lastly, we have
a Tuggle option, which is pretty fun as well. You can actually see what's happening here in the timeline. I'm not pressing anything. I've just pressed
Toggle, and Toggle will toggle back and forth
between the live view, which is this camera icon and the last frame
that you shot. And this is to show you
basically how your timing, how your spacing is working
on whatever you're animating. And you'll see me do that a lot during my animation is I go back and forth a lot
to just check, okay? This has moved way too much, so I'm going to move this back. Okay, maybe a little bit more. Okay, I'll like that, right? So I go back and forth to check. Maybe I want even
a little bit more. Okay, so back and
forth, back and forth. This is to check your movement, check your motion, and see if your animation
is looking right. So it's kind of a muscle memory, and it's kind of a
way that you can feel the animation is by having
this back and forth. In the old days, Disney guys, when they used to work on paper, you'll see them flip the paper, actually multiple
pages of paper, back and forth between
their fingers. This is how we start animating, and it's kind of like
a flipbook, right? So you're flipping back
and forth just to see preview animation instead of
pressing play all the time. It's good to know
what's happening just on the last frame.
So that's Tuggle here. I'm going to exit
out of the bin tray. And I think that's it for now, that's, I think, a good
starting tour for Dragonframe. As I said, we'll go a
little bit deeper into the software as we start
animating some food. This covers all you need to know right now and how
to use Dragonframe. Once we start
animating our food, we'll go a little bit deeper
on all these features. Congrats. You are
now familiar with this wonderful
software. Well done.
6. Animating Step by Step: You in this section, we'll apply our five stop
motion principles to five stop motion techniques
through practical examples. I've come up with
funny names for these techniques to make them a bit more
memorable for you. First up is the
good old switcheroo or replacement animation. Replacement animation is a
stop motion technique where instead of moving
a single object gradually frame by frame, you swap out different versions of an object to simulate motion. This is especially useful when creating complex
actions that would be difficult to manipulate smoothly with only just the one object. Let's use popcorn as an example. In this sequence, I will make a popcorn kernel
pop by swapping out individual kernels with progressively larger
puffier versions to show it popping in real time. So here are the steps. I'll
start by setting up my stage. I'll prepare a simple scene
where the popcorn will pop. I'll make sure my
camera is mounted securely in a tripod and
my lighting is consistent. For popcorn prep, I will sauce versions of popcorn in
different stages of popping. I can use real popcorn here and start with
unpopped kernel, a half popped one, and
a fully popped piece. To animate a popcorn, I'll place the
unpopped kernel on the set and take my first frame. I can make it stand up by
using some sticky pat I will also make it jitter
a little side to side to add some
anticipation before the pop. Then I'll have it raised
off the ground by using my winder rig and take each frame as it
gradually goes up. I'm also thinking
about my easing out principle to make his jump
decelerate towards the apex. Then I'll swap my unpopped
kernel with a half popped one for the next frame to
show the kernel expanding. After that, I'll switch to a fully popped kernel for
the final transformation. All the while I am using this precise winder rig
to move the corn by tiny increments and applied my easing out principle
to create a smooth jump. You can also use an amature wire to achieve a similar effect. I will then remove this
rig in post production. For an added flourish, I'll let the popped kernel bound slightly
in the final few frames, applying our follow
through principle, where the movement continues even though the main
action has stopped. Next up is a very
common technique that I like to call rewind mode. Rewind mode or
animating in reverse. This means we are basically
working backwards by shooting the final frame first and moving towards the
starting position. This technique is
particularly useful when animating food that needs to look a certain way
when assembled, as it can be easier to
manage when disassembled. It's also commonly used
when creating typography, out of food or logos, like in the work of Beca Clason. For the course title animation, I use this technique
by starting with the finished design first and
working my way backwards. Another nice feature
of dragon frame is the ability to import
an image or a logo at a separate layer and
your live view to help you line up precisely your
designs with your food. Another important tip
is to really think about your easing in and
easing out principles. So that frame two, for
example, barely moves, and you gradually increase the spacing as the elements move out of frame so that when you play your
animation in reverse, you get a nice smooth motion easing into the final design. Slice, dice, and chop. There are countless
creative ways to coll up food in stop motion. I love this approach
of grading a carrot. I used a couple of guides
on top of my Live view to ensure I reposition the carrot in exactly the same
place for each frame. By playing with the spacing, I created a nice
deceleration effect. Adding a quick sound
effect here to the mix really
sells the illusion. Human touch.
Animating yourself or someone else's
hands can serve as both a tool and a character
in the animation. Adding a playful and
interactive element that makes the action feel
more organic and relatable. This technique is unique
to stop motion and can enhance storytelling in ways
that digital animation, CGI, or even AI often
struggles with, especially with the
intricacy of hands. The technique of animating the human body is also
called pixelation. For examples of this
look, you can look up the work of animator
Norman McLaren. Reality remix. This is perhaps the biggest
superpower of Stop Motion. The ability to give any
object new meanings through creative
visual storytelling. By using everyday food items
and re contextualizing them, you can create engaging and
imaginative animations. The possibilities for
food transformations, metaphors, and new
meanings are endless. The body of work from Paz is a prime example of this
approach to stop motion. By working this
way, clients will come to you not only
for the execution, but more importantly,
for your clever ideas.
7. Planning Your Scene: Now are we familiar with
the various principles, our ingredients of
stop motion animation, and the stop motion techniques,
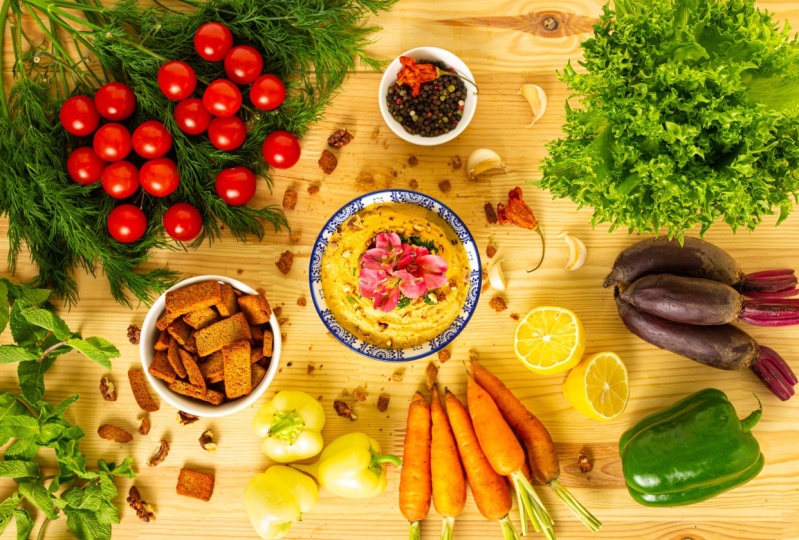
our cooking methods. Let's bring it all together
into one project, a recipe. We'll create a short
animation demonstrating a basil hummus recipe
and we'll incorporate as many principles
and techniques to create something
unique and fun. For more complex animation, it can be quite useful to create a storyboard to plan our
sequence of actions. I will work in Procreate
in a vertical format, so I can post this to
Instagram as a real. So let's draw ourselves
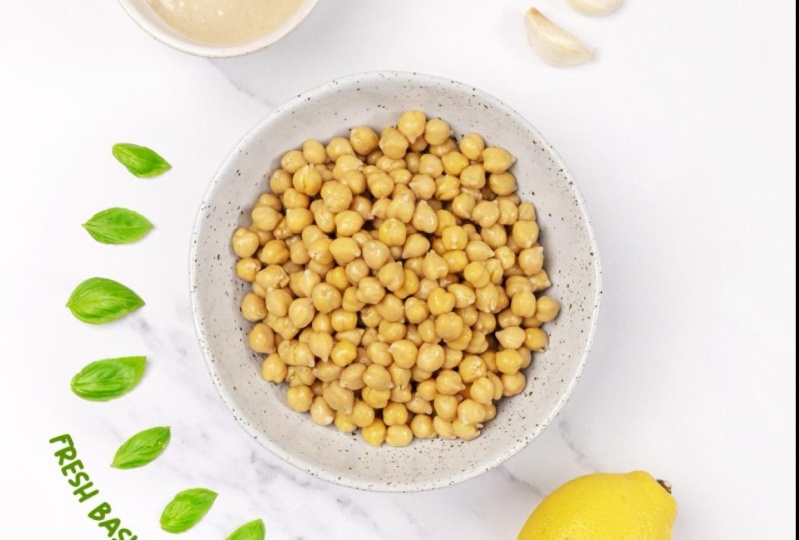
a bit of a plan. Okay, so I'm going to list my ingredients first
for this recipe. I'll have some
basil, chick peas, garlic, tahini,
some lemon juice, some pine nuts for topping, and maybe some spices
like paprika and Zata. I'm going to have my ball
come into the frame, maybe with a slight
overshoot, as well. And then the chickpeas
will quickly follow with a bit of an arc. I'd like them to
spin around the ball and add a bit of a stop to it before
they go into the bowl. So some anticipation there. Then they're going to
quickly pop into the bowl, and I'm going to introduce my other ingredients
like the lemon, the basil leaves, and maybe the garlic and
the tahini as well. Once those ingredients
go into the bowl, I'm going to bring my hand and have some
sort of interaction, adding that human
touch we talked about. So maybe the hand
is going to go and grab the bowl and
help it spin somehow. And we're going to add some anticipation as
well to that spin. So it spins maybe
counterclockwise, and then we have
that clockwise spin. That spin will initiate
the mix for the humus, so the humus will blend. And I think what will
look really cool is if I can have the
dish cover the camera, so it's going to go up and fly into the air,
cover the camera, and then drop back down
maybe as a different plate, and maybe introduce a
different background as well. So once the dish lands, I'm going to add
the final toppings. So the spices, maybe
some basil leaves, and some decoration on the edge of the frame
would look cool as well. So now that I've got my plan all laid out in my storyboard, we are ready to
shoot our animation.
8. Bringing It to Life: Okay, so we are now inside of dragon frame and ready
to animate our recipe. Okay, so I have my camera
set up in portrait, and I have my nine
by 16 mask on, and I also did a focus
check and a couple of test shots to make
sure I am happy with the image and
the composition. So let's bring our first
prop into the shot. That is our gray
ball here that will gradually ease into the
center of the frame. I have drawn some
straight vertical lines on a drawing layer to help me line up the edges of the ball and to make sure it
moves in a straight line. As mentioned in the storyboard, I'd like to give the
ball slight overshoot, meaning it'll slightly go too far and then come back
slowly into the center, giving the animation
some subtle bounds. I could have had the ball
already in the center, but I want to have
an empty frame to start with because I want to incorporate some text and the title of the
recipe in the video. If you do want to
work with text, it's a good thing to think ahead and plan for these moments
when text will appear. Okay, so that's
the last frame for that first move of the ball. Let's have a look at the
playback and see how that feels. Okay, so that's looking good. I've got my nice overshoot, as well, then coming
to a nice subtle stop. And here is that motion
from different angles. So again, here, I'm using the drawing layers and
the guidelines to help me with creating my
arcs for my chickpeas. So I want them to move in
from the bottom left here and come in in a nice arc and then start spinning
around the ball. I'm going to use the
increment editor and add myself a
bit of tick marks. So I want to have 24 tick
marks around the ball. So there is about 2 seconds
to complete a spin. So those increments are
right now in linear. They're at the same
spacing from each other. And I'm just lining
up the chick peas on those white tick marks and also on the red line
to follow my x. And that's taking a bit of
time to make it happen. I just want to make sure
I'm not introducing too many chick peas and I stop when I'm
completing the circle. Okay, awesome. So
all of my chick peas have now joined my circle. So I've got 24 chick peas, and I can start
creating my spin. So all I have to do here
is actually introduce another frame of them moving
in between those tick marks. So I'm going to create kind of a fake loop here for the spin. So it's going to go from
one tick mark to the next, but I just want to
have this in between frame to complete that motion. So again, still going
in linear increments, and you can see here in real time how long it
takes me to move all 24. So this is by far, probably the most time consuming
piece in this animation, moving all those chick peas. One by one and making sure they still
line up on my guidelines. Okay, let's speed
this up a little bit. Okay, so now that
I've spun a little bit a couple of
times with my loop, I'm going to slow them down so they come
to a gradual stop, and I'm just going to
eyeball this and just move them frame by frame here and
make sure they slow down. Okay, so let's play
back the whole thing, wave those arcs with the
spin and the slow down. So, again, this is
the time consuming part of the process here. Nice time lapse to show it. Okay, so now I've got my bowl in the middle and my chick
peas ready to go in. I think it is also a good spot
to have maybe some text in the bowl showing how many grams of chickpeas I'm going
to use for this recipe. I'll try to also have the
chickpeas overlay the text. I think there'll be a
nice way to integrate the typography within
the animation. Okay, so now I'm adding
the chick peas into the bowl at first one by one, and then I just
add more and more. So the animation is quite quick. Okay, so once all my
24 chickpeas are in, I feel like the bowl
feels a bit empty, so I'm going to add more
and take a frame each time. Okay, so let's see it in action. Great. Looking good. Okay, so now we have to
cook those chickpeas, so I thought it'd
be good idea to have my hand come into the shot. So introducing here a human
touch or a pixelation. And I'm just going to
have the hand come in and then do a quick
snap of the fingers, and then those chickpeas
will be cooked. I'll just replace them with
already cooked chickpeas. Okay, looking good. So now I want to introduce my
other ingredients. So the lemon juice, the ini the garlic,
and basil leaves. And to do that, I'm
going to actually choose my animation technique
we spoke about earlier, which would be
animating in reverse. Okay, the rewind mode. This is because I want
to have a nice layout, nice composition of those
elements around the bowl. So I'm going to
place them first in the final position and then animate my way backwards and
remove them from the frame. So for the basil leaves,
which I think look great, they add this nice
touch of green and color to the composition, I'm going to bring up my
guideline from before and make sure that I line them up on that circle that we used
for the check piece. So there it is. Maybe also
use those increments, so they have a nice equal
distance between them. So again, those guidelines
come in really handy, and you can reuse some
from before as well. Okay, so let's do some
final adjustments here on the items, and I'm ready to
animate them outwards. So I'm not going to animate them all the way out to the
edge of the frame. I'm just going to pop
them in one by one. I'll start with basil
leaves and then work my way around the
design with then the tahini, the garlic, and then
finally the lemon. So this is what this animation
looks like in reverse. So now I'm going to select the first frame of this bit here and shift
select the last one. I'm going to cut those frames, right click and then
paste in reverse. And that's going to
reverse the order. And if I play this now, you can see it's
coming into the scene. Let's play it one
more time. Fantastic. So now I can bring these
ingredients into the bowl. I'll also reintroduce my hand by having it reach and
grab the ball of Homs, do a slight anticipation
counterclockwise, and then give the
ball a big spin to simulate that blending
action on the recipe. To make this happen,
I need to have my blender nearby
and take a number of frames of different stages of blending from rough to smooth. This is, in a way, a type
of switcheroo happening here or replacement animation that we've talked about earlier. Here's what that blend
spin motion looks like. Pretty cool, right? Okay, moving on to the more tricky
part of the video, I want the ball to rise
all the way up and cover the lens of the camera
with its homos texture. To make it happen, I'm going to use my daughter's lego duplo. Tse bricks are great
because they are sturdy, quick to assemble, and give me regular
increments to work with. So you can see here,
I'm rising the plate, being quite careful so it doesn't fall over
and ruins my set. I'm also adding a bit
of ease out principle. So when the dish gets close to the camera to make the
transition nice and soft. Then when my camera view is
completely full of homos, I'm going to swap the
dish and also swap the background before having it fall all the way back down
to the center of the frame. I've chosen a contrasting
shape here for the dish and color as well
with this yellow fish and also a wooden backdrop to make that change of scenery
as strong as possible with the idea of having
the view move from the kitchen top with this marble texture to the dining table with
the wooden texture. I've also added some
chick peas bursting from the plate as a dish makes
contact with the table. This really exaggerates
that impact. To make the chick peas
disappear more smoothly, I did a sui hivu here with
some pine nuts. Looking good. Okay, it's also time to add my other toppings to dress up
the dish with my olive oil, then the basil leaves, zata and paprika for garnish. Finally, I'm adding a couple of props to dress up the table with this nice garlic bread at the top and a wooden board and some cornbread
from the bottom. Alright, so now let's check
out the entire animation. That's great. So now let's move into post production
to finish our video.
9. Editing and Finishing Touches: Now that we've captured
our frames and brought our food to
life three stop motion, it's time to dive into one of the most crucial steps
post production. This is where animation truly
comes together and shines. First things first, let's
start by double checking our frames inside of dragon
frame. So here's a tip. Play through your animation a couple of times to check for any missed movements or on
one that jumps in the motion. Sometimes your frames might
need a bit of a cleanup. If you have extra frames
or perhaps some mistakes, maybe a hand snuck into
the shut, don't worry. You can easily delete or re order frames to ensure your animation is
smooth and clean. This is also the time to do
final timing twigs by holding certain frames for longer timing or removing frames altogether. It always amazes
me how one frame less or more can make
a huge difference. Let's take this part of
the sequence, for example, where the plate drops back
down and I can isolate this particular sequence by pressing I on my
keyboard for in. This will basically
create an endpoint, similar to Premiere Pro, if
you've used that before. So in and I want to
stop right about here, I'm going to press O for out. So I've got my in
and out markers. So now if I've got the
loop button selected, and I press Play,
it'll just cycle through those few frames. Okay? And I feel like we can get
some more impact on that fall. Okay? So this is, again, the importance
of just one frame. So as the plate drops, I remember from my chute that I've got, yeah, you can see, I've got a little
bit of lego here between the plate and my table. Okay? So this creates
basically an ease in effect and it
softens that landing. I want more impact.
So I'm going to remove this frame
here altogether. So frame 197. I'm going
to click on that. I can press delete or
right click and select. That's going to
delete that frame. So now if I play
this back, boom, we've got a much
stronger impact. Okay? So sometimes removing frames can make a
very big difference. Okay, so as I said previously, I like to work with
the raw images and do some more
post production, but you can also export, if you're happy with the
results from Dragonframe, you can export a
movie straight out of Dragonframe and get
a video this way. To do that, it's quite easy. You just go to file export movie and then choose your source, make sure you have
the high risk JPEx that we've been shooting so far. And the exposure is the camera that you
want to export from. So I've got multiples, but if you have just one, it'll be selected here. The frame rate, make sure
that is the framework you're working with and you want
to select all frames. And the cool thing is here, you can say to Dragon
Frame, actually, I want you to crop to
my aspect ratio and make a nine by 16
video out of it. So use that crop. You can also set
the um, scale here. So by default, if
you set 200% scale, it'll create a huge file
with lots of pixels. We are working
with 1080 by 1920. That's a nine by 16 resolution. So you can set it up
here, and then you've got the exact dimensions
of your movie. And then all you have to do
is choose your movie type, so you could choose MP four, which is nice and compressed, or you can go uncompressed
and choose like a PRs quick time. Okay, so let's export that
and see what that looks like. I can choose my
destination here. I'll just put that
on the desktop. Okay, so I've made
some changes to my sequence here by
holding some frames, removing other
frames, and basically creating pauses and
variation in timing. And this makes for more entertaining and
better viewing experience. So it's important to have
some breathing spaces. You can see this bit here has been sped up while other
bits and pieces have been slowed down to ensure there's enough time to register what's
happening on screen. Once I'm happy with this
timing and frame order, I can go on the left hand side here and conform my sequence. And that's basically is
going to bake in all of my changes and create
the final sequence of images in my Dragonframe folder. And speaking of that folder, I can access it at any time by right clicking on
any image here in the timeline and select
Reveal in Finer. And that's going to open
up my source folder. So in here, I've gone ahead and went into the
filter options here, and I can filter my images by
kind, application or size. And that's basically as
a handy tip so that you can sort images because right
now you've got both types. You've got the JPEGs
and the raw images. Remember how we set up
that initial file format, and I want to work with the
highest possible resolution, so I'm working with
the raw images. So to sort those images, I've got this filter happening, and I'm going to select Shift Select all
of my raw images, and I'm basically
going to drag them inside of Photoshop here. Okay, so Photoshop is going
to then open up Camera Raw, and Camera Raw is basically a separate app
that comes in with Photoshop and allows you
to work with raw images. So it's quite a
powerful bit of an app. I'm going to ignore
this pop up for now. And you can see I've got all
of my images opened up here. So this is great because I
can basically do any edit on one image and effect all the images in that
sequence at the same time. To do that, I'm
going to click on the first or last image
and scroll all the way back and shift Salk and you can see now I've got
all those images selected. So if I make any change here, let's go crazy and go pink, you can see all those
images go pink now. So similar to light room, if you've used light room before and worked on multiple images, you can do edits this way. So the first thing
I want to do is actually go into my optics, and you can see here by default, camera row as detected my camera model and
also my camera lens. And if I remove the corrections, you can see it's correcting for some distortion
and also vignetting, okay? So that's pretty handy. Make sure you've
got that selected. I'm also going to rotate
my images because right now it's in landscape and I
want to work in portrait. So I'm going to go
here into the crop, and I'm going to rotate conoce. So I've got my images
in a vertical format. So that's looking good.
I think I've got, you know, good
lighting to work from. But let's go through quickly and show you what options
you've got here. And this is why we use
raw because we've got control over a lot more settings than if those were just JPEGs. So, for example, I
can up the exposure. I can adjust my contrast,
highlights shadows. And you can see I can
retrieve a lot of information from those settings. I also got control over color, so I can change the color temperature if I
want to go cooler or warmer. I got those settings.
I can adjust the tint. And also vibrance and saturation is something that
is quite fun to play with. And if you want to go even
more in detail and add detail, you can work on the texture here and add some
texture or clarity. All of these work really great. I've got a curve graph
here to work with, and here is where things get really really
intense and fun. I can go and isolate
particular colors. So for example, the greens, I can adjust the
saturation on my greens. If I want the basil
here to pop up more to be darker, I
can play on just those. Same with the luminans you
can see I can adjust that. And again, all of
these options I have control over because
I'm using the raw images. So they're a bit
larger, bit more cumbersome to work with
because they're big files, but trust me, in the end, it really gives you a lot
more editing options. So go around and have
a play with these. I'm going to make some changes, and then I'll show you how
to export those in a second. Okay, so I've made my changes. The idea here is that we
don't get too carried away with making
too many changes. The reason for that
is that we don't want our image to
look too artificial. I can cycle through
the before and after. So as you can see, I've
made things a bit brighter. I can also show a side
by side comparison. So this is before,
and this is after. So you can see a bit
brighter the greens, more saturation, more white. You can see on the hand as well this is before,
this is after. So a bit broader and all
around, just more appealing. Okay, so I'm going to
select everything. I can also do a Command A
to select all my images, and now I can export them. So I'm going to go to the top
here and choose a location. So I'm going to go a
little bit outside here and go into this JPEG. I usually like to
call them retouched. Select that folder
and document name. That's fine. I can do a two
digit, starting from frame. One is fine. Actually,
FM got more than two. We got three digits.
Let's go for that. Okay, and I want to
use a JPEG format, quality high. That's all good. And let's go ahead and save. You can see at the bottom left that I've got 262
images remaining. So I'll let that run through, and we'll see you
on the other side. Okay, so my export
has just finished. Let's go and have a peek
at our folder again and make sure everything
has saved correctly. So I'm gonna go into
the JPEG, retouched. And it looks like
everything's right here and looking beautiful. Okay, fantastic. So, there are a few changes I
want to make still before I bring this
into final editing. I've noticed a slight
mistake right around here, and I've made a mental note about that while I was shooting. As you can see, I've got the wooden plate in the bottom corner
here that's going up. And I think right about
Yeah, there it is. So it's moving here and then stays still here
and it's moving here. I basically forgot to move
it on that one frame. So that's frame 232. So what I might do is change
231 and just remove that. Yeah, that's how I'll fix it. So let's open up 231, which is right
here. Let's check. Yeah, perfect. So 231, I'm going to open
that with Photoshop. Done with Camera Raw,
so I can just say done. I'm also going to open 230, so I have a frame with
nothing in the corner, and I'm simply
going to copy 230, command A, come in C, to 231. Yep, Shi command V to copy. Then all I have to do is just I can make a
mask can remove. Let's just make a mask. I
think that'll be simpler. I'm going to invert
the mask and just paint the little bit here. Yep. Here we go. So essentially, I've just masked out
the entire image. I've just left the
bottom left corner. So that sits on top of my
frame that I wanted to adjust. Okay? So I'm going
to save this and I'm going to go save now, initially, it will ask
me to do a photoshop. I just wanted to save as a JPEX so I don't mess up my sequence. So I think the way to
do that is to save a copy and just
remove the word copy. Yep, and then just save. I'll ask me if I want to replace it, I do want to replace it. So I'll just hit Okay, and let's just check that. 231. Yeah, perfect. Now that's gone. And it moves. Okay, so now that we've got
all of frames fixed up, I've erased the little mistakes. I can go ahead and import that JPEC sequence into my
editing software of choice. I like to work with
the Venture resolve because of its coloring tools, so I can do further
color grading and color correction in resolve
on that JPEC sequence. But you can also import
this into after effects if you want to do
some motion graphics on top of the stop motion. Premiere is also a good
choice, final cut. Any software he'll accept
that image sequence. The process for these
editing softwares is pretty much similar
across the board. You import your image sequence. You make sure that your
frame rate is correct, and then you choose
your export settings according to the platform
that you want to output to. Let's take a look
at DaVinci resolve, how to import our sequence,
and how to export it. Okay, so inside of
the Bent resolve, I'm going to import my JPEG image sequence
into the media pool, and that's going to
create a sequence for me. I want to check the frame rate. Right now it's set to 24 FPS. So let's change that.
By right clicking, I'm going to go into
clip attributes and change the frame rate to be a custom frame rate of 12 FPS. Press Okay, and I
then want to create a new timeline by right clicking again
with the selected clip, and I want to name this final. And if I use the
product setting, it's going to create a wide
screen horizontal timeline. So I'm going to
uncheck that and go to format and change this to
be a vertical resolution. It's going to switch
things around for me, and I'm going to have a nine by 16 timeline. Let's press Create. And you can see now I've got
a nice vertical timeline. Okay, we can play this through. That looks good. Awesome. Here I can adjust
my colors again. This is why I like resolve. I can go into the color tab and play with my color, color boost, play with a contrast
with the mid, the gamma, all that
sort of good stuff. A quick side note
here about sound. Adding sound effect and
music can really elevate your stop motion from
good to unforgettable. Imagine the satisfying pop of popcorn popping or the swish of a strawberry diving
into a smoothie. For me, sound is 50% of
the experience of a video, and sound design actually
deserves its own master class. But just know for now that
this step is also when I would add sound effect and
music to complete my video. Sinking sound to you animation
is also all about timing. Make sure the sound precisely matches the visual and the
motion in your frames, like a spoon clinking to the bowl or slice of bread
landing on a sandwich. Actually gathered
hundreds of thousands of sounds over the years. I organize those in sound
libraries on my hard drive. You can also do that yourself, or you can go on
paid platforms like Artlist or Sound to help you find the exact
sound you're looking for. There are also some
free websites where you can find royalty
free sound effects. Or better yet, if
you have the budget, go ahead and find a sound
designer in your area. They'll help you out immensely. And to export this sequence, I'm going to go into
the deliver page. In this page, I can choose what platform I
want to output to. So TikTok, video, YouTube. I'm going to choose YouTube, and again, you don't have to choose a particular platform. I like the YouTube preset. Just make sure it's
set to vertical, and I'm going to add that
to the Render Queue. Let's name this
final on my desktop, and I'm going to select
that and then say Render A. Okay, and we're done. Let's
right click Reveal in Finder. And we've got our
final video. Awesome. Okay, so here's the
animation again after I've added some text
and some sound design. And then you have it, your food, start motion animation is
ready to share with the world. What are you uploading
to Instagram, YouTube or presenting it
as part of a project? Don't forget to keep
engaging your audience with the same creativity and passion that went into
making you animation. Post production is where all the hard work
comes together. It's a space to refine, enhance and really give your start motion the
attention it deserves. So take your time, explore and experiment with different tools and techniques. And you never know.
You might stumble upon something that makes your
animation even more magical.
10. Ready to Serve: Final Thoughts & Next Steps: Hi. Who. Wow. What an
incredible journey we've taken together
in this master class on animating food. We explore the
wonderful world of Stop Motion and how
you can transform simple food items into engaging stories that
capture the imagination. We started by understanding
the basics of stop motion, learning about the
principles like timing, spacing, ease in and ease out, all of which help
bring our food to life in unique and
delightful ways. You've seen how
these principles can be applied creatively to animate anything from popcorn
to swirling spaghetti. Then we dive into
the equipment and tools necessary for our craft. With tools like dragon frame, we learn how to control
animations with precision. The onion skinning feature and the frame by frame playback are invaluable
tools for achieving that seamless look
in your animations. Next, we had fun
experimenting with various animation techniques
like replacement animation, shooting in reverse, or using
actual hands in the frame, bringing it all together
in a complex recipe video. So now, as you wrap up, I encourage you to
take everything you've learned and start animating. Don't be afraid to think outside the box and let your
imagination run wild. The possibilities are endless. Start small and practice
the principles. Then try to tackle specific techniques
that we've learned. Remember, stop motion animation is not just about
the final product. It's also about the
joy of creation, the stories you tell, and the connections you make with your
audience through your art. So share your animations,
get your feedback, and continue refining
your skills. Lastly, I'd like to thank you for taking
this master class. I can't wait to see
the incredible food stop motion animations
you'll create. So go ahead, get your cameras ready, and let's get animating. Food isn't just served.
Is it brought to life. Thank you all and
happy animating.
 Paul Lalo, Creative Director/Motion Designer