Transcripts
1. Welcome: Hi, my artsy friends.
Have you been stitching? Are you ready to take
your hand embroidery out of the hoop and
into your closet? I hope you'll join me today, because we'll be
doing just that. We're gonna be taking a few hats and spicing them up with
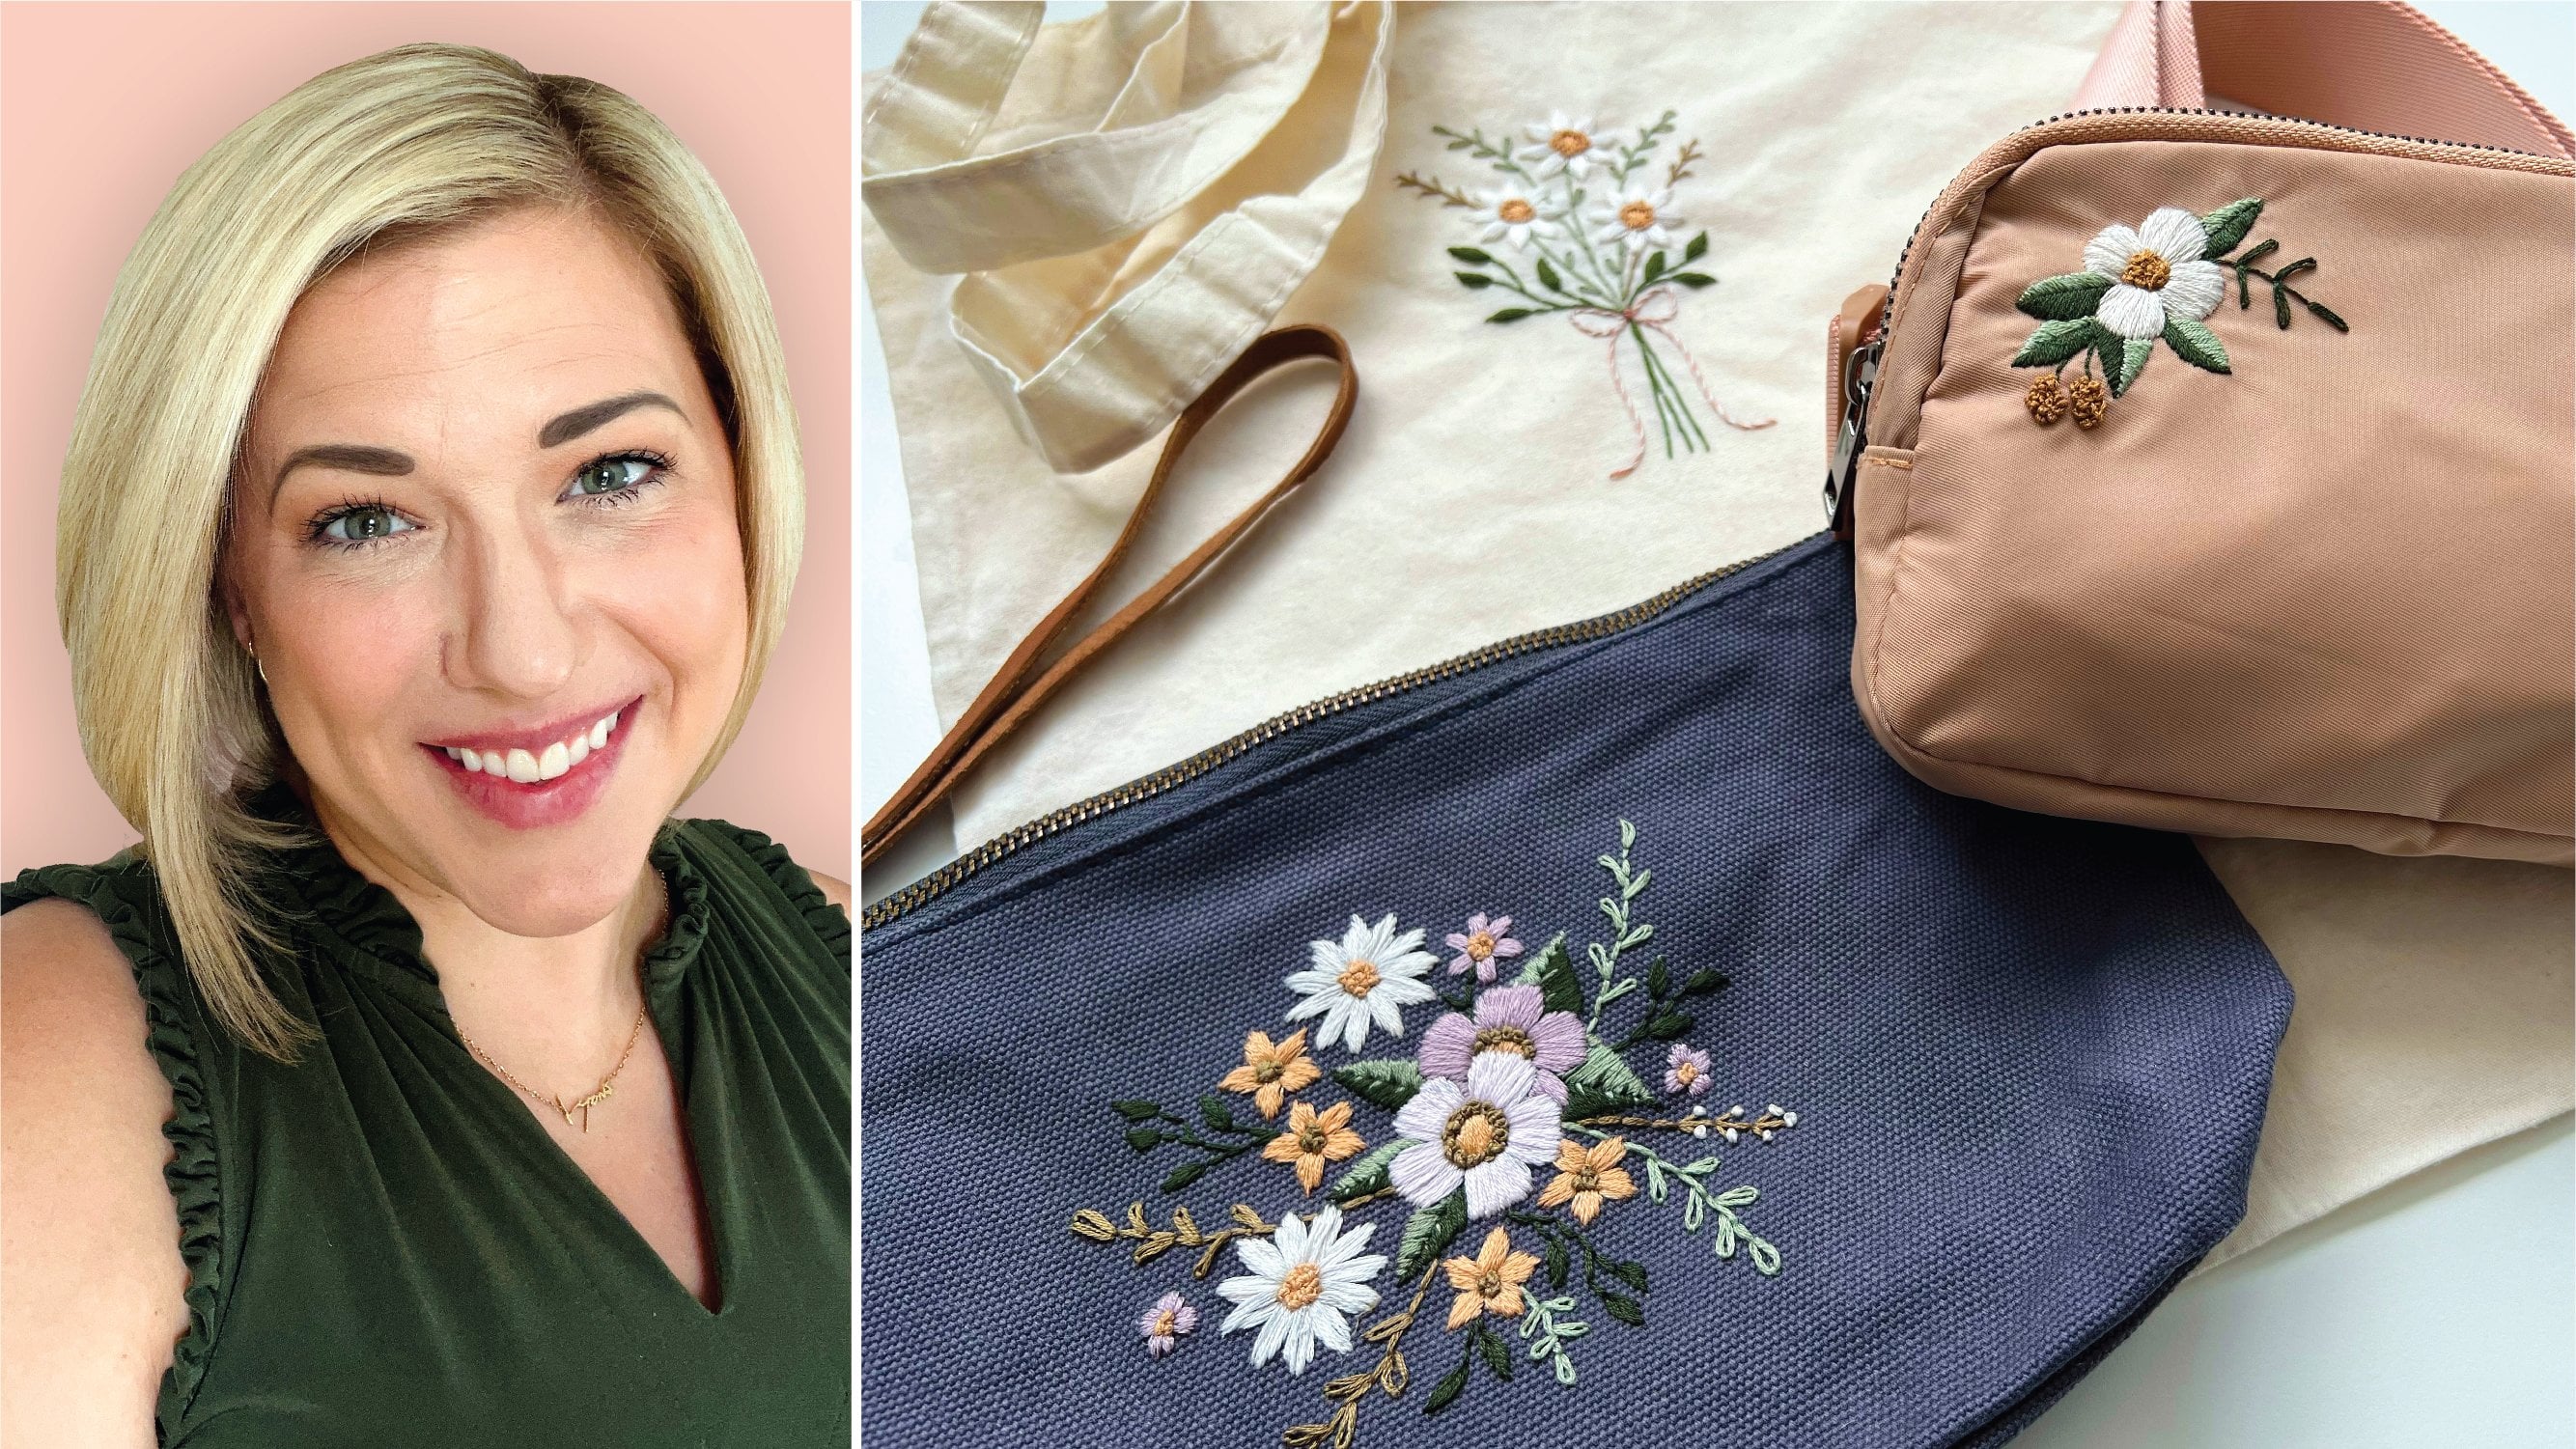
some simple stitches. Hi, I'm Kathleen Lyons. I'm an artist and
digital marketer based in Nashville, Tennessee. I graduated from Ottubran
University and starting my career as a graphic designer working outside of Chicago. Today, you'll find me working in the digital
marketing space by day and spending
my nights weekends pursuing my creative career. Okay, so graphic design. Obviously, I went to art school. I'm in the digital
marketing space. So how did I end up
in Han a embroidery? It actually started with
my second pregnancy. So I was pregnant with
our daughter Ella and had a ton of gender neutral
clothes from my son, Kaden. And knowing we were
only having two, and it was a girl,
I just wanted to find a way to make
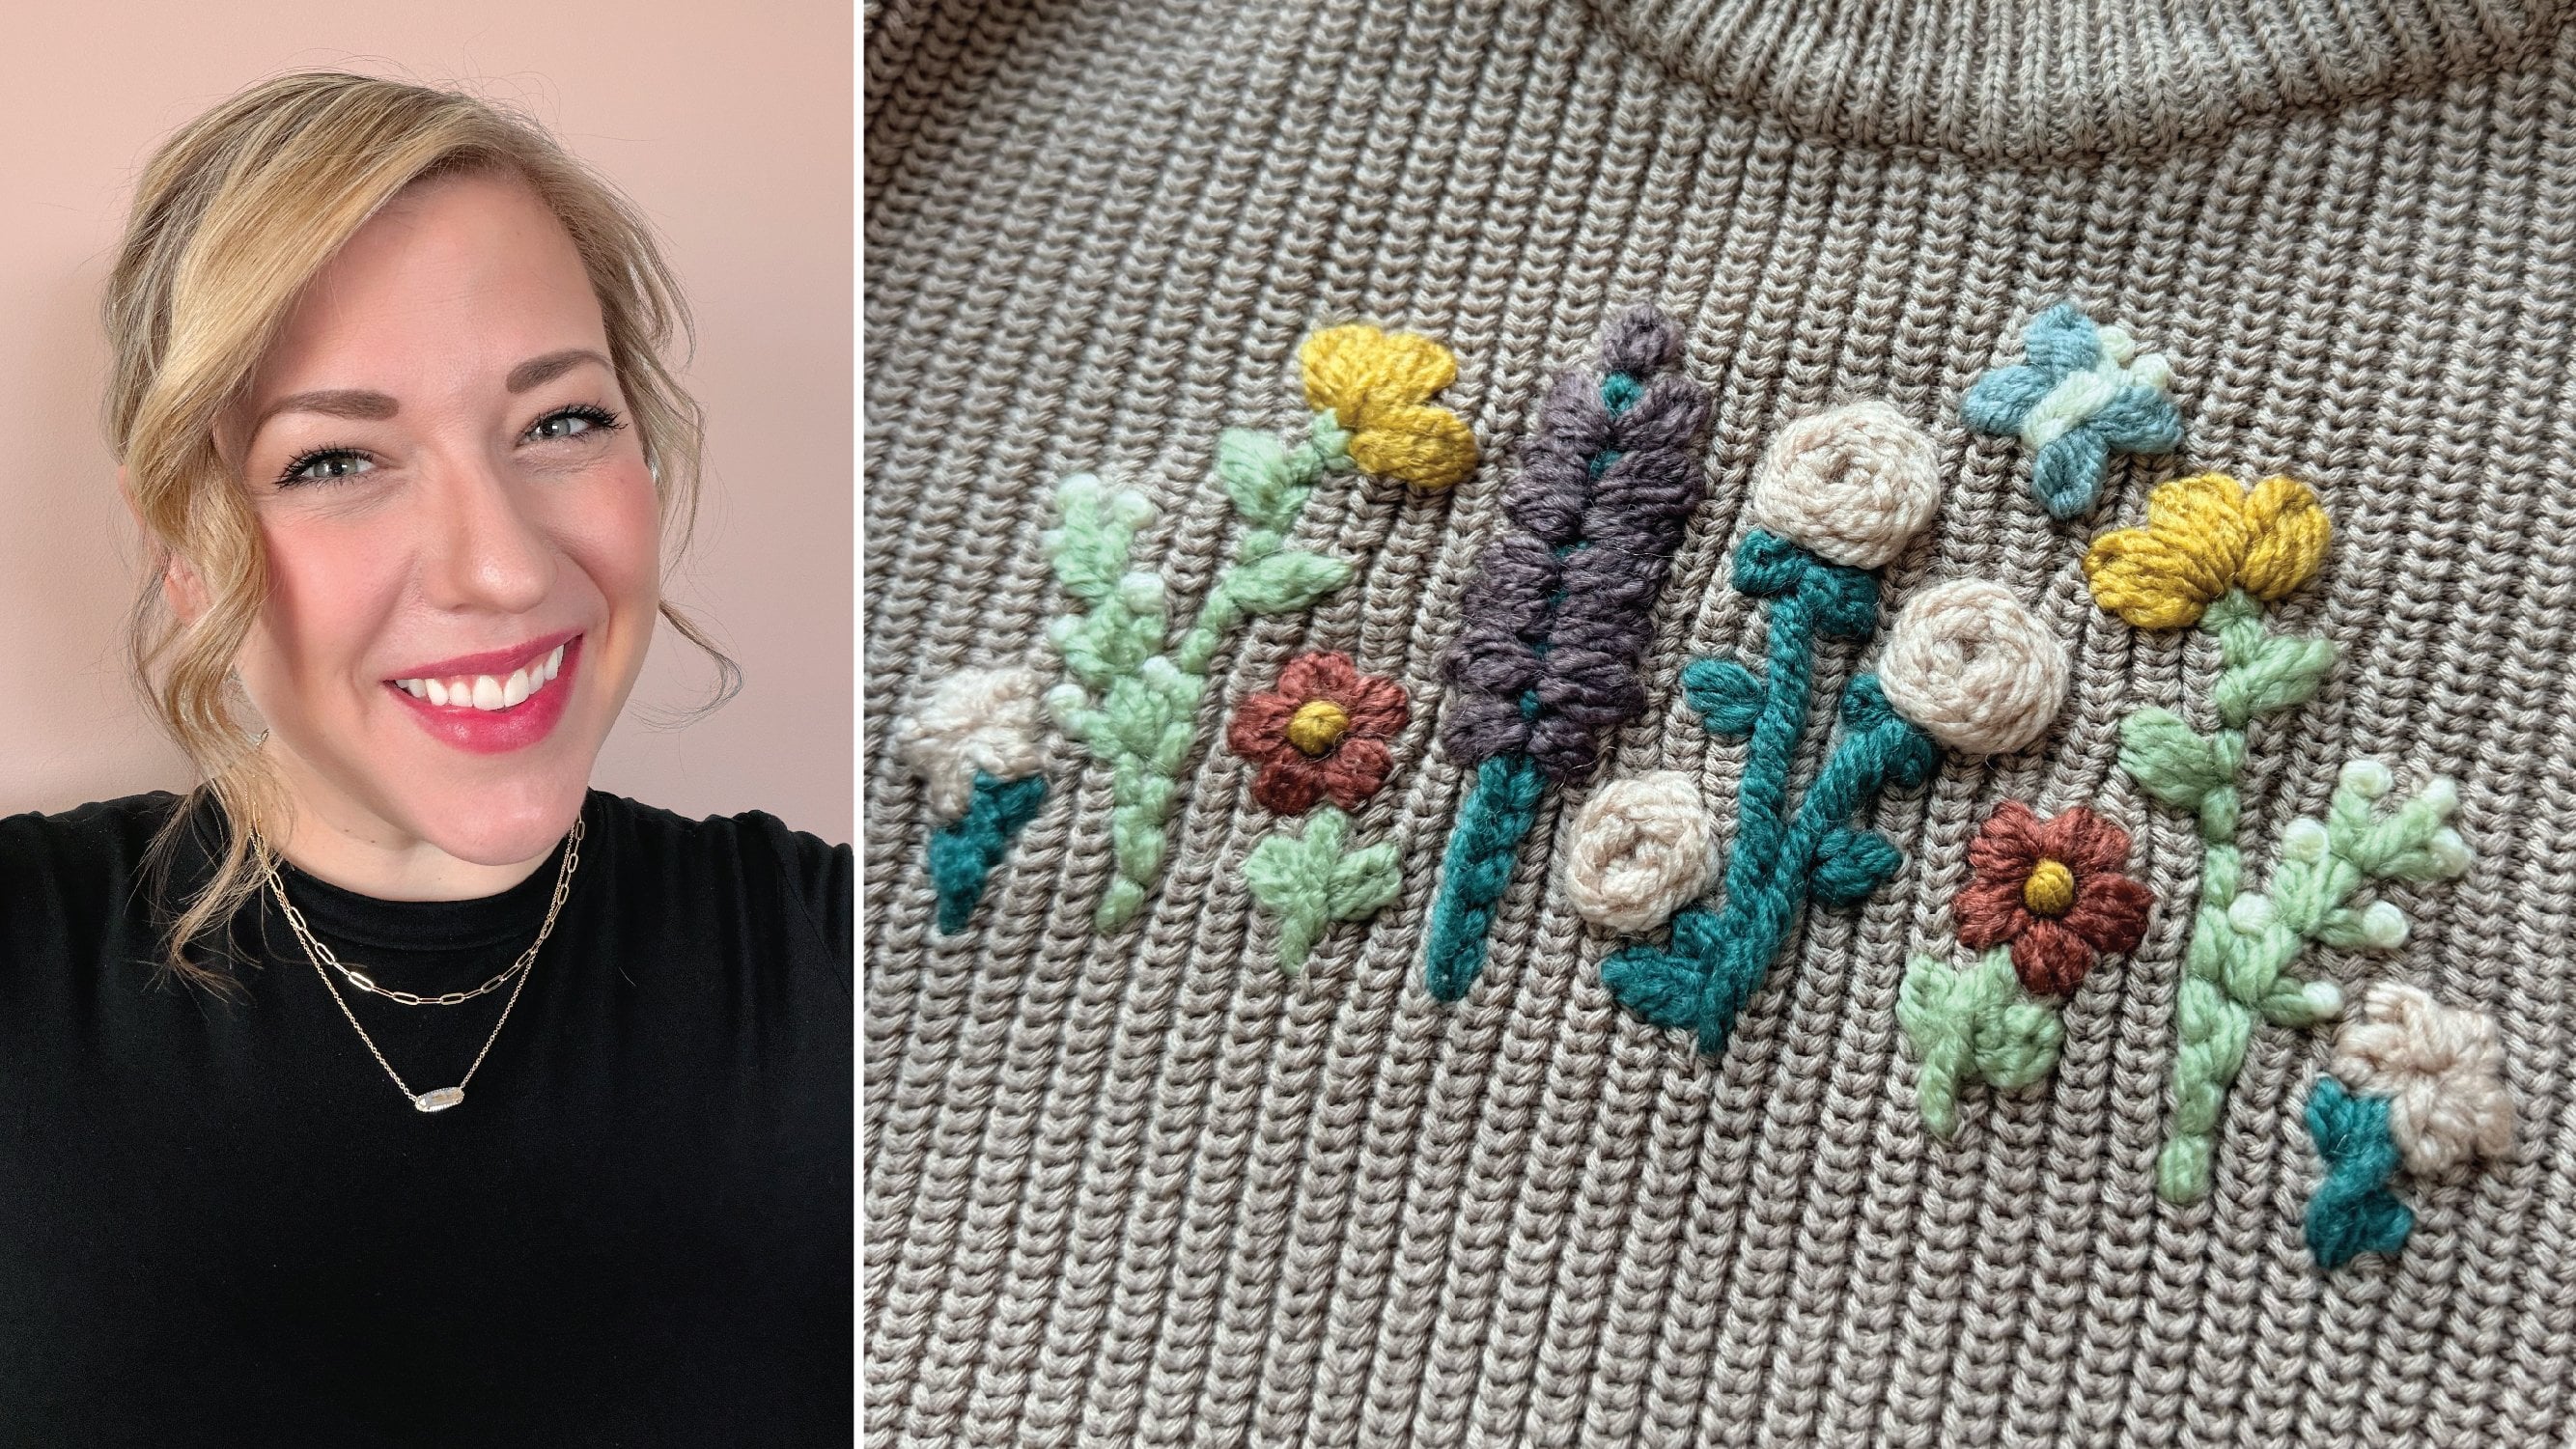
them sweet and girly. So, I got a book on Hana embroidery and
the rest is history. I've been stitching ever since. It turned out to be easier
than I thought and honestly, so satisfying to turn all those
gray sweaters into sweet, girly pieces for embroidery
gives that piece new life, whether it's a piece of clothing or a hat
or an accessory, maybe even your shoes. It's just such a fun way
to express your style. In this class, we'll be stitching
three hats as projects, but I couldn't help myself. There are two bonus patterns. We won't be walking
through those, but you will have
access to them, and I'll show you
some of my examples. So you're going to
get five patterns. We're going to go
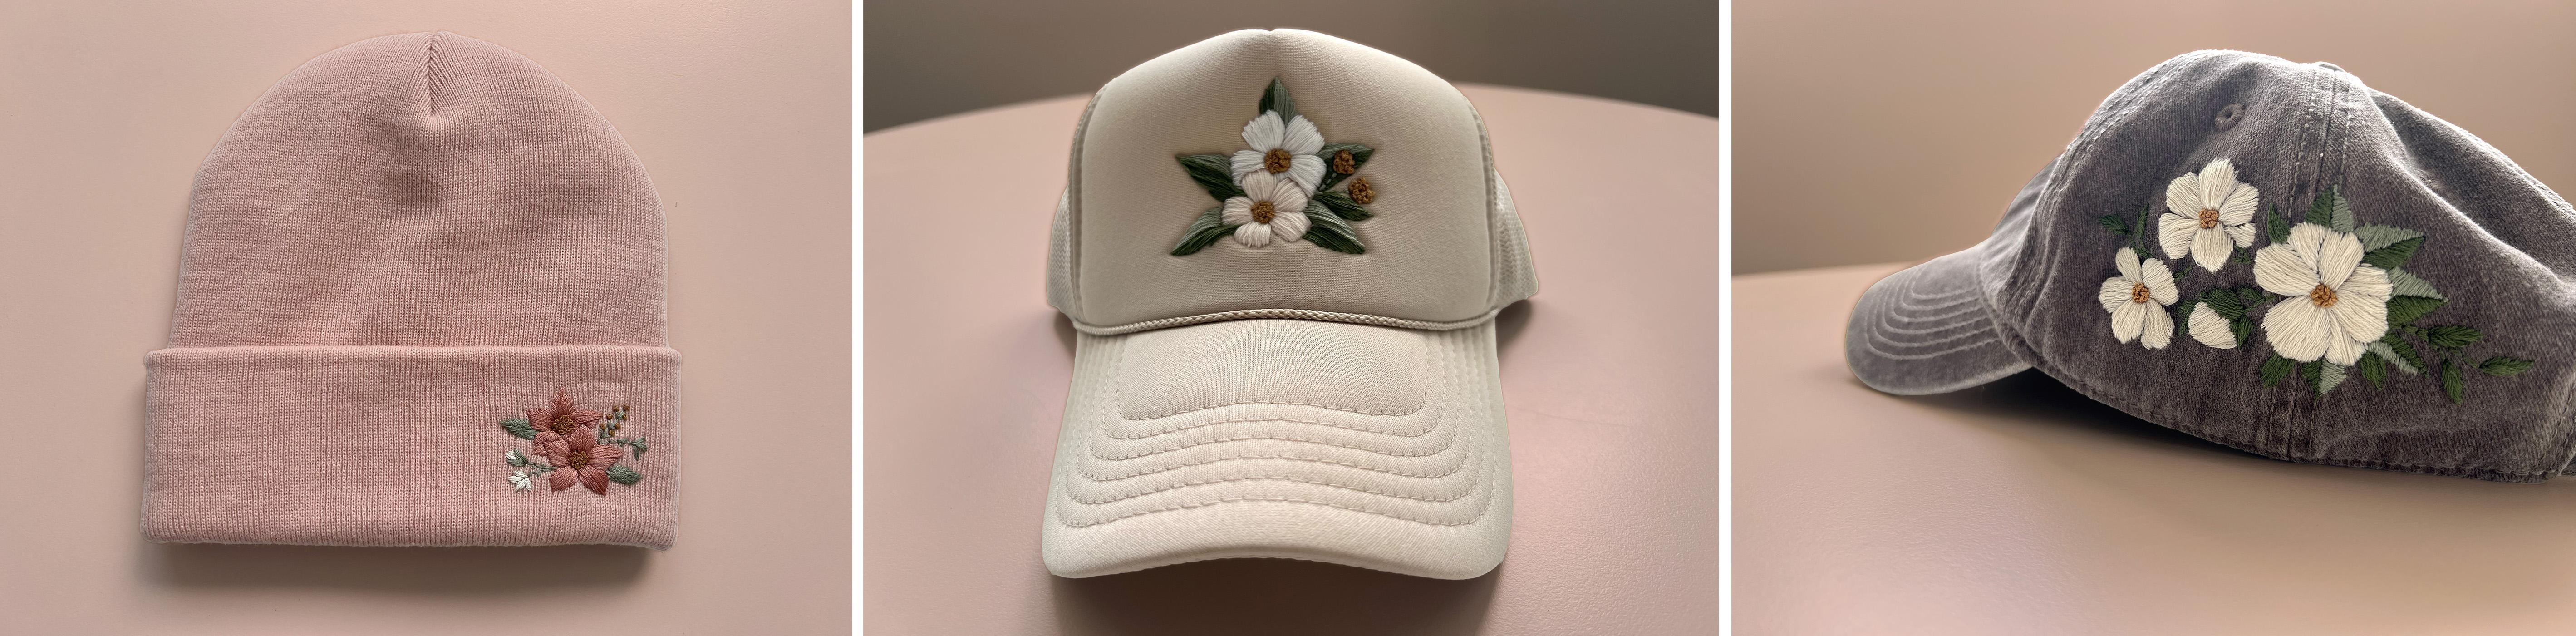
through three projects. We've got a Bani, a ball
cap, and a trucker hat. I also have these
linked for you, but go check your closet first. I'm hoping that
this will inspire you to start upcycling
some of your clothes. If you're ready,
let's get stitching. I'll see you in the next lesson.
2. Class Project: Class project time
for this class, you'll just need
to stitch a hat. So find one from your
closet, ideally. Let's upcycle if we can. Or snack one from the
links that I've provided. You'll go ahead and pick whichever pattern
and style that you prefer and then choose your
color palette, your stitches. All of this is open
for interpretation, and want to see it be as
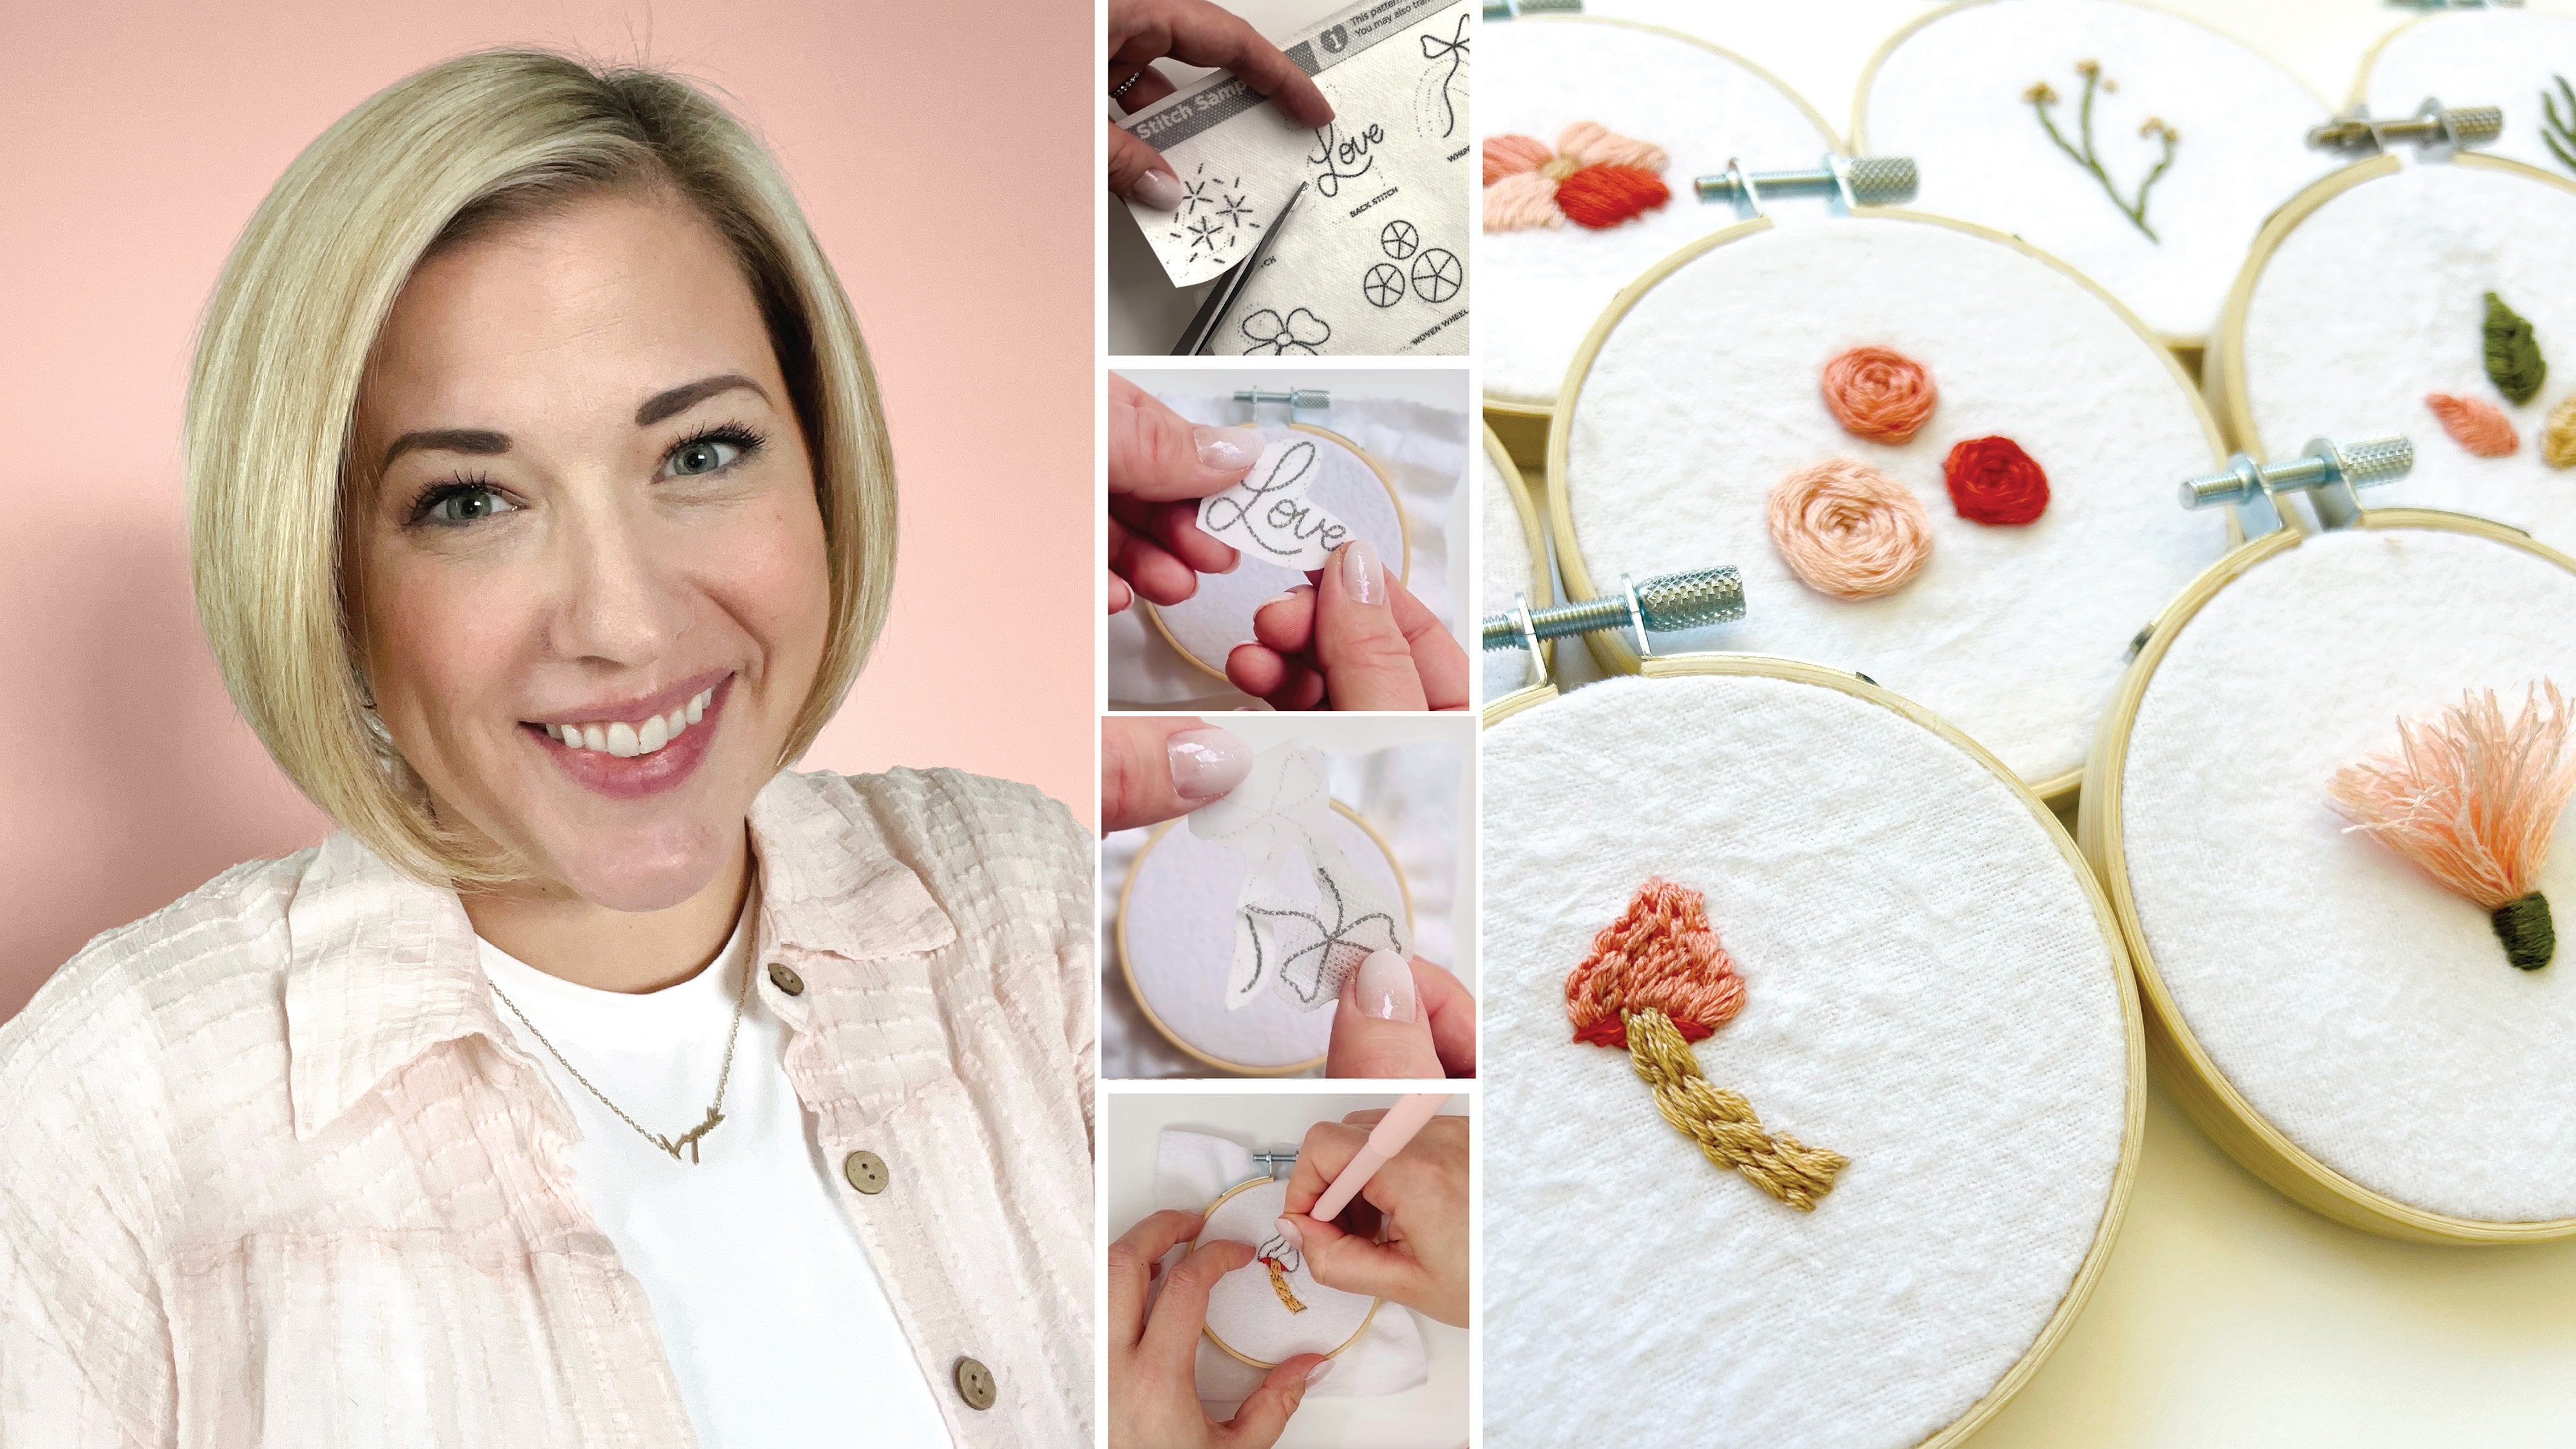
unique as possible to you. So in your assignment, you'll download those resources, stitch guide
patterns, et cetera. I will be using a water
soluble stabilizer, so I recommend that as well. It's really tough on a
hat to be able to trace. But if you want to go free hand, make sure you grab those
heat race bool pens. We're going to apply
the pattern to our hat, stitch over it, wash it away, and then have so
much fun wearing this new artwork as
part of our wardrobe. Lastly, I ask that you take pictures and share
them into projects. If you share on social, I would
love for you to tag me at Arts Lions or use the
hashtag Arts Stitches. I'll see you in the next lesson. Happy stitching.
3. Supplies: Okay, supplies. Now, these are all linked in
your resources, but I wanted to run through
them really quickly. I pretty much always use a water soluable stabilizer
when I'm working. I used to use a laser printer, and it actually would create
some weird stuff on it. I do recommend an ink jet,
but it will work in either. As long as you have a printer, you'll be able to
print on those. Alternatively, you can get heat erasable pen
and go free hand. I'll link these two.
They're super fun, but if you want a free hand,
you can do that as well. You can draw with them and
then erase it with heat. So I have a hair dryer,
iron, anything like that. You'll see me use the sticker. I'm going to print those
out, cut them out, peel, stick onto the actual piece, and then you're going to
need your needle and thread. I suggest choosing some
floss that you like. These are obviously
colors that I enjoy. Pick whatever colors you like, and then you need a
needle to go with your floss. This
always seems silly. Mm hm. You also need scissors. I love these. I'll link them. Just make sure you
have any scissors so you'll be able
to cut your floss. And lastly, again, I hope
that you upcycle something. I will have these linked. I have a bebi. I'll be showing you I'll
be working on with you. A trucker hat. And finally, a nice ball cap. Kind of those kind
of vintage dad caps. So those are the
three we'll be doing. And then, like I said, I'll have two bonuses for you so you
can see what those look like. But I'll just
include the pattern. We won't be walking through
this on the projects. So grab your stuff. I think
we're ready to get started.
4. Stitches: So this class is
intended for you to be able to jump
into the projects. However, I didn't want to
leave my beginners out. So I'm pulling a few of the stitch examples from
my one oh one class. If you're new, please
go watch that first. You'll be able to start
anything after that. But I'll pull those in.
There are four stitches. There is a back stitch, a satin stitch, a French
knot, and a leaf stitch. So I'll pull those in
here for my beginners, and my intermediates skip this
lesson. Wherever you are? Let's start stitching. Starting with a water
soluble stabilizer, I'm sticking that on, and then I'm just
going to come up through the mac with my needle and straight back down to start that initial
straight stitch. Now for the backstitch, I'm going to come ahead
one stitch length. And then when I come back
down through the front, I'm going to be going into the same hole as my last stitch. So that ending hole of
the initial stitch, I'm going to go into that, and then I'm going to repeat
that all the way around. So that is the pattern
for the backstitch, going up a stitch length and
then coming back down and sharing that same hole
from my previous stitch. This is a great way to outline. It's great for hand lettering. And just keep in mind
as you have curves, you might need to go
a little bit smaller. So as you're determining
your stitch length, be sure to note that. And again, it doesn't
have to be perfect. Sometimes those little
imperfections are what make our work unique. And
that's the backstitch. Starting with a water
soluble stabilizer, I printed on this,
and I cut it out, so I'm just sticking
that on my fabric. I'm gonna come up through the back down through the front. I'm splitting this
centerpiece here. I do a lot with satin
stitches just to help keep me a little
more even as I'm working. And I'm going to come up
again through the back, down through the front, right
next to Matt first stitch. So these are essentially
straight stitches that are side by side by side, and I'm going to keep
them as close as possible because my goal here
is to fill the shape. So the satin stitch is
great for filling shapes. I would advise keeping them on the smaller side if you
have some larger areas, maybe explore the long
and short stitch. But the satin stitch
is great for filling in small areas and doing
it fairly quickly. So I'm gonna speed this up here. Again, I do like to split my shapes just to help keep it a little more consistent and keep my stitches from
getting too wonky. And that's it. Quickly
filling this in, this is our satin
stitch. Check it out. Starting with a water
soluble stabilizer, I print it on this, cut it out. I'm just going to
attach it here. And I'm going to go ahead and do a backstitch for these stems, and then we'll get started
with a French knot. It's going to come
up through the back. I go to wrap it two
to three times and then push it down right
next to where I came out. So this is going
to create a knot. I'm going to keep this
parallel to my hoop. Sorry, it's getting stuck. And then I'm just going to
pull that right on through. So we'll do that a
couple more times. Now, be patient with yourself. French knots are
notoriously difficult. So up through the back,
gonna wrap it two to three times and then come back down right next
to where I came out. Go ahead and keep the
other side taut with my other hand and let
that slide on through. Okay, one more time. You notice I did goof up a
little bit there. So be kind to yourself
as you're wrapping. Sometimes it gets
a little tricky. So wrap two to three times and then back down right next
to that initial stitch, Hold it out to the side
and let that start going through and then let it go. There's your French knot. So I'm going to
finish this up so you can see it all completed. But again, please be
kind to yourself. These are difficult
to get the hang up, but once you get
some wraps, they start coming a little
more naturally. Wrap it up here, and this is our wrench knot. Check it out. Starting with a water soluble
stabilizer, I printed this, cut it out, and I'm
just going to stick it here onto my fabric
and get started. It's gonna come up
through the back, down through the front,
and I'm going to come up at the top of my leaf, and then I'm going to come about three quarters of the way down in the center and
push that back through. Now when I come back
up, I'm going to the left of my
initial stitch and then I'm going to go back down just over to the right
of that first line. So I'm going to
be crossing over. And that's the most
important part of this is to make sure that you're getting that crossover so that you're getting
the leaf effect. It's going to create this
seam down the middle. So I'm going to come up on
the other opposite side, so on the right side, and then back over and cross
over to the left. So I'm going to keep doing
this down the edge of my leaf. I'm going to come up
and then cross over my center and just back
down to the opposite side. So again, I'm going
to continue doing this through the leaf
and I'm going to go all the way down until I hit the bottom and I run
out of space to fill, and I'm going to do that
for all three of these. So I'll speed this up so you
can see the final effect. But it's just up
down, crossover, and the crossover is the
most important piece to make sure that you're going to get that seam for the leaf stitch. We're all done. Check it out. I'll see you in the next lesson.
5. Beanie: Hello, my RC friends. Today, we're gonna be
stitching a beanie. This is my final
piece. I encourage you to use the colors
that you like. All right. I'll see you in
there. Let's get started. So we're gonna start with our
water soluble stabilizer. I'm just peeling this off. I already cut it out,
and so I'm gonna place this on the beanie where
I'd like to stitch. So I'm gonna stick this on here. Again, these dissolve in water, so I'm gonna stitch
right over it. So I'm gonna come up through the back. Down
through the front. I'm going to start
with a backstitch. This is also considered
a fern stitch. You may see it like
that elsewhere, but ultimately we're
just doing backstitch. We're going to come up, and then I'm going to go back down and share that same hole
from my previous stitch. And I'm going to do that
for this entire stem. I do want to note that I'm using three of the strands
for the floss. So keep in mind, you can use the whole floss. You
can use two or three. It is totally up to you how thick or thin you'd
like this to appear. How much floss you use can impact the overall
look of your piece. So again, I'm using three here. And I'm going to go ahead
and finish out the stem, and then I'll speed
up a little bit and catch you on the next piece. I've finished all of my stems, and next we'll be
doing a leaf stitch. So I'm going to come
up through the back. I'm going to go down about
three quarters from this leaf, and I'm going to pull
that through and come up to the left
of my center line. And then I'm going to be
crossing over that and going just below
it. Where we go. Cross over to the opposite side, just below where that
initial middle stitches. I want to make sure
that I'm crossing over to create that seam. Or I guess it's a
vein. I'm going to do the same thing
on the right side, and then continue to
do this all the way through the leaf until I
filled the entire shape. So I'm gonna come up
through the back. I'm gonna cross over that center and come down on
the opposite side. And that is our leaf stitch. I'm gonna continue doing that, and I'll speed this up for you. We've got the leaves stitch in. Gonna finish the others, and then we'll come back for a satin stitch for our petals. Gonna come up here. And I'm actually going to make
this kind of a bud. So this is still
going to be green, but it's going to
be a satin stitch and match my other
flower petals. So I'm mixing it up
a little bit here. I am going to do a lazy daisy. So it's similar to
a chain stitch. It's just detached. If you need help with these, please go back to my
one oh one class. I have plenty of videos there, including this as well
as the chain stitch. So I went up through the back
and down in the same hole, and then I'm going to
stitch it in place here. So I stopped that loop by adding this stitch
and then I'm going to lock it in place by
going over that loop. So again, up through the back
down through the same home. And then I go towards the top of where I
want that loop to be, and that's where I pull
my needle through. And then I stitch right over
that to lock it in place. So there you can see
it kind of stops it. And then I'm going to lock it in place by going back down. I So I'm going to finish these buds and
start I'm using a white here. And then I'm gonna be using my favorite a Blush
pink for my flowers. Now I'm going for more of a tone on tone with these flowers. Again, please make
sure that you're using the color palette
that you prefer. This can look so different just based on the
colors that you choose. I want to make sure that even though it's a pattern
that's been supplied, it still looks like you, based on your colors
and your stitches. So I'm going up through the
back, down through the front, this is the satin stitch, so
we're going to go side by side by side and
fill in that shape. So I'm actually going to
separate this out a little bit. So as I mentioned, I like to kind of split my shapes to keep them a
little more symmetrical. So that's all I'm doing here
is I'm kind of giving myself guidelines so that when
I start stitching, it doesn't get too wompy. Now, this is very type A of me. If you're a little more
type B and you like it a little squirly, go for it. You can go side by side by side. Honestly, some of the nuances in our stitching is what
makes it feel like ours. So again, work how you prefer. I like to split these and
go side by side by side. But you can obviously start anywhere and just
fill in the shape. We're gonna speed this
through, and then we're only going to do one
of the French knots. Again, if you need
help with those, please go back to the
one oh one class where I walk you through 15
different stitches, including the French knot, which, to be fair,
is the hardest. If you want to swap that out for a satin stitch,
totally go for it. And so I'm wrapping this
two or three times, and then I'm just
going back down. So that's me pulling
that through. Easy PZ. Now I'm going to rinse the
water soluble stabilizer off. This one I had to
let soak for a bit, but eventually it came off, and this is our final piece. So pretty. Key takeaways. Be sure to use the colors and stitches that
speak most to you. If you like a certain
palette, go for it. If the French knot is
giving you trouble, opt for a satin stitch instead. Ensure you dissolve your
water soluble stabilizer completely to avoid
any dark lines showing through on
your lighter threads. If you have existing pieces, those are the perfect ones to use versus buying
something new. I'll see you next
time. Heavy stitching.
6. Trucker: Hi, my de friends. Today we're gonna be
stitching on a trucker hat. Are you ready?
Let's get started. We're starting with our
water soluble stabilizer. I'm just gonna peel
that and stick it onto my hat here in the center. Now, you can put this
off to the side. You can put it wherever
you like. But I did this one in the middle, and now we're ready to stitch. So I'm doing a ton of satin
stitching for this one. I'm gonna start with the leaves. I'm coming up through the
back, down through the front, and this is going to
be a satin stitch, so it's side by side by side. I will split my, you'll see. I will split my shapes
here to try to keep me a little more symmetrical
and pretty well lined up. I will say, I wish I
had gone an angle on this one and made a
few shorter stitches. So play with it,
choose what you like. You could also do
a leaf stitch for this one, or long and short. Feel free to mix it up with
the stitches and colors. I am doing a two toone here, so I did one side of leaf with a light green and the
other side with dark. And now that the
leaves are done, I'm going to work
on these stems. So this is just a backstitch. Going to come up
through the back and down through the front, and then I go ahead
a stitch length, and then back down into the
whole of that initial stitch. So here, you'll see me do that. I'm going to come down
through the front. And again, if you
need help with these, the one on one class is perfect if you're just
learning stitches. So now I'm going to come back up about a stitch length ahead. And then I'll come back down into the last hole of
that initial stitch, so that will be sharing a hole. These are great for outlines.
They're great for SNEms. So I'm gonna finish
these up really quickly, and then I'm going to start
working on my petals. So again, I'm working
with satin stitches, so I won't I'll
speed this one up quite a bit since you've
gotten the gist of it, but I'm going to do
this back petal, like all the petals of the back flower and a lighter color, and then I'm going to do a slightly darker
color in the front. So again, make sure that you're choosing the colors that
you like, mix them up. If you'd like to do some
different stitches here, feel free to mix it up, as well. But I'm going to
be sticking with the satin stitch for this one, and then we'll do the center
with some French nods. Now, I also want to
acknowledge that working with a hat can be difficult,
take your time. A lot of times you're wiggling around and trying to get
the right grip on it. Just know that that's
normal, work through it. It's just part of stitching
outside of the hoop. So now I've gotten
those two flowers, and I'm going to show
you one of these. It was really hard to film. And the French knots, again, if these give you trouble, so we're coming up
through the back, wrapping two to three times, and then going back down really close to
where we came out. So right next to
that initial stitch and then pulling that through
to complete the knot. So again, in the
one on one class, but also this is
really hard on a head. If you opt for a
stating for the center, that's totally fine, but it does give this
really amazing texture. So I did that for
the little bulbs and for the centers
of the flour. So now it's time to wash off our water
soluble stabilizer. And again, soak them as needed. And now we're all finished. Check out the checker.
Can't wait to see yours. Be sure to share
them. Key takeaways. Be sure to use the colors and stitches that
speak most to you. If you like a certain
palette, go for it. If the French not is
giving you trouble, opt for a satin stitch instead. Ensure you dissolve your
water soluble stabilizer completely to avoid
any dark lines showing through on
your lighter threads. If you have existing pieces, those are the perfect
ones to use versus buying something new.
I'll see you next time. Heavy stitching.
7. Ball Cap: This lesson we'll be
working on a ball cap. Be sure to grab your
water soluble stabilizer, your collar palette,
and your needle. Let's get started. So we're starting with our water
soluble stabilizer. I'm going to place
mine on the side. So I'm gonna peel this and
place it where I prefer it. Feel free to put this
on the front, too. You can put it
wherever or across the back would be
pretty cool, too. But I'm going to start on
the side, and I'm going to begin with all of the stems. So I'm going to be
doing a backstitch. So I'm coming up through the
back down through the front, and then I'm going to
come up a stitch length, and then back into the last
hole of my initial stitch. Again, this is the backstitch, so I'm going to use these
for all of the stems. I'm going to work those through. I'm going to stay with
the same color as well. I'm gonna work those through,
and then I'll come back and I will meet you
for the leaves. So I have all my
stems in, we're going to start with the
leaf stitch here. I'm going to come up
through the back, go to go down about three
quarters of the way from the leaf and then going to come up again on that left side, cross over and go down just
below my initial stitch. So again, this is a leaf stitch. If you need help, my
11 class is available, and I go through this stitch
along with 14 others. 15 stitches total. So I'm getting a heap
repeating that pattern where I'm just coming up on one side, crossing over to the other
until I fill this shape. And it's going to create
this really nice seam that's really the
vein of the leaf. So I'm going to
keep doing that and fill this in and
then I'm going to fill in all of the small leaves
with the same technique. So now that I have all of
the small leaves complete, I'm going to start with
these bigger leaves, and I'm actually going
to use a satin stitch. So I've started
this here. Again, I like to separate out my shapes, so I'm kind of giving
myself guidelines here, and I'm actually going to
split this by color, as well. So I'm still doing
this dark green. So I'm going to do this half and a dark green with
a satin stitch. You can see I'm placing a few guidelines here to
get the angle that I want, and then I'm going
to fill this shape in. So I'm going
to get this going. I'll fill in this side and
do all of this dark color green before I switch to a lighter color to fill
in the opposite side. All of this will
be satin stitch. So again, up through the
back, down through the front, and then it's just side by side by side to fill in that shade. Okay, so I have all of my leaves and that
dark green done. Now I'm going to come back with this light green and finish the other half of
these larger leaves. So again, I'm going to
try to measure this out one to give
myself guidelines, but also try to
match the angle that I did on that initial
dark green side. So you'll see me come across and kind of line it up a
couple times here. I'm really just trying to gauge the right angle and
make sure that I'm giving myself enough guidelines to keep my work a
little bit neater. So I'm going to fill these in. Again, this is satin stitch. I'll be using satin stitch
for the petals, as well. So I'm going to speed this up and fill in this light green. Okay, so I filled
in this other side, you see that two toone here. So I'm going to do that
treatment for the rest of my leaves and then
come back for the petal. Now for the petals, feel free to use whatever
color you like. I'm going pretty monotone here. I'm going to be doing cream on all of them. You
could mix it up. You can make some of
those bottom petals a slightly darker color to give it a little
more dimension. I'm using three strands here. You could also do two strands, one color, one strand,
opposite color. However you want to play
with this, feel free. Again, I'm a little basic. I like my neutrals, so I'll be doing cream here, and then I'll be filling in with kind of a gold for the center. Again, this is satin stitch. I'm just outlining and then filling in side
by side by side, which I'll do for the
rest of the petals. Now that those are
filled, I'm going to be doing French
knots for the center. Now, if they're giving
you a hard time, don't worry about it. Of for the satin
stitch, no biggie. But I'm going to
be wrapping mine, I think, three times and
then pulling through. So we'll do we'll
pull this through. And then we'll do one
more so you can see. So I'm going to come up through the back and then
with my needle, I'm going to press against that, wrap it Yep, three times, push down through right
next to where I came up, and then pull that until
the knot is complete. And these have such
a great texture. They're worth the pain and
the practice, I promise. So now that we have
those complete, I'm going to wash this off with a water soluble stabilizer
there on the back. So this is my kitchen sink.
Welcome to my kitchen. I use the sprayer a lot. So I'm going to get
that all off and then let it dry so we
can see our final piece. There we go. Beautiful ball cap. Key takeaways. Be sure to use the colors and stitches
that speak most to you. If you like a certain
palette, go for it. If the French knot is
giving you trouble, opt for a satin stitch instead. Ensure you dissolve your
water soluble stabilizer completely to avoid
any dark lines showing through on
your lighter threads. If you have existing pieces, those are the perfect ones to use versus buying
something new. I'll see you next
time. Heavy stitching.
8. Final Thoughts: You did it. Thank you so much for stitching
with me today. I hope you enjoy these
projects and we're able to download your patterns and
guides without any issues. If you do, please contact
me Kathleen at artlons.com. I am hoppy to help you out. Remember to post
your final pieces to the project section. And if you're posting online, I would love you to tag me at rt Lions or use the
hashtag rz stitches. Bonus points if you do both. Remember that Murder is
a great way to unwind and unplug from our busy lives. Even better is when we
can upscale pieces that have been in our closet and just need a little extra love. Plus, you get to wear your
artwork. How cool is that? Anyway, if you're
ready to jump in, I encourage you to check
out my other classes if you have ideas or other
things that you're like, Oh, I like how that looks, but
I don't know how to do it. Please send me a message. I would love to be creating
more to help you all out, and you know I'm
always ditching. But please take the
time to rate and review me on Skillshare
and give me a follow. I'd love to be able
to stay in contact. And like I said, I'm always looking for feedback
and suggestions. I am just wanting to
share my love and embrory but I want to make sure that it is also serving you. I'll see you in the next class.
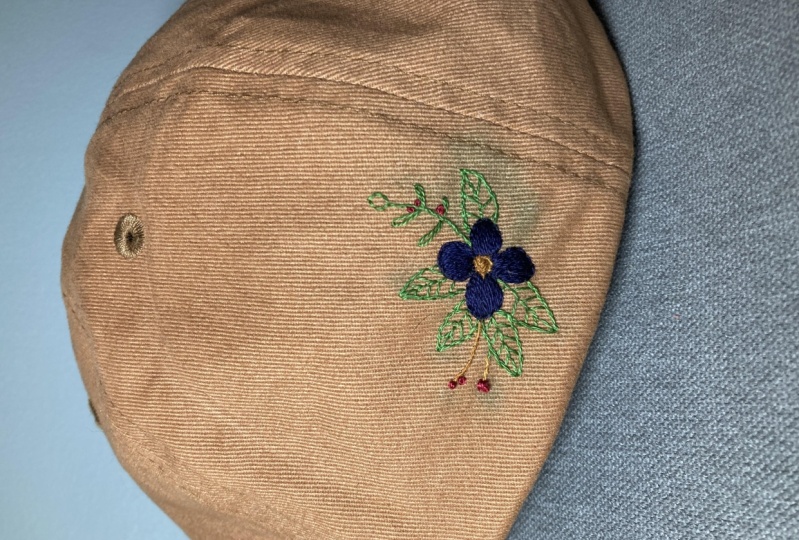
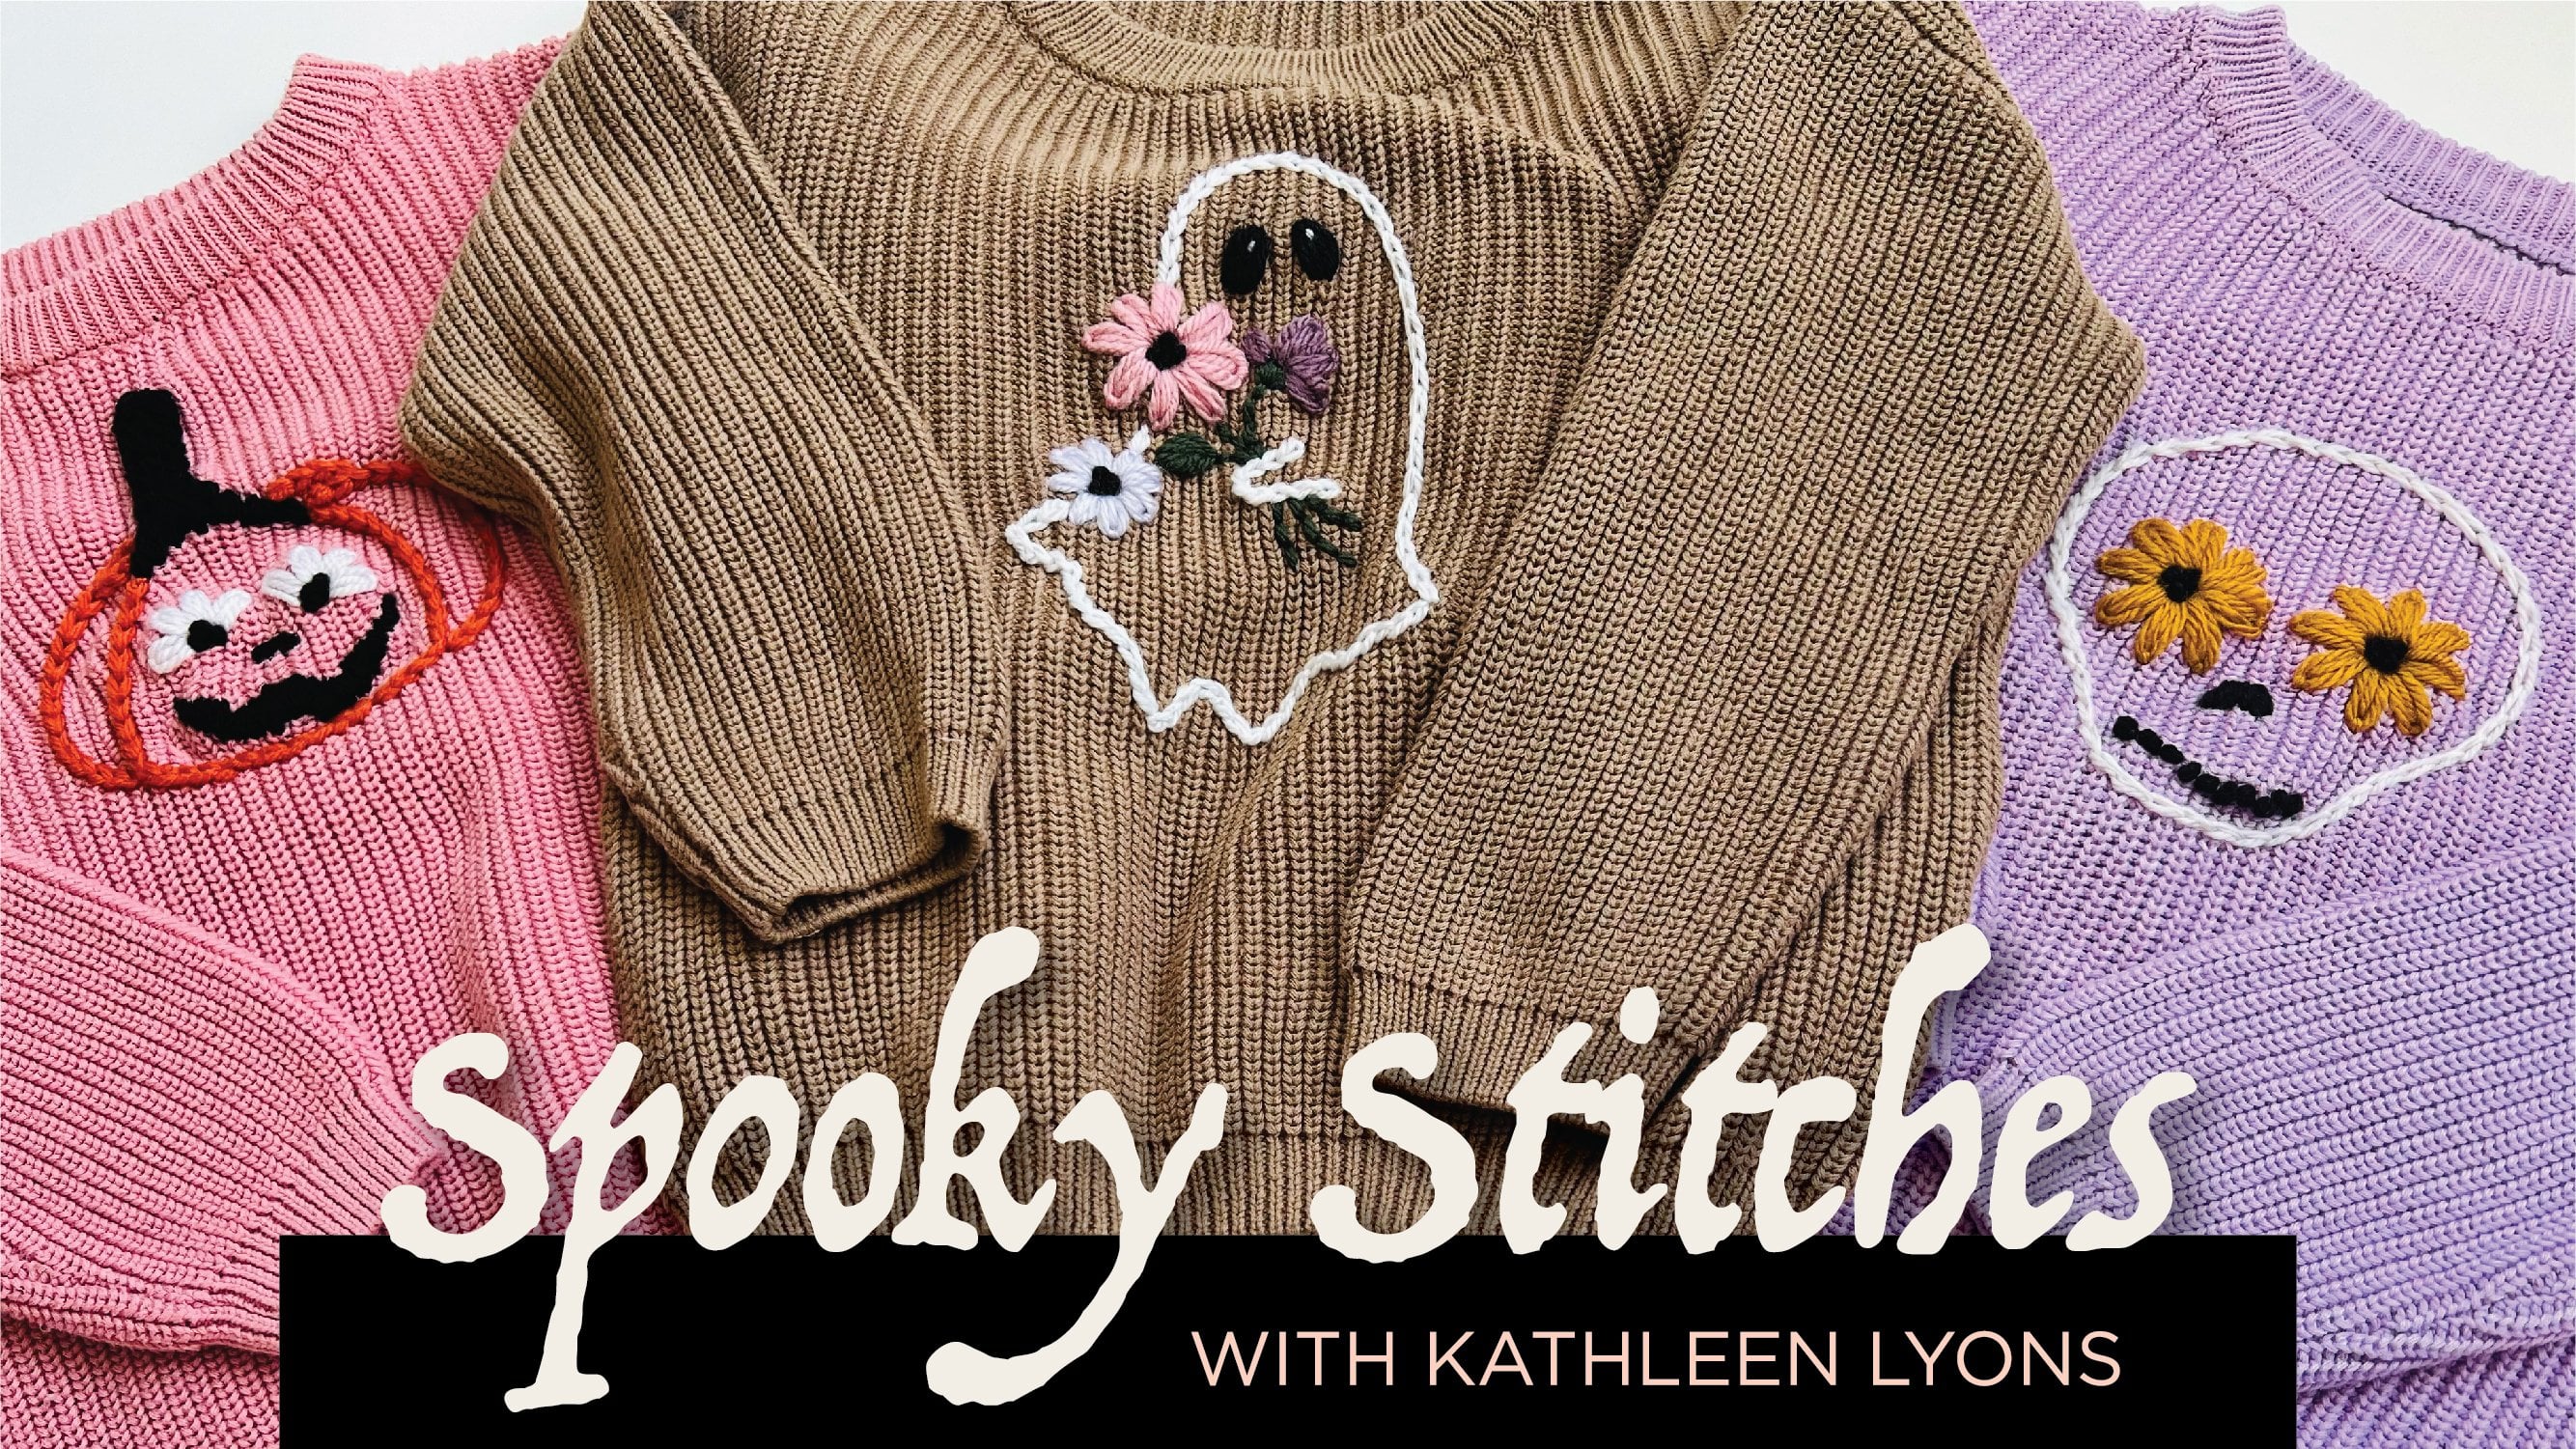
9. Bonus: Okay, I promised you a
bonus. Give me 1 second. So these are the two patterns
that I included as a bonus. The silhouette.
This could also be filled in if you use satin stitch mixed with your back
stitch could be pretty too. And then I also included one
for, like, a side placement. I really enjoy the ball cat, so I did a couple extras. Those are in your resources. Make sure you check
those out, too. I'll see you next
time. Heavy stitching.
 Kat Lyons, Artist + Educator + Entrepreneur