Transcripts
1. Welcome: Have you've been wanting
to try hand embroidery, but weren't sure where to start, I have excellent news for you. You're in the right spot.
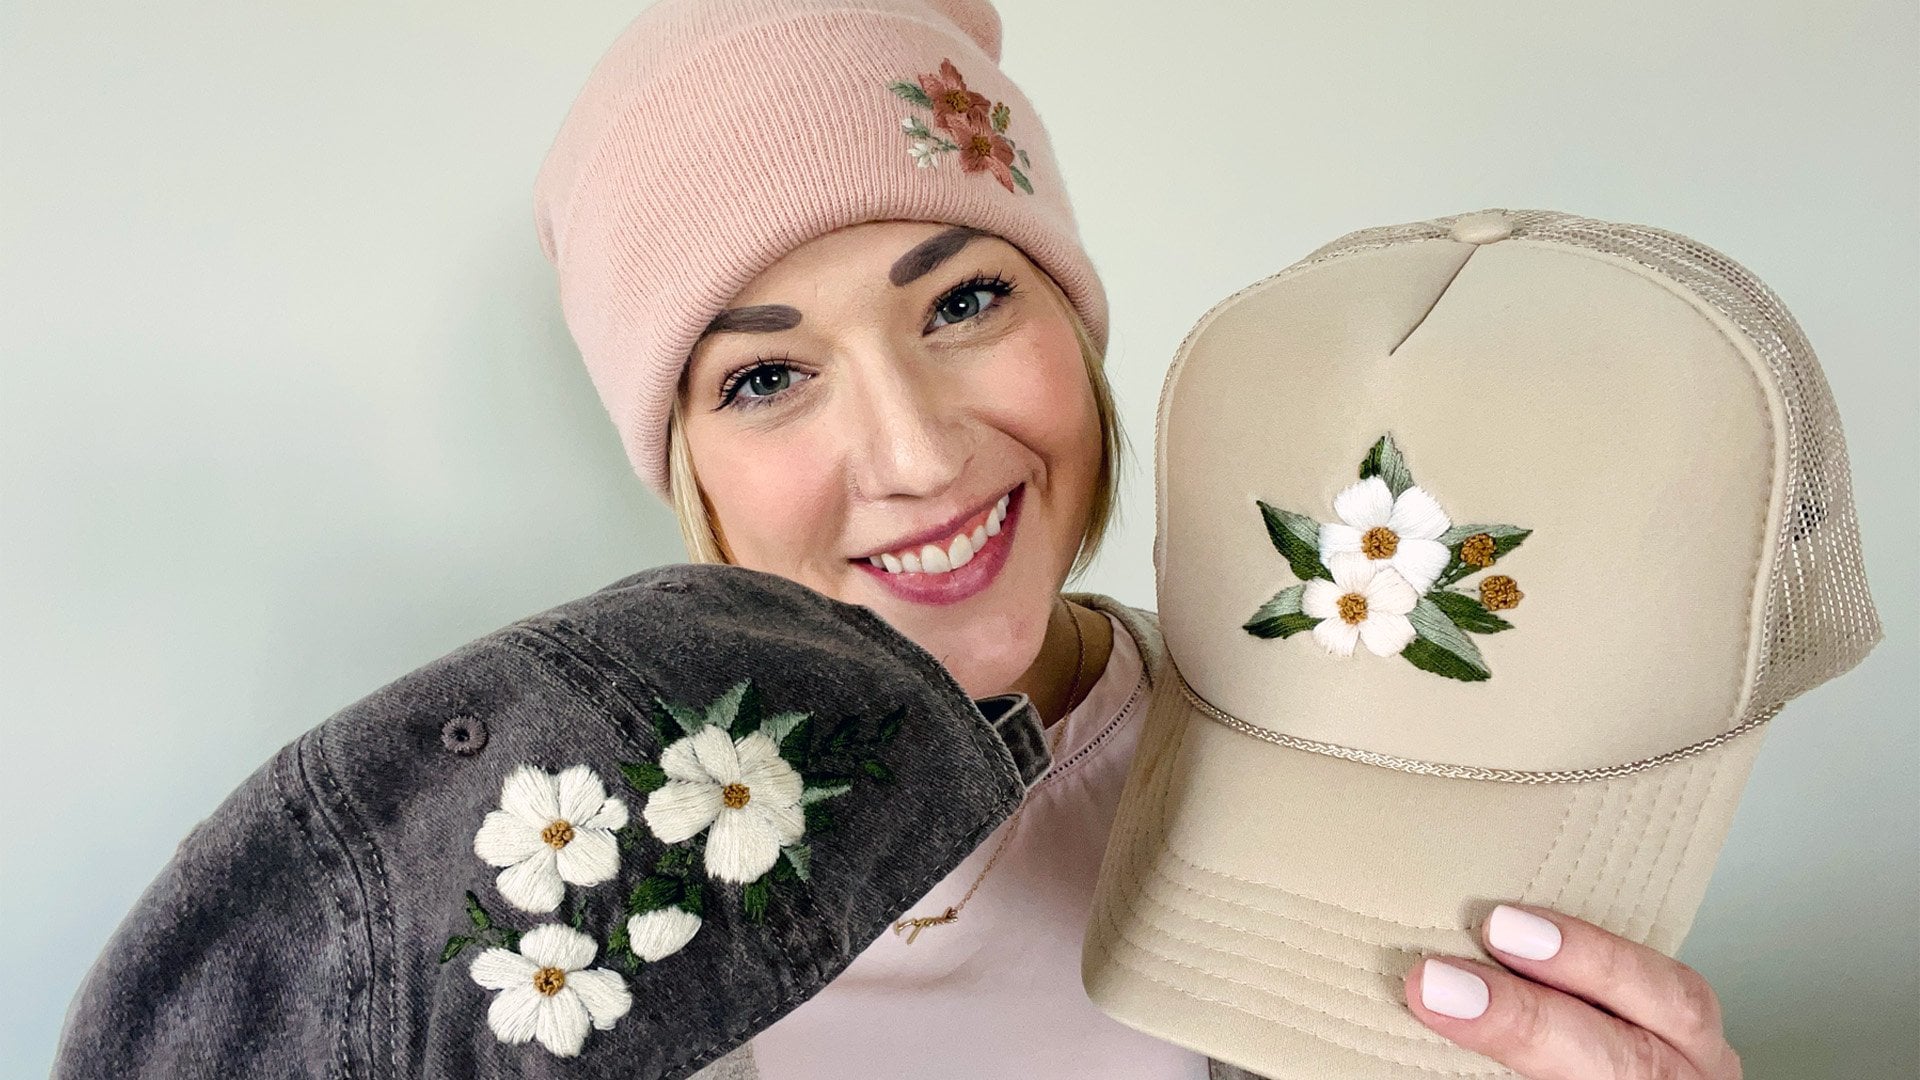
Hi, I'm Kathleen Lyons. I am an artist, educator and entrepreneur based in
Nashville, Tennessee, and my journey into
hand embroidery started with two littles. So I had a son, and then we had a daughter. And when I found out I was
pregnant with my daughter, I realized that I
didn't want all of the gender neutral
clothes for her wardrobe. So I started upcycling
my son's clothes, all of those gray sweaters, and adding little floral motifs. Since then, I have
taught several classes. I've been starting
to teach in person, and I even developed a
new teaching method, which is what I want to
share with you today. So in this class, we'll be
going through ten stitches, but we're learning them a
little bit differently. So I've developed a stitch deck, which is just ten cards. Where there's
different stitches, and this becomes
your stitch library. But we don't want to learn
the stitches in isolation. So we're going to
learn the stitches. We're going to learn all ten. We're gonna do it in
this cool new way. If you want to use a
hoop, by all means, check out the one oh one class, but we're gonna learn
it in a new way. And then we're
going to apply it. So at the end of this, we have a floral garden
that we can add to a shirt, a backpack, a to wherever
you'd like to apply it, but we will using all ten of the stitches to
create this garden. And for my advanced or my
intermediate stitchers, you can go ahead and
grab the pattern. There's patterns. There's
also several single motifs. If you just want to
do something small, go ahead and grab those. I didn't want to
leave anyone behind. So if you're brand new
here, stay with me. We're gonna learn
all of the stitches. And then we even
thread a needle? No, I got you. We
got you covered. So, if you're ready, grab a needle, and let's
start stitching.
2. Class Project: In this class, your project is going to be to stitch
one of the patterns, either the full floral garden or a single motif and share
it in the project section. You'll need a few items, so make sure that you
check out the supplies. You'll need your yarn and
needle and also some fabric. I recommend a cotton knit
sweater or a denim jacket. Again, all of those
are in your supplies. You'll choose what you'd
like to stitch on, and then also the pattern
or motif that you'd you'll then print and cut out your
pattern or your motif. You'll apply it to your fabric, stitch right into it,
and then rinse it away. And then once that's dry, I would love for you to share a photo in the project section. And if you share on
social, please tag me. I'm at Art Lions. I want to cheer you
on wherever you are. And if you have
questions along the way, feel free to reach out. I'm always happy to help. I'll see you in the next lesson.
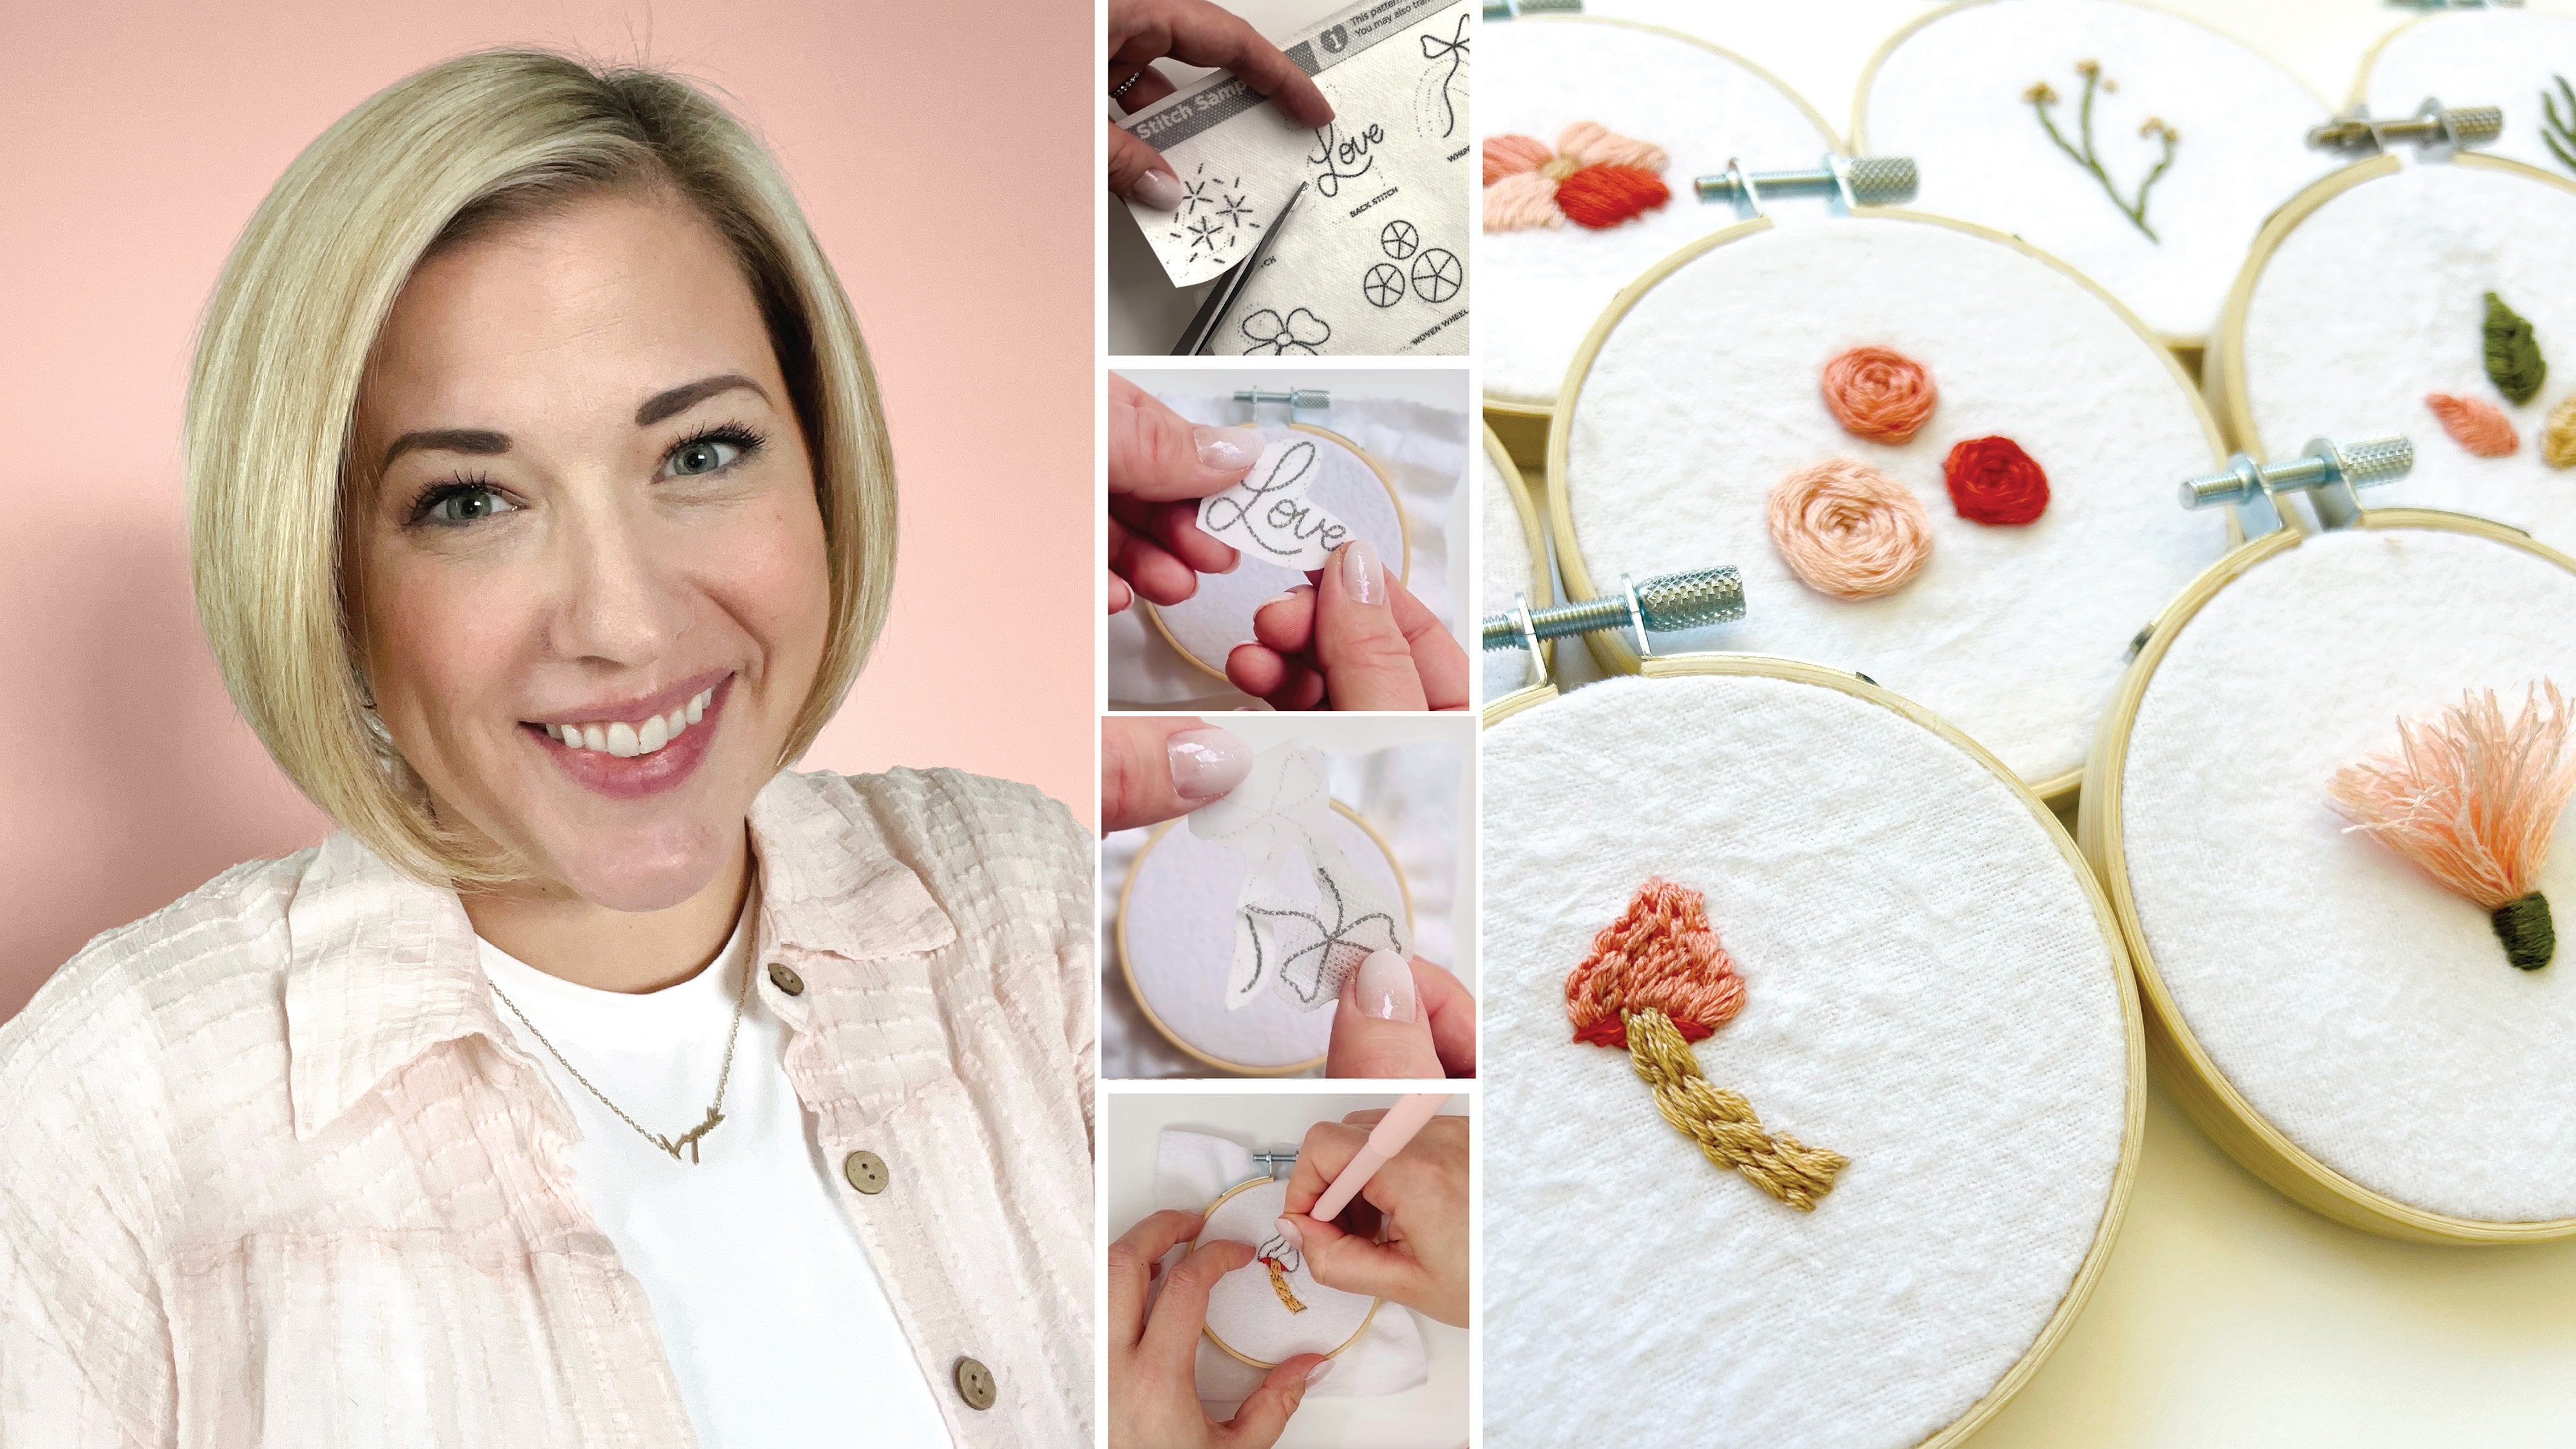
3. Supply Suggestions: So let's talk supplies.
First sinks first, you're gonna need
something to stitch on. I will be stitching
on a small sweater. I love the idea of upcycling.
That's how I got started. But I will link a couple options for you of things that
I like to stitch on. So those knit
sweaters are great, especially if you're
working with yarn. I'm also going to be using
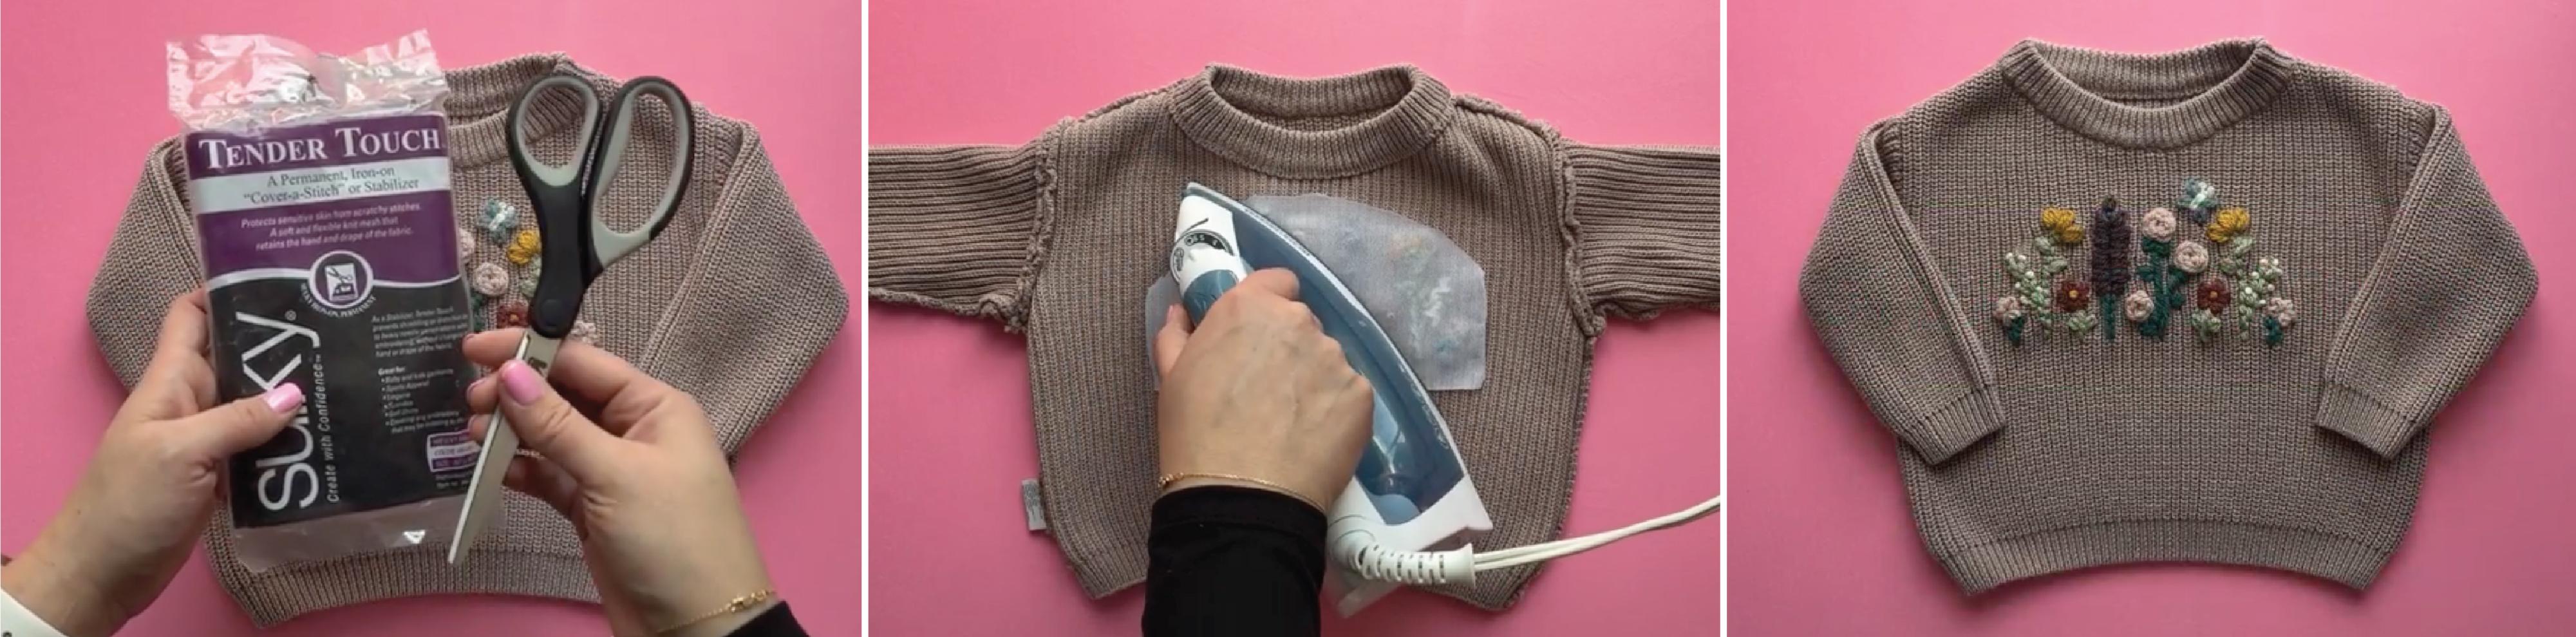
a water soluble stabilizer, so that's one of these guys. I recommend the sulky brand. You want to make sure
that you get the version that is adhesive. I'll have that link
for you, as well. And then I like to add the sulky tender touch to the back. This is not necessary. It's optional, but it gives a nice backing to it so that
it's soft against the skin. If your little were
to be wearing it, now if it's on a toe, skip it. Also, we're gonna be needing some scissors. So any
scissors we'll do. These are my
embroidery scissors. I love those. I'm also
recommending this threader. So I have other versions of it. This one I really
like cause you can grip it and pull a
little bit better. But you'll also need a threader, especially if you're
working with yarn. I recommend it for yarn,
not as much for floss. So, to that end, you're
gonna need floss. Or yarn of some sort. I will be working with yarn
if you're doing a sweater. This one's really fun
just because it gives it a little more
texture and bulk to it. I love yarn B, but you
can choose any yarn. I do recommend an acrylic yarn, especially if you're
gonna be washing, if it's something
that's wearable, that you're gonna
be washing a lot. And typically, I'm
using a weight four. So I'll have that
linked, as well, and then you're
gonna need a needle. So, I use a darning needle. It's more of a yarn type needle. Again, if you're using
embroidery floss, which you're totally welcome. There's some pocket
size versions of it, so I would recommend those with embroidery floss and
embroidery needle. All that is linked
in your supplies, as well as your stitch deck. So I am recommending
this is what I'll be using to teach
is the stitch deck. These come with cards in
them for you to practice on, and you can cut it out and redo and practice as many
times as you want. However, you could also get a hoop and use some
fabric to practice. So either way you want to
go, I do recommend that one. I found it's the easiest way for my newbies to get started. So once you've got all
your supplies together, meet me in the first
lesson. See you there.
4. Straight Stitch: Hello, my artsy friend. In this video, we're
going to be learning the straight stitch.
Let's dive in. So we're going to start
by threading our needle. So I've got my threader here, and I'm just going to loop the yarn over and pull through. And now I've already
got it knotted, so I'm gonna go ahead and start. I'm gonna come up
through the back. I'm gonna go ahead one stitch length and
go right back down. And that is our straight stitch. So I'll continue doing this. I'm going to come up
through the back. And down through the front, this pattern is the
straight stitch. You'll also see this is more of a running stitch where you
get the spaces in between. You'll see it used in some
of the other stitches. You'll see it listed
as seed stitches, like think like sprinkles on a cupcake, where they're
kind of scattered. But it's the same motion where you're coming
up through the back, down through the front
over and over again. And that's it. That's
our straight stitch. Now, we do want to
keep our back clean. So I'm going to show
you really quickly. I just loop under
my thread here, so it's kind of
made a backstitch, straight stitch kind of
situation on the back. So I'm just looping this and wrapping it to keep it
nice and tidy on the back. And that's it. There's
our straight stitch.
5. Satin Stitch: Hello, my arts friend. In this video, we're going to be learning the satin stitch. Let's jump in. We're gonna start by knotting the yarn
and then threading it. So I use my threader
to pull it through the eye and the
needle. Now I'm ready. Gonna come up through the
back, down through the front, and then I'm going to
go to the very next one top to bottom, up through the back,
down through the front, and we're filling
essentially this rectangle. So the satin stitch is
meant to be a filler, but it is essentially straight stitches side by side by side. So you're coming up
through the back, down through the front. I'm going to speed
through this one, and then I want
to do one more so you can see what a curve
shape might look like. So we've got that one done.
Now when I do organic shapes, anything curved, I usually
split my shapes first. So we're gonna do
that down the middle. And then I'm going
to fill that in on one side and then come
back and do the other. It just helps keep my stitches a little more straight and
a little less wonky. It makes it more
even. But again, this is just another example. We're going up through the
back down through the front. I'll speed through this. And
this is our satin stitch. It's perfect for filling.
6. Back Stitch: Hello, my artsy friend, and this video will be
going over the backstitch. Let's jump in. Start by knotting our yarn, and then
I'm going to thread it. So I'm gonna put the threader
through the needle and then pull the yarn through.
Now I'm ready. I'm going to come
up through the back down through the front,
just one stitch length. That's our straight stitch
that'll get us started. We're gonna go up one
stitch length and then back down into that same hole
from our previous stitch. And that's the
backstitch. So you go up one stitch length and back down to the hole that
holds your last stitch. So they will be sharing that
hole. That's part of it. It makes it great for outlining
and doing hand lettering. So again, up a stitch
length and back down. So I'll finish this one up. This is the first variation. This is the traditional
backstitch, and we're going to do
two more variations. I'll also show you how
I keep my backs tidy. So I like to do a
whipped backstitch here. So I'm just going
under the stitches. And then sometimes if my tail is long enough, I'll
pull that in too. If not, I'll thread it and do
the same on the other end, but it just helps to
keep it nice and clean. So now we're ready for
the whipped backstitch. So I'm going to start
with a backstitch. So do our straight stitch and then we'll go through
and put this foundation. It's gonna look exactly
like we did the top row, up a stitch length and back down into the last hole of
that previous stitch. So I'll fill this in
really quickly so we can get to the
next variation. So you can start at the end, or you can go back
to the beginning, but we're going to start the whipped part
of the backstitch. So you're going to come back up and you're going to go under the initial stitch and you're
gonna wrap it essentially. So you're gonna be creating
a rope like effect. It just really smooths out the line. It's really beautiful. And if you use
different color yarn, oh, you can actually
go backwards, too. So I've seen it both ways. I
tend to lead with my needle. I don't know if it matters. Pick which one
works best for you. But these are also great
during the holidays, if you use a different
color to make candy canes. And that is our
whipped back stitch. Now we're ready for
our final variation. We're going to come up through the back down through the front, but we're going to go two
stitch lengths ahead. And then we're going to
go up one stitch length and then back down
to stitch lengths. So you're gonna be
splitting that essentially. So you're going to go
in the middle of that. So again, we're
going to go up one stitch length and then back to stitch lengths and actually splitting right into the
middle of that yarn. It's going to create this
really cool braided effect. It's very similar to the chain stitch, but
it's actually filled. So again, you're going up one stitch length and
then coming back down two so that you're actually
splitting your stitches. So I'm going to fill
this in quickly, and then we'll take
a look at all of our backstitch variations. And that's it. There's our backstitches. So
I did clean out the back. I'll show you that,
too. And there we go. You're backstitch Pro.
7. Fern Stitch: Hello, my arts friend, in this video we'll be covering the fern stitch. Let's jump in. And start by
threading our needle. Is gonna take my
threader through, wrap the yarn, and pull
it right on through. And then I've already
knotted it, so I'm ready to get started. I'm
going to take the card. I'm gonna come up through the back and down through the front, I'll start with our
straight stitch. And I'm gonna be doing
little back stitches. So I'm gonna go off to the side, up through the back,
down through the front, we'll be sharing that same hole, and then I'll repeat the same
thing on the opposite side. So up through the back down through the front and
continuing to share that hole. And then one last
time, we'll go out a stitch length and come back
down. Into that same hole. And then we'll do
the same thing where we'll split out to each of those branches and keep coming through the back and
down through the front. Repeat this pattern
over and over until you finish
your fern stitch, but this is just creating a, like, plant type shape. Like I just think of it
being an organic shape. So it's like a stem or a branch. It's called the fern stitch, and you're doing a lot of
back stitches, essentially. So I'll wrap this up, and
I'll show you the back. So we'll complete it with
one final backstitch, so up through the back
down through the front, sharing that hole. And
then I'll turn it over. I like to keep my
backs pretty tidy, so I just take it and I wrap it under the stitches back here. And then I'll go through a few, and then I'll secure it
and tie it off and cut it. So I'll do that really quickly, and then I'll show you
the finished product. So there's my back, and that's it. That's
our fern stitch.
8. Stem Stitch: Hello, my artsy friend. In this video we'll be covering the stem stitch. Let's jump in. Start by knotting our yarn and then using the threader to
thread it through the needle. And now we're ready to start. So I'm going to come
up through the back, and then I'm going to go
ahead two stitch lengths. I'm going to keep
this as like a loop, and then I'm going to come
back through that first stitch length and pull it.
We're gonna do that again. Go up two stitch lengths, and then back one stitch length to create this kind
of a vine effect. It's called a stem stitch. It looks more like a vine to me. But you're going to go up
two stitch lengths and then back and up again
one stitch length. So you're gonna be spitting
that, and I'm going to speed this one up and
then we'll go through it slow one more time so you have two chances to
practice this one. Also show you how I
keep my back tidy. So I like to do a whipped
back stitch on the back. So we've created
this backstitch with our stem stitch on the front, and I'm just
going to loop this. So I'm just going
under the stitch. If I have a long enough tail, sometimes I'll secure
it in there as well. But I just wrap
this and it keeps it nice and tidy
on the back end. So we'll try this again. We're gonna go up
through the back, and we're going to go
up two stitch lengths, go down the front, and then back up in that first stitch
length and pull it through. So then we're going
to do it again, up two stitch lengths, back one stitch length,
and pull it through. So these are perfect for
stems. Nope, unintended. They're great for any kind of
botanical type of element, and even just outlining
and hand littering. So I'll show you the
back. Here we go. And that's our stem
stitch. Check it out.
9. Chain Stitch: Hello, my art friend, in this video we'll be
covering the chain stitch. Let's dive in. Starting with our thread, we're
going to measure it. I usually go two of these, so from the tip of my
finger to my elbow, or I go one full
one to my shoulder. Then I'm just gonna knot this. We only need to do it one time and go ahead and
thread my needle. So this is part of
the stitch deck. This is the needle and
thread that came with it, and we're going to thread that. Just go to stick this through
the eye of the needle. Go ahead and loop that yarn onto the threader
and pull it through. Now, you might have to
give it a good tug, but it's going to come
right through and then we are all set
to get started. I'm starting with
the chain stitch. I'm going to come up
through the back, and then we're going to go down again, right into the same hole. I'm going to stay to the
right of that thread. Then we're going to come
up just a stitch length ahead after we've created that
loop and catch that loop, and that is going to
secure it in place. This is the pattern
for the chain stitch, we go down in the same hole
and then we're going to go up a stitch length ahead and catch
that loop. And that's it. So I'm going to keep
repeating that, again, going down
in the same hole, creating a loop, and then going forward one stitch length
to catch that loop. Now, this is the
traditional method. I'm going to show
you two other ways to do this chain stitch. One is a little bit faster, and the other one gives
you a little bit of a different look with a
reverse chain stitch. So I'll speed this up,
and I will meet you back. And to finish it, we're just going to do a straight stitch. So we just went
straight back down. Now, if we are doing the back, I like to do a
whipped backstitch. So I'm going to go
underneath that, and you're literally
just whipping it around. You're going to
kind of enclose it. So what was created
on the back from our chain stitch is
called a backstitch. You can also go backwards. I've seen people
do both. I usually just go forward with my needle. Play with it, see what works, but just wrap that around and then you'll be
able to cut it off. This is especially nice
on your sweaters to keep everything clean
and tidy on now, I'll also do it for
where I came in. So I'm going to just thread that quickly and tuck
that in underneath. Again, we're doing a
whipped back stitch effect. So you're just going to go right under those stitches
and weave in your yarn to secure it and
keep our back nice and tidy. Now let's do our next stitch. So same thing. We're going
to come up through the mac. We're going to go down
in the same hole. But instead of creating
a loop this time, we're going to go up
that stitch length. So initially go right through
and then create our loop. So we're going to make
sure that this is looped around and then
pull through both. Now, you may have
to bend the card a little bit or pull a
little bit harder, but that will expedite
your stitches so much. So we're going to go down
again in the same hole, back out a stitch length. Then make sure we have our
loop. And pull that through. Again, we're just going to
repeat this the whole way. It's going to look exactly the same as the traditional one. It just helps you go
a little bit faster. I find that it
helps me space out my stitches a little
more evenly, too. There's something about
that kind of, like, kebab effect that somehow I'm just able to gauge
it a little bit better. So, give it a try. Again, we're going to go through
three different ways. There may be one that works best for you.
Go with that one. These are all the same stitch. We're just doing
them a little bit differentechnique for each one. I'm going to wrap this up. Again, I will end it with
a little straight stitch, clean up my back, and I'll meet you for the
reverse chain stitch. We have both of those
cleaned up on the back. We're going to do our
reverse chain stitch. So this one starts up through the back. We're
going to go down. We're going to make that
straight stitch right away. Now, this is kind of a
backstitch technique where you're going to come up a
stitch length and then go back. So we're going back to
loop under that stitch. So we're kind of
creating the loop that way and then back down. So like I said, this is
a reverse chain stitch, so it's going to look a
little bit different. So, again, we're going
to go up a stitch length and then make our loop under that stitch and then
right back down into the same hole.
I love this one. This has become my favorite. But again, you need
to test all of these just to see which one
resonates best with you. So, again, we're coming up a
stitch length ahead scooting under that stitch
and then right back down into the same hole, and
we'll close it the same. We will end with a
little straight stitch. Ess these out, see which
one feels the best, but this is our
reverse chain stitch. I find it's a little
more fluid for me. It's easier to keep my
stitches a little more even. But there's days where I
decide to do the fast one, and there's times that I
do the traditional one. It just it's better
if you know them and can try them out and then see which one feels best to you. I'm going to wrap this
up. I would love to hear from you what your favorite
version of this is. It me over on Instagram, I'm at rt Lions. I want to hear which
one is your favorite. And we finish it
with a backstitch. We're coming up ahead and
then right back down. That's it. I'll
clean up the back. But those are chain stitch.
10. Lazy Daisy: Hello, my arts friend. And this video we'll be
covering the lazy daisy. Let's jump in. We're gonna
start by knotting our thread, and then we're
going to pull that through the eye and the needle. So I'm gonna my thriter here. Grab the yarn and pull it right through. We're ready to start. So I'm gonna come up
through the back, and I'm going to pull
that over to the side, and I'm going to come back
down into the same hole. So I'm gonna be creating a loop. So I'm gonna pull this through, but I'm gonna allow
this loop to form. And I'm gonna come back up a stitch length ahead
and catch that loop. So I'm going to
catch that and then secure it with a
straight stitch. So I'm going to go right back
down into that next hole. And that is our lazy daisy. Now, you'll typically
see these in clusters. So we're going to
do one with three. It's going to do
the same thing came up through the back,
creating that loop. Gonna catch that loop
and then secure it with the straight stitch just
going right over that yarn. So back down there.
And then when I do the multiple petals, I'm actually going to come into the same center hole gonna
come up through the back, down through the front,
create that loop. Gonna catch it, and then secure it with that
straight stitch. So again, you'll see
that in multiple petals. So I have three here and
five for you to try. This is, if it were a flower or greenery is what I see
used most often for. So we're gonna finish this up and then I'll speed through. I'll meet you back for
that greenery piece, and then we are going to
add a center to our flower. So we'll come back to that
one. Now for this greenery, same thing on each
of these petals. So I have like two leaves here. I'm going to create that loop, go back down, and I'm gonna be catching that loop
and securing it. But on either side of those, I'm gonna be sharing
that same center hole. So I'm gonna do that here. I'm going to secure
that one and then do the opposite side, and
then I'll speed it up. And then I want to show you so the stem could be a backstitch, a stem stitch, lots of different stitches that you
could make that stem piece. I'm going to do a
couple backstitches, just so you can see it. Or they could just be
clusters of leaves. So I'll speed this up, and I'll meet you back for a
couple back stitches. Now I finish those off. I'm going to just throw in
a couple of backstitches. I'm gonna go up a stitch length, and then back and then
up a stitch length again and back into that. And if I have one more
hole, I could finish this, but you get the idea where
you could add a stem to connect these. There you go. Now, we're going to go
back to our flower here. I've switched yarn so you
can see it, just the color. So I'm gonna come up
through the back, you can do a French knot,
but you could also do this. You can knot once, and
then you knot twice. And you can go right
back down next to that. And then you're gonna
have two threads on the back that you're
gonna end up pulling. So we're gonna go through,
pull that through, and then you're gonna
pull your other one, and you can just tie
those on the back there, and you've got a
center. Lazy Daisy.
11. Fishbone Leaf Stitch: Hello, my arty friend. In this video, we'll be
going over the leaf stitch. Let's jump in. Starting by knotting our yarn, and then
I'm going to thread this. I'm gonna take the
threader, grab the yarn, and pull that right
through. Now I'm ready. So I'm gonna start at the top. I'm gonna be going
down the center. This is going to
create the vein of our leaf. So this
is the leaf stitch. And then we're gonna come up to the left. You can
go left or right. But I'm gonna start on the
left and then cross over the right and go over
that center line. And I'm going to do the
opposite on the other side. So I'm going to go
to the right and then cross over to the left. As long as I'm alternating sides left then right and
crossing that center piece, I'm going to get that
vein for the leaf. There are lots of
different ways to do this. This one is a little bit of a cheat since you've
got your holes here. But you'll see other
variations of this. Essentially, you just want
to make sure that you're crossing over so that you're getting the
vein of that leaf. So you're getting that texture. So I'll continue doing this. I'm going to follow
this all the way down just going down the sides, left then right,
crossing center. So again, we'll come
up through the back, and we'll cross over
to the opposite side. And then we're gonna end in the bottom there in the middle. So one more time,
and then we'll we'll start finishing our
leaf. Cross over. Wrong hole. Cross that over, and then we'll
finish it off. So on the bottom here,
we're gonna end up sharing that center
hole on both sides. And that is it. One more stitch, and that is our leaf stitch. And I do like to
keep the back tidy. I just slip under
those stitches, but that's it. Check it out.
12. Woven Wheel: Hello, my artsy Fran. In this video, we're
going to be going over my favorite stitch
the woven wheel, A k row stitch. Let's jump in. We're
going to start by knotting our thread and
then threading the needle. So I'm gonna take my threader,
push it through there, and pull the yarn
right through the eye. Now we're ready. I'm going to
come up through the back of the card and then back
down to the center. So I'm going to be starting on these outer holes and
going towards the center. They're all going to share
the same center hole. So again, coming up through the back down through the front. These are five
straight stitches. This is going to give us
the base for our weave. So this is the woven wheel. So it's going to create
a rose like shape. So again, I'm just going
up through the back, down through the front,
and I'll speed this up. So we set our foundation with these five straight stitches. And next, we're going to
come up in the center, and you're going to notice
you're going to be kind of above your stitch. So that one is going
to be our over. And then the next one
you're going to go under. And the next one you're
going go over and under. And we'll be repeating that. So now I went under,
and I'm going to go over and then under
the following. So again, you're
just going back and forth over, under over under. We're going to weave this
around all of our stitches. So all of those five
straight stitches are foundation and
then we just weave around them. It's super easy. Again, just over and under, and you're going to pull
that through, not too tight, but making sure that you don't
have it too loose, either, especially if this is on
apparel that you may wash, but again, just
over and now under. And I'll speed this up,
and I'll meet you back for how to finish it off and
keeping our back tidy. And now that it's done, we're
just gonna go right back down and finish that through, go all the
way through the back. And now I have all
three done here, so I want to show you the back. So I typically just
go under my stitches, wrap it a few times,
and then clip it off. Just to keep the back
tidy, like I said, keeping it neat,
especially if it's out on appal is really nice. My daughter has a
cardigan that she loves with these on
it, and that's it. It's our woven
wheel. Check it out.
13. French Knot: Hello, my artsy friend. In this video, we're
gonna be going over the French knot. Let's dive in. We're gonna start by
threading our needles, so I'm taking my threader and grab the yarn and pull
it right through, and mine has already knotted, so I'm ready to get started. So I'm gonna come up
through the back. And I'm going to wrap
this two times, one, two, and go right back
down into the same hole. And this is going
to create the knot. Now, while I'm letting that go through, I'm holding
the other thread. So let's do it one more time. Go to come up through the back. Gonna wrap it two times. I'm holding that
other thread while I pull this through
for the knot to form. And that is our French knot. Do it one more time on this
row, we're wrapping twice. So I'm coming up
through the back. I'm going to wrap two times, hold that thread and
then pull my needle through to create the
knot. Speed this up. On the next two rows, we're going to do
different wraps. So you can see the
weight that it carries. The more wraps you
do, the fluffier and, like, thicker it gets. So this one we'll
do three. So I'm going to wrap it one, two, three times, and then back
down into the same hole, holding that thread while
I pull the knot through. So I'm coming up again, one, two, three, and back down. So it's just something
to keep in mind. You'll get more volume
the more wraps you do. It also depends if
you're using floss, it could matter how many strands of the floss that
you have with yarn. You're just going for, like, different volumes and texture. So I'm going to have one down. But this one we're
gonna go really flof. We're gonna do four. So let's go one, two, three, four, and write back down. So this is going to
be our fluffiest one. And feel free to
experiment with this. If there's a certain
number that you like, go with that, but I'm
going to do it onere time. One, two, three, four,
and then back down. They're all the same motion. It just depends on the look
and feel that you want for your French knot
versus a cloud versus, like, pollen on a
flower or something. You're gonna want different
volumes for those. So keep that in mind
as you're stitching. So I'll wrap this up
and meet you back to check out all of
our French knots. Here we go. The French
knot. Check it out.
14. Garden Stitch Along: We're going to start
by cutting out our water soluble stabilizer, so I printed the
pattern on here. I go to cut this out as
close as I can to my design, and then I could just going to peel it and stick it
onto my sweater here. So once I have that, I'm
going to cut my yarn. So I'm going to measure
from the tip of my finger to my elbow twice, or I do it from the tip of
my finger to my shoulder. I'm gonna cut that and then I'm going to thread the needle. So I'm going to put the threader through
the eye of the needle, grab my yarn, and
then pull it through. And I'm going to knock the other side to catch
that on the back. Now we're ready. So I'm going to start with
our stem stitch here. So I'm going to be coming
up through the back. I'm going to be
kind of measuring out two stitch
lengths to go down, and then I'm going to be coming
back up in between those. So I'm going to go down
through the front here, and then I'm going
to come up right in between those to do
the stem stitch. And that's going to create
this smooth stem for this first flower. I'm gonna
do that one more time. I go to go and I'm going to
pull down through the front. And then this time
when I come up, I'm coming up in that
last stitch that I made. So that's going to
be sharing a hole. So, again, this is
the stem stitch. You can use a stem
stitch, backstitch, whichever you enjoyed, use
that one here for the stem. So I'm going to
finish that up, and then I'm going to move
on to the leaves. So for the leaves, I'm using
the satin stitch here. You could do a leaf
stitch, a satin stitch. Whatever filler that you prefer, you could even do a straight stitch here
if you just want one. But here, I'm doing
a satin stitch, so I'm just doing a couple. I'd say two or three
will fill this. It depends on the size
of your pattern as well. But I'm just gonna
fill this in really quickly and then get up
there to the petals. Next, we're going to do the
lazy daisy for these petals. So I'm coming up
through the back, and then I'm going to go
down into that same hole, and then I'm going to
be creating that loop and then catching that loop. So now I've got it created. I'm going to come back
up through the back at the top of that petal
to catch that loop. Now I'm going to
pull that through, and I'm going to go
right over that thread. So I'm going to go
down actually into the same hole to
secure that loop. And I'm going to
repeat that for all of the petals on the
specific flower. That's our first
flower. Now I'm going to move on to my fern stitch. So this one is perfect. You can go and do a
backstitch and lay it down or you can
do it as you go. I typically do it as I go. I think that it keeps my
back a little more tiny, so I like that, but feel free to approach this
however you like. This could also be
a stem stitch with a couple of straight
stitches coming out of it. You feel free to
get creative here. That's our fern
stitch. Now I'm going to come back through
and do a few you could either do French knots
here or you could do a couple tie a knot and
then go right back down. Whichever works for you, I
really enjoy the French knot, but believe me, it
took some time. So I'm going to just
go through and fill all these dots in
with French knots. It's it. Onto our next flower. So this one I'm gonna be doing
a backstitch for the stem. Again, please feel free to use whatever stitches
you liked best. I'm going to go through this
one and use a backstitch. I want to make sure
that I'm using all of our stitches in this
particular motif. So I'm going to go up
one stitch length, so I made my straight
stitch and I'm gonna go up a stitch length, coming through the back and
then back down the front into the same like the last
hole of my initial stitch. But that is going to
create our backstitch. So I'm gonna go back
into that hole. And again, these
are sharing a hole. This is the backstitch. And then I'm ahead and continue that
pattern down the stem. So I'm gonna go up
a stitch length and then back a stitch length. So I'll speed
through that one and meet you back for the leaves. Now, for this leaf, I'm also going to be doing
the satin stitch, so I'm gonna come up
through the back. Again, I always like
to split my shapes, especially when they're organic like this or they're
more rounded. So I'm going to split
that, and then I'm going to just fill
in on either side. I'm only gonna use maybe
three stitches for this one, so I'm gonna go
on either side of that center and
fill in the leaf. And that's it. There's
our stem and leaves, and then we're going to
move on to our next flower. So I'm gonna come up
through the back, and I'm gonna be creating
lazy daisies for this one, but I'm gonna do it a
little bit differently. So I'm gonna go down into the same hole and
then catch that loop. Then once I've caught the loop, I'm going to go back
over that thread. And again, I like to go
down into the same hole. You could also do a full
stretch stitch here, but I like to keep
it kind of tight. So I go under there
into the same hole, and now I'm going to
fill this back in. So I'm going to go
back to the base of my lazy daisy stitch there, and I'm going to come back up to that stitch that
we used to secure it. I'm going to go right down
into the base of that. And that's just going
to give it more of a filled look versus
having an open loop. You can do either, and or you could use a satin stitch
on this flower as well. Again, feel free to mix up your colors and
stitches however you like. There's our third far.
Now for the next flower, I'm gonna use a stem stitch. And then for the petals Well, for the leaves of this one, I'm gonna be doing what we
just did for the petals. I'm gonna do a lazy
daisy on either side. And now we're gonna
fill in the flower. I have to tell you that
this is my favorite one. We're gonna be using
a satin stitch on this little flower down here. So I'm gonna do, again,
I split my shapes, and then I go on either side. So each of these, I'm using about three stitches and I'm just filling in
those petal shapes. When you're coming up through
the back and down through the front side by side by side to create
that satin stitch. Now we have it. I'm going to come up and I'm going to
do a little bit different. I'm going to do a knot, and then I'm going
to do a double knot. I'm gonna go right over that. It's going to go right over top of that other knot and
then right back down. Again, this is kind of a
cheat for the French knot, and it's going to give you
this nice bluminous center. So I really like that for
this specific flower. We're going to be
doing a chain stitch for the lavender here. So I'm going to start. I'm going to do the reverse chain stitch. You're welcome to try any
of the variations of that, but I'm going to make a
straight stitch and then I'm going to come
up a stitch length, and then I'll be sliding back
under that initial stitch. So I'm gonna pull that
through the front and then go under that
straight stitch I created. So I'm going to pull that
through and then back down into that same
hole to create my loop. And I'll repeat that
all the way down. So I'll go up a stitch length, and then I'll come back
and go under that stitch. So I'm going to go through
the entire stitch. Like, I'm going under both of those threads and then back
down into the same loop. And I continue that all
the way down the stem. Yeah. And then once you've
gotten to the bottom, you can either end it by pulling
through and just keeping that the final stitch and you
can weave through the back, or you could finish it
off with a backstitch. Now on the back. So I've been doing this throughout,
but I wanted to show you. I like to go under
my stitches and do basically a whip
to backstitch, but I'm just securing them through the stitches
by going under them. And I go a few inches, maybe three or 4 " to make
sure that it's secure. I'm also going to be using the tender touch on the back of this to secure my stitches, but I like to keep
the back tidy. And now for the
pedals on this one, I'm going to do a lazy daisy, so I'm coming up through the
back down through the front, I'm going to catch that loop. And I'm going to
secure it and that's going to create my
petals for this one. I'll do that all the
way down the stem. So again, I'm going to
be catching that loop, securing it in
place, and then I'll continue to do that through
each of these petals. You're welcome to try
other stitches with this. Satin stitch would also
work for these petals. If you enjoyed that one.
Make sure that you're continuing to experiment
with stitches. So for this one, too,
I am going to come up through the middle of
that chain stitch. You could go over. You could go under. You could do
the petals first. Again, play around, but
I'm gonna come up through the center of that chain
stitch from my stem, and I'm going to use that as kind of the centerpiece
for my petals. So I am kind of
playing with this. It makes a nice layered
effect that I liked. But again, you could go
straight over the stem or you could do the petals first and then do
the stem over top, however you like to layer it. So so I'll get
these petals down, and I'll meet you back
for our next flower. So I'm starting the next flower, and I'm starting up a little
bit higher because I know I want that bottom stem
to overlap this one. But for this, I am also
doing the stem stitch. So I know we've gone over
that one a couple times. I'm going to go through
this one pretty quickly, but I'm making my first stitch
and then coming up between that to start the
layering effect of the stem stitch. So I'm
going to do that again. I'm going to go
up, and I'm gonna be going about a
stitch length down, and then I'll come back up where I left off that first stitch. So I'm going to come up
through there, splitting that and pulling it tight. So I'll continue.
I'll finish this up, and then I'll meet you
back for the leaves. So I have a couple
little leaves up here. I'm gonna be doing lazy daisies, and this is kind of like those, you know, when it's, like, a bud that kind of wrap the top of it. I just like the idea of adding a little bit of
flourish up here, so I'm going to put
on a lazy daisy. Again, I'm catching my loop. I'm just going to
secure that in place. I'm gonna do that
for each of these. Now that I have those done, I'm ready to do the larger leaves. For this one, I am doing
the fishbone leaf stitch. So I'm going to come
up through the top. I'm going to create
a center line, so I'm gonna come about three
quarters of the way down. And then I'm going
to be crossing over. So I'm gonna go up on one
side and then crossover. So I'm gonna come up
here on the right. And I'm gonna cross center and go right below where I
made that center stitch. And I'm only gonna
have to do this a few times c this is pretty small. But I'm gonna do it
again on the other side. I'm gonna come up
through the left and cross over that center
line to the right. I'm going to repeat that
down and finish this up, and I'm gonna do the same for the other two leaves
on these stems. Oh Now we're ready for the woven wheel. So each of these roses is
going to be a woven wheel. So I'm going to start by putting down my
straight stitches. So I'm coming up through
the back, down through the front for those five pegs, and I'm going to be sharing the center hole
for each of those. So I'll get those laid down, and then we'll start weaving. Now I'm going to
come up near center, and I'm going to cross over my first and under the second. And I'm going to continue that pattern just
over and under, over and under until I
cover my straight stitches. Be sure to move your
fabric around with you, too, however it feels natural. That's going to be really helpful as you go through these. Next, I'm going to
do the butterfly. So again, I'm using
the lazy daisy. I'm going to do that for each
of its little wings here. I'm going to start
by coming up through the back, down
through the front, into the same hole,
and then I'm going to create a loop and
then catch that loop. So I'm gonna catch
that here, and again, I'm going to go
over my thread and down into the same
hole to secure it. To make sure we're crossing over there and going right back down. I'm going to do that
for each of these. I'm also going to fill these. I like this better as a fill, so I'm gonna come
back up through the center and towards
that secure knot, so where we are secure stitch. So right at the base of that,
I'm gonna come back in, and that's gonna
fill in the wings versus leaving it an open loop. You can do either. I just
like to fill that in. Since technically they're wings. Then we're gonna come back for
the body of the butterfly. So for the body, I'm actually
going to do a chain stitch, and I'm going to do
my quick version. So I'm going to go up through the back, down
through the front, and right back out as if
I were making that kebab, and then I'm going to loop
it and then pull through. And then just for funzies, we'll do a traditional
version, too. So I'm going to go
right back down into that hole and back out. So, like I said, I do
interchange these a lot. But whichever version of
the chains did you prefer? And then I'm going to secure that by going right back down just over that thread and
back down into the same hole. Now, this is optional. You could be done there,
but I'm going to throw in a couple straight stitches
for its antennas. And then I do add a couple
of French knots here. Again, totally optional, but I felt like I gave it just a
little more personality. So I'm putting in
straight stitches, and then for each of
the little antennas, I just did a small French knot. I'm coming up through
the back, wrapping it twice and going
right back down. You could also do
the knot cheat here, too, where you just knot
it and go right back down? I think that would work here
as well. And that's it. So I'm going to mirror our other flowers on the other side, and I'll meet you back to
wash off the stabilizer. So now we're ready to rinse off that water soluble stabilizer. I'm going to start by getting
some warm water going. And for the most part, this is going to come off really easily. So you can already see it's starting to dissolve
in the warm water, but I am going to let
it soak a little bit. So I like to get
all the excess off, so I'll get most of
that background off, but sometimes it can stay
under your stitches. So I like to soak it
sometimes even overnight, but I am going to rinse
it good with warm water. You see the
background's gone. I am going to give it a
little time to soak, and then I'll show you
our final sweater. Here it is.
15. Final Touches: So we have our sweater complete, and now we're ready
for the backing. So I use the sulky tender touch, and we're just
gonna cut this out. So I'm going to size it up
about the size of my design. I wanted to go maybe half
an inch outside of that, but I really wanted to be able to adhere to my
yarn on the back. So I'm gonna go ahead
and cut that out. And again, this is
totally optional. This has got two sides to it. So one is very soft. So if it does lay against
skin, it's nice texture. And then the other
side is very rough, and that is what's
going to adhere to the back of the stitches. It serves a dual purpose, one that it's soft
against the skin, but also it helps keep
your stitches protected. So it's going to
adhere to the back of the stitches and kind of keep those from getting frayed and things during the wash
or anything pulling out. So I'm going to clean this
up and then I'll turn this inside out so you can see how we're going to
adhere it to the back. This is an iron on, so you
will need an iron, as well. So now that we've
got it inside out, I'm just going to lay
this as flat as possible. And then I'm going to
grab my tender touch, and I'm going to make sure
I've got that rough side. That part is going to go down. It's going to go against
the yarn on the back here. And I'm actually
going to go ahead and trim this up a little bit. So I find that it doesn't adhere well to the
actual sweater. It really does the best
job adhering to the yarn. So I'm going to make that
just a little bit closer with my design and create this
kind of, like, arch effect. So once I have that
cut, I'm going to grab my iron and go ahead
and get this put on. So this is like
any other iron on. Be sure not to go
too long a one spot. You don't want to burn through
the sulky tender touch. You also don't want
to hem your yarn, but just be careful, but make sure that
you're getting it on and then checking the edges once you have it done to make sure that they're
not cutofra and come off. So I'm gonna give
this a couple rounds, and then I'll meet you back
to show you the final piece. So we're gonna turn this back
inside out, and that is it. I'm gonna fluff out my woven
wheels, and that's about it. All done.
16. Closing Thoughts: Alright, my artsy friend, you did it. Congrats. I am genuinely proud of you. You just learned ten
stitches that you will literally use forever, forever. Whether you did the
fool pattern or motif, I am just so excited that you made something
for yourself. Thank you for stitching
alongside me. I hope this felt cozy, doable, and, like, a
little creative exhale. If you want a tiny next step, I would recommend
choosing if you did the full pattern,
just choose a motif, but do something on
a sweater or a badge and whatever you have a bet repetition is
the secret sauce. Keep going. And don't forget
to upload your project here. I definitely want to see it. Or if you just want
to send it to me, that's fine. We can
connect on Social. I want to keep cheering you
on no matter where you are. So if you want to
connect on Social, I am at RT Lions on
Instagram and Tik Tok. And if you enjoy the
class, please share it or better yet,
leave a review, and tell me what you
want to see more of because I am just so excited to get more projects going and teaching more
here on Skillshare. Thanks again, my artsy
friend. Happy stitching.
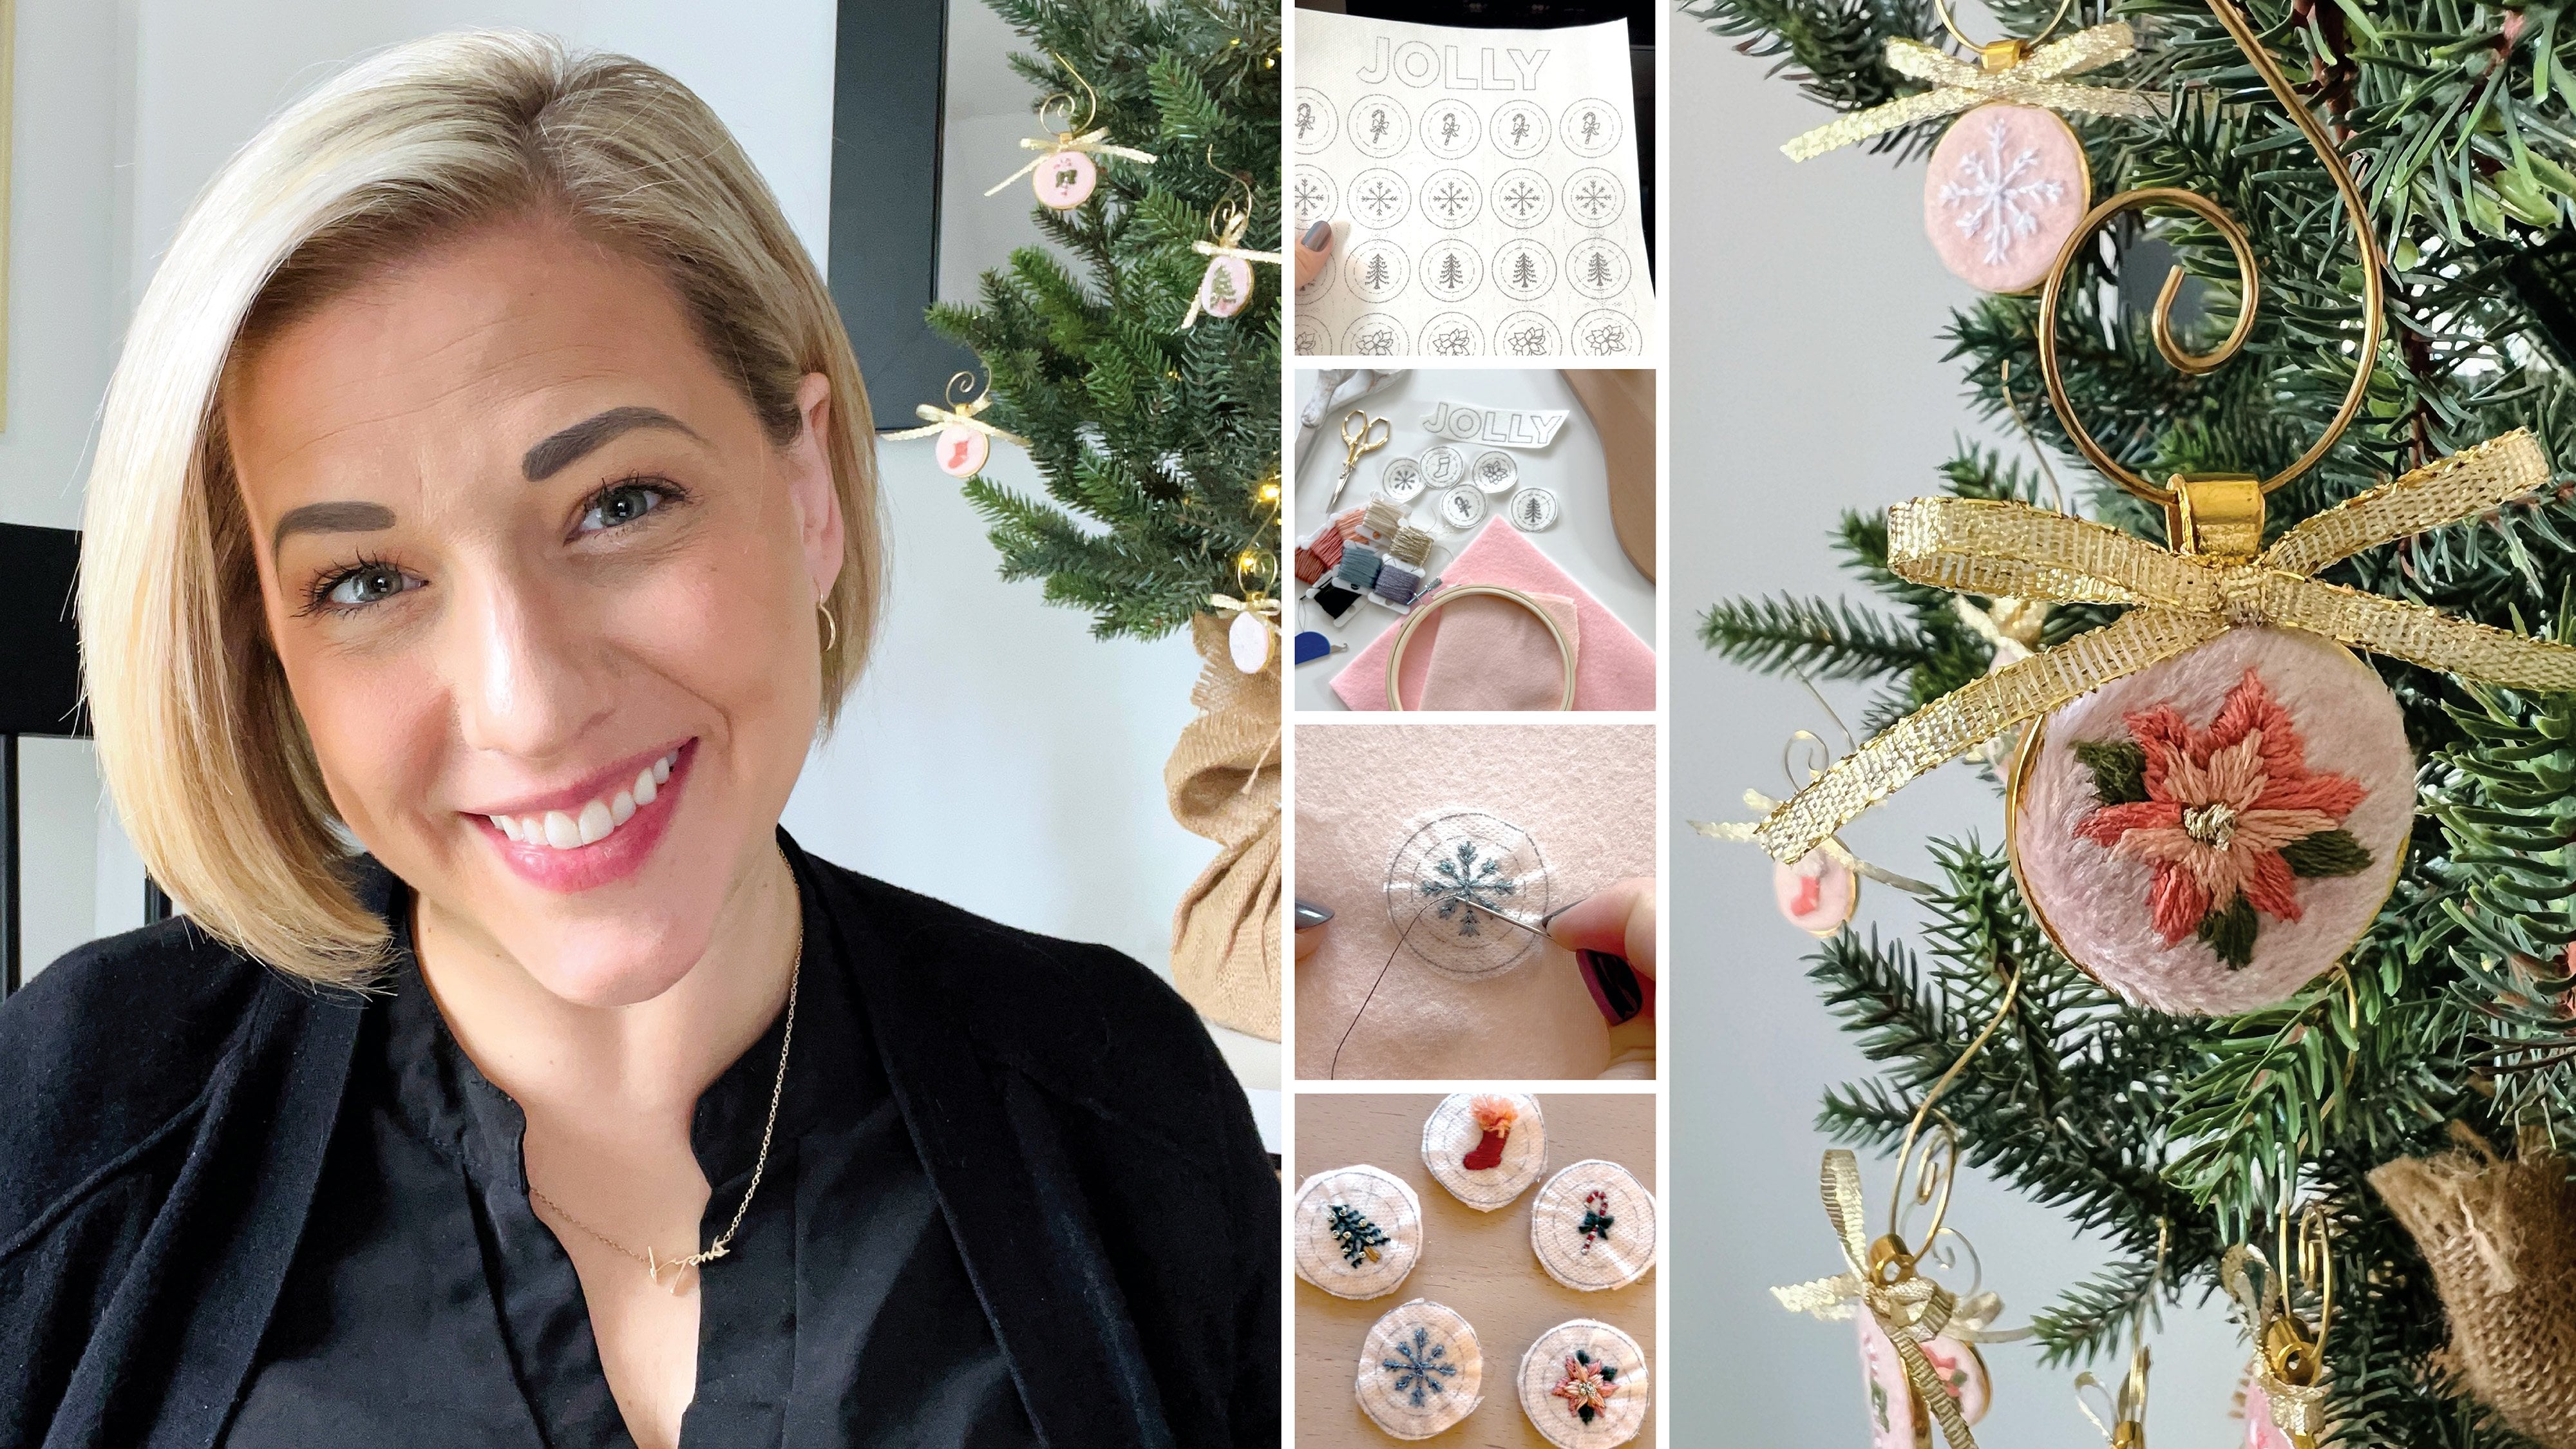
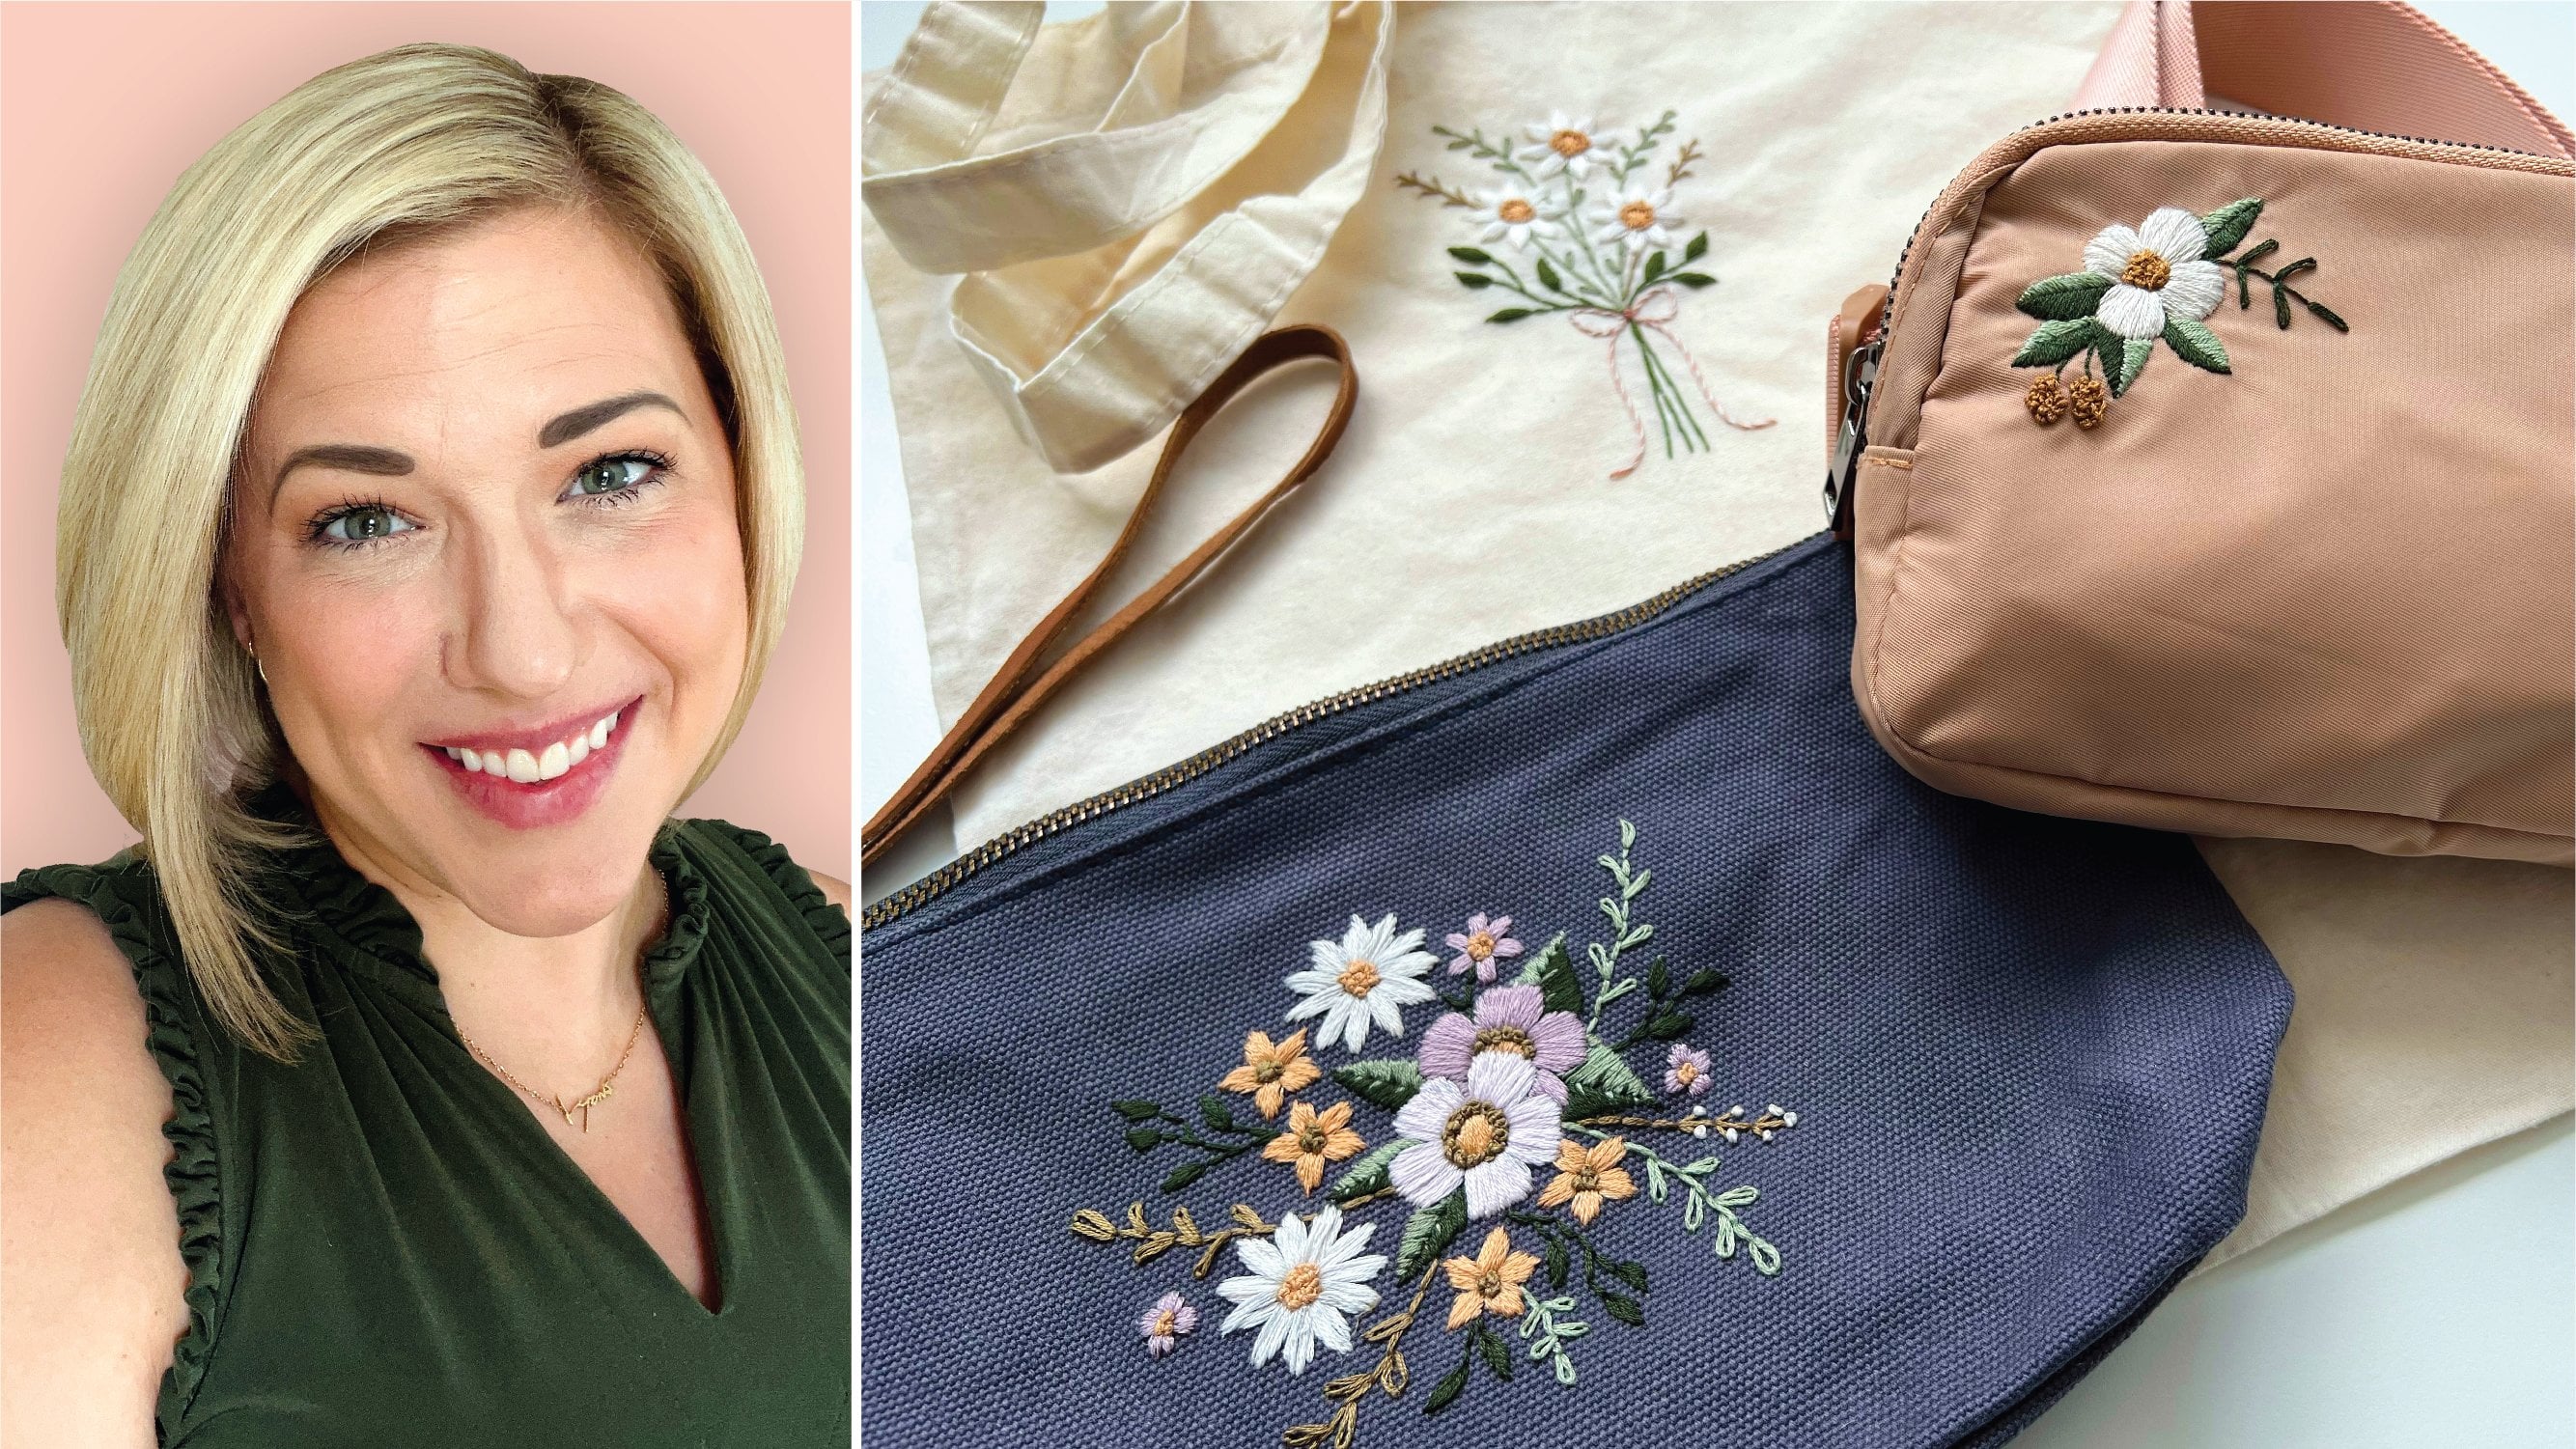
 Kat Lyons, Artist + Educator + Entrepreneur