Transcripts
1. Intro: Hand Embroidered Candy Canes Two Ways: Four. Hi, my name is Becca Ron, and welcome to the
Stitch Snippet. I'm a full time teaching artist. I work in a micro studio
here in Minneapolis, and I use a lot of
embroidery in my work. I do a lot of things
on fabric and paper, and the way I like to bring them together is to do
some hand embroidery. In this class, I'm going
to show you how to hand embroider candy
canes two ways. Both ways start with a
basic embroidery stitch, either a chain stitch
or a back stitch, which you might have done
before in another class. The fun thing about these is this class is
going to show you a way to use those stitches that you already learned to
make something fun. Your project for this
class is really simple. Just stitch some candy canes. Be sure to take a
photo and post it in the project section
at the end of class. We'd all love to see
what you come up with. So the next lesson, I'll talk about some
materials you'll need, and then we'll start stitching.
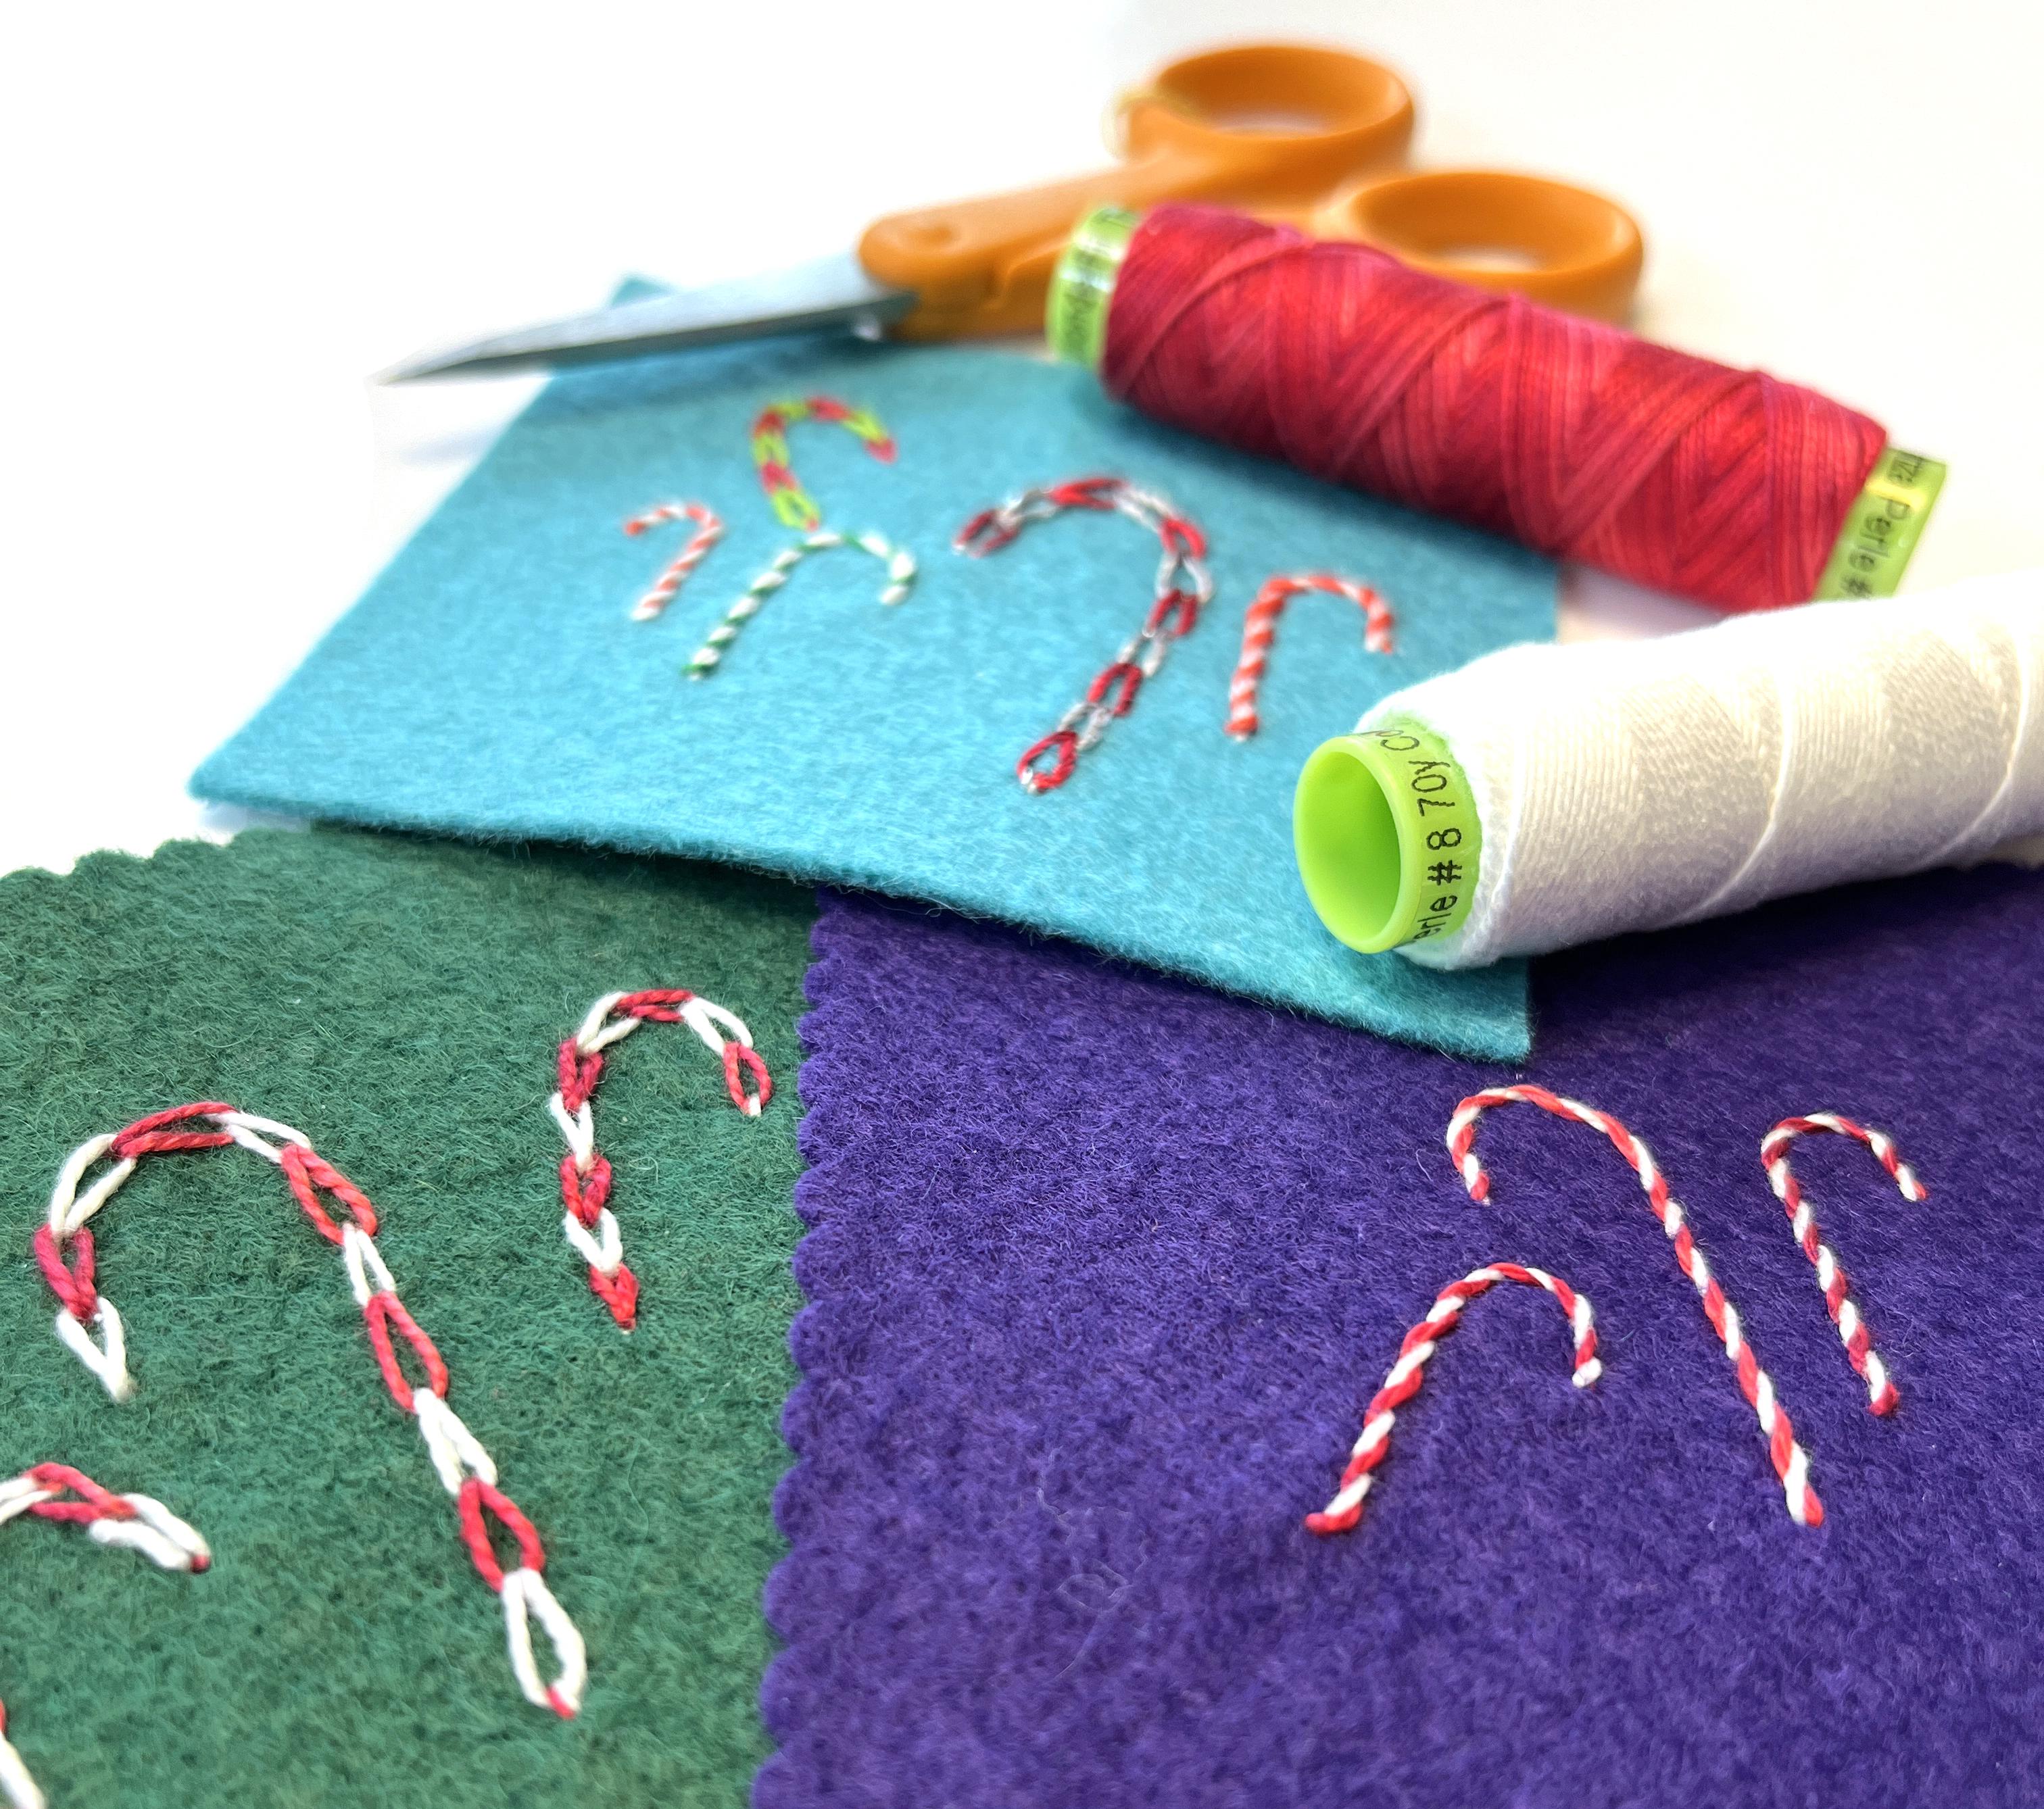
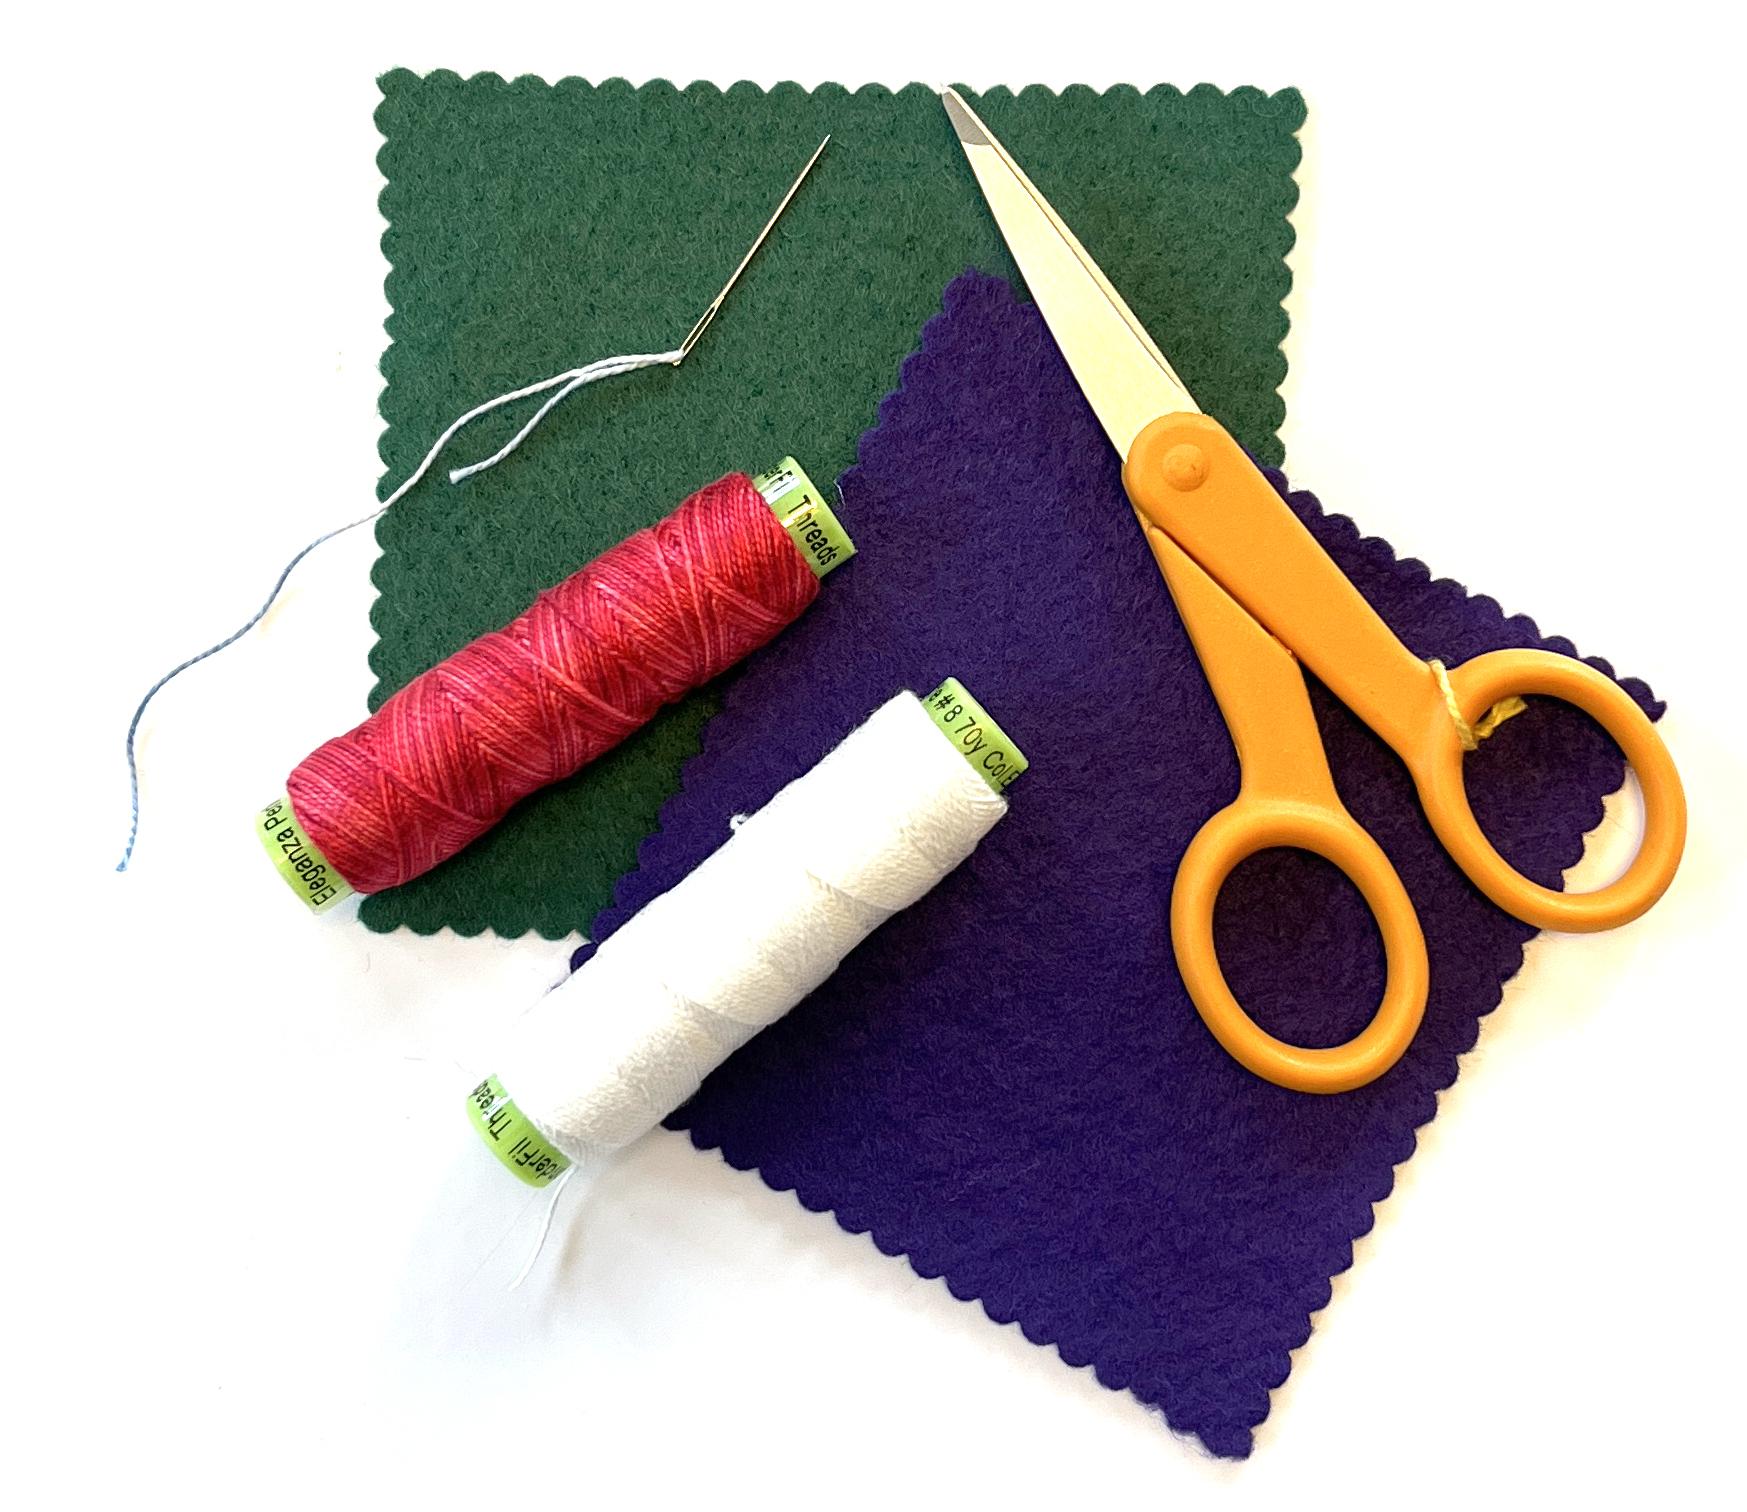
2. Materials & Tools: The materials for
this project are just some basic
embroidery supplies. You'll need a pair of scissors. You will need two
colors of thread. If you want to do a
traditional candy cane, that means you'll
need a red and a white. You'll need a needle. It's helpful for this project to have a needle with
a really large eye. So make sure you have
one that you can put two strands of
thread through, and I recommend a henle needle. If you look for that,
those usually are great, large eye and a
nice sharp point. And then you need
just some pieces of fabric to be able
to stitch into. I'm going to use wool
felt for this project, but you can stitch these
onto any kind of fabric, even finished products like place mats or table napkins,
anything like that. Okay, so gather your supplies, and let's start stitching.
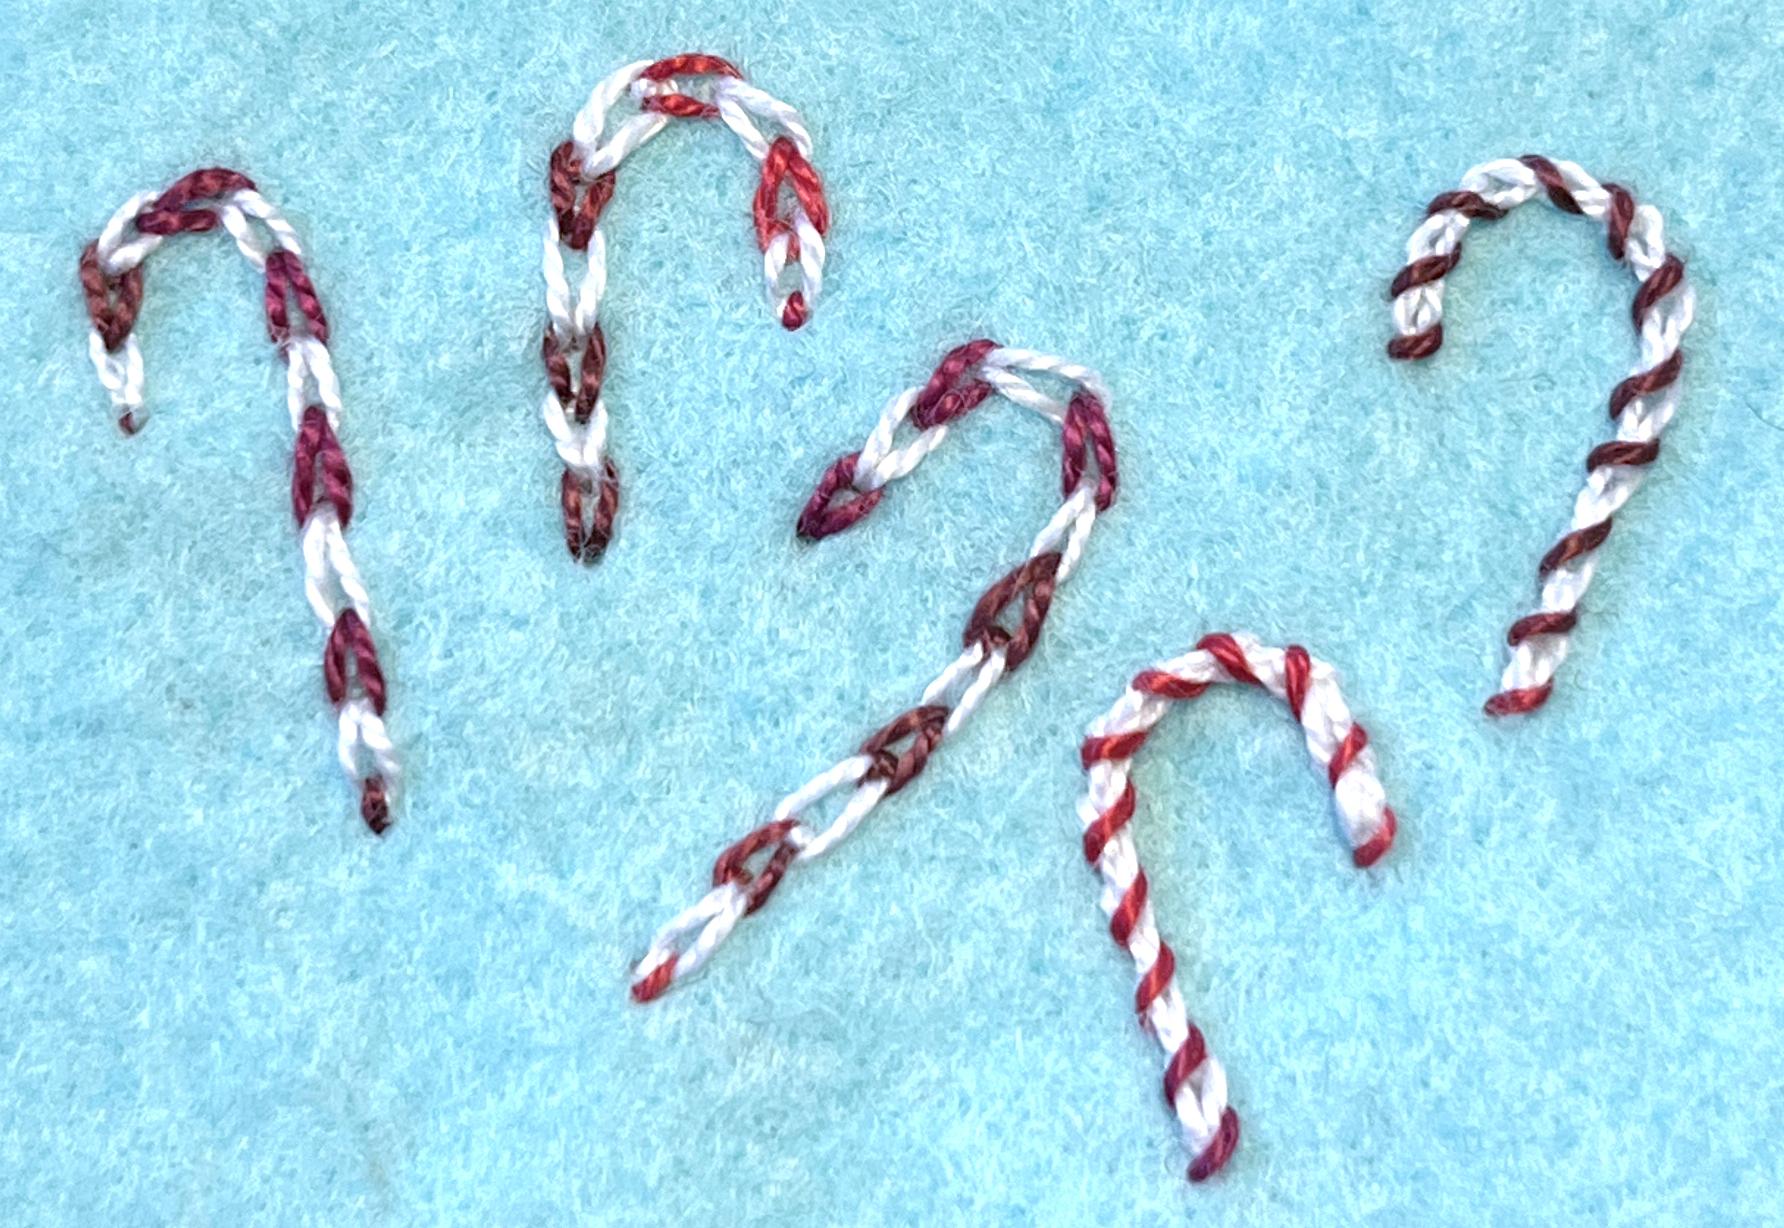
3. Magic Chain Stitch: This class is called candy canes Two Ways because I'm
going to show you two different combinations
of stitches that you can use to make a great
fun candy cane. So we're going to
start out with the one called magic Chain Stitch. This is based off of a
regular chain stitch, which you might have done in
an embroidery class before. But the difference with this one and the reason we
call it magic is we're going to stitch
with both colors of thread at the same time. So I want you to start
out by cutting a piece of thread the same length out
of both of your colors. Now I'm using pearl cotton. For my examples, you can also do this with six stranded
embroidery thread, anything you have that
you want to stitch with. I'm just going to cut two pieces that are the same length, and I'm going to
thread both ends of the thread through the eye of
my needle at the same time. This is why for this class, it was important to have
a needle with a big eye. There's my needle threaded. I'm also going to tie
the two ends together. I'm just running my fingers back along the length of the
thread to make sure that I've got them really
the same length and then they're
sitting smoothly against one another and
then I'm just tying a simple overhand knot to
tie the two ends together. You can start anywhere you
want to on your candy cane. I like to stitch them from sort of the short
part of the cane and then kind of go
around making that shape. So I'm going to
start by bringing my needle from the
back to the front, and I'm going to
pull it all the way through until it
stops at the knot. Now, you've got a thick
piece of thread here. So you may have to,
as you saw me do, wiggle your needle a little bit to get it through the fabric. Okay, to start
out, it's going to start just like a
regular chain stitch. So I'm going to bring
my needle down right next to where it came
up out of the fabric, so almost in the same
hole, right next door. And then I'm going to
bring the needle tip up the length of a stitch. I don't want to make
these too tiny, so I usually make
my stitches about maybe a little less than
a quarter of an inch long so that you can
see the color change. So here's where the magic
part of magic chain comes in. I'm going to take just one
strand of this thread. So I'm going to start
with the white, and I'm going to wrap this
thread behind my needle. Again, we're just doing
a simple chain stitch. So we would do this
if we were doing a basic chain stitch already, but I've got just the white
one behind the needle and the red thread I'm just leaving kind of plain as it is, like,
right where it came out. Now I'm going to pull my
needle through the fabric. And I'm going to keep pulling,
pulling, pulling, pulling. Once I see the white thread, start to form that little
chain stitch loop. I'm going to just grab
the red thread and give it a little bit of extra pull and you'll see as I pull on it, that red loop is just going to disappear into the
back of the fabric. Even though I've
got two threads, I've just got one
chain stitch of white. Okay. Once I've got that stitch kind of settled down where
it needs to be, I'm going to do my next stitch. So my next stitch, I'm going
to go into the inside of the loop and put my needle down right next to where
the threads are coming out. And again, I'm inside of that
previous chain stitch loop. I'm going to bring
my needle tip up the same length that I did
for that previous stitch. And this time, I'm going to wrap the red thread around
the back of the needle. So we're going to alternate
these colors every time. So the red thread goes around
the back of the needle. And now I'll do the same thing. I'm going to pull it through. I'm pulling both
strands through. Once I've got the red one
almost all the way closed up, I'm going to give the white
thread the opposite color, just a little extra tug to make sure it disappears
all the way to the back. And we've got the beginning of a magic chain stitch,
alternating in colors. Now I just keep
going exactly like this where I'm
alternating the color, I wrap around the back of the needle every
time I do a stitch. I'll do another one slow. My needle goes inside. I'm going to start to curve
my candy cane shape around. I'm going to curve this
stitch going a little bit to the right by bringing my needle up just a
little bit slanted. Now I'm back to
the white thread. White thread goes around
behind the needle. Then I pull all the way through. Pull, pull pull till it's
almost closed up and then give that other color
thread an extra tug. That's all there is to
the magic chain stitch. I'm going to continue
my way around the candy cane alternating
colors every time. I'll speed up the video
just a tiny bit so you can just watch me finish
up this candy cane. Okay, to finish off
your candy cane, I'm going to do one more
stitch in white here, so I'm going to do my
last stitch the same way. And I've got that one. I'm going to put
the white thread behind and pull
through like we did before and even up that
red thread. There we go. Then you've got both
threads coming out of that last stitch
of your candy cane. To finish off a chain stitch, all we're going to do
is make a tiny stitch to the outside
edge of that loop. So I'm just going
to bring my needle down right on the outside edge, and I'm going to
pull both threads through to the back
of the fabric, and that'll make just
a little tiny tack down stitch right at the bottom. And there is our magic
chain stitch candy cane. So you can put lots
of these together. You can alternate
different colors if you want to make a green
and white candy cane. But there is our first of
candy cane stitches two ways.
4. Whipped Back Stitch: Okay, Version two
of our candy cane two ways uses a stitch
called a whipped backstitch. So we're going to start
out by laying down a candy cane shape
out of backstitch, and then we're going
to come back and do the whipped part of
it in the red color. So I'm going to start this one with a piece of white thread. Okay, I've threaded
just the white thread through my needle and I've
tied a knot at the other end. I'm going to start this
one the same way I did with magic chain by stitching it from the short
part of the cane and then around making
that cane shape. We're going to do a back stitch. I've brought my needle from the back to the
front of the fabric, and I'm going to start by doing just one little stitch forward. Again, this is about
a little more than an eighth of an inch
is a great size. For this stitch. I'm going to pull
that one through. Then the way back
stitch works is I'm going to start
my next stitch going ahead along the line
shape that I want to stitch and then
I'm going to bring the stitch back to
meet the previous one. I'm going to go
ahead a little bit and bring my needle
up right there, that gap is the
length of a stitch. I'm going to pull through, and then I'm going to
finish that stitch by stitching back in the same hole that my first stitch ended in. That's going to connect to those stitches one
after the other. I'm going to just keep going
around doing back stitches. I'm going to bend my line around so I'm making that cane shape. My next one I'm going
to put a little bit to the right and bring it back. I'm going to just speed up
the video a little bit and finish stitching my
cane shape in white. Okay, there's my
finished cane stitch. Stitch it in white.
Now I'm going to switch to a piece
of red thread. And this one, again,
I'm just going to thread through the needle just by itself and tie a
knot at the other end. And I'm going to start
by bringing this up just barely to the left
hand side of where I started this cane stitch. So I'm going to come
through the fabric, and I'm just going
to come up right next to you where that
first stitch was. And for this part of the stitch, I think it's really helpful to flip your needle around and use the blunt eye end to do
this part of the stitch because what we're
going to do is slip underneath these
white stitches. We're not going to go
back through the fabric. And so the only trick
to this stitch is just to go the same
direction every time. So I'm going to slip all of the stitches from the
right to the left. So I'm going to take
the eye of my needle. I'm flipping it around,
and I'm going to slip underneath
the first stitch. From right to left
and pull through. That's going to make
a little wrap of red thread around
the white stitch. I'm going to continue
doing this through every stitch, from
right to left, under the next one, pull right to left,
underneath the next one. Under the next one and work my way around the
entire cane slipping underneath every stitch and letting the red
thread twist around. And Okay, when I get
to the last stitch, I'm going to slip
around the last one, and you can see that my
thread is coming out just to the right hand
side on the bottom there. I'm just going to
bring my needle to the bottom or to the
back of the thread, just stitch through, and then I can finish off the red twists. So you can see that now makes a candy cane stripe of red
twisted around the white. This one is particularly effective if you use a
really thick thread. So with a six stranded
embroidery thread where you use all of
the strands together, that's a really cute
way to do this stitch. Then you just have to
tie off on the back and your second version of the
candy cane is finished.
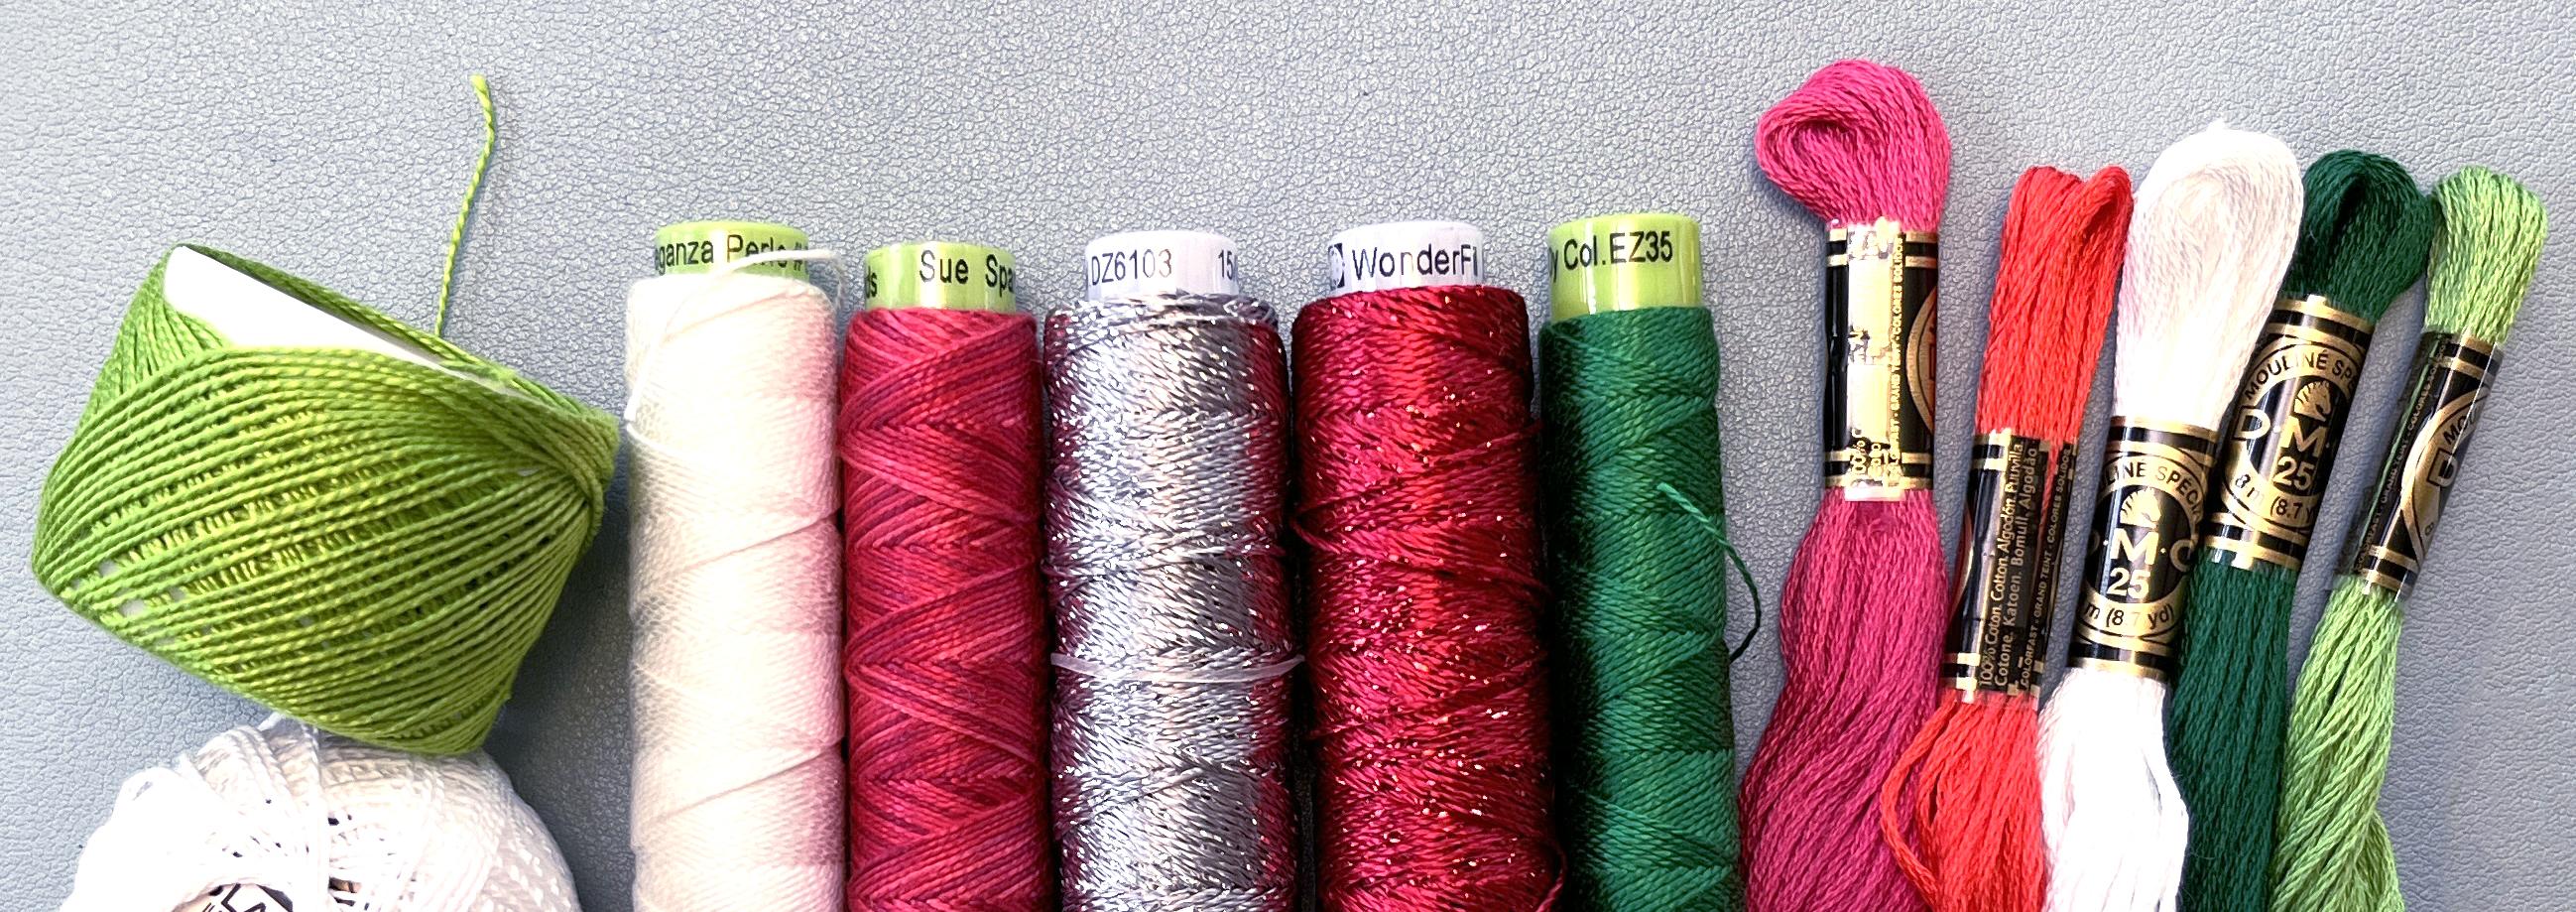
5. Wrap Up & Variations: So there are your
candy canes two ways. I did one more sample where I stitched them up using the
same stitches we just did, but used a variety of
different kinds of metallic and other threads and
did some color variations. You can see there's
lots of ways that you can use this candy cane design, either method of stitching. I hope you had fun
making candy canes. You can use these for gift
tags for making ornaments. You could put them on napkins or place mats for your
winter holiday decor. You could stitch some
on the collar of a sweater or on a pair of shoes. Why not? Candy canes, I think, are a fun addition to any
kind of a holiday decoration. I hope you had fun
making candy canes and you'll come back for
another stitch snippet. We all want to see
what you stitch. So be sure to post a photo of your candy canes in the project
section for this class.
 Becka Rahn, Artist & teacher, paper & fiber art