Transcripts
1. Welcome to my Studio: Hi, my name is Beca. I'm a full-time
teaching artist and I work in a micro Studio
in Minneapolis. I worked primarily in
fabric and paper or using surface design techniques like embroidery and printing
to create my designs. I teach here from my Studio in online
classes like this one. But I also do a lot of classes in museums and libraries in my community and
with conferences and fiber ART guilds
around the country. I've won a few awards
for my work and I even co-authored a book about surface design on
fabric and paper. This class is a very
tasty introduction to some Hand Embroidery. I'm gonna teach you three
different stitches. And then we're going to
combine them together to make tiny ice cream cones. This class is great for
beginning stitchers, or if you want to just
learn something new, I'll show you all of my
favorite tools and materials, will learn and practice
three different stitches. And then we'll combine
them all together to make some stitched pictures
of some sweet treats. I love embroidery because
it's a FUN, portable project. You can take anywhere. You don't need a
lot of tools and materials to get started. In fact, if you're
a crafty person, you probably have what you
need already in your stash. The best part is that once
you've learned a stitch, like the ones we'll
do in this class. You can use it for so many
different kinds of projects. If you're ready to
start Stitching, then choose your favorite flavor and meet me in the next lesson
where we'll get started.
2. Let's Stitch Ice Cream Cones: Let's talk a little more
about our class project. We're going to be
Stitching ice cream cones. Why did I pick ice cream? If you do search of
beginning embroidery, you will find the same
basic project over and over a sampler with straight lines of ten
basic beginning stitches. I'll tell you a little secret. Those are boring. Instead, I like to
choose groups of stitches and put them
together into a picture. You're still learning
and practicing just like you would with
one of those samplers. But you're doing
something more than just putting the stitches and
along straight line, you learn more when you get to choose the placement
and the spacing of your stitches and
different ways to combine them to make different
shapes for your design. In this class, we're going
to learn three stitches. The woven picot stitch,
the buttonhole bar, and the figure eight knot, which is one of my favorites. I chose them because
each stitch has a specific shape and
we'll be able to stitch them side-by-side to make something that's more than
the sum of its parts. Here's how we'll get there. First, we'll talk about
tools and materials you'll need to make your project and choosing colors for your design. Next, we'll get setup
and ready to stitch. That includes things like
threading the needle, conditioning your thread
and tying a knot. Then we'll spend a lesson on each of the three
different stitches. So you'll have lots of
chances to practice. Finally, we'll put those
stitches together to make ice cream in our
favorite flavors. Last, I'll finish off with
some tips for finishing your projects and
ideas for what to do with the picture
that you've stitched. We all want to know what
your favorite flavor is. So be sure to post a
picture of yours in the Class Projects.
Are you ready to go? Find a comfortable chair
and some good light? And then start
thinking about what's your favorite ice cream flavor. That's important.
In the next lesson, we'll talk about
the materials you need and then we're
ready to start Stitching
3. Tools & Materials: Okay, Let's jump
in and talk about the tools and materials
you'll need for this class. Very first tool you will need is a pair of small sharp scissors. These ones that are called micro Tips by whiskers are
my very favorites. So the next tool you'll need is a needle for doing
your stitching. I wanted to tell you about
three different kinds of needles and I've taken a close-up picture of these
so I can put it up on the screen a little closer
than you can see in the video. So my favorite needle for doing embroidery is the one
on the left-hand side, and that's called
a chenille needle. So chenille needles
have a really big I and a sharp point. So that's why I like them
best for doing embroidery. Now you might not have heard
of a chenille needle before. But if you go to your favorite
craft or Sewing store and you look at the display of all the different
kinds of needles, just look for the ones
labeled chenille. There'll be there. The next one I want
to tell you about is a tapestry needle. So tapestry needles you've probably seen in a
really large size. Those are the ones
they used to weave in ends if you're a knitter. They also make them in this
small size doing stitching. So tapestry needles
are different because they have a
rounded or a blunt point. So you might use a tapestry
needle when you need to do a stitch where you're not stitching all the way
through the fabric, but just like weaving
in through the threads. So one of the stitches we're
gonna do in this class, it might be handy to
have a tapestry needle. The last one on the
right-hand side is a regular embroidery needle. And you've probably heard of these embroidery needles are great if that's what you
have to stitch the project. They have a little
bit smaller I, so there are a little bit
more challenging to thread. It's hard to find one that is the right size to use
with your thread. So how do you know
what's the right size? My best rule for you is to match the size of the needle with
the size of the thread. So if you're using
a thicker thread, you'll want a thicker needle. So thicker diameter,
thicker width, and a thinner thread
wants a thinner needle. If you can match up
those two things, you have the perfect
needle for your project. You don't have to worry about
what size it's labeled. For your project. Look for a chenille needle or an embroidery needle and match that up to the size
of your thread. Will talk about thread next. For this class, we are going to use six stranded
embroidery thread, which looks like this, and you've probably
seen it before. So this is cotton thread
and it comes in a bundle like this that is six
strands all held together. And when you stitch, you can use all six strands or you can separate it out and use any number of the
individual strands. So it's very versatile. It's a great thread for this. I'm going to use six
stranded embroidery floss for this class. But I wanted to talk about another kind of
thread in case you have some of this
because this is really my favorite
one to stitch width. And that's called pearl cotton. Pearl cotton is a
little bit different. It comes as a single-strand
that stays altogether. So this is a size eight, which is a smaller one. And this one is a size five, which is a thicker thread. They're both pearl cotton. They're equivalent to the sides. Five is about the same as
six strands of this floss. And the size eight is about the same as three strands
of this floss. Now, you can find pro
cotton like this in many different kinds of formats like here are just some of
the ways that it comes. All of it is pro cotton
embroidery thread. They just package it
in different ways. I have in the Resources
which is down below, you can download for this class all of my favorite
kinds of threads with all the details and
places you can get them if you want to check that out in the Resources section. Finally, let's
talk about fabric. So if you are imagining in your head
and embroidery class, you probably are thinking of an embroidery hoop like this
with some fabric in it. This works great and you can absolutely stitch your
project on fabric like this. But I actually have a different kind of fabric,
which is my favorite. That is a wool rayon blend felt. There are two reasons
I love stitching on felt, especially
for beginners. The first is that when
you finish your project, you can cut out and
do all kinds of different things from
your Stitch felt fabric because felt
it doesn't come apart or fray like
regular fabric does. You can see that here. So it's easy to finish your
project into something else. The other reason I love felt
is because it's kinda thick. It's got some thickness. So when you stitch through it, it helps you with the tension on your stitches to
make sure that you don't pull things too tight. And to keep your stitches
kinda smooth and even So I think it gives
you an advantage. It, it makes the
Stitching easier. Now, I said, I like
wool rayon blend felt, that's my favorite one. It's a little bit different
than crafts store felt. And I'm gonna put a
picture up on the screen so you can see that up-close. Most craft stores carry
acrylic or polyester felt. In my photo, That's the kind of turquoise and the
green colored ones. There's a reason
I don't like that quite as well for stitching on. First is you can see in the picture it's got a
little bit of shininess. It's basically
made from plastic. And so it ends up looking a little bit shiny and plasticky. I don't love. That's up to you if that
bothers you or not. The other reason I like the woolen rayon blend is
because it's a little stronger. So that polyester felt is held together just
with the plastic, kind of melted one fiber to
the next one where we'll, and Rahn felt the
properties of the fibers. The roughness of the fibers is what's holding it together. So the woolen Rahn felt
tends to be stronger. Your project's going
to last longer and you can do more
things with it. That's just my
personal preference. So you can choose the kind
of felt that works for you. Um, and you can absolutely
practice on anything you've got hanging around
in your Sewing space. Let's recap about
what you'll need specifically for this project. So first, your small
sharp scissors. Next, you'll want to choose the needle you want
to stitch width and make sure that
your needle matches up with the size of the
thread you want to use. Then finally, you will need a couple of small
pieces of felt fabric. That's what I'm
going to stitch on. You just need some
kind of small scraps. It's easier to work with
a small piece than it is a full sheet when
you start Stitching. Okay, last, Let's
talk about color. Now remember how I said
you should think about what your favorite
ice cream flavor is. That's going to
help you figure out what colors to use
for your project. You'll need kind of three different colors to
make your ice cream cone. The first one is
you need some kind of a shade of brown
to make the Cone. So you can choose
a lighter brown, a darker brown,
whichever you like. Next, you need your
ice cream flavor. So you need to think about what color makes the kind
of ice cream you like. Vanilla chocolate, maybe
mint chocolate chip. And then finally, our ice
cream cones are kinda fancy. They have a cherry on top. You need a shade of
red or hot pink that you can make your cherry
for the top of your Cone. Then finally, you need to choose a background color that
you're going to stitch on. The only rule I have about the background
color is you should test out the colors that you've chosen to
stitch width and make sure that they
show up against that background and
nothing is blending in so that you'll see all
the parts of your design. So be sure and do a little
color check and make sure that what you've picked
looks great together. Once you've gathered
all of your materials, then it's time to move on to the next lesson and
we're going to talk about setting up your project so we're ready to
start Stitching
4. Preparing to Stitch: In this lesson,
we're just going to get setup and ready to stitch. First thing we need to
do is get some thread. So I'm gonna grab my six
stranded embroidery thread. For the first part
of this class, we're just going to
practice each of the stitches so you can
use any color you want to, to do your practice stitches. I want you to find the
end and we're going to pull off about 14 " of thread. And a good way to measure
that if you don't have a ruler in your head, is to grab the end of the
thread in the tips of your fingers and measure all
the way back your elbow. And that'll give you a great
almost 14 inch length. We are going to use this thread, all six strands all
together for this project. So you don't need to
separate anything out. And now we need to
thread the needle. Now before you do that, I want to show you one of
my very favorite tips Ever, which is how to make your
own paper needle thread or for that, you need just a scrap of paper. I just tore a piece off of a little notebook that
I have in my Studio. And I want you to cut just
a little slip of paper, like a french fry, about an eighth of an inch wide and a couple
of inches long. So I've got just this little
sliver of paper like this. I'm going to take that strip of paper and I'm
going to fold it in half so that it makes a V, a letter V. Okay? Grab one under your thread. And we're going to put
that inside the paper, inside the V and
then close it up. Like so. And now this is where
you're gonna love the chenille needle if
you haven't with a big I. Because instead of
threading the sort of wiggly soft end of the
thread through the needle. We're actually going to put the ends of the paper
through the needle. So I am going to just
slip the ends of the paper inside the
eye of my needle. And now I'm going to
pull on the paper. When I get to where the thread is kind of meeting the
eye of the needle. If I just kinda give
it a little wiggle, I can pull right through there. Your needle is threaded
and you can save the little slip of paper you
can use over and over again. They make needle thread errors that are a little piece of wire. And I always break those. I really like this better. I think this is a better tool. Okay? You have your needle threaded in the opposite end
of your thread. So the one that is the other
side not in the needle, we're going to tie a knot. And I like to do just
an overhand knot. Again, there are lots of
different kinds of knot. So if you know a different
way to Taiwan, go for it. But I do Wrap around
the tip of my finger. I just make one loop around. And then I pop the loop
off the end of my finger. Then I grabbed the free end of the thread and just stuff
it through that loop. So then I can just
pull it tight. And that'll make
us single naught. And that should be plenty to hold this in place
for what we need. Okay, so we've got
a knot in one end. We have the needle in the other. I've pulled through
a couple of inches. So through the eye of the needle just
enough so it'll stay. Then one more thing
I want you to do with the thread before
we're ready to stitch, is we're gonna do a
little motion like this where it looks like
I'm padding the thread. I'm just running it through my fingers four or five times. And what I'm doing, this is called
conditioning the thread. I'm pushing extra
twists out of it. So I'm not doing anything
special with my hand other than just smoothing it
and pulling it backwards. But what that's doing is it's helping the thread
kind of relax, get some extra kinks and
twists out of it and it'll be way less likely to knot up
while you're stitching. If you just take a second to do that every time you
thread your needle. Okay, so our thread is
prepped and ready to go. And I got a piece of
fabric ready to stitch on, like I said before,
a smallish piece. I think this is a
six inch square, is a great size to start on. Once you've got your thread
and your fabric ready to go. Then we'll move on to the
next lesson and we're ready to start stitching
the woven picot stitch
5. Woven Picot Stitch: The first stitch we're
going to learn is the woven picot stitch. So you should have
a piece of felt, your needle which
is threaded with six strands of embroidery,
floss, your scissors. And then we'll need
one other little tool to do this stitch, which is you need either a
Sewing pin or an extra needle. We're going to use
that to help hold part of the stitch as we're
doing this Stitching. So I chose a woven picot stitch because the woven
texture of the stitch, I think looks like
a waffle cone. It also is a stitch that looks like a long skinny triangle, which is the shape of
an ice cream cone. So to start your Stitch, I want you to grab your
pen or your extra needle. And the first thing we're
gonna do is place that so that it's going to hold
onto a part of our thread. So I'm gonna take my
needle or a pin and put it down into the felt
and then up again. And the space between
when I where I went down and up is going to be
the height of our Cone. Okay. So mine is a little wider than like the
width of my thumb. It's about maybe
three-quarters of an inch. Okay. Now I'm going to take the thread and I'm going to bring it from
the back to the front. And I'm going to start
out so that I'm in line with where the
pin is coming out. So I'm gonna go just in that same line over to
the left-hand side. And I'm bringing my needle
out about a quarter of an inch or so to the
left-hand side of the pin. And this is my needle here. I'm gonna pull that through. Okay, so you can see where
the thread is coming out. So the top of our Cone, the top of the triangle
shape is gonna be about half the
height of the Cone. That's kinda what we're going
for to make this look like it's the right kind of shape
for an ice cream cone. Next step, I'm going to
take this working thread. That's the one that's
coming out of the fabric. And I'm going to hook it around the bottom of
my pin or needle. Okay. So I'm just bringing
the thread kind of behind the back of it. And now I'm going
to make a stitch down on the right-hand side. Again, kind of lined up where the pin and the thread
are coming out. And the same distance from
the left to the right. So the same distance from that
center, which is the pin. And I'm gonna pull that through. Okay, so you now
have a V of thread. And if you can imagine, this is kinda the outside
edges of your ice cream cone. This is a great place to look
at your stitch and decide if it looks like the right
shape for what you want. And you can always go back and try it again if you don't like
the shape of your Stitch. Okay. We have one more straight
stitch to put in and these are gonna be the foundation for the woven part of the
woven picot stitch. The third stitch, we're
gonna do, the third part. We're going to come
up in the center, just to the left-hand
side of your pin. And again in line with the top. So all of the stitches
are gonna kinda be in a straight line across. So I'm going to come up
just to the left side of the pin and pull that through. Okay? And this is going to become a center thread that's gonna go down the center of the Cone. And same way we did with
the very first one. I'm going to take this
again and hook it underneath the other side
of the pin or the needle. Okay. So now we have three legs. Kinda looks like a letter W or maybe like a bird
foot kinda shape. Those are the
foundation stitches. So now we're going
to start doing the woven part of Logan
woven picot stitch. And I mentioned you might
need a tapestry needle, needle with a blunt point to
do this part of the stitch. So you could switch needles
now if you want to. Or I'll show you another trick
which I use all the time. Which is instead of
pushing the needle through with the
sharp pointed end, I'm actually going to turn it around and use the
eye of the needle, the sort of blunt or rounded I as the part I'm going
to use to do the weaving. And if that doesn't make sense, I'll show you what I mean. We're going to start weaving in-between these three threads
that we just laid down. And we're gonna do
just a plain weave, which means I'm an alternate going over and
under the threads. I'm going to start over here
on the right-hand side. I'm gonna go over
the right thread. I'm gonna go under
the middle thread. And I'm gonna go over
the one that's on the left, over, under over. And I use the eye
of my needle to do that because I'm just
slipping under the threads. I'm not going
through the fabric. And then I'm gonna
pull this through. And Push it down towards the tip, towards where the needle is going into the
fabric as far as I can. Okay. Now the next row, we're gonna go back
the other way and we're gonna do the
opposite of what we did. Now, I think it helps
a little bit to turn your project a
little so you can. The angle is a little better. So now we're doing the opposite. So the last time I went
over the outside thread, so this time I'm
gonna go under it. So under over the middle thread, under the outside thread. And I'm going to
pull it through. And I just wanted the edge of that thread to line up with the outside
thread of our Cone. I don't want to
pull it so that it bends in because then we're going to lose
that cone shape. So I just want it
to rest up against. And I'm going to
take my fingernail just kind of and
push that thread as far down towards the tip
of the cone as I can get it. Now we're going to
continue making rose, just going the opposite. So we're gonna go
back-and-forth, kind of in a zigzag pattern. And we're gonna do
the opposite of whatever we did the last row. Okay, So last time we went
under this outside threads, so we're going to switch and go over under the middle
and over the outside. Pull that through just so it rests against the thread and then give it a little
push down if it needs it. Okay, We're gonna go back left
to right, opposite again. So I'm gonna go under, over, under, pull that so it just rests
against the outside and push those rows together. Hey, and I'm just going
to continue the same way. Going back-and-forth. An alternating, whether
I'm going over or under. Now, if you lose
track and you can't remember if you're on
a over or an under, you just have to look at where
your thread is coming out. So right now, I went under this last one because I can see that's
where the thread is. The next one. I just want
to do the opposite of that. And hopefully you're
starting to see that waffle woven
texture happening. Now, I'm going to
speed up the video so that you don't have to watch
me do this in real time. That way you can pause the video here and continue
your stitching. And then we'll catch up
altogether when we've gotten all the way to
the top of our Cone. So we're going to continue
the same thing we've been doing until we've filled
up all the way to the top. Okay. I've almost filled
up my entire Cone. I can probably fit one or
two more rows in there. I can see just a little
bit of the stitches left. So I'm gonna go
ahead and do that. One or two more. All right. There it looks like I'm
pretty much filled up. So to finish this off, the last thing I'm gonna
do is I'm going to make a little stitch from the front to bring my
thread to the back. So I'm just gonna go over that
last outside thread again, right close to the top and just stitch back to
the back of the fabric. Okay, Now I'm done with the weaving part so
I can take out the pin, which has been kinda
stabilizing it and holding it stays in the right shape. But if you notice when
you pull the pin out, I'm this little picot that you just made
is actually loose. It sits up off the fabric, which is very cool if
you want to use it to stitch things like
leaves and other stuff. But we want the Cone for our ice cream to kinda
stay down on the fabric. So I'm gonna make one
more stitch and I've got my needle just still
here in the back. So I'm just going to bring
my needle from the back. I'm going to catch the
very bottom of my Cone, just kinda anywhere in
the bottom of the tip. And I'm going to make one
little stitch to the outside. I want to make sure there's
a long stitch on the back. I want to make sure
I'm not pulling that tight so that it's like puckering up the fabric. So just so that your, your thread is laying
across the back. And I'm gonna make a
little stitch just to the outside edge so that I'm tacking down the
tip of the ice cream cone. Okay. There is my finished Cone. You can kinda smooth out
the rows of Stitching, of weaving with your fingernails and kind of shape
it a little bit. And then the last thing
you wanna do is to tie a knot in the back
to finish it off. So here's my favorite
way to tie a knot. Make sure you've left
yourself enough thread. This one's a little bit short. I'm going to look at
where the thread is coming out of the
back of the fabric. And I'm going to make just
a tiny little stitch, like a little bite
out of the felt right close to where that
thread is coming out. So I'm not going all the
way through to the front. I'm just kinda
taking a little like a half stitch through the felt. I'm gonna pull that through. But I'm not going to
close it all the way up. I'm going to leave a loop. Okay, so here's a loop, my threads little messy. So I got a loop there. I'm going to take my needle
and go through the loop once. And then through the loop twice. So I'm going through it twice, kinda go in the same way. So I've got two twists around. Then I'm going to lay
this down on the table. I'm gonna take my
fingers and put one on either side of that loop. And then just give this
a gentle kind of pull. And that's going to
pull a knot right down against the
back of the fabric. I'm just pressing down with my fingers to make
sure that the thread snags down right up against the back and then
you can trim it off. I like to leave about
a finger's width of of tail end of thread
when I trim it to make sure that the knot
doesn't pull itself out. We have one woven picot stitch, which will be the Cone
for our ice cream cone. So I would like for you to practice making a
couple of Cones, a couple of woven
picot stitches, until you're happy with them. And then you can move on to the next stitch in
the next lesson.
6. Buttonhole Bar Stitch: Okay, next we're going to stitch the ice cream part
of our ice cream. And we're gonna do that with
a buttonhole Bar Stitch. So when we finish
our ice cream cones, we're gonna do three
buttonhole Bar stitches. I'm kind of nestled
one against the other. But to practice we're
just gonna do one. So I have another
piece of thread. I switched colors, but you can use any
color to practice with. And we're going to
start this one out. Same way. I've got my needle threaded, I've got a knot tied. I'm going to bring my thread through from the
back to the front. For the buttonhole Bar Stitch, it's a little bit similar
to the woven picot stitch. We're going to lay down a couple of Stitches that'll be like the base or the foundation
that we're stitching against. And then we're going to do another stitch
over top of those. These ones have a lot in common. The buttonhole Bar Stitch, I'm going to make a long stitch. That's gonna be the width of the stitch that
I want to Make. I'm going to make mine
about a half an inch wide, which is about as
white as my fingertip. So I'm just making one
long Stitch going across. And then I'm going to
make a second stitch exactly like that
right next to it. So just really close. So they're touching each other. I'm going to bring
that one through and ended at the same spot. So I've got two long stitches that are just sitting
one next to the other. So that's the bar part of it. Now we're gonna do a buttonhole
stitch on top of that. So I'm going to bring
my needle out at the left-hand side
and I'm bringing it out just below
those two stitches. So right up against it, just so I can bring the
thread to the front side. Now, this is another one where I feel like it's
more comfortable to stitch if I turn it this way so that I'm stitching
away from myself. You can hold it however,
makes sense to you. But that's the way that it makes sense to me that I like to. And I'm also going to flip
my needle around again. You could also switch
to a tapestry needle, but I'm going to use
the eye of the needle because once again
we're gonna be slipping underneath these
stitches instead of Stitching through the felt. So I'm going to take
my thread first. I'm going to move it over
to the left-hand side. And I'm just holding
onto that with my thumb. I want to make sure
that it ends up in the place I need for it to be for the rest of this stitch. So that's always my first step. I move the thread
over to the left. And now I'm going
to slip the eye of my needle underneath the bar. And I'm treating
those two stitches as if they're One thing. I'm sliding underneath
both of them. And before I push that
all the way through, I'm going to take
my working thread. That's the one coming
out of the fabric. And I'm going to slide it
underneath the needle. I'll do that movement one
more time so you can see it. I'm taking my working thread
and I'm just wrapping around the back of the needle
and then laying it down. Okay. And now I'm going
to grab the needle and pull it all the way through. And you'll see as I'm
tightening this up, it's kinda making a little
knot over the bar stitches. I'm pulling towards myself, which will slide
that down towards the bottom edge of the Stitch. Okay, now we're going to
repeat those same steps. I'm going to bring my
thread over to the left. Just kinda hold
it with my thumb. I'm going to slide the eye
of my needle under the bar. And then before I drag it, pull it all the way through, I'm going to take
the working thread and Wrap around the
back of the needle. Okay. Then I'll pull through.
And once again there's a little knot That's
tightening up on the bar. And also the same as we did
with the woven picot stitch. You can kinda push those
knots together towards you. We're going to fill
up this whole bar using this same stitch. I'll do a couple more Slow. Thread goes over to the left. Needle, goes underneath than the working thread
goes under the needle. Pull it through. Okay.
Thread to the left. Needle goes under, Wrap the thread around the
back, push through. And I'm going to hold this
up close to the camera. So you can see there's a row of knots happening over top
of the buttonhole bar. Once again, I'm going
to speed up the video so I can finish the
last few stitches here. I'm going to try and fill the whole space here and
pack the stitches together. And then you can join me again. We'll get to the top
and we'll finish it up. Okay, I've filled my bar
with buttonhole knots. And now to finish
off this stitch, it's gonna be very similar
to the woven picot. I'm going to make a little
stitch to the outside edge. And if you look, your thread is kinda coming out
of a little loop. The stitches kind of
looped around it. I want to stitch
to the outside of that loop right at the end. So I'm bringing my
needle down right there. I'm going to stitch
that down to the back. Now when you look at
your buttonhole bar, there's one edge that's got like little loops
that go around it. And then the top edge
looks like it's got little diagonal
knots on the top. Now you might notice sometimes these buttonhole Bar
stitches want to twist, they want to wrap around and the knots will end up
moving to the other side. That's completely fine. Like that's very normal. The way that these Knot sit, that's a natural thing
that's stitch wants to do. Now, I think it looks kinda FUN because I'm imagining that this is like a twist ice cream
cone, like soft serve. And so sometimes those
have little ripples. So I like it when the ripple
happens in the stitch. So if yours are a little
bit twisted, no worries. Okay, so that's a
buttonhole Bar Stitch. We're gonna do three of those to make our
ice cream cones. So again, I'd like you to practice till you feel
comfortable with that stitch. You can replay the
video and follow along. And then we'll move on to the last stitch for
our ice cream cone, which is the figure Eight Knot
7. Figure Eight Knot: The last stitch we're gonna do is called the figure eight knot. And this is one of my
favorite embroidery stitches. Now you'll notice I don't
have my needle threaded for this one because we're gonna do something just
slightly different. We're going to thread
the needle the same way. But instead of using just
a single strand of thread, we're actually going
to double this up. So I'm gonna pull
this through so that I have two strands that
are sitting side-by-side. And I'm going to tie both
of the ends together. So it's gonna be doubled
up in my needle. The reason that
I'm doing that is because the size of this Knot, the size of the stitch is based on how thick
the thread is. I want to make a little
bit extra large knot so that we can see this. And this will be the
cherry that's on top of our ice cream cones. Okay, So I now have a double-strand of
thread going through my needle and I'm going to treat this like it's one thread. So I don't have to worry about splitting them
apart or anything. We're going to pretend like
this is one thicker thread. To do this not I'm
going to bring my needle from the back to the front and pull until
it stops at the naught. Then this one works
in three steps. The first step is
we're going to lay the thread onto the fabric. So we're going to draw a shape with the thread before we do anything
else with the needle. And what we're gonna do is make a loop that goes clockwise. So here's what I mean. I'm gonna take my thread and just make around clockwise motion so that I've made a loop of thread. Okay, I'll do that one more time so you can watch me do it again. I'm taking my thread and just making a clockwise
motion with my hand. So I've got a loop
that goes clockwise. Okay. I'm going to
hold it down with my thumb just so
that the loop stays. Now I'm going to step to take my needle and I'm gonna go under the right
side of the loop. I'll tip that so you can see
the needle a little better. So I'm going under the
right side of the loop and the tip of my needle is
coming out in the center. Then I'm going to make sure
that the tip of my needle goes over the left side. And I'm going to tip it down so that I'm
putting the point of the needle right back down into the fabric right where
the thread came out. Okay. I'm not going to
pull that through. I'm just going to wait
here for a second. I'm gonna grab the
working thread, which is the one that's attached to the eye
of the needle here. And I'm going to let go with my thumb and gently
pull on this. It's going to make a knot right down at the
bottom of my needle. Once you've got that knot resting down against the fabric, now you take the needle
and this is step three, and you pull it all
the way through. Okay? And that has made a little map that sits on
this surface of your fabric. These are neat. I'll try to take a picture of one really close
up so you can see they make a very symmetrical
kind of three lobed, not when you finish them. So let's do a couple
more together. I'm going to bring the needle
from the back to the front. Step one. I'm going to draw a clockwise
loop with a thread. So I go around. So I got a loop and I'm
holding it down with my thumb. Step two, I'm taking
the needle and going under the right
side of the loop. Tip comes out
through the center. I'm going over the left
side of the loop and then tipping my needle tip
down so that it's going in, right beside where the thread was coming out of the fabric. Now I can let go with my thumb, grab a hold of the
working thread here, and gently pull the knot down
to the base of the needle, right by the fabric. And then pull the needle
all the way through. Let's do one more needle
from back to front. Clockwise loop. Under, over, back into the fabric. Like go of loop. Pull the threads down to
the base and pull through. There are three figure 8 kt, which will be the cherry
on top of our ice cream. Now figure 8, kt are based on the size
of the thread to sue. If you want smaller knots, you use smaller thread. And of course, thicker thread
would make bigger knots. You can tie these
off the same way we did with the previous stitches. By making a little stitch partway through the
fabric on the backside. I'm going to pull that
down until I have a loop. I'm gonna put my needle through
the loop once and twice. Fabric goes down on the table, finger on either side to
hold it down and give that a little pull and then
trim it up. Okay. When you are comfortable
with those three stitches, then we'll move on to the next
lesson where we'll put the three together and we'll
start making ice cream cones.
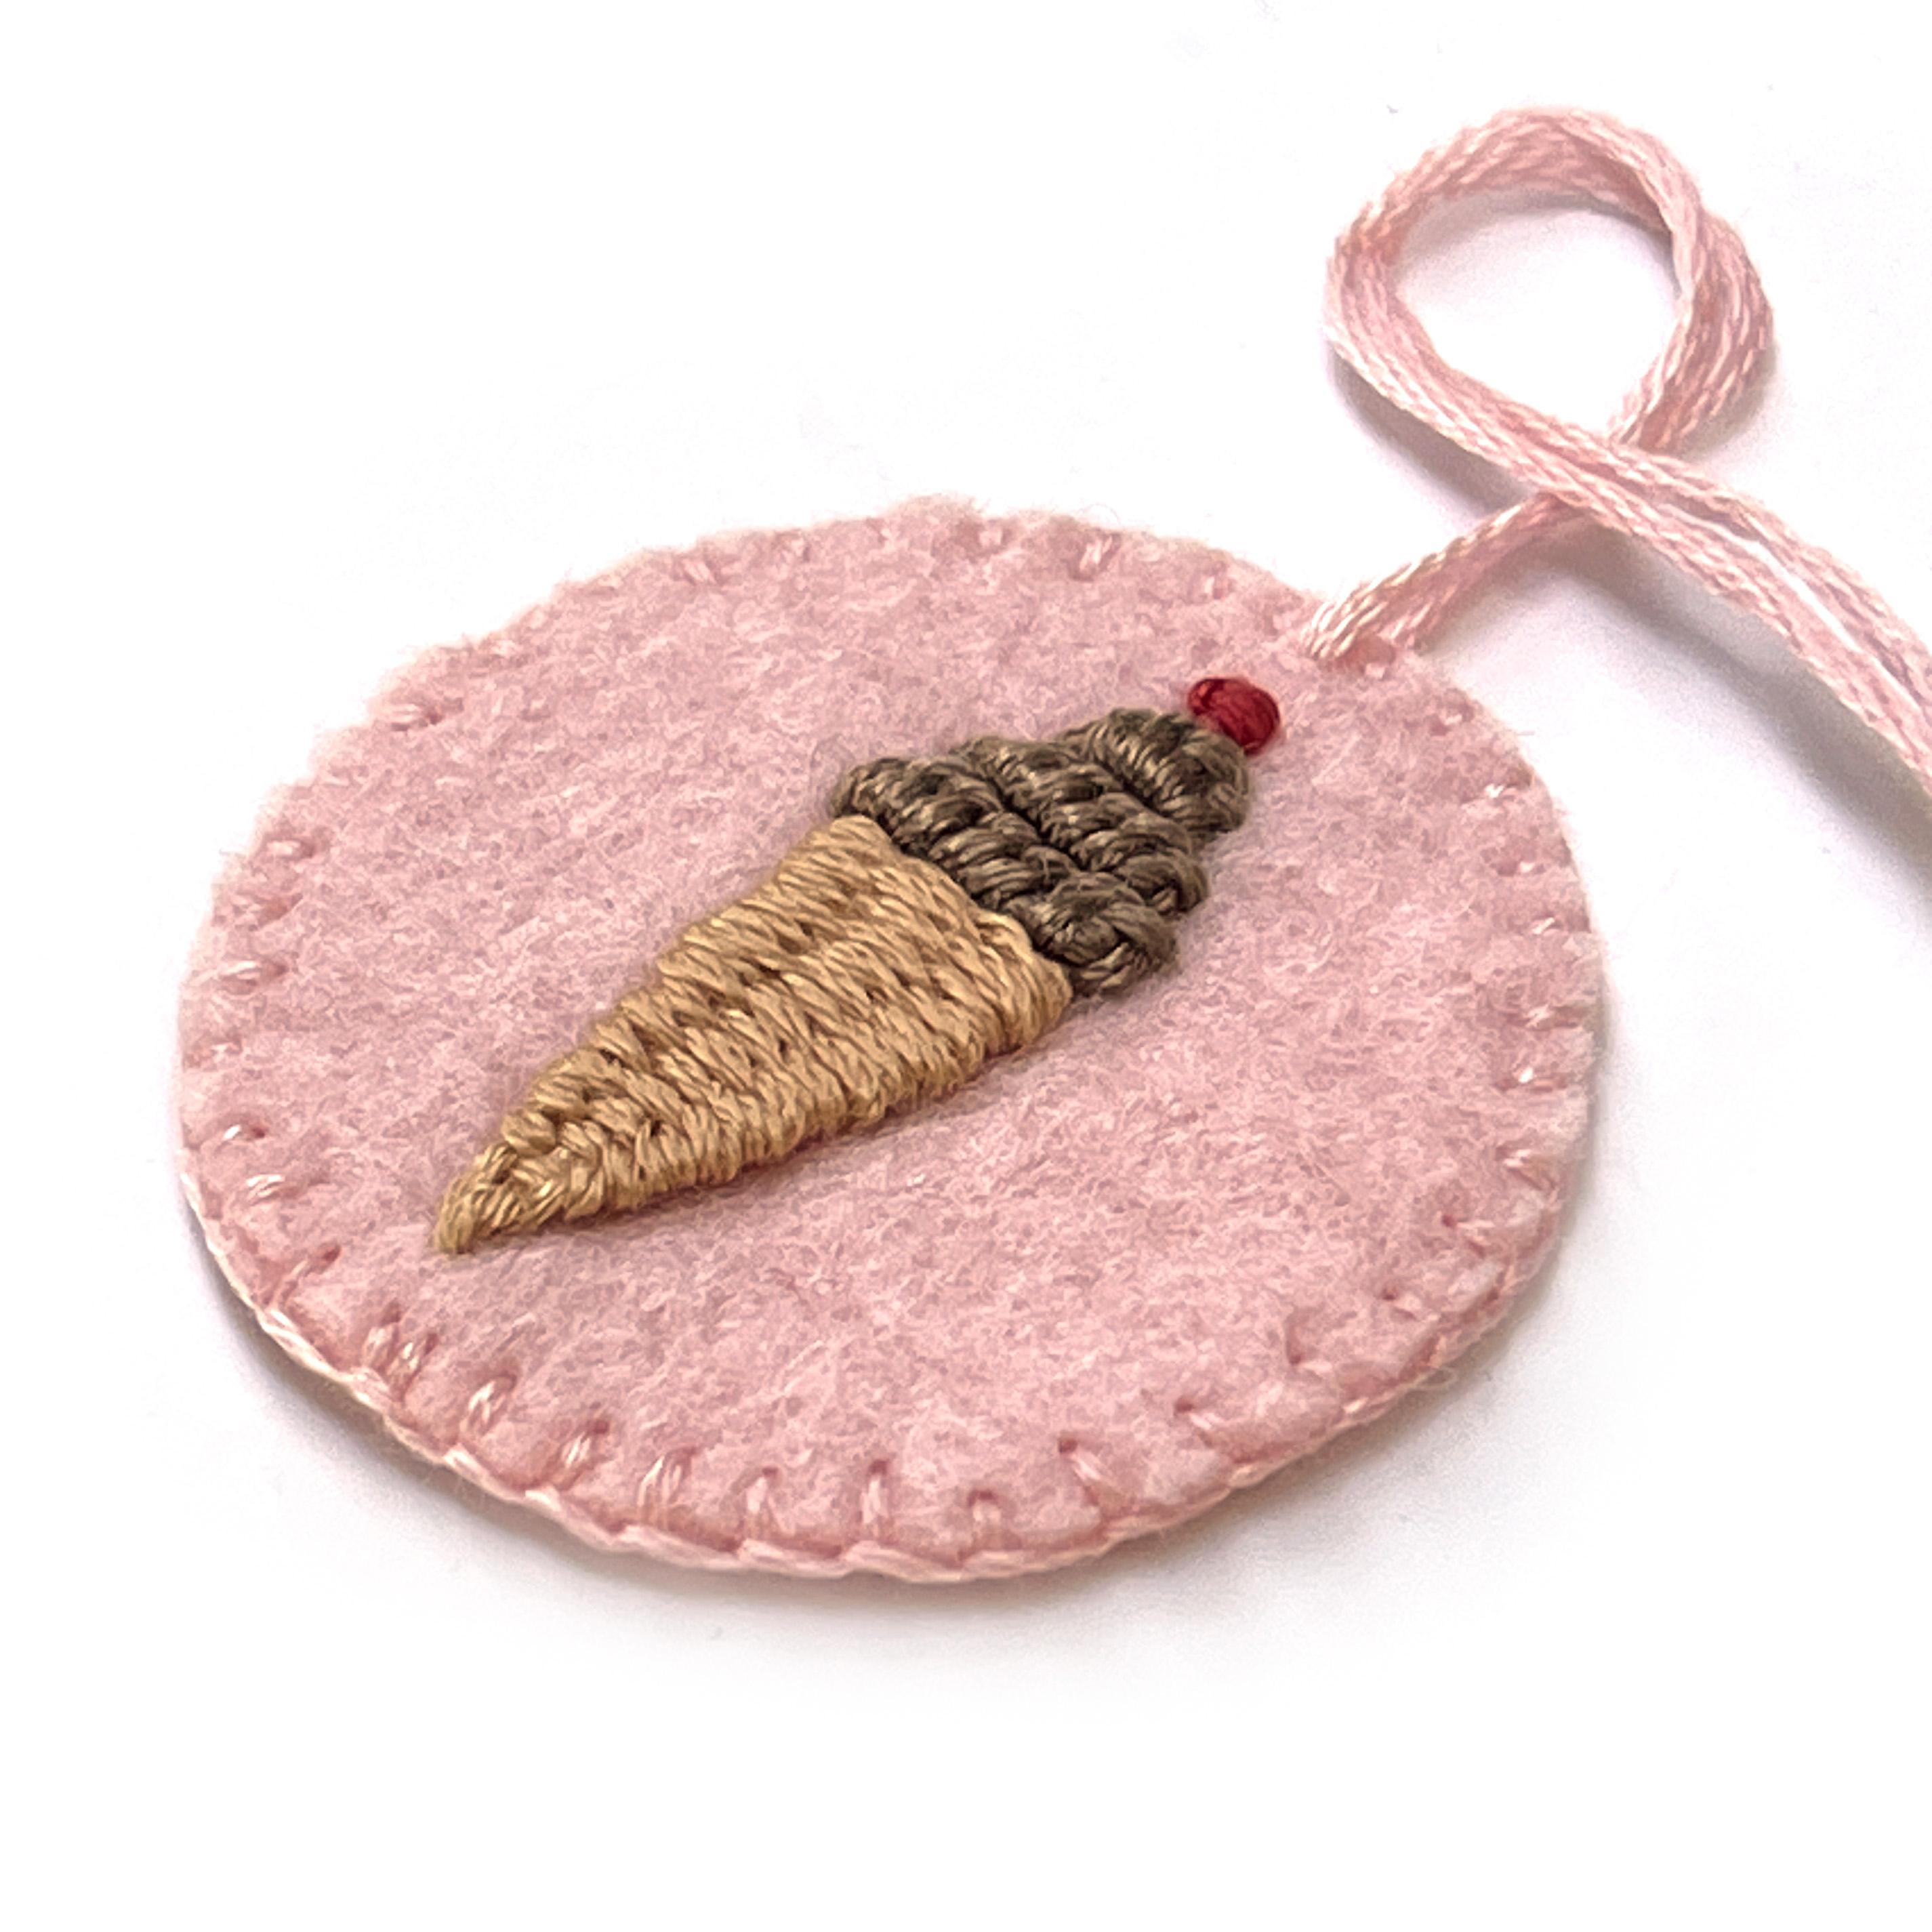
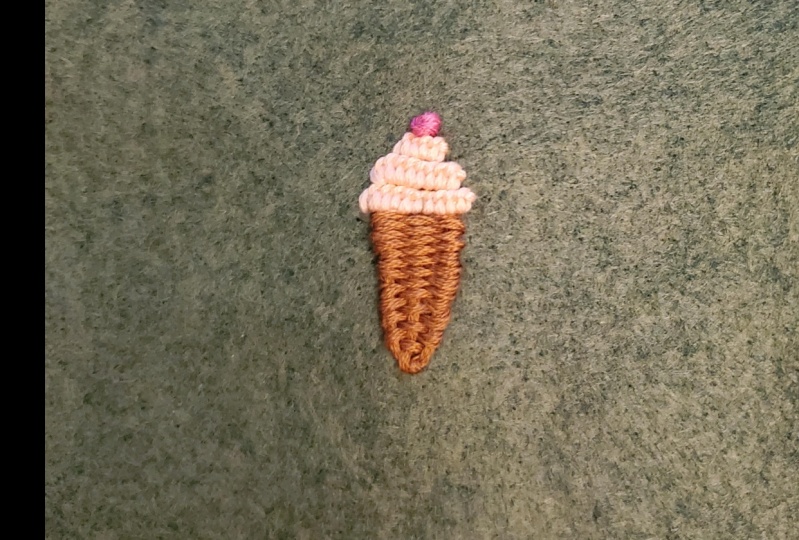
8. Assembling Your Ice Cream Cone: Okay, Now is the Fun part. We're going to take those
three stitches we just learned and put them together
into ice cream cones. So we'll start with a
woven picot stitch. And remember the first step
is we're going to put the pin in where the top and bottom
of our Cone wants to be. I'm going to make mine again about three-quarters
of an inch tall. It's a little bit wider
than the width of my thumb. And I'm gonna put the
Cone a little bit below the center because
I'm trying to stitch my ice cream right in the
center of this felt piece. So that'll be on the
bottom part and I'll put the ice cream
on top of that. I'm going to speed up the
video as I stitch this because we've
already gone through all the steps of these stitches. And then I'll join
you when it's time to put the ice cream
on top of the Cone. Okay, step one, I have
stitched my woven picot, which is the Cone of
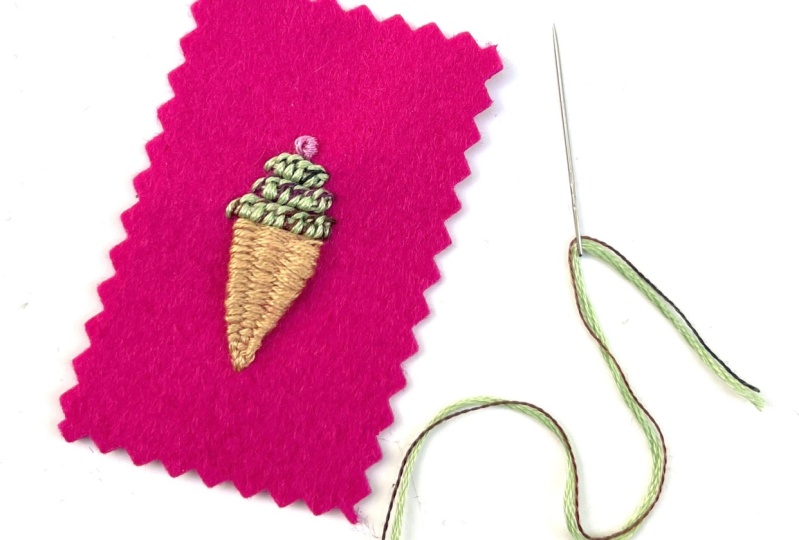
my ice cream cone. Next I want to switch colors. I'm going to stitch the ice cream part of
this in this pale green. Maybe it's mint chocolate
chip or pistachio. Again using six strands
of embroidery thread. The next stitch is the buttonhole
bar, which we learned. And we're gonna do three
buttonhole Bar stitches. And I'll put a picture
up on the screen of a finished ones so you can see this as I'm
talking about it. We're gonna put three stitches, one on top of the other. The first one, we're
going to make just a little bit wider than
the ice cream cone, than the next one will make
just a little bit narrower. And the last one will make even a little bit
narrower than that. So it makes that soft
serve ice cream cone shape that tapers towards the top. So I'm going to start
my first stitch. Again. I like cooking
with this kind of sideways so I'm
stitching away from me. I'm going to bring my thread up right at the top of the Cone. But just slightly to
the outside edge. I want it to look like it's almost dripping over the edge. Okay, And first step of
this one again is to make those two bar stitches
right on top of each other. Okay? And then I'm going
to come up again at this bottom or the left edge before I start doing
the buttonhole stitch. Now, this will be
just a little tricky because you're Cone is a
little bit in the way. So just make sure
when you are sliding underneath this
Bar Stitch to make the button holes that you're not catching any of your
Cone colored thread. So once again, I
will speed up and I will check back with you when we've finished this
first buttonhole bar. Okay, I stitch to the end
of that buttonhole bar. So I'm going to make
a little stitch to the back to finish that off. And then I have enough thread
that I can just stitch my next one without having to
tie it off and start again. So I'm going to start
at the same way, but this time I'm
going to start to the left-hand side of my
first set of stitches. And I'm going to make this one just a little bit narrower. So I'm gonna go in maybe
two stitches worth. And start with my
double bar again. Okay? And you can see it's right next to that first set of stitches. Now I'll bring my thread
back to the front. Once again, do the
buttonhole stitch over top of that
next set of bars. Kf finished the second one. We have one more to go. I'm gonna do it the same
way as the previous one. I'm going to come in
about two stitches width. So it's just a little
bit narrower again. This last one goes fast. It's a very short. Okay, there's the third
row of my ice cream. I'm gonna make the
stitch towards the back. And now I can tie that. Okay, Let's step is to
put the cherry on top. Of course, we're gonna
do that the same way as we practiced with a
double thickness of thread. And I'm making my
mind pink of time. Okay, so I'm doubling
up the thread and tying the two ends together. And I'm going to start this
one right in the center, right on top of that last
buttonhole Bar Stitch. Hey, so I'll bring my thread
from the back to the front. Okay? Making my clockwise loop. Going Under out
through the center, over the left side, tipping down into the fabric. Pull that tight, and then
push the needle through. In the next lesson, I'll talk about some ways to finish off your project so you can make something Fun With
Your Ice Cream Cone
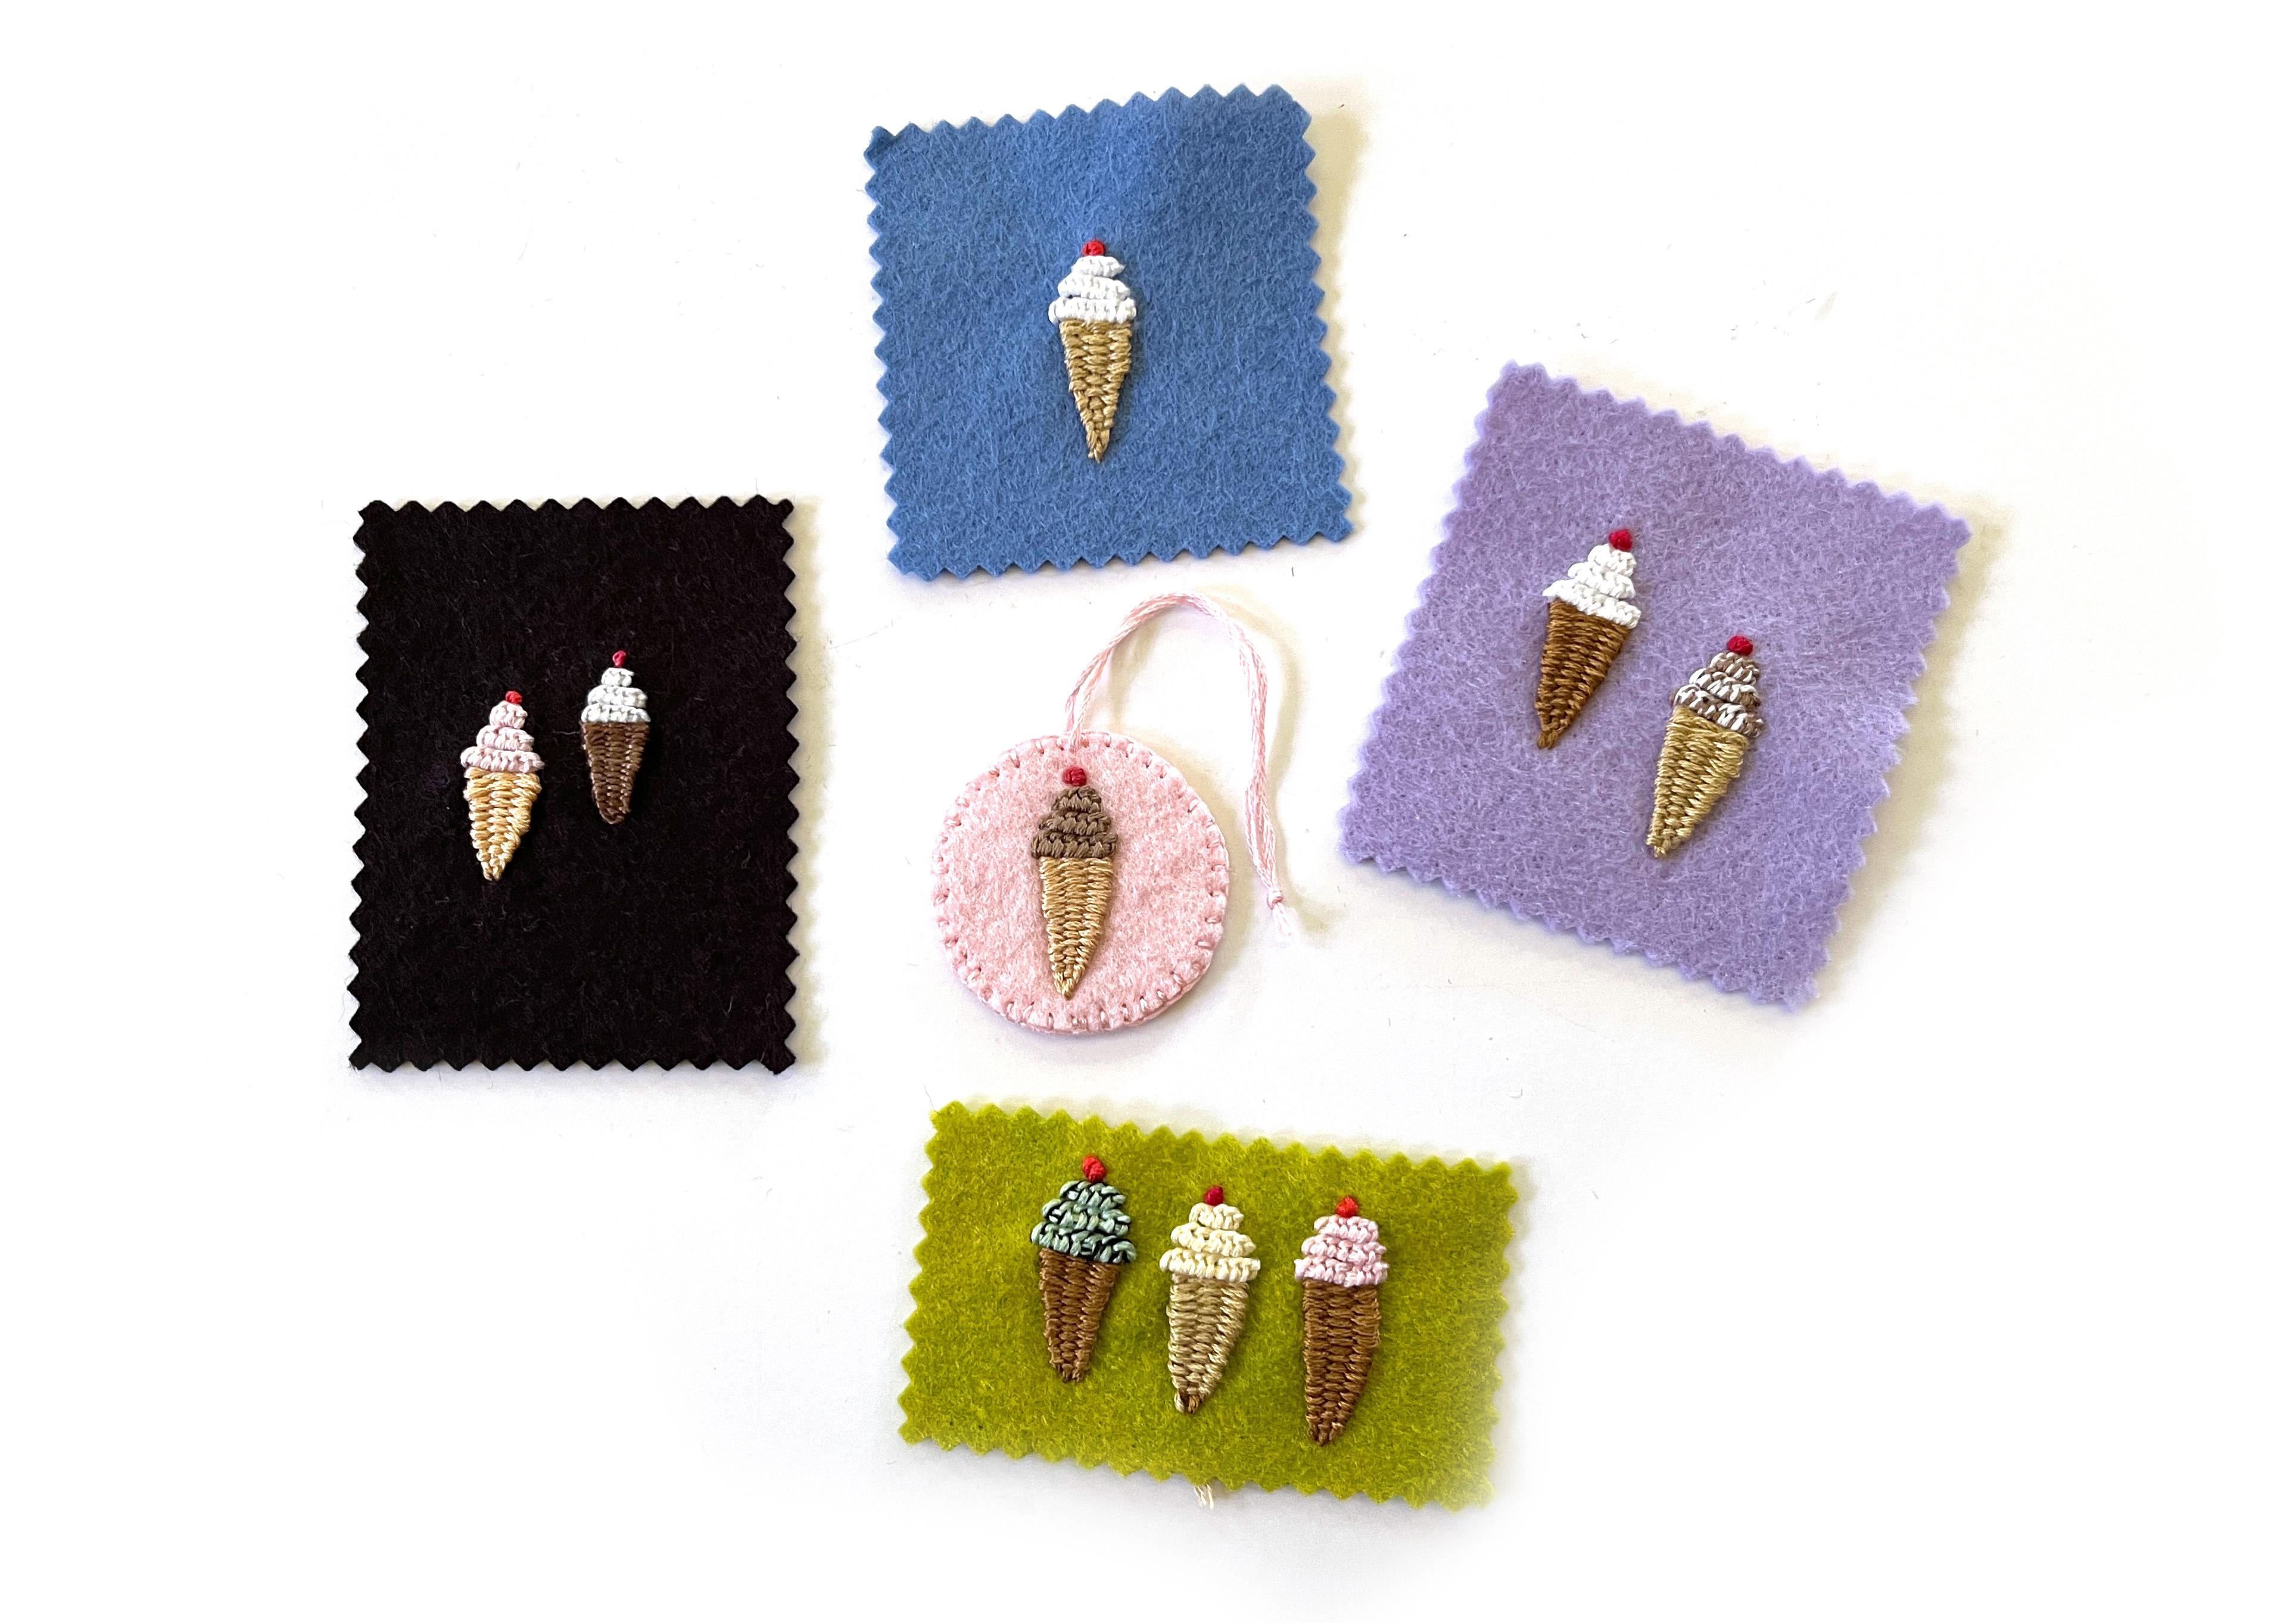
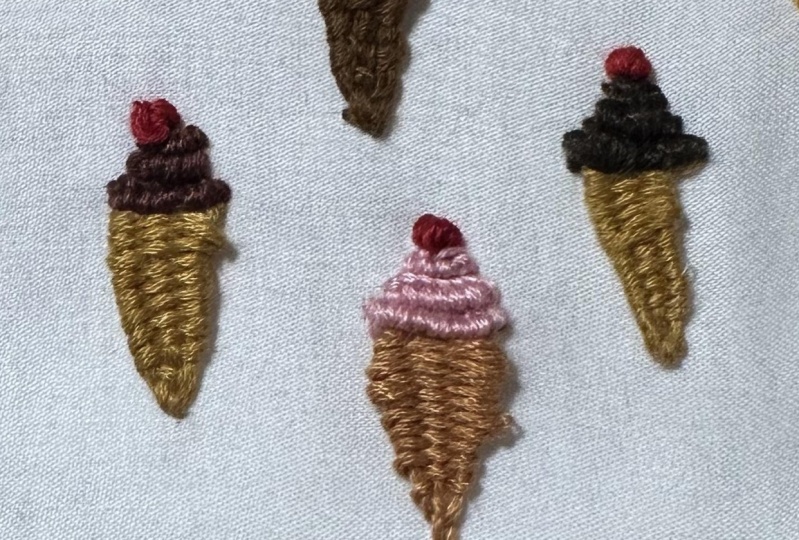
9. Ideas & Tips for Finishing: Okay, last, Let's talk about
finishing up your project. So here are a few things
that I've finished already, and this is the one that we just finished stitching
in the last lesson. So you can look first
at your felt and decide if it looks like it
needs a little touch up, if it's wrinkled or needs
a little bit of pressing. These ones look pretty good. But if you knew need to, you should grab a
terry cloth towel. And you can press your
piece by turning it over so that you are
working from the backside. And then just take a warm iron and you can iron
the backside of it. Now the reason you
use a towel is so that there's a lot
of like airspace in the towel and it
will not flatten your stitches when you take the iron and put it
on the backside. So if you need to
get wrinkles out or just kinda get
everything smoothed out, you can iron from the backside. And then you can decide
how to finish it. So you can make all
kinds of things because your piece
is stitched on felt. And I'll show you
some examples of things that you can
make in some photos. But one thing that I love to do is because these are
ice cream cones. I think they make really
great birthday cards. So these examples,
I cut the edges with a pair of decorative scissors that
are called Thinking shares. So I've got a pair here. They cut zigzag edges, and I have another pair
that cut a scallop. So this is one of my favorite
ways to just add a little, something FUN to your felt. So I can just use these and
trim a little scalloped edge. Okay, so I've got a little
decorative edge now. And then I have just a piece
of colored scrap picking paper like card stock that I'm
just going to make a card. So I'm going to fold it in half. And then my ice cream
can go like so. My favorite way
to finish this is to grab just a
regular glue stick. I'm gonna glue stick it down
to the cover of the card. And that way it will stay
put and not move around. So I'll do that first a
little bit on the backside. And then I like to stitch
this down to the card. I'm going to use one of the
colors that we used before. So I've got a little
bit of pink thread left in my needle. And for this I like to
just use a running stitch. Running stitch you
probably have seen before. This is the one
that just basically goes up, down, up, down. It looks like a dashed line. So I'm going to open up the
card and I'm just going to stitch down through the
paper and the felt. So I'm going to come up through here and I'm just going to make long stitches
through both layers. If you have really
thick card stock, you can use a pin or a push pin to help you kinda punch holes through
it to start with. This one is pretty
thin so my needle goes through pretty easily. Okay. There's my finished card. And if you don't like the Stitching
showing on the inside, you can cover this up with a
piece of decorative paper. So I hope that gives
you a couple of ideas of what to do with
your finished project. Of course, be sure
to post a photo of your project in the
project section below.
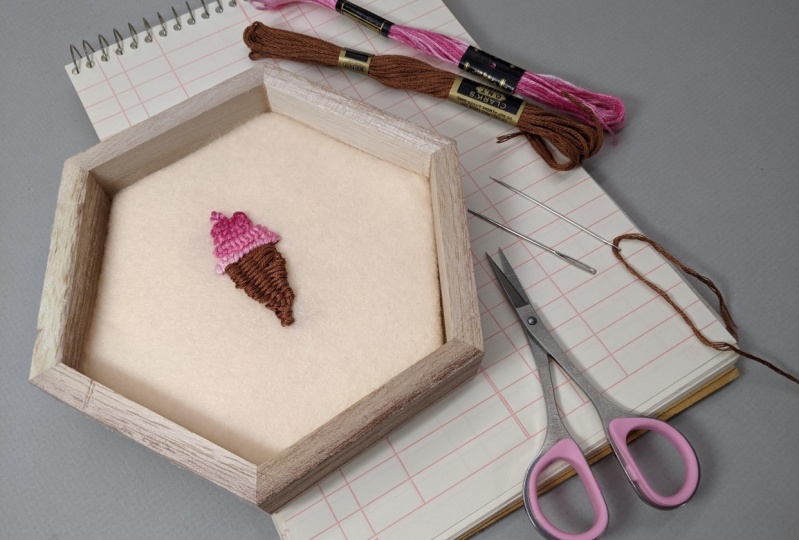
10. Thank You & Wrap Up: The first and most important
thing to say is hurray, you've learned
three new stitches. And thank you for spending
time stitching with me. Remember, you've learned not
just to Stitch Ice Cream, but three different stitches, so you can combine those
and lots of different ways. Here's one example of
those same stitches. To make something
completely different. I'd love to see the creative
ways that you come up with to put the stitches
together and what you make. Be sure to tag me on Instagram
if you post something FUN. If you have question or even a tip you want to
share with other students, be sure to post those in the
class discussion down below. I love to chat with you and I would love to answer
your questions. And finally, if you want
to know more about what I'm thinking of for my
next Skillshare class. Other things I'm teaching what
I've got in my Etsy shop. The next fabric I'm designing, or even just more
pictures of my dogs, Stanley, you can
find all of those at my website, that garan.com. I hope to see you in
another class very soon.
 Becka Rahn, Artist & teacher, paper & fiber art