Transcripts
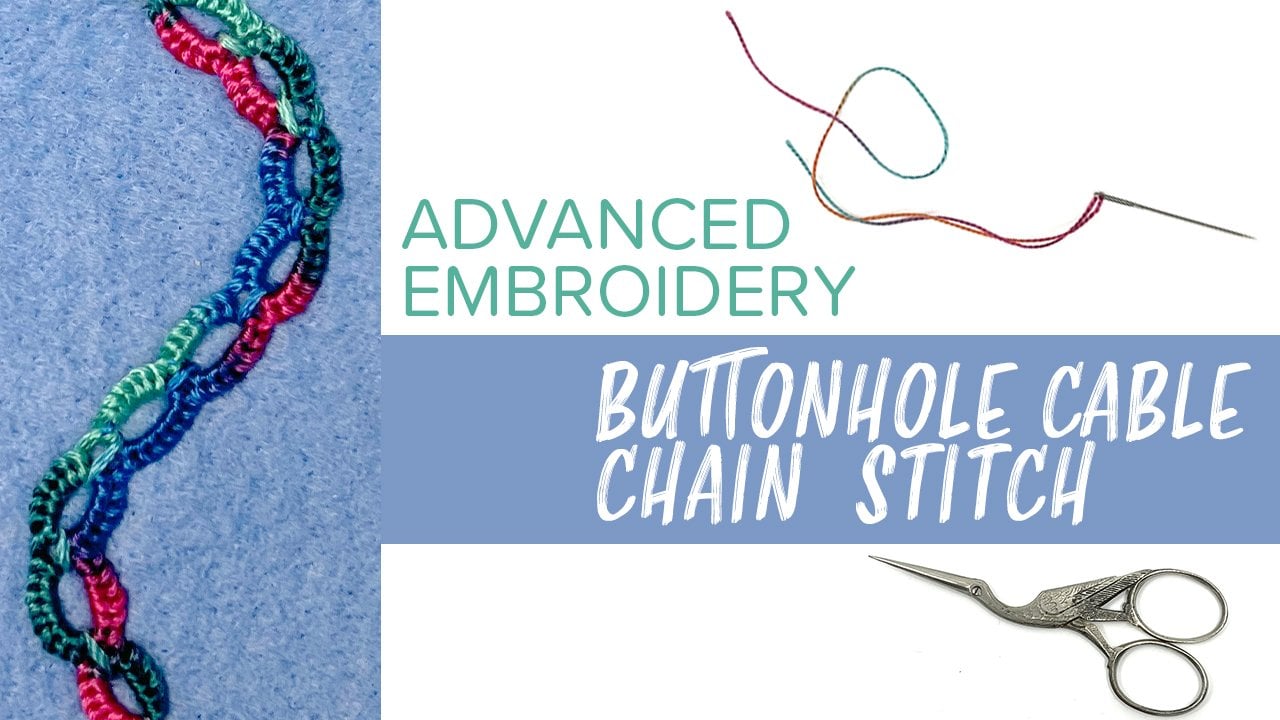
1. Intro: Oyster Stitch: Welcome to Advanced embroidery. In this class, we're going to
focus on the oyster stitch, which is based on some
variations on the chain stitch. My name is Becca Ron. I'm a full time teaching artist, and I use a lot of
embroidery in my work, both on fabric and on paper. Most beginning embroidery
classes give you a sampler of about ten stitches, and you make a bunch of stripes of these different
kind of stitches. In this class, we're going to work a little
bit differently. We're going to focus in on one more complex stitch that builds on those ones you might have learned
in a beginner class. This advanced class
is going to use the same materials that you've used in other
embroidery projects, some thread, some fabric, a needle, and some scissors. But what we're going to do is challenge you a
little bit to do some more complex stitches that have multiple
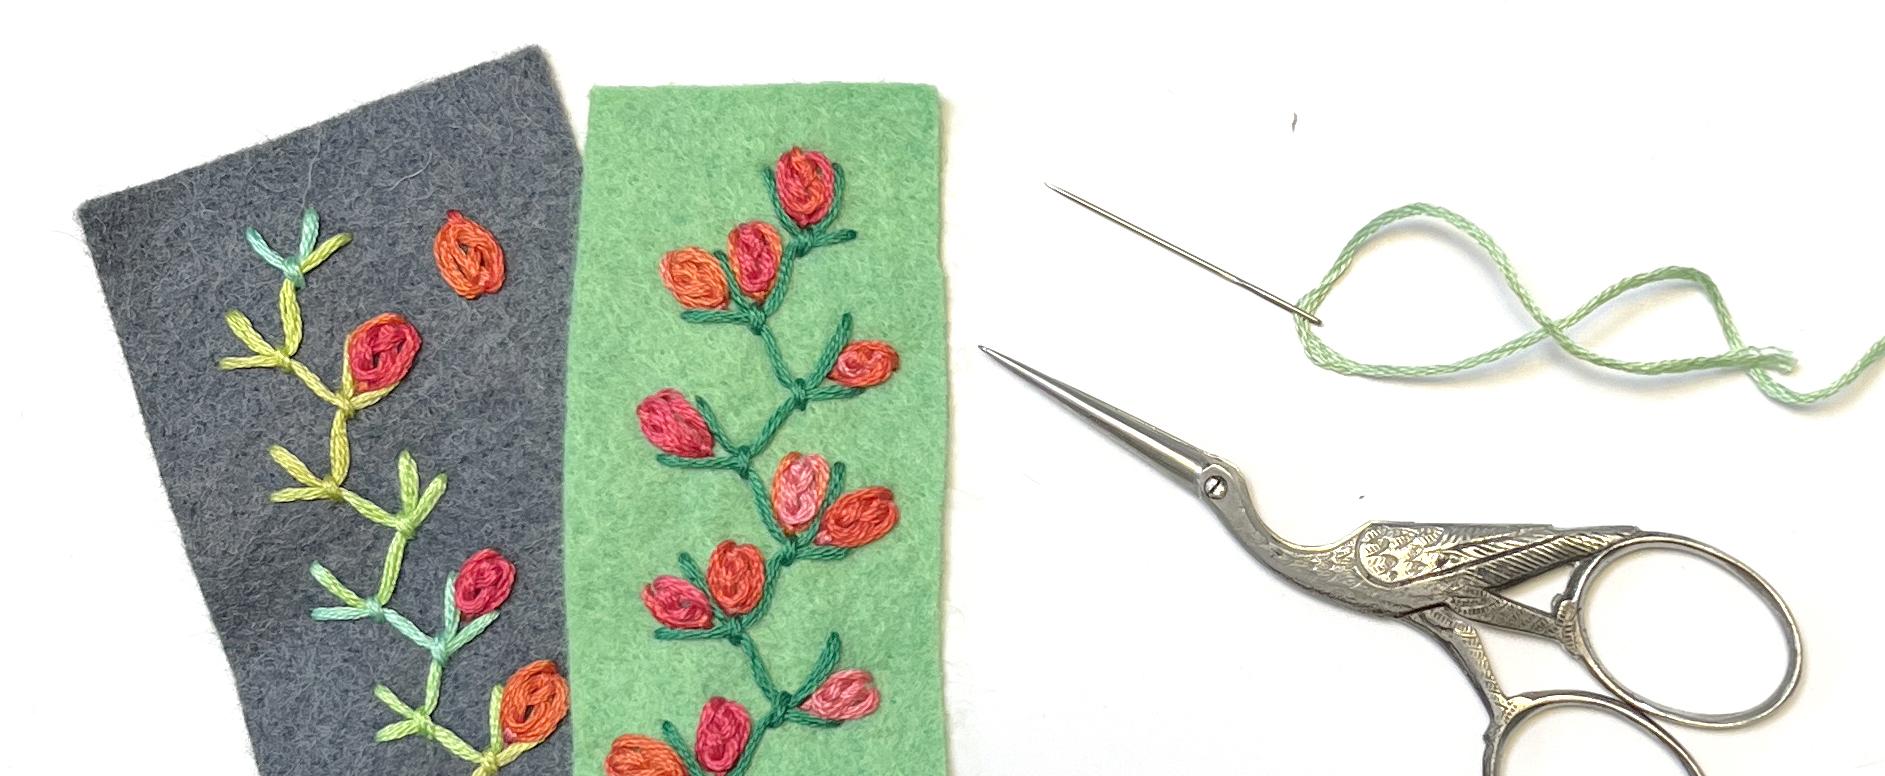
steps to them. Oyster stitch looks like this, and you can use them
individually or you can chain them together
to make kind of a border. So if this looks like fun, then join me in the next
lesson and we'll jump in and get started stitching
some oyster stitches.
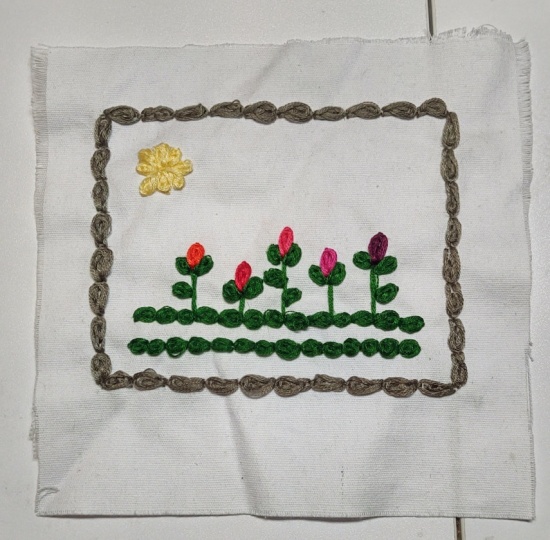
2. Project & Materials: Okay, your project for this class is to
just make a sample. The best way to
learn these kind of more advanced embroidery
stitches is to just practice. And so you need to make
a few of them over and over so that you can really
learn how to stitch works. So you can choose to
stitch on anything. Make just a few stitches. And in fact, these are great examples of the kind
of thing I'm looking for, just enough that you can
practice what you've learned. Next, let's talk
about the materials you'll need to be able
to practice this stitch. So let's start with
the very first tool you're going to
need is a needle. The needle I have here, stuck into a little sample
of linen is a Chanel needle. Chenal needles are my
favorite to stitch with. They have a really large
eye and a nice sharp point. You can find those in the same kind section where you find other kinds of hand
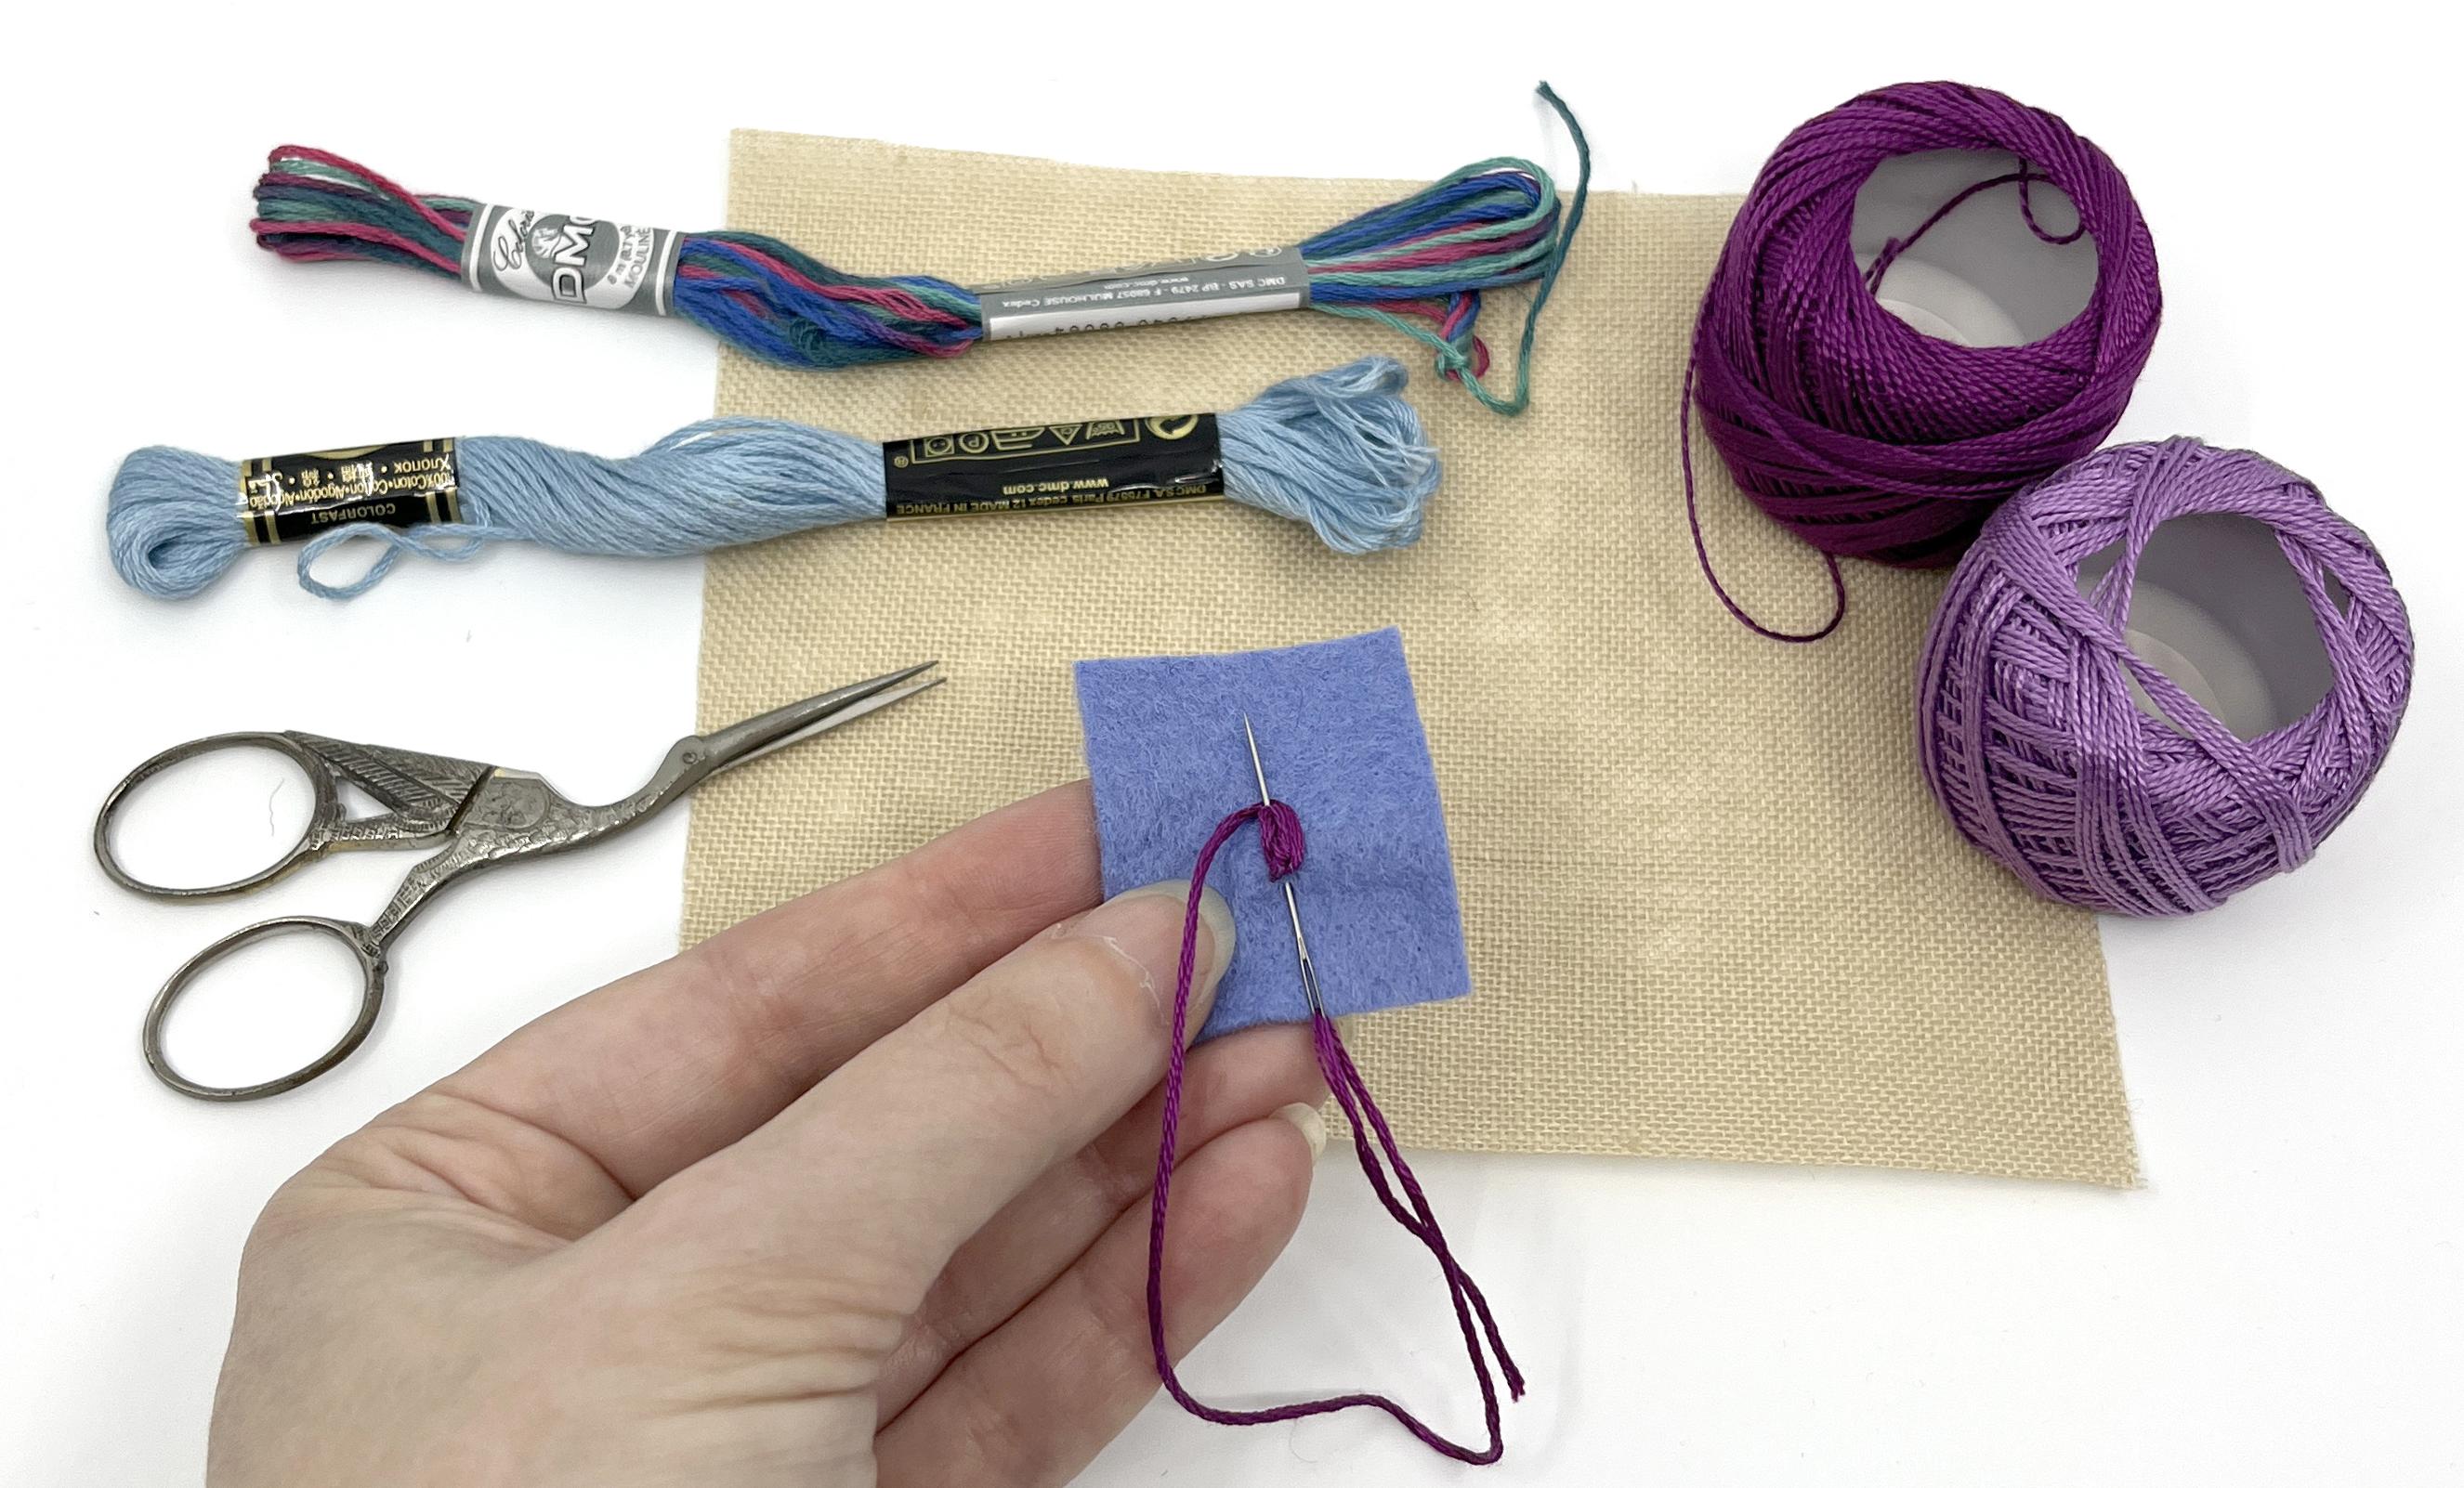
sewing needles in your favorite craft store. So look for a Chanel needle. Then you want to
choose your thread. Now, for oyster stitch, the size of the stitch
really depends on the size of the thread
you're using to make it close up so that it makes this
oyster shell shape. You want a pretty thick thread. So I'm going to
stitch my samples using six stranded
embroidery thread, and you've probably
seen this before, you might even have
some in your sash. I'm going to use all
six strands to stitch the samples that I'm going
to show you during class, and that looks like a couple of the samples
on the sheet here. This one and the
ones in green are stitch with six strands
of embroidery thread. If you want more of a challenge, you can choose from
a whole variety of other kinds of threads
to try your stitches. Here are some other
suggestions for great kinds of thread
that you could use. My very favorite to stitch
with is pearl cotton. This is a size
eight pearl cotton and it comes in larger
sizes than this. You can find size five and
size three pretty easily. It comes in little
balls like this. You can also find
it on these spools. I would say, next challenge I would try was stitching
with pearl cotton. And if you want a
little added bonus after that is to try
a variegated color. This line of stitches here on my example is stitched with
a variegated color thread. You can see the stitch changes color like stitch by stitch, and that's fun to do. Pearl cotton is a great option, and if you want to give yourself even more of a challenge, you can try a novelty thread. The one here with the sparkle, this is called dazzle
that's made by Wonderfil. It's a rayon and metallic. Um, this one is very slippery. Keeping your stitch tension is a little more
challenging with this, but it gives this great
sparkle metallic finish. In my other hand, is a thread
called co vita by DMC, and that's a wool thread. It's like a tapestry wool, and that's also really
fun to stitch with. You can choose from any kind of thread that you
get excited about. Here is a little example. That's the sparkle
thread that these are stitched with in
the center right there. Okay, so we've talked
needle and thread. The last thing you need
is a piece of fabric, and I've got two options here. I'm going to stitch
samples in this class on this kind of
even weave linen. This is like an
embroidery fabric, and I found this in
the same section of the craft store with the
cross stitch fabric. I think this one is a really
fun one to stitch on. I like that it's got
a little bit of body, a little stiffness to
it. That's one option. You also could stitch on
my personal favorite, which is a piece of wool
and rayon blend felt. Now, the advantage
of stitching on felt is that it has a
little bit of thickness, and so it's really hard to
pull your stitches too tight. That means it helps you out
with getting the tension on your stitches and having them turn out nice
and even and smooth. Here are two great options for the kind of fabric to
stitch your samples on. Of course, you can use
whatever you have available. Now, you will
notice I don't have an embroidery hoop
out on my desk here. I don't personally stitch with an embroidery hoop
very often at all. For me, they're uncomfortable
and in the way, so I don't actually like
stitching with them. Now, you're absolutely
welcome to use one if it helps you
with your stitches. But that's the reason I choose these two stiffer
fabrics to work on is that I don't need
the embroidery hoop to be able to hold on
to the fabric for me. So up to you, choose the
one that you like the most. A couple other things that
are helpful, of course, a pair of scissors so that you can cut some pieces of thread. And you might find
valuable a marking pen. This is a friction
pen made by pilot, and this is a heat reactive ink. So I can write on
my linen fabric. Then all I have to
do is heat it up with either an iron
or a hair dryer, and once the heat hits the
ink, it will disappear. For instance, when I did this little sample of this
sunflower shape here, I actually traced
around a penny with a friction marker
like this so I could make a circle to
do my stitches on. It might be great to have
a marking pen if you want to make yourself a line or a shape that you want
to stitch around. That covers all the materials
we need to start stitching. In the next lesson, we're going
to do just a quick review of some basic stitches and then we'll move
on to oyster stitch.
3. Stitching the Oyster Stitch: Most of what I would consider an advanced embroidery stitch are built off of
another kind of stitch. So you might have heard of, you might have tried
before a chain stitch. That's one of the most common
basic embroidery stitches. So Oyster stitch is actually built off of a
twisted chain stitch, a little slip, and then
another chain stitch, which kind of surrounds
the center stitch. So the components
of this stitch, you probably have done before. But what happens is we're going to put all three
parts together and it's going to make this really kind of distinctive
looking stitch. I'm going to put a couple of
still photos really close up up on the screen
so we can talk a little about what oyster
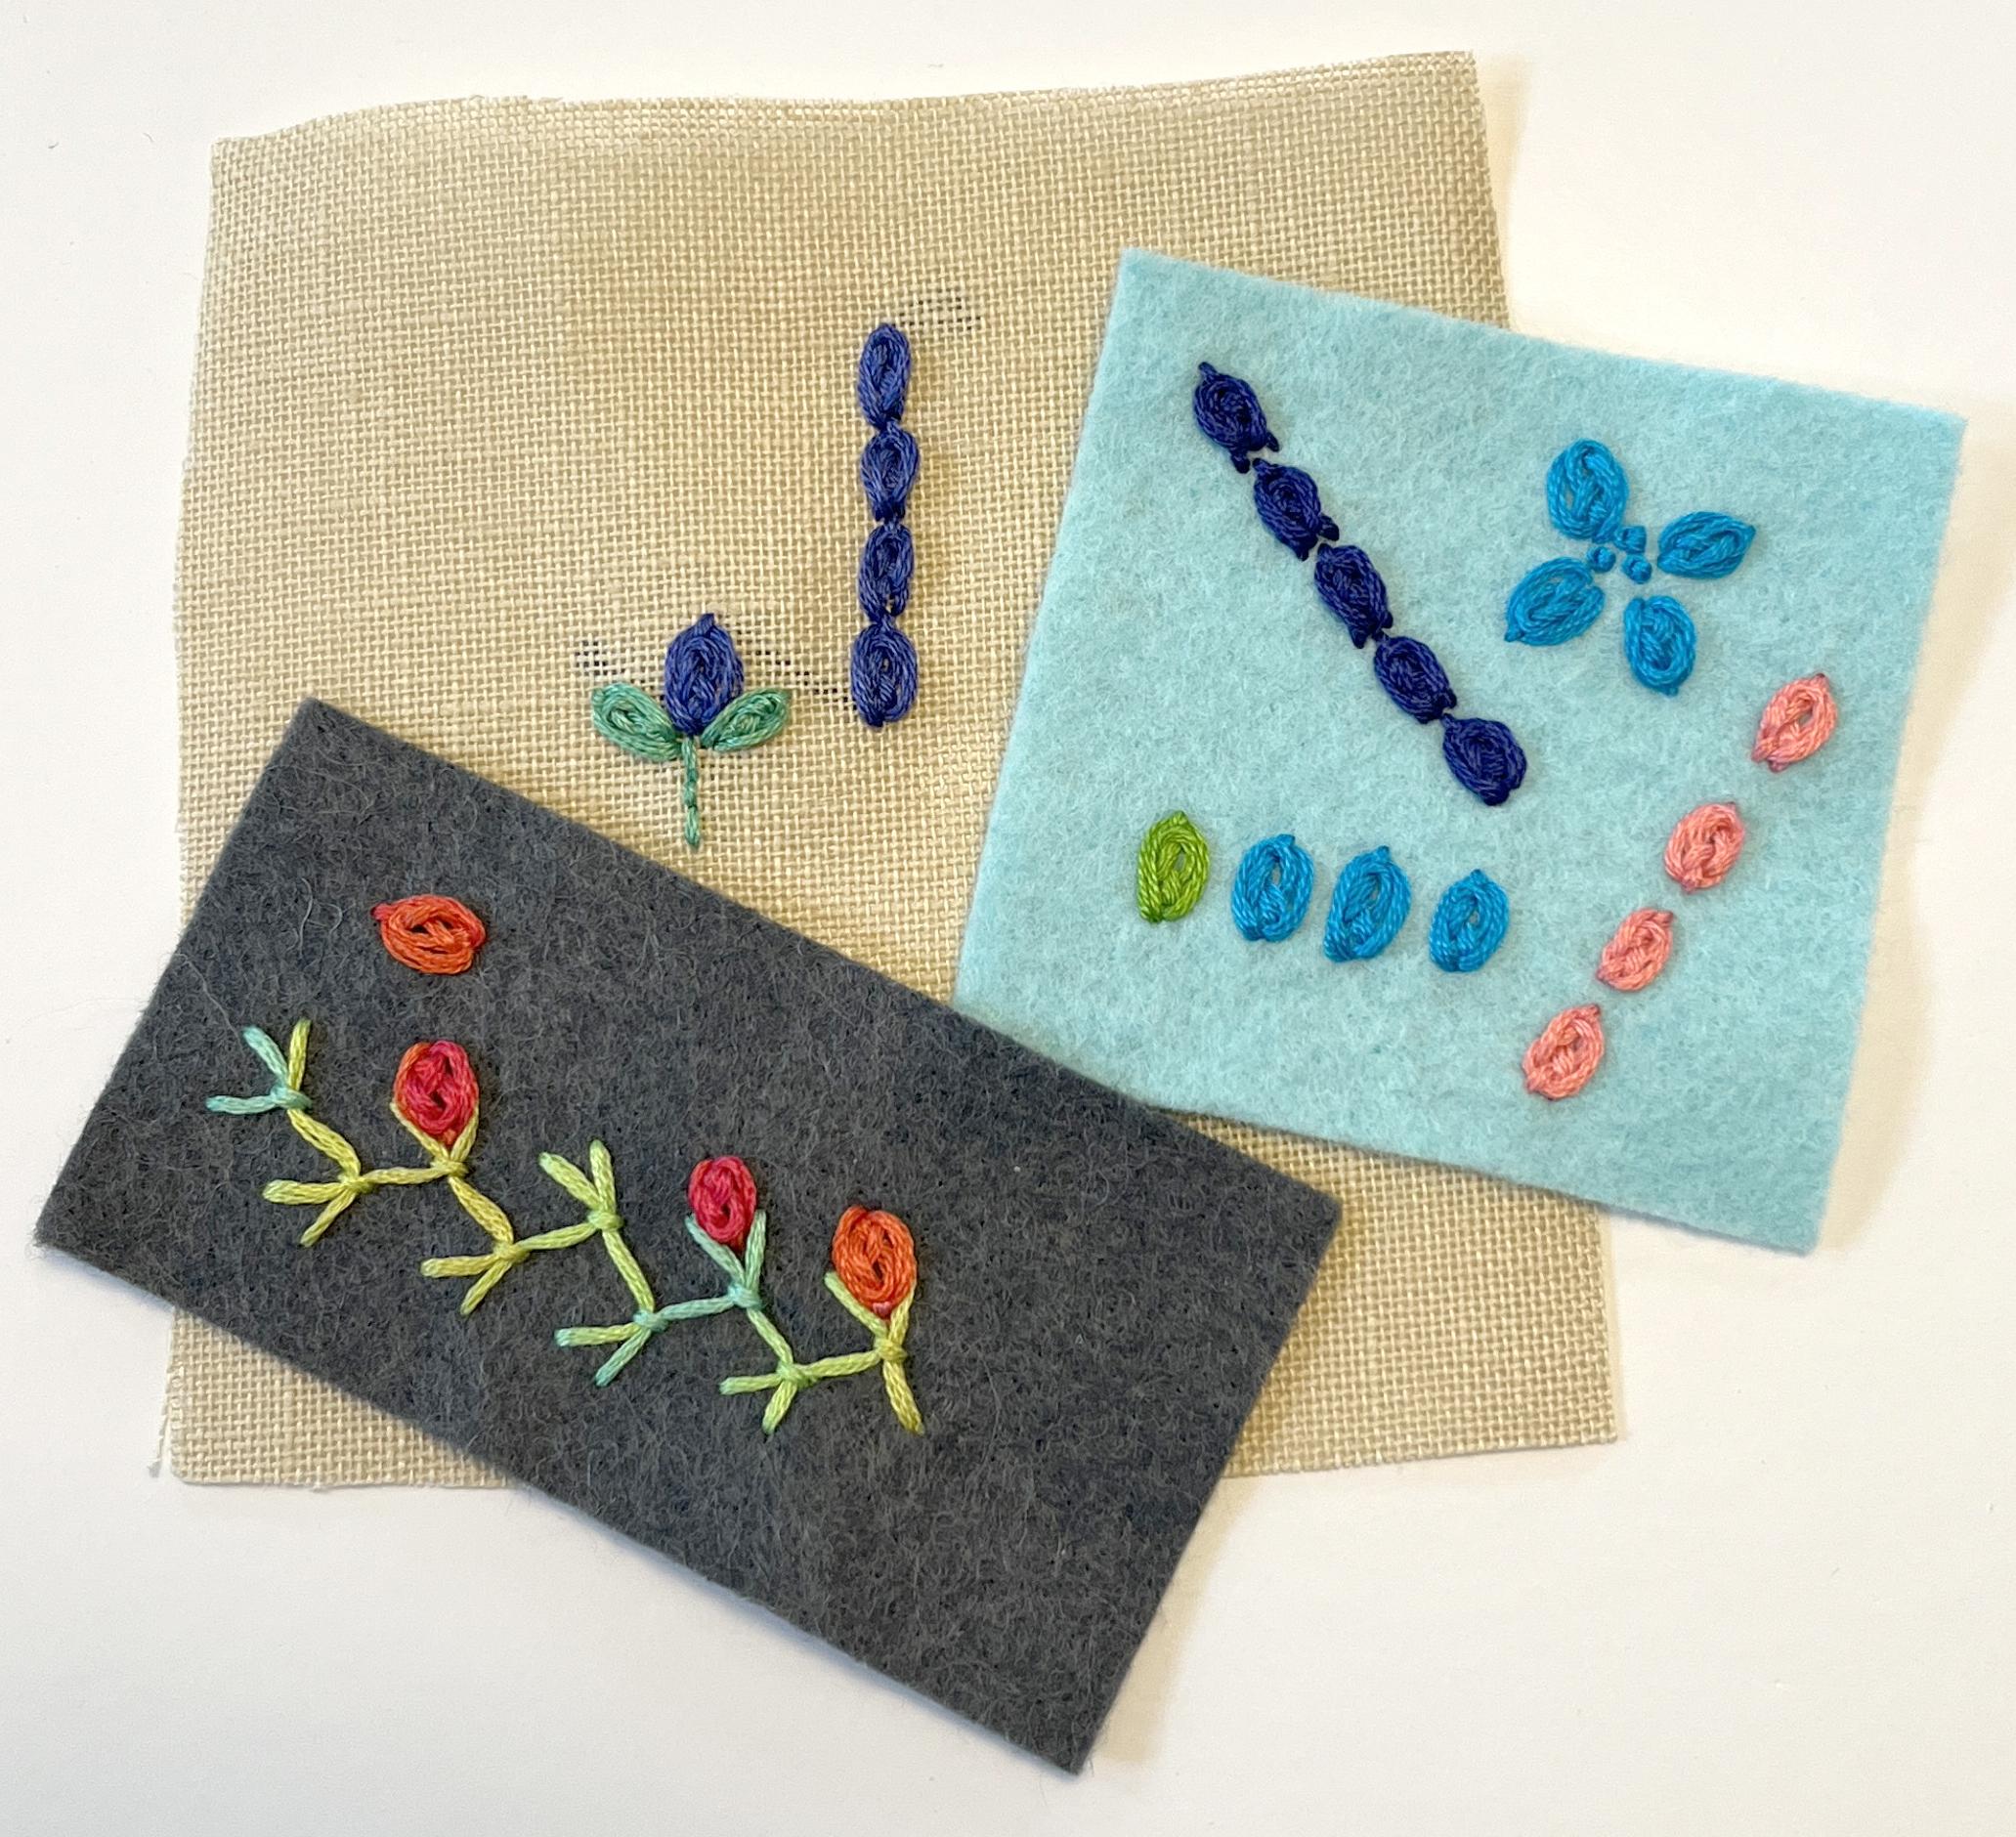
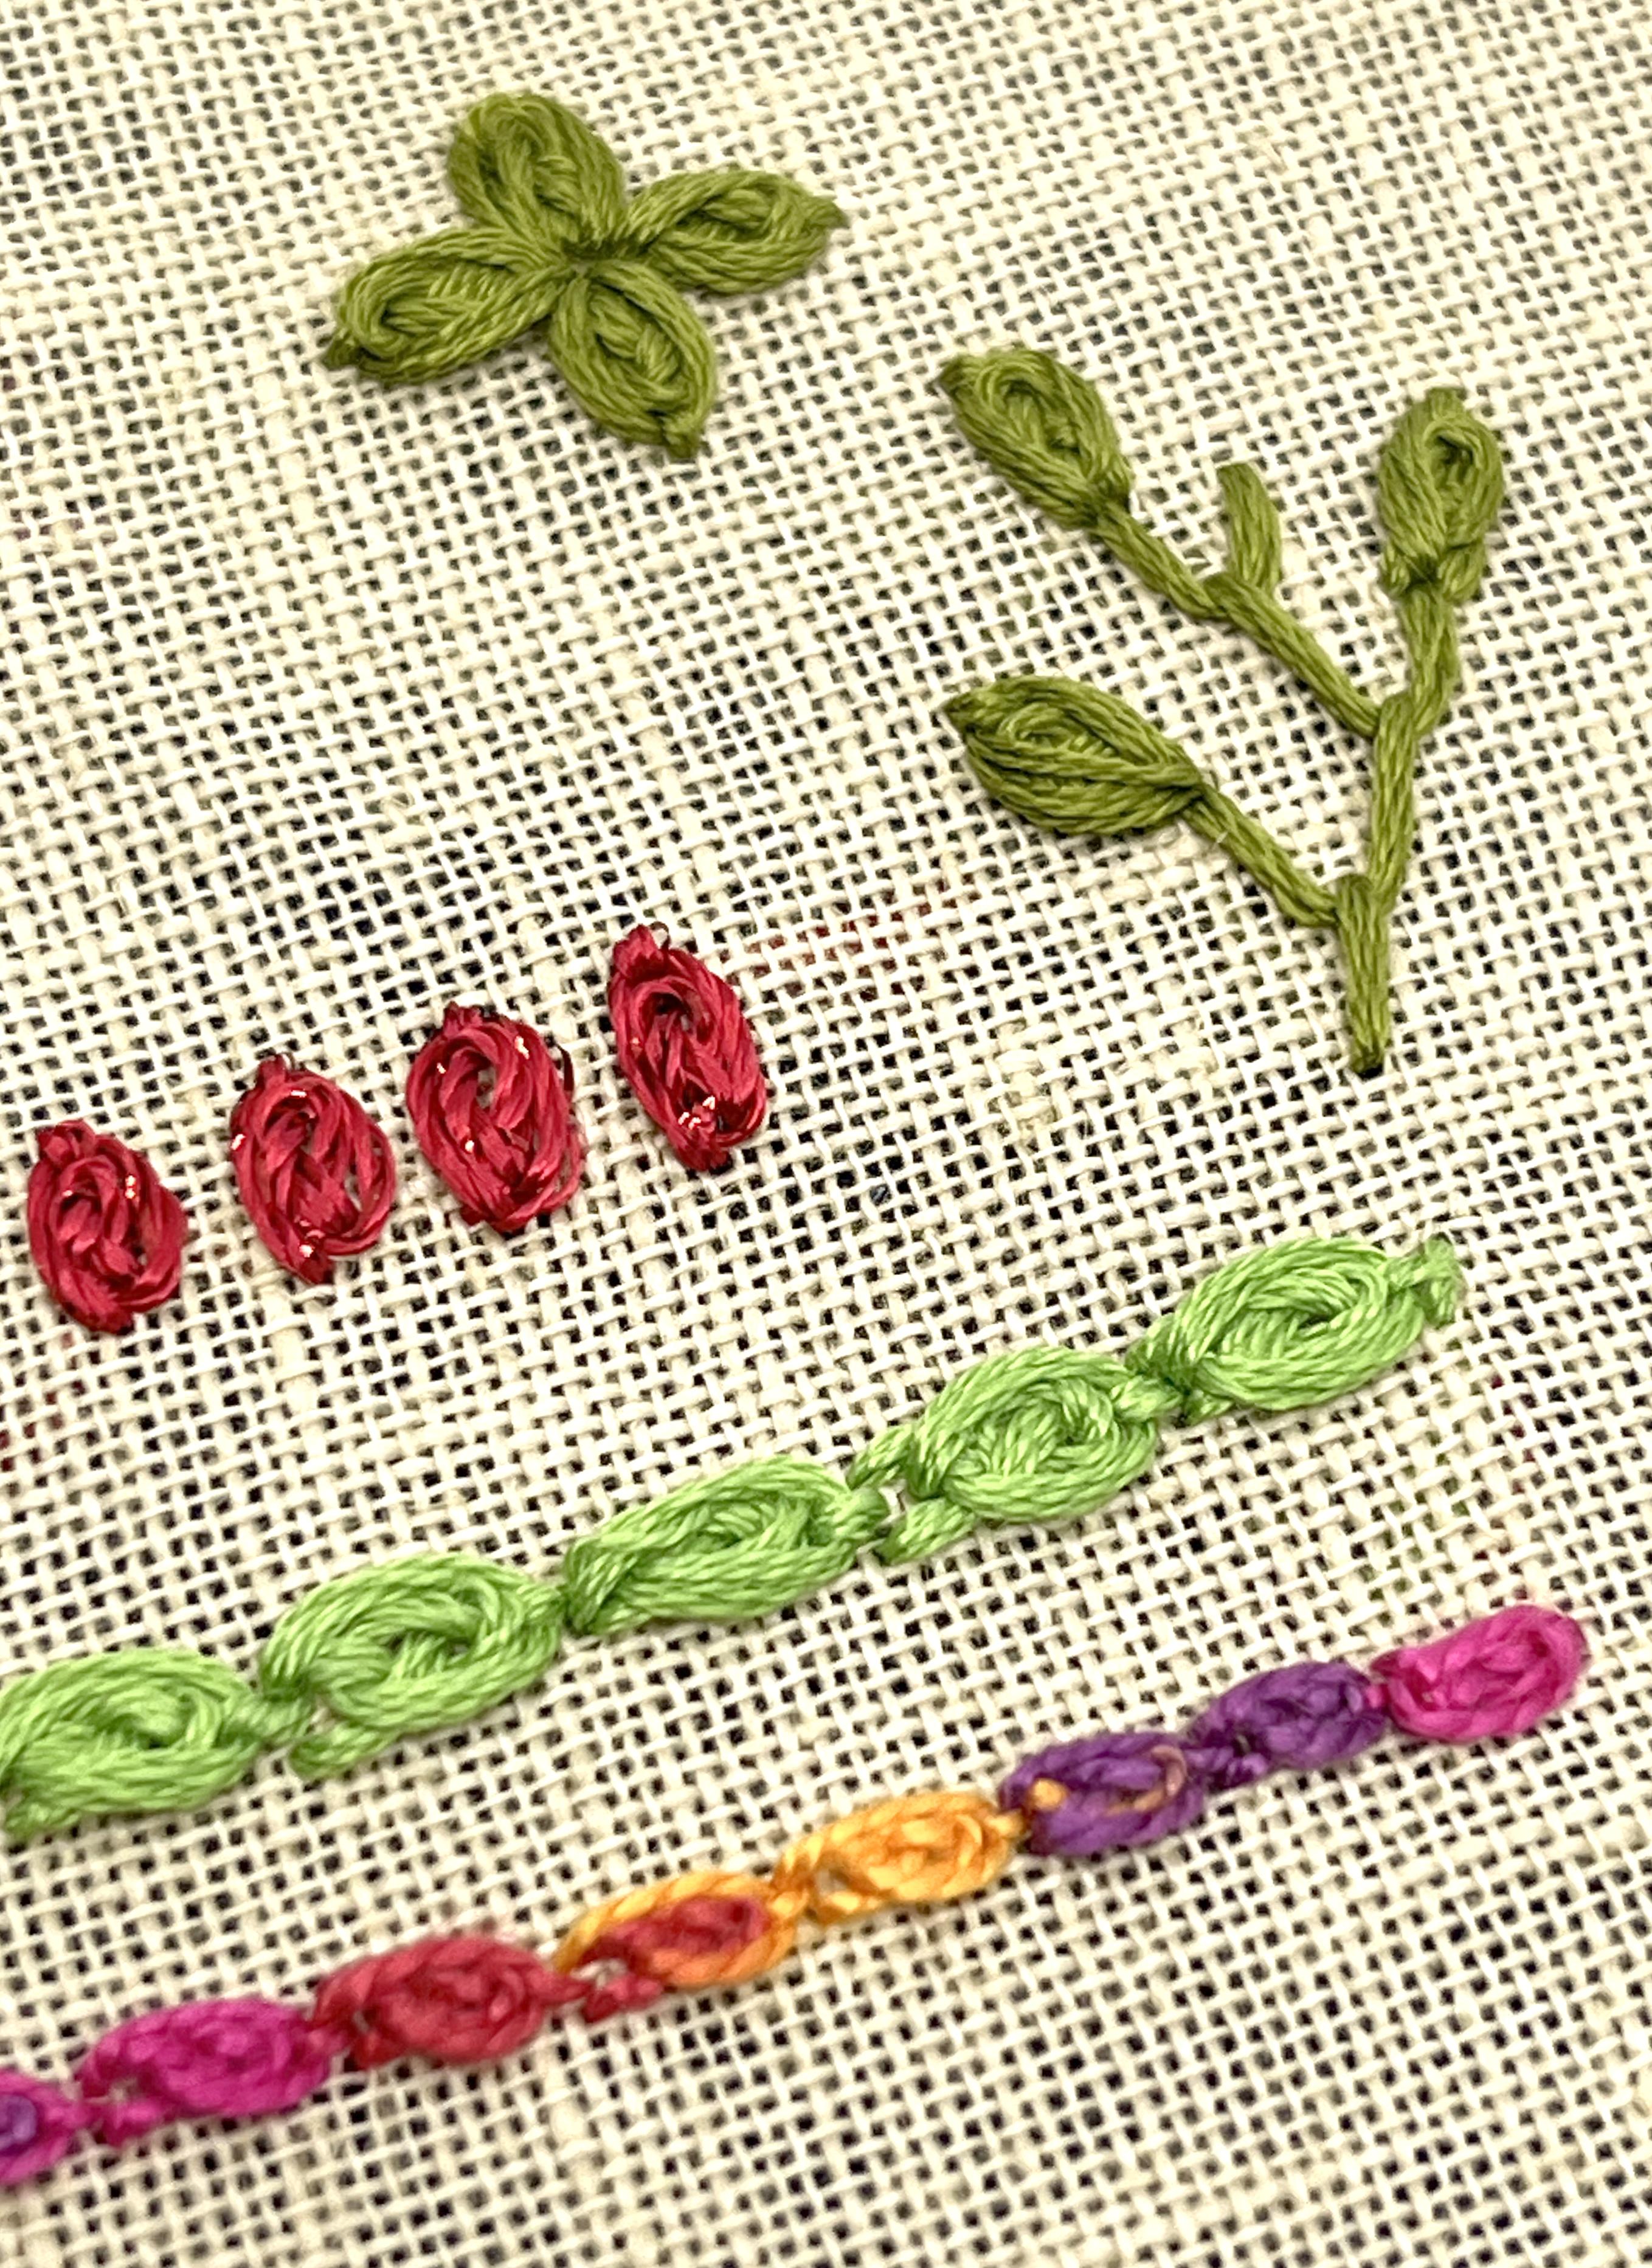
stitch looks like. So Oyster stitch is
an individual stitch, so they make kind of an oval
shape when you stitch them, and you can use
them individually, so they make a shape kind
of like a berry or a bud. If you stitch them in green, they look like leaves. You can also make
some oyster stitches, which kind of meet end to end, and that makes kind of a trim
or a beaded kind of border, and I really love
the way that looks. There are lots of ways
to use these stitches. Now, if you look closely at
the structure of a stitch, there's a lot of
threads that look like they're going all
kinds of places, and they'll make more sense
as we get to stitching this. But the center of an oyster stitch is made
up of a twisted chain. And so we'll do one
twisted chain stitch. We're going to slip the thread underneath one part
of the stitch, so it makes an extra
twist on that inside, and then we're going to surround that whole thing with
another chain stitch. So Oyster stitch
works in three parts. Let's start out
by just reviewing a twisted chain in case you haven't done
one of those in a while. I'm going to move my
examples out of the way, and I'm going to grab
some thread and a needle. I'm going to stitch
this one in blue because I think
you'll be able to see it on camera the very best. For this stitch,
I'm going to use all six strands of the six
stranded embroidery thread, which is a little bit unusual. I don't usually stitch
with a thread this thick. But oyster stitch, I
think looks best if you have a thicker thread that can fill out all of the
parts of the stitch. I've threaded my needle, I'm going to tie a knot
in the other end. Let's just start
off by reviewing how you do a twisted
chain stitch. A good rule of thumb
in this example is that we're going to work on the left
side of the stitch. If you remember one
thing about this stitch, things are always going
to go to the left. First thing, I'm going to
bring my needle up just from the back to the front
of the fabric anywhere, and I'm going to pull it through until it stops at the knot. For a twisted chain stitch, I'm going to put
my needle down on the right side of where
the thread is coming out. My thread is coming
out on the left, I'm going to go down, and then I'm going to bring
my needle tip up. And park the needle right there. I've done a down up stitch. I'll hold this
close to the camera and the space that I've left between the down and up
of that stitch is just about maybe a little shy
of a quarter of an inch. That's about the size that I'm going to make this
oyster stitch. It will turn out a little larger than that when I
finish up my stitch. I've parked the needle there. Then I'm going to grab
my working thread. That's the thread that's
coming out of the fabric, and I'm going to wrap this. If I were doing a
regular chain stitch, I would take my
thread and I would wrap it just around the
back of the needle. That would make a
regular chain stitch. But instead, I want to
make a twisted chain. I have to put a twist in my
thread as I wrap it around. The way to do that is I'm going to take my working thread, I'm going to cross
over the needle. I'm on the other
side, and then I'm going to go back
towards the left. My thread has gone over the needle and then hooks
back towards the left side. I'll do that movement one
more time so you can watch. I'm taking my working thread. I'm crossing over the needle, and then I'm going back to the left side and
hooking it underneath. You can see the thread
that's lying on top of the fabric is now leaning just a little
bit to one side. Once I've done that wrap, I'm going to go ahead and push the needle through and pull And I'm pulling just
until the thread closes up on that piece that's
coming out of the center. If I hold the still
close to the camera, you can see, now we've got a
twist in that chain stitch. You can see the legs
on the bottom of the stitch criss cross
over top of one another. I always think these look
like the ribbons that they make for breast cancer awareness and
that kind of thing. That's the shape of the
stitch that we're making. Is that kind of ribbon shape. Next step, we're going to do a little slip stitch so
that we can get our thread, which is right now now up
at the top of the stitch, we actually want to move the
thread down to the bottom. I want you to look carefully at your twisted chain stitch. I'll hold mine up close again, and the leg of the stitch that's underneath is
on the left hand side. I can see just
like a little tail sticking out on the
left hand side. What I'm going to do is
take my needle and I want to slide my
needle from the top to the bottom underneath
that left leg of the ribbon. I'm going to just
bring this down, and I'm going to show you I'm sliding underneath
the left leg, and I'll hold this close
to the camera again. I'm not going through
the fabric at all. I'm just going underneath
that little left hand tail, and it's the one that's
under the cross underneath. Now, I'm just going
to pull that through. I've not gone
through the fabric, but I'm just slipping a thread. And this, I want to
pull just so that the thread lays down next
to the other stitches. Here we go. It makes this beautiful braided section
right in the center. I'm just laying it down, so I'm not pulling
anything too tight, it's not scrunching up just so the thread lays down next
to the twisted chain. Now my thread is coming out
of the bottom of the stitch. That was step two
of moister stitch. Step three, we're going to
make another chain stitch. But this one's
going to go around the whole outside of this little braided
center that we created. I'm going to take my needle, I'm going to put it down right
at the base of the stitch, right underneath everything,
and I'm going to bring the needle tip up
right at the top edge. Once again, I'll
hold that close. My needles going down
right at the bottom and up right at the top of that little braided
center section. We park the needle
there one more time so that I can grab
my working thread, the one that's coming
out of the fabric again. I'm going to wrap this one going counterclockwise,
towards the left. Remember I said we'd
remember the left. I want it to wrap a going to my left hand underneath
the tip of the needle. Then I'm going to push the
needle all the way through. One more time, we're going
to pull the sloop just until it cozies up right around the outside
edge of the stitch. I don't want to pull it so tight that it slips underneath. I just want it to cozy up
around that braided twist. That's a chain stitch going
around the outside edge. If you've done chain stitch before to finish
off a chain stitch, we're just going to take
the working thread and make a tiny little stitch right
to the outside edge. I'm just going to go
right at the top, right where it's
already coming out, and I'm going to the outside
of that laps thread. We just lay down, and that's going to be like a
little tack down stitch, that's going to hold
that outside loop. I just pull that one tight. There is one oyster stitch. We're going to do one more slow. I'm going to start one
more. I'm just going to move over a little
bit on my fabric. I'm going to bring my needle up. That's going to be the
base of my stitch. First, we're going to
do a twisted chain. I'm bringing my needle down right next to
where it's coming up, and needle tip comes up about
a quarter of an inch away. I'm parking the needle there. First twisted chain, my working thread
crosses over the needle, and then loops around
towards my left hand. Then I push the
needle through and pull that just till it rests
on the top of the fabric. That was step one. Step two is our little half slip stitch. We're going to slip underneath the left hand tail of our twisted chain
just through the end. I'm going to pull that through and just lay that loop down on the left
side of the stitch. Makes a little tiny
section of braid. Then our final chain stitch, which wraps around
the outside edge, I'm going to go down at
the base of the stitch, bring my needle tip up right
at the top of the stitch. My working thread,
I'm again wrapping the thread towards my left
hand, counterclockwise around. And then I'm going to
push the needle and pull that just until that loop
closes up around the stitch. And then one more
stitch to the outside. And there is your
completed oyster stitch. Feel free to go back and replay that video so that
you can work through the stitches as many times as you need so that you can
get a little practice. In the next lesson,
I'll show you a little bit how to combine
oyster stitches with other things and give you some ideas of how you
could use these stitches.
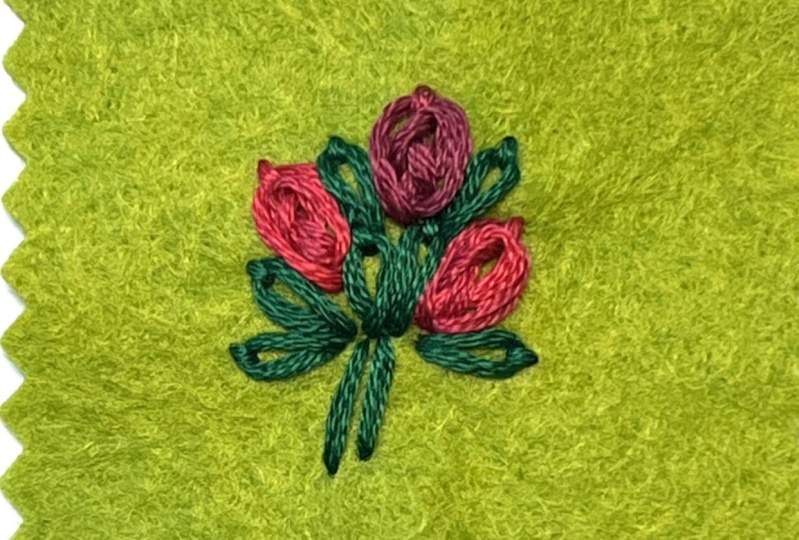
4. Variations on the Stitch: Okay, to practice,
we were stitching some individual oyster stitches. Now, one of my favorite
ways to use this stitch is actually to put oyster
stitches sort of end to end. And that makes this
kind of beaded border. That you can see an
example here in green and then another one in
a variegated thread. I love this look, all
you have to do for that is stitch some oyster stitches so they go one on
top of the other. I've got one stitch here that
we did in the last lesson. I'm going to put the next stitch just right on top of this one. When I bring my needle
up to start the stitch, I'm going to bring it up just to the left hand side of
that little tack down stitch that we did and right at the very top of the last
stitch we stitched. That's where I'm going
to start my next one. And I complete the oyster stitch then exactly the same way. I'm going to go down and up. I'm going to do a twisted
chain and pull through. I'm going to slip
underneath that left leg, you got to be a little
careful because there's another stitch
right in the way there. Pull that one down just
so it sits next to it. Do and up at the top and
bottom of the stitch. Wrap around. Pull through. There is a second oyster stitch. Helping create a chain, and I might have actually pulled that last chain stitch
just a little too tight. There we go. Fixed. There is another oyster stitch stacked up on top
of my first one. I finish the second
one the same way by making a little tiny
stitch, the outside. Then to continue that
little beaded border, we just do the same
thing we did before. I come up just to
the left hand side and I continue my
oyster stitches. That's how you can do a chain of oyster stitches
one after the other. Now, there's lots
of other ways to stitch them. On this example. Here I stitch them all starting kind of going
around a circle, and that makes this kind of
cool sunflower looking thing, and then you could
fill in the center of this with other
kinds of stitches. On this example here, I did a little bit
of feather stitch and then put oyster
stitches right at the end of the
little feathers, and so you get kind of a
leafy branch looking there. Here I stitched
four of them that all started right in
the center point, so you get a little like flower, little starburst kind of shape. Here are a couple of
other examples of oyster stitches stitched on another kind of
branching stitch. So you can use these
lots of different ways. So that is it for oyster stitch. I wanted to keep
this class really focused in on doing
these advanced stitches. But then you can use them in all kinds of
different ways for your own projects and kind of incorporate them with all the other stitches
that you know.
5. Wrap Up: So don't forget, your
project is to make a sample. So try out oyster stitch with some other
stitches you know, try making a little oyster chain or even like a little flour. I made with three different
oyster stitches here. So do something creative, take a great close up photo and post that in the project
section for this class. We'd all love to
see how you've used oyster stitch to make
some really cool designs. So, I have a regular embroidery
group that gets together, and they have a real
love hate relationship with the oyster stitch. It's become kind of a joke. I hope you are one of the
people that love this stitch, and you had a good time making your sample and happy stitching.
 Becka Rahn, Artist & teacher, paper & fiber art