Transcripts
1. Intro: Finding a way to
reuse elements in your illustrations
is a great way to create a consistent
style in your work. That's why I put together
a class to help you create your own stamp brushes and use them in your illustrations
in procreating. The great thing about
stamp brushes is that you can use these in
your designs over and over again and it allows
you to literally put your stamp on your designs
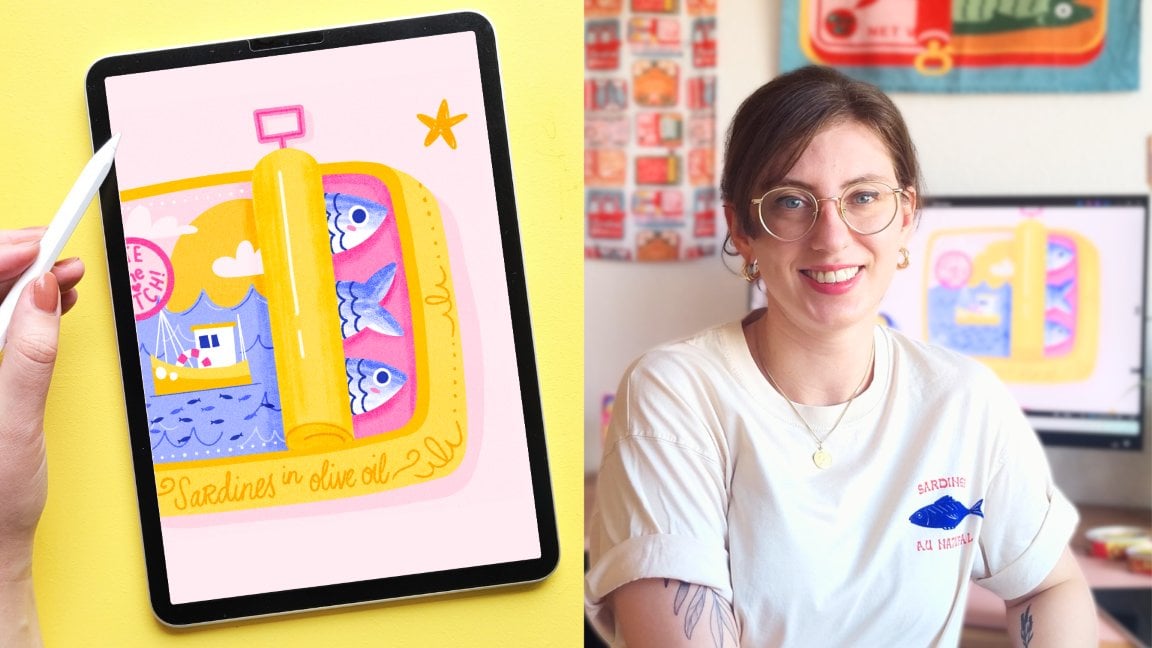
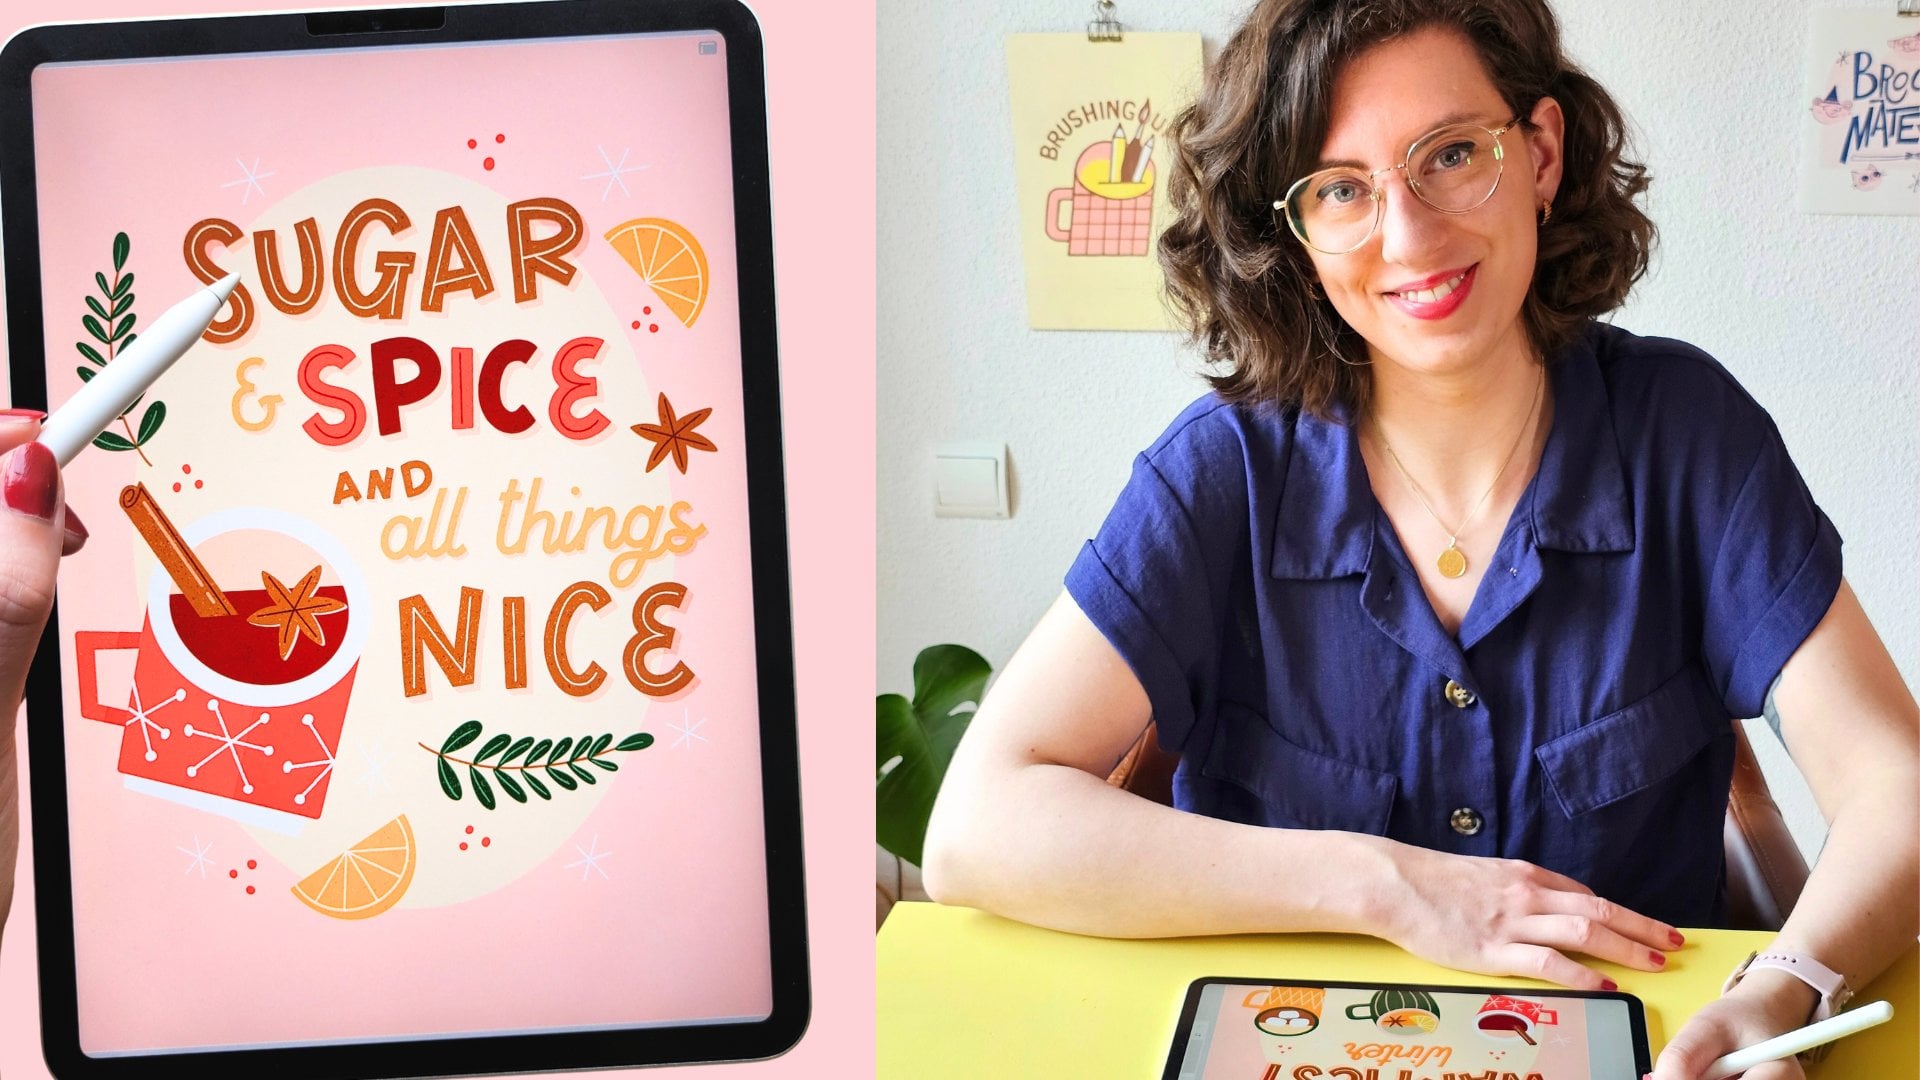
with your own style. Hi, my name is Claire. I'm a lettering artist
and illustrator. I love creating by
hand and in procreate, which is why I work on
greeting card designs, menu designs, and more. I often make a lot
of sketches all at once for a series
that I'm working on or thumbnail sketches for a larger project and I reuse
a lot of the same elements. By keeping these saved
as stem brushes, I don't have to redraw
them every single time, and it really helps me speed
up my drawing process. Making your own library of stems helps you to
save that time and effort so you can focus on building up your own
style in Procreate. Firstly, I'm going
to show you how the Brush studio and
Procreate works. We're then going to create our own Sam Brush collection while working on a still
life illustration. A still life is a great way to practice adding
smaller elements to your work because we can simplify objects
into simple shapes. By the end of the class, you'll have your own Stem
Brush collection ready to use in your own illustrations
or to share with the world. The only thing you'll
need is an iPad, an Apple pencil, and procreate.
So let's get started.
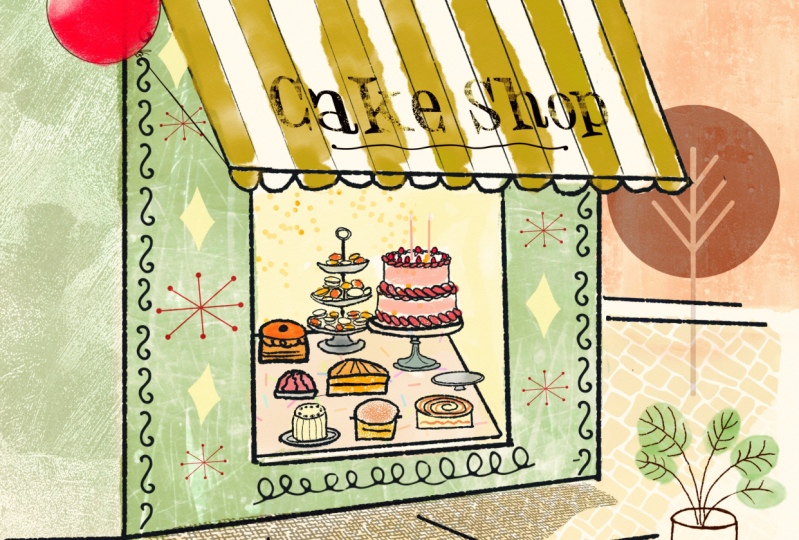
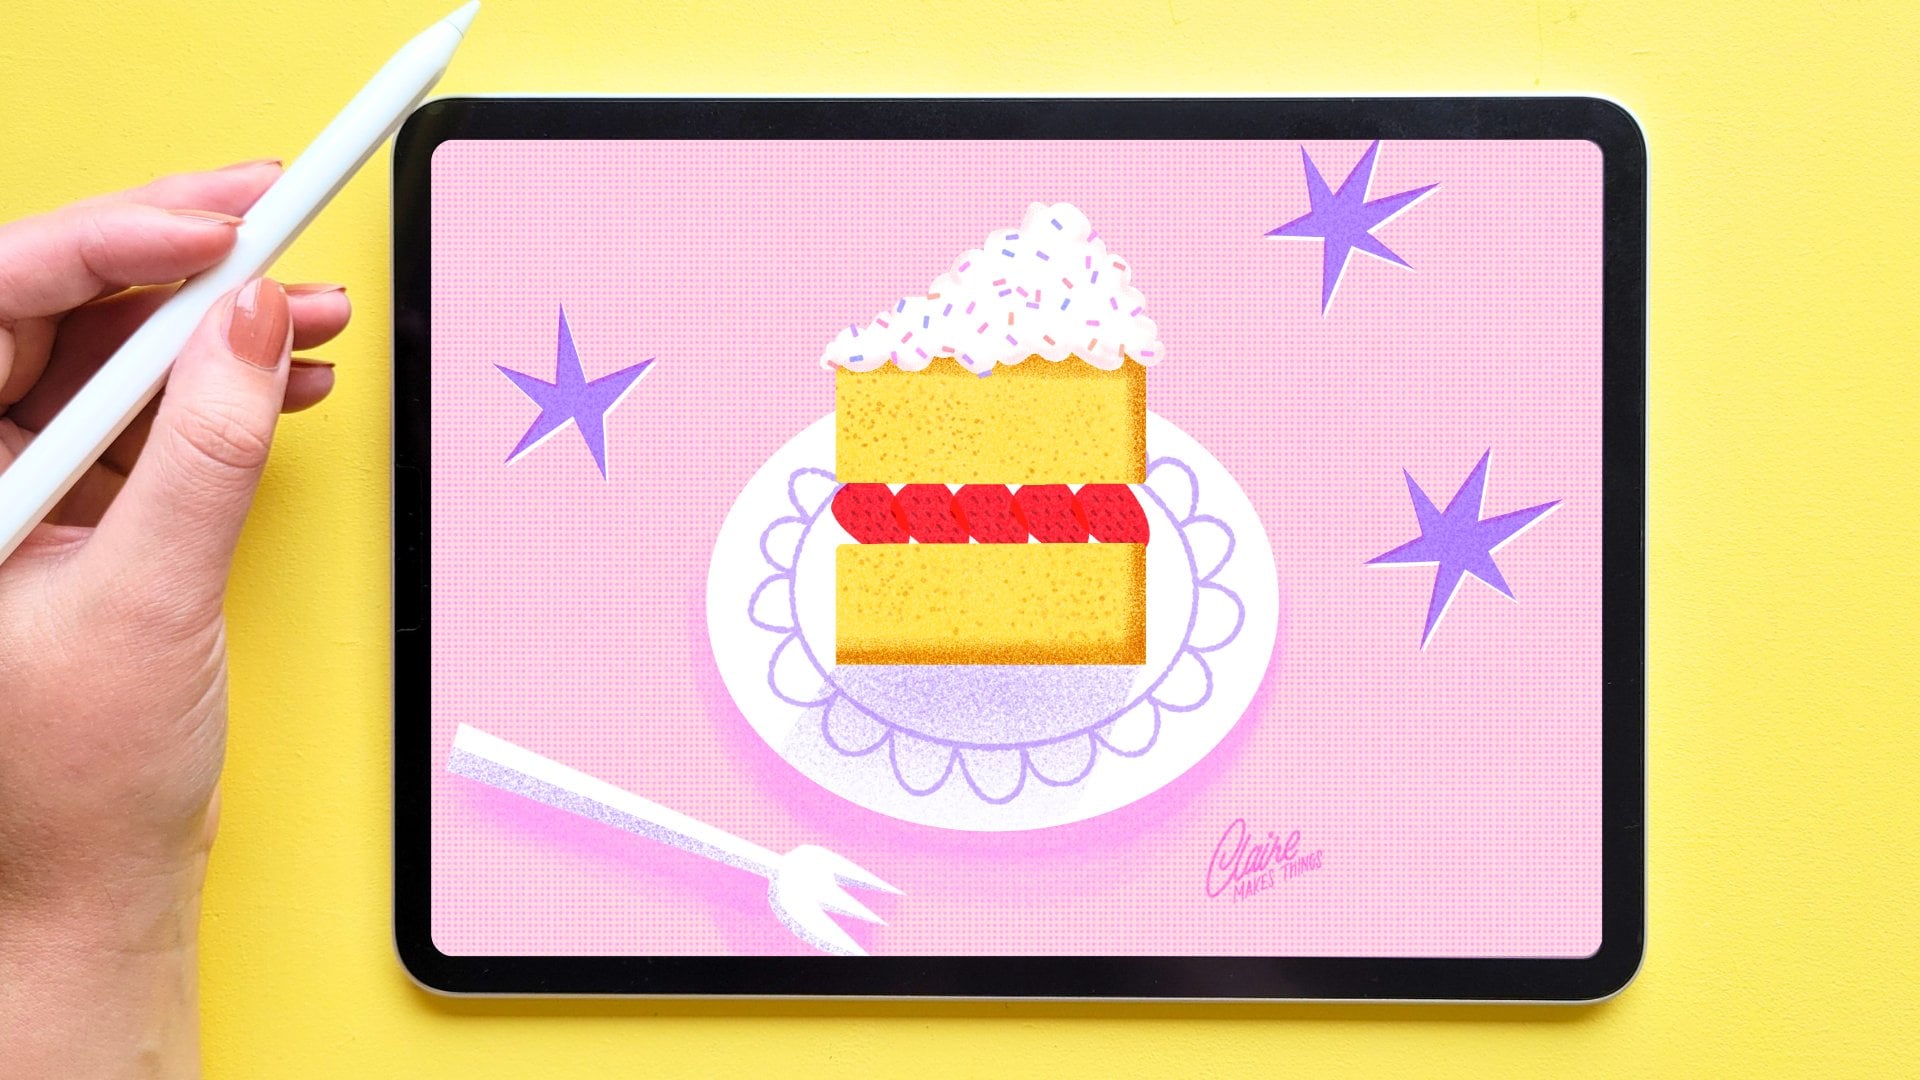
2. Customising Stamp Brushes: [MUSIC] Before we get started, I want to show you an
example of a still life I made and how I use stamp
brushes in this one. As you can see in
the background, there's this little pattern
that I've repeated. That's actually a stamp
brush that I use sometimes. I repeated that same
element inside the cake as well and inside those
tea cups as decoration. Basically by repeating
these elements and using them as a stamp brush, I didn't need to draw
them over and over again. It was really fun to
be able to create some consistency by
reusing those elements. Actually those sprinkles
on the cake are also a stamp brush and the streamers
on the table as well. You can save all of these stamps and change the
attributes of them. So, let me show you
what they look like. I keep this tab with lots of
different stamps that I use. You can see you can make them as complicated or as
simple as you want. They're just individual
pieces that you can use. To make a new brush,
you can either tap on the plus sign or go
to an existing brush. Let me show you this one. You go straight to shape, as you can see on the side menu. This for stamp brushes
is the most important because what you start with
is a shape that you make, you paste it inside this menu and then you give a
different attributes to change it around. You can see that this is just an individual
shape basically. The difference between
a normal brush and a stamp brush is
that line that you make. A line would be continuous and this one is made up of
different individual pieces. You can see that better
when you go to spacing. You can see once we take that
spacing all the way down, this will just turn into a line. But because we
changed the spacing, you can see all these
individual elements. [MUSIC] One of those attributes or rules that we set
for our brushes can be changing the
direction slightly. As you can see every time I tap, the shape changes
direction just a tiny bit. We can change that
by using scatter. Then every time I tap, the stamp will just look
slightly different. Now we'll just make it a
little bit more natural. With all these
tabs on the sides, you can change the color, you can change the size, there's lots of
things you can do. I'm going to show
you a couple of different stamps that you can make and how you can use
all of these settings. As I mentioned before, we're going to start
with this shape. That means you can basically put anything you
want inside this. You can make templates, grids, full illustrations that
you want to reuse, or just really simple shapes. [MUSIC]
3. Resources & Getting Started: [MUSIC] Before we
set up our Canvas, let me show you how you
can import the resources. Make sure that you
download them on your iPad and then we'll go to
the downloads folder. Either to downloads or to your browser folder and
they should be there. Firstly, there's
a Procreate file. This is the right size for
making our stamp brushes. It also has a
couple of templates inside of still-life
illustrations that you can use. If you want to use that just tap and it will be imported
into Procreate. Next, we've got a brush sets
as well and if you tap this, it will automatically
be added to your brushes in Procreate. Lastly, I'm also using
a small color palette. If you want to use the same one, just tap that and you'll find it back in the
color palettes. If you're not using this file, let's make a Canvas
from scratch. Go to the top right, plus sign and plus again. We need to make sure
our Canvas is big enough and it needs
to be a square. Four thousand by four thousand
pixels should be enough. It's really important
here to use a big size because this will be the maximum size for
our stamp brushes. You really want to
make sure that's big enough so you can use these in bigger works
like maybe prints, if you want to print something, make sure it's big enough. You can always make
the Canvas smaller, but you cannot blow it up later. Those are the right settings. Here in the brushes, you'll see the brush side is there and then in
the color palettes, it'll be added to the bottom. I'm just going to move
this up for easier access. [MUSIC] I really like to use a drawing guide. I'm turning that on and I'm editing it just
to make it a bit bigger [MUSIC] For both the stamp
brushes and a still life, I'm just going to
stick to one brush. You'll find that in inking
and it's called dry ink. I really like this brush because
it has a bit of texture. You can see that when you
zoom in, it's really nice. However, because we're using
quite a big Canvas here, the maximum size of
this is quite small. I just want to make
it a bit bigger. I'm just swiping to the left, duplicating this and
making a bigger version. Go to Properties and just
adjust the maximum size. You can see this line becomes
way thicker and that will be really useful for
making our stamp brushes. [MUSIC] As you can see this
brush is quite far down. If you want to make
it easier to find, just go to the top. There's a recent tab and you'll find all your recently
used brushes there. You'll be able to just
quickly access it there. If you want to make sure that
you really don't lose it, swipe to the left and then pin and it will just
stay at the top. Then for our stamp brushes, I'm just going to
make a new tab, so it will be organized. We'll add all our stamp
brushes in that tab. [MUSIC]
4. Pick Your Theme & Sketching : [MUSIC] We're going to slowly build up our illustration and create our stem
brushes on the way. Once we're done with this, you'll have a full collection of brushes that you can
use in your other work. Let's start with our still life. We're going to build a really simple still life
by making a background, and then the foreground
with several objects. We'll create a bit of depth this way and still keep it simple, so we can focus on adding
smaller elements to this. Think about adding maybe
maximum 2, 3 objects. So now we can start
thinking about a theme for our still life and
options here are endless, but as I said, stick
to just a couple of objects and not
too many details. Have a look at reference photos. You can have a look on Pinterest for maybe photography
of still life, or set up a little
scene on your desk. Maybe have some
teacups, some flowers, some vases, whatever
you have and set up something so that you can
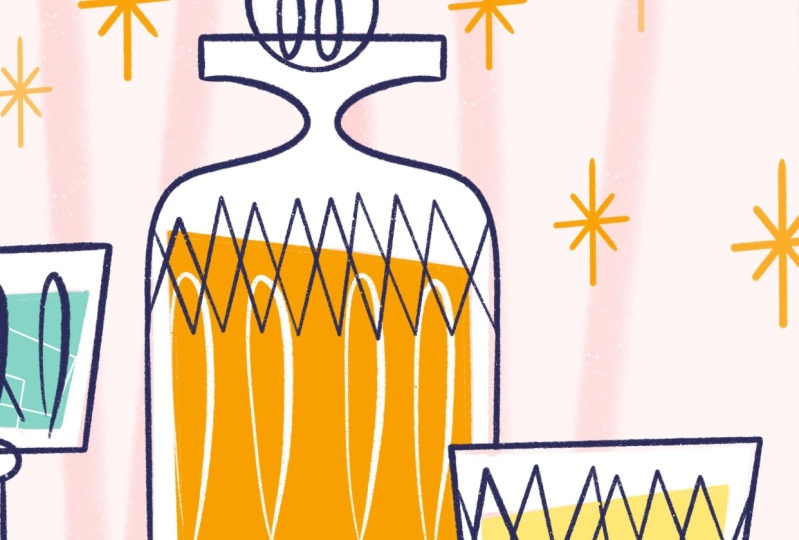
start sketching from that. [MUSIC] I'm going to work on a
cocktail still life, with cocktail glasses and
bottle in the middle. Now, I really like to work in a 1960s, 1950s mid-century style. It's not based on the shadows and how it
really looks in real life, but really strong
shapes and angles, and the perspective is not
always right, but it's flat. This really allows you to focus on the shapes of
everything instead of perspective and adding depth and this is really good in
a sketching phase as well. So when you're sketching
your still life, think about what angles you
can use and the shape of your objects instead
of trying to make it look as
realistic as possible. [MUSIC] I'd like to start with a small thumbnail sketch or maybe several
to try stuff out. This will really help
you focus just on the bigger shapes and
not all the details, and see how everything
looks inside your canvas. [MUSIC] When you're happy with
your thumbnail sketch, let's select that layer and blow it up to the
size of our canvas. This will be the base
of our next sketch. [MUSIC] So now I want to make
sure that these shapes are even more straight, and I'm going to do
that by just drawing a line and hold the pencil, and then Procreate art creates a straight line and the same
thing with shapes as well, just draw the shape, hold it, and then Procreate will turn that into
straight lines. If you hold it with your finger, it will make a perfect shape. [MUSIC] So let's lower the
opacity of our sketch, and then we'll create
a new layer on top, and redo our sketch but
with straighter lines. [MUSIC] Here the shapes don't have to be
perfectly straight, and that's the beauty of it. They can be imperfect
while still having straight lines and that
makes it look fun. With this bottle, for example, I'm actually going to draw
the left side and then duplicate that and mirror it so that they're
actually the same. If you're having
trouble drawing a curve like this and you want it to
be a bit more stabilized, just go to the wrench icon, to preferences, and then
to pressure and smoothing. Turn on the
stabilization and just move it all the way up, and this will really help you to control that
curve a lot better. [MUSIC] Then turn it off again. I'm going to select this
side of the bottle, [MUSIC] and then swipe with three fingers
down and you'll see the cut and paste
menu that shows up. I'm going to duplicate that
selection and then flip. Now, we can place it
inside our layer, and you'll have a perfectly
symmetrical shape. [MUSIC] Let's finish. So now we don't need our thumbnail
sketch anymore, so I'm just going
to delete that. When you have
finished your sketch, you can start thinking about what other elements
you would like to add that can set the scene and
we can add some details. I'm going to add some ideas
and notes on top of this, in another layer, in another color in orange. I'm thinking of maybe adding some festive elements because
it's like cocktail glasses. To set the scene
also a background, maybe a funky retro background, maybe some stars or
something festive. [MUSIC] Then inside these bottles, I also want to add some details. In the glasses., there could
be ice cubes, for example. [MUSIC] This glass bottle could have some engravings, some details on it,
maybe a little pattern. [MUSIC] Then there's still
some space on that table, and we could also use that to set the scene
so there could be some festive elements,
maybe some confetti. All those elements are
going to be repeated, so it'd be really
great if we could add those as stem brushes, so we can use them
in different places. Because I create these
still lives with cocktails and festive
seems quite often, it will be really
helpful for me to be able to reuse all
of these elements, so I can make different versions of the still life later on. It's okay at this point if you don't know yet what
you want to pick. I'm going to show
you a couple of different basic stem
brushes that you can use in your own still life
that are really versatile. You can just follow along.
5. Line Brush: [MUSIC] Now that we have the outline of our
illustration ready, we can start adding
the background first. Because this is a line
that I'm going to repeat, we can turn that into
a stamp brush and then repeat that line to make
this funky wallpaper. Let's make a stamp brush. Let's turn these layers off. Make a new layer. To make a stamp brush, we should start drawing our element first and we need to make sure to use
black for that. I'll double tap and then with our dry ink brush we
need to make sure that we fill up the whole
Canvas so we use the full size. I'm just going to
draw a simple line. I'm holding it to
make it straight. As you can see, we're
using the full length of the Canvas. Now we need to turn this
into a stamp brush, so we'll go to the Wrench icon, go to Add, and then Copy canvas. Let's go to our
stamp brush tab and then to the plus sign
to create a new brush. Then we'll go straight to shape. Procreate automatically
sets a circle for the shape and we just
need to make sure to paste our shape into this. Import and Paste. Now I need to make sure
that our shape is in white, so we've reverted with two
fingers tap. That's our shape. Now you see that this
is still a line. But if we change the
spacing of this, we'll set that to maximum. Now you can see that
we have our shape. To make sure that these lines, every time I tap
there going to be a different direction
or a different angle. I'm using scatter. Just like with the
art deco brush that I showed you before, with scatter, you can make sure that the direction
changes slightly. The next thing I want to
do is go to Apple Pencil, and you see that the
pressure here is at maximum. This makes sure that when you tap very lightly
with your pencil, that is much lighter. But I don't want it to
be quite as extreme, so I'm just taking that
down a little bit. Lastly, let's go to properties. Here you can see
the stamp preview. We're going to turn that on
so that in the brush menu, you'll be able to see the shape. Also makes sure that orient
to screen is turned on. When moving your Canvas, this will make sure
that the brush will react to the screen orientation. Especially with stamp brushes, you need to make sure that
it faces the right way. Next, we're having a look
at some brush behavior. Here you can change the
size of your brushes. Between minimum
and maximum size, that's how much range you have from the smallest size of the
brush to the biggest size. To be able to use this as a background for
a whole Canvas, I'm going to put this
on maximum size. Lastly, we're going to change the name and this will
be our line brush. Let's just test this out on a new layer, see how it looks. You can see every time you tap, the line is in a
different angle. Let's make our background. Firstly, I don't want to
have a white background, so I'm just going to
add a light layer before adding our
wallpaper on top. I'm selecting the light pink. On our new layer, I'm just going to fill that layer and then
turn on the opacity just so it's very light
around 15 percent. Then on another layer
with the same pink, I'm going to use the
lines for our background. We don't need to make
sure that the lines reach all the way to the bottom because our table is there. It just needs to go from the top to the edge of the table. Because the Apple
Pencil Pressure is on, if you press a bit harder
the lines will be darker. You can change the opacity of your lines as you go as well. If it doesn't work right away, just undo and fill up your background
until you're happy with all the lines at
the right angles. I think that looks really nice. It kind of looks a bit fuzzy because of the texture and it looks like it's
a bit further away, which creates a bit of depth. I'm just going to
select the parts of that table and just
cut off the line. Select that rectangle,
swipe three fingers down. To delete that part,
we just use cut. Before we move to
the next lesson, make sure that your
background is finished. [MUSIC]
6. Star Brush: [MUSIC] Now we're going to have a look at elements
that we can add to our background because
it's a bit empty. I had the idea of adding these filler elements
like stars or dots or some fireworks or something
and that will help us also add a bit to the
style of our still-life. I'm going to make these
little retro stars. Firstly, I'm going
to swipe right on all the layers of our still life so we can
organize things a bit. I'm going to group these
and rename that group. Let's pick black again and go to the dry ink
brush to make our stamp. Again, I'm not really
going to work symmetrical, but I just want to make this star that is a
little bit longer than it is wide
and not perfectly straight either to make
it a bit more dynamic. But I am going to
use straight lines, so I'm going to hold them
so that they're not wobbly. As you can see, we're using the full length of
our Canvas again. Then wrench icon again to
add and then Copy Canvas. Then to our Stamp Brush tab, on the plus sign,
and then the Shape. Let's Paste our shape. With two fingers tap
to revert your shape. Then to the first tap to adjust the spacing to maximums and
now we can see our star. [MUSIC] I just want to make a couple of changes
so I'm going to Apple Pencil. Again, I'm changing
the pressure. I'm just going to turn this
off so that I don't have to think about the pressure
of the shape at all. However, it would be nice to have a difference
sometimes like a mix of opacities and sizes
of our star as well, but I prefer to be random. To do that, we'll go to Dynamics and then
specifically to Jitter. Here you can see Size and
Opacity, and with this, you can make sure that it picks the size and opacity
for you randomly. Every time you tap, it's a bit of a mix
and then you can choose how much of a range
you want there to be. For Size, I'm picking around 50. You can already see
the size change on our drawing pad and then with Opacity you can see how much
of a difference that makes. Well, I'm just going to
turn it up to about 80. In this way, you can
see that because of the changes in size
and opacity that it almost looks like it's
layered at some stars are more in the background
and some closer by. Then lastly, to Properties turn on the stamp preview again, and then I'm going to
change the Size here as well to about 400 and you'll
see on the drawing pad, the size of those stars. That's the maximum
size that we can use. The Opacity, turn that
up a little bit as well. Then we'll call this star
brush. That should be finished. Now you can see it fits
perfectly in our tabs. You always have a
preview of our star. Let's try this out
on our background. I'm going to make
a new layer again, and then I'm going to pick
orange from my color palette. I'm just going to
try this out and see what happens every time I
tap and if I'm not happy, I'm just going to undo. I'll just add a few. I can change the size
on the right again. That range from smallest to biggest is what you've adjusted with the
brush properties. You can change the
sizing of this and if it's not small
enough or big enough, you can just go back
into the brush to brush properties and change the
maximum and minimum size. I'm happy with
that, but I want to show you one more example. I'm going to a new layer. There are many
different types of these little stars
and I think they work really well as
little filler elements, especially when you're
doing something like a festive still-life. Here's another way you can make one that looks a bit different. You go to the wrench icon, go to Canvas, and then
Edit Drawing Guide. We're going to turn on Symmetry, and in this case in options,
the Radial symmetry. Then make sure that
on your new layer, Drawing Assist is on
so that when we draw, we follow the lines
of our drawing guide. If you're drawing a
star, for example, with lots of different
angles and points, it's really helpful to have this in place and you'll
see when we start drawing what that looks like
with the dry ink brush. I've got to turn that on. You only have to draw one side and automatically all the
other sides will be added. This is really helpful if you
just want to draw something a bit more complicated
and it just has to look the
same on all sides. I can never get lines
to be perfectly straight and they're
always a bit wonky. In this case, it will help to make sure that all the
sides are actually the same. You can try the different
types of symmetries. For example, with this one, not all the sides are the same, but at least it's symmetrical. This also works really well
as a nice filler element. I'm just adding the same
type of properties, the sizes, the opacity
as the other star brush, and the result is
still a bit different. So that's another option. [MUSIC] We're going to group
all these stems together and eventually you can throw these away
because they're already saved as stamp brushes. But if you want to
make any changes, then you can just still
keep them as layers. Before we move on
to the next lesson, make sure that you have created your filler brush that you
can use in the background. Remember that if you're
making a shape and lots of angles and you want to make
sure they all look the same, make sure to turn on the
Drawing Guide and play with these options of Radial symmetry and others to help you draw. [MUSIC]
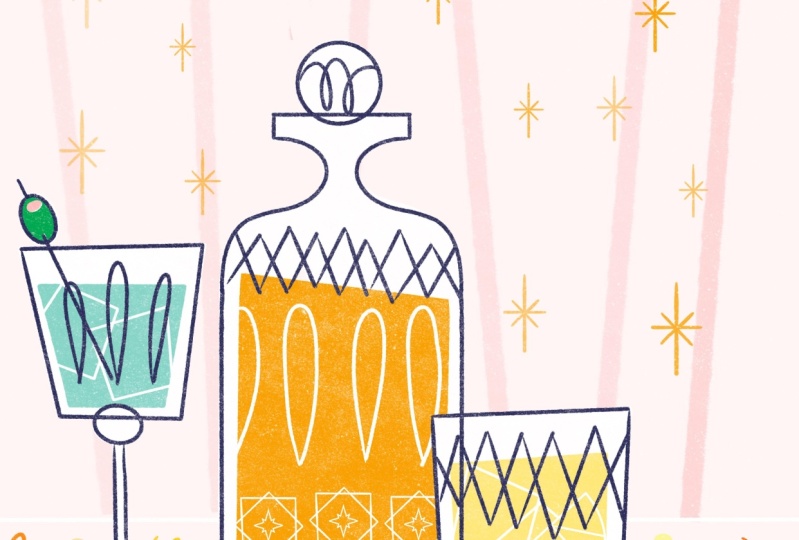
7. Colouring & Ice Cube Brush : [MUSIC] Now, we can move on to our
foreground, our objects. Firstly, I'm actually going
to draw these shapes. I'm going to fill them in color, so that we can put some
more elements on top. I'm going to use white and
then our color palettes. I'm actually going
to use our sketch layer as a reference. I'm turning on reference. Then when we color our
shapes on a new layer, we will follow our reference
layer automatically. I'm going to use white. I want to fill these
glasses with white first. I'm just going to
swipe the color to the glasses. You'll see. I just fill that color like
it was a normal layer, but it's all on a
separate layer. [MUSIC] Now, on another
separate layer, I want to fill the liquids of our glass and basically
all the colors. I'm just going to draw
our shapes again on top, the same way we did before. Make sure the term reference off because we don't really
need that anymore. I want to draw these separately
again because otherwise those sketch lines
are actually going to show they're not going
to be colored in. I draw the shape
from our sketch, hold it to make
sure I procreate, makes straight lines and then I'm going to
fill that with color. [MUSIC] Then orange in the middle. Make sure that when
you fill these shapes that the actual shape is closed. Otherwise it's just
going to color the whole canvas [MUSIC] Lastly, I want to make these
lines as well, I'll just redraw
them on a new layer. The sketch layer, I'm not using it as a reference. I'm just turning Opacity down and just drawing
on top of it. I'm just going to re-do them. [MUSIC] Again, I'm just making
the shapes holding them to make straight lines. [MUSIC] Just like we
did before this bottle, to make that specific shape, I'm just turning
on stabilization again to make that curve perfect [MUSIC]
Turning it off again. I'm just drawing the
left side of the bottle. Again, just selecting it and swipe down with
three fingers, for the cut and paste menu
and then duplicate and flip horizontal and you have a
perfect symmetrical shape. [MUSIC] An emerging these layers right away as well [MUSIC]. By adding these
strong blue lines, you're again creating
this contrast between the background
and the foreground. It's really quite strong
and I quite like that. [MUSIC] Make sure that when you're filling these
objects that you keep all of this on separate layers, so that later on a few
monitor change colors. You can do that easily. [MUSIC] Now, we can add some more
elements to these objects. I would really like to add
something inside the glasses. I had a mind to create these ice cubes.
It's really simple. I'm going to show you how to
make that as a stem brush. In our stems group, new layer, go to black. Then I'm just
drawing this shape, holding it to make
straight lines. Now, normally an
ice cube could just be a perfect square shape. I thought it'd be
fun to turn it into this not perfect shape. Then when we turn it
into a stem brush, we can also make sure
that every time we tap is going to be at
a different angle. Again to the wrench icon, add copy canvas [MUSIC] shape editor, paste, and then tap
to refer to shape. Let's put the spacing
on maximum again, so we can see our shape [MUSIC]. As I said, it be fun to make
sure that every time we tap this ice cube is at a different angle because that's how they could be
in a glass as well. There could be
different every time. For that in the shape menu, just scroll down and you'll see all these different
options to be able to do that. The first one randomized, will make sure that
every time I tap the shape is at a
completely different angle. That's it. The only
thing I want to change this stamp preview
and change the size, just make it a bit bigger. I'm turning off Apple
pencil the brush as well. Then this is the ice cube brush. Now I want to make sure that these ice cubes only show inside the colored
part of our glasses, so the liquid basically. To do that, on top
of our color layer, I add a new layer, tap, and turn on clipping mask. This will make sure that
what I draw will only show up in those colored parts. Let's make this a bit bigger. Now you can see
that the shape is only seen inside our
colored glasses. If you want procreate
to remember that exact size of the
brush that you're using, then use the brush memory tool. On the right where you
can adjust the size, tap on that slider and
then on the plus sign. You'll see this little
bookmark show up. This will make sure
that this brush will remember that exact size, and you can reuse
that in every campus. [MUSIC]
8. Pattern Brush : [MUSIC] I think it'd be fun
to add something to it, a bottle in the middle as well. This could look like these glass carvings you see
on liquor bottles sometimes. This pattern at the
bottom, for example, and we can add that
as a stamp brush. Let's turn this off. Let's go to our stamp group. On a new layer with
the dry ink brush, I'm going to make these
decorative elements and I'm just doing that
by drawing a square. It doesn't have to be perfect. I'm just going to reuse that by swiping to the left duplicate. Then I'm just turning this
45 degrees more or less. I have to make it a bit smaller. Still using the full canvas, I'm putting it in the middle. Then something else we
can add to the middle, maybe a small star. That looks like a glass carving. I think it'd be fun to repeat so I can turn
that into a pattern. Another way that you can
actually make a brush is not by using a plus sign but go to
an existing stamp brush, swiping to the left,
and duplicate. The only thing we
don't need to change is the shape so we just paste that in. That's it. If you want to keep the same properties as the other brush, then those settings
will already be there. But I'm actually in this case going to turn off
that randomized. I'm actually also
adjusting the spacing. I'm just taking them
down a bit to about 60. This will make sure that our
elements are actually closer together so that if
you draw a line, you can actually create a
pattern really easily that way. That's what we wanted
to do in their bottle. Then in brush properties, I'm just changing
the size a bit, just making it a bit
bigger and that's all. This will be the pattern brush. I'm just keeping that shape, I'm merging it just in case if you want to make any changes. I want to add that to
the bottom of our bottle and we can put that in the
same layer as our ice cubes. I'm also going to
do this in white. That'll be a nice
contrast with the orange. Let's see how that looks if
we create a line and hold it. This will make sure
that you can actually adjust the spacing a little bit still and making sure that it's straight. I think that looks good. You can even add patterns on
top if you wanted to. But I'm just going to
just stick to one line. I think this pattern
will look really nice as a background as well. I want to add a few
more details to the glasses and I'll
do this by hand. I think it'd be a
nice mix of using stamp brushes and adding
a few more details. But before that, let's add a few more elements to the table to make
things look festive. Experiment with different
brushes you want to use and make sure to finish the stamp
brushes for your objects.
9. Confetti Brush & Colour Dynamics: [MUSIC] Now we can add a
few things for our table. I had in mind to make some confetti and some of
these little streamers well. [MUSIC] I want to show
you one last way to add stamp brushes by simply using the default
shape and procreate. We're going to start
with our confetti brush. Turn everything off. Just on the plus sign, and then you'll see in shape, the default shape is a circle. That circle, if
you make a brush, that will turn into
a simple line. But if we adjust the
spacing on that, I want just to put that to Max, you'll see that
turns into a circle. That can be the basic beginning
of our confetti brush. The most important thing
that we'll adjust to the shape is that we don't see
the confetti from the top, but we actually see it from
a different perspective. So what we'll do is, in this shape menu, just scroll down
and then with this, we can actually change
the tilt of our shape, and that means that we can
change the perspective a bit. I'm just changing this slightly, just pushing that shape down. Now you can see it
looks like the confetti is on the table,
so that's perfect. [MUSIC] I'm also using
rotation just a bit, 10 percent or so, just so that they're
not always the same, and it just makes it
a bit more dynamic [MUSIC] Because confetti is usually a mix of colors, we can actually change that by going to the color
dynamics menu. This gives you the
ability to change color saturation and brightness according to the pressure
or the tilt of the pencil. Stamp color jitter, the first part is, for stamp brushes,
the most important. This affects what part of
the stroke changes color. You can see that when you use the drawing part and
change color there. Hue changes the variety of
colors on that spectrum. If you choose a lower setting, it will make a more
gradual change. These four settings are
really useful when you're making smaller elements
close together and you still want to be able to individually see these pieces without them becoming
this big block. By changing the color
slightly or the saturation, you'll still be able to
see these separate shapes instead of having to pick
a new color every time. So I'm setting the hue to 15 or so and then the
saturation up by 10. Lastly, I'm just bringing down the Apple Pencil pressure slightly and then the
brush properties, the size is fine and I'm just
turning on stamp preview. This will be our confetti
brush. There you can see it. Now I want to make
that other brush [inaudible] like
streamers as well. I'm also use color
dynamics for this one, but for this one, I'm just
going to make a new shape. We can draw a spiral of some sort and
that will be enough. Copy canvas, and
I'm just going to duplicate our confetti brush
and paste our shape in. Perfect. Then with this one, we can just change
rotation a bit or scatter just so that the shape is a bit
different every time. Then I'm just bringing the
hue down just a little bit. Then I'm using jitter
to change the size. Then the Apple Pencil pressure, I'm bringing that down
just a bit as well. Lastly, in brush properties, I'm changing the size as well. That's our streamers brush. Now we can add both of
those into our still life. On top of our objects, let's make a new
layer and I'm going to start with the
confetti brush. I'm going to show you what these colors are
going to look like. I'm just choosing orange
from our color palette. Here you can see
there's a little bit of pink and yellow, it's quite soft and it just matches our
existing color palette, which I really like. It's much more fun than
just one color of confetti. [MUSIC] Then pink for the streamers on
top, a bit bigger. You can see there's a
slight change in color just a little bit and it's finished. [MUSIC]
10. Final Details: The only thing that's
left to do now is to finish the objects
in our still life. We can add a few
more things by hand. [MUSIC] I think this looks finished. There's a combination
of stamp brush that we used and a few other bits
that we've added by hand. If you've been staring at your illustration for awhile and you're just not really sure if anything else
needs to be changed, you can just go to the
wrench icon canvas and then Flip Horizontal. You can see if anything
is out of place and just generally to get
a new perspective on it. When I mentioned
that pattern brush, I mentioned that it might look nice in the
background as well. I just wanted to show
you an example of that. I used this in
another still life and I wanted a subtle
background for this. I just reuse that stamp brush in the background over here. You can see it very lightly. I think it just adds something
extra that was quite fun. As you can see,
it's really easy to reuse these type of stamp
brushes in different ways.
11. Finishing Your Brushes : If you followed along, then by now you should have
your own collection of stamp brushes and
the last thing that I want to show you is
how to finish this set. Let's tap on the Confetti brush. We've already changed the name. But as you can see
in about this brush, you can add your own name and a photo and your
signature as well. Most importantly,
we can make sure that if you're happy with all of your settings
from the brush, that this brush will
remember all of our settings by creating
a new reset point. Later on, if you maybe
change some stuff around, you can always go back, click on Reset, and you'll
have your original settings. That's it. Let's say that you want to export your
stamp brushes. Maybe you would like to share
them or sell them online, just tap and go to share. That way, you can export
a brush that file. [MUSIC]
13. Thanks for Watching!: Thank you for joining my class. I hope that this process gave you some inspiration to make your own still life and create a collection of stamp
brushes of your own. As I mentioned, you can turn
anything into a stamp brush, from a simple circle to a
complicated illustration. And it depends on what you
need most for your work, what you want to
reuse in the future, and what you like to create. Because this is such
a personal project, I would love to see
your collection of stems and how you use
them in your own work. Remember, you don't need
to start from scratch. You can follow along with me
if you use the resources. Don't forget to
share your process and your still life in
the project gallery. If you enjoy this class, don't forget to leave
me a review below. And if you have any questions, go to the Discussions tab. If you want to learn more, I've got another class on
lettering in Procreate, where I explain a bit more about compositions and combining illustration
with your lettering. Thanks again for joining
me. See you soon.
 Claire Makes Things, Illustrator | Lettering Artist