Transcripts
1. INTRODUCTION: Hello, and welcome. Today, we're going to be
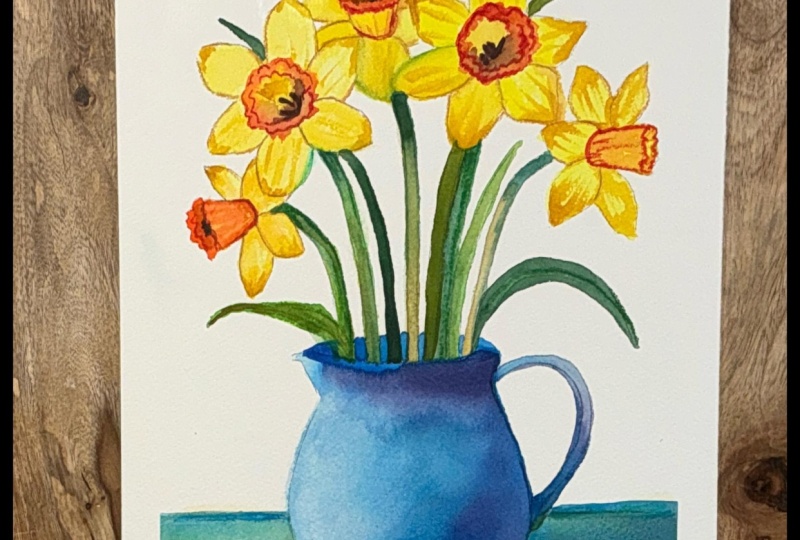
painting this beautiful, bright and uplifting bunch of daffodils in a lovely blue jug. We'll build the painting
together in gentle stages, starting with soft,
wet on wet washers and gradually adding
depth, color, and detail. You'll learn how to keep the
daffodils fresh and lively, balance harmony and variety, and use simple shading to give form to both flowers
and the jug. We'll mix a range of
greens for foliage and we'll use loose expressive watercolor techniques
throughout. It's suitable for all levels, including beginners because I'm going to be guiding you
every step of the way. And I'll be sharing all
the techniques, tips, and tricks that I use in
my own professional work. I've included a copy
of the drawing in the project resources section so that you can download
it and trace it, and then not worry
about the drawing because this is a
painting class. I am a professional artist, author, and tutor,
and over the years, I've sold a lot of work
across the world and helped hundreds of people to
learn more about watercolor. You can see examples of
my work on my website. My style leans towards
impressionistic and contemporary rather
than photorealistic. I like to explore loose approaches that
bring out the color, light, and essence
of my subjects. I've tried to
replicate this across all the many other videos
that I have on Skillshare. I'd love to see your
own finished painting, which you can upload through the project and resources tab. I'll give you some
personal feedback on it, and you'll be able to
see the artwork of other students and
get their support. At the end of the
class, you'll have your own beautiful artwork
to be very proud of. So let's swizzle our brushes and get on with the painting.
2. Materials & drawing. Daffodils: 1st loose layer using wet-on-wet technique.: Know you're going to love
creating this painting, and I'm sure it
will put a really big smile on your face, too. For this class, these are the colors and materials
that I'm using, but do feel free to use
any that you already have. For information on brushes
and paper, et cetera, do check out the basic
materials document that I've added to the
project resources section. As you can see, I've taken a few liberties with the
reference photograph, and that's the great
thing about creating art. You paint with your
memories, senses, and imagination, as well as
what your eyes literally see. Now you can see that I've
kept the drawing very simple, minimal details so
that we get a nice, loose free flow painting. And I've included a
copy of the drawing in the project resources section so that you can download
it and trace it, and then not worry
about the drawing because this is a
painting class. I've got a bright light
yellow mixed in my palette, and in another section, I've got that same bright light yellow with a little bit of transparent orange added to it to make a slightly
darker yellow. But first of all,
I'm pre wetting each petal with some clean
water and a soft brush. And that's because I want
a nice blended effect on the petals when I apply the paint with not
too many hard edges. I've started with the flower
at the left hand side, missed the one out next to it, and gone on to the
one at the back. And that's because if I paint
them one after the other, all the colors will run into
each other and we won't get the definition that we
need between each flower head. Now, if you're not
a fast worker, you can just paint one
flower head at a time. I'm going to start with
this little group of three, but if the third one is
dry when I come to it, of course, I will have
to pre wet it again. So now I'm going back to the first flower
head that I wet and applying my pale light
yellow color wet on wet. So that's wet paint
onto wet paper. You don't have to fill in
the entire petal with color. You can leave little
bits unpainted. Because the paint is
going on to wet paper, you will still get
a nice soft blend, so you'll get some areas that are a little bit stronger in color and a little bit lighter where you've not
put the paint directly. And it is important to have those lighter areas because these petals are
fairly translucent, except for the trumpet, which is a little
bit more opaque. I've moved on to
the second flower, and I'm repeating the
same process here. So just for emphasis, I'm dropping in my light yellow, not covering in
entirety each petal, leaving some little
areas lighter. All the while being mindful that these little petals can be translucent with the light
shining through from behind. I've decided to go back to the first flower now before
moving on to that third one, and I'm using the
slightly darker yellow to emphasize
some of the petals. I'm going really round the edges of each petal
with the darker color. The light yellow is still wet, so I am still getting some
nice blends of color. I'm not putting on too much
paint because I don't want to overpaint the light areas
with this darker yellow. I want a nice mixture
so that I've got some light tones and
some medium tones. I have put a little
bit more of the darker yellow on the bottom
side of the trumpet, where it will be most dense. So now I am moving on to
that third flower and repeating the
process of applying the light yellow color
onto the damp paper. It's probably worth repeating
that if it wasn't damp, I would have to pre wet it. But it is quite a cool
day in my studio today, so everything is not
drying too quickly. So back to that middle flower
now to put on the darker yellow while the light
yellow is still damp. And as you can see, when
I'm just touching it in, it is still damp
because the paint is running and blending into the
underlying lighter colour. If at any time it doesn't blend in the way
that you want it to, you can take a clean damp
brush and just run that over any hard edges that
appear that are unwanted. And if you put a little
bit too much paint on anywhere, of course, you can use your clean damp
brush to just lift some of it off or even dab it
with some paper towel. That second flower is now defined nicely with
the dark yellow, so I can move on
to the flower at the right hand side and define
that one in the same way. I know there isn't
a lot of difference between the colors that I'm
using these two yellows. It's really quite subtle, but I have seen a lot of
paintings of daffodils where the artist has used a more brown color
for the shading. And I do think it tends
to make the flowers look as if they're starting
to shrivel and die. Having said that, there's
no right or wrong in art, and all artists have got their own opinions and
ways of doing things. So this is just my way. But I want to keep my daffodils looking very fresh and
newly hand picked. So now I'm going to repeat this whole process for the two flowers that
I've missed out.
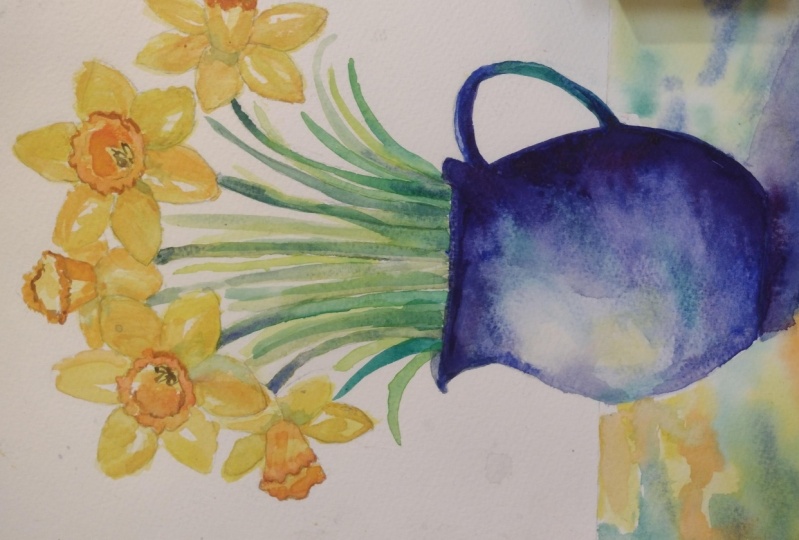
3. Paint blue jug; harmony and variety. Daffodils, 2nd layer, wet-on-dry & blending and softening: To paint the jug, I'm using some cobalt blue, some
manganese violet. If you don't have that color, you can mix a nice purple
with some red and some blue. I've also got some vdium
which is an emerald green, and I'll be using
a little touch of the yellow that I
use for the flowers. I'm going to be painting wet on wet wet paint on wet paper. So first of all, I'm pre wetting the whole of the
jug with some clean water, apart from leaving a small
area unwt on the far left. This is where the jug
is catching the light, which will help to give it
a three D rounded effect. I also want the tone of the color that I'm
applying to the jug to be lighter around the highlight than it is at the outer edges, because, again,
that will help to give the jug this
rounded appearance. I'm touching in the cobalt blue to the top part of the jug, and you can see how that paint is traveling down
in the wet wash. So as it gets further away from where I've
first placed it, the tone gets lighter. In fact, you can
probably see more clearly here on the jug than
you could on the petals, what a lovely soft
diffused effect we get with this wet
on wet technique. I'm allowing the
water on the paper to soak up the paint from
the tip of my brush, similar to a process of osmosis. And you can see that
some nice shapes and transient colors
are appearing on the jug without me really
having to do very much at all. You don't have quite
as much control with the wet on wet technique, and it's important in a
way to let the water color kind of do its own thing and give you some
nice surprises. Whilst the cobalt
blue is still wet, I'm touching in some little bits of vidian here and there. Later on, we'll be painting the stems and leaves with green. So I want the color to tie in and harmonize with the
rest of the painting. The colors haven't
spread quite far enough over to that
left hand side, so I am going to take a clean damp brush and
just tease that color just gently with the tip of
my brush and encourage it to flow into that
left hand area. I do want to retain
the highlight, but not quite as big as it was. Again, you can use a
piece of paper towel to just lightly dab off any
paint that's unwanted. I sometimes think
it's as much about lifting paint off it is
about putting it on. I'm reasonably happy now
with how it's looking. So whilst it's still wet, I'm going in with my
Manganese violet. Now, I'm touching this down the right hand side of the jug
where it's more in shaded. Because we need to
strengthen the dark tone on the jug to get more of that
rounded three D appearance. The other reason that I'm
adding some purple to the jug is because it is opposite the color yellow on
the color wheel. So that gives us a really
nice complimentary contrast. Blue is opposite the color
orange on the color wheel. So when we start to
add a little bit of orange on our daffodil trumpets, we're going to intensify that complimentary
contrast even further. With nearly every painting, you want a nice balance
of harmony and variety. We want harmony so that everything hangs together
in a cohesive way, but not too much or the
painting becomes boring. And that's why we
need some variety so that the painting
retains interest. That might be dark tones next to light ones or squares next to circles or bright colors
next to dull ones. And we need that balance so that the painting doesn't
become chaotic. Okay. Have you noticed how much lighter that dark purple color is now that it's traveled
into the wet paper? It is worth remembering that
when you paint wet on wet, the paint will lighten as it
travels into the wet under wasah so you can afford to be a little bit overgenerous
with the strength of it. For the jug handle, it's such a small, narrow shape that I'm
painting this wet on dry. Give you a little
bit more control. The colors do stay stronger and crisper and the paint will only go where
the brush takes it. I can still add in drop in my little bits of vdian
into the cobalt blue, and I can put some of
that manganese violet, the dark purple color underneath the top of the handle
and along the bottom. And I can use the tip of
my brush to kind of just tickle the paint and encourage
it to blend where needed. The handle is at the right
hand side of the jug, where it's in shadow. So we do want the color
to be a bit stronger and darker at this side than it is over on the far left where
we've got the high light. But where it sticks out furest, that area too will
probably catch the light. So you can use a little bit of paper towel just to dab the color off here
and there on the top, where it is catching the light. I'm thinking now that the shadow color that I
put on the dark purple and blue that I put on at the right hand side has
lightened too much, and I'm not getting
that depth of color and tone at the right hand side. So I'm adding a
little bit more of the cobalt blue and
the Manganese purple. Over the top it is still wet, so I'm still getting
those nice blends, but concentrating
that darker color on this right hand side. And although it is still wet, it's not quite as set
as it was before, so that darker color that
I'm putting on again now isn't traveling quite
as far as it did before. And before it dries completely, I do want to add in just
a little touch of yellow, kind of a reflection from
the daffodil colors above. You don't need much. Just
a few little touches and perhaps a little bit more
of the vdian green as well, reflecting from the
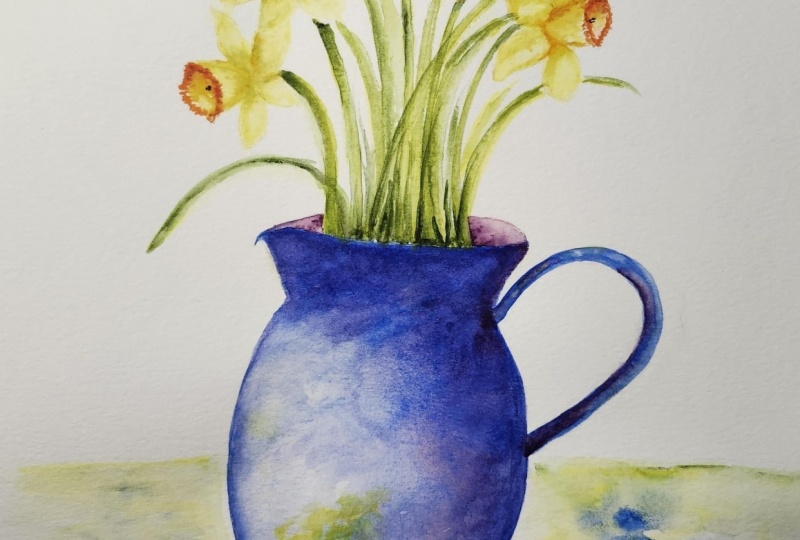
stems and leaves. But I think this first layer of the jug is now pretty much done, so I'm going to stop
fiddling and let it dry. For the second layer of color, I've added a little bit more of the orange color
to my yellow mix. I'm going to use this
slightly darker color to add more detail and shading
to each of the flower heads. In particular, I want to add more color to the
trumpet areas and also where some of
the petals are in shadow from one above or
from the trumpet above. And painting wet on dry now, so wet paint on dry paper. And this is where you
really do need to use that blending and
softening technique, blending and softening a hard edge into
almost nothingness. If you've not practiced
this technique before, then I do suggest you try
it on a spare piece of paper before committing it
to the actual painting. It seems a relatively
simple technique to do, but in fact, it can be quite tricky
and mastering it will make a massive
difference to your painting. I have gone for a more
orange or yellow look on my daffodils because
I thought it would show up better
on the video. But if you prefer to keep
your daffodils very yellow, then you can complete this next step that we're doing
now with another layer of yellow because even if you put one color on top
of the same color, you will still get that
depth of definition. I particularly want to use
my darker color to define that frill edge that goes
around the end of each trumpet. To create that frill effect, I'm using the tip of
my small brush to just dab here and there rather than
making a straight line. We need also to think
of the trumpet shape as being a little bit like the jug in the sense that it's rounded, it's more rounded
than the petals. We need to add some
darker tones around the top and bottom edges to give it that
sort of appearance. Remember, if you get
too much paint on, you can lift it off with a
clean damp brush or you can dab it off with some
paper tel or even both. I'm going to let you watch the video play now as
I work my way around each of these lovely
Daffodil flower heads and give them all a little
bit more definition. Oh. A.
4. Table & Floral Details.
Paint table surface. Add flower stamens & gentle shading to petals.: Before we start with
the next section, I want to show you
what I've done off camera with some magic sponge. I felt I'd lost some
translucency in the petals, but lifting the color off with a clean dt brush
didn't quite cut it, and that's where this
little magic tool comes in. You can see quite a few
areas where I've either lightened the tone or gone almost back to the
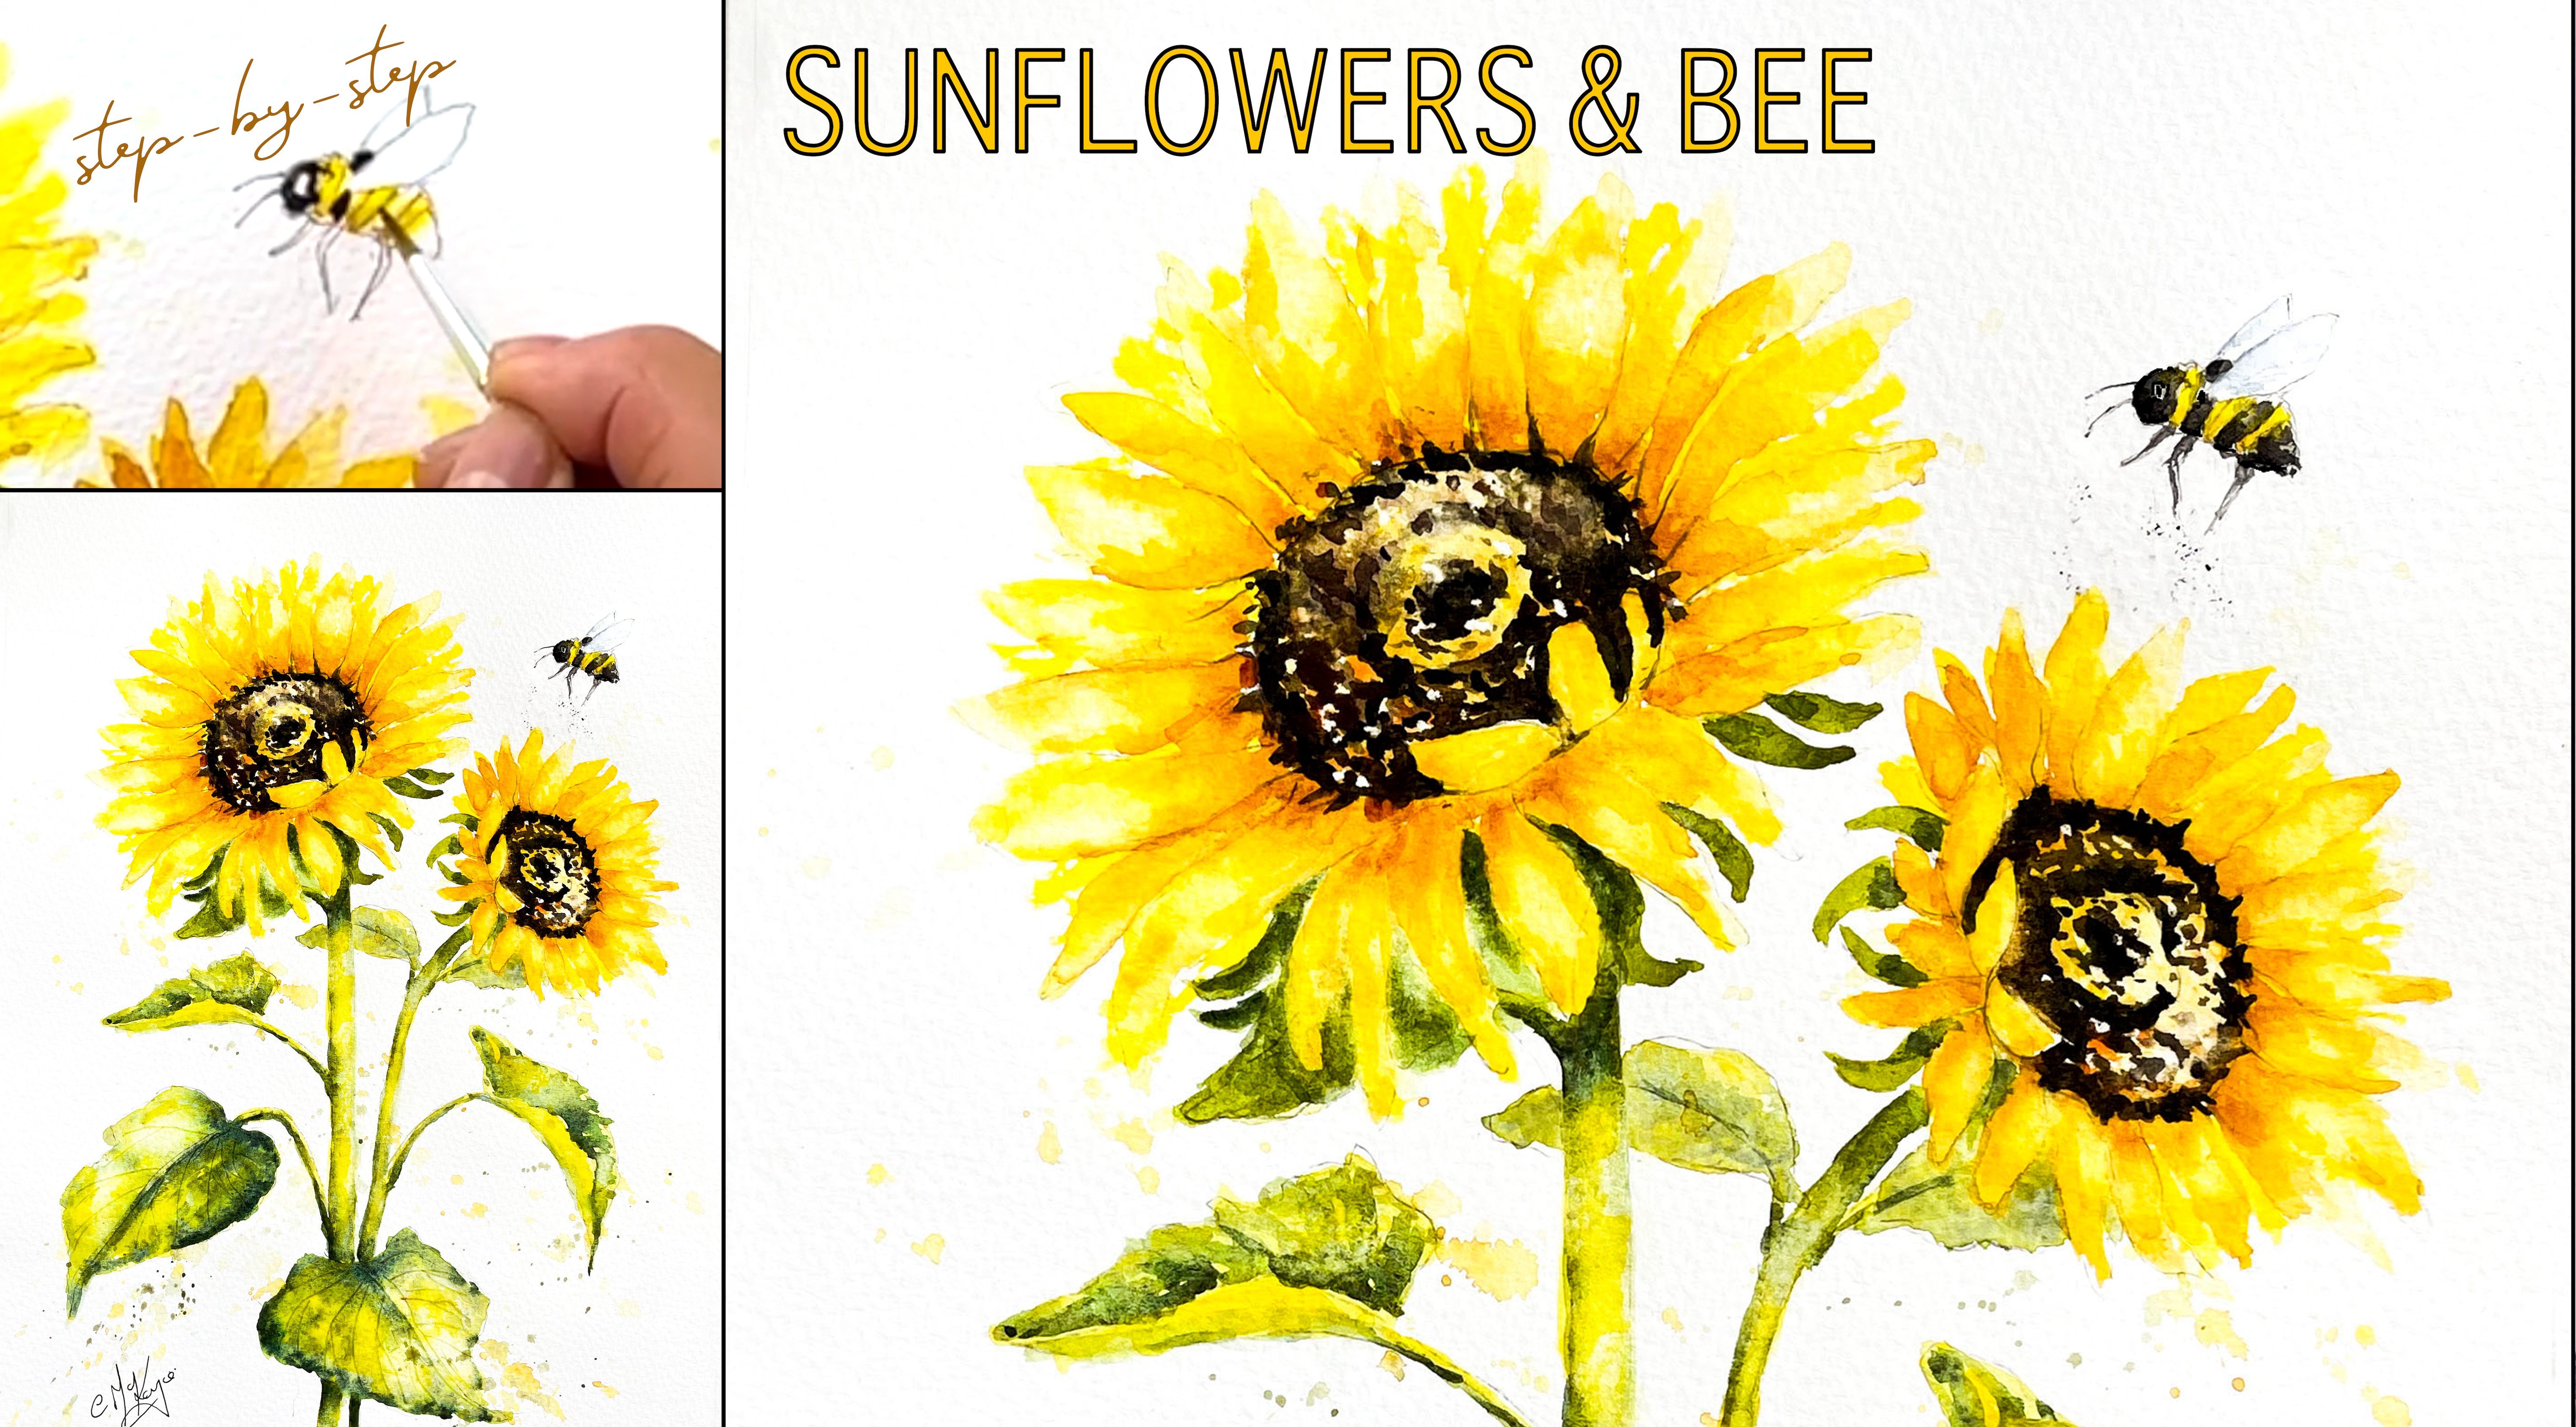
white of the paper. If you've not used it before, I'm going to use an extract from a previous sunflowers video where I can demonstrate
it more clearly. Don't worry, we will get back to our daffodils in just
a minute or two. It comes in an oblong block, but I tear little bits of it off so that I can access
smaller areas. You can use it to lighten
an area that is too dark or even strip the color
right back to white paper, depending on which color
you've used because some colors do stay the
paper more than others. Just tear a small
piece of the sponge, dip it in some clean water, then squeeze it to
just damp and rub over the unwanted paint until
the color is removed. Use a paper towel
in between to blot and get the last bit
of paint off and keep rinsing your sponge out
during use to keep it clean or even throw it away
and use a fresh piece. If you accidentally get a
blob of unwanted paint in the middle of your painting or you just want to lighten
the tone of an area, give it some highlights. This little piece of sponge
will become your best friend. Because it's normally sold as an abrasive
household cleaner, it does tend to rough up
the paper a little bit. So take extra care
if you're painting over the area that you've
sponged with another color. So have a good look
at your own painting to see whether you
need to recover some translucency by
removing a little bit of color or if it's perfectly
fine just as it is. I'm going to keep the table cover very simple and abstract, and to tie it in with the
rest of the painting, I'll be using the same colors
that we've already used. Because I want a nice
soft diffused look. I'm painting wet on wet again. So I've wet the whole
area with clean water. And while that is still wet, I'm dropping in some of the light yellow that we
use for the daffodils. Then I'm going in with
that slightly more orange yellow and dabbing that in in a few places in
between the light yellow. Then I'm going to use some of
the green color, the dian, and position that also in
some of the gaps where I've got white paper and overlapping some of
the yellow as well. A nice mixture of tones here. Then I'm adding a little
bit of the orange color. Not too much of that
is a strong color and some of the blue that
we've used in the jug. Okay. Now, the
important thing to note here is that although I've overlapped some of the yellow and the green, I've tried to keep the blue and the orange separate
from each other. Because if you overlay yellow and green and
blue and orange, you're going to
get a muddy brown. So by all means,
add these colors, but keep them in separate
parts of the foreground. You do want them to blend and mingle a little bit so
that the colors blend, but you don't want those
colors to run into each other to the extent that we create a horrible
brown mud color. Don't be afraid to pick
your paper up and give it a good shake because that will encourage those colors
to merge and blend, and then we get this nice,
soft, diffused appearance. And that's all we need to
do for now for the table. We need to let it dry before
we can add some shadows. So, while my table
cover is drying, I'm turning my attention
to the centers of the daffodils to paint the little stamens
inside the trumpets. I've mixed quite
a dark color with the orange and a little
bit of the purple. And I'm just using that to paint around the little stamens
that are inside the trumpet. We'll be quite dark in there, but we don't want anything
as dark as black. And I'm using the point of a small size to brush to
get into this small shape. I don't want any hard lines, so I'm using a clean damp brush, the point of my brush again, just to dampen around the edges of that dark
color that I put on. So just blending it into the underlying wash. And then to help it
sort of settle in, I'm adding a little bit more of my orange color around
the stamen shapes. I'm also touching
in a little bit of that orange color on the
frill area to emphasize them. Water color does tend to dry about 20 to 30% lighter than
when you first put it on. So sometimes when the
color does sink a bit, you do need to go back
and reinforce it. But, as I've said before, have a good look at your
painting because it might be that yours is perfectly fine and you don't
need to do this. Then to add a little bit
of shading to the petals, I'm using some
very watery vidiu. It's almost like
tinted water really. I'm not going to add this
shade into every single petal. I'm just looking at
where there is one petal underneath another or where it's in shade because
it's lower down, and I do we need to add a
little bit of shading there. If you do put it on and
it doesn't look right, it off quickly with
some paper towel. It might feel a
bit strange using this very watery green
as a shadow color. But I don't want to use brown or gray for the reasons that
I explained earlier, when we get the green
leaves and stems on, that will actually tie in
and they will almost be reflections or shadows
reflecting the greenery. I think I've pretty much put on all the shadow color that
I want on the petals now, so we'll move on to the
next step where we will put those stems and
leaves in place. H.
5. Paint stems & leaves with range of greens. Strengthen jug shadows. Add cast shadow on table.: Using my yellow blue
and green colors, I've mixed a range
of different greens. You want some light ones, some dark ones and some
medium tones in between. I'm starting off with
the lightest tone, which is just the pale
yellow on its own. And I'm stroking that down
each of the daffodil stems. And as you can see, I'm working wet on dry wet
paint on dry paper. So I haven't used water
first to pre wet the stems, and I'm going to use
this yellow color as the underlying wash to add some darker
greens to the stems. Now, if you're not
a quick worker, you can just do two
or three stems at a time instead of all at
once as I'm doing here. You want the yellow paint to still be wet when you
start adding the green. And that's what I'm doing now. I'm just adding a touch of my mid green to the top
and bottom of the stems. Because this is where
they will be more shaded as they emerge from
the flower heads and also from the jug. And you can see that
with a little bit of help from me
tilting the paper, that green color is traveling
up and down the stems, and we're starting to
get a more three D look. I'm using a damp brush to just lift some of the green off
where I don't want it, particularly in the
middle of the stems, where they're more likely
to be catching the light. And then using the
tip of my brush. I'm just adding a little bit of the same green color down the
sides of some of the stems. Okay. And then to darken
them a little bit more, I'm using the cobalt blue just at the top and
bottom of each stem. Where they are looking
a little bit heavy, I'm using that clean damp
brush again to lift off some of the color because the stems are also
quite translucent, so we don't want them to
be too heavy and thick. And you can also go back
in with a little bit of the yellow color
if you feel it's gone too blue as I'm doing here. I've mixed a very dark green, which I'm just adding on
in a few little places on the stems to again make them look a little bit more
rounded and three D. Then it's a case
of filling in in between the stems
with some leaves. Now, the leaves tend to be wider I should
say than the stems. But we're going to use similar
process of putting on the yellow first and then adding some greens and
some darker tones. If we just used one
single green color to paint all the
leaves and stems. Well, it wouldn't
look realistic and it would look pretty boring
and uninteresting. So I'm just going
to now build up the shapes of the leaves
in between the stems, again, using my
different green colors. And just as I did
with the stems, I'll be using a
damp brush to lift off some bits of paint
here and there to convey the translucency of
the leaves as well and maybe even dabbing with a bit of scrunched
up paper towel. And don't worry if some of these shapes merge
into each other. You don't have to keep
them completely separate. We don't want them to look
like soldiers standing in a line with equal
distances between them. So you're going for a more
phazard natural sort of look and some of the colors will run in and help
to convey that. The last thing that we need
to do is to strengthen the shadow on the jug and add
some shadow on the table. I've already mixed a dark purply blue
color in my palette. But first of all, I'm
pre wetting the jug, particularly on the
right hand side with some clean water. Do need to do that
very gently so that you don't lift off that
underlying blue color. And then while the
water is still wet, I'm adding in just underneath
the rim of the jug, my dark purple blue color and
letting that run down into the wet wash. Now I'm coming down the right
hand side of the jug. This is where it's most in
shadow with my dark color, and stroking this lightly, letting it go into the
middle of the jug, where it will
diffuse and soften. I'm still using quite
gentle brush strokes, just trickling that paint over the surface so that I don't
disturb the underlying color. And I'm using the tip of
my brush now just to add a little bit of dark paint
shadow underneath the handle. I've got quite a good
point on my large brush, but if you haven't, then yes, switch to a smaller
one for that bit. I've added a little bit of
black to my dark color, and I'm using that now to emphasize the shadow
even further. Now, it might look quite
dark and a bit unreal, but remember we are
painting wet into wet so that dark color is going
to lighten and diffuse. Remember watercolor does dry about 20 to 30% lighter than
when you first put it on. To paint the shadow
on the table, I've gone back to my
purple blue color, and I'm just placing
that color underneath the jug and dragging it out
to the right hand side. Now, a shadow is always
darker nearer to its source, and as it moves away, it lightens and disappears. So we do want darker color immediately underneath
the jug and then more watery
and lighting tone as it moves away
towards the right. So I'm adding in a little bit of that stronger purply black just immediately below the jug. And then I'm using a clean
damp brush to drag that color away and let it soften and
diffuse into nothingness. To balance the shadow
that's on the right, I'm adding a little bit of shadow to this left
hand side of the table, which might be from
a daffodil above or some other shape that we
can't see in the painting. Okay. Regarding the rest
of the background, you could, if you wish, paint the whole of
that background, going in and between the leaves and around the
daffodils and the jug, that would be quite
tricky because you've got a lot of very small
shapes there. Alternatively, you
could just simply add some spatter
in the background. But I've decided to
leave mine as it is and go for a nice clean
looking appearance. If you do decide to
go for a background, why not take a photograph
of your painting at this stage so that you've always got it to go back to if needed. It can be difficult to decide when to stop and not
over work a painting. Sometimes it's a
good idea to leave it a few weeks and then
have a fresh look at it. You can always add a
background at a later date. But for now, I'm going to
call my painting finished. I do hope you've enjoyed this painting and that
you've learned some tips and techniques along the
way that you can incorporate into
your own paintings. And why not pop it into
a mount and a frame, and you'll be amazed how good
it looks when you do that. Really love to see your
own finished painting, which you can upload to
the your project section. And if you could just take a moment to leave
me a short review, that also would be really great. I do hope you've
enjoyed this video, and it's encouraged you to have a look at some of
my other classes. In the meantime, thank
you for joining me, and I look forward to seeing you next time. Happy painting.
6. FINAL THOUGHTS: Well done on completing the
class and also the painting, if you've been painting
alongside of me. We've covered quite a
few different techniques as you've been following
alongside of me. We've simplified the drawing
from the reference photo. We use the wetting wet technique for the first layer of color. We then use the layering
technique to add a second layer of color after
the first layer had dried. We looked at how to blend
and soften hard edges, particularly when
adding final details. We mixed a range of
different greens and used the light and dark
tones to convey the three D roundedness effect
of the stems and leaves. We looked at how to paint shadows on the jug
and the table, making them darker
at the source and lighter and more diffused
as they moved further away. Oh now, don't forget to upload your own painting through the project
and resources tab. After all your hard work,
I'd really love to see it, and I'll be sure to give
you some personal feedback. And if you've
enjoyed this video, do have a look at my other
classes on Skillshare, which are packed
with more tips and techniques to help you
on your own art journey. If you click the follow button, you'll be able to follow me, and then you'll be the first
to know when you upload a new video or any
exciting updates. And if you could
just take a moment to leave me a short review, that also would be really great. In the meantime, thank
you for joining me, and I look forward to seeing you next time. Happy painting.
 Carrie McKenzie, creating painted visions