Transcripts
1. Class Intro: [MUSIC] What is a
sourdough starter? I read somewhere that
it is a container where a symbiotic relationship is formed between
microorganisms and bacteria. A community unto itself that
coexist together and through manipulation can give you a
delicious sourdough bread. It can give rise to your bread, it can give you a fluffy chewy
crumb and sourness to it. What do I mean by manipulation? I mean that you can
ensure that you have less or no sourness
to your bread. Yes, that is possible. You get to choose your own adventure by
watching this class and understanding
what's happening inside this
particular container. Hi. My name is Nadia. For those who follow me and have watched my previous class called Sourdough Bread: Understanding The Hows and Whys, I now bring you Sourdough
Starter Demystified. For those who are
watching this for the first time and
are not following me, I'd suggest you go
ahead afterwards watch my previous class, where I go more into detail
about what's happening with your sourdough dough before
it goes into baking. I am a content creator, photographer, and videographer. Both my partner and I have our own YouTube channel
called Nadia and Rob, where we discuss food, food-related products,
lifestyle around food, food culture, you name it. That's our channel.
If you're curious, I would suggest that
you go ahead and check it out because we also pack in quite a bit of taste and knowledge
there as well. Not that I would say I'm
not recommending it, I am recommending it. I would recommend you go
check out our channel. A sourdough starter
is a great mystery. It is still being studied
by scientists at this time. This class we'll cover what I've discovered and
understanding and share my knowledge with all
of you guys without being overly sciency
or scientific. I want to provide information that I think would
benefit you and help you create a much stronger
starter that will last you for hopefully
years and years. Having your own starter
isn't just about crumb, crust, great rise, but it's also about flavor. By manipulating that flavor, you can really take your sourdough bread
to the next level. My mother starter is
about three years old, just over three years old. She's been fed recently today because it's been two weeks. When I'm not baking, she stays in the fridge
during that whole time. Because she is
strong and mature, I can get away with
not having to feed this starter for
up to two weeks. This class is geared
towards beginners, but all skill levels
can watch this. Any discoveries or thoughts
that you would like to share, I would encourage you to put it down in the discussion area. This way we build
a community and we get to learn even further about each others'
sourdough starters. Everybody's kitchen
is different, everybody's environment
is different, so your sourdough starter
is unique to you. Welcome to my class. I hope that this class will help you understand
your sourdough starter. Now let's move on
to our lessons.
2. Project Intro: [MUSIC] Before we
start our lessons, let's discuss the
project of this class. The project is for you
to be able to create a strong starter that you can then use in your
sourdough bread baking. We will be covering
the creation of a brand new starter from
scratch from Days 1-14. It's going to be about
a two week project. Why Days 1-14. Well, I believe in creating a proper foundation when creating a sourdough
starter from scratch, and that's what will be
covered in this class. Measurements ratios
will be provided so you can follow along
and create your own. I will also be
providing a guide and some additional notes
that you can download and use while creating
your own starter as well. Lesson 1 we'll be going over the tools that we need
and understanding the requirements of
particular ingredients to ensure that your
sourdough starter will continue to thrive, once it's been created. Lessons 3 and 4 we'll
actually cover what's happening inside
of your container and why it's behaving that way. Of course, depending on temperature environment of
your kitchen in your home. Then from there on, we get to understand how we can keep the
starter going and how to actually store it as
well if you aren't baking on a regular basis. I also encourage you to share your thoughts,
your discoveries, and anything else that
you may have regarding your sourdough starter in
the discussion area below, where everyone else can also see what you're doing and share their own discoveries as well. We will also be
creating three breads from three types of
lavas or starters, that you will be able to see the behavior when you're
trying to manipulate a sourdough starter
for taste and some characteristic
differences of the bread itself when compared. Do feel free to use the
lessons as a guide as well. If you need to re-watch
it when you're doing something as that's
what they are here for. They are here to help you to
make sure that you create a amazingly strong
sourdough starter that will stay with you for years and years,
should you wish. As it matures, they are
actually harder to kill, so you don't really
need to worry. There is no fear when it comes
to your sourdough starter. Your sourdough starter is
your pal in the kitchen, it is your pal in baking. You can use this class
to understand how to build a beautiful relationship with your sourdough starter. I'm looking forward
to seeing what all of you create when it comes
to sourdough starters. If you name your
sourdough starters, please let us know as well. At one point, my very first starter I had named
it Tamagotchi. Now I just call it
my mother's starter, but there's no harm in naming your starter because it
is your little buddy. I'm curious to know
what you name them. Let's start the
lessons and let's go on a discovery journey together. See you in Lesson 1 [MUSIC].
3. What You Need and What To Expect: Hi everyone, welcome
to the first lesson of sourdough starter
demystified. In this lesson, we'll be
covering five key things, which are flour, water, measurements/ratios,
tools needed, and what to expect with your sour dough starter
or while creating it. Now the first thing, or actually two
things that are very important for flour and water. Now, for flour,
for best results, I'd recommend using
whole grain flour. It could be either whole wheat, whole rye, or whole spelled. Reason being because
a whole grain flour actually has all
the nutrients and the microbes needed initially to help build your
sour dough starter, give it all that it needs to start gaining
strength during gestation period if
you want to call it that way and start
becoming a young, healthy sour dough starter. If you are milling your
own grains at home, it's even better because you have the endosperm, the brand, the germ, everything that is within that grain
will be included, which means it will have even more nutrients
and microbes. All the strength that's needed. I don't mill my
own flour at home. I do have access to a
bookstore so I can actually get wholegrain flour from there
and feed my starter with. A miller is not a necessity or a milling
machine is not a necessity, but it's a nice to
have, so to speak. Now, if you only have
all-purpose flour or bread flour that
are extremely sifted, meaning that there's no brand or grain within the flour, please make sure that
it is unbleached. Reason being because
the bleaching process actually does kill off the nutrients the microbes needed for the sourdough
starter to begin with. So if it doesn't have all the nutrition in the
beginning, it won't thrive. It will actually hinder
the growth process. Out of all-purpose
and bread flour, I would go with bread flour
because it actually had some more in there than
just an all-purpose. The all-purpose flour has
just been sifted even further so if there was
any little bits of anything left behind,
it'd be taken out. Now for water, the
question tends to be, can I use my tap water? The answer is, it depends. It depends on, can you drink your tap water
within your city or region? If you can, then that's great. That means it's usable. But I would recommend that you place the
water in a jogger or a jar and leave it on your counter uncovered
for at least an hour. Reason being because if there's any chlorine present
in the water, it actually allows the
chlorine to evaporate. So give it at least an hour, if not more, to allow the chlorine to
evaporate completely. Chlorine will also inhibit the growth of a
sourdough starter. So it's not going to really thrive if there's
chlorine present. I know some people you have used tap water without letting the chlorine
evaporate and they've been able to create a
sour dough starter. But I believe in trying
to give as much ammo to a sourdough starter as
you can in the beginning to enable it to thrive
and continue to thrive. At home, I use distilled water. We do have a
countertop distiller because we use it
for a coffee machine so that we can avoid
any calcification or any other buildup in our
coffee machine or scaling. But if you don't have distilled water at home,
it's not a necessity. Again, it's just
another nice to have. Tap water is fine as
long as it's drinkable. If you can't drink
your own tap water, then you wouldn't want to use if your sourdough starter or
even for your bread baking. Measurements and ratios. Now, when I was very green
to the sourdough game, I was learning at that
time from someone else on how to build my very
own sourdough starter, and I was told to first use a large amount of
flour and water mixture. The amount was 100 grams
of flour and 100 grams of water to make a total of 200 grams of flour
water dough mixture. When it came to feeding it, discard half of the
mixture and add another 100 grams of flour
and 100 grams of water. It just kept building. Now, it's fine, it works. But I learned over time as I was making my own sourdough
starters at home and experimenting that I did not need such a large amount to get it going because
all it's going to do is we're still going to
have yeast coming in there. If you don't stick with the proper feeding schedule or the amount that
you're giving, exponentially you can
eventually starve your starter. So I decided to
keep my math simple by keeping a smaller
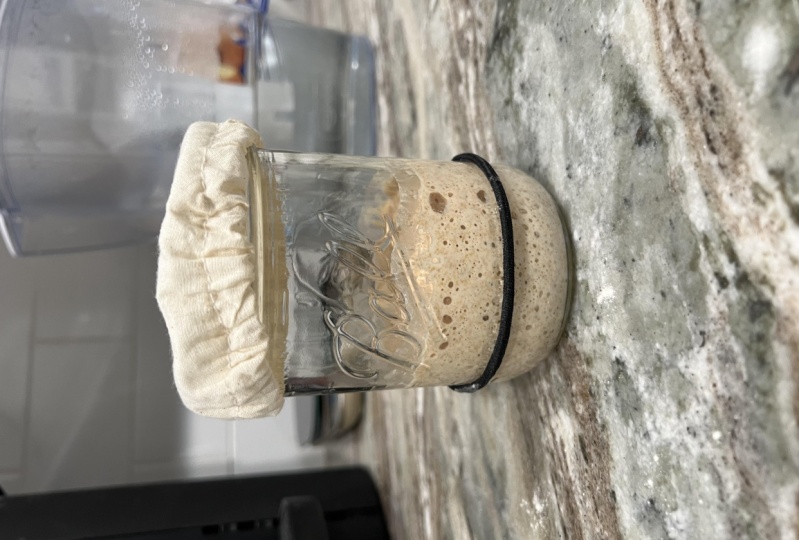
amount of starter around. This is my starter. If
you can really see. As you can see, it's a
tiny amount in there. This is what I
keep in the fridge and I feed it every two weeks. But I've had this starter
for over three years, so I know it's strong enough to handle without being
fed for two weeks. You have to remember a sour dough starter is
just an inoculation. I use a bit of it to go
into what I make a levain. A levain is what I use when I use it completely
for bread baking. I try to keep it separate because if something goes
wrong with the levain, then at least my
mother's starter is still healthy and
strong and going. I've spent so much time and love in building
the starter, I wouldn't want see its demise. I'll be very unhappy and sad. So in this class, we're going to go on how to just build a small amount
of your starter. I use the discard method, I've used it many times and I find that my starter was a
lot healthier as a result. So that is what I'll be
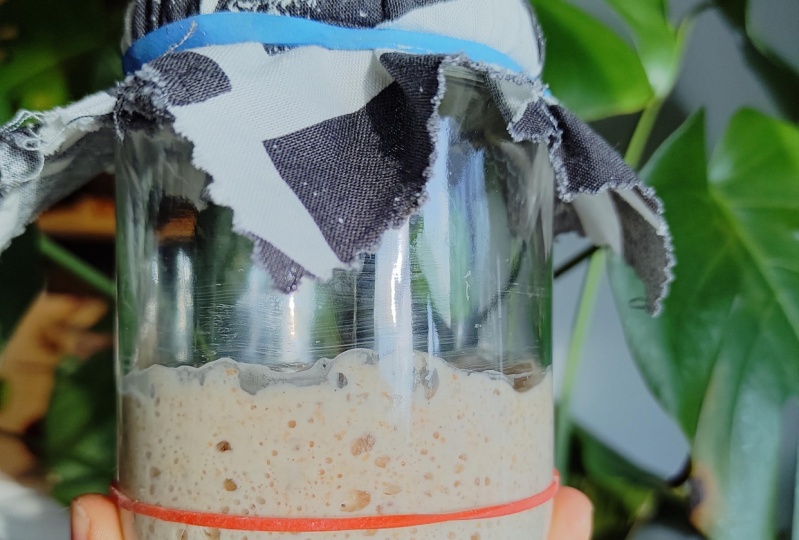
showing you in this class. Tools that will be
needed for this class are: jar with a loose lid and a rubber band to use as
a marker, water, flour. Whole grain is recommended, but if you only
have bread flour, please go ahead and use that. Digital scale,
spatula, and a spoon. The spatula that I
would also recommend is one that is straight-sided
on both sides, but these scraper part
has a bit of a curve. Reason I like that is because
then I find you can really scrape the sides of the
jar down really clean. Nicely in that way, you can see the rise and
fall of your starter. I like to keep my jar as
clean as I possibly can, so I can have a good visible or visual cue of
what's happening. It's just a nice habit to have. What to expect. Now, a starter's growth depends on the environment and the food that it's getting. I've made a sour dough starter from scratch in the summer, and it only took
about a week for it to become ready to use. I've also made a sour dough
starter in winter when it's a lot colder and it took about two weeks before
it was ready to use. In both cases, I was using the same flour and water mixture and that told me
that obviously it was the temperature
that was the variant or the variable that was causing either the speed or the delay
of the sour dough starter. Essentially, it
was a temperature that controlled the growth. In winter time, the bacteria and yeast are a little sluggish. They're not moving
around as much, so it will take a
lot longer for them to do what they'd want it to and that's including
eating and creating gas and hanging out with
each other, so to speak. For the purpose of this class, we'll be creating a
sour dough starter with a one-to-one ratio, meaning that it will be equal
parts of flour and water. Once we've created
a good, strong, young starter, we will
then be making three. I apologize in advance that'll
be probably using starter and levain at times
in the same sentence. But when it comes
to baking bread, we will be making three
different starters for now, which will be regular starter, which would be a one-to-one
ratio, a stiff starter, which would be a
two-to-one ratio, and a regular starter with
a bit of sugar in it. We'll also be seeing
a comparison between my mature starter and the
young star that we've created, to see how quickly it feeds and holds its place at its
peak before collapsing. In the next lesson, we'll be going over in making the mixture for
our starter day 1. So see you in the next class.
4. Let's Start Creating Our Starter: [MUSIC] Welcome back
everyone to our Lesson 2. In this lesson, we are
essentially going to start working on creating
our sourdough starter. This is Day 1. The mixture that we're
going to be working with or the ratio is 1 to 1. The measurement is
going to be 40 grams of flour and 40 grams of water. For flour, again, I would recommend whole grain if you don't have a whole grain, you can use bread flour. The benefits though of
a whole grain flour is that because of all the
nutrients the microbes in there, it is an all-day buffet to a sourdough starter when
it's first starting off which means you
only need to feed it once a day for
about seven days. The feeding schedule
is 24 hours. If you're going to be
using bread flour, I would recommend feeding
schedule twice a day. I believe some people
only do once a day for about the first two or three
days and then after that, start feeding it twice a day, you will need to see the
behavior of your starter if it starts to show any activity
of how hungry it seems. You can tell when it's
hungry it's when it rises and when it
starts to fall, the drag marks
indicate that it's starting to fall after
it's reached its peak, which is when you really need to feed it because it's
hitten starvation point. But for this, if
you have wholegrain flour, 24-hour feeding schedule, if you have only bread flour, I would say every 12 hours feeding schedule for
the first seven days. Now again, as discussed
in the previous lesson, temperature does come into play. At the time of the recording of the sourdough starter that I'm making for the
purpose of this class, it was spring, a very
chilly spring so the activity was a
little on the low side. When I once made a
sourdough starter in the heat of the summer, it was very hot and very humid. The first day I saw
a major activity where the sourdough starter was actually ready to
come out of the jar. That's how much activity I had. It was pretty intense. But for this one, it
was pretty quiet, not much activity as you can
see in the video recording. I don't even think
it barely moved. I think it just
stayed where it was. It said no, thank you to me at the time from the looks of it. I realized early on, they actually don't need that
much of flour and water, in the beginning, to
get a starter going. You just need a
feeding ground and an environment for the
starter to thrive in. Also, because I use
the discard method, there are other methods, but I prefer the discard because I found that my starters have gotten healthier and
stronger a lot faster. By using a smaller amount, I'm actually helping to
create less waste in a way. Our city where we live, we do have a compost
program so I know that all my discards are being contributed to the
compost program. If your city or region
has a compost program, I'd say you can
use it guilt-free. If you do your own
composting then that's fine. Other people like
to bake waffles, pancakes, crackers, you name
it with their discards. You can do that as well. I don't make any
of those things, so I can just discard
and because I have just a small amount of
starter that I'm feeding, I know if I take even
a quarter of this, I'm only creating
this much waste. I'm not creating as much of a waste when you think about it. I'm only discarding
about this much of it. If you want to give
your discard to a friend or a family so they can make their own
sourdough starter, they can use that as an
inoculation as well. Again, think about it, a
starter is just an inoculation, so you're only taking a portion of the
starter to inoculate another flower water
mixture to make your levain in
preparation for baking. Why keep such a large amount around because if you don't do the math and feed it in
its exponential amount, then you're going to start
starving your starter and eventually it'll stop
thriving and probably die. Unless you're making
multiple breads a day when you need a large
amount of sourdough, you really only need this much. Also, it becomes a waste after a while when you
have so much around knowing you'll have to
get rid of it because you cannot support in feeding it. If you're not baking as much but you want to keep
a starter around, this amount is fine
to do discards and feeds with because if you keep it in your
fridge like I do, my starter is very healthy. I only have to feed it once every two weeks
and it's fine. The other benefit of using
it as an inoculation is that should something go wrong with your levain for baking, at least your mother
starter is still strong and healthy and uncontaminated, so you can rely on the amount
that you have already. This is I think closer if not
more than three years old. I think more than
three years old, it is extremely strong. It is my best friend
when it comes to baking my little pow and I always make sure that
it's happy and healthy. Let's mix the flour and the water together
and mix it all up. Clean off the sides
with the spatula, put a rubber band roughly
around where it's been leveled off to and we'll let it sit for a
day and see how it does. In the next lesson, we are now going to
go into Day 2 and review Day 1. See you
in the next lesson.
5. How Well is Day 2 Going?: Welcome back everyone. We are now in Lesson 3, but Day 2 of our starter. Don't get the two confused. I'm probably going
to get confused. Anyways. Day 1, let's review
it really quickly. We saw no activity. Probably because the
temperature was so cold. We saw no activity, but it doesn't mean that nothing has been
happening in there. I like to always
sniff my starter. Sounds weird, but I like
to give it a sniff. I knew Day 1 it was just
going to smell like dough. I've done this so
many times before the Day 1 always
smells like dough. Sometimes you'll
see some changes in scent in Day 2 and onwards. But it also depends
on your temperature. If the temperature is cold, all the microbes are actually
not moving around as much. They're just being quite
lazy and probably sluggish, so you won't see much activity. As for Day 2, up from Day 2 to Day 7, we're going to stick
to the same schedule. If you're using whole grain, which is a feeding
of every 24 hours. If we're doing bread flour, then probably a feeding
of every 12 hours. We're going to stick
to the same ratio, 40 grams of flour and
40 grams of water. In terms of the
mixture from Day 1, which is not quite
a starter yet, discard half of it out. Then mix in the
40 grams of flour and 40 grams of water. Give it a good mix. Scrape down the sides, readjust your rubber
band if you need to, and let it go, let it do its thing. Now in some cases on Day 2, if you didn't see any
activity on Day 1, you may see activity in Day 2, where a colony of microorganisms
are probably arriving, ones that are existing
in the grain to that, maybe in the air. Three that may promote
from the water. Four that even your hands, whatever microorganisms, even bacteria that
are on your hands, anything in the environment
can now start to enter into the jar because
the lid is very loose and you may start to
see some activity. Also because you have the
dough mixture from Day 1, it also has a lot of it's
own colony of microorganisms that have entered within
the 24 hour period. If you do see any activity, it's probably the microorganisms
******* and burping, releasing their own CO_2 gas
within the dough mixture. That's what it's
promoting the growth or the height of the sourdough
starter or the dough mixture, whichever you want to
call it right now. I think it's a
little too soon to call it a sourdough starter. There are just so much joy
filled within that jar on Day 2 of finding
their new home that they're just excessively
releasing gas everywhere. After we've mixed and if
you look at the recording, there has been a lot of
activity during Day 2. The microorganisms are
so happy to have found this new home that they're
just releasing gas everywhere. Sounds silly, but that's
really what's happening. They're just filled with joy
of founding this new home. I'm wondering and I'm hoping that this continues on
to Day 3, 4, and 5. In the next lesson, we're going to review footage
over Days 3, 4, and 5 and what's going on with
the sourdough starter. See you in the next lesson.
6. Is My Starter Dead? What's Really Going On: We're back, Lesson 4. In Lesson 4, we are going to be reviewing
footage from Days 3, 4, and 5 of our
sourdough starter. As a recap, we are sticking with a 24 hour feeding schedule because I'm using
whole grain flour. If you're using bread flour, stick to 12 hour
feeding schedule. It's the same amount
or same ratio, 40 grams of flour and
40 grams of water, and we are discarding half of the previous day's
mixture to mix in with. Now, Days 3, 4, and 5 get a little interesting because this is where
it really gets people. It got me the first few times. After that, once I understood
what was happening, I relaxed because I knew at
some point activity maker. If you see footage
from Days 3, 4, and 5, there's
barely any activity. I think in one of the days
there is no activity. What's really happening?
Some people ask, is my sourdough starter
dead? Not by any means. It's not dead at all, and it's not quite
dormant either. What's happening is a battle. A battle is ensuing in
this new found territory, and this territory has
been discovered by other microorganisms
in the environment, so they would like
to inhabit it. But you can't have so many microorganisms in one
battle ground or territory. You may, I mean,
science is still discovering a number
of things that's happening within a
sourdough starter. We're still in the
early stages of understanding why it does, what it does and
how it comes to be. In Day 1 and 2, a microorganism specie or a few of those species entered, and on Day 2, we saw a lot of activity happening because
there were just so happy, they basically threw a party
and release gas everywhere. Day 3, another specie of microorganism
arrived and went, I think I want to stick
around. What do you think? [NOISE] The micro organisms
that are already there went, No, I don't think so. A battle starts to see
who becomes dominant. [NOISE] That's what's
happening between Days 3, 4, and 5 in my case of
my starter here. That's why there's barely
an activity because they're trying to duke it out to see who's going
to stick around. We all know what
happens in a battle. There are casualties. Because there are casualties, there isn't enough of yeast of any kind to help release
any gas or growth. Doesn't mean you stop
feeding it because if you want one of
the yeast to survive, you need to feed it, give it more ammo so it becomes stronger of whichever
specie ends up surviving. That specie will depend
on your environment, your kitchen, your
hands, everything. That's the type of specie
will probably stick around, not every specie is alike, not every kitchen is alike. If you're wondering whether your sourdough starter
[NOISE] isn't thriving, is just it's going through something that's really hectic, and they are going through their own soap opera
that they need to work out. Now, when do you know when a particular specie
of yeast has survived? When you start seeing
activity again. Till then, just keep feeding
it and give it the strength it needs to do whatever it needs to do and
duke it out and win it. There may still be
other small colonies around of different species. I believe some scientists
have discovered that it's not just one type of yeast that ends up living in
a sourdough starter. There are other types as well. We have one dominant that
basically rules them all, becomes its lord and is the primary yeast within
that sourdough starter. Instant yeast, I believe
is only one kind of yeast, but there are other yeasts in the environment
that end up living in the sourdough starter. No two starters
are alike either, interestingly enough, which I thought was very interesting. Also the type of
flour you use will also enable a particular type of yeast specie to be there. In which case, if within the seven-day period
you decide to change your flour, one, maybe because you
can't have access or don't have access to it
anymore or you decide, I'm not seeing any growth, I want to try
changing the flour, you're hitting the reset
button when you do that. If you change the flour, you're introducing
another type of specie and it will go into another battle and you probably
won't see much reaction. You may see reaction the first day when you add
that new flour in. But the second day I guarantee it's just going
to be a flatline. Trust me, I've been
through this many times. I would highly
recommend you have enough of the same flour for at least the first seven
days and keep some of that same flour around for the feeding going
forward as it will encourage that same type of yeast to stick around and
stay very strong and healthy. In the next lesson, we're
going to go over Day 6 and 7. We are almost there. We're almost done
making our starter. Almost. Remember that word. Almost. But after seeing that nothing much has
happen in Days 3, 4, and 5, hopefully, there's activity in Days 6 and 7. See you in the next lesson.
7. Battle Has Ended and We Have...?: [MUSIC] Welcome back. We are at Lesson Five. In Lesson Five, we're going to go
over Days 6 and 7. What do we see in Days 6 and
7 when we review the footage? That's right. We see
activity on Day 6. Why? Because that means that the battleground or the
battle has ended and a particular microorganism
or yeast has laid claim to the land and
declared it as its new home. So happy for it because now this yeast has become my new
power in the baking game. What this also means though, this yeast is weak
at this point, what happens in a battle is
that there are casualties, so it has lost a lot of
its buddies in the fight. Which means it's at a bit
of a weak stage right now, which means it needs to be fed because this young
yeast is so weak. Therefore, by sticking
to the same flour, you are now feeding it
whatever you had given it beforehand to win that battle and it'll start
growing and thriving. Your waiting and your patience
has been greatly rewarded. You now will be having a
reliable sourdough starter. Please don't change the flour. But not only is there a
dominant microorganism, yeast that has taken
over the territory, it also has partner or partners
depending of bacterias, namely lactic
and/or acetic acid. Those are bacterias. They are not your foe. They can be your friend. You don't want to fight
them because lactic acid is what gives the sour taste
in your sourdough bread. It also breaks down
hard-to-digest gluten, which is why a lot
of people who are gluten sensitive or have issues with their tummy and
can't eat bread, are able to have a
sourdough bread because the lactic acid has done
most of the work for you. So it's not your foe. It's not your enemy.
It can be your friend. How can it be your friend? Well, without it realizing it, you can actually
manipulate this friend. Why do I use the word manipulate
is because what I mean is because it lends a flavor
to your sourdough bread, you can manipulate in terms of how much sour flavor
you want in your bread. Some people like their
breads really sour. Like the San Francisco
bread, I believe. I've been told many
times it's extremely sour and it's known for
it and people love that. I am on the other side where I'm not a big
fan of sourness, I just want enough where
it actually activates my saliva glands and gives me a little je ne sais quoi
taste of the bread. But I don't want it to
overpower where then I can't enjoy other toppings that
I may put on the bread. When I was selling bread, I would have customers who
would want it really sour, and I would have customers who only wanted a little bit sour. Then I had customers who
didn't want it sour at all. So I had to learn that
from my mother starter, how to create levians, as long as I was given
notice ahead of time, I could build those levians for this particular flavors
and make the bread. That is what you can do. You can manipulate
the flavor from the sourdough starter of what your bread is
going to taste like. I think that's pretty amazing. More of that will be discussed
in a few lessons later on. But I wanted to put that
seed in your mind now, you can manipulate the flavor
of your sourdough bread by playing around with
the lactic acid within the sourdough starter. At this point, you may notice a black liquid showing up on the top layer of your starter. That's called a hooch, It's like a blackish
gray liquid. It's not a bad thing at all. You can either pour it off or you can mix it
into your starter. It doesn't harm the
starter in any way. I actually tried for the purpose of this class to
actually create hooch, I was really trying and it just wouldn't do it for
me. It just refused. So I unfortunately don't have an example of what
a hooch looks like. But if you see a
blackish grayish liquid literally slopping around
on top of the top layer, just either pour it
out or mix it in; it doesn't harm the
starter in any way. Also, you want to get into the habit of
sniffing your starter. I, on daily basis, give it a sniff and see
what it's smelling like. If it's smelling like
a fermentation where the best description
would be like when you go into whiskey distillery
has a sickly sweet smell. That's what a fermentation from a sourdough starter will
probably smell like. Some people claim they
can smell cinnamon. I don't smell it in mine
but I smell fermentation. If you're starting to
get a cheesy smell or like an acetone, acetone being like nail
polish remover smell, throw it out; that
starter, there's no hope of return. Something
has gone extremely wrong. It will probably
die off anyways, but you don't want to use it
for bread baking, trust me. The cheesy taste will actually make your bread
taste like cheese, but it may also be not
that great for you. The acetone one,
definitely don't use it. We don't know what's going on. Just chuck it out and start
from the beginning again. I know it sucks, but just start from
the beginning again. I don't want to recommend
using any cheesy or acetone smell
sourdough starters in your bread baking no matter how high of a heat
you're baking in; something's just not
right with that starter. Now by Day 7, people see a lot of activity. They're like, my sourdough
starter is ready, it has now become yeast
that I can use for my bread and people actually do bake with it and are quite happy
with the results. I like to take it a
step further to ensure my starter is in fact
extremely, extremely strong. I actually go for
another week of feeding. The reason I also do
that because I actually see a behavior change
in my starter. It now wants to go into
a 12-hour day cycle of feeding as opposed
to 24-hour day even though it's a whole grain. Which means I now go into twice a day feeding schedule
starting from Day 8. We also make another addition
to the sourdough starter. So the next lesson we're going
to go over Days 8-14 and see what changes we've made and what habits or
behaviors we're seeing. So see you in the next lesson.
8. Week 2 of Our Starter and Some Changes: [MUSIC] We're here
with Lesson 6. In Lesson 6, we'll be going
over and reviewing days 8-14 of our young and very active at this
point sourdough starter. First thing I've
noticed it's actually getting hungrier a lot faster, it's going through the
food a lot faster. So I have now switched from 24-hour to a 12-hour
feeding schedule, which means twice a day. I've actually added
something a little different to the
sourdough starter. I've actually added a
bit of bread flour. Why after the seventh day since we've been
just feeding with whole grain flour
this whole time, have I decided to add
a bit of bread flour? Well, before I answer that, I would like to ask people, have you heard of
the float test? What is a float test for
those who haven't heard? Well, a float test
is to check to see for your starter is ready and
active to use for baking. It is a very popular
method to use. What you literally do
is take a teaspoon, take a little small scoop of your starter once
it's hit its peak, take a bowl of chilled
or cold water, and gently put in that scoop of sourdough
starter and see if it floats. The float test, aptly-named. Don't do what I did by just
plopping it into the water, it's definitely going
to sink no matter what; you've just busted the
air out of that thing. Gently just use another finger or use your finger and
just put it on there. [MUSIC] I don't use
the float test. I go by seeing what the
starter is looking like. If it's active and
bubbling and it smells like fermentation
and it's nice and tall, it is definitely
perfectly good to use for bread baking at that point
because it is filled with gas, which means when it's feeding
again inside of your dough, your dough will be filled
with gas and ready to bake. Another reason I don't
use a float test, I discovered early on that if you're just
using a whole grain based sourdough starter and you try to perform
the float test, nine times out of
10 it will fail. It does not mean you
starter is not ready, it just means it's too dense to actually float.
Think about it. When you're making
a whole wheat bread versus a bread flour base bread, the whole wheat bread
will always be dense. The bubbles are very
tight or the crumbs are, it's going to be
very tight and very small but it's still
a delicious bread. Whereas the one where it's
just bread flour, one, it has more gluten in it so
it can really stretch out. Two, because of the
gluten network structure, the gas can be trapped
a lot better which will enable the flour to rise. Because it doesn't
have so much grain in it from the whole wheat, there isn't enough
weight weighing it down. Same goes for your
sourdough starter. A whole grain base sourdough
starter is just way too dense to actually successfully
perform a float test. A bread flour base starter
will always 10 out of 10, maybe even 11 out of 10
pass the float test. I learned to note the
smell and the behavior of the sourdough starter and
see what it's looking like and has never failed me. Use your senses and they can clearly let you know how
your starter is doing, and how it's going to do
during bread baking as well. So the reason I add a bit of
bread flour to my starter is because of the gluten
network properties within the bread flour. I have found that after a while, you just use a whole
grain-based flour, especially if you're
doing a one-to-one ratio, the starter is quite soupy
and texture it's quite loose, I don't like that. By adding a bit of bread flour because the
gluten structure in there, it becomes a little
stickier which means the starters
stays better together, which means I can
actually scoop it out in one chunk and not have it pour out if that
makes any sense. It's more of a textural
preference for me, where you can use the whole
grain flour if you want. But I have also found, and I would love to
know if other people make the same discovery, that because I added a
bit of the bread flour in the sourdough starter my bread when it's rising and baking, it actually rises a
little bit better versus just using a whole
grain base sourdough starter. It could be just me, I don't know if anybody
else does that. I haven't met anybody
else who actually mixes bread flour and
whole grain flour. If you do, please let us know in the discussion area
what you've discovered. Sourdough starter
is quite young, especially in North
America in terms of making, thriving,
feeding, keeping it. The more we discuss
with each other and share our discoveries, the more we'll know. Then what is my ratio for the bread flour to
whole grain mixture? My ratio is three to one, three being the
whole grain flour and one being the bread flour. I actually keep it
pre-mixed in a jar dedicated to the
sourdough starter. I don't really need a lot of the bread flour within the mixture to keep the
sourdough starter going. The whole grain mixture is
the same flour I've been using since the
beginning when I first started building the
sourdough starter. So that way it keeps thriving. All this time, I've been doing a feeding schedule
of twice a day with my three-to-one ratio of whole
grain bread flour mixture. If you've only been
using bread flour, I would recommend feeding
it at least three times a day, it'll let you know. If you see it rise and then
fall and you see drag marks, it's clearly extremely hungry, basically starving,
you need to feed it. If it can go with just
being fed twice a day, then that's fine as well. But, you don't want to keep starving your starter either. Because the more you starve
it or the frequency of it, you're not enabling it for it to become stronger and healthier. You want to keep feeding it. Once it hits peak, feed it. If it drops a little, drags down a little,
that's fine. But if you really
see it drag down, you don't want to keep
doing that because then it won't thrive as well. You've worked so hard to build
a starter and nurture it, and build a relationship
with it and make it your pal in
the baking game, you want to keep it going. Once it becomes
healthier, stronger, then you can store
your starter in a way where if you
don't bake as often, you still have a healthy
starter to work with. Get to know its feeding cycle, build a relationship
with it and you'll be happier for it and
so will the starter. When you see a comparison
of my mature starter, which is three years old, compared to the young
starter we've made, you can see that, yes, the mature starter does rise faster than the young starter, but it's also holding its peak a lot longer
than the young starter, whereas the young starter hits its peak and then
starts to fall. It is so hungry, it is starving that
it wants to be fed. Whereas the mature starter, because it has so much
yeast in there and they're all strong and bulked
out and healthy, they don't have the need
to feed that quickly. That's what I mean.
If your starter is very strong and
healthy as it matures, you don't have to
feed it actually that often to keep it going. That's why my starter
can sit in the fridge for up to two weeks
without being fed. Few times I've gone a month without feeding
it because I want to see what would happen and
will still find it came back. But, it's not
something I would do often because all I'm doing is actually hindering
its growth progress. That's why you want to
keep your healthy stronger going because then you don't
have to feed it as often, which also means you can schedule out your baking
time in a way where you know you don't have
to run and use your levain or starter right
away for bread baking. You can actually
have the starter growing overnight or the
levain growing overnight, and then start your dough mixing in the morning
which is what I do. [MUSIC] My starter can go on
a 10-hour feeding schedule. When I wake up in the morning, start my autolyse and then add the starter once
my autolyse done, and then go about my day. In the next lesson,
we'll discuss what to do with the
starter once it's become healthy and strong.
See you in the next lesson.
9. Methods of Storing Your Starter: [MUSIC] Lesson 7. Everyone,
we are getting there. We're almost getting there. But before we get to baking
bread with our starter, our newly found
starter created or discovered or whichever
you want to call it, your new starter baby. We want to or at least I, I want to go over
what you can do with your young and
healthy starter for those who just don't
really bake that often. If you bake every day or
multiple times a week, then you can just keep feeding your starter on your
countertop if you want. I have stopped selling bread because I have
other priorities. My starter now lives in the
fridge a lot more often. What I do is because my
starter is three years old, I know it's super strong. It can go up to twice
a month for feeding, so fed once every two weeks. At this point your starter is just still on the young side, semi-strong side, still needs a lot of ammo to get it
strong and healthier. With age and maturity, I would say feed it once a week once you put
it in your fridge. Keep a small amount, you
don't need a large amount. This one is even smaller
amount because again, I use it as an inoculation. This only has I would say about 10 grams of starter
and 25 grams of flour. I make it a little bit stiff, so I only use about
15 grams of water. I keep it stiff because I find it lasts even longer
in the fridge but that's becoming
more of an advance. Right now we're just
discussing what do with your current starter. I can do that with this because it's a
super-strong starters. After a year if you want
you can make more of a stiffer starter to keep in your fridge to make it
last longer in the fridge. Meantime, I would say keep the same starter of
your building in the fridge till it
becomes nice and healthy. You can also store
it in the freezer. It's not a method
that I've used. I know other people who
have used it and I've been told to allow it gently to frost on its own
whether in the fridge which will take a lot longer
or on the countertop. Please don't put it
in the microwave on defrost because you are just basically cooking
it by biased order. Just let it gently defrost. It will require a
lot of patients. The other method,
and this is a method that I have not used yet but I'm looking forward to at some
point in the far future is you take a baking sheet, put parchment paper
on top and spread your sourdough starter
thinly on top of the paper. Let it dry on your counter. Don't use a dehydrater. Just let it dry on your counter. It may take a day if not more depending on your
environment in the kitchen. Then just break it up. Some people put in ziploc bags and store it in the freezer. Some people put those in
a jar and store it on their shelf in a dark cool place so it
doesn't get disturbed. You don't want any
sunlight hitting it. Some people actually give
it to friends and families, those chips to make
their own starters with. It's great because
what it's doing, it now allow the starter
to hit a stable point. It's neither feeding, neither
growing, neither declining. It is hit a full stable phase. Is that the word
I'm looking for? Phase. It's extremely stable. When you're ready to use it, you take one of
those chips or two, put it in a jar, put it in a bit of water
and flour mixture, stir it all up. After s few feedings if you haven't seen any
activity right away then after a few feedings you
should start seeing activity in your starters box so
you can do that as well. But I think it's great. Break it up, put it in ziploc
bags, put in the freezer, and it'll be fine as long as you make sure
that there isn't any frost forming on it and
you'll be fine, so airtight. I do apologize, I don't have an example of the
drawing method. Maybe in the future
if I put something together I can share
in the discussion. If you use a drying
method please do share in the discussion
area with others. I think it's a great method. I haven't had the
need to do it which is why I haven't done it. But if you do please do
share, we'd love to see it. What we've been waiting
for in the next lesson, we will be creating
three levain. A levain is where you
will be using all of that starter for your dough. You won't be leaving
anything behind. We will be making three of them. We are making a stiff starter which is a two-to-one ratio. We are making a regular
starter, one-to-one ratio, and we are making a regular starter with
some sugar added to it. In the next lesson we'll discuss why we're doing it
that way and the results of the bread
and how you can benefit from it. See
you in the next lesson.
10. Creating Three Different Starters: [MUSIC] Lesson 8, we are at Lesson 8, which is great because my
mouth is getting a little dry. Thank you for everyone for
sticking to all the lessons and you've made it this far. We still have a few
more lessons to go, but this is the exciting
bit, for me, anyways. This is where you can understand
how you can manipulate your sourdough starter to impart a particular
flavor in your bread. I feel like when it comes
to sourdough bread baking, I've seen so much around
to get the perfect crust, the perfect score,
the perfect crumb. Do you want a big crumb? Do you want a small crumb?
Do you want to wild crumb? Are wild crumbs bad? Do you want to get rid of them or do you want to
keep them around? How much butter and jam do you want going
through each crumb? There's so many
questions in the world. But the one question I find that never gets asked is flavor. Your sourdough starter
will be imparting flavor into your bread and
that's where I think is a missed opportunity. The lactic acid bacteria
in your sourdough starter is where you can manipulate to impart a particular
flavor in your bread. Like I said before, I used to sell a lot of bread. I had customers who
wanted really sour, some didn't want any sour, some who wanted just
a little bit of sour. I built out levains as long as I was given
enough of a notice to manipulate the flavor so that they could
taste it in the bread, and they could taste
it in the bread. One easy way of getting the
particular flavors you want is building out a starter
that's a regular starter one-to-one where it's equal
parts of flour and water. Other is the stiff starter, which is a two-to-one ratio where there's more
flour than water. The third one that
we're going to do, for the purpose of
this class experiment, is a regular starter and adding 25 percent
of sugar to it. [MUSIC] The regulars starter will always have a sour to it. How sour? It all depends on there are a lot of
variables in there and as you get into the
sourdough starter making, you can experiment to see
what gives it more of a sour taste and what
takes away the sour taste. In some cases, if you want to even give
more of a sour taste, I've been told to add rye flour
to the sourdough starter, because the rye flour already has a lot of lactic
acid on the grain so it will impart
a more sour flavor right from the beginning. If you don't want a sour
taste in your bread baking, say if you're making brioche and you don't want that
sourness in there, you make a stiff starter. Because most of the lactic acid lives in the water. So by
adding more flour than water, you're actually giving the yeast more of an opportunity to
propagate within that starter because it has more feeding
essentially to work with and not allowing the
lactic acid to build up. There's a lot going in that jar. We're not aware of how much
is happening inside of there. By adding sugar, and some people even add
baking soda instead of sugar, you are also taking away
the sourness naturally because you're adding
something sweet to it. The one thing you
should keep in mind, which I had failed to do
when doing this experiment, is that by also adding sugar, you are also influencing the hydration level of
the sourdough starter. Because as a sugar
crystals melt, they will release some water
into the starter as well. Keep that in mind. So regular starter will
give you sourness, stiff starter will take
away most of the sourness, and regular starter with sugar will also take away
some of the sourness. Which is more sour,
which is less sour? That's what we're going to
see with this experiments, and also if it influences any other characteristics
of the bread. I'll be providing over here the measurements
for the regular, stiff, and the regular with
sugar levain or starter. We'll be using those
for the bread baking. The bread baking, I have now kept all
variables the same, I've kept the amount of flour, amount of water, which is a 75 percent hydration
before adding the starter, salt, and I'm also going to
be maintaining same timing. Proofing, fermenting
time will be same for all three those, including what time
they'll go into the fridge for overnight proofing as well, I'm keeping everything the same. The only difference are the
three levains or starters. Again, I apologize. I will be going and
saying starter levain in both cases in one sentence. But a levain is where you
are building a starter for the purpose of
baking using all of it versus a starter, which
is what you keep around. See where it gets confusing? Yeah, I know. We're
making three levains. Those are the only influences for the bread baking purposes. Everything else is equal. In the next lesson, let's bake some bread
and check the results. See you in the next lesson.
11. Time To Bake and Taste!: [MUSIC] Lesson 9. Finally, yes, I said finally for
the previous lesson, but this lesson as well, because we are finally baking breads with
the three lavas. We're going to finally
check the results. Again, all the variables
were kept the same. The amount of flour, which I believe
was only 250 grams of flour I wanted to
make small breads. Hydration kept the 75 percent
prior to add the lavas. Salt is the same and all the
fermentation proofing time, everything will
be kept the same. Again, I had failed
to realize that in the regular sugar lava, once the sugar melted, it actually influenced
the hydration of the starter even further, which meant that it influenced the hydration of the dough
once I added the starter in, the dough was a
lot more liquidy. It required a lot
more manipulation to the dough to make it stronger and be able
to meet into bread, which also means that the proofing time would
have been different if I was managing the proofing time for each bread individually. But for the experiment, I wanted to keep
everything the same. We can see here, all three breads are done. The crust right now looks great, the scores and then look great. The one with the sugar, you can see it has the characteristics of it
being close to over-proofing. The score is not that great. The rise is pretty good. But if I let it stay
out on the counter any longer or in the
fridge for any longer, then it would have definitely
been over-proofed, and we would have had more of
like a pancake type bread, really flatbread, but we got it, we have it for the purpose
of this experiment. Stiff starter gave us
a much taller bread. It's beautiful. The
score is also beautiful. The regular starter also
gave us a nice tall bread, but when you put it side-by-side with the stiff starter bread, you can see the one with the stiff starter is
still much taller. But both of them, the cross looks beautiful and the scores came out
really beautiful. If I tap at the bottom, it gives a nice
crusty knock sound. Nice and hollow on the inside. The regular starter, the sugar, not as tall as the other two. The score is nice, decent, but not as magnificent
looking as the other two. That's because it
almost over-proofed. If I had put this
bread away sooner in the fridge and
baked it sooner, I guarantee this would have been a much taller bread with a nicer score on it,
but that's okay. At the end of the
day, the bread would still taste great
no matter what. Once we cut into
all three breads, we can see the crumb, the crumb for this tiff starter. There's a bit of a wild or
big wild crumb in there. It happens. It's still
a young starter. I feel like as opposed
to the bread with the starter, with the sugar, I feel like the stiff
starter bread would've benefited with a longer
fermentation time. Because it had less water
in the stiff starter, it didn't influence
the hydration level in the dough as much, which means it
could have actually fermented for a lot longer. Otherwise, the bread
still looks great. Could also have
been the way that I had shaped it wasn't that great. There's a lot of
variables, but inevitably, you will probably get a wild crumb down then
no matter what you do. The regular starter bread,
the crumb looks great. Again, we have a bit of
a wild crumb in there, but the overall crumbs
structure it looks fantastic. Same with the bread, with the regular
plus sugars starter. What I did note though, that the crust for the bread with the sugar
in it is a lot thinner. The crust on the bread
with the sugar in it is slightly softer and thinner while the crust with a stiff starter is crunchy
and hold its shape better. Whereas the crust for both, the stiff starter
and the regular starter bread is great, it's crunchy, it
has a give to it, it's got a great bite to it. If you're a person who
doesn't really want a crusty bread or wants something that's very gum
friendly as I like to call it, adding a bit of sugar in your starter may be a
good thing for you. Whereas the other two, the crust are very crunchy. But the most important
thing is the flavor, the flavor between
the three breads. In the regular starter bread, I can definitely taste
soreness in the bread. In the bread with
a stiff starter, you can't really
taste the sourness, is just a little bit
that just activates the saliva glands and the
back of your jaw here. The one with the sugar, same thing with the stiff
starter one is just enough. There's just a hint of sourness that you
can't really detect, but it's enough to activate
the saliva glands. You know what I mean
because if you have a bread with no sourness in it at all, which you can achieve, it won't even activate
the saliva glands. That sourness
activates something in your mouth to get the enzymes going to break down the
bread and your mouth. All three taste great. But me, because I don't
like a lot of sourness, I prefer the stiff starter and the one with
the sugar in it. I would say, try
the experiment at home and see what you
like because this way, you can discover
which flavor notes do you really like and that way, you can really
start playing like, if you're making a rosemary
lemon bread at home, you actually want just a touch
of sourness of the bread to play along with the lemon
zest flavor in the bread. It'll just taste delicious. If you want to add a sweet potato or purple
potato to the bread, I would actually say less of
our sourness works better because then you get
more of the sweeter taste from the potatoes. You want to play around with
the type of bread you're baking, including for Katya. For Katya, I actually like
it less sour because I want to taste the sourness from the tomatoes and anything
else I'm adding on top of it. In this way, you
can really start expanding your culinary palette. It's really fun to play with, and it's not just a
sourdough starter anymore, it's just another tool
in your cooking that can really enhance what you have and take it
to the next level. In the next lesson, I know we already talked
about this before, but there's other
things you can do to manipulate the sourness
of your starter. In the next lesson, we'll be discussing
what you can do and maybe some touch a
little bit of history on it. We'll see. See you
in the next lesson.
12. Manipulating Your Starter's Flavor: [MUSIC] Welcome back everyone, and thank you for sticking
around and hanging on as we are now at Lesson 10. In Lesson 10, we'll be discussing
sourness manipulation. Now in previous lessons, we had discussed how you can go about manipulating the
sourness of your bread. We even baked three breads using three different levains and that gave us different flavors, but there are other things
you can also do to manipulate the flavor of your
sourdough starter, namely the sourness. One of them can be the feeding. If you're feeding your
starter only once a day, it'll become inherently
more sour because the lactic acid bacteria is becoming more present
or more prevalent. If you feed a starter with a regular ratio of 1:1 and you're still
feeding it twice a day, it will still be more
sour because there's equal parts of water
and flour present, so both the yeast and the lactic acid will be
coexisting together. If you feed it more often, like three times a day, then you will actually start having less of a sour taste, and that's because
you're not allowing the sourdough starter
to get hungry, and if you keep feeding it, it means that the yeast
is becoming stronger and becoming more dominant
versus the lactic acid. As well if you create
a stiff starter, like feeding it
three times a day, a stiff starter can also enable a less sour taste because
there's more flour than water, which means the yeast has
a greater opportunity to feed and have more allies building up against
the lactic acid. They're not going to
go into a battle, it just means that
there's more of the yeast versus
the lactic acid. Those are some of the
methods you can do, and of course, adding sugar or baking soda to your regular starter will also
give it a less sour taste. Those are some things
you can apply. If you really want
a sour taste in your sourdough starter to be
imparted into your bread, you can also add rye flour
to your sourdough starter because the rye
flour already has lactic acid present
in the grain. There's many ways of doing it, which is why I'm saying
experiment at home, share your results in
the discussion area, share with us your thoughts, really play with
it and understand, because not only
are you learning to peak the flavors
here and there, you're also building a
relationship with your starter. That might just take the
sourdough game to the next level for you and be able to use the starter itself for
other baking needs, not just for bread
but for sweet treats, for anything else that
requires yeast once you understand how much of it you need for that
baking purpose. Now, I did mention only feeding your
starter once a day, please do keep in mind you
are making it hungrier, which is what's imparting
the sour flavor because the lactic acid is much more dominant than the
yeast at that point, but it also means that the
performance may vary in the bread baking
because over time, the starter itself is
not really thriving. Please do keep that in mind. I would say play around with it, do it by creating
experimental starter, once you have your young
healthy strong starter, then keep that aside, take a piece of it as
inoculation builds, experiment starter
or starters and see what you get out of it and what flavor profiles
you get out of it. You don't need large amounts, you just need enough
to be able to bake bread with it and use it. Because then if
something goes wrong, at least your main starter
that you created is safe and you can use it for bread
baking whenever you want to. Here is the history lesson part. This is long before
Brewer's yeast became the choice of yeast
to use in bread baking. Prior to Brewer's yeast, bakers when they had
those sourdough starters, their patrons had requested that they make their
breads less sour. They weren't enjoying
the sour taste. So what bakers used to do is feed their starters
every four hours. Again, feed their starters
every four hours, which meant they kept their starter on
their bedside table or beside their pillow, depending on what they
had furniture wise, and they would wake up every
four hours to feed it. They didn't really
get much sleep, and that's why when
Brewer's yeast became available to use amongst bakers, they got on board really fast because that
means that they could actually get some sleep without having to
wake up consistently. Eventually, other
yeasts came to be; baker's yeast, instant yeast, and sourdough starters
slowly got phased out in most parts of the world,
including North America. Sourdough starters were still around in other
parts of the world, depending on where,
but not as well known. Pandemic rolled around
and people realized that yeast and other baking
ingredients were not available, so they decided to go down the rabbit hole of making
sourdough starters, which has been great because now scientists are
actually looking more into it and understanding
how it really works. Actually, use that
phrase loosely, understanding how it works, they're still not sure
of how all the microbes get in there and how they decide what stays and what goes, or even the amount of
microbes that are out there, they're still
discovering all of that. But it means that sourdough
starters have come back. Not quite disappeared,
but they became unknown for the last 150 years. I could understand why
the bakers abandoned it, because every four hours just to keep the
sourness at bay, that's a lot of work. But now that we can understand of how we
want to be able to manipulate the flavor by performing hacks like adding
sugar, or baking soda, or doing a stiff starter
and all of that, you can actually change
your baking schedule and your baking
habits as a result. Next lesson, the next
lesson is the final lesson. In that lesson,
we're going to touch upon some things that
maybe we haven't discussed or just
briefly went over really quickly. See you in
the next lesson.
13. The Good and The Bad: [MUSIC] Lesson 11. You have all made it. Thank you for sticking
around honestly, because I am actually
tired of talking, but I really want to impart all this information
to you guys. If you've stuck around, that means you've
actually gone through everything and hopefully will want to experiment at home. I really hope so because
it can be a lot of fun. I enjoy doing it, and I like learning from doing things in a
practical fashion. So I hope this inspires
you to do that as well. In this lesson,
we're going to go over some things
that maybe we didn't quite touch upon or just
went over quite quickly. I know I ramble quite a bit, so I just want to make sure that I haven't missed anything. First thing is smell.
Your sense of smell. Get in the habit of
sniffing your starter, there's nothing wrong with it. If anything, it tells you of
what's happening in there. If it smells like fermentation, it's a good thing, it's doing something really great in there. Certain flours will
also influence the scent or the fragrance
that's coming off the starter. Only way to know that is
to play around with it. If it smells cheesy, something has gone wrong, and I guarantee you
from experience, you cannot revive it, so just chuck it and
start a new starter. Or if you were smart and
did like what I did, you have your mother
starter healthy, off to the side,
uncontaminated and it's just the levain
that's gone bad or your experimental
starter that's gone bad. If it has an acetone smell like a nail polish
remover smell, it's a very distinct
scent and is extremely pungent in terms of when you sniff your starter, it really invades your nose. Something also has gone wrong in that one and I would advise
you to throw it out. I do not recommend
you using it at all. Next one is color. Some starters, and it has
happened to mine as well, you may see a grayish
color on the top layer, not to be confused with hooch, hooch is in a liquid form. This is just the top
layer of your starter, has a bit of a grayish color. That just means
it's been oxidized, and I've discovered that when
using fresh milled flour. With just regular store-bought
flower that's unbleached, I have not seen that, but with fresh
milled flour I have and I found out that
it's just oxidizing. If you don't like
the look of it, just scrape it off and use what's underneath it
or you can keep it. It's up to you,
it's not harmful. Hooch is the one
that's in liquid form, which is a blackish
gray color liquid sitting on top of your
sourdough starter. You can either pour it off
or you can mix it back in. No one has come
across any issues and I don't know if it
changes the flavor. I have actually not
come across hooch, so I can't even show
you an example of it, I am so sorry. But there are a lot of examples of it on the
web where you can see what hooch looks like and no one has come across any
issues with it. Again, you can either part
off or mix it back in. Mold, you know what
mold looks like. You will definitely know
what mold will look like when you see it on
your sourdough starter. If you see that, please
just throw out the starter. I cannot advise anyone
to just scrape off the top layer and use what's underneath because I don't
know what it would do. Molds are just a
tricky fungi that we don't know what would
happen if you would ingest it, so I cannot advise people
to just scrape it off. I would say throw it out and use another starter or
start from scratch. There is a method called
the scraping method. I don't have any
experience using it, but I know there are
people who use it. It has been tried and tested
and people swear by it. A scraping method basically
means that when you have a starter and you're
getting ready to bake, this is not a levain,
this is a starter. You're getting ready to bake. How do I describe this? You just have a slightly
larger amount of the starter than what you
would need for baking. You take out what you
need and all you're left with is just like scraping bits at the bottom of your jar. They just put a
lid on and put in the fridge and use it for when you are
ready to bake again. I don't use that
method because what if something goes wrong
and I lose my starter, I'd have to make a
new one from scratch. I've worked so hard with my three-year-old
starter to get it strong and healthy
and its mature state. I think it would work if you were baking every day or
baking a lot because then you are actually feeding
that scraping bit that's left behind and
you're keeping it going. Also, I think, or logic dictates
that it would work when your starter is already
healthy to begin with. If it's young, right now, it needs food and nourishment to keep it going
and to become stronger. If you do it when it's
a little bit older, mature and stronger, then you don't have
to feed it as often, you can probably
get away with it. But for me, I'm
just too afraid of losing my starter
because I still do bake quite a bit at home and I don't want to worry
about it so much. My stress level just
goes up really high. If you do end up using
the scraping method, please let us know in the
discussion area how you're finding that method and
if you really like it. I know it's a great way of
not producing any waste, which is preferred over
the discard method, which is why I ended up creating a smaller starter because I just wanted to minimize
the discard method. But if you use a scraping
method, please let us know. I mean, anything that you
do and you want to share, go ahead and share in the
discussion area below, we would love to read it and this builds a community
and we can share information with each
other and also make discoveries that other
people may not have made. Who knows? Thank you for sticking around and
making it this far. I hope you're inspired to experiment and see what
you can do with it. I know your sourdough
starter will be healthy and strong because you've taken
notes from this class, and I hope this class has been engaging and entertaining
and informative, most importantly,
informative for all of you. Thank you for taking this
class and have a good day.
14. Congrats, We Made It!: [MUSIC] Congratulations, everybody. We have all made it
through all the lessons. I hope that this class, you are able to feel less
intimidated and less fearful in creating a sourdough starter and understanding
what's really happening inside of that
particular container. When you think about it,
it is self-managing. You don't really
need to do anything aside from feeding it and making sure it
has enough feed to survive throughout
the whole day. The container or the ecosystem
inside of that container is going through its own battles of survival of the fittest and sorting its own
diplomacy out inside of it. All we need to do is make
sure it has enough ammo to do what it need to do
in order to stay healthy, strong, and mature over time. The stronger and
more mature it gets, the less feeding that's
actually required because there'll be able
to sustain itself longer. I know, that sounds odd, but through my experimentation, that's what I have discovered. I would love to see
what you discover. Please do feel free to share your thoughts and
your discoveries in the discussion area, photos in the gallery page, just so that we can
see what's going on with everybody else's starters
and what you are finding. If something's not working out, then we can all help
each other out. Sourdough starter was
pretty much forgotten for about 150 years in
most parts of the world. Until recently when
the pandemic hit and now we are part of
a discovery journey that it feels pretty
good to be in, to be honest, because now
you're learning something that you never thought you
could do in your own kitchen. I find that really interesting,
but that's just me. I like to discover new things
and I hope that you do too. As well, please leave
an honest review below. I would love to know
what your thoughts are. I do read them and any
feedback that you may have. That way, if I create
a feature class, I can apply to it as well. I do read, I do listen. I feel like we can
build a community where we share all
of our own ideas and anything else
that you may have. Should you like,
please do follow me. I would really appreciate it because then you'll know what
my next class will be up if I create another one. Thank you again for your time. I hope you are enjoying
your sourdough starter and if you do give it a
name, I would love to know. Take care for now.
See you next time.
 Nadia Cheema, Content Creator/Photo and Videographer