Transcripts
1. Class Intro: What is sourdough bread? A sourdough bread is chewy, it's tangy, it's crunchy. It is a sense of satisfaction of making something that has been around for hundreds of years prior to instant yeast, that is. It is also a bread that is tricky to work with, can be quite temperamental. Changes with the temperature change in your kitchen, and I can tell from experience, sends us fear. Your dough sends us fear if you didn't know that, not really, I'm kidding. What I'm basically saying is that we all know that a sourdough bread, especially for starting off, even if you're an intermediate baker, is still tricky to work with. Even experienced bakers are still learning every time they bake bread. It is just one of those things. It is an active dough with live yeast that wants to run its life in it's own way. Can't argue with that. Hi everyone. My name is Nadia. Welcome to my class of making sourdough bread, understanding the hows and whys so you can make better bread every time, hopefully with consistency. I'm a content creator, photographer and recently a videographer for about two years now. Both my partner and I have our own YouTube Channel, which is where we primarily showcase food videos. Food is our life, food is our love, and we love exploring culture because that is what comes with food. Along with being all those things, I'm also a bread baker and I sell bread on a weekly basis. I sell about eight loaves per week. This is enabled me to really make a lot of bread and learn a lot quicker within the year that I've been baking. A little bit of history on bread, just like everybody else when the pandemic hit, I decided to start my understanding of sourdough starters. I wanted to try actually five-years go, but I was just so busy and some of the research that I did told me that it takes a bit of learning or a lot of learning curve. When the pandemic hit, I figured, great, now I have an opportunity to actually put some time into it because I'll be home and working from home. What I learned online research is tricky because most of the videos and documents that I was reading were mostly recipes, and what I realized there's no such thing as a recipe. There's probably a recipe of the amount of flour to water, to salt, to starter. After that, there is no real recipe. It's understanding methods and that's what this class is about. I will be sharing methods and processes with you to help you understand what exists and what you can do, and when you can do it. You will need to experiment in your own home and see what works best for you. I'm only going to be showing what's in my kitchen and within the environment that I work with. This class is geared more towards for beginner to intermediate who already have a very strong and healthy sourdough starter. We will not be going over on how to create a starter from scratch. My starter is a year old and it's very strong and healthy and that does play a big part in ensuring that your dough is fermenting properly, and in the end helps to give it a good rise, because yeast will be producing a lot of gas and CO_2 in your dough. We'll be going over baker's percentage, methods for creating great dough strength all the way up to the baking. Welcome to my class and I look forward to imparting some of my knowledge that I've obtained over time so that you can understand what's really happening with your dough and build a beautiful relationship with it. The first lesson that we're going to start off with is baker's percentage, and I'll see you there.
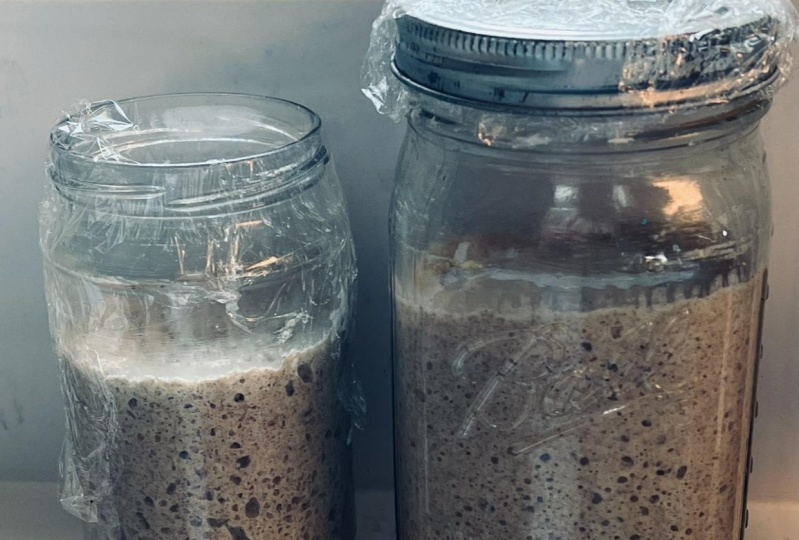
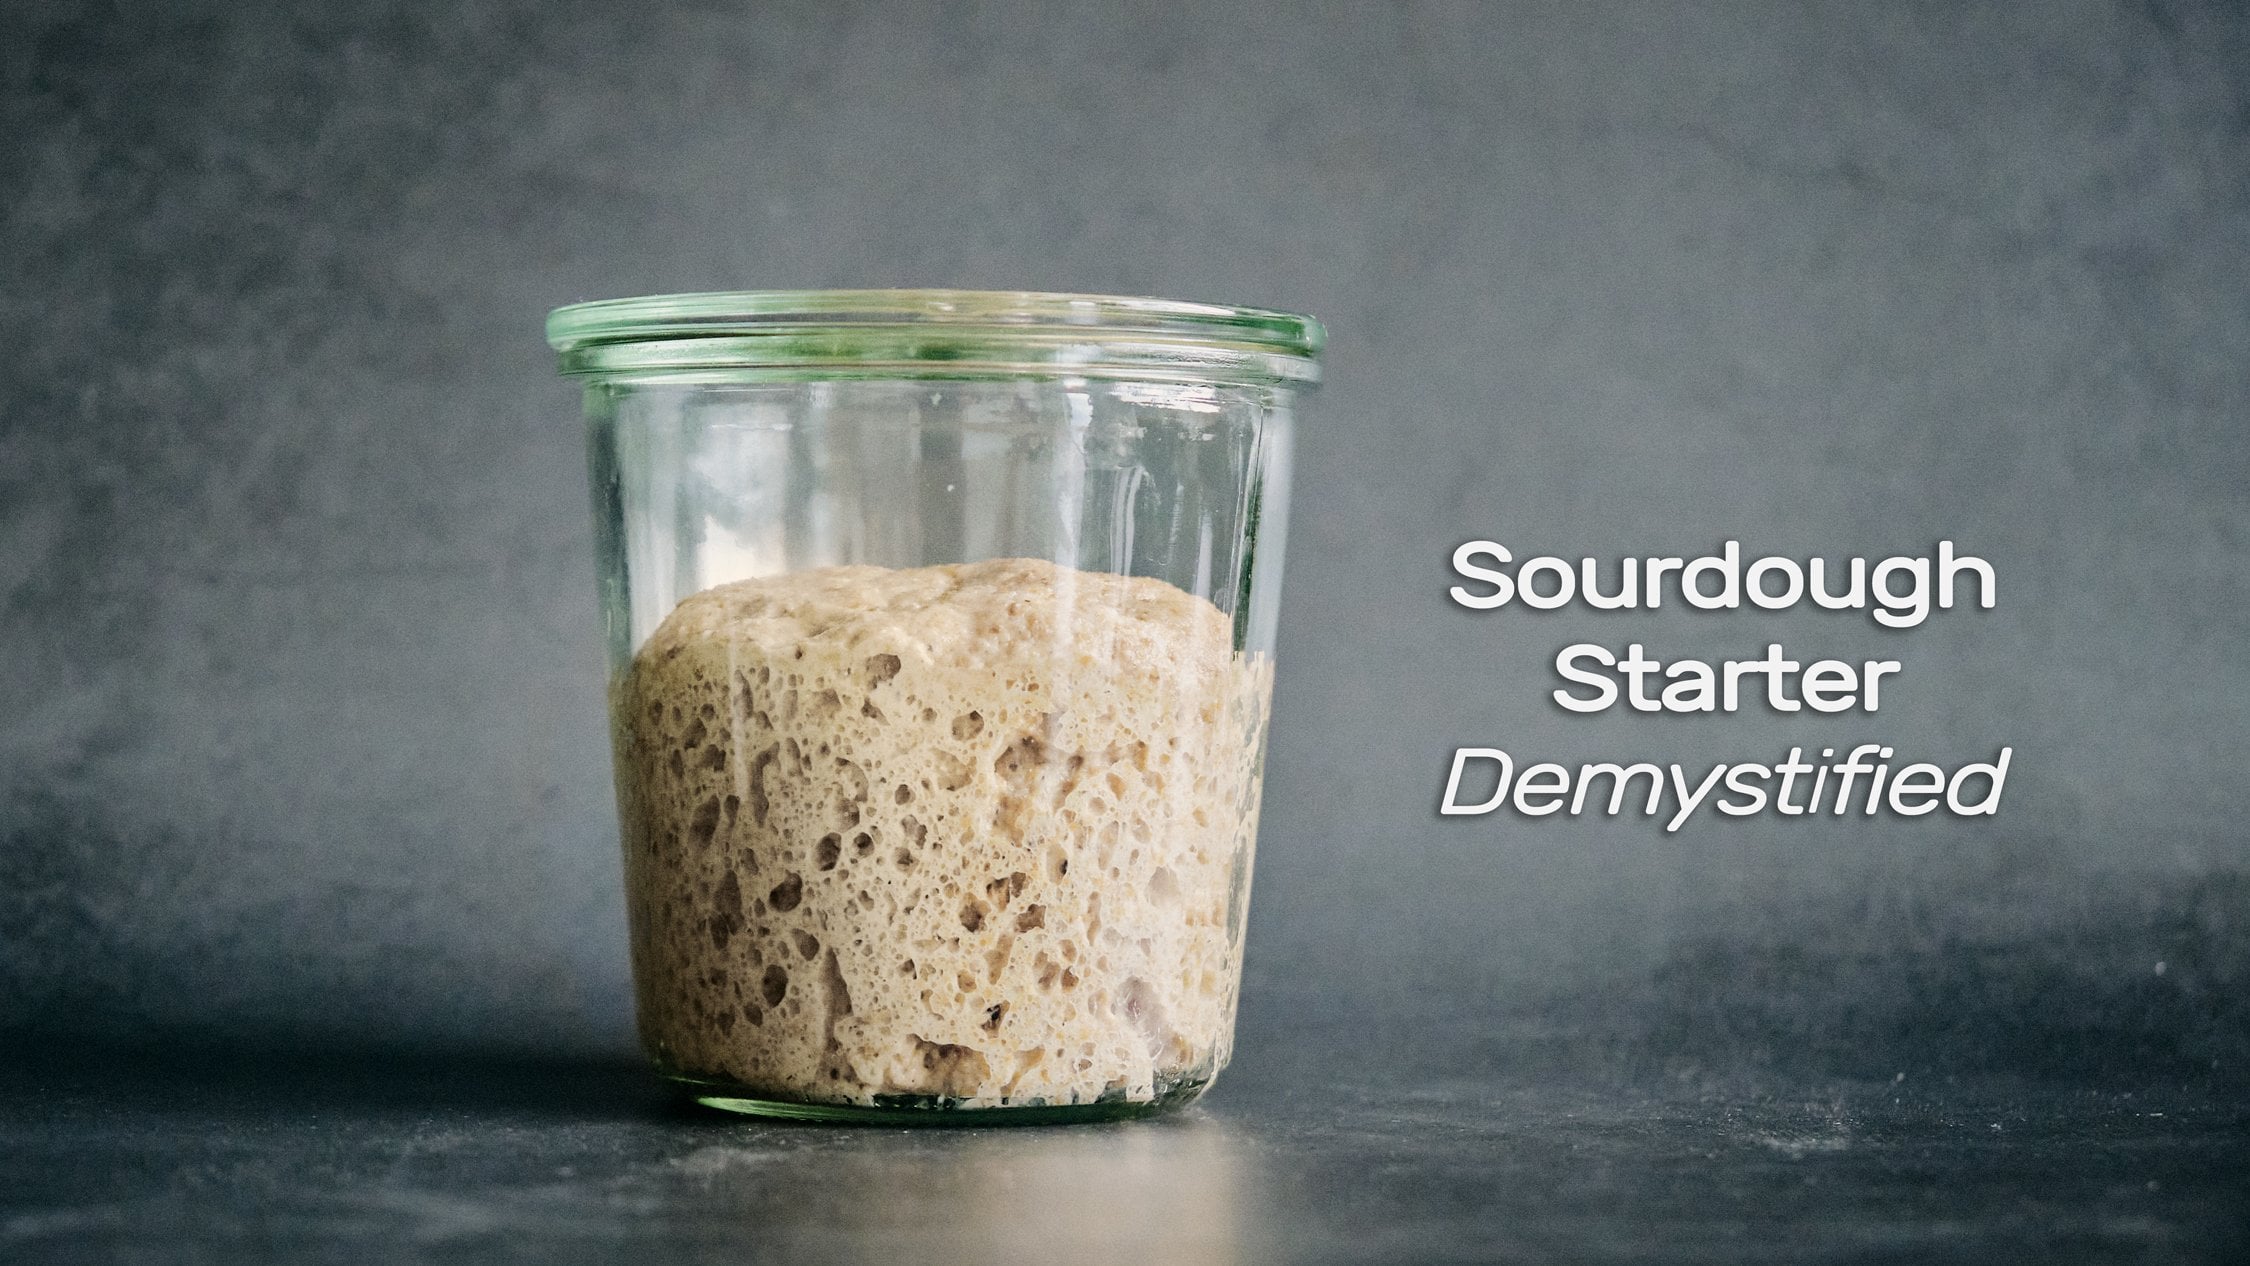
2. Project Intro: Now, before we start our lessons, let's quickly discuss the project. The project for this class is to make a delicious sourdough bread utilizing the methods that will be outlined within this class. If you look at lessons 3 and 4, both, three and four will be listing out the ingredients and the amount for each ingredient. You can start putting your dough together while you're following along with the lessons. By the end of it, create a delicious crunchy bread with a soft chewy inside. Now reminder, you do already need to have a strong and healthy starter to work with. This one is mine. This little guy right now is just being refreshed for this weekend's bake. It's been in the fridge for about four or five days, so I'm just waking it up. Looking pretty good, nice and bubbly. Lots of activity. I encourage folks to share their work in the discussion section of this class. I will be providing a guide for you to follow in the project section of this class. In the guide, not only will there be the baker's percentage, so you have a clear understanding of how it works and what the math looks like as well you will be seeing a lot of the definitions for the methods and the processes being used in the lessons. You can read along and use those as you're making your bread. The aim of the game is to help create consistently delicious bread every time you bake. Of course, do use the lessons to revisit and view as examples will be provided within those so you can understand what's really happening, along with just refreshing your knowledge that you've obtained from this class. I will be making a loaf for the purpose of this class, that is 350 grams in flour weight. You can make a bigger one if you want, or a smaller one. This is all made possible by using the baker's percentage. Let's go ahead and start with the first lesson, baker's percentage, and let's get this class going. I look forward to seeing what everybody here makes. Please do share your results in the discussion tab so that everybody else can also see what you've made. It's a great way of learning from each other. Let's get this started.
3. Baker's Percentage: Hi, everyone. Welcome to the first lesson where we discuss baker's percentage and how you can apply it to your own baking needs at home as a home baker. Now, baker's percentage is a lot of what professional bakers use in their own bakeries where they do the math according to the weight of the flour. This is where a digital scale is very important as we'll be measuring everything by grams, not cups, not tablespoons, none of that. Reason being, when you weigh things in grams, you get a more accurate reading of what you're working with, that you're not guessing one, what your hydration is going to be like. The volume of the water in weight will be the same that you measure for flower in grams, which makes things really easy, so everything we're going to measure is in grams. Now, baker's percentage works off the flour weight. If the weight of the flour's a 100 percent and you want 70 percent of hydration, 20 percent of, say, your sourdough starter, and two percent of your salt, you can work off the a 100 percent of flour. I usually bake a 350 gram loaf which is in the weight of the flour, I'm not including the water and everything. Now say for the sake of making math easy for all of us. Say you want is a 100 grams of flour and you want to just use 70 percent hydration of water, you then go 100 times 0.7, which is 70 percent equals 70 grams of water. You see, so easy. If I want to scale up and I wanted to do, we can use a calculator here. If I wanted to use 350 grams of flour and I wanted to do a 75 percent of water, which would then be hydration level, I would go 350 times 0.75, giving you 262.5 grams of water, or you can round it up to 263 grams of water. Very simple. Same thing applies for your sourdough starter and your salt, and if there's any inclusions you want to make. In baker's percentage, it is normally a 100 percent of flour. You then select your percentage in terms of hydration, you can go anywhere from 55 percent all the way up to 90 percent if you wanted to, then you go anywhere between 15 to 20 percent of sourdough starter depending on the temperature of your home and the environment, as well as how much of an inoculation you want to place in the dough and about two to three percent of salt. I normally do on cold weather days, 20 percent of sourdough starter and I normally like about two to 2.2 percent of salt. With the baker's percentage, it is easy to go up and down and scale by keeping that flexibility. Now, since we're baking bread for the purpose of selling, I sell about four loaves per day, so it's using the baker's percentage math, I can easily scale up or scale down as needed. Now that we understand baker's percentage, in the next lesson, we're going to be discussing protein and hydration. This is where I find a lot of people tend to have a little bit of difficulty in understanding what's really happening and tend to have soupy doughs or overly sticky doughs. See you in the next lesson.
4. Protein Percentage and Hydration: Hi, everyone. Welcome to lesson 2, where we discuss protein percentage and hydration. So why do we need to understand protein percentage, which then leads into the level of hydration you would have in your dough. It is very important because the protein percentage of a flour will indicate how much water it can handle. You can experiment this at home if you'd like, where you take your flour that you have at home, and you can do little bowls and then those little bowls add about say, 30 grams of flour. Then depending on the percentage of water, you can go either 65 percent, 75 percent, 85 percent, 90, however you would like to break it down, but do little bowls of water where you'll be able to see the level of protein. You mix it all up. Wait about an hour and then you try to do a windowpane test. The bowls that pass the windowpane test when you stretch the dough out, are the ones that can handle that level of hydration. The ones that don't, which generally tend to be the ones with more water in them, don't even bother using those because your dough just can't handle it. It will turn into soup every time you try to work with it, and overly sticky. How to determine what your bread flour can handle. In most packages, you'll see a per serving gram and then you'll see a protein line. For example, if the nutritional table on the bread flour package reads four grams for protein, and it is part of a 30 grams per serving, divide 4 by 30, you'll get 13.3 protein percentage, which then tells me can handle up to 78 percent of hydration. I know this because I've tried it at home. If the number is lower, there are some bread flours that only have 11 or 12 percent protein levels, they can handle anywhere between 73 to 75 percent hydration. If you want to up the hydration a bit more, try adding some whole grain flours, like a whole-wheat flour for example, which then can help up the hydration level, but I wouldn't push it too far. Work only with what your flour can do, don't try to go beyond it because it is going to fail every time. Now, for bread flour is generally the protein percentage that you see on the package, more than likely will also have a good amount of gluten level in it. In this class, we'll also be using whole grain einkorn. Now, einkorn, I just really enjoy the taste of it. It is also an ancient grain that has a lot of nutritional value to it, but it was also quite low in gluten. Even though the protein percentage of this flour is 16 percent, that tells me it can handle water, but it doesn't have the gluten structure to create a really [inaudible] bread, it would actually be quite a dense bread to work with. To counteract that and still be able to work with a high hydration dough, I combine my bread flour with about 20 percent of the einkorn whole grain flour and I'm then able to go up to 80 percent in hydration because of the two. Meanwhile, the einkorn will benefit from the gluten structure of the bread flour and we'll still be able to have nice airy bread with the beautiful crust for you to bite into. If you don't want to use, einkorn, please go ahead and use either rye or whole-wheat or even spout, but understanding that both rye and spout have a lower gluten. Just because a flour has a high percentage in protein doesn't necessarily mean that a high percentage of gluten. Understand the flours that you're getting. Bread flours, generally because they come from a wheat, will have a proper gluten structures to handle the bread baking process, while the ancient grains may not. But if you combine the two, you'll still be able to get a delicious bread, with a boost in nutrition as well. Now, let's go over the tools that you need in the next lesson.
5. Tools and Ingredients: Welcome back, folks. We're now in lesson number 3, and here we will go over some of the tools that you will probably need and some that are optional before we start getting into the whole baking bread process. You will obviously need a bowl, you need something to mix the flour and water with, spatula or wooden spoon, a cloth. I don't really like to use plastic cling film, but if that's all you have, please go ahead. Some people even use shower caps to cover their bowls, that's perfectly fine as well, I do the same thing at sometimes. You will also need either a Benetton or bowl that's going to be lined with a kitchen towel. We will be making a batard shape, it's an oval-shaped bread. It is the preferred shape for me. But if you want to do a round, you can easily do your round-shaped bread from this as well. You will also need a bench scraper and a bread lame or a sharp knife to be able to score your bread with. As well, you also need a Dutch oven. I will be using the Challenger Breadware pan, it is my preferred method. You don't have to use it as long as you have a Dutch oven that can actually trap and hold steam inside during the first part of the baking, that's perfectly fine. For ingredients, you will need flour, water, salt, and as mentioned before, a very strong and healthy sourdough starter. Let's get cracking. In the next lesson, we will be discussing autolyse, which means now we can start mixing our flour and water together.
6. Autolyse | pronounced ‘Auto-LEASE’: Welcome back everyone. We are now at Lesson 4. I'd say we're doing pretty good. Lesson 4, we will be discussing autolyse. But before we start going over autolyse, let's go over the ingredients and the quantity of each ingredient. I will be using 350 grams of flour. The flour will be combined with both bread flour and whole grain einkorn. For the einkorn, I will only be mixing in 20 percent of it. Out of the 350 grams of flour times 20 percent, you get 70 grams of einkorn flour. Now, we will be working between a 77-78 percent hydration of water. Again, check your flour protein percentage and see what level of hydration your dough can work with. I'm doing more of an airy open crumb bread for this class, but you can also do a tighter crumb. It all depends on what you like to have for your bread at home. Since we'll be working about 77 percent hydration, 200-350 grams of flour, we will be adding roughly 270 grams of water. Reason I'm saying roughly, I know sometimes when we're measuring, you can give or take a gram depending on how fast or how slow we're adding the water in. Set aside about, say, 5-10 grams of water, for you to be able to dissolve the salt when you're going to be mixing it into the dough. You don't have to, you can add all 270 grams of water in, but I find I like to dissolve the salt a little bit, as I do find that it helps to mix it into the dough much better and you get less of a graininess. I like to add about 20 percent of sourdough starter, so for this, I will be adding 70 grams of starter. I find on colder days, 20 percent works, on hot days, 15 percent works. I will be adding in the starter once it has reached its peak time. I've had the starter for over a year, so I understand when its peak time is reached and I can autolyse my dough ahead of time, working within that time frame. I will be using 2 percent of salt, so 2 percent of 350 grams of flour is seven grams of salt. Now that we have everything lined up, let's get into discussing what autolyse is. What is autolyse? An autolyse is a self digestion process done by the enzymes within the flour. They are activated as soon as you add the water into the flour mixture. You don't need to autolyse. I prefer to do it only because find it allows me to work with a much better dough right off the bar, and it also enables you to reduce mixing time. For a true autolyse, it's just a flour and water combination, no salt, no starter. You can autolyse depending on your flour, anywhere from 30 minutes up to three hours. I would not go longer than three hours unless you know your dough can handle it. I will be autolysing for one hour for the purpose of this class. When you first mixed the flour and the water together, you just mix it up into a shaggy clump, you don't need to knead it. When you try to do windowpane test, you'll see the dough breaking apart. The reason is because we haven't created any gluten structure yet, which is another reason why the autolyse, is a handy process to have. Now, once you've mixed the flour and water, cover it. I like to cover with a moistened tea towel or kitchen towel. You can cover it with a shower cap or a plastic film. Set it aside on the counter anywhere from 30 minutes to three hours. When he come back and check your dough again, you can do a windowpane test and you'll see the texture of the dough is completely different, it's staying together and that's because now the gluten structure has started to develop really nicely. Now, what made this possible? What's happening in the autolyse? There are two enzymes in particular that are coming into play here, amylase and protease. What is amylase? Amylase is an enzyme which converts the starches in your flour to sugar which is what your sourdough yeast will be feasting on. This helps to improve the bread volume because the yeast will be letting out a lot of CO_2. As well it helps to create a symmetry of your bread when being baked, along with creating a darker outer crust because of all the sugars. Protease is another enzyme that feeds and breaks down the gluten in the dough, which helps create extensibility and reduces mixing time. That's why when you touch your dough, once it's gone through it's autolyse process, you'll see that you can stretch it, its a lot more homogenized looking, you can do a windowpane test. It's just holding really well. In your next bake, if you haven't already, try using the autolyse method. Where even if you're in a hurry, at least give it 30 minutes. A relationship is forming, it's going to help turn it to a beautiful thing afterwards so, why ignore it? Now that we've mixed everything, set it aside, cover it up on your counter. Next lesson, we'll be discussing extensibility and dough strength, which is very important to ensure that your dough is handled really well, and then when it bakes, can hold all that beautiful gas that your yeast is producing, and giving you a nice airy tall bread. See you in the next lesson.
7. Extensibility and Dough Strength: Here we are. We are in Lesson 5 where we discuss extensibility and dough strength. It's a short lesson. It's understanding why you need both the dough strength and extensibility to work together in your favor actually. How do extensibility and dough strength come to play and work with each other? Extensibility is where the dough is able to stretch while dough strength that you will be creating allows it to still retain its shape so as the yeast is releasing CO_2 gas, the extensibility will allow the bread to stretch and rise, but the dough strength that's created will ensure that the bread doesn't spread out. It can hold its shape that you've created for it in the final proofing, very important for the two to exist. Without one you can't really have the other. If you have no extensibility, a lot of dough strength, the bread will pretty much explode when baking. Nothing catastrophic, but they will burst. If you have too much extensibility and not enough dough strength, it'll just bake flat because there's no dough strength to hold the structure. The two do come hand in hand. They are very important, and allows you to bake the bread without having to use a lot of time, basically. Now in the next lesson, we will be mixing in both the sourdough starter, and the salt, and we'll be using what's called the Rubaud method for mixing. It is not a requirement, but I do find that it helps me to mix in the starter, and the salt a lot more easily into the dough. See you in the next lesson. [MUSIC]
8. Adding Starter/Salt and Rubaud Method: Hi folks. Welcome back. We are now Lesson 6. We're getting through this together, which is great. In this one, we'll be mixing both the sourdough starter and the salt together. Remember that little bit of water that you had set aside, you'll be using it here to help dissolve the salt and we'll be able to blend a lot more easily into the dough. Now I will be mixing in both the starter and the salt together. I've tried doing them separately and I have done them together and I haven't really noticed any particular difference. I haven't found that it's actually killed the yeast. The dough still rises and ferments very well, but it's up to you. It also lessens one last step for me, to be honest. First, let's sprinkle some salt onto the dough. I like to do it on one side and then let's put in the sourdough starter on the other side of the dough. Key to working with a high hydration dough are damp hands. I always keep a bowl of water nearby to be able to dip my hands, my fingers into before touching the dough. It enables the dough to not stick to your skin. A lot more easy to work with, so you don't have snowball hands. What I like to do first is once I put the salt and the sourdough starter in is pour that water that I set aside onto the salt and you'll note it'll instantly start to dissolve. Not 100 percent, but it's already softened quite a bit. Then I like to take wet hands and start to spread the sourdough around on top of the dough. Dimple. I love the dimple. Then I start taking the sides of the dough and start folding it into each other. We'll just keep doing that, folding, pinching. You'll note, I'll be pinching, slightly dimpling, and twisting the dough. A very gentle process. The [inaudible] process allowed you to start creating gluten structure, so why tear it now? Keep pinching, twisting, dimpling the dough. Then we're going to start going into the Rubaud method. Now what is the Rubaud method? The Rubaud method is where you're creating a scooping and pulling action, mimicking a dough machine that bakers use. It may look like it's not doing anything, but really it is allowing the sourdough starter and the salt to mix in to the dough. I can do anywhere from two to five minutes. Five minutes is a good one to do it. If you find that you're getting tired, you can switch hands or you can take a break for about 10 minutes and then go back at it again. Not only are you mixing in the sourdough starter and salt, but you're also starting to develop even more dough strength. It's a really good process to have. If you don't want to do the Rubaud method, just keep pinching, dimpling, twisting, do all of that. How do you know when it's been incorporated? It's hard to tell, especially if your sourdough starter is the same color as your dough. For me, my sourdough starter has spelled in it so I can tell if it's been incorporated nicely. Another good indication is, does the salt still feel quite grainy or can you tell it's been dispersed? The way to tell is just you don't really feel the salt. It's the way that I do it. But if you're not sure and you still want to make sure it's been incorporated properly, give it a 50-minute rest and go back and do the Rubaud method. Now the next lesson we are going to be going over what's called a slap and fold, also known as French kneading, also known as air kneading. See you in the next lesson.
9. Slap and Fold Technique: Just checking my notes, we are now at Lesson 7. We are getting there. We are in the process of creating great dough strength to ensure that when we bake it, the bread holds its shape along with all that gas that your yeast is producing. Yes, you'll be hearing the word gas a lot in this class. We will be using a method called slap and fold, also known as French kneading, also known as Air kneading. What you're doing is basically you're going to be grabbing the dough from one end, lifting it up, slapping it down and folding it over. This will get better with practice. Don't get disheartened if you don't get it the first time around, you just need to be able to start getting into it and be aware that the dough will stick to your fingers, and it's not a bad thing. Now the dough has rested for about 30 minutes. We will start the slap and fold process. What I like to do first is to do a quick regard mixing of the dough, because once I do that, I find really is easier to scoop the dough out of the bowl. Place the dough on a working surface and then wet your hands just a little bit. Grab the dough from one end, pick it up, slap it down, curl it. Start off slow in the beginning. You don't want to overstretch it out. You just want to see if it curls a little. Keep doing it till your dough comes together and doesn't stick as much. This dough took me about five minutes to get it together. Once it's together, pick it up, put it into the bowl, and let it rest for 30 minutes, and then we'll go into, and this is only optional, the lamination process. Next lesson we'll be discussing what is lamination and why it can be very beneficial for your dough. See you in the next lesson.
10. Lamination Technique: We are back. We are now at lesson 8. The dough is getting stronger and still has a bit of extensibility to it. We're having a good balance of both. In this lesson we'll be discussing lamination. It is optional, but I do recommend trying this out as I do find it makes a dough stronger. Lamination is a step where it helps you to see what your dough is feeling and looking like. It helps to create additional strength, also this is where you can add some inclusions to your dough before you start going to stretch and folds or coil folds. You lightly spray your work surface, not a lot, just a little bit. Every time you have water touching the dough, you're playing around with the hydration level, including when you're wetting your hands before you touching the dough. Just be aware of that. Once you've lightly sprayed your work surface, place the dough in the middle, and then lightly start to stretch it out, pulling it from the center and pulling it out. Go as far as you think can go. I try to go as far as I can. If you'll note, my dough is not breaking. Now, if your dough starts to tear, it could be that, either you used too much water, or the flour itself doesn't have that much gluten in it, which means working with a lower hydration may be best for this flour. So once you've stretched it out, with lightly moistened hands. Pick up your dough from one end, fold it to the middle. Pick up the other side, fold it to the middle as well on top of the other fold, and then start folding it from the top or from the bottom, as you see here. Put it back either in a bowl or another vessel that's clean to start performing stretch and folds and coil folds. Again, lamination is a great method to use if you want to introduce more dough strength. I've used it before starting my stretch and folds, and even after I finished doing my stretch and folds. It may degas the dough a little bit, but at the end the bread still baked beautifully. If you forget to do a lamination before you start your stretch and folds. I find you can still do it afterwards, before you put it away into bulk fermentation. The next lesson we're going to start going over stretch and folds. See you there.
11. Stretch and Fold Technique: Lesson 9. Welcome back everyone. In this lesson we'll be chatting about stretch and folds. Now, this method is not necessary, but it's helpful. I tend to combine this with coil folds as well, or sometimes even just coil folds, depending on the hydration level of my dough. What you want to do, the stretch and fold is basically pick up the side of the dough, stretch it up as far as you can and your dough will let you know how far it can stretch. Don't try to push it as you don't want to tear the dough, you've creating gluten structure in the dough. You've been allowing the gluten structure to be formed within the dough, you don't want to tear it because once it tears, it's hard for it to re-form again. You can do four fold, seven fold, 10 fold however folds you want in a dough. Just know that when the dough is telling you it doesn't want to stretch any longer or as much, you've done your first stretch and fold. Once that's done, just quickly round off the dough a little bit and cover it with a towel. I like to let the dough rest for about 30 minutes before I go into my next stretch and fold. With this particular flour mixture, I can do about two stretch and folds and 2-3 coil folds before I let it go and sit into the bowl fermentation phase. So let your dough sit for about 30 minutes and we'll come back and see if it needs more stretch and folds. It's been 30 minutes now and I'm going to do another stretch and fold and you'll see or note it's not letting me pull as much, which means that we're building really good dough strength. Do your folds, let it rest for another 30 minutes and we're going to go into the next lesson where we're going to discuss coil fold. Coil fold is a very different method from the stretch and fold, and I'll show you why. See in the next lesson.
12. Coil Fold Technique: Welcome back everybody. It is now lesson 10. We are now going to be performing coil folds. Out of the two; stretch and fold versus coil fold, I do prefer coil fold a lot more reason being because I do work with higher hydration doughs, and I find the coil fold is a lot more gentler. If you're only going to do is stretch and folds just be aware that every time you perform a stretch and fold, be gentler with each time. Because now gases being produced within your dough. You don't want D gas, and you're working so hard in making sure the dough retains gas in there. This is why I prefer the coil fold. With the coil fold, you basically pick up from the center of the dough, you gently stretch it up. Because you don't want to go 10 feet into the air, you can go back down, repull again, and this allows you to start coiling the dough into itself. Coil one side, turn it coil the other side, and then we're going to continue on with the other sides of the dough. This coil fold method is a lot gentler than the stretch and folds. It's helping the dough increase even further in dough strength and making sure the gas is retained within. Go ahead, perform your coil fold. I'd say give it a go. I also like the fact that you are getting a smoother surface and you're starting to create some tension on top, which you don't really do so much with the stretch and fold I find anyways. For coil folds, let the dough rest anywhere from 30-60 minutes. Some people find that an hour can go by before the dough even requires another fold. This is where you want to start to really read your dough. Because I've worked with this flour mixture before I know that every 30 minutes I can do a coil fold before it goes into bulk ferment. With other flours I've worked with I found that I only need a few coil folds during the whole bulk fermentation process. How to know when to do a coil fold. Take a look at your dough. When you perform the first coil fold after 30 minutes, just take a look at it. If it's still holding its shape, roughly, leave it alone. It doesn't need a coil fold. If it's spread out too much, and it's not really having any rounded edges, give it a coil fold. Again, do the same thing, 30-60 minutes, tickle your dough. This is where you're starting to understand what your dough is doing and starting to build a relationship with it. You don't want to perform too many coil folds because then you're not allowing the gases to keep forming into the dough. Also, the dough might be too tight. You want it to relax a little before each coil fold or even a stretch and fold. Do give it between 30-60 minute time intervals before you perform your folds to see how the dough is looking. For this class I performed two coil folds. To recap, I did two stretch and folds and two coil folds, and I find that my dough is now ready to be put away into bulk fermentation. You can perform a window pane test at this point to see what your gluten structure is looking like. If it's not tearing, it's ready for it to go into bulk fermentation, if it tears, perform more folds till your dough feels strong enough and ready to go into bulk fermentation. In the next lesson we'll be discussing bulk fermentation.
13. Bulk Fermentation: Hi folks. Welcome back to Lesson 11 where we discuss bulk fermentation. We are almost there and I'm so glad because I'm actually getting tired of talking. But I'm so excited because this means we're getting closer to a delicious bread that we'll be having after all of this with really good butter. I like to actually put jam on my butter. Bulk fermentation. Bulk fermentation is where you let the dough sit. Once you worked so hard to create all the dough strength, you let the dough sit anywhere between two to seven hours. It depends on the strength of your starter, the humidity level, the temperature, and the flour itself. Again, because I've worked this flour mixture so often, I know that in the wintertime it can sit anywhere from four to five hours. In the summer, it'll sit anywhere between one and 1/2 to two hours? Yes, temperature can have that much of an effect on your bulk fermentation time. Here's a container that I like to use because I like to use the volumetric measurement. Because I'm baking and selling bread, I need to have an accurate reading of when the bulk fermentation is done. I like to let the dough sit in fermentation till it rises about 25 percent to 30 percent. If you have a lot more whole wheat in your dough, I would recommend letting it go anywhere between 50 percent to 75 percent. But because my flour mixture is mostly bread flour, I find 25 percent to 30 percent rise is pretty good. If you want to let it go longer, just be aware that the fermentation time isn't just during this bulk fermentation at room temperature. Fermentation can still continue to happen in your fridge if your fridge isn't overly cold. I know my fridge isn't very cold as much as I'd like it to be, so the fermentation we'll be continuing. If you know that your fringe's temperature is four degrees Celsius or lower, then the fermentation will not be continuing, which then makes it safe to push the fermentation now. In my case, since my fridge is warmer, I will let it rise about 25 percent. Then I will put it away in the fridge overnight and let it continue to ferment very slowly and have it ready for the bake the next day. What is a volumetric measurement? It's pretty simple actually. Because this container has a measurement on it, when it sits, I can see how much the dough has risen to very clear indication. Especially if you're starting out or you're unsure if you're hitting the right fermentation time, this would be a really great handy tool to use. Also because it's a square shape. I would love to be skipping pre-shape. I will explain next lesson why. I have a clear indication here of where my dough is at currently. Once it's risen about 25 percent, I will then get ready to do a final shaping. If your dough has more whole wheat than bread flour, then I would recommend that you allow it to ferment further so that the bacteria has time to break down the flour, enabling you to have a much softer airy bread rather than a dense bread. Let's go to the next lesson.
14. Pre-Shape Or Not To Pre-Shape: We're at Lesson 11. In Lesson 11, we'll quickly discuss pre-shaping and bench resting, and why I'm not doing it. Now, what is pre-shaping? Pre-shaping is a method used to realign the gluten structure of your dough, letting it rest for a little bit before you go into final shaping. It is actually a handy method if you want to have more of an even crumb, or if you're making a bigger batch, you were then cutting it down to smaller batches, you will then definitely want to pre-shape, because the pre-shape, again, will be realigning all the gluten structure and giving it a shape of sorts. The reason I'm skipping pre-shape here is because I'm already using a square container for my batard or an oval-shaped loaf. If you want to do a boule shape loaf, you can still skip the pre-shape here and just fold in the dough as needed to make it into a round shape, or go ahead and do the reshape, the word shape is really being used in this lesson a lot, to then give it a round structure to make the final shaping easier. It's up to you. Also, if you don't want to have big wild crumbs in your dough, pre-shaping is actually a handy method to use for that as well. Why bench rest? The reason you want to bench rest is because once you shape the dough, it is quite tight. For final shaping, you want to allow the dough to rest a little bit to retain some of its extensibility again, without having the dough tear. This is very important. A bench rest is allowing the dough to rest between pre-shaping and final shaping. Why do you want to bench rest? It's because you do not want an already tight dough from the pre-shaping tear when you're doing the final shaping. If I do perform a pre-shape because I'm working with a bigger batch, I do let the dough bench rest for about 30 minutes, uncovered. This is a preference. I prefer uncovered because I do like a bit of a skin being formed. I find the surface of the dough is less sticky when going into final shaping. This is a preference, you can cover your dough if you want. Experiment, try it out, see what works for your home environment and for your dough as well. The next lesson, we'll be discussing final shaping. See you there.
15. Final Shaping: Lesson 12. Yes. Bulk fermentation is done and we can now go into final shaping, unless you've done pre-shaping, either way, we're good to go. For final shaping, I will be doing the batard shape, which is the oval-shaped loaf. For my banneton, I like to sprinkle on a bit of rice flour, either white or brown is fine, it's up to you. Some people like to have a mixture of 50 percent bread flour and 50 percent rice. The reason I like to use rice flour is because it doesn't get influenced by the moisture in the dough, so it'll still stay quite dry, which enables the dough to not stick to the banneton. If you're using a lining or a cloth in your banneton, you don't really need to dust it with anything because if the dough has built proper dough strength, you'll find that it's actually less sticky so it won't stick to the cloth lining. Open the lid of your container. Lightly dust the top of your dough, go ahead and dust your work surface with the flour as well, tip the container upside down and just wait. Wait for the dough to come out of the container all on its own, don't try to force it out. There is a reason for that. If you note here, the dough is actually coming off the container on its own quite nicely. This is a good indication that it actually went through a really nice fermentation time. If it's ripping and overly sticky and it's actually tearing away and leaving quite a bit of the dough behind onto the container's surface, that means it's actually over fermented and the gluten structure is compromised. At this point, if it has over fermented, not to worry, it can still bake a great bread. Just pull out a tin loaf and roll up your dough, put it in there, let it do its final proofing in there, and bake it. Since the dough has come off the container surface nicely, put the container aside, and you'll note the dough is actually holding its square shape nicely. Put a little flour on your hands just so you don't have a dough stick to your surface. Bench scraper is your best friend here right right. Use the bench scraper to push some of the flower under the dough around the edges to prevent the dough from sticking onto the surface while you perform your final shaping. Similar to lamination, you will take one side of the dough, fold to the middle, take the other side of the dough, fold it on top of the first fold, and then gently start to roll your dough from the top using your thumbs, lightly stretching it out and pulling and stretching and rolling. Very, very gentle as you do not want to overly degas your dough at this point. Once you've rolled your dough, let it sit on the seam for about a minute or so, stitch the sides down, this is more for aesthetic than anything else, I just like to keep my shape nice and clean looking. If you'd like to create further tension on top of the dough, just lightly, using a bench scraper, push the dough on the work surface, very gently, you do not want to create too much tension where it would enable the dough to rip on the top. While you're letting it sit on the seam-side-down, letting it seal properly, grab your banneton or your bowl with the kitchen cloth using the bench scraper, just lightly nudge the dough and let it roll over, and this is where finesse can come into play. Some days I have good days, some days I have bad days. In this case, it's a middle day for me. Gently pick up your dough and place it into your banneton. Once you've placed it in the banneton or bowl, give it a quick stitching. What the stitching does is not only just make sure that the seal is sealed, but it also enables the dough to retain its shape as you're creating further tension. Once stitched, I'd just like to lightly dust it with a little more rice flour, place a shower cap or put on a plastic bag, and we're going to put it into the fridge overnight and bake it the next day. If you can't wait, let it final proof on your counter for about two hours or so. Once it's gone through its final proofing, by doing a poke test, poke the dough. If you poke the dough and it comes back too quickly, it still needs more time to proof. If you poke the dough and it slowly comes back but leaves a little tiny dimple, then it's good to be baked. If you poke it and it stays indented, more than likely it's over-proofed. Again, put it into a tin loaf and just bake it that way. I'm going to put it away in the fridge overnight as I find, one, it can work better with my schedule as then I can bake it the next day early morning. Two, I also find it's much easier to score the dough because it's been chilled. Let's cover it, get it ready, and put it away into the fridge overnight. You can put it in the fridge anywhere between eight to 24 hours depending on fermentation time and the temperature of your fridge. Again, to recap, if you want to bake your bread the same day, just let it go through its final proofing on your counter for about two hours and check doing a poke test or like me, you can put it in the fridge overnight and let it go through a cold retardation phase and then we can bake the next day. This fits better with my schedule. You'll need to experiment to see what works best for your schedule. Congratulations everybody, you've made it, you've made it into the final shaping. We're not done completely because we still need to bake the bread. But we've gone through a long journey of understanding the dough, building a relationship with the dough, and creating both extensibility and great dough strength to now let it sit overnight. We're going to come back to the next lesson, in this case, the next day but we're going to start getting ready to bake this bread, and it's going to be extremely rewarding. See you tomorrow.
16. Baking Bread: Welcome back everyone. We are now at lesson 14. Lesson 14 is the most exciting lesson because here we are going to be baking the bread which is personally my favorite thing to do. Why do I love to do it? Well, you get to see the results of the fruit of your labor. Does that make any sense? I love finding out how my dough did. First let's go over what we need. We will need a spray bottle, possibly a brush like a pastry brush to dust off any excess flour, and either a sharp knife, sharp blade, or a lame of some kind. A lame is basically a tool that's required to help score the bread whether it's in a curvature shape, that blade itself, or what I like to actually use is called the wire monkey because I like to be closer to the dough when I'm cutting into it. I used to use the more traditional lame which is on a stick with a curved blade, but I found that was a little too far from the dough when it came to scoring, especially if you want to do a little designs. Now that we have everything, let's get first into preheating our Dutch oven. For my oven, 490 degrees Fahrenheit works best in terms of preheating and the initial cooking while the lid is on. I had to experiment a bit. For most folks, anywhere between 450 and 500 degrees Fahrenheit seems to work, but you'll need to experiment to see what works best. If it's too hot, the crust forms way too quickly and it doesn't give the dough a chance to rise and you don't really get much of an ear. If it's too cold, you don't give the dough enough of a chance to really rise. You'll need to see what temperature works best, there is no definite number, it all depends on your oven. I like to preheat for about an hour, giving the Dutch oven an opportunity to really heat from the inside as well as the outside so you get an all around crust formation when it's cooking. Once I see that it's time to put the dough in the oven, I then take out the dough from the fridge that's been sitting there overnight. As you can see, it's flattened out a little, it's risen just a bit for me because my fridge temperature is actually not that cold so it continued to ferment. But if it flattens out, it's okay. It will still be holding its shape. I like to dust on a bit of Semolina flour on top or on the bottom of the dough depending on how you see the orientation. As I find one, it helps prevent sticking to the bottom of the Dutch oven as I won't be using any parchment paper, as well it also gives a nice little crust at the bottom. If you'll be using a parchment paper to place your dough on to put into the Dutch oven, you can skip the Semolina and just dust a bit of flour to ensure it doesn't stick to the parchment paper but if you want the little textural crust, I recommend a bit of Semolina and a little goes a long way. Take your Dutch oven out of the oven safely with gloves on so you don't burn yourself. Take the lid off. Place the dough onto the pan or in your case the parchment paper. I like to dust off excess flower. You don't have to if you don't want to. Once dusted, then I proceed to score. Now, it all depends on how your dough did overnight. It may that it may score really nicely if you have a chilled fridge, in my case, not so chilled, it gives a bit of a snag and a tug. Overall, cut with confidence, don't go too slow, don't go too fast. You will figure it out over time as you'll be baking more often and it'll also come with practice. Again, this is where you get to really know your dough and understand how it's feeling that day. Because, we all know those doughs can be pretty temperamental. Now what I like to do is spray the top of the dough with some water. When I close the lid of the Dutch oven, give it some extra sprays. I've tried it without spraying water. In my case, I found the crest a little too thick. I don't know if that's true in most cases, but when I started spraying water onto it, one, it helps give it more steam so it could have more of a rise and two, the crust comes out nice and shiny which is the look that I prefer. Sometimes it encourages extra blisters if that's what you like. I like blisters. I like the little extra crunch and I also like poking them, bad habit. Once you've sprayed water on it, place the lid back on Dutch oven, put it in the oven. This again is where it comes to preference. With the lid on, give it a minimum of 20 minute bake. If you want more of a softer center and a little slightly softer crust, which is what I prefer, I actually bake with the lid on about 25 minutes at 490 degrees Fahrenheit. Experiment to see what you prefer. Once the 20 or 25 or even 30 minute mark has passed, depending on your preference, remove the lid off the Dutch oven and bake it further for about 20-25 minutes at a lower temperature. My preferred temperatures is 460 degrees Fahrenheit, yours could be 450 or in some people's cases, I've even seen them go down to 430. At this point, the bread has already baked all the way through really nicely. All you're doing in the second part of the baking, by removing the lid is just developing a color, which is why it's up to you how long you want to bake it for. For some of my breads, I only go about 15 minutes for the browning phase, reason being because some people I know that I sell to like a lighter crust. I prefer a darker crust, so I go anywhere between 23-25 minutes. Try it out, see what you like. But I've heard people say, and I agree with them, all the colors on your bread, they're all flavors. The darker it goes without it being burnt and that's the threshold you'll need to see what you'd like, it gives a multier flavor. There's a new word. A multi like flavor, which I really enjoy. The scoring, what does the scoring really do? The scoring helps to ensure that your bread doesn't burst open in certain areas because it needs to release tension as the bread is rising. To recap, baking bread, get all your tools ready, make sure you have gloves that are oven safe and can handle a Dutch oven at a high temperature without burning your hands. Bake at a higher temperature that works best for you with the lid on first about 20-30 minutes and then when you're ready for the browning phase of the crust, take the lid off and bake for further 15, 20, 25 minutes. Again, it's up to you what level of color you would like your crust to be. In the next lesson, we'll be discussing when to cut your bread. It will be a short lesson and it's very tempting to cut the bread right when it's out of the oven. But there's a reason you wait. See you in the next lesson.
17. When To Cut Your Bread: Cake. This is where folks wonder why shouldn't I cut my bread as soon as it comes out to be oven? There several reasons. For your benefit, that is. Now if you know you're going to be having that bread that day, all of it, then you can go ahead and cut it right away after it comes out of the oven, as long as you can handle it because it'll be hot to touch. But if you want the bread to last for a week or even more, in my case, I slice it up and I place it in the fridge. You don't want to cut the bread right away. You want to give the bread a chance to really cure and just keep cooking in the inside. I don't know if most of you noticed this, if not, I say give it a listen once you finished making your bread the next time you bake one. If you bring it close to your ear, you can still hear the bread crackling. It's still cooking a little bit. It's just come out of a really hot oven, so it needs to equate itself in your room temperature and the temperature it just came out of. I like to leave the bread alone for about half a day before I decide to cut into it. I tell most people minimum two hours to even overnight. Some people say leave it for about an hour before you cut into it, but I still find the bread is quite warm on the inside. What's happening, if you cut into it too soon, because it's so warm on the inside, you'll see steam being released. That steam is moisture. You are baking a high hydration dough for that moisture. If it's released, all that hard work you've put into it is literally going into the air right in front of your eyes. High hydration dough doesn't mean open airy, the crumb that you see on Instagram pages, although that is what can come out of it. High hydration dough traditionally was made to allow the bread to stay moist longer on your kitchen counter, so you can have it up to three or four days without it going too dry or having a steel of ring around it. Why would you cut into the bread sort early, allowing that moisture to be released? Another thing that's happening is that when you cut into it too soon, yes, moisture is released. Two, you'll find it's quite gummy on the inside. That's because it was continuing to cure before you cut into it. That gumminess sticks around. It's not chewy, it's gummy. It's bit of a craggy feeling, bit of a stodgy texture. One way to see that is that, you try squishing your bread the inside and if it stays together, it's a little bit stodgy. The moral of the story is, please don't cut into your bread too soon. Give it a minimum of two hours, unless you're planning on eating the whole loaf that day. When you do let it sit and cure properly on your kitchen counter, one, the crust is nice and crunchy. Two, the inside is fluffy and airy. I've made breads with tighter crumbs because that's what I wanted, but because I let it cure, the inside was still lightened airy and it didn't feel something heavy sitting in the pit of my stomach. That's what it means to let your bread cure for a little bit longer. If you find that you're tempted and really want to cut into the bread because you're so curious of what it looks like from the inside, I suggest to people to put the bread in the oven and forget about it. Just don't accidentally turn on your oven at any point throughout the day. But this way, if you don't see the bread, you won't be tempted to cut into it. Next lesson, yes, baking is my favorite, but the next lesson is my also first. Second is also my favorite. You can have multiple favorites. The next lesson is where we get to actually cut into the bread. I let my bread sit for about half a day so we can safely cut into it. Now not everybody's bread is going to be the same. I have no idea what my bread is going to look like, even though I've been baking bread a lot for the past year, over a year now, especially since I sell bread. But it's always a fun little exploration. Not everybody's bread is the same, but it'll still be delicious. See you in the next lesson.
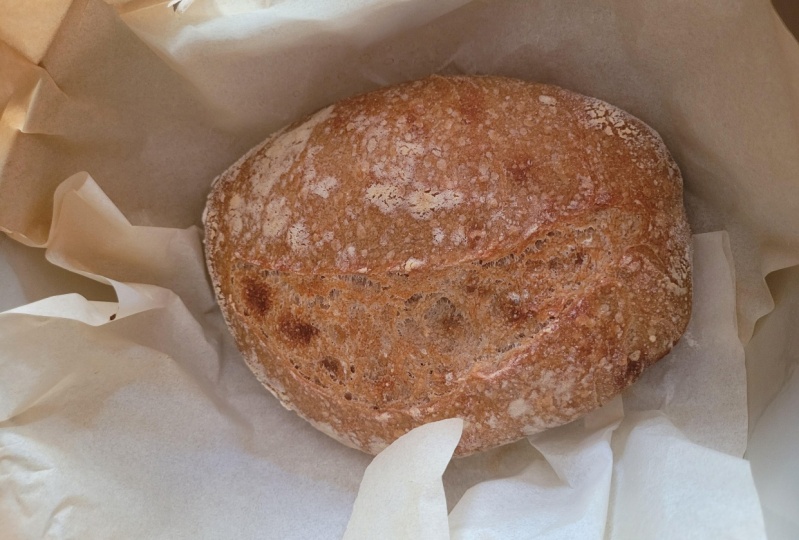
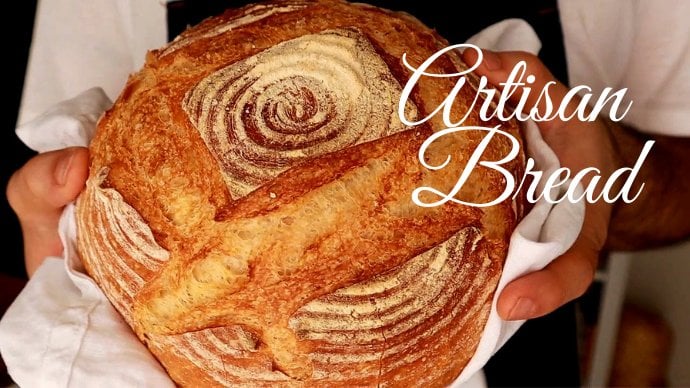
18. Cut and Reveal!: Welcome back. We are at our final lesson. I am so excited. I hope you're excited. Not only am I excited because we're cutting into the bread, but I'm also excited because I'm actually really tired of talking. It's a lot of lessons, but they've all been very good. Grab a sharp bread knife. A good bread knife goes a long way, honestly, and let's just go ahead and cut into this delicious bread that we've made. Oh my God, this bread looks fantastic. Well to me it does. Beauty is in the eye of the beholder, in most cases. I like a more airy crumb, not because it's become such an Instagram thing to do, I just like the texture of it because I find it sits less heavy in my stomach, if that makes any sense. I generally just put butter and jam on my bread. I don't normally do sandwiches, so this open airy crumb works for me. If you like to have sandwiches, then go for a little bit of a tighter crumb. One way of getting a tighter crumb is buy pre-shaping. It'll still be a bit of an airy crumb, but it won't be as wild looking as mine is. Because we worked so hard in having a balance between extensibility in dough strength. You can see that the dough rose nicely but still held its shape. It's only like a 350-gram flour dough, but it grew pretty big. Congratulations everyone. We have all made it through this class together, and I hope you take this opportunity to really experiment and see what works best for you. I would also love to know what everybody thinks and how they did with their bread baking exploration journey in the comments in the discussion area, it'd be great if we could all keep in touch. Congratulations and enjoy your bread baking as much as I do.
19. We Made It!!: Congratulations everybody. We made it through this class together. It makes me feel great to be able to impart my knowledge onto everybody about this. There's so much involved in bread baking and there's so many recipes out there, but really there is no recipe. It's understanding your dough, it's becoming best friends with your dough, it's building that beautiful relationship so that if something is not going quite right that day, you can counter it by doing something else. We have covered everything from tools, to baker's percentage, to protein percentage, understanding hydration methods to help create both extensibility and dough strength, auto lease and the enzymes that are involved in the auto lease, all the way to making a beautiful dough that is then ready for baking a delicious bread. That's a lot to cover to be honest. But what I wanted to do was to give you the methods that exist so you can experiment and see what works best for you. I mean, there are days if I'm working with an 80 percent hydration dough or higher, I don't use everything that I've given in this class. I don't use slap and folds, and I don't use stretch and fold. I just do coil folds and then do lamination and multiple robot mixing methods. As I find that helps to start creating a great dough strength. Play around and see what works for you. If there's anything I hope you can take away from this, is that don't let the dough sensor fear, because there is no such thing as being afraid of a dough. If there is, please let me know in the discussion area. Just understand what's happening, don't fall for recipes, your kitchen is your kitchen, it is unique to everyone else's kitchen. Work with what's within your environment. I hope that this class gives you the encouragement to keep experimenting and just baking delicious bread for your family or for yourself, all depends, friends, whoever. Let's share with each other how we're all doing. Share your photos and comments in the discussion area and in the gallery page of this class so that we can see what you're doing, how you're doing. If there's any troubleshooting, best thing to do is actually take photos of everything of the steps and try to explain what you did and what you used. From there we can troubleshoot and see what's going on. The more open the discussion, the better it is. It is a community of sharing, so let's just keep doing that. Now, this is where it's always the awkward part, only because it's a bit of a self-marketing. Please leave a review, I would love to know what you guys thought of this class. That way if I create any future classes, I know what you guys are looking for. Should you like, please do follow my profile, that way you can always see whenever I have new classes coming up, it would really help. I would really appreciate it. I hope you liked this class, please leave an honest review, I would love to take a look at them. Thank you again. I really look forward to seeing what you guys make. Enjoy your bread baking journey because I know I enjoy it very much as I learn from it every time still. Take care. Bye.
 Nadia Cheema, Content Creator/Photo and Videographer