Transcripts
1. Introduction: Hi, I'm Shannon Suban, an artist and art educator
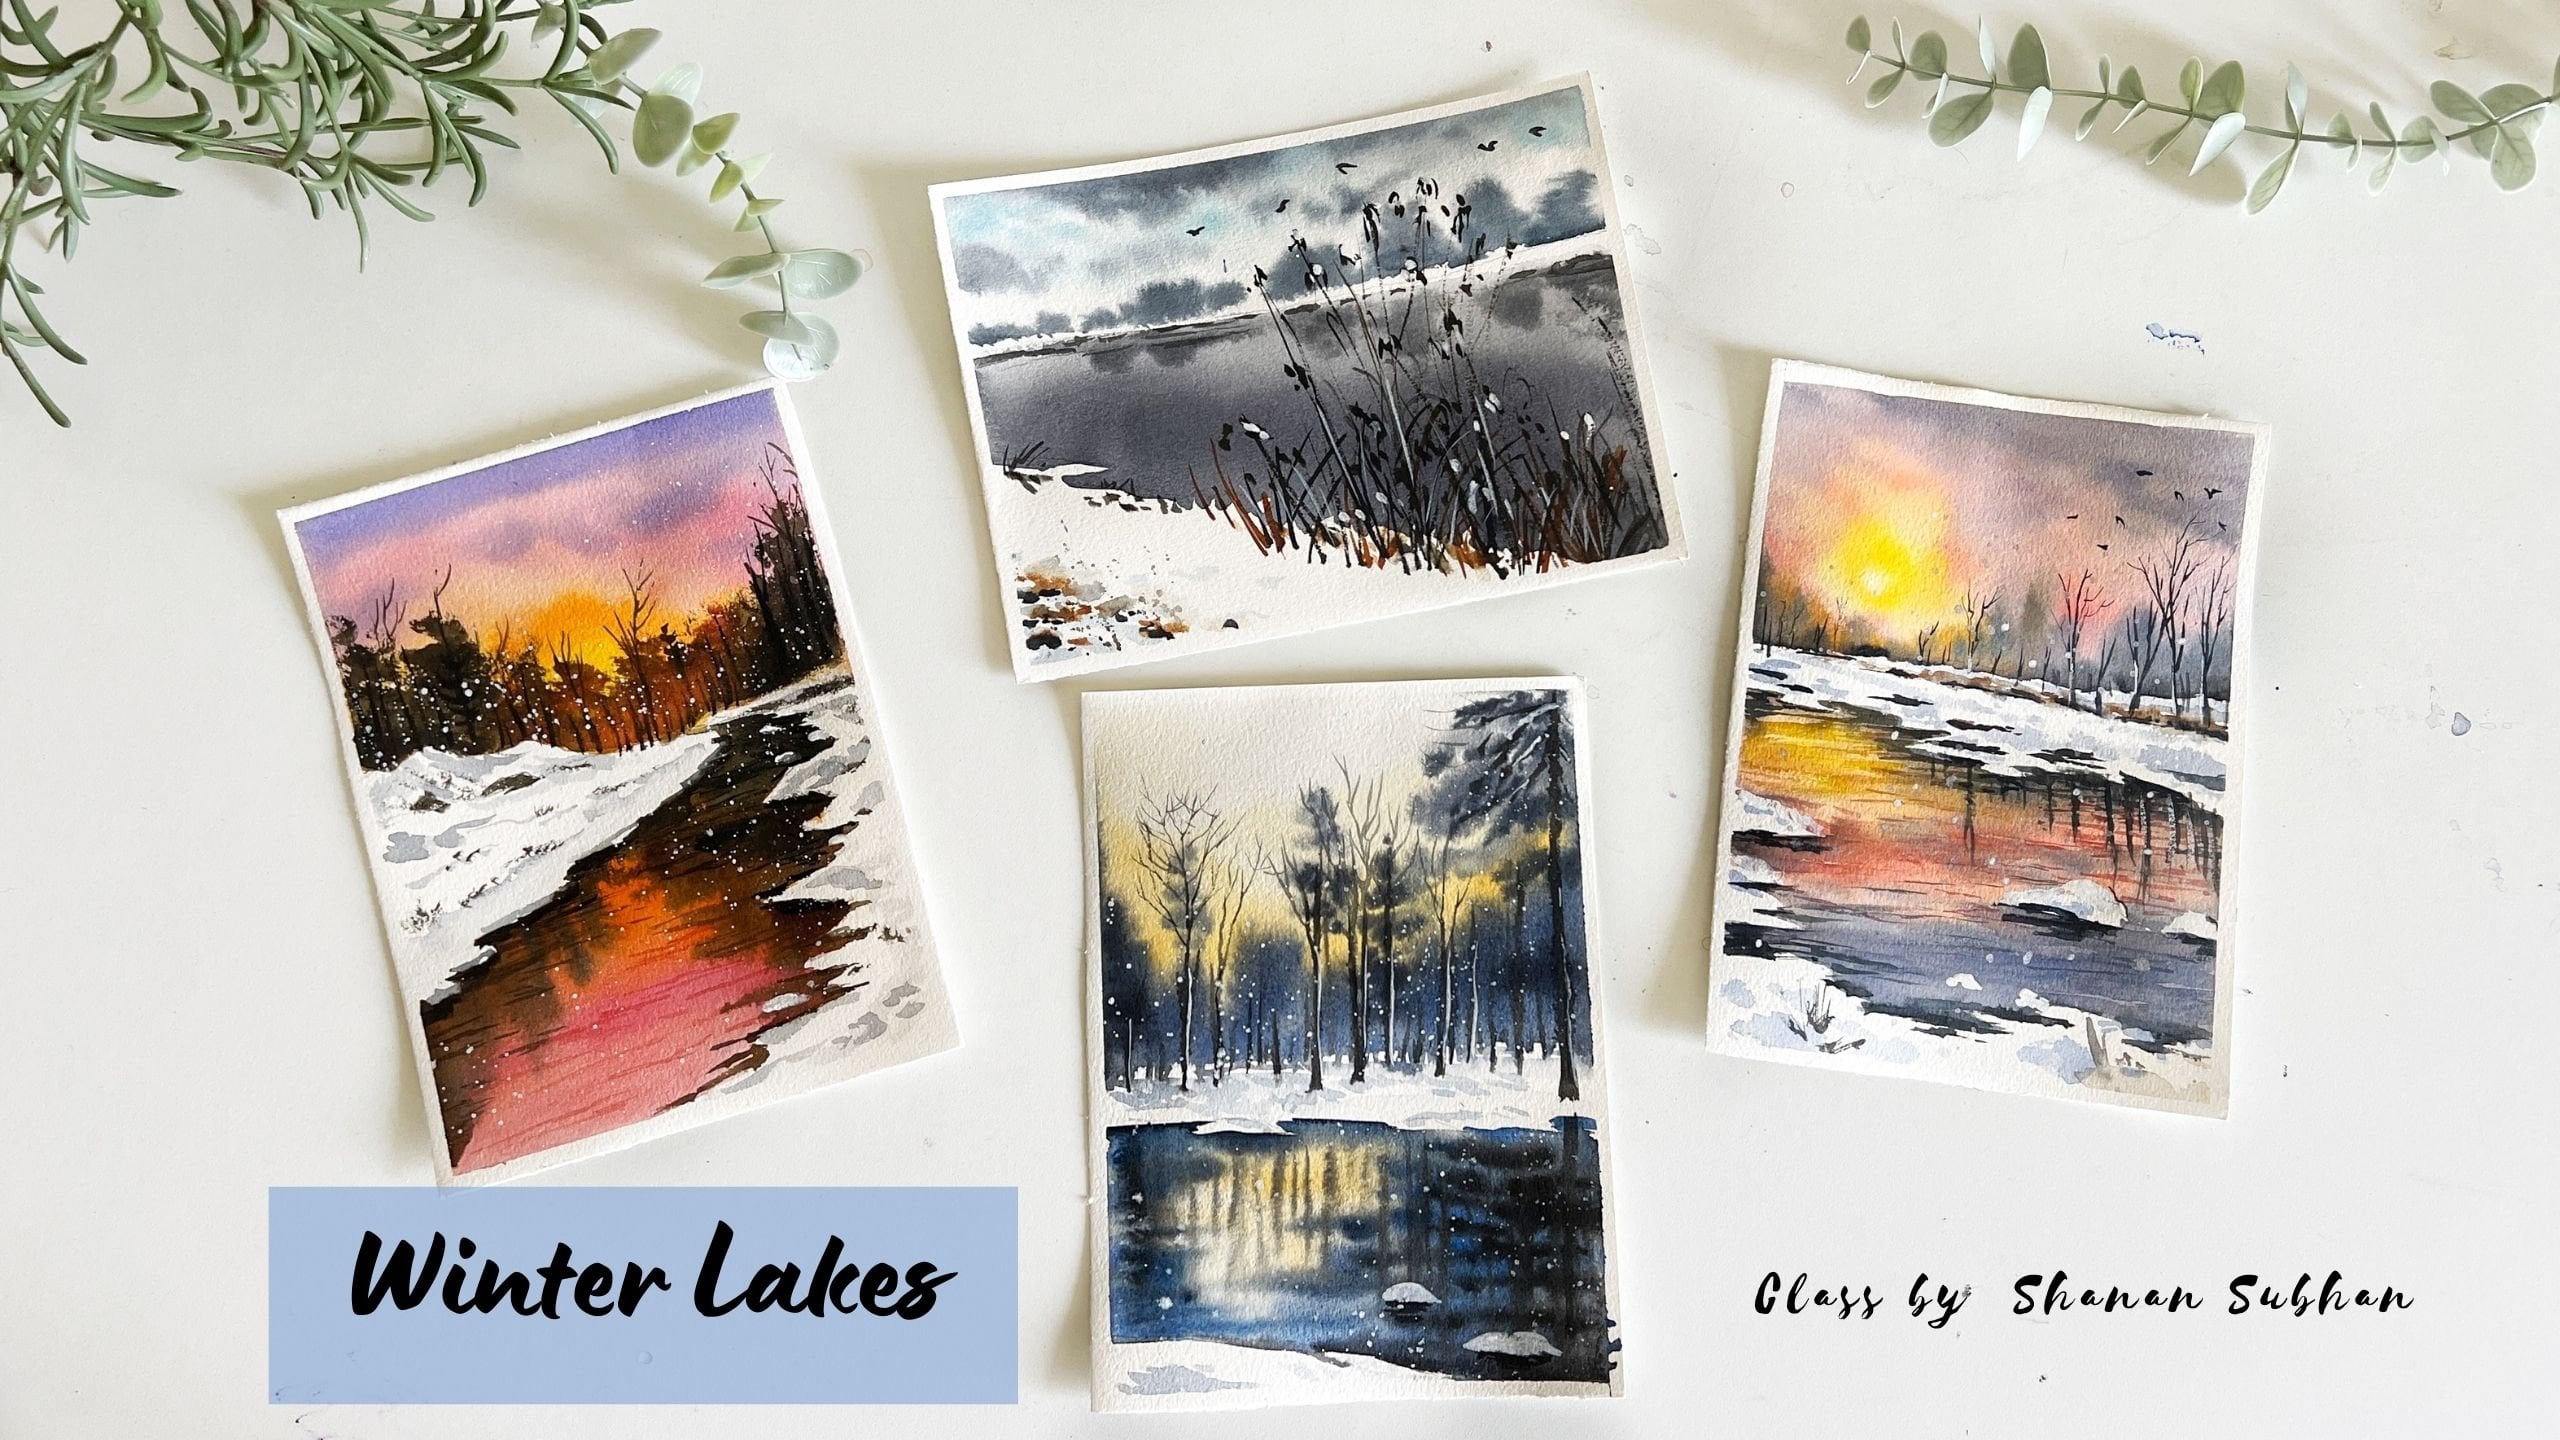
living in Bangalore, India. Welcome to my class on
painting Winter Landscape. In today's class, we are
going to learn to paint a snowy landscape along
with a majestic pine tree. I'll be explaining each and every step of the painting with detailed instructions so that you can easily follow
along with me. I'll also walk you through all the art supplies
needed for the class. This class is designed
for someone who has already been painting
with watercolors. In case you're a beginner, then I would recommend
you to follow my older classes where I have covered the basics
of watercolors. However, I'll be
discussing the techniques used in the class with the
help of some simple examples, without any further
delay. Let's get started.
2. Art supplies: Hello and welcome back. I'm so glad you decided
to join this class. All right, let me
walk you through the art supplies that I
have used in the class. These are the brushes
that I'll be using. This is Princeton
more brush size four. And next is silver
velvet size 1282. And this one is Rosemary
Rigger, brush size four. Next we would need
pencil eraser, or a kneading erasor, whichever
is available with you. Kneading erasor helps to remove the darker pencil lines
during the sketching process. Next is this backing board which I've used to
support the paper, and I've taped it
using masking tape. Next, we would need a
napkin and tissue paper to clean the brushes and
lift off the paints. Now coming to the colors, I have used artist grade
colors like senil, Jello machine, Daniel Smith. All the colors have
poured into this palette. The colors that I'll be using in this painting process
is ultramarine blue. Burned timber
paints, gray oilet, These are some of the
important colors. Then we would also need white gauge paint to create these highlights
in the painting. We would need two jars of water. Please take clean water and
also a water spray bottle. Lastly, head dryer to speed up the drying
process. All right. These are the supplies that I have used in my
painting process. You could go with any similar supplies that
you already own. I'll see you in
the next chapter.
3. Techniques: Before we start our
painting project, I want you to get familiar with the techniques that
will be used in the class. First one is the
negative technique. In this technique,
we are applying paints outside of
the focal element. You could apply the
paints using wet on dry. It depends on the requirement we will be using
this technique for the background to paint
around the main pre, also inside of the tree where we are painting the darker foliage. Next is the masking technique, where we try to preserve the
area by masking something. You could use a masking fluid to preserve the white areas, but I'll not be using
any masking fluid here. Please don't get confused. This will be same as negative painting
technique where I'll leave white spaces and then paint the darker
colors around it to suggest the shadows of
the snow crapped trees. But why I have named it
as masking techniques, you can use masking
fluid to preserve these white areas in the
painting, the painting as well. I'll skip the masking fluid and carefully apply the
layers one by one, don't get confused, you can
simply follow along with me. Next on the same example, I'll demonstrate lifting
and blending technique. Now we would need a
clean and damp brush. With the help of your
clean damp brush, you'll be lifting the paints, creating a softer touch in
the snow capped layers. It will create a
smoother transition from white to the shadow part. In the initial layer, it will appear dull, but once you add
the green foliage, it will turn into a
nice, beautiful tree. Next, we will be discussing
a technique where we will learn to soften
the hard edges. Let's say we have these
hard edges in our painting. We somehow want to make it
soft or have a diffused look. What we can do is, again, take a clean dam
brush and we'll run a brush over the
hard edges into and from motion to create
the softer look. This technique will
help us create softer looking foliage
and shadows in the tree. In this example, I'll show you how I've painted the
background trees. Let's say we have this main
tree in a triangular shape. We are leaving that area and painting the background
using wet on wet technique. First, wet the background area, then I'll be applying various shades to create that nice dramatic effect
in the background. This will be the initial layer. Once this is partially dry, then we can go ahead and add the trees in
a defined manner. For painting the
snow, we will be using diluted ultramarine blue.
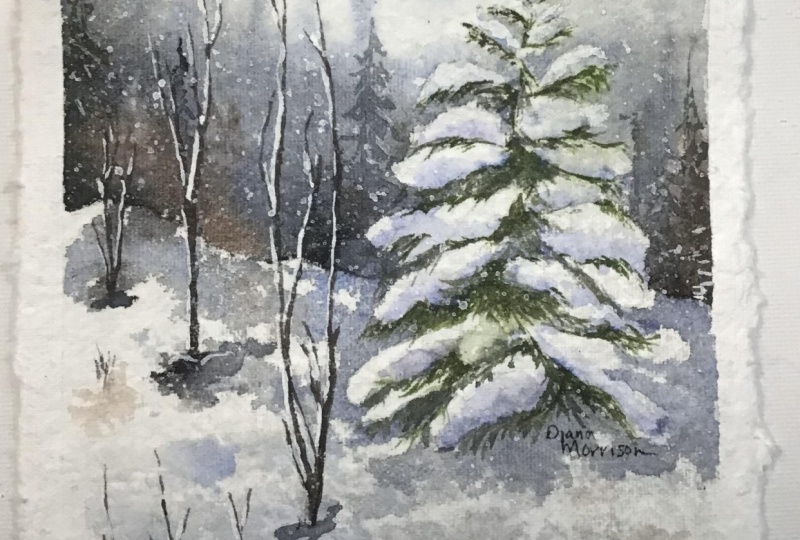
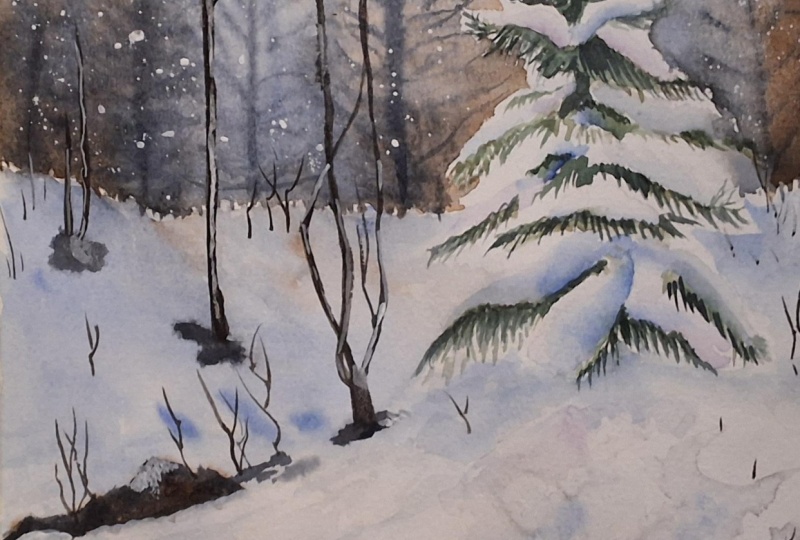
4. Sketching the Pine tree : All right, let us begin
the painting process. I'm going to secure my paper. First, I'll use this
1 " masking tape to tape down all
the sides neatly. I've given about a
half inch of border to the paper down all
the sides neatly. This is to ensure that our
paper is tightly sealed during the painting
process and we will also have a nice
border to the painting. Once you have taped
down all the sites, run your finger over the edges to make sure
it is tightly sealed. Now let us get to
the sketching part. I'm going to take my
pencil and an eraser, and we'll begin by marking the composition
of the painting. The main element
of this painting is the snow capped pine try. I'm going to sketch that first. I'll start by drawing
a vertical line very lightly because I don't want any pencil marks on the paper. I'll add the branches
of the tree one by one, starting from the top part and moving towards the
bottom of the tree. As you move towards the bottom, you will have to make the branches slightly
bigger in size. Here our aim is to
achieve a conical or a triangular shape in the
overall shape of the tree. First, I'll mark the
shape of the branches, then I'll begin adding
the snow cap areas. Take your own time
to sketch the tree, because this is very important
part of the painting. Now I'll again go back
to the tip of the tree. Here I'll draw some
circular shapes depicting the snow
over the branches. Mark it very gently, we don't want darker
pencil lines. These shapes depict the snow
collected over the branches. You can change the shape
as per your liking. You don't have to exactly
follow the same step. I'm trying to make the tree look fuller by adding more branches
and snow capped areas. The area where I'm marking these pencil lines will suggest the green part as in the
leaf of the pine trees. I'll also add some tiny, small shapes as the
filler elements. Now let us erase the center straight line
that we had drawn initially. Okay, so the sketching
of the tree is done. Now you can use a kneading eraser to
remove the darker lines. Because water colors are
very transparent in nature, the pencil lines will
be clearly visible. So make sure you're using
a kneading eraser or a regular eraser to remove
the darker pencil lines.
5. Painting Main Pine tree: Okay, so the sketching
part is done. Now, let us mix the colors. I'll take ultramarine
blue and add some water, making it diluted inconsistency. Next I'll take a violet color, and again, add water to it, making it diluted inconsistency. Let us take a diluted violet and we'll apply it partly on the
sketched areas of the tree. We'll apply both
the colors here, oilet and ultramarine blue. This will suggest a sense of variation in the
shadow of the snow. Since we are painting
the base layer, you don't have to worry about making it all perfect
at this point. Just randomly apply the paints. Also make sure to leave some white spaces to suggest
the bright snowy area. Now, as you can see, we have some hard edges
on the snowy area. Let us soften them using
clean and damp brush. With my damp brush, I'm gently rubbing my
brush on the surface, softening all the hard edges. By softening these hard edges, we get a softer
look on our tree. I'm painting from
lighter to darker color. I have painted the lightest
color of the tree. Next, let us proceed to the mid tones and
the darkest tones. Next, I'll take ultramarine blue in slightly mid
tone consistency. And I'm going to
drop some colors on the lower part of
the shadow areas. Just a hint of the midtone
colors would be enough. You don't have to
apply a lot of colors. Once you have applied
these colors, then you can again use damp
brush to smudge these colors. Next, take Sam Green and
mix it with burned timber, so we will have a
warmer green color. Now take this green
color and apply it on the lower part of
the snow capped areas. I'm painting some random
leaf like shapes. We will repeat the same step
on every snow capped area. You just have to apply some repeated angular
brush strokes, suggesting the foliage
of the pine tree. Use the pointed
tip of your brush. Here I'm using size
eight round brush. Avoid painting uniform
or symmetrical shapes. Try to paint it in
an irregular manner so that it suggests an
organic looking tree. Fill the empty
spaces in between. You don't have to paint exact same brush strokes
as that of mine. Follow your own intusion
and paint your own tree. This was the mid tone color. Now to make the
tree look complete, we will add some
darker colors next. Next, let us take the
darkest color I have. A mix of sub green and burn timber along with
some paints gray. This is the darkest tone. Now we will partially apply this shade on the green areas. Remember, you don't have
to cover the entire area. Only few brush strokes
would be enough. This dab your brush to create some simple dots
or brush strokes. This will act as the
darkest shadows. You can additionally introduce some new leaves or branches. I'll be adding
some more branches to define the overall
shape of the tree. Now take the shadow color of the snow that is ultramarine
blue in diluted tone, and apply it on the
snow capped areas. This step ensures that the leaf and the snow gets blended well. Now take ultramarine
blue and paints gray in a diluted consistency. Apply this color around the tree where it
touches the ground. Next, take clean water and
blend these sharp edges. Moving on, we will paint the
snow on the foreground area. Let us apply ultramarine blue at the bottom
part of the paper, and then spray some water. I'll tilt the board and
wipe off the extra paints. Next, we will allow the
pains to dry completely. We don't want the paints to interfere with
the background, let it dry completely. You could also use a head dryer to speed
up the drying process.
6. Background trees and snowfall effect: All right, so we have
painted the tree. Now let us paint the background
area of the painting, and I'll gently mark the
boundary area for the horizon. Now turn your paper around so that we can paint the
background part easily. Also, I have removed the darker pencil lines
using needing eraser. Now let us take a
larger sized brush. I'm using a mob brush and let us wet the area below this line, leave some white spaces around the tree area here. I'm going with wet
on wet technique. Hence, I'm wetting
the entire surface. On this wet surface, we will paint the background
trees and the sky as well, so carefully apply water
around the tree foliage. Now let us paint the background. I'm using a size eight
round brush here. We will be using darker colors
to paint the background. Take burned timber paints
gray and keep it ready. First, I'll take burned timber and apply it
on the wet surface. Here, I'll apply on the left
and the right side, both. We are going to have a
mixed color background. Next, let us take
another darker color. I'm taking paints gray and apply right next to the brown
color that we have applied. You could also mix two colors in some areas and it will result
in a darker brownish color. Next, I'll add ultramarine
blue around the same area. This is to add a sense of
winter vibe to the painting. And on the upper
area of these trees, I'll be applying a mix of ultramodine blue and paints
gray in diluted form. Then we will apply
some vertical lines. In downward strokes, you can simply pull the
colors down using your brush. This will be our pine
trees in the background. We have created the tree trunks. Now let us paint the
foliage around these lines. I am using a mix of
ultramarine and paints gray. It is a sort of
muted blue color. Make sure to leave some white
spaces around the tree. Now, you may tilt the board. After tilting the board, first thing I want to
check is if my tree is looking proper and organic, some places I notice
some hard edges. I'm going to use a damp brush and blend it with
the background. I don't want these sharp edges. Take your own time
to fix the tree. If you're okay with
having hard edges, then that is also fine. Okay. Next, let
us paint the sky. My paper is still damp. I'm applying some diluted
ultramarine blue for the sky. If your paper has dried, you could spray some water and then apply the
paints for the sky. I applied the colors
and then used a wet brush to blend
the colors in the sky. Next, I'll be using my
water spray bottle and sprinkle some water on
the background tree area. This is going to create the snowflake effect
in the background. Now let us quickly move
on to the next chapter and add some detailed
trees in the background.
7. Adding snow in the background : The base layer of the
background is ready. Now let us introduce some
detailed trees over there. While the paper is damp, let us add some trees there. I'm using paints gray. With that, I'm painting
some pine trees. The trees that I'm
painting in the background are slightly smaller
than the main tree. This is to depict a sense of
distance from the main tree. The objects away from the viewpoint appears
smaller in size. My paper is still damp. That is the reason why I'm getting these diffused
looking trees. I'm using paints gray
to paint this tree. Now on the left side, I'll add a partially
visible tree and another tree
on the right side. Next we'll take a tissue paper and squeeze it to make
a roll out of it. Now with the tip of this roll, we'll be creating a tree. We will achieve it by
the tissue on the paper. This will lift off the
pains of the surface. This will suggest a snowy
tree in the background area. Now, to make the pointy
tip of the tree, I'll make another roll
and lift the pines. Now let us create
another similar tree, dab the tissue and
lift off the pines. This should appear in a
conical or a triangular shape, suggesting a pine tree. If your paper has dried already, then you can skip this step. It is. Okay. All right. Now, let me add trunk
to these trees. Now, I'll go back to the tree on the right side and fill
up the empty spaces. Next I'll take white gas paint. I'll mix it with a little bit of water to make a thick paste. Now, load your brush with this thicker paint and splatter it on the
background, the area. This will depict the
snowfall in the atmosphere. Okay, let us move on
to the next chapter.
8. Adding Foreground elements : In this chapter, we will
paint the snowy ground. Let us apply water to perform
wet on wet technique. While painting snow,
you should remember that snow isn't just white, it also reflects the
colors around it. Here in the surrounding, we have trees in blue
and brown color. Same thing, we will reflect
it the ground as well. First, I'll apply some paints, gray and then I'll add
in some brown shades. I'll also try to maintain
some white areas which will suggest the sunlit
areas on the ground. Next, I'll be adding some darker colors for the
intense shadow on the ground. Moving on, I'll paint the shadows underneath
the tree area. Next, I'll use some ultramarine
blue in diluted form. With this color, I'll
apply some random shapes. This will create an uneven
appearance in the ground. Some strokes on the
foreground area as well. Next I'll take a mix of burned
timber and paints gray. And apply this on some
random areas of the ground. This is to suggest a rock, the normal ground surface. Now in order to make my main pine tree
shine or stand out, I'm planning to paint
or cover the rest of the snowy ground using
a soft wash. For that, I'll use ultramarine and paints
gray mix in diluted form. This will create a subtle
separation between the midground and the
background elements, which in turn allows
the main pine tree to draw all the attention and
glow with its inner light. As you can see, after adding
the background color, a tree is glowing on its own. Now to add some
depth to the snow, I'll be adding darker colors at this point. The blue color
might appear very darker, but after drying, it is
going to look just fine. Trust the process and allow
this layer to dry now.
9. Final Details and Outro: Okay, so the background paints have dried and like I said, it appears just
fine after drying. Now let us add some more
elements in our painting. I'm going to paint some dried trees in
the mid ground area. Take a fine liner brush
and mix a darker color. I have mixed brown
and paints gray. Now let us start painting
the dried trees. Paint the trunk, and you
could even fork them into multiple parts
to create branches. I'll add some tiny trees along the boundary
of this main tree. I'm painting these tiny trees
with loose brass strokes. Now I'm going to add
a bigger tree here, making the trunk part thicker so that it supports
the entire tree. You can add your own
touch to the trees. There's no restriction or compulsion to follow
exact same steps in the foreground. I'm
adding some grass blades. Next, I'll go back to the main tree and refine
the overall shape. Adding few grass strokes of diluted ultramarine blue
to add some more shadows, do not completely cover
the area with blue color. Make sure to leave
some white spaces. Next, I'll take some
white gauche paint. Make it a thick paste out of it. Apply it along the tree trunks, creating a snowy
effect on the trees. Do this on all the trees. All right, so we are
done with this painting. You could add some
words if you want. Now let us remove
the masking tape, revealing the final
look of the painting. There you go. This is how
our painting looks like. Hi again. Thank you
for watching my class. I hope you had a fun
learning session today. If you have painted
along with me, please do share your
class projects under the project gallery and also leave a review or
feedback for the same. Your support and reviews
really mean a lot to me because that
encourages me to post more classes and improve
my teaching skills. Please leave a review feedback
and share your projects. That would really
mean a lot to me. I'll see you in my next class. Until then, bye bye.
 Shanan Subhan, Watercolor/Gouache | Art Educator