Transcripts
1. Introduction: Hello and welcome to this introductory class, sketch it mastery foundations. My name is Victoria Wilson and I've been using SketchUp to create 3D models in the design industry for the past 14 years. And during that time, I've developed my own methods for creating models and a more effective and time-saving way. So this class is all about sharing that foundation of knowledge that you need to build on in order to go out and do your own projects. I'm looking forward to sharing with you all the basic information you need to get started in SketchUp using the tools editing, drawing, navigating. I'm sharing my tips and tricks so that you can go on and use SketchUp in whatever way that you need. Whether it's designing furniture, lighting, buildings, small models, or doing what I do, and creating larger models of interiors and whole homes. And just really showcasing products to your clients, designs to your clients. And you can take this information and just build on it to go on to do whatever you need to do using this 3D modelling software. So I hope you enjoy this course and get some really good information out of it. And I can't wait to see your projects and see what you create moving forward.
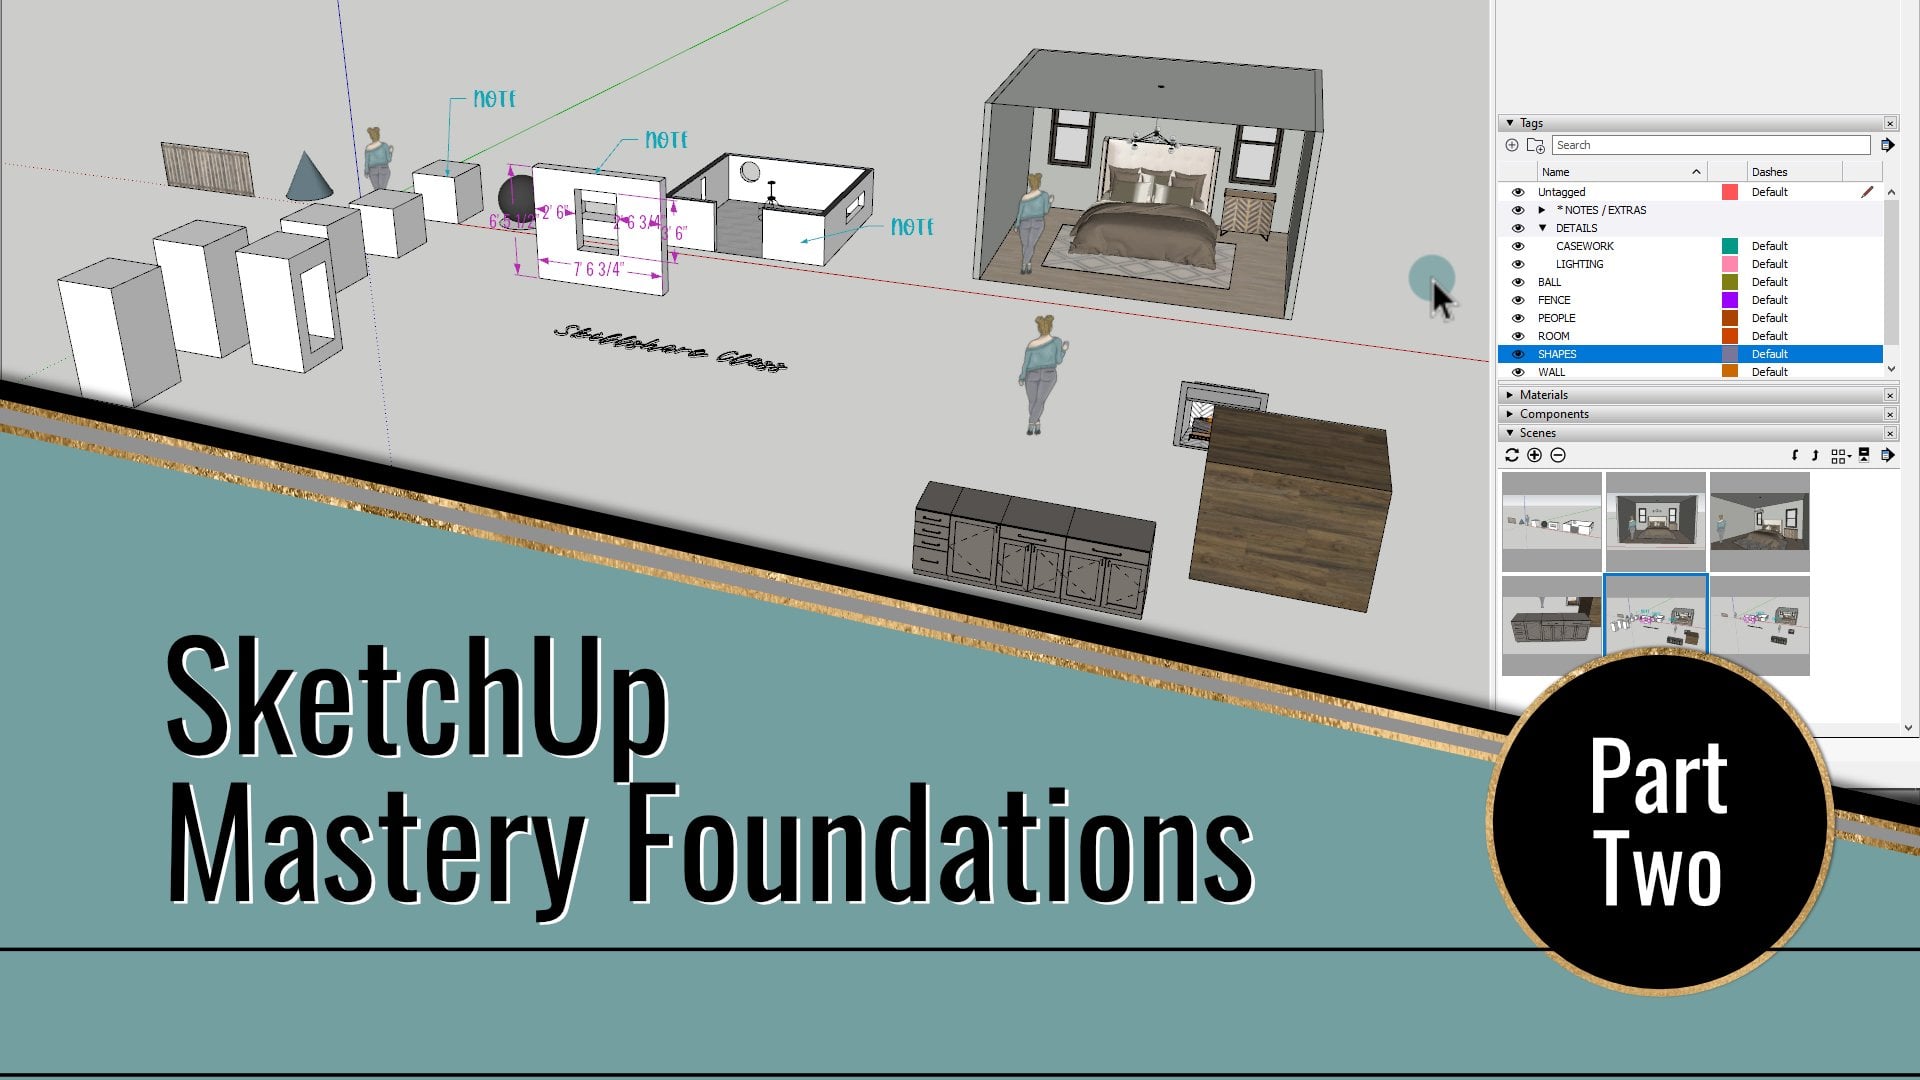
2. Your Class Project: Your class project can be broken down into two parts. I want you to take what you learn in this class as far as the toolbars and all the tools and customize your workspace to meet how you want to actually use the program on a regular basis. And then I want you to take the tools that you learn and start developing some basic forms and shapes that you can then go on to turn into full models. If you stop the projects and resources section in this class, you'll find a couple of downloads that I've given you. And there's a little bit more information about the projects. So make sure to hit this See More button so you can see it all. But I've given you links to the SketchUp website and the pricing page and a description about your class project, as well as some other links for the 3D mouse that I use for SketchUp that I talk about in the class. And under the resource list you'll see two downloads. One of them is a basic SketchUp model that is an example that I'll be using throughout the class. And the other is a PDF of a SketchUp toolbar comparison, and I'll reference that in another lesson. But this is, this is something that you can refer back to when we talk about the different tools as a refresher, if you're looking at the Skillshare app, you won't be able to download these. So make sure that you're in a browser either on your tablet or on your computer to be able to see these. And I can't wait to see your projects, so don't forget to create a project at any point throughout the class. You can update it and add to it along the way. And I'm excited to see what you come up with.
3. Getting Started: Alright, so we're gonna start off by going over the different versions of SketchUp currently out and which version I'm using throughout this course. If you've looked into SketchUp before but haven't committed yet, or if it's been awhile since you've looked into it, you may notice some changes. When you click on the Plans and Pricing on their website, it automatically takes you to this for professional page. If you click on the Personal tab, then you'll see a free option. First off, the main difference between these versions is that the, the free version is WEB only, whereas the pro version is a desktop version plus web. And the shop version, It's still WEB only, but you get a little bit more to it. But the pro version is what I'm currently using. If you're looking to at some point use the documentation companion called Layout, then you'll definitely want the Pro version because that's only way you can get that one. If you're not entirely new to sketch up, then you may remember in its early days, the desktop version was free. Of course that version also didn't have all the same features as the current version. You may also remember a time when the pro version was a onetime purchase with a yearly maintenance plan for updates. As of the end of 2020, they have switched over entirely to a yearly subscription plan with updates rolling out as they happen. As for the version I'm currently working with and will be demonstrating with for this class, It's the most up-to-date version of the pro option. I'm actually still running on my a perpetual license for now until the next major updates. That would likely make me switch to the subscription or entice me enough to switch to the subscription. Feel free to choose which version you'd like to use. But just be aware that I will be demonstrating in the pro version on my PC. Keep in mind that there will be a few differences if you up for the free version. And there will also be differences if you're working on a Mac, I believe on Mac, all the toolbars and things float around the screen and can't be docked, which is probably one of the biggest differences. I highly recommend going with the Pro desktop version. At this time, you'll need to set up a Trumbull account. If you haven't already done that. That links your subscription information. You'll use that account to sign into sketch up and connect your license once you have it installed on your computer. It's also what you'll use for any online collaboration within sketch up and for downloading models from the SketchUp Warehouse if you plan to do that at some point and yes, we will talk about that. So take some time now to go ahead and download the version. If you haven't already done it, go ahead and download the software to your computer and get signed in. And then we'll get started with the welcome screen and the user interface, the workspace, and start looking at tools and how everything is set up.
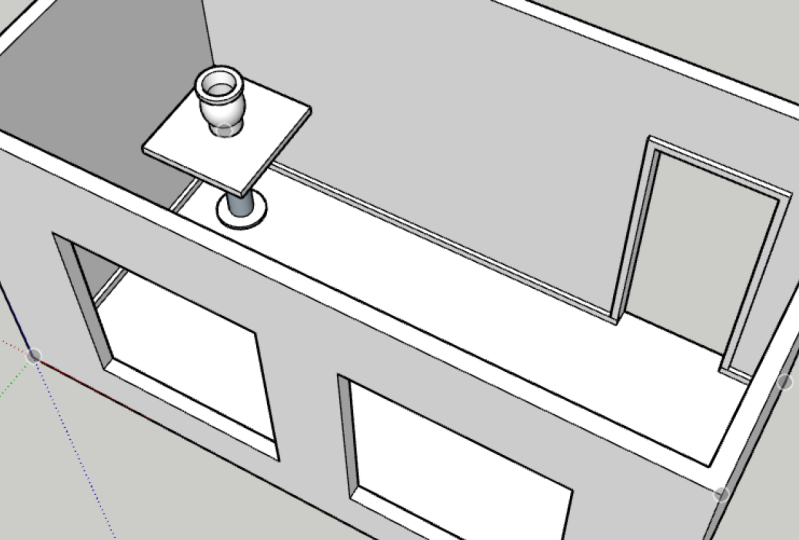
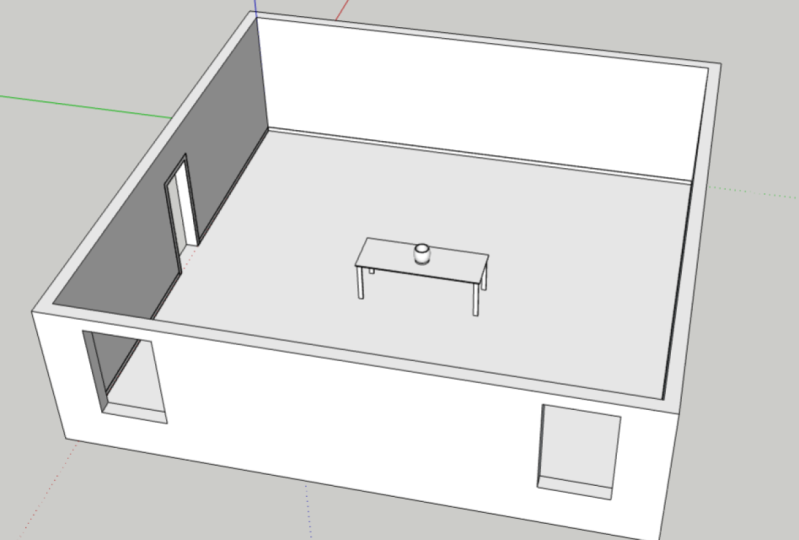
4. User Interface: Welcome, Menus, & ToolbarsUser Interface WMT: When you first open up SketchUp yields, see this welcome screen and yours will probably look different from mine if you haven't used SketchUp yet. Because one of the things that it shows you down here at the bottom is recent files. So if you haven't used SketchUp get you won't have any recent files shown here. But if you do, then you can open the files just by clicking on them. Another thing that this welcome screen has is templates that you can use. It has a place where you can open up files, access all your files. This down here at the bottom is where you would add your licensing or your subscription information. Like I said in the last lesson, I'm currently working on a perpetual version. So I have my license information here. But on the main screen here at the top you'll see a variety of templates. If you click More, you get a whole bunch of templates that you can choose from. Some of the main differences between the different templates will be the styles, the backgrounds, and then you'll have the units of measurements. You can see some as inches versus meters, millimeters, centimeters, different things like that. So it all just depends on what type of drawing that you're creating. You would use a different template. If you create your own templates, they would show up here. So under underneath the templates, you'll see the names of the templates and you'll see this little circle if you click on one of these and fill it in, that means you're setting it as your default templates. So from now on, when you start a new drawing, that would be the template that just automatically shows up. So if you want to start with a blank drawing for the purpose of this course, you're welcome to choose any template that you want. If you want to work with the model that I'm working with, them, make sure that you download the example model that comes in your project and resources section of this class. I decided to give you a basic example model to start with so that you have something to look at some examples that we're going to manipulate and learn some of the tools by looking at this particular model. So choose if you want to open this model or to use a template. If you decide to go with just a blank template, I will be working in inches. So at this point, choose how you want to start. If you're going to work with the example model that I've given you. You just click Open File and find it on your computer and then we'll just get right into it. So now we're in this example model that I've given you in the resource section. And my screen may look a bit different from yours because I have modified some parts, but it should still be pretty similar. I've actually changed up my setup to give a more basic look while still keeping some of my customizations. And what we're gonna do now is take a look at the user interface or your workspace whenever you prefer to call it. In the example model I've given you, there are a few basic forms already created just to give you some examples and something to navigate around that whenever we get to those tools. And if you've opened up one of the standard templates, then you may have noticed a SketchUp character on the screen. They usually change those out each time. There's an update. In the example model that I've given you, you'll see a 2D camera facing character here. This is one that I've created. I turned one of my illustrations that I did in the Procreate app on my iPad and changed it up to be a SketchUp character because I thought that would be fun. So we're going to start out by going over the different parts that make up this SketchUp workspace. First, you've got your space up here where it tells you the file name That's pretty basic. You've got your minimize, maximize, and close all the standard things when working with a program. And then you've got your top menu. So this is where you have file and you've got all kinds of your basic tools. We'll go over some of these as we need them for this class. And then it gives you a recent list of files here at the bottom. Then you've got edit, view, camera, draw tools, window extensions, and help. Now one thing that I want to make sure to mention is that some people don't like the welcome screen that comes up every time you open sketch out. So if you would like to turn that off, how you do that is go to Window and then Preferences. And it brings up this sketch at Preferences menu. And you'll go to General. And you can uncheck this box that says Show Welcome window. So you can uncheck that and it'll just open up whatever default template that you have set for SketchUp. And if you haven't set wine, It's okay. You can always set one later. You can always come back and turn this on and off depending on what you want. But I just thought I'd give you that option in case you don't like it because I know some people don't like having the welcome window and some people do. I personally like it because I can switch between different and templates. But this is where you can turn that on and off. And if you don't have your default template set, and let's say you do want to turn that off, but you want to go ahead and set your templates. If you go to Help and welcome to sketch up, it will bring up that welcome window. See you can always set your default template by clicking on the little circle to fill in the little heart, and that sets it as your default. So that's pretty simple there. Next we're going to take a look at toolbars. So this is your toolbar and you can move this around it maybe in a different spot. It's been a while since I've had like a fresh restart of SketchUp. So I'm pretty positive a brand new version comes up here at the top like this. And it most of the time, it's the getting started Toolbars. So that is what this is. And if you see, if you hover on this little area, you've got this little dotted area here. You can drag that around. You can pull it off. It's undocked if it's just floating like this and you can drag it up and snap it to the top, or you can snap it to the side, whichever one is your preference. So I'm going to leave it up here at the top. Typically I like to have mine at the top, but that is personal preference. And one thing I want you to get out of this course is to figure out how you want to customize your workspace. So that's actually part of your project. I'd love to see a screenshot of how you've chosen to customize your setups. So we'll learn all the different areas and you can decide how you like to use it. One way to access the toolbars is if you right-click up here on the toolbar or in this area, you get this little pop-up. And if it's checkmarks, then that means the toolbar is turned on. And if there's nothing decided, that means it's turned off. That's I mean, that's that's pretty obvious. But toolbars here, if you come down to this, this opens up your dialogue box where you can check multiple ones at a time. See you don't have to turn them on and off at the same time. Individually there. You can reset it to go back to the regular version. Under options, you can choose whether or not you want the Show screen tips on toolbars and the large icons. Right now for the purpose of this course, I have the large icons turned on because I've heard that be easier for you to see. But typically when I'm working, I will uncheck that so they are smaller. One of the reasons I do that is so that it takes up just a little bit less room. Because when there are larger, it shrinks down. Just a tiny, tiny bit. It shrinks down your modeling space. Just like if you have your toolbars lined up on this side and on the top, then your modelling windows going to get a little bit smaller. But it's just personal preference. So you can have this large or not. For right now, we only have the Getting Started toolbar and the measurements toolbar turned on. So this is your measurements toolbar over here. As you use some of the tools, you'll see measurements pop up in it as you draw, as you zoom. Different things like that, that you can input measurements or view measurements in this space. Another way to access your toolbars is if you go to View and toolbars and it will bring up that same dialog box for your toolbars. Just brings you back to here. Another way that you can move your toolbars around is if you double-click on a toolbar, it unlocks it, and if you double-click, it docks it. So that's if they end up floating around, accidentally just double-click it and it'll go back. And like I said before it, you can move it around. You'll see that if I drag just a little bit, it goes underneath this measurements toolbar because it creates two rows. So when you get multiple toolbars turned on, once again, it shrinks down your workspace. So we're just going to situate these here. So. Okay, so we just have a single row. Here's one thing that I've noticed, this is an experienced tip for you. I've seen some people new to sketch up, go through and turn on every single toolbar on the list. Please don't do that. It's a pet peeve of mine. You can do it if you want to. But if you do it, you're gonna get a lot of the same tools duplicated. For example, a lot of people who are new to sketch up it will turn on getting started and the large toolset. And just looking at you can see that there's a lot of the same tools turned on. And if you turn on every single toolbar, then you're going to get these individual types of toolbars all by themselves, plus the Getting Started plus the large toolset. So it's a newbie thing. I've seen it happen over and over and over again. And I think people just don't realize that they're getting multiples. But if you, if you go through and turn on every single tool bar, one, you're going to be overwhelmed because that's just, that's, that's a lot that's a lot of toolbars. You guys don't need all this and see you can't see it that I've got a few that's popped up on my other screen over here. Let's see if I can grab them. I've got two monitors by the way. So if I open something up and it doesn't show up, it's because it's popped up on my other monitor. But so I think I only have one of these that is this one here is an extension, so we're going to turn that off and ignore it for now. But if you turn on every single one of your toolbars, one, look how much room that it's taking up on your screen. Just one because I haven't organized them here. But you've got duplicates. If you start looking, you'll see duplicates of lots of these different tools. And so you don't need to turn on every single toolbar and have multiples. And since this is new to you guys, I'm assuming, since this is new, I don't want you to get overwhelmed, so there's no reason to turn on every single toolbar. It's not going to make you look more experienced. If you turn on every single toolbar, you're just gonna get overwhelmed. It's going to be too much. So what I want to do is we're just going to turn on one toolbar at a time. As we review those tools, as we learn what that toolbar has for us to use. So for now, let's just, let's just get rid of that. So we're going to turn off everything. But the measurements toolbar and the good gets started toolbar and heads up. We're even going to turn off the Getting Started toolbar here and a little bit because we're going to start moving into the actual tools. So, but for now, we're just going to leave this here. So let's not get overwhelmed towards us 21 little bit at a time. We're going to ease into this, you know, what you're doing. And here's another little tip for you. I have given you a reference sheet in your resources section of this class where it, it's going to compare each of the different toolbars that we're gonna be talking about in this class. There's, there's more but where this just the first part. So we're just covering a certain portion of the tools. And I've given you this cheat sheet so that you can see a comparison of what's on the Getting Started toolbar versus the Large Tool Set versus the individual toolbar. So if you ever get lost and don't know what sweat, refer back to this list. And you can see by the time we're done, you'll be able to determine if you'd rather work with the Getting Started toolbar because you don't like having all the little ones. Or maybe you want to work with the large set toolbar. Maybe you just want a couple of toolbars because you're just going to really ease into it. It's up to you. One of the points of this course is to just give you this foundation of knowledge and then let you choose how you want to work. Another handy tip for you is if you rearrange your toolbars, sometimes not always, but sometimes SketchUp has a tendency to not save your placement. So one big tip is if you notice you rearrange your toolbars and then the next time you up and sketch up, they're not in the same place. Rearrange your toolbars, close it, open it again, and check them. If they've stayed in the same spot, you're good to go. If they haven't, rearrange them, close, re-open. And it's kind of like you gotta give sketch up that memory of where you want yourself to be in your workspace. I hope that makes sense. I just wanted to give you guys that tip because there's been so many times in the beginning of working in SketchUp that I rearrange my toolbars and then the next time I open them, they are not the same place because I just went ahead and started working. So that's that's a tip. But now you know how to move them around so you can do that.
5. User Interface: Default Tray, Axes, & Scene Tabs: Okay, so now we are going to take a look at the Default tray, which is this guy over shared. This is a place where you can manage different dialogue panels for different model elements such as tags, which used to be called layers by the way. So tags and layers, same thing if you hear me say layers is the same thing as tags used to be called layers up until almost say, like the end of 2020 or the beginning of 2021. It's still pretty new. I still call it layers because that just makes sense. Anyway. So this is where you organize different different dialogue panels. And you may notice that I have to, that's because I've customize it. So I'm gonna show you how to do that. One thing is if you click on these, you can minimize them. So they don't take up so much room. When you have them big. You'll get a scroll bar here so you can scroll down through these. So if you right-click on the top of this, you can see once again, I said I have to. If you go to Manage trace, it brings up this dialogue box. Here is where if you click on your Default tray, you've got these checkmarks. So this is the dialogue panels that you can have. If you create a new one by clicking New and create a new one. And you can only have a dialogue box on one panel at a time. So I've chosen to set mine up how I like to work. So my Default tray has these things and then I have another one specifically when I'm dealing with documenting stuff. So that's styles, shadow fog, and that's it. Everything else is under the Default tray for me. I think the only thing I don't use is the instructor. I don't use match photo really an outliner. I occasionally look at it, but I do keep that turn on. So this is where you can turn on what you want to use. You can turn them all on. You can just turn one on that, a time dependent on what we're talking about in the lessons. You can match yours to mine if you want. It's all about customizing your workspace to function, how you need it to. Another way to access your, your trays is if you go to Window and Default tray, this is where you can turn on these things. You can also rename it, you can hide it. So see that just hid my default trace and now I just have my documents SRE. If I come back on and say show tray. So because I have two panels, you can see that I have them both showing up here. You can say managed tries new tray, anything like that, but this is dealing with your trace. Another thing you'll notice is you've got the little x so that can close your tray completely. If you still want your tray, but you won't get out of the way while you work. You click on this little thumbtack and that is your hide functions. So when you do that, it just kinda minimizes it. But when you hover, you get access to the tools. I usually keep mine pinned. Just because that's how I like to work. I like BI tools right there. But there are times, particularly, I guess I would say when I'm presenting to a client or something and I want more modeling space that I will unpin that. And so you see how much bigger your space gets. You can resize this. So you can make it smaller by clicking on here and dry it. You can make it really big too. I mean, that's a little big. But I mean, I have large monitors. So if you have a smaller monitor, you obviously want to keep it smaller. But that is, I usually keep on about right there. So this is your default tray. Now, if you want to minimize these things, she can do this, you can close them. You can. For ease of showing you this, I'm going to minimize all of them. You can rearrange them so that they're like You just click and drag and you can just move it from one space to the other. This is just the order that I prefer mine in. Like I said, you're welcome to match mine if that makes more sense for learning purposes. But this is just, this is my setup. And I usually keep them. Well, I usually keep model in the info open all the time. Tags, layers, open materials and components and the rest I usually keep close unless I need them. But this is your default tray. Now it, just because it's shown here, doesn't mean it has to be here. You can click your tray and drag it somewhere else. So when I'm moving it around and you see these different little panel sections. So if you hover, it's going to show you where it will go. So you could put it on this side if you want. You could have two separate ones. You can put them here together. If I hover over this, that little icon you can see in classe it's got two little tabs. And so that will stick them together like that. So you can put this in any location that you want. I prefer the sides because it takes up less room. Because if you put it up here, I mean, honestly don't know why you would put it up. They've got this huge. So I personally prefer the right-hand side. I honestly cannot tell you why. I've just just that's just why I like it. So you can move that anywhere you want. But that's your default trade is really handy to manage all of these different dialogue options, these different panels, all in one place. You don't have to do to you can, you can have them all on one. It's up to you, customize your space how ever you want. And let's see Next. Let's talk about your axis here and your origin point. This is super handy for when you're drawing things and when you're modeling and moving things. So this is your blue axis. So this is up and down. And then you've got your green axis that goes, I guess she could say forwards and backwards if that helps. And then your read access goes side to side. So when you're moving, things are drawing things. You can align them to these axis and it helps you keep things in a straight line. And I'll show you more about that whenever we actually get into the drawing part of this. But this is very important. And your axis here is where they all meet. A lot of some people ignore this, but I find it extremely important if you're creating components are models that you end up grouping together. So for instance, if you're building a really complicated model where you're actually combining multiple models together into one big file. If they all have the same origin, then you can easily pop them into the right place every time by snapping to this origin. So we can look into that more, that's a little more advanced, but just know that your axis here is your directions. It's really important when you're inferencing and drawing. And you want things to go in a particular direction. And you can align with these. So that is your, your axis will look like this. I will look more into that when we're actually doing the drawing part. So the last thing I want to talk about for your workspace is seen tabs. So in this model, I've given you one scene. When you first open up a drawing, just a basic drawing. You're not going to have any scene tabs unless you add any. In this particular class. We're not going to look into adding scenes. We're going to look more into that in the second part of this foundations series. But for now I wanted to give you guys a scene so that if for some reason when we're learning these tools, when we're looking at navigating. If you get lost, like if you get really zoomed in somewhere or accidentally get really zoomed out really far, or you're scrolling in and you're inside of a shape, which can happen. You can get stuck in a wall. It happens. But if you get lost, I wanted to give you the scene so that all you have to do is click it and come back to this point. So what I mean by that is, let's say you've zoomed in here. We're going to learn this next about navigating your model, but I just use the scroll wheel on my mouse to zoom in and out. So let's say you're here and you don't know how to get back to that view, you're lost. You still new to this should not comfortable with navigating. I set up this scene so if you click it, it's going to take you right back here to this view. So if you ever get lost, you don't know what's happening. If I'm looking at an area of the model, showing you a tool and you're somewhere else because you get really excited about tools and started messing around and you want to come back, just click this working tab and you'll come right back to this view and you're good to go. So like I said, up next, we're going to look at navigating around our model so that you can zoom in orbit and all that good stuff. And then I'll show you a special little tip of mine with my 3D mouse. So that's all coming up in the next lesson.
6. Navigating: Orbit, Pan, & a 3D Mouse: Okay, so here's where I might start to push you out of your comfort zone. Now that we're starting to dig into the actual tools, we're going to take it toolbar by toolbar. So the first thing we're going to do is get rid of the Getting Started toolbar and focus on another 11 of the crucial elements of working in SketchUp is being able to navigate around your model in a variety of different ways. Since we haven't got to the building part yet. I've already given you some basic forms in the example model. So as we look at these navigation tools, you'll be able to have something to look at. So let's start by swapping out the Getting Started toolbar and turning on the camera toolbar. So this is your camera toolbar and I'm just going to move it up here next to the measurements. So the first tool we're going to look at is orbit, that is this tool here. And you can also access this by typing O on the keyboard. I'm a huge fan of keyboard shortcuts. They are super handy. Great way to speed up the process. And nine times out of 10, I'll use the keyboard shortcuts before the actual buttons. But for the sake of learning purposes, I'm going to try to make sure that I really use the buttons, but also tell you the keyboard shortcuts. So orbit O on the keyboard. This allows you to freely move around her model and move your model so you can change up the views. So what you do is you click and drag, That's it. Just click and drag. And you can click and click and drag. And this allows you to orbit around your model. And depending on where you click, that's where it orbits. So if I click over here, it's focusing on this. If I click over here, it's focusing on this. Hopefully that makes sense. So it just follows your cursor and if you're using a standard mouse, you can also switch it to the pen tool. So the pan tool is next. This is Pan. So you're just clicking and dragging on this one and it's literally you're just panning across the screen. So if you're on orbit, type O, if you hold down the Shift key, it turns into pan. So you can use those in conjunction when you need to see how you can orbit around. But I wanna see more of this. So switch to pan, see how that works. And you can access both of these by going to camera. And you've got orbit and pan. Now, pin the built-in keyboard shortcut for PAN is h. But I have changed that on my keyboard shortcuts because I rarely use pan. Honestly, I use orbit more than anything else, but I've changed the age to stand for hide because that just works better for my my process and how I use it. So but the standard one is H for hand, for pan, I guess. So another way to zoom in and out and move around your model is using the scroll wheel on your mouse. Now I talked about this in the last lesson a little bit, but it's a really easy way to move in and out and just swap back and forth between the orbit and that. And just like with orbits, when you're scrolling wheel is when you're using it, It's just whatever you're focusing on, whatever your cursor is hovering over. And that's where it goes. I remember in the last lesson I told you that once we got into navigating, if you get lost in interview, if you hit this working tab, it's going to take you right back to that beginning point. So really handy. Now, before we move to the next tool over here, I want to tell you my favorite way to navigate a model. And it's not a SketchUp tool, but it's a huge, huge saver. So I like to use a 3D mouse. I'm going to show you what that looks like. Okay, So keep in mind that I just showed you what this 3D mouse looks like. Now I'm going to show you how I use it to move around the models. So I've shown you orbit, this is orbit, right? Okay, click and drag if I want to go around it. So if I'm switching to the 3D mouse, I can push it to zoom in and zoom out. So you can see my cursor's just sitting here. I'm going to leave it over here so you can see. So with the 3D mouse, I can push in, I can pull out, I can go to the side, I can lift it up. I can push it down, I can tilt it. I can go multiple directions all at one time and see how it's different navigating through a model when using this 3D mouse. So it just depends on how you want to move. But honestly, this 3D mouse is a game changer for me. I love it. It does take a little bit of practice. I definitely recommend like don't just think you're going to like be amazing at it because it does take some practice. We first started out you can to look like you're a little drunk or something like that and just kinda, you know, moving in like weird directions, like see, it's very sensitive. And you can just, just turn and move and just ease around there a model. And you can vary the speed if you want. But it's, it's just so handy, you guys. It makes a big difference because when you go from using it like this to, you know, zooming in and out with the scrolling wheel like this and clicking and dragging to orbit around. It's just, I feel like it's a big difference. One of the main reasons why I got this is because I use this software on a daily basis, pretty much for projects. And after a while my finger was kinda getting a little annoyed with me with the whole scrolling wheel. And then, you know, you've got to click and drag and, and all this. And so I got this to kind of ease my process and just make it so much easier to move around. And I'm going to be honest. Clients love it when you are moving around their project like this. I've worked on projects before where I've been standing outside of a model of a house that I built and take the client in through the front door to look around their room. And like I said, it takes a little practice because you'll run into walls and, you know, you gotta learn your boundaries, but it makes a huge difference. So this is a big tip, big, big tip for you guys and ladies that I've given you the links for C, you can see it's, they have different ones on the 3D Connection website. There's big ones that weren't great for CAD if you're into cat. Oh, by the way, this does work for CAD 2. You can zoom in and out and move around. A CAD drawing too. I use it for that as well. But it's really handy. It used to work with Photoshop. I don't think it works. So Photoshop anymore. But a tip for you when using this is it comes with two little buttons on the side and you can customize them. And when you click the button, you can customize what these buttons do. But if one of the big tips I have for you is when you click Properties popped up on my other screen, hang on there it is. Here's where you can adjust the speed of it. So when you're starting out, you may want to make it a little slower. You can adjust the buttons here. And advanced settings. This is important, so play around with these until you find what works for you. And if you're moving around in your model looks really weird. Check the navigation modes because these are going to be different. So camera mode is what I just showed you. If I switch to object mode, then the, the 3D mouse works as if you're moving the object, not the views. So when I tilt it, I'm tilting the object. So it works differently. And honestly, object never really works for me, like my brain works. So the object mode just really throws me off. So that's the object mode. Then there's target camera mode. It, this one's ours me off too, because it works very similar to camera, but it it's different. It's, it's kind of hard to explain. So definitely play around. If you decide to get this, play around with those different view modes. There's helicopter mode. Never use helicopter mode. But so honestly, I don't know what the difference is on that, but the only ones I really use our camera mode and Target mode. And occasionally it will switch to to target camera mode. So if it looks weird and you're having trouble, just make sure that it's on camera mode. That's easiest for me. I've seen people use these for video games too. So, I mean, if you're into that, you might wanna get one of these two. But I've seen how my husband works in his video games and like how the controller, you can look around, it kinda has that same sort of effect, but with your SketchUp model. So if you're into gaming, you might want to get this to, but definitely check the navigation modes because it'll throw you off sometimes. So camera modes, my favorite target mode, it occasionally we'll switch to that if you go into parallel projection mode, which we'll get into that, but just want to heads up occasionally we'll switch if you're doing something different. So camera meds, my favorite. But that is a big tip and I'll use it in conjunction with orbits. So I may do orbit like this and then switch to the mouse. It just depends, you know, but you can use them in conjunction. How I have my setup is my 3D mouses and my left hand and my regular analysis and my right hand. So I do work two-handed, which is never would have dreamed. That's how it worked, but it's huge time saver for me, so it does take some practice, but I highly, highly recommend checking out a 3D males. So there you go. There's wireless nodes, regular modes, there's giant versions that look like a gaming controller. But the one that I showed you, that's mine.
7. Camera Tools: Zoom, Look Around, & Perspective: All right, so let's move on to our next tool. Next is Zoom. I've already showed you how to zoom in using the scroll wheel on my mouse. But if you click, Zoom here and you click and drag on your model, That's what you're doing is you're just zooming in and out. And it just does the whole screen. It's not really targeted, it's just the whole thing, right? So zooming in and out, It's also the Z on the keyboard. So if I'm in orbit and I want to switch to Zoom, just hit Z, and now we're in Zoom. And it's just a handy way to do it. You can also access this by going to camera and zoom. Simple, right? Now, when you select Zoom, you'll notice that up here, your measurements toolbar has switched over to say field of view. Typically your SketchUp models going to be in a 35 degree. You can change this. So by typing in, I'm just going type in 45. You see how the view changes. I can type in 60. View changes again. And so it's a whole different look whenever you switch to that. So if I go back to 45, if I go back to 35, see how that changes. So that's your field of view. This is really handy for getting different looks. If I'm modeling, I will typically stay in 35. But if I'm looking at maybe like a view of a room. So once again, I'm using my 3D mouse. So let's say we're in this room and I want to see a wider angle. I might switch to 60 and see how that changes if you're looking at it as if you're in a room. So that's something that you might want to play with from time to time. You can also access field of view up here from, from camera mode, but it works a little bit differently. So it works where if you switch to field of view there, you drag it to change the view. So you can see field of view is changing up here. So if I move around and remember this is not just regular Zoom, I've gone to camera field of view and then you can drag it and get a different look. So you might wanna do this if you're trying to go for like a certain look like you, you know, you want to change it up but see how distorted things can get. So those are the differences between going to feel the view up here and if you're in just regular Zoom and you type in measurements, so those are some differences there that will change how your model looks. Another tool is Zoom windows. So this instead of working like regular Zoom, you're drawing a window around, you're clicking and dragging to draw a window around what you want to Zoom. And when you like, Oh, you're zoomed in and then it just switches back to select. So if I wanted to zoom in on this, you can just keep doing it over and over and over again if you want. Now to get to Zoom window, it's Control Shift W. I've never used that keyboard shortcut, by the way, I very rarely use Zoom window, but I just wanna make sure you have it if you want it. So the next tool is zoom extents, literally self-explanatory. It zooms to the extents of your models. So that's a really handy way if you get lost in something like a hit Z for zoom. If I zoom in right here, and let's say I just keep on zooming. And now I'm inside this shape and you're like, Oh, how do I get out? Zoom extents. Now you see the extensive your model. If your models like really, really big, This'll stretch out further. Obviously, if you zoom out so far that you can't even see your model anymore. Like we know it's there, it's down there by the origin. If you hit zoom extense, it's going to snap you to just the extent of your model. So it's a great way to, to get lost, get right back to it. Or if you know there's more but you can't see it. Zoom extense. Next. Pretty self-explanatory. It's previous, so it just goes to the previous view. That's it. So you can keep clicking back and it goes through, you know, previously it cycles through a few. It doesn't go like forever. But it's cycles are a few. But that's previous symbol. Right? Next is position camera. So this is when you click it, you'll notice your height offset, your measurement changes to height offset. The standard is five foot six. You can change that depending on the view that you want. But when you hover, you can see you've got like this little man or woman, full Parson and a little dot. So if you click. It's going to place a camera in that location with an eye height of five foot six. Now you can see our cursor has changed over to this little eyeball, and that's the next tool that's look around. So if you click and drag, you can look around your space. So let's give you an example of how you could use this with some of the other tools. Okay, Let's say you're working on a model of a kitchen. I use this example a lot. But let's say you're, you've created a model of a kitchen, your present it to your client. You can use this tool to position a camera. Let's say you want to show your client what their kitchen is going to look like if they're standing in front of the sink. So you position the camera and then you can look around and they can see the space. Okay, Now let's combine that with the field of view. So we go to zoom and type in 60 degrees. Now we can see even more of the space. And if we want to go to look around again, we just click it and look around. You can also access both of those tools by going into camera. And you can see walk around, position camera, Look, look around. Not walk around, but you can walk. Walk is our next one. So the way walk works is literally you can walk through space so you can click and drag. And it's like you're walking through a space. Now, honestly, I don't use walk very much, mainly because I have the 3D mouse and I can just move around really quickly. And to me that's easier for me, but walk is a handy tool. Now, I will give you a warning because it can look really weird. Sometimes it will move over objects if you like. Let's say you're in a model and there's a staircase, and you use the warp tool, it will literally bounce up the stairs or bounce down the stairs. So it's not a smooth transition if you're using something like that. But walk is, is a very handy tool. Okay. So that pretty much covers all of those zoom in and camera tools that I want to talk to you about. Next, as far as navigating, because I've seen people accidentally stumbled upon this. So I just really want to point it out to you. Is if you go to if you go to camera, you can see that currently we are in the perspective view. If you switch to parallel projection, things get a little weird, right? So things are very weird here. Now what that does is it puts things on like an isometric view, like it, it's angled. This is not the best, in my opinion, not the best mode for modelling because it kind of feels really distorted. But if you combine it with one of the standard views here. So if you've got a camera and standard views, and let's switch to front. If you combine a standard view with parallel projection that gives you that flat view. So this is something where like let's say you're drawing an elevation of a wall or you're looking at a plan. So let's go back to standard views and go to top. So you, you saw what this looks like in 3D. So this is parallel projection where it's flat, it's completely flat. It's great for views like this. Not so great for modelling because things just look really weird. So let's go back to top view. And also if you're in a standard view, you can see it says up here at the, at the, at the top, it says what view you're in. So let's look at the difference between parallel projection, which is what we're in now versus perspective. See how that changes, is you get a completely different look. So perspective is what I like to model in because it's more, I guess she says more realistic. But that's prospective. So those are the differences. I've currently set up a keyboard shortcut for parallel projection because I do use it off and on. I use a lot. But definitely, especially if you're starting out model in perspective view because parallel projection and just throw you off a little bit. Now there is 2 perspective. So the difference between 2 perspective is just a little different from regular perspective. So it sets you up with two vanishing points. And it, it just looks different. It automatically switches you to pan. And because you're maintaining those two vanishing points. So if you switch back to orbit, it's going to take you out of 2 perspective and put you back in regular perspective. So let's combine this for an example with the front view and then switch to 2 perspective. So with 2 perspective and a standard view, you know, you're maintaining those two vanishing points as opposed to if you're in perspective, like when you move around that vanishing point and changes. Now, if I'm being honest, switching to the 3D mouse here, if I'm being honest, I never use two-point perspective in here. I just I just don't. I do use regular perspective and parallel projection depending on the look that I want. If I'm using just for modeling or if I'm creating like a standard view, those are the only ones that I use. So that wraps up this section on zooming and camera tools. Next, we're going to be taking a look at the standard toolbar. And those are just some really basic things. So that is up next for the next lesson.
8. Standard Tools: Okay guys, it's time to turn on another toolbar. This time we're going to be looking at the standard tools. So let's right-click and turn on the standard toolbar. So this is exactly what it says, really. The standard tools. This is just your basic, so this one is new. And it's going to open up a new drawing in whatever your default page template is. If you wanna do a new drawing from a specific template, you would need to go to File and New from Template. And then that's where you would choose a different template other than your default. Then this one is just open. Symbol opens up a drawing somewhere on your computer. Then we've got Save, which is not to be confused with Save As so save means you're just saving the current changes to the model you're working on. It's also Control S on your keyboard. Whereas if you go to File and Save As that's going to save your current model as a new model. So two different things. One says you're working model as, you know, as itself, it just updates it. Whereas Save As, saves it as a new drawing. So don't confuse the two. Then you've got your basics with cut, which is Control X on the keyboard. Copy control C on the keyboard, paste control V on the keyboard, and then erase. So this is not the same as like a regular eraser tool, but all of these apply to anything that is currently selected. And we'll get into the actual Select tool and a little bit, but those are just your basics with the same keyboard shortcuts is most most editing things like Word and anything like that, you know, cut copy, paste type of thing. Then we've got undo and redo undo, control Z, which is a pretty standard one, control Z on your keyboard. Redo, I think there's a shortcut for 3D, but I never use that. So it's Control Y. That's what it is. Control Y for redo, but I never use that. Then this is print. Honestly, I rarely use print because it's, it, it takes a lot of funneling to get it to work exactly like you want it to. But it allows you to print a view of your model. And there's lots of settings you have to go through to get it to work out just right. Is it the view? Is it the model extends, is it this is, it's kind of a pain. I never really use it. It's much easier to set up scenes and export views as opposed to printing views. So we'll get into all that later though. Then your next one is model info. And when you click it, it literally brings up a dialogue box for the model info. You can click on each of these and play around with some of the different settings. Most of these are just the regular ones. I haven't edited. Any of these really. I don't think from the defaults credits would be if you're logged into your Trimble account and you're building a model, whether it's like a little model that you're going to use as a component or a big model, you can click claim credit and your name will go there. Dimensions. This is where you can set up any settings for your dimensions that in your model file, this is just some basics here. Geo-location, rendering, statistics. This is where it tells you how many edges and faces and components and all this kind of stuff in your model. Texts. This is where your text settings will be units. If you're working in something different or want to change your units, this is where this is. We'll get into some of these later as we look at some of those individual tools that those settings may affect. But model info is literally just info about your model and some of the settings. So that is the basics of that series like that's it. That's all for that toolbar. This is a short lesson. In the next lesson, we're going to be looking at the principal tools.
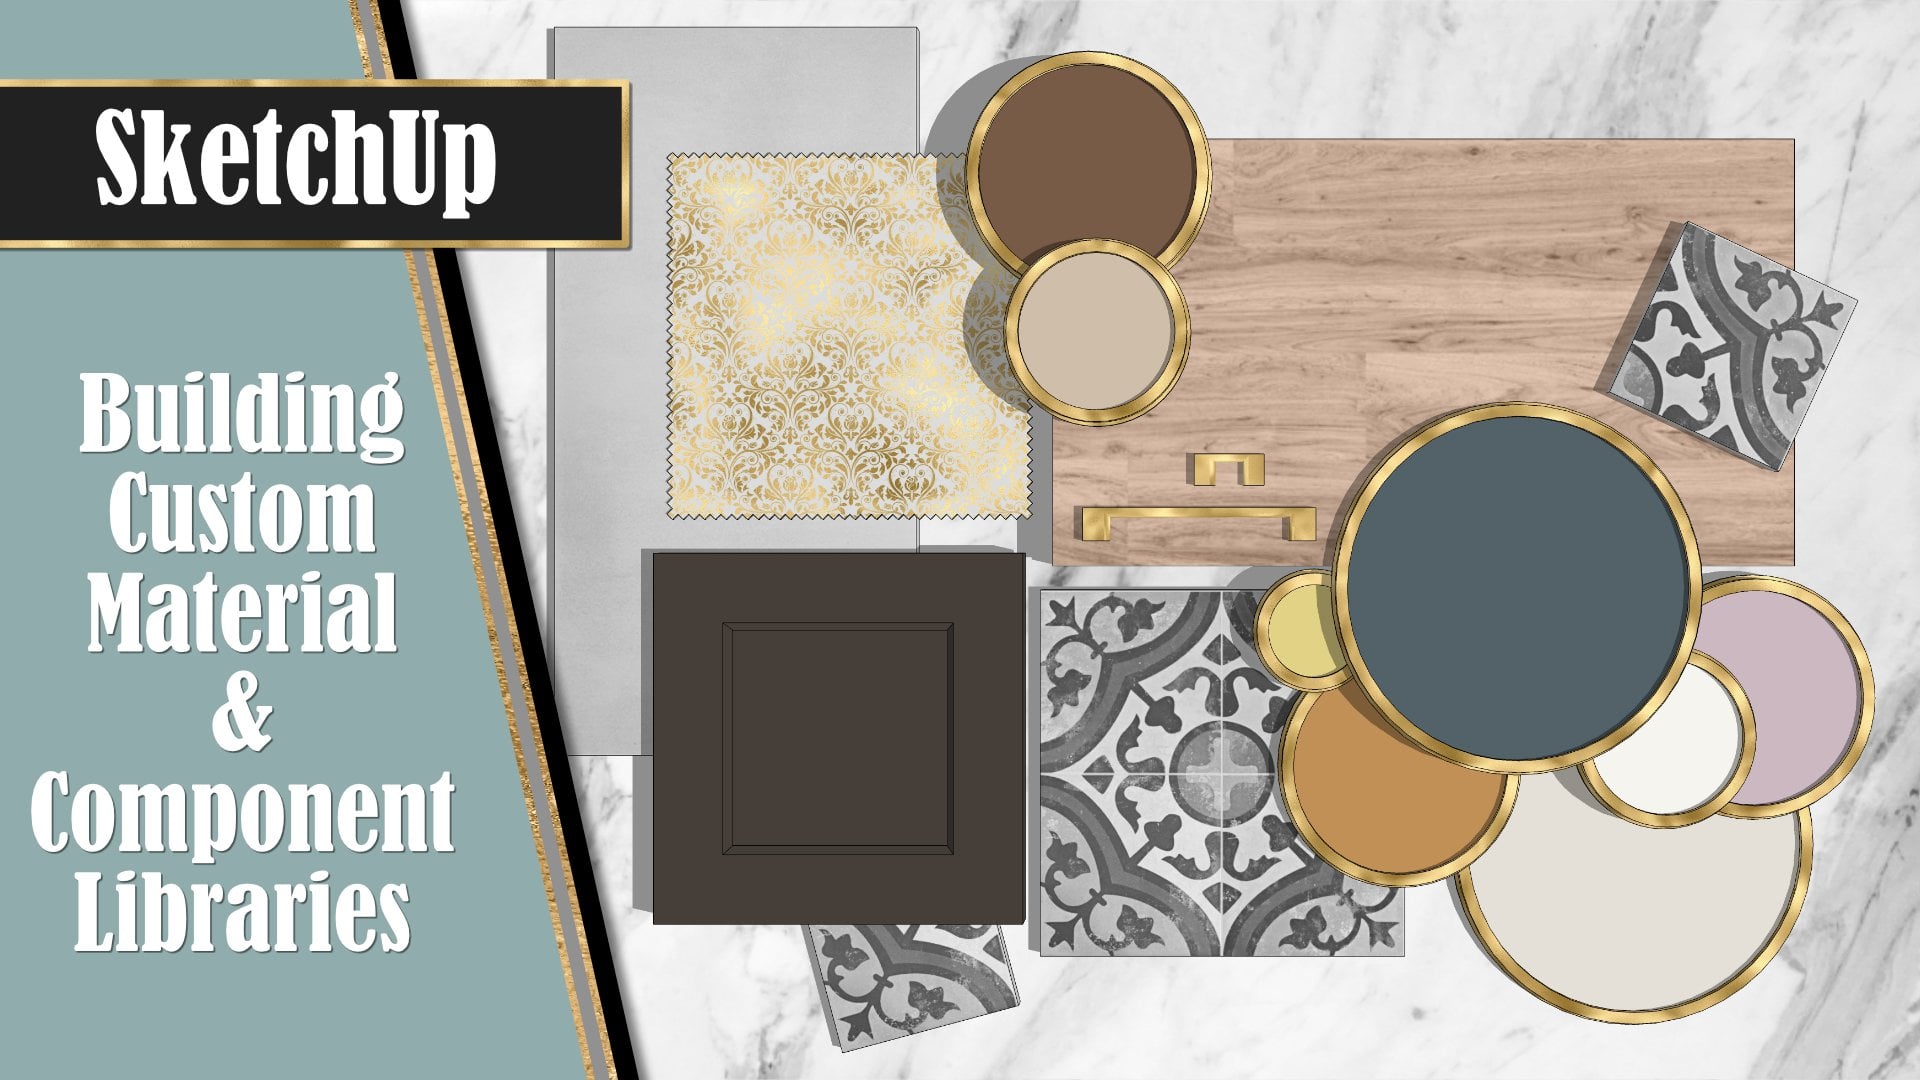
9. Principal Tools: So this lesson should be another short run because some of these tools on this next toolbar, I'm only mentioning them because we'll get into deeper detail into those later on in this class and possibly the next class. So for this lesson, we're going to be looking at the principal tools. So let's turn on the principal toolbar. And it's this just for a little buttons and align it up here. So the first one and probably the most important one is the select tool. Because, well, it's super important. You're going to select anything and everything you work on. So it's super important. The select tool can be accessed from the spacebar. So let's say we're in orbit mode and we're looking around and we want to go back to select. You can either select it or you can go to Edit and get more functions here for select, like select all, select nine things like that. But if you're an orbit and you just want regular select, you see the spacebar. And sometimes you'll notice this if I'm in a tool and I type a keyboard shortcut, sometimes it goes directly to it. Sometimes see I did the spacebar and the cursor doesn't change until I move. So you may notice that, but select allows you to select individual lines or faces or components, anything like that, just by selecting. So the difference up here, if you go to edit, like I said, select all, literally selects everything that's Control a on the keyboard That's kind of a standard one. And then select None, which is Control T. I actually use that a lot. Literally just deselects everything. Then you would have, let's see, let's select this. And we can do invert selection, which will select everything. But that. That's kind of a self-explanatory invert selection. Here's some fun things. Them, okay, I'm going to zoom in here. If we're looking at select, if we do one click, it is the line or the surface, okay, the line or the face. Let's zoom in more. Okay. So the line or the face one-click. If I did two clicks, just to double-click, it's going to select whatever you clicked on plus what surrounds it. So if I do a double-click on this line, I'm going to get this line and the two faces that it touches, OK, double-click here, I get the face and the lines that touch it. Triple-click. Sometimes started do trouble click, Okay. Triple-click selects everything that touches, everything that that touches, right? So let's move over here to this one. Single select that this face double-click and you get the face and the lines triple-click and you get everything that touches. So that's a really handy thing to know. So it's a really easy way to quickly select something. So single click, double-click, triple-click. Okay, then here's another one. This is kind of a standard 12 for a lot of editing softwares. If you want to select, let's say you want this face and this face, okay, if I'm just clicking both of those, I'm only going to get one. So if you select hold down the Shift key, see how the cursor turns into it's gobbled plus and minus sign. That means you can either add to it with a click or subtract with a click so you can select more than one face. So like let's say you wanted all the faces but not all of the lines. You're still going to get the lines actually, but they're not selecting them individually. But let's say I want this circle over here, the sphere. I'll show you how to make that later. And I want this face. So you would hold down the Shift key and that gives you a plus or minus. You can add them, subtract. Alternately, if you hold down the control, it's just adding to it. So everything you click will add to it. Now let's say you click a bunch of stuff and you triple-click. Okay? You triple-click, you triple-click. But then you want to take one thing out of it. Okay, hold down the Shift and I'm going to double-click on this circle. And now the circle and the line have been de-selected. Simple, right? Another way to use the select is you can drag a box, but there's two different ways that you can do it. If you go left to right and click and drag, it's going to select everything that is fully inside of that box. So it only grabbed this, this face here and this face here with those lines. If you go from the right to the left. It's going to select everything that touches that box. Now you'll notice, let's do that again. The shape of the box, the outline of the box is different, okay? This way you see how it's a solid line. You're doing everything that is fully inside that line. If you go from the right to the left, see how it's a dashed line. You're getting everything that touches that box. So you're getting more than that. Okay, so if you do left to right, right to left, two different kinds of selections. Hopefully that makes sense. But selection tool, very, very handy. You're going to use it all the time. And you see now that we've got the selection tool, those cut copy and paste buttons, those are now highlighted there available well paced isn't because we haven't copied it anything yet, but you see how now they're available because something is selected. If we're not selecting anything, you see how they're grayed out. So there you go. There's that. The next button is make component. I'm just going to mention components right now because that we need a whole lesson on those honestly. But there's a difference between a group and a component. So a group is something that Is just that one instance. And you can turn something into a group, like if I select all of this and right-click, I can say make group. Okay, So now this is a group. If I were to hit this button and turn it into a component. And let's say I had two or more of these. If I edit one, then if it's a component, what I do to one will happen to all of those same ones. So that's the difference between a grouping, a component, a component, if you edit, it, happens to every instance, whereas a group, that's it, it's just a group. You can edit it and it's not going to affect another group that's the same. But we'll get into components and groups much lighter because that's, we're just getting the basics right now and you haven't even started drawing yet. But I just wanted you to have that select tools, so that's important. The next one is the paint bucket. So this is where you apply materials. When you click it, your material panel is going to pop up over here. And there's a, there's a bunch of materials that are built into SketchUp. Honestly, it's not as many as there used to be, used to kick it bonus packs, but you can make your own materials and you can create your own material libraries. I could honestly do an entire class about making your own materials and components, because I highly recommend that you start building your own library of materials and components. As an example, this is my library of materials of things that I built for myself that I keep and use on a regular basis. Like I have construction document materials, That's all grayscale materials except for this one, That's my schematic. But a highly recommend to start building your own library of materials and components. So at some point there will be an entire class, not just a lesson, but an entire class about building your own material library. But there is a lesson in this class about apply materials, so we'll get to that in a little bit. So I just wanted to tell you that there is a button for it. I believe there is a keyboard shortcut or there was and they have gotten rid of it. But I think it is B for bucket. But I think I'll change that to something else by never use the keyboard shortcut. And honestly, I never even used the button because I will come over here and, you know, use it this way. Well, I guess I do use the button, the button, but material drop-downs over here. If you click on a material, it's going to automatically change to the bucket. So if I'm in selection tool and I click on the material here like this, it's automatically going to change to the paint bucket. So I rarely use the actual button or a keyboard shortcut for it. So, but we'll get into materials later. Whole lesson on that. Whole lesson coming next is the erase tool. Now, the erase tool has some new features that it didn't use to have. So it works to where you can click or drag to erase things. So I can click this line. And now it's gone. I'm going to Control Z to undo. I can drag and get multiple lines and lots of stuff's gone now, okay? You can also, if I do the Triple-click here, I can hit this erase button and the whole thing goes away. You know, we talked about the erase button already, Control Z to undo. But here's some things that keyboard shortcut for erases II, by the way. You can also edit, you can also access that up here, I think. But there we go. Tools, erase what you see. I rarely use the dropdown in use, but tools and eraser for that. Okay, but here's some tricky things that you can do with the erase tool. It has some toggle features. So if you use the, if you hit control, you get this little bitty symbol next to it. That's kind of like a rounded surface. And that allows you to soften and smooth edges. So lets me use my 3D mouse. I'm going to zoom in on this box here. So if I use the amount hit Control on the eraser tool, so we've toggled on the soften and smooth. If I select this line. Now I have smooth this out so the lawn has disappeared and it's like this soft surface. I can come in here and do that to all of these if I wanted to. And you see how the look of it just completely changes. It just softens it and smooth out the edges. The edges are still there. But this just smooths that out. So if I do the ALT key, it turns on hidden geometry so that I can unsmooth those same edges. So the hidden geometry comes on and you can see all these dashed lines everywhere. But you can toggle that on and you can unsmooth things. So if you hit Alt again, it turns off. Same thing with control. You can turn it on and off by hitting it and hitting a again. So that is smooth and unsmooth. You can also hide the lines so you'll see the difference between smoothing and hiding. So if I, if I toggle the Shift key on, It's the symbol that's next to the eraser is a little bit different. It's, the line is gone, but it's not like a smooth curves. So the difference between Hyde is, I can hide these edges but you see how it doesn't like, it doesn't round it like the softening does. And you can do Shift again and it's Shift again, doesn't doesn't unhide it. Okay. So keep that in mind. It doesn't unhide it. You can't toggle that. That's just it's hidden or it's not hidden. So I'm going to undo. You can also come up here to View and hidden geometry. I have set a keyboard shortcut of v for hidden geometry. And there's a difference between the hidden geometry and hidden objects. So hidden geometry would just be lines, whereas hidden objects would be like a group or a component. So that's the difference there. But let's say you do this. You got shift for your hidden geometry. You can hide these lines here, but you want to undo it. You can turn on your hidden geometry. You can also click on this and say unhide, you can right-click unhide. You can also soften and things like that. So when you have something selected and you right-click, you do get some more information about it. So check on those things like, I didn't plan on doing this one, but right now let's just go ahead. If I hit divide, I can move my cursor and divide this line. So let's do three. So now I've got three individual lines. I didn't intend to teach that on this one, but we're talking about right-clicking. So there you go. I'm going to undo that though. So I wanted to be that acts. So you see the difference between hiding and softening it. It's one is just the line whereas the other one, it really just smooth sit over. So I'm going to turn off my hidden gem tree and click my working tabs so we can go back to this full view and that's it for our principle tools. Next, in the next lesson, we're gonna get into the actual drawing tools and get to start playing around with building things. So let's go to the next lesson.
10. Drawing Tools: Lines & Rectangles: Okay, and now we're getting into the real fun drawing and sketch up. It's time to turn on the drawing toolbar and look into the tools you'll need to start creating some 3D forms. We're going to start looking into the different methods you can use to start building forms. And one of the great things about SketchUp is that there's no one way to do things. There's always several methods you can use to get the same end result. So let's turn on the drawing toolbar here. And the first drawing tool we're going to look at is the Line tool. You can access the line tool by clicking the button here, or by typing in L on the keyboard, or by going to the draw drop-down menu. And all of the tools that we're going to be talking about in this lesson are going to be under the Draw drop-downs. So I won't say that with every with every new tool, but they're all going to be here. And we're just going to move through this toolbar one tool at a time. So with the line tool, you click anywhere for your start point and click again for your second. It is as simple as that. You can also use the space bar to go back to the Select tool. You can also start it. And then up here at the top you'll notice the measuring tool has switched over to length. So you can type in a length. So let's say 36 inches hit Enter. And now we have a line at 36 inches or three feet. And when you're drawing a line, you'll notice that as you draw, the length changes. So if you don't want to actually type in length, you can just, you know, just kinda draw along to you guys about what you want depending on what you're actually trying to do. And you'll notice that as you start to draw, you get these colored lines here and these correspond to the different axis lines that we talked about earlier. And you can use the arrow keys on your keyboard to lock in those directions. So up is the blue axis. So that takes you up and down and it locks. It says you can hover in different areas and it's always going to stay up. The left key is the green axis. So that's forwards and backwards. The right key is along the red axis and that is left and right. And then down will be parallel or perpendicular. So that's its matching, something else. So that's when you see a pink line. So that's not an axis, that's kinda like that's true alignment type of axis. Okay? And when you start a line and hover over areas in your model, you can see different colored dots appear. And I just want to remind you I am using the 3D mouse, so I'm going to zoom in. You can just use the scroll wheel. But when you hover over an area, you get different colored dots depending on where you're at. So green would be an endpoint. Cyan is a midpoint, red is on an edge, and then blue is on a face. So that just gives you, if you want, let's say you wanna go midpoint to midpoint, or you want to go endpoint to endpoint. That's what these little reference points are. So all forms in SketchUp are made of lines and faces. That's it. Lines and faces. Every single thing is made up of lines and faces. To show you what I mean, we're going to draw a rectangle using the line tool with only lines. So when you draw, and we're going to use our reference points here, when you draw that final line. Now you have a face, okay? That's how, that's how everything is made in SketchUp, just lines and faces. Now we're going to turn this rectangle into a cube using the same methods. So if I draw on up and I'm going to lock in my direction. And now you can see that as I draw each side, we're getting faces. And now we have a cube. Well, rectangle, is it a cube? If it's a rectangle? We have a box, we have a box now. Okay? So you'll notice that these phases over here wide and these faces over here are blue. So this is the default material in SketchUp unless you change that at some point. This is the default material where white. Let's see. Okay, so white is the front and blue is the back. A lot of times this won't really matter too much if you end up applying another material on top of it. But if you plan on using a rendering software later on, that's where it'll matter. So an example of that would be if you applied a brick material on the white side, then when you render it with a grout lines of that brick would appear to be recessed. But if you apply that very same material to the blue side of it, then the grout lines would appear to be protruding past the break because it's reversed. So why is that? Most times it won't matter because you apply material, but if you do intend to use a rendering software in conjunction with SketchUp, that's where it will matter. I think it also affects things. If you plan to build something in 3D that you want to build using a 3D printers. So I think it does matter with that too. I don't have a 3D printer yet. But if I did, I would know the answer to that. One day it'll happen. Okay. So the best thing to do is to always make sure that the white side is facing out. That's just like a good practice to remember. So I'm gonna switch to using the space bar and switch to the select tool. And if you right-click on a face, you can say reverse spaces. Now sometimes we're drawing a shape. You may get, it's weird, but you may get one side that is blue and all the rest are white. I don't know why that happens sometimes, but it just does. There's probably some technical reason. But I haven't figured that out yet. But if you switch one side, then right-click again and say orient faces, it will switch all those connecting ones. Usually don't get all of them. Sometimes it may miss one and you can still just flip it and just say reverse faces. But that's the quickest way to swap that. And this is especially easy if you don't intend to apply material right away and you want it to be that nice white color instead. It's a good way to do that. All right, Now that we've created this box, I'm going to show you what happens when you delete one line. So I'm just selecting it and hitting delete. So when I delete that one line, you'll see that we no longer have a shape. But if I draw that line back, now we have a shape all over again because everything is made up of lines and faces, edges and faces. That's all it is. Literally everything is made up of that. And there's this new feature, it's fairly new called weld. So when we're talking about lines, I'm just going to draw like a bunch of random lines. Just to show you this feature. If I were to select, I'm going to triple-click so I get all of them without having to select them individually. I can right-click on this and say weld edges. So now when I click on this, it is one continuous line as opposed to three individual lines. So this can come in handy when you're using the Follow me tool because it gives you some softer edges. As opposed to if you have like individuals series of lines. We'll get into the following tool later. It is fantastic, but it's also handy if you just want to make sure those lines stay together. Now I don't recommend doing this. You know, like it's not necessary to go through and you're like, oh, I need to get all of these lines and weld them together. Now, that's not necessary. You don't have to do that. That's just a little much I'm going to say explode on that so that I get on the individual ons yet. So it's not necessary to do this for every single line. This is just something if you've drawn some line work and you want it to, want to copy it. Like maybe, maybe you have, you created this shape. You don't want the face, but you want the line work. So if I select all these and say, well the edges, so now it's just one thing and I can, I can move this around. I could do whatever I wanted, relocate this or whatever, without having this select four lines, you just select one, weld them together. So that's, That's that you're not going to use this a ton. I don't think because I said you don't go around welding all your lines together. That's a little much, but it isn't a handy from time to time. So the next tool is free hand. And he is my 3D mouse to zoom out. So freehand is pretty much the same thing as line except you're clicking and dragging to create a shape. Now, I think in all the years I've used SketchUp. I've used this feature maybe twice, and it's not very accurate. That's why I don't use it very much. But if you need something quick. I guess you could use that, but it's, you know, it's there. That's the Freehand tool. I'm going to select all these and hit Delete, rid of those. And we'll just get rid of all these things here. Clear the space. Get rid of those two. Okay, back to square one. Now we're going to look at the rectangle tool. So that's this tool here. It is R on the keyboard. And you see how our cursor has a little rectangle. You click for your starting point and click for your ending point. So you're just, I'm not holding down, I'm just hovering. So you click and click. And because it's a rectangle tool, it automatically fills in the face. And there you go, you have a rectangle. So you'll notice that when you start this tool up here at the top on our measurements toolbar, it switches over two-dimensions. You can type in a dimension. So for example, let's say you wanted to feet by two feet, you could type in two feet, comma two feet or 24, common 24 and hit Enter. And now you've got a shape that size. Now let's say you, you don't want to type in the measurement or, you know, let's say you want to draw a rectangle and you know, you want it to go this way. But you're like, What order do I type in? My measurements, so that goes the right direction. You don't want to go this way and then have to move it. You wanted to go this way, right? So the easiest way to do that is start your rectangle and the lookup. There are dimensions and see, okay, so in this instance, the skinny side is first and the long side is seconds. So let's say I want this shape to be one foot by three foot. That's what I would type. I would do one foot comma three-foot Enter. And there you go. If I did the same thing and I typed in three feet by 10 feet, foot and typed Enter, it goes the other way. So keep that in mind when you're drawing your dimensions. If you look at it first, it always helps to do something that's like the measurements are drastically different. So you can know if you do something that's very similar, you're like, Well, which one's which? So start out something skinny. So you can see what direction you need to type. And then you can go from there. Now if you're looking at fractions, this works for lines rectangles. So I'm going to show you if you're looking to draw something in fractions like let's say you want something that's one foot, 1.5 inches. So you would do one foot and then one space, one slash two or 1.5. And there you go. So it's, there's a space between your inch and your fraction. It also works if you do if you do one foot, 1.5, but you're not going to know the decimal points of every single thing. If you need something that's like, you know, so many eighths of an inch. So if you're looking for fractions, it's your inches space and then your fraction. All right, so now that we've started drawing some shapes, I want to point out something that I find really handy. So earlier we talked about our Default tray and our different panels. One of those panels is the entity Info. You can see right now it says no selection. But if I were to come over here and select, I'm going to triple-click so I get all of this. If I were to select this, then you can see up here it says five entities. It shows the material. It would show a tag or layer if it was organized that way. If I select a single line, I can see it's saying an edge and it's showing the length. If I select a face, it's showing me once again materials and then it's showing me the area. So this is really handy if you're wanting to quickly get measurements for something. So I'm going to look at this. We're going to play like this as a room. And if I quickly want him to know the measurements of this room, one way to do that would be to select this line. I can see it's nine feet, three inches by nine feet, three inches. And I can see the square footage of this room from wall to wall is 86.69 square feet. Now if I didn't want to include this space in the doorway, but wanted to know what this area is. I can't draw a line and just select this face. And there we go. Now I can see the difference. I can also delete this line later. If that's not something I need. With area, you can select multiple faces at a time to see the square footage of multiple faces. So if I wanted to, Let's say this phase, this phase, this face, this face. And that's holding down the Shift key. So I can select all of those. I can see that the total area is this. It works the same way with lines. So if I wanted to know the length of these two lines together, that shows up right here. This is a really handy way for measuring things very quickly and very easily. So if you have lines and faces together, it's not going to give you measurements. So keep that in mind so you can get combined lines or you can get combined faces, but you cannot get both. So keep that in mind. Okay, So the next tool is the rotated rectangle. So this is very similar to the rectangle tool. But this is something like, let's say you wanted to draw something that's not flat. You wanted to draw it vertically. So you start this tool out, you get this little protractor, and you can use the arrow keys to switch which direction. So let's say this one. Okay? I would draw the starting point and I can specify a length or I can click to just draw length. So I'm just going to click here. And then your next point. See how it automatically draws it in this direction. So I can just click or, or specify length to do that. And now I've got a rectangle that's been drawn on a different angle as opposed to just laying down flat and then having to move it. So this I haven't really used this much. And I'm honestly in all the years that I've been using SketchUp, I cannot remember if this is a neutral or if it's just one that I just never really used. Because typically that's what I would do is draw a rectangle and then move it or position it or rotate it. But I did use this the other day I was drawing some exterior trim on a house model that I was making him and I didn't want to draw the rectangle and then rotate it. So I drew rotated rectangle. So this can be, it can be handy. Now let's look at a circle. I'm going to get rid of some of these things. We're going to clear workspace here.
11. Drawing Tools: Circles & Arcs: Okay, I remember this model has this working tabs. So if you get lost and want to come back to the original view, you can. And also remember to use the orbit tool to move around. But I also have my 3D mouse. Remember, highly recommend a 3D mouse. So quick and easy. Okay, so our next tool is circle. When I click the circle, you see our icon changes here, our cursor changes. And up here at the top you see the measurements bar has changed ever two sides. And it'll automatically start out with a number. I think it's usually 2412. What this means is your circle is not really one continuous line. I mean, it will welded together when you draw it, but your circle is made up of line segments in order to form a circle. So this number, you can change this number. The higher the number, the smoother the transition from line to line is. But you don't wanna make it so high that you end up with like bazillion line segments because that's just gonna kinda slow things down. So if you're drawing a smaller circle, 24 is fine. So let's zoom in here. Give me an example. Okay, So this is a smaller circle. 24 is fine because it's really smooth. Now if I start drawing this really big, you see how those line segments get kinda pointy. That's where you would want to change your sides to a higher number. So maybe instead of 24, you want to go with 48. Now, you'll notice that because I clicked, it's the center point of your circle and you can draw out. Now our measurements says radius appear at the top. It doesn't say sides anymore because once you make that first click, you can't change your sides. Total. So now you can either draw to specify the size of your circle or you can type in a number. So I'm gonna say 24 inches and hit Enter. And now I have a circle with a radius of and 24 inches. I can draw this and say 12. And now have a circle that has a radius of 12 inches. And if I draw really big, you see how the difference they all have sides of. It's a 24 Section side. That's really confusing to say. The circle's made up of 24 section, so that's online. So you see how the size looks different depending on the size of your circle. So keep that in mind when you start to draw a circle. So if I start over now I can specify my side. So if I say 48 and hit Enter, and I draw a bigger circle, see how it's much smoother than this one. So just, just kinda play around with that depending on what you're drawing. If it's something really small, it 24 is perfectly fine. If it's something really big, you want to go bigger. Because if I go even bigger this, with this one, you can see that with 48, it's still pretty smooth. And this is a really big circles. So I would say honestly 48 is probably my go-to when I type for a circle. All right, so now that we've got two different tools there, Let's combine those just to show you something different. So I'm going to say, here's my rectangle. I'm gonna draw a circle with the center point being the midpoint of this and snap to the end point. And then if I delete these lines now I have a whole different shape. Because once again, it's all about edges and faces. So if I came over here and did this, now I have a whole different shape. So edges and faces, That's what it's all about. Alright, our next tool is the polygon tool. So this works similar to circle in that you are first is your center point, and it also gives you a number of sides. So this one started out with six and you can see as I drag it, it's still going to maintain that six. You can also type in a radius for this one just like circle. And once again, just like circle, you cannot specify a different side measurement once you've already started. So if let's say, Oh, that doesn't work, just just started. Just started again. And spacebar is your go-to, right. All right, So polygon, let's say I type in eight. You see how the shape changes to eight, right? So that is the Polygon Tool symbol, right? All right, Now we're going to look at archs. There are several different kinds of arcs in SketchUp. You can see all these different ones. Only one of them has a keyboard shortcut and that's this two-point art. So I'm gonna show you the different ones here. So the first arc is similar to a circle in that you're going to specify your number of sides. So once again, it's that smooth, the smooth line. And this one, as you can see, it looks very different, okay? You've got a protractor as your, as your cursor. Okay, so the Arc tool is very similar to the circle and that you specify your sides for the smoothness of your art. And you choose the center. And then you'll choose, you can rotate around, you can specify a length up there, but you choose your start of your arc, and then you choose the end of your arc. So one-click for the start, next click for the end. And you see how it automatically can snap there, but you can specify the angle by typing that in. Like if you wanted 90, you could type that in, hit Enter. But its center, start point, and end point. So it all just depends on what kind of, what kind of shapes that you want. But that is the regular Arc tool, okay? And then the 2 art, this is a on the keyboard. It's just like circle. You've got specify your sides, That's your smoothness. So with this one, you choose your first is the starting point, and then your next point is your ending point. And then you set the third click is the bulge. So that's your curve there, and that's how you do that. So if I wanted to, let's say just for reference points, let's say you wanted an arc that matched these dimensions like you, you know that this is your space. You can choose Arc. You do your starting and then your bulge point there. And so that's one way that you can get this shape. But you can specify, say, your start point. And let's say five feet. And then you want it to come out. Two feet. There you go. That's how you create this. So that all these arcs that you see, they all start and end differently. So it just depends on what kind of art that you need. The next one is your three-point arc. So once again, you can set your sides. And with this one, you click for your start point, then your bulge, then your endpoint. So all of these arcs, you get the exact same, basically you can get the exact same shape, but it's all dependent on what you need. If you have, let's say you have a rectangle. And let's say let's go to 2 arcs so you know your starting point and your ending point. And you see how when you start drawing you get this, this cyan line, it says tangent. If you were to just click again, it sets that on that tangent. And now you've got a shape similar to what I showed you before, but I didn't have to draw a circle and delete those lines. I've just got an arc. I can do the same thing here where I do this in C-hat. It kind of snaps right there. So by doing that it forms a half circle. And then I can just delete this line. And now I have like this kind of like pill shaped form. So the last type of arc is called pi. And with this one, just like the circle and the other arcs, you can specify your number of sides and you get this protractor again. And you will click to set the center and click or specify a length For your start point. And then click for your endpoint or type a certain angle. So it snaps to some of these different lines on the protractor. But you can type in like let's say 35 and hit Enter. Now I've got this pie shape form and it actually closes it in as opposed to these other ones that are just arcs. In this one, I draw a line first, but this one actually closes it in. So that is, That's all from drawing tools and that That's how you create any and every form basically in SketchUp, it's all about those edges and faces. In the next lesson, we're going to look at editing tools so that you can start manipulating these things that you draw.
12. Editing Tools: Move & Grouping: So this is the last toolbar we're going to take a look at for this part 1 in this foundation series. Now that we've looked at the basics for drawing, where everything is made up of edges and faces, is time to start learning how to edit the shapes and forms that you create. So let's turn on the Edit toolbar. The first tool we're going to look at is the Move tool. But be prepared it does more than just move objects around. So you can access it by this button here or M on the keyboard. And all of these editing tools, you can find in the Tools drop-down menu. They are right up here, these first few. So with the move tool, you can either select what you want to move first or you can hover over it to let the tool actually select what you're going to work with. So since all of this geometry is loose, when you hover over it, you can see it highlights the face or it highlights the edge. And because it's loose, if you wanted to move this whole element, you would need to select all of it first and then do the move tool and you click your reference point. That's the point that you're moving from. And then you would click wherever you want it to move. You can move along the axis. You can lock in your directions using the arrow keys. Like what we've seen before with the drawing. And you can just move this whole element around. Or I'm gonna do Control T to select None. Very handy. Control T. If you wanted to move just a line, I'm going to zoom in here. If you wanted to move just a line, then you can either select it first or you can select the tool and let it highlighted if you want. But when you move just a single line, you can change the whole shape of something. And you can move C, a, a point, a single point. And SketchUp has this feature called auto fold to where it just automatically just create some extra lines where it folds things along what you're moving. You can use the alt key to turn that on and off. That really only, it, it really only works part of the time. Not that it's, not that there's something wrong with it, but it's like SketchUp automatically has this auto fold feature in. And sometimes if something isn't moving like the way that you imagine it too, you can use that alt key to kind of kind of snap it into doing what you want. But you can move this whole thing. You can move distances if you want. Select, let's say we want to move this in six inches. We type six, hit Enter and it moves that. Let's say we want to move this, I'm going to lock in the direction and hover over this point. I can click here so that it aligns this edge with this point. So you see how you get all kinds of new options once you start throwing in these editing tools. And you can select a whole face and move a whole face. Now you notice that whenever I drag this down, It's, it's interacting with this other geometry that we have. So I can move it down to here and then delete this. And now you've got a whole different shape, right? I'm going to Control Z a few times to undo that. And the move tool is just super, super handy. That's your basic move. So now that we've looked at move, let's look more into how moving elements into other elements can affect things. So we saw a little bit when I move this face down into this here. And sometimes if you move an element, like let's say I'm going to zoom out. Sometimes when you move an element into something else, you get an intersection that you want, but other times you don't. So now, when I move this here, if I do the Triple-click, you can see that this is all connected now. Now in this particular instance, you probably didn't want that, right. So you can undo and get it out of it. But if you leave it there, it gets, you know, it's all connected. How do you avoid this? The easiest way to avoid this is by grouping. We talked briefly in an earlier lesson about grouping, but I really want to dig into it a little bit more. In part 2 in this series, I will do an entire lesson on groups and components because they are one of the best ways to organize your model. But for now, I'm going to Control Z to undo that. Let's look at groups in a simple way. All right, so if I triple-click this to get everything selected for this form, I can right-click and say Make group. I'm going to do that for all these pieces here. So I'm going to triple-click, make group, triple-click, make group, triple-click, make group. Won't keep saying that. That's kind of annoying. It's gonna do that for all of these. Now this is already a group because it is a component. So when you see how I click it and you get this little bounding box, It's the same thing you get here. You'll get a bounding box for all of these, right? Because that shows that that is all contained within a group. To edit a group that you've made. I keep going back to this little guy. This is our go-to here to edit a group that you've made. Just double-click, okay? When you are editing and group, you can see that everything around it is kind of grayed out. And this grade color will change depending on like your style that your model is set in. But you can see that this is all kind of highlighted. It's in like regular colors. Everything else outside of the group is grayed out and you get this kind of dashed bounding box instead of that blue one that we saw before. And once you're inside the group, you can still, you can still use move. You can still edit this. And to get out, you either click outside, anywhere outside the box, or if you're in the group, you can hit Escape and it goes out. Because sometimes if you're, let's say we're in here and we're editing this because we want to draw a rectangle on the floor or something. You may not be able to see how to click outside of it. I mean, here you can see there's a space over here in this little cutout. So escape is your go-to. Another thing to mention is when you're in a group, Let's go back to this woman edit. You'll notice that inside the group you've got an axis, an origin point here, just like you did for the model. And when you're in a group it separate from the axis of your model itself. So see we're in the group. This is the axis based on this object. If I get out, you can see our axis origin goes back over here. So the axis isn't moving. I don't want you to get confused on that isn't moving. It's just that this is your axis and origin for the model itself, whereas this is for the group. This is important if, if you're applying a material, it can affect how the material looks. It. It's just basically like setting up for this group so you don't really have to worry about it too much. But you could change it if you wanted to. If you right-click over one of the axis lines, you can see you get options to place the axis, move it, reset it, align the view, hide it. So you can change those, play around with those if you want. If you want to move it, you can move it to a designated point that has all its little much. But if you say place, you see how you get this little icon where it looks like a little mini axis. So you can change it. Let's say you want your axis point to be in the center of this so you could click and then see how it moves around. So you click here to set your right one, and then you can click again to set your green one. And now the axis moves to the center of that. So it just depends on, you know, you can just leave that. Or if you're doing something specific, you can move it. If you have a group that you've created and you no longer want it to be a group, you can right-click on it and say explode. And it goes back to just being edges and faces. And then you can just put it back as a group if you want. For right now, don't worry about making components. Because CMYK slowed this. If you say Make Component, you're gonna get a went to another screen. You're gonna get this little pop-up window and this is, this is too much. Don't worry about this right now. So if you say Make Component, this is what you're gonna get. So let's not worry about components. We'll get into that in the next part of this series. But for now, I do want to encourage you to work in groups. So I'm going to say make group. So I personally prefer to working groups over loose geometry for a few different reasons. And when I say loose geometry, that what I mean is this is loose, it's all edges and faces separately, okay? So I prefer to work in groups. One because you don't accidentally, you know, if you want to move this. So we're learning in a MOOC man, if you want to move this, you can put this right up here beside it. And you still have two separate things. You can put this in this room. If this was a piece of furniture, you wouldn't want the legs of your table to get mixed up with the face of your floor. Okay, for that, for an example, I'm going to put this back. So you don't accidentally have weird interactions. So that's one reason for grouping things. Another reason for grouping things is you can apply materials to a group instead of individual faces. So I know we're not really going into materials, but I could click this and just apply and it's one-click and you've applied that material to the entire group instead of every single individual face, I'm going to undo that. Another reason is that when you start getting into larger, more complicated models, if everything is loose geometry, it actually slows down your model. And one of the big things I want to teach you with my classes is ways to move and model more efficiently. I want you to have a quicker process, smoother process all around. So this is one of my big tips. If you work in groups, especially when you get into really complicated models, having things, groups instead of loose will speed up your model. To give you an example, I had this model of a full-blown house where we're talking about walls, trim, cabinets, roofs, windows, doors, everything. They were all grouped individually. But to play around with it, I exploded everything. And I mean everything. Because there was so much stuff in the model, it slowed down considerably. So even whenever I use the orbit tool and moved around that particular model, everything just moved really slow. You really, really slow, like it changed to wireframe views and everything to speed up the process. So highly recommend working in groups. It's a really easy way to manipulate things in and edit things without accidentally messing something up. Okay, so now that we've talked about moving and now that we've talked about groups, I want to show you how the move command can become a copy command. So we're going to use this is like my go-to shape with this model. I'm not sure why, but we're going to use this and we're going to turn it into copy. So we're gonna start the move command. And if you hit control, the, there's a little plus sign that turns on next to the cursor. This means you are now in copy mode and you can select your start point. And instead of just moving, you're making a copy. Okay, so then you choose your destination point, and there you go. Now you have to now SketchUp you use to make you repeat that control toggle every time you wanted to make a copy. But as of June of 2020 and wine, they've changed it. So now it's going to stay in copy mode until you hit Control again. So I can come in here and I can just keep on keeping on with these copies, right? I can choose different points. And it's just going to continue and continue and continue. Now, if you've modeled in SketchUp before, this may throw you off a little bit because, I mean, like I said, this is very new and so I keep accidentally turn it on and off or it makes extra copies when I just wanted one and be done. So and so it will continue copy until you hit Control again and then it just goes back to move. See how I'm no longer making copies. Okay. So I'm going to get rid of these guys here. And now I'm going to show you a different way to copy it. So when you copy something, you can do specific distances. So I'm going to say move control. You can lock in these, these access points, by the way, let's say you want this distance, you want to copy one out, 36 inches so I can type 36 Enter. And now I've got a new copy that's 36 inches away from that original point. Now, let me show you how you can create more than one copy. Let's say you want, I'm going to undo that. Let's say you want this shape 36 inches away from this back corner, but you want four of them instead of just one. You don't want to do it over and over again. So we're going to select it move control. We're going to select this end point. And I'm going to type in 36 Enter. Now before you do anything else while you're still in this function. This is what you do. Don't click out, don't move while you're still in this function. We're going to type four and x and hit Enter. And now we've created four times the copy at that same distance, they're all that same distance. So that's how you can create multiples without having to do more work. So if I do this again, I'm going to copy this, you know, this amount and say I want two times the copies. Now I've got two times the copies. That's how you can remember. You're you're multiplying the amount of copies so there's an x. Now, let's say, I'm going to get rid of these here. Now let's say that you have a starting point and you have an ending point out here somewhere, and you want four copies equally spaced in-between. Here's what you do. So we're going to say M control. We are going to copy this out. I'm keeping it along that green axis here. I'll even lock it. So this is our endpoint, but I want four copies in between, so I'm going to click to sit it. And before I do anything else, I'm going to say four and forward slash Enter. And now I've got four copies that are all equally space between our starting point and our ending point. So it's a forward slash. Think of that is you're, as you're in-between lines. So it's an x for the number of times you're copying out and a forward slash for a how many you're putting in-between. So now, I mean, how simple is that? You just have to remember those things. Alright, so now I'm going to get rid of these guys and I'm going to show you that you can use this function on an angle two. So like let's say you were making stairs. These would be, we're going to use this. These are really large stairs, but you can use the same copy method for things on an angle. So I'm going to say M. So we have the move command control. And I'm going to choose this point. And then this point so that it's, we're stepping up. Okay, and then I'm going to say 4 times Enter. And now you can see that I've made those copies along that angle. At that same interval. I'm using my 3D mouse here. But it's just, it's really, it's just really, really handy. You can use this for to give you some examples, stair treads, railings. So if you're creating Pickett's to go in railings, you can space those out evenly. Columns, things like that. If you're doing furniture arrangements, you can copy those out. Chairs on the dining table, anything like that. Super handy.
13. Editing Tools: Push/Pull & Rotate: So the next tool we're going to look at is the push pull tool. It's kinda weird to say that push this knowledge as well as the Pashto is p on the keyboard. And the name kind of gives away what it does. But let's put it into practice. So we are going to draw a rectangle. And then we're going to choose the push tool and hover over this face when a click. And then look now we are pushing out this face to form a box. So you can type in a measurement to go up a certain amount. Like if you want to do 36 inches or you can push it up to wherever just any point. Or you can push it and select an endpoint or a midpoint or some other point in your model so that it goes to be the same height as something else. And that's, that's really simple. You can just keep on pushing and pushing to get different shapes. You can also use this to push openings out like what you see back here. So if I draw another rectangle here, p for the push command, and I can push this out, click on this back edge. And now we have pushed this shape through and it is gone. Now we can also push this top down to this hole that we created. And now you've got this weird face that you don't need because we can delete these lines and they've got a whole other shape. And because we're working in groups, you could group this. And if you have an existing group, you can come in and edit that. And now we've closed that up now that's just the box. Very handy. Here's another example for you. Okay, so I'm going to draw this shape. And I'm going to push it up to here, okay? And I am going to use the copy commands. Choose this end point and I'm going to say six in-between. Okay? Then we're going to use the push command to push this down four inches. So for inter, and here's a quick tip for you. I push this down a certain amount. If I double-click on the next space, it's going to push it down that same amount. So you can very quickly adjust things without having to type them in over and over again by just double-clicking that face. All right, let's clear our workspace. Our next tool is rotate, and that's this one here. And remember that R on the keyboard stands for right triangles. So the shortcut for rotate is something else. And it's actually Q on my keyboard, which sounds really weird at first. But if you think of it like this protractor symbol that comes up whenever you choose this command, then maybe that'll help you remember it. And just like the Move command, you can either select the object first or hover over it to highlight it and select it that way. But keep in mind that neither of them will automatically select a whole shape if it's not a group. So for example, let's explode this. And if I choose the rotate command, it's only going to try to select a face or a line. Okay, so keep that in mind. And how the tool works is you're going to, Let's zoom in a little bit. You select your point of rotation and click. And then you can just move this around this angle. So see how different that is. If you were to select just a line or if you did a face, then it's a completely different thing than if this is a group. And you choose the command and you're rotating the whole group. And you can use the arrow keys to change what axis that is going on. So if you want to rotate this way versus this way, so it all depends on the axis that you're using. And let's say you want to rotate this shape, but you want to find the center point of this whole shape. You can either draw a line first and find that that central point. Or you can hover over this point, like you're heading towards the middle. There's a faint axis line that shows up. And then hover over this one. And it will automatically snap when you hover over one and then the other, it'll automatically snap to where those would meet. And then you can click and rotate. And there you go. Now, here's another example of how to rotate an object. So I'm going to undo that. You can actually use the Move command. If it is a group, you can't use it if it's a liner face, but if it's a group, you can use the Move command to rotate. So when you hover over it, you'll see these little grips pop up in different places. They'll pop up along each side and you can actually use those grips to click and rotate and you can type in an angle. See how this up here changes to an angle. You can type in angles to rotate on, and you can choose different grid points. One main difference is if you're using the move command to rotate something using these grips, it rotates on the center point of that face, as opposed to using the rotate command. And you can rotate on like a corner or a weird point like let's say this is a door, like a pivot door and you want to rotate along this hinge or something. That would be an example of how you could use that. And just like the move tool, the rotate tool has a copy function as well. So to give you an example of that, I'm going to draw a circle. And we're going to say there's a dining room table. And let's draw a square. This is going to be a chair. I'm going to use the Move command to center that up. Yet a center point there or here. Let's scoot it in a little closer. All right, so I'm going to go up above so you can see this, but with the rotate tool, I'm going to group these because let's skip this in, okay, but having it grouped, you can see this chair's kinda tucked up under your edge of the table, right? But let's say we want multiple chairs here, but we don't want to like put them and rotate them and put them in, rotate them. So if we start the rotate command and find our center point, at any point you can come in and click the Control button. Okay, so now we've toggled on the copy function. I'm going to choose the center of this chair and rotate it up to here. And I'm going to click and do 3 times x. So now I've got chairs. So this is a really fun way to copy things on a rotational points. So I'm going to delete these. Okay, so here is another example for E. So we're gonna say control to copy and choose this point and say three in-between Enter. So now we've got them equally space. Now, I can also backspace because we're still an active command and do five. Okay? Or for right. And then you can, if you want these on the other side, you can copy from here to control OK, here, and do that same amount. And remember you've got an extra one on top, so just delete that one. But that's an easy way to equally spaced chairs around a table or columns around the base or anything like that. You could do this without having to like measure and figure out and place and rotate. This is an easy way to do that.
14. Editing Tools: Follow Me & Scale: Okay, so the next tool we're going to talk about is Follow me. That's this one right here. This is the tool you need for creating things like this sphere and this cone is also the tool that I use when creating some roofs and interior baseboard trim, crown molding, things like that. There are honestly tons of great uses for it. And I'm going to use this sphere as our example for this tool. So when creating something like this, there are two things that you need. One is your profile and the other is your path for that profile to follow. So it doesn't really matter which one you have first, as long as you have both your path and your profile. So I'm going to start out by drawing a circle. And then I'm going to draw a vertical line from the center and use a rectangle to create a flat plane. This is what we're going to draw our profile on. And since I'm gonna give you two examples, I'm gonna take this and use the Move command, toggle on copy and recreate a second one just so that I have this same profile to go with or the same setup to go with. So for this one, I'm going to use an arc and create this basic, basic shape. And then I just delete these extra lines that I don't need. And then in order to get this profile to follow this path, select the path, choose follow me, and click the profile. And now you've got a shape. Now this one wasn't exactly a ball. It's more of like an egg shape, but that all depends on your profile that you draw. So to give you another example, I'm going to draw like a really weird shape that, you know, just some random shape here. Let's see. Let's go with that. So just this random profile. Think of it as like a vase or maybe it's abstract coffee table or something. So I'm going to select the path, choose follow me and click the face. And now you've got a whole new shape going on. Whole new thing. Now one thing about these, if it's not a sphere or a ball or something like that, sometimes you will lose this face here on the bottom. If you just draw any line to any point, it will close it in because remember its edges and faces. I mean, it's that simple. That, that's it. That's does the follow me tool. I'm actually going to undo and use the same profile. But then I'm just going to tweak it just a little bit and delete these. I'm going to select the path, choose follow me, and click it. And now I've got a completely different shape. So see it's all about your profile, whatever profile that you use. So for another example of how I might use this for creating Interior Trim. Okay, So this is your group. You want to have it separate. We talked about that before. So the room itself is separate. And I'm going to draw my path. I can either use the line tool and trace around this room, or I could go a little faster and draw two rectangles and delete this line that I don't need, so this becomes the path, okay? And then for my profile, we are going to type in a dimension here. So this is our trim profile, okay? So once the path is selected, then I can choose the Follow me tool and select my profile. And now I just need to delete this face in the middle. And I've got my trim around the room. And I don't need this section. So I could either draw lines on top and push that down. And then you just delete these little extra bits. Or you could go on the other side of it and push that whole face through. Either way works. And then I'm just going to triple click this and make it a group so that it doesn't accidentally get messed up somewhere down the line. But that's just an easy way to create a profile and follow it around the space. You can do this with crown molding. Anything if you want like a curved edge to turn something into a pillow. Let's see, Let's look at this. Here's an example here. If I draw, if I draw an arc, if I draw an arc here, and let this be my path. And then choose follow me and click this little edge. Then now I've got a whole different shape to my cube. And then you can use the eraser tool. And we've looked at this before. And we controls so that you can soften these edges. See how that looks cool. You can also select all of it and say soften and smooth. And you get the adjuster here so you can really soften it. So that's another thing. So that's a whole other look there. So those are just some of the things that you can do with the Follow me tool. Okay, so the next tool on the list is this one here, its scale and its S on the keyboard. This allows you to scale items or stretch them out. So we're going to use this guy as our example. And when you select the item and then choose scale, you get all kinds of different little grips that you can use to manipulate the items. Let's zoom around over here. Actually, let's go around to the back. Okay? So when you choose scale, you get all these different groups and as you hover over them, you can see what direction it's going to scale the item. So at the corners, it's going to scale uniform. And then in the middles it's going to scale from the opposite point. And all you have to do is click and then just stretch it out. So it's similar to to push when you get into stuff like this. But then when you do this, it makes a big difference. And you can stretch it out to be whatever you want. Or if you look up at the top, it says a scale so that you can type in to enter and it becomes twice the size. So it really, I mean, you can do a lot with this and really manipulate an item very quickly, very easily. You can, you know, squish things around like this. It's it's pretty handy but the grips will tell you what way you're stretching. And the grips that you use depends on the result that you want. Let's say you don't know the scale factor, so you don't know what number to type in, but you know, something needs to be a certain size while you can use the scale tool to do that. So let's say, you know that something needs to be five feet by five feet. I'm going to draw a rectangle and it needs to be eight feet tall. This is just like randomness here. So we're going to change this circle to be, or the sphere to be a shape that fits these dimensions. And we're going to use the scale tool to do that. But we're also going to use it to sort of move at the same time. It, if you put your reference in a location, you can scale to it instead of moving it and then scaling it. So me show you what I mean. So we are going to use our little grips and we are going to use these reference points. So we're just going to snap it onto these points. And obviously it's not going to be a sphere anymore. But we can stretch this out. And if you can't see it, orbit around, it's okay. And now we've got this whole other shape. And we didn't have to figure anything out. We started out with something small and just use the scale tool to stretch it out to those locations. I've used this for something like if I have a piece of furniture, it's a model of like a sofa. While I needed to be a foot shorter, instead of drawing a whole new sofa, I can just draw a reference shape, which then you can delete. You just draw your reference shape and stretch that using the scale tool. It works very handy. Now I will say this, if you are doing something with a group or an object that has a material to it. Let me just throw something on here. So let's say I put a brake on there. This birth actually already looks pretty stretched out because of the fact that I've scaled that. So I'm going to show you another example, 2. So same material. See how it looks different because I have stretched this one out using the scale tool. So it has scaled this material as well. And if it was uniform, that'd be fine. You know, it's still not quite right because now this brick is larger. So here's a quick way you can get around that if you need to. Let's say you resize something and it's kind of material. You don't want to mess it up. You can always use the default material like this and put it back. Or you can, Let's see, if I select it and say reset scale, it's going to go back small so it's not what we want. So if you select it and explode, then the material goes back to its normal shape. So then you can just make it a group all over again. That's one quick way to get around it. Of course. Now if you do that, then the material is not applied to the group anymore. It's now applied to all those individual faces. One way to get around that is you could reset it to the default material. And the reason why I say that is because now that it's on the individual faces, if I go to change the material, like let's say I'm going to pick concrete. I've just clicked it and nothing happens. Whereas this I click it and it applies to the group. The reason why is because this the material is set to the inside on all the individual faces. So a quick way to get around that is just like everything and choose the default material. And now you can see it's changed. Back to this. I didn't intend to go into a material discussion too deeply, but I just wanted you to be aware that if you stretch something that has a material applied to it, it will affect the material. So hope all that makes sense. I'm going to go back to default on that.
15. Editing Tools: Offset & Flipping: Okay, So I've cleaned up some of my screen here, so we're back to what we originally started with. And now we're going to take a look at the last button on this toolbar and that is offset. This is a tool that is super handy and it allows you to offset existing lines by certain dimensions so you don't have to redraw those lines. And I'm going to use this cube as my example. You can either select multiple lines first. So I can come in here and select all of these individual lines. Or I can double-click this to get this face with the lines. Either one works and then choose the offset tool and you get this little red dot. And that means it's on an edge because that's what we're offsetting. We're offsetting edges. And so you click on the edge and then pull it in. And you can either pull it in, you know, a random amount depending on what you need or you can pull it in a certain distance. So if I were to say, let's, let's say I wanted to inches, I could do this and you can keep doing this over and over and over again. And you can keep doing this over and over again. And you don't have to select the lines first because as you can see, it hovers on the faces. So you can just keep going and going and going. And then you can combine this with a tool like push. So, you know, you can push things in. Let's not go that far and just get all kinds of different things. So, you know, you can use this for creating cabinet doors, like I've done that before, where you have your door and then you want to offset a certain dimension and then you've got the panel on the inside. You know, it could be anything you could do, really ornate trim or wall treatments, anything like that. There's lots of uses for offset. It's also good if like let's say you have a shape and this is going to be your room. You can offset 4.5 inches and now you have now you have your walls and then you can push up your walls. It's all kinds of different things that you can do with offset. And it has to be lines that are connecting. So that's something to remember. So if, if I were to select this line, hold the Shift key down and select this line. Offset won't work and it'll tell you it has to be, they have to be connected like I could do. I could do these two lines only if I wanted to. And just offset that in and then push that back. You could do stuff like that, but they have to be connected or it doesn't work. And also whenever you use this tool to create these new lines, the reason why you can push it is because it creates new faces because sketch up modelling is all about edges and faces. So when you use these offset tools, you can, you're creating a new face just because you divided something with new line mark. Just keep pushing away here. So it's, it's really is a really, really handy tool. All right, so I've got one last tip for you in this lesson before we move on to a review of what we've talked about. And this is something that you won't find on a toolbar. But it is extremely handy for lots of different modeling techniques, for lots of different building purposes. So I'm going to use, I'm going to use this as an example. And I'm going to go ahead and make it a group. And what I want to teach you is how to flip something. So if you have a group or you can't really do, I guess you could do it with a line, but if I have this group, and let's say, I want this opening to be on this side, but I want to have to redraw this opening over here. If you right-click on it, you can say flip and then you can flip it along red, green, or blue. So if I flip, that goes over there and then I can flip again. Well, that one didn't really show anything because they don't have a lot of differences. So I'm going to cut out something else just so you can see. Okay, so now if I say flip and flip, and then you can flip vertically too. So it's, it's a really handy tool when you're creating something. It just kinda of, it just mirrors the object. So some examples of how I've used this, like, let's say I put a door in an opening, but i, the component comes in one way and I want the door to open into the room. Instead of out of the room, I can select it, right-click and flip it. And there you go. Or you can do. Let's see. I'll show you another example. I'm going to make this a group. And I'm going to copy it over here. And then I'm going to make another copy of this. So now you can see that it's the same thing, but I can mirror it. And now they're symmetrical. So this is, this is just another great way that you can use. If you combine it with the copy tool, then you get this great symmetry. Super handy. So next, I'm going to do a quick review of some things that we've talked about and just show you some basic examples. Just do a little, little bit of playtime, model playtime to review some of the things that we've talked about and then give you a little heads up on what you can look for next.
16. Review and What's Next: Okay, As so we have gone over quite a bit of information when it comes to modeling and sketch up. And this is just the beginning. There will be two more parts to this mastery foundations series. So this is just the, but I thought since we've gone over so much, it would be helpful if I did a little review of some of the tools by giving you some examples. So let's just look at creating a rectangle. We're gonna do this from an anterior perspective. So think of this as a 12 foot by 12 foot room. With our rectangle. Then we're going to use the offset tool to get our walls. The push tool for our wall. Then let's draw a door on here. And he's the move tool to center it up and push two, push it out. And then let's add some windows at 12 inches out of the corner. And let's do 30 inches wide. And how about two feet off the floor? And the same height as the door? Let's erase these little guidelines here. And push out our window. And we got ourselves a room there. And to make it easy to mess with, let's make it a group. You know what? Let's throw some trim on the here and trim out this section because we don't need it by the door. And let's assume we're going to have some tremor around the door. So let's move them out and draw some trauma around the door. Put this out here, Saddam name that. And there we go. We've got the start of a room. How about that? Let's draw a table. We need some legs. Copy those over, and then flip the whole thing. We're going to ungroup it and put it in our room and can blend y naught, just center it in the room to flour added. Look at that. Now. Let's do, let's do a big vase to sit in the middle of the table and clear out what we don't need and follow this surround can get rid of that. Let's group that too. And this is just some fun stuff, just a little example of some of the things that we talked about in this class. And I hope that you guys will create some fun shapes and forms, maybe pieces of furniture, rooms, anything like that, and share it in the project section for this class, I would love to see what you create. And if you customize your workspace, then definitely give me a screenshot of that too. I'd love to see what you guys come up with and let me know what's your favorite SketchUp tool. And if you have any requests for upcoming lessons or or anything like that, make sure to let me know. And if you guys want to connect with me on social media, you can follow me at clips. So design studio on Instagram and Facebook. And in the next part of this series, we're going to be looking at organizing your model using the tags and layers, components, materials, and also looking at scenes and section cuts.
 Victoria Wilson, Designer & Digital Creator