Transcripts
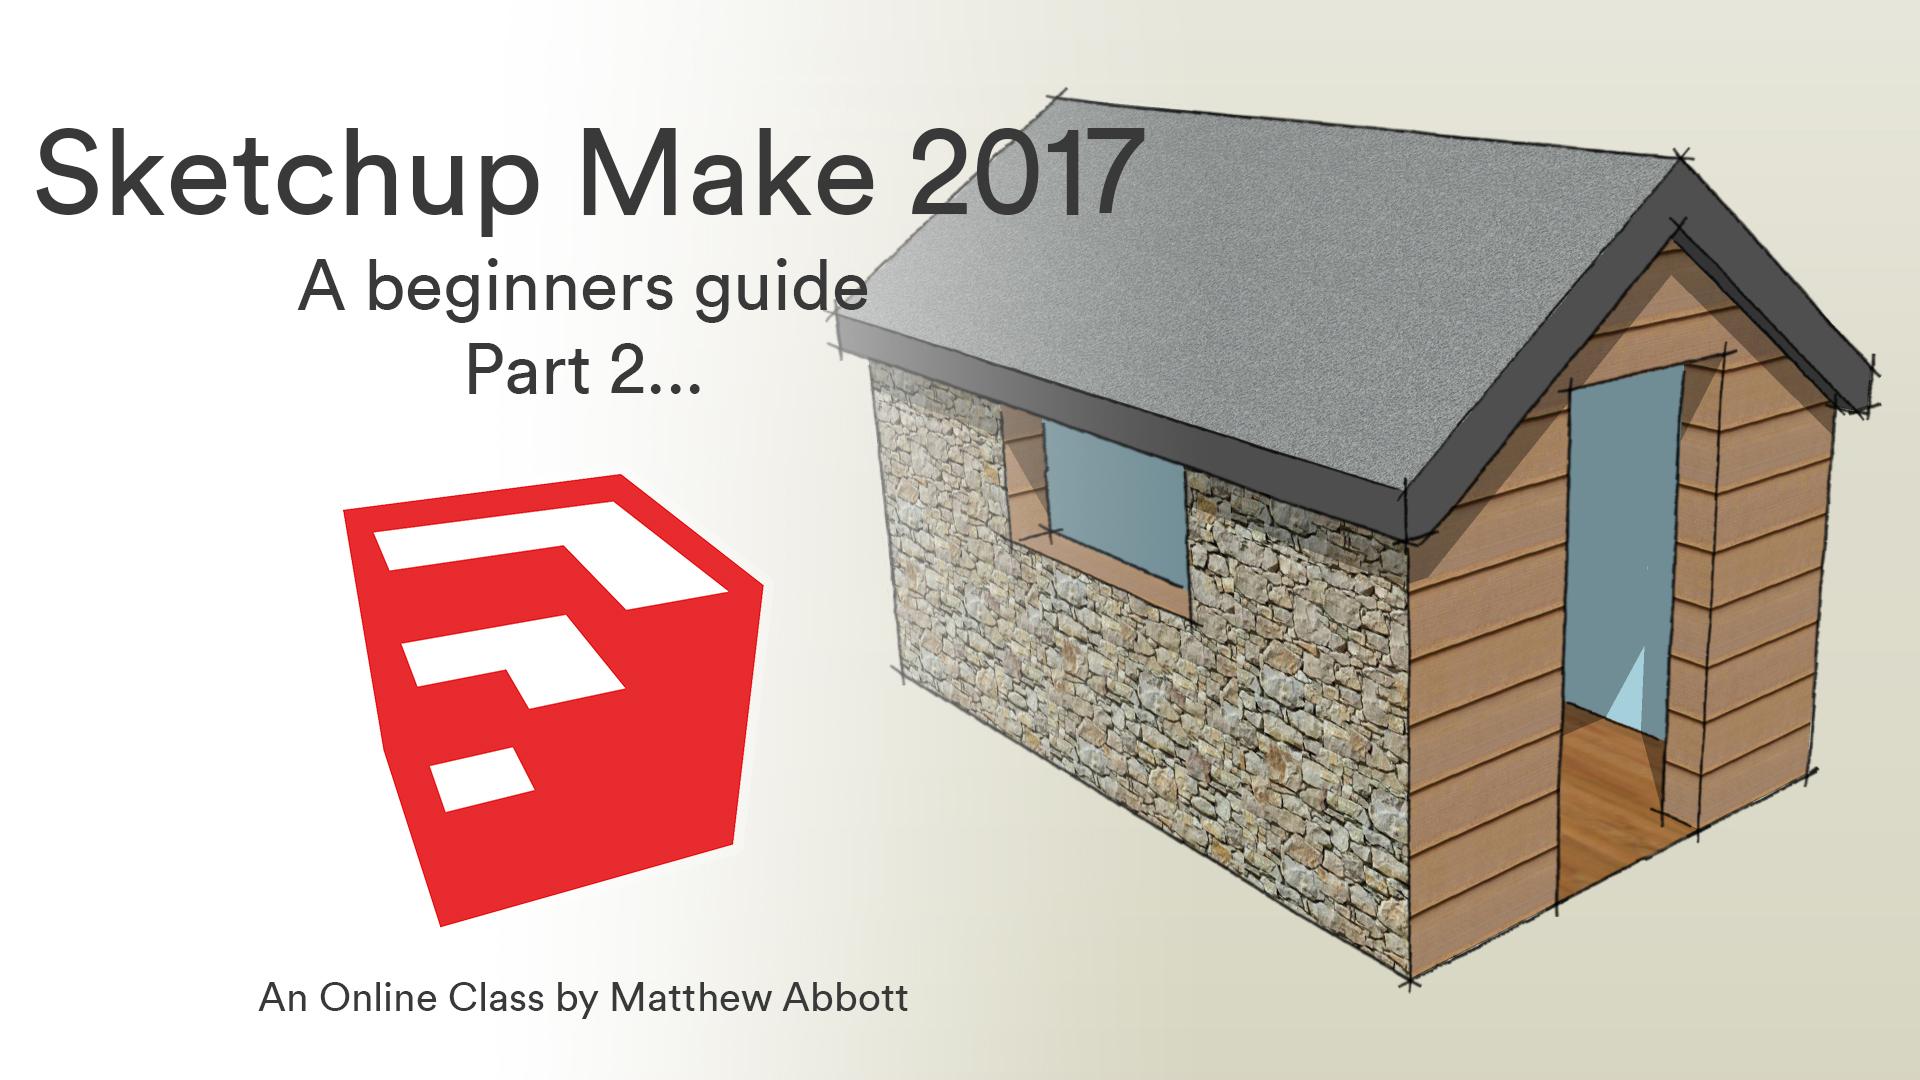
1. 1 Class Introduction: Hello and welcome to the second class on skill share dot com. This class follows on from my previous class on schedule. Basics. Please watch that first, to get the prerequisites for this video on when you have watched it, remember to click the follow button and to leave a review. In this video, you'll learn how to draw a very basic building will create Gable ends using a tall according firms. We'll also use the push portal to create throws on windows, and then we'll learn how to apply, create and edit textures. Next will create styles and edit room and finally will export animations and images using over programs. When you have completed the class, don't forget to click the follow bottom and leave a review below. Right, let's get to the lessons.
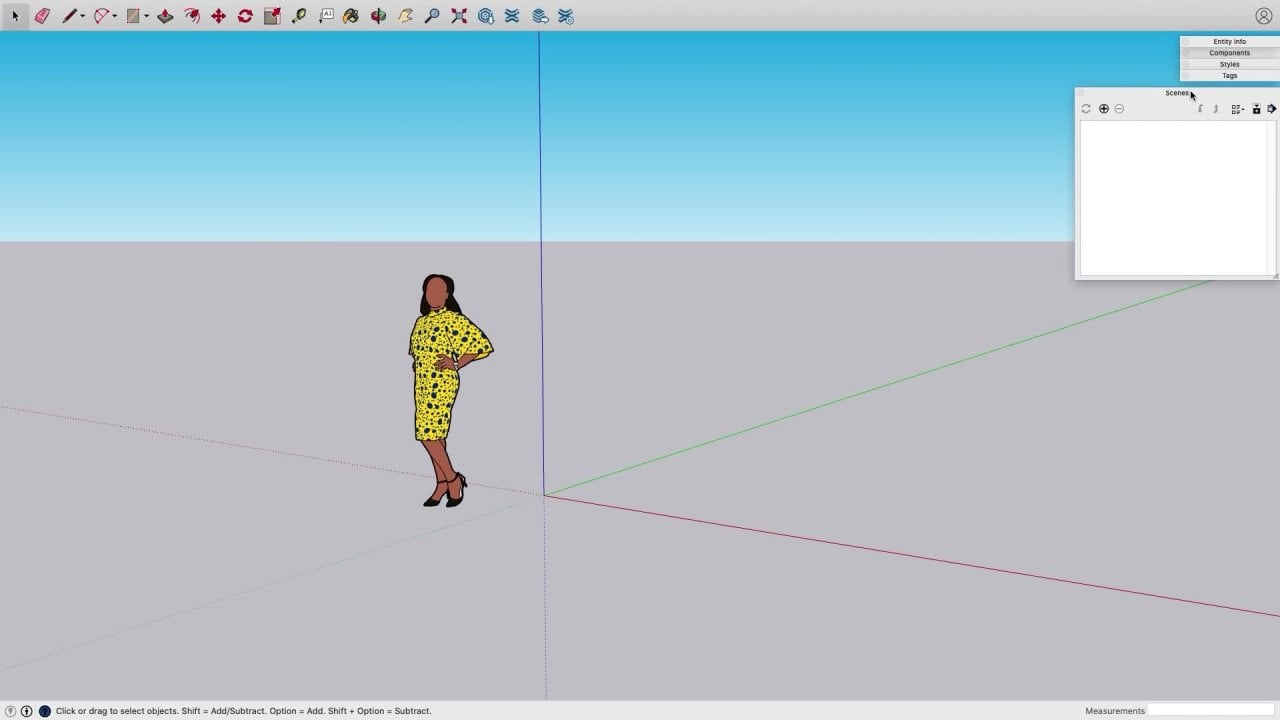
2. 2 Draw the building base edited: in this video, I'm going to show how to create the basic house. This house is going to be something like a monopoly style house that you play on the game. So the first thing I'm gonna do is I'm gonna leave this man here because he's a good, um, I didn't. Is a good way of telling what the scale is in the scene, but I'm going to draw a rectangle that represents the base off the building. So this will This will just be a simple rectangular building. So I'm going to the pencil tool. You can use the rectangle tool if you want to, but I found it's just quickly. Just use a pencil tool. As always, I always start on the origin mark, which was where all the access lines cross. I'm gonna click it and pointed down the red access. Now, remember the measurements in the bottom right corner. You always let go the mouse. You don't click that number in the bottom right corner. You just tap the distance you want to travel in. So in this case, I'm gonna make my shed four meters long, so I'm gonna type 4000. Remember, I always work in millimeters. Now I'm gonna point along the green axis. I'm letting go of the mouse again. That's my golden rule. Always let go the mouse. The line is gone. Green looks, It's in the right spot on going to see that the building is 2.5 meters across. So 2500. Then I'm gonna point it back down, red, and I'm going to put 4000 and again and finally click on the first point. So if I compare the building to the man now that looks about in scale for kind of a garden shed kind of structure. Now the man is the correct height for a man, so in fear, if I click on the line tour and then move up from him, you'll see that I've got a blue line coming off the top of his head. So what I'm gonna do now is I'm gonna measuring quickly with the line tool. So I'm gonna hold shift. Now it's blue. I'm gonna touch the bottom of the man. But if you read the measurement off in the bottom right corner, you'll see that it's 17 65 millimeters high. So That's a quick way of measuring something. Another way of measuring. If you forgot the measurements I use just now when I made base is to use the measurement tall on the left side of the screen, and that's the one with the number free on it. And it's called Dimension. So you click the first point to measure you, click the second point to measure, and then you drop the measurement down like that. So I'm just gonna measure the over end like you. So So now you can see that the long axis is four meters on. The short axis is 2.5 meters. Now the man is no longer needed, so I'm going to click the black arrow, click on him and then hit backspace. Excellent. Now I could use a loaded numbers Andi to then create the the insect shaped for the wall fault. There's a quicker way so I could do a load of mass with a pencil tool and kind of plot in from the corner out, then across, then open them back then down again. But I'm not. So the quick way is to use the offset tall, which is this one here above the Dimension tool, So I'm gonna give that a click. I then hover over the face I'm interested in and editing. So this is the Blue Doctor one. So that's the active face on a click and drag in on. Remember, you let go of the mouse, you'll see there's around one number in the bottom right corner. That's gonna be the wall thickness. So I'm going to think, I think I'll do my walls 200 thick. It's nice, easy number to remember then. So if I write to Double Zero and it return, my walls are now 200 millimeters thick. So instead of doing to all that hassle of working out all the values for the internals, you can do it. One tool, one click and drag and then just Taipower for you Want to go now that tall messes up quite a lot, so if you nudge the mouse, the number sometimes disappears. If that's the case, hit, edit and then under offset, so it's easier to try it again rather than trying to fix it, so you may as well just undo it and then read of the correct value. Now I'm gonna put a wall Height it now for my building. So this is from the base of the building to the eaves. So I'm going to use the push Pull tall for this. So remember I showed this in the last class that I published, so I'm gonna hover over that external ring kind of shape. So it's kind of like a square doughnut. When you look at it, I think click and drag it up to get it moving, and I've let go of the mouse. Now again, look in the bottom right corner. The measurement is 18 06 I wanted to be two meters. It's a nice easy number to remember again, so I'm going to say 2000. Return Excellent on just the practice using the measurement All the Dimension Tour. Sorry, you go to that one with the number frail, you click the base point, you click the top point, and then you can come out in that direction, and when you get in the right spot light, you'll see the measurements will snap to each over at the base. So it's four meters long. It's 2.5 1000 millimeters wide, so 2.5 meters wide on day, two meters high with a wall thickness off 200 millimeters. And remember to get the high to the wall. I used the offset tour. Sorry, the push portal which was here. I clicked and dragged it to get it moving. I then let go the mouse completely a type 2000. Ah, hit return. So in the next video, we're going to put on Apex on the end, like a gable end on either end of the building, and that will show you this will show you a technique and schedule called inference.
3. 3 Draw the gable ends: So in the last video, I created the basic building. So if I have a look around the building now, look, you'll see that it's kind of like a basket shape. It's Salo solid in the floor now that you say it's got a base in there for the floor of the shed. Now the overall length was 4000 millimeters by 2.5 meters by two meters high. I always work in millimeter. So it's 4000 for four meters, 2.5 1000 for 2.5 meters on 2000 for two meters now. In the previous class, I said that there's a difference between blue faces. Andi White faces so blue faces are back faces on Dwight. Faces are from faces, so every face and Afridi program is over a front or back. Some Freedy programs say that back faces or transparent. So this blue one, for instance, in three D studio. If I was to load this model into it would go completely transparent and see straight through it, whatever was below. But if I look at it from this angle, that wouldn't be able to see for X. That's the front face. So that's a thing called back face calling. Now I want this to be white on this face, so all I do is right. Click it go down to reverse faces. Excellent. So now you see it's white inside on blue outside. Now to optimize the model this face here, this white kind of square ring rectangular ring. If a click it it goes Dottie, and then on the keyboard I hit the backspace bottom. So by deleting that face, I'm optimizing the model. That face will never be seen because it's below the surface. It's behind that is behind the walls effectively, so because it's not doing anything, it's not. It may as well be deleted. So if I have 100 of these buildings in my scene, that little saving there, can I talkto a big saving, which will make the computer room better Now, in the last video said, this one was going to be about creating the eaves of the building or the gable ends, So that's the triangle at either end of the shop face. So what I'm gonna do is I'm gonna hold down the shift key and pan, so remember you panned by holding the middle mass pond down like a button with the shift key at the same time. And then you kind of century talked like that. Now, don't work really flat like that. That will really make it difficult for you. So I always put it to an angle like this. Now I'm on the pencil tool. I'm finding that midpoint and I'm clicking at Remember, the midpoint always shows up in blue. Now I've pointed it along the blue axis. I'm not gonna type in the pit the overall hi to the roof from the base of it to the top of it. So it's from the eaves to the apex. So on the screen, in the bottom, right corner. Look, making note that you let go of the mouse. I'm gonna make my blue line. Remember, Blue is up down 900 millimeters. Okay, now the tool is still active. If I move the mouse look, so I'm gonna click into that corner and then again with the line tour, that apex point will go to that corner point. Now, this central line is no longer needed. So I'm going to click on the pink a race at all and then swiped mouse over it. So that gets rid of that line. And you see that I've got an infinitely thin gable Andrew wall. Now it needs some thickness to match up with this wall face here. So leases were doing that is with the push portal. Now, notice when the mouse is, it's on the blue face in the fall corner. This enables me to hit this large area here it was to do it Here is less surface area to hit. So I always angled the camera like there, so I can clearly see the perspective in the scene, and I always go from the fall side downwards. So what I'm gonna do is I'm going to say that I can't remember that this war was 200 FIC, so I'm gonna make the computer work. So this is what's called in for rent since ketchup. So with the push portal active, click and hold on that blue face and I do a fast movement down to this face here, and then it locks to it. So now we let go of the mouse, so that's given it thickness. Now the back faces a rolled in the wrong place of here. And if I look around there like you see it as a whole? So first off, I'm going to use the eraser to get rid of this line because that's no longer needed. Then I'm going for the Black Arrow on going to right click that face on going to reverse faces. Finally, I'm gonna right click on this face and reverse it on this one and reverse it. Now, if I look around the back, you see the hole is still there. So if I go for the line tool and click that corner so that corner, which fills it in, is also fills this face here in. But don't worry about that. So go for the black arrow, All the eraser click and drag over it. It deletes that spare line that's no longer needed. And it also gets release filling face here. So now I'm going to go over to this side of the building. So I'm gonna change my perspective like that. Zoom in on that side of the building. I go from my pencil tool on going to repeat the same process I did on the opposite side with same numbers. So I'm on the pencil, the line tool. I'm on the midpoint. I'm in the blue access I let go with top 900 return and then join it to the corner there. So then I'm gonna do it from there. So there, now I'm going to erase up that middle line. Then I'm going for the push Pull. I'm on the far edge of the face. So this is the far side. That's the close slide on the far side. Has all of this area to hit. Where is that? Side has very little to say it. So this side is easier than the opposite side. So I'm gonna click and hold on that face on drug fast down there. And then I'm gonna race this line and you'll see this time it didn't go blue. That happens. So if it's not gone blue, perfect less work for us now, this lines not need it. So I'm gonna get rid of it. And because we don't with the overall dimensions of the building, I'm going to use the eraser to get rid of these measurements here. So that is the basic building created, and now that's ready to have a reflection put on it
4. 4 Inference and drawing the roof: So in this video, I'm going to show how to create the roof on the building. To do this, I'm going to use another the same technique a did in the same video, but in a slightly different way. So when I'd use the inference to create these gable ends, I can do a similar thing when I'm drawing. So first off, I'm going to zoom in onto this at this gable end here. Unjust angle the building slightly like that. Now with the line tool, I'm gonna click on that corner on going to move the mouse up. So you see, I'm not holding anything on the keyboard. It was kind of in this free mode, so move it up. I'll hit this line here on all trace along. Get like that. This tells it to draw the line parallel to the face of traced over. Now for Move the mouse down. Now you see, it goes pink, Meaning I could move up there like that now to do what's called an inference lock. You hold down the shift key, the pink line, but I'm drawing at the moment will go slightly thicker. So this is with shift key this is without. So I'm holding the shift key down. I'm then going to click the target face, which is this one here. So I'll click on it and that will draw the line. Now do the same on this point here. So I click it with the line tool. I follow the line of both for a bit that gets it the idea than to follow it. So it will come down then you see, I see pink. So hold the shift key. The line goes fic and I click on the target line. So that gives me the overall kind of underneath the area of the roof. And then you say, I've got this struggler line here that's not doing anything, So I'm going to use the eraser on that like so now I could there on the opposite face, But there's no need because if I push pull that across Creator anyway, So if I zoom out so in this one, you need to clearly be able to see that arrow. Had he clearly to be able to see these endpoints that is going to reach. So I'm on the push portal. I'm hovering over that face there goes doctored, and I can click and drag it. And again, this is another form of inference. You literally put the red tip of that arrow on the push portal on to the point that you wanted to hit, and then it will snap to it. So now that's created the internal roof in the external roof in one easy hit. So now I can use the eraser to get rid of that line on that line, because again, they're not doing anything. Now to make the roof slightly more interesting, I'm gonna put an overhang around the edge. So to do that, I'm going to go the pencil again. I'm gonna hover over this line here and you see, I've got a midpoint, so I'm gonna click it. I'm then going to come down on right, And you see, when I'm at the right angle, see if amount look, it wouldn't do it. If I'm at the right angle, it will say perpendicular to read to edge so I can write in the distance that I want the roof thickness to bay. So I'm gonna say that I want my roof to be 200 thick so that will draw a line 200 mills down, and then I follow the line of both, again said. It's another inference. I can't come down. What you see is pink. So hold shift on a click on the target face. So then I need to do the same in this direction. But because I've already done that pitch, it knows instinctively there that I need. Teoh continue that line down the same angle. So you see it's gone pink, so I'm holding down the shift key toe, lock it and then I'm clicking my target face. Then this line is no longer needed in the middle, so that's in the race like that. So now I'll use the pencil again. And remember, if it's a really flat angle, it makes it really difficult. So I always put it to a sharp angle like that. So among the midpoint I'm coming down on, I'm looking for it to say perpendicular a type 200 hit return. So then you see now it's no in snapping on, so I need to follow this line for a bit. Move down, hold shift when it pink it goes pink and then click my target line. Then click that one. It then knows to follow that line along. You see it saying, extend edge. So you hold shift and you click this one. So now you got that line there on that loan there that no longer needed. So I'm gonna erase them. That and that. That's one in drone. So now I'm going to repeat on this end. So lying toe Nice sharp angle midpoint come down and right you see There it says perpendicular 200 return. Follow this line for a bit and come down. You see, it's pink. So hold shift to lock it. When I click my target point Now I'm gonna click that point there, Come down, you see it saying extended. So you hold shift again and you click the target point. So now we'll finalize that on this face by doing that one looking for it to say perpendicular again. Sometimes when it's like this, look that's gonna lock onto the other points. That's good if you want him to be level. But I want them just to extend out look like that. So you see, it's saying perpendicular toe edge. So all you do is just push a little bit further than you think you need. So I'm gonna write 200 then hit Return the tallest still active. So I traced this line slightly with the mouse, or just hover over and follow it, and one is pink. You hold shift, and then you click the target line, and then finally you do the last room. So if it says extend edge brilliant hold shift. So now I've got free lines. I don't need that one. That one and that one. So I'm using the eraser clicking and dragging over the lines I don't want like that, which cleans them up nicely. Now, to finalize it, I'm gonna go from there with the pencil tool. The line tour. Sorry, I'm holding shift to lock in the red access. So basically click its start point and you get it moving in one of the colored axes, Then hold shift to do an inference lock, and I'm going all the way across. And that should then meet perfectly with that one there because they have used the same numbers. So now I'm going from that point on holding shift and go into their and that is now perfect all the way around. So now we just want a tiny overhang on all four sides aside, parts will be slightly holder to do than the end parts. So if I go for the push polar, the end one look him over. Little arrow head shaped that the roof shapes making click and drag it out. And I wanted to extend out from the building 100 mil, so 100 return. So then I double click on this one, and that will repeat the 100 mil. And then you'll see that I got to create this lower section. Now there's a couple of ways you can do this. I'm going to tranq, square it off of the base, then go up and then meet that angle, which will practice the inference that we've been doing so far. So if I zoom in on it, I'm going for the pencil. I'm clicking that corner. So I want to come along the green access. So you see, the loan is turning green. It says on green access, and I want to bring it out 100 mil. So 100 return. Then I want to go up in the blue now I want. I don't know what Mike that line will be, but I wanted to be in alignment with the picture of the roof here. So when it's blue, you hold down shift, which turns on the inference lock. So it locks in the blue plane. Now, if I wiggle the mouse slightly and kind of touch the edge that I want to be with you, the line will automatically go to the right length, so it calculates it for you. So I'm going to click on this here now in the corner lock. It's going to the same height. If a move up, it'll go to the right angle. So when it's at the right angle a click wants and then finally I joined the dot back like that. Now this line is not needed, so I'm getting rid of it, which deletes that face. But that's not a disaster. We don't need it so we can get rid of it. So now I'll do seem out here so you get a nice angle. Lack of got. Here you go for the line tall, you click the corner and your point it down the green access. So when the lines green. You're in the perfect spot type of 100 again. It returned again, and then you want to be open the blue access, so you hold shift. When it's blue, you follow the target line look, and you see it goes to the right length. If it's on an angle and you click, and then finally you join it to that corner there. Now this corner needs clicking on with the line tool to that one that draws that base facing. And then that one joins onto that one, which finally leaves us with a line here that we don't want on alone here that we don't want. So I've just erased. Um, so now I'm going to repeat on this face, so I'm going for the pencil again, clicking the corner, moving it along the green 100 return. Oh, blue access hold shift, follow the kind of angle line, click it when they following it and then join the dots So you've up. So then you're going to hear I'll do this corner in the same way. So it's green 100. Return blue, hold shift and then follow this line and then click that corner point there. So Now the eraser is used to get rid of that line, That line on that line. And then finally, the line tour refused to join that one cobra. I'm that one. So that which creates the final roof. So that was using inference is and inference locks on. Remember the inference lock is the shift key. Once you've got it traveling in the direction you want it to travel in. So when it's I have a red cream blue or pink, basically, when the Linus Fick you know you're inferring
5. 5 Using inference to create Doors and Windows: in this video, I'm going to show how to put doors and windows into the building. I won't detail them in this particular video, but I will show how to make them now. When I created these walls, they were 200 millimeters thick. If you forgot on your wall thickness that you've used, you can use the dimension tall here on the left. That's the one with the free arm in Click one line to a number line. What? Sorry, So sorry. With the Dimension toe, we click one point to the next point, and then you drag it out. Look, so that's telling me that it's 200 mil fix. So if I check that in the opposite direction so that point to that one. You see that it's 200 square, and it's that because they used the office that video in the very first video. So I used the offset Tall sorry in the very first video Now because I know it's 200. That's kind of the area that we can't go inside off when we're drawing the doors on windows . So the door is going to be on this face here, this gable end here of the building, and I'm gonna put a window in the middle here, so I don't need these two measurements. So what I'm gonna do is I'm going to click on them and hit backspace. But it would help her clip on the Black Arrow first. So I do occasionally by mistake. So I'm gonna click it and then hits the backs. Baseball What? That now, Because of the wall Fitness being at 200. If your wall, your door or your window Sorry goes within 200 of the wall, it will break because in reality, you can't do that so you can't have the window going into the bricks off. Why is it will make for a very strange corner in a very strange window. So what I'm gonna do is I'm gonna go for the pencil tool. I'm gonna find the midpoint on this cable end, and I'm going to click it. I'm gonna come up in the blue access and I'm let go the mouse and I'm going to say that I want my door to be 2.1 meters high. So 2100 millimeters or 2100 I hit return I'm going to say that the door is 900 millimeters wide overall, So I'm pointing it down the green access, moving it well away from any possible targets. And I'm going to write 450 The reason of Don't Matt is if the door is 900 a crossing total . The first vertical line I drew for the door was the midpoint. Half of 900 is 4 50 Therefore, that's the whip for put in. So I'm coming down on the blue access. I could type 2100 again. Sport. Whilst it's blue, we condone inference again. So if I touch the bottom line, you'll see it says on edge. And so long as I'm in the right area, it'll kind of smack up to the bottom line. So just click, so it takes some of the fault out of it. So I'm gonna click up here now on the top left corner of my half door, point it down the green access. If I'm in these kind of injuries, it tends to snap to stuff. So we always overshoot. If a camp So now I'm gonna type 4 50 hit Return, which has drawn the line. And again, no. If it's a fit Klein like that, that means it's not connected to anything, whereas these ones are connected. So they've gone thin. Edge lines is, well, draw thick. I think I explained that in the very first class low. So on the line tool on my own point. If you're not already active on it, go straight down about it, says on edge. You can click now. I can erase that middle line. So I've got a 2.1 meter high door by 900 millimeters wide. I'm gonna zoom in, change the angle slightly, so a sharp angle works better with what I'm about to show you. So if it's like that quite flat on the push portal won't know if it's going forward or backwards. So put a nice, sharp angle on like that. So I'm going from a push portal. I'm going on the far corner, too. May I? Not the close. Once I'm gonna drag it to the left and for drug it leftover come to this face. So I'm on the far side with the push portal active a click and drag to the left. Now if it says on face on the mouse, which it just just below the point of their or it goes blue and blue and white and kind of Dr like that, that means it's worked. Sometimes it doesn't that in that case, you gotta wiggle the mouth slightly like that to make sure it's connecting, and then you can let go. So now you'll see that I've got a whole into my building. Now I'm gonna use the eraser. I'm gonna get rid of that line. Okay? So if we look below a lot, you'll see I've got the door coming into the floor object. It's all one object that would be good for tech string in the next video. Now down the side of my building. I want to draw a window when I want it touching. Leave here. So I'm going with the line tool again. I'm on the midpoint. I'm gonna come down on. I'm going to say that I want this window to be 700 high. So I've got start point on the med. I'm on the blue access of let go of a mouse. I'm gonna type 700 return. I'm not gonna come to the right and you say It's red and I'm going to say I want it 700 to the right. Okay, then I'm on the blue. I could move up when it says on edge Click. So now I'm going to click on that corner, the bottom left on my window. I'm going to come to the left on the red 700 return and open the blue find the IV says on edge a click. Then use the eraser to get rid of the middle. So in theory, the window is 700 high. So for clip that loan, look and look on my entity info palette in the top, right? You see, it says 700. Now remember, I always draw the entity info palette open. If you can't find yours, it's a little window menu, and it's under entity info. So you click a line. It says 700 if it's grade is because it's got a line that I ever end, which means you can't change the number. But if it's if it's free over the building, there's no lines constraining it. It'll be black there, which then means you can read. We can change the number in there. So if it was on 700 you wanted 800 you could type 800 hit return. But whilst ever it's gray. It's constrained by in this case, this line here a miss line here. So I'm gonna do this. Push, Pull again. Now I'm gonna zoom in. I've got a nice, sharp angle going off and I need the push portal I'm on the far side a click and hold on a drag to the right side the close slide So when it goes blue and doctor you like that and it says on face I can let go And you see then poked a hole into my building like that. So now I've got a window Now on this end of the building and draw a circular window. So I have not done so called yet, So this will be interesting. So go to the line tool. Find the midpoint on that gable end and click it. Now I'm going to say that I want the circle to be centered 2.1 meters of the buildings I've pointed out along the blue access told it 2.1 of his return. In fact. Sorry, I don't want it. 2.4 meters up. Our equipment also have hit escape. I wanted to be in alignment with the bottom edge of the IV song A draw. A line across in the green Access, you see? Look, it says on edge if it's green. So then if I used the eraser, I could get rid of that line on that one. On that point, there is gonna be the center of my circle. Now what? I'm draw circles. I locate the middle. And once I found the midpoint, I'm gonna click on it with the line come down the red access. And I'm just drawing a random line. So it was clicked out there. So now got a marker where the middle bay on this vertical line is no longer needed. So by getting rid of that line, it won't cut through the circle when I draw it, which means the circle won't subdivide, which means it will be left of a circle. So otherwise it'll kind of be a segment on the circle where the line cuts through it. So I wanted to be neat. So this line here is perfect out of circle tool lives on the left side of the screen. Here you say It's the CK on the keyboard Now in the bottom, right hand corner Look, you see you got sides, the more side you have a smooth the circle Look Sketch up can only do straight lines. It can't do curves so as to simulate and with smaller straight lines. So this four small straight lines drawing the circle to make the quality of the circle better. I'm gonna increase the number of sides and all you do is type 32 hit return and that will have 32 edges, which should make for a nice, smooth circle. Visually now Ah, hover over that right hand side of that guideline of made on a click it I come off to the side looking You see him on the green access and you see, Look, the radius at the moment is random on mine and I want it 400 millimeters, so that would give me an 800 diameter in total. So if I typed for double zero and hit return that draws a circle, you see, visually it looks nice and smooth, but When I zoom in, you'll see Look is made from straight edges. There's no way around your stuff to use more segments. But exactly now I'm going to use the eraser to get out of my guideline. And then I'm making sure I'm on a nice, sharp angle, which I am. I'm on the push portal. I'm on the far side. I'm gonna click and drag to the close side. You see, it says on face it goes blue and white. It goes, Dottie, therefore I can let go. So that has made a circular window a rectangular window under rectangular door. So again, this is another form of inference sketch apps full of you. These inference is, and they're incredibly handy. Now, in the next video, I'm going to show you how to texture the building.
6. 6 Applying and creating Textures: in this video, I'm going to show how to texture the building. Now Texturizing is achieved on the left hand side of the screen. Here on that paint book it, I come. So you give a click and then you'll get this palette here. Now, make sure you're on the house. Brick here by default is on this circle here, which is ah, kind of color picker. So you basically mix your color rope. Say, if you want to the brown on the roof like a brown, a brown or green kind of felt cooler. It makes the color rope and then you click on the surface that you wanted to color it in with. So I wanted it green. It makes the green up you want, and then you can literally click on the face that you want to call her in. So I use the house brick one if I want to do any kind of coloring in. So this is this one. This is called texture Pallets. Now, if I go to coolers named, this will give me ah library of default colors. So if I want to read up, for instance on the roof, I could pick this one here. And then again, click the roof. So I prefer to go from these. Now if I go to the drop down menu again, you see, It says colors in model. So this shows you everything that is used in the file. Now, most of these colors are coming in from the man that was originally in the file. So if I right click here Sorry. So I was gonna purge them there, but of they've actually removed the option. It used to be under the right click there, but basically these colors of the ones of you. So if I wanted my green a mixed up just now it's there. I can paint it again. So everything you use appears in here. So if you're not removed using a color, you can right click on it, look and you can hit, remove. And I'll say this material is being used. That's in the component that's hidden out of the way at the moment. So I'm going to say replace because it replace it with the default material. So I'll do that a few times. You can hit return if you want to do it quickly and if you delete a material is being used and replace it with the original. So this green is now being deleted and you see a white it out like that. You see, that's the red one here. So if you right click it and remove it, you'll see it gets replaced with this one, which is the default material. So that's the white and the blue material now under the drop down menu got different categories. So if I want, for instance, brick cladding and siding on this little shared I can click on that, find an appropriate material. So I want that one there. I can then click on the face, then where I wanted to be applied like that. So I'm gonna put it on the insides of these windows as well. So the trick here is to get the face completely visible that you want to paint in. So if that circle that's at the end of the paint poor icon on the cursor fills the space in , you can click, you can paint it, but if it kind of falls over the line, it will get the wrong face that so I'm gonna put a black color on this fate. This, um, edging here. I think that's called a soffit in reality. So I'm gonna go to callers named I'm gonna kind of find a dark gray reason I'm using Dark gray is it's less in your face than either black or white. So when you got a call it it's too dark or too light on file. It tends to dominate a bit. So by using something over than dark gray and dark white, bright white, that means, but it's less distracting in the file. And it's not drawing your eye immediately to that spot. Cool. So I like what I've got there. Now we've got the internal walls. I got the floor and I got the roof to texture up. I'm just going to de select the roof a moment. So if I go to asphalt and concrete, I'm going to come and use this dotty texture here, and then I'm gonna fill the roof. And so it's kind of looks like a gray felt. Okay, now, inside my shed, I'm gonna have a posh wooden floor. So on the drop down menu on the texture palette, I'm gonna look for Ward. I'm going to say if there's a decent wooden floor in the that looks OK, actually, that looks more in keeping, So I'm gonna go with that one and then painted on the floor. Now I could paint the same one on the walls, but I think I'm just going to go over a block color. So I'm gonna go coolers named again, and I'm going to say that I just wanted to be a flat kind of light blue. So I'm gonna go with that color. And this is where it helps to have doors and windows. You can look through them to see your internal faces toe, then call of them incorrectly. Excellent. Now, if I just me of this color palette out the way a second I've got my floor in there. But you see the boards of the wrong way around. I want him to be length ways. So you might like that. But I want to turn them around. So with the black arrow, I right click the face. I go to texture and then position, which gives me these fall adults here now the green one. If you click and drag, it will rotate the texture the blue one will enable you to position it. So I'm going to use the red one. Sorry. Put it in the corner like that, and I'm going to use the green one to rotate around. And when you're in the right spot, if you see that kind of project protractor circle shape. When you hit that corner, it'll snap to it there, so that rotates and keeps the same scale. But if you want to increase the scale, direct the green one out, and that will scale the top. That yellow one is to distort the texture on the blue. One is to skew the texture, so if you want to put it on an angle, So if you like what you've got here you click Kirm the black arrow, which then keeps the setting. So now you see my wooden boards ago in length ways through the building. Now one thing you might want to do is create your own texture sketch. It will accept PNG's gifts and J pegs. You don't want them to be massive files low. So something in the range of 400 pixel square is more than a north, probably the most. I would do is 500 unless it's a very special case, and I wanted a really high quality image. So this floor, for instance, is quite a low rez bomb, so I could find a nice wooden floor texture on Google, for instance, of a decent higher airs. And then I can apply. It is a custom texture, but what I've already done it. I've already downloaded a stonewall texture. So on the drop down menu here you go to callers in model, and you'll see that you got five colors in there, plus the default material and note here that you can't delete the default material. It doesn't allow you to do that. So in this white area here you right, click and you go to new texture. Now I downloaded one off Google, so it's in my downloads folder of minds called Stonewall Texture. It's after Bill clicked it. It says, Give it a name, Stone more textural. Do it so I like that. So I'm gonna keep it. Then you've got a width and a height. They've got a proportion Lakhan. So for change one, we have all changed. So when you see the icon like that is locked. If I click it, that breaks the proportions, so I'm gonna leave it. Click So you see it's vertical. So if I okay, it it adds into the palate, look. So then I can click it, and then I can click where I want it to be and you see a lot. My stone walls in there bought. It's a little bit on the small side, so black arrow, right click your texture. Edit it. There's 1000 milk, so I believe I need to go for I tried on a smaller number. Note. Smaller goes. It's even smaller look. So if I tray on 2000 you see that's more like it then. So you see, it's Maurin scale with the building. I think it needs somewhere in between 1000 and 2000 in this case. So I'm going 1.5 1000 and now I'm happy with that. So I hit the close button, so that's how you scale the texture and how you make a custom texture. So when you're Googling textures, write what you want in like stonewall, right texture after it, and if you wanted to repeat perfectly right tile, herbal And when you're hovering over the sample images on Google, um, make sure when you hover over it, the numbers in the bottom left corner of the preview image are about 500 or lower. Okay, if it's too small, say, 50 square, the quality of the image will look really bad. So that's text oring Dawn for this video. So in the next one, I'm gonna show you how to put a style on it. So I'll just close off this palette and I'll see you in the next video.
7. 7 Styles and Creating Scenes: in this video, I'm going to show you how to create an apply styles. So styles, my style palette is actually already open here on the right. So if I go to the window, you can find it on the styles there. So if it's going to take its active somewhere on the screen, if it hasn't, it'll go away like that. So this kind of horizontal line means the pallets there, but it's not actually open, so I'm gonna click it once and then Itzler, so to totally get rid of it, there's a little red dot look in the top left corner that you can click on, and then it will go completely away. So it's window styles, so I always have entity and four open, and I always have styles open now toe. Apply a style. Make sure you're on the styles palette, and you'll see there's a house icon and to the right, the house icon. There's another drop down menu, so click it you go down to sketchy edges in this case, and then you'll see that there's a big list of potential styles you can use. So if I go down here and find one that I like the look off, like this one here and click it and you see, Then it will become that style. So when I orbit around my model, you'll see that it has a sketchy edge to it like this. Okay, so if I click on over one, I can have that style Look, you see that applies that style to it tonight. So I'm gonna have a look around, are gonna find one that I like the look off. I kind of like that. It's sketchy, but not too sketchy, so it looks a little bit vague, which looks kind of cool. Now, the the textures that have applied have now been lost. So if you want to edit this style, you go to the edit menu on the styles palette, and you'll see you got five cubes so immediately blow at it. You've got these five cubes by default. It's on the left hand one. Now, as a little side note here, profiles will change the thickness of the line Extension will create little extension points on the line. And Halo kind of puts a little separation between the lines. So if I turn that on or not floor. You'll see it. It'll move away from the corners now. They have numbers to the side of them, some of these settings. So if I want the halo to be bigger some fora tomorrow, if I put it to 10 you'll see it a wide in that gap all. You've also got a level of detail. If I drop that really, really low, you say it loses some of the lesser lines. But if I bring it really high, it will show all of the lines. So this area here watch. So this is high. This is low. So that's a small one that's missing. That's missing. And that's me saying on these corner details are missing, so that's on minimal detail. So when you drag it right up, you see all that detail returns. Now to bring the cooler textures in that we've used off these five cubes, you click on the 2nd 1 in, which then gives you another five cubes below, so you can have it on. Why a frame mode, which is sometimes an interesting effect to apply. You got it on solid mode, which is what it's on now, so it's kind of hidden line mode. You've got this beige mode which kind of applies the rough colors of the materials to the objects you got The stripey mo which puts the texture on. And you've got this mode here, which is kind of ah, agreed outs, kind of semi transparent, kind of textured ghost mode. But with this particular tear is not working that well. So if I put it on the stripey box, you've also got an X ray mode so you can have the textures and it will see through it like that, which again is quite pretty cool, actually. Quite good effect. So that's how you apply it. I'm not going to use the X ray mode in this video, so I'm gonna start going to turn that off. So all of donors select the stripe Cube there, which shows you the color texture plus your sketchy lines on, because account, I'm just gonna make it look a little bit more sketchy. So I'm gonna go back to select. I'm gonna go into edit sorry into the first box at the top here on dawn. The extensions. I mean, this type of slightly bigger normal ought to get these corners in, so you can exaggerate them as much as you want. But you just do something that you like. The look off at the end of the day. Now settle purview that you like, go to the view menu toe animation. And then I'd seen And this will give you a scene at the top of the screen then. But this might appear If this appears, I want to update the selected style. So I'm gonna click that 2nd 1 he can't save as a new style if you want. There's nothing wrong with that. In fact, they might actually do that just for simplicity. So I'm gonna hit, create scene, so that gives me seen one. So now if I mess the view waffle, zoom out upon it The moment I click seen one, it will animate it and it'll bring it back into view like that. So that's how you set up a basic scene for exporting and how you apply a sketch style to it . Onda how you edit the style like so now Because we've applied a few styles, we'll have under the select area of the styles palette. Someone's reviews. Now these are the sketchy edges. You've got all these different categories to play with. So if I want to get rid of the styles I'm not using, I go to in model on that drop down menu. So these are all the styles. The one with the black border is the one that I'm using at the moment. So I'm not using this top left one, So I'm going to right click on it. I can delete it. Now, this black arrow here, if you click it will have a purge or news adoption. Okay. And that will leave. You adjust that style. But by doing that, you lose the default style, which is sometimes really useful if you're if you want to flip back to it. So in this case, I'm gonna talk to edit and undo delete style. Okay. Now, because of applied it, it's kind of gone a bit too far. Doesn't matter that go with it. All we've done is made the file more efficient, basically. So that's how you purge or new style. So, under the styles palette, you go to select in model. And if you want to get rid of everything, you click this black arrow and purge unused. All you right, Click on the one you don't want And then you hit. Delete. Okay, On the one with the black border is the active style at the moment.
8. 8 Exporting Images and Animations: Now in this video, I'm going to show you how to add multiple scenes, rename them, modify them, and then export an image from them. I'll also show how to animate between them. So we've got seen one already to rename a scene. You right, click on its name and you go to rename. So I'm gonna call this from door. Oops. I can't spell today. There you go. So it's called front door. That scene now what I'll do next is I change my view, I think of to view animation obscene. Okay, so that gives me seen to. So I want to rename that. I'll call it back window. I'm a stickler for capital letters. I'm just gonna put that in there. So now if I click from door look, it'll spin around to the front door. If I click back window, it'll flip around to my back window of you now because I want to make my drawing slightly more interesting. I'm gonna turn shadows on, so that's a little window menu. Then you've got shadows and you'll see Look, it says UTC minus seven. So it's saying seven hours behind Greenwich. And that's because the program was created in Colorado in America, so it thinks it's their by default. So if you go to the window menu to model info, so window model info, you go down to geo location. Anne got set manual location. So I'm in the UK, so I'm gonna call it UK. I am in Komal. I'm gonna write Komal. And a very, very rough number for Ah, long, eternal latitude for calm. All is 50.505 No. Okay, so 50.505 north and then Komal is roughly 5.505 Whoops. 0505 west. That so 5.505 west. That's good enough. Okay, that's somewhere close, so I'm gonna okay that. So now it thinks it's at that latitude 50 0505 north longitude, 505 west. Okay, so I'm gonna red dot that pallet, and then I'm gonna change the UTC minus seven two UTC zero. So, basically, you would google up the longitude and latitude of your location where your building's gonna bay. You're right. The approximate longitude and latitude in. And then you'd set the time zone on the shadow settings palette. So then the calendar is in the American format, so it's month, and then it's day. So if you drag the bull around, that will change the date. Okay to turn the shadows on. Sorry. First you click that cube in the top left corner. So when it's dark, the shadows appear like that. So then, when you change the dates, look, you see the shadows or change over the year. Okay, so I've put my mid year that tolls may that on the tempt of the seventh month, keep from two thinking American on these numbers. It will tell me that sunrise on that day is at 4 28 in the morning for that GPS location, and some set is a 8 22 at night. So some set is at that time some sorry sunrises at that time, and then sunset is at that time, 8 22 at night. So if I drag the time of day, look, that's the morning. That's when it's on zero. So that's before the sun's up. It blacks out for go to the side lot, you say it's a nice long shadow. Then if I go somewhere around midday ish that will be south. So this is the north face of the building, you see, because it's mid year, there's a short shadow. So then if a put it towards the end of the day, the shadows go long again. Look, so that's there. So that's how you set a shadow. So I'm just going to set something that looks visually pleasing. I'm gonna put a little bit of a shudder into the building like that. That's it. That's good. Now, now, because of change The shadow I've got to update the scene that I'm in. So it's called from Dull. I right Click it and I click Update. Okay, so if I hit the back window one now, that will flip to there. You see in this scene the shadows on time. So I'm gonna turn them on again on going to right click on the scene tab. Ongoing date again. Okay, so the date and the time is different on back window to front door. So for click it, you see, the bulls will change. So if I want them the same, I've got to remember. It's 10. 39 AM on 07 slash 10. So if I go back to back window, I'll put in the cut in the date 107 slash 10. And in the time I'll paste in the time from the previous file and then right click the tab for the this particular scene that I'm in and then updated What's not rename it? Update it that cool Now if you want the back window to be first in the animation you right , click it and you can move it left. Okay? And if I right, click it again. I can see Move it. Right. So that's how you change the order off, Hm? If I create another view Sigh Have you there off a century top I can create another scene So view animation had seen And I got seen free look So if I want seen free between From time back window I can right click Seen free and move it left So now got front door I've got seen free But Jonah call side window So I'm gonna rename it by right clicking it That and then I've got back window that now you can animate this Soto animate it. I'm gonna go to free of the front door seen for. So it starts there. I go to the view menu toe animation and you see you've got settings. So it say in the transition time between scenes is two seconds. Change that. If you want to make it shorter or quicker, so bigger or smaller and it's always in seconds. Then you got seen DeLay. That's how long it pauses when it hits the scene. So I'm gonna say I want it to pause for two seconds and transition for two seconds on because enable scene transitions on, it'll animate between them. So I'm just gonna close this window now to actually play it. You go to view animation play, so it's pausing for two seconds. Then it's animating for two seconds, and then it's pausing for two seconds, and it will do that infinitely. So to stop the animation you click on front door. Now, the animation can be exported in professional versions of the program only. So what? Some in the trial version they have got 23 days left on my trial. I could go to file export animation and from American output in animation, and it'll render each and every frame. So if I click that minds on hate to six full and it's called a doctor MP four file. So if I go into options, it's going to render it out a 10 80 p full HD at 24 frames a second. That's perfectly fine for most uses. But if you want a smaller animation, you've got 4 80 p like that which will export quicker. So the bigger and heavier the model is no longer the export time will bay. So I was gonna okay this. I'm not gonna hit the export in this case. I'll do that off camera. So if I hit cancel on this one whilst I've got a view visible on the screen. If I wanted a still of this, I'd go to file to export, and it will be a two d graphic that export. So what? Exactly what's here is what will be exported. So I'm going to call this image, actually. Now, call it building front Still that it's a J. Paige. So you see, you got all these options of file formats, so J peg, PNG tiff and possibly pdf for the most common 100 years. I'm in the habit of doing everything in J back. So I'm gonna leave on my now you've got options. Look, always go toe options when you're exporting, because by default it's on used view size, which will give a really bad ropey final results. So if it looks, picks allies when you print it, it's because thes settings are too low. So always, always on tick use, view size, make sure the chain links on unless you want to change the proportions of the image. So in my case, I do. So I'm gonna break it. I'm making sure me millimeters not pixels, and I'm gonna put in the dimensions of in a free sheet. So I'm gonna put 4 20 on the whip by 297 mills on the height. Then I can lock the proportions. Then you've got a resolution looking pixels to the inch. So if they get a good quality, I'm gonna type 300 in there. Print resolutions are always pixels to the INGE. We never use pixels to the centimeter. It's one of the few times I'll actually use the imperial system. Now Anti a blessing always needs to be home. And Jay peak compression, if you want Good quality should always be at the max on number 10. So I'm gonna okay that. So I've named it a set it up. Interruptions. It's a J. Paige. So I'm gonna hit export. So you have to wait a few seconds for it to do this. That's doing so. If I click my finder when I go into my documents folder, that is my image that I've exported. So then I can put it anywhere that will accept a J peg, which is pretty much any program under the song. So your challenge then. So the point of this class is to make me a shed object, so make your dream shed. So I want you to make the dimensions up design what you want it to look like. Set some scenes up, try and export the images have ago exporting an animation as well, watching a registered version and try and set the animation of using these scenes. Okay. And when you have, don't finally upload it to the project area of this class. Okay, then when you have done all of that like the video, leave a review and click on Follow me. Thanks. Bye.
 Matthew A., A Teacher of all things Computer Graphic