Transcripts
1. The Complete SketchUp Guide : Basics: So what is the complete sketch up guide? Most people start sketching fast and free, but sooner or later, modeling gets really, really confusing back of good methods and techniques. Leave modelers at a dead end. What if there were a professional resource for learning? Sketch up completely. Enter the Complete Sketch of Guide, A guide to help You master schedule fundamentals so you could make beautiful and accurate models like the pros and taking easy to follow core steps. You'll benefit from years of industry knowledge of professional techniques, some that are probably not even known about people who make sketch himself. When you start taking your ideas into sketch up with a clear idea, knowing what comes next is going to be a difference. You'll be ready to develop your project, save your energy and your creativity, and put that into your desires. Click to find out more about the complete schedule guides Day
2. 1.01 Introduction to SketchUp: Hello and welcome to the complete sketch. Uptight, This is a course that helps people who are just getting started and want to understand how to do three D modeling. How to understand the great program sketch up how to get from zero to bring him to understand and do most projects. This course is taught by May instructor Brandon Gifts, and it's set up and a few sets of modules that go from learning be interface to learning key commands about how to make objects, how to make two d had to make three D and also goes and how to edit your model. Use transform and some of the view commands. This course says, for anyone who is trying to get a sketch up who just wants to deal with this great news free software For those who are really looking, developing skill, this is an introductory course is taught by made Brendan Gibbs, who's been in the architecture design industry for over 20 years. So I put in my professional tips about workflow how you can really maximize your time when using sketch up in this class project, which it might be seem a little bit simple but it's practicing your understanding of the interface understanding of proper methods and work close to make a project which I'd love for you to share. And I could course help. If you have any ideas or you're trying to do something more complex, just let this course will help you understand. Sketch up and be ready to have a great workflow as you make a new sketch models and become a master and sketch up, possibly with taking my next course when you're ready. So if you're ready to get started, maulings and let's go.
3. 1.02 Getting Started: schedule is quite a powerful tool. In the window. You'll see the Villas of Law, a project in France by architect, like a Pussy A modeled in three D. It's ketchup. The beautiful thing about this project is like many of the projects, both complex or easy. You can make this model from nothing, or you can bring your existing drawings and you can model it entirely in three D in sketch , including set up the visual styles and all you need to do is pretty much know the basics of using sketch up. As for a sketch up models sketch up has enough flexibility where you could open sketch up and just view any model. So there's also a viewer, an opportunity, just a look at great architecture objects in sketch up. So here's important concepts that make schedule different and really, really powerful. And as we model, you know you'll be looking at these sort of concepts that you can dio as we go through some of the exercises. As you learn the interface
4. 1.03 Fundamental Concepts of SketchUp: so this course is made for people who are just starting from scratch. You can get started and you'll be able to use ketchup by the end of this course. Here's some concept that really help guide your path. We're looking at a plan of the villas of wall here. Some key concepts from the 1st 1 is intuitive design. Where is some things are very complicated. You can actually go from the smallest, simple part of a project into the more complex in sketch up, and it's intuitive, and you'll see that in terms of how do you make objects and how do you start and finish your model? Also, sketch up is great at surface modelling. That means that these all these three D elements, the surface and the planes that they're not a solid object, meaning you could just add a bunch of surfaces and make an object. And some of the tools and sketch up help you realize something's like solid modelling. But sketch of itself is a surface modeler. The next one is stickiness. So as we start making different points and sketch up, you'll start to see what sticking says and why it's important to be thinking of that while you're modeling, um, fourth is three d warehouse, so three D warehouse is a great place, and it's a resource for sketch up. Like now. There's a lot of resources for three D programs, and that's a great thing that you can use to help your modeling in case you want to add different elements to your model or just want to find something unique to render. And finally, sketch was great at rendering installs. As you can see this, you see, his interface will go over it shortly. You'll see how you can start to use the program to get pretty much the power of one of the most intuitive three D models out there.
5. 1.04 Installing SketchUp: sketch up is a very easy to get started with software. Whereas before there was a free version and a paid version, the paid version has gotten significantly easier to afford. Um, you can always Now, when you look at sketch up, um, as someone something to use you couldn't go to their website to get up that calm and you can try sketch up and you can just put in your information, tell you tell what you're using. Four. And there is a plan where you can, of course, you sketch up for free your personal, um and is it also sketch up for no personal projects for a cheaper price per year, And then the sketch a pro and the yearly price Ah, is there a swell? So depends how much you want to pay. You can also get a classic version where you could just use it. The great thing about these licenses is that you can upgrade any time. So for this, Tutterow will be going to sketch up 2020
6. 2.01 The SketchUp Interface: This is sketch ups main interface when you click on sketch up after you've downloaded it, and it pretty much is basic interface where it talks of what files you have on. There are some templates, so you can get started with a usual formatted there and inches or meters, and then you proceed with some of the recent fouls. And also you can learn some of the other information different. How twos That's ketchup has, um, and there's a lot of content for doing particular things, including a sketch up forum and at the bottom you see the license. So if you're either doing the software for free or using line, since you have that accessible. So let's go ahead and click, starting with a simple template, and that loads up for a little bit. And here we're gonna look at what are the main parts of this interface for sketch up? Well, we start, of course, with the top, which is the menu, Um, and you can see the different elements for the menu, Um, and pretty much the typical uses for a menu. Ah, where you have your file at it view camera, draw tools, windows and Of course, looking at your editing is different. Copy and pasting. I am your father. Of course. Open your files. Exporting. Um, different settings for the project. Um, including printing out. Then your view is where your dealing with what is going to be showing, and then your camera is how you're dealing with your view. Port your jaws where you start to draw your elements. Your tools is different Manipulation of things on the scene. And your window is where you pretty much can set up what you see on the window, like the tray, which is to here, which we'll talk about truly. Then you're helping you. You're gonna have help on anything you're needing to dio. Okay, so after menu, there is the icon bar where you see various Icahn, um uh that are loaded. You can also load other I can until bars here by right clicking in this gray area. Um, you could do some for for the camera. This right here is a basic set, and this right here is some views you see getting started. That's your basic and then your views. You can also select larger tool saddle bill here and these These are all DACA ble, so you can always move them around. Um, and those of the icons, pretty much they will make an object. We'll look into that shortly. And the to the right is your trey. And in your tray you have your tool bars for editing things in the model. Different settings. Yeah, well, look into some of these where you can look at an object and get information about it. You can change materials. You can edit components, which is pretty much different. Objects that were can, ah, copy around your object and then there styles for visuals. And then you look down and there's going to be tags and tags. And 2020 used to be layers. Ah, in previous versions. So mind that if you're using a new version, then shadows for different visual effects in your model, you can see there and then scenes is where you're setting up a particular view. And then finally I there is the instructor, and there's also there's some other two bars, one of the most important. Ah, yeah, is probably the, um you go to ah, window on default tracon change. Ah, the outline er is quite significant. We'll go into that shortly. Eso that's the There are two more parts left. Those air two parts the family that I can bar on the tray tool bars here. Now we look at our main visual area are our canvas, and we can see there in perspective anything that we're drawing. So this is a useful. You can see the three axes, um Z X and Y and anything you you will have a reference to where that is, using that. And as you see at the bottom, you see the status bar. That's also very important. So we'll know exactly what we need to be looking at, um, for information about what's going on, the model.
7. 2.02 Basic 2D Geometry: Let's look at our basic ability to create sketch up. And this is coming from an architect point of view so mine that I think that we create a lot of different things as architects, and I hope to give you some of the greatest tips and working with sketch up from that perspective. But when the first things is cause I don't need this is a person opposite three D a drawing . I won't need her, but ah, that is accessible. Always if you go to components, you can actually see things in the component. Ah, it's going down in the component. You will look at different things, um, that you can get from three D warehouse, including people. Um, so that's going to be in your trey, your trouble artery. You can come back to that, get people, and you can load any anyone from that website and we'll talk about that later. Or were you just going to start with the looking at our default? Dray said to entity infill and we'll talk about you to the different things that you start to see and sketch up. So this is what it means by intuitive. Okay, we're gonna start actually, by drawing Align the most simple item on sketch up. So let's talk about different things. You have to press. So I've been navigating the view port a little bit. Um, I'm using the scroll bar to zoom in and out. I'm using, um, shift and these go bar to move. And I'm also using, um, a CBC are panning are orbiting just by holding down and moving the mouse on the school bar . So everything's pretty much is done. Uh, navigation wise with school bar. When you click on a tool, it'll show that tool in the screen and opposite there's object to select. We'll see what that does. Okay, so we draw a line pretty simply, um, you can just click. And if you see one of the things about the intuitiveness of sketch up, you see when that line goes grain when it goes blue or red, those air call inferences. And that's part of the intuitive part about sketch up. So, as opposed to making sure by type Ian the direction which is also possible, like in some other cat programs, you can see everything automatically constrained, or you can just, you know, put the line anywhere, but it also tells you if it's going to be like a vertical or horizontal line, and then you see these other inferences it can tell when these are parallel, and that's, ah, great way of just sort of starting that. That's one way to start using a line, and what you see now created is a surface. So again, sketch above the surface, smaller. And so you know we can now navigate around this object, and you can see what lines could do. So I withdraw signs and you can also hear there's other options for FREEHAND lines. Um, you could see the shortcut for lines is hell. It's a free hand line. You know, if you have a tablet, maybe that'll be easier. You can also sort of do that. And one of the great things about sketch up right now is we're drawing lines randomly anywhere. Um, but it's still beacon trained to e access. See, you see that it was red, so it's been trained to access. But sketch up also allows you to draw on surfaces. So that's also a cool thing, both drawing in terms of free hand or regular lines, and that's going to a little bit. What lines could do. Um and, uh, you look into this line. I'm going to zoom in to focus on this area. Ah, when you you make your line, you see that there's no there's, there's nothing in between the lines. It's just one steady line. And when you select selection is a very important part of sketch up. Ah, you can select that landed you've made. Um, you can click it once and I'll just select that element you're going to modify. I'll tell you sort of how to deal with things like this, but you triple select, just like the whole object. Um, but right now you look at the entity info. It tells you how many edges it tells you a little bit about that line, the length, total length. And it has some other functions for viewing characteristics and also the layer or the tag. Okay, so that line, um, which is actually, you know, several lines is each individual line, and what we'll do now is we'll draw and I'll show you that you can draw on several accesses . You didn't draw quite three D, and it's not a major thing to do you press space or exit, too. Stop the command. And yes, I said, You've been triple click and select it. Um, and one thing about sketch up a swell is you can also do curves, and that's one of the functions Here. You can choose two points, and there are other options for drawing. I didn't do a three point Arkle or a regular arc or pie where it's a filled arc surface. So these right now we're working guidelines I want to do. I started with these two points. You see that inference as well, that sort of red inference that shows where the there is a connection. If there's a parallel line, it will show that, um, and now we know how not to make these arcs. Let's look into surfaces, and then we'll go into shapes. So sketch of defines a surface both by having four lines, of course, or three that are co plainer. That connect surface first is automatically created in sketch up. Now, these lines right now, this sort of mawr different. Um, then three. But since their co plainer, if I was to connect this line that makes another surface. And so now you see how you can do surfaces, and you can do these in any dimension. And you can also do these, um, if they're parallel and so or if it's on a plane and the plane is either three or if you continue this line out and the lines are parallel on edges and you can also select and delete in line, and you can also the leader line here and that also actually stops and release the surface . So mind that that's the line tool, the very in depth ability with ease. And also, as you look for the Ark tool, um, you look at the arc, um, or any curve. Ah, then you can actually change how maney resolution it is for the sides and change how many sides you can make it to be very, uh, rough. So you can also make your polygons in that way. And so, uh, this is ah, the getting started toolbar. So it's pretty basic. You can also click your racer if you want to erase a line. And those are some basic editing. Four lines and also to make it easier. Does this shapes icon in the shapes icon you can choose, Uh, a rectangle wrote it rectangle Just we're not really gonna go into that, Uh, but pretty much you can draw on any surface, we'll show you that shortly. You can also just make a surf circle or polygon, and we'll just make a little bit of each of those. And so, um, here we are, making anywhere you could see this little inference that shows what things are parallel that little dot that line and you just click. You keep dragging. And if you rotate while you're doing that just like with lines you will show you if it's going to do that on another axis. So he rotate your in this view, you know, automatically figure that out. And that's part of the intuitiveness. And and then we'll delicate to making a circle. And you could sort of see something. Efforts is just picking up. So this was the circle, of course, is more toward its something center. So, uh, as we see where the center is, um and sort of where this line will go to it will help us figure out how we want to do what we're doing accurately. And then finally look at a polygon, which is sort of made the same as a circle. It shows that the inscription there and right now we can rotate any way. Ah, but if you if you, uh if you press a shift, it will constrain the access Has it been created? And that also happens sore Working with, uh, actually circles, you want to do this element of where you see the rectangle, um, rectangle can do any sort of scale, but also, if you want to keep it as a square, it shows you that inference, that little dotted line from access to access, and then it also actually shows you the golden golden section. So and it also shows you a, um, the golden section different, um, orientations. Um, now, also, if you press shift while you're joining, it will constrain the the particular orientation. So it's gonna keep a square. Or if you have the golden section, we'll keep it at the gold section and so says there's not a direct tool for making a lips. What you can do is, uh, as we go to the editing tools yield on how to, um, manipulate these. So these are the basic creation tools of geometry and sketch up
8. 2.03 Basic 3D Geometry: sketch up can be a very accurate program. And one way of saying that is starting with our lines, supposed to just drawing anywhere. Um, if you want to draw and it go in the direction we want, we can look down. You see the status bar, it tells the length. So if you want to make a box, that's for on the you know, the screen. So it's X and Y access. We just get the inference for four here for here, for we have a perfectly four by four created shape. Um, and the same thing happens if we want to make a circle, which is actually automatically a surface. Um, if we're creating that and we say what we want the radius to be if we want to be, too for diameter four, we just type that in again. You press see, click where you want to be. And actually, now, when you've done it once, it gives the inference that you can repeat pretty much the same thing over and over again, which is very useful. You just see in the bottom, right? What? That sizes. And so if we're looking now also for what sort of things weaken control with drawing a rectangle. You see there two dimensions to numbers in the Dimension box at the bottom, right. We can go ahead and put four by 44 comma for and, uh, do the same thing and mind where you place these. Also, as you see, this was created much lower. Um, one way to keep it in the the acts that you want Ah, is to pretty much draw straight down or, you know, looks trade at the access that you want to draw in. That's Ah, another way of helping you out when you're working with this program. So you don't just draw things anywhere. Um, all right, now let's look into some of the surface functions you can do with these. As you see it have done a selection box this election box and sketch up work similar to other programs. If you go left will select everything that's in the partial view. If you go right, it has to have every geometry in there and the circle geometry. Unless you at another line that goes through it. Unless you had another line that goes to it, it will be one, but did you see this line went through it. It just divided it. That is called stickiness. And that's one of the board concepts of sketch up. So let's you get something much more complex and go from simplicity complexes very quickly . And so one of the things that we can now do when selecting the rectangle is you can select each part separately and you could see that right there. And if we go in order of their getting started toolbar, Um, well, just look at what this is, which is a very handy dandy feature, um, which is for extruding and so extruding you can actually, you can't shoot lines, but you can extrude the surfaces. And if you want to go up four make this a four by four cube. Just type that in to the bottom, right? I want us to be for for that cylinder, do the same thing and one of the great things. Of course, you can always extrude the edges or the other faces, so you can pretty much just continuously expand it. And like I said before, um, sketch up by being able to draw a line we can now, having these this line here, we can deal with this surface separately. So there'll be one surface until we don't both of them. And then you could extrude up. And now we're starting to make a little more complicated geometry and we'll be drawing on the surface. You could see it. It's on that surface and we can just take this and p is the shoot command a push, pull and go down. And there we have a little more complex geometry. And if you want to look at this divided circle, we could do the same thing going up a little bit here, here. So it's totally different. One thing you can't do directly, of course, by the surface modeler versus an herb. Smart lawyers. You can't offset the curved surface. So if you put this on the edge, it says cannot push or pull on smooth surfaces. And so, um, what that would say is, if you had actually made it into a polygon, this will go through here and polygon will change this edges to 12. Um, first you size, let it go and would put 12. Um, decide. Sorry, but 12 s that changes. This decides Onda local back to that. So you're for making a polygon. You pretty much you talk about the inscribe size or just due to and we'll type right now. They wanna have eight sides, put eight s, and that will change how many sides? This at us. And now when we push, pull my press P Now we can say we can press space bar to close out and we clear it. Push, pull. We can choose any other sides on like a circle, and you could see that you to go out in their own direction. So each face goes out in its own ah, perpendicular direction. And so that's how we can really work with some of the basic surface functions with sketch up and you start with a line now, one thing to also look it now that we've have several of these rather orthogonal geometries , what if you're doing a damn tree that's not a square or not with agonal meaning? What if I want to? You make a triangle. And what if I wanted to actually be a little size? Uh, what if I want to go up for And I wanted to go this way for and I do this. So now I have this triangle and I pressed push and pull and, um, using my minibus button forbidding. Now I can draw lines proposing L on this surface. So, you know, see that not only does their other inferences for enjoying on the X y Z surfaces with those planes, you can also draw on the surface of any object except for a curve. So that's Ah, very interesting way now of working with extruding now getting into three D surfaces with sketch up.
9. 2.04 Basic Transformation: So this is the fun part where we get to say all the geometry we have in the model. How can we start to really move them around and work with them? Before I go into this? I do want to talk about the item called the group. So the group, whereas when you click on any object, normally you just click on the their surface or a line. Or if you use a selection box, you can get multi surfaces one line, that whole thing. But think about if you're you know, Look, I selected part of this. I want to move it. Um, but if I had by some random chance, uh, just use a part of an object, um, it would make it a very problematic to work with, Um, sketch of 2020. Ah, it's possible. A little more intuitive for, um, working like in terms of you're moving all these surfaces, as you can see or if you you move the, um, a certain set of parts. It moves the whole object, whereas before sketch up. If you accidentally select part, you know it will have this stretch that you didn't intend unless you wanted that you know, like it's doing this. So one way that you can, um it's gonna help us as we start to look at the different areas for manipulating objects and transforming them is making a group. So I'm going to. And by the way, ah, um, the control I was using to move things was, was right here. If we had moved, we have rotate, and we have scale. And so you can choose em to move as well. You can rotate, um, by using rotating, and we're going to that tool shortly and then scale this. So, um, before circulating with these commands, I'll talk about the group so you can triple clip of you double click, get a surface if you triple click. If you double click on the surface, you just have one part of it. If it's a multi, um, surface, um, object. But if you typically get the whole object, if you right click, you can create a group and, uh, or a component, we'll talk about components later. Essentially, a group is where you have the object, and now, every time you click on it, there's no chance of just clicking one line of the other. I'm using the move command. You can just move things all around moving in three D space. You can also, by snap, you see the snap Inference, little points. You can click it to join something else. You move it back away. So having that as a group makes it so much more easy cause you can select it and move it. And so now you look at this move, man. That's some of the things that important about moving. You can move based on a point, so that helps you keep accuracy. You can also move a certain amount of distance as you look on the bottom. Um, right hand side, you can put 20 Move back, you can put 10. You can move here 20. And you same thing to do up. Uh, I want to do 20 up and you compress controlled see toe undo. And so that's a continuous function with sketch up and so moving. Of course, if you actually move a surface by itself Ah, you actually extrude, um and so that by not be the intended purpose. So the same thing will do it again by triple clicking, creating a group, and now we can move it on the access we want. All right, So now let's look at the rotate in scale. So first rotate one important things been rotating, of course, is the have a center. Where is the rotating EU rotating on this point? And look at the inference to find out are rotating in this axis. So when we see it's blue, we see, um, it's hard to get the blue because we're looking at a tilted surface. Whereas if we were looking here, we triple click this box making a group, and we do rotate. We see now, Okay, that's gonna rotate on the X waxes and actually the the excesses, the vertical axis. Um, if we if we undo that and if we look at it this way, we see that red access. Now, you see, it's rotating on that along the Z and, um, the X axes. And then here, you know, we actually can just randomly rotate at a point. Obviously, sometimes you want to know where that point is. We could always draw it where we want it. For instance, if I said I want to rotate around this point, I could just say, Let me come back and rotated here. Um, but the issue with rotating we have like these planes is this black rotation was You know, the inference means that it's going to rotating on that surface and you see the surface actually the same surface. But it's not rotating along the X, y or Z. So be mindful that when using the rotate command and finally ah, and of course, rotating. Ah, with a circle, uh, does. There's a great inference for the scent of the circle, so that's that's a useful way of not getting in trouble with those. Um, you can select that and it goes to the center and you see that it's perfectly around. And finally Ah, now let's look at the scale, command the scale. You click on any object, you see nine little cubes and actually you see nine for each side when you see one of the top of the bottom. So if you're working with the top of the bottom, your scale is going to be going upper going down, and if you press shift, it will go out in all directions. They will keep it, um, disproportional. Um No. If you flute clipped the middle over here, it's gonna go one on one away. Now, if you want to go on the both sides, you press control. And so to see that it it's not proportional except for on the X and y. And if you go to the bottom, it'll change that as well. And if you click on the edge, it would scale it, unfortunately, as well. And if you press, um, control are doing that, it will do proportional from the centre off the of the object, as opposed to just on that edge. You see, it's scaling from this point, and if you press ah, you press shift while using that, it will, ah, take off the restraint off the proportional, which is known lake when you collect that one. So the middle ones keep it, um, along an axis. And these, um, help you deal with a particular, um, sort of, Ah, it lets you be free. But it won't change the, um, the Z axis. So that's what those are for. Or this one the same thing. There's an access that is not touched. If you're dealing with the ones on this um, center of the edges. And that's how you skill and scaling. Also a great way, as you can see here with us, um, little shape here, but we have a tube. But if we make a circle and we want to make it a lips, we could always to scale that smaller and that we have our lips scale by one edge as opposed to the other side. And we could take the same thing for this tube. And now we have a he lips. So obviously you can see some with a three d object. How that was you can get very interesting for your shapes, but also how you can do that very simply, with a geometry, you could be a surface. You could, of course, always have double click or triple click that, um, to do that, I'm not going to go too much into this now. But there's also working with, um um, going going into a and I'll explode this and exploding. It is one way Working groups. I'll talk more about groups later, but if you explode it to be more like a surface, you can also scale just one of the faces of a group. And if you press control your scale by the middle. So now a heavy, a bit of a tube. That's a different one. I did almost like a pyramid. We cannot make it more of a cone by doing that.
10. 2.05 Groups, Components and Arrays: components and groups are very important. Part of sketch up and a very slow way of organizing your model. So right here, you see, um, a component? Um Well, both actually this groups. But the idea is that what if I wanted to make several of these and as I copy from using the M command, um, I'm gonna put X put, actually x times six. Is he six? Lease on? No, actually makes it seven. Six more. Um, if I go in here and I I change something like when I had a little bit of a line on that face or if I, um, want to come back and say, uh, maybe I want this a little bit smaller. Well, the rest of these air not going to change. So we definitely It's some way for all these to be coordinated. So I undo. Go back. Ah, If actually, when I make it either select component or by make a component out of a group, I'll just call it object one. There's a lot of different setting now that can be put on your little group so you can have a description of it. You can line it to a particular ass axes, horizontal or vertical so you won't be rotated. Or when you bring an end, you could make it the face component for the face of camera. This is a setting for probably with your using people's always facing the camera in this and other tags and information that would be useful for different building information, modeling or been components. But we're just gonna make it simple. Just make the name. And now, um, if we don't want these, these two have. We're not really gonna change this. It's fine. But if we now do this, we want to copy all of these and it's fine. We'll just use that. We'll do times six. If you want to come in here and change the surface, you'll see that it's changing every single one of these. So that's very useful you can imagine. And that's the main difference between a instance and a pretty much a group. Um, pretty much the instances of the groups, even if I copy it, they don't relate to other groups. But the instance off the component is with the mother group, and, um, there's a ability to while you're working on my other group or a That's right. Now, you see, everything is great out. We're now working inside of that component on the same thing happens where it's kind of a group, you can see everything is great out so you can only work on that group. So that's really a great isolating feature. You can also, if you go to your, um, Europe, you have your visuals, that you're looking into your model and you go to edit. Um, you can work on, ah, different things for, um, closing that group, Um, where you can open it with your edit command. Um, I typically go by double clicking, um, the object so each one is different. And so, uh, there's another useful feature here. Um, and I was seeing if you could, uh, directly see it. But if you're trying to, um, work on this and you don't really want to see the rest of the model, you can actually start to customize some of your commands. Um, and I know I like to do, and I think that's actually come standard. Uh, you can press when you're in, then object in a group or component. Chris H and you hide the rest of the model if you're setting, might not have that. You can always come over here to, ah, work on the particular settings and in your model, um, using preferences. Um, and you've been in your shortcuts. Type in Hyde. Rest a model hide uninsulated or haida. Have you, uh, Capon? It'd hide rest of model here. It's a sign of h. You could, you know, senators are, and it tells you if it's used by something else. This is what I like to be signing. No, but it's already set to what I like, So I'm just gonna cancel so now, but press h, we were on that. However, I'm working on the component press h It will show the other component instances. They're all linked. So now, another useful tool with working with groups sank bonuses in general. Ah, his ability not just to copy and peace and sort of golden here. But you can also go based on ah circular center. They can do, Ah, a polar array on. It's very nice to say, polar array. Um, in one way. If I want to use this center, I probably want to have these things. Send it a little bit. I'm moving these. I'm saying the inference for the midpoint. It's intersecting that surface. And if I want to, I want to you, Ah, make an array. I'm going to press control as I do that and I do two times or x three. No, we have Ford, but I just as easily could have done time. Seven. Um, make sure you do that while it's elected, so it's it doesn't expire pretty much, Um, times time. Seven. Actually, if you're doing 90 degrees, it's gonna actually backfire. That's all over writing itself. But if I do times it's going to actually, um, if I do actually divide, so I'm gonna show you this one as well. I did. Divide by five. It's going to do five of these within that angle. So there is times times three. There's also divided, divided by four that does equally spaced units between. And you could do that. Also, that array go down. We do indeed, this times eight and he's an accurate, so one way to control it. If we want to make circular, you can always rotating. We can choose that angle, so if you want to do an angle of 60 times. Five. There we have that controlled England, all of these units. Now there's not a three D array You want to make three D for these, Um, you just pretty much make a separate copy and I'm pressing shift to select each one of these, and you just pretty much go on access in times three. That's how you would do something like that. So that's using opponents on using groups and raise.
11. 2.06 Measuring and Dimensions: having an accurate model is an important part of working with sketch up. And, of course, that could be clicking a point in the space and having a particular amount of Acker's. But I also could be testing if your model is correct. So here's some tool to help you in that your tape measure and a tape measure will in your lower financial you how long something is. You can make sure that which aren't modelling is correct. So this one obviously is a sort of random size. Um, you can also see down in that way. So, um, if you want to say, Oh, you know, like what we had is good or if you just want to inspect what you've done, you can always use your tape measure or click T, and you find a different makes about your model. And if it's doing what you want and also for if you want it to, um, share and we're gonna talk about exporting in a later second, um, you can click on any surface and it tells it information for its It's this says that surface area. And if I click on the line, it says the length, But I could also right top line. And so that shows you even we rotate. We see these little tags, and I need to get in to see a part of the model to measure it. I can always go and, um, and measure that one way to add even more dimensions. So this is when you start toe, learn the program. It's going to be useful to not just use the getting Sarge aboard, but also the more advanced toolbar. You can actually also make dimensions. You click point another point, or you could align itself, and you can make your, um, dimensions for each of make sure you selected each of your lines and sciences, so it has to connect to a point when you're making. I didn't mention because it's you see, the triangle needs to find another point, and you can also measure angles. So it's either it's you're making this object or someone else has made it for you. I'm gonna make a line to make it on the basic access. I want to find out more about that. Just click that middle point, go from edge to edge, and it tells me that distance is 1 28 1 28 So that's that's a useful way of keeping that information, um, in your model, and you could be a lot more accurate because of that.
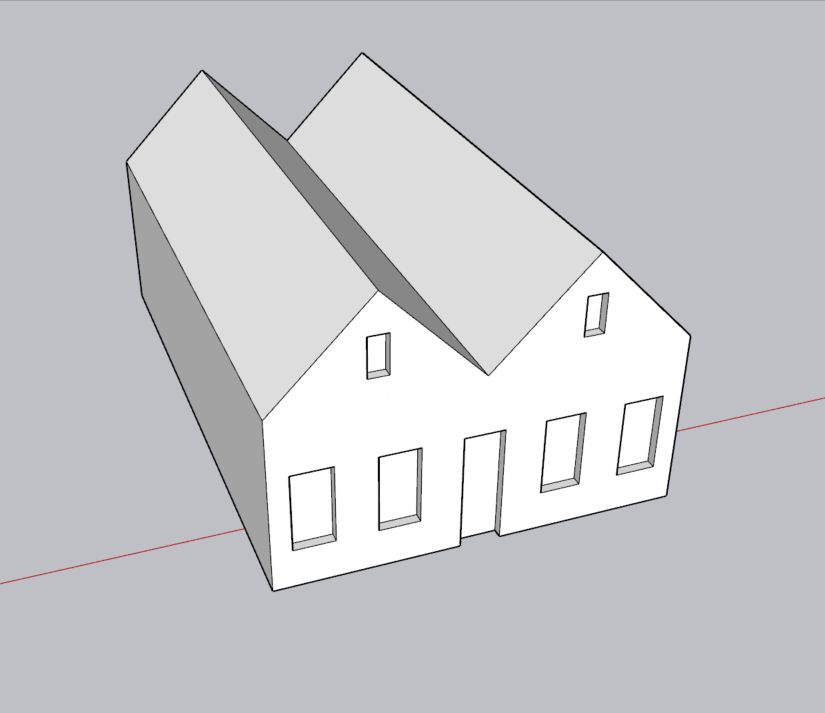
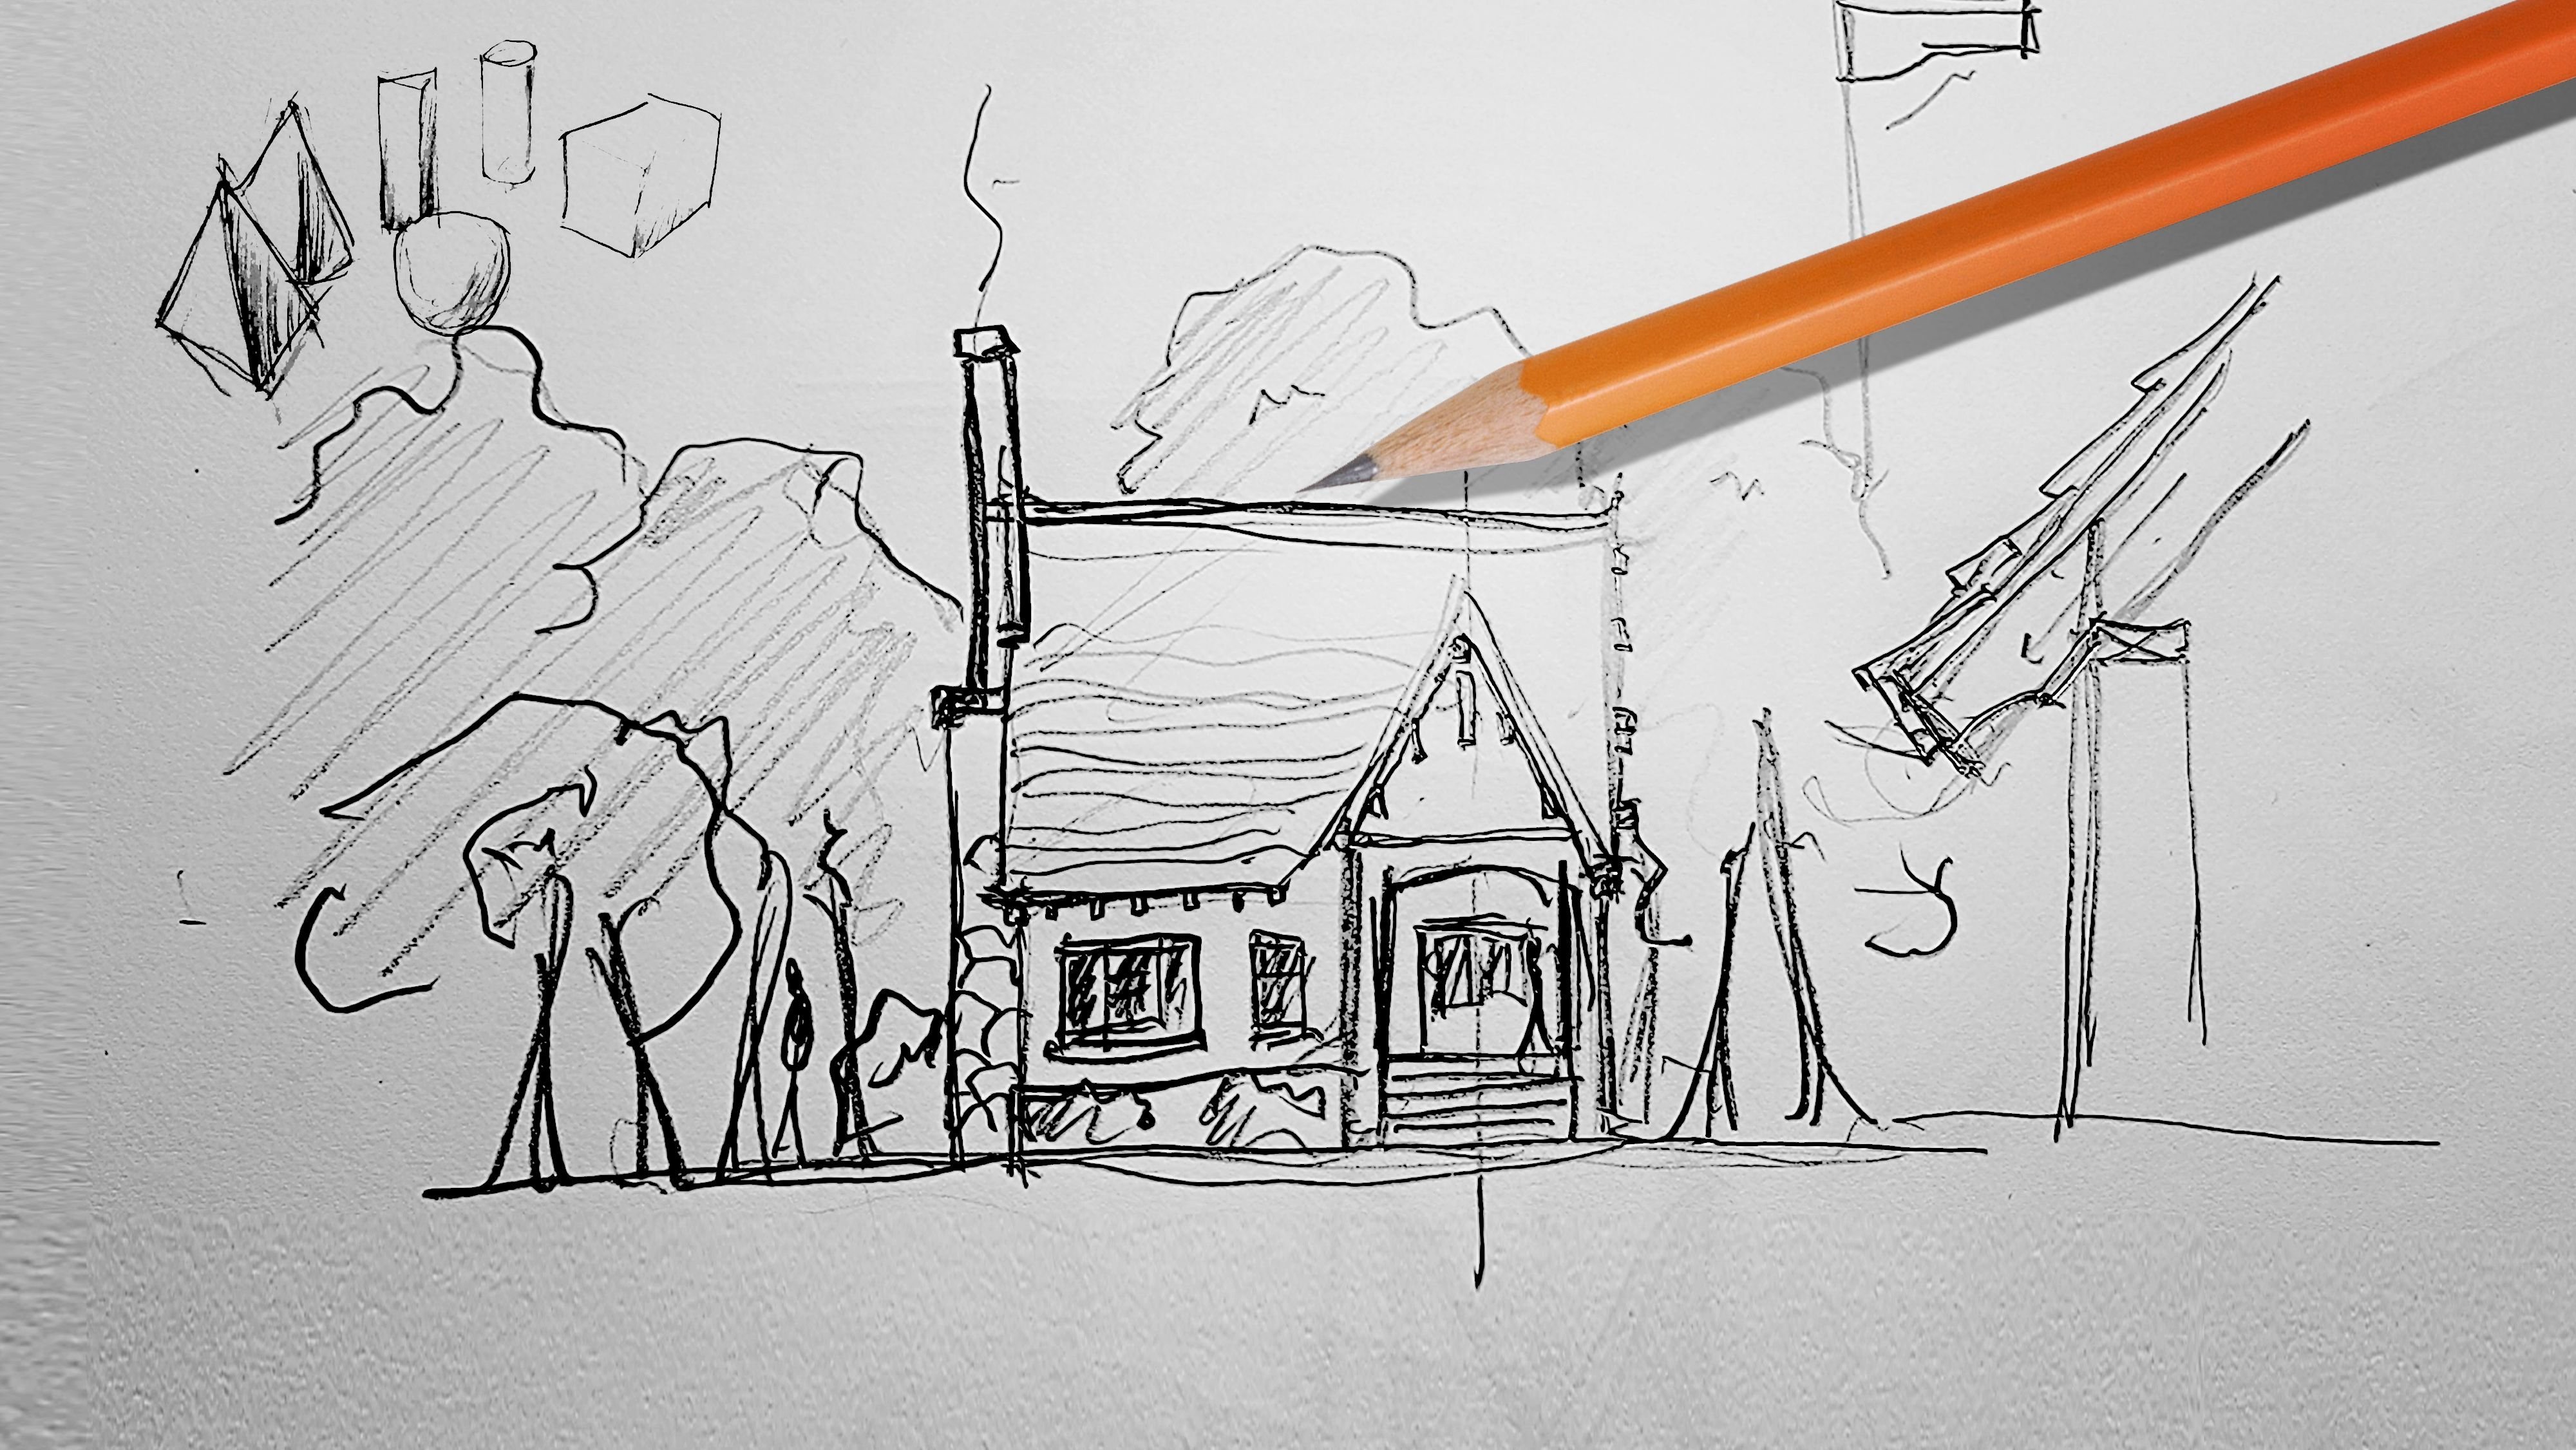
12. 2.07 Make A Simple House: Let's get started with a fun exercise with sketch up in the view poured in the canvas for you. You can see a house and of the press the middle mouse button and just, um, pan around in orbit around and you can see that it's pretty simple, but it's really cool toe. Use some of these skills three years making lines, looking at services to make something like this. And so we're going to start from template to make this we follow along. Ah, we actually want to use simple meters. Take away the little character. Yeah, we're gonna start using lines and we're just going to go up four meters and we want this house to be five minutes to cross and we want Teoh also using that inferences. We see our endpoint in our mid points entrance. We want to go up 2.5 meters so we can have a This is a 45 degree triangle roof. For now that we have this, we're going to use our extrude tool. We started with our line tool Ever going toward, um are shoot tool that we have a surface going to come back 10 meters so Now that we have our basic shape, we want don't make some doors and the windows. So we come down here with their line tool and we go up, we want to probably to A to your 0.5 meter door. You come out 0.5. Oh, I'm gonna make sure we're when that inference of that access 0.5 you go down and do the same thing and it automatically click to the same amount and just want to come in now, maybe point pointing to now we have our door, so that's really cool. It's a now let's do some windows. And while they want to do windows at the same height, actually, just gonna bring this line over and bring it down and still really easy. I could click and to lead the line erectus use the race for tool, and these windows probably want to keep the same height as the door. Are same with that store? Um, yeah, probably come down 1.5 and we're trying to do a one meter. They have won and like to probably have them one in the center here. And as these lines are broken, do you have a different center every time it's broken. Now we can. What we need to do is this you select him and delete them. Or use the eraser tool. And to you a cool thing about strewed. We're gonna do point two on this one. Ah, just double click. Make sure you're on the right side. Oh, makes me type in the right number. 0.2 and it's actually going their own direction. Don't worry. We have another short cup up our sleeve. We can always a line are actually to another face that we can. His opening that. Now we have a house with thickness, at least from the outside. And the next thing you want to do is at a chimney chimney. We want to come in the back and probably won t be out. Ah, 0.75 meters. Come Right, um, on this side one meter and next deacon, go this side. Also one meter. We will click to make it a solid. It will connect straight to that line on the house Bs sketch of stickiness. And now we shoot that and well, go ahead and put 10. They get nice until it to told. Let's bring it down, be to Yeah, that's great. He and actually we might want to actually have come into the house just a little bit. So we do 0.5, and there we have it. I'll show you a little trick and we'll talk about it later. It's a little different color because there's a front in the back face. So what we can do is click on each of these faces that it blue, and we can go ahead and right click, and we scroll down to reverse faces. And that will let us make that same house, uh, color. So we have house and maybe to make a little more beauty to it, let's add a window on the top and one way to do that. It's very simply taking our midpoint. Coming up one meter, you probably go up another meter for posterity and maybe cover 0.25 It's a good number. Come up, uh, one now 0.5 and snow worry. It's a little time we come down. We just want to make sure that it's going down on the Blue Xs and says it there. Fine. And we'll extruded like that. Be mindful when you're making geometry. Um, like I said, you can go ahead and copy something like this. Um, maybe if we tell a location, maybe that's one meter you want to copy this year, you can just click on that point. Press control to make a copy and to make a line over here get are one meter out. Now we move this. You hear this point not control and try again with her auto. Uh, yeah, there we go. Be careful when you're what you do, what you do Well, you click, and it will remember your last man extruding it, Or if you are also using a distance and it will make your life a lot easier. And though we haven't added the inside, the outside is down in it. It's looking pretty beautiful. And, um, go just once that further Just be an interesting thing. Um, and we're just using basic sketch up basic sketch up geometry. We can also make a ive to this roof, and I'll be, uh, interesting. Um, yeah. One way to do that, very simply, could this line you see, actually, there's a purple line. That's also an inference. We're gonna make that at 0.25 We'll do the same thing over here. We'll extend that line, and it's already remembering the distance. You know what we can to let's take the line we have and offset this face. You just use that offset using effort. Or if we use this command offset, we can click. And we could lead old extra line that we had. You know, he had a little bit of it even aside and a rake. This is a architectural terms, but what may want to come in 0.2? That's a good number. You come back to this side and extruded over here, and then we should a little bit 0.2. Now we have a house with a ive and windows and doors and the chimney, so it's really that simple. You have a house and it's done in sketch up and you're ready to learn some of the other skills for customizing this form.
13. 2.08 Working With Materials: having a working model lets us really have the most out of looking at sketch up and be ready for doing some of the more advanced things, such as using our trade toolbar, so as opposed to just know basic properties for face or line. Now we could start looking at some more complex things, like materials or using opponents or working with styles, tags, layers, um, shadows and the like. So I'm gonna go down bit by bit as we talk about each of these. And one way to make this, um, a little bit better is, um, by having a little more of groups in the model. So right now we it's not really in groups. Um, so that's something that would help us, but you really don't have to work in groups, but it is useful in the future when you using a lot of complex objects. Okay, so you probably want to have some basic materials over this house. Um, so now we look at the material to bar. We can see first that it has Well, it's a little bit like a folder, and we have this ability that edit anything, but probably in the first see what we have in this drop down. So we have the ability that make three D print materials asphalt, concrete, bled brick planting, you know, carpet colors, class, my escaping and a couple different. Other different, um, textures, I think want to use for this project you want put citing on the walls, Maybe a brick base to this house. You make a roof pattern for the roof. So we go ahead and start with looking at roofing. I would just use the the singles. And we probably make a grayish color for coloring the, uh, add to this roof. So we have a little bit of distinction, and as we want to do, citing, we'll come back here and we'll look for some of our citing options. All right, so you have to scroll up to do that. And I think that's a good citing to use. Come back on each side. We'll probably This is white. So, um, now we have a couple materials. Um, I'm gonna go ahead and save this model. It's good to always say pretty regularly. And so now that we have this part, you know, we were pretty clear. Clearly not having any windows or doors, and that would be useful. So go ahead and make this a group because I probably want to use the same window around the building. Are you the same double door? We're gonna create a door, though later in this course will show you what about a little bit about three D warehouse. But I'm going to create one window, and we're gonna use the same one, Um, a couple of times. So the first thing I want to make I'm gonna make it into a component. I'll say window small is want to make, uh, a trim. It's maybe that is 0.5 for the Children, and I'll go ahead and delete this. I bring this out eight points. Go five. Probably come back in a little bit. Point Oh, 25 Okay, so it's always a nice element. Have a good trim on the window. Then we'll make a, um inside to this trip and will offset this. Probably 0.5 for a window Fash. We'll come back and we might have that It 0.1 that old? No, not even of course, uh, be set in. So you will make this a group is. They could put groups inside of components and will come into the wall. It be 0.5 and finally to finish her window. Well put. You can see we're still inside of this group. Its component Now on. We now can put a material on this That is actually a glass material. You see that? We want to make something good. Translucent glass. You want to probably come in? Move that. Yeah. So there we have it. Ever. Glass when do? And maybe you also want to Who could keep out of this, Make my life a little bit easier? Probably gonna make a little one by one 0.3 by 0.3 Oh, in fact, that's be a little harder. Um, 0.2, it will make a little box point to and then remember that. So we'll make a window. Um, divider. Window light. We want to put this in the center. You will make a another one, and we'll use that transform command. Okay, First of a little bit. All right. So we'll come back over here, go rotated on that. We can't see it completely impress h. So we hide the rest of the model come back here. Well, uh, I knew that there. Yes, we scaled it. We've rotated it using a level of power sketch up. They want this to be in the middle, since that point area, they have, ah, one window and on the way to make sure we just get to the places we want. We're not mulling inside of the house were just my leg. We're just modeling. No, Macy. And if other issue, that's one reason. Be careful what? Your model. We're gonna put this down here, and we actually have three save use. When you zoom in near the material, it gets slower. Be mindful of that. You could be inside of material. And so that's why it's good to save. Reports were come back to with fine views. So I have my windows and of course, they're all linked. And so now I want to use the same window on this side and it's on the front side. I want to put on the side, the house and inside. And I want to come back over here and you see that the blue inference for rotation and come back over here and It's sort of hard, Teoh. Get it to be on the right axis. So you see that Make sure you mind of those colors Mexicana rotated off, and I'll just move it to the right point and look in the bottom right part of the window, and it says where it is. So now I get to move this out, then all snap it there and cause I don't wanna affect all these windows, I want to make a new tide that's larger and right click and say make unique. And so that lets me make a unique window for that configuration. And so, this window, with a total of 0.5 meters longer, we're going to come in here this over 0.5. We'll come into the trim, do the same. I'm gonna make sure that's on an axis. I'm gonna go to our stash. Yeah, this window. We'll need to go down. We need their distance tool. Oh, my tape measure oppressed T. We see it needs to come down 0.5 as well. That will go into each one of these. These groups, these air, not components. That's why it's not affecting the other ones in the group in the model and actually schedule probably remembers that 0.5. Yeah, and we do our or scale. Make sure that the middle scale you could see its in the middle, even though you don't see some of the handles and we want to move this to the middle. That's the midpoint there, and we want to scale this So it's been trained hits there. Now we want to put this. It's going in a little bit. It was useful to make things flush where one edge, it's the other edge. Because when you finally get to rendering will it will be effective because you will see all these lines, how much you hide them with the entity. So I'm going to copy this window to here a copy of this one as well. So now we go to our I refuse on the inside starts windows. We're focusing on outside windows, but now we have our outside windows and we have a roof. We have some materials, and so that's a good way to get started. Um, now we're ready to customize more
14. 2.09 Using The 3D Warehouse: with a model with materials. Um, there's a lot of components that we could add in that are very useful. If you go to three D warehouse, some of the ones I will say are useful. Besides the one that I just created in the model you can see A also added a door. In fact, I could go into this component and just, um, click a little bit of setting Teoh and this door Could you know where your window could be placed again And it would be useful for, um, things that you've made. But also, you can go to three D warehouse, and you could find a lot of different models they have available. For instance, if ah, and we click this click down, you see the little house. We're going to get some components that are probably already in here. So let's choose some landscape so you can just look at some some of the options that are here in a three D warehouse. Um, loads up with some of the different things they have. Course. It's nice to have a little tree. I'll just use a basic tree. Well, look that in a model put a couple of these around. And as we're starting to bring some life into the model, you'll see the benefit of having that. And one thing we do is we scale some of these and this actually is locked and scaling. That's some of the some of the objects. Um, that's one benefit of making on. You can actually change that if you go into edit component. Um, did you just do that here on one of the settings? Yes, we actually can get there. You might have to work on various things so we can go to actually the components that are in the model we select on that tree. We can add it to the consent of the items in there. So some of the things were defined when someone made the component, we could always exploded. I don't want to get the paso finding what someone did. And when you explode it, you get some other options there and by when I can train it. So it's not going to crazy. Um, you see, these air also limited since you can discontinue to explode it and, uh, yeah, now we get some variety of sizes that we can place in the model, and people always want to do this. They sometimes use what's available. But now that we have this set of things of trees, we might when I asked shrubs. So let's go on at from the T D warehouse, Ah, shrubs and probably won't have. It's something similar in a similar style you could see in three. Where else, Um, or if you click the warehouse from here and I have two screens, so it's loading. There. You you probably want to say, a two d Strub. And you know, you look for a type of style that's similar to what you have in your model, and that's one of the challenging bits. So this is three D warehouse, and that's how you get to these components. Um, and we'll see if we can dio Yeah, there we go. Sketchy low shrub. We're gonna put that in our model. It's really basic, but it's a nice gives you a nice idea what what's going on here? And you also see that one of our models, part says, been rotated. So we just got back. Sure, that happened. See it? That's where you have to be careful when you click something by accident. Um, now it's that's been changed to always facing the model. So we're gonna go ahead and correct that. So this is, um, you can see a bit of, Ah, Pandora's box. You changed too many components. It's good to make your own and avoid some of those problems. Okay, Um, so now we have our windows. Yeah, we we looked at maybe some adding some of the others that we go back to the warehouse. We'll show you some of the other things that are available within it do. The warehouse is a collection of three models there, also to people that make models also but tremble on. Previous on my Google Day schedule had offered all these different things as people in the community really wanted to have a lot of things to make, things that they could put in the bottle. And so you can see from animals. It's enough that quarter it's not really a big thing. Um, architecture is probably the biggest collection. Make sure we take out there, but tag, we just want to see everything. You see different buildings than different ways. You can reference and look at and you know you like art. There's old manner of things from building the electron ICS landscape. You know, you name it, it could be on sketch up, and also you Can you go to see the warehouse? You can also look your models, and you can always we find your categories by saying how many pull the guns she wanted to be a simpler or bigger foul come to think about. There's also collections that are similar things, and there are some products that people might have. Ah, perhaps like an architectural chair. There are different types of elements that people that might be selling or if there's a particular component to a window or door or something like that. And then there are also some catalogues so a lot of people can advertising you can advertise to with the warehouse, Right? Um, I think these air, a simple set of things that I, you know, really value having in tow my model. And I think components are pretty valuable. So, um, go ahead and explore to find out thank you. Put in your model with the components and do the warehouse
15. 2.10 Class Project: I just want to give you a little clarity on the exercise that you'll be finishing for this class, which I believe will help you as you move forward to the next level. You're pretty much going to take some of the shapes from the grid that I've given you and you're going to make a face, make that into a form, and then you're going to from the extruded form, add a window at doors. Then you'll be ready if you want to add maybe dormers. Pretty much easing some of the similar concept that you learn in this class might seem like easy exercise, but doing a right will help you a swell as reputation repetition to improve your schedule abilities. So go through six size. Do it again. Start to try something interesting. Maybe you add, you know, a little bit bigger windows. Maybe you'd start to put a little bit of composition, maybe see an architecture project that you want to mimic a little bit. If you're learning a little bit too much, uh, trying to do a little too much, you probably ready. Take my second course find in my class, so I wish you the best in your exercise. Let me know how it goes. Share it. I'd love to see and help you as you get to your next level. What sketch?
16. MotionFORM Resources: If you're looking for advanced exercises and activities sketch up, be sure to check out my website motion form dot com for new courses and content. That's free. I have lessons on making towers. Parametric Architect Advanced Boolean Justin Billions are pretty much ad and attracting with solid tools. Very cool feature sketch. If you also are looking for content, you can also check out my YouTube channel. Get the latest clips and if you're ready to move forward, then I'll see you on the motion forms.
17. 3.02 Top Ten Must for SketchUp: Now it's time for the final top 10 master techniques for this guy for sketch up. So these air a list of some things I think will really help you go further, much faster, as you are learning, sketch up as you're starting. Using it will make you more effective at you. Keep in mind some of these ideas and also find out similar ideas that could really help you be more productive, make better models and so on. First tip is start with basic profiles in Masses. This can't be said enough because the ideas even the most complicated forms, start with simple geometry or simple ways of doing it. So why start in the very complex way when you could start very simply and you could work your way back? Whereas if you start super complex, it's hard to go back. You have to restart from the from scratch. It's it's the same thing, is writer's block, and it's still useful and sketch up. Just start with basic profiles, basic masses, basic geometry and then just build up from there. Use groups. This is something I always do because step sketch up stickiness while helping you make some unique geometries and so on it. It's useful at the beginning of a project. But if you don't make groups sooner or later, you'll have to come back and edit, and you'll have to select the surface again. And it's just easier to start by using groups and using groups, even mawr than layers. Um, I think groups are definitely effective. So obviously this is if you're making a building, you know your walls are one your floors or one, uh, your trees one. But this could be with furniture if you're making one part for the seat, one part for the structure or, you know, however you doing, if you're doing different types of French or different configurations, using groups can work and also with layers would use those ways so you can organize your model more effectively. Use working views. Now. This is critical because I put down some some views that were really useful for me. Ah, and industry work. But the idea is, whatever you're doing, there are some views that could really help you and go to your animation than you, where you can make it into a scene and you can go back and forth. You can take away the transition but thinking about something like the whole view, saying everything, having a view that you want to render or reference view what you could just see what's going on in your model, maybe a detailed view and then your top down view. Of course, you can use the bill 10 views, but make sure that you have control of your model cause you don't want to lose yourself in your bottle. Next one is be precise. So I put some ideas about your precision. Um, but the concept is that you can get things really close. You can use your points to, um, the inference points of your moving things. You can have a clear size, precise size. You can also scale things precisely. Sketch up allows you do that. And it's if you're just, you know, just making something really quick. You might not have to use as much. But the inferences are there to help you be fast with that. So you know, having different dimensions, knowing exactly where things are, you know, just pretty simple, you know, like, how long does it take to attached to a particular point or put in a meter or three meters, and it will be much beneficial down the road. The next tip is used and reused. Components of this is so powerful because why just continually re make new things? It's It's cool toe, have custom parts. But no, if you make a really good component, you can just use that again and again. For this course. I made some new components, but when I'm using my work, I reuse a lot of components and I find good ones on the treaty warehouse or and different groups. And you can use that, you know, just like for walls or for doors, windows, furniture, roof, mirrored forms, raid forms. You know the ideas. The component helps you control your motto, and it helps you get further because you can use things rather than remaking them again. Remaking things could take a lot of time. Next is testing your imports before placing them your model. Um, this is really important because it helps you make sure you get something that's really good quality. So you're inspecting your important you can adjust the scale, you know, make it so it's fitting toe what you're uses that you can customize it. And you can also edit that import in a separate file. And finally, from this is you can use that import again and again. You could just change that basic file. And when you never that updates, you can always update the the reference in the file. So keeping it separate for certain objects is very effective. Next, we want to think about creating a support folder, and this is simply just thinking about how you organize what you're working on. Um, support folder. Essentially, you think where you have you remain sketchy fall, which I would not recommend saving to death. Stop, make a folder. When you have your sketch it file, maybe you save it as a version. If you're, um, editing it again and again, you won't have to support much folder that has where your materials and things you want to import in. Then you wanna have output photos, we have your renders and different things they're exporting. And then you wanna have a template folder where you can have, like useful setups, maybe views that already set up. You can just use that again. Maybe you have different libraries for different types of things that you want to use, um, for many projects. You can do that by having a support folder having a good structure. Next utilized valuable plug ins. This is so critical, I think you need to understand that there are plug ins that already part of sketchy because they were so good. But there's some other ones out there, so I recommend taking a look at the extension warehouse. Um, there's a lot of free things. They're paid things, but there's a lot of free things. I definitely take a look. And there's also free trials. If you want to do things like rendering or energy working on different types of geometry estimation, there's even, of course, for scripting your own or some plug ins. So take a look at that and find the best ones that work for what your purpose is. Next, you'll really benefit from finding the most valuable resource is this is critical because it's it's easy to just really struggled with a problem sometimes because it's so easy to use ketchup. But having good courses, good books, good forms and community to help you figure out new things is something that could be really helpful. And so, you know, you never know when you're just trying to do something quicker, Um, taking some time, learning it, your own trying out. But there's also some great purpose and finding different resource is, Yeah, one thing I would say for sure is make sure that you are even, um, just, you know, keeping your own particular notebook and that will hit my Knicks. Top 10 is you keep learning new techniques, so this is just keep playing around with it. Don't give up on it. If something's hard, there's an ability to figure things out again. Try new things. Share. You, work with others, get their opinion, look at their work. Give your opinion as well. Then, if you're working with this in your school, your work is your company. You know, try new, different things. I learned a lot of things that I do because there was someone who tried something. I was trying it, and you just become really fast and creative. That's one powerful thing about sketch up. It doesn't get in the way of you being creative. And, of course, we play this course. This is a fundamental guide for sketch up. I've made a certification course, I think find out what other things are out there. Output and links in my sight. But if you want to be really good, you're gonna keep going on. And just to make you excellent at using this and other software and finally Ah, actually, at least this number 10 you should just have fun with sketch up sketch. It is an incredible software. And if you keep some good strategies and concepts in mind, it will make your modeling days incredibly effective.
18. 3.03 Additional Course Materials: four additional resource is from the course you can go always see some of the included material that I'll put with each section. Also put any material that was separate from a section in this course on my website motion form dot com. Thanks a lot for taking the course. Um, you can ask questions in the course if you need any additional resource is. But I pretty much trying to put everything as much as possible to get you started with sketch up. So you do excellent job. So check check the website for new content. Um, also for new ways that you can be better at sketch up and design modeling.
19. 3.04 Styles & Shadows: There are lots of different ways you can see a 3D image. Currently. You can see I don't have my motto on anything. And so it's pretty much as a floating in space. I'm going to draw a rectangle. And I'm going to make some grass. Make this group so I can edit it individually, going into materials. And what we're gonna do after we add this grass and make a little place in front of the house for a sidewalk. And then we're going to start looking at how do we make this will shoot up a little bit. Actually, we'll shoot the site down 0.1. And you have to be careful sometimes these, so I'm gonna move this up. Instead, we're going to first make it into a concrete, polished concrete. Ports. Will actually come up 0.1. Move that whole element down 0.1. Well, actually increase this little pad or executed, or push it all the way back to the back of the house. Come back to our s2. And we have a little more realistic grass. So we will start looking at our styles for how we can have our model. So again, you see our Home tab. We see things that are in the model. We only have one tableview. And so there you see the blue sky and where the house is. But we can also look at various type of satellites from a couple of different varieties. You can link it, how they draw the lines. Materials are here. You know, it can be more sketchy. It can be more sort of computer ish. It can be a little more like watercolors. And also it could just be like a way of showing like various colors with the color sets. Then there's some default styles. Looking at how you do 3D printing and to even being transparent and wireframe. And then also you can look at some photo modeling where you're just really seeing the lines. And to being very sketchy, some sketchy styles. And also to just regular straight lines. Then I can have different thickness. And then you could also look at some of the style builder window winners for this competition. And so they worked with different type of paper. And you actually can also customize some of these styles or make your own style play around with it using the edit command. And I'm not gonna go into that, but there's all sorts of ways to change the background and how lines are. As you get into it. You know, it's something you can play around with and also mix up. For our purposes, we want to look at the Pinto edges. This one of my favorite styles or use it in my terms a lot. And one note about styles. Styles can be saved just like a view. So right now if I click back on s2, it will revert to the previous style. And if I click on the home button, all these little style that I just looked at are all saved my model, but I don't need all of them. Actually could probably delete most of them. The norm one. So yeah, you can just go through and delete ones that are not needed. So it's a very efficient process. You want to be able to be efficient and intuitive as part of your working in SketchUp. You actually load them again to worry it wasn't completely deleted or just made a little bit easier. And so now I have some beautiful lines and I'll actually save that as a new same thing. I can see the difference between the old one and the new one. And as we see this little transition, now we'll go into how you can actually change that. Going into view and animation. We're not going to really doing animation, but you can sort of see that you can change from views, views. But we can actually go into here. And we'll click Disable the same transitions or enable it. And it's really, really quite basic. When you're doing this. I'll go through walk, there's a little bit later. We're gonna take it off for our view purpose right now. And now we can just click and see the difference between a style. And we can go back to our model styles and add something like this. And so now you see the beauty of styles. Now one way to empower styles is usually SketchUp shadows. So shadows are a powerful way of how you can actually look and see how the reality of something in SketchUp with Shadows. Use click in here. You can change the time of day. So the sun is the one generating the status. And you can rotate around in the sun would be in that same place. You can also change the time of the year. And the sun axis is actually, if you look at, when you click down, the north is always towards the top. So if you want to have a different set of shadows, you'd rotate your model. And you can also have an accurate we'll quickly look into Google geo-locate. But if I wanted to have a a different set of shadows, realistically, I could just rotate my model if it's in a different access towards the sun. However, we're just going to stay with this one and there's a lot of fun things you can do. So this is in a pressing Escape out of this, I'll click on like space. If you cook, history starts in your shadows, there's an option right here where you can show this shadows on the faces are on the ground. So I, since I have this a little bit lower than ground, took that off right here. And we can also decide how like we want to writable light, dark, we want the shadows. So we see a little bit of shadow, a lot of shadow. It's all editable right there. And so now that we have a little bit of shadows, what happens when our shadows are on and we see the style. What, what sort of style combinations can we do? We take back and add a little darker for our shadows? You see also inside of the building is going to be dark. So it's moralistic. So we, you know, we can see how it looks and what might be better for showing our project. So after we've got this styles setup and have our shadows, how we like it. We can always save it. And we were ready to share that or develop that. But we can always, of course go back to just regular editing of anything we need. And we can see any of these edits for, if, for instance, if you want to push out are our IV or rake on this side and go back to our render. We can see that it's going to still be in there and we can do. And so you could actually work in the style where you can work in the default viewport.
20. 4.01 Importing JPGs: Sketchup is very powerful, not just because of what you can do in it, but because you can bring in projects and images and match them in your model. So here's an example. As we import some files, I'll first go to Import. And we'll talk about the typical types of things that you can important to sketch up. So right here, I have a few from the models we've worked on, have some different items you can import. And we look at the US imported types. You can actually see you can download 3D files files and 3D Earth Auto CAD file. So it's 2D, 3D and quite a variety of other, including other SketchUp files. So we're going to start, we're going to first look at a philosophe var JPEG. So import it. We can place it anywhere. And we want to have a setting between these columns of five meters. So if we measure now, and this is not to be too precise, we say that this right here is 0.37 meters. So if we do times three, it's gonna be about a meter. Ok? So we come back down a little bit smaller. And then we actually scale it to five. You'll see that a person in this is about 1.5 meters. We F2 test scale a little bit so we can make sure it's correct. And that's the same thing you'll deal when you import your jpegs. And we'll see this a huge loss to be about 1.1. And so it actually is pretty accurate. It's a big house. It's a very big house. Might be a little bit too big. We look over here. So your import, sometimes it's easy to make it bigger. So this is still a bit large. We're going to actually make a five-by-five. And again, you can make more precise. But for this, this is just really trying to make a quick model. And so we'll make a polity. We'll put it right here. We'll make this a component from the start. And that's the same thing as a column. And we'll just move it, will actually array it and move it to the other side, divide by four. And then we'll come back around. And we'll do the same thing down this way. Before. We have that five by five grid. We're going to trace this outline just a little bit. And again, like make sure you reminding how you can get more quality images. And this one is, it's very basic. But having a center is one of the important parts of me. Because if I can get the centered, I could be more accurate with our model. Doesn't matter the drawing. And now I'm going to come out here 0.8. And I'll move this up and do this out. 0.8 will go up. But our focus would be probably this line comes across. And you can actually do arc. Though, obviously, having a good center. We'll see actually little more precision. We'll change the resolution of that segment. Maybe 32 will delete this line and this line will move this up. And we just want to show we're not trying to make the whole drawing from there. But in terms of what can we do after this inputting a very little information from a 3D plan that's made red on top of a jpeg. And we can just use our typical dots of how, how high these things might get. We can put three meters up these and now we all should this part of our building group. And we'll come over here and we're just gonna do the outside shell. Will come from here to here. Will, should that up as well? Make that a group and we'll rest that SRE on top of. Actually, since it's not yet to make sure that we have our center, this is a little bit broken. Now we can do it. Take that center of their match this under here, and we're almost there. And one thing this model has also is it has our little corner pieces. And we'll look at a, a picture of this Philistine wall. See what we're looking for. And so now we see that we're almost there. You probably want to draw a little strip. And we'll just actually, for our sake of speed, just put it on here and make it maybe a one meter high little strip. Make group. We're going to come and make it a material that's probably darker than the rest of them, model centered. And we'll make sure we're on move. And we'll come back here. Limit point will come out to be 0.05 meters. Come down two meters. Now we'll take this location. We'll come back over here and make sure we're covering it, press control. It's on the same phase. And we'll move it in 0.11 way to make it easy for yourself is going to copy this. Figure out the size on this face. Probably just be, take it from this point above c, it's and rotate and degrees. And to orient for this, we're going to put a center line, go straight down. We'll move our fine arts center line for Sarah line for our little window bar. So now we have an ability to match these center points. And we don't know it that we want to delete this. We see it's a little bit too much out. So we're going to actually measure this one, 1.43. This one is 0.16, so we'll just go ahead and move this 0.30-five, actually, 1.35 to 1.25. Similarly here, 1.25. Alright, so with this we see our basic of our villus of war. This looking at a mass. Nothing very complicated. And you can do this from anything you'd Important to the SketchUp, just scale it, make sure it works. And actually all the Google Earth also imports. So the answer is we can always say that after we finish with it, the law JPEG. And it saved.
21. 4.02 Importing CAD: We can also input into SketchUp from a wide variety of other CAD programs. And one thing we'll import, as we've seen, a image that's maybe not so precise. It's a more precise philosophy law. In cat, we import a note, tells them information about the imports that we can use or maybe probably often will not. And now this is a lot more precise. We look at this model, we can see that probably have a more accurate sizing is 191 2N, 21.5 years. So that's, that's really helpful. That helps us for what to work on this model. And one great thing about this as well is you find different models. On lots of times you have the drawings with a section. So you can also get accurate information about how that building is working together. So from here, all the great things is you actually can go in here. And the sum of the direct lines gives you an access each individual line. And the only challenge, of course, is to make sure you're, when you're making this model that you're not going to be selecting every single one because that's a mistake some people make. As we import this, trace it lot more accurately than our previous model. And as you can see with this more curvy roof structure, 11 thing we can do is we can go ahead and just copy out that area. We use the top view. And if we look at the height that is in the model, for that area, That's going to be about three meters. Let's go ahead and delete everything that's attached to it, not the model itself. And we can of course add some of that later. As you can see, it is all coplanar. It's immediately made into a surface. And we know that the keep this one. Let me just make it by itself. And we can even take out some of the things that are in here. We just come up three. Immediately. We have a part of our model that would be otherwise more difficult. And so we can import anything, can use geometry directly and we can come over here and say that we feel like some of the lines we see here. We can immediately just start to draw and create surfaces. And come back over here. To the same rules apply. You'd have to really be going in bit by bit and inspecting the SketchUp model. What things are accurate, what things are not. As you see right here, we actually are taken away some of the sides and that's probably not good. Because if we look at our references for this, each of the side has this ribbon window. So one way that I found useful, unless you just drawing a circle or you can just really just measure. It's about one meter out. And so if you look at that as a reference on both sides, see that's there. You can just double-click this particular portion. I think that's a good way to do it. And you click this. Now you have this separate from all the other geometry. Come back over here and draw it in full. And then you draw your line to separate out. You can take everything you have here depicted over here. And another just cool little tip is you only have to make a few sides. Everything else he could just duplicate. I'm going to turn off using hide. I'm gonna go ahead and select lines here. And I'm going to use circle. So to love to use. We have a little 45-degree. And we knew that there are topics coming up three meters. And this will probably three meters as well. When drains up one meter. And this go lee up three meters. And one other thing, I'll take this one grain that up three meters. Actually went out of two meters. And the way we'll do this one, we'll come back over here. And I need that little line. Come up. Press control. That'll flip those vertices. Three, come up. One, take this. Come up. So we have two of us sides. And easy way to just get the other sides. This link at the top view. Top Kolkata again. Select this. And we'll actually use a little reference line for this. So we can get that precise point. We'll just take all that and come back over here. So now we have that this duplicated thetas clean up any actual lines. We can also use this. Make sure you select the proper lie that you're trying to delete. We're only concerned with the ones on the outside because you're just looking at that. Or do or above you. Again. For our reference, we're going to draw that top-line. Good selection. This go on axis til we get there. We see some things that are little bit disappearing. So we're going to fix that. But I do wanna make sure that we're straight and we are well erase more the duplicate geometry and make sure we have all the missing geometry. Got this line coming up. One reason why this is not hitting properly, because it's four lines, could be it's not even. So probably wanna do that again. Just simplify this. So we definitely want to have things precise. You can actually go above. Take this entire bottom side, copy it up. Rotate it 90 degrees. They will have like a perfect joint R3. And we didn't lose anything, anything in the process. But we have a lot of duplicate geometry when the tuple lines be aware of. And this is again, the challenge of working with these. So be prepared to work when you import a cat plan. But at the same time, you're gonna be seeing so much more than what would have happened if you were modeling everything from scratch, which a lot of architecture students and design students probably remember very well. Alright, so now we have our sides and it's gonna get this last little corner. Come back here and deletes possible conflict in lines, which they're probably almost the instrument font. Which is a great reason to start from pure geometry. Note to self. And will actually even this, this line directly. And it looks like that will solve our problem. But we move in this two here. Put it straight back in our proper location. You can extrude each layers. And the same sort of way that you might want to actually start using your own geometry, drawing on top, rather using theirs for most of this. But of course, when you look at more curvy shapes, you can use those for reference point.
22. 4.03 Importing 3D Files: Another great addition to your scheduled models with importing is importing 3D, which is can be the most fun, all the most dangerous. Like I said before, importing components is also importing 3D. I've looked on the 3D warehouse for some items to import. And then there I saw as an interesting chairs and tables. So you can see as well. And while you could important your model, go ahead and show you what happens if you import from another location. So we import just like you would import it a graphic. So this is a name from three warehouse. So one of the great things, well, some things are there to scale. So this box is us about 12 meter zone as well for torso, feet, about four meters. Now I want to import it some of the chairs. And so one thing happened when I import the chairs and import spurt Shauna clave is this is all out of scale. So I'll have to do the effort too. Get back to scale. And knowing that my seat height in US is about 18 inches and that'll be about 40.4 meters. I'll use that as a reference so I can scale this down to a more reasonable size. But after that you can exploit it or use it as is. I'd like to probably use this one. Polygon I use the plan view. Look at this. Be careful what plane as normal. Because every object point, it could be a right axis with around. So be mindful that rotating it 90 degrees. And my love, my seat height is good. And that table height, let me use our measuring tool, t. What, three inches. So it should be correct. Now we're a little bit and wall. Let's get back to a better location. Okay. It's about three inches. That's good. Let me make sure that our c that is what we want it. One foot four, okay? It's B, should be a lot like this group should be a lot higher. That's the one thing. You never know what size these imports would be. When you get it to RightScale, like sum, product manufacturers, they all have their models in SketchUp. When you get it to the right size, you can have a really nice scene. And one thing I'll do now for this. I'm actually gonna go to the top. I'll get a little bit of a center point. I'll use the top of that table. And one of the things about the table analysis actually made nicely so you can't see the geometry, but I wanna see that geometry. And that's again, another little interesting thing about working with these imports is how they're made. Are they really super smooth? So you can't see the lines? See, now double-click it and I see otherwise. Triple-click did. And I could select an until my clients. Now, now that I have that I can get my center point pretty easily. I go above cuz they're not precisely centered. I'm gonna go ahead and move them to the other side. What we can do is make sure we just put this our chair number edges of a chair to a little bit point. Again, precision is susan is pretty valuable for a lot of people. So that midpoint. So now we'll just come down or any point, a blue axis on the face. So we know that chair is centered. Pull it out. Put over point. Copy 0.5 over 0.5. Actually, we'll just go ahead and move it over. So we are working in feet for this model. And we'll go ahead and move this over. And one way to make this even easier is get are accurate center point. But again, this is furnitures. We don't have to be super precise, but you can see, you can, you know, that's something that can make it very useful when you model. Okay. And it's there and now have imported set of furniture. And you can import any 3D modeling and import buildings. You can also place an object which is done by when you as, as opposed to just regular importing it. It's already in the model. You can always right-click and make these different components. If you have not edited out of the object where I have exploited these, so it's no longer referential. You can always go back and reload it. So I can make it back to the original settings. So all the lines are gone again. And you can do that of course, if you have multiple buildings and a model, et cetera, et cetera, that's how you can use importing in 3D from several programs.
23. 5.01 Follow Me Tools: Now we are looking at how to use one of the most popular tools on SketchUp called the follow me tool. You'll find it on the Large Tool Bar. And it's run under the push pull. It's called follow me. And the window you see several different forms and we're going to show you how Follow me works with them. And actually I'm going to even do a another profile line. And I'm going to show you first what follow me as I'm going to draw these lines, and I'm going to draw a profile. So you see that the profile here, it's just me drawing a line and makes a surface. If I click this line and I click, Follow me, click on that. It's extruded. And this is the back face, so Triple-click and Reverse Faces. That's a executed face for a Follow me. And so if it can extrude it ne profile along a path, what, what are the limitations? Well, the limitations first is these have to be exploded. So this was a group and we'll go back and make a group out of this. I can't extrude a group. Again. Follow me with the group and it looks like a shrewd. But when you start to say, I'm going to explode this, I want to do this. You can both click the line first or you can click the surface. Those both work. And if we say we want to copy this profile to this form, we probably want to rotate it. So moving the way we want it, I click on the path. And I click on Follow me. Sell it follows that path right there. And right here. You'll see that it's going to follow that path all the way down. It'll follow it up, it'll follow it everywhere. So we click on, actually, we're going to click on the line, which is our path. That's what it's called. And then we'll click on the boolean. Sorry, the follow me. We just click on that surface. And one reason why it showed up over here is because of where the profile was. If you wanted to go along this axis and not be moved, we probably want to do something like this. So it's perpendicular to the line. So now we're Triple-click and we'll make sure not to select profile. So they're actually, it'd be attached by SketchUp stickiness. But we've separated them. So now I just click that and it follows that path. There you go. So now the question is, you've seen that you can actually make a follow me without actually being connected. For instance, if I took this profile and I said I want to use this arc. And I said I wanted to be more resolution. And then if I said OK, let's selected, let's do this. Curve c, It's not even on there. So that gives us even more applications for what if we want to do a curve on a curve? And this be familiar if you've seen some of the cool ways like SketchUp doesn't really have a sphere dysfunction. But if you do this where you clicking these, and actually we're gonna make our profile. So we click will delete the surface inside, will make its probably 48 resolution. And we'll do our same Follow me. And note that somehow you get a little warning message. But we have created a sphere using the follow me tool. So I would often naked into a group. So if I want to cut it in half or something, I'll just simplify it. Because when the geometry starts affecting other geometries or they can get sort of wonky. So let's also say If we want to do something like making a path on this top of this surface. And what if we, if we wanted to maybe come out a little bit? Now? You have to be also mindful that your profile touching this is going to affect how it operates. So I'm gonna make sure to include this line. And we're gonna do fall again. And nice. It's, it's made this little cap. Now if I undo this and I forget to the fact that it intersects. And the idea is you, sometime you want it to be closer. You do this. You see it isn't complete. So you mine that when you're using your Follow me, what lines you've chosen also, you could simply start on the profile and it automatically understands. You can even go down yet be careful. Again, careful where it goes. You have to be careful on that was we'll try that again. So there's ways that it can just click it once it will only go on that line. You click it and hold it. And make sure you're not selecting a mixture, you not to lithium the wrong geometry. So that's a great reason to use a group in the situation and hide the rest of the model. So nothing interferes. And we want to go around. And it's just like riding a bike. And if we want to do this on a curve or just copy that profile, you want to put one of the edges long here. With the same thing as when we made the sphere. We can select that path and click this. And there we go. And you can use any profile and the profiles had to be flat. But it can have any sort of some form. And that way is it doesn't even have to be closed. As you seen, I've I've done close profiles. But if we took this backwards, we can also just, well, it has to be a solid lego saying. But it can get pretty close to looking like a line. That was just a line. So that's the something you can do. It's and again, it's good to make sure you're making a profile and 11 axis. You can get it really thin. And you select your path. And so it looks a little closer to being very thin, but it does have to be a surface that you're using the follow me tool and it takes a path. And so that's some of the ways to do and to not do a Boolean, which is a great powerful tool.
24. 5.02 Booleans: With SketchUp models. As in most 3D programs, there's a time when you, of course, want to start getting some really complex geometry. And SketchUp gives you that option in the form of using boolean geometry. That means we, you add, subtract or intersect surfaces and also in terms of intersections. So any geometry you have in your stage, nice surface, it intersects another surface. I thought I'd start by showing you a line. So you can see some of the basic concepts that also play with 3D. Whenever you intersect a surface, it divides. And if you just delete that line, it turns back into a regular surface. And every time you put a line through another line, if it's not in the group. If it's in the same plane, which this one isn't. If it's in the same plane, make it a different line. And what I, what I wanna do with this one, it's now connected. And so the same thing happens unless I press copy and make another one. Same happens if we want to, for instance, take this geometry for this roof and this sort of Gable of architecture, if we want it to move these next to each other by the center. So now these are sort of joined. When you Triple-click, it selects the entire form. But say that you wanted to move this edge. Again. Now you see that there's this sort of connection. It's sticky right now. But we don't see the intersecting edges. And so one way to do these sort of things and what, for instance, if I wanted to take out this part of the roof rather than this part, is, we can select the whole part of this material and this object and we can right-click and click intersect faces. So all of this election is pretty much what can be intersected with. The collection with model is when you're working with groups. You can intersect inside the group of things that are outside of it. But I'm not gonna go into, Go ahead and intersect with selection. And now you can see now that we have access to this, this line is divided. If we wanted to take this out, for instance, and even remove this geometry. So it's nicely renderable. And we just go back to our view. We can see that this is giving us an interesting form now. And if you even wanted to make this larger, we get, say, all these geometry that we had intersected before. We can take that down. And I have two of these. Now, mind if you try to do it again. If it's too close, geometries will be sticky. But if we copy it and it's far enough away, it has a different set of order. Alright, so that's using our Intersect tool to sort of add something. Now let's see what happens when we intersect and might possibly want to take away. So now we put this box with this. So now using stickiness, These are pretty much one surface. So now when I take a part out of this box, that's all I needed to do. And I could do this as many times as possible. Mind that the more services in mind that in a model, the longer it will take to load. So what about if we want to do an intersection with something like a cylinder? Well, I'm going to show you two different varieties of how to use intersection with these two. When I make these a group. Now show you the method that I'll show you to do these things that we just talked about. And I'm going to open the solid Tools menu. So first of all, with this, I'll just show you how to do it with the native program. We're trying to get this to go over this form. And we're not exactly large then it yet. So I'm going to, I'm going to select this. And we'll select this and I'm gonna go ahead and make them wider. And we'll go ahead and do this. Focus on these two objects. Here. I'm just going to extrude this form over this cylinder. And I'm going to delete these edges that are not of that much importance. And I see right now that it's, it hasn't really intersected yet. So if I just do that selection box and do the same intersect. With selection. And I take this off and this off. Immediately. You see voila. We've intersected with the surface. So this is one way that some people will make a intersection to a brown surface. Now, what about if we want to use our solid tools? So what is the solid tools about? Solid tools does similar sort of things. But as you know, as you know with groups, groups do not display stickiness. But what you can do and will make a copy. So you can see some of the varieties of booleans that we can do. Is, you click this as our first surface. So the order matters. We click this and we click our r. We're going to start with a subtract. It's attracted the first surface. So we can also do this. This will be better if I move this out so you can see what's happening. If both of these have like some overlapping geometry. And I'll show this one. And the similar way. You can click both of these. And you will have a outer shell. Now there one object. And then you can click on these here. And you can also have this option for intersection. So that took the intersection of all those masses. And so you have the Europeans that outer shell intersect or union. Union is going to combine the solids and we'll keep the interior voids. So I'll show you what that looks like. We took these union. It would it would have to be a little more complex of an object. But I'm going to show you what things you can and cannot. Mind that there's also a trim option and the split option. And those are pretty much a little more complex geometry. I would start with the basic. But when we're looking at just basic functions like for the intermediate and beginner, I think these are some really good things to practice around with. But I'm going to show you what you can't do. This right now, is what SketchUp will call with the enemy menu a solid group. So this is part of the whole complex thing. So don't get too much into this for beginners. But I will say that be very simple about your models. Because once something like this happens, if I say, I want to maybe boolean or union, it would say that it's not a solid. So be mindful that if you're extruding, are making forms, that they're very simple because we start getting complicated. It's going to give you that error. So these are simple geometries that work with the Boolean. Whereas of course, if you exploded these and it would still do a form of that intersection. But yet probably Triple-click intersect faces with selection. And now you have the ability to take that out. So if something is a little bit complicated, there's always several ways to do what you're trying to do. So now I have these gable ends and they are something I want to join. And actually, now that I have these two, I'm thinking about an interesting way of probably getting intersection. So now you can see that we've made this very simple, yet beautiful shape by intersecting those. So there's all sorts of combinations that can be made using solids as groups and solid, solid groups, or by using the intersect function. And I've saved this for last, because I have these two forms. I want to show you how you can do that with the cylinder and that angle. And what I'm going to go ahead and do is going to make a copy of this. And with my copy press control, I'm going to go ahead. And just by taking that top surface down to the bottom, I essentially have now made a parallel surface. And what I wanna do is I want to subtract this from the top and the bottom. And there you go. Now I have an even more interesting shape. And that took a lot less steps versus deleting all the surfaces and the leftover geometry that have some intersecting surface. So these are some of your options for working with Booleans and intersections. In SketchUp.
25. 5.03 3D Text: 3d texts can be made in SketchUp, Which can be very useful if you're making a sign or some sort of tool in your drawing the models. It's very easy. Since you see I have this 3D tags and you can make something just like this. So all you need to do is go to your Large Tool Set and press Delete texts. And so I'll just say jazz. So like normal editing software, you can choose the font. You can choose the alignment if it's filled or extruded. It could just be the lines. And it says regular. Choose the height. Just lines. Or I could come back here, say jazz, and both have it filled and extruded. And one thing about this tool is that it is made to be easy. I'm going to draw a rectangle. So I'm an angle it. So if you wanted to make text a surface scattered automatically aligns it to that surface. And one of the challenges for sure is a o stay on that surface. You just have to get it off the surface. You can rotate it. So that's really useful if you're just really trying to get something quickly into a place. And then as you solve for this is a solid. And we use solid all the time. If we make this objects is solid. And see the detects and the solid. Straight useful even though it's separate letters that sort of tell you a little bit about it. It is a core function. We're just gonna take the midpoint to locate going down. And so that's one of the reasons why we can't go down is that it's locked to the axis. So that's one of the pluses and minuses of SketchUp surfaces that now it's aligned to the image. So if you want to do something like maybe subtract it, you're going to have to exploded. And if you make it a little bit again, it's still only solid. But now you can move it freely because there was constrained to that surface. And so if you want to say, I'm going to subtract it with the solid tools. They yeah. And so there is your SketchUp texts, some of the unique features about it. An interesting way and how you could use it in your project. No matter what angle you are using.
26. 6.01 Animations & Layering: When we work with SketchUp and we want to get a little bit further with our views. It's useful to have some of the abilities of easing layers. And also that's sort of part of the views and layers are how the builtin animation works. So let's start by looking at our layers. And then we'll go into a little bit about both animation and also looking at working with views. So we're going to look at three different thing when I look at the layers which actually sort of split between tags, tags and between outliner and tags or what needs to be layers. And outliner is looking at every single object in the in the program. You double-click. If you click on it, inside of it, it's the same thing as clicking inside of a group or a component. And so you can digitally individually take something off or on. So right now, we have no, no tags in the model. But if you want to start saying, give I make this a group and I say I want to put all my trees. I want to have them relate to each other and have the ability to turn them all off at once. Could easily just say, let's make an, a tag for trees and turn all these into the tree tag. Well, now we open it, we can have that. And unfortunately the these items that were part of the exploded Sri yarn included, but I can just select them just like that. We have our trees, one layer. And now actually we could even put this on actually layer and it really be to stay vegetation layer. So if you ever just want to see the house by itself would do that. And we could do the same thing for any of the elements in our model. For instance, if I wanted to write now I have everything the same layer. But again, I was speaking about before. What if I took off and had the roof separate? What if I just made that a its own component or group? Or press control now too. And then we'll go to actually use the material. I'm going to right-click and use the out button, sorry. And the IE driver picks up the material. And now I'm going to come in here. And now we have a solid roof right there. Now, I'm going to make the house solid. And we'll hide everything else again. And we see that now we have the ability to maybe take off the roof because we have it in a layer. It's still there. But I said if I want to make a tag for the roof and select that roof. Right here. We can always say, well, we want to see are inside arouse. Or we could say, you know, we only want to see the river itself. Now one problem with that is, is the default layer, the default tag, the one that's currently selected. You can't hide it, so you'd have to double-click on one of the other layers. So then you can see, you know, if you want to look at them or isolate the trees, or if you wanted to isolate the proof. Now, one note, and you probably don't want to make geometry on other layers other than untagged. Because right now, obviously every untag is everything. But if I come back in here, like it's recommended to tag the groups, don't tag the individual geometry. If I come back in here and make this actually the house that we have that then I add one for the windows and doors. We can keep things from getting too confusing. So and these windows and doors could all be in the windows and doors tags. So now I've see me turn this off. It's not going to affect fat because these entire objects are on this layer. Let's bid a bit unusual how that works. In previous models. You couldn't leave on untagged. The base layer would turn off everything. But in terms of having everything on its individual layer, that gives you a different control over your model. Your whatever is the current layer can't be turned off. So all right, so that's looking at our tags. If we look on the layer of the working with this house and looking at our outliner, the outliner shows all the groups in the model. And the value of this is that the post to a layer. Which has a lot of different objects. With the outliner, you can choose the object explicitly. So if I want to get to this window right now I can see, OK, this one goes here. You know, if I can actually look at the element I want to choose in case it was hidden. And I can work on it right there. Now I can do this. I can break into it in terms it in make it a this operate with it. You know, that's, that's what you can do straight there. Using the outliner I learned helps you organize your model. In case you want to say different groups. While it's not a component that I'll repeat, it could be a group set that I want to have unique. So I could come in here and say front windows. And I could come in here and say, make this a group. I double click the twice windows. And you can already see, actually it would be even easier if I had the windows first. So that goes to the model and say, oh, I want to look at the front windows. I want to look at the side windows. Your outline our lets you see the generals of what's near model. And so that's a very useful way of working. And that's using an outliner and that's using tags. So now let's look at scenes. So right now I have forcings and I have a transition setup, the go to view animation. So you'll have to have a transition and it will stay at each location for 1 second. And I'll go ahead and put at the point. You see Kant put it less than that. So that's, it's only, only full members, so mine that. And we're gonna do actually two seconds transition. And so with this, you see that I've set up very far out view, setup a closer view. I said a few to assign. Left set a View High. And while it's nice, it's sort of coelom view. There's also an option of just playing your animation, that's what they call it. And he, this click Play. And I'll start from the scratch. And it'll just keep repeating. And so that's a useful way of dealing with our, our things as a, it's not a full animation where I just select the path, but it's still very useful. And one thing that whereas we can incorporate looking at these different views, is we can always add a another view where we might say, let's change the tags. Let's turn off the roof here. We can say that view. And now we get, now when we click play, we could have a diagram and have words and such. So it's, it's a very useful tool. And you could also have layers with different styles. The animation process for this is not precise. So the update the same play and it moves to this, you see it change the tag and then turn it into another view. So that's a useful way of how these all integrate together to help you control your model and really get some very interesting views for sharing and exporting and understanding your model.
27. 6.04 Section Cuts: For those of you who want to know how to do one of these cool features that I showed them, my intro, it's called the and I use it a lot for my modeling. It's called the section tool. And the second tool is accessible from this toolbar. You right-click and click on section. So a section is pretty much a cut through any geometry. And one of the cool things about SketchUp is that it gives you some functions on your section. So you see one currently, this is one of the section planes. And we have an object and I made a object inside of it. And you can see that it highlights this section. So we're going to start from the beginning and then we'll go onto what you can do with these. So I've modeled the house, Little House Form. And inside I have a box and some going to add that right back. And so you see both of these are, these are not groups. So I'm gonna go ahead and make it a group which is not necessary. But I'll, I'll show you why that's important in a minute. And so we want to make a section going through vertically. We just click it, give it a name and a symbol if you like. And so now this is the active section plane and you can move it by pressing M are. And you can see different sections do the house. So what can you do with this section? Well, from the viewport you created with this creates section plane. You can also hide it if you want, if you want to make a diagram. You can also display the cut or just leave the plane in there. Another thing you do is you can play feel. So one thing about feel that's important is if you make a group inside of a group and you want to try to fill, it won't work. So they would have to be in the same group without being an a layer. So that's a little caveat for working with Section Planes. We're just going to explode that. And so what can you do with the Section Planes? Well, I'll get to some fun animation features, but you can rotate them. You can also right-click it first. If you want to make it active. Or if you want to reverse it, you can align it with the view or the line, the view to the section cut. And you can also create a group from the slice. So I'm going to turn on this display section, fill with a create a group from the slice. Now while I have that view, I can go ahead and hide this object. And I can bring it back up and outliner. Now I have a section cut. So this is obviously not as cool with a, with just a simple box when they go to the outliner to reshow that. But when you start thinking about a complex object, for instance, a building with mini rooms, et cetera. Excuse me. Yeah. And when I add an object to the stage, the section code goes through everything. You might want to turn it off so you can see things. And also if you want to make it straight, it is sort of make a line. We're gonna change that to the inference. And you can make multiple section planes as well. But remember I made that cut. So when I hide this, you can see my little cut. Let's make another section plane. And we'll call this vert two. And both of these can actually be active. And so one way to have that clearly operating is to set that in a view. And we're really going to start with there. So that the interest thing is they can't both be active except for in a actually view. Pretty much cut the view. So I'll correct that statement. One can be active if we save it as a scene. And then our next scene, we make another one active. And we'll flip it. And you see how the section plane can update to that one. So that's one way of using sketch section cut. If you think about when geometry of a model gets more complex. Or if you start saying, Oh, you know, I want to have two houses, you'd get all of them and their relationships with that simple feature. And so you can do a very interesting animation also, if you have animation of one Section Plane, update that, and add a view where I'm going through two, even if I just go through the edge. So we're going to actually, the way to do this is actually to make a copy. Okay, so we will make this the active cut update. And you'll see it going through. And so a cool way to, to make this into an animation to get with a particular view set. Hide this. We add our first one. You might want to name it something unique front. And then we'll go to the colored section cuts. And we'll make that an active cut. And we'll add this. And I'll just call it back. And we'll hide our section cuts again. And while I have all these scenes up, if you want to export this as an animation, you probably want to delete the extra scenes. This testing it out. And maybe of course to edit the animation and the settings. Maybe 15 seconds as transition. And all we need to do is press Export animation. And it will export that animation for you to show how cool you are with CHF. Alright, I hope you've enjoyed the section. It should be a very fun addition to your modeling.
28. 6.03 Geolocate: Scatter paths, some nice Dalton tools. Also the helped you get more realistic. And, and those are the photo match and geolocation tools. I'm actually gonna start with the geolocation tools. And we're going to use an example for finding out a little more about a location on a, on a site. So if you're doing a project, might say, hey, I want to see how a look on side. And it will, it will do this. Now show you as we look at it. First you go to a farm and you geo-locate it at a location. And then we do this. Immediately. It loads in a map your address. I use this address a lot. So this is X X1 Madison Avenue and Memphis, Tennessee area that I know well. So you see there's a level of detail typically goes in and for the closest detail. So I want to get this area. And this tool helped me import this map into sketch up. And when I imported at to get the map type, you can also choose just shown streets or each of the cell and image. We select a region. And you can change the size. Which center it has. It says it can tell the boundaries. So there's a couple different settings you play around with. So here we have it is scale, map, location. And so what do we do with this? Well, thankfully, because of Google Earth, we can also start finding out a little more information about the things on here. But if we just basically want to say, okay, this is a site. Maybe we can go ahead and giants and rectangles. If you make it into a group, a group, go inside. We actually can rotate this group. And one thing to notice before we added anything is that this is true north. So if you go down on the view command, we can minimize this. You go and look at the views. North will always be going up this way. The top is where north, south is going this way. Then West is nice is this way. And when this file is important, geolocation. It is automatically going to be pen down. See, can't move it, the press M. So you have to go to your default tray. Scroll up. I'm going to pan out again. Click on it, and you can unpin it. So we are going to be losing the North. But if you're not using that, it's fine. One benefit of that, of course, is you will preserve your location. And I'll actually start with a little bit of the masses are going to go on this mass. So you can't see it from outside. I say sort of distance. This is just playing around with masses. But I just wanted to throw some boxes along and scattered is great for this sort of thing as well. You can go to a process of sketching all the lines. You probably want for sure things to be diagonal. So I would say one way to cheat this for you is to pretty much get those edges for your map in an even, let me just do it this way. We will unlock it just for the purpose of making a copy. So we already on market and we're going to rotate it. And so we had a, an accurate orthagonal view. Because right now, drawing the buildings here, I can copy this, but it's not going to be the same as if I just came and each one of these little rectangles. And more or less, to start drawing the profiles. They see going on there. Draw how it looks, names, you need to rotate it. You can do that. The common here, do the same thing. The size here. So I could set a bit of a arbitrary height. Each one of these And this doesn't have to be accurate. But ideas now go ahead and say, let's, let's turn these into a group. And all we need to do to be more accurate, take this group. Let's put it right next to this previous group. And it's generally going to get it to where we want it. And we did a little bit further. So you delete one, you see this? So now let's be notices about a city block. Now we turn on the shadows and the geo-locate. It's going to have accurate shadows. So you see the sun rising in the east and setting in the west and see what it is throughout the year. So this is useful if we're trying to have an accurate saying, oh, if I want to build a new building here, and I want that building to be told and everything else. And I want to move this down. Then surely that will help me understand what's going on throughout the year. And that building also by using the context. And to get an accurate view of what's happening in this site. We're going to say this is our test geo-locate. We always can go to looking at Google Earth. And Google Earth, we can go to maps and maps. We just Madison Avenue, Memphis. Four. We see the same map here. If you want to see what's actually happening. And say, this is sort of the actual situation. And so we just adjust to what we have here. And so here's another cool thing that we can do, even with Google Earth. We come back out. If you see a building that we like, maybe this building too much. And we say, hey, you know, maybe I want to take this image that we use for photo match.
29. 6.04 Photo Match: So we're going to use Photo Matt to below more accurate one of these buildings from this site. Okay, so this is a area, it's in Memphis hometown. And I wanna get this image and make a little more accurate building. I use often view for a lot of graphic functions. I'm going to press C and get the the current window. So whatever you use or if you're using a photograph, that's great. I'm clicking here. I got this. Alanine is this part of the building. Or I can save this Desktop. And I'll just say perspective. And if I go in here, and having this is great. But I know the building I'm looking at. Some of these is, is probably right here. And go back to the map location. So if I draw a decent footprint, I did my little modernist building there. You can go ahead and hide most of the model here. Or I can actually do this in another file, but, but in general, I just connect carbon here and draw this box is going to draw a perpendicular. So that's solve one headache. Copy that. I'm going to say new takeaway or model. Now we want to draw in perspective. And we can get that tool, my photo match to them the camera. And we have several folders we could use. We're going to stick to what we're trying to do with this and add this photo match. I'm gonna go ahead and set it up where this corner, this building is going to be our control. So what you see in the photo match is you see pretty much perspective setup. These green axis. It goes to this point that read these two lines go to this point. And you're trying to align the axis lines to something in the photograph. So you need a photograph that has enough sort of perspective information. So that's one great reason for this photograph. Even though you can't see everything, you can see enough to establish a perspective. And so you get as close as possible to the real perspective. What you see is pretty accurate. And then you move the starting point to something like this. And then you say, you right-click. Done. We're gonna come back and scale this correctly. But for right now we're just going to copy that little profile N. And so one thing you see right now is you're saying it's hard to see things. And that's because we have this capitol where at a particular view angle. So if you remember, when we press z, we have a field of view. So this should be as very wide and it's gonna make a little bit harder to edit. So I'm going to make the field of view 35. And as I've copied this, I see that it's not exactly at 0. So I'm going to bring it down to 0. I'm going to rotate it. And just gonna lie at the box, that the building is pretty much a box. So it's gonna be a lot easier. If we go back to this photograph. You see that it's on the other side. So that's going to be something we do as well. Let's move this to the right side. So we see a bit of a profile where a little part comes out from the side and I'm going to use this as a reference right here. We're going to extrude up. And we're gonna, we're gonna shoot up. We using inches or now. Again, you can use a calculator, but excludes up about eight feet. We know from that that we need to edit the photo. And so we're going to edit the match photo with the match photo dialogue. It's an SRE toolbar. To edit it here and edit it cell that recognizes a proper scale. Okay, and we're going to measure again. Wanna say done. They'll measure T. And it has a more accurate scale. Okay? So now that we have this, I'm going to actually use some construction line to help me delineate. So this comes out from the building. Maybe about one foot. Doesn't look like it's square. Could be wrong. But I think it comes up maybe 12 inches or foot. Now we have. This building. So you're gonna come up to here. We see that this goes up a little bit more than that. So they come down here. I'm going to make a little square up here. So this is a little tower that comes up in combat perspective match. So now it's created a skit same. So we have a little thing on top of there. We're not going to worry about that for now. The front, which is probably a parapet, goes up further. So we're gonna take this down. We go bad perspective. So it's again, we're using this work new view, help us orient ourselves. Just making sure where everything is. And i took away that phase so I could pull this one down. And now we see this line was here. You don't need that. And after we done this, we see that this is a little bit too far over. So again, we can always be scale this to the plan. So that was very useful to get the Google Map geo-locate size. And we can of course scale this as needed. Alright, so now we have this pretty much scale. And here, so here's the nifty feature you can do to make, makes. The next level is going to go ahead and make that a group. We're gonna right-click on it. Right-click you look down at the bottom of the pop-up, says you can project the photo. So we're gonna click that. Now. We change it. We see that we have pretty much the elements for that building. So this can be done. Let's go ahead and copy this. Copy it and save it. And we're going to say this is building one. We're gonna fix it. We're now going to go back and do a whole load Kate file. We're gonna import. Yeah, we'll scroll down to our building one. So you can either copy it and are do it this way. Right now. This come back over here. And again, the map is more accurate. So maybe my dimension was off by a little bit. We can go ahead and this scale it. And then come down here. We could do that for the entire site. And so you see how we can get very accurate results. And we've seen some of the interesting models on SketchUp. Google Earth. You can get a whole site and realistic. Just no simple steps.
30. 6.02 Using Extensions: Sketch up has a lot of power in itself, but it also has a lot of power in terms of the type of add, add ons and plug-in that you can put into your project. And so I'll show you some of these add-ons. Also, some programs that actually come with SketchUp. And you can decide if you want to learn these, these are more advanced concepts, but I'll definitely show you how you can get started with these. So we'll take out the little model. One way we can actually start to see some of the built-in tools is by going to our or window and we can look at our Extension Manager or the extension warehouse. You click Extension Manager. You'll see the different types of extensions that come with SketchUp. And these are some dynamic components used to be a separate app and now it's part of SketchUp. And I'll show you a little bit of that. But also there are some things that you can actually find on inspection warehouse and extension warehouse was right near the 3D warehouse. You click on that and it'll take you to all sorts of extensions to do some of the types of things that we typically have done. For instance, if we're looking for an extension to make some architectural features, click. And you can see different types of ways to work with the camera. The subsea make sections. And so some of these are simple, some of these are really complex. There's also extensions for curves. You want to make better geometry. Some extensions that help you make different types of curves or curvilinear surfaces. There's also extensions for different energy analysis. Interior design. Pretty much something that helped you have a more effective program experience for whatever you're using SketchUp for that, for businesses, for construction. You can find extensions do that. Now built into SketchUp. There's also a way to sort of make your own. This is extended manager. There's way to make your own plug-ins. And I'll show you layout, which is another built-in, It comes with SketchUp. But if we go to the Ruby console and from the window file drop-down, you actually can type in your own code. And that's of course a more advanced concept. But if you want to do Ruby, that's the SketchUp programming layman language. Just gonna type in Ruby programming. Sketchup. And you just put that in your browser. And it will, there's all sorts of tutorials and I also do a coarse upon that. But SketchUp pretty much gives you some basics to making codes. And you can see some example scripts here. And there is a wide variety of things you can do with both SketchUp and this. Ruby language also works with layout. And we're going to look at layout next. But you can do anything from pretty much anything you can model and sketch up. You can automate with Ruby. Now let's look at layout. So layout if you have an object. So it will just open up one of our previous projects. And say for instance, we want to take this model and start generating some views. More. Maybe on the construction level that we can do some things already. If we want to go a little bit further, we can go ahead and click on Layout. Will this the load at two monitors so it doesn't show the layout screen directly. Layout has a similar start page to sketch upward talks about a template. So you can choose any size that you want. You can change this later. Mic title block. If you're working for a company, you can custom, customize it. I'll click them modern. And layout has pretty much similar types of tools to sketch it only. It's built with its canvas for a printable file. And as opposed to this Paint 3D, you actually are dealing with a sort of a box of the model. And della making a course on layout. But pretty much layout has its own set of toolbars and its own set of functions where you can import and export SketchUp models and work with all the views you have, all the functionality you have for getting a visual. You can do that here and you can also add text and other dimensions, anything to help build your model as a communication tool. And so layout, there are other plug-ins, but this layout is made by the same people have SketchUp. Finally, I definitely want to show you, as we looked at some of these objects, do you want to show you the some of the built-in power that you can go through. In dynamic components. And dynamic components, like I said, it was a plug-in at 1. But dynamic components is another way of some of the objects. And SketchUp can be programmed. You right-click on any object. You can see at the bottom of this little pop up that says dynamic opponents. And dynamic opponent is pretty much some component that you can pretty much make dynamic. You can make the size dynamics. So as opposed to going in and stretching and pulling, you could put that actually in the object. And that's also a much more heavy set of skills. But out, I'll show that in a more advanced course. But one benefit of making that if you don't wanna make your own, which is something you have to learn how to do. You can actually always look for them in the 3D warehouse. We'll go ahead and click 3D warehouse to get to a dynamic window. And so you click on one of these. You downloaded straight into model or you can make another model. And so I wanted to make this be closer to the window. And what I wanted to do probably to make opening for it. And one of the options here, you actually see that sometimes we have to check out if there are some options. So this dynamic window doesn't actually seem to have much dynamics. So some, some dynamic things are duds. So that's something to watch out for. You probably want to save your model as well before you download these cars. Some, some dynamic windows are not well, are some dynamic objects are not well programmed. So we unload this one n. And this one, we'll just take a look at it. And so now you see it's actually in Russian. So, but the idea is pretty, pretty clear. It says the sizes that we're making in. So there's a lot of ways to get confused for you go to the 3D warehouse. So you might have to shop a little bit around to find what you're looking for. This, don't worry, it's, it's it's a normal process. You see some things get to the top of the list. Some things are a little clearer. So this dynamic windows, probably a better tool to load this in. And so this comes with how to use it. So that's great. Pretty much it has all these options to get your Doctype whenever you like. So if you right-click on it and you look at your, your options, you have all these options, how many dividers you click down to apply. So we can also change how high the window is. So we see right here we have 200 and we can make it 400. And all these things are built SRE Dan. And also of course very beautiful is that pretty, pretty much see that this wall is connected with the window, so that parametrically moves as well. And there you have it. Some of the plug-ins and different third party apps that help make sketch up a tool and a multifaceted resource.
31. 7.01 Rendering in SketchUp with Enscape: For all of my students, I wanted to show a little bit about rendering in SketchUp. This is a sketch of model that I've made and I've included some assets or different models from the program Enscape. Enscape can do some incredible renders. And I just wanted to give you a quick view. You can find out more and courses the come from this channel on Skillshare. And you also can look on our website for more courses.
32. 7.02 Adding Enscape Assets: So as you see, all these objects were made in Enscape where you can download a free trial. Make sure your computer's fast enough. And it creates a little bar. And you can add your elements by clicking your asset library. You see I've added several objects and it's very easy to add another one. And it takes a little time to load. But if you wanted to add people, if you want to add furniture, for instance, you add a chair. It's very easy to add. You can work on the materials by clicking on the material the same way you add to your sketch model and you can edit it here. And if you're ready to render, all you do is press the Enscape play button and the views you have, you can actually access them. In Enscape. This is Enscape loading.
33. 7.03 The Enscape Interface: Enscape rendering can be a beautiful way to make your models and the realistic sense. So you can see with this, you can get just as far and further with realism. Then you would end the program of SketchUp. So if you click the Help menu, you actually can see all the different items that you can do. You can change the time of day, you can move around the model I've been using the WASD. You also can use the directional pad. And you can see you abuse that you've made. You can make videos, you can export your model into renders. You also can do things like change. The way perspective is. You know, there are different types here.
34. 7.04 Enscape Settings: You also can choose your visual settings for how the sky will look, how different elements of the image will look nice. You can choose your output size. You also can choose your settings for advance renderer options. You can change your input, like lying around it. How does your mouse move? What is a spectator height? You also can change the devices and also sound because you can put sound in your model.
35. 7.05 Enscape Rendering Summary : And escape is a wonderful way to look into your models. And rendering in general is made easy because there are apps like this for SketchUp. So stay tuned. See some links for some courses to help you make these in your SketchUp models.
36. Introduction To V-Ray For SketchUp: One of the things
that's great about SketchUp plugins is
also that you can use some really established plug-ins for getting
visuals like VRA. So that's the view that
we're looking at right now. It's your SketchUp model. And V Ray, It's
pretty much rendering everything that we've
placed in Sketch. It integrates with V Ray. And I'll talk about
a little bit of that as we go into this overview. You re for SketchUp so you
can render your models. It gets beautiful visuals. I'll start off by just
talking about what we write is we re, you can see here from
this plugin it has a menu of a few that are very
useful for, for you. The one that is the
critical one is the V reference ketchup toolbar. When you download this, you get a free
trial for a month. But essentially lets you create materials with what's
called an Asset Editor. This is, these are all for
working with rendering. Kosmo is where you can download objects
like trees and cars. Vision is where you actually can the
teacher model real-time. And we'll look at each of
those, the frame buffer. And some of these are helping you do batch renders
and multiple renders, the Virial light to create
a light in the model. So that's really cool. Something that I can expand
out the real objects. You can have a big your
own sort of proxies. Proxies. You also can make
infinite fields or grass and such like that. Can also choose different types of functions like
scatter, displacement. You also can use some
various utilities. Again, these are more advanced. So we'll just keep
it simple for now, like wearing clothes,
these It's tabs. New, gotten to place your model. You want to go and re, re, you actually can
just simply started.
37. The V-Ray Asset Editor: That's an editor will let you choose refined what's going
to come out from the reader. Essentially, you start
with the Asset Editor, which has places for your
materials and your light, your geometry, your elements, textures, also settings and
different ways to render. You can render this one frame you're going to
render continuously. You also can render
it in the cloud. So that helps your renders go a lot faster because we
can take a long time. Also, we can look at our buffer. Any of the previous renders. For working with materials. You start really right here, orbitals in the model. And you will click
on this left bar, then opens up to
show all sorts of materials that really
has already set up. They are loaded one line, but you have ability to see them in the list or the icon method. Thumbnails. You go to the right when you want to bring a material
and you just click on it, you click Add a saint, or you can select the object
and the Add Selection. And when it's in the model, you can look at it in your settings and
Attributes editor. So each type of material has a different type of attributes. You also can add more
attributes or layers. The attributes are different
ways you can show, like put the line, translucent. These are really some texture that's choosing things
like waitress properties, material ID and overwrite. And in terms of layers, you can make it more
like a metal emissive. These are some other different effects you can make to it. So I have some really
simple materials. Citing is important
from a material here. And it can always be looking to see if that's in the viewer a
collection right now. I'll just type inciting. But maybe if it
doesn't have there, maybe it has a material
that's similar. Instead, I said it'd be a
wanted this to be stucco. Though it would be
nice to Option. And I can always just
make sure it's in the bigger category than
just the smaller one. Stucco. Stucco. The category we
just want to like a white stucco and see
something like this. We'll add it too soon. So replacing my
previous society. One thing off this stucco
is it to be very white. Now, I can come in here and
say with my stucco texture, I will just come
to this geometry. And I will keep it easy. Let's say Add to, apply it to selection. You also can apply
it to the layer, but we should keep
it simple for now. So we can always verify
the material that we use in looking and sketch up
some excuse happening here. So this is this ductile material where you don't see it now, but you'll see it when
it makes the model look. And unfortunately it
makes everything that's close to the same material. We actually might want
to have this as a brick. So this is our first
element that will work on make that into a group. This is where it
definitely gets important to be more focused
with your materials. Go ahead and make
all this stuff out. My brick. Don't use a rubric
for this chimney. Stucco and brick. And I'll apply to selection. And now we can take a look
at how does this come out. And also for our class,
we come over here. We'll go ahead and bring in Glasgow to black to the scene. Just right-click over here. Selection. Use the eyedropper
to collect that. Do the same thing up here. One of the reasons to do
the vv glass instead of the normal glasses that has additional texture properties
like you see here. You can pretty much be
fine every element of it. Here. We're looking at rewrite proxy, want to go and I'll show you how to get those into your model.
38. Modeling And Setting Up V-Ray Lights: The other types of objects and materials
is the first one. The types of objects
like things like sunset are gonna be
making a vertical line. We already have a light
that's from the array. We can actually right-click
on any of these. For instance, if
you wanted to do a little bit later
time for our render, we could go in here and make sure that
our shadows are on. If you want to go later in
the day or even earlier. And maybe if this tree is
taken up to one space, We'll move it out the way. And what we could do is maybe start having some lights from the
inside of this building. So a little bit of lighting. So this type of object maybe would come in is create a little bit
of a proxy ceiling. Doesn't have to be the same. That doesn't come in. That I do recommend making walls a little more explicit because of this process, I'll
make that a group. We can even come in here
and do that pretty quickly. Which essentially we've come in here and it's not
really a full model yet. But we can just go ahead and
cover some of these lines. Will just come and remove
the lines when you're finished. That are extra. Way to remove the excess. Request is to intersect with. Selection. Does take out these
additional lines. Now have our anterior here. And we use that
same thickness for the wall will just point
to come back over here. Point to the same
thing over here. To come up. This is simply allows us
to take this out so that internal region as
a separate entity. So now I want to do things
like create valuable ceiling. Be a lot easier than
a hide the roof as we just add a little
ceiling or enzyme. Ceiling is going to
be group elements. These ideas, let's go
and select all of these. Put these in. This model was developed in
the architecture for sketch, of course, you can
find on my page. Alright, so here we are. At a point t. Let's pop that up. Now, one thing I wanna do now, I'm going to show you a little
bit about Ray, Ray lights. But I create some sphere lights. Not too big. Distributed
them out a little bit. Come on here and use that
array, function them out. I'll go ahead and create
a layer for lights. Please. Put them in a group that will make them
edit at the same time. And I'll make sure that
they're below this. Now. Turn everything back on. But to go into the array, we're going to look at
the whole render setup. You can add things
like your materials. You can also add textures. But I think geometries
and lighter. The critical thing we're
going to be adding, just basically seeing what you
can do for you right here.
39. Importing Cosmos Assets: Then we'll go on to Cosmos. Show you quickly so you
can see what Cosmos is. The cosmos previous loads
this little pop-up. And it gives you an option
to look at 3D models, furniture and
accessories, lighting, people, architecture. So I'll put a couple of
things in here, make it nice. The process is pretty simple. You just click on something
and it will load it up. For instance, if I wanted to
have something like this, a little more evident,
I could put that here. Now like this. I don't know exactly
how long everything takes to render some things. Or download takes a long time. Something else that
would like that. You can just place
it in your model.
40. V-Ray Settings Buffer And Interactive Render: Pretty much you're going to
make your quality level here. You choose the camera issues like how much light
comes in with exposure. Window up, put your
shoes as size. You have the ability to run
your animation as well. You can choose your environment
here there's textures, you can play some environment. You can use material override. You can use a swarm
override as well here. And Swarm is where
you're going to be able to use the Cloud rendering. You also have to change
different settings, like you turn off switches, like for lights and such. You can choose to show curves
and model here you can make them visual a little bit
cleaner with D noisier. And there's some advanced
parameters here. Global illumination is one of the critical aspects to keep your models will be beautiful. That's the v Wade book. But we're just gonna
do the basic settings as is in this model. And you also can of course, save and open your settings. From here. You can check out that there's some presets and I'll include
some in the class. Okay, so here we are. Pretty much ready to render,
so it's a quick render. What happens when
you click render? It renders the view
port that you have. And right now, I'll let
things be very basic. Love added some,
some nice elements. My lights are not turned
up their fullest. But even as we're looking
at it, it's very realistic. You see that stucco texture. It looks nice. Looks nice. Use treats his proxies. So it's a sort of showing simple elements
so you can model, but it's actually
show very complex. And the rendering. We can now make this
a little bit better. And I'm gonna show you about
interactive rendering. And then we'll go into fizzy. Vision, will be ray. Alright. I stopped a little bit because I want to show you
the interactive render. Letting me a little
bit different. I'm going to set up the viewport
a little different way. Interactive render is
another great option. And V Ray, if you're like looking around and try
to find out how things look. For instance, if I change
the time of the year, let us choose where
that tree is going. Do it here. And it gives me that
ability to quickly say, Hey, you know, is that
gonna be a good look? Also can do things like Zoom and start to see
how things look. What things would look closer. So these would be another way. The more fine you
do a full render. But in terms of just
getting that out. Now this is a great way to see some live elements of what's
going on in the model. For instance, now I have a light inside and I've made it a
groups, they all work together. I went ahead and set these 400, start to see them. Make it a little more
brightness in the model. If we came down and the time of day come out a little bit. You can see now I have a
little bit of an effect of light coming out of the
house. That's nice as well. We also could come
and bring a light into this is this
little one up here. So you can see it's not
really in missing right now. But all you need to do is create something like spotlight, the starting point, and
then we'll go down. And when it starts off, it's pretty pretty tame. But all you need to do is maybe make sure it's
not in the geometry, is put it down, it's
low, below the geometry. Clicking on the spotlight. And it's kinda a little
bit because we want to capture that
effect of the light. I would do something
like 2 thousand. We're trying to make sure
that we're capturing it. So you're starting to
see a little bit of the effect of that spotlight. We want them to 10 thousand. You'd see even sharper. So that was something we
wanted to add for the house. Would just be maybe copying those between the
windows or something. And because I didn't live render you notice
that definitely is taking a little bit
longer for all these. So that all my awesome, I be so 1111 of these
little spotlights inside, I'm going to go ahead and
stop interactive render. Will show the Export
render in a minute. I could just take one of those. And since it's not rendering, it's gonna go a lot, lot faster. I'm pressing Control
to copy this light. And what is the 90 degrees? Pull them back over here. Move this up a little bit. It is a little
timely data model. What you might do some
lenses which should turn off the layer a little bit
anyway. Well, I added these. Now. Now we have a little
bit of a late effect. I'm going to go ahead and
create my night scene.
41. Image Settings And Export In The V-Ray Buffer: We are starting to see
what the effects we want. We will also have
some other utilities like infinite plane for if you want a horizon down pretty low, I don't really need
that right now. It says do one more
just for render. And I'll show you
the export process. Rendering can of course
take longer as matrix to be very small or reduce
the quality and the Settings. Menu is the medium. Because of this
down to very low. This would click
for it to render, Make sure your course
logged in to the ray. And one of the things, of course, it's not the
brightness that you want. You can always just come in
and add a little bit more. So right now, we are looking
and saying, what do we see? What do we not see? A light is having a little bit of issue. Come back over here. And maybe we will go into the model to find out how can we make these look a little better. One thing else can do for our lights are lights
also have settings. For instance, right now, this slide is visible
in the model, but we can make it. So you can see it. We can turn it off. And in terms of the object and can be working on how that
is looking as well. You can make it invisible. If we would run that again. Now it's a little bit darker. I might add a little
bit of sunlight to make those lights and visible just from
that little button. We want to have a
little more visibility to our lights here. Model. Maybe a little bit better aligned to
visibility here. We'll go ahead and stop this. Render it again. Check it out, see
how it's coming up. If you keep having an
issue in your model, you might just be detached and do these
things from each other. We also have ability to set
some of this in the model. So for instance, this should have its own
light. In general. Try to turn this up to
see if it has that. Because it did come from Ray. Ray should have
more of a render. I'll look see. It already had its own
light and I put my own in there. If you are. You can experiments sometimes
they give you that, might have some of them don't. But now that looks nice. And go ahead and get
our final view back. And we'll stop this. We can do that full render. This whole scene. I'll go ahead and do winter. And pretty much a lot
of things are just sort of going on in the
background for you. So this is a nice
warm little lamp light to the house and
behind there of course, is just the regular house. And I could, like I said, just increase the sun
just a little bit. For like a little sort of evening or morning,
morning sunlight, they're pretty much it just as like a nice little
composition element to it. What we do after we've created
that render for Vireo, We can always just click on
after it's rendered on file. There'll be finished shortly. We have the ability to
both save the one visual. We also can say
multiple channels. And if you want to add
channels to your model, you can always be adding that
in the materials settings. Would just go out into
those real quickly. Pretty much each material
has the ability to add the material ID. Then you would just be
exporting that when your model is coming out and create a render elements
to be exported. Right here. If we wanted to export that, maybe work on that in
Photoshop or something, we could export that. And what would
happen when you say, you'll be able to
save all images. You can save it into a
single file that's going to be like a more V Ray format. But in general, if we just want to save this
image as it is, you can always just click Save and choose the directory. And that's pretty much it. You also have the
ability in V Ray. As of course,
there's always more. You can actually do a lot of visual editing
directly in the console. Lot of times people will work on how much light comes in or what type of
color contrast. And so it has its
own sort of set of tools to help
you render them. You can choose a area if you
want to test the rendering. But in terms of adding
that image afterwards, you have ability to put up
different effects like curves. Curves is a great one. I always use it in my
photography and renders. You just can
double-click and you can choose what parts of the image you're gonna
get brighter or darker. Yeah, something like that. And also ability to work
on the white balance. If you want it to be a
little warmer or cooler, you just get to play around with this evening, make it
a little bit cool. You could always be
working on these. And you also can look at
the stats for the image. Pretty much fine tune what you're going to get
out of your image. And then you can export that. We also can bet
image process if you having several
renders at same time, your model or scenes
that you would want to render wouldn't close. That became a pretty nice
I want to show you also, in addition to the VRA
rendering in that method, this for an image, you
also the ability to just do a real-time render. And that's through VRA vision. Go ahead and click on that now.
42. Realtime Render With V-Ray Vision: In V wave vision, you can pretty much, this is related to
Enscape as well. Because viewer and
escape merged. You can now do this. It's not even just
live rendering. It's a little dumbed down. The keys for going
around this model. Like you can find them out
within the Information tab. But pretty much it's
directional pad. It's your keys, WASD, q and E can go up and down. With your shift button. In your left mouse button, you can change it
where the sun is. Perfectly. With your shift. In your right mouse button. You can change the exposure
to choose auto exposure here. You have to change
how you navigate by clicking here or pressing tab. So that's another way of
going around your model. And you can also save the particular image you
just let the settings on. You can also save animations. And you also can at
the end of the day, also package here your visuals so that you can share
with someone else, can load your model just
like the Enscape executable. Pretty much it. You can share that walk
through with the client or something. Close all these. But just in general,
it really lets you see what your textures and everything is
doing in the model. If you noticed, the ground plane is a little bit undeveloped, that'll be something we'd
want to be working on next. Because I think it's
obviously simple, but it's not as advanced
as the V Ray full set. But I sent them, it's pretty nice to be seeing
all the elements upfront.
43. Conclusion V-Ray For SketchUp: That's what you can do with VRA. You can go ahead and
check my profile for courses on more
in-depth use of these as you're developing in your skills.
Modeling and design.
44. 8.0 Congrats!: Congrats on finishing this sketch up guide in the complete sketch up Guide course. I really appreciate you taking my course. I hope you had fun. I hope you definitely gotten a lot out of the exercises and tutorials and that you've got to do the class project. If you haven't already done it or if you've done it, please go ahead and share our love. I see it. Your colleagues would as well. Also, if you want to do something interesting, I love to help you get that started on your beginning journey and schedule you again. You'll learn some of the concepts about what sketch of is what it can do. You learned about interfaces? Basic man's editing these critical aspects to your sketches career. So keeping them in mind spending that time to master them, help you as you go on to anything that you want to do with sketch of three. Appreciate you being in my course. I wish you the best sketch up career
 Brandon A Gibbs, Architect & Innovator