Transcripts
1. Class Intro: Do you want to learn how to use this amazing simple software
called SketchUp for yard, interior, exterior, or
any design project. You are big enough that
SketchUp and would like to learn it from scratch. Then this is the class for you. We will extensively review all the major tools in SketchUp. And by the end of this class, you will learn how to create
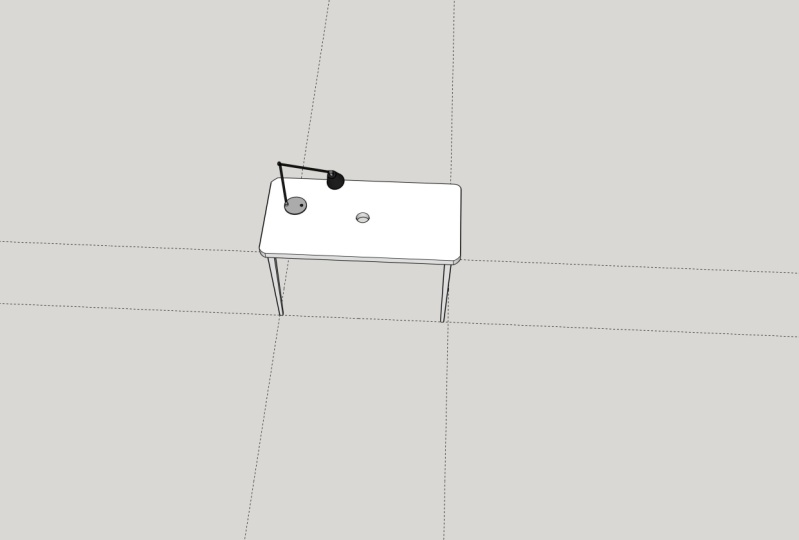
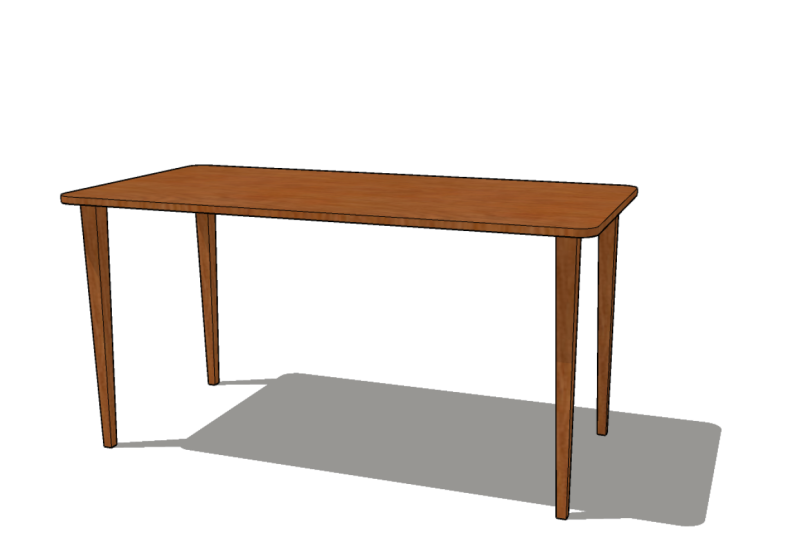
a simple furniture model, which is a dining table, which will be your
class project. You will start by learning
to install SketchUp, learn to setup
templates and units. Learn how to use
SketchUp both on a Windows interface
and also on Mac. Learn how to navigate
it interface, how to use its
various tools like the Select tool rectangle
tool, eraser and more. You will also learn how to
use materials and SketchUp, setting up scenes, working
with groups and competence. And towards the end,
we will also show you some quick hacks to work
faster with SketchUp. By the end of the class,
you'll be able to create your first
furniture model, and this will be
your class project. This fully detailed classes. All you need to get
started with SketchUp. As I take you
step-by-step through the entire process of
creating awesome 3D models. Now without further ado, I'll see you in the
class and say, Cheers.
2. Installing Sketchup: Hey guys, welcome to the first video of our goals where we're going to learn how to install schedule. So you can open the resource Google Sheet, which contains all the links and files for this course. And to start off, you can click on this link, which will have to do SketchUp main website to download your sketch up Fred. Now if you're not a student and you just want a diode sketch up, the easiest way is to simply select for professional projects, which is as default and click on Start free trial. You could also go to for personal projects and select the sketch up 30 day trial. Or you can also use the sketch of free read-only version and follow this course as well. But make it I'm going to use for professional projects and click on Start free trial. And I'm going to login with my Google e-mail ID. If you're on Apple, you can sign in with your Apple email area as well. Since I'm not an Apple user, although I'm a big fan of Steve Jobs, I'm going to stick with Google, the stamp. So sign-in with your Google account. The screen which are seeing as in German, because I'm in the process of learning German pressure. I ambition diets, our initial feed, rod stem for Zuko age for those who don't understand, they're open, please ignored, and go forward. Or two. Once you log in, you'll need to fill in SketchUp Soviet that dig in to understand your industry and where you work in. So fill-in the liquidity deals in our case, it's going to be interior design. So I'm going to select interior design. And I only want to select what I'm interested in. You can now fill in your company details. Mbsr codex is my architecture firm. You're in Bangalore, India. Put any other details, click on, I agree. And finally, click on Start My Drive. So now sketch I will automatically download to your system and you can open it up to start installing sketch up in your BC. So once it's downloaded to your system, we can start the installation process. So open the dot EXE file or the dot DNG file. If you're using a Mac, select the language of your choice. In my case, it's English and it's come to United States. Click on Next and now choose the location where you want to install your schedule file. So make a folder called SketchUp 2021 and then click on Install again. And no, it would start installing bill sketch up software and doing our system. Right? Sketchup has been installed and now you can click on finish to finish the installation. So one schedule been installed, it comes to other softwares, which is layout and stale build-up. We want to be using layout Leto in the main course. For now, let's open SketchUp Pro 2021. Once you open SketchUp for the first time, you would need to accept the license agreement. So click on I agree, and click on Accept. And these days and sketch up as their subscriptions after. And you need to be up every year. To continue using SketchUp, you would need to sign in with the same email ID which you use to register for your 30 day trial. So I'm gonna click on sign-in and login with the same Google lady that I used. And that's it to assignment to all things SketchUp. And to get started, you can click on Start to start the trial license. So in the next video, we're going to start using SketchUp and we're gonna be talking about templates. So I'll see you guys next video.
3. Templates in Sketchup: Hey guys, welcome to the first video in this course. So to get started, we need to open SketchUp. Once we've installed SketchUp and also a heads up, you'll be using the Windows version of SketchUp in this course. Although I'm also going to be showing you the Mac versions for certain functions in SketchUp. So to get started, let's open SketchUp Pro 2021. So generally, once you install, you will find icon in your desktop so you can double-click to open it up. And wanted open. You may need to register your e-mail ID in case you're opening it for the first name and then login with that e-mail ID, which is what you used to download and install SketchUp. And once you've registered, you can start your 30 day trial license. So once you've done all of that, it's time to select our template. Now you can see that SketchUp comes with a lot of templates. And if you want to see additional templates, you can click on More Templates and you can see the other templates audio. So each of these templates have different kinds of background colors, starting views, units of measurements, bags, and a lot more. It's also got a scale duty figure. In this case, it is Somalia. And here's a fun fact. So every year they publish new to refigure. And those 2D figures are actually employees working in the scatter UP office to the actual people and they have themselves represented in the software. Now if you want to change the default template and sketch up, you can change it by clicking on this parts per million. So changing the default template and the next time. Now for example, if I open this and the next time you open SketchUp or you click on File New, it's going to load in rhythm metric units. Now if you want to change the default unit, simply go to hell and click on welcome to sketch up. And then you can change the default units again. So an odd guess, we're going to use the simple interest, or you can also use the architectural inches. That's pretty much the same. So we're going to use simple. So once you've selected your template, just click on the box here. And I could open the template. Now if you wanted to end the units after you selected template, which I would not recommend is you go to Windows, click on Model info, and then you click on units. And you can change the template eurozone. But I would suggest that you change the template right off the bat before starting a new project. And for this course you're going to be using the simple inches units. And for all those who work with metric, glory because I will be translating the units every time I get a chance. And I'm also going to show you something in SketchUp which is really cool. Or you can use both the metric and imperial units while modeling and scatter. I'm also gonna get rid of these plugins for now because we don't really need them for the basic scores. I will be using them in the main course. So the next, we don't want to introduce you to those SketchUp interface and doc brief about the interface. So I'll see you guys in the next video shows.
4. Introduction to the Sketchup Interface in Windows: Hey guys, welcome back to another video. Now we're going to start off by using simple template. So click on the synchronous is template to start off. Now the all the Mac uses odor. Feel free to skip this video and head to the next one where I will be showing how to use SketchUp and Mac. It's a little different compared to the Windows version. Actually, a lot more different. But do not worry, I will be showing you what the mean differences are in the Mac version the next video. So like any other software out there, you're going to find SketchUp super simple use. We have the main menu bar on the menu toolbar on top here than we are the modeling tools, the viewport, the default. And then at the bottom we have on the bottom left are hints, which gives us an idea of a V2 and on the bottom rate, our measurement. So let's look at each of them one at a time. So starting off is the menu toolbar. So as you can see, we have the file Google where you can save stuff, open models. And then you can also put in to save as images, export or duty drawing, among many other options, I will be showing it to you later in the course. Then we have the edit option and copy paste. Like any other software, Control-C, Control-V, or universal function, which is now part of almost every other software. And then we have view where you get to show different kinds of dual buds. So if we go to View tool walls, I can switch on all of these and it will chew up on that RPO. You're going to leave it off. No, it's just gonna keep it simple. Then we have camera draw and bools, which is basically the various functions in SketchUp. I will not be using these drop-down menus as much because I will be using shortcuts instead. And I will show you how to use shortcuts to model Foster and efficiently. So we will come back to this ago, later stage. Finally, we have windows, and this is a super important drop-down menu because it's going to be a little different from the Mac version. Now, this windows drop-down menu, you can go default ri and activate the default radio. If it doesn't show up, you go to Windows default rate shortly. And this is our default radio. Now, this is where you get to add materials at bags, which is also known as layers. Also, we can activate shadows, as you can see. And it's also got a few more options. So we will be going in depth on the default rape. Leto in the main goes for now is just to give you an idea of what you would be able to do. But the default dream. Now for the Mac users, you will find that you won't get those default re like this on the rate, you'll generally get it as different windows. And I will show it to you soon. And if you want to add or remove stuff, do the default tree, you can go to Windows default ri and add any of these. Actually keep the outline around because I use it for my SketchUp or Unreal Engine workflow. So I'm going to keep that on and the rest of it is default. So actually you take a screenshot of this and make sure it's the same. If it doesn't show up, you can just go to Windows default ri and make sure that these are picked on. Now when you're not using the default or you can click on the auto hide button and it would be in the radio. And if you want to bin it, you can simply click on the Run button again and it would be pinned to the rape. Finally, we have the extensions drop-down menu. This menu comes after you install a couple of plug-ins in SketchUp. As you can see, I have the 3D plug-in installed schedule the slicer, among many others. We will be using this again in the main course. Finally, you have help. And like I said before in the previous video, if you want to change your units, default you under studies, when you start sketch up, you can go to help windows. Welcome to SketchUp and then change the units here. Well, it then we have our modeling tools 0, the bottom, which has the basic molecules from select tool. It is a line, OK, Move Bush, many others. You will jump to that shortly in the coming few videos. Now the bottom left is something important where it gives you a hint of what each tool is capable and which tool you're using. For example, if we click on the eraser tool, you can see that it gives a hint showing that you can erase often a smooth entities in the model. And now when I hovered over the viewport, the hint again changes where it says select items to it is, or drag across multiple items. So they're pretty useful. Dialogue box, I generally don't check it out that often because a long scheduled, but for beginners, it comes in really handy. And finally, on the bottom layer, we have our measurements. Now, this is something which you might want to get played from the start, is that you don't really need to click. And nothing happens even if you click your, because SketchUp reads Waterloo value, type directly into the measurement box, you don't really new click and presenter. For example, I'm drawing a rectangle. We're going to do the same with every one feet, come off my feet. And I didn't really need to click your I simply needed to type in my measurements simply and then press Enter. That's all you need to do. I will be reiterating this later in the course as well, so that it goes ahead and you don't make the mistake of clicking the measurement box. So you just simply type the value and press Enter. So that's a brief on the SketchUp user interface. In the next video, I will be showing a brief on this GitHub user interface and Mac. So for the Windows users, you can skip the 3D after that, which is an introduction to the basic sketch up boots for two days. There's no exercise files for this because it's simple. You don't really need something. I'm gonna make it in the canvas or in the viewport. And you can make your own shapes. And what have you like to see you guys in the next video shows.
5. Introduction to the Sketchup Interface in Mac: You guys welcome back to yet another video. Now this, we do this for all the Mac users out there and we're going to be showing you how to use SketchUp for Mac. So once you double-click on the sketch up icon, this dialog box will open. And then you can select your template, which Inaki is, is SketchUp inches. So once you open SketchUp, this is our main dialog box which contains the viewport. I'm going to maximize this window by clicking on the green button, which would enter into fullscreen. And the schedule format is similar in certain respects to sketch out for Windows as well, since we have the top menu bar and our drawing toolbar here, and then the main view port. And in the bottom left we have a hint text which indicates what each of the tool does. So it basically gives you a hint. And in the bottom rate Bihar measurements blocks, all right, so the main difference between scheduled for Mac and Windows is that your preferences are found under the sketch up drop-down menu. So if you click on SketchUp, you'll find those preferences you read as SketchUp for Windows, you'll generally find the preferences option under the windows drop-down menu. So that is pretty much the main difference. And the UDL mean difference, which you're going to see between Mac and Windows for SketchUp is that we have something called the default rate on the rate, and it doesn't show up in Mac. Now on the Mac version of sketch up, you generally need to add in the dialog boxes in the default re one-by-one. So I'm going to click on entity Info to add it in. And it shows up, you're on the right As dialog box. And if you click on the top, it would minimize into a single rectangular, but you can also drag it and Docker to go at this. So I'm gonna go ahead and add it mod windows, which would be similar to the default re in the schedule for Windows version. So you can activate each of them from the windows drop-down menu and dock it to the bottom of the list, lose. And once you dock with letters, you can move the entire so-called default re, graduate. You like Azure AD docket to the fact. So I'm gonna switch them on one by one. We're going to keep styles is when minimize and darker decorator that. And I'm also gonna do it for tags and rest of the mean windows for so-called default. All right, that's good enough. And we also have another window box which is materials, but you can't delete docket along with the rest of the windows are done. The materials windows only one which is separated. And you can also activate it by pressing B on your keyboard, which actuates the bucket tool endometrial dialog box as well. And now I'm going to explain the radius drop-down menus in SketchUp for Mac. So the drop-down menu is similar to most other programs, where you can see we've open fails. Make a new file, Export, Print and mode. Edit is where you have the universal copy paste, paste and place elite guides, and some more useful functions. The View drop-down menus where you can switch on the radius blue bars. So generally on the left, if you've seen some other tutorials to find a large toolset bar. So to activate that good tool palette and click on large toolset. So that would activate the large toolset bar here, vectors. So you could either keep the large toolset bar or you could also keep the top general drawing toolbar. Now to be less redundant since it's the same tools, I'm going to just keep the dot-dot-dot. And if you'd like to hide their Abdulla and straight, you can go to View and click on height. But in my case, I'm going to do the reverse where I'm going to hide the last rule set by an early keyboard. All right, so now we have draw camera and dunes. And I don't generally use these drop-down menus because I use shortcuts in state. And it makes my life much more easy because I get to Module faster rather than coming here each time to activate a certain tool or function. And I would highly encourage you guys to do the same as that. So the drought dropped on a new gently contains the drawing tools like making a lane rectangle shapes, and mode. The camera is where you can switch between prospective valid projection and two-point perspective. And you can also set in certain standard views for your elevations and plants. Tools is where you get to have the main functions, which is select, move, rotate, scale, push, pull, and mode. Like I mentioned before, I would highly recommend you guys to use shortcuts rather than coming into this drop-down menu and selecting each of these functions. So try to get into hybrid of using shortcuts. And we will be sharing those shortcuts in the comic few videos. Then we have the ever-so important windows drop-down menu, which is a little different from those sketches for Windows version. And you need a switch on each of these dialogue boxes one by one to make your default on the right as shown. Finally, we have extensions which contains all your additional plugins in SketchUp. And in our case, we have really installed and in case you install other plug-ins like flex tools, schedule, we scatter skimp on mode. It would show up under extensions. Now this is our mean drawing toolbar. And if you want to add to this toolbar, you can go to View and click on customize toolbar. And now you can start dragging any of these icons into your toolbar on top. And this dialogue box gently contains all the icons are functions from your sketch up and also your plugins. And once you're done adding those icons, you can click on done. For now we'll just leave the default. This is our main view port where you do the modelling. And this is smelly who is apparently an employee in SketchUp. And every year when they release a new duty figure, it is actually representing someone who works at Trimble, scheduled on the bottom left, as mentioned before, is a hint box. So for example, if I click on the eraser tool, you can see that the hint box changes to denote what the is dual does, which is select items to it is, or drag across multiple items. And it gives you the appropriate hints during the start of the function mid action. And after you've done a plane or function or two. On the bottom right, we have our measurements box. Now it's super important for you to not click on dimension box and type in your value because it doesn't work. So you simply need to type in your value. So for example, if I'm making a rectangle with a certain dimension, I'm going to press Alt on my keyboard, click once, and then I'm going to type in my value, which is 10 feet, 20 feet, and then simply presenter. So you notice that I do not really need to click on the bottom late. I can simply just type in the value and press Enter and SketchUp would automatically the those values and then outputs yard rectangle to that space. So that is a very quick tutorial into SketchUp for Mac. If you have any certain notes or more, feel free to ask away in the discussion box below this video. I hope you guys found this video useful and I'll see you guys in the next video, shows.
6. Navigating in Sketchup: All right, so before we jump into the tools in SketchUp is super important to know how to navigate in the sketch up because it's either gonna make you or break you. If you don't know how to navigate and sketch up. It's actually pretty simple and similar to other 3D modeling software as maybe a little different. So we have the left-click, right-click, and the middle mouse button. So what the middle mouse button does is that you get to orbit, as you can see, I can orbit in the viewport. Now with the middle mouse button pressed, I'm going to press the Shift key on the keyboard. As you can see when I press shift, it changes to the and, or the band dude. And now again, ban and sketch up as well. So get used to orbiting and also planning together. This helps when you are modelling in SketchUp. And then we have a left-click and right-click, left-click to select stuff in SketchUp. And then right-click is to find out the various options that you have for that selection. And then we also have the selection boxes. So no, if you select from left to right. So what do was within this black box is going to get selected. And if I drag from right to left, now whatever comes in the bottom of this box will get selected. Now you can see that. So Emily's hand is at the edge of this box. And if I leave it, you can see that to relate get selected. But if I drag a bounding box and if it's not covering the entire asset or group, it's not going to get selected. So get used to this as well. Where left to date is where whatever comes into the box gets elected. And right the left is whatever comes within the plot of this dashed box gets selected. And finally we have the Zoom. So if I scroll my middle mouse button, I can zoom. And I can zoom. Where do I want in the viewport? We also have something called as magnifying glass or a zoom to layer. Problem with this is that if I zoom in, it would zoom in only in the center of the screen and not anywhere else. So I didn't really use the middle mouse button. Finally, if you want to select multiple items in SketchUp, you can use a control and control shift buttons on your keyboard. Now to demonstrate that I'm going to make a copy of Somalia using the Move tool and pressing Control on my keyboard. Clicking ones, looking boys and typing in x. And oh, don't worry if you couldn't follow that. I will be explaining that in the coming few videos, right? So now if you want to select all of these, you can of course, drag select and make a box around the objects so that will select everything or even from right to left as well. Now, let's say you selected everything and you want to deselect the alternate ones. So now if I hold Control, you can see the plus button on my select tool. And if I hold Control Shift, it changes to a minus. So now I can click on the Items which I want to select and deselect those items. Now if I release the Shift button on my keyboard, goes back to the plus button, and then I can select back those items. So control is to add stuff to the selection and Control Shift, de-select stuff from the selection. So that is a quick video and do navigating and SketchUp and also selecting stuff. In the next video, we're going to use our modelling tools and finally start creating something awesome and sketch up. So see you guys next video.
7. The Select Tool in Sketchup: Hey guys, welcome back to yet another video. No. In this video, I'm gonna be showing you the most important tool in SketchUp, which is the select tool. So to activate the Select tool, you can go and click on the Select Julio or you can press the spacebar on your keyboard. So they'll select tool helps you select stuff in SketchUp, which is pretty obvious since it's called the silicon. So for example, if I zoom in, I can select the face may clicking ones. Or they can select the edges as well. By selecting the edge of the box. Now if I double-click on a face, it would select the face. As you can see, it's become dark video. Handle blue line, which is the border of prophase. So that is double-click. Know what happens if I triple-click? So if I typically, it's all connected faces, lines, and edges. So if you want to select the entirety of a model, you need to deliberately, to select stuff. Already. Know, if you want to make a drug selection or a box selection you can drag from left to right. So I'm holding the mouse button and dragging from the left to the right. Now what is going to come within this selection box is going to get selected. So you can see that these faces are legal selected as these were not in that selection box. But if our DAG and envelope the mailbox, then dialog box would get selected. So that's left to rate. Now if I drag from right-to-left, can see that it dawns, do a dashed line. This means that what it was going to come in the bottom of this dashed line selection. So I'm going to leave it here. You can see that this fierce get selected and all these edges gets elected as when this face as well. So that just means that anything which is going to come with an a part of this dash box is going to get selected. You can see that this landed gets elected because that didn't come into part of that dashed box. Now to explain that better, Let's say I want to select only this phase. So I'm going to drag from left to right. So you can see that it would select this face. Since it gained within that box, since I drag from left to right. Now if I drag it from right to left, it's going to select all of these phases as well. So I hope that made sense. And another useful function of the select tool is when you're switching between various commands in SketchUp. So what I generally do is if I want to push a certain fears, I would select this face and then click the bush tool and then push it up. Now before going to the next tool, I would press the spacebar to activate the select tool and then select the next icon or next function in SketchUp. So in this case it's more. So it's always a good idea to switch between bools by using those select tool command. Now before we go ahead, I'm also going to show you how to access the large toolset bulb, which only shows up here on the left. So you can go to View, click on dual bus. And then if you scroll down, you get an option called large toolset bar. So you can either use the large toolset bar, you can use the Getting Started menu bar on top as well. So you guys can select which one you want. Do not keep both of them since it would be redundant to have the same tools in different venues. So you can either give large toolset been Pardo, getting started. But for this course I want to keep the Getting Started button. And I'm going to use shortcuts a lot to modelling SketchUp. So that is a quick tutorial in to the Select tool. In the next few videos, we're going to learn the other tools and then create boxes like these, phony job and a lot more. So see you guys in the next video. Finally, if you want to select multiple items in SketchUp, you can use the control and control shift buttons on your keyboard. Now, demonstrate that I'm going to make a copy of Somalia using the Move tool and pressing Control on my keyboard. Clicking ones, looking place, and by being in eggs. And Oh, don't worry too much. If you can't, don't worry if you couldn't follow that. We'll be exploring that in the coming few reuse. Lets you know if you want to select all of these, you can, you cannot, you can, of course, black select and make a box around the objects that would select everything or even from that April left as well. Now if you want now, let's say you selected everything and you wanted to select the alternate ones. So if I hold Control, you can see the plus button on my select tool. And if I hold Control shift changes to a minus. So now I can click on daydreams, which I want to select and deselect those items. Now if I release the shift plugin from my keyboard, goes back to the plus button, and then I can select back those items. So control is to add stuff to the selection and control shift. D select stuff from the selection.
8. The Axis Lines and Line Tool: Alright, so we're going to jump into the modelling part. Before I do that, I'm just going to quickly run through the axis lanes in SketchUp. So we have the blue axis, the green axis, and the red axis. Now before I explain any of these axes lens I just want to point out, and I want you to keep this in mind is that the green axis is always pointing to the true not in SketchUp. Which means if I switch on the shadow zone. Now you can see that this is the not this assault and this was the Eastern West, the dimers 140. And this is the month which denotes that it's somewhere in mid-October. Now if I change this to morning, you can see that the sun rises in the east and sets in the west. So that's something which I want you to keep in mind going forward because we're going to be using it a lot in the part of the course is red. So the green axis is pointed towards the, not, the red axis, obviously towards the East. And the blue axis is towards space, or it's also known as the zed axis, which is pointing towards something unknown. And we use access a lot when it comes to modelling in SketchUp. So let's start modelling. And the first tool which you're going to learn as the ln button. Now, click the Line tool to activate the line tool. Or you can press L on your keyboard is the shortcut for line. So if you click once on the viewport, you can see that you can start drawing a line. And a lot of students make the mistake of, I'm going to press escape to get out of the line command. So a lot of the students make the mistake of clicking and then dragging and not releasing the left mouse button. So that's a mistake and SketchUp which you need a white. You simply need to click on the viewport, release your hands from the left-click and then move around in SketchUp. And you can see that it snaps when I move towards the red axis. So it's Napster, the red axis. So I'm just going to click here. And then again, if I want to move along the green axis, I can move it towards the green axis. Now, since my viewport is oriented in such a way that if I move this way, it will get snapped to the z-axis. That's not what I want. So I'm just going to audit to the right a bit and then draw my line to the green axis. Then finally back. Or if you want to infer to this point, all you need to do is go back on the red axis and it would automatically snap on foot this point. Now if it doesn't involve, what you can do is just go to this point and then drag it out slowly and then as well. So click that. And finally we need to close this. And we have our face. So now before I go ahead, I just want to explain faces and edges in SketchUp. So these are the edges that we just drew with the line command, and this is the phase. Now an enclosed edge will create a face, as you can see. And also something super important to know is the diverse faces in SketchUp. So we have our white face or the bottom and sort of blue phase, or the dogs. This is a diverse spheres. And when it comes to read a modelling or rendering. You should always apply material on the white face of SketchUp. We're going to be showing that lived on the course as well. So do not worry too much about it, but I'm just gonna keep you updated so that you don't make the mistake of applying gradients on both archivists. But for now, just forget about that. We will dive deep into applying materials. Endo VD part of the main course. I'm going to show you how to create the same box, but this time with some measurements. So I'm going to click on the line tool again. And I'm also going to show you how to lock your axis when drawing lanes. So accurate, the line tool by clicking your way pressing L key on your keyboard, I would suggest that you start getting the habit of using shortcuts, because if you use shortcuts a lot in SketchUp, now click ones to start drawing a line. Remember, do not click and hold. Click and release your left mouse button and drag it to the red axis. Know, for example, if your lane is not snapping to the relaxes and you want to snap it, all you need to do is press the right arrow key on your keyboard and it would snap to the red axis nor unify, go anywhere else on the viewport. It doesn't change. It's locked to that red axis. So once it's locked to the red axis, you can give or measurement, know, like I mentioned before, You do not have to go to the measurement box here on the corner and click your YouTube. You do not have to do that because it doesn't work. All you need to do is just type in your value. So I'm going to type in N apostrophe to denote that it doesn't feed and then press Enter. So that's 10 feet. I'm going to drag my line to the green axis and do lock it to the green axis, I'm going to press the left arrow key. So now it's locked to the green axis. And now I'm going to press F5 and press Enter. So now you can see that since I did not give the right unit the apostrophe, it read in inches. So SketchUp daddy reads mostly in inches. So the double-clicking anywhere else, no, I can overwrite this value which I just give. So with the green axis snapped or the left arrow key, whatever it is, you're going to type in the value again for a VIP and then presenter. So just overrides the previous value and then takes and the new value, and now we have the correct measurement. You can also type in, in meters, which is something really cool in SketchUp, and you can't really do this in 3ds Max. So the other 3D modeling applications. Now for example, I want to type in hundred, five hundred MM. I can just type in 1000, 500 and then type in MM. Press Enter, and boom. We have a 1500 m length. And then finally to close this, again, just click on the end point O. So click on the Select tool again to activate the spacebar tool and deactivate the line tool. And now we have our shape. So what do you do? Practice what I just taught you, which is using the line tool, locking it to the red axis, clicking ones, looking into the green axis, clicking again, again, logging into the red axis, inferring into the first, and then going back to draw your ship. You can also use the measurements by simply typing your value and get used to using the line tool in SketchUp. Now let's say you made a mistake and you want to go back. And you know how to do that is simply by using the undo command, which is Control Z. And you can see that last line gets deleted. So the control Z and redo is pretty useful in SketchUp. It gives you make mistakes. All you needed was go to Edit and click on Undo draw line, or you can press Control Z. The other shortcut is all been backspace, which I don't use is generally control C. So the next video we're gonna learn how to use the rectangle tool and make these shapes faster. So I'll see you guys next video shows.
9. The Rectangle Tool in Sketchup: Hey guys, welcome back to yet another radio. Now in this video I'm gonna show you how to use the rectangle tool and household usage rate. So the Rectangle tool is most often used compared to the line tool. And do actually the rectangle tool already need to do is go to your main toolbar and click on the Rectangle tool. The shortcut for the rectangle doulas are. So you can either press out or you can click on there too low. Like I mentioned before, make sure to always use shortcuts because that would definitely increase your speed and workflow. So to use the rectangle tool, you can click ones. And like I mentioned before, do not drag. After clicking, simply click once and release, then left-click mouse button. And if you click the second name, it's going to make your rectangle. So that's awesome polluters to make your rectangle. Now if you want to give a particular dimension of the rectangle, what you need to do is I'm going to press the spacebar to select my select tool. And I'm going to click on the rectangle tool again. Also, if you've noticed, I always switch between the select tool and then the mean dude. So in SketchUp, It's super important to always keep using the select tool and then switch between your other tools. Although it's a brisk, odd, do it the rectangle tool. And now click once, release the left mouse button. And now I'm going to give a dimension for this rectangle. Now it's super simple to give a dimension four rectangles and SketchUp. Firstly, need to deepen the width so it's going to be 10 feet. And then you need to press comma on our keyboard without pressing Endo or any other key. And then type in the second value, which is going to be 20 feet, and this is going to be our depth. Now you can see in the bottom right corner that I've opened then feed, then apostrophe comma 23, and then press Enter. So boom, you made art rectangle, which is 10 feet by 20 feet. Now let's say for example, you want to draw a rectangle on the green axis or on 3D. So what do you need to do is, again, I do it though, rectangle tool by pressing R on the keyboard. Now, click ones. And if you want to draw in another plane or in the x-y plane or YZ plane. I'm not sure. Rich senators, you simply need to press the right arrow key on your keyboard to it snaps to that plane. And you can then give a different dimension. So I'm going to give ten feet, 15 feet, and then press Enter. Similarly, if I want a rectangle on the green axis or on the red axis, I press the left arrow key and it snaps to this plane. And now I can give another value, say 25 feet comma 15 feet. So that's how simple it is to make it in different planes as well. And finally, if you want to snap it to the plan view or which is the X-ray Blinn, the main blame in SketchUp. It's a good idea to snap it by pressing the up arrow key. This way it would not snap to any other object. I'll say, for example, if I'm drawing a rectangle this way, you can see that if I hold or this point and gets snap to this edge. So to avoid that, I press the up arrow key and now it's always snap to this plane. So now I'm going to give a value, say 20 feet. Come on 31 feet and press Enter. So that's how simple it is to create rectangles in SketchUp. In the next video, we will be using the offset tool and then give some thickness to our rectangles and then make our walls. So I'll see you guys in the next video.
10. The Offset Tool: Hey guys, welcome back to yet another radio. No. In this video we're going to learn how to create a wall thickness using our offset tool. Also do is in your main toolbar again, you can click to activate the acyl group, or you can press F on your keyboard. So once you press F, it would activate the dual. And now you can hover over any fears. And it would highlight that face, which means you can answer disease. Click ones. Make sure to not take it back. Simply click and release your hands from the left mouse button. And now you can give a thickness either inside or outside The box or if you want to give it a thickness of six inches, you can type in six and then press Enter. So that would give it a thickness of six inches or say the box. Now, I would suggest that you select the face first and then plus the offset rule, which is F on your keyboard. The reason being because there would be a case where there are multiple phases. And if you go ahead and simply used also dual, you might not offset that I face. So it's a good idea to select the face using your select tool. And then pressing F on your keyboard to activate the offset to give a thickness of eight inches. Press Enter. And you are done again to reiterate, when you're giving offset, make sure not to click on the measurements box on the right. Simply just give you a value, say ten inches, and then press Enter. That's all you need to do. You do not really need to click Go and then give the measurement because it doesn't work, you simply need to deepen your value and sketch upward automatically read that. So this is a quick tutorial and do the OSI dual. Now in the next tutorial, learn more about the Eraser tool. And then we'll create some abstract art. Duty art on our sketch opened or not gonna get into 3D yet, still trying out a duty modelling dunes. And then we'll slowly get into 3D as well. So go ahead and practice the offset tool, and it's a very simple tool to use. Also notice that I'm still in the obstacle. So make sure to get into the habit of using the select by pressing spacebar on your keyboard. So that's about it. I'll see you guys next video shows.
11. The Eraser Tool in Sketchup: Hey guys, welcome back. Now in this video we're going to learn how to use the eraser tool. So to aggregate there is a bool. You can click on this eraser, or you can press E on your keyboard to aggregate data as a tool. So again, the habit of using shortcuts again, use E for eraser, for offset, and Space-bar for the spacebar tool. Of course, you have rectangular zone, which is odd. And, and finally line tool which is L. So don't forget those shortcuts. You would find it in the PDF as well. Do get into a habit and you will see your sketch up modelling workflow get faster and faster. All right, so once you activate the eraser tool, you can start deleting stuff in your Canvas. In the viewport. All you need to do is click and drag. So only for this tool you need to click and drag and sketch up. The other goes. You don't really need to click and drag, so you can simply click and drag Gu Alito, lines and faces. Now, there's another way to delete stuff in SketchUp, and by using the Select tool spacebar, we can simply select the face on SketchUp and click on Delete. Here as well. Know, for example, if I want to delete this, you're going to make or Box election from right-to-left to select those two edges and the face and press Delete. So now I'm going to press undo because I don't want to delete delete them. But that was just to show you how to delete stuff in SketchUp. Know, let's say you're deleting stuff and you accidentally deleted these two lines. That's not what you want it. So only need to do is press Escape when you are still holding the eraser button. And it will just get out of the command. If I'm relating, we're pressing the left-click and not a leasing. And if I press the Escape key, can see that I go to the command and I don't delete stuff. So one last time, if you only delete stuff using there is a dual left-click drag and then release your left key so you can delete stuff and then schedule. In the next video, we'll learn how to use materials and start bringing in stuff in SketchUp. You can also go ahead and create multiple shapes and sizes that we have a canvas and then we can paint on top of this. Well, let's see you guys in the next video.
12. The Materials Window in Sketchup for Windows: Hey guys, welcome back to yet another video. Now in this video we're gonna learn, use the materials window from our default tree. So you will find the materials we know in your default rain or judy poultry is not shown here, can go to Windows default re amplicon shortly. My initial new. So this is our materials window and you're you have the actual materials. So if we click on the Home button, you can see that these are the various materials and these materials actually belong to swallow. So this is how materials. So by clicking the Home button and simply shows you the radius materials that are bought scene. And in this case, we have Somalis materials which are part of our scene. Now, SketchUp comes pre-loaded with those set of materials. So if I click on the drop-down box, it comes with various kinds of materials for various categories. Let's go to colors first. So click on Colors and also select any color. It changes to the bucket tool, which is B on your keyboard, shortcut for being bucket. And now you can start painting in stuff in SketchUp. So I can use random colors. Then being 10, some abstract art. So I would suggest that you guys also try out and create something cool on SketchUp. Just some duty for now. I'm going to create 3D Lego. We also have some other materials which you can check out. We have a glass material and then we have metal, landscape and so on. I personally do not use SketchUp media nutrient or a lot because I'm a really useful and I create 3D materials instead. But this is a great base for you to start. And if your colleague showing to the views and elevations do your client, then this would definitely help you out in designing your space. So we have various materials. Finally, to fill this up. We also have wood. I want to show some wood in your scene. And we also have some roofing materials as well. Now these are great to export SketchUp images like I mentioned before. But if you had a video.So there is a different workflow do materials and I'm going to show you that we read part of the main course. You can also edit the materials if you want or if I click on Edit. Now this is the medulla we're going to edit, which is roofing shingles, which is this. You can change the color if you like. You can also match the color on the screen if you like. And you can also reduce the opacity. So you can play around with these options. Now the most important battle middle endometrial dialog box is the seismometer because I use it in battle with SketchUp. Now for example, I want to increase or decrease the scale of this texture. So I need to select this material for us. So we want to select, and then we have something called those sample pain. So click on Sam Belbin, select those material and then go to Edit and change the size and sit. Let's say I want to make it smaller so one foot. So it's chin and it changes proportionally. If you don't want to change it proportionally, you can click on the unlock aspect ratio and then change though. Others say, do your wish. But I would suggest I do change it proportionally. Now for the Mac users though, Material dialog box would look a little different. And I'm going to show it to you in the next video. Finally, if you click on the Home button, it redirects to in model, which means these are the various materials that are loaded in your scene. So these are the actual materials that are loaded in your scene. And you can see those by clicking on the Home button. And if you want to increase the thumbnail size, if you are this small clicker, which is DTLs, and change it to extra large or large. I'm going to leave it at large. Now let's say there are some material that you don't use. I'm going to delete some, maybe delete this. You can see that I'm using the Select tool to delete stuff and sketch up. And then you can click here and click on purge unused. So that would delete any materials which are not part of your scene. So I hope that gives you an idea of materials. We're going to be using it quite a bit in our scenes. Along with the reading material, acidotic goes well. So I'll see you guys next video.
13. The Materials Windows in Sketchup for Mac: Mock users working back to yet another radio. I'm gonna switch on the materials window and I'm going to be explaining materials dialog box in Mac, which is slightly different from the Windows version. So you can press B on your keyboard to act with materials window, which would show up on the rate. Or you can also go to Windows and switch on materials it as well. So this is our main material editor in SketchUp, and you can dial will between the radius dabs in this window. So we have the colors tab, which contains reuse crayon colors. And you don't really find those Material Editor in Windows version of sketch up. So this is pretty cool for the MCAT of this. And we also have the public eye cornea, which contains the main materials in your scene. So SketchUp comes preloaded with a library which contains various materials from different categories. No Doppler or material. I'm going to quickly draw a rectangle and also do ate it. All right, so to apply a middle, you can select the material and it would switch the bucket tool. And then you can simply click on a face to apply the material. I'm going to switch back to colors and then select the color of my choice. And I play dough material on May 5th. So there's different tabs for colors, but I prefer the crayon color down, which looks pretty neat as well. Now, if I go back to the brick icon, you can see that this is the last material chapter. So if I click on the Home button, you can see that in the bottom, we've added this material. So the home button simply indicates that these are the radius materials which are part of vSim. The add-on materials which you see are actually part ofs formulas 2D figure. Now for example, if I add another column and if I go back to my home at the deals, you can see that the blue is the newly added material. And if you want to edit any of these materials, you can select the material. Click on Color and click on Edit. And it would switch to the edit mode. And you can change the size of that texture, reduce opacity and mode. You can also increase the size of geometrical box in case the materials aren't showing up on top. Finally, if you're using really for SketchUp and you want to show the 3D toolpaths. You can go to View, click on pooled Pali, and then switch these on one by one. And once you switch them on, you can simply dock it to the left L and one below the other. Three, we're not going to be using the Mac version of SketchUp, but the reader user interface and the functions are similar. Boat and Windows and Mac as well. All right, so that was a quick intro to the materials for the Mac users out there. I hope you guys found this useful if you'd like me to create any additional tutorials. But you would find useful with SketchUp for Mac. Feel free to comment in the discussion box below, I'll see you guys in the next video.
14. The Push Pull Tool: Hey guys, welcome back to yet another radio. No. In this video, we're going to learn how to use the push-pull tool and finally create some 3D and arsine. So Dockery, the bush bull tool, you can go to our main tool, bio and drawing toolbar and click on the push tool. Or you can press V on your keyboard to activate the push pull two. Then I'm going to zoom in and I'm going to start exporting these boxes up. So you can just simply click, left-click and release and then start dragging it on top. And now you can give a height. So I'm going to give her height of say, 15 feet and then press Enter. You can also simply click release and click again to give a height based on your discretion. Or you could give it with a certain height and mind. So let's say 20 feet for this grassland, which is seems pretty darn. That's two flows then feed as each float for a building too quickly in India, and I'm sure in most other countries as well. And all phase, click your release my mouse button. You can see that I can only drag it to the 0, so the offset is limited to the site. But once I click again, I can drag it on top. So there are some quotes in Bush Boolean, but it's a fun tool and you can create some really cool models using the push-pull do. Now let's say you're dragging those fears and you give the wrong measurement. So I'm gonna give him 10 feet. And then I realize I need to give only five feet. So now before you click anywhere else, now if you want to overwrite the previous value, only need to do is type in the value again, which is five feet, and then press Enter. So it overrides the previous value of ten feet. And then you have your model at 40 feet. And if you again accidentally click on the wrong face and you don't want to push this. Either click on the Select tool or you can also press escape to. So that's a quick video into using the brush tool. And I've created something abstract and awesome and sketch up, I hope you've created the same. Don't try to be a perfectionist right off the bat. Player onto the tools, get used to it. And then slowly perfection comes as you keep getting better. So that was a quick look into the basic tools. And now in the next video, we're going to learn how to create our foss room and sketch up and decorate the room. So I'll see you guys in the next video shows.
15. Saving in Sketchup: Because now before we jump into the modelling of our room, we need to see it, this model, which is super important, and I forgot to mention that in a previous video. So go to File, click on Save. If you're not saved the file at all. Or you can click on Save As, as well if you want to create a new copy of your file. So I'm going to click on save. And now we want to do my directory where I need to save this file. And I'm going to give a name for this. So I'm just going to call it abstract 3D. Ok. And now you can save your file in any version. That's the best part of what sketch out, which I really appreciate. Because in other software, especially in Revit, you can't really save it in a lower version, but SketchUp gives you the option to save it in a law version. And if you're timid or the employees are working with another version of SketchUp, you can simply click on that version and click on save. I'm going to leave it in the default SketchUp model and then click on Save. Now if you want to make a copy of this, you can go to File, Save As change the name and click on Save again. Or you can also go to File, click on save as, copy as. And then you can see that it automatically put a number to it, which is abstract 3D art one. And just notice what happens on top. We have the name as abstract 3D art. But if I click on Save, it's going to remain the same. And a lot big this name. So if I click on Save, you can see that remains as abstract 3D art. And if I open my folder, we have two files. So File Save has copy as simply keeps an history of the updates in your schedule file. And it's a good idea if you have multiple changes in your model, you simply do a file, save as, copy as and it will create a copy of your main file. And you can always open that file in the main file crashes or comes up potatoes. So hope you found this video useful. In the next video, we're going to start modeling our room. Let's get started. So I'll see you in next video.
16. Setting up Scenes in Sketchup: Hey guys, welcome back to yet another radio. Now in this video, we are going to be setting up our scenes are also known as camera views. And then we're going to change the view mode to parallel projection, which is also an auto mode. And finally, we want to export JPEGs out of our plans and elevations. It's super-simple glue. So let's get started. So to create a scene in SketchUp, you need to activate the default dream. And the bottom of the default dream. We have something going scenes. So scenes basically as the camera view in SketchUp. And it's super important and have your scene setup right from the beginning before you get into modeling. So I'm going to create my scene by clicking on the Add Scene button or the plus button neuron. So this would create a camera view. Now let's say our orbit and move to another side. And I want to go back to that original camera view. All I need to do is click on scene one year on the top-left. And it would go back to the scenario. So each time you click on Plus, it would always create or tab on the top here. Now I'm going to set up my plans and evaluation rules. So to do that, I need to switch from my perspective view to something called valid production. So do that, go to camera and click on valid production. So essentially a valid projection mode is a three-dimensional space. What you can see you, but the lanes in the three-dimensional space are always parallel together. So you can see that this line is parallel to this line, and this line is parallel to this line. Whereas in perspective mode, you have a 3 perspective where these lines actually converge to a vanishing point in space. We learned more about perspective and parallel projection generally in drawing courses and also an architectural school and other artistic courses. There's something super interesting. So I would definitely recommend you guys to give it a read. So now we're gonna go to our valid projection mode. And now we need to set up a plan view. So to setup our plan, you go to Camera, click on standard views, and click on top. So this is our plan view and now we need to create a scene for our plan view. So I'm going to create a new scene by clicking on the plus button. And we have created our scene. I would encourage you guys to also rename the scene. So you can right-click here and click on Rename. And I'm going to call this top view. So now you can switch between scenes as well. So if I go to Scene 1, it switches back to our perspective view mode. If I click on top, you will just do our top view. You can also switch on the shadows to give it more of a cool effect. So go to View and click on shadows. And if you want to adjust the settings and the shadows, you can go to your shadows dialog box here, the default, and then adjust the settings accordingly. Once you adjusted the settings, It's super important to update the scene. So right-click and click on Update. Now if you don't update the scene, I haven't clicked on update it. And if I go back drop you. It removes those settings and goes back to the original scene. Settings. Follies makes you as soon as you make any changes that you update the scene. So I'm going to update the scene again. Let me just go to shadows again. Just check whether shadows. I'm all right. I'm happy with this and I can update. Now if your system is slow and if your shadows are on, it's going to start hanging your system. So it's a good idea to switch off chartreuse after you've updated though settings. So I'm going to update the view as well to zoom out and zoom in so that it's centered the screen and then switch off the shadows and then update the view. All right, again, delete. So really for now because we don't need the scene. So this is our plan view. And now we can create our front view. So to create our front view, all we need to do is go to camera three core standard views and click on front. So this is our front view. And I'm going to create another scene. So right-click and click on Add seen. So there's two ways to add scenes. You can either right-click here or you can go to SEO and click on the Plus button. So I'm going to rename this, call this Francine or frontier. Click on Update. Now if you didn't notice that I gave a shot GOT for parallel projection and also DOP you to reasoners. When I'm designing a space for proclaimed in, when I'm doing an interior design project, it super simple for me to go to the plan view, but by simply pressing Alt W to switch to pal production and then pressing RD go to the plan view. This helps me to model faster, move stuff around easily and also speed up my workflow. So you guys can go ahead and do that as well, where you can change the shortcut to all plus w and the top. You want to know how to change the shortcut. Go to Windows and go to Preferences. Then ghoulish shortcuts, and search for valid projection. And then you need a simply type in alt W and press the plus button Europe. I've already assigned, but I'm going to press yes. Anyways. And also make sure you go to the top. You embrace all. Finally, I also have given a shortcut for the front view. I haven't given it, so it's going to be all then F. And then finally press. Okay. So now I can switch between perspective and valid projection mode. Go to the front view, the top view, super-fast. Now we need to export these views. So go to your top view. Now one exploited with the shadows, go view shadows. And then to export, simply go to File, Export and click on 2D graphic. Now we need to give a name for this. I'm gonna keep it abstract art, 3D art called stop you. And place it in the directory of your choice. You can also change the format, so mine as JPEG format. And in SketchUp Pro, you have the option to save it as a PDF, EPS file, bitmap, JPEG, if PNG and also altogether. I will be showing this later in the main course. For now, I'm going to save it as a JPEG. Check the options in case you want to increase the size you can do so you are as well. I'm going to use the US view says there's OK and then click on Export. I'm also going to go to front view. Go to shadows. Continue the shadow settings a bit. You need to understand from where the shadows are falling. So this is our NADH and right now it's set up to fall from the morning sun. So I'm going to click on this again. Set it up like this switch on the shadows. And that should be fine. All right. Once you're happy with the scene, go to File, click on export 2D graphics, and change this to the front view. Let's check out our exports. So congratulations, you've just created your first two images of a sketch up. I'm super proud of you all, and I hope you found the process super-simple. In the next few videos, we're going to learn how to create a room and use these simple techniques to create an awesome interior design. So I'll see you guys next few videos. Shows.
17. Making Groups in Sketchup: Hey guys, welcome back to yet another Radio. Nowhere in this video I'm going to be talking about the importance of groups and why you need to model each and everything in SketchUp groups. Let's go. So let's create a new scheduler file, go to File, and click on new. To me, lay it back. So now we need to create two rectangles and then push them out, just so that I can show you the difference. So I'm going to make my first rectangle and then my second rectangle. And now I need to give height or an extrusion. So I'm gonna use the push-pull tool, select the face, press B on your keyboard to activate the push pull tool and give a height of five feet. And this one as well. And let's make one of these boxes are group. So to make it a group, you can triple-click on the face and it would select all the faces and edges in this object. And now you can right-click and click on Make group. Alright, so we have one object which is a group, and one object which is not a group. Not the reason why we create groups and SketchUp is because of something called stickiness. So as you can see, we have this object. And if I try to move this, so I'm going to press M on my keyboard to activate the move tool without anything selected. Now if I click on this edge point and start moving, you can see that I move who lead that edge point and not the entire object. But in this case it's a group. So if I click on Move tool, and if I click here to select the group, I can move the entire into d. So that's one of the main differences. Now let's say I make a box here which is connected to this object. And I'm going to give a thickness again. Similarly, I'm going to make another box here and give it a thickness here. Now since this is a group, and if I move this, it's not really stuck to this phase or this new box. It's a separate entity and I can move around better way I like. And if I try to move this, so I'm going to select some faces and edges out this box. And now we first ray moving this, you can see that it's stuck. So this is called stickiness. Where if it's not a group and I make something attached to this phase, it's always going to get stuck to that face. It's always get into the habit of creating groups and then placing them together. This helps a lot and it would definitely easier modelling workflow going forward. Now here's a quick tip to make groups super-fast and sketch up. And that's by assigning a shortcut G to make groups. So we're gonna do that by going to window's, going to preferences, clicking on shortcuts and search for MC. So we have made group and the bottom you're going to add a shortcut G, and click on Plus. So I've already assigned it to make group. Click on Yes. In your case, it may have been assigned to make components. I would suggest that you reassign it to make groups because we generally use more groups in our models then components, especially when it comes to interior design. So click on Yes and press Okay. So now to make groups, all you need to do is make your rectangle. Double-click on the face to select the faces and edges. And then simply press G on your keyboard to make it a group. So now those are separate group. Now if I enter those group, you can see that the rest of the ADR gets grayed out and we have a bounding box here. And then we have our face and save. So this helps me model only what is inside this group. So I'm going to just push those out. So we have another group. And I'm going to switch on something called outliner in our default tree. Fit doesn't show up in your default re. You can go to Windows default ri, and such an audio file you can right-click on the default way, click on Manage trees, select the default ri, and switch on our drainage. So what outliner does is it gives a name or it details out a hierarchy of your groups. So we are one group, yogis, we have another group, and then we have one more group them. You can also have a group within a group which is called a nested group. Now let's say for example, you want to nest this group inside this group. So to do that, you need to select this group, press Control X, and then you need to enter this group. So now you can see that we are inside this group because of this bounding box. And to enter the group, you need to double-click. After you enter the group, go to Edit and click on paste in place. So as soon as I pasted it in place, you can see that this group, which is this, is now undergo main group. So we have a nested group within the main group. I will be showing you instances of heavy use, nested groups competence and more in the main course. So that is a quick tutorial into groups. I would highly recommend you guys to make everything in groups from your anode. And I will be showing it to you shortly when we start modeling our room in SketchUp. So I'll see you guys in the next video.
18. Using the Move Tool in Sketchup: Hey guys, welcome back to another video. In this video we're gonna learn how to use the move tool. And we're also going to learn how to play in multiple copies are added using the module. So to activate the move tool, you can click on the Move icon in your toolbar, or you can press M on your keyboard to activate the move tool. So as soon as you activate the move tool, you can click on the group you want to move. Make sure you click on a group and not any face or edge. You can Morpheus and edge, which I will show you shortly. So the more group you simply need to click, and then you can either move it in the red axis, being axis, or even in the blue axis. So I'm just going to move it this way. So go ahead and try using the move tool to move stuff around. Now if you want to move it locked to the red axis, you can click ones to move this, and then you can snap it to the red axis where everything that right arrow key. And now it snaps to that axis. So we're going to trade coding over the state. Always snaps to go red axis. You can also move it by a particular distance. So as you can see in the bottom right corner, the distance changes. And now I'm going to type in 25 feet and press Enter. So it's moved by 25 feet. Now if you want to make a copy in SketchUp, you can select the group, press M on the keyboard to activate the Move tool. And now you can press the Control key. Ones. Make sure to not press and hold, simply press and release. And it adds that plus icon to your Move icon. And now you can click once more and along the green axis you can lock into the green axis as well and place it at around 25 feet. So that makes a copy. I'm going to show it to you again. Select the group. Press M on the keyboard, act with the move tool, and then press Control on your keyboard. So now you can click and make a copy. Now if you want to make multiple copies in SketchUp or multiply by n times, only need lose press M to activate the Move Tool again, press control. Make sure to press and release and not press and hold. And then click once. Click on the second to place it, and then type in your value. So I'm going to dive in x and then press 10 and then press Enter. So that's copyrighted by 10 times. Now let's say you want to copy it only fight dams know without pressing anywhere. How do you escape dual or anything? In mid action, I'm going to press X5 and Enter. So you can always switch if you are given the wrong value. So that's the copy ten times. Now let's say you want to copy it to a certain distance and divide that distance equally by five or 10 times. So I'm going to select this group, press M and then press Control. Want to place it here. And alpha divide by CS6 and then press Enter. It divides the distance from this edge to this edge by 6 and equally spaces of your group. So that was a quick tip into using the groups. Now you can see that and I'm orbiting, it sort of clips this plane. And I'm sure a lot of students are going to face this problem. So the best way to resolve this display simply going to camera and switching to perspective mode. So if you switch to perspective mode, you're going to avoid that clipping problem in SketchUp. Finally, if you want to edit the group and move or lead this part of the face, you can enter the group and you need a select only this part of the group. So I've selected believed that edge, four edges and the face. Now I'm going to select the Move tool. Click once and I'm going to drag it by, say, two feet. And I increase that distance by two feet. So that is a quick tutorial and do the move tool and how you can copy and make arrays are multiple copies and sketch up. We will be using it a lot. And the Goethe and in the main course played out, get used to it. And it'll definitely help you in your workflow. Now, the next video, we're going to learn how to use some particular shortcuts, which I mostly use in my own workflow that would definitely help your See you guys next video.
19. Using Shortcuts in Sketchup: Hey guys, welcome back to yet another video. Now in this video, we're going to be showing you the radius shot guts that I personally use in my daily SketchUp workflow. So the number one shortcut that you need to learn is the hydrous to the model shortcut. So we're going to assign the shortcuts first. And then I'm going to show what each of these shortcuts do. So let's go to Windows and go to Preferences. Click on shortcuts. And the first one we're going to assign is called hydrous to the model type in height. And when you go to the bottom, you'll find this view slash component, edit slash height rest of the model. So given a shot God called G, if you want to assign a shot, GOT simply click your press G on your keyboard and click the plus button I've already assigned. So this is where there's dialogue box showing up on a press. Yes. Now the next shortcut is edit slash head. So I was saying F2 for edit slash eight. Unhide all, which is F4 on your keyboard. Unhide last is F3. So three shortcuts your and then hide the modal. Know the other shot got a term, we'll use something called X-Ray mode. So I've assigned the shortcut way for this, you can simply click your plus Y on the keyboard and press the plus button. So apart from these, I also use the cameras slash valid projection shortcut, which is Alt W, and the front view, which is alt F. And finally, the w, which is d. You need to press Alt. And then it'll show up here and make sure to click on Plus. So once you've added all of your shortcuts, in case you want to use it in the future, you can export the shot guts out. Let's call it a SketchUp data fail. And then you can re-import it in other systems or in future versions. So once you're done with this, but that's okay. So let's start at the first shortcut which is hydrolyzed to the model. Now for example, if we want to edit a group and I want to edit the edge face or this face, the fear CR rate. You need a plus J on your keyboard. So what that does is it hides dirt as to the model. And it only shows the group which is active, as you can see with this bounding box, all of them make something new, maybe a rectangle or something like this abstract shape. And if I press Escape, you can see that I've added it to this side face of this group. So it helps when you have a lot of groups inside your model and you need to edit a specific model or group. Now for Endo those group and a Gandhi edit that side, fears. So this helps in hiding the Leicester model. It's simply toggles between the main model and the OH, group which is active. So you can start using the tool as well, hydrous to the module. And next, which I can use something called the X-ray mode. Sometimes in CO2, but it's difficult to select certain faces and edges. So we use the extreme modes of replace Y on my keyboard, you can see it's a wireframe mode. And now you can see the back part of the faces as well. So now you can enter the group and you can also select the back part faces and below face or whatever it does. It helps when you're trying to move stuff, degrading a room. And if there are too many things in your space and then it'll be difficult to move stuff. So use the extreme mode to see things which are inside your model. All the shortcuts it make more sense once we start modeling art. The next shortcut is hide and 18. So if I wanna hide this and edited later, I can press F2 so it's hidden. And if you want to see what is a linear model, you can go to View and click on hidden objects. So you can see that this mesh means that this model is hidden. Not show the hidden objects. And if I wanted a 100 height using the keyboard shortcut, the last object which I hit was this box. So I can press F3 to unhide the last object. And if I heard a lot of stuff, and I want to show all the objects which are hidden. You can press F4, so that will unhide all of your items. So these are the mean shortcuts that I mostly use. And apart from that, like I mentioned the previous few videos, if you want to go to their plan view, the best way is by going to your belly projection. And then we just all w and w, which is d. And you can also switch between perspective and bile production in the top you as well. There's also the front view. So this helps in modelling foster. This workflow is generally used in 3ds Max, but in three years max we generally have four windows. That isn't SketchUp, you can only work with one viewport. So I hope you found this video useful. And in the next video we're going to finally start creating our room. So I'll see you guys next video shows.
20. The Tape Measure Tool: Hey guys, welcome back to yet another radio. Now in this video I'm gonna show you how to use the measure tool to measure stuff, the AID grades, and also scale in SketchUp. So to activate the tape measure tool, you can press B on your keyboard and that would activate the paper image icon. Or you can click on the measure tool in your drawing toolbar. So now I'm going to create some guidelines OR gate binds in SketchUp. So to create our guidelines, you simply need to click on the edge and then drag out a guideline. So this is a guideline. And if you want to create a guide point, you need to click on the edge of your group. And that would create O gate barring claim. The main differences, the guidelines are infinite lanes because you have infinite lanes are not again, that is the gate points are simply just earn dashed line to maybe refer something out. So the gate bind lanes come from the edge points for endpoints in a group, whereas the guidelines come from the edges themselves. So you can create multiple guidelines. And if you want to create our guidelines are the particular distance. What you need to do is click on the edge of the group. And then you can scroll on top. You can maybe press the up arrow key to snap it to the blue axis. And then given your value, which is going to be three feet. So I've given a guideline which is three feet. And now I can create referring these guide points and create something else as well. I'm going to press Control Z. Now before I show you how to scale stuff in CHO, these guidelines, if there are a lot of them, it would be annoying to continue modeling and sketch out, but all of these on. So to switch this off, you can simply go to view and switch those off. So if you click on grades, it turns off all the gates. If you go to View and click on grades again, it knows them back on. If you want to delete them from your sketch our window, simply go to Edit and click on Delete gate that would delete all the guides in your sketch up window. So you can do that towards the end. Once you've done all the modelling. Now I'm going to show you how to scale in SketchUp using the tape measure tool. So if I press B on my keyboard, you can see that it comes along with plus dash symbol. So if I press Control on my keyboard, you can see that disappears and it documents. So if I make it disappear, simply the tape measure tool. Now with this tool without the plus button, Eigen scale stuff in SketchUp. So how do you scale stuff? And all super important that you need to know what you want to scale. If you want to scale the entire model, you can simply use a reference point. Now let's say for example, this is a wall which is at seven feet, eight inches, but maybe in their life that actually 15 feet. And the entire model will scale to this reference measurement which are going to take. So I'm gonna click once and then we want to click the second name at this point, which is seven feet, eight inches. And now I'm going to type in my value without pressing Escape or any other key. So I'm going to type in 15 feet or 15 apostrophe and press Enter. Now we're due to ask you if you wanted to. You say is the model. Note that all the components would get resized as well. So click on Yes. And now you can see that everything is resized. So if I want to measure in SketchUp, I can click once. And now we don't clicking anywhere. I'm just going to hover on the second part. So now you can see that it's scaled to 15 feet. So I'm going to undo that. Now let's say you want to scale only this group and not the rest of the groups. So if you're on a scale only this group, you need a simply enter the group. And now we are inside this group, as you can see, the bounding box. Now I'm going to select the whole thing and I'm going to press D again. But you can notice that it's got that plus symbol there. So I'm going to press Control again to deactivate the plus symbol. And then simply click once, hold to the adopt to see the measurement is four and our feet, maybe I need a smaller room or a smaller box, whatever it is. So I'm going to click the second name. And then I'm going to type in my value, which is going to be two feet and then press Enter. After you're done pressing Enter, make sure to click yes. So that's the actor group, which is going to get precise to do feet. So let's check that out. I'm going to go back to the Select tool, click out to the group to exit the group. And then measure though, says, so we can see that it's two feet. So that was a quick introduction to the deep measure tool. Once again, to reiterate, you can measure stuff by clicking ones and simply this hovering on the second to find out the measurement, you don't need to really click as soon as you Hall on the second you can notice though measurement. The second is simply creating guidelines and guide binds. And finally, the daughters scaling stuff in SketchUp. So I hope that helped you all. And we will be using the tape measure tool a lot in our modeling process to check stuff, give reference length and more. I'll see you guys in the next video. Shows.
21. The Rotate Tool: Guys, welcome back to yet another radial node. This video I'm going to show you how to use the rotate tool. So the rotate tool works similar to the Move tool in terms of its functions, but obviously it rotates stuff in the sketch up. So to activate the rudy tool, you can press Q on your keyboard to rotate in SketchUp. All you can click on the rotate tool in your drawing toolbar. Now what I would suggest is that you select the group first and then plus the rotate tool or the Q key on the keyboard to know which group are competent you want to rotate. So if you want to rotate this, you need to first click the base point from where you want to rotate from. So I'm going to randomly click some IO and space. After you click, you need to click the second, which is going to be our reference point. So I'm going to click this as a reference point. And I'm simply going to rotate it to 90 degrees. Now you can also rotate and copy like how we have move and copy. So I'm going to click once again the point of rotation. And then the second would be the reference point which I want to rotate from. And now if I press Control key on my keyboard, it makes a copy. So I can make a copy this way as well. And you can also do date and make multiple number of copies. So I'm going to maybe select this now. I can also dart at a certain distance, so I'm going to use the line as the reference. I generally use the ln more than the tape measure tool to draw a reference length. But it's your call. So we want to give this, I'd say 30 feet. And now I can select this group rescue drag to it though. Today tool. Select the endpoint and then select the reference point we want to rotate from. And then you need to click on the second to place it. And after you place it, before you click anywhere or press the Escape key, type in x into great detail and press Enter. So that makes Adi of copies of your group. And if you want to adjust TO value, since 20 doesn't close the loop without pressing anywhere. Again, I'm just going to type in 2003, That's Endo, and that would close the loop. That's pretty cool. Have you created a circle shape? You can also divide stuff? No, for example, we'll copy this now and rotated from the center, less secure. And then I'm gonna divide by say, 10 presenter. And that would divide it into a semicircle, equally spaced out. So that's the rotate tool, a pretty handy tool when it comes to rotating stuff in SketchUp. I also want to bring to your attention that you can rotate with the move tool. So Febreze M on my keyboard. And if a whole or any group, you can see that we have these points. So these points here, you can simply click them and then rotate in SketchUp. So you don't really need to use the repeated all the time. But in certain stages you might require to use though for day 2, you can simply use the Move tool and click on this anchor points to forget and sketch up. So that was a quick introduction into Rotate tool in SketchUp. In the next video, we're going to learn how to use competent in SketchUp. See you guys next video.
22. Making Components in Sketchup: Hey guys, welcome back to yet another radio. Now in this video I want to show you the importance of creating competence in SketchUp. On the previous video, we made the circle. But each of these objects here are actually groups. So FanDuel group and edit one of these. You can see that it is independent of the rest of them. So I need to go to each of these groups and make that change. And that's a big bin if you are modeling and sketch out. And if that are thousands and thousands of groups which are pretty much the same. But since they are non-recombinant, you need to go to each of them and edit them out. So that's the importance of components where if you copy the same component and make this loop, and if you edit one, it would affect the rest of it as well. So let's quickly do that to help you understand competence better. So we want to call P This group to the sideshow. So I'm going to use the Move Tool press Control on my keyboard to make a copy and click once that's created a copy. Now, this is a group, right? So I need to make it a competent. Simply right-click and click on May competent. So this would make it a competent. You can give a name for this competent and we'll call this typical box. You can give it a description if you like. I generally don't give a description. And you can leave the rest to the competence as is, we don't really use any of these much in SketchUp unless you want to export it into an AFC. But that's for later stage where we want to talk about BIM and mortar board, BIM modelling with SketchUp, but that's not for now. We keep that for later. So we only need to give a name. So I'm going to keep it as typical box and then simply click on Create. So now I'm going to create the same loop. So let's make a line again. Maybe at 20 feet the stem. So the rootedness, select the group rescue on your keyboard to activate the rotate tool. Lets the top arrow key so that it snaps doodle top axis. And now you need to click the base point. You're going to rotate from click the reference point. You can maybe click event this endpoint as the reference point. Press Control on your keyboard to activate the copy mode in the dual and click on the endpoint to make a copy. Or you can type in x into 14, whereas Endo maybe x 15. And we are done. Now since this is a component, if I enter the group and press B on my keyboard to activate the Push Tool, click once and drag it on top. You can see that the rest of the competence change as well. So competence comes in handy when you're modeling something which is similar in the scene. For example, maybe a railings, stair, steps, stairs, some same furniture, maybe like dining table chairs and so on. It's important to make them accompanied. If you don't make them a component, you'll end up wasting a lot of time, energy, and it's not really efficient when it comes to modeling and sketch up. So hope you found this video useful, do test out component in SketchUp. And we will learn how to use competence later in the main course as well. So see you guys next video shows.
23. The Scale Tool: Hey guys, welcome back to yet another radial. Now in this video we're going to learn how to use the scale tool, which is another important modelling tool in SketchUp. And it's one of the last rules that we're going to be learning. And then we'll jump into creating our group. So to activate the scale tool, you can go to your drawing toolbar and click on skin. Although shot God for the scale tool is S, So you can press S on your key to activate the scale tool. So you can click on any group to apply the scale function on. So I'm going to click to apply it on this group. And now we can start scaling it using these edge points. So if you want to scale this proportionally, you need to click on the corner edge points. So I'm going to click here and we can see that this box starts scaling uniformly. And if I click on the points in the middle, you can scale each of these edges. You can scale it this way. Scaler on top. So you can scale at the bottom as well. So we generally use scale tool along with the push pull tool to resize objects, increase the size of certain objects, scale them proportionally, and a lot more. So that's a quick function using scale where you can model stuff and also resize stuff. Now if you want to scale them proportionally, or if you want to scale them by say 50 percent or a 100 person can select the group and then press S on the keyboard, act with the select rule. Once you click on the corner point, you can start dragging them to scale it proportionately. And now in the bottom right corner, you can see an option called scale. So I'm going to scale this, don't do half of it. So I'm gonna type in 0.5 and press Enter. So that would scale it to 50 percent of the original insights. And if I want to scale this back to the original size, I'm going to simply dive in two. So that would bring it back. So that is a little mat that is required to using the scale tool if you're honest, proportionally scale everything. But I personally use it simply to stretch it and model foster. There's another way you can use the scale tool to make objects to a certain size. Now if I enter this group and let's say I want to scale this entire group. So I'm going to select the entire thing. I'm going to press S on my keyboard to activate the scale tool. And now if I click on this grid points here, I can give a size for this object in this axis. So let's say I David three feet, press Enter. So that's given a size of three feet. Let's measure this out. And you can see that it three feet. Similarly, you can scale it this way as well. And let's say I'm going to give 350 or as well. So now it's three feet year as well. And finally, let's make it a cube. So press S on the keyboard to activate the scale tool. Click on this midpoint here. And I'm going to type in three feet. And now we have r cubed. So that is a quick to go through and do the scale tool. We use it quite a lot in our modeling as well. And we'll be showing it to you in the coming few reduce when we start modeling iPhone. So I'll see you guys next video shows.
24. The Follow Me Tool: Hey guys, welcome
back. In this video, I'm gonna show you
an awesome tool in SketchUp called
the follow me tool, which you can use to create casework profiles and
a whole lot more. To start off, let's
create our line. So use the line tool, which is L on your keyboard. Click once and you can
draw it in any axis. So let's start on the green axis and click the second time. Now I'm going to press space
bar to get out of that tool. Now let's create our profile so that we can wrap it
around this line. So you can either use
the Rectangle tool or the so-called tool, or you can also create
your own profile. So let's start by using
the rectangle tool. Let's press R on my keyboard. And then what you
can do is before you click anywhere or before
you create the profile, you will need to
change the axis. So tap the left arrow key
on your keyboard to change the axis and then click once. And now you can see I'm
drawing it on the green axis. And you can either give a
dimension or you can click the second name to
create your shape, which is going to
be odd raw file. So now what you need to do to
use the following me tool, and I'll show you
the best way to use the following me
tool as well is to first select the line
that you want to profile to be extruded along. So I'm going to click
on this line here, which is our bot. So make sure to select a path
first and then go to Tools. And then you will find
the following year below the push-pull tool. So you can also
assign a shortcut, but I had to use the
following me tool. But in case you're
gonna use it a lot, you can assign a
shortcut as well. So let's click on Follow me. And then you need
a simply click on the face to create that profile. So let's do the same for
the circle tool as well. So this time I'm going
to create a line and I'm going to create
a line as an L shape. So I'm going to click again
to create an L-shape line. And then I'm going
to press space bar to get out of the command. Now let's draw our circle, which is going to be
perpendicular to this line to proceed to activate
the circle tool. And then again plus or tap the left arrow key before
you click anywhere. And now you can click
on this endpoint here. And you can either give our
diameter or the radius. So I'm gonna give say
about 1 " and damp and we have a small 1 " circle. Now let's create that profile, which is gonna be a
pipe along this line. So let's select the path first. So that is step one. Then you need to select the command or the tool
which is following me. So let's go to Tools
and click on Follow me, and then click on the
circle or the circle. And now you can see that
we've created a pipe. This is the basic functionality
of the Follow Me too. Now you can use it in
various scenarios, e.g. if you want to
create a modeling. So let me draw a
rectangle this time. Let's actually draw odd profile. So I'm going to use the
line tool this time. I'm going to click on the edge. And now if I want to make a
profile on the blue axis, I'm going to tap
the top arrow key. So make sure you get into the habit of using
these arrow keys because it's snaps when you are drawing
stuff in SketchUp. So I'm gonna give a
height of about 6 ". And I'm going to snap
it to the red axis. So tap the right
arrow key this time. Now where you give a
thickness of about 2 ". I'll go down and we've
created a rectangle. Now let's create an arc maybe. So let's click on OK. Julio
and click once there. And if you hover
to the other side, you'll find this pink line, which means it's
tangent to the edge. To click the second time and then you'll have to
click on the third time, which is Honda being cleaned. So make sure you're always
clicking on the pink line. So this way the weights that face then use the Eraser tool, which is E on your keyboard
and delete that edge. Alright, so we've
created a profile that you want to wrap
around this rectangle. So this is another way where you can use the
following me tool to simply select the
face off the shape. Do you want to wrap it around? And then go to Tools? Follow me, and click on the
shape that the profile. So you can see we've created
our molding as well. How cool is that? You can create multiple, various shapes. So if I undo and say e.g. if I make a rectangle this
way and delete this edge, and I'll select this face, go to Tools, follow me
and select the profile. You can see we've
created a profile that is so cool is that finally, one last scenario
which I can show you is if you're creating
a wine glass and so on. So e.g. if I make a
circle like this, Let's draw a line
from the center. And I'm going to draw it up. And I'm just going to draw a
shape like this rectangle. Now let's use the Arc tool
and let's click maybe at this corner you click again
and it started laying that, that maybe like this, maybe make sure you're snapping it to the
right axis as well. I'm going to delete
this shape here. We have sort of a wine
chip or a wine glass ship. Now, like I mentioned
in the start, select the face first, which is going to be the bud. And then go to Tools. Follow me and click
on your profile. So you can see we created. Cool wine glass. Now if you want to
have the opening inside, I'm going to undo. What I will do is I'll
make an offset like this, and then I will simply
extend these lines here. So the offset tool
shortcut is F, by the way, are not
forgotten any of those. So now we have a cool
profile like this. So let's select the
face colored tools, follow me and click on the ship. So we created a cool
wind loss as well. So there are multiple
scenarios where you can use the following me tool and we will be using it in
our course as well. Now one last example
that I would like to show is maybe using Follow
me to create casework. I'm going to simply draw a
rectangle and let's give it a 7 ft comma 3
ft and tap Enter. So basically this is the shape or the size
of a door shadow. So now what I will do is
I will draw my profile. I will draw a rectangle. So I will use the line tool and then go to the center there. And now what you can do is
you can give a thickness. So snapper, blue axis, you know how to snap it as well, give a thickness of about 2 ". And let's draw our
rectangle this way. Alright, so we have
our profile shape. So now we'll need to
create some bad Tanya. So what I will do is I will
use the tape measure tool and I will give the distance
from the edges about 3 ". And let's give another 3 " here. And I'll also draw a
guideline from the top lines. So let's give about 0.5 ". So now what I do, I will use the Rectangle tool and simply drawn Doppler
these guidelines. Then I'll use the eraser
tool and delete that. As a bonus. You can also give some curvier or let's see, e.g. let's use the so-called Julio. And let's give a radius
of about five MM. So you can type an M, M as well. So type five MM and tap Enter. And you can delete
these edges there. So let's do the
same for the site. Snap to the midpoint, phi m, m. Let's do it here as well. We have our cool ship,
no profile at this. So again, let's use
the following me tool. So select the face. Then let's go to tools. Follow me, and let's
click on their profile. So you can see
that we've created this cool guesswork
chateaux for our door, which looks pretty cool as well. Looks like more of a dog, which is used in
temples in India. By leaf, you want to
delete these guidelines. Let's go to Edit and
click on Delete guides. So that would delete any
of the guidelines set. These were various scenarios where you can use the
following me tool. Go ahead and practice it a bit. We will be using it in our projects in the
course as well. I'll let you guys in
the next video. Cheers.
25. Create your First Furniture in Sketchup: Hey guys, welcome
back. In this video, we're going to use all the
tools that we learned so far and create our first
furniture in SketchUp. So let's open SketchUp. The most important first
step before you create any project is selecting
the right units. So in my case, I'm going
to be creating a furniture and it's best to use the
woodworking template. So if you don't see the
woodworking template, you can click on More Templates. And then at the
bottom you'll find the woodworking millimeters
and the woodworking inches. Now if you're more
comfortable using inches, I'm sure most of the students
from the states use inches. You can go ahead and use inches. But in my case, I'm going
to start with millimeters. I will try and convert the
urines every now and then. So you get an idea of the dimensions are
used in this project. So let's select would
work in millimeters. Interface looks. And I'm using the
latest version, which is SketchUp Pro 2022. Now a highlight
feature which I really liked in this new version
is the search tool feature. You can click here to
search for any tool. You can simply type in. What
do you want to search for? For example, if you
search for Extrude and the push-pull becomes, it also searches for tools
within your plugins. So if you have
additional plugins and there are certain tools, for example, very light so you can search
for those as well. Those are super handy
feature which will help you search for tools
quickly in case you get lost. So you can either click
here or you can press Shift S and then
search for urine. So you can search for
rectangle and so on. But in our case, we're going to stick
with the shortcuts. Since modeling with SketchUp, shortcuts will help
you model faster. So now we'll create our table. So let's activate
the rectangle tool. So press R to activate
the rectangle tool. And then click once and release
the key from your modes. So now we can start
creating the rectangle, but it's always best to
give the right dimensions. So let's type in
the name mentioned. In our case it's gonna be 1500. Mm. Doesn't founded comma 750
and then press Enter. So you only click once and
you do not click anymore. You just need to type
in the values 2500, commerce and 50, and
then press Enter. That's how simple it is
to create a rectangle. Now doesn't find it
translates to five feet. Sound 50 MM translates
to 2.5 feet. So you can create a rectangle
which is five feet, 2.5 feet in depth on it. So now we have our base. As you can see. So let's make those groups so double-click to select
the faces and edges, right-click and
click on Make group. So this would make it a group. And now let's create
our table legs. So our table legs wouldn't
sit at the edges, but at an offset
from the table edge. So there's two ways you
can create that guide. The first way is by entering the group and
then creating an offset. So press F to create an asset, click once, and then you can give an offset
that around 50 MM. So that would create an offset. And then you can start placing our table legs at these points. So this is one way, the other way and
my recommended way is by using the
tape measure tool. So activate the tapers or tool by pressing G on your keyboard, then click ones on the edge. And I can see that we can
get this infinite line. So let's place this at around 50 m m from
the edge of the lens. So type in 50 or two
inches and press Enter. Similarly from this edge, click and release diaper
and 50 and placenta. Now we have our guide
points and now we can create our table legs. Are these edges. So let's activate the
rectangle tool again. Let's click here. You can see that it snaps
to that intersection. And then let's type in our
table leg base dimension, which is going to
be 50 m m comma 50. So that's two inches
comma two inches. So now let's select
this double-click, right-click and
click on Make group. So we have two separate groups. Now. Let's enter this group now. So to enter the group, you can select the group
and press Enter, or you can double-click on the group to enter
the group as well. Now let's activate
the push-pull tool. So press P, click once and
release your mouse key. And then give a
height of around 730. Height from the base
to the table top is generally at around 750 MM. So we can give it 20 MM
thick base at the top. Now, then you click outside
to exit out of the group. Now before I copy
to these corners, I will make this
group are competent. So if I make a change to
one of these instances, it would affect
that those as well. Right-click and click on
May competent and call this table leg presenter. Now let's copy to these edges. So select the table
leg as M to activate the move tool and tap Control on your keyboard to make a
copy or Option on the Mac. So now we can click
on the corner. Click and release, always
click and release in SketchUp, there's very few tools
that we click and drag. So let's click and
release and then let's place it at this edge. Awesome. So now let's select
both of these. So I can press and hold the Control key and then
select the second object. So you selected both
of these objects. Press M to activate
the Move tool, tap control to switch
to the copy mode. Click at this corner and then
place it at this corner. I'll let awesome. Now what I need to
do is make the base sort of smaller than the top. So before I do that, let me hide this right-click. So select Lobster right-click
and click on Hide. So now we can just
see our table legs. So let's enter this competent. So double-click to enter.
So now you can see that you can see
these instances, which means that
if you change one, it would change these as well. For example, if I push this out, you can see the
other ones change. But in this case I'll
have to scale this down. So let's make a drag selection from the left to the right. So that will just
select the base. Now press S to activate
the scale tool. Then you can press Control and Alt on the Windows keyboard
and then drag it down. So when you drag
it, the generally snaps to the point size scale. So you can see in the
bottom rate is 0.5. So once it snaps to that scale, you can just click to apply. So we have a nice
conical table lake. Now I have to
unhide that object, which I just said. So let's go to Edit,
click on unhide, and click on our geometry. Let's select this
face and mood on top. So select the face, press M
to activate the move tool. Click once at the bottom. Now we're not copying,
simply moving it. And to snap it to the top axis, you can press the top arrow key. Just tap the top arrow key, press and hold, and then
place it on top of the lake. Now let's check the dimension. I'm using the tape measure. It's around 730 m, so we can give a base
thickness of 20 MM. So let's enter this group, use the push-pull tool
and give it a thickness. So click once, click and release and type in
a value of 2020. And presenter. Alright, awesome. Now, generally tables will have a beveled edge
at the corners here. So let's do that. So again, let's
create some guides. Use the tape measure
tool and give an offset of around
50 m m from the edge. Alright, And let's draw an arc from this
corner to this corner. So let's select the arc tool. Click once I that edge and
then click on the second edge. And now if you hover
over this side, you can see that
snaps to the tangent. As soon as you see
the pink line, you can click the third time. Now it separates out the phases. Now, if you want to
delete this part, we can use the push poll tool to activate the push-pull tool. But you can notice that now it wouldn't actually push
this phase because this face is selected to select the right face
first and then activate the push-pull tool and then
click once and Bring it down. And you can see that offset
limited to minus 20 Aram. Please click on the edge and
that will get rid of that. Let's do it yard as well. So let's click on the Arc tool. Click once, click and
release the second time, and click and release
the third time. Now let's select the face
used to push poll tool. Click once and release
the key from your mouse. Then you can also
orbit to the bottom. Some students have asked me, how do you orbit
while pushing simple, you just need to click
and release on the face. And then you can orbit
however you like. And then at the bottom
you can click on this face to delete that edge. So let's do the same for
these edges as well. Awesome. Now I'll create an opening, the Center for my
wires and so on. So let's again create our guide from this edge and let it
snap to the midpoint here. So you just need to
click and release. And then you can snap to
any edge that you like. So in our case it has to
snap to the midpoint here. And similarly from this
edge, the midpoint. Now let's activate
the circle tool. So press C to activate
the so-called tool. Click in the center there. Now, a lot of students
make a mistake. Now you can see that I
didn't say this group, but let's press Escape,
exit the groups. So now if I press
the circle tool and then click the center. And then if I draw my circle
at radius of around 30 MM, you can see that I've
drawn my circle. But most students faced this problem that when they
tried to create opening, it wouldn't really
create an opening, but either it would create
a simple solid group. This happens because you are not creating the circle
inside the group. So it's very important
that you create a circle inside the group. So let me press
Control Z to undo. So you can see that
I'm outside the group. How do I know whether
I would say the group? It's because of this blue plane. Once I enter the group by double-clicking
or pressing Enter, you can see this dashed
boundary dotted line. That's how I know I'm
inside the group. And also make sure that
when you select the face, you can see this highlight
on the face as well. So now if I make a circle, so let's create a
circle and give it a radius of around
30 MM plus 30. And presenter, now
a device to face. And now if I activate
the push-pull tool, click once and release. Then either you can orbit to the bottom and then click
again to create that opening. So that's how you
create an opening. Always entail the group and
then create the opening. Now there's a lot of guides, so I do not want to
see these guides. To clear all of them in a simple way is simply
by going to Edit, Clicking on delete gates. So that would get rid
of all the guides. And finally, let me just
group all of these together. So make a drag selection
from left to right, right-click and
click on Make group. So you can see that all of
these groups come together. You're in the outliner windows, you do not see the
Outline window. You can go to Windows default
re-entry john outline. And what I generally do is
rename the outliner as well. So let's call this table, click once and then
click again to rename. And let's call this
table top. Awesome. So we've created our
cool looking table. And if you want
to play something on top of this table,
you can do that as well. Feel free to be creative. Let's go to Windows, PDB arrows. Search for statue. Let's probably bring this in. So let's click on,
Download, click on yes. Sometimes the placement
point is different. You just need to click once
to place it somewhere, and then click on the
corner and place it here. Then you can use the Rotate tool to rotate it by 18 years. Well placed are
cool looking model, I guess this is Caligula. Not really sure what this is.
 Manish Paul Simon, Architect | 3D Artist | BIM Expert