Transcripts
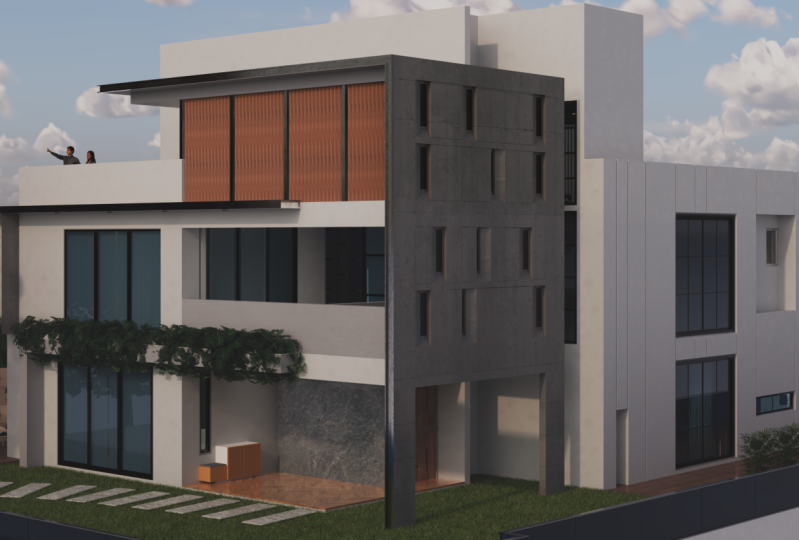
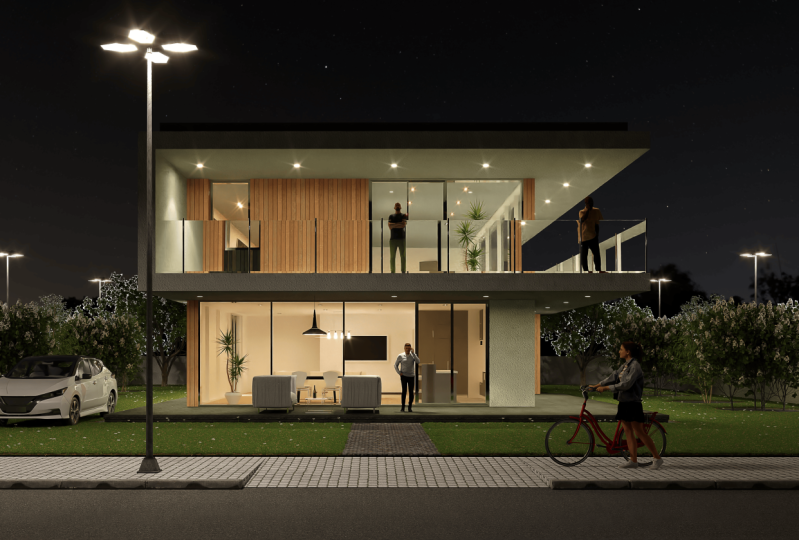
1. Class Preview: Hey guys, welcome to my brand new exterior master class on Skillshare, where I'm gonna be taking you step-by-step in creating this awesome photo realistic 3D Exterior render using SketchUp. We're A5, scattered 2 and Quicksilver my gas cans. So yeah, this course is going to be jam-packed with a lot of useful information to help you get started in creating high-quality 3D photorealistic renders. We will start by placing a simple exterior scene from 3D. Borrows, learn how to position the camera using the rule of thirds. Learn how to add some trees from chaos, cosmos and also position them to create dramatic lighting in our scene. We will learn how to set up the lighting using HDRI and also create a mood for our scene. Then we will learn how to create high-quality 3D graphs using this awesome new plugin called scattered to learn to leverage the power of quickselect my gas gans to add in high-quality 3D models and materials into our sketch obscene. And also learn how to use various other useful plugins for creating exterior and those towards the end of the course, I will show you how to convert your data and those into Nintendo's completely within the read a frame buffer. Some additional post-production techniques and Photoshop. And there's also an awesome class assignment. Towards the end, there's a lot more awesome information packed in this masterclass and I'm super stoked to be teaching this with you. By the end of it, you will have enough knowledge and skill to create your own awesome 3D photorealistic Exterior render. That, that is a mouthful. Now without further ado, let's jump straight to the course. I'll see you in the class and say, Cheers.
2. Install Sketchup, Vray, Skatter 2 & Other Plugins: Hi guys. In this video I'm gonna show you how to install the plugins that we need for this workshop. So open your Skillshare glass and go to the About section and the bottom, you will find the master links, google Sheets. So click on that to open it up. Now you'll find the links to all the plugins that we need for the course. So you can start off with SketchUp, so you can open SketchUp. It's a fairly simple browsers to download and install it scaled up. So all you need to do is select the category which you fall under. So I'm gonna select for personal projects and uses SketchUp Raul to click on Start free trial, then you need to sign in. And it is a fairly simple step-by-step process to download and install it SketchUp. So once you download and open SketchUp for the first day, you will be asked to sign in. So you would need an active internet connection. Make sure to sign in with the same email ID that you're going to be using to register in this website and you will get your 30-day Sketch Up. Next is 3D, which is similar to sketch up. So open though VD link. And then you can click on DRE free, which is really a favorite SketchUp. Can click on Start your drain. And then you would need to create an account or sign into your existing account. If you're new to 3D, you will need to create the Akan. So add in your credentials, click on Continue, almost there, and then click on Create icon. So they will send a link to your email, which you would then have to activate by opening your email. So open the e-mail and click on actuator gone. And then you can sign in. And once you sign in, depending on the country of them, you wouldn't need to further verify argon. So just add in your phone number and then click on get verification good. And add in your verification flawed and click on Continue. And now you can select your category. If you're a student, you can select student, make sure to send them a valid student ID and you would get a discount for your yearly subscription as well. So it might guess I'm going to select individual and then click on start measuring animal. So now you've got it and they will send an e-mail with for the information as well. So click on download URL and then you will be redirected to the download page of girls group. And then you can select media for SketchUp. Select the version that you have for SketchUp. It comes from 2015 all the way to 2021 and want to select 2021. And then select the latest version, which is really a fav update to click on Download. And then it would download to your system. So once the setup is downloaded to your system, you can open it as an administrator. You're going to open it as a dendrite lives well, and then follow the instructions to install it and do your system. And wanted to install your system. Towards the end it would be read adducted, do chaos license over. Just make sure that you've been installed with the same email ID that you use to register for the 30-day trial license. And if it's not at the CME malaria, you can click on Online licensing sane old, and then sign in with the CME melody. And then you would get your 30 day trial license. So once we raise installed and you open SketchUp, it would populate with the rule was no. If you don't see the rewrite rule buds, you can go to View Toolbars. And when you scroll to the bottom, you would find these really cool, but make sure that the switch them on. And then it would show up your and then simply dock them in place. Next we can download scatter and installed scatter and also transmit door so you can open the scatter link in the Google resource sheet. You will get a Drell for scattered as well. So click on download URL and then you can click on click here to download the installer. So that would download the RBC, which is around a 100 MB. Or you can also install it from the extension rows. So I'm gonna open SketchUp. So to download and install S-CAR-GO from the extension rattles, you can open SketchUp, go to Extensions, Glaucon extension writers, and who generally show up in the Start under featured extensions. Or you can also search for scatter. Make sure you're downloading and installing scattered tool. So click on scattered Woo and then click on Yes. And it would install it into your system. And once you install scheduled would show up in SketchUp. I knew me after restarts, ghetto was red and if it still doesn't show up, you can go to View Toolbars, scroll down, and you'll find scattered source which start on. So once you've installed sky, don't you open it up for the first time we're asked for the license. So simply use the email ID that you use to register on the website. So once on the scatter where Plato can clear it and are gone if you haven't registered yet. So I don't know credentials click on Register, and then a verification email will be sent to your mail. So open the e-mail and click on the link to verify your icon, and then click on Start 15-year trail. So no, it would start go 15-year Dre for your scatter icon. Once you're happy with the product, you can also go ahead and purchase the license. Next two can download and install transporter, which is a standalone application and also comes as a plugin called SketchUp. So open transmitter, click on Download, and then select Windows or Mac depending on which system to use. And we're going to say like windows. And this would come as a standalone application so you can open the setup file. Click on I agree. And go ahead with the installation process. The licensing for dance brittle would be similar to scattered Israel and you would get up 15 neutrality. Finally, we need to download and install some plugins, which you will get from the extension rows. So open SketchUp go to Extensions, click on extension rattles. So it's for Sketch. You open this up and then click on install this plugin. Similarly, there's also texture means, so you can search for taxonomy. This is the plug-in that revenues, so select this and install this plugin as well. So these two plug-ins out what we're going to use in this workshop. Now we also use Quicksilver mega scans and our separate video for that. When we reach the Quicksilver, my gosh scans part of the course or late. So with these plugins installed and ready to go, we can back the exterior scene. So see you guys next video.
3. Exercise Files: Hello. In this video, I'll show you how to use the Exercise Files on Skillshare. So just go to a boat and at the bottom you'll find the Exercise Files. Click on this link. So you can either download the zip file. So we have this afraid which contains all the exercise files together back in one single folder. It's an odd fail, so you need when you open it up or even winds up. Or you can also go to each folder and download the specific file for each video. So every lesson comes with DO files, the start file and finish. The finished file is essentially what happens after you're done going through the lesson. So you can start at the start frame and then follow along. Or you can also open the finished violet and check how it looks once the lesson has done. Some lessons also come with additional files which you can use for that particular lesson. So that is a quick video into exercise files. If you have any doubts, please reach out to me in the class discussions and I'd be happy to answer any of them. See you guys in the next video.
4. Before We Start: Hi guys. In this, we don't want to show you how to use SketchUp or rather how I use SketchUp when I work on projects. And this will also help you follow the course better because I followed the same workflow in most projects and also most of my courses as well. So the first thing, what I'm gonna do is switch on this large goods at bar on the left. So go to View Toolbars. Scroll down a bit and you will find something called the large toolset. So switch that on. And you will find the common tools that we use in scatter up on the left side of your window. And then of course we have the VTA dual bus, which I showed you in the previous video. And the other plugins which we will use in this course. Next is how I use SketchUp. So first thing is how I make groups. So the traditional reassembly do enter the group, select the faces or edges that you want to make a group. Right-click and click on Make group. Now there's a shortcut which I use, which is actually for competence but MG Institute group. So what I do is make a rectangle. And if I want to make this a group as employee, double-click and press G on my keyboard. So that would make groups last two. I'm cutting down two steps. And in the long-term, I would save a lot of damage zone. Next is switching to valid projection or perspective mode. So use the shortcut Alt W. So this would switch to valid projection mode. And if I switch back, if I press Alt W again, it will switch back to perspective. So what it does is if I want to quickly go to my top view, it would help me go to my top view as well. So for the top view is Alt D and front view is all f. So you can see that we are in elevation. More great Now to replace all w goes to perspective Alt W again goes to value protection. So if you're wondering how to assign the shortcuts, you can go to Windows, go to preferences, go-to shortcuts. The first shotgun, which I'm going to assign a score group. So search for group. Now in the bottom of the list you will find Edit may group. So you can see that there are saying, gee, you're going to just simply plus Tokyo. Press G and click on the plus button and then assign the shotgun. And so once you are saying press OK and you're done. So we also need a US entity, more shortcuts. So go to Windows, references, shortcuts. And I'm going to search for camera. So under camera we are valid projection. So you can see that ST plus w. So simply click and press Alt W and then assign the shortcut. Similarly, I also have a shortcut for the top view, which is Alt D, and the front view which is odd F. Now blood from D-sharp guts. The other shotguns which I've assigned is hide. So if I search for Haidt, we can see that era st, F2 for height and F4 and handmade last is f three. There's another shortcut which is height desk to the model. So you see view slash component, edit, sludge high does the model which is j. Now I will show you hold these shortcuts work as well. So let's press Okay, to save our shortcuts. And the palate projection, I used to switch between these two modes. We are going to camera and then clicking on perspective or valid projection. But since he had the shortcut, it's made life easy for us. Now coming to the height bools know, for example, if I want to hide this group, I can simply select this and press F2 to hide the group. But as F3 tornado. And if I select hide this, hide this and best effort. It doesn't unhide all the objects in your scene. Now another cool feature which I use a lot is the hide rest of the model or toggle visibility tool, which is assigned as G. So for example, if I enter this group and I don't want to see the objects and own this group and I'm editing this group, you can best GA to toggle visibility. Now the problem with this model is that it has not been modeled as groups. So each of these elements are not groups and it would be a big problem while editing the mode later. It gives you want to make changes. But since you are doing only the exterior window for the scene, it should be fine. So that those toggle visibility. Let me just enter this group so you can see that the rest of the model heights. But if I plus j again, it would toggle visibility. Now some additional stuff which I want to show you in SketchUp is making a copy. So I use the move tool, so press M to activate the Move tool. And to make a copy, you can press the Control key. So now you can see that dog goes through changes to a plus button. The null I just need to click and then release, click and release, and then moving object. And then click again. So let me show that to you again. So with the move tool activated, press Control to switch on the copy mode. Click once released the mode outside, and then click again to copy. As simple as that. Now if you want to make an RNA copy, so for example, if you want to copy this 10 times, select this object. It has m plus control again, to make a copy, I'm going to reference this distance. So I'm going to click from this point, release and click on this edge. And now without touching any keys on the keyboard or clicking your mouse again, simply type in x then, and then press Enter on your keyboard. So that would add a Gabi way, then damps. Here's another cool feature in case you change your mind and is not dead times without clicking anywhere or pressing any keys on your keyboard, simply type in the value again, which is x, five or six, presenter X, X2 and X3. And so that would update in real time. And once you're done, then press the spacebar dual, other escape key and new arrayed copy stuff. Now another important workflow that I use a lot is locking stuff in SketchUp, we're moving it around, lock it to these axis, which is the green axis, the red axis, and the blue axis not to lock, we can either use the arrow keys or we can also press the Shift key on your keyboard. So for example, if I want to move this along the red axis, I'm going to select this object for us or this group, press M, and then press Control on my keyboard to activate the copy dude, I'm going to click once at the corner of this group. And you can see that when I drag it, it's not locking to the red axis. So if I want to lock it, I'm going to press the right arrow key. So now it is locked. So even if I move my cursor to the bottom, adoptive screening will always move along the red axis. Similarly. So let me just place this year. Similarly, if you want to lock into the green axis, click once and press the left arrow key and the statement it would move along the green axis. Same goes for Google Doc access as well by pressing the up arrow key. Now if you do not want to use your arrow keys, you can also use the Shift key. So press M, click ones. Now once you move and you're aligned along the red axis or changes to a dark lane on Febreze shift, it would lock the dotted line and make it darker, which means that it's locked along the red axis. So just get into the habit of locking stuff and using the arrow keys on your keyboard to align it and move it along a certain axis in SketchUp. Finally, we do reference materials and to use the same media and in your DAW objects you can use the paint bucket tool. So press B to activate the paint bucket tool. Click yo to sample the beam, which is this button. And then select the material and apply it on your groups. Thus the basic stuff in SketchUp, which I'm sure you already know. And another cool low-flow that I use is the rotate tool. So if you want to rotate those objects here, for example, in the x-y plane or YZ plane or whatever, rescue to activate the rotate tool. And now before clicking anywhere or purchasing any keys on your keyboard, press the right arrow key so that would lock to the red axis plus the left arrow key that will lock to the green axis and press the up arrow key, and that would lock to the top axis. I'm going to press the left arrow key to lock into the green axis. And then I'm going to click once, release, click again, release again. And then you can either type in your value. You can see in the bottom left we have an angle. So let's type in 30 and then press Enter. So that would audience it along the green axis at an angle of 30. So one last step, which I will show you guys is, for example, if you want to edit some lanes and move some lines around, you would need to enter the group. Now let's say I want to move this line, so I'm going to select this line and just like how I lock stuff along an axis, you can also select the ln plus the move tool and then lock it along an axis by holding the Shift key or by pressing the right arrow key. So this way, your lane wouldn't go here and go on other blends. And if you make a copy, then they do not extend that group. So be careful when you are selecting lanes and moving it. Now the best way to select this lane is either by selecting the slain or by making a direct selection from the top left to the bottom rate. So that would select the line. But if you drag select from the bottom rate to the top-left, that would select the faces well, and that would move the entire group. So make sure you're always dragging from top left to the bottom rate so that it selects water was within that box and then you can move it at on. I will be showing you how I adjust the lawn in this modal window, coming few videos. So that was a quick video into how I use SketchUp. And it goes most of how I would be working and sketch up into courses. Well, in case you get stuck, you can replay the videos and you can also reach out to me in the discussions or in the notes. So I'll see you guys in the next video.
5. Adjusting our 3D Warehouse Model: Hey guys, welcome back. In this video, we're going to add a 3D shadows model into our scene. And then I just did a bit and use it for the rest of the course. Let's get started. So to start off, I'm going to open SketchUp. It's a good idea to bring your sketch up to the main toolbar if you're gonna use it a lot. So they click and click on bin from Glasgow. And then you can use any template that works for you. I'm more comfortable with inches and wanna go with architectural inches. So click on architectural inches, or you can click on architectural really matters as well. So one inch is 2.54 centimeters. To run it for 14 days, around 30 centimeters. Sketchup is loaded and we have our main plugins, which is the really doable those scattered toolbar Israel from scattered do taxonomy and round corner. We will try to use these plugins. And if there are any additional plug-ins, will add it later on in the course. So I'm going to delete some yellow and then I'm gonna go to Windows, 3D shadows. So I'm going to search for modern hose. Want to scroll down a bit. And we're going to select this modern house by Eros. So you will find the link to download this model, or you can use the model from our exercise files as well. So click on the model and click on Download and click on yes. Let's replace the model. So the first thing which I would suggest that you do is place your model in such a way, such that the backside of the willingness facing doors, the NADH. So the green axis is the axis. So the backside of the house faces or not. And that way we have the lighting enough front of the house. So if I quickly switch on shadows by going to View shadows, you can see that it is hitting go front facade of the house. So I'm gonna go to the top view. So as I mentioned in the start, you can press Alt W and Aldi with switches to ballad production and then the top view. And it's also a good idea to make a scene out of this top view. So I'm gonna go to my scenes in the default ri and click on Add Scene. And I'm also going to rename this. So click on the scene and call this W. So now each time as odd bit out and I click on the output, goes back to the plan view. So now I'm going to handle this group. Now the problem with this model is that it's not made in groups. So each of these elements are separate pieces and it'll be a hassle when you are applying materials. So for now, I'm just going to work with this model as is. But the only benefit in this model is that they have assigned the roof to a dye called roof. So if I hide this roof, you can see the inside part of the host as well. So I'm gonna switch on roof back. I'm gonna go to my top view and I'm going to extend the loan a bit. So I'm going to extend this to 35 feet. So I'm going to type in 35 feet. So the reference line, you can use the measure tool. So plus D, click ones on the edge, drag over the line, and then type in your dimension. So I'm going to drag my lawn deliberate 35 feet. So select these edges. You can either click hold shift and move it below the edge. Or you can also deepen the value, which is 35 feet. My grid. Now I can draw my roads and also my foot. But so again, go back to drop you. Zoom out a bit. Use the rectangle tool plus dot-dot-dot Berlucchi to lock it to the top axis so the blue axis. And then make a rectangle, the sphere. Make this a group. I'm going to give a dimension of about eight feet for a football. And then I'm going to select this line and then just move it to the edge. Alright? And then I'm also going to move this to the edge of the site. So select that edge and motivate to the site. Now I can make my road. So copy this foot back down or making them dieting on plan and our district leader in 3D. Now for the road I'm going to give around feet. Maybe even more. Can we for the fetus. And then simply enter those groups, select this line and move to the edge of that reference length. Snow. You can see that we have our food but and our road. So each of these are two separate groups, nor we have different guidelines and it's distracting, so I'm going to delete them. So the best way to delete them is by going to Edit and click on Delete guides. I'm going to give some thickness to the foot, but down the road as well. So let's enter the foot. But he was the push-pull tool which is B. And push this down by say, four inches. The road, I can simply push it down. I don't have to give it a good thickness of the road. Maybe I can do it later on in the scene. Now I'm gonna just alone a bit. So the reasons I build this group does do $2 ability. I'm going to extend the grass done the edge. So I'm going to select this lane and simply more delayed or extended this as well. So select the slain. Use the move tool, hold Shift and extranet and the edge. I'm also going to give a parking space in Ireland, which is around 16 feet by eight feet. So I can give 16 feet by 16 feet so we can bark Dugas. So I'm going to draw a rectangle from this edge. Snapshot of the blue axis. And I'm going to give us 16 feet, comma 16 feet and present though. So this will be a parking space. And I'm going to play this material on this Lasagna. Let's go back to our bucket tool. So please be to activate the bucket tool and then click on sample pane, select this material and I played on this but of 80 plus. So now we can delete this line and we will Bravo parking space for houses. Well, the last thing what I need to do is also designed the foot barter bit. So I'm going to handle this group. I'm going to give a walking pathway of around 40 feet and the rest can be a ramp. So what i Lewis maker grid display and make a grid this way as well. So now I have three grids which I can use as reference. And now we can draw a rectangle from this edge to this edge. And simply like this, don't, right? And now what I can do is draw a rectangle. Make this a group. Use the rotate tool. So press Q to press the right arrow key to snap to the real axis before you click anywhere. And then click on this point, click on the second and bring it down. So now we have a ramp as well. So four feet for some possible ways, people using the part to a foot, but the walk and the ramp for the CARTO endo. I'm also going to give a component all the same. So let me just until this group Darlington this edge. So now we have a separate phase and then just simply push this out. So now we have a component level and the state as well as all W to switch back to perspective mode. Last thing what I could do is maybe to add some pebbles in the landscape to make the landscape look a little bit better. Because we have Mozart's skip and hearts game landscape. So soundscape is generally your plants, flowers and mode, and hard scape is generally harder. Elements in landscape, like for example, your pebbles, stones, rocks, and so on. Fazio. So let's enter this group. Does J to toggle visibility. Select this edge, and then push it out to the edge of this. So now we have one Fazio. Similarly, I'm going to draw another VSCO. Let's see how wide this is. So use a tape measure tool. This is around four feet. Similarly and want to draw or four feet wide. Hello, and make a rectangle. And now we have two different faces. So now for the bevels and apply a different material. And then we use mega scans to bring in proper material later on in the course. So I'm going to select ground cover global one-inch from our landscape and then simply applied on this face. Now what I wanna do is make different groups. Because with all groups it would be difficult to use Gatto and other plugins and sketch up. So I'm going to select the lawn double-click. I'm going to hold the control key on my keyboard and double-click on this loan as well. And then I'm going to press D to make it a group. Similarly, this hard scape, yo select these two. And the entrance here as well. And press G to make it a group. And we can also make this compound or low separate group by going to the adult view. Making a drag selection from the top left to the bottom rate. So it's only this part of the model. And then making it a group similarly orders well, and there will be instances where it will select these models. You can't really do much about it because they aren't two separate groups. What you could possibly do is maybe just de-select this part of the selection. So hold Control Shift. You can see that the cursor changes to minus. And now if I make a drag selection from top left to bottom, radio can see that only the top and the bottom gets elected. So plus z to make it a group. And I went, Oh, this group. And so you can see that so much of it gets selected. There's not much you can do since this model has exploded and doesn't have separate groups. So always remember, if you are modelling a house from scratch, please model them with groups. But let's say we have our base model ready to go. If you're going to be hiding landscape trees and a whole lot more in the coming few videos. So I'll see you guys in the next video.
6. Positioning the Camera in Sketchup: Hey guys, welcome back. In this video, I'm going to set the camera and I show you different techniques that are used to compose my scenes better. So the first thing what I wanna do is like always draw a reference line. So I'm going to use the line tool. Click once, snap it to the red axis by holding the Shift key and click on the other side. So now we know where the midpoint is. So if I press the lane bool, it would snap. For the midpoint which is somewhere on your feet, you're unable to snap, simply move your lane old and then you'll find the midpoint. I found the midpoint. Now I'm just going to create another line and then place my camera at the end of this land. So the position your camera, you can use the position camera from your large Tooltip button. Or you can also go to camera and click on position camera. Now, if you're already in the habit of creating multiple use, I would suggest that you assign a shot got full position camera so that it'll be easier for your to create views and sketch up. So I'm going to click on position camera. I'm going to click on this edge. Now the reason why it's coming this way is because we are still in projection mode. So I'm going to press Alt W to switch back to perspective mode. The reason why I gave Alt W was because it's used in 3ds Max a lot as well to switch your different views in two years max. Alright, right, so once I switch to perspective mode, I can then click on the i2. Or I'm just going to show that again because it might be confusing. So again, go to camera position camera, and click on the edge of this line. So now since we are in perspective mode, it shows the view in the right way and then it automatically activates the ICU lizard. So now you can left-click, simply bring it to the center. All right, So body to the center and Oregon create a scene before I just did further. So to create a new scene, simply right-click on the top view and click on Add. And I'm going to call this front view. So note a few things which you need to do is adjust the vertical and horizontal lines. So go to camera 2 perspective. So this would make all your lines perfectly horizontal and vertical, which is a principle used in architectural photography as well. And note I click and click on Update. Now the next thing what I need to do is take that ends our output or the size. So for that we're going to use the 3D acid editor. So to start, you'll be acidotic. Go click on. There'll be the acid would adiabat in yellow, which is the big week, the logo of 3D. Then go to your Settings, go to render output. And we have something called CFM. So switch that on. And now as soon as I switch that on, you can see that we have these two black bars on the top and the bottom, which essentially means that these black parts of the sketch, I hope you wouldn't get rendered. And only what is within this box would get rendered. So that's done. And the last thing which I would suggest is that you use the rule of thirds. Any composition that you follow. I use the rule of thirds because it helps me compose my images better. And to use the rule of thirds, we need to use the 3D a frame buffer. So for that, I need to run the interactive render. So Gordy acid editor, go to settings such on our dx. So John interactive, so John Doe v Wade and ISO and change it to NVIDIA air. Now these settings are perfect for those who have an RDX graphics card. For those who do not have an RDX graphics card, I would highly recommend that you stick to the original CBO mode, which will use your CPU, Processor and graphic art to create the render. And also use those in ISO help you avoid any black screen issues or any other issues in the interactive lenders are since I am in RDX 37 digraph with God on my laptop, I'm going to use the RDX mode. And I'm also going to switch to, and really our air. Now I'm going to click on Render with 3D interactive. So as you can see, this is our interactive render right off the bat. To know what they need to do is add a grid to those render. So to do that, I'm going to add a layer, and it's called a background layer. So click on the Plus button here, which is Leo's. By the way, this is the 3D collection controlled which you found in the previous versions which we had in the bottom left. Now what is on the top rate and it is called as layers. So click on the Plus button and then click on Background. I'm going to add our grid EXIF image, which you will find an exercise files. So click on the Open Folder to open up the file. Click on rule of thirds grid and then click on Open. So as soon as you add it, it will show up in the background. So the shorter grid Endo foreground, what you need to lose simply switch on as foreground. And now you can see the grid and foreground as well. Now I'm going to simply drag this to the left and this to the right. And I'm going to do a list to the left. And I want to dial my sketch up, UP the rate. So now using SketchUp, going I just though, you a bit better. So let's go to front view. Let's use the half bandwidth. So click on the band good. And use the band dual in such a way that these two grids, or whatever you see here is equal. So you don't see more of the brown to both the sky and the ground are equal and the composition. So to do that, I'm just going to send dome a hose in the scene. And now you can see that our ground and our sky are equal in ratio. So once you're happy with this, you can right-click on the front view and click on Update. Now one last thing which I would suggest that you do is check the field of view, which you can check out the star desert. So press the Z key to activate those Zoom tool. And now you can see that our field of view is 53. 53 is our late for exterior renders. But I would suggest trying even 35 because that would bring your object, or in this case, our residents closer to the viewer's attention. So I'm gonna type in 25 and then press Enter. And now you can see that the field of view changes 35. And you can also see that those residents comes closer to the viewer. So now I'm just going to use the scroll tool in my moles and scroll out a bit so that we can see the Joseon. Let's go back to camera, switch on 2 perspective. And then right-click and click on Add and call this front view 35 as the field of view. So now if I run an interactive render, you can see that it's sitting perfectly, but maybe I could adjust it a bit more. So I'm going to move it slightly up. And that looks perfect. So our sky and our ground are equal in proportion. And our house is sitting right in the center of the image. So you can see that our lines up perfectly horizontal and vertical for using the rule of thirds where we're going to add objects of interest may be trees or some additional plants or something closer to these, these four points. But it's a 12, moved it up a bit and everything looks perfect. You can update the scene. So right-click on front view and click on update. So now if you want to see the difference between our field of your 50 and 35, again terribly go to front view. And now you can see that we have a more elongated sort of a landscape. And if I go to front view 35, we can see more of the road. The house comes closer and then diet composition looks much more better. So in the next video, using the rule of thirds, you're going to play some trees and then also adjust the lights. So I'll see you guys next video.
7. Adding Trees using Chaos Cosmos: Hi guys, welcome back. In this video, we're going to add some trees before we are just delayed because trees play a crucial role when it comes to relating exposures. So the first thing what I'm gonna do is run an interactive render. So let's go there. I said I don't just check all of the settings. Now if you're going to switch between interactive and you'll find a lender. I would suggest that you see about the render settings to save them out, simply click on the Save, then those settings to failure. Call this interactive settings. And then click on Save. So it'll say out as though we are. So click on Save. And now if you want to load that backend in KSU ginger settings, simply click on Lord, lord window interactive settings. Well, let's don't want to run an interactive render. All right, so this is our interactive render and you can see that we can add some to use your dream job. You don't get an automobile for this image. So we need to add doors gain of trees and plants and more. So before I add all of that, what I'm gonna do is I'm going to add this image to the history VFB so that I can see your progress of how I made my render from a simple drab or simple scene to something which looks really nice. So if you want to drag your own diet progress, I would highly recommend that you use the history VFB. So do use these three VFB equal to options. Could have VFB settings, go to History and switch on enabled. So this would enable your history. We have three settings and also specify a particular folder. So click on Save, create a folder called VFB, and then click on select for loop. Now if you load the four lobe, which is that in the exercise files you would see the NBA or progress of our course and how we transform this into something which looks really nice. So I would recommend that you use your own folder. And if you want to check our folder later, you can load in our folder as well. So once you load it in your folder, you can click on Save and Close. And it would show up on the left. If it doesn't show up, you can simply drag this to the right and you can see obviously VFB. So to add this render into a redistributive, be simply click on the plus CO3 button. So now it's added. And each time I keep adding or Endo, I can compare the difference using Bill AB horizontal feature. So I'll show that in a bit. Now what I'm gonna do is drag this to the left. Let me drag the slider to the left so that I can only see the render. And then we have our sketch up, you know, the problem in indirectly renders. If I rotate my sketch I view, it would rotate the interactive render as well. So if you want to lock the view, what you can do is let's go back to our scene which is front view 36, and then click on Lock camera orientation. Now if I rotate in SketchUp, it wouldn't affect Bill 3, the interactive render. So with the weird interactive render on, you can add some trees. Now if your system is law, I would recommend that you switch off interactive render and then add the trees and then later switch it back on. Because sometimes with the interactive render on, it would crash SketchUp. So to be on the safe side, I would suggest that you switch off and track would render audio. And then later I just position for the interactive render on. So now we're going to add some trees in SketchUp. So let's go to our chaos cosmos, Rosa. So click on the chaos cosmos but didn't open it up. This is a new feature with 3d5. It's not part of the previous versions, so make sure you're using the latest 3D version to access chaos cosmos browser. Let's maximize this. So see you there and IOS library. So it has different 3D models, like furniture or accessories, labeling vegetation and more, and even vehicles and people. So we're going to add some to ease into our scene. So let's click on trees. And we're going to add some autumn trees. So you can see that we have trees with different colors. So this works well. European corn beans, select that. If you haven't downloaded, did you get you an option to download and then you can import it into your scene. Now sometimes there's an arrow that shows up seeing that nor scheduled file is open simply clause chaos cosmos and then open it back again and it should work. I'm going to add this portion. I would as well. Maybe this tree. We have some large trees. Now if you want to see the scale difference of three, you can see that we have a small human figure, your and then the large tree. So that denotes the skill difference. And distri is slightly smaller because you can see that they're human height is half of the tree height. And in this scale it's only around 1 sixth or 1 seventh of the tree. So I'm going to load this American beech tree as well. Place it somewhere at the back. Maybe the street sweet gum. They sit at the back. Let's see if we can add any other trees. Katsura, mono, japanese thing, everyone likes Japanese, raise taxes while not tailored. Read the name of these trees before you place it in because it would also help you and answer your knowledge. And maybe finally a white oak tree. So we'll place it at the back and then go back to our front view and run any indirect or granddaughter. So you can see that trees have a dramatic effect on arsine and looks makes the scene look much better than what it was before. So I'm going to add this quickly to my history with me. And then if you want to see the difference, you can assign those values. So click on AB Horizontal, click on the image, Docker image to assign a and this as B. And now if I drag from the left to right, you can see how much of a difference that remakes in your scene. Or let me stop that Endo. Oldest to the left. So now we're going to adjust the lights, which we'll do in the next video. We're going to use the HDRI from Gayle's cosmos, the sunlight, and we're going to use the trees in our scene. I have a dramatic effect on the render. So see you guys next video. Cheers.
8. Daylight Setup in Vray 5 for Sketchup: Hey guys, welcome back. In this video, we're going to set up the lighting, the delayed set up in ICU. So the first thing what I'm gonna do is go to asset editor, go to Settings, and then we have something called material or eight. So this is generally used by most 3D artists so that they can understand the lighting the scene better. Once the lighting setup, then they mourn to setting up the materials and mode. There's also grid in creating cleared and those for your model, which will also help in impressing your professors and your plans. So I'm gonna switch on media law today. And I'm going to use the overlaid color, which is this. So now we're fed on an interactive render. You can see that it is already done with that single column. It also increases the speed of your interactive render. So that helps in faster workflows. So with our interactive render on, the first thing what I'm gonna do is lock camera orientation so that when I rotate, it doesn't affect the interactive render. And now I can place my trees ideal locations. So let's check the shadows first. So go to View, click on shadows to know can see that the shadows falling this way. So to adjust the shadow settings, go to Windows default very shortly. And then I'm gonna go to Shadow CO and then make it a morning late. Something like this. This should work well. So just keep an eye out on this time. So if I go back to front view 35, you can see that it changes back again. So we need to adjust it back in the scene. So simply adjusted the sphere and then switch off The shadows. Are off The shadows and then update the scene. So like click on front view and click on 35. I laid. And then what I'll do is I'll place a three in there part of that sunlight. So I'm going to place the street somewhere. So now you can see that that affects the scene dramatically. This is mod out a bit. Bsn, other dream maybe somewhere. It's also a good idea. If you want not do omni shadows, you can simply move the street up. So I'm moving it on the z-axis. So these are different hacks that 3D artists use to get by the lighting in your scene. So we have some shadows on the windows and on the lawn. The street looks a little too big, so maybe I could delete that and use a smaller tree. So copy this year. It goes up a bit. That looks decent. Let's work with this. And Lido updated in case we are not happy with the lighting. So now let's go back to front view 35. Everything looks good. Let's close this and then just update this to be on the safe side. I later, I'm happy with this. Now what I'll do as two insulating a bit by using or dominate. So to use a dome late, click on chaos cosmos, and go to the HDR, a category you're going to use a Evening Sun. So click on evening. Let's scroll down. Let's go for a dramatic background. So maybe somebody works well. So you can click on Download and then click on Import. So once you click on import, it would show up in the acid Editor. So let's close girls cosmos. Let's go to our acidotic door. And if you go to textures, you can see that we have some Dilaudid. And so now we need to add this to our dorm late. So I want to stop the interactive render. I'm going to add a dorm late first. So let's maximize the scatter of you. And then we have Gormley video. So let's click on normally, place it anywhere in your scene, doesn't really matter. And once you play so dominate a good populate in the late category of your acidosis. So you can see that we have gone late. So we need to copy our kiosk osmoles, It's DRA we just somebody into the dorm late. So right-click on Saturday, click on Copy. Correlates. Go to dominate and open those settings by clicking, clicking. And then we need to place it in the HDRI texture slot. So I click here and click on BSD as copy. So once you've mastered it, you can see that the lighting changes a bit. We're also going to change the shape to sphere. And if you want to adjust the HDRI background, I would suggest that you go that extra slot, click contexts, appeasement, and then change delta H values. So I'll show that to you in real time in the interactive render. Let's move this to the right again. That's an unknown interactive render or so before I add on in Blackboard window, there's one important step that you need to follow, which is to switch off your environment late. So there are three main lights in video. One is the sunlight. Then we have the environment late, and then we have the DOD, which is normally these days, most of them use dorm late because it gives the scene a very realistic field. But otherwise you can also use enlightenment and sunlight. So we have two layers and layers and all which is our sunlight and dorm late. So we need a switch off the door late, which is that enlightenment late. So to start off, Korea settings, go to and vitamin. And simply pick this off. So once you take that off, it switches off the sunlight. So now we can run it, in fact Orlando. And now we can adjust the background as well. It's so dark, just the background correlates, go to dominate. Click on the texture slot and rotate the head value. So this doesn't really make sense because it shows that the sun is at the back, but the shadow is falling towards the host. So we need to rotate it a bit more. Hello, I'm happy with this kind of an effect that it kind of shows that that is late coming from the sale of the scene. So I'm gonna stop the render and we are done. But there's one last thing which I would highly recommend you guys is adjust the camera exposure value and also add some VFB layers. So first thing what I want to do is adjust the camera exposure to make the scene a little more play-doh. So let's run an attacker Window. Let's go to our camera settings, go to Settings and click on camera. So now we can see that we have something called the exposure value. So before justice, I'm just going to open that runs camera parameters 0. So these values is actually what the exposure values all aboard. If you see that, if I drag this to the left, the ISO genius. So I'm gonna give exposure value of around 13. And you can see that the ISO increases and it brightens up our scene as well. So maybe keep it at around 13.5. The lower the exposure value is, the play dough your scene becomes. And the higher the exposure values, the darker the scene becomes. All right, so this is an exponential value of 13.5, which looks good in our scene. So I'm going to stop the interactive render. I'm going to maximize this. And now we're going to add some VFB layers, which is essential right from the start of your Dialogflow. So I'm going to drag this to the left ear. And now we can see that we've already added a background. Now we need to add some additional Leo's. So let's add maybe an exposure for click on the plus button and click on exposure. Now what the exposure does is you can increase the brightness of your scene. And also they use the highlight bonds, which sort of reduces any parts of your scene which is overly exposed. And you can also increase the contrast a bit. Next, I'm going to add a curves layer. So let's click on the plus button and click on God's. Let's click on the bottom left. Drag this to the bottom so that it boost the shadows. That's click on the red button here on the right, on the top rate, and then drag this to the top so that it boosts the highlights. Then you can click and see how much of a difference these Leo's add to your scene. You can also add a white balance and either make it a warm scene or a cool scene. So let's keep it somewhere closer to the colder scene. And you can play it onto the adore. We have bilayers as well. Another favorite, one of mine is called filmic, don't map. So first switch design, you can see that it makes the scene dramatic and will reduce the one-shot effect this has on the scene by reducing the blending value. So I'm going to drag this down. So they do around 0.3 and that should work fine. All right, since I'm happy with this lighting, I'm just going to add this year. And now we can see a difference between before and after. Let's see how this render looks without the material overlaid on. So let's go back to I've isolated or go to Settings. Scroll down and switch off material or eight. Now let's run interactive render. Maximize this. And you can see that our scene looks much, much better. The lighting effects, Bohr effect. The only thing which we need to do now is just the materials at some landscape. The grass looks 2D and flat. Maybe add some stones and make the entire scene look better. Hello, In the next few videos we're going to add our grass. I start using an awesome new plugin called scattered to see you guys next video deals.
9. Adding 3D Grass with Skatter 2 in Sketchup: Hi guys, welcome back. And this, we don't want to show you how to add grass violin's using this awesome plugin called scattered to. So to get started, you will need to have scattering installed, which you saw in the start of the course. And once it's installed, you're going to open something called a 3D bazaar, which is an exclusive 3D library which comes with scattered. So the open scatter, you can click on the scatter Aragon, but I'm not going to open scatter yet. I'm going to add an object from the DD was i and then edited out in our scatter compositions. Let's open RTD was I click on 3D without to open it up. Now you get some free assets to its Gatto. So I'm just going to go to scatter do contents. And we have something called Scattered do grass. So let's click on Download. And then once you've downloaded the file, click on Import. So once we import those Gatto fail by this guard dog object, it would get added to something called scattered objects in those guard dog composition editor. So in the new version or S-CAR-GO, which are scattered, do they'll come out with something called compositions. So with compositions, for example, have something called Le composition Manager. We can add multiple compositions of different elements in our scene, which will help us organize the modules. But so this wouldn't make sense once you start creating compositions. So that's what we're going to go now. So as soon as you add something from three was a gets added to a composition which also gets populated video and you can further edit owed later. Now, once the scattered objects are added, you need to add something called a host. So Horst is essentially what will carry the scattered objects. So an arc is the host in this scene is going to be lawn. So to add this has a horse. The first thing, what we need to do is to make it a group. You cannot add faces or edges. You can only add groups or competence. So I'm going to enter this group. And you can see that it is already a group. And we just present year to Douglas ability can see that it's a group. So let me exit the group, have Escape to exit. So in order to add this, it's best to add it when it's not nested within another group. So I'm going to select those lawn press Control X. We just took our time. We want to preserve skip so that I'm in the main modern scene. And then I'll go to Edit and click on CBS in place to know in order to group is not inside any other group or is nested inside a group. So it's simply the main group which is in the model. So now I can click on, because averse to scatter objects on. And then I can select the group I want to scatter. So soon as you select, you can see that it populates with the grass here. Now this is just a preview. So I'm going to click on Daniel. And there are two modes in scatter off. So one is a mod which is not render only. So this means that if you click on Generate, it would generate the grass in your SketchUp model. And you can see the grass as 3D high poly model. That is something which I would not recommend because that would make your model heavy. So we need to keep our model late and it'll help us help us with our workforce as well. So in that case, you need a switch on read-only mode and then click on Generate. So when you click on Generate, grass will only show up in your VA interactive render. So two-point bargain to make sure that you generate your gas or any other highly polymorphic and render Only mode. Now, we generate the graphs with the default settings. You can increase the density or to make the grass tickle. But let's see how this graph looks in our interactive render. So let's go to our front view and then run an interactive render. So you can see the grass right away. Now the problem with this grasses, let me just move to the right. To the left that is. And so I was scrolling. So you can see that this graph is not perfectly straight. It has a jagged edge. So we can fix this quickly and scattered again. So let's start the interactive render. Let's go to our 3D bizarre again. Let's go back to scatter got gas. And now you can see that we have different modes in scattered got grass. So you can see that we have the proxy and high poly. So in case you want to load in the high poly models, you can select high Bali, which I would not recommend to select proxy. So that shows up or linear 3D interactive render. And then we have something called scatter grass, grass cut, bottle scattered. This essentially means that it would show up early and up borders of your boundary or on your host. To once you select grass cut model, click on import. Let's close three was out, and let's select our host again. So click on the surface and select the host. And now you can see that it shows up within the borders of this group. Click on Done, and then click on Generate. Now, when I mentioned composition manager, we have two compositions which you've added Guassian. So if I open competition manager, you can see that we have the scattered got grass. If I click on Edit and this would be the main grass. And then this would be the bothered class. So now with this, Let's check our window. So let's go to our front view. And let's run an interactive render. So now you can see that the grasses perfectly strip. And this works well in our scene. So finally, I'm just going to add this to my industry VFB and do a before and after. So you can see that deals with that duty grass and 3D graphs. It makes the scene so much more better. So that is a quick tutorial into adding graphs with scattered does a lot more functionality and schedule which I will be showing in the coming few videos and also in a separate new course. I'll see you guys next video.
10. Using Quixel Megascans with Transmutr: All right, so before we proceed with a future tutorial, I'm going to show you how to install Quicksilver my gas cans because we're going to use some acids and materials from manga scans library. So you need a search for quickselect magazines and then click on quicksand mangoes scans to open it up. And then you need to click on Subscribe to create a new account. Click on Begin for free, add-in all your details and then sign in with games are gone. So I'm going to sign in. So once you sign in to Quicksilver, get an option to download the Greeks will mega scans software, also known as quicksilver bridge. So click on bridge to open it up and click on Download bridge. So once it's downloaded, you can open the setup and then go ahead with the installation instructions. I would suggest that you download and install the setup in another directory so that you'll see Dave is always three with a lot of space. So only have Quicksilver bridge installed, so I'm going to open it up. So this is Quicksilver bridge and it comes with a lot of awesome acids and materials which a lot of 3D artists are using known and are able to create amazing renders with. And now because of transport do you can bring these mega skin acids in SketchUp. So I'm gonna show you how to connect pixel width transporter. So you can just click on any material. And it shows up here on the rate, various options. Now what I'm gonna do is next to Duke resolution, we had those settings button, so click on that and click on Export Settings. Now, in your export target, it would be defaulted to Unreal Engine. Just scroll down and click on Custom socket Export. Now you need a copy the socket port from your dad's Moodle and paste it here. So I'm gonna open transporter, which also comes as a standalone application and also as a plug-in in SketchUp. So open transmitter. Go to settings. And then when you scroll down you will find Omega scans bridge socket board. So copy this and then be a studio and go back. Once you've mastered it. And you want to bring a certain model into transmitter, all you need to do is click on Download. It will download the model and then you can export. So once you click on Export and choose Export successfully, and it shows up in your transmitter. Now, transporter helps convert your OBJ 3ds Max fails in dark, scheduled fails, and they give you options as well. So what I do generally is simplify the mesh so that object is not too heavy. So I'm going to drag this slider to the right of it. Done on 77 percent. Check the materials as well. The materials come with GSK and delivery, and then I simply click on transport. So once you click on transport, you get an option to save this sketch file. I generally save it in the download folder of quickselect rich. In case you want to look at this no-load follow simply go to Quicksilver bridge. Click here, and click on go to files. So now you know the location of where your Quicksilver bridge acids are located in your system as well. So in this case is located. Now if I want to use the same location, here's a quick hack which you can do, which I learned in my previous company. Simply click your copy this directory allocation, go back to your transmitter, click on transmute, and then paste or location. So I'm going to be a student presenter. So you can see that it's come to the correct location and then simply click on C7. So it's transmitted object. And if I open SketchUp know and VS that directory, you can see that we have a sketch or fail open it up. And you can see that we have our object here as well. And these are the ID to random models which you can directly place in your SketchUp scenes. So we will be placing some variables. Some say drawed Gabe's and a whole lot more from Quicksilver, my gas cans. So in the next video, we will be adding some models and more into arsine. See you guys next video.
11. Adding Megascan Assets into Sketchup: Hey guys, welcome back. In this video, I'm going to add some acids into our theme. The first asset which I'm going to add from my gas cans is I've wrote saved cobe for the foot, but so let's go to our quick sale bridge, and let's search for street. Now let's crawl on a grid. Let's click on 3D assets. Let's click on Street, and we can click on clubs. So now you can select any color from this list. And I'm going to select this and then click on Download. I'm going to say it downloaded into K2 Gayle, good enough for our scene. And then click on Export. Now if you do not have transmitter opening, wouldn't export to make sure you have transferred open as well. So we have transport open. Now if you have the previous file, then you'll have to click on New, click on Confirm, and then click on export your organ to send it to transcriptome. So now we can see that we've watered in. We can simplify the measure bit so it's not too heavy. And click on transcript. So now let's go to 3D. Well, let's check where this folder is located. So click here and go to files. So this is where it's looking. I'm going to copy this location. Go back to transmitter based on location, and save the file load enclosed transporter for no closed Quicksilver bridge as well. We're going to import that into scheduled. So you can drag objects directly into sketch up into import them rather than going to File Import. That's two steps which you can save it. I'm just going to open that folder and then drag this into our sketch obscene or lead to replace our block. It's rotated a bit by 180. And let's play a severe damage. No, I don't really want to increase the size the height of my foot, but this seems to be around six inches. Yeah, it does around six inches. So let's see if we can get afford inch thick coat. Now once you've downloaded some acids, you can go to glocal. I can see the different ADSR acids that you've downloaded. So I've downloaded an acid called Street gobs, which I'm going to use. And if I click your profile, you can see that I've already transmitted these objects. I'm going to use this for my sketch obscene. So let's drag this in place and delete that large globe. Now we can simply drag this to the edge of this. And we are good to go. So now we need to copy this multiple times. So if you know a hack and SketchUp which is moving Gabi, you can do that. So plus m plus control domain could copy, click once, click the second name, and then multiply and do 10. Let's go back to drop you. So now you can see that we placed it there. We're going to make this entire thing OR group. So it's easy for me to edit. Because when I enter and it will hide those layers to the model. So I'll have to copy this some more. So let's copy this from your own. Yes, it in place when the blend by another seven. And select all of these objects plus j. So I know where I'm copying it with control again, copy it to the side a bit, and we are done. So normally if I go back to front view 36, we can see our awesome job in place as well. So added one acid. Similarly, you guys and go and had multiple acids using scans, transmitter and then finally bringing it into SketchUp. Now these gum with the video material. So if I press the bucket tool, select this material and go to my Asset Editor. Open this up. Let's select that material again. You can see that it comes with the materials and the bitmaps. So if I go to bump, the bump map, which is actually a normal map, it as a displacement map as well. So these come fully loaded and you do not have to worry too much about my deletes and just focus on your design. So the next video, I'll show you how to use materials from the mega scans la ri and create our roads, our food, but, and more. I'll see you guys next video shows.
12. Adding Road Texture with Megascans Materials in Sketchup: Hey guys, welcome back. So in this video we're going to add textures from my, my gas cans library. You're going to follow the road texture. So let's open quicksort bridge again. And let's search for road. So you can use any material that you prefer. I'm going to go with this fine road to click on Find road, and then click on download. And once you click on Download, you can export materials transmitted or you can only export models and 3D assets. So since this is a material, will have to use it directly in 3D. So click here and go to go to files. So now you can see that we have the different maps and we can load this directly into video. So I'm going to copy this location, goes the for loop. Let's go back to sketch up. And let's create our genetic material. So right-click, click on generic and rename this to a underscore road. So the first thing you need to load is the dexterous lot for the diffuse battery door. So click here and go to bitmap. It's based our directory, and we can use Duke albedo. So click on duty albedo and click on open and go back. And we can paste this into our scene to close the Asset Editor and the other group. Select a face and then apply the material using the bucket tool. So once you apply the material, now we need to scale this. So I'm going to right-click, click on texture, click on position. You can see that scaled really low, So we need to increase the size. So click on the green pin. You can rotate it and scale it using the green pin. So I'm going to rotate it by 90 and then scale it out a bit. And then left-click and band so that the white strips is in the center of the road. Once you're done, right-click and click on Done. Alright, now let's go back to front view. So we have our road in place. Now, since this is an autumn scene, I would like to show some leaves in our road towards the edges and next to it. So we need to import leaf texture and blended with the road material. So let's go back to our bridge manga scans. So with Mega scans open, I'm going to search for something called decals. So I'm going to type in D calcium. So as you keep scrolling, you will find under decals We have something called fallen leaves. Or you can also search for fallen leaves. So if I search for fallen leaves, can click on D calcium and you can see we have different sorts of fallen leaves and we can use any of these. So I'm going to use M lives who click on em leaves. And you can use to get resolution and click on Download. So now I can open this file to go, to, go to Files. So this is what it looks like. And now we need to blend this without road. So first we'll create our leaves material in vD. So let's go back to oscillator as create another generic material. I'm going to rename this, call this a dash leaf. And now I can load in our leaf median. So click on Bitmap and load design. So I'm going to use albedo JPEG. And I need to add an opacity map so that can be a see-through material. So goddess capacity, click your click on bitmap and comes with opacity map, which is Duke opacity, open that up and then go back. So now you can see that the black part gets hidden and only the white part of the Opacity map, which is the leaves, will show up in the scene. So now we need a blend this with our fraud media. Sort of blended. We use a material called VDI blend. So right-click on the materials and click on Blend Mendelian. So the base for our Marina is going to be at all. Click here and select a road. And we need to add a leaf as the court material. So click on Add and teleco elif median. Now you can see that it overlaps with the road medieval. And now when I run interactive render, you can see our road. Now the reason why you're not seeing the blended material was because we didn't apply the blend medulla on the road. We just applied the road medical. If you're happy with the road, may really, you can continue the course, just split the road material. But if you're on a desktop, the blend material, we need our blade on the road, so let me stop the window. Let's add this to the history VFB. And now let's apply the blend material. Before I add the blend material, what I'm gonna do is I have a plugin called Sketch you. So let's switch on Sketch URI, which is a free plugin. So I'm going to use the sketch u, v to copy the UVW map of this board so that I can load it later on and I don't have to rescale and not just an extra organ. So let me just move this to the bottom of the 3D toolbar. All right, so I'm going to enter this group. I'm going to select Sketch Yuri with the fair selected. And I'm going to right-click on the fierce. And then we have something called SeaView is. So the sulci are the UVs of this group, which is basically the size and the texture and how it is oriented on those fees. So you're gonna see it there. So CF1 phase, so we're going to load that back in later. So now let's apply our blended material on this road. So let's go to Azure editor, select Blend. Go back, use the bucket tool and paste the material. So now you can see that it goes back to that original small-scale. And this would scale texture really small. So we need a load those UVs back. So under their fears. And to the group, select the face, click on Sketch jewelry, then right-click and click on the logo. You can see that the UEs from the previous material has been loaded to this new material on those group as well. So I hope that made sense city bay that we do and that would start to make sense for your press. Okay, now let's see how this render looks. Now if you don't want to see this extra Hell Boy and you want to see the road instead. You go back to my acidotic go. You can see via something called binding, just opened binding and change that extra more to custom mode and select DOE extra. So let's go to bitmap. Need to add the road material, road material and go back. So now you can see that it comes in that scale. All right, so now let's go back to front view 36 and run an interactive render. Alright, so we Barton the road, but you can see that the leaves are extra big. And the reason behind that is because the leaves are at the same size as the road texture. And that is no option in Vd for SketchUp to adjust the size of this quote material. So you will need to do it manually in Photoshop, which I will show you in the next video. So I'll see you guys in the next video.
13. Using Vray Blend Material to Mix Megascan Materials: Hey guys, welcome back. So in the previous video, you notice that the leaves where extra big on the road. And the reason we end that was the textures were the same size as the road texture. So we need to make the size of the leaves smaller in Photoshop and then bring it in. So to do that, I'm going to open Photoshop. So I'm going to open these bump maps. I'm going to select albedo, capacity map, roughness map, and displacement map. So click on, select these and click on open. Now each of them would open in a separate tab. So you need to double-click on the background layer and then bring it to the main file, which is albedo background file. Or what you can also do is go to Files, Scripts, load files into stack, click on Browse. Now select all your bump maps and press Okay, and then loaded in. So now it comes in the same file. So now what I wanna do is let me just close all of these. So now what I'm gonna do is reduce the size of these bump maps. So I'm going to select all of them. I'm going to press Control T and individ I'm going to change this to 25 percent. 25 percent. So it's 14 total original says, now I'm going to press Control D again. And then more video. I'm going to group these layers together. So press Control G to group. And then I'm going to duplicate these groups. So press Control J. And then I'm going to press Control D again, and then move this down. So once you more down click on Commit transform similarly do the same two more times. And we're done. So next what we can do is we can select all of these groups, right-click and click on ungroup layers. And now we can select the same bump maps for an RTOS. Let's select Opacity map, suppress controlled to make multiple selections in the Layer window and then group them out. Similarly, roughness, map, displacement, and then normal. Now this is not the albedo which I want. So I'm going to delete this albedo layer. And then bringing the main albedo layer, which is this. So open the Albedo map. Now we'll click to make it a layer 0 and then drag this into the next step. I'm using the latest version of Photoshop. So if you're using the older versions, you may not find the features which I'm talking about. Now with this. I'm gonna do the same thing. Select this press Control D genes, the width 25 and the height of 25. And click on the Select button. I'm going to move this to the corner, duplicate this, and move it down and do two more times. All right. So the reason why I did this was because let me just group to strictly if I bring my road texture and so File Open. This is my road textures is open, that is double click Open and drag it to Photoshop failure. You can see that bring it to the bottom of the layers. You can see that these leaves are now stacked at the corner of our road texture. So the suit act in the same way in odd blend medial in 3D as well. And if the leaves is completely overlap Pluto road, you can see that the size of the leaves increases as well. So this is a manual way of how you can add leaves using the blend material. So now what I'll do is I'll start saving all these materials. Before I save them as JPEGs, I'll also add a black background. So I'm going to add a new layer by clicking here. And I'm going to press Control Backspace or Alt Backspace to add a black background. Now, alt backspace means I'm adding the foreground and Control Backspace means admiring the background, which is, in this case is right now or if you found it a little overwhelming. If I was a little too fast in Photoshop, you can skip it and simply use the maps which I will be saving out from Photoshop. So now I'm going to quickly see if this out one by one. So go to File. Save As, save this out as albedo. The concrete, please. Make sure you give a black background and not a white background because the white background could affect the other blended material as well. Next is our displacement map. So I'm gonna delete or hide the rest of the maps. Then go to file save as copy and see if there's a displacement map. Next is our normal map. And then we have the most important map, which is an opacity map. And finally the roughness map. All right, so now you see a doubt though, bump maps and now we can load that in Vd. So the Lord it into video. Let's go back to our blend material. So select this blend medially. You can see it's blending. And now we can go to a leaf material elif and start changing though bitmaps. So open that extra slot, Open File, go to a final maps and click on albedo. That's opened opacity map. You can see that if you come only at the edge of the texture, we can also load in our roughness maps. So I'm going to change the surface roughness and then loading our reflection roughness map. So click your click on roadmap and loading the roughness map g into rendering space. And then we can also load in our normal map. So change your bump to normal. Click your become bitmap. And loading don't normally represented. Change the rendering spears linear. And that should suffice. So now if I go back, you can see that though, leaves come on the edge of the road. So no effort on interactive render. You can see that our lives are showing up edge of the road. Now if it's still 2D, then you can maybe add a displacement map. Do their duty losers. Well, so let's do that. So let's crawl down. We do not have a displacement map, so we need to add that. So click on, Add Attribute and click on displacement. Switch this on. And then Lord in our 2D maps. So Genesis to do the displacement and then go to bitmap. And Lord in our displacement map, change it to rendering space linear as well. Now the displacement maps will only show up in the final render and agenda. He doesn't show up in the interactive window. So that's something that you need to keep in mind in case you are. Displacement maps do not show the height or depth in your material. The difference between bump maps and displacement map, because that bump will give you an illusion of 3D effect. But as displacement will actually create the geometry of the tree effect. So that's how you create a blend material in 3D. It's a little complicated compared to other software, but it gives you a more creative capabilities and capacities to order materials and play around with different materials. So the next video, we'll add our other remaining materials and also change the material of a facade and will see you guys next video.
14. Add Remaining PBR Materials from Megascans : Hey guys, welcome back. So in this video, I'll show you how to add the remaining modules and also leveraged the UK was metadata collection from manga scans. So let's open quicksort bridge. And let's go to collections. And collections. We have our quiz, so let's open outwards. And under our quiz you have different models. We are different categories. You have TDI, yeah, imperfection maps to create these. These maps would generally be added in that reflection, glossiness, pedometer. So you can use any of these acids. So if you go to surface, we have different categories for our archives collection. But I'm going to go to essential, want to go to surface. And then we scroll down, you'll find something called Street down. So if you open street bells, we can use this for our foot, but so I'm gonna simply use these weight sidewalk data. So click, you can click on, change the resolution to Duke. Delegation suffice for us. Click on Download. You can also use fork in that would enhance your render quality even more, provided that you're rendering a high output window. So it's downloaded. Let's click here and click on go to files. So these are the various acids that we need load into 3D acid Eric dose. So let's copy this directly location, close Quicksilver, Bridge, open our acid and go create a new material. Rename this, call this a dash sidewalk. And then I can start loading in our materials. So albedo goes to the diffuse texture. Start always. Then let's check if we have a reflection color. You can use ambient occlusion in reflection color if you like. Now that would make it super reflective. So maybe once we add a bump map, but that would reduce their infection, Let's add a deflection glossiness as well. And that is a roughness map. To can use the roughness map, kinda surrendering space, linear and gender surface control to use roughness. Now you can see that the reflection goes away. And we can finally add up bumps. So select the bump map, which in our case is the normal maps to select anomaly map, change your render experienced li linear, and change this to normal. It see if there's any other map that can be added. There's also a displacement map, but we don't really need to have to add it. So we've added our materials. And this I would looks. Now let's apply it to our football. So with the material selected, which is your sidewalk, let me enter this group. And I play the Medea similarly yard as well. Now instead of right-clicking, selecting the texture and then changing the size of the texture. What I can do is go to edit and I can change it to orders, right? So let's try three feet or two meters. Two meters works well. Maybe I can adjust the position for this as well. That looks fine. So similarly, you guys can go ahead and load in materials from the magazines library. Remember that the albedo goes to your diffuse texture slot. Displacement goes through this basement in case you want to add a displacement extra shot. The normal map generally goes to bump and you have to always change the bump mode to normal mode. Roughness goes through reflection, glossiness. And provided that you change the mode from medalists to roughness and ambient occlusion, we generally don't use it, but you can either go reflection parameter. In the next video, I'll show you how to add our white pebbles, stones. And I'll also show you a new cool feature in 3D, where you can use the displacement to create 3D geometry and see you guys next video.
15. Create Pebblestones with Displacement Geometry (Vray 5 New Feature): Hey guys, welcome back. In this video, Toyota add those white pebbles, stones and also create a 3D geometry out of it. So let's go back to my gas gans mega scans is a beast and I use it a lot. Harder to find pebbles in magazines. You can go to Surfaces, stone, and then weapons. So under pebbles we have different kinds of pebbles which you could use. I'm going to go with these beach pebbles to select beach bubbles. If you can't download, and then open the folder location. So now these are the maps that you have which we can load into SketchUp. So don't copy this file location. Let's create a new material. Slot, click generic, really endless school pebbles. And then I start loading in those materials. So albedo goes to refuse slot. We have the roughness map changes to rendering space linear, and also change the surface contour. Roughness. You can add some Armando reflection. If you want. Then we can add anomaly map and change the strand experience linear as well. And now we can start adding our displacement map. So with the new feature of VA, we can add a displacement map as a geometry. So to do that, go into this group, will select these two groups. Because G to make it a group, press Control X, and then paste it in place. So now it's just in the main model and not nested inside another group. Now what I'll do is I'll upload this a pebbles maidens. So we have the published material selected. You're in materials, use the bucket tool and apply the material. And you can see that scale is too small. So let's go to edit and change it to three feet, three inches, or one meter. Most mega scans library is one meter by one meter. So if we change this here to one meter, you would get the correct scale. So good. So we change the size of the pebbles. Now we will have to add the displacement. So to add the displacement, select the group, and then simply click on Add Displacement to selection. So once you click on that, go to acid editor, go to geometries, then it will show up under displacement, you can rename this, can call this pebbles. And now we can add our displacement maps. So I'm going to change this or 2D displacement. Click yo go to bitmap and add in our Duke a displacement map. So click on Open. Jesus surrender experience linear. And now let's check how does render looks. So like I mentioned before, displacement maps wouldn't show up in the intact would endorse. So you will need to use the direct render mode. So let's go to settings such orphan drug dosage of progressive views quality as high and use the VDI oscillator. So let me zoom in a bit and then click on that and the bottom. So now you can sort of see the geometry in or if you want to increase the height of these displacement maps, what you can do is, let's go back to geometry. You can increase the ammonia. So you'll have to read end of this to me to stop the interactive. So you can see a before and after, and then render it again. So now you can see the 3D geometry in the pebbles. The more height you give, the higher-order 3D geometry gets. So let's stop that. Andro see a difference between the previous Amber neuron. So you can see that the more ammonia give, which is, which is the ammonia, the more height you get in your displacement map maps. All right, so I think hormone tofu should suffice. And let's go back to front view. And we are done creating our displacement map. In the next video, I'll show you how to use a new plugin, which is a cool plug-in that I use as an architect to add materials to our facade, go aground and more. I'll see you guys next video.
16. Using the Textureme Plugin to add Building Materials in Sketchup: Guys, welcome back. Now in this video, I'll add some more materials using a plugin called texture me, which is super useful for architects and interior designers. And before I do so I'm just going to run in childhood render and see the progress that they've made thus far. So let's load back door interactive settings. So select the interactive setting, fail and click on open. And then tender with 3D interact. So this is the progress that we made thus far. I'm going to change the materials of the facade because I don't really like the stone Galileo and like to be more of the color value for the scene, which is grays and whites, greens and these use at the back. So when I had agreed travertine stone. So let's stop that window. Let me quickly add this to this to you. If me and let me open the text, show me a DDL plugin. So click on em texture. Building material plug-in dorm lead up to go to material, goods or natural stone and click on sandstone. So now we can use any of these medial DO. So let me just scroll down. There's one videotape was mainly like a lot, which is the raw Chaka publish. I'm going to use that fabric fab blend him Shen sandstone material, which is supposedly a German word. So let's click on Download and then it will audio. So now, since the medieval select video, I can handle this group, select the fears, and then apply the material. So I'm going to play it down. And on these edges as well. Similarly, I can apply another medial for our compound oil and also food are floating here. So let's go back to our taxonomy material. Go to Materials. Click on Copy, click on all. Now if you're not familiar with any material, you can click on All and then search for the medulla. So I'm going to use this concrete material which is lighter in color to click on Download. And then it would show up here. And then I'll play it on dau phase. Now the scale is too small, you can change it. Does give it on three feet. That's fine. Now, if you want to adjust the materials further and let's go to our acid editor, select this material and show up. You're now it only comes with one map. And that's the only issue with taxonomy materials. So you will need to create those. Adopt maps either in Photoshop or an adult third-party plug-ins like substance Pinto, and designer. So what you can do a save these textural files out. So to say these texture file load, you can go to extensions file by Derrida. Sooner. You can see that all of these medieval are not saved and is in a temporary location. So select these materials. Click once hold Shift, click on the second day under select all of them. Could archive and report, create a folder called maps, and then select the folder. So now the switch you up in the taxonomy folder. So you can see that all of those materials show up here. And now you can select the base albedo material or the diffuse texture starting material. And then for the theater, black and white textures and a bump textures in Photoshop or any other software. Let's go ahead and select another material for our company and for the flooring as well. So let's go to natural stone. So I could use this for the compound one. So click on Download. And it shows up here. I'm going to apply the material of the scale is too big, can reduce the scale. Maybe three feet. Didn't adjust the position of the material as well. Do it for the side. Select your face, select axial position and mortar product of texture position doesn't show up. You'll have to click on Make unique texture and then select the axial position. Now again, if you want to select this medial and edit it, Let's go to Extensions, really pale Python editor. So you can see this is the medulla, which is a temporary location. So click on our cave and debug and save it in your maps folder. So now what you are bureau as m takes two to three 47. It you can then further dig into Photoshop and edit out as well. Or if you want to add it directly in 3D. So let's edit these materials a bit in 3D. Before that, let me just finally add the flooring here. So I'm just going to select this and then apply it on the floor you pebbles materials. Let's change that to reading material. This is what happens when it's not in a group. Multiple and extend this out, this edge and increase the thickness of this B is how it looks good. So let's go back to front view and then run interactive render. Lead to either end those committee leaf. And I'm really liking how it looks. In the next video, I will be editing some of these materials, adding reflections and more, so that they have some depth as well. And see you again next video.
17. Editing Existing Materials in Vray: Hey guys, welcome back. So in this video we're going to edit the materials a bit and also add some paper stones because this looks a little too flat. So we're going to start by editing out some of these materials, especially a glass window frame the door these days. And also this metallic plate. And radical we find useful. So let's minimize that. Let's start at the window. So I'm going to undo this group. So you can see that the windows also sort of exploded. So let's see how it works with just these window materials. So I'm going to select this window material. Go to oscillate ago, goto deflection and increase the reflection and also go to refraction and increase the diffraction. So we have a completely transparent window glass and now we can also adjust the window frame material. So let's select the window frame material which is called a 06. And at least the reflection a bit. And also increase them mentalis. So now we have all metallic window frame. Also going to rename this a dash window frame. And the glass can really named Luke a dash window glass. Next week, can I just though the die material to select the pain material, you're going to give some are more reflection and it is the glossiness. Now let's check this material so we can use this in the bumps lot. So right-click Copy, go to bump, right click here, and click on base desktop. Now what we can do is we can edit this medieval. So you can right-click on the texture slot, click on wrapping, and click on color correction. Again, reduce the saturation. And we can increase the contrast and also the brightness. So now if I go back, it will have sorted for bump. So if you wanna increase a bump, you can press do. And that would give it sort of a 3D effect. You can also add a displacement map. But for us the bump maps are faced since there's lenses are the distance from the camera view. Now we can not just the door medieval, so select the door material. So that is no door material, a blade, so we can assign any material. So let's go to asset editor. Let's open this up. So we have the default 3D materials that comes with reading. We can go to wooden laminates. So we can use this lamb need CO2, 120 centimeter material. We just kind of late and colors well, and now we can apply this media on the door. So select the face, use the bucket tool and apply the material. After you apply the material, go to edit and change this to 120 centimeters. So that does not aid skill. So merely on this fierce as well and this phase is well. We can also go ahead and upload for their sport. Now for the floating yarn want to play, I wouldn't blank. So go back oscillated, Golgotha would eliminate. Go along and you'll find with blanks 0 and a 100 centimeters to any of these in. And I'll go back. So as you can see that we have the selected medieval wood planks. Is it a 170 widows? And then update our material. Once you've uploaded. This is a 120 Erdos, a 100 centimeters. So gender scale to a 100 centimeters and breast DAP. You can upload your resume. And that should suffice. Now we can adjust this material, you select a material. So again, a default materials, and now we can apply a middle metallic materials. We've got a metal that's go for aluminum abolished. As you can see in the reflection, we've only increased the Medalists and I just IOR value a bit to get the scanner from India. So now we can apply this year under the group, select the material and how Plato extent please do work with groups Hansen, applying materials better and easily. I'm going to select this door again and then apply this medieval. You're using the sample being assigned materials. And finally, I need a play needed, delete this extra phase here. So let's see what that is. Select this delete, go back until this group and just make that rectangle. And delete that face, dilute those lens. And it's an all week and make our histones. So I'm gonna make a rectangle on top of this. So we have the codec, sage maker, Megiddo group, then move it down a bit late or any other group. You add thickness over onto inches, which is the same as this o an inch. Now we can assign a material to this. So we're going to use the same meter, yellow, which is a Magritte. Then are saying that material. And then I'm going to make it a competent to make it a competent call. It. It was Jones. And also I can give a slightly larger size. So maybe another one foot. And then copy it to this edge and move it out by say, six inches. And then copy it and multiply it by 10, or maybe 14 or 15. All right, so now I can select all of these and make it a group. So it's easier to edit later. Using the Control key on my keyboard to select multiple items and then move it in. So that's right at the edge. Right, that looks good. You can also adjust the material of this. So select this material. Let's go to reflection, gives some amount of reflection, produce the glossiness. Let's check this material. We can copy this to the bump maps. Right-click Copy. Go to bump. If I click based. And also wrapping, click on color correction. Increase the brightness a bit as the contrast is red, and reduce the saturation. Let's go back late, that's done. So if it is a little quick, I'm actually repeating certain steps. Sled you get into the workflow. So the more you practice, the better you understand the concept of applying materials and the faster you workflow becomes. So title, replay these videos and try to get into the floor of a building materials, editing acids, adding acids, and so on. Let's have played all the materials. Now. Let's go back to front view. And let's run an interactive render. Pebble stone of two-inch looks a little too thick, so I'm just going to make it more than in smaller. So before I do that, let me just lock the camera orientation and togas and a more bring it down a bit. So that looks fine, which is one inch and three-quarters. All right. That looks fine. You can go ahead and assign a material for your concrete shell as well. And you can go ahead and also add it from my gas cans and follow the steps from the previous videos. Let's check this material as well. This is the medial one. Maybe increase the reflection and reduce the glass in the summit. Right thing, but you look fine. It must be the shadows from the trees that's causing this effect for this slab. In the next video, I'll show you how to add in deregulates and also some bullets and the exterior. So that in later stage, we can convert our delayed into a night render using something awesome called a light mix. So I'll see you guys in the next video.
18. Adding Interior & Landscape Lights in Sketchup: Hey guys, welcome back. In this video, we're going to add some interior layouts and also some additional landscape elements like bulla, that mode so that we can show some labeling on the outside as well. So to start off, we're going to add some lights in, say, in our rooms. So we can add a sphere late to click on the sphere layer and do the room. So you can simply scrolling. And then odd bit using your middle mouse button and then place your later to 12 players to just move it in a bit. All right, Great. And then I'm gonna make a copy, so I'll press M, then make a copy. This way, I have to select these two lights and make it a group. So now if I enter the group and best year, I can easily add some additional notes as well. Now let's go to the top view. Let's go to dogs and switch off roof and visit. You can also hide these trees. So let's hide the street. Okay, great. So now we can move this to the center of the room and do this. So you're late, group, select any sphere late, and moved to different rooms. So I'm gonna move one year, one year, one year as well. Once you placed it, It's also a good idea to increase the height. So as you can see, we have in loosely on top. So I want some late to fall on those windows. I'm just going to move that up a bit. Hey, we just bring it down so that this year later not seen. And this late as well and can increase the scale and would up a bit. So once you've adjusted and added all your sphere late, we need to adjust the settings for this year. Let's gory Arthurdale, Addo or late. We are sewer later, Dolly. A setting that you need are just options. And to John, invisible, it's an aldose source, is not seem like great. So now let's switch back roof and school back to front view. And let's run an interactive render. Hollow tube. We've added the lates, but it's, it's not showing up. We can adjust the intensity of the late in settings, but we're going to use late mix later in the course, and we're going to just delete later on the course. I'm going to leave it as is. And I just delayed to nato. So I'm going to stop there and know. What I would also recommend is that if you do not have fun, enjoy it and save your scene, salami switch off the roof. I'm just going to add some gardens. And in chaos cosmos. If you go to accessories, 3D models, accessories, and scroll down, you will find gardens. So I'm going to add this coordinate, lizard and place and then rotate it by 180. Here's one year and place another year. And make sure there is some gap. So that, that is, you can see some are more dove laid in the room as well. So now if I go back to front view, the garden is intersecting with the roof, but it will not be seen in the front view. So you can leave it as is. Great. So we've added the coordinates as well. And now we can add some boilers or late. So let's go to windows. Did you arrows so much for XD, the lights, or maybe even bullets. So you will find some products. Here. We have something called the Delta Lake. Now if you're searching for a particular late or you don't know what kind of late you need died in the exterior landscape. Can simply do a quick Google search called exterior lights in landscape. So you can see that we have these wallets, which is fixed at on the wall. We have these step plates. We have a 50 bed. But what I'm looking for these lanterns. So we have these cool Japanese landowners, which we can add an RTD arrows as well. All we can alter these bullets, the smaller ones, which look really nice as well. So I'm gonna go ahead with this modern lanterns. Click on Download and glucokinase and place it in scene. And I will copy this. Let's make sure it's a competent 2. Let's copy this here. Let's go back to front view. So sometimes the tree is commonplace, is make sure to hide them. I'm going to copy one here as well. And also, please select this corner to know what I'm gonna do is adjust the settings for this. So let's go to a late, select this translucent glass green material. And we're going to add an emissary on top of this. So click on the plus button and click on Immersive. And that should be good enough so we can adjust this later window light mix. Let's let's check our lights in the scene. So let's go to front view. And let's click on Render interactive. So now we can see that we have our boiler lights as well, which is looking nice. And we can finally add some additional assets. For example, our cause, a human figure, some plants, the gardens is also looking nice along with the Windows. And I've seen as almost there. So z you guys next video.
19. Adding Entourage with Chaos Cosmos : Hey guys, welcome back. In this video, I'm going to add some entourage, a god's people and mode. So we'll start off by opening girls cosmos, and let's go to vehicles. So the favorite vehicle you can add any regular du Lake. I'm going to add my electric car, Tesla because it's the future. These by electric cars going forward. So let's add the electric current Dataflow cloud, this case. Let's add it in place. Also, what I notice is that I can add this late here in this corner as well in the order of lading. And maybe too late. These corners create. Now we can add some humans. So let's go back to chaos cosmos. Could people scroll down? Just going to add this person, you may be coming from the same ID number or maybe split a sit here and rotate it by 180. And let's add another human figure. And that is Henry died ND into the scene. Let's make any as pilot as the owner of the house. Maybe this exiting the hose with the cycle going for a quick style. And also like to add a d into our lawn because it's too minimal. So maybe we can add some TCO and a very minimal tree. So let's go back to vegetation trees. So let's see what we can add, which does not do fancy. Jasmine, Emma leaves. And let's, I'm gonna go to this load doesn't. And I'm also going to make a circular cylinder, this group make a circle. And I want to assign though pebble material, so we ablate those material. Now let's check I've scatter acid so that you're not messed with the group. So let's open our composition manager and click on Edit grass so you can see that the grass overlaps with distortions. So what we need to do is actually make an opening. So we're going to make a group first, so make it a group, and then press Control Z to make a copy. And we're gonna exploit this group again. And then I'm going to delete this face. So now we have an opening there. So now let's check our scatter composition again. Click on Edit, can see that it's still gums. So all you need to do is just click on Settings and click on A1, and then it will update automatically. Null since I made it a copy, you can go to edit polygon based in place. So now it is perfect. It will come with the pebbles as well. Let's do we either Dreze pebbles late. Now we can add some small glands here. Go to indoor plants or maybe shrubs and bushes. So let me just add this for somebody. So you guys can be creative and add which opens you feel fits the scene. You can also add these plants and scale it down a bit so that it's not too big. Let's see what we haven't flagged. Grass and rocks can add these. These are pretty common in the states. So we could probably add some desert plants as not Domini. Take few, few of them. May be at this Mexican planter is moving in a bit, mix and match. There's gotta be randomness because nature is all about randomness as well. I'm going to select these two and more mature. And we'll rotate it a bit. And without windows in material. Let's do we placed quite a lot of plants, trees, cars, vehicles, and all that. Now let's go back to our front view. It's IV, Everything's fitting the scene so you can see that our baby and the mother is not fitting the scene. So let's just move them in. And our friend, DR. henry, he's also not part of the scene. So maybe we can just move them out. Maybe uses the road more than the footpath to cycle, can paste them on the road. So let's play a click on front view again. These again. All right, great, looks good. And then click on. Our end is looking awesome. Some of the assets are not seen. We can't see our plants here, so maybe you can add some more plants. Looks nice. We can move AND back a little so they can see more of the car. So I'm just going to do that quickly in the interactive render mode, so modest to the left, we'll sketch up to the rate, use default area and then lock the axis. So click on camera doc, camera orientation, and then move your assets in the William tractor mode. Maybe I can copy this plant here. And this plant here as well. Copy this plant here, Oregon grid, and copy this small town TO, let's see if we can add any other plants. So let's go back to subs and wishes. Maybe we can add this to the corner. Maybe not the color plant size quite big. Sulla, reduce the size. Alright, that looks good. And maybe copy this to the side as well. Can delete this plan because there isn't showing up in the render. That looks really nice. Awesome. So I don't know, is finally coming to life. Looks really nice. We had some shadows of these plans on the wall. Some shadows and the lighting looks good, that these look good. Maybe add some additional late 300 so that we don't see this yellow yard, the back. And if you do not have a component, you can add an infinite plane that could add a ground below the horizon line. But in this case, since we have a compound 1, we only need to add anything. We just have to add some TCO, so I'll do that quickly. So let me scroll out. Let me see if I can add some additional trees. Let's call it trees. Maybe the European Juan mean gets a small tree version I and would. That looks good. See how homage of an effect that is in the scene. I like this tree. So I'm just going to move this to this edge mode in a bit. That looks much better. It looks composed by those. Well, I'm happy with this. Let's see if what happens when we add an environment fog in our scene. We're going to stop that Endo. Just going to add this to our history VFB. So you can see the progress that we made from the start, which is quite considerable. So let's foster view. And this isn't going to be also, let's assign this as a, this is B. And if I go back, you can see the difference be made from the first to the end of the scene. So quite a lot of difference using the acids within really. Well. Okay, so we come towards the end and in the next, we don't want to show you how to use late mix. We're going to add some additional aids just to see how we can tweak the late and cleared an aid seen within WTF frame buffer. So I'll see you guys next video.
20. Use Lightmix to create Night Renders: Hey guys, welcome back. In this video, I'm going to use the light mix to tweak the LAITS and convert our rendered on a tender. So before I start, I'm just going to add some additional lights and our lawn. So I'm going to use the rectangular area. So click on rectangle. And I'm going to draw a rectangle this way. So it's being thrown from the top. And I'm going to scale this on top. So we are one lady oh, we need late on all four sides. Also going to rotate it. Alright, that looks good. Now I'm going to rotate it by 90 and multiplying 203. Now we have laid down on all sides, just going to move it out a bit. Once we're going to select these lights. And since these are competent, I want these lights to be added. An older ground lamps are the bullets. So I'm going to press Control X. So I'm going to select these lights. Again. I selected the ground where mistake. So select the slate, then press Control X and do the bullet. Then go to Edit, Paste in Place. And I can see that it's added everywhere. So now what I'm gonna do is I'm going to go to my oscillator. We have a rectangular tool. And I'm going to switch on invisible so that I don't see the source late. And I'm also going to increase the directionality. So we have some soft lighting on the landscape and heart skip. All right, that looks good. And now let's go to front view. Now we need to add a light mix to go to acid editor, go to render elements. Click here. If you haven't added a trend elements, you'll get an option to either an element or you can also right-click. And then we have something called light mix. So let's add late mixin and let's group the LAITS way instances. So let's group instances. And now let's go back to front view and run an interactive render or lead. So we've added our lates, but it will not show up in the data window because the sunlight, Obama's most of the artificial lights, which is obvious. So what we need to do is reduce the sunlight, darn it off completely. So Goryeo source light mix, such after sunlit, sooner you can see the sunlight is turned off. And now we have the rectangle late. So let's switch off all the late. John, the rectangle eight sooner. You can see that the rectangular affects the scene and let's increase the value. Let's say 30. Study works well, maybe even 60. And then let's work on the dome light so the dominator can change the color. So click on the color layer and let's try to make it dark. You can also change the color, make it blue, whichever works for you. So let's post that was okay. Let's switch other background because it feels a little too distracting. And then let's switch under CEO late so you can see that individuals gets lit. Scenes is 230. So now the interiors as late as well. It looks really nice. All right, so that looks good. Let's switch on self illumination because that is our MSL layer. That looks good as well. Then whiter Middle Ages enemy is off. We can also switch on that sunlight and reduce the intensity, I want to say 0.1. So you can see that we have some shadows as well. If that works for you can do that, but I'm going to keep it off. And then we can also add some street lights. So similar to how we added doors, the lamp lights here. Let's just move this to the right. Keep our sketch up you, Let's lock our camera orientation. And all they do is play some rectangular cuts. So I can't see the rectangle late. Maximize it. All right, so let's place our rectangle like this. We're going to rotate it. So sometimes it Hangzhou, let me just stop the render. I'm going to stop the render. We want to place my street lights first and then running Jackie Jacquard Endo. It's a placement late. I'm going to press the left arrow key to access the green axis and rotate it by 180. Let's move it up a bit to a certain height, to a street lamp plate. Height would up a bit more. Instead at this corner. And then copy it this way. Let's make it a group for later. Now similar to how we are just did what I lead to more, rename this first called the street late. And so John Stern, invisible so that it's not seen and just change the directionality. So this should give some soft lighting on the road. Let's see how this affects the Window. Let's go to front view. So you can see that it won't show up in the endosome, just going to adjust the position a bit more. So select these two mood in like these to move it in. And then go to front view and then run an interactive render. You can also place a late behind the DRI to cast shadows from the late on the road. So that's also cool technique which you could use. And you can also change the late. For example, a endo laters goal to continue to sort of warm. So now we can see that rods are lit as well. So the chains, the Endo later, I'm just going to quote two, sphere late. And then gender temperatures. You can see that we have some warm late, right? That looks good. And I'm going to make the sky a little more darker. Yeah, that looks perfect. The self-immolation is little too bright, so maybe we can reduce it a bit. Give some armada of temperature later in your folder, Bullard later as well. And for the street late as well. So go to street late. Change it to sort of a warm late, late. So this looks good. And now once we do our final interactive render, a final render production renderer, that is, we can load the settings and so we can see a low dilate mix settings will click on Save. So I'm going to call this night Render Settings and click on Save. Now since we saved our light mix setting, all we need to lose is load that wagon. So I'm going to revert to my original settings. So John sunlight and environmentalists. And also I'm just right-clicking on the values, switch them all back on. And then maybe switch off. Reduce self illumination a bit so that it's not seen in the data window. We can adjust the render settings as well. For example, if I want Endo late in the day or Endo, you can simply go to your sphere late, which is angled eight. It's a good idea to rename your late because you might get confused when you're using light mix. So maybe let's just keep it out. It looks fine. Can see the Endo late street light can be off. Don't really need that. And this can be our day setting as well. So click on save and call this D render setting. So once you do a final render, all we need to load these settings wagon. I didn't see it them out as a render. So I hope you found this video useful. In the next video, we'll do a final Endo and then do some post-production in VFB. And also then have a final Photoshop video and show you guys some additional post-production techniques which you would find useful. So see you guys next video. Just altogether, before I leave, I've been adding my evil and goes to the VFB. I hope you've been doing the same and helps him keeping track of your progress. You can see that I have seen from the start of homemade Endo is and what it's become now. So make sure to always added to your VFB. Going to stop there Endo or yeah, see you guys next week.
21. Final Render of Scene: Hey guys, welcome back. So this is the final view and we're going to set it up for Endo. So the only additional genes was that I had Henry because if there are Doumani humans in the scene, then it could get distracting. So we'll just add one person, henry for next time and leave the rest of it as is. Now, we can update this, click on Update. Now we can set it up for a final render. So let's go to Azure. There DO go to settings. So Java and drag. Now, there are two ways you can do a final render oneness, the progressive, and second is the non-progressive way, also known as the bucket render mode. So the progress of how it works is that it renders passes. So the longer you leave your Endo, the sharper and borrow your Endo becomes. And this helps in getting an output faster as well. But with the bucket rendering mode, agendas pixel by pixel from one corner of the screen to the other corner. So that would take slightly longer and the output would not be available to you right off the bat. So you would have to read for say, half an hour longer beaks. But if you have the progressive render mode, then as you keep it under running, and the more number of passes that end up undergoes, the better your Endo becomes. I hope that made sense. If you are using US law system, I would suggest that you stick to progressive No out since I have a decent system, I'm going to switch off progressive, which would switch to the bucket rendering mode. Now the quantity, thank Liza, too high. You can notice that the noise limit sort of reducers. So if I go to high, it becomes 0.01. And if I give high blood sugar becomes 0.005. So the higher your quality is, the longer the render Dame becomes. But though rent output is much better. So if your client is not being used too much and you do not have to spend a lot of time in your Endo, then I would suggest that you keep the quality to high. And finally, I'm going to change that been ISO to variance. So that's all you need to do and also reduce the update effects. It doesn't really show up Endo final production render. Now let's check out an old book. And I'm gonna change this to 2000. Now I'll forget, Endo says is 3, 8, 4, 0 by 2, 16, 0. Ugandan, don't forget, if you'd like, but it would take a long time to render. So I would suggest that you stick to 1920 by 1080, which is a standard screens a lot do 1000 by whatever. Second ratio shows up. I laid so I can set the military dendrite, can keep doe quality at high. And this is the final render settings. I'm going to see it There's old and call this the final render settings. And once you set up everything, just click on Render with reread. Take a deep breath, go for a coffee break, go for a run workout and come back to see your awesome vendor or Endo. Later. It's going to start the render. I'm going to pause the video and come back once that is done. Sometimes it shows a black screen, which happens in 3D. So that's why I suggest that you use the progressive render mode, know NGS, uh, Georgia black screen. You do not have to really worry because once that Endo is none, the final render output would be seen. So in that case, you can just reduce their vendor or put and see if that works in guessed door rendered as a shop. But in most cases it will show up just weird for a bit deviation and you will see your final render. So I'll see you guys once that end those done. Hey guys, welcome back. So that Endo is done. And you can see that we have something called stamp. So understand, we can see that payment book format or no. So look around 38 minutes and I have 37 be graphic art, 16 GB RAM, SSD and NAMD days and seven processor. So I use a laptop, so generalise laptops are slower than system. So if you have a proper configured system to surrender would take lesser time to render and you will get the product faster. You can also leverage chaos glowed to clear then lose. It gives you set up all the settings and the rest of it. Now, once you've done the Windows, this happens in most 3D rendering studios that who nor does something which is off. So the one thing which I noticed in this render, which is off, is the shadows. So you can see that the shadows are super sharp. And the reason behind that is because we didn't adjust the sun settings. So I'm going to quickly adjust the sun settings and then rerender this all began. So if I go to my late cooler sunlight, you can see that we have something called the size multiplayer. So we need to make the shadow software and the Reagan make the shadows. Sappho is Bye. Increasing the size multiplayer, do a value of around 10. If you make it a 100, then the shadows to be super soft and you won't really see the edges as well. So I'm going to keep it, I'd say is ten. And then rerender this auto Before I read under this out, I'm just going to add this to this three VFB. So we have a final embryo. And I'm also going to check this and really interactive. So let's load the 3D antagonists settings again quickly. So click on the folder and select interactive settings and click on Open. Give it a bit for those settings, do load. All right, so we loaded our interactive render settings and I'm going to click on Render would be the intact. So now you can see that our shadows are much more software. And the tree shadows that are much more software as well, which gives that very nice calm feeling to the scene. If you wanted to see more of the shadows, keep it at around five or six, and that would work well as well. All right, so now I'm happy with this. So let's look back our final render setting again, so-called Lord. Click on final render setting. Click on Open. Let's check the setting once again, and then click on Render video. I guess so that Endo is done. Let's check the day once again. So with a stem took a little longer, 42 minutes and 46 seconds. And we have our final. So I want to see if this ODE before I edit or add any extra postproduction. So click on Save. I'm just going to call this final render. Let's see if and this is our final and it looks really nice and neat. And in the next video, we're going to boost this a little bit more using the 3D layers in the VFB. Since you guys next video.
22. Convert Day to Night in the Vray VFB: Hey guys, welcome back. In this video, we're going to convert this dead end or do a final render, like I mentioned in the previous video, you can simply Lord in your late mix to create the night render. So go to a source light mix. Click on Lord, Lord door late make setting from our Render Settings. So click on Render Settings and click on Open. And you can see that it creates the night general, but it also creates a lot of noise in the scene. So we need to reduce this noise. So let's reduce the rectangular late. Maybe it's fewer late. The street late can be increased a bit more. The sunlight sort of adds lading to the background as well, which is nice. But it does reduce the self illumination. So you can notice that though noisy 0 is because the rectangular late, so you'd have to reduce it a bit more. Just keep it a little bit. And we have our night Endo. So sometimes you'll get problems like this where certain areas have a lot of noise. To correct this, what you can do is just add an invisible rectangular layer and reduce the density Boolean or really low value, and also increased the directionality of direct directly. And that would solve this issue. So we have another window and then we can see it this out as well. So click on save and call this final render and also add it to your history of b. So now if you want to see a before and after of the nitrogen beyond the data window, you could do it this way as well. So this is our final data window, and this is our final Nintendo. The next video, I'll use Photoshop and enhance these renders a little bit more. It's not really that great. But if you have to adjust some parts of your image, then I would highly recommend using Photoshop after you're done rendering as well. So I'll see you guys next video.
23. Post Production in Photoshop: Hey guys, welcome back. In this video, I'm going to show you some additional post-production techniques in Photoshop. So let's Lord, in our final render. So go to File, go to scripts and click on load files into stack, click on Browse, and I'm going to load my two images. So select those two managers. Press OK, click on Okay. So I'm gonna start with the data and low. So the first thing we need to convert the smart objects, Right-click, click on Convert to Smart Object. So now if we play anything on the image, it will not get a blade, do it natively, but it would be added as a layer. And you can always delete those effects at a later stage if required. So we're gonna select the data window. The first thing what I wanna do is go to Filter and Open Camera Raw Filter. So the Camera Raw Filter, you can do a lot more of both production. So it must start at the basics. So you can increase the temperature to the right or left to make it either warm or cool. So I'm going to make it a bit more cool. Just a little bit. Going increase the values too much, saturated and unsaturated a lot. So just a little bit more. Maybe contrast. Please wait a bit. Agree the blacks D Here's would add sort of a fog if I reduce the value. So let's just keep it there. Can add some way brings as well. And we also have a cause in the Camera Raw editor. We also have something called vignettes. So if we increase this to the right or left, good, add a vignette to the scene, which adds that nice extra touch. You can also go to a minuscule scale and then adjust the reds, oranges and more in your scene. But I'm happy with this. So I'm going to press okay. And are you can see look before and after. Now you can do the same for your final Nintendo's. Well, so switch on the window, right-click and click on Convert to Smart Object. Let's you read our final night render as a smart object. And we can add some additional effects for our final Nintendo's. Well, so let's go to Filter, camera Raw Filter. And we can start at the basics. So increase the temperature in this case. Here's the exposure a bit contrast. So I'm just playing with very subtle values. Members, okay? All right, and now if you want to add some additional post-production, we can use layers and we can use different colors and change the blending mode and opacity to give it that extra pop in your scene. So for example, these late. And if I add another layer on top, I'm going to change the color red. So I'm going to get this color. You only use the brush tool by pressing the left bracket key. And then you can use a soft round brush. Reduce the opacity to about half flow as well. The 1.5. And now you can start drawing on top of these lights. You can draw your own as well. And now what you can do is you can change the blending mode to screen. And you can reduce the opacity. So it adds that extra light bulb in your scene. And now what I wanna do is to fix this, I'm simply going to be int on top of it. So you can either been delayed or you can be in some dark. Want going to add another layer? Let's make it to this color. Let's select the brush tool and select the scholar named want to draw on top of this. You can see that sort of gets rid of those lies there. And then do the same. Change this to Multiply and reduce the opacity a bit. So if you make that part of this render darker, it's not that noticeable. But from that render looks good. So I'm going to group these layers together to select these layers. Press Control G called as Nintendo. And you'll see as this out, simply go to File series. Click on here as copy, and save it as a JPEG. So I'm going to call this Nintendo. Keep it at the maximum sales and press. Okay, then I can turn my day late. And I recently lens effect, which you can give us go to filter and click on Lens Corrections. And now we can use something called a chromatic aberration. So if I go to Custom, AI can increase this and degrees the fixed screen and fix the yellow fringes. So now if I zoom in, you can see this chromatic aberration at the edges. So most photographs dessert have this slight edge, chromatic edge in that photos. So this would give you that extra photographic field press. Okay? And now we can see the difference between the landscape collection on and the lens correction off. And then see if this ODE. So go to File, Save As zeros, copy, change to the rubric and call this data. And so this is the final day or Endo, and this is the final line render of a scene without having to read and seen. So I hope you guys found this course useful. I would love to see your work as well and the best place you could share it on social media. Be sure to tag me, which is managed, Paul Simon, which is my personal Instagram or even my sketch up guru, Instagram, which is SketchUp guru or official on Instagram. So do dag mean and I drag it out and use some valuable feedback as well. So I'll see you guys soon. Take care.
24. Class Assignment: Hey guys, So I would love for you guys to do an extra assignment just to practice because practice makes better and practice makes perfect as well. So just randomly download any 3D shadows model which is not too complex from SketchUp. Bring it to Yossi and follow the steps that I've taught you in this course. Set it out for Endo. Try using the mean plugins which are scattered to omega scans to add that extra realism in the scene. And then go ahead and share your work either in this class or even on social media. I'm looking forward to checking out your work and also help you out in the process. Do stay tuned for more such workshops and masterclasses coming over here. This is your host, one each Paul Simon, AKS getter will signing off chills.
 Manish Paul Simon, Architect | 3D Artist | BIM Expert