Transcripts
1. Class Preview: Do you want to
learn how to create professional in DDO drawings for your SketchUp 3D models
using layout for SketchUp, would you like to learn
all the cool tools in layout for SketchUp to create some
quick presentations and impress your clients. Then this is the class for you. In this class, I will
show you a step-by-step on how to create a complete set of board presentation and working drawings completely
within layout for SketchUp. We will start by optimizing our SketchUp model before
we send it to layout. Learn how to set
up our plans and elevations and SketchUp
before bringing it. Learn how to set
up templates and layouts to maximize
productivity and create drawings first at various views and change
the scales in layout. Learn how about how
to use layers, pages, and studies to create
different types of drawings. In layout. We will learn how to add
dimensions and annotations, like professional interior
designers and architects. And then we will also learn to leverage the power of scrapbooks tried in section lens and a whole lot mode that would
boost your productivity. And towards the end, we will
learn how to set up a Sheets and set it up footprinting all within layout for SketchUp. This fully detailed class is all you need to get started
with Leo Fu SketchUp. As I take you
step-by-step through the entire process of creating
awesome in DDO drawings. And which I'm sure will boost
your carrier and business. Now without further ado, I'll see you in the
class and say jazz.
2. Before we start : Hey guys, In this
video I'll show you what is it acquired before we start diving deep into creating a drawing and
layout for SketchUp. So you can open the
master resource sheet, but you will find the download
section of this class, so you just need to click
on the mastery. So she do. And that will open
up a Google Sheet which contains all the links of the software that we require for the course and also the
link of the exercise files. I'll talk a brief about exercise files so you can open this up. Now each file is around 200 MB. So what you can do
is you can work with a single layout master file. So once you reach the sixth
lesson of the scores, you would understand
the importance of using a single file for
the rest of the course. So in this case I'm using
sent to load master file. But you can go ahead and
start with the basics. For each lesson I ever fail, which you can work with. It would make more
sense once you reach those sent to layout
part of the course. Then you have the main software
which is SketchUp 2021. Node layout comes
along with SketchUp. So all you need to do is
just installed SketchUp. And it would install layout. What SketchUp as well. It's a fairly simple process to download and
install SketchUp. And you can just
open this link and follow the instructions on
those SketchUp.com website. I'd like to know we'll
jump into SketchUp and then show you how
I use SketchUp and just the basics so that you can follow the course
along quite easily. Once you open SketchUp, you will find a template called
baffling stateful layout. Now this is the template
I use when I create drawings in Lao-Tzu SketchUp. So I will be showing you how to create this template
as well in this course. For now I will open this. No, the only quick change that I need to change the
background to white. So I'm just going to go
to my style, my default. And then I'll go to Edit. And then you'll get
an option here called Background Settings and click here to change the color and
make it completely white. So that's 255 for all
the values for RGB. But it's okay. It becomes white
backgrounds is what I need. You can also update the style. You can also update statement. Now this is something
which I missed out in the course video. So keep a lookout for this. And how I use SketchUp is just some shortcuts that I personally use which
benefits me as well. So before I use the shortcuts,
I will assign them. You can go to
Windows preferences, click on shortcuts. You
can search for height. I use the shortcut F2. Now sometimes F2 may not work in your keyboard because
the function keys, which is F2, F3, F4, is not turned off in
the bios settings. In that case, you can
assign a shortcut, for example, control
one for height. Knight Hall could be controlled to night loss could
be controlled three, this is another shortcut
which you can use, but in my case I
use F2, F3, and F4. Now another cool
shortcut which I use is toggle visibility,
whichever saying j. Then finally there's
X-Ray mode as well, which is why another shortcut
which are used as group. If I click on Edit may group, you can see that I've
assigned the shortcut G. Now this is previously
assigned for components, but I get more groups
then components. So it made more sense for
me to make this shortcut G. I'll show that to you quickly
know if I make a rectangle and just double-click and
that would make it a group. Minimizing one step right after right-click and
click on Make group. So it LTE model faster as well. Then I can enter the
group, push those out. Now if I want to hide this, I can select this
group and press F2 to height or you can best. Then you can press F3 to unhide
lost and photo and Idle. Now another cool shortcut
which I used this Alt W, which switches to
pilot prediction mode. So you can go to camera and see that I've assigned
this shortcut Alt W. I will also
assign a shortcut Alt D, which is for top use FIPS. It goes to the top. You. You can maybe assign
that shortcut as well. Just search for camera. You can see that Ira assigned valid projection is all
W and standard views. These are some of the
shortcuts that has worked for me to
help me moderate phospho and sketch up an
overall increase productivity and save a lot of
time in the long run. Now that's about it
that you need to know to get started
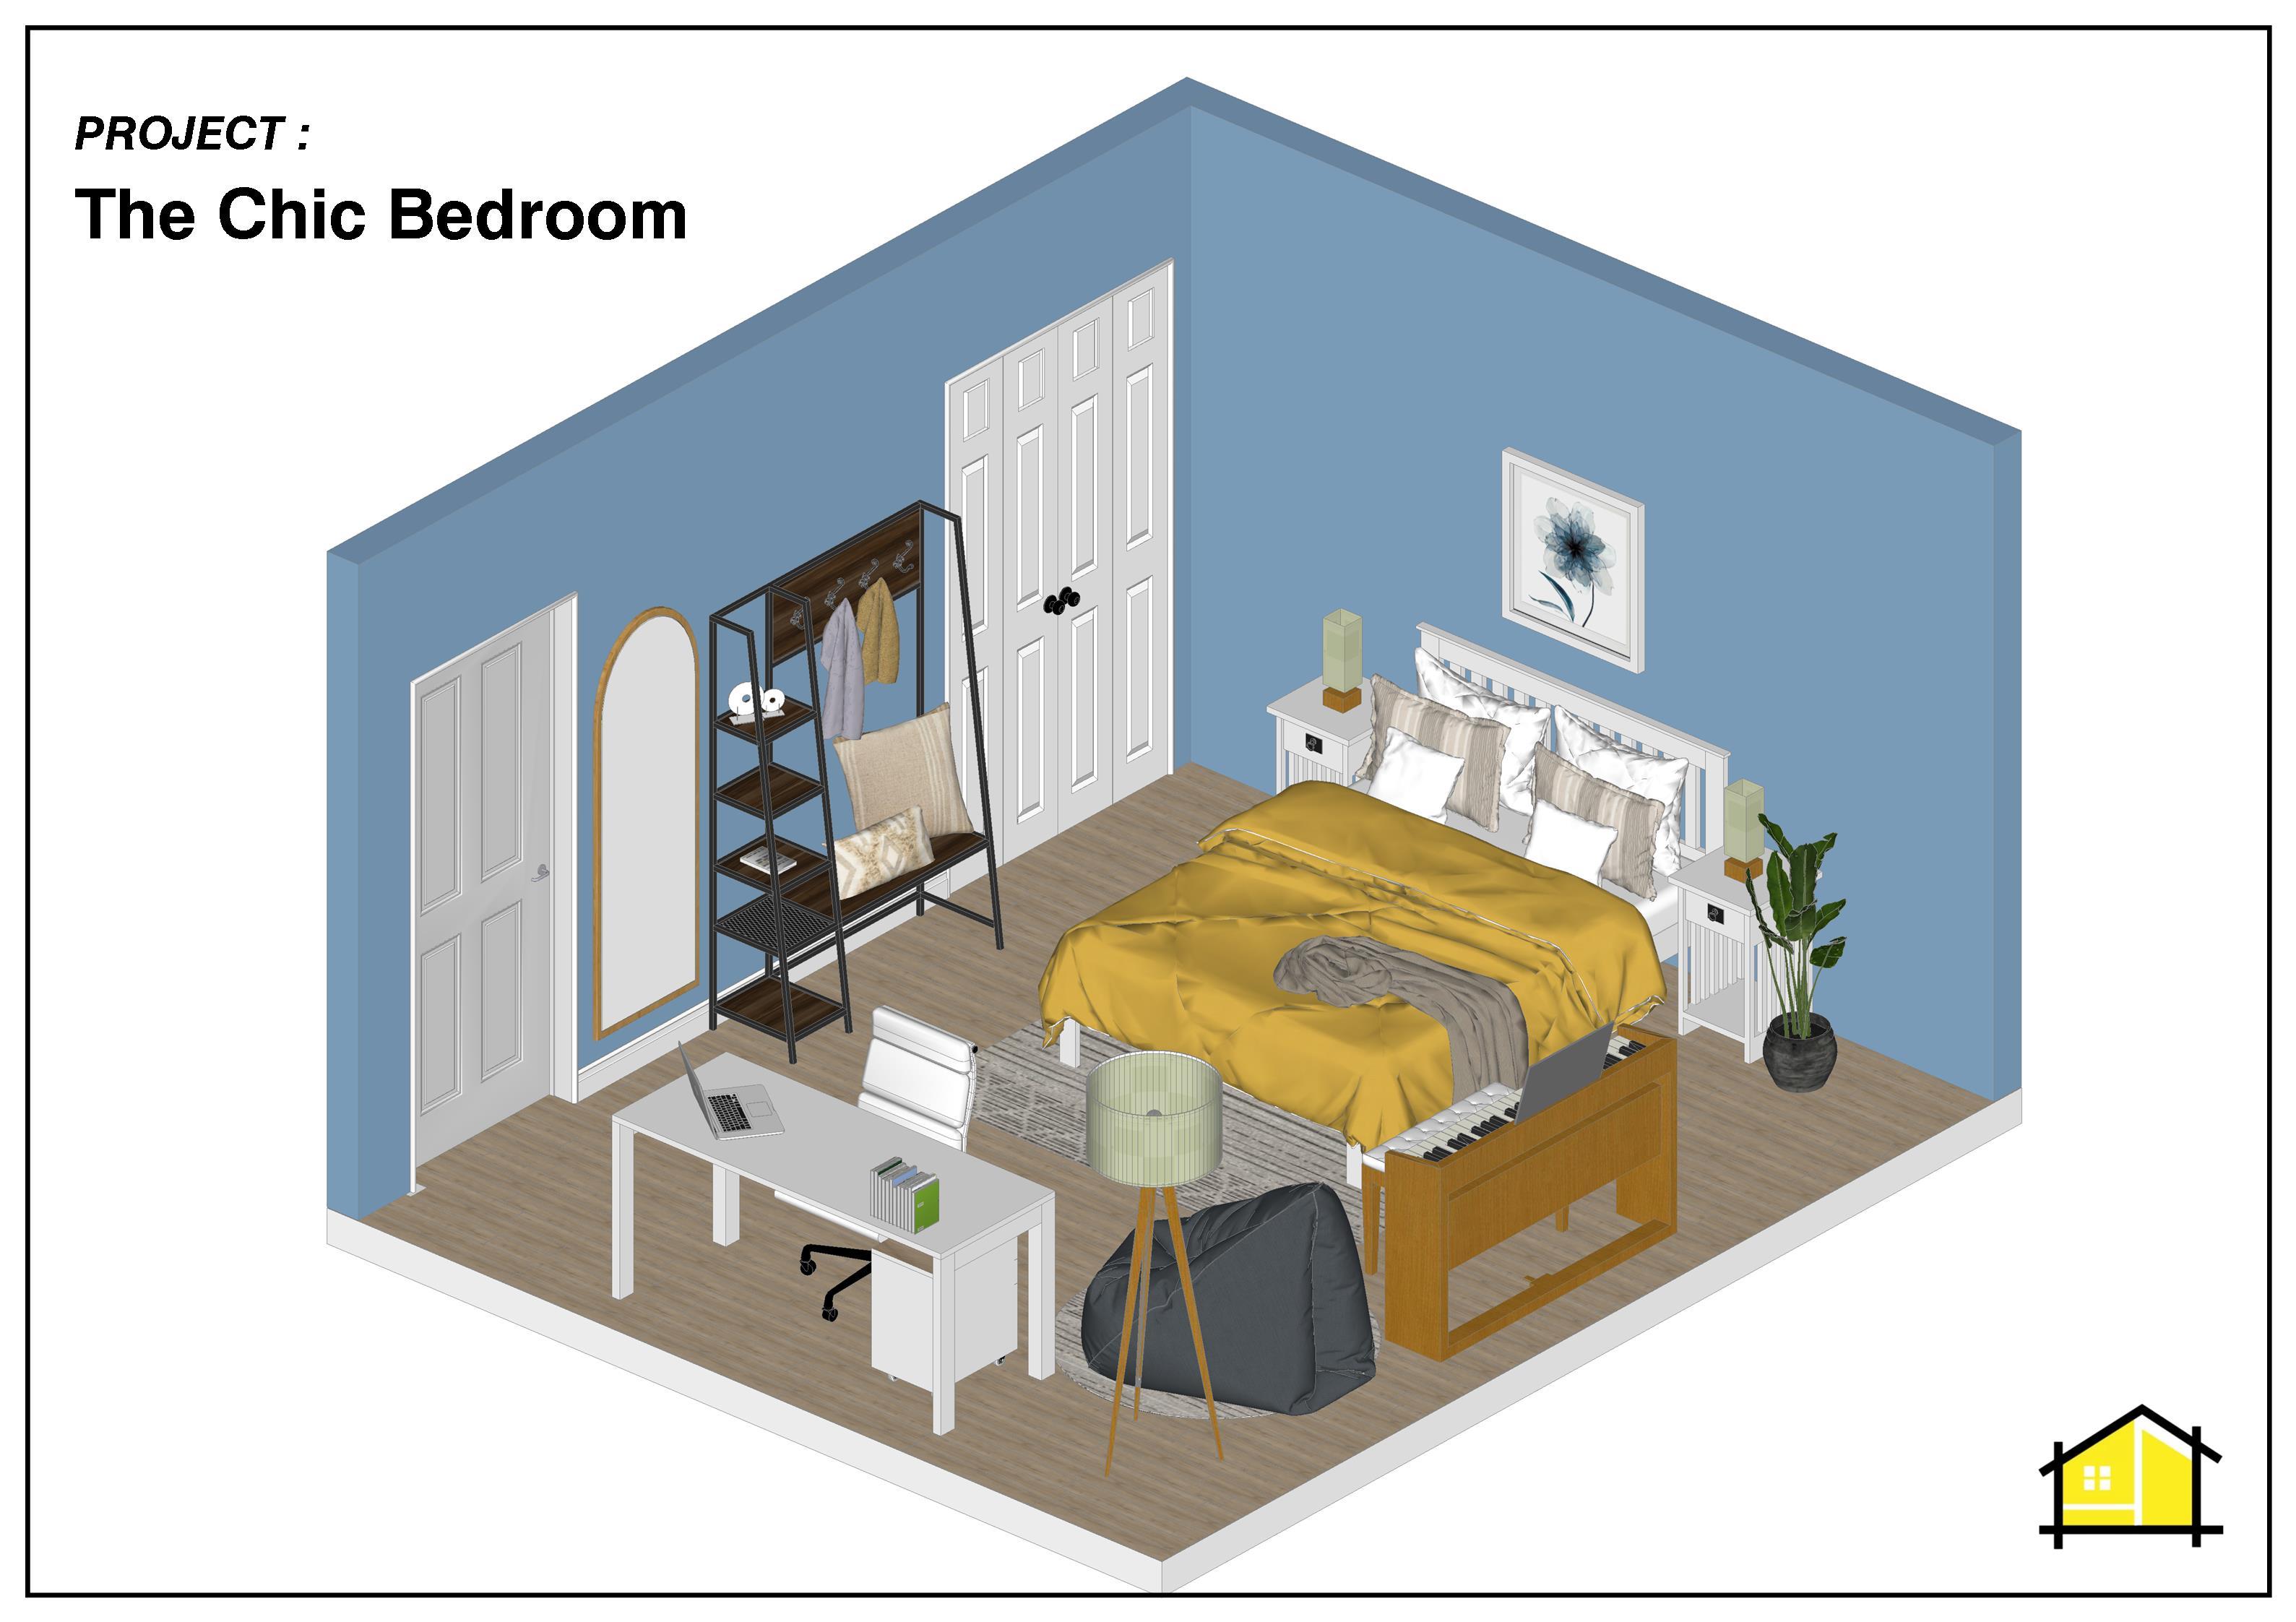
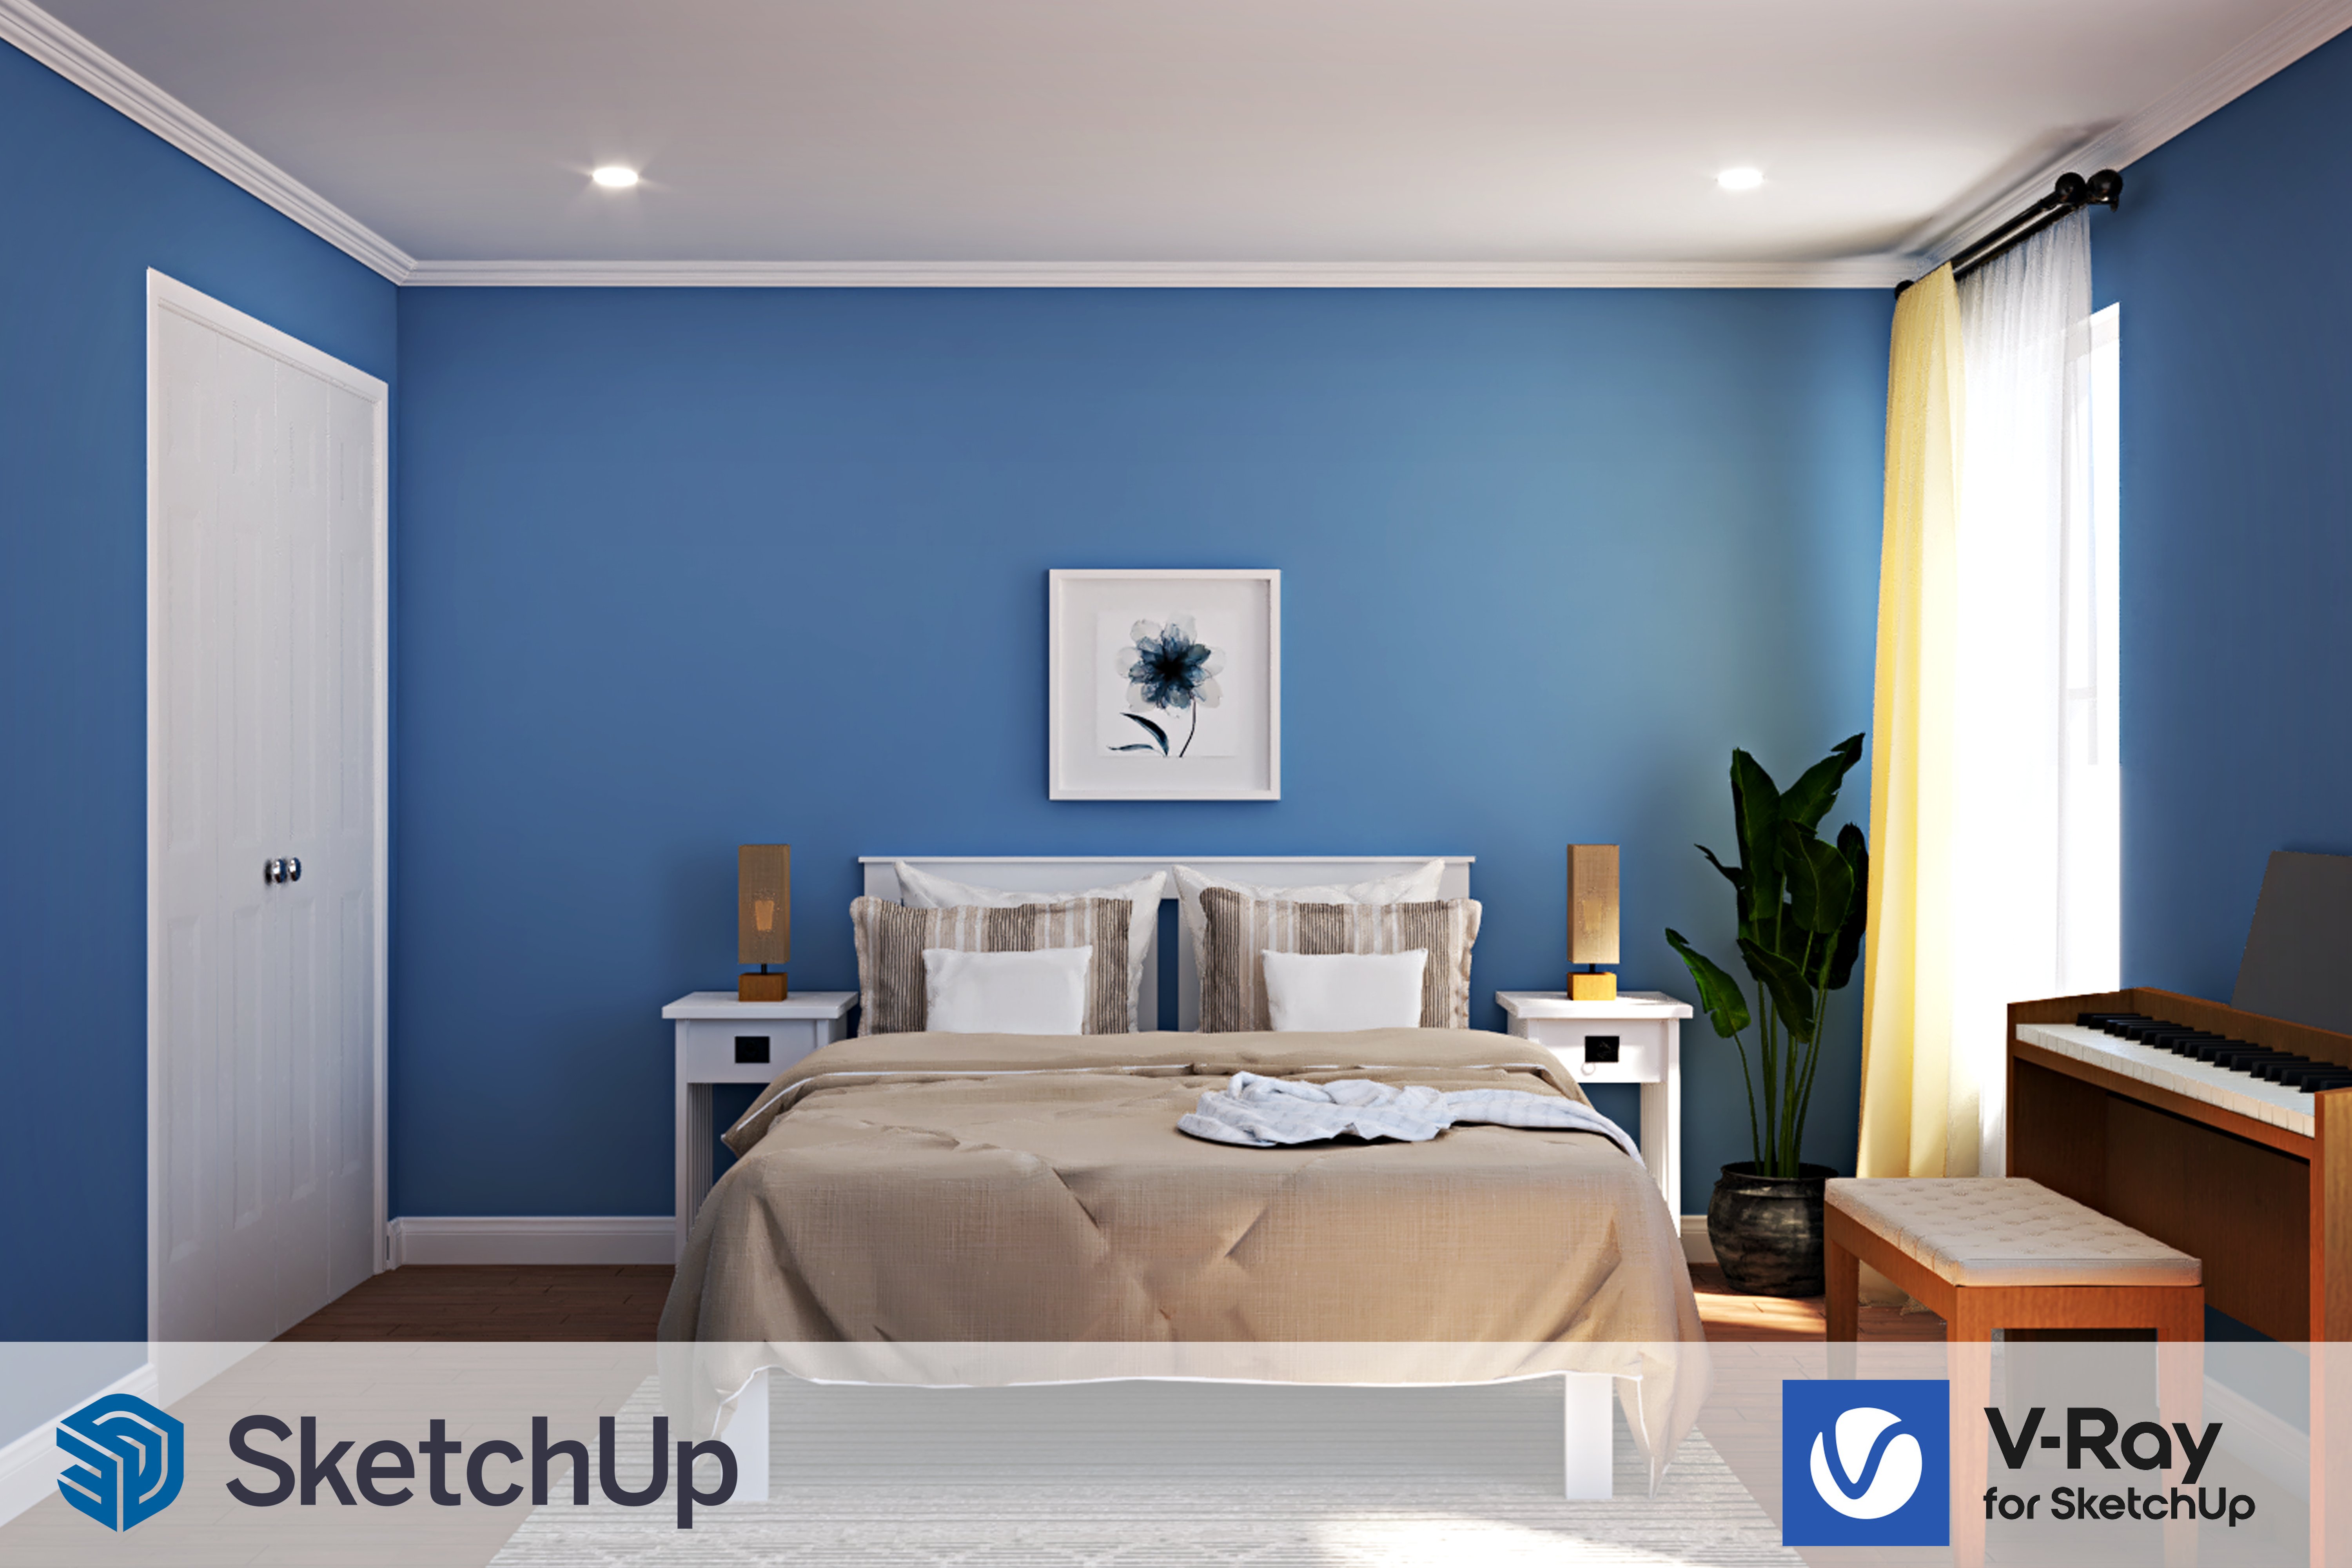
in this course, I will be using an
existing model. We're just part of my
bedroom design course, where you learn how to create a photorealistic render
of the bedrooms. I'm going to use
the same model in this course and place it in
the center of the scene, and then create some nice
drawings out of that model. You will find all the models and mode in the exercise files. So nothing, nobody, right? So hopefully that'll
help you out in following the
scores properly. If you have any doubts
you can reach out on the Facebook group or on the discard so that we
have for this class. You can also ask away in the discussions box
for this course. I'll let, I'll see
you guys next video.
3. Before we get into Layout - Optimizing Sketchup: Hey guys, In this video, I'm gonna show you how to set up a SketchUp model before we
use and bring it in Boolean. This is the model
that you've used into a vaccine or complete SketchUp. And Vedic goes for
interior design. We're going to use
the same model, sort of clean it up, and
then send it to layout. I'm going to show you
step-by-step how to create the sections and how you can
set up valuations and plans. And the most important part of this process is
creating proper scenes. I'm going to start by deleting all these sections and then placing them again one-by-one. I'm going to select all of these and then click on Delete. I'm going to unhide. So
I'm going to press F4, This one unhide, any additional
objects in our scene. And there's some additional
walls here as well. So let's go to View and
click on hidden objects. Now you are not able to at night because that object
goes within a group, so you will have to enter
that group and then press F4 to an eye towards. I can also delete
this extra VSCO. Need that. Since this is a lab
component which is part of the new
version or SketchUp. I can right-click go to
configure load component. Then simply reduced
the open-angle to 0. So that would make
it a closed rule. And there's an additional
light as well, which comes from 3D. So we don't need this light, so we can select
that later, Delete. Now before I modify
this room anymore, Like for example, for
moving this room. And this is going to
approach this model using two awesome plugins. Start off, I can pause the
model by going to extensions, cleanup, and clicking on clean. Now, we can use the
default settings, which is the scope,
which is a model. And then burden used, which is gonna delete
any unused lines on objects in our scene. Then we can lead the rest
of the settings as is. Click on clean up. You'll also notice that
your file size would reduce each time you push the model or use
the cleanup plugin. And this helps in modeling and rendering faster with
SketchUp as well. You can see how much of
a difference it's made. So you can see that
the edges are reduced, the feces and reduced and so on. So this is better than the default package
option which you can find by going to
window is more than NFO. And selecting statistics and
clicking on port and used. Oh, it doesn't really
make a difference because I've already
puts the model. And another useful
plugin which are used is the solid
inspector plugin. So just go to Tools and at the bottom we have solid
Inspector do so click on that. Now you can see that
it shows the arrows in our scene and it can
fix the model as well. So simply click on fixed. All. Some models couldn't be fixed. What I will have to do is first explored
this groups that I click and click on
explored dynamic. I can hide the top
slab and then I can go back to stool solid inspector,
click on, fixed on. So simply select the surface
border and it is showing the model where the
arrow is showing up. So you can see that
this is an area. You need to do hide
this and to this group. Then simply draw a line that
would make it proper phase. You can delete these
extra lines and then again go back to pools. Solid inspector fixed on. You can see that there
was an extra Orpheus. All you need to make
it a group and delete. Now if you go to Tools, solid inspector, you can
see that there's no arrows. There was an extra
phase overlap to this model and that is why
the arrow is showing up. Like did you fix the model? And now what we can do is
remove this extra fluorine here because we don't really need this to show up in
layout for scheduled. What you can do is you can
make an extra box sauteed, make it a group extended out. An extended to the
edge of the wall. This is one group and
this is another group. Now we can use a solid
tools in SketchUp. So could've view toolbars. John solid tools. Now I use another plugin
called Bull tools, which comes from
my inside studios. This works equally well. But in most cases, the solid tools within SketchUp
should work fine as well. Know what I need to do is
click on the subtract tool. Then I need to select
the first solid. Then select the second solids. Now you can see that it is not selecting the second solid. We need to make this a solid. So as you can see, if I select
this box and if I go to Entity Info and see that
it's called the solid group. But if I select this group, the solid group option
doesn't show up. So to fix this, we're going to use another plugin
called solid inspector, which is free from extensions. Go to Tools and click
on Solid inspector to. Now we can see that if I select this object that afford external faces that
they need to fix, all you need to select
the external phase. Click on tab. And then you can
see that this is the problem in the model. You can see that these
other two forward phases that we need to fix
by pressing tab, you can either fix
it manually by simply going and deleting
this face or you can click on fixed all that would get rid of
those extra faces. And now, if I scroll out, click the Zoom extend. And now if I select this group, you can see that
it's a solid group. Now we can use the
subtract tool. So click on the subtract tool, click on the first solid,
then the second solid. Gilda time for the calculation, and then it should subject
to solid peacefully. Alright, so now you can see
that we subtract the group. Now I can simply
delete these extra. So I'm just going to
go to the top view and then select all of these. Press Control on your keyboard. Do a direct selection tool, select any additional intervals. Then click on Delete. Great, So now we've created
our flooring as well. Awesome. Now we can do a quick
solid inspected check. So let's select
the entire model. Laura tools and click
on Solid Inspector. There's no arrows,
Everything looks good. And we are ready to use
this model for layout. I'm gonna see if
there's oat to click on controllers to
save your model. That's how you can
clean your model using these two
awesome plugins called cleanup and solid
inspector to buy TomTom. It works really well
in the real size of your file and it helps
in modelling faster. In the next video,
I'll show you how to set up the styles in the SketchUp model before
we send it into layout. I'll see you guys next video.
4. Setting up Styles in Sketchup : Hey guys, welcome back. Now before I had to lay out, I'm just going to change
the template in SketchUp. I'm going to create
my own template. And I'm going to use
this template for all my sketch up to
Layer process because it heads and creating better lines and better drawings.
And Leo does well. Depending on which units
you use in your country, you can select the
appropriate units. In India, we use both
inches and millimeters, but the official units
for India is millimeters. I'm going to select
architecture manometers late to the first thing
what you need to do is switch on the default rate. Just go to Windows default. Then shortly it did
show up on the right. All you need to do
is adjust scenes. Before that, I'm going
to delete some million. Comes with every
template and sketch up. And I'm also going to
approach this model because we have some
LEAs materials in it. So let's go to
Extensions, cleanup. Click on clean. Then
click on cleanup. Now you can see that to seven
colors which comes with, similarly has been poached, snow to clean model. And now I can go to my styles and start changing the values
which I need full layout. What you can do is
you can just go to Edit and you can start
with to the ED settings. So we're gonna keep
the profile to one. And what this does
is now for example, if I draw a box here, you can see that the
edge is slightly thick. If I change this to
one, it becomes less. Keep the profile B1. And we're also going to
change the line color. Because when we draw on layout, we would like to highlight
certain objects in layout, in the floor plan
or in sections. And if this is dark, we won't be able to highlight
anything in the plan. So we can change this to
a value of 128128 here. Blue is been a heroin
grand DAD that service. Okay. So that would give it a
nice dark gray color, which is perfect for drafting
and sketch up as well. So it gives it a pencil look, which is slightly off
black, sort of red color. And when you want
to define something you can simply
treats with black. And if you want to highlight something you can
place in Becker's with. Next we can go two boxes. The font colors always white
and the background is blue. This helps to see which
phases are reversed as well. It's always important to
have your front color facing the camera because that's where the medulla is going
to be applied as well. And keeping the back
hello blue also helps us understand which faces
are lowest in the motor. For now we can leave
the settings as is, and we can change it
later if required, and keep the style to the
speciated with texture. It can go to the
background settings. For the background settings, I'm going to switch
off this guy. You can see that we have SKUs. I'm going to switch this off. Now we have a nice
clean background. And then I can go to my modelling settings and I can change the section
fill color as well. I'm going to change this to
one hundred twenty eight. Twenty eight and 128. Nice dark color section field, which we can change
later if required, you can make it
completely black. If I go to Tools section
plane now and make the section can see that the
section is gray in color. Now the, the lines
a little too thick, so I'm gonna change the
section language to one. Now it becomes more thin and which would look better
in SketchUp as well. That's all we need
to do in styles. You can go ahead and
add tags as well. If you wanted to add
it to your template, say for example, walls, windows, boards, and so on. So you don't need to keep
creating tag every time. But for this workshop,
this should suffice. And also you can notice that this circle has come
on the days icon, so I need to click on this and that would update
the style as well. You can either update
the style or you can also create this
as a separate style. So you can click on
Create New Style. And then you can rename this to drafting for layout style. So this would be saved here. And then click on the blue
button to update the status. Now I can delete section. I can delete this box. I can package the
model one last time. So click on Extensions, clean up and clean
it last settings. Then all I need to
do is go to File. Click on CFS template, this drafting style layout. You can also give a description. This blade consists of the appropriate style readline
with drafting in SketchUp. You can also set it as a default template.
So click on Save. Now when you go to File New or let say if I
knew from template, you can go to my
templates and then you can see that we had the
drafting style for layout. You can go ahead and create another style for the
interest amplitude. But four millimeters,
we are good to go. The next time I open SketchUp, you can go to more templates, my templates, and click
on drafting staff. Now if you want to make this
your favorite template, you can simply click on
the Load button here, and I would set it as
a default template. And the next time you open
SketchUp up your resume. Finally, I've set
up the template, you're not before that I will
need to copy the model into this model or you can change the styles in the
existing model as well. So I'll show you how
to copy it correctly. So let's open SketchUp. I can copy this, so let me
just select only the model. I don't need to select
the 3D components. So I've selected only the model. Also makes sure that all the
objects in the CNS scene, you can see that
everything in our scene. Now I can select this, make a DAC selection which selects all the
objects in the scene. Then you can either
right-click and click on Copy, or you can also go to
Edit, click on Copy. Then simply go to your
new file called Edit, click on Paste and please give it a bit for the
process to happen. Now you can see that our
model is bought in perfectly. We can also check
the dimensions. Is 152 MM, which is
perfect for our layouts. Seen is when. Finally
you can see it opens with a clean model. There is no scenes
or anything setup. The next video before I set
up the scenes and everything, I will set up the template
and layout as well, so we will jump into
layout in the next video. I'll see you guys
in the next video.
5. Setting Up Templates in Layout: Hey guys, welcome
back. In this video, I'll show you how to
set up the template and layout for SketchUp. So to get started, I'm going to open layout so you can just search for Leo 2021
and open it up. It comes with the
SketchUp Pro version installed into your system. Let's allowed for
SketchUp also comes with different templates and you can choose your own
template as well. So let's click on
More templates. We can select no
plain paper for now. You can see that there
is no a11, a22 sales. So we will create that
size in load for SketchUp. So let's start off by
selecting A3 landscape. The first thing what
I'm gonna do is change the layout to A1 size, which is finite,
the four by 841 MM. Most architectural forms
and interior design firms use A1 or even
easier to sometimes. But in most firms they use
A12 print drawings and mode. The first thing what
you need to do is go to File and click on
Document Setup. Then you need to go to paper. Then you can change the
size of your beach. You can see that it comes
with A1 and easy to say yes. Or you can also create your custom size by giving
the height and width. Since in the eye can see here what I'm
going to select A1. That's fine. 94 by 841 limit. I'd also like to see the
margins in my layout, so I'm gonna select Margins. I'm going to change the
color of my margin, so I'm just gonna
make it dark gray. And it's skipped that
dynamic from DOT borders. So you can see that we have
this nice clean margin. Leonato SketchUp. Let's click on Close. All
we need for the layout. Now I show you the various
tools that comes in layout. So we have the basic
tools which is lying, arc, rectangle, circle,
polygon and so on. They also have the dimensioning
tools, for example, text enabled dimension, for dimension views the shortcut D. So that would switch
the dimension tool. And then of course the
spacebar for the select tool. We also have table,
what we hardly use table sometimes when you want to clear
scheduled and so on. Then we have it is to
add a stuff in layout. Then we also have stateless, which simply samples
are certain style and then it helps you apply it on other new objects or
dimensions and so on. Split and join refers to lines which you would like to
sort of joined together. So for example, if I
draw a line this way, then I click on Split. Then I can split the line
at various junctures. And I can also join them by
clicking on the join tool. And then joining them together. You can see that
becomes is one thing. Then of course you can add different pages and not to view. Start our presentation,
diversity within layout. All right, so first thing,
what do you need to do is check the shape style. You'll find it in the
default under color. So we actually have style. Now
if you don't find it here, you can go to Windows
and you'll find all these options here. You need to switch them on in the show up in the default view. So for the shapes that we can
use, the default settings, which is stroke 0.5 dashes,
which is a solid line. We can obviously
change this later if we need to change it to
a dashed line and so on. Destruct style is for various
around corners and so on. But I hardly use
this in my drawings. And then we have
the leader lines, which is the start
and end arrow. We can give an arrow
for the Start arrow. So for example, if
I go to my label, now you can see that we
have an arrow there. If it is a straight
line that goes away. So make sure you give an arrow and we can give the
size of the arrow. We can keep it to a board. This works well. A1c sheets. And we can also change
the size of the text. So you can go to style. And we can change it
to switch to 721 BD, which is generally used in
most architectural forms. And it's like a
standard as well. So it was changed
the size to maybe 14. That should suffice. Also, I will be changing the end arrow and
keep it to the plane. The next time you select label, you can see that
though options change. We can then look at our
regular textile as well. So let's go back to
the Select tool. Let's go to textile
mill and make sure to select this 721 BD. You can go ahead and select
any other forms as well. But in my case I'll
be using 721 BT, and I'm also gonna
select the size of 14. So now if I draw text, you can select the text Julio. You can just give
a random index. Then this looks gonna be the size which will
come as default. It'll always read from the last setting that
you made for your text. Agreed. Now these exercises is small because the sheet
of course is big. Susan a onesies. And when you put in
date, it will be readable and works well
for the drawing as well. Next is dimension, so we
can select the dimension. Now, before you click
and create a dimension, you need a change
and settings first, because after you click and then select
this and change it, it would apply those settings
only for this dimension. So make sure you select, activate the dimension tool and then you make
the changes yet, the next time you
create a dimension, it would read from
these headings. The first thing what I need
to do is change the stroke. I'm going to keep it to 0.1. And I'm also going to change
the star data architecture. Standard dash line there. We have proper name, slash, which is standard for
most architectural drawings. And we can also change
the size to five points. Five points. Now we can
go to dimension style. We can change the position of labeled on the dimension so
we can change the center. And even for the
angular dimension, we can keep it a horizontal. Then we can go to our scale, and we can keep the
length millimeters. We can also keep the
position one MM. We don't need to cool
bind 0 because one MM books in most cases
and you can go up to a thousand and two
thousand and ten thousand, eight
hundred and so on. These are settings that we need. So now if I create my damage and you can see how it comes,
becomes pretty neat. And now if I go back to my Settings and click
on dimension again, it will read from the
previous settings that we made changes to. And then it'll create
your dimensions. Now if you don't want
to display a unit, you can disable display units. So the next time you create your dimensionally it
comes with other units. Let's keep the units on
because it helps us confusion. Know if I draw the
dimension again, it comes with the units. You can also of course
changes, takes time. But in our case, we are going to be using
the sues 721 BP. Next is that angular dimension. So you can click on the top
Danio and click on Angular. Now we can change
the stroke to 0.1. We can keep the start
at o and narrow as the default error than G
In the size of your grade. So maybe to five or even four. And then we can go
to dimension style, make sure you keep it in
the center horizontally. Finally, we can check
our textile as well, which is 21 BD. Now if I create and
aggregate this way, you can see that we have a
nice proper angular dimension. These are the default
settings that we can use. Now before I go ahead
and save this template, I just want to quickly
show you that. For example, if I'm
creating a dimension, let's say I create a dimension. Let's go back to the
linear dimension. This is the dimension
that I created. And if I select this dimension, Let's see, I changed
the values here. Let's keep the sea 1515. Now this would affect
or lead this dimension. So the next time I
create a nitrogen, it wouldn't read from those damaging lead from the default. If you want to
change the default, all you need to do is
select the dimension, change the values here first, and then create the dimension. Select the dimension tool. Change the values here first and then create the damage it. So now if I change
this, say for example, 2.8 again, and then I create my damage and you can
see it comes as thick. And the next time I
create a dimension, it's gonna read from that. Simply select the dimension, change the value your first, then create your empty. The next time you
create a new damage, it will always read from
the default settings. I hope that made sense. Let's now we can see it
this out as a template. I'm going to delete
all of these because I don't need them to
show up in my template. Now if we're gonna be using differentiates for your company, you can go ahead and create
those sheets here this way. Like so and then add
your text and so on. So this way you don't have to
keep adding them next time. But since we are going to
be using a plain template, this should be fine as well. Let's go to File, click
on Save as Template. I'm going to call this
drafting template plane. And then select my Templates
and click on. Okay. So the next time
you open layout, which is going to closely
out for null violates it. You can see that in PHOs appeal, if you want the temporary
show up as if as a favorite, you can simply hot
it and then it would show up in the
stock of your scene. Click on drafting
template plane, and we have our proper
A1C is temporary. It also makes sense
to add those size of the beach in your template name. On the next video, I'll
show you how to insert a SketchUp model into layout. Then start setting up our
drawings. You guys next video.
6. Create Plans and Elevations with Sections & Scenes in Sketchup: Hey guys, welcome
back. Now before we send our SketchUp
model into Layout, going to show you how to
create the scenes and set up our plans and elevations
using sections in SketchUp. I'm going to start
off with the plan. So let's go to Tools. Click on Section Plane, and I'm going to create
a section plane on top. Gonna call this the
furniture plan. Good idea to name your sections
and your scenes as well. Let's resolve here. I'm going to select this
section and then use the Move tool and drag it
down to create a section. It know what I need to do
is setup the plan view. So we always use the parallel projection
mode or the view. So you can go to camera and
enable badly prediction. Or you can best Alt W,
which is a shortcut, I use switch to pilot
prediction mode. Then after that you need to
go to the top view as well. So you can go to Camera
standard views and click on. You can also press Alt T, which is the shortcut I use. Once you've gone
to the top view, it's a good idea to create
your scene before you are a bit on, make any changes. And the SketchUp model, just go DOC and Z0. You can maybe zoom in a
bit so that you can see the plan better using
the scroll button. And then click on the Plus
button to create your scene. Once you've created your scene, it's a good idea to rename
your scene as well. So you can either
rename your scene here. I'm going to call
this furniture plan. You can also go ahead and give a description and all of that. You can also right-click
here and click on Rename. If you want to
rename, you'll see I've created my first view. Now if I orbit out, I want to go back to that view, I can simply click on furniture. Awesome. Now the next section which I'm going to create
is R4 elevation 0. Again, you will have
to use section planes. So go to Tools. Click on Section Plane, and apply your
section plane here. I'm going to call this section. I'm going to select this
section and then move it in such that it's right in the center of the
scene and I can see the bed. Now, another way to
align the section correctly is simply by selecting
the section like Lake, and then you can
click on Align View. So that's another way to align your section or you can do
it the traditional way, which is by going to camera standard views and clicking on either the left or in this
case it's going to be rate. Then just sort of zoom in. I click on the furniture
plan and click on Add. So now I'm going to rename this. So again, right-click
on s2, renamed. Let's call this
section aa. Cool. Now let's add another section. So now you can make a copy
of this section as well. So you can select
this section plus M, the movement breast
control to make a copy. So let's move this section. Now if you want to flip this, you can use the Rotate tool. Sort of come to the
center of the scene. You can also place the doll pedagogy so that you lock it to the blue axis and then rotate it by 181 to rotate it to 180,
you can just move it in. Then right-click and
click on active gut. You've activated that section. I can maybe move
it in a bit more right in the center
of the scene and then I can right-click
and click on Align View. Now let's create section B. So right-click and click on Add. Then rename this. I'm going to rename
this to section bb. Now we need to add
another section. So the standard is
add the section. Let's go to Tools and
click on Section Plane. And we'll add it this side
called the section CC. There's okie. More than. And then select the section right-click and
click on Align View. You can also hide the bed if
you wanted to shoulder bit. Let's first create the scene. So I click on section
BB and click on Add. Then I'm going to
rename this section. So right-click Rename,
call this section CC. Now let's create a
section on this side. So let's go to Tools
section plane and add a section here
called the section DD. There's OK. Then
more than a bit. Then you need to right-click
and click on Align View. And then you need
to, via your scene, you can either do it here, ARIO. Let's do it here. Understand. Call this section. Dd. Great. I can also create
another section on top. Just to show the
reflected seating plan. You can select the
section plane, press M control to make
a copy and move it up. Make sure you're moving
it in the top arrow Axis. I can just move below the slab and then right-click and
click on active gut. Now if the model is
a little too slow, when you create these sections, you can delete some of the
models that are placed in the scene and then it'll be faster for you
to work as well. So I have activated the section, but it's not really
cutting anything. So I'll have to
move it down a bit. So select the section,
move it down. So now you can see
these four lazier. That's all I need for this room. And then I need to go to
the top view as well. So you can click on Align View. Then I can add my RCP plants. So right-click, rename
this goddess RCP plan. Now let's say for example,
you do not want to see the furniture in the
reflected ceiling plan. You can select all of
these four meters. Then right-click and hide, or you can also press
F2 to hide objects. We need our ideas. That laptop. Once you've hidden
it, you need to right-click and click on update. It'll create a bonus view, maybe isometric
view of the plan. So let's go to
furniture plan first because I want to see
the objects again. And then what I'll do is
I'll deactivate the section, cut and scroll this side so that I can see
the foam better. And then I will hide these
walls, trim details. And then I'll create
an additional view. Right-click and click
on Add and rename this call this isometric view. Now has view looks great, but then DES, section planes look a
little too distracting. Now you can either select all your section planes
one-by-one and then hide them. Odd what I would suggest is that you create tags
for all of these objects. I'm going to go to Stack so you can see that we do
not have many tags. If you're gonna use
layout in your workflow, it's a good idea to
start using tags because it helps organize
your model better. So I'm going to add it back
called the section planes. Then I'm gonna select
all of my sections. Then to assign this tag
to the section plane, I just need to go to
Entity Info and change the tag from untagged
Section Planes. After you assign
the section plane, you can simply click on
the Eye Tool under tags. You shouldn't really
click on the Julio because this is
the height button. So let's go the tags and
click on the Boolean. Now it will hide
those section planes. And it's very important that you right-click on isometric
view and click on update. The next time I click
on isometric view. You can notice that our
Section Plane tags resolve. Similarly, I can go
ahead and assign different tags to
different models. So some useful tags that you can create as walls, windows, then maybe slabs, furniture, lights, gardens, and so on. Once you've created your tags, you can click on
Name and then it will sort of sort
those tags out. May the nomenclature. Then you can start assigning
these objects to those tags. So I'm gonna select the Windows, which is called a tags
and click on Windows. I do not want the
windows to be seen in my isometric view so I
can hide the windows. Then right-click on isometric
view and click on Update. Similarly, these gardens,
select the gardens and then change the tags to cottons and you can
hide the gardens as well. I click on isometric view
and click on update. So this is good enough
with isometric group and it can also hide these tags. It's a good idea
to either assign the main group to your DAG or you can
also enter the group and select these
individual lights and assign the light
to the light stack. Now if I hide the lights, you can see that the nested
group also heights denial. I click on isometric view, click on update, and I'm
done creating my scenes. One last DAG which allowed
is decor or Wallach. So let's create an array
called his wallet. Then I'm going to select
these objects here and assign this to Wall
Art and hide this. So let's update the
isometric view we have done. Now if you want a
proper isometric view, you would need to keep it in
parallel prediction mode. Because if you change
the perspective, we have sort of a
perspective isometric view. But most isometric views have
those perfect 90 degrees. You can see those
perfect 90 degrees and 45 degrees in the scene. So this is a good view to keep. And then right-click
and click on update it. So we set up the scenes
and V are ready to go. In the next video,
I'll show you how to import these scenes into layout and then start creating your giants. I'll see you
guys in the next video.
7. Send to Layout for Sketchup: Hey guys, welcome
back. In this video, I'll show you how to
import your SketchUp model into layout and then get
started with the drawings. There's two main ways to import your model into
sketch out the best way is by simply going to file and clicking
on sand to layout. And then this would open
layout and then place your model automatically
within layout as well. So this is the best way for you to bring your
modelling to layout. Then once it opens layout, you can select your
template as well. As you can see in
the previous video, we created our own template. So let's go to my template and click on drafting
template plane. And now you can see
that we've bought in to sketch out
view into layout, and it's placed the
moderate perfectly as well. The other way to bring in
your model is by going to File and then
clicking on Insert. And then make sure you change
the file type or SketchUp. Select your sketch our file
and then click on Open. And that would open the sketch modeling
to layout as well. Now, one important tip
that I would give you is do not make any sort of
dimensions in SketchUp. You can make all the
dimensions in layout. And also make sure you save the file with a single filename, which we're going
to use a layout. In my case, I've called it
send to layout master file. So you can notice that I made a mistake while naming the file, so I will have to
rename this file. You will also see how
renaming this phi will have an effect on layout. I'm going to quickly
close this file, renamed the file,
and then open it up. And also see how
renaming a file, the main master file, has an effect on layout. Now you can see on layout that the file is being read from a filename called sent to layout underscore master
file with the WE. But we need to relink it back to the file which
we've just renamed. What we need to do is
click on this link here and go to our main file, which is sent to
layout master file, rename category as well. And then click on Open. Now you can see that it's
reading from both cardiac file. Make sure you SketchUp file that you're using in
layout is the correct file. And also if you make any
changes to this file, it would start updating
and layout automatically. Now for example, if I make a rectangular just to show
you how it changes in load. So I made a rectangular room and then I go to File
and click on Save. Now if I go back to Layout, you can select layout
and then click on this Update button. You can see that
the box appears. That's something which
you need to keep in mind, is that this fight will be used throughout the entire drawing
phase of the project. And it's super important that you maintain this
filename as well. Now if you can guess, you
need to make a copy of this file and keep
various past versions. You can simply go to File
and click on save as copy as you can see that
it CSS file one. And if I click on Save, gonna retain those are general file images and
do layout master file. That's a quick dip in case
you want to keep versions of your filing because sometimes
the main file crashes and throws a boxplot Darrow. It's a good idea to keep versions of your
SketchUp file is wet. So now I can delete this box
because I don't need that. And then see if adult
so Control S to save. Then I can minimize this. And then I can select the model on the view port IO and
then click on update. And then the box goes away.
That's all you have to do. And then we can save this
layout file as well. So let's go to File Save. So there's the first time
I'm saving this file. We're going to call this
exercise the lesson names. So S2 layout finish. That's how simple it is to bring your
modelling to layout.
8. Adding Views and Scales in Layout for Sket : Let's say for example, you
want to change the view. So you can select
this view port here. Then change the
view to jump land. Now w changes as well. And in case you want
to change the scale, you can select the
viewport again. Jane, the scale
from current scale, which is a random scale here. Do a scale that works. Let's try. One is to do 40. That's a little too small. We can create our
own scale as well. So you'll have to open them, click on custom, or you
can select any scalier. So let's click on custom. These are the rating
scales that we have. We can create our
own scale as well. So let's say for example,
you want to create a scale called one is to 25. I'm gonna be me in this
correctly as well. One MM, 25 MN and call
this one has 225 scale. Then your water can do is
change the units to MM. Mm in the paper is equal to 251 amendment paper is equal
to 25 MM in actual units. And then click on
Add custom scale. So now it comes in the bottom here you can
see one image tool, 25 million skin. Click on Close. And then we can assign
that scale as well. So let's go to our scalier. Select one, MM, one is to 25. We've assigned the
correct scale. Now you can notice that my
background is sort of dark v. Now this is not what I want. I will need to update the background settings
in the sketch of you. So let's go to our
sketch of UDL. And then let's go to Styles. Make sure you're using the
drafting for layouts daily, click on edit, and let's
go to Background Settings. Now you can see that the
background color is green. So let's click on this. And let's drag the slider to the right to make it
completely white. 255 two hundred fifty, two hundred fifty
million press Okay. Now you can see that
DO background changes. Let's click on update your
bid style with changes. And this would update the
style for all the scenes. So if I go to the other scenes, you can see that it updates
for all the scenes. If you want to
create a new style, you can click on the
add new style here. But this is the actual style
that I need for layout. This is something which I
missed out in setting up those SketchUp template
video of this course. So make sure that you give
the background white. And then you can click on Save. So Control S to save. Let's go back to
our layout here. Select the viewport,
then click on update. All these settings fall under the SketchUp model
part of the default. Now you can see that we can
see the background better. You can see that the
viewport extends all the way to these edges. Before you sort of reduce the
size of this bounding box, you need to make
sure that preserves scale on the sides switched on. Because if it is switched off, then you can see that the view doesn't come the correct scale. So I'll make sure you click on preserves scale on the size. Select the view again and
change the current scale to 25. Or maybe even one is two
in 2020, looks good. And now what I can do simply
drag these sliders to the left so that it sits well. Then move to the corner. Replaced one view. And in the next
video I'll show you how you can place the
other views as well. How to copy these views, aligned the views properly, add some text and so on.
You guys next video.
9. Copy Views and Create Clipping Masks in Layout: Hey guys, welcome
back. In this video, show you how to copy and
align views and layout. In the previous video,
you learned how to bring in yarn model, change the scale, and also adjust viewport to copy it to a very simple
process is to waste or copy. You can select the viewport
and then you can best control key on your keyboard or the
Option key for Mac users. Keep pressing and holding Control key and then
you can move it. You can also hold shift, move it along a straight line. Then you need to release
the most key first, and then deletes the
keys on your keyboard. Press and hold the Control
key on your keyboard to make a copy or the Alt key
on the Mac keyboard. And then click ones. Then when you're
dragging it down, you can hold shift
as well so that you drag it down along
the straight line. And then you can release
the key on the mouse. And then you can
release the keys on the keyboard as well. At least them together. And then you'll be
able to make a copy. Once you made it a copy, you can also change the view.
So this is a floor plan. Maybe you can add three
additional sections in this page. I'm going to select
this and change this to section to section BB. Then I need to
make a copy again. The other way you can make
a copy is simply where pressing Control C
and then pressing Control V. This would copy the view port on top
of the existing viewport. Then simply drag
it to the right. So when you're dragging
to the right Hold shift, that you drag it straight line. So sometimes if you don't
release the mouse key, it will move it down. So let's Control Z, that again, control Z to undo. And then make sure you
hold Shift properly on the keyboard and then
release the mouse key first, and then it would move it. I'll use released the
most key first and then release the keyboard keys. I'm gonna change
this to section DD, section CC. That is. Then we can add an
additional view as well. So gonna move this
to the left a bit. Then again to copy, I can press Control. You shouldn't press
Shift together. You should press
control first and once you start moving it, copying it, then you hold
Shift on your keyboard. Then when you want to place it, you can release the
mouse key first. And then it would
place the model. And then this would
be section DD. The reason why this
is overlapping with this section is because of our viewport extensively
left like this to the left. All the better way to do it is by creating a clipping mask. So all you need to do is
first draw a rectangle. So click on the rectangle tool, and then I'm going to
click on one inch, then click on the second edge. Then you will need to go
back to the Select tool, select this boundary edge, and then select the
viewport is valid. So press Control key to
make double selection. So I'm gonna select
the viewport you selected board and
then go to Edit. Simply click on
Create clipping mask. That would get rid of all the additional elements
outside the section. So now I can just move it back. Similarly, I'm gonna do
that for all the user. Let's draw the rectangle,
select the rectangle, and then the viewport, and then go to Edit and click
on Create Clipping Mask. I'm going to also
create an additional view because I can see that I have enough space in this page. I'm going to press Control.
Then move this to the left, which F2 blockade prevented. Release the mouse key and then
release the keyboard keys. Then I'm going to
select this and change this to RCP plan. Now obviously I would need
to extend our clipping mask. Let's just create a
new clipping mass. So if you conduct angle, please let the endpoint and at this point. Then select the two. Good edit and click on
Create clipping mask. All right, So now we've created all the
views for our page. And then next video I'll
show you how to align your views and then we'll
jump into creating ideas. I'll see you guys next video.
10. Align Views in Layout for Sketchup: Guys, welcome back.
In this video triode, Elaine, some of these views. Because as you can see that
the arrow on top and down, so it's always a good idea
to sort of align them. And that will help compose
the sheet better as well. Do elaine the views you
need to simply click on the Blend and then you have
something called the gripper. You just need to drag
these group of tools to the corner. Now
it's placed there. And now when you drag it, it is sort of snap to the edges. It's annoying nodes perfectly aligned to that corner there. And then value moving it. I'm gonna lock it to the line by pressing the Shift key
so it keeps it straight. And then went to the site. This as well, select
section holder, gripper. Then drag it to the corner. Once you've dragged it without
clicking anywhere else, you need to click on
the section plane and then sort of move
it to that edge. And then while moving it, you can hold Shift so that
it locks it to the axis. And then at least the mouse key. And you are done. Let's do the same for
these views as well. Let's select this section now. Select the gripper,
moved to the corner. Then move this to this corner, and then sort of move
it to the right. And finally dispute. You can see that when I
drag without clicking on the clipper, drags
the whole view. So press control Z, police like the gripper to the corners. Then drag your section. I'm snapped it to that corner,
then move to the right. It's always important that you release the mouse key first and then the keyboard keys. I'm going to press
Control Z to the right. You can notice that if I
released the most key, it doesn't snap to
a straight line. I'm going to hold shift at
least the most key first, and then you're good to go. Now if you want to
align this view to build this plan here, you can draw a
reference line first. So click on this line
and click on that edge. Sort of create that, and then click the second time to
create a reference line. Then you need to
select the viewport and drag the gripper, the corner there and then simply move it to the right
also in a moving hold Shift so that it
locks to that lane. And then you can
release the mouse key and then the Shift
key on your keyboard. Now you can see that it's sitting perfectly
below the plane, so I can delete the
reference line. One last step, which
I will show you how you can manage these
use in the viewport. So for example, if you want to select these two viewports
and move to the left, nor instead of moving it by dragging the most, you
can do that as well. You can also press the
right arrow keys or the left arrow keys and then
it wouldn't match by 0.5 MM. Now if you wanted to nudge
at a greater distance, you can hold Shift and then
press the right arrow key. And that would notch by phi MM. You can't really change the default values of the
nudge because it's inbuilt. But that's a quick
tip in case you want to nod stuff in SketchUp. I'm going to drag
another line here. So I'm gonna create
another line here. Select this viewport, the
group or to the left. Then move this to the left. No, it is sitting under
that section perfectly. And then Canada to the right a bit by pressing
the right arrow keys. That's a quick tip. Then let's move this to the left as well. There's enough gap. Maybe I don't really need
to align these sections. This edge, I just
moved to the right. Great. That's how you Elaine views
and also move them in low pH. In the next video,
I'll show you how to create the layers
and then we start creating our dimensions
with you guys next video.
11. Add Layers in Layout for Sketchup: Hey guys, welcome back. In
this video tutorial behind the layers in our layout
with SketchUp model. On the right, we either default. In the bottom, you'll
find the earlier. Let's click on Layers. And then we can start
adding in our layers. I'm going to add in my layer, and then I'm going to rename
this right-click rhenium, going to call this
furniture plan. Then we have our CB plan
or our lighting plan. I click Rename college
AA, section AA, BB. You can also double-click CC. Non-gaseous. Additionally,
as you can press the minus sign here
to delete them, then double-click and press
dd to create your last layer. The reason why I give
these layers like this is because now in case I create dimensions
and all of that, I would like all
those dimensions and plan and everything to sit
within the same layer. This viewport should fall
under the furniture plan. And then when I hide
the furniture plan, it would hide the viewport and all the dimensions as well. This way, I can keep the
sheet more organized. Now what we need to move these viewports to the
character layers, you need to select the viewport right-click and then go to move to layer and
click on warning Japan. Let's do it for the other views. Let's move all the way to
positive correct legals. And now if I hide any of these, you can see that
it starts tiling. This works perfectly when we
are organizing our sheet. Now another important tip is working on the current layer. On the correct layer,
you can see that we have this pencil icon you click here, it changes the actively or if you're working
on the furniture plan, make sure to select the
financial plan first, and then start drawing in
your dimensions and text. This is a quick video
into creating layers. In the next video, Toyoda, that x
dimensions and more. Let's see you guys next video.
12. Using the Text Tool in Layout for Sketchup: Hey guys, In this video I'm
gonna show you how to use the text tool in
layout for SketchUp. So back to the text tool. You can either press
D on your keyboard, which is the shortcut for decks with dissimilar to
sketch up as well. You can click on the Text tool. Now you can just simply click and then start typing
in your decks. For this case it's gonna
be furniture, layout plan. Then click on the SEC Julia. Now if you want to
increase the size, you can select the text and
go to your text failure. Then we can start increasing
the sizes. Make it bold. You can leave the font
to suicide and 21 BP. And that's how you
create your text. Now the next time
you create a text, so I'm going to press D again. You can see that it goes
back to that original text. Says, if you want to change the default exercise so that
the next time you create a text reads from the
default exercise, you will have to change
the settings first and then create a text box. I'm going to click
on the texture and I'm going to
change the settings. I'm going to keep it around. Let's check what are
the size of this. So this is at 28 bold. I'm just going to
go back to text. Select 28 bold. And now if I create a text, you can see that it comes
in properly section A-A. Then if I create again, so let's click Once. You can see that you can
create that text again. There's another
different type of text which is the
bounding box deck. So if I click on Next
and click and drag, and I've created a bounding box. This is simply a bounding box. Now if I click onto
the Select tool, you can see that it's
within that box. And if I drag this would be limited within
the bounding box. Now if you do not
want a bounding box, or you can do is right-click
and click on Make unbounded. This way, the box will
adapt to how you type. If I type the type and
the more I say the box, the bounding box with. Now if I go back to
the Select tool, you can see that the boundary
box adapts to that text. That's the bounding box. Now there are few options
for the text as well. So if I select the sticks, you can see that we can align it to the left,
right, and center. So you want to see
how would align them? I'm just going to make
this bounding box we go. Now if I click on the middle, it's going to align
in the middle. I click on that date. It's going to align
to the right. And if I click to the left, it aligns to the left. Phase, make it
big, sort of down. You can also anchor the sticks to the top, middle, or bottom. So you can select
the ANC option, yachts ankle Center,
Anchor, bottom, anchor dot. We keep it to the center, bring it back and align
it to the left for now. Then another cool feature of the text tool is
sort of aligning all these texts
together so you can select all of these decks. And then you can
right-click, click on Align. Click on horizontally. Now we do Elaine horizontally. You can also align
it vertically. Now for example, if
I drag this here, if I pull this press Control macro copy
and drag this year, I made a copy of that again, this called the section CC. Now I can select these two
texts and then right-click, click on Align, Left. Now you can see that text
LANs perfectly below that text can delete
this texture. Now let's say for example,
you want to create a superscript for
whatever reason, I'm going to enter this group. I'm going to give
an example here. So this is to know if you want to create
this as a superscript, you can simply select the x86, go to Text, baseline, and click on superscript. That would be a DOT
superscript for you in case you want
to mention the meters, square meters, and so on. You can also sample text. Now for example, if I make
the sticks bigger or smaller, so to 20 maybe. Now if you want to
sample this text, what you can do is
let's click out, click on the style icon, select the text
you want to sample and then apply it
on these texts. Let's press undo because I
want the text bigger and says, let's copy this to the bottom. And you can also control C, control V, and
then move it down. That's another way. Let's align this and select all
of this right-click, align and click on horizontal. And let's call this DD. This is gonna be
actually my right. I didn't either
double-click to enter the group and then select the
text and change the name. Let's call this ACP
reflected ceiling plan. One last thing what I need to do is I need to assign these
texts to hepatic layer. I'm going to select the text, go to right-click,
move to layer, and click on furniture plan. So now if I go to Layers and
switch off furniture plan, you can see that it
hides with the text. Similarly, this text is
like click multi-layer ACP. Now, if you can see
that I can hide each of these layers and it hides
with the text as well. So it's very important
that you draw the text in the right layer, or if we've drawn it
in the right layer, you can also move
it to that layer. When we draw our dimensions, I'm gonna be changing
the layer to the calculator and
then draw my damages. The next video I'm gonna
show you how to use the dimensions and then add some dimensions and also some additions to our
dr. In the next video.
13. Pages in Layout for Sketchup: Hey guys, welcome back. Now
before we add the dimensions, I'm gonna be talking briefly
about the pages here. So we're going to use pages to create various
versions of the drawing. We can have the presentation
drawing, which is this. And we can have the
working drawing, which is all the dimensions
in your plan and elevations. And we can also have a
cover page and so on. In this case, since I
already placed the views, I can duplicate this page. It can right-click and
click on Duplicate. Now we have page
one, which is this. You can see that the hashtag is next to page onto
v out on page one. And if you want to
rename this page, you can right-click
and click on Rename. I'm gonna call this
presentation drawing. And then I can call
this the working right? So I click Rename, call
this working by the cell. You duplicate a page and the selected page is what
you're gonna be working on. For example, this is working
drawing with the selected. So if I move this texture, then if I go back to
presentation drawing, you can see that the text has gone back to its
original position. So make sure you highlight the correct page and then
start working on the drawing. I'm going to just
press Control Z to bring back my section text. And then here we have something called including presentation, which basically means
that when you go to View and click on
Start Presentation, drawing is not included in the presentation of your views. Then finally on the
top right we have the list view and
the thumbnail view. List view helps in sorting out your drawings by name and
thumbnail is of course, giving you a glimpse of
water's present in each page. And finally, you can
also add blank pages. So select this as the last
drawing and click on Add. So it adds below that. And if you want to
delete, you can simply click on Delete select pages. Let's undo that. Nolan's paid seven,
I'm going to rename this right-click Rename
call this isometric view. I'm going to add my
isometric view in this page. Second, go back to
working drawing, select any View Control C, and then go back
to isometric view and then go to Edit
and click on paste. Or you can also press
Control V paste in my view and I can
change this view. Now, let's go to
Sketch Up model had changed this from ACP
plan to isometric view. Then I can also select the
View right-click and click on release clipping mask so that
I can see then DO model. And then I'll move it
to the right here. So this looks pretty cool. I can add the render
isometric view as well. Simply go to File, click on Insert, then
select the right. By labor, you can click on
insert the bill as well. And now we can see that we have a rendered view of this file. So click on this
and click on Open. I can increase the
size of the sticks. Now you can see that it doesn't increase the size uniformly. You would have to
hold Shift so that it uniformly increases the
size. How cool is that? If you only increase the
size of this model here, you need to simply
increase the scale here. So let's go to one
is to ten, maybe. It's a little too much. Let's keep it around 20. It looks good because we can add the dimensions,
annotations, and so on. Now there's one limitation
with pages in layout, and that is, you cannot have
different sizes of pages. You can have only one
size for each project. In my case, I'm working with the A1 size for this project. If you want to make an A3 size, then you would need to start
from scratch and create new project and started an
API sites for your pages. That's the only
limitation with layout. A workaround with using
multiple paid sizes for layout. Maybe by using A1 size and then simply creating
the A3 size boxes, placing stuff inside that box. Then later you can go ahead
and use an adult PDF cropper. Or you can use a
PDF cropper to sort of crop that drying out. But ideally, I would suggest
that you start off with the correct pizza
is in your project. I hope this gives you
a brief into pages. In the next video, we'll tackle our dimensions and start
creating awesome blanks. So I'll see you guys next video.
14. Changing Styles in Layout for Sketchup: In this video, I'll
show you how to create different styles for
your different pages and note the presentation drawing will have a different style compared to the working drawing, isometric view and so on. You can see that on the right we have
the different pages, so I'm gonna select
the working range. And this is why we
are going to add the dimensions and so on. Now a few things before I
start adding the dimensions is that I do not really want
to see these section line 0. I will have to go back to my SketchUp model and then hide the diamond
Shouldn't bag. So let's open SketchUp,
the master file. To simply hide the bags. You can start at
the furniture plan. You just go to tags because I've added those
Section Planes, door, Diageo. I can have them
sexually in that way. I click update, section A-A. I did there. I click Update. Similarly BB load for
each of these scenes. I agreed to remodel
this section planes. We can add those
section plane on the line directly within
layout using the scrapbooks, which I'll show you
later in the course. Now I can see if this
or Control S to save. Then I can go back to Layout. Let's go to Sketch Up model. You select any of the views and then click
on the circle button. Now you should see the section
lines disappear in a bit. All right, so now you can see that our plans look much neater. The section lines
are gone as well. It would go for the
other drawings as value. That's one way to hide your section planes in
case you want to hide your section planes
in all the drawings, in all the pages as well. The other way is by
selecting the model, going to sketch a model,
and then we have diaxial. Then you can show the section
plane for certain views. You can see that now the
section plane shows up here. Similarly, if you want to enable this section
paying for certain views, then you can enabled
tags from yours as well. But if you want to hide
it from all the views, then you would have to
save it in the main model. So let's hide it. I would also like to make this land sort of
black and white. I can go to style and then
we have different styles. So in the model style we just have drafting
full layout style, which is our mean style. We can also select
some other styles, but I would recommend that you do not select it from here, but you change the
style in SketchUp because I sort of change
the line width and so on. What I lose it, I will duplicate the drafting full layout
style and then save it out. So let's open SketchUp again. Let's go to styles. Now I need to go to Edit
and click on Settings. And then here we have the
speciated using Dexter. And we have also
display in shaded mode, which makes it sort of bright. We can also select Display
and hidden line mode, which looks pretty cool, which is a black and white mode. Or we can select wireframe. Wireframe doesn't really work. Maybe we can select the
wooden frame mode for now, are displaying hidden mode. And then what I'll do is
I'll create a new style. So I click on Azure, so it sort of adds
a number there. So Daphne for layout style one, I'll call this drafting
for working drawings. Step. This is the style
which I've named now I just need to click
on the Update button there to update for, just for this scene, I
forgot to the other scenes. You can see that it
retains the old style, but we can change the
style in layout as well. Let's go back to furniture plan. Now we can see that I
didn't update the style, so it wouldn't really
update on the scene. So you would need
to change the state and so you can change
the style from your, let's go to Home button
here so we can see drafting for working drawing style and
drafting full layout step. Let's select working
drawing style. I click Update, and
then save this out. Then let's go back to
Layout, select this plan. Then click on update here. You can see a new
style is being added. The view changes to
that style is well, now if you want to change the
style for the other views, you can select these views. Can also press Control to
select multiple views. And then change the stylus
we're selecting the state. Let's say we change the style. Let's go back to pages and
click on presentation drawing. Now I want this to be in color, so let's select this view. Let's go to SketchUp
model and selling, drafting for layout style. So now we can begin creating our dimensions
layout for SketchUp. So this is a good Turiel
into how you can create different styles for different
pages in your drawings. In the next video, I
will show you how to create dimensions in layout.
15. Dimensioning the Furniture Plan in Layout for Sketchup: Guys, welcome back. Now finally we are
going to start adding some dimensions
to our drawing 0. So let's go to working
drawing first. To start creating
your dimensions. You can click on
the dimension tool or you can press D on
your keyboard as well. It would activate
the dimension tool. Then you can simply click once and you click the second time. And then you need to
click the thought time to create your dimension. Now you can see that the
dimension is ideal for A1, say the size excise looks good. But if you want to
increase the size to change the divergences
as the default, Let's open textile
and dimension style and let's select the dimensions. Now you can see it's set at ten, so maybe let's keep it at. Now let's draw our
diamond shape. That looks better. Let's give
two-dimensions this way, which is the length
and the width. And then if you want to match
this nitrogen, you can, you can use the style icon, click on the dimension
and apply it here. Now you can see that
increases the size. Now, this dimension is
linked to the wrong point, ideally an interview
or drawings, it's linked to the
inside edge of the wall. You can simply drag that endpoint and then place
it to the corner there. Similarly, it as well. Let us do it for this dimension. Let's click that corner
and place it an endpoint. These are the groups that come for each
dimension. Alright? Now if you would like
your dimension to be not horizontal but
along the dimension, then you can click on Align. Then you can see
that the damage and follows the dimension layer. Now I can draw the setting
out for the windows as well. Let's move this
language line on top, and then let's create
a dimension again. It's gonna be from this point. This point. Sometimes you may not have
selected the right endpoint. You will have to
select this edge and drag this end point
to that corner there. Now both of them
seem to be sitting directly on top of each other. This is 175 of them. Now let's click on the
dimension tool again, and then click on the
model and point always, make sure you snapped to
the model endpoints in your model that
we click that and then this model
endpoint then moved up. Then we need to click
on that model endpoint. This. Finally, the inside endpoint. Always make sure you're clicking
on the modelling points. That looks good. Maybe I can just move this to the top of it. I always keep switching between
dimension and Spacebar. That's how you work
and sketch up as well. Now, one important tip, which I forgot to mention is that when you're
drawing your dimensions, always make sure you're
drawing the right layer. So let's open layer 0. Now you can see that we've
drawn then the ACP plants or for high the ACP
plan at heights, these are averages as well. So let's select all
of these dimensions. Right-click, go to move to layer and click
on furniture plan. Now you can notice that
when I was doing that, I ended the SketchUp model. And then what happens is I sort of misplaced
the view as well. So it's moving around. It's always a good idea
to lock your viewport. I'm going to press Control
Z and then Control Z again so that I'm not inside the viewport
and press Escape. Now I just need to
select this viewport, go to my SketchUp model, and then you'll get an option
to lock this viewport. So if I lock this and I can see that it has a
red bounding box. And now I won't be
able to and build this view in paper space. This way, you can avoid double-clicking and
entering your viewport. One thing which I
missed was that when I noticed this dimension, it's actually 224th amendment
188, which is wrong. It's supposed to be
around 4 thousand MM. Know the reason behind
this error is because I haven't snapped the dimension
to the model and bind. If I draw another dimension, I'll click on dimensioning and snap it to the
modelling point. This model endpoint. You can notice that
the size is 4470, which is the cardiac sites. The correct this what
you can do is you can either delete it
and create it again. All you can select the dimension and then go to your dimension, style her, and click
on auto scale. Now we need a Jane low two scale from one is to 11 is to 20. And now you can see that it matches the damage and on top. But ideally, I would
suggest that you try to snap your dimensions
to the model endpoint. So I'm gonna delete
those dimension, then move this down a bit. Then I'm going to delete
this dimension as well and then create
another diameter, so plus D. And then select
the model endpoint. This modelling. So now we
have the correct damaging. Also we need to change
the orientation. So let's click on a
line and we are done. Now I'm going to shift
this x down a bit to select all those texts plus
shift and down arrow key. And then I can draw
my dimension 0. So let's click on D again, and then click on
the modeling point. To this model endpoint. That's around 10000000067. You can also move this text to the left ear and do this by double-clicking and then select the text and move
it to the left. Or you can move to the
center as well this way. But let's move to
the left a bit. Then let's continue
drawing our dimension. So plus d again. And then let's click on
this modelling point. This point here. Then from this point
to this point. Finally from this point. Finally from this point to
the inside edge of the one, which is around six inches. This looks good. And then I can do an overall dimension as well. Let's click on D again. Select that endpoint. Then select I've selected
both those endpoints. Now it is two MM shot. So there's 44704468. Sometimes you may want to
adjust it manually as well, so you can say until this
group and then get 4470 SPSS. You can give it
manually as well. In case it's not
reading Docker images, select this dimension
instead of more than, not more than the entire
damaging because it moves that way when we're selecting the center
grip and then moving it in. And then finally we
have a point here. I would like all my damage
that will be aligned. So I'm going to play D and
then change it to align. And then I create the damage. And again, now it comes in. This is 3754 and there is
a difference of three MM. I may have to endogamous
group and give value of d Phi sine Phi seven SPSS. There are some
limitations and you were working with
layout for SketchUp, but that shouldn't hinder you
from completing your plan, especially if it's
your presentation. This is a setting out plan of
the windows and the doors. You can go ahead and also create another copy of this floor plan, of this financial plan, and then set outdoor
furniture as well. So maybe you can set out
the furniture for the bed, for the devil and so on. But for now this should suffice. And then I can go ahead and create dimensions for
all my other plants. Again, you can notice
that I've given the dimensions to
the wrong layer. So if I hide, can see
that inherits all of those dimensions or select
all these dimensions. Right-click, go to click on Multiple layer and
Glaucon furniture plan. Now if I hold for any Japan,
everything gets it in. For this.
16. Dimensioning the RCP Layout : All right, next is ACP layout. We can make the ACP blended actively earned and start
creating our divergence. Great. So now these damaged
to the command correctly. Now you may have noticed
that the dimension of snapping to all these lines Z0, which is coming from the floor. So it's a good idea to hide the flow in your SketchUp model, or you can assign the
floor to a DAG as well. Let's see if this is
assigned to any tag. So let's select those
SketchUp model code to sketch a model you. Then you can see that we
do not have any flow tags. So let's open SketchUp quickly.
Let's select the fluid. Then it's created a
tag called his floor. Then we can assign
this to that tag. So let's go to Entity Info
and assign it to a float. So now let's see the result. Then let's go back to as SketchUp and layout
for SketchUp, select the viewport and click on the link button your update. And now the tag should
show up under tags. You can see the
Florida shown up so you can simply switch
off the fluid. Once I start the floor,
it looks more neat. Then I can start
creating the dimensions for my lighting data. Some principles that architects follow when they create the dimensions for
certain plants. Now, in this example, which is a bad
example ever created, dimension on top,
bottom, left, and right. Now there is no real need to short on the top and the bottom. Because I know that
this same dimension would reflect here, wizard, I'm going
to delete this, and then I'm going
to delete this. So it's a good idea to
minimize the number of dimensions you add
which don't make sense. And also how architects read dimensions for a certain
room is now for example, if this room is 4470 by 3759, let me just create
the text as well. Now what this dimension
indicates that the first direction is the length and then the
second one is the width. So it's always
linked into width. When you check flow plans
drawn by architects, they always start with the
longer dimension or the top damaging first in
the first position and then the second dimension. Please make sure you follow this principle when you
create your own drawings and don't replace it by
giving it 3759 by 4470. That would be confusing for architects and
contractors as well. It's always follow
the first long dimension, which is 4470. This will be the length and this will be the width dot dot. Now I can create my lighting
and dimensions as well. So I need the lighting to snap right in the center
of the slide. So I will draw some
reference lines. I'm going to draw
one line this way, press Escape, and then draw
another line this way. Let's do it for all the lights. Now I can draw my divergence
so I can click on D again. Then I can select
any point here. Then select the
midpoint. Seven-sixths. Select this midpoint. Now you can see that
this dimension is wrong because it's 123 of them. Now the reason why
it's reading what, 23 MM, because it's
reading the papers scale. You'll have to change the
dimension scale for this. To select the dimension, go to damaging styles, select autoscale and change
this to owners to 20. This is the correct size. Now let's go back.
Finish this direction. Now let's draw from the top and the other group and it
moved that dimensional adult. Maybe like this, then contribute
co-creating a dimension. This dimension as along as well. So let's match using
the sample state, select this nurturing
and apply it here. Change the scale. Then we continue creating a
damage in lighting design. When you're placing lights, it's a good idea to
follow the X to X rule. I'm going to do if these text double-click
and name this as x. This is gonna be two x. And then this is going to be X. Again. I can also hide this floor lamp. You do not want to
see the flow lamp. Or maybe I want to see the
floor lamp in dashed line. I can draw a circle, loose edge, select the circle, go to shape style and
change this to dump it. Then go to sketch,
view and hide this. Assign it to furniture tag. So let's go to tags. You can assign it the
light stack as well. Odd, it would be better signage
to the foliage or tags. So I'm going to assign
this to furniture. Once I've assigned it to
fund check and see if it didn't go back to layout. Right-click, you need
to update this model, but it wouldn't show up in
SketchUp model because it's locked that I click on Lock
and then update the model. It's an all we need
are simply hide the tags. So let's go to tag. So I'm going to move furniture. And you can see that the
furniture grocery grid. Now, this would be x as well. So let's call this x. Let's also move this back to the center. And let's call this x. Now what this denotes is that x is the
distance from your, which is from this edge to
the center of the light. Then to double the
distance of this distance. And finally x, so x two x x. And then here we can
rename this as wha, wha, wha, what the contact that does is that the entire
distance is 4470. And then you would
divide that by four. So x two x three for x plus two, x plus x is four x. And then you divide this by four and then divide the space into four points,
four lines, 1234. And then you would equally
space the lights on 0.1.3. And then in-between would be the double spacing.
Hope that made sense. Similarly for this line as well, he'll take this entire distance, 3759 divided by four,
and then split, split that entire wall
into four equal parts, and then place the one
later and one light here, which will come on the second, fourth part of this wall span. That's a quick lighting there
for you guys in case you want to space your lighting
properly in the room. Now in all this light
is in place properly in SketchUp and that's why this dimension
wouldn't make sense. No, because this damages are
bigger than this dimension. So in that case, you will
have to go back to SketchUp, divide the lines equally, place your lights correctly and then bring it back to Leo. There's no way to the
right lines in Lille, two left to do in SketchUp
and then bring it to. You can also notice that I have an extra box which I
don't really want to see. Instead of going to sketch up and then hiding this box and other quick hack which you can do layout is simply using
the rectangle tool. So select the Rectangle tool, click once and click the second time
procreative rectangle. Select the rectangle and
go to your shapes failure. And we can keep the
field as white. And also we can select the stroke and make the
stroke as white as well. So that is no failure yet. So let's add a fill as well. The fill is added as well. And now you can
see that it covers that box perfectly as invisible. Alright, since, since we created everything
in the right layer, Let's go to layers here. And if we hide the SEP plan, you can see that the ACP
layout height schematically. Sometimes you will notice this yellow triangular,
which is sort of an arrow. So to fix this, you need to simply
update this model. So select this model,
right-click and click on Lock. Then select the view. Go to SketchUp model and simply
click on the link. That would get rid
of that at other. Then I can click on Lock. Let's hide our furniture
plan is when you're done creating our ACP plan in the next video to
outer diameter, outer sections, which is
a fairly simple process. So see you guys next video.
17. Dimensioning the Sections in Layout for Sketchup: Hey guys, welcome
back. In this video is show how to damage
in this section. The first thing we need to do is activate the right layer. So we'll start at Section III. And I can hide the ACP plan. Now, I will create
all my divergence in this view, but in this layer. So publicity to activate the damaged gene
pool and then it starts clicking on
the motor points. So you can see that model
edges also work well. Let's select the model
edge and let's create an entire height of the room, which is set at 2467. You can also go ahead and show the slab thickness if you lake, but if it's interiors, you don't really need to
show the slab thickness. Now we had the
lighting yard as well, so you can maybe set out the divergence for the
lighting if required. But usually interior
designers set out the dimensions for
the interior furniture. We can start by setting out those squatting
year in this case, which is around 125,
which is five inches. Then we can set out
the furniture lizard, maybe the bedside table. And I can also set
that I mentioned from maybe the height of
this side unit here. Let's create the dimension from a modern edge to the height. That's it. 1739 of them. So let's move in. Always make sure you drag the gripper, not Android origin. Also, make sure that none of
the dimensions overlapping. That would be very
unprofessionally. Look at. This looks very neat written on other dimensions overlapping. And you set it out
correctly as well. If there are some
furniture damages, you can set them out
separately inside. Maybe I can show the warlord from the bottom of the wall art, blue bottom off of fluid. Then select the dimension. Let's go to Shape Styles. And let's add a fill color. You can see that now
damage in overlaps that furniture so you can read it average
and courage gizzard. So add a fill color
in case you want to add that effect of the damage. You know, I don't really
give a diversion on top of the section because generally you can read that I mentioned from the floor plant, but maybe I can give the
height of the curtain rods. Let's give the height of the
curtain rods set up to 3367. Alright, so now I'm
going to quickly go ahead and dimension notice sections which would be like
sort of in a time-lapse. And you guys can see
my workflow as well. Alright, one last step, which I would give
is always make sure you draw a separate floor. Any odd interior drawings, because most interior show
the floor thicknesses URL, we had a slab and then we
have the actual float, which would be around an inch thick or an old ten
to 15 of them tick. You can manually place a
rectangle for now, like this. Then move to they just this way. Let me just move this gripper and then move it to the edge. So you could manually draw
floating this way if required, and then change the shape, style or shape fill that is, you could do it this way
as well, but ideally, I would suggest
that you do it in, Sketch Up, draw a fluid, and then bring it
back into layout. I'll let, so that's
a quick tutorial into creating the
section dimensions. In the next video,
I'll show you how to add annotations in layout and then annotate all of these
objects are for teachers. And as an exercise, you guys can go ahead and annotate or divergent the
rest of these views as well. I'll see you guys next video.
18. Adding Annotations in Layout for Sketchup: Hey guys, welcome
back. In this video, I'll show you how to add
annotations in our layout model. Now you can see that this arrow shows up
sometimes when I reopen the layout file
where it's unable to update or re-link
the master file. I'm just going to select this
file and click on railing. Now you can see that I'm able
to relink the master flame. I'm asked to file was
last saved on number six. So I'm gonna select
this and click on open. Now that has gone away. So click on Close. Now this shows up because it's
still unable to re-link. So right-click unlock,
select this view. Then just go to SketchUp model
and click on this button. You same goes for this
use on lock this click on that arrow goes away as well. So now we can lock this back. Before I create the annotations, you can see that my
sheet kind of looks full and there won't be any space to either
annotations value validations is simply
the label icon, the OS you can just click once. Now for example, if
you want to label those, you can click once here. Click the second time and the
third time rupee or label. Then you can call this
whatever you like. This will be a floor lamp. Then presto selector. You did stuff in layout. But sometimes when
you are working, you will notice that
there's not enough space to annotate everything
in this page. What I'll quickly
do the Google pages and I'll duplicate this view, this Piaggio, I click duplicate. Then I'll call this, rename this call this plan, section a and B. This is going to be renamed
as section CCNE dd. What I need to do
now is from plants section a and B and neither
delete section C and D, I will unlock these views. Right-click. This is not locked, and then I will
select c and d are. I click Select, click
on Select entities. Then as simply click on Delete. I can delete this as well. Now if I go back to
Section D, C, and D, Now in this view, I'll delete the financial
plan, all of these. I'm going to select BBN, then shift select
all of these layers. Right-click, click on Select entities and
click on Delete. Now this is unable to
D because it's locked. So I click on Lock and delete. Now if I go back to plan, there's more space
to add annotations. I'm gonna move
this section down. I'm going to select,
right-click select entities. Then you'll notice
that the grip, so I can move this
to this corner. I'll also draw a line
before I move the stuff. So let me just draw a line this week and then
right-click select Entities. And then after
de-select the line because I don't need the line. This is now I can select
all my objects here. And then I'll find the repo
and move it to the corner. And now I can move this down. More daunted snaps to the line and then
release your mouse. Sitting in perfectly. Now let's see what is
part of section A-A. You can see that something
is part of section. We need to right-click
move collected as well. We can fix that later. Now what I'll do is I'll
go to BB silicon trees. Then sort of nods
this to the right. This is the box or some rectangle that is part of EA. So you can delete that. And let's select AAA. And we can move it to the
left, to the right a bit. Let's do that for this
ACP layout as well. So select SEP, plan, select entities and attributes. Now we have enough space
to give our annotations. This might happen when
you're nudging it. You don't nudge it with the plan and that's
because it's locked. So right-click unlock,
then select the entities and then Niger to flip. Now let's go back to
Section C, C and D. D. Let's right-click select
the interview section CC. You need unlock the view first
to right-click and lock, and then select the
entities and move it up. Similarly, DD as well. Let's select the entities. Then move to the left. Alright, perfect, So now we
can start adding annotations. So let's start with plan. To add annotation, you can
simply click the label icon. You can also assign
shortcut for labeled. Let's click on the label icon here and start labeling stuff. So this is gonna be our studied able motor gonna delete those dimension because
I don't need that. Because I have it on
top and the left. Let's go back to the label. Let's double-click
scholarly study table. Do CO finish. Usually we give the table and
the finished as well. Let's label our whole
tree or quadratic. Click once, click
the second name. And let's call this holiday
quadratic refer.com. It's a good idea to be more
specific with the objects. It'll help the client understand where these models and objects come from as well. The drug version. And then it's a
good idea to Elaine these conditions along
the straight lines. So let's select this
right-click and click on left. Now it's perfectly
under each other. Also, when you create labels, make sure you don't overlap
these labels like this. This is not a good way
to label your drawings. This is called wooden floor. Planks. If you hard creating
it like this, make sure you just select
this dimension and sort of move that down that's
not overlapping. Then select these two and
right-click and click on left. Let's move this up a bit. Can also an object.
Similarly, you guys can go ahead and
label the drying. Let's label our bean bag
keyboard. We need Finnish. Also when you've labeled it
and it's not sitting buffer, you can sort of move it up. Make sure there's not
overlapping each other. Then select all of these. Right-click go to align
and click on left. Also, you noticed, I
just noticed that I've assigned it go wrong tag. So right-click, go to move to layer and click on 40 Japan. Make sure I select the
right vaguely odds violent than continuous signing my tags. Right? So you've sort of
assigned most of tags. You know, if you
want to show this, this part of the room, maybe you can show the tags, decide. But ideally you would like
to keep all the tags in one side of the drawing so that makes it
look neat as well. Let me just click on
this, select this, and call this gardens
in low plants. Now I want to go ahead and
did the rest of the plan. I will switch on the timeline so that you can see my workflow. And as practice, you
guys go ahead and irritate the rest of the
plan and the speech as well. Now, you can see
that this annotation is sitting below this plant. Firstly, I needed generally
offer such as TB plant. Then select these to click on, move to layer and
select SEP plan. Now you chose up on
top, doesn't show up. You can also select
this right-click, go to arrange and click
on bring to front. Now, a quick tip I
would give you as now if you're gonna be using
the align tool a lot, it's a good idea to add this. Here on the toolbar. Go to View Toolbars and
click on Customize. Then go to command. And
let's search for alignment. You can see I didn't dare
line and then simply click this and drag it. Drag it and just make sure this dark line comes here
and then place it there. It's also a good idea to assign a shortcut to your
annotate labeled command. So let's go to Edit Preferences
and search for label. You can assign any
shortcut LSR in D. This has been assigned
to another shortcut. Assigned the shortcut W, because all the other shortcuts are assigned to
some other tools. And now I can simply press W and start labeling
my drawings. Now you can see I
can select all of these and simply this. Now I can go ahead
and indeed the rest. Um, no, I noticed that there's a lot
of blank space in this page. So what I do as
good of isometric, we're going to select this model Control-C.
Go back to my page. And I can also select
isometric Leo. Just create a new layer, call it isometric layer,
and then paste it here. I can go ahead and
add traditions with this as well if required, but I like it as it is. And this 3D section perspective sort of explains the
sections as well. So let's not add
a date these you can do annotations
and dimensions. For example, if you click
on divergent plus D, then you can sort of start creating dimensions for these as well, which is pretty cool. But let's not do it for this
speech because I like it. I would like to look neat. You can leave it like that. Let's keep this page as value. This doesn't extra that
you add annotation. In the next video,
I'll show you how to use patterns so that we can sort of add those
wall sections into one. Because I don't like
complete dark Waldo. Because generally waltz sections or different annotations. Show that to you guys
in the next video, I'll see you guys next video.
19. Adding Patterns in Layout for Sketchup: Hey guys, welcome
back. In this video, I'm gonna show you how to add patterns in our section that plants so that we can spruce
up the drawings a bit more. So the first thing
what I need to do is draw my rectangles. So it can click on
the rectangle tool. And then I'm going to
click from one corner, maybe this corner
to this corner. Then I'm going to
select this rectangle. Make sure it's
snapping to the edge. And then I'm going to
select this rectangle. And we can go to up
pattern familiar. I've already added a button
called bleak common phase. If you don't find this, if
you click on the Home button, these are the burdens
in your document. If you don't find these, you can just click on the drop-down, you go to all patterns. So these are the various
patterns you can select from. So let's go to material symbols. You can see that we have
the various symbols here. Let's select temporary
common phase. Now you can see that it's
assigned on this rectangle. Now the reason why
it's showing up as dark gray is because it
doesn't have a fill. Let's go to our shape style
and let's add a fill. Now it comes in with the
fill as well and no pattern. So you can switch
off the pattern. We can switch it on from the shape style dialogue
box in your default. Let's create another rectangle. So let's select the rectangle. Now, since I want
the rectangle to have the bedroom as default, I'm going to select peritoneum and then I draw my rectangle. Will also need to
have a full-on. Let's select the rectangle
and select Fill. You can add, I don't know, in India generally we have a different pipeline
for our wall sections. Let's go to pattern fill. And let's maybe say this is our pattern that we use in India in most
of the sections. So you can use this as well. Let's match this. So let's select this NPS. Great. We can also change the
section 12 to black. So let's create
another rectangle this time from the
top to bottom Rate. Select this and let's
switch other pattern. Let's add a fill and this
would be completely black. You can add a nice dark filter. You can also copy this. I'm going to press
Control C, Control V, and then move it down and make sure it snaps right in
the center of the section. So this looks more
neat once we add in that black section box. Now if you want to see the black section box and
all your sections, it doesn't really
make sense here. I'm adding it for each section. Then we'll have to change
SketchUp model style settings, or we can change it here. Let's see if we can
change it here. Let's go to SketchUp model. Let's select this model. Got Australia. This is
the graphing view style. There's no way to sort of
edit to style in layout, so you will have
to Edit Sketch Up. So let's open
SketchUp. Let's open the send to layout master file. Now we need to go to our style. Styles, go to Edit, and then go to
modelling settings. And let's select a
section fill and make it completely black. Now we need to
update this style. Then it would update
an older dissections. Good. Let's say there's also
Control S to save. Then let's go back to Layout. Select our viewport endings, click on update to update it. But what I noticed was that early in the presentation running because the
updated only one style. So after our Beta
other style as well. So I'll quickly do that. Maybe I don't need
to have it does stick this black sections
in the presentation slide, but we can keep it in
the drafting style. So let's go back to SketchUp. Let's change the section
filled back and update. Then I'll have to select
the right styles. So I have this style here. And let's click on Edit, click on Section field, then change the color to black,
dragging it to the left. Now I can see the style, of course, save it out. Then go back and select
any of the views. Let's go to plant section
this time, select this view. Let's go to Sketch
Up model and update. I'm going to give
it a bit to update. Its abated, but I
can't see the changes. Let's select the viewport. For some reason it's added a
new style, just style one. So let's just select the first
style and then it changes. Uploaded bad. Let's go page to select
these two viewports. Change the style. Then it
should change your as well. Great, So now I can
just quickly add my patterns, remaining sections. So let's go back to page one, and then let's add our pattern. Let's select the rectangle. When you orbit on top, you
can see that it changes with the Move tool with controlled me copy
and move to the side. Now before I overlap
it on section BB, I will move it to
the right layer. So select this rectangle. Good mood, polio, BB. Change the grip point to this edge and then move
it to the corner there. You can also not
just to the right. Let's copy this to
the other side. That's based in perfectly
to now I can just copy this Control C to copy. Then I'll go to the third wedge, control V to paste. Let's move this tool
CC and then copy it. Control C, control
V, move it down. We don't move it outside of
the viewport and move it to the right layer and
then move it in place. One last thing, what I lose, draw a rectangle around the
box because you can see that there's a gap here so it wouldn't look
nice and the drying, so the selector
right layer first select the rectangle.
You can switch off fill. Then simply draw a stroke. Let us draw the rectangle first and then
change the settings. Draw this rectangle,
select this pattern, fill. You can see that the
lines sits in perfectly. That's what I need to. Let me quickly draw that for
the rest of the sections. Drawings are looking neat. The next video I'll
show you how to add sections using our scrapbooks. Since you guys next video.
20. Using Scrapbooks in Layout for Sketchup: Hey guys, welcome back
in this video to hold, you use scrapbooks in
layout for SketchUp, to add more details
into our drawings. To use grab books, you will
find it in the default tree. Let's close these drop-downs. You can find it in the India. So these are scrapbooks. Now the first thing I
want to do is create a separate three in the default
way to add scrapbook. So let me just go to Windows
and click on new tree. Then It's called the scrapbook. So let's call this scrapbook
name and then press Add. New Order does is in the bottom you can see the default layer. And then you can
see this scrapbook. You know, I can simply
drag this down. And I can see a
bigger preview of my scrapbook on the right. Scrapbook is simply a
collection of videos drawing assets that you
can use in your drawings. You can create your
own scrapbook as well. And scrapbook is
simply a layout file. So now for example,
if I click on Edit, you can see that this is
a phylogeny and 2016, they haven't really
updated any of the scrapbooks. So
let's click on. Okay. You can see that this
is simply a pH and layout. If I go to my default
layer and click on pages, you can see that this
is drafting symbol one, this is two, this is three. And these are simply groups. And other groups, they
are different lines. So you just need to
create different pages. One is to one format
and then save it out. So when you're saving it out, just click on File,
Save as scrapbook. And then it would save it into the default scrapbook library, which is the second option, C Users and this folder. If you're creating one
scrapbook, you can do that. You can gain multiple
pages, add your objects, or whatever it is that
you use on a daily basis, and then save it
out as a scrapbook. Let's close this. I click close. Now we can start placing in a scrapbook into our sheet here. Let's see what we can place. So definitely are not signed. So let us just
simply drag that in. And once you place
your you can increase the size by dragging
it this way. Make sure you
increase it uniformly so that stays uniform. So hold Shift on your keyboard and then it gives the size. Now we need to copy this to
every page in our layout. You can right-click,
click on move to layer and click
on, on every page. Now what this layer does is, now if I go to some
other pages here, you can see that it
copies to every page. Layout. That's pretty cool because you don't need to copy
paste on every page. If you have any objects which
are there in every layer, you can paste it onto
every layer page. So the NADH sign would be the only object that would
be added to every page. So let's go back to plan
and then let's add, start adding Us section lanes. So let's activate
furniture plan. What I'll also do is I'll
go to SketchUp model, select the viewport, open tags, and I switch on
the section plane just to see where the
sections are cutting. So you can see we
have one section now. We have another section. Then we have two section line 0. Let's go to our scrapbook. Let's go to assemble three. And let's drag in
our section lines. So let's drag this. Then just place it here. Then we can end up this group, select this line, and
sort of move it up. After that, we need to place
our section huddle as well. Let's place this and
let's move in place. Let's move reported the center. Then move to that line there. We can also enter
this group and move this damage to the left a bit. That looks good. Now we
need to these are size of our section so we can press Control Alt and Shift and
increase the size a bit. Then we can enter this group. This would be section A-A. We can enter this group
called the section a, and this would be
on page number two. You can also include the
size of the sections. So maybe just change
the dimensions, change the text style.
Keep it around 14. And this is one.
That looks good. Then press Escape. Let's group these together. So select those two sections, those two objects
right-click and click on Group, notes, a single group. Now we can copy it
to the other side. Move it to the right a bit. Copy to the other side. Intersection lines
actually you're just going to move it goes
to the section line. Then I will need to mirror
it to the other side. Or what it can do is
enter this group and this group and then
mirror it this way. Sort of a manual process. Not do parametric and
layout for SketchUp, but that's how you can
rework layoff or SketchUp. This would be section
BB, that should suffice. And then finally, this has to be shifted over to the side. And we love to also this, this side, section
a and section BB. Ideally they have
to be together. But since the section
lines of a friend, I'm not going to be changing it. So you can sort of overlap these lines and
then give a line in the center and indicate
this as AA and this is BB. So it's one single circle. This arrow would
indicate that a is the state and BB section
bb is the state. Now let's quickly create
the other section. So let's go back to
scrapbook and add those action lines. This
will be added here. You shouldn't really
drag these because this would make the
entire section deck. So you'll have to
enter the group first, select this line
and then extend it. Then let's drag this will do same position
and do the group. Select this line
and drag it out. Now we can place our sections. We can place this one. Mood in place and other group
change the page number, the section, I think this is Cc, can also include the size. Select this press
Control Shift Alt then gives us the size
of the text as well. If you notice that you
need to keep changing the sections every time
you create a new project, it's a good idea to make
these sections as a template. So the next time you
can use the font sizes that you've you generally
use for your projects. Now you can notice that we
have this down arrow symbol, which basically means that
the label is clipped. So if you do not want to
see this down arrow symbol, you can just go review
plotting symbols and switch off clip text. I can also add some people in the sections which would
make it look a little cool. So let's click here
and go to people. See how different people. So let's select translucent and then we can start dragging. And our people also make sure
it's in the right layer. So let's go defaulted
this section aa, select section a, and then we'll have to
move this as well. Then I can sort of
move it in place. Ads that cool effect
to that section can add some other people as well. So let's go back to scrapbook. It comes in with
the right scale. So you can see that I want us to 20 and all the other skills. So let's select one is to 20. And let's drag in this
move to the right layer. Then place it in place. Snap point to the bottom. And then there's more
modern than Florida. Make sure you select the right
layer and then move it in. Or you can also move it,
move it to the right layer, and then paste it in place. Gives us a nice scaling in the drawings. That
looks pretty good. All right, so that's
how you use scrapbooks. You can do a whole lot
more with scrapbooks. And I will be sharing
a lot more content on how you can use
scrapbooks effectively. And hopefully I will be sharing a template with you
guys soon as well, which you can use
for your projects. I like to. On the
next video, I'll show you how to add shadows, fog, and some final touches
and print out our drawings. So see you guys next video.
21. Shadows in Layout for Sketchup: Hey guys, welcome
back. In this video, I'll show you how to add
shadows in your drawings, which is grateful
presentation drawings. So let's go to our
presentation diagonal. Before I do that, you can see
that text align property. So let's select this. Right-click, align horizontally,
then moved up a bit. These upper bit as well. This looks fine. Maybe it can just call this an
isometric view. And that should suffice
presentation right? Now we can add some shadows
into a presentation drawings. Let's select the first view. And then let's go
to SketchUp model. And we have something
called ethics. You can open ethics. Let's
start off by adding a shadow. We need to change the
settings of the shadows. Let's make it around 530 PM. Five thirty, four thirty. To figure out the
right settings, it's a good idea to go back to your SketchUp model and see
which settings or swelled. So I'm just going to go back
to my SketchUp model here. Then I added a new shadow and sort of check the
settings as well. So it's 12:44 PM
at 14th of June. So let's change that
in layout as well. So divided 44, it would take some time to update
and change this. We've added the correct date. You can also switch
on fog if you like. Sort of adds a fog effect, but you don't really need it. Let's just keep shadows
on and leave the US's. That looks really cool
where we have a shadow and it's not applying on the ground ends within the floor. Let's just fix this view because I don't like it to
be faded and not in color. So let's go to our
sketch, our model. You'll go to Styles, drafting for working
drawing style. Let's switch off The shadows. I don't need the shadows to
be seen in this drawing. Let's switch out the shadows. That's a quick video into
using shadows in layout. I don't really use it
in layout for SketchUp. For drawings, I generally use it only for
presentation purposes. That's mostly within SketchUp. In the next video, we'll
create our sheet layout, then set it up for
printing as well. You guys next video.
22. Creating Sheets - Using Grids & Shared Layers in Layout for Sketchup : Hey guys, welcome to
our final few videos. Now in this video we'll create our sheet layout that
looks a little better. So what I do first is I'll
switch on on every page because I want my sheet layout
be applied on every page. And then I'll sort of move
my nod sine to the corner. Then it's np dot title,
Barrio and bottom. So first thing what I want to do is I have my margin, yeah. And when you export
this drawing, it'll come with this margin. But I would like the modern
to be a little thick. So I'm going to click
on the rectangle layer, and I'm going to
click on this corner, but I'm not able to
click on that corner. So what you can do is you can right-click and
click on Grid snap. And then you can see that it
snaps to that corner there. Since it's set on fire, I'm a more dynamic
and from this edge, the bundy edge, select that. Then go to this corner. No, The reason why you're not able to snap
and this corner is because the grid settings
is set at phi MM. So let's change the
grid settings quickly. Let's go to File and then
click on Document Setup, and then we have
the grid settings. So we can show the grid. You can see that
this is the grid. We can change the spacing
from dynamism to one MM. Now we can snap to that corner. Let's click on Close, and then let's click
on rectangle again. Now you can see that it
snaps to that corner. And it should snap to
this corner here as well. Could we created our bottom? Maybe we can make it a little
more tick to select this. And let's change
the stroke to one. So now it's a little more tech. You can also change
it to five maybe. That looks nice, a nice
thick border for our sheets. And in shopping
every page as well. How cool is that? You can switch out the grid now, you can right-click here
and say John height grid. In this presentation drawing, I can delete the ACP layout because it's not really
showing anything. You can delete that. And then I just go
back to default to is select everything in section AA and more to go left a bit. Select section BB to the right. You can see that
didn't move with this. So I'll have to select
all the entities, silica entries and
more than please. Also make sure it's
aligned correctly. Then move this on top a bit. I'll finally paste
my isometric view. The isometric views, a nice
stretch in all of the pages. Heads compose the page better. Monitor. Its just
more than you. Click. Send the ACP plants. So we'll have to move
it to isometric. And we love to change
the scale as well. So let's go to SketchUp model G and the scale to
maybe you want us to 30. That looks good. Then I'll create a rectangle. Make sure that rectangle
is in the correct layer. And select the rectangle,
select the View, right-click and click on
Create Clipping Mask. Select Edit Mode up a bit. I can also select the text. Moves up, sticks
to the left a bit. These, these copy
this to the left. Move to the right.
Isometric view. That looks much more composed. Now I can select all of these, this mode up a bit. Club in our space for me sheet. Now we can start creating our sheet and also add
some text and so on. So the first thing I
want, I'm gonna do is we're gonna draw a line here. Let's click on the Line tool. Let's go to our default
tree and go to layers here. It's in the isometric layer. Let's change that
to on every page. And then let's draw our line. This way. This line will show up in
all the other pages as well. We left are just the sheet, but let's finish
presentation sheet first. Maybe I can bring
this a line down a bit. That looks better. And I can give it a
thickness as well. Let's go to Shape state and
give it a thickness of five. So nice to claim. Now, you may have noticed
that when I placed it on the, on every page layer instead of as science this lane to all
the other pages as well. How does assign this? There's an option
next to Laos called control whether layer is
shared across all pages. For example, if I
create a new layer and if I don't design, you can see that it changes. The layer is shared
across all pages and you can also toggle
between the two layers. Now since I've already applied some objects
on this layer, if I toggle this, you can change what
happens in the contents of this layer so you can keep the contents or lifo this page. You can also copy the
contents to all the pages. This is something
which has missed out in the Leo video of the course, but know, you know, later I'm going to delete this. Let's keep it on NADPH
layer as the active layer. I'm also going to
select this arrow. Select this line here
and go to shape style and change it from an
arrow. Simply straight.
23. Creating Sheets - Using Autotext in Layout for Sketchup: Now we can start
placing our texts. Now instead of
basing normal text, I'm going to play something
called an auto text. Before I play store
detects ammeter, check the document setup. So let's go to File. Click on Document Setup, VR. We have something called
the architects option. When you place these
tags in your text, this text will show up
and it makes it easier to populate your text as well. I'm going to turn the
details for these tags here. You shouldn't be
changing the tag, but the auto text here, you can select the first
one which is address, and then start
giving an address. I'm just gonna give
it a random number. Then I'm going to
change the author name. You need to select
the text and change the name here and not here. Let's select company name. You can leave the rest
of the settings as is. Now, we can start
creating our text. Let's select the text option, so plus D or select the text. And then click once I
call it project name. Now let's copy this down
and call this location. Then we can go on
additional lighteners. Destroy language here. Also the line I don't like
the settings of this lane. Let's select the Line tool and change the default settings. Then draw the line. Looks better. We don't get to do
shoot sulfates. And then I can maybe
draw a line this way. Let me select this text and
then copy it to the side. Make sure you're making
a copy by pressing Control key on a keyboard
and holding Shift as well, to draw it on the same line, not to use the Auto Text. Let's check the other text tag. Let's go back to
the document setup. We do not have a
project name here. In that case, you can create
your own or to text as well. You can click on the
Plus button here. I'm going to call
this custom text and call this project name. Then I need to assign
a custom tags. So let's call this
project chick bedroom. Then close. Now if I undo this text and give the bag which
is project name, and then select out by
using the Select tool. You can see that the exchanges, we can change the size of this. Let's go to our textile and
make it slightly bigger. Then let's copy our
location here to the left. Let's select these two
and align it to the left. Now we can change the location. So the auto text for
location is address. Let's check the spelling. It is case sensitive, so you have to get the
first labor as capital a. You can see that that
does comes in perfectly, fits in one lane non-ionic, bring it to another line. Can just go to Document
Setup, select address. Then please enter your clothes and then you can see that
it comes to the next lane. Similarly, I can draw, I can copy all of these
texts along the line, copy it to the side, and
then I'll give the date. Then change this to the
date which did publish. Then select the
tool did published. And I can see the date
comes in perfectly as we can get the scale as well. So let's check the scale. There's no scale, so maybe you can add an auto protects for scale. With auto text. What it does is if you
change the scale here, it will update in every page in your project, so
that's super-helpful. It's also matched the specs. Select this and match
it to the same size. Copy this line to the side. Then finally you have
the drawing number and the project number. Let's select all of these texts. Then copy the design. You cannot use the line as well. Maybe just remove the
line height will need to slain called the drawing name. Drawing number. Page name and page number. Can also move this to the right a bit and
told is not sane. And maybe just delete
this not decks. I just wanted to
note sign there. Now we can adjust
this a little better. Let me delete all these lines
and move this to the left. You can use the Nudge tool, pressing and holding Shift
on your keyboard and then copy this ln over center. You can see that this line
SRO snap to the slain. It's sort of a polyline. So if you want to
remove this lane, that problem is by deleted and beliefs are
the line as well. You can use the split polio and then split it at this corner and then delete this lane. That's all you need to do. Now we have a nice neat
drawing in our scene. Let's maybe move this in a bit. Select all these and move them. Moving. You can go ahead and
add additional details. You can create your
own template as well. So now since I've created
this into on every page tag, it goes, goes onto all
the other pages as well. So as you can see, we need
to move, shift these on top. So let's do that quickly. Select all the
objects in AA and BB and nudge it on top. Looks good. You can see that the
drawing name changes and the drawing number changes
as well, which is cool. Which is what I need. Then we add our isometric view. Now what I'll do is I'll make isometric view as the
cover page selenium, this called Discover
page height, this diary sheet and my cover page a lot of drag the
cooperates to the top. To hide the sheet title. You need to create a new layer. Let's create a new layer, call this sheet layer. Now I'll select all
of these objects. Right-click, move to layer
and click on sheet layer. Now what happens is born show
up in the other drawings. But what you can do
is you can go to the Layer and simply click
on this option here, where it will toggle
through all the layers. And then what you can do
is you can just go back to your cover page and
simply height is back. This way you don't see the title and you only see the
isometric views. And it'll show up
in the other pages. You have your cover page
and the other sheets. I want to create a
nice cover page. I don't really want to
waste a lot of time by opening Photoshop
and then sort of editing out these edges so that I can keep all leaders and leaders that would
look cool as well. But what I'll do is I'll delete this inserted page and then
select this and center it. Then I'll select this view
and go to SketchUp model and simply change the
scale from one to 22. Maybe. One is to select
this and delete this. I don't know what that was. Then I'll select
this and drag these. Drag these extends to the
edge mode on top a bit. And moderate. Then
maybe insert my logo. Logo your motors to the left. This is an ACP plan
because this is an ACP. And create a new layer, create a new tag
called Discover, and then assign this to cover. Can also give a title. Can go to my
presentation drawing. You can see that I've assigned it on every page layer sort. It's good to cover, select this. I'm gonna copy this
quarter cover page. And then when I
want to paste it, I'm just going to
right-click and click on pace to current layer, which is gonna be
pasting to cover layer. So let's click on that. Then I can simply
drag this to the top. Maybe I can delete this and just keep the project
name, the company. Now if you want a sheet layer to show up on top of this layer, what you can do is
let's go to a layer. Just drag it on
every page layer. To the top. You can see that it sits
on top of all the leaders. Hello, Good, So we're
done with all sheets. We can start a
presentation. Now. Let's go to View. Click on Start presentation. Make sure all your
sheets such as integral. Let's go to View
start presentation. You can see that we created a nice school set of drawings. In the next video,
I'll show you how to print out these drawings and share some useful
print settings as well. So see you guys next video.
24. Printing in Layout for Sketchup: Hey guys, welcome
back. Now there is something which I
noticed in this view is that this wall is sort of
not touching the edge here. What I'll do is I'll
update this model. Move this water to the
edge of that group. Then I'll just go back to isometric view and
save this out. Now it looks perfect
and look good in a layout with SketchUp
sheets as well. Let's check what this is. We can quickly fix this as well. Select this wooden blank, and then simply copy
it from this edge, this edge, and then push it in. And let's go back to my isometric
view. It looks perfect. Let's say there's OK, we're
saving the master file. Then I go back to my model here. Let's select this view. Let's go SketchUp model and then click on
the link button. Now this looks better, it looks more perfect as well. Now let's see if this
affected any of the pages. So let's go to our
presentation running. Nothing wrong, go
Everything looks good. Let's go to plan section AA
and BB with anionic skirt. Ccne, dd. Everything
looks good as well. But sometimes when you
update the SketchUp model, the dimension sort
of don't read. In that case, you can simply drag the dimensions right-click. You'll get an option to
relink back to the model. So you just need to
click on that option. And then you would be
able to re-link it back to the model and you'd be able to retain
your divergence as well. So that's a quick tip. So in case that happens in
the future average show that, you know another video. Now let's get back to printing
and print this file out. So let's go to cover page. Now since this is an A1 size, if you go to File
and then click on, but you are left with
very few options are if I click on Preferences,
we have landscape. But if I go to Advanced, you can see that I have
relief from A3, the tabloid. There's no A1 and A2. And if you print an A3. So if I press OK and OK, let's just select
the first page. Then I need to print to file. So if I print is our print
out a desk document. So you can see
that it's printed. But since it's an A1 says it'll print in the
ordinal scale. So it's showing,
I don't 1 fifth, 1 sixth of the sheet. So what you can do is
instead of printing it, you can go to File, click on export, and
export it as a PDF. You can click on
export as PDF and then you can call this
whatever you like. So finally sheets. If you can't save,
and then you can save all the pages
from one to four. Contain that a solution
from medium to high. You can retain it on medium. You can use the best quality
and click on Export. Now we will start
exporting as a PDF, and then you can print it
out from the PDF file. Now you can see that
it's printed out the sheets properly and
it looks neat as well. I will have to
update this because it's not location and scale. Let's quickly update that. I just need to enter this
and change this to scale. Then it would update
an older drawings. That's the best part about using the on every page earlier. Odd by dogging goes on which toggles to shadow
across all the pages. If you're planning to
print certain sheets. For example, the sheet. I wish you use certain
steps that you can follow to have better
print quality. You can select this view your, and then you can go
to SketchUp model. Then you can change
from raster to hybrid. What this does is it will
make the drawing sort of vector and you will get sharper lines
in your PDFs as well. It's gonna take a little
longer to make it hybrid, but it will increase the quality of your
drawings. But it's okay. Hello, did take
about five minutes to sort of make
this hybrid view. Now when I create a
PDF window of this, the lines would come
out much more sharper. But there are few
recommendations. If you are using heavy models like for
example, this red model, then I would
recommend not to use the hybrid mode because
it would sort of increase the time taken to
convert it to a hybrid view. In that case, what you
can do is you can replace these 3D models with 2D
families or 2D plans, which you would get
from 3D shadows. And then you could change
this to and the hybrid board. But now I use the vector mode because it takes a longer time. So try to stick to hybrid mode. Hybrid mode is basically a
mix of raster and vector. And it gives you the
best of both worlds, which is enough quality
for your buttons as well. Once you make it hybrid mode, then you can go to
File, click on Print. And then depending
on your printer, you would get the A1C
is they'll put in those I have do not
support A1 size. Now if you want to put
in directly to A1 size, that is an option to
download this PDF called nitro PDF go
nitro.com slash Primo PDF. You can download this PDF. And then once you download
and install this PDF, you would get an option
showing up here. Like for example, I have
blue beam PDF here. And then you can
change the settings, make it A1, and
then print it out. But in our case, we can simply
export this out as a PDF. So we can just go to File, click on Export, click on PDF. And then we can call
this finally sheet. And then click on save. And finally, you can give the best image resolution,
resolution settings. So let's change this to high
and print all the pages. You can also create the PDF layers and
then click on Export. Now it's going to take
a bit longer since a set the height resolution. If you've done printing a PDF
and everything looks good, you can zoom in and see
the quality as well. It looks perfect. Let's
zoom into this plan because we sort of
made this hybrid view. And you can see that the
lines are much more sharper, which will look really
good in the prints. These lines look good. But it's always
important to make it hybrid when you
send it for print, you can also print
it from New York. Data key from your PDF viewer. I use WPS Office, which is a great
alternative to adopt PDF. I hope you guys
found this course useful and learn quite a done. I'm sure you've
learned enough to create your own
awesome drawings. I would love to see your work and what you've been able
to reproduce by going through this course to take any project from my
previous courses or take your own project. Use the techniques that I've taught you in this course and then start creating your own
interior design drawings. I personally use
Leo the Lord for my presentation drawings and also for my working drawings. I very rarely use AutoCad, but nowadays you can get almost all the work done
within SketchUp layout. And of course read
afford rendering. Please do leave a review for
this course if you found it useful and see you guys
in the future courses, videos and mode, and hopefully meet you in
person someday as well. Daycare, just
 Manish Paul Simon, Architect | 3D Artist | BIM Expert