Transcripts
1. Introduction: What you are looking at is a blank page spread
in a sketchbook. Too many people, the
emotion that comes up when you look at a
blank page spread is this and they're excited and
there's so much possibility and they can't wait
to make marks on the page or create
great works of art. To many people, this blank
page spread looks like this. And it's full of fear, and it's scary and it's
debilitating in a way that Oh, I think I couldn't do that. I can't Oh, I'm gonna
ruin the paper. That's two ways to look at this. For most people, however, biggest thing is this. What in the world am I
going to put on this page? I don't have any ideas. I can't imagine what
I could sketch or draw that would even look
good or matter to me. The truth is that your life
is so full of things to draw and paint that it's
amazing, overwhelming, even. We just don't see it that way. If you take a moment and
do a slow scan across your desk or around the chair that you happen to be sitting in as
you're watching this, you will see so many
things to draw. Now, all of those
things don't make an interesting piece
of art by themselves. But when two or three are
arranged in an interesting way, they make a lovely piece of
art called a still life. This class is about making still life drawings from
things in your life. My name is Jessica and
I have been teaching sketchbooking and practicing
sketchbooking for 20 years. In this class, I'm going to show you that you are
never going to run out of ideas of things
to sketch if you consider the things in your life to be an
interesting subject. Your project, of course, will be to draw or sketch
a still life or two. Let's go and learn all
we can about still life.
2. Very Short Supply List: Apples any sketchbook,
any pencil, any pen, anything you've got. And that'll be true for
all of these classes. We're gonna want you
to do it your way, but what we're going to be
talking about is what you're going to do when
you do it your way. And we're gonna love
to see your projects uploaded and so that we can
share ideas with each other. And it's gonna be a lot of fun. So let's get started.
3. Still Life - What Is It?: A so still life as an art genre came along
around the 16th, 17th century. Mostly in the
Netherlands, it took off. Before that time, if
you painted something, you painted basically
landscapes or portraiture. Even all the religious
art that was done was basically landscapes
or portraiture. Landscapes taking in buildings
and churches, of course. And so in the 16th century, painting started to show up
that just had things in them. They couldn't be called
portraits because they weren't people or animals, and they couldn't be called
landscapes because they just weren't so the term
still life came along, and what still life basically meant was a painting
of inanimate objects. And not dead objects, like, you know, botanicals were huge and the
flowers were alive. Usually animals
included were dead, and we'll take
just a little tour through some of the
traditional still life. But basically, the
thing to remember is it is a composition of
inanimate objects, and it's arranged beautifully
and painted beautifully. And it was really a gift to the art world because
they could move in a new direction they could play a lot more with color
and composition. And so when Cason and Mane and these people came
along in Van Gogh, when they came along, they had a lot of
room to stretch, and so they embraced
still life in a big way. So let's just take a look at what we're
talking about here. There's a lot of fruit. A lot of vegetables, a lot of here's a
really simple one, but here's a famous Sison
one here, and it's pears. But here's a man made object, two of them, a plate. And so we start to get
objects that aren't vegetables and fruit or eggs or dead animals,
which is good. There's a bunch of
fruit, as well. We got a rug in this one and vases and flowers and
fruit. No dead animals. Nice. I like this. I don't even know
who painted this. Oops. Irina Jagger. So she might even be modern. I don't know, but
I sure like that. I like the close up thing and
the detail and the color. Again, we have a basket, we have a table, we have
a knife, we have a vase. We have them all
arranged very prettily. We have a still life. Here's a fussy one, it's got a little elephant
in it over there. Elephant statue. I like
this. This is really cool. It has a lot of good
color in it, too. Little more modern
take, coffee cup, wine bottle, orange, dish
toll, cutting board. Again, following the traditional
way of doing things, but getting more
modern in the look. Back to our larger view here. Oh, lamp and classes and book, and there's a reason why I'm pointing all
these things out to you. Oh, bird. That's really cool. Two cups and a lemon. This is a good starting place often is a threesome
of something. There's a lot more in a lot of these, but you
need at least three. Still life with two things
is kind of a divided idea. Even here, you got, you know, two things,
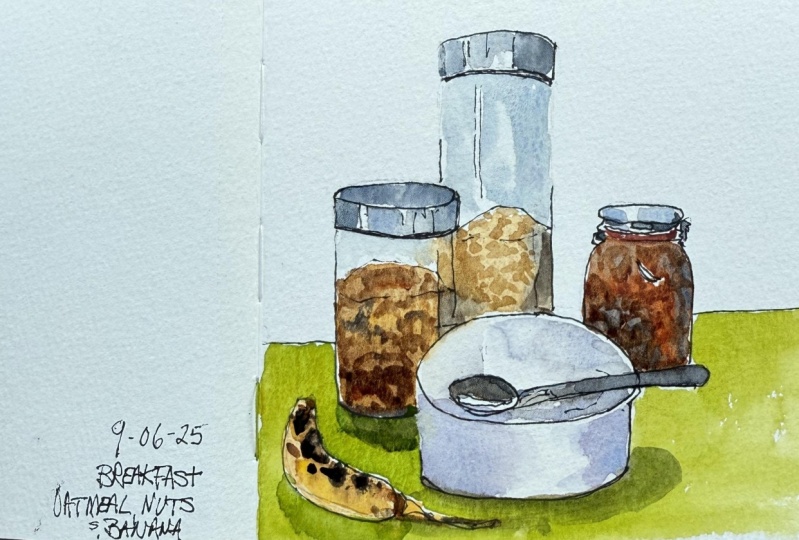
but you got a spoon. So you got a third one. So you get the idea, right? And so what we're going to do is we're going to take the idea of still life and see how we can do a still life from your life, since we're trying to tell your life story in
your sketchbook. And it's a lot more fun
than it sounds like, and it has infinite possibilities
for getting you going an infinite number of
pages in your sketchbook.
4. You've Got Stuff: The lucky thing is
that we all have a lot of what we need to do still
life paintings and sketches. And what we need
is stuff because still lifes are made
of made up of stuff, and everybody's got
a lot of stuff. We have so much stuff, we
can't even believe it. And every one of our activities has its own collection of stuff. And I'm using some
wonderful illustrations here that I got from
a digital asset site. And I love this woman's work, and many of the
things she does are big spreads of things. And so camping here and we have a table
and we have a guitar, and we have a grill
and we have a teapot, and we have a tablecloth, and we have a thermos. Okay, let's look a
little further here. This one was about being
warm and cozy in the autumn. Look at all the things in here. We have sofa pillows
and books and old fashioned long play
records, and we've got a plant. We've got a stack
of blankets and a piece of pie and teapot. I love looking at
these. They're great. Uh, cleaning things
and a whole bunch of bottle shapes and brushes
and broom shapes. And again, another
activity that we have that has its own set of stuff. So we're going
through these to kind of set off something
in your mind. A kind of new way of looking
at your life and your stuff. Even if you are one of those organized people,
you still have stuff. You have at least
three things, right? So you're good for still life. Makeup and hair,
and, oh, my Lord. How much stuff do we
have around that? The hair dryer and the
brushes and the combs and the drops and the
curling irons. And okay. So there's a lot in your
own bathroom, I bet. Kitchen and cooking,
all kinds of stuff. All kinds of pots and
pans and ingredients and bottles and jars and
cool looking tools. And, you know, I think
the next one is also cooking and pots and
blenders and too much fun. More cooking cooking
has got a lot of stuff, but here's a whole kitchen. Shells full of stuff. This is still life right here. Look, that's kind of cool with three
different kinds of jars. Okay, so what we are going to do is we're going to stop the
class and go into our house, our home, and we are
going to hunt and gather some things that will make an interesting still
life for our sketchbook. Now, shape is an
interesting thing. The things that have
the same shape, three things of the same color. The things that have
something in common. I did an entire sketchbook
on that on time. And I'm going to show
you a few samples of mine in a minute. I've done many, many,
many still life. And so you are just going around and you're
hunting and your gathering, and when you find three things that you think would be
really nice together, then set them, and
don't just stop there, set them in a group together
and go find three more and, you know, do this
for a few minutes and you're going to get
to pick your favorite. And then I want you to
you can work from life, of course, but it's
harder because you knock things over and
you keep moving them. And so what I would like
is get a counter with a blank wall at the back
or put a big fat book up that you can use as
a backdrop and set your items together and take
a picture with your foam. Then look at that
picture and say, do I like that arrangement
of those items? If you don't, move them
around until you do. This is your composition and you want it to
be interesting. One key about composition is that you want
things to overlap. You do not want three
things lined up in a row. When it gets to be ten things in a row, it gets interesting. But you want relationship, and so you're going to
get something in front of something or next to something or two of them touching
and one over here, like the coffee mugs and
the lemons that we saw. Anyway, I want you
to do this with all three groups of three or
more items that you find. And yes, you can have
four, you can have five. Don't get too nuts because you got to draw this, remember. Okay, so that's the first part
of your exercise is to do that and get your pictures together on your phone
so you'll be able to use them for reference. Meanwhile, I'm going
to show you a few of the still life sketches that
I have done in my books, and that's going
to make the idea hunting even a little easier.
5. Sample Still Life Sketches: I. I have done so many still
life sketchbook pages. We could be here
all day doing this. But I have decided to show you
just four or five of them, and it will get you
going on the idea. This is a sketchbook I said I devoted to a theme
of three of a kind, and so they weren't necessarily
always still lifes, but they were combos of three items that had
some relationship. And so types of candles is one thing you can go into
your life and look at. Do you collect candles,
and even if you don't have people
gifted you with them? Enough that you
would have, like, three different candles of different kinds or three
different heights of pillar candles or something like that that you could make
a candle still life from. Candlesticks would be okay. That one. And right
nearby all the time, are art supplies, and I've
got a couple of things in here that I did a
still life using. This was just half pans. And I was doing it on a glass I had them setting
on a glass surface, and so it occurred to me that
I could mix them and kind of show the colors that you can come up with the
primaries there. I thought that was kind of
interesting still alife. Scratch. Bowls. I've
done a lot of bulls. I love bowls. Bowls are a thing. I collect them and I play
with them and everything. I don't know what it
is, but these were three very colorful
terracotta bowls that were glazed
except for the rim. And I played around with their placement
for quite a while. I put them on a round
stool top because I wanted to echo this shape, but I like this a lot. I suppose a lot of
people would say, Geez, if you put a sprig of
something in here, it would liven it up. But I didn't do it because
I really was loving the whole bowl thing that
I already had going on. We see, this is in
the three of a kind. It wouldn't really be a
still life, but it could be. I mean, it could be.
Those are things that go on toothpicks. That was my theme, but I guess you could call
that a still life. Three tubes of paint. And this was, you
know, obviously, my doing the half pans kind
of triggered this for me. And I thought it'd
be fun to give these paints different
kinds of names. So this one is nail
polish and it's opaque. And these are the
characteristics as well, stone ground mustard
is granulating. Blueberry is staining. So that I was just playing around with the concept,
which is always good. When you are being
creative, go for it. And brushes. This is kind of an odd setup, but I liked it. It
was very directional. This is a glass brush catcher. It's a thing, an art
supply that I make with glass and my brushes
rest on them, and I love them, and I can't
do promotion during a class, but they're always
on my website. And this is like an angle brush and a pointed round and a flat. And I just thought it
would be fun to do a portrait of them altogether. This is as simple as what
we mean by still life. You don't have to have lace and tablecloths and silver
urns and all that stuff. It's inanimate
objects in a picture. Basic definition. Okay. I'm going to show
you one strange one here. That's just not the
usual take on anything. But it is still life, and it has actually
four items in it. And I don't know. I saw something that
triggered this thought, and I thought, What, you know, you've seen carnations
sometimes that they die for different holidays by putting
the stems into colored dye. And so I just
thought if a flower was in my paint water jar, would it turn red if the
paint water was red? No, there's a lot of
humor to this, too, because I'm such a freak
about clean water when I paint that I would
never have enough color in any water jar of mine
that would color a flower. But that's reality. We don't always need reality. I thought it was kind of pretty. It was a good
little composition, and it's still life. So that should give you
even more ideas if you didn't already go get too many ideas when you
went and hunt and gathered. And the next thing that
we're going to look at is that idea of
arranging them. And I'm going to show you four that I came
up with while I was making this class and what I mean about getting a
nice picture to paint from.
6. Still Life Working Photos: I place I went on my hunt and
gather expedition was into the bathroom because
I had in mind the different how
many different shapes there are of bottles and jars, and I just knew I
could find something that had a relationship
in that was cool. And I've been kind of a nut on natural oils for a while now, I really think that
they're wonderful and they do all different
things for you. And so I looked I picked
out three bottles of them, and I thought, Oh,
that is so great because they're all they
got that in common. They're all natural oils. They got this brown
glass in common. That's not gonna be
easy for me to paint, but it's okay. I'll
deal with it then. This is raspberry seed oil, which is wonderful for your
healing things on your skin, tea tree oil, and
this one is an argon. It's Moroccan oil. And
I love the shapes, and I loved how
they went together. So I moved them around on
the counter, and, you know, this was here on my
desk, I can tell by the wood under the
under the desk cover. And I wanted something to
harmonize behind them, and that looks all
professional, doesn't it? But all it was, really,
was this sketchbook. I set it up behind them. I know the color looks
different 'cause I lit it, but, you know, a different way. But that is one of my, you know, one of the things I'm
absolutely going to sketch, right? I really like it. And I move these bottles around quite a lot
before I decided who should be in back
and who should be in front and left and
the right and so on. So that's the idea of these
photos I want you to take. These are on my
bookshelf in my kitchen, and they were gathered because of their harmony
of natural tones. And they were sort of
already arranged like this. And this is the half wall
behind my bookshelf. And so they kind of already
had the picture going on. I would have if I wanted this to be an
awesome photograph, I would have made
sure that this is the base of a raven sculpture. I would have gotten
that out of there. But when you're
sketching, you can dump anything out of
there that doesn't work. And I love the fat
shapes of these. They're all fat shapes, but they're all
different fat shapes. I like the challenge of that. I like the little guy with the darker neck
being in front, showing up against
the lighter one. I really like this too, and I'm going to be sketching
this at some point. My third one, this is a
set of Japanese sake cups, and there are four of them. But when I worked
with four of them, I lost a dynamic. There were just
too many of them. It was more clumpy, you know. And so I thought, No, I'm going to work with three and arrange them asymmetrically. And this, again, was the top
of my bookcase, the wood. And so I have these two, like, in an overlap here, and this one with
its own personality. And this one, the lines are bringing you right into the
center of the composition. So I got to play with the composition and get
a really nice balance. I will very definitely be
sketching this still life. And then a short ways away is one of my favorite
things that I have, and it's a set of
blown glass cherries. And I can't remember where I got them from what
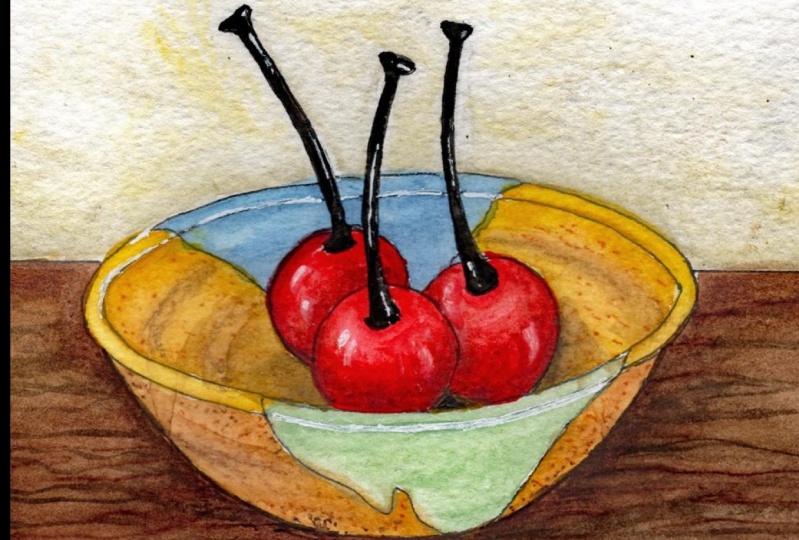
artists or where. I just know that I love them, and they sit in a bowl in a
special place in my kitchen. So I took the best picture
that I could of them, and that was my fourth choice. So here's what we've got. I've got the
cherries and a bowl. We've got the
Japanese stocky cups. We've got the vases. This is funny, by the way, because I never kill flowers. I go live with them
in the garden, so I never use a vase as a vase, but I love them and I collect them because
they're beautiful. And we have the essential oils. For this class, I had to
choose one, and I did. I chose the cherries. And you see on the opening
class introduction thing, you saw the finished sketch. This is not a painting class, though I am not going to carry you all the way through how I got from here
to that sketch. I am going to carry
you through how I sketched it to the
point that you can then take over
with your supplies and whatever you like
to use watercolor gush, colored pencils,
markers, whatever, you can take off from there. Now, I have put all four of these pictures that I took into the project
section for the class, and you are welcome
to sketch from any of them if you want to at any time. And if you want to draw along
with me on the cherries, one, you can print it out and
just keep the picture here. You'll see that I
use my iPad with the picture brought up
like this to draw from, but you can have it right there visible if you want
to draw along by printing out the PDF that
has this picture in it. So onward and upward, we're going to go
sketch these cherries.
7. Sketching the Bowl of Cherries: So this is I have
the photo up on the iPad and I used
that as a reference. This time, I'm using a Tomata sketchbook,
100% cotton paper. This is about six
inch by six inch, and I love these books. They're not expensive.
They're on Amazon. The paper is very, you know, it's 140, but it's a hefty 140. So anyway, that is
today's sketchbook. I'll be using what I always use my pencil to start
out and a fine liner. So that's the supply list
at hand at this moment. I always start in roughing out. And remember, this photo is
in your project section, if you want to work
with me on this photo. But I start on roughing
out the major clumps, if you will, or shapes
in there still life. And so this bowl that the cherries are sitting
in is the main shape. And I'm doing the top
of it is an oval, and ovals aren't that easy
to just play and draw, but I feel my way
around the shape. With these sketchy lines, which I'll be able to erase because this is a hard pencil, and I'm using it very lightly. But this way, I hunt and I find the good oval
that is there. Now, we're looking we are seeing a top ledge of the bowl 'cause
we're looking down on it. We see that a little
bit up there and a little bit in front. We're not seeing a
whole lot of the bottom of the bowl because we are
looking mostly at the top. I want to add a little, though, because the actual
bowl is textured, and I really like
the color of it. It's a speckled stoneware kind
of thing, like the inside. And so I'm going
to allow my bowl just to sit a little
deeper than the photo. And then we're looking into it so far that we are seeing
in the actual picture, we're seeing the horizon
line sitting here, but I have made I've changed my perspective
just a little bit, and so I'm going
to make my horizon line just a little bit
lower here as well. Alright. So those are the big
shape areas right here. And then the next thing I
have to do is the cherries. And that front one
is the biggest one. And it is about that big compared to the size of
the interior of the bowl. And then another one sits
right behind it, right here. And I can see it going that far. And the other one is almost completely sitting by
itself at the right. Any of this bores you, you can, you know, speed ahead. I am not a fast sketcher. The stems are pretty odd on these cherries just
because they're blown glass, and that was a little
procedure that had to happen. They're interesting, though. And they come out
of the cherry in a curved kind of you
know, join right here. And then we wouldn't see that. And a nice smooth
curve to the top. And then they're
kind of capped with a little a little end like that. That's what makes them
a little unusual. It's actually a
flattened circle there. So that stem goes there. I'm going to make a little
bit of change from my photo. I don't like how the
stem action is here. It's just not very good
for my composition. So I'm gonna just move
this one slightly this way and that one slightly that
way to adjust for that. So this one will have
it come out of here. And I'm first just putting in my line of the thing
without drawing all of it. And then back here
we have a stem, I'm gonna take off this way. That way, nobody is bumping. It's all still
pretty interesting. Okay, and then I can
enlarge this stem. And I'll be cleaning this
up with the fine liner. This is always my procedure. That's a little I don't like it. It's a little too straight. It needs to be for
me to like it. It needs to be a
little more curvy. This is why I use
pencil and eraser when I compose things 'cause
it never happens. Then I don't use that eraser
to move things around. And I think it's a big
part of creative process. So I don't mind at all. Okay. And then this one I do like I do like the
curve on this one. And it will get thinner
as it comes up here and gets its little Top. All right. What other major areas
do I think about? I have mostly the
stomer color in here. It's kind of a white glaze here, which I don't think
I'm gonna do that because it will confuse
the drawing, I think. Okay, but back here, we have a beautiful blue glaze that's coming down and back up. Behind these cherries, and
it's such a pretty blue, and I think it's gonna
be really good looking. So I am keeping that. I'm not gonna put the
white in this area. I don't think I might, if I can get, you know,
get away with it, I might fake another piece of blue over here 'cause
it's up to me, you know? It's artistic license. So, okay, I am going away
to clean this up. And when I get this cleaned up, I'm going to go over my
good lines with this. This is a 0.3. It's a pit pin. They also call it a
small and I like that, and I'll be back with the
drawing at that stage. I wanted to stop back
in at this stage, just to show you how far I
refine before I go to ink. And you know, everybody
doesn't work like me, so everybody won't
find this interesting. I just wanted to be
able to show you that I have in my mind, perfected my shapes, rounded out where I wanted to
round out, cut in oops. I still wanted to do more there. And it gets to be a dirty mass, and this is a really good
reason for using a three H or four H pencil because it's not going to have as much
smearing possibility. But anyway, at this stage, when I haven't cleaned up this much is when I go to my ink line because I have now decided where I want all my
ink lines to be. So here is my final ink
rendition of my still life. And I work differently
than a lot of people. I am not a loose sketcher
and loose watercolor artist. And someday I will
write something about how I do
watercolor my way. I've never seen anybody else, like, do it that way. But all of that being said, what I do is create basically a coloring book for
myself to paint. And that's the stage
that we're at right now.
8. Closing Thoughts: This point, we have reached as far as we're
going together in this particular prompt class because it's not
a painting class. And at this point, if you
worked on the cherries with me, you have something like this, and it might be the rough ink line that I
got on this rough paper. You might have
done it in pencil. You might have, I don't know, maybe even gone
straight to paint. However, that choice
is up to you. And I want to close this
class by just reminding you that this is not
a one time prompt. This is a great prompt for anytime that you just
can't figure out what to do with a page in
your sketchbook because the procedure of hunting and gathering that we went
through was really fun. And I in a very short time, found all four of the
possibilities that I found. And I'm sure that the
next time I do it, I'll come up with another four. Well, I have four of them I
can put in my sketchbook. So it's like a perpetual, never ending prompt,
page prompt. I hope you enjoyed this
prompt class and that you will use still life to capture a lot of the
moments from your own life. As always, I would love to see what your sketches are like, what your still lives are like, see parts of your
story by seeing that. I'd also like to see your
drawing of the cherries, if you chose to just work
along with me right now. So please upload your
projects and we can share and talk about
them. See you next time.
 Jessica Wesolek, Artist/Teacher