Transcripts
1. Introduction: Hello, my name is Jessica. I've been an artist and art teacher for almost
all of my life. And in all of that time, my mission has been to
simplify the basics of drawing and painting so that
it's not a big mystery, and so it can be done
comfortably without fear. Today. I am here to talk to you about how to do that
with cylinders. Cylinders are just in everything all around
us all the time. And people feel like they're
a little difficult to draw. And the culprit is the oval
at the top and bottom, and keeping curved lines
parallel and so on. But with some really good
tips and some practice, you can learn to
just casually drug great cylinders to make any
kind of object that you want. Your project at the end of
this class will be to do just that and make 123
or all you want. Actually sketches
that incorporate things that are cylinders. And if you upload them
to the project section, I will give you feedback. If you ask for it. I will give you answers
if you have questions. And otherwise, we can
just admire each other. Sketches of cylinders, supplies, nothing but a pencil eraser and sketchbook or paper
drawing paper of any kind. That's all that you need. And so let's get going.
2. All About Cans: I would like to introduce you to a can of water chestnuts. I chose water chestnuts we can as they come in a
little shorter can, then a lot of other things do. And when we're talking about taking a really good
look at a cylinder, I wanted to make it happen under this camera without
too much distortion. There is some thinking
out in the art world. That is a better thing for
you to see something and dries and not think about what you know
about the something. I have a problem with
that I really do as a person who's
taught art all my life, I really think that the
knowledge you have about an object is an important part of you understanding
how to draw it. And so I make that a part of my teaching and I'm
going to introduce you to this can and water
chestnuts to introduce you to what you know or should
know about a cylinder. And that is, that a
cylinder is made of only, it's a three-dimensional object. It's only made of three
planes to them the same, one of them different. The top of a cylinder
is obviously a circle. And we can see that right here. And the bottom is also a circle, so that's two of
the three planes. The third plane is a rectangle. But if you look at this
data on eye level, you can tell it
looks like there's a rectangle there
if you ignore this, the shading of it coming up. But it's a big rectangle. And it's a rectangle
that's been meant around in a circle to connect to
the top and the bottom. So when we're trying
to draw cylinders, cans and things like that, we're going to be thinking about what is it really made of. And that is going to guide
how we draw what we see. Instead of leaving the
what we know out of that circle is viewed
from different angles. It becomes a series of ovals. And this is really
easy to see here in the more severe the angle, the more narrow the oval. Okay, That's the one thing
that we need to know. Another thing that
we need to know is about parallel lines. This is a rectangle. And we know a rectangle is
made out of parallel lines, top, bottom, left and right. If we took this label off of
this can and lay it flat, we'd be looking at a
long skinny rectangle. So we know that the line at the top of the rectangle
is going to have to be parallel no matter what perspective we're looking
at it from it's going to be parallel to the bottom
line of the rectangle. Since the circles are
connected to the rectangle, then they're curved edges, which we see when we
see this at an angle, are going to be
parallel to each other. So one of the biggest
clues of somebody, you, unless they're doing it on purpose and there's
a masterful artists, but usually one of the clues that somebody who
doesn't really know how to draw is that you will see that they have drawn a
glass or a can or whatever. So under, and they have this curve up here because
they can see this, but they don't think about the fact that this
line down here, it has to be parallel to that. And so they'll have a nice oval at the top and a straight line across the bottom of the glass
or the vase or whatever. And it just doesn't look right. And so you know, right away, whoops, that person doesn't know how to
draw a cylinder. Another good thing to look at, and I'm going to pick a, another odd thing here. I, I have a lot of little water jars that I use when I'm doing
my watercolor. And this is a cylinder as well. Smaller, about the same height. But a clear one is a good
thing because it allows you, when you look at an angle to see that bottom circle as
well as the top circle. And you can tell they are
basically the same thing, but in this distance
they would be same oval. So you can see here the eye level line because of my watercolors
staining this. And so if we were to look
straight on at eye level, then we just see a rectangle. Straight line, straight line, straight line, straight line. Okay? But we know it to be true
that the top is a circle just like the can and
the bottom is a circle. And that when we look straight
on, we have a circle. When we tip it, we have an oval. In this case, we can
see that we have two ovals and both of them are visible because this
is transparent. So this is what we
know about cylinders. And the other thing we know. And it's most people's opinion, they're really,
really hard to draw. And they aren't easy. But once you understand and once you do a
lot of practicing, they're not really hard either. The culprit is the darn oval. Ovals are very difficult to get used to and to get able
to draw correctly. And we're going to
talk about that next.
3. Drawing Ovals With Your Arm: If you've ever watched
a pendulum swing, you know that it finds its
perfect arcs and it will say, it will be swinging in a, an oval and it will
sometimes straighten out to a real narrow one and be going sideways and sometimes
the reverse direction. This is how fortune
tellers do it. Anyway. Your arm is sort
of like that pendulum. And given enough freedom. And using your whole
arm and your wrist, you are going to teach yourself how to draw
a very good oval. And the more you do it, the better you're
going to do it. I was tempted in this class to have like
music play for like 5 min and then a dinner
ring and you would have to, you have to practice ovals
that whole five-minutes, but the content police at Skillshare would probably
arrest me for that. So I'm not going to do that, but I am going to
ask this of you. I am going to show you how to
get your pencil on your arm moving so that you're on
the track to do nice ovals. And then I'm just going to
beg you to sit around while you're talking on the
phone or doodle time, TV watching or whatever, with your pencil and
with your sketchbook. Not a good sketch book
just to practice thing. And just draw ovals, draw ovals and draw ovals
and draw more ovals and just keep on drawing ovals
until your arm, we're pretty much
give you a good oval. Now, could I do this a long time ago and I started
out, oh, no, no. But in here with a
little bit of emphasis, I have found a true oval. So I use very light pencil. I use three H pencils because
I draw in a sketchy way. And I think it's the only way that you
search out the right form. The wind is blowing
and the pollen is attacking me and
I'm really sorry, it's not my microphone. It is Mother Nature
torturing me. Okay. So you saw
what I did there. What do you did not
do there and what is never ever going
to work is using your wrist and tightly drawn one line and
drawing an oval. It looks great, doesn't it? And I wasn't trying to
make that bad either. Oval thing has to be sought out the way the pendulum swings. And so it's going to take
a motion that moves in a lot smoother and
less controlled way than when you are doing
this holding a pencil, your hand just isn't going
to do the same thing over here as it starts
out doing over here. And it's important that this is like this and we're
going to look at that in a minute using
Procreate to help us make perfect overs. But I want you to
see the movement and the movement moves
your whole arm. You can't see my whole arm, but you know that my hand is connected to my
wrist, to my arm. Therefore, we are
moving the whole arm. I also have the sketch book
on an angle because this is my arm and here's how it's
going to move and that doesn't really do it
unless I'm not crooked, all balls doesn't do it. So you want to align your book
up with what you're doing. And then you just want to get going before you ever
even touch the paper. And then just kinda
go lightly and sketchy until you see
that oval emerge. That is pretty cool. This one's fatter than
the first one I did. And make these
choices according to what the angle is that you're
looking at the cylinder. But you just do this. You do it large or small and you do it over and over again with your whole arm attached
to that pencil and you keep going until
it emerges at first. When you start doing this. If I stop there, I'd have something just as
bad as I did when I just drew it with
a single line. So I watch, I just keep this thing going
until it evens out. And I mean, why not be perfect, but it's going to be in there. You see, this was too much over here and you get rid of
everything you don't need. But you see the true oval
coming through for you there. So that is how you
start doing it. And they won't look this
good when you first do it. But if you sit around and draw these pancakes until
you go to bed tonight, it is going to finally, these are going to start coming
out and you're gonna go, Oh wow, I see where that is now. Okay, So I'm going to take
you over to procreate where tools help us to
draw a really good oval. Because I wanted to tell
you the facts about ovals and show you the facts.
4. What Is a Perfect Oval?: Okay, Now we're over in Procreate and I can do
the very same thing. I have a sketching pencil
chosen as a brush, and I have black as the color. So with a light touch, it's going to look gray. And I can do the same thing. Light, light touch, and
are moving and moving. And I can make pretty darn good ovals and flesh that out a little
bit because it needs to be same there. Same fatness. Okay. All right, so we can do this in practice here if you'd
like to work digitally. I am going to turn that
layer off visibility. And I'm going to add a layer. And because there are magic
tricks and procreate, you are able to
take your pencil, drawing on the wall and sit there for a minute and
look at what happened. You have a perfect oval. And people, some people
say this is cheating, but that's baloney if you're, if you're using Procreate
where I had with that. Now, you, when you lift your
pencil, it stays there, but up here came something
that ovals are also ellipses. And up here came a little
choice to edit our ellipse. And I chose that. And soon as I touch this again, those little spots
are going to go away. And so I am going to take a screenshot up volume and the
sleep button of that oval. And I'm going to save it. And then I'm going to go ahead
with saying, okay with us. Now, I'm going to go and get that screenshot I just did so that we
can make use of it. And I'm going under the wrench, I'm going to actions and
going to add, insert a photo. And I'm gonna go and choose
that that we just had. And I can make it bigger just so we're not looking
at all of the stuff. Okay. And I'm doing a de-select there. So this is what we got. We wanted to save
this because it had these perfectly placed dots that divided it in half this
way and in half this way. And now I'm going to
add another layer. And I'm going to do another
Procreate magic trick, which is I keep the
pencil for now. Which is that if you draw a line and then you hold
onto it and don't let go. You see what you got here. And it makes a perfectly
straight line. And I'm going through that dot and through this one now
I can hit edit my line. If that's not right on the dot. And I can move it so that it is, it is really pretty
much on there. Okay. And I like that. And then I'm going to do the same thing
through these two. Wait till it's a
really straight line. It's going through both dots. I did this to show you that each quadrant of an
ellipse or an oval, however you want to say it is the very same size and shape. Okay, so if we flipped
this piece over here, it would be a dead match. If we took this half and
flipped it over onto there, it'd be a dead match. In other words, each of these parts is exactly
the same shape. They're just arranged
differently. You can imagine if
you had a pine, you cut the pieces and
the pieces are all able to fit on top of each
other if you flip them over. Okay, So this put this in your knowledge bank
because when you are trying to come up with
the perfect oval, when you're drawing it. You need the two halves
of it to be the same. And you need the two ends
of it to be the same. And this can really
make a difference. If, if this end was pretty pointed and
this end was rounded, it wouldn't look right. They have to be the same thing. So outside of Procreate
and digital stuff, there is a trick
that you can do if you really anxious about
your oval being correct. You can draw, use a guideline. It has to be straight
up and down. Can use a guideline. And you can draw
half of an old law. Then we get a piece
of tracing paper. With a pencil. We trace this is
still that three H, but it makes it nice deeper. Mark on this. And you just want those two lines because they
got lineup again. Okay, And then because
this is exactly the same, turn this over to
the pencil is down, line up the two verticals there. And then trace on this side
to kinda imprint that. On the paper underneath. That was a very light imprint because it's a white pencil, but I can go over it so
that you can see it. And there we have a
pretty darn good oval. Okay. I never do this anymore. Because I do this in my brain and my hand
have worked together to learn what is supposed to look like when
it when it gets there. So when I'm like doing this and watch him when I'm getting I recognize when my correct
oval gets in there. Okay, In this case, you would of course, get rid of your cheat line. There you have your overall. So now let's move along and
see if we can draw ourselves a pretty good cylinder using a couple ovals
and a rectangle.
5. Drawing a Planned Cylinder: So we're going to draw
a cylinder based on this little plastic
cup as our model. And because it's small
enough to see him to hold. And we're gonna look at a kind
of a moderate angle there. Maybe this bottom is tipped
up about 30 degrees or so. Okay. And so the first
thing that we need, and this time we're going
to want these two to match. And we're gonna do it
the planned way first. And then I'm going
to show you how to do it just casually. So the planned way is that we're gonna get our tracing
paper and we're going to make a line that this time I'm drawing it a lot
bigger than it is here. This time is as long
as the whole cylinder. Now I'm free handing this, this line has to stand straight
up and down on your page. It has to be parallel
to the edge here. Then. So I kind of
have it that way. But a lot of people
wouldn't have it that way because they
don't have all the practice. So if you don't have
all the practice, then go ahead and take a ruler. Let me make sure The true, the same distance from the
side, roughly speaking anyway. So we want an oval
at the top and I am just looking at this and I'm
just arbitrarily saying, I want my oval to be about that angle of looking
at this cylinder. Okay, as we did a minute ago, we're going to use a piece of tracing paper and
put it on the back. Is this and I should probably
try to make a darker is. Anyway, there is where
the guideline is. And then I'm going
to trace my overall. All right, and so to make sure
that my top oval is right, I am going to line that up and then do this and hope
it offset it did. Okay, so I'm just going to strengthen that so
that we can see it. Alright, now, I want this
same oval down here too. I don't want to see
the whole thing even if we wouldn't in the end, if it wasn't transparent, we're gonna draw the
whole thing always. So I line up my verticals, pushing hard on this pencil
so that that will imprint. And so that I can then have some more lead to
be transferring this bird. There we go. We're getting there. Okay, so all we need
now are the sides. And the sides. There are a couple of parallel
lines and just 1 min, I am going to talk to you a little bit about parallel lines because they're so important
in drawing anything. Right? Sorry, I didn't hit our hair
where I was supposed to. Okay. There we go. Alright. Now we're going to
come in and get rid of our guideline because it's
just going to confuse us. Now, if we look at our cylinder, we see that there is an extra
little oval to this bottom. And it's because there's
a bottom in here that has a thickness and there
is a room up here. And so we are going
to come back and do this as soon as I talked to
you about parallel lines.
6. Drawing Parallel Lines: Drawing parallel
lines is your tool to dry most man-made things. Woman made things in the world. And so it's really
important to know. And so while you're practicing or after you're
practicing your oval drawing, sit around and practice
parallel lines draw. Picket fence is related
to a good way to do a lot of them in a row or birthday candles or something. But anyway, the idea is
this and I am not going to, my first set, I am not
going to stand up straight. I'm going to say that we draw
a line that is our source, fine. Our first line. We want to draw a line
that is parallel to this. It is not that easy to just do that when you're watching a
line that you're drawing. Because that wants to
go all over the place. And you don't just
do it with a stroke. What you do is you
pretend this is, this is an electrified fence
and you need to stay at least whatever this far away from it to not
get electrified. And so while you draw
the second line and you do it in a sketchy
little stroke way because you're hunting. You are watching this line. Remember when you were
young and you were playing softball and they will
keep your eye on the ball. Never mind looking at your MIT. Because if you were
watching the ball, your hand would go there
and catch the ball. Well, it's like related to that. That if you watch this line and you want to
stay this far away from it, you can do that better by watching this than
watching this. And so I am looking
at the top line and I'm judging that
space between as I make little light marks to go along and stay
the same distance away. And that's the definition
of parallel, of course, is that anywhere
along this line It's the same distance away
from the other line. If you do want true verticals, like if you're going to
draw a picket fence, you have to start with a line
that's already vertical. Usually that works out. I don't know if flip
this for this moment, but usually that works out
to be the edge of your page. So when you draw
your first line, you are watching this. I mean, when you draw
your parallel line, you're watching your first-line, your first sign in this case
is the edge of the page. And if it's all the way in
the middle of the page, and this is too difficult of a judgment to be watching
that edge from overhear. It is a fine thing to make
your first line mechanically. And let's just say it's
at four and a quarter. I'm gonna make that line. And then I'm going to
make another one mark at four and a quarter. Then when I connect those two, if all in the universe is right, I am going to have a line
that's a true vertical. So if you're starting a house drawing your urban sketcher or something you're starting
and how it's drawing. And it's going to,
your first line is going to be in here. Then you might want to do that just to make that
first guy up straight. Because otherwise when you keep, it's like a knitting, you have a bad
stitch or you drop a stitch and then
you don t know it. And then everything you do
after that gets progressively worse until the whole thing you were knitting
gets like this. Kinda the same thing if
we were to start drawing a fence here and this
was not true vertical, over by the middle of your
fencing be fallen down. But rather than just
drawing sets of lines which you can do to
practice all day long. It's sometimes fun to do
to make us something. And so you can sit
around and you can make slats and make them parallel and try to
another good practice, try to make them exactly as far apart as you want
to try to match these spaces is sometimes that control is
really important. And sit here and Dr.
fences while you watch TV. And then put little upside down, V is on the top. And you can draw a picket fence. If you're good. If you
do drop picket fence is a good thing to put a
horizontal line as a guideline. So all your little tops
end up at the same place. Okay. So I want you to practice
and practice and practice until making a line
parallel to another line. It's just a piece
of cake for you. And when you can do that, we can go back and
we're going to apply that very same rule. To our little container because it has a
little rim of hairnet, has a little base down here. Both of those, when
you look at them, I represented by another line. And we know that the line has to be parallel to the edge, right? So what we're gonna
do is this is going to be our line
that we're paralleling. And you do the very
same thing only this time you're not
going in a straight line, but you are doing
the same thing. You are watching this one
while you're drawing this one and you're doing it with the
lightest of little strokes. This is why I recommended
three H pencil or for each pencil even in light
pressure, you know, they're, they're hard leds and they will incise your paper
which you don't want if you push hard on them. But if you just use them
with a feather lightness, they're so good for this kind
of thing because they erase really cleanly and
they allow a lot of hunting without
a lot of smearing. Okay, where else is
this ram gonna be? It's gonna be back here because we're seeing the
back of that circle as well. And I'm moving a
little faster now, so don't be worried to death. There's that parallel line. And now I'm gonna
go down here and put this basin and the
base is like thicker. That's like twice
as thick as that. So I'm going to say it's
going to be I'm going to extend my hurt my side lines which are
parallel by the way, about the thickness
that I want that to be. And then I do the
very same thing. I'm watching this line and I am drawing a line
parallel to it. Okay, I'll get this
little Ngugi off of here. And then much lighter in the back because
you're seeing through the through the edge of the
glass or plastic or whatever. So we're gonna put that
into because you create, you can see that, but not as clearly as you
can see it on the front. Is this was cleaned. We could see all
that a lot better, but these are never cleaned for very long plastic lakes to
be stained by watercolor. You might have noticed it
on your plastic palettes. If you use watercolors, since doesn't like
to come back off in its entirety. There. If we just get rid of
a few little smudges, we have drawn a
really good cylinder. Don't look like an
amateur and all. And only because we knew what we were doing and
what we were trying to do.
7. Drawing a Transparent Glass: And now we have all the necessary skills
to casually draw Saunders. And we're going to
start real, simply. Go with a glass
that's transparent. I'm going to do something here
that will add tunes as we go with our examples here, we're going to realize that when we make little alterations, we still have cylinder. So my, my oval at the top is
kind of a little bit funky. And instead of putting that
same oval at the bottom, I'm going to put a smaller one. And that's just roughed
in at this moment. And I'm going to connect both
ends of the ovals together. And we have a glass shape. Here's a plastic glass and
I'm grabbing to be our model. Another glass for water
in the studio here. And the rem at the top
is very, very thin. So I'm not going to
bother doing that part. I see that my oval right here
is a little bit too high, so I'm going to adjust that and I'm relieved
that Rem like it is. And I'm going to come down here and make that a little
more perfect and leave that back one
little lighter. And then this does have a
substantial bottom to it here. And so this time, my lines that are
going to define that are going to be
a little bit longer. And then I am making this parallel line,
watching that one. Wanting to echo it. Now this time I'm going to
put water in my cylinder. And so I'm not going
to show the confusion. This is our artists license, but the confusion of that
rim in the back because it's going to make a mess down
here and I don't want to mess and nobody's receives
this is going to care. This is my glass. And this is the front. And we're seeing
the front strongly. And this is the back and we're
looking through the glass and not seeing it as strongly. Now I'm going to add to this, I'm going to put water in it. And how am I gonna do that? Water sits level, right? So we pour water in here. So it's glass down. The water is going
to be parallel to that oval circle
and to this one. And so what we have
to do is add a, an oval, this kinda
matching oval to the top. But it's gonna be less wide
because it's not at the top. So you want to get
in there and do that same thing about there. And again, the
backside be a little lighter and the front
side little darker. We'll come back and
talk about putting a little indication that
this is water inherent tube. Right now, we're just
creating a few renditions, if you will, of our
over what we learned. And so what do I
want to put in here? I think I want to it's
more than half full. It's a glass of
optimism already read, but I think that
it's gonna be this. And so there is an arc, which is a part of an oval, and it's a stem and there's
a parallel line to the arc. And I'm gonna make a leaf up here with a
couple of more arcs. I always refer to this as used as drawing
with parentheses. And I tell you when you
think of it that way, it makes it so easy. I took a set of parentheses here and I just
push them together. And now I have a leaf
and isn't that nice? And over here, I'm going
to just put a little cup, another arc, part of a
circle, part of an oval, and some more sets of parentheses to give
myself some petals here. Kennedy won bus, I don't
know what this flower is. It doesn't know what it is. I don't think, and
it doesn't matter. Okay. And I'm even
going to stick a little few of these guys. Yeah, if not a couple, a few. Now, I just turned
really simple cylinder into kind of a fun drawing
and we wanna go in and get rid of that line
which won't show because of the leaf is blocking the
backside balance rise. And when I do this, because I want it a little
fatter on both sides here. And then we've got,
we're going to erase the within the
little blossom cup. We wouldn't see the stem lines. We have a drawing showing you
put another leaf somewhere. It can't be in the
water than always destroys your cut flowers. But maybe there is
another one in here. Just balances things out. So still a cylinder. All we did was we
shove the bottom in a little bit and made a
smaller circle at the bottom. We kept everything
else parallel though. These two lines are no
longer parallel because now you're getting
narrower at the bottom.
8. Drawing a Can of Soup: Alright, let's make a can of some kind of vegetables, okay? And now I am going to move along and
be real casual about it. Now this is not gonna
be transparent. And so what's the difference
when it's not transparent? You won't see that. You won't see the back of
your oval at the bottom. But until you just get really good at
parallel line drawing, it's always good to put
that in there anyway, so that you're aware of it. And it's gonna make,
making this line down here easier on you. Also going to define the
base of this and I'm going to tell you why that's important in just a minute here. If you want to go get
a soup can to do that. But what I want to point out is if this is a
can of something, anything that's on the
label has to follow our same rules of paralleling
the shape of a cylinder. And so if we're going
to make a label, and that's what I'm
gonna do it right now. I'm going to make
a label and show you how we could put
a word on the label. And it still all be in keeping with what
it's supposed to be here. So if we have a label paste it, I'm not going to say that it
goes from there to there. I'm going to say or does, and that's a background color. But what I'm interested
in is if I have to have something going
across those lines, have to parallel the top
and the bottom curve. This is my parallel lines
are so important and it's not only straight things. You gotta know how to do
it on around things too. Okay, Now suppose that this is soup and you
want to say it soup. Your lettering has to do this same kind of a dip and follow this
same parallel line. So what we're going to do
is form our letters to echo that same curved
line top and bottom. And again, you're
going to see I draw everything first in pencil. And then I dropped
all my pencil, stuff like this because I am correcting when you're drawing with little tiny
lines like this, What's happening is that you're, you are allowing
your inner guidance to find the correct line. And I say inner guidance
instead of inner critic. I don't believe in
any inner critics are a lot of us have some
problem with self-esteem. That's all true, especially
in art, I guess. But that voice inside of
you that says that's wrong. That's not a criticism, that's a guide your brain knows with some
supposed to look like. You start to learn that with a, when you're a baby and the brain knows
what a straight line is and the brain knows what a parallel set of lines
are, what they look like. And with a can of
soup looks like. And so if you're going
along and you're doing it and something inside is
saying that's not right. Say thank you and fix it because that is what the
whole thing is about. And there's a whole
industry built and convincing you that there's
some little demon inside. Criticizing your own time. Really not a good
thing to think. There's a can of soup.
9. Drawing An Ink Bottle: Let's take a look at
this ink blot off, and let's look at
it straight on. And when we do that, we see that it is actually a combination of two cylinders, one on the top of the other. It also has a little
difference here and this cylinder has a neck. Okay? But otherwise, all
of our rules are in place. We have a plane of a circle. We got another one
for the top here, we've got another one down here. We have parallel
lines on the sides. We have a label this time that I want you
to see when I tip this so that we're seeing
part of the top as an oval. We're also seeing
this label taking on that curve that it has to be
to be parallel to the sides. And I'm going to say
that a different way. This side is a
rectangle along one. This label, if laid flat, is a long narrow rectangle. It got wrapped around
this rectangle. So it's parallel
to this rectangle. So anything that this rectangle, that is the cylinder, the side plane of the cylinder, anything it does,
whatever is parallel to, it is going to do. That is just a more
elaborate explanation of what happened over
on our soup can. And you see that the
more we tilt that, the more of this curves and
these curves and that curves. Okay? But right now what
we're going to do is we're just going to combine two cylinders
into one object. And so I'm going to start with the cap because that's
the smaller cylinder. And we're going to
build from there. So again, I'm still drawing this over with my
whole arm even though it's kind of a little one and the cap is kind of a tall on here. Okay. And bottom of the
cap looks like the top of the cap parallel to it and
it has little ridges in it. I'm going to simplify
that a little bit. But that's going to indicate
that that is the cap. Again, parallel lines here. They're short ones
so they're easier. And another thing, if that's easier is things look better
if there are symmetrical. So in making these lines, it's a good approach to put that middle line in
and divide it in half, and then put the same number
of lines on each side. That way you don't end
up with a little skinny, although in real life you'd have a little skinny
section over here. This way doesn't look like
it makes it all seem right. And so you put that middle
line dividing this in half, and then you divide each
of those halves in half. And then you divide each of those quarters in half and you end up with a nicely drawn cap. Alright, so our other, and I would ordinarily see, Let's draw this like this, but I'm not going to
mess this up right now, but I am going to
put a little bit of the neck in there because we're going to
come out right from there. You can see this. Okay. It's got a nice little
shoulder on a two, a neck and the shoulder. Alright, and this again, this is not something that
your brain will easily do. So we're gonna get help with it. Your brain does not
easily do symmetry. Because I don't
know why exactly, but it seems to go
back and forth and perception as like, you know, you've seen those
drawings or it looks like a Victorian woman one way and I forget what vase
I think the other way. It's tough for your brain and your eye to look at
this right here, this shape, and come over
here and make it the same, but make it opposite. Now, after practice,
you can do that. But before practicing
a lot, it's tough. And so we're going to
grab our little piece of tracing paper one more time. And we're just going to grab that little line there
just to help us out. And I'm pressing her this time so that it'll make
a good impression. And I want to put it in
about the same amount. See where the cap is. The neck comes down about the
same amount from each side. So we're going to mimic that. And Good, right about there, one section it
looks like, right? So since we did
this symmetrically, kinda got ourselves
in business here, we can just do one in from this side one
and from that side. There we are. And now that's going
to look right. And like I say, you learn to do this, your brain learns to do
this after awhile though. So now what we have is
the top of our cylinder. Cylinders. You have to
do this often because cylinders have some
rounded, rounded shoulders. Lot of them do. I'm just going to grab a
weighed out thing here. Same construction, but not
not a neck and shoulders. This is just got shoulders, but it has this little
rounded curve at the top. And that is still a cylinder. This has got sharp edges. This one doesn't, it's
got soft shoulders and you can just draw
that out and you just put that in later. And we did this first because
there is neck but I mean, you can do a bottle like this. You could do just a
straight cylinder like our soup can
and then just go back and just round off the
top two corners a little bit. Okay, so here we are now and this is the top of our cylinder. So we are going to do this and put in
the thing you can't see the back edge and then come
down with two parallel lines. For borrowed as this
is about, well, our neck is bigger, but this, this is about two of
these proximately. And so I'm just going to
fake that a little bit or I might just look at it
so that is about an inch. And so if the body
was about 2 " or so, that would be twice
that and you'd have sort of the right proportion, proportions and other scary
word that starts with a P. And at the bottom we have
what I showed you on here. We have a little
round shoulders. We don't have any neck, but we have a little
round shoulders. So I'm gonna come
down here like this. I'm going to put my
bottom in like this. I know we can't see the back, but this just makes it easier
to make the front correct? Isn't right over there. And then you're just going
to come down and just round that bottom right there. Right? Now let's take
another look at this. And let's put our label. And our label. I do have this out of
proportion because this is a lot longer,
but who cares? Because I get to
do that if I want. Okay. We're not actually able to see this is all
going to be black. But we are able to see
this front edge and this label is darn close to it. I'm going to have this
be the top of the label. Because if you look on here, Here's your little
round shoulder, and here's the label already. Here's our little round shoulder in here is the label already. I might lift it
just a little bit. I might just put it just
to make this a little more matching to
our, to our model. I'm just going to
lift it with that is the top edge of the label
which is parallel to that. And then down here, we're not going
to see that back, so I'm gonna get rid of it. And the bottom of the label is down here
and you can see it. See a little bit of the bottle after the end of the label. So I'm going to exaggerate that a little so it doesn't
just look like a messy line. Alright, and I'm not going to bother with the
whole branding here. I'm just going to say
Inc. and to do that, I am going to put my
just like my soup can, my lettering guidelines. And then I write. And we had a little
glitch there because a phone call came
in and that's where all the down sides of
filming was your phone? So my eye, my n and my k. And I think I'm just I can't decide
whether to leave it. The guidelines or
not, but I think not. Just have the word ink on there. It's probably obvious,
but it's a good thing, like if you have
three letters that you didn't do it of course, but it's a good piece of advice. If you had three letters that
you start with the one in the middle and then put
one on the other side in. And it gives you a nice
spacing kind of thing. If you had even number of
letters, you can do that. But you like when we had soup, we would have put
that blank space between the 0 and the u. We would put it
right in the middle. And then two letters to one
side of them to others, the other just another
lettering trucks. So there is our ink bottle and
that is a compound of two. So two cylinders, here's one. And even though it's
got shoulders and neck doesn't matter,
it's still one. And here's the smaller one
that's sitting on here, screw down as the cat.
10. Compound Cylinders: I'm going to show you a much more complicated
combination. I'm not going to take
the time to draw it online because I'm
just a habit here. And I'm going to point it out
what it's made up for you. And it is this bottle, which I'm gonna see if
I can back out here. You can see it all. I don't use swab
hairspray, my goodness, but there's alcohol in here that I used for different
processes in my painting. But anyway, here is a pretty
complex set of cylinders. We have four of them here. And obviously one is the big body and one is
the cap that screws on. So first, just like
our ink bottle, but then there's another
little cylinder that holds the fourth cylinder
and place up here. And they each get a
little bit smaller because this has to
push down into this, so it has to be smaller. So I'll show you the pencil
drawing of that smaller. Of course, what I did, I started with the long
body part over here. I started with the cap. I pretty much knew I wasn't
going to run out of room. If you want a long
tall cylinder thing that you're dealing with, it's very disturbed with
the longest part first, and I started far
enough down that I knew I had room for
the other three. There's a little
shoulder on this too. It's a different one. It's one that is just a
slanted line on each side. So after I did the long cylinder that holds the alcohol or
hairspray or whatever. I did the cap this cap was like texture that is really close together
those little lines. So I didn't bother
with the spacing out. I just put the lines in as
texture and it had little, little border thing at
the bottom of the cap. And then this was a little
cylinder that I drew in here. It's a little smaller
than this one is sitting right on top of it. And I originally, if I were you, I would have drawn it over that line so I could tell that I had it in
the right place and all. But as you get used
to these things, you don't have to put the
whole oval n all the time. If you can see it, then you can leave it as it is. And then this is the final
little cylinder that's the push button deal with the hole in it so the
spray can come out. So this whole thing
is complicated, but the whole thing
is nothing but for different sizes of cylinder. So that's easy enough, right?
11. Shading with Watercolor: We know by the, by the lines that
we've drawn that this is a three-dimensional object. This can. And another indicator of that is shading and shading
puzzles a lot of people, but it's really not that
hard to figure out. Shading is about
light reflecting from whatever plane
it's shining on. So in the case of a
box or something where it's a flat plane and
a light is hitting it. It spreads out evenly. When it is not a flat
plane than light does different things according to the shape that the
plane is now in. So if we were to shine a, I like to think of I'm going to try and get a little
smaller here for you. I like to think of light. Like I have a hose gun
and I'm spraying water. And it's an easy, It makes it an easy
way to think about it. And if it hits a flat
surface and it spreads out, it spreads out pretty evenly. If it hits a curved surface, it's going to hit
one part of it. Harder. I'm just going to
use that analogy. Light isn't hard, but
it's going to hit it more intensely and it's going
to reflect more intensely. And as this shape, I'm just going to grab. Okay? Because we can see it here
as this shape goes away. So does the reflection. Now the lighting in here
is about the video on. It's not about me putting
light on this object, but you can see right
here what happens, okay? You chose your light source. This light source is
coming from over here, but it's coming oddly because
it's couple of lamps. Let me see if that
didn't do as much good. Anyway. You see this line right here is where the light is hitting
directly the hardest. Okay? And if I move this up,
you'll see more of it. And as it falls away, it gets a little lighter, a little lighter and darker is darkest as it goes
around the bend. And so that's the science
of it in a nutshell. Painting yet, or coloring it is about you doing
the same thing. It's about you choosing a direction the
light's coming from. An i'm, I'm gonna
choose that one. And then your lightest area will be where that
light's going to hit flat on a little tiny bit of this plane because
a plane isn't flat. And as it falls away
in either direction, it's gonna get darker
and darker to the edges. So I'm going to use
watercolor to show you this, and I'm going to lift it to
show you the highlights. And so this is a very
easy way to do it. Other ways are to apply pencil
and build up your tone. And you know that this is
draw simple in this class, so we're not going
into all of that. So I'll just show
you the shading. I'm going to use
the easiest way, and I'm going to use blue. I wish that I could lose the
habit of saying I'm going to because it's irritating. It's hard to lose Abbott. And I know a lot of teachers
do it because they're trying to put the steps in order as MI. But I am applying the paint all over the
surface of my cylinder. And I haven't Santa Fe, I have to move kind of quickly because
everything wants to dry in seconds here and
I'm gonna get this as, even as I can. So going in a hurry, I'm going to be very sloppy. Non-intentional me just
because I'm in a hurry. I'm not a big fan of
sloppy in my work. I usually go over the
top making it all right. But a lot of people like sloppy. So the point being here
is to get an even, pretty even color all
over that surface. And then come back and
add the light number. I'm adding plain water with my brush in the area where the light is
going to hit the most. Then I coming back with
just a damp brush. Now I'm lifting that. There's a very
short time that you can play with
watercolor blending. As it starts to dry. There's a point at which you
have to get out of dodge or you're going to make
horrible marks. I'm just grabbing the
opportunity here to do that. And then I don't have
enough shade over here. So I'm going to go and
add some dark color. Is darkest area. It's always a little bit
darker towards the bottom to try to fix my line. Or that doesn't matter right now I'm getting into trouble territory if
I keep messing with this, so I'm not going to
I'm going to let it dry and then we'll talk
about what happened here.
12. Shading, Shadow, and Transparency: My blue is now dry and
although this is not the neatest paint
job I've ever done, it does show you, in essence how to shade a cylinder that
you're going to have the lightest area
where your light's hitting and then it's
going to wash away. Now, this can be a lot darker depending on and the color
that you're using and so on. But this is our casual, our draw simple idea. And so where you go from there, it's up to you really know, if the light is
coming from here, it's hitting the
top at a pretty, at an even rate. I'm grabbing a
little bit of gray here because the tin
at the top is gray. And usually the corners of your oval will end up being
darker than the middle. And it's because these edges kind of shade it a little bit. So that might be the way
that you did the top. And then I'm probably
crazy to try to do this with that still being wet. Should never paint wet watercolor
next to wet watercolor. But we have things
to get done here. The inner edge of this, which show and it
would be reflecting its own light as a round. I don't want to get
complicated here, but as a rim that's like
a long skinny cylinder, they got bent around there. So it has a rounded,
somewhat rounded surface. Anyway. There goes the shading of it. And then one more thing. I'm going to use, what I always use for shading, for shadows, which is a gray watercolor
pencil and the water brush. And I'm going to back out
just a little bit and use this pencil
lead as a kind of a palette and put a
little gray down here. Now what this should look
like in your imagination is one of our ovals moved
over underneath here. The light will come in. And this actually is, this is just the sitting shadow. If we were gonna do a cast
shadow that went back, it would be going at
a different level, different angle because of this light, but we're
not doing that. What we're doing
is basically it's called grounding a drawing, making it look like it's not
just floating in the air. Now it's okay to be
floating in there too. That's just another way of
doing a spot illustration. But this way we can put a little dark
right up by the cam, like sitting on the ground. Then the reason I use a watercolor brushes because
I can make that edge fade and blend real
easily that way. All right, so it's
not like I say, a painting class or
a painting lesson, but it is a way for
you to color in your cylinder drawings with some idea of how the light
would be affecting them. Good to add a little bit up here in this
corner because this slight really be gone
across that way. The other thing I'm
inadvertently showing you that when you ink things and they're going to turn into that nice little bit of
sloppy look of a sketch. Unless you're just really, really meticulous and I
wasn't being meticulous. So you see what happened here? This is not, not perfect at all. It, this line should
have been right here. But the ink pen made
its own decision. And I'm going to live with it. Because that is just
a casual drawing ink. It's very hard for ink to
behave and you can't erase it. So when you're going
to do ink sketching, you're just going to
live with your mistakes pretty much unless
you can fix them. All right, here we have
a glass that is well, a glass that's transparent. So it's not a glass
or model was plastic, but who's arguing
about it, right? So I have a water brush
hair and that's what I like to use for that same reason that I could smear the
watercolor pencil. I can do that with a
tiny bit of blue because all you're gonna do with
transparency is edges. And then blend them
out to nothing. Starting with the, we're
starting with the glass itself and then we'll look at what we do with
water inside of it. Again, the corners a little more shade than the rest of the top, but be careful don't pick up too much paint or
you'll be in trouble. That right there is just
so almost too much. And I'll make that back
room kinda match up here. Then we go down this side. And the leaf is behind
the glass. That's okay. Go over it. And there's a little
bit indicated color alone under the rim here. And just like spread
that out nowhere. Now we have our bottom. And the bottom is going to have a little more intensity because
it's getting less light. But still it's not gonna be any solid kind of thing at all. And then are very bottom. This guy just at the sides, like we're in the very
bottom like we did the top. Already know one more
area which is the top of the water that has color. Although it's not
usually totally blue, are totally gray or anything. It's like you can do
this with gray too. I didn't have to be blue. But this part has water,
this part doesn't. And so in a very, very subtle way, we are going to make this a little more intense. That wasn't subtle as it, but it will be. Okay. And that's not an even
coating of anything either. It just should look a
little bit different than where there is no water because you're just looking
through more stuff. Basically. I got too much up here. Pick that back up
as much as I can. Now, if you're painting the
leaves and the stem here, it would be a little
more of a color change. This Would, you could see the best of all because there's
nothing in front of it. This there's plastic
in front of it that we get a little bit lighter there. And under the water
lightest of all, because all the water
is in front of it. Okay. This leaf, it'd be a
little lighter than this leaf because you're looking
through something on it. Some people come
back and add white, a couple of white
highlights drives. I can try doing that. I'm going to try doing
it with a chalk marker, but because our
pain is still damp, you're probably not going
to see it very much, but over dry paint, you can come back with
an acrylic painter and white pencil or chalk marker
and make just a couple of, indicate a couple of
reflection lines here. And that's going to make your, your glass look more real. All right, Let's talk in our last lesson about what your project
is going to be. And we'll be right back.
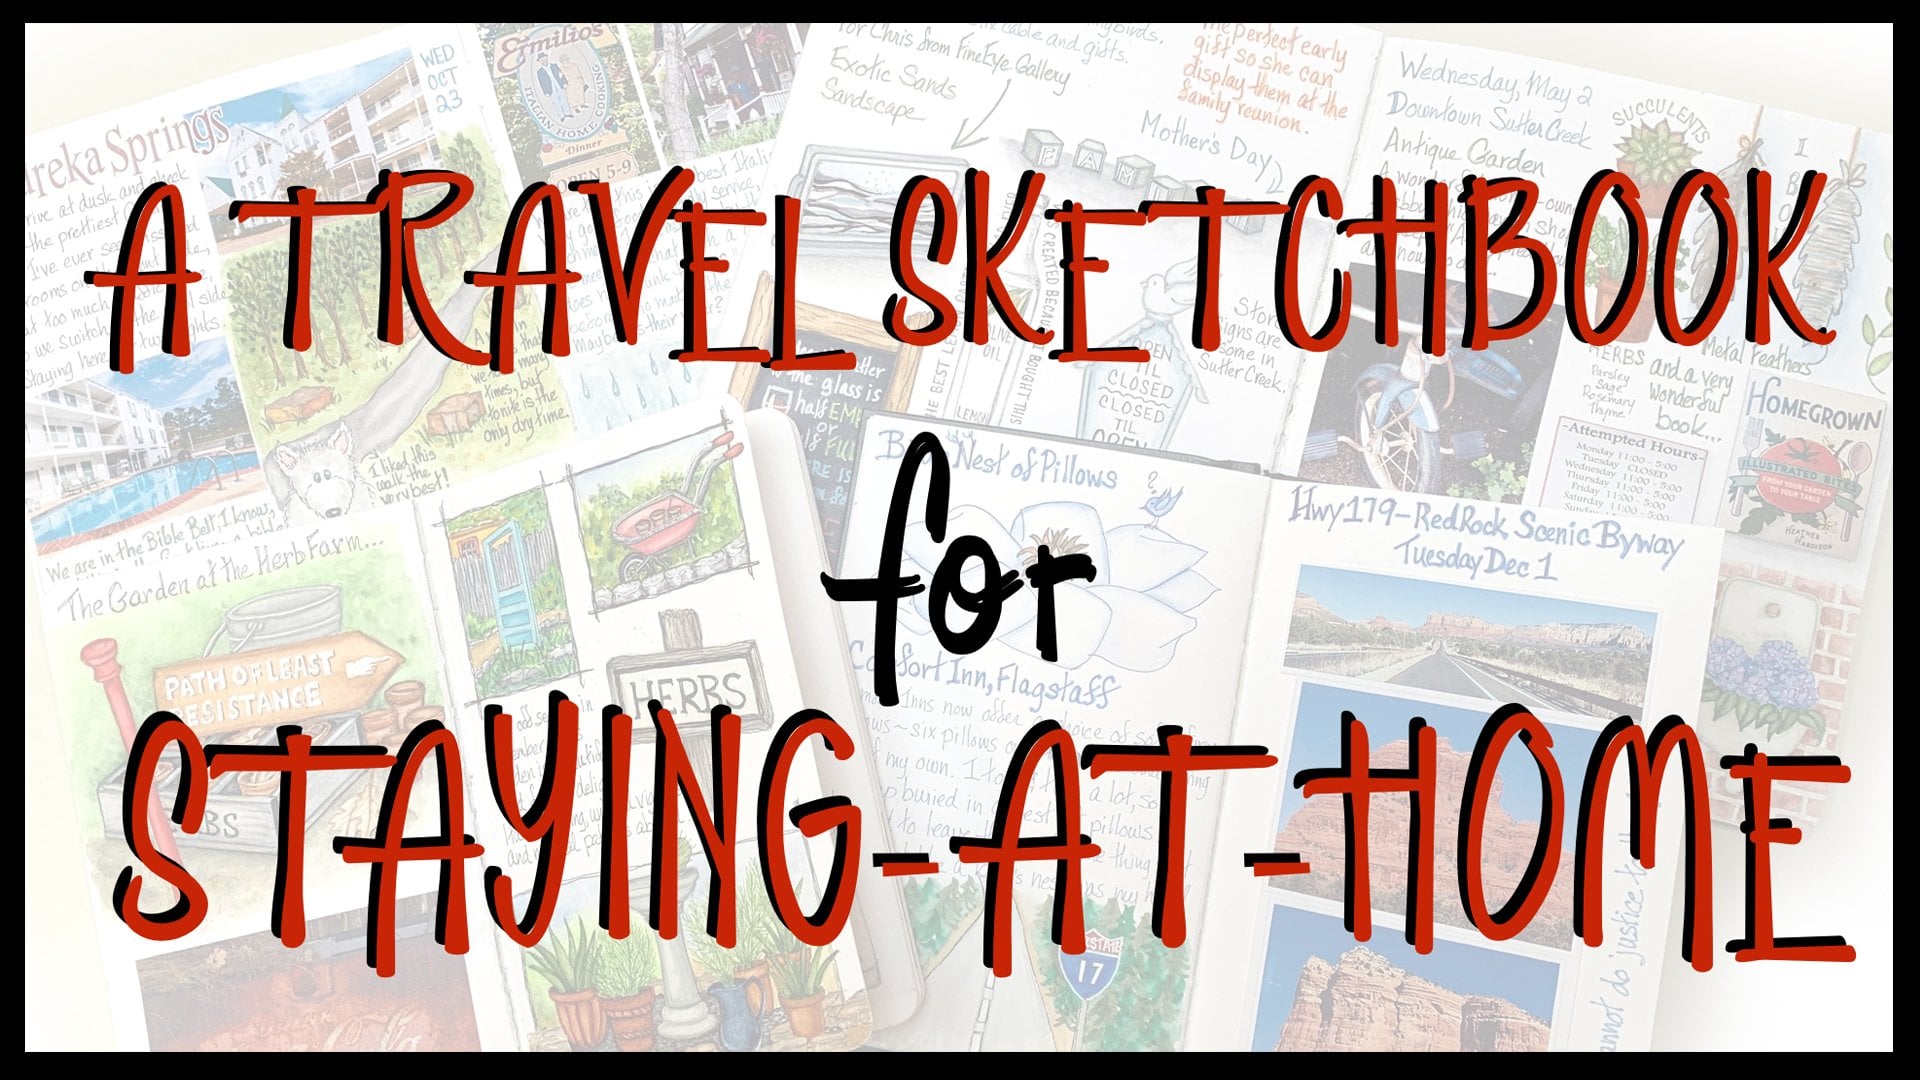
13. Your Class Project: These pictures which you saw
in the introduction lesson, they look rough, are
blown up like this because they're sketches
for my sketch book. But I thought that it would be a good thing for one to give you a PDF of these to look at closely and work
from and think about when you come up with
your own drawings, you can copy them, of course, but it's always better if you
come up with your own idea. If you do copy them, don't publish them or sell them. Um, because there are real
art that's made from these. It's mine, it's
under my copyright. Anyway, what I'm gonna do, I have these in Procreate and I have a
page assist turned down, so we'll be able to
go page by page. And I have made myself
and obnoxious brush here. And I think I'll choose a
color that's just as some noxious like a
light green maybe. Let's see how that Yeah,
that's pretty noxious. Okay. What am I going to do is I'm
going to page through these. Just point out where the
ovals are, the canisters. And this one looks
pretty obvious, right? Because we have our title here. And there's one down here, of course it makes the bottom. And then this is
our parallel top of our label and this is
her bottom of our label. And inside we have liquid that'd be like
the water in our glass. So this right here
is also an oval. Then if you wanted to
get the hang of how to draw this handle on this, this is also an oboe is only
part of it that's showing, I don't want a little
tight in there, but you get the idea There's part wouldn't be
important to you. But that part would be
to form the handle. This one has lots of it has two cylinders
and lots of ovals. Let's start with the
candle inside because it candle as this. And there's one down here as the bottom of
the candle, right? And the jar has this one. And this one. Then there's water in
here which has this one which draws around behind. And there's another one here, which is the glass as what
we did on our drawing, has a glass bottom to it. So 123456, ovals and
that one are ellipses. The pages don't turn when
you're on page assist here. So I got to remember
to push the button. Here we have our
top and our bottom. We have another one here that is the top of the twisty part. And we have our parallel
line along here. This is a real simple one. The bottom wasn't
quite as simple because I had to go in
and scale up for texture. But the first thing
I did was I put that parallel line and
so I could work from it. This one again is
simple. A cylinder. A cylinder. This is like r or ink bottle
on it with a real squat cab. And so we have our ray over top. We have our top of our jam. We have our bottom down here, we have the top of the top. And actually the bottom of that cylinder would
be this rim here. Okay? I bet you're catching
on real easily here. The kitty that's
helping in the garden. This is a cylinder now, just like that transparent
glass that redrew. The sides are slanted
in a little bit. And this is sort of a
cylinder on a cylinder. This one is its own here, the body of the pot. And then on top here, rehab one without kitty, sorry, that has its, on which that one's going to sit
right on that line. This is really its own
cylinder up here as well. Simple one, kitty with toilet
paper or yeah, there we go. Then this is interesting
because if you're doing paper towels or toilet paper or anything and some
of its unfurled. What you need to do is
you follow that same. Curve and this same
curve as it comes off. And that's gonna give you a
look like it's coming off of this cylinder and it's the
same width, and so on. Well, you can't see it all here. I don't think. No. But we have a we have
a cylinder up here. That's the cap doesn't
happen to be on it. We have one here that
I drew as a spiral. We have one here which
is the top of this jar. And also there's
one here and here. But all you're going
to be putting is the parallel part because
that's a glass jar. And we have an interesting thing here because we have this
just like the water, but this isn't, It's lemon curd, so it's more lumpy. And that's why I made the
line not a perfect oval. And we have this label here. And so we got our line
there and line here. And then there's one at
the bottom that's cut off. This vessel is straight on. And so for that reason, I remember I level we
started out with it. If we're looking right at it, we don't see all those ovals. So this line, that's
a design line. This is not the
what's in the bottle. It was a part of
a of a design of the bottle is a straight
horizontal line and the bottom, the cap is as well. And the top of the
cap is as well. And that's because we're
looking right at this. At eye level. Here we have a pot with a rim. So again, really, we
have two cylinders here. We have this one that
is wrapped around. Actually this is one big
rectangle or afternoon, but it's wrapped around and
make it all one at the top. And its own kind of
cylinder, kind of. Then down here we have the
same thing going down, which you can't see it. It's another steel band like they do on
containers like this. This time. Or I've got to turn this, can't really reach it. This is a cylinder as well. And so you just have to, when you look at something
more complicated, you just have to look for
the base shape of it. So this is our cylinder
like we're used to, but the angle is given
us pretty straight lines here because it is
held far away from us. And it's also held
pretty straight on. You could say that this
is a cylinder to shape. Again, the garbage can
is this is a cylinder. Which door? Because I've just done
that 1 million times. What's interesting
is that the top of the garbage can and has
all these ovals in it. And it's because if
you looked at that top straight on just
like a can of soup, it would be a circle. But we're not looking
at it straight. I'm looking at it
at quite the angle. And so we're seeing
all of the circle, circular lines on
that tab go to ovals. And of course I will have
to be parallel to each other because that
relationship didn't change. Here we have a little
cylinder within a cylinder. This is just a little
sketch about using a clear paint can on top as a clean and dirty
water travel Dish, robotic watercolor. So what's obvious here is this cylinder and the one in
the middle and the water, which is another one that's a third cylinder
that's going on there. Well, there's forth because the water in here is different. There are other
cylinders here though. This, the Farallon is
paintbrush is a cylinder, would look like that. And actually the whole
handle other paintbrush is also a cylinder. It's just had a shape
change just a little bit, just like we had to do
for that class to make it bulge out and look
like a paintbrush. So that run through, I hope is helpful. And in the resources section
or the Project section, you can find a PDF to
download to look and study these and draw over them or whatever if you
want to print it out. If you want to
draw over them in, in Procreate or something,
then your project. So get comfortable
and sit down with your pencil and your paper and think of little scenes
and it'll still alive. So it'd be real boring
just to draw 3123 cans. You only have to do one. But if you did more than one, you'd have more practice. But it would be boring
to do just playing cans. And so think little
still-life things to do. That'll make it
more fun for you. Get out, you're coloring your colored pencils or your
watercolors or whatever, and shade your drawings and upload them to
the project section. And we'll all take a look and ask me if you have questions
or you want feedback. And I'll do that as well. I hope you've enjoyed
this class and I hope you feel a lot of comfort about going
out into the world and finding cylinders
and sketching them.
 Jessica Wesolek, Artist/Teacher