Transcripts
1. Introduction: Welcome to Sketchbook
Snack Drawing goofy dogs. Now, you may be wondering what the heck even is a
Sketchbook snack. And no, unfortunately, it is not a tasty treat that
comes with this class. It is, however, a short
exercise that you can do in your sketchbook whenever you want
something light, easy, and fun to do.
Sounds nice, right? Hi. I'm Jenny Macklin. I'm a software engineer, turned Illustrator and
surface pattern designer. I love playing in my sketchbook, and I'm frequently inspired
by my very own goofy dog. Never have I had more fun than when I'm playing
around in my sketch book, drawing silly goofy
dogs with no pressure to create something
for my portfolio or even for social media. That's why I created this class. I know firsthand how easy it can be to feel overwhelmed,
burnt out, and just plain, tired of
the cycle of creating art and posting it to social
media only to hear cricket. That's why creative play
is so important and why you should start
incorporating it into your routine if
you don't already. By taking this
class, for example. In this class, I'll be teaching you how to fill a
sketchbook page with goofy dog drawings
that are uniquely yours. We'll start with a simple
exercise to warm up. Next, we'll talk about
how you can confidently draw shapes from
reference images with a focus on interpreting what you see rather than making
a carbon copy of it. These are goofy fun
dogs after all. We'll talk about
materials, and together, we'll pick out some colors from supplies you already
have on hand. And then we'll fill a
double page spread in our sketchbook with a bunch of beautiful goofy dog drawings. Join me in class and draw some goofy dogs
of your very own.
2. Warm Up - Potato Pups: Before we dive into
our final project, we're going to warm up
with a quick exercise called potato pups. For materials, you will
not need any potatoes. You will, however, need paper, something to draw lines with, like a pen or a colored pencil and something to fill
shapes of color with, like marker, gouache,
or watercolor. You can do this exercise in your sketchbook or on a
loose sheet of paper. Go ahead and pause and gather your materials if you don't already have them.
I'll wait here. Got 'em. Let's jump
into our warm. So this exercise, we're gonna be drawing potato shapes
on our sketchbook page. I'm gonna do about five. I suggest you do somewhere 4-7. They'll look just like
this. Use a marker or paint or whatever you want
to just make these potato blobs on the page. Okay. Now that you have
a page full of potatoes, it's time to make
dogs out of them. So we're going to use our
pen or colored pencil, anything for making lines, and we're going to
use our imaginations to use these potato
shapes to create dogs. We'll basically be using them as the main shape of whatever
our imagination sees. It might be a full body dog, it might be a dog
standing or lying down, or it might even just
be a dog's head. Whatever first comes
into your head, that's what I want you to draw. And don't worry if you make mistakes like I
made on this one. We're not being precious here. We're just warming up and getting our creative
juices flowing. So I'll go ahead
and speed this up again so you can
see how I did mine. And then I want you to go ahead and do a
couple of your own. Okay, great. Now that
our worm's complete, we'll move on to a lesson where we learn a
little bit more about shape and how to find it in
a reference image. See the
3. Finding Shapes with Confidence: Talk a little bit about
how to pull shapes from reference images instead of our imaginations like
we did in the warm up. Or rather let's talk about how to combine
reference images with our imaginations to confidently define our own shapes when
working in our sketch book. Okay, here we have my iPad with a couple of
reference images, and you don't need an iPad
yourself to do this class. If you want to follow along, I've provided the
reference image for you, and you absolutely can if you just want to get your hand
used to these shapes, but it's not necessary. So if you just want to watch
and take notes for when we're ready to work
on our sketch book, you can do that too. There are a couple of
things I want you to look out for in your reference image. First, we're going to identify the main shape in the animal. Then we're going to look
for features that we want to highlight or exaggerate. And lastly, we want to
remember that we're not trying to make a
carbon copy of the dogs. We're just trying to
interpret what we see and communicate the idea of the
dog on our sketchbook page. That's really the key here, because if you're trying
to copy the dog exactly and get every little nook
and cranny of the ear in, you're going to get
a little bit stiff, and you're going to, you know, maybe lean into those
perfectionist tendencies a little bit more
than we want to. So in our exercise, we want to stay loose, and we want to interpret
what we're seeing. Seeing not copying. We also want to make
sure that we're allowing mistakes to happen, and then working with them. Because we'll be working
with non erasable materials, you're not going to
be able to scrub out any mistakes or tap the undo button like
you can on the iPad. So when we're doing
these loose drawings, we want to make sure
we lean into mistakes. If they happen, it's okay. We just let them go, and then we keep working and we
work around them. Okay? You'll see more about
that in the final project. For now, let's dive into how I interpret shapes
from these images. Let's start with this guy
right here up at the top. So the main shape that I see for him is kind of like a blob like we did in
our warmup exercise. So I'm just going to
draw this loose oval in. And the majority
of the animal is captured in this
potato shape here. Let's go ahead and
go over to this one. This is another dog that
has a very defined neck, so that main shape of
the long neck is gonna be the one that I capture
with this big lose oval. And we're not going
to be actually using these shapes
when we're drawing. This is just to use in
our imagination when we're looking at
the reference image and drawing in our sketch books. Now, this dog has a
very interesting, almost hour glass
shape like this. And that's what I
would be trying to emphasize for him
where he curves, his head is quite wide. I curves in, and then his
body is quite wide, too. So these curves on either side, I would want to capture
in my sketchbook. This one is one of my favorites. Look how cute he is. His very long neck is definitely
the first thing I see, followed closely by
this big ear over here. So I'm going to
capture the neck, again, like we did
with the other dog in this very long neck. He also has some
nice curves here, like the dog we just saw. So when I'm drawing
in my sketch book, I'm going to be
exaggerating the neck and exaggerating the skinniness
of this dog for emphasis. Okay, let's move on
to the last one. So the main shape
here is his body. Got another little potato. And because he's got such
exaggeratedly straight paws, I'm going to add that
into because I'm going to want to capture
the stiffness of this. He's saying, No, I don't
want to go anywhere. So we're going to make
sure when we do this. It's not really part
of the main shape, but I'm adding it
in here because it is such a unique feature, which brings me to the
next thing that we want to talk about when
we're looking for shape. Some of these animals have
very distinguished features. He's got his legs, H head is also quite small. And so we might be able to emphasize that when
we're working. This one, we've definitely
got these loose fluffy ears. And then the second thing, let's go ahead and do
this in another color, so you can see it a
little bit better. The shape of this
head is so skinny, and his snout is so long
that that's going to make a very interesting image in our sketch book. So I
want to call that out. Go back to this
KD pie down here. He's got a nice big ear. And then I as to really like the angle that's created
by his face here. So I'm gonna want to capture these features in my sketchbook. For this handsome boy here, what I really like
about his big ears is how loose and
floppy they are. So I'm gonna probably just create some very loose lines like this to capture those in a more stylized manner
rather than trying to represent every fold and
crease inside his ears. And then lastly, for this dog, the big eyes are one
thing that stands out, and then also the long, floppy ears for me. So I want you to go through this exercise in your own way. You don't need an iPad to do it. But I want you to take a look at the reference images
that I've provided, and I want you to try to
see these two things. What is the main shape that you see that you want to
represent in your sketchbook, and what are some of the distinguished
features that you want to capture to really communicate
the essence of this dog? Alright, I hope
this was helpful, and I will see you
in the next video.
4. Exploring Materials & Color: Warmed up. We've learned how to confidently define
our own shapes. Now it's time to talk materials. The best materials
for this class are the ones that you
already have at home. You don't need anything special to follow along
with the exercise. In fact, you only need
three simple things, paper, something to fill color with and something
to make lines with. You can use your
comfy favorites, or maybe you want to take this opportunity to experiment with something that you have, but you haven't really had
a chance to try out yet. This exercise is
perfect for both. I'll show you some
of the options that I have, and together, we'll go through an exercise
to help us pick out the exact materials and
colors that we want to use for our final
project. I'll see there. Okay. Let's dive in. The first
thing that you're going to need is a sketchbook
or a piece of paper. What we're going to do
now is swatch some of our materials and I'll go over which ones you'll
need for the project. So let's go ahead and
get started with that. I've opened up a blank page in my sketchbook and I'm
just going to swatch out some materials we have to test out what we want to
use for our projects. The only thing that
you're going to need for minimal supplies, and that's kind of what we're
going for here if you want to get more detailed,
of course, feel free. But the minimum
that you're going to need is three materials. You're going to need
something to make color marks blocks
of color with. You're going to need
something to draw lines with, and then you're going to need something to add details
and flourish as well. I'm going to stick with markers and highlighters
for our testing. So I have this little
chunky highlighter here. I'm just going to test it out and it works really
nicely on this paper. I think it's nice and smooth. It's easy. I can block
out color quite quickly. Then if I wanted to add
some details to that, what I want to do is find
something that goes with it. If you're not used to color, I would suggest sticking
with monochrome pallet. Another green like this, for example, just draw that out on the side.
That looks quite nice. I'm going to just
drop over it to make sure that the
materials can layer on top. And then I have this pen for making marks. Let's try that. So we go a little
bit of bleed here and the feathering
on the mark there. And I quite like that, but that's something to think about when
you're doing that. We have some marks there.
That's a nice option. We also have a brush pen. You could do the lines, you get the thin and
thick, thin and thick. And it leaves a little bit
of texture in the lines. And let's see. We have these zig brushles that we could do this
pink, that's really nice. That's darker pink. We could do maybe a lighter, t's see how we mix them. Get a little bit of
pilling on the paper, so you want to be
careful of that. Then we have neo color. We could go over
that with It's nice. Let's see what I'll
see some Tambo, purple, maybe some color pencil. So what I want you to do here is just take out the supplies
that you have at home. Pick some colors that you like. I have some here that
I've got some nice pinks, to go with these,
and some purples, some greens like this. This looks blue, but it's more
like a mint green almost. That goes quite nicely
with this marker here. I think monochrome keeps
things nice and simple. So if you want to do
that, that's great. You could mix and match. I think these look like they
would go nice together. But essentially, you
just want to test out all your materials that you think you might
want to use like this, see which ones layer
well on top of them, and then pick a
limited amount for your sketchbook spread that we'll be doing in
the final project. I would say if you're not
going to go monochrome, I would say probably limit
to three main colors. So like, these would be good. They all match in nicely. It creates like a nice
fun pop of color. If you're going to be
mixing and matching, just make sure that you
have some light values and some dark values so that you don't end up with a lack
of contrast in your image. Okay, so what I want you
to do is continue this, take the materials
that you have at home, whatever you have on hand, swatch them out and
pick a few that you're going to use in your
final sketchbook spread, and I will meet you there.
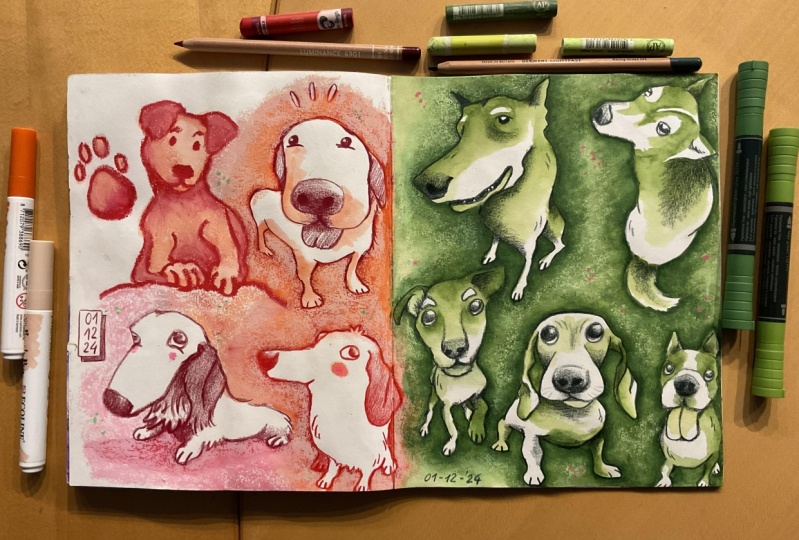
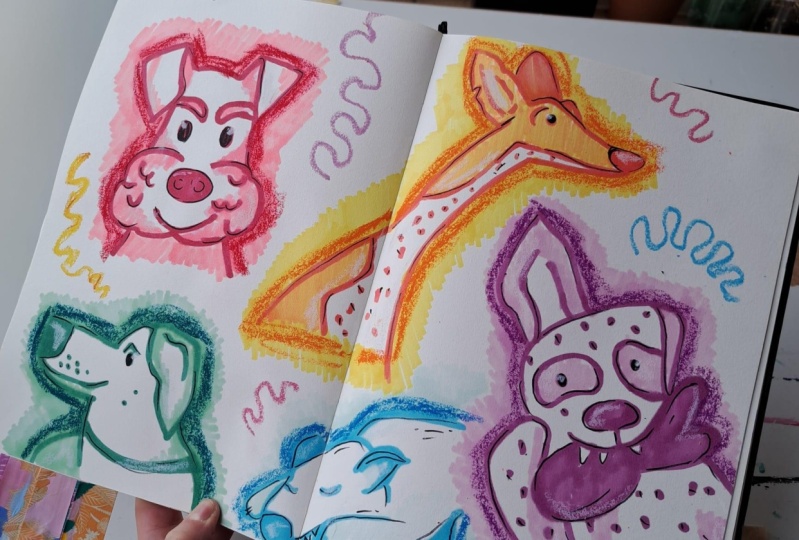
5. Final Project - Goofy Dogs: Are you ready? It's time to get started on our final project. In this lesson, I'll
show you my step by step process for
drawing goofy dogs. And the great thing
is, there's nothing special or complex
about this method. You can easily follow
along with me, and your drawings will
still be uniquely yours. So grab your sketchbook and the materials that we picked
out in the last lesson, and let's go draw some goofy
dogs. I'll see you there. In this demonstration,
I'm going to show you my three step
process for drawing goofy dogs from reference image. The first step is to
draw the negative space around the subject to give me a good idea of the
general proportion and size of the subject. Then I refine the shape
with linework and add the necessary details that tell the viewer what the
subject actually is. In this case, the dog. And lastly, I add
finishing touches and flourishes just for that little
extra something special. Okay, let's get into drawing. I'm going to select
a reference photo and pop it up on screen
for you here so that you can see which one
I'm working on for each of the sketches in
my sketchbook spread. And I'm going to go
through this first one with you in real time and just explain what I'm doing in the different
parts of the process. And then I'll speed up the video for the rest of them so that you don't have to sit through
the whole half hour that it took to do this spread. And you can still
get a good idea of what the process looks like for me and how you can apply that
to your own sketchbook. So as I mentioned,
the first step of my process is to draw in the
negative space like this. Notice that I'm going
pretty quickly. If I was doing a
finished piece of work, I wouldn't be moving so fast, but because we're trying to
play in our sketch books, I don't want to
overthink this too much. So when I'm drawing
the negative space, I just quickly sketch in the
general shape that I want, and I work with
what that gives me. In the end, you'll see
I have this sort of stencil like creation
on the page, and I'll use that for this
step, which is linework. Well, you allow it to guide me in the decisions that I'm
making when drawing the dog. And I find this is really helpful because
especially for beginners, getting proportion and shape
right can be very difficult. And especially when
we're stylizing things, we still want to make sure
that they are recognizable and that our drawings
are done with intention. And I find that drawing
the negative space first really helps me with this. So as you can see here, I've started the second step, which is the linework,
and I've started to draw in the outline of his face. Some of the facial features like his eyebrows and
his big mustache, which are two of the things
that I really want to capture and make sure that
are a little bit goofi fied. So I've added a little bit
of extra fluffiness to them, and I've made them sort of
the feature of this sketch. And I'm also going to go in and really just darken the
lines a little bit here, add these little extra loops and just do what I
can to make them stand out because they are really the part that I want
to emphasize in this dog. So next up, I'm
taking the marker and going over the
outline of the dog, again, just to darken
it a little bit. And this is that same thing that I was doing with the lines, where I just really
want to make it pop off the page a little bit more. And for me, that's
just something that I find makes it a little bit
more visually appealing, and I think it makes it a little clearer at the same time. So now we're moving
on to our last step, which is adding the final
touches and flourishes. And for this one, I'm just
adding a little bit of an alternative color
to make it stand out a little bit more in the
key features of the dog, which, as I mentioned, were the eyebrows and the mustache. So I'm just going in with
this lighter purple, which is in a slightly
different shade. And that gives it a
little bit more contrast and depth, which I really enjoy. And you might want to
use a different color, you know, something complimentary
or something like that. I encourage you to try a few different things
and see what you like. And then this last step
that I'm doing here is just adding in
little bits of texture. And then I'm just
going to add in some little scribbly
lines because I'm not really liking how
dark the outline is yet. I want to make it stand
out a little bit more. It's a little bit hard
to see on camera, but we're just adding these little scribbles to
really have him stand out. I'm going to go ahead and speed
up the rest of the video, and I'll meet you back
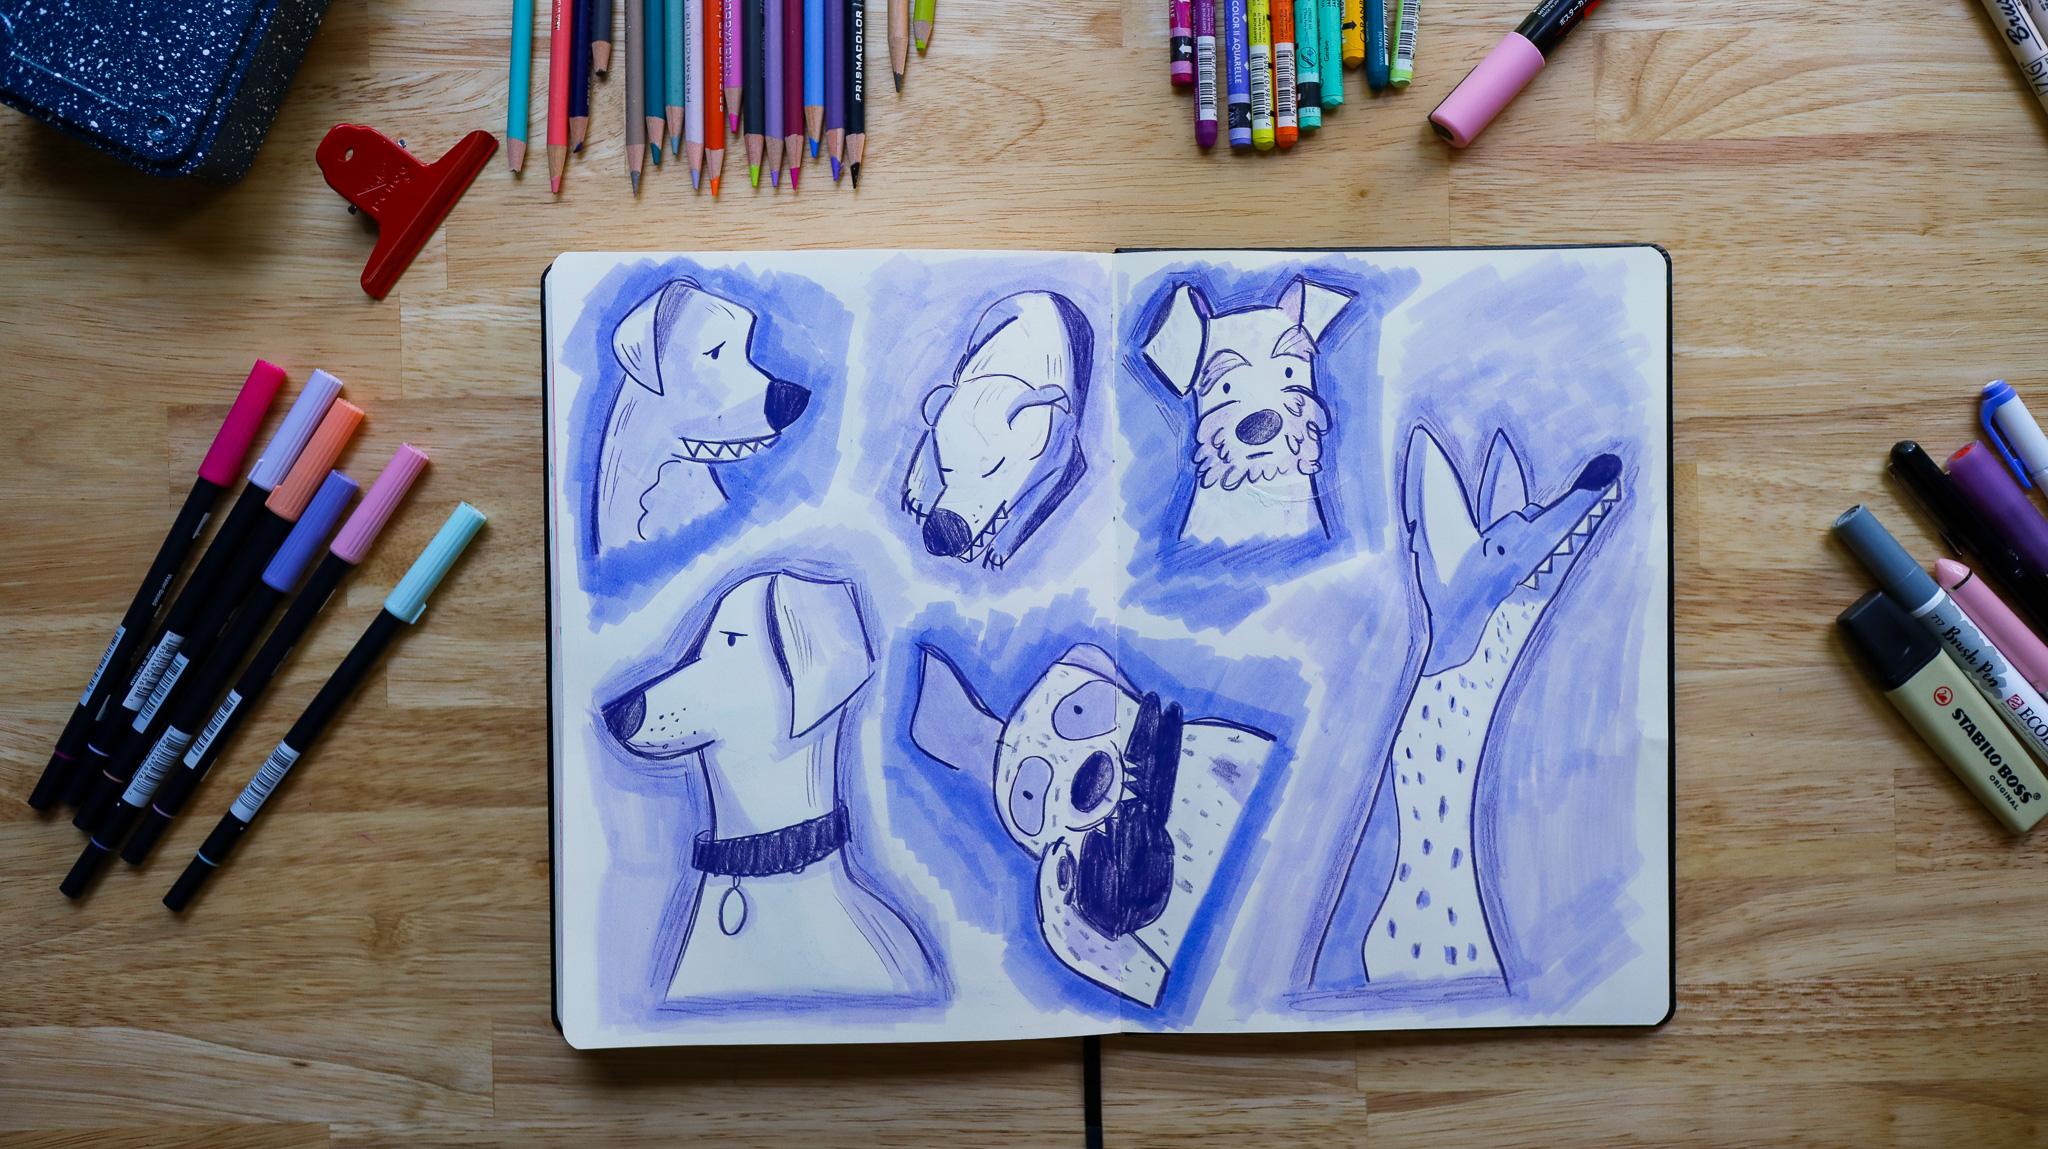
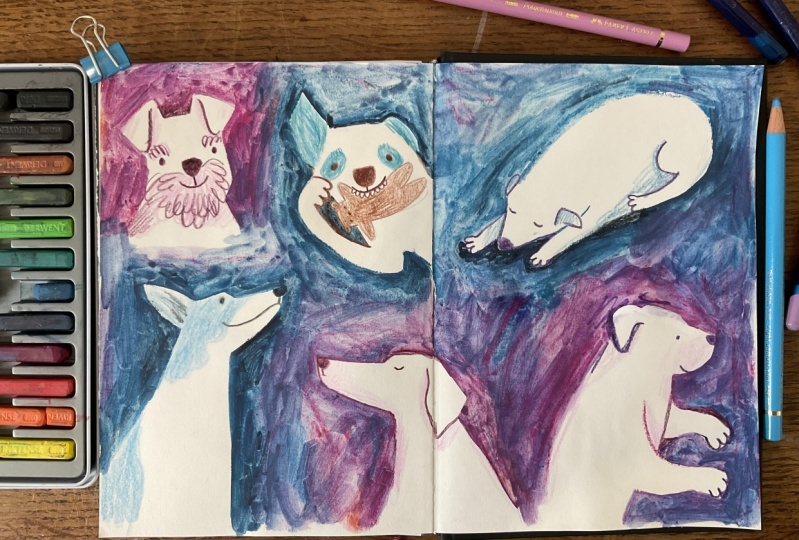
here in a few minutes. Oh. Yeah. L, here is our final
sketchbook spread. Now that you've seen my process and seen me fill up
the whole spread, it's time for you
to do your own. So go ahead and select any here 5-7 reference
images that should be a good place to start and do
your own double page spread, and then I will meet
you in the next lesson.
6. Next Steps: Congratulations. You did it. You filled a spread
in your sketchbook, and you've drawn some goofy dog. How was it? Did you have fun? Did you draw something
that made you smile? If so, mission accomplished. Feel free to come
back to this class anytime you need another
sketchbook neck. With different reference images or even just
different materials, this exercise is
endlessly repeatable. As a bonus, I've included extra reference photos
in the downloads so that you can easily
do this exercise again whenever
you're feeling stuck overwhelmed. I would love
to see what you made. Upload your project here
on SkillShare or shared on Instagram and Tag me at Tiny Leaf Press so I
can give it some love. If you enjoyed this class and
want to hear more from me, be sure to follow me here
on Skillshare so that you can be notified when
my next class releases. You can also find me on
Substack where I run a weekly newsletter
and occasionally host live drawing sessions.
See you next time
 Jenni Macklin, Illustrator & Surface Pattern Designer