Transcripts
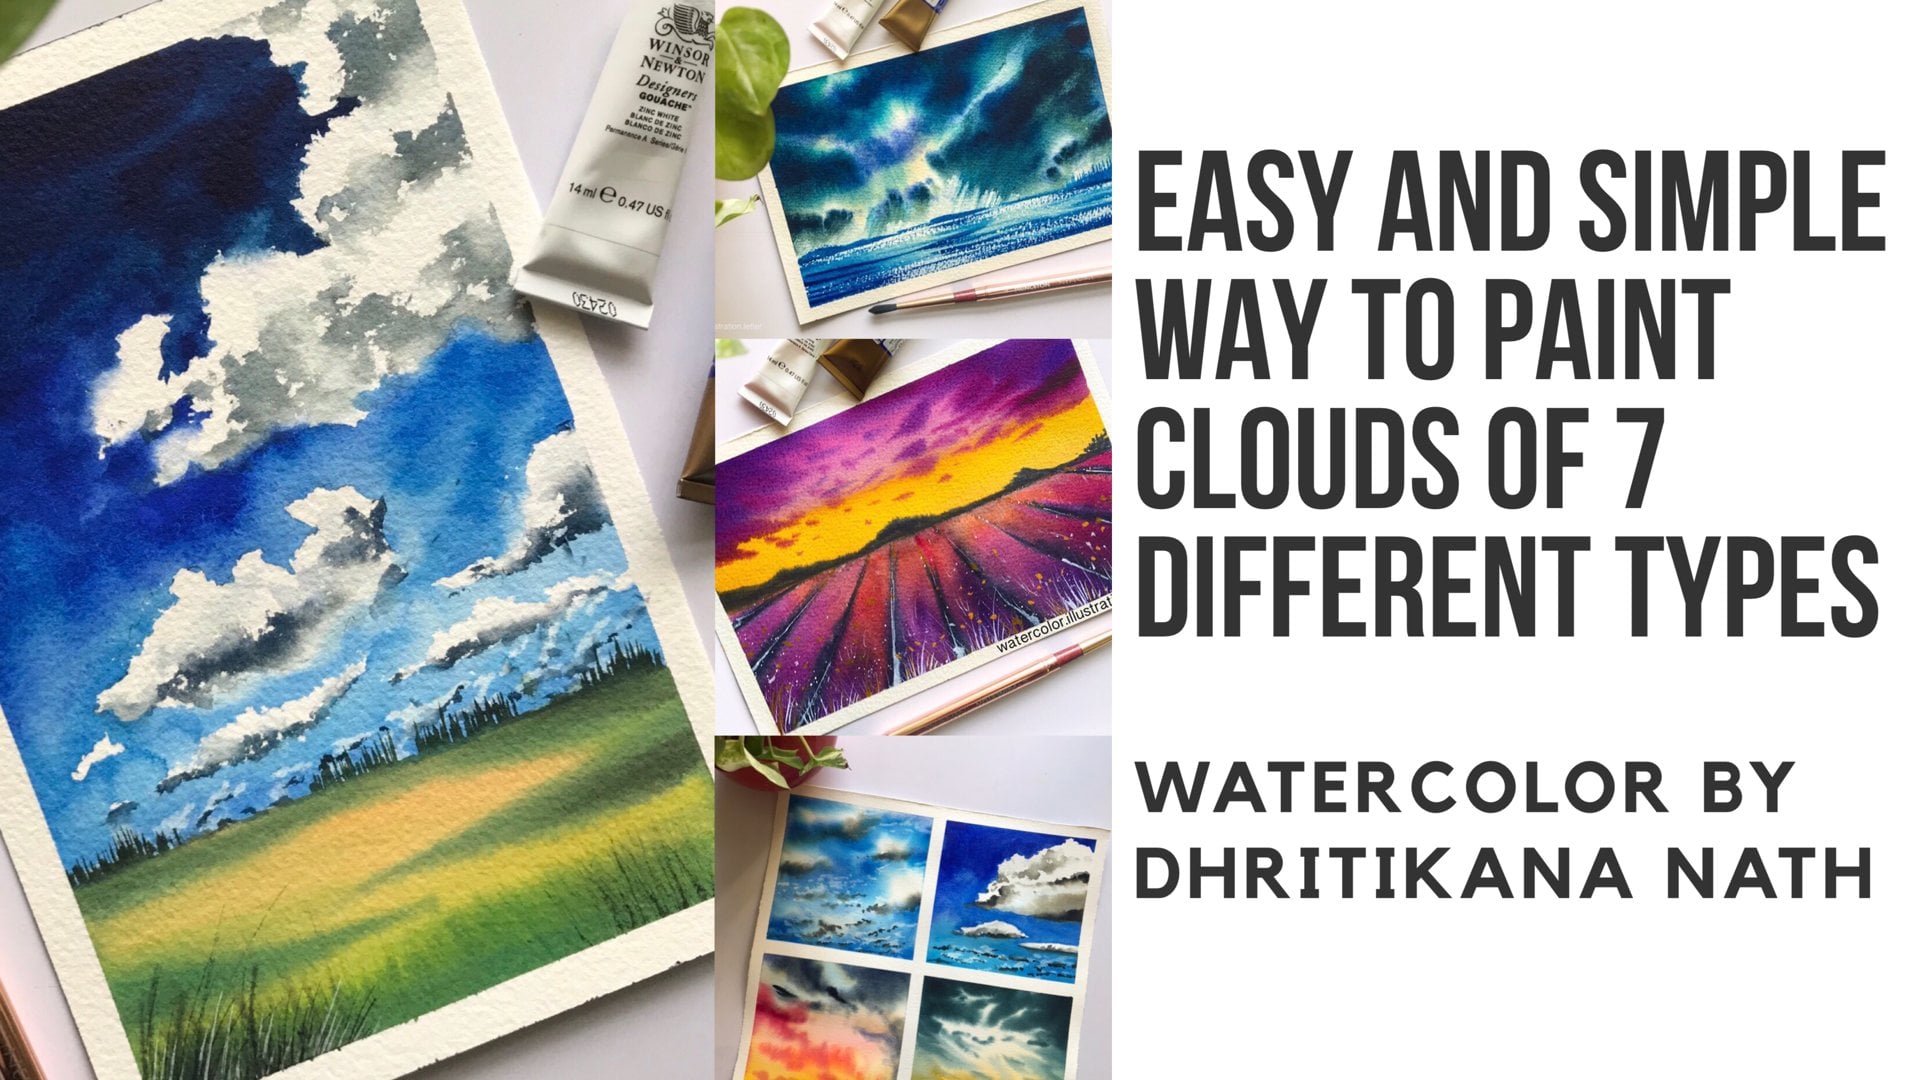
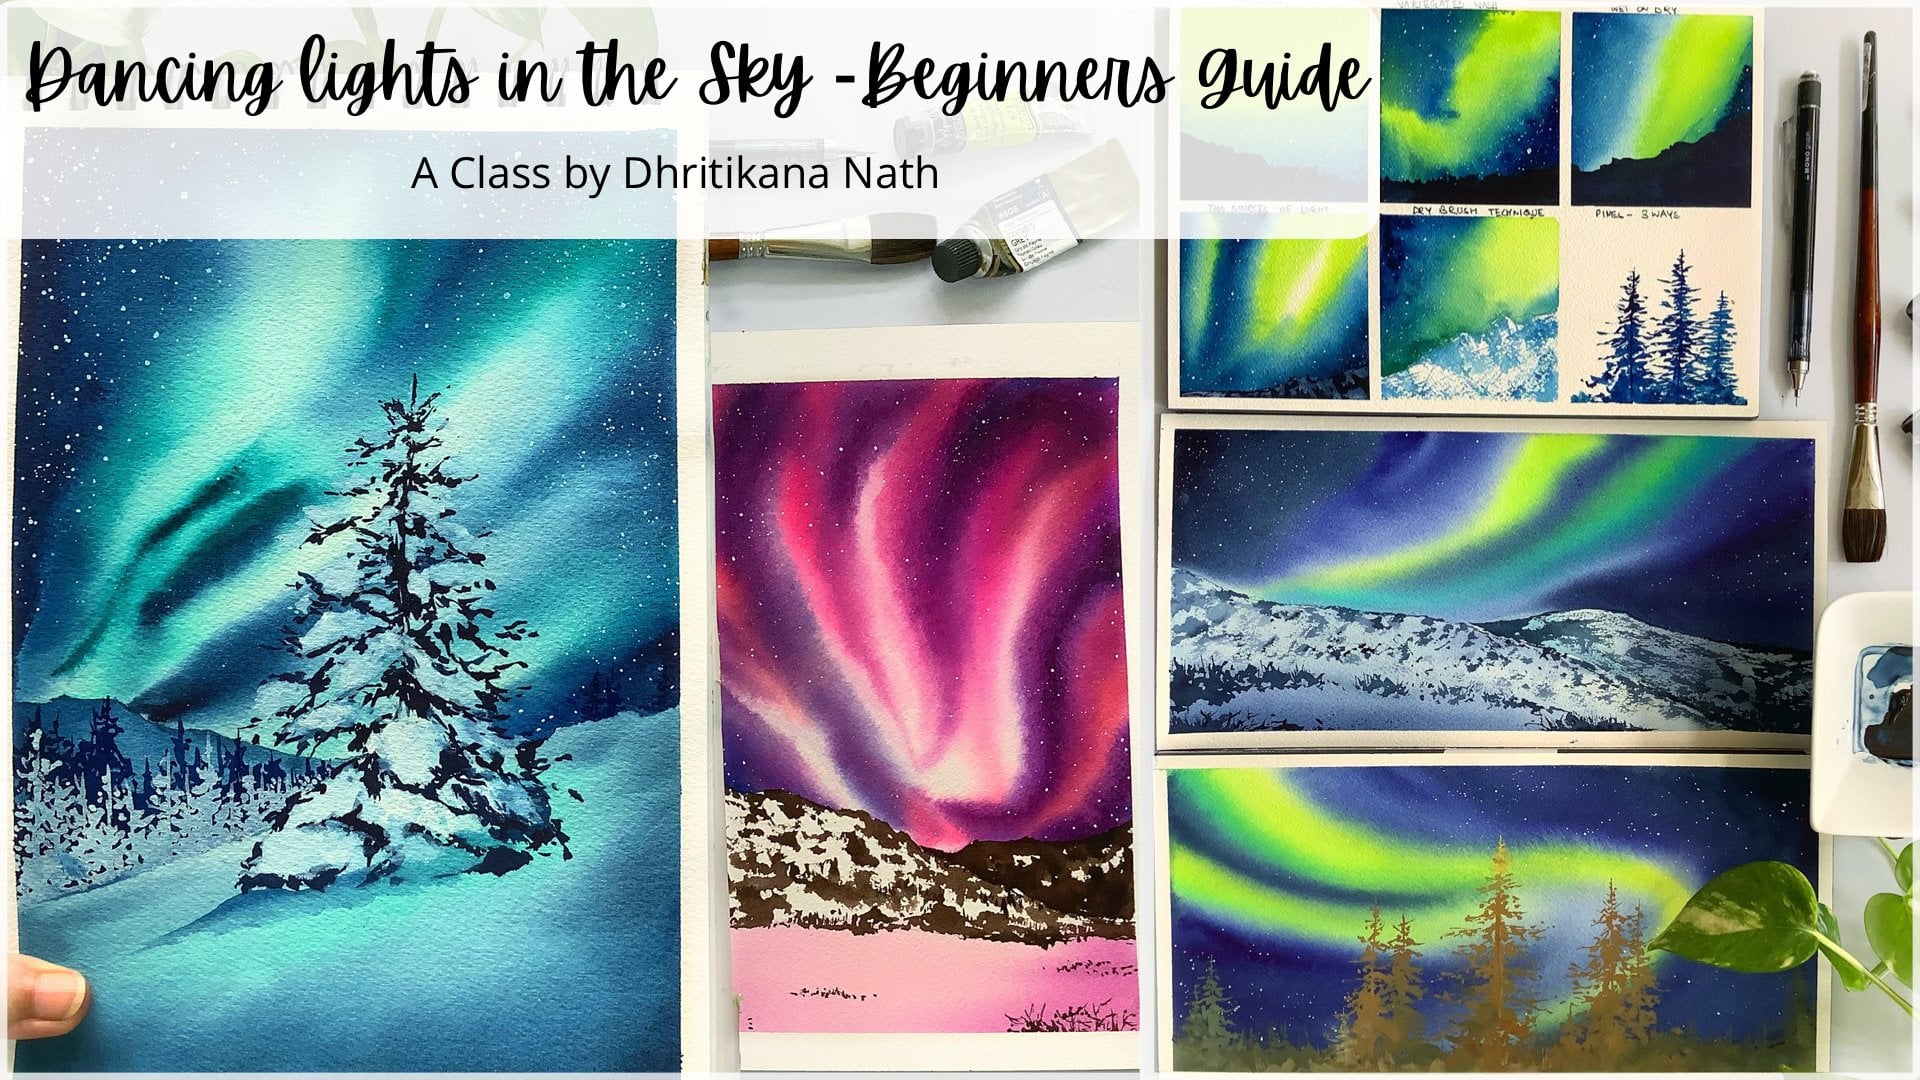
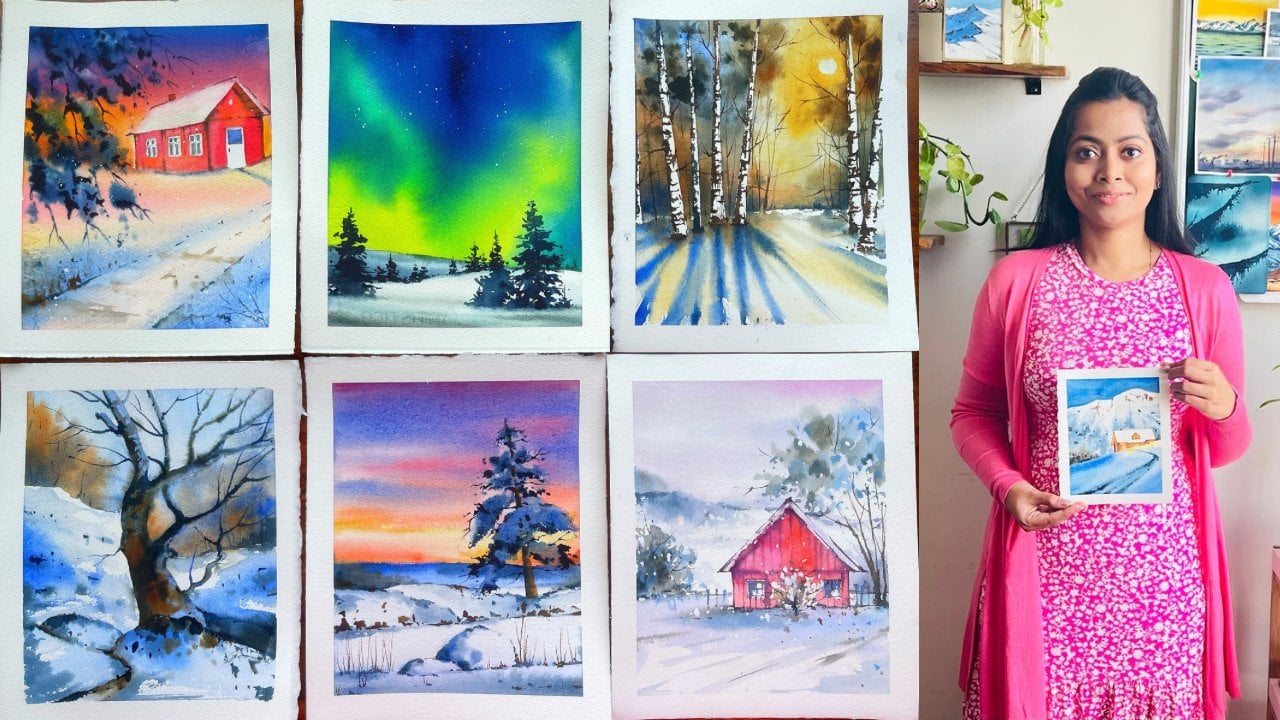
1. Introduction : Hello, guys. I am really gonna not a Delhi based watercolor artist at super duper excited to meet you all in my second special class painting to allow has bean Ah, beautiful journey for me, where the possibilities off different variations are endless. As an artist, I always have this freedom to use my imagination for showing the magic off light and shadows. I'm exhilarated to see how the light and shadows at the extra dimension to a painting. If you want new or intimidated by what the colors, then the best way is to let go off your fears. Pick up your pains. Pick up your brush on watercolor paper to give a stop to your journey. This painting the monster It's a few off my favorite techniques, like wet on wet, wet on dry and combination off different colors. The main motive off working with water colors is the best medium to capture the atmosphere and feeling often artist. Lastly, today we will learn light in the pines on Let's jump onto the next lesson to give it a start
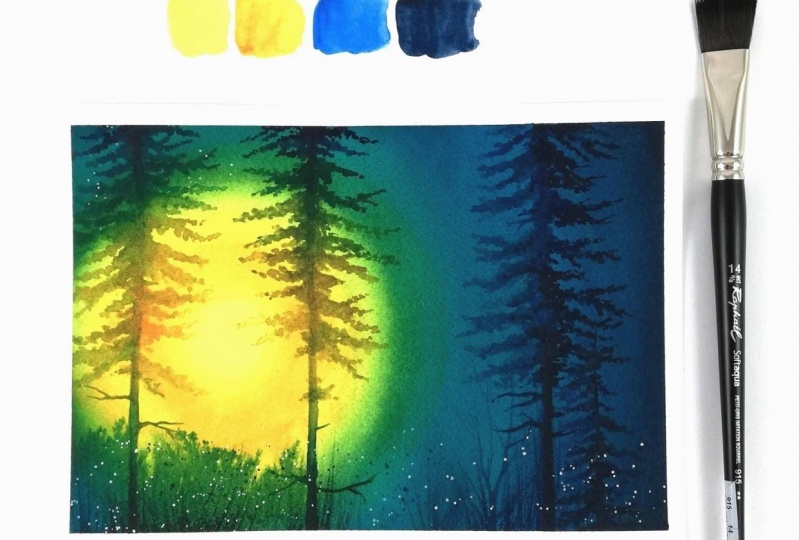
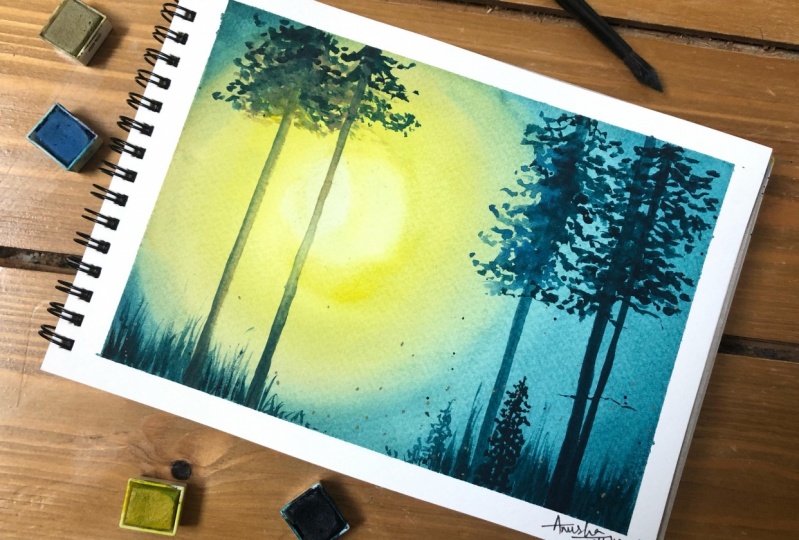
2. Composition and materials required : so, guys. The first lesson is all about composition and the colors we would be using for this particular painting. Let's talk first about the composition and its importance. Always start by sketching the thumbnails. Add or delete any element right now. If your composition works well in a drawing, it would work well in a painting. So I am here demonstrating my light shadows on the placement off my pines. You can use an extra pencil to do this process. I will now start by listing down the materials that we need people. It would be a big mistake if you don't know what kind of people goes well with your technique. For this painting, we will use 100% Corton 300 GSM drop green Fabbiano paper. You can drop any other people like archers, prime a watercolor bad handmade paper, but always make sure it is 100% garden and 300 GSM. It's important to use artist great pains for desired result. Try to award student rate watercolors because they are less vibrant on remain moist for a shorter period of time. We're using primal woodland palette to complete this painting. Two inch masking tape so that we can stretch our paper and even have a crisp Bordeaux. A pencil is required for growing our finds. I'm always people nasal handy. Always use new sheets of paper to test your colors in case you are new to the watercolor medium. Invest on a few basic items like paper and think better than materials. Better is your output. We just need three brush to complete our painting. The first ist Princeton Neptune sized one brush. You can use any other fat brush. This is important for a background wash rigger. Brush Size 10 by Princeton. You can even use any other pointed brush. Ma Brush Science zero. That's all we need from the brushes. Let's keep official handy to dab off any ex trappings from our paper prime. A watercolors come with their own mini palette and a sheet card. From there, you can refer your colors. I'm just demonstrating how you can use their too small pallets, which is available within the cute 10 boss. Always keep two jars or two glasses off Porto so that we can have country supply of fresh water from one of the jars, and the other one can be used to wash our brushes. Let's start by scratching our colors from the woodland palette. First is a daylight. I'm using my rigger brush to do this process. Sandwich is the second stream has the thought, and Miss is the fourth to check the harmony off the colors. It's important to scratch it together. I have used tones off yellow, blue and green for depicting my contrast off like and shadow.
3. Choosing color palette and practice: I'm very excited to go toe the session specifically in our class as this will help you to discover different color mixes a really over you to create a painting. Now I always believe the main reason toe get attracted to painting is the combination of the colors. Okay, Rich is chosen by an artist. I'm a firm believer that we do not need to use a lot of Russia's paper and color to do a painting. Even a monochrome painting looks beautiful in different values off the same color. As you know, I adore paintings in monochrome, so I usually try to play with white spaces the life flu that has shown over here on the deep blue or the proper to create the shadows. The light blue on the white spaces are always good to show. The light below are the combination off woman who shades that you can use from any palate to complete this painting. As you keep watching the scratches, let's die a big deep into the techniques that I work with different techniques, so different compositions on the bestest when you know which one will work best to achieve their desired effect. I often used the same technique, which is weight on with on the scene color palette for my foreground as last form a background to achieve my desired results. If you apply where, think who would drive people poor on a background off life wash or colored wash, it would help you to get sharp edges. That's what we will do to pay fines. And on the other hand, when we have painting a background, if you put something on a damp surface, it will flow. Feeding on that's their desired result we need for our background. Shadows can always make or break your painting. If it is done well, it gives depth. Kind demonstrates the light. That's what we will learn now using a flat brush on a rigger brush. Once all the swatches are over, you might have also that are moving between different ballots and demonstrating the combinations. You can choose because we do not need to stick to one prime. A palette that it's Woodling you can use today. See classic tropicals Any anyone ask for your choice. Let's use a flat brush from Princeton to show the light and shadows off the mines. I'm always are means to see how much life on its true dimensions can be and do a painting. Give me know how to being lights. Now I open up my PTC palette. Very travel. Choose on the two colors that it's yellow hankering. You can see that all be. I refer to the shade card to choose my colors from the top. It is the yellow hand. Bottom is the green. Rest is just the plane in the middle. Lending is always a key in a painting, the better you can blend. Better results can be achieved on once. Julie framework off your mind. You will start extending it in a cone shape, please. So phone ship. What? I'm trying to tell you that the whole tree has to be like her. Or you can say it has to be in the form offer crying Go. I will keep using my light, A told on the left. On my deeper don't on the right movement to create a pine is the key, and it only comes with practice Practice. High factors keep following the heart movements. Leave some white spaces towards the end of the branches on have more leaves in the middle of the finds. This whole access that we're doing will help you to get ready for the final painting. I'm using the tip off the flat brush towards the end of the branch, but the sea brush is used at an angle to fill up with tickle strokes in the middle of the fine. Let's now switch to our rigger brush by Princeton again. The technique remains the same. Used to tip toe, create 10 short lines towards the end of the branch on the pick strokes or the take short lines. What small lights to what? The middle of the brunch. This would help you get the results we need. Hand your I am continuously showing you the pallet on the color mixes that I would be using in this small illustration. Keep watching for though, and do not get anything as this illustration will act as the foundation off our painting do practice, as many fines came like the chattels as possible before you move on to the final project
4. Creating the background : I can't wait to start my project now. But instead what you do? Is that what we should do? My answer is no. I have made a small checklist on I have been following this checklist pretty religiously in every painting that I do first. Decide on the composition off your painting. What will be your subject once you start your composition? Get up. Take a quick break. Have a glass of water or what? Some news. Just five minutes. Quick break, then get back to check. If you would like to rectify anything in the composition that you have, you will only get a very average painting. If your composition is not perfect. The second ISS. My technique is the technique best suitor for my people. I will use a wet on wet technique only when I have a paper off 300 GSM stretcher. People with health off a masking tape like I did it would help you to avoid Revie. That show when water is applied on the surface, always see all the edges with help off a scale. The porters decide which pollock you would like to go with. It helps to give a message about the moon off your painting. Now let's start. I will use my Princeton size one Neptune rush to apply water on the surface of the people. Always cross watch. This cross watch is very important. So that we do not be about any gaps are spaces. This will help you to achieve a shine on the people. Step one is to being background using Don't wait pick me. That's the reason we did wet the whole people and let your colors no figure I have chosen the brightest, which is my yellow who stock with my pain. We need to follow a pattern when we are applying our colors to create the Bagram from the woodland palette. Forced is a yellow which is name as daylight Yellow coco, which is named a sandwich Serie Liam or live blue. But his name a street on our indigo which is there has missed Lisa the coordinative colors that I have suggested you in case you do not have the wooden pallet available with you. When you start applying your colors, keep lending it with the health off a flat brush after you apply, hoping, you know, went on their technique. Know that it would become one shade lighter on drying. If you think you have got the correct colors when the paper is wet, that it's wrong. Isn't that an amazing rule? And other important point from my learning now is always have enough paints that you need for your background wash If you are working with tubes. No, it will not get wasted as we will need these colors to paint the trees in the foreground. This this stuff very good excites for practicing the background. Wash light in my composition appears on the left, so the shadows are on the right. I will keep letting my colors. Then I'm satisfied with the final background wash. Keep observing my hand movements to get the perfect plan X. - I will leave my people toe dry. Now core. The machine is called. Once my sheet is dry. You will see that I will apply my colors in the same order, which is my day life. Sandridge stream. I'm the mist. I always clear my background push rather than going with one wash. In case I'm not satisfied with my first blush, I will let it with my second wash, fainting my background washes is like a meditation to me. It helps me to come now and gives an opportunity to channel eyes my palm. I will speed up my process. Video obit has by now I am very confident enough that you all can do a perfect background wash. No observed how I keep mixing up my color from the palette and keep applying it to the paper. I will meet you in the next lesson where we will create trees.
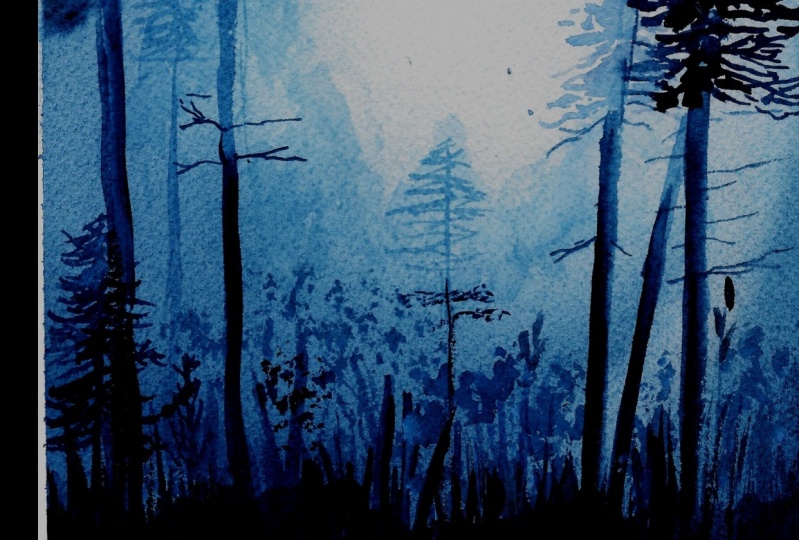
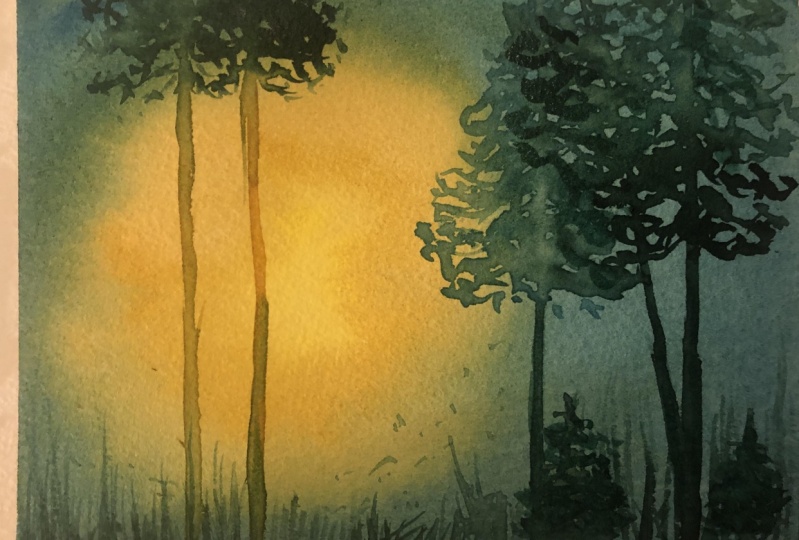
5. Painting the Pines - Part 1: once a background wash his trying. We need to stop painting the pines first. Let's go ahead and draw the four lines to depict the fines, as we have discussed in the composition with help off a pencil. The placement off the pines is very important for the final painting. I always check my people if it has dried completely, placing my hand on top ofit. I've used my missed color to paint the finds in the shadows. I'm using the rigger brush from the bottom on from the top to draw the pines. You will see that this painting is based on a limited palate, which limits us to use only four colors. This has helped me to evolve my own style, but you should do paintings involving multiple colors as well as limited palate. This would help you to find your own style. I can't stress more on the hand movements as I make six strokes towards the bark off the Bynes antenna strokes at the end of the branches. The fines are done in a loose tile, not depicting on the branches individually, but to finish off, giving the shape off a pine tree. You can even use your flat brush to make these fines. Passport. Our practice session from Lesson three. Changing your colors should never affect the tone and mood of the painting. Darker areas should remain dark and lighter areas should remain light. The colors that I'm choosing is based on the same. You can see that I keep firing the sizes off branches and leaves, while a Ping Mei finds never tried to incorporate too many techniques in a single painting , you may end up over doing your painting for the background wash as you saw we did. We're number technique, but for the four rounds we are doing went on, Dr I think, very the sizes off loose branches on leaves while I paint my pines. I asked for my experience off how AH, composition is turning out on the final project. I'm going to add one more fine in between. This extra pine would help me to balance the composition better. I'm adding some finally deals, which are Bushes. You can even on this later, the last line in the shadow a year. What's the left will have a mix off two colors stream and missed, since light is more towards the left. I will use more off stream that is light blue compared to the messed, which is their deeper tones of blue. Let us keep extending our finds in a loose tile. - I did not paint a lot off leaves on the line in the middle because it is getting covered by the bind on the left hand. On the right, - I will keep adding some more final details, toe this shadow area, and I will meet you in the next lesson to paint the pints in the light radio.
6. Painting the Pines - Part 2: Now it's time to paint the pines in the light idea. We were pained to pine trees. Aspect are composition all we start with your lighter values. We can get back to darker tones as we progress. The light area is in the middle of the painting. I will add some deeper tones on the top. On at the bottom, I stopped making the fines from the top on the bottom, just magic in the middle. I really love off the extra paint. With help off addition, I will add a bit off missed color at the top on at the bottom off the pine. This will help to so the effect off the light in the middle off the pine. I will keep mixing the colors on, keep extending it towards the light. You will see that I used lighter tones when I'm making the middle off the pines, where, as I use the deeper don't towards the top, I'm the final details when I add on the bottom off the line. Till now to complete the pines, I have used only one single brush. We therefore do not need so many rushes to complete a painting, even one brush can act the best to complete what type off composition I will keep, adding some loose leaves as thoughts here and there on that, have no one to the final details. Cut booth. There are some shot as well as some long lines at the bottom off the painting. This helps me to give a texture as well as it improves the composition. Just keep adding some short turbines to depict the forest. You should not overdo the shorter pines. They should be just two or three in number. Now I have taken my tissue to just cover my lighter ideas. This is the final part off adding some extra toe. The ground rival splatter some colors with help off the brush. It is the mist as well as the sandwich. Don't overdo this part. Just a few dots your and then you can even dab off some extra dots, which are really take or big. Just a few more finally deals, and then we should be done whenever you feel stuck or can't directly paint with the brush. Never hesitate to pick up the pencil at the lines and then paint on top off it. The all alone the process off, painting directly with the brush after practicing many, many different kinds of composition. The moment of truth has come when we've removed the tape. Once the paper is completely dry, this is the best part off any painting, the feeling off, completing your project successfully after seeing my edges. Yes, I am not completely satisfied. Let's head over to our next lesson to know. How can we fix these bleeds or not so clean edges?
7. Bonus Lesson: You can always use a flat brush on an opaque, medium like whitewash to fix the planes on. That's what we need to do. But it is up to an individual's choice, I will say to fix it or not to fix it.
8. Final Thoughts: e. I hope you have enjoyed the final project, and now you guys moving more comfortable painting lights with watercolor, A medium Never, ever get disheartened with any off your finally painting. If my be just a bad day or you might need a bit more practice, the whole idea off the class is to help you be experienced in different watercolor techniques. Introduce you to a limited palate. Always remember, painting is a journey with no final race to reach. Just enjoy the medium. I find the joy in the unlimited possibilities. Please upload your class project in the project Garvey and, if possible, leave a feedback so that I can do the necessary changes in my upcoming classes just to let you know, as a teacher, it means the world to me when I see your projects. That's all for now. Meet you in my next last very soon
 Dhritikana Nath, Watercolor Artist and Instructor