Transcripts
1. Shading in Photoshop - An Introduction: Hello and welcome to this course on techniques for shading designs in Adobe Photoshop. My name is Helen Bradley and I'm a Skillshare top teacher. I have over 260 courses here on Skillshare and over 144,000 student enrollments. In this class, we'll look at a range of ways to shade objects in Photoshop. Every method gives very different results, and they all use very different tools and techniques. Along the way, you'll learn to configure brushes, use masks and last styles to simplify designs to make recoloring easier and lots more. By the end of this course, you'll be able to shade design elements in various ways and you'll have developed core Photoshop skills that you can use every day in your work. Without further ado, let's get started.
2. Pt 1 Create a simple half and half shading effect: Inside Photoshop, I'm going to create a brand new document and I'm going to be working with a 1000 by 1000 pixel document. I am working in RGB color mode. I do have my Background Contents set to white. That will save me having to fill the background with white every time I'll click Create. Now I'm going to be using shapes. I have the shape tool selected here, this custom shape tool, but I'm setting the stage to pixels. You get a choice of three options here. Pixels just means that you'll be adding a filled shape to your document. Now, the shapes that I'm using here, I've got in a single collection, which is unusual in the new version of Photoshop. I'm going to show you at the very end how I've arranged my shapes to get them to look like this because I don't like the new arrangement. I have a crown shaped selected, which is some way here in my collection. What I chose to do at this stage is something that's very regular, that is symmetrical. If I don't do something different before I draw this shape, it's going to go on the background layer. And I don't want that to be the case. I want the shape to be separate. So I'm going to add a new layer. So that's pretty critical for most of these processes, is that your element is not on the background layer. Let's choose a color to use. I'm going to choose a sort of purple color because when you use pixels with a custom shape, you're going to actually lay down that colored shape as you draw it. So I'm holding the shift key to constrain it to its original proportions. If I want to move it, I'm adding the space bar to move it. Before I let go the left mouse button that's critical. So I now have my crown shape on a separate layer, but it is pixels, it's just filled pixels. The first effect that we're going to use, this first shading technique is to shade half of this shape a different color. And that's why I chose something symmetrical to start off with. I'm going to the rectangular marquee tool, and I'm going to drag a marquee over half of this shape. So I'm just going to try and eyeball it. If I need to move it again, I haven't let go the left mouse button so I can move it around a little bit. Let go the space bar just to fix its position and then let go the left mouse button. So I have half of this shape selected to make this side either lighter or darker. I can use what's called an adjustment layer. So let's go up here to Layer and then we'll choose new adjustment layer. Now the simplest of adjustment layers for this process is quite simply a levels adjustment. So let's go to Levels and we'll just click. Okay. So this is what we get in the levels dialogue. And what we can do is we can drag to the right, this middle slider to make this side of the shape darker. And if we drag to the left, it's just going to be lighter. So you can determine which side you want your lightness and darkness on by just dragging here. Thought I'm going to actually make this side light off. I'm dragging towards the black. That might sound counter-intuitive. But in actual fact, what I'm telling Photoshop is I want more of the pixels in the image to be light rather than dark. So this is dark, this is mid-tones, this is light. This is a sort of chart, if you like, of all the colors in the image right now, we're not saying as sort of proper chart because we're just working with a single color. But this will make it lighter. So I'll, I'll click to close this dialogue. Now, there are some problems built-in to what I just did. Let's have a look and see what they are. Let's go to this background layer and let's fill it with a color. So let's call and get a sort of turquoise, light turquoise color. It's my foreground color. I have the last selected so I can fill a layer with a foreground color by holding down the Alt key on a PC option on a Mac and pressing the backspace key. Of course, you could also do that by just filling with the paint bucket tool. But you can see here that I have an issue. I fill this layer with a solid color, but I'm getting this sort of two tone look in my background. Now if you want that, that's fine. If that's the look that you're going for, then you've solved the problem. But if you wanted a solid background color with just the shape, with this sort of two tone effect. Then we need to do something with this layer here. This is the layer, the levels adjustment layer that is controlling this sort of two tone effect. And right now, the way that adjustment layers work is that they affect every layer below them. And so that's exactly what we're saying. It's affecting the filled crown shape and it's also affecting the background lab. But we can limit its effect to just the layer immediately below it. And we do that by clicking on the Adjustment Layer and we go to Layer and create clipping mask. And in that sense now the levels adjustment only impacts the crown. It's having no effect on the background at all. If you want to undo that, click on this top-most layer that has this clipping mask associated with it, this little bend arrow. And it's inset a little bit telling you there's a clipping mask. We'll go to layer and we'll release the clipping mask. Now the labs being unindicted if you like, and it's affecting all allows below.
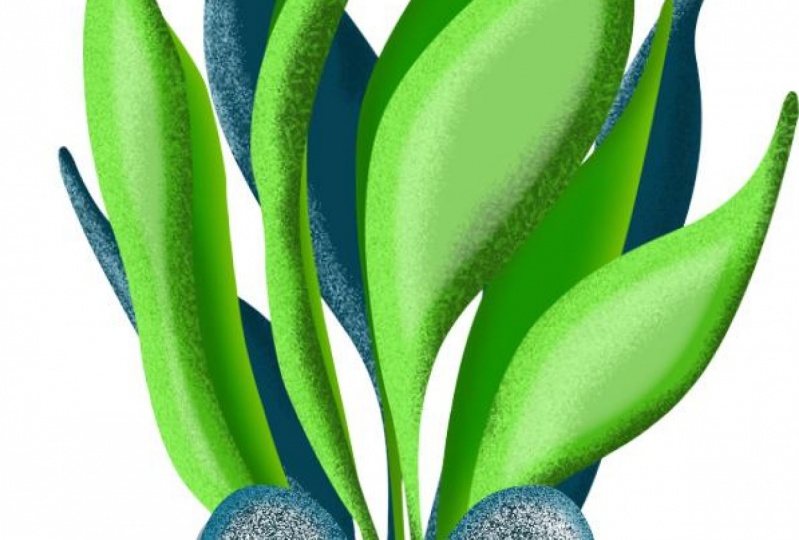
3. Pt 2 A more complex half and half effect: So far we've looked at creating this sort of half and half effect with an object that is perfectly symmetrical. Let's look at something that is not symmetrical. Again, I'm creating a 1000 by 100 pixel document exactly the same as the previous one. Let me go to the shapes tool. This time I'm going to choose a leaf shape that is not perfectly symmetrical. This one here. I'm still working in pixels and I will need to add a new layer. Just make sure that these objects are going on to brand new layers, to choose a sort of orange for this leaf shape, again, holding the Shift key so it's constrained to its original proportions, just placing it in the image using the space bar to move it. And now I have my leaf on a separate layer. Now the leaf is almost symmetrical, but does the spit down the bottom that is not symmetrical. So I'm going to use the pen tool for this. I'm going to select here on the pen tool, it's relatively easy to do so let's see how we'll do it. I'm going to make sure that I'm working in a path. So at this stage there's no color going down. All I'm doing is drawing a path I can use for this half and half effect. I'm going to click here. And I'm going to come down here to the point where the cemetery ends. So I'm going to click and drag at this point because I want to start moving around this curve. I think I can do it in one step, so I'm going to click at the bottom here. And again, instead of just clicking, I'm clicking and dragging. At this point, I can finesse this or I could come back later. I'm going to finesse it. So I'm going to hold down the Control key on a PC that would be Command on a Mac. And I'm just going to move this anchor point and its handle into position so I can work on this as I'm drawing it, provided I keep Control K or Command key pushed down. I can also come back here and I could work on this one too. With this one, we don't want the line here to change, so I'm just going to bring this handle all the way in to sit on top of the other one. And then I can drag on this one. You can say, it's not really having a lot of effect on the line down the middle of the leaf. But I do want to make this curve really nice as soon as I'm happy with what I've got, I'm gonna let go the Control key. And now I can continue to draw. I'm actually going to draw all the way around here and come back and just click on the starting point. So I have a path that is following the line that I want to use through this leaf. But at the moment it's a path. So what I'm going to do is I'm going to convert my path to a selection very much the same way as we had a selection with the marquee tool earlier. We can make this a selection. We do that in the paths palette here I've just opened up the paths palette. You can get to that by choosing window and then paths. Once you've got your past selected here, you can click here on load path selection, and that converts the path here into a selection. Now we're just going back to do exactly as we did previously. And we'll go back to the levels adjustment layer, New Adjustment Layer, go to Levels. Click Okay. And again, I can darken or lighten this later half of the leaf by just dragging on this midpoint slider on the Levels adjustment so I can decide which side I want it to be light. I'm going to make this life. We're going to have the same problem as we had previously because this layer is not clipped to the layer underneath, Sophie had a colored background other than white. That would also be changing color. And because my masks not a direct half and half, it's going to look pretty awful. So you can make this adjustment lag clip to just this lat and not affect this layer using this dialogue. So you don't have to go to the Layer menu to do it. If you think about it when you're here, you can actually do it here and you do it with this icon. And that just clips this adjustment layer to the lab below. Let me show you what it's going to happen. You can say that it's jumped in, It's been indented in, it's got this bent arrow, it's a clipped layer. It's only going to affect this layer. If you click this again, you're undoing that. So I'm going to actually leave that in place here. Because with this particular shape, because I've got this band effect happening, I'm certainly not going to want to have it affect any color in the background here. So I've done that. And now we could go and change the color of our background layer. Let's go and choose a sort of dusty blue for this. As before, I could fill this layer by selecting it and press Alt Backspace option Delete on the Mac, or I can click here to select the paint bucket tool and just dump the paint into this layer. So here we have this half and half effect and it is fully adjustable. So if we think that this is not quite the contrast that we want, Let's double-click here and we can adjust the lightness and darkness. So given the result that we're saying with the background, if that's the background that we want to use, we can adjust this to make the half and half effect a little bit more contrasty.
4. Pt 3 Simple shadow and highlight shading: For this next example, we're going to add highlights on one side of the shape and shadows on the other. So again, on going back to creating a document that is filled with white, I'm going to add a new layer because I want my pixels, my shape to be on a separate layer. I'm going back to the custom shapes tool here, and let's go and choose a simple heart shape. This one here, it's a filled heart. This would be how hot? That is. Just the outline, not the fill, but I want the filled heart. I'll select a pink color to use. So let's just go and get a pink color. And I'll hold the Shift key as I draw my heart again, adding the space bar to move it into position. So this is going to be the base color for my heart. I'm going to add a lighter highlight around here and a DACA highlight around here. So I'm going to grab this lab, I'm going to drag it onto the New Layer icon. So I have a second one, I'm going to do that again, so I have a third. Let's go and make this layer here the darker color, I'm going to select a darker color to use. So let's just go to this base color and choose something a little bit darker. I want to fill this shape with this darker color. Now if I use the paint bucket tool or the Alt Option Backspace tool right now, I'm going to fill the whole laughs. I let me just show you what's going to happen, not exactly satisfactory. Instead, I'm going to make a selection of this hot and I can do that by control or command clicking once on the thumbnail here and you can see the marching ants around the shape. Now I can fill it with the Alt Backspace option Delete, or I can go to the Paint Bucket tool and just click inside to add my color to it. Now I've got my selection. And these hearts here on these other layers are in exactly the same position. So let me just click on this one. Let's click it to select it. And to this, Let's add the lighter color. But first of all, I want to sample my pink using the eye dropper so I know what my starting color was so that I can go and choose a lighter version of it. So I'll click here on the color. Let's go and choose a lighter version for my highlight. I want to fill this. So again, Alt Backspace option Delete or disguise the paint bucket tool and dump the paint in. I made to deselect my selection so that select and deselect, or I could press Control or Command D to deselect the selection. So now let's turn on all three layers. This top-most layer is the base heart shape. The second law is the lightness and the bottom shape is the darker shadow. So I'm going to turn on my base shape and my shadow layer. I'll click on the shadow last so it is selected. I'll target here the move tool. Just click on it to select it. And I'm just going to start moving this shape using the arrows on the keyboard. I'm going to press Shift and the right arrow key that moves it about 10 pixels at a time and just find it in an easier way of grabbing hold of this to make sure that it's going in the right place. Now I'm moving it downwards as well because I want it to line up with the bottom here. I'll just click away to make sure that I've got in the right place. If I haven't gotten the right place, just going to re-select the layer and just use the arrow keys to adjust it again, but I did get it right the first time. So this is my shadow. Let's go here and grab the highlight layer. Again, I'm going to do the exact same thing with the Move Tool selected, the last selected. I'm going to press Shift and up arrow and left arrow because I want to start moving this out of the way. Now, one thing I'm saying right now is that this light layer, this highlight layer is no way near light enough. So I'm going to click away from it. I'm going to click on this ladder to target and I'm going to Control click on the thumbnail, so I'd have it selected. I've got the last selected over here in the last panel. And because I control clicked on the layer thumbnail Command click on the Mac. I've got these marching ants around this lighter area. Now I need to make a better job of choosing my light color. Choose a better life at color. And I'll go back to the paint bucket tool and just drop it in. I'll press Control or Command D to deselect the selection. If I'm happy with that, great. If I'm not, I can go back and try a different color again. Just think it's not quite live enough. So that's a very simple shading effect done with three copies of a shape. One of them, the darker one for the shading I've moved across and down, the lighter one for the highlight, I've moved up and across. And then this one here is the base shape. So you can say that it's the shape that is notionally having the shading added to it. The background lay here at the moment is filled with white, but we could fill it with any color. Let's go and get a sort of turquoise color to fill it with. And you can say the shading here, nothing that we've done with moving these three laze around his had any impact on the background layer. So we don't have to protect the background layer in this case in any way.
5. Pt 4 A more complex shadow and highlight shading: For this next example, I've already created my document and my brand new layer. I'm going to the custom shapes tool. And this time I've chosen a speech bubble shape. Not because I want the speech bubble per se, but I wanna make a cloud out of it. And it's showing me sort of half of a cloud or starting point for our cloud. I'm going to click here and I'm going to choose path this time because I want to draw out the path so I can edit it before I work with it, I'm holding the Shift key down as I'm dragging out my path here. So this is the cloud shape. I'm going to the paths panel because I need to work on this and just in case I make a mistake and lose it, I'm going to actually save this work path. Work paths are not saved and you can lose them really easily. So I'm going to click on this little fly out here, and I'm going to choose safe path, just going to call it path one. And now this can't be lost. I can just click on it at anytime I can get it back. So that's a nice way of working with paths. Now, I want the curly bit here. I don't want the rest of this. So I'm going here to the white arrow tool, the direct selection tool. And I'm going to drag carefully over the bits that I don't want, making sure that I don't select any part of the Cloud that I do want. I'm just going to press the Delete key. And I'm told that this will turn a live shape into a regular path. That's just fine. Let's just click yes. And now I have a path that is my cloud shape. So I can actually save this. So if I select this and go over here to Edit and down here to define custom shape, I can make my own cloud shape. I'll just type cloud and click. Okay. So now I can get to this like I could get to any other Photoshop shape. I'm actually going to delete this. I'm going back to my layers panel. I've got my layer selected. I'm going to choose custom shape. I'm going to go and find my new shape, which is going to be at the very bottom here. I'll click on it to select it. I'm going to make sure that I have pixel selected here because I do want to keep drawing with pixels. I'm going to use this blue shape, the sort of turquoise blue as my cloud. I'll hold Shift and I'm going to draw out my cloud shape. Now we're going to do the exact same process as we did previously with three of these cloud shapes that we're going to run into some difficulties. I'm going to show you how to solve them. I'm going to make two copies of this shape. One of them is going to be darker, one of them's going to be lighter, and one at the top is going to be my base shapes. I'll just turn that off for now. This one's going to be my lighter, so I have it selected. I'll Control click or Command click on its thumbnail to select it. Let's go and get our lighter color. Last time I didn't get it lightness. So let's see if we can get a lighter this time. I'm just using my Alt Backspace key stroke, but you could use the paint bucket tool. I've got my selection in place. I'm just going to de-select this layer. Let's go and select this layer. Make sure it's selected because we want to drop the paint into this layer. Let me just sample the base color using the eyedropper tool so I know what color I'm trying to get a darker version of. This is looking pretty good. And I'll fill this. I'm going to press Control or Command D to deselect the selection. So I have my shadow, my highlight, and my base shape. Let's go and get the shadow. I'm going to move it across and down. So I've got the Move Tool selected up here. And I'm going to do this with the arrow keys shift right arrow, and then just start moving it down. Adding the Shift key just moves at a bigger amount if you like. So I'm pretty happy with that. Let's go and get the highlight layer. And we'll do exactly the same thing, shift and arrow. And I'm going in the opposite direction this time. I'm going to fill the background with a color because it's probably going to make it easier to see what the problems are going to be here. So let me go and get a sort of pinky purple here and fill the bottom layer with it. So this is where I'm saying that there are issues. You can see here that the shadow and the highlight or running into each other in various places. So I want to make a decision about which of these are shadows and which of these are highlights. And I'm going to remove the object that I don't want. So here, I don't want the shadow. So I'm going to the eraser tool and going to make sure that for my eraser, I have selected here a really hard brush. So let's just go and say what we've got in general. Brushes. A hard round pressure sized brushes, pretty good for me. Doesn't need to be enormous and I can certainly control the size in just a minute. So I've got my brush, I'm looking at it on the screen, it's a good size. I'm targeting the lab and I want to remove the content from, I want this shadow gone. So I'm just going to paint it out. I'm going to come around here and decide here, I want the highlight gone. So I want to use this shadow, but not the highlights. So let's go to the highlight layer and let's just remove that. And we're going to work around my shape, locating the areas where the highlight and the shadow are running into each other. I'm going to make a decision as to whether I want the highlight or the shadow at this point, and then remove the opposite. Here I want the shadow, but I don't want this highlights. So target the highlight layer and just paint over it. And here, I don't want the shadows, so I'm going to target the shadow layer. I'm just going to paint that out. And just make sure that any place where the highlight and shadow are on top of each other, I'm making a decision about which of the two that I want. As you're working on this, you might find it easier to name your layers, which you can do by just double-clicking on the land name itself. So let's double-click there. I'm going to type shadow. And here I can double-click on this and type highlight. And I've just named this layer Cloud. So if it's easier for you to find the layers in the layer stack here by clicking on the name, then go ahead and name your layers. Now, I want to go back to seeing my entire document. So I'm going to press the Control key command on a Mac and tap the number 0 that just re-size as the image so we can see at all. Now if we're not happy again with our highlights, I'm just going to Control click on the highlight thumb now and we can go and sample the existing highlight color. And I'm going to go a bit lighter. And again, fill it with the paint bucket tool or Alt Backspace option Delete, they select your selection. So in this more complex example, we had highlights and shadows that ran into each other. And all we did was make a decision about whether we wanted the highlights or the shadows in each of these instances.
6. Pt 5 Shading with Brushes: So this next example we're going to use brushes to add as shading and highlights. I'm just back to the exact same size document as I was working on, going to choose a sort of blue color to use. And I have got my shape selected. I'm using pixels and I found this little submarine shape, which I believe is probably part of the 2019 shape collection. I'll hold the Shift key as I drag out this shape. We're going to talk a little bit more about shapes in a video at the end of this class. I have put this on the same labs, the background. So let me just undo that and, and put it in the right place. That's really critical. Okay, now will help me if I save these colors as I work. So I'm going to the Swatches panel, and I'm just going to click the plus symbol here to add my colors. So this is going to be my base blue. I'm going to add another lab because my highlighting is going to go on a brand new layer. So let me just name that layer. Now for the highlighting I wanted, unlike a color of this blue. So let's go and pick our life at color. I want to be able to get back to this later on, which is why I'm saving my swatches. So this is going to be my highlight. We need to set up a brush to use. I'm going to the brushes tool here. I'm going to click on A1, and I'm going to click on this drop-down arrow here to get access to the brushes. Now the brushes that are included with Photoshop days, days, much more limited than what we used to. And so we're going to add the legacy brushes. So come across here to this gear icon and go down here to the bottom and click on Legacy Brushes and okay, and that adds the legacy brushes to Photoshop. Now we want one of these default brushes. Now, I don't like the way that these brushes a shine these days. If you don't like that and you want to back to just its original version. What you'll do is click on the flyout menu here. Turn off brush name and brushstroke so that you'd just getting the tips. I find it easier to work that way. Inside the default group inside Legacy Brushes is this one that's just a dry media brush. So it's got a number 66 underneath it that tells you how big the base brush size is and it's a dry brush tip here. So I'm just going to click on it to select it. And then I'm going to the brush settings panel so that I can adjust the way this brush looks. So I'm going to increase the spacing. But something's telling me there's something really interesting happening with this brush here because whatever I do to it in terms of size, Gita and size and scattering. Still painting along this line. Now when you see a brush that doesn't change behavior, when you sort of add scattering and stuff like that to it. Have a look for the Dual Brush option because this was actually a brush that's controlled by another brush. So another brushes actually controlling the behavior of this brush1. If we turn that off, then we get what's really happening in our brush. And this is what it looks like and it's nothing that we want right now. So this is going to increase my spacing and little bit I'm going to go back to Shape Dynamics, adjust the size, Gita and all the work here is really happening in the scattering area. So I'm going to adjust the scattering are going to do both axis scatter. Think no, I think I'm only going to do scatter on one axis here. I'm going to leave the count back to one, but I am going to increase the spacing a little bit and possibly adjust the angle and roundness so that this brush breaks up a little bit and becomes a little bit more interesting. And maybe just a little bit of spacing here. Okay, let's see how this is going to paint. So I'm just going to close this down. That's looking like a pretty interesting brush to use for highlights. So I've got my highlight layer selected here. I can adjust my brush size either through the brush panel here, just adjust the size. Or I can use the open and closed square brackets. So the open and closed square brackets will make it bigger and smaller. I find that an easier way to operate. The next thing I need to do is to decide where my highlights and my shadows are going. So I'm going to highlight top and left and shadow bottom and right. So let's just stop painting this on. Going to change the size of my brush because it is too big. Now if I want to paint in a straight line, I can click and then hold the Shift key down and click again. Now, because my brush is very uneven, It's not going to look like a straight line, but it is going to point along those edges. And then I want to come here and go down to here. Going to close this brush up a little bit. I think the spacing is too far apart. Click, Shift-click, but it can also just brush it on. Making sure that I go on the top and on the left for my highlights. Now one thing I'm not the slide spit concerned about now is the IVUS brio. I've got paint going absolutely everywhere that I don't want it and that's just fine. Soil. I want. This side to have a little bit of highlight as well. So again, highlighting on the top and on the left. Now once you're pretty happy with the initial highlighting, we need to get rid of the over spray. Now you can do that in a number of ways. But the simplest method to use is the one that we used for the levels adjustment. And that's just using a clipping mask because what we want to do is to clip the paint work. So it only affects this layer and where there is content on this layer. So I'm going to click on this layer here and go to Layer create clipping mask. And that just clips the paint work. So it only appears where the actual submarine is. Now this point, you can continue to add paint to your image, but you may also want to remove some of the paint. And what I suggest you do is to use an eraser. So you click here on the eraser and I'm going to re-select the same 66 brush to use with the eraser and again, set it up. So I'm going to remove the Dual Brush option here and then just work with what we've got left. The spacing looks okay, I think it's the scattering that's too much. Now the spacing doesn't look okay at all. And with the shape dynamics, I'm just adding some GTO saw. It becomes a more interesting brush. But of course this is not a brush. So back on the paint layer, I'm going to just adjust the size of my eraser and just bring it in to remove some of the highlights. So a combination of adding paint and removing it will be really handy for adding highlights to your object. And then with the shading, we're going to do exactly the same thing. Just add a brand new layer. We're going to sample the color. I'm going to sample the base color here. I'm going to click on this and find a darker color to use. I'm going to add it to my swatches. I can click my layer either after I've done my painting or in the middle or before. And I think it's easier to do it before. So I'm actually going to click on this layer now and choose layer and then create clipping mask. So now all the paint I'm putting on this layer is going to be clipped to the underlying shape. And let me just call this shading. So back with my brush and with my paint color, I've got my shading layer selected. Let's just start painting this on. I'm going to adjust my brush size as I'm going. And for this I'm going to the right-hand side and to the underneath. Now as I'm painting, I'm saying a few places where I could have improved my highlighting. So I'm going back to my highlight layer. Let's go back to the swatches panel. Pick up the highlight color, which is why we saved it, because it would be difficult to get it back. Otherwise, make sure I'm painting on the highlight layer and just go and add in the highlights that I've saying that I'm perhaps missing. So then we can go back to the shading laugh, find an eraser again. And we can use the eraser on this shading layer if we think the effect is too much, you may get a slightly different result if you alter the order of these layers to put the highlight on top and the shading underneath. You can just experiment with that. You can also adjust the opacity of these labs. So I'll just dial down the opacity so that the highlighting that you've got is now a little bit more subtle. And so towards the shading, adjusting the opacity will allow you to get a similar effect, but a little bit less intense. I'm using scrubby sliders here. These are Photoshop slide is wherever you see a word, There's a really good chance that when you hold your mouse over it, you'll get a hand with a set of arrows. And what you do is you just drag on the word. And that is a scrubby slider that changes the opacity value without you having to click here and adjusted this way. Find scrubby sliders really handy to use. So look out for those as you're working inside Photoshop.
7. Pt 6 Shadow and Highlights with Layer Styles: For this next shading effect, we're going to be
using layer styles, and we're going to come
up against a problem, and we're going to talk about how we're going to solve it. So I'm going to click to
add a brand new layer. I'm still working
with custom shapes. I have a pink color selected, and I have a flower
that I'm going to use. I'm just dragging out a
nice, large flower here. I'm using this flower
because it's quite sizable, it's going to be really easy to see this effect on this flower. I'm clicking on the
layer and I'm going to click here on FX icon, and I'll choose in a shadow because what
we're going to do is apply the shading and also the highlights
both using in a shadow. I'll click once on that. Now, the dialogue is
showing a preset here. So I'm just going to
click to delete this. And I'll click again
on the FX icon. And now, if I go
back to in a shadow, these are the default setting. So it's just a little bit
easier to see that this is what you're going to see when you get to this dialogue. We're going to deselect
use global light because we want to be able
to control the light. If we do the shading, first of all, I want it
to be the other side, so I'm just going to
rotate this around until I get the shading in
the position that I want. So this is giving me my
shading in the right position. I'm going to adjust
distance and also size. So size is actually
sort of the fluffiness, or softness of the shadow, really, so just
be aware of that. I'm looking for a good
combination here. I've got multiply blend mode, which is a really good
idea to use that, and I'm going to choose
a darker pink color. So my color is matching
my flower here. I'll click Okay. So right
now, that is the shading. So we're going to add the
highlight the same way, go back to the lag, go
back to the FX icon, go back to inner shadow. Now, this is giving me the inner shadow that
we had previously, and if I start editing
it, I'm going to lose it. So I'm going to click
here on the plus icon. This was new in photoshop
quite a few years ago. So some of you who are
using older versions of Photoshop may not have the ability to add
multiple inner shadows. The later versions
of Photoshop do. So now I want to turn this
in a shadow to a high light. So first of all,
I'm going to move my light to the exact opposite. I'm going to set my
blend mode to screen, which is a lightning blend mode, and I'm going to
pick a lighter pink. Okay. So this is more
like a true highlight. I'm also going to
increase the opacity, so I'm getting a good
lightning effect, and I can adjust
these settings too. But basically, what I'm looking at between
this shadow and this highlight is dark on one side of the flower
and light on the other. So you can tweak these while
you're in this dialogue, so you get access to the
one that you're using for the highlight and also the one that you're using
for the shading. Use multiply blend mode, which is a darkening blend
mode for the shading one, and use screen blend mode, which is a lightning blend
mode for the highlights. So I'm just going to click
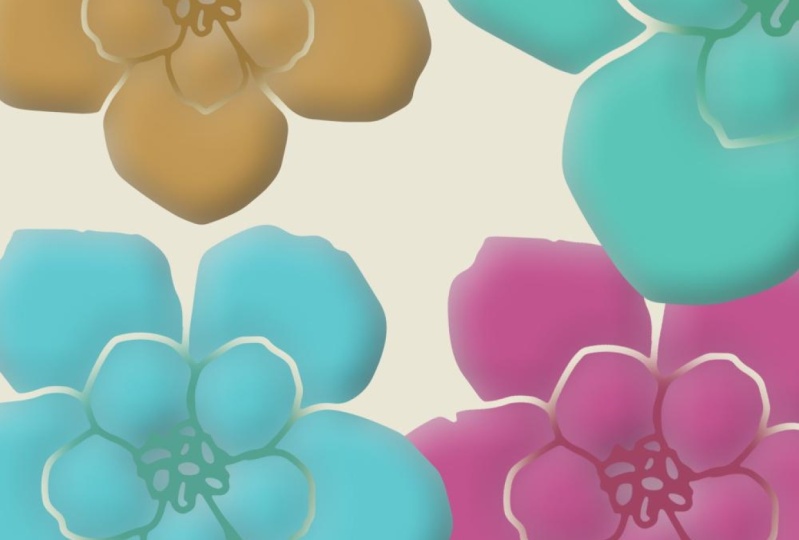
Okay. So far so good. If we wanted to change
the color of our flower, this is where we're going
to get into some trouble. So I'm going to choose a color that is exactly
opposite this pink, which is a sort of green color. So let's go and
get a lime green. Now, it's going to be a
pretty toxic sort of color, but it's going to show very
clearly what our issue is. I'm going to control,
click on the layer now, so I get a selection here, going to select the layer, and then fill it with
our green color. Now, the problem here is that
the colors that we used for the shading and the highlight are bleeding into the green. The reason I chose
green was that was the color opposite of that
sort of pink magenta. And what's happening
is that we're getting this pink color sort of distorting the
edges of this flower. Ideally, this would be green. So let's see how we
can solve the problem. First of all, I'm going
to the flower itself, and I'm going to make it a gray. So I'm going to choose here a
sort of middle gray for it. When you're using gray, you'll find that
the RGB values of all of the red green and
blue channels are 1209, so this is a gray. I'm going to control, click
on the layer thumbnail here and fill this
with our gray, and you can see really clearly here the pink is
bleeding into here. So let's now go to our
inner shadow layer. Just double click
on this. Now, this is the highlight. You
can see it screen. So instead of the pink, I'm going to choose
a light gray. Again, the R G B values
are the same value. And so my light color
is now a light gray. Let's go to the inner shadow, the one that is controlling
the shading, and again, I'm going to choose a dark
gray. And click Okay. So now I have gray shading
and I have a gray flower. But what happens
if I go back now and make that flower,
that's sort of green. So let's go and get our sort
of really luminescent green. And now the shading
is not bringing any color because
I'm using gray, then it's just blending
into the flower underneath. So in this circumstance where we are using layer styles
and where the colors aren't changing in
the layer styles when we change the color of
the flower, for example, it's better to use grays, black, white shades of gray for our highlights
and for our shadows because the results
are going to be perfect regardless of
what color we use. But, you know, we
didn't have to even color this flower
green this way. Let me just wind
back to the gray. We could add an adjustment layer here to recolor the flower. I'm going to choose layer and
then new adjustment layer, and I'll choose hue
saturation and click. A hue saturation
adjustment layer can be used to recolor things. So I'm going to click
here on color eye. And from the hue slider here, I can choose the color to use. I can adjust the saturation, so I get a more saturated color or a less saturated color, and I can adjust
lightness as well. So here we have the ability to experiment and
color our flower, whatever we want to color it. And this adjustment layer is also adding color
to our shading. So probably the
combination of making a gray flower and using dark gray and light
gray as our shading and highlights has
actually given us a really nice and fully
editable version of this flower where the colors
in the shadow and highlights are working
really, really well. Now, there is one problem here, and we probably already
know what the problem is. Let me click on the
background here and let me go and add a background
color to this image. The problem here is that our background color is being colored the
same as our flour. And the reason is because
this adjustment layer as all adjustment layers is affecting
everything below it. But we already know the solution because we've used it
a few times before. We just need to clip it. So I'm going to select this
topmost adjustment layer and choose layer and then
create clipping mask. So now the adjustment layer
is only affecting the flour, and it's not affecting
this background. Now, I'm looking at this background right
now and thinking, that's a little bit intense. So let me just show you a trick that I have for things
like background colors. I'm going to actually
turn off that layer, but I'm going to target it. I'm going to choose layer and then new fill layer
and solid color. The reason I do that
is that when you use a solid color fill layer, you get this color
picker appearing. And you can just drag over it to sample a color and see
it live on the image. And you can say, Well, you know, that's not really
working for me. Let's go and see if I can find some different combination. I'm not choosing a color, filling a layer, and then going, Oh, well, that
didn't really work. Let's go and see
what might work. We're actually able to pick it. So we haven't actually
committed to anything yet. We're just having a look
around in this dialogue, trying to work out
what we want to use as a color and just clicking. But of course, making
sure, first of all, that we have clipped this hue
saturation adjustment layer to the layer below sts
only affecting the flow. And so whatever we have on the layer below the flower
is actually pure color. This is the color
that we selected. This is the color we're
seeing in the document, and we can just double
click on this at any time and just
change the color. We can do whatever we like. But I do like those solid
fill color layers rather than trying to just put color
into a background layer. I think this is much more
efficient way of doing things.
8. Pt 7 Highlights and shadows using Shape Paths: For this next example, we're going to be using shapes, and I'm going to show
you how you can use pars to actually access
some shading options. I have a cat shape
already selected. I have my fill set to gray because I'm using
shapes this time, so I have shapes selected here. So I'm going to drag out
to create my cat shape. And of course, it
is a filled shape. I'm going to make a
duplicate of this because I want to use the duplicate
for my shading. This duplicate has a
fill and a stroke. I don't want it to have either, so I'm just going to turn off the fill and the stroke
on this duplicate layer. So essentially, it's not
providing anything to this image except that
it's giving me a path. So I'm going to select
the path selection tool, which will allow me to move this path across a little bit. And what I want to do is to
borrow some of these lines in this path to actually
add shading to my cat. So let me just zoom
in here a little bit. So with this path, the things that I want is
I want this curve here. Rather than having
to draw it myself, I want to use that curve. Now, there are tools in Photoshop for removing
anchor points. The problem is that if I use
it on this anchor point, I'm actually just going to
remove the anchor point, but be left with a path
between here and here. What I want to do
is break the path. I want to break it, so I'm
just left with this shape. So I'm going to the
white arrow tool, the direct selection tool. I want to keep this piece, which means I want to
break it at this point. So you go one node beyond
the one you want to keep. So I've got that selected. I just clicked on it, and I'm going to press
the delete key. I'm told that this will turn a live shape into
a regular path. That's just fine, but
you can see here, it's broken, and that's
exactly what I want to happen. I'm going to click here and
I'm going to delete it. So I've now got this curve. And if there are other
curves that I want at the same time,
I could keep them. So I could keep this line here. So I'm going to
click on this one, make sure it's selected
and press delete. So I've got that line there that I can use as some shading. Now I'm just going to
remove everything else. I'm going to drag over the
bits that I want to remove, making sure that I don't have selected the bits
I want to keep. So you just need to be
a little bit careful here in terms of doing this. You don't need to get
everything all at once. So now what I've got left
is these two curves, and they're the exact
curves that are used on this cat because they
came from the cat shape. So given that these are paths, we can do something with them. We can actually
add color to them. So let's go back to strokes
and let's add a light gray. And then we're going to
set a value for this. And I'm thinking probably
about ten pixels will be a good value. But if you want it to be
less, you can use less. Now, I've got round
corners preset here, but I'm going to show you how to do that if yours aren't round. Click on this icon here. Actually, they're not round.
They just look it right now. So go to your caps and make sure that they are round caps, and then we can just click away. And this has given us lines that are adding
highlight to our cat. Now, these are also selectable. So with the white arrow tool, we can just go and select
over this particular one, and I can use the
arrows to nudge it a little bit if I want to place it in a slightly
different place. I don't want to move
it too much because it is actually following
the curve of the cat. If you want to edit it, you can. So you could have drawn this
manually using the pen tool, but you can also click
in here because this is just a line and
you can adjust it. So if you want it to be
a little bit more curvy, you're just going to
add a curve to it, click away, and it's your
highlight if you like. So let's go and get our cat again and let's make
this the shadows. Turn off the highlights for now. I'm going to make
sure that I have this cat shape selected. It will be dark
gray at the moment, so let's set it to no feel color just to make it
easier on ourselves. This time, we want
to take the path in the opposite direction because we want to add some shadows. So I've just moved it in
the opposite direction. Now, I'm going to work out
which bits I want to keep. I'm going to the
white arrow tool, I'm going to click
away from the shape, let's go and select the
bits I want to keep. I think I want to keep
this little curve in here, so I'm going to go
to here and delete this anchor point and come
up here and delete this one. I'm going to keep
this curve here, but perhaps remove this one. Now, if I want to keep this curve here and
keep this bit down here, I need to break
it at this point. So what I'm going
to do is actually add a point in
that I can delete. So let me just go
in and add a point. Okay. Now, let me go to the white arrow key
because I don't have enough points to be able to keep these lines without adding one
and then just removing it. So that's allowed
me to break this. I want to delete here too. So I don't need any of
these other shapes, so I'm just going to select
them and remove them. Being careful that I don't remove anything
that I want to keep. If you take too much, it's
a very easy process to just press control or command
Z to undo what you did. Let's go and color these. I have them selected, so I'm going to the
stroke, and this time, I'm going to use a
really dark gray because these are going to be my shadows and let's increase the pixel value to
about ten pixels. Now, it's way too dark, so I'm going to bring
down that color a bit. Let's double check to make sure that we've got
the right caps. We don't have round caps, so we're making
sure that we've got round caps on our shape. Now, I still think that
this is way too dark, so let's go back and
reduce the color here. I think this shape's all wrong. So let me just go and
see what we've got here. And let's turn our
highlights on again. Now, these, of course,
can be blended in, so you can adjust the opacity of this layer if
you think it's too dark or too light and just make it blend
in with the shape. Now, it's also possible for you to make these
shapes yourself. So I'm just going to
add a new layer here. I'm going to the pen tool, but in this case,
I'm going to make sure that I'm
working as a shape. Now, that's pretty critical
because it's going to give us access to
features for recoloring. So let me just see a little bit clearer
where I'm working. I'm working in the shape. Area here, I'm going to
make no feel no stroke, so I can concentrate
on drawing my shape, click and drag, click and drag. If I've finished,
I'll just press escape because that
will give me my line. I'm going to select it with
the past selection tool, this black arrow tool. I'm going to stroke, and I'm going to select
my light color here and reset it up exactly
the same way as I did the previous one with a ten pixel stroke and making sure that
it has round caps. At this point, if I'm not really happy with the shape
that it's taking on, I'm going to the
direct selection tool, the white arrow tool, and I can use that to just
bend the shape a little bit. I also want to reduce the
opacity of this layer. So let's just have a
look and see where our highlights were,
which was this layer. Here, we had an opacity of 82%, so let's just drag this
opacity down to match. So here we've been able to add highlighting and
shading to our cat. But there's an important
distinction to note here, While we were drawing
what look like pars, we were actually using
photos shape feature. I think you'll find it
easier because you can apply fills and
strokes to shapes, but you can't as easily
apply them to pars. So when I was drawing
things either with the pen tool or where I was
duplicating the cat shape, I was making sure that I was always working with
the shape option, not the PAS option. If you're used to
using illustrator, this is going to be a really confusing
distinction for you. If you're just using Photoshop, then it's going to
probably be a bit easier because you're just going
to be working with shapes, and those shapes have an underlying path
that you can get access to through the PAS panel. Let me just choose a layer
that has a shape on it. When we go to the PAS panel, we're actually able
to see the path that is associated with
that particular layer. So that's another
option that you have in photoshop for
adding highlights and shadows to your
work using shapes that are lines that have a
stroke applied to them.
9. Pt 8 Recolor a mult layer shape: In the same way as we used a hue saturation
adjustment layer on the flower that had
the highlights and shading added using
layer styles, we can use that exact same hue saturation adjustment layer on things like this cat. I'll add here layer, new adjustment layer,
hue saturation. Click Okay, and I'm going to use the colorized blend mode, and I'm going to color my cat. Now, of course, the problem
with this is going to be if we have a layer underneath
that has color in it, let me go and just
add a new fill layer, which is a solid color layer, and let me go and apply
a sort of pink to it. Now, you can see that
this pink is being re coolord by the hue
saturation adjustment layer. So if we want to
isolate the cat, so it is affected by this hue saturation
adjustment layer, but nothing else is, this
is what we're going to do. We're going to go
and pick up the cat. So everything that
relates to the cat, we're going to select, I'm going to click here
on the group icon. So what we're going to do is
make a group out of the cat. So this is the cat. And now we can clip the hue saturation
adjustment layer just to what is
immediately below it, which is the group
containing the cat. So let's click here and choose
Layer new clipping mask. Now the hue saturation
adjustment layer is affecting only the cat, and the solid fill
color layer is not being affected by that hue
saturation adjustment layer. So now we could come in here and change the color of
that background, and it's not being affected by that hue saturation
adjustment layer, which is actually just
involved in coloring the cat.
10. Bonus Shapes in the most recent versions of Photoshop: So throughout this class, I've been promising you
a look at shapes in the most recent versions
of Photoshop because things have changed and they've changed quite considerably. So in the past, you
used to be able to get access to
additional shapes by clicking on the shape drop down list once you've got custom
shapes selected here. You could click on this
down pointing arrow, click here, and you'll get
access to your shapes. It's not operating
quite the same way in the newer
version of photoshop. So in the newer
version of Photoshop, what we're going to do
is go to window and to shapes because shapes
now has its own panel. And here are the
base shapes that are delivered with the newer
versions of Photoshop. And while I was just prepping
for this particular video, I did find the submarine. It's in the boats collection. So if you want the submarine, it's here in boats in
the regular set of shapes that are included with the newer
version of Photoshop. Now, this is the
shape that I created. And, of course, if I
want to be able to access it if I reset my
photoshop preferences, it would be lost, If I
deleted it, it would be lost. So typically, you would click on any shapes that you
want to save right, click and choose port
selected shapes, and then you can
save it as a file. Now, I've already done it. I've saved it in a
file called Cloud. And so I'm just going
to overwrite that. So if I was to
delete this shape, go and drag it onto
the trash can, I can always get it
back now by clicking on the flyout panel and
going to import shapes, and I can go and
import my cloud shape. And it's now in a
collection called Cloud. We're also missing a
lot of the shapes that were distributed with earlier
versions of Photoshop. And if you want access to those, you're going to
this fly up panel, because unlike on the
flyout panel up here, there is an option here that
is legacy shapes and more. Click on that, and you will
add the legacy shapes. There are some 2019 shapes, a whole heap of
them, and there are all the legacy default shapes. Now, what I find really annoying here is that these
shapes are all in groups, and I don't always
know which group I want my shape to be in. So what I did was I opened
up these legacy shapes, and then I created from that a collection of my own
called everything. So what I did was I just dumped all of my shapes
into this everything group. So I now have a panel
that is reminiscent of the earlier versions
of Photoshop where all your shapes
were in a single group. I just find that sort of
everything dumped in one place, a little bit easier
in terms of shapes. You mileage may vary. But you now get access
to the legacy shapes, the 2019 shapes, and all
the legacy default shapes. But you will need
to do that through the window shapes panel
because that is different. Obviously, on this panel, you have access to
thumbnails and things the way that you actually
see the shapes here, and you can also
use a search bar. So there is a search bar here, so you could look for shapes. For example, let's
look for cat shapes. And we'll see shapes that
have the CAT in their name. This is obviously something that will have CAT in its name. Well, it's a steam
engine cow catcher, so that's why it's
got cat in it. But these are other shapes that have the word cat in their name, so that might be a way of finding shapes if you're
finding it a little bit difficult in these most
recent versions of Photoshop.
11. Shading in Photoshop Project and Wrapup: We've now finished
the video content for this course,
it's over to you. Your project for this class
will be to reproduce one or more of the shading techniques on an object of your choice. When you've done that,
post an image of your completed artwork
as your class project. I hope that you've enjoyed this course and that
you've learned a lot about your alternatives for shading
objects in photoshop. If you did enjoy the
course and if you see a prompt to recommend
this class to others, please give it a
thumbs up and write just a few words about
why you enjoyed it. This helps other students
to see that this is a class that they
too may want to take. If you see the follow
link on the screen, click it so you'll
be notified of my new classes as
they're released. If you'd like to leave
me a comment, please do. I read and respond to all
of your comments and I look at and respond to all
of your class projects. My name is Helen Bradley. Thank you so much
for joining me for this episode of Graphic
Design for Lunch, and I'll look forward
to seeing you in an upcoming class soon.
 Helen Bradley, Graphic Design for Lunch™