Transcripts
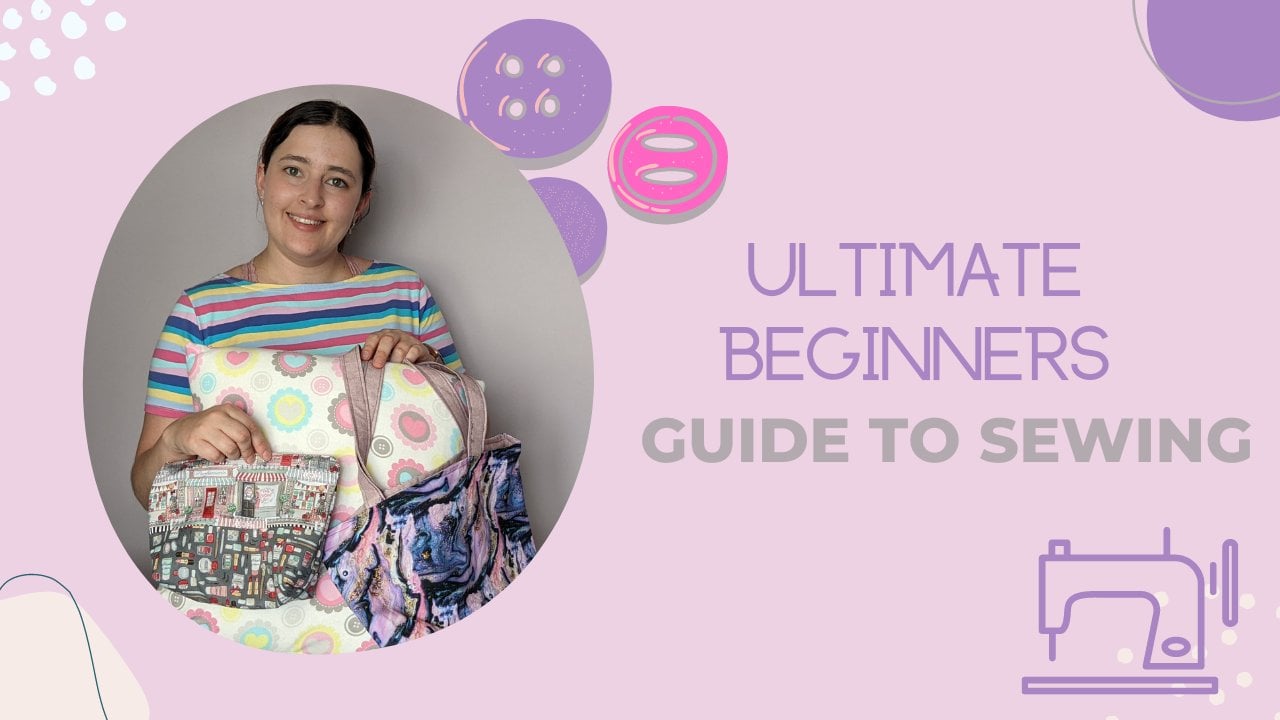
1. Hello & Welcome!: Are you interested in learning how to sew but don't know where to start? Maybe you got started by sewing masks and now you're ready to expand your skills. I'm Jessica Potter Pierce with 5 out of 4 patterns, a PDF sewing pattern company. We at 5 out of 4 believe in empowering others with the love of sewing because we think time spent creating can calm your brain and bring clarity and relaxation. That's definitely done it for me. I built a company whose motto is never stop sewing, never stop growing. I'm here to help you learn to do just that. I'm passionate about helping people learn how to sew. I truly believe that with a few key techniques, your sewing skills will drastically improve. In this class, I want to teach the fundamentals of sewing to provide the base for you to jump off of on your sewing adventure. This class will show you the basics and core fundamentals that will help you find success instead of frustration. This class is for anyone looking for a strong foundation in sewing skills. You'll leave with a stronger understanding of sewing techniques that will help your projects go from looking homemade to looking handmade. The main sections of the class include sewing tools, machines, notions, understanding fabric types and techniques that will really help your handmade goods look amazing. In each section, I'll show examples of how to use the tool or how to do the technique. I believe that the skills in this class will help you take the next steps on your sewing journey. In the next video, I'll go over our two projects. It's time to start planning your fabric.
2. Class Projects: There are two class projects. First, I'll show a straightforward pillowcase with visible seams on the inside. I chose this project because it uses a lot of the fundamentals we go over in the class. Plus, making pillowcases brings me a lot of joy, and I want to share that with you. No one ever outgrows pillowcases so I like to use my favorite fabrics on them. Plus, they make a great gift and care packages. Sometimes I'm just in a sewing slump and I want to go back to a project that brings me joy every time I see it. After I showed the basic pillowcase, I show you a different way to create the same pillowcase, but with encased seams on the inside. This makes the inside look just as nice as the outside. Plus, it introduces you to new concepts and will expand your ability to think three-dimensionally. Or it might just make you realize that sometimes you have to trust the tutorial or instructor, even if you can't visualize the outcome. I want to go over a couple of ideas for different types of pillowcases that you can make. This is a piece of white fabric that my family tie-dyed. You can see that there are seams at the top and bottom here, but this side is actually on the fold. Since a pillowcase doesn't need to stretch either direction, you can fit it into the fabric however you can. This one I didn't even make a cuff, I just folded back the hem about two inches here. Let me check. Yeah, I just shaved two inches and I sewed it down. That's one way. We really like tie-dye at my house, it's pretty fun. Here's a pillowcase I made to match a duvet cover that I made for my daughter, this one's a little well-loved so you can see stains on it. But this is an Amy Butler fabric that I found at a quilting store nearby and this is just a blender that went with it. I hid the seam between the cuff and my main fabric. I'm looking to see it but it's cut on the fold on one long edge and then I did a French seam on one edge to hide the inside seams. But I love doing it with just a little fabric that is probably more expensive and then finding a blender that's cheaper. That way you get a little bit of the best of both worlds. This next one should serve as a warning. You could see that the way a pillowcase would typically be on a bed with an opening at one side or the other, the design is going the wrong direction. If you have a directional design, you actually have to pay attention to how you cut the pillowcase. This was cut on the fold, but that enabled me to get one pillowcase out of a yard of fabric because I cut it on a fold after folding the fabric this way, but unfortunately, the design is going the wrong way. Fortunately for me, my eight-year-old doesn't mind and she loves unicorns and princesses. This pillowcase is an example of one made from flannel. This is made for my son when he turned two and moved into a big boy bed and has obviously kept its colors really nicely over the last eight years. You can find flannel really cheap, but if you buy the [inaudible] make sure you pre-wash it with a color catcher quite a few times, otherwise you might get bleeding into the main fabric here. Flannel is great, because the big bucks fabric stores will put it on sale super cheap and it's cozy, so everybody likes it. Here's one I decorated with a stencil. I use my silhouette machine to cut out my daughter's name and a cute little heart peace sign. Then I also did a pop of color here with some decorative stitching and hearts. My sewing machine has this decorative stitching built into it. I really liked it, it made it fun it also sew down the seam allowance from this pop of color here in my cuff, and that made it super fun. Plus my kids really love decorating it, and if you're sending him to summer camp, it's great to have their names on things. Last but not least, this is my absolute favorite. This was made using a border fabric. Border fabrics will have something like this along the top pretty high and then just a design along the bottom of the fabric. Sometimes it goes every yard, it's repeated and sometimes it's along the side edges. It just depends what it is with your fabric. We really, really loved this one. It was from a quilting store and this is the coordinate that goes with the pink. It's an expensive pillowcase, but no one grows out of it and we all enjoy having it because it brings us so much joy when we see it on our beds. Those are just a few ideas of different ways you can combine fabrics and materials in order to get some fun designs. I chose these projects because they're fun and quick to make. I really want to see your progress. Share photos of your fabric in the Project tab so we can all, ooh and aah. Are you ready? Share your fabric choices with us. Enable us to buy more. It's time to get busy, you've got an awesome adventure ahead of you.
3. All About Woven Fabric: In this video, we're going to talk about different types of fabric. For the purposes of making a pillowcase, we're going to use a woven fabric. But I just want to introduce you to a couple of different types of fabric and what they might be used for. In all honesty, there is a plethora of fabric in the world. We're only going over a few different kinds just as a basic introduction. But hopefully, you'll find that helpful. When it comes to woven fabrics, there are a ton of cotton woven. This is a light to medium weight. It doesn't stretch, and it's used in quilting cotton is another term for it. You can also use it for some apparel items, but you're not going to get like a really drapey dress or anything like that. It's going to be something that's crisp, like pajama pants, or a button-down shirt would use a cotton woven that's about this weight. Some button-down shirts have a slight amount of stretch in them, it just depends on what you're looking for. Sundresses, little toddler dresses with buttons and ruffles and all that jazz can be made out of cotton woven as well. When it comes to apparel, you can also get into other things like this is a round showy. This has a beautiful drape and is quite different than a quilting cotton. I would not make a pillowcase out of this though because it's so lightweight that it's not going to last very long with the rough and tumble of sleeping on it. Another good option for pillowcases for one of the projects in this class are flannels. They're super soft and cozy, they make great pillowcases, great pajamas, and they come in a lot of fun prints. I really like flannel, about the only thing I make with it are pillowcases, pajama pants and nightgowns or nightshirts, and button-down pajamas. But, another good thing about flannel is that it can also be super cheap at Joann Fabrics and Crafts or Hobby Lobby, whatever your local store is. A lot of times they'll run it really cheap, which is fun. But one thing that I would warn you of is a cheaper solid, I'm going to put these two together, but you're going to want to wash this solid one several times with color catchers or whatever you use because what you don't want to have happen is say, make a nightgown with a blue trim at the bottom, wash it, and the blue trim runs into the rest of your fabric. That stinks, that can happen quite often with cheaper fabrics. But when you're just getting started, I think it's important and I had been sewing for quite a while, I still use a lot of cheaper fabrics, especially when I'm trying something new. One of our pillowcases today will be made from this combination. One thing I love about quilting cottons, I love holiday prints. I tend to hoard them. They're just so fun. You get so many different kinds. But when you're sewing your pillowcase, one thing you want to keep in mind is directional prints. All of this is running up and down, it's a directional print with a cotton woven. You're going to have a raw edge at the top and bottom and then along each side you're going to have what we call the selvage. This will run up and down your fabric. They'll be a small amount of give horizontally, but it's not stretch, so to speak like you would get from a knit fabric. Then up and down with the grain of the fabric, it runs up and down your yardage. There's no stretch. I've attached a quick little PDF that digs a little deeper into woven fabrics. Hopefully, you'll download it. I think it'll be really useful as you're learning all about different types of fabrics. But for the purposes of this video, I just want to point out that there are directional prints. These are both examples of directional prints. There are somewhere they're just a scattered repeat, it doesn't matter what direction it goes, then there is somewhere they're tossed and again, it doesn't really matter so you don't have to worry too much about it. Some fabrics you're going to find, you want to pay attention to which direction you cut your pillowcase. For the purposes of this fabric, having a pillowcase up on the bed like this is fine, but if I made the opening of the pillowcase over here, it looks a little funny. See see what I'm saying? Last but not least, I just wanted to show you one other thing. Well, actually two other things. These are two fabrics, these are from Indy Bloom Designs, and they're sold at Hawthorne fabrics, which is an online quilting shop. Quilting shops will offer a little bit higher quality fabrics. They won't shrink as much, the colors will stay a little bit longer. Once you get into sewing, if you get into quilting you're going to become very familiar with quilting shops. You probably have locally owned quilting shops in your area depending on where you live obviously. These are two of the same print, which is something I love about Hawthorne is this is a bigger scale. This is on a cotton woven, and this is on a cotton jersey. If you wanted to make a t-shirt or something like that, you can make pillowcases out of this but for beginners, I recommend starting with woven not in this. Because this is just a different learning curve you're going to have to figure out. For the purposes of this, we're going to start with cotton wovens. I just wanted to show you some of the options. This is a quilting cotton, it's a medium weight, it's crisp, it's going to look beautiful as a pillowcase. On the other hand, this is designed by Amy Butler and this is a home dec weight. This is going to be a little bit sturdier and a little bit thicker. This will hold up really well if you wanted to do cushion covers for your dining room table, or I'll show a photo of a chair that I completely recovered in this. This is home dec, it's meant for home decor objects. It's going to last a lot longer than a quilting weight cotton would on a chair or something like that. You can also make bags out of this weight. You can make bags out of both, this is just sturdier. When it comes to things like drape, it's hard to tell I think from the video, that brown is lighter weight, the green is a bit thicker. It's not going to drape as much. That's like how it falls when it's just falling on its own accord. For apparel fabrics you're going to want something with a really nice drape. It makes it look pretty around the body and it looks so flowy. For home decor, you're going to want something a bit sturdier that's going to hold up to wear and tear. Make sure you check out the PDF download that I've attached. This is just a very quick overview to get you acquainted. Your local shops should have some form of cotton woven fabrics that will work perfectly for all the pillowcases in this class. Like I said before, that was just a few different types of fabric, but I hope you found it helpful because I know that when I got started, I had no clue about different types of fabric and what they were used for. In the next video, we're going to talk about different types of machines and what kind of stitches they produce and what you can use them for. For the purposes of making a pillowcase, you'll only need a sewing machine, so don't get stressed out. This is just an introduction because again, when I was getting started, I had no idea what all these machines were and what I would possibly use them for or why I might one day think I needed them. Enjoy, sit back, don't stress, and just welcome the introduction of information.
4. Machines and Stitches: In this video, I'm going to show you different types of machines and the stitches that they can make. Having anything beyond a sewing machine, isn't required for this course. But I know when I was first starting out, I was really confused on what a serger and a cover stitch did and why I might want one. I didn't quite understand, and it took me a while to be able to figure out the differences. You can buy a standalone cover stitch machine or combination serger cover stitch machines. These machines are not required for beginner sewers, but if you continue to sew you might be interested in purchasing one. They can elevate your handmade items quite a bit. This machine in front of you is a serger/cover stitch combo machine. It's a Babylock triumph. I think it's important to note too, that none of the machines I own are beginner level machines. They're definitely something to work into. A cover stitch machine will make straight stitches on the front of a fabric, and then on the wrong side, it will look like this. It looks really cool. You'll see it a lot of times on the outside of athletic wear. You can get that same look with the cover stitch machine if you sew your fabric with the opposite side face up. A serger on the other hand, looks like this, and it finishes the fabric so that it doesn't unravel on the inside of your sewed good. This is what's on the inside of ready to wear items as well, and it looks really good, and if you're using a stretchy garment, it keeps the stretch which is really nice. This is a pillowcase that I made and I used a hard stitch to top stitch my seam along [inaudible]. This is just a special day stitch on my sewing machine. Some of the higher end machines have quite a few of these, you can even do words. But on the inside you'll see all these threads, because I didn't serge it first before I did the top stitching. This is pretty common. When you don't have a serger, this is what what can happen. But if you serge it like I did here on the side seam for some reason, just not that particular seam, you don't get that same effect. It keeps the fabric from unraveling in the wash. It's okay if you don't have a serger for this project, you are just making a pillowcase. The second project I actually show you how to enclose all of the inside seams so that it looks super fancy. In clothing items, you'll see serger and cover stitch in a couple of different places. Around the neck line. The neckline will be serged on, and then it will also be cover stitch down, so you'll get the two nice lines around the neck line. But from the inside you'll see both the serging and the cover stitching. You can also see at the helm here, the ruffle was serged on and then it was covered stitched to hold the seam alone spacing the rest of the skirt. With a knit fabric, you can still stretch it, which is really nice. It's a great reason if you're making a swimsuit or something like that. It's really nice to have a serger for those things, but all of these things can still be done on a regular home sewing machine too. This is my sewing machine. This is what we're going to be using for this course. This is the BabyLock Aria. This will do your basic stitching for wovens or knits. It's a great machine, but again, this is not an entry-level machine. Since I've been sewing, this is my third machine, and I've moved up slightly more each time. My very first machine was a Husqvarna, it was non computerized, it was perfect. My second machine was also a Husqvarna that I bought used off of eBay. There are a ton of different machines out there, the sky is the limit. Some of the things that I like to look for in the sewing machine are a needle that can go side to side. This helps when sewing small things. My very first machine could not do this. It still sewed fine, but it just couldn't do it. Stitch selection is a big thing. This has a couple of different options for sewing knits. Stitch selection is a big thing. This is a lightening bolt stitch or a stretch stitch. There are different zigzag options. There are overcast options, if you don't own a serger. This is called an overcasting stitch it comes with a special foot. You can just finish your woven fabrics with a zigzag or you can do this, either one. Also have the straight stitch. You can change the length of it. Like I said, there's a lot a lot of different machines. One thing that I do want to warn you against, these are called bobbins, they are what go in the bottom of your machine. Even though these are all similar and they all work inside of this machine, only one of them is actually made to be used in this machine. It's really important that you look in your book that comes with your machine and make sure you know which one to use, because it will change the quality of the stitches and whether or not the tension is right, and sometimes it can mess up your machine. So that's important. In the next video, I'm going to talk to you about required notions for the pillowcase project. I'm also going to show you some that are just bonuses, and mostly because I really like them. I like to have one hand and they make things easier, but you don't have to have them. I will say they make great stacking stuffers or small gifts. So tell all your loved ones.
5. Notions: In this video, I'm going to show you what notions are necessary to complete your pillowcase. I'm also going to go through a few of my favorite notions that aren't required, but they're still nice to have. Most of these can be found at your local craft or sewing stores. In this video, we're going to be talking about notions. There are a lot more notions that you'll end up wanting, so be prepared for that. But you don't necessarily need all of the notions. They just become similar to kitchen gadgets at some point. You either love them or you hate them or you make do without them. But it's trial and error. You figure out what works and what doesn't. When you're getting started and you only have a sewing machine, an option for finishing the edges of fabric are pinking shears. I can be very honest. These were gifted to me and I rarely use them. But the person who gifted them to me used them a lot. I don't know. I'm lazy. Pinking shears, that's one thing. Another thing you're going to need are scissors. You're going to want different sizes. Some people pay for nice, expensive scissors. I have six children. I don't buy expensive scissors. I'm not allowed to own nice things yet. I buy little sets at my craft store that come in three sizes and then the kids take one and I lose one, and then I try and aim for bright colors because gray tends to blend in a little well, and I'm not the cleanest person. I do recommend small scissors with really sharp tips so you can get into small spaces and cut threads. Some people attach the scissors to their sewing machine. They come in all different shapes and sizes and price points. A big thing that has made a huge difference in my life are these little clips. This is a package that I got off Amazon, it's like a package of 100. I actually do have more than this left. They go on sale. They're fairly cheap. They're great. I prefer clips over pins most of the time because when I go to remove a clip, it doesn't necessarily shift my fabric. But when I go to remove a pin as I'm sewing something small, sometimes the fabric just shifts just enough and I want to cry a little on the inside. That being said, I still use pins a lot. Don't mind all this other crap that's on here. Pins actually come in both ballpoint and universal, so pay attention to that. This is a magnetic pin holder, which is quite fun and also super-useful. I really enjoy this. I got it online at WAWAK, which is W-A-W-A-K. It's a really great online marketplace of all sorts of sewing goodies. It's a little difficult to search through, but it's really fun. These are pattern weights when you're sewing PDF patterns, I'll show you real quick. Not with that. When you're sewing with PDF patterns, which is what I do primarily, let's just imagine, when you print out your pattern piece, you're going to want to use a pattern weight to hold it down. At first, I used washers and ribbons and a hot glue gun and made these. But I've also been known to just use whatever is nearby. You can use a cup or a tin, a can of goods, whatever you want, you can use it. We had a little craft made these out of modeling clay, bake them. There's washers on the inside. It's super fun and they're really cute. Everybody wants a burger. You can do anything you want. I highly recommend pattern weights. But again, you don't have to pay for them. They're just fun. Pattern weights. This is a measuring tape. Once you getting into sewing and you start measuring children, every time this fabric measuring tape touches your child's belly, they will giggle and squeal and wiggle away because it feels a little cold, something I remember from my own childhood. I highly recommend getting these in a different color because once you have a white one, if you're like me, it will blend into other things. That's why I have lime green. These will stretch out over time. As you keep these, you're going to want to measure it against your cutting board. Wow, it's already there. Now, there you go. You're going to want to measure this because it's a fabric measuring tape it will stretch out just a little bit. I'm talking over the years. They're relatively cheap. Very useful for taking personal measurements. You're going to want one of these in the long-run. This is a stitch remover. It's necessary. Trust me. The fastest way to learn is to mess up super fast. The faster you mess up, the faster you learn. That's how I should've said that. This little gadget will help you remove stitches safely without ruining your fabric. Definitely need one of these. They come in all shapes and sizes. I paid a little bit more for an ergonomic handle. It doesn't really matter to me. I will say that over time, I'm going to point to this with the scissors, this part in here will get a little dull. You are going to have to get a new one at some point. Again, no matter how many of these you have, they like to hide. I owned several. I don't know where they are, and I'm constantly looking for one. You can also get some really pretty artistic ones. But again, it's all about how much you want to spend. Thread. For the purposes of this class, we're going to just need all-purpose thread. You can use 100 percent cotton if you want. These are both 100 percent polyester. The problem with 100 percent cotton is it might shrink and then I get a little nervous. For the purposes of this class, 100 percent polyester is great. This is a Gutermann thread. It's slightly more expensive. It's going to be sold at your local quilt shops. I think some of the larger box stores have it too. This is dual-duty made by Coats & Clark, I think it's actually what it's called. This actually came as a huge 50 threads set so that I can get lots of colors at one time. It has been extremely useful. I will say that as you move up in the sewing machine world, some sewing machines are more finicky than others, so pay attention to what your machine likes. I'm perfectly happy with this brand. Another super-duper useful thing. Let's move all this out of the way. This is a rotary cutting mat right here. Rotary cutters come in all different shapes and sizes and brands. This is my original one. It worked perfectly fine. It has a screw so that you can replace the blades. I've now relegated this to cutting paper because again, I do a lot of PDF patterns. It's great for cutting out PDF patterns out of paper. I always know that this is my paper one and this is my fabric one. You don't want to use the same one for both paper and fabric because paper will dull your blade really fast. This is my fabric one. This is made by Alpha. There are tons of different brands. You have to find one that works for you. This is right-handed or left-handed, or you can do both. This one has a little clip on the back that releases it and you can buy replacement blades very easy. Yes, these can be dangerous. I've done a whole separate video that's coming up next for how to use this. But I can honestly say that if you're going to buy one major thing or maybe asked for it for a present or something, some kit that involves a cutting mat and a rotary cutter and these. These are acrylic rulers. They are very useful if you're cutting quilts or quilt blocks or anything like that. But I use them all the time for apparel sewing as well. I really cannot emphasize enough how useful these are. You may also notice that this is a cutting mat as well. This is actually my entire cutting tabletop and it's 36 inches by 72 inches, is very large. I can do a whole pant leg here for myself and I'm 5' 9'', so that should give you some insight. It is extremely useful. It's not, you don't have to have it. But having a counter-height cutting table saves your back. So something to work toward. Something to start with. This is what I started with. I highly recommend it again. Like I said before, I'm going to show you in the next video how to use it. It's very useful. I remember from my childhood, my mom using pins, pinning the tissue pattern to the fabric. I tried doing that. I could never cut straight. It was very frustrating. I can't iterate that. I can't emphasize enough how useful this is. That's it for this class. Like I said, this does not cover all of the notions, just the ones that I like to use a lot. Have fun with it. These are great stocking stuffers for those people who don't know what to buy you. In the next video, we're going to prep our fabric and go over some small details that will really elevate your final project. I can't wait to share my tips and tricks for making handmade goods look store-bought.
6. Prepping Your Fabric: Before we get started, we're going to talk about prepping your fabric. In order to have the best outcome, prepping your fabric is essential. You should wash and dry your fabric after purchasing. Fabric colors can bleed, so wash is really important to keep that from happening on your final item. Ask me how I know. There can also be chemicals and dust from the warehouse. Fabric can shrink too. It's important to follow the wash instructions on the fabric. But for the purposes of our pillowcase fabric, I recommend washing and drying. Next, it's time to press your fabric. Ironing and pressing are often used interchangeably, but they're actually two different things. Ironing is something that we do for our clothes at home. We go back and forth, sliding around. Sometimes we use steam, sometimes we spray it with starch. But when you're working with fabric that you're then going to sew into something, ironing can actually distort the fibers in the fabric and that can lead to some wonky quilts, or wonky cuts, or wonky garments, and wonky is bad. Pressing without distorting your fabric can be a little bit of a challenge. You want to press your iron down firmly without burning your fabric. I recommend using a press cloth, which can be any spare piece of fabric that you have that's not going to burn easily. You want to avoid pulling the fabric too far in one direction or another. Let's say you want to set the seams of the item that you're selling, whether it's a quilt, a pillowcase, a pillow cushion, or a piece of apparel. You're going to want to press down with the steam and then lift it up without going back and forth. Then you're going to want to let the item cool before you move on. For our purposes, it's not imperative because we're just making a pillowcase. But these small skills are really important to learn so you find success in the long run. Irons are not all created equal, some some quite fancy and they can get really expensive. I'm sure that the really expensive ones are worthwhile, but I don't have one. The reason is, my ironing board is right next to my door, I've got six kids coming in and out, and while I'm sure it would make my life easier, I'm just fine with my cheap one. I am really clumsy. If you're selling apparel, I want to really hit this home. You can press after every single sewn seam and it will make a difference in your final garment. Do you have to? No. But it will look far more professional the more you press. Pressing and topstitching are two of my love languages. When people are testing new patterns for me, that's actually one of the questions on application. Are you willing to do these things? It's amazing how different a final item can look after paying attention to these small details. Is it a little bit more tedious? Yes. But the pride I feel at the end is totally worth it. For this pillowcase project, I'm trying to get the big creases out of the fabric so it just cuts smoothly and evenly. I'll be honest, I'm not super concerned. I just keep reminding myself, this isn't couture, I'm just making a pillowcase. But I do think it's important that you know that even these small details can make a huge difference in your final project. In the next video, I'm going to show you how to cut your fabric. It's time to get to work.
7. Cutting Your Fabric: In this video, we're going to talk about how to best cut your fabric. When I say best cut, it's because there's actually two different ways to do it. If you have a directional fabric, it's going to change the way you have to cut your fabric and it's actually going to take slightly more fabric than originally called for, you're going to need just over a yard if your fabric is directional. I'll go into more detail on this in just a few seconds. Really quickly, I'm going to show you the layout of our pillowcase and just break down all the pieces you're going to need to cut out. You ready? Let's go. Here is our pillowcase. As you can see, we've got our main fabric here and our border or cuff here on the side. I just want to break this down because I throw out a lot of the numbers at you, and I think it's easier for you to see an image. Let me scroll up here. Length and width are easy to get confused, especially on a pillowcase where it's laying as a landscape mode if you will, on your bed. For right now, we're going to call the length 20 inches here, is the short end of the pillowcase, and our width is 28.25. These are our finished length and width. This is for a regular-sized pillowcase. If you'd like to make a queen-size or a king-size, just check out the PDF download that's in the Supply section, it's going to tell you the right dimensions for those sizes. For the purposes of the video, I use just regular sizes. As you can see, that 28.25 is broken into two pieces, it's the four-inch cuff and the 24.25-inch main piece. What this means is when we go to break it down, to cut our fabric, we're going to have to add seam allowance to it. Well, the cuff is actually cut so that you can fold it over, so there's no raw edge against the end of the pillow. This just makes it look nicer at the opening. You're actually going to cut that piece 8.75 by 20.75. Which direction you cut it, doesn't really matter on your fabric and I'll show you what I'm talking about in just a minute when we're actually cutting the fabric for the test pillowcase. The main body is 25 inches. A lot of people like to use just a different color for the cuff just to add some interest, there are lots of different ways to do it, you do you boo, boo. Then even the main fabric for the length is going to have to be 20.75. All of these measurements take into account the 3/8 of an inch seam allowance that we want to add. That way after we sew up our pillowcase, it's still going to fit a standard size pillow on the inside. It's really important that no matter what size pillowcase you're making, you add the seam allowance to it so you know how big to cut your fabric. For ours, we're going to cut it 20.75 inches long by 25 inches wide for the main fabric, and then for the border, it's going to be 20.75 inches long by 8.75 inches wide. That's going to give us that finished border width of four inches. Now, one thing to keep in mind is what I was talking about with directional fabric. This little guy wants to be upright when he or they or she or whomever is on your pillow; if you have directional fabric, you're not going to want to accidentally cut it like this, you're going to want to cut it this way. Well, that means that in order to cut your fabric, you're going to need longer than one yard. I'm going to keep hitting this home because it really matters and I don't want you to be disappointed. I'll show you in a video with fabric in my hands, just keep watching. Let's go cut our fabric. I'm ready to cut my main fabric here. If you'll notice, this is a directional print all of the little Wonder Women are going one direction, which means if I were to cut it on the fold like so, one side would be the correct direction but the other side of the pillow would be upside down. This is my folder right here, when you look at the back of the pillow, it would look like this. Now, I don't really care, I'll be honest. Let's see if I have enough. Once again, to cut my main fabric, I need 25 inches the width of the fabric which is selvage to selvage. You'll notice that the selvage on one side of this has a white band, the selvage on the other side has actually already been cut off, but this is selvage to selvage, I need 25 inches. I have more than enough. Typical quilting weight cotton is 44 inches wide, selvage to selvage. Then for the height, I need 20.75. I do not have enough. Another important thing to mention is sometimes the selvage is a slightly different feeling than the main fabric, I recommend cutting off the selvage before you sew it up. You don't want to include this in your final project because it will stretch differently than the rest of the fabric. I'm not ready to cut out my fabric and because I'm choosing a non-directional print, I can fold it in half, selvage to selvage, and cut out two pieces at one time. This is also a great time where you can cut it on the fold if you would rather. My pieces are not cut, the top and bottom of my piece which are now here on the sides. If I line the selvages up, I get this weird pulling. This is a cheaper fabric that I got on sale and it's important to know that because you don't want to ignore it, that's the warp and the weft of the fabric that's just slightly off. I'm going to smooth it out. Again, I'm making a pillowcase, so we're for progress, not perfection here. My three-year-old is going to be thrilled with her ninjas. For this, I've winded up, but you can see that the top and the bottom aren't straight across. Sometimes they get cut off-grain and sometimes they wash and sometimes you can pull it diagonally and help it get back, but for the purposes of this, I'm not concerned; I just don't want to cut it with that huge wrinkle, I want to try and get it as straight as possible. If I were making clothing, I would be more concerned. Again, we're going for a width of 20.75. If you want to cut it on the fold here, you're going to cut it at 20.375, this way. I'm going to go ahead and cut mine on the fold. See how I just decided that? This is a rather large cut, it's harder to cut large rectangles than it is small ones. That's why I recommend a big ruler like this and this is also where marking pens that disappear on fabric come in handy. Again, I'm going to cut mine at 20.375, I'm using the numbers on my ruler here. My screws on my cutting table are getting in the way. 20.375 on the fold. You want to test your pen all the time, you don't want to just binary mark it. If you don't have a disappearing ink pen, another option is chalk. I've used sidewalk chalk because again, lots of kiddos. Here's Tailor's Chalk, it comes in blue, you can see the white is missing. This works really well. Always check your fabric. I'm just going to come back over so hopefully, you can see these marks. The length of my main print is 25 inches which is actually longer than this. This is 24.5, so I'm going to line up one end so that it's straight. Now, the small one is five inches, it's going to be like that. I've lined up the 20-inch mark here at the end of my pillowcase, I've added five inches there, and I'm going to use my rotary cutter to cut that line. Make sure you cut in straight, that'll be like me. For this end, I'm going to use the fold and my fabric is one straight edge and the top will be at 20.375, and I will cut. You'll hold the rotary cutter with one hand and you cut going away from you with the other. Really important to cut going away from you. Never cut coming toward you. I'm going to come back over here and cut this side. I've already marks this with my pen, and there is the main body of my pillowcase. Again, I cut mine on the fold. You can do it either way. The direction of it didn't matter for me, so I cut mine on a fold. Now we're going to cut the border piece. The border piece width is 20.75 inches. Again, that's two, cut it 20.75 inches. If I want to cut it on the fold, I'm having the same thing. You can see how this is just not straight. It does tend to collect things. For this one, it's 8.75 inches by 20.75, or if you're cutting it on the fold, it's 20.375. If I'm saying too many numbers for you because I know you're a beginner. It's all in the PDF download. Make sure you look at the resources. This is actually thinner since it's cut a little wonky. I don't have enough fabric to cut this on the fold. For this one, I'm going to cut two pieces that are 8.75 this direction and 20.75 this direction. Remember, I'm going to show you my little man here again. The 20.75 is right here. The 8.75 is actually going to be folded over, so the open-end, it's going to be on the fold and it's going to have a finished length of only four inches. The 20.75 is this open end in right here. It doesn't really matter since this is a solid, it doesn't have a direction, one thing that is really helpful with a rotary cutter. I can fold this, make it much smaller. I can use the fold as a straight edge so that I can square off the end here. Then I'll use one of my larger rulers to go 8.75 inches down. Now I have a piece that's WOF, it's a width of fabric, by 8.75. If this was a standard length, I would have everything I need right here. But unfortunately, it's just a smidge shorter, I believe. I'll double-check it. Maybe I was doing something funky. No, it works fine. Crazy. I was doing something funky. I'll go to 20.375. That's what it was, see? You can see if I set it up with the grid on my cutting table here, this bottom edge is on the grid, look at that, 100 percent not straight. This little length right here is what I need. At this point, I'm going to cut off the salvage of both layers. Again, I'm using this as a straight edge since I know it's square, and then I will cut. I want 20.75, which when that's in half, it's 10.375. I actually use this ruler to get 10.375 and fold there. That makes it a little bit easier to cut bigger pieces. It takes a little maneuvering, but it's not too bad. Now I can cut it with this ruler. I want to make sure it's straight. Here's one piece of my cuff. Now I'm going to cut the other one. Again, I'm going to go down 8.75. I'm going to open it up and cut off my salvages here. I can actually do this one. I'll do it a different way just to show you. When you have a big mat as your entire cutting table, you can use the lines on it to help you cut longer lengths too. I don't do this very frequently, but I don't have a good reason. I'm going to line it up right here, straight across, right here. I want 10, 20, 20.75. Make sure everything is square. Now I have two pieces for my cuff and my main fabric ready to go. Are you ready?
8. Sewing Your Pillowcase: It's time to sew your basic pillowcase. The first thing I want to do is match up my fabric, right sides together. Now, I'm going to take it over to my sewing machine, and I'm going to sew down the short edge and up one long edge and backstitch at either end, so I'm going to backstitch here, which just means sewing a couple of stitches and then reversing for a couple of stitches before carrying on, you're going to want a straight stitch. You're going to get to the corner. You can lift up your presser foot and then continue on your merry way. You don't have to stop stitching or anything. When you get to the very end here, same thing you're going to go backwards a few stitches and then go back forward. That just locks your stitches in place. Now, it's time to sew our main body, remember we're going to go down one long side and then pivot and go down one short side, leaving the other short side open, we want to backstitch at either end and again, it's a 3/8 of an inch seam allowance. I lift my presser foot and I'm pivoting my fabric to sew down one short end. Remember I kept mine on the fold. If you didn't, you're going to need to sew down the other long end as well. Then backstitching. Now, it's time to go press this seam. The next thing I'm going to do, I'm going to take my border pieces here and match them right sides together, and I'm going to go down both short ends. Backstitching at the top and at the bottom. Again with just a straight stitch. I'm going to use a 3/8 inch seam allowance here. We're ready to start stitching. Again, it's a 3/8, 7-inch seam allowance, which is the space between the needle and the edge of the fabric, and we're going to backstitch at either end. Our first side is done and I'm going to repeat with the other side. Now, it's time to go press these seams. Now, I'm pressing my seams for the border piece, I'm going to press my seam open, which means I'm just opening it along the stitch line here. Again, we're not ironing it, we're going to press it, which is just to hold it down and lift it up. Now, I'm going to repeat with the other seam. Now, with my [inaudible] piece, I'm going to match the raw edges together all the way around. This one, close the seam allowance here. That's why I'm not very worried about finishing that seam allowance. Now, I'm going to press it, I'll probably press it all at once like this and then do it individually along the edge as well. My border is now pressed and ready to be attached to the main fabric. Now, it's time to press my main fabric seams. I'm just going to do this, just so we can walk you through how to really help your final products to look good. I'll be honest, it's a pillowcase, so I'm not too concerned, but a lot of this is just setting the stage for future sewing as well. At this point, I'm just pressing the stitch line, this just really helps the stitches shrink a little bit so they end up really nice. It's funny we joke that I press more now with sewing than I ever did with just clothing. Now, I'm going to take this over to my machine and finish this raw edge with a zigzag. I'm going to finish the raw edge on my main fabric. If you own a serger, this is where you would use it to just keep this right edge from unraveling after repeated washes, but for this purpose, I'm just going to use a zigzag and it's just in the seam allowance along the edge of the fabric. When I get to my corner, I'm actually going to stop about three-quarters of an inch from the actual corner. That's because when I go to turn this right side out, I'm going to trim across this corner to help get a really nice point in here. I'm going to backstitch. Again, if you really want to keep your stitches along the rough edge or the raw edge of your fabric, don't go over the seam that you've already sewn. Now, I'm going to do the short edge. Same thing this time, since this is the corner I'm going to trim. I'm going to start about three-quarters of an inch up. I'm going to backstitch at this last corner, and this is on the fold. If you don't have a fold here, I highly recommend stopping three-quarters of an inch away from your corner again, so you can trim that corner. Now, I'm going to go press it one more time. I'm going to press my zigzag stitch just to help it shrink into place a little bit. This is not imperative. You can skip this step. It's just a good practice to press all the time when you're doing a parallel sewing. Again, this is just a pillowcase. I know that. If you're quilting, you'll find that you press all the time there too. I'm ready to trim the corners. Now, it's time to trim my corners. On this, you're going to want to get as close as you can to the stitches without cutting the stitches at all. You can see it better on this side. Here's my corner, and I'm just cutting it diagonally across that corner, and then you can even shave it off a little bit more on the sides, and an angle. I'm going to do the same thing with my other corner. This is the corner on the fold though, so I'm not going all the way to the edge. I'm just doing them just a little bit. I can actually do it a little bit more. Trimming corners is important because it helps you get a really nice point. Now, it's time to turn your pillowcase right side out. When you get to the corner, you want to use something with a point on it, but that's not too sharp. Something like a crochet hook or a knitting needle. Chopsticks works well. The point the scissors can work, but if you pick out something too pointy, you're just as likely to push a hole through the fabric. Just be careful when you're doing those. There's one point. Now, we're going to do our other corner. Again, you're going to want to use something sharp but not too sharp to gently push out in that corner. Now I'm going to give my pillowcase a press. I'm going to press my pillowcase body now. It's important to roll out the seams so that they're right on the edge. The only way I can really describe it as rolling but you just manipulate them into place. Now we're ready to attach our border. It's time to attach our border. This is the raw edge and the open-end of my pillowcase main, and here's my border. Here's the folded edge, and this is the raw and the open edge. So right sides together. You're going to slip this over the end of your pillowcase, and you're going to line up the seams. This is my fold. We're going to pretend that that's one side seam and we're going to line it up with the seam on my border. You're going to clip, same with the other side, which is an actual seam. I'm lining it up so it looks nice once it's all sewn together. Then I'm going to find the middle of both of these pieces. The quickest way to find the middle is to line up the two pins. They should be exactly the same size, the border and the main should be the same size. Finally, the last halfway point. Now I'm ready to sew my border on with a regular sewing machine, you're still going to use a three-eighths inch seam allowance. So all the way around the entire pillowcase. Then you're going to want to finish the seam by doing a zigzag, and then my next step would be to press the seam allowance toward the body of the pillowcase and topstitch it down. So we're going to do all of that now. We're ready to attach our border to our main. This is a really good time to change out the thread on your sewing machine and in your bobbin to match either your border or your main fabric. I'm going to leave mine white just so you can continue to see the stitches. It doesn't matter where you start. We're not stretching anything. It should just be a one-to-one easy match-up. The important thing is to not pull, especially here on the border, because you don't want it to be pulled in one direction or another. We're using a three-eighths inch seam allowance all the way around. We're going to backstitch at the end. Now you can see where I've attached it. Now we're ready to overcast the edges with a zigzag. You can use one of the overcast stitches if you like. It doesn't really matter. Then you're going to backstitch again at the end. Now it's time to go press our seam allowance towards our main fabric. So from inside you can see we want it to go toward the [inaudible] I'm going to press it from the outside. Most places it'll go towards the [inaudible] really easily. Here at the seam, it's having a little trouble because it's a little thicker. So I'm just making sure it's going the direction I want it to. Now I'm going to go back and topstitch my seam allowance down. If you're really uncomfortable, you can stitch from the inside of your pillowcase, just right along the edge of your seam allowance. But traditionally topstitching is done from the outside of the garment. I know that my seam allowance is three-eighths, seven inch, so I'm going to go just a scant three-eighths inch, how about that. I'm going to do a straight stitch. This is a great time to do something decorative and maybe a blue or a red thread if you're feeling confident. The kids always get a kick out of that too. I'm just doing a straight stitch. As you're doing this, it's really important that this doesn't bunch up, you want it to stay flat. So you know, you can almost see your seam allowance through the fabric. You really want to make sure that the underside of your pillowcase isn't getting caught underneath the presser foot here. So I'm really trying to go slow and make sure it's guiding correctly. I backstitched at the end. My pillowcase is now done. We've been so good about pressing every step of the way that I actually am going to press the stitches one last time. In reality though, I'd probably be so excited to be done that I would skip this. Here's my finished pillowcase. Now we're ready for the next project, where I'm going to show you a similar project to make another pillowcase. But this time all the seams on the inside are going to be hidden. Now, why is this important? Hiding the seams. Nobody looks at the inside of the pillowcase. But it's fun to see how the magic pillowcase goes together. Keeping these seams hidden will increase the longevity. So that way your grandkids can enjoy this one day, or your neighbors, whatever or, I don't know, keeps going on and on. Hope you join me. Can't wait to see what you make with your pillowcase project. Make sure you update the projects. I want to see everybody's pretty fabrics. We're done with our first pillowcase. I know it's not exactly thrilling or super exciting. But for me, a pillowcase is what I always come back to when I'm in a slump, or feeling down, or if I just need a quick gift for somebody who's away at summer camp or perhaps college. It just works for me. It brings me joy. I don't have to worry about kids growing out of it, et cetera. I hope you enjoyed the process. I stretched it out a little bit, but I swear it's a super quick project. Once you get the hang of things and it all goes super-fast. Next step, I'm going to show you how to do a pillowcase a slightly different way, that hides all the inside seams. It's quick and easy too. The math is a little bit different, but I swear it's not hard and you're going to love how it turned out. Come on.
9. Cutting Your Burrito Pillowcase: In this video, we're going to cut out the fabric for our burrito or magic pillowcase. It doesn't really make sense why it is called a burrito until we start sewing it up, so just bear with me and go along for the ride. I warned you that the math would be slightly different, but in the end, I decided to keep all of the dimensions the same as our original pillowcase, and that was just for clarity. I didn't want to throw out more numbers at beginners. I just wanted to keep it as clear as possible, but it's nothing to be concerned about. In the end, the burrito pillowcase will be a quarter of an inch smaller than the original pillowcase, but when you're going over a pillow, it's totally fine and doesn't matter at all. As you are watching this video, we're going to cut out the fabric, all the numbers are going to be the exact same as they were in our previous video, but I've also added a little strip that's a pop of color, and this is just an added little bonus. Let's go, let's get started, do this cutout, and get it sewn up. Are you ready? Now we're ready to start our second project. This one, it looks exactly the same, but it's not. This one is called a burrito-style or a magic pillowcase. It's basically a different way of putting together the pillowcase. You get really super nice insides and a super nice outside. It's just a little bit fancy and helps with the longevity of the pillow or of the pillowcase, I should say, and is fun to put together. I'm also going to add right here, right where my little pink stripes are, I'm going to show you how to add a fun pop of color. You can add that pop of color, and so the pillowcase the same way we did in the previous project. I'm just showing you how to do it this time because it seems fun. For the border, we're going to cut to that or 8.75 inches long, that's with the grain of the fabric by 20.75 inches wide, that's selvage to selvage. For my border print, I have a scrap of these cute little mittens and mugs of cocoa. For my main fabric, we have gnomes, if you know me and all, you know that I love gnomes. I happened to have a lot of gnomes for some reason, we're going to use that for our main fabric. This time we're going to cut two that are 20.75 inches by 25 inches. Remember, 25 inches is the main width of the body, for me, I'm using a directional print. That means I can only cut it, my little gnomes are standing upright when I'm looking at the pillow. That means that 25 inches is going to be selvage to selvage, and the 20.75 is going to be from the top of my fabric, like the cut edge of my fabric down, basically, from the head to the feet on my gnomes, that means I'm going to actually end up using 42 inches of fabric. I'm actually going to use over a yard of fabric because I'm using a directional print, that's important to remember. I love getting a pillowcase out of one yard, but you have to be able to cut it. The 25 inches is going from the cut edge down and the 20.75 is going selvage to selvage, just something important to keep in mind. For this little pop of color here, I'm going to use polka dots and when I cut it, I'm only going to need two inches, I'm going to write two inches plus this length or width, however you want to see at the 20 inches. So 20 inches plus seam allowance is 20.75, so times 20.75 inches. Again, 20.75 inches is this, height of your pillowcase. The two inches we're going to fold it, it's really just there for a pop of color. I don't have enough length this way to cut 20 inches, I'm going to cut mine selvage to selvage again. All right, let's get our fabric cut. We'll just go down in order, the first step is my border fabric. I've got a wonky rectangle shape. I say wonky because if I line this up, the selvages and the bottom are straight, it starts to get off a little bit. If I decide that I want to make the folds straight, then I get off in other direction. We'll assume that our fold is straight, and I'm just going to trim the bottom here so that it's square. Again, I need 8.75 inches, so I'm going to fold this over again, and I'm going to use this one. Mind where you put with the bottom and with this folded edge, and I'm going to do 8.75 inches tall and then I'll unfold it and I can either do two at 20.75, or I can cut it on the fold and cut one at 20.375. I think I'm going to do that because I'm looking at my other fabric here. No, I'm not. I'm going to cut too because the way my gnomes are facing, I'm going to have two seams, I might as well just carry those seams up through my border print there, this ruler has an extra half-inch right there, I just need to keep that in mind when I'm measuring it here. I'm going to use my other ruler just to help me keep that line straight. Then this edge, I can open it up or I can just trim it right here on the form, I literally just did a little sliver, it's fine. I have my border print, two of them, 20.75 inches wide by 8.75 inches long, so I'm going to set those up to the side. Now, I'm going to do my little contrast band. This one is with the dots here. I definitely don't want those to look funky. They're really small, so I don't think that they would really draw a lot of attention, but I can already see like if you follow the yellow, it's going in this direction, I can see that this cut is not square. It's important not to just pull these when you get little threads that are still attached because they can cause a run in your fabric. Once again, I have 20.75 inches by 2 inches. I'm going to fold this over. I might have to cut this a little bit differently. I actually don't have enough width here to cut it on the fold. What I'm going to do is I'm going to trim myself a gaff here. The dots help me make it really easy to trim a straight line as long as the dots are printed straight. Now, I'm just going to use my long ruler. Again, I want 20.75 by 2 inches. There's one. I think it's time to replace my rotary blade. My two strips for my little contrast are my pop of color. Now it's time to cut my main fabric. My fabric isn't wide enough to cut 25 inches on a fold, so I'm going to have to cut 25 inches by 20.75 and then below it, 25 inches by 20.75. The first thing I'm going to do is fold my fabric over about 13 inches. Perfect. This is where I'm going to get that 25. I'm going to cut it on a fold just to make it a little more reasonable. Twenty five inches on the fold is 12.5, so you have options here. You can take your marking pin and mark your knowns. Then from the top, you can measure down 20 inches using your marks as a guideline. That works really well. Then I'm just going to double-check, 20.75, see I didn't cut it across there. Let me do it this way. It's always good to measure twice. So I've marked it there, and then I'm going to use this straight edge to get it square. Now I can cut this corner. Just make sure that your pin is not going to accidentally show through to the main fabric. It's in the same allowance, so you should be fine. You just always want to be careful. So there's one binding piece. I'm going to do the same thing again. I folded from the salvage toward the middle and it's all smooth and straight. I'm just going to mark in a few places to make sure that I'm still staying straight here. Again, it's 12 and 1/2 on the fold to get that 25 inches that we need. Now my second binding piece has been cut out. I'm going to go give everything a good press. In the next video, we're going to sew up our burrito, our magic pillowcase. Let's go, let's get this done.
10. Sewing Your Burrito Pillowcase: In this video, it's time to sew up our burrito pillowcase. The steps might seem a little tricky and your brain is going to be like, why? Why am I doing this? What? Is she right? Maybe she's wrong. Just trust me. At the end, you're going to be like, it's going to blow your mind, and it's going to be awesome. Let's get this going and get it done. It's going to be super quick. I swear, you're going to love the outcome. We're just about ready to assemble our magic or our burrito pillowcase. Which one do we want to call it, burrito or magic? Magic. I get to do jazz hands with that. We're just about ready to assemble our magic pillowcase. The first thing you're going to do is take your border pieces and match long edge to long edge on each piece and press, and then same with your contrast pieces. You're going to match long edge to long edge and press with both of them. Magic. Now, we're just going to work with one set of pieces at a time. I'm going to set the other ones off to the side. The first step is to open up that piece that you just so carefully pressed. I've opened up my border piece. Then I'm going to take one of my main body pieces, and I'm going to line it up with the short edge up here. Then my contrast piece, I'm going to line it up with this edge here. All three pieces are all lined up along one edge. Next, I'm going to take my main body and I'm going to roll it up. Are you getting excited? We've rolled up our main body piece out of the way. This is all still lined up. Then I'm going to take the opposite edge of my border piece and match it to this edge where everything else has already been aligned. Next, I'm going to clip it into place. You can use pins or clips. I've got it all pinned through all four layers. The layers are one edge of the border piece, my main fabric piece, my contrast, and then the other edge. Now, I'm going to sew at the 3/8 inch seam allowance all the way down this edge. It's just a straight stitch. I'll be right back. I have a tube here. Now, I'm going to turn it right side out. Again, I just did this on my normal sewing machine because the beauty of this method is that everything is encased, so you don't have to worry about the seams unraveling or anything like that. Here it is from the inside. See how nice that looks? Then from the outside, baby. Who's excited? I'm excited. Are you excited? Look at that. Now, we're going to give it a really good press. We want this side to just be flat and look really nice, and this side, we want it to lay flat as well. Let's go give it a press. Here's the final side from a pillowcase perspective. Now, I'm going to point out something. If you are right-handed, you might want to do it like this, but if you have a double bed, it needs to go both ways, so who cares. It won't matter. It just made me laugh because I'm looking at this and I'm like, well, if I wanted this on the other side, these little people are upside down. That's just the way of it. Now it's time to do the other side of our pillow. We're going to do the same thing. I'm going to take my border print. Now, this time when I lay my people down, if I lay them down with their feet that direction, then it'll be as though the cuff is on this side. For this one, the cuff is on this side. That will be right for the back of the pillow. Wait a minute, had to work that out. Man, when in doubt, choose a piece of fabric that doesn't have a direction. That will make this easier on you. I've lined up my edge. The first step, just to make sure we're paying attention, first step, open up your border piece, lay it down flat, right-side-up. Line up your main fabric along that edge. Line up your contrast piece. Roll up your main fabric. I folded my border up over my roll to meet that edge again and I'm pinning it. Now, I'm going to go sew a straight stitch here from edge to edge with a 3/8 inch seam allowance. When you're sewing this, you want to be really sure that your roll is nowhere near that edge because you don't want to get your main fabric caught in there. Be right back. I'm back with my burrito. We're going to turn it right side out. It's so fun. Now, it's ready to give a good press. Again, here's the inside. Now, we're ready to sew our edges. I have one piece wrong side up, and I'm going to place my other piece wrong side up on top of it. Now, this seems a little counter-intuitive, doesn't it, but we are actually going to be doing French seams on the edge and the reason is this will encase the raw edges all the way around. It just makes the inside keep that fancy look, plus it hides your raw edges so you don't have to worry about it unraveling. It's really important. You're going to want to really try and do a good job of lining up this scene. One trick, this is called WashAway Wonder Tape. It's not required, but whenever you're lining up seams or stripes or anything like that, it works really well. It's an adhesive tape. It doesn't gum up your machine, so that's a nice bonus, but you can put it in the seam allowance. I use pins as well, but it just really makes sure that it stays put. I'm going to clip it too. For this, we can go ahead and clip all the way down the edge. Again, you can use pins or clips, whatever floats your boat. I'm going to point something out over here because I see something wonky. Same thing up here. I'm going to use a small piece of WashAway Wonder Tape. You also really want to make sure that this top edge is aligned because nothing is going to look goofier than having that misaligned. Some of these things honestly get easier with practice, and then some of them are tedious no matter how long you've been sewing. I think what gets easier is just setting it up and doing it the right way the first time, like with pins and using tape if you want to use tape, but really it comes down to pinning it because once you realize that that's worthwhile, you do it and you don't have to seam rip it later. I'm going to point something out. Part of this is how I cut the fabric, but look right here, you see how that's not quite lining up and then boom, look at that. What I'm going to do is I'm going to take my long ruler and do these clips. I'm just going to square that off. There should be plenty of wiggle room to do this and still be able to fit a pillow in it, because what we don't want to do is so that as it was cut, if you ended up matching them, then you would end up sewing it off grid and you could end up with wrinkles we can't get rid of or we can end up with a hole. Now, we have our fabric wrong sides together, which is a little bit hard to remember to do it first, we're going to start on one edge at the cuff and go all the way around with a scant quarter inch seam allowance. Scant just means barely, little bit smaller than, just shy of quarter-inch seam allowance. Still a straight stitch. You want to try and pivot at the corners, so you don't want a curve them off. You want to go down and then turn like lift up your presser foot, turn your fabric 90 degrees and you want to backstitch at both ends of the border. I'm going to go do that. As you can see, I've gone all the way around three sides with a scant quarter inch seam allowance. I'm now going to trim my corners. Again, you're just cutting the triangle off in the corner close to those stitches. Now, I'm going to turn it right side out. I'm going to carefully poke out my corners. I really would rather have a rounded corner than hole in my fabric. Now, it's the way we typically fold it with right sides together. The next step, I'm going to take it over to my sewing machine, and I'm going to manipulate the fabric so that the seam is right along the edge and I'm going to press it. You definitely want it right along the edge and you don't want any extra bubbles of fabric or anything like that. I've pressed my pillow case so the edges are very crisp and everything is looking good. I'm now going to go back over those same seams with a three-eighths inch seam allowance. The purpose is to make sure that you get the entire seam allowance that you sewed in the previous step completely encased because what you don't want to have happen is if I don't take a big enough seam allowance here, you might see it from the outside like that, we don't want that to be what you see. We want that to be what you see. Now, I'm going to go back over to my sewing machine and sew around the all three sides with a three-eighths seven inch seam allowance. We are just about done. The only negative to this style of pillowcase is going to be the corners because you can't trim this. I mean you can, but then it'll still unravel and that defeats the purpose. You're going to leave it, and then when you turn it right side out is just going to be a little bit more rounded than our other pillowcase, but I'll tell you that when you get a pillow in there and it looks super cute, no one's going to know. I'm seeing one thing that I want to point out to you. This is the step where we go around the whole edge of our pillowcase and we just look to see if I cut the seam allowance. Right here, we can see threads. I'm going to trim those. I probably should have trimmed those before I sewed them, but I'm going to trim them now, but I don't see the edge of the fabric. Same here. I've got some threads, but I don't see the edge of the fabric, so I'm feeling pretty good about myself, just threads. I'm going to clean up all of the threads, and then I'm going to give it a really good press, and boom, we're done. It's hard not to feel, Oh, look, I messed up. This is what we wanted to avoid. In order to fix this, all I'm going to do is come pinch this like so and resew it. I had a little problem getting over the hump here, so I want to make sure it goes all the way up here. I use a clip so I know about where to start, and then it goes just to the white and the clip so I know where to stop. I could come in here and try and trim it with scissors so that it wasn't noticeable. I don't really trust myself, honestly, not to cut my main fabric, but that will help me take a little bit less, but again, if I get in here and I go to cut and I accidentally cut my border fabric, I'm going to be a little sad. I would rather just go back and just take less than an eighth of an inch right here. I'll be right back. I'm back and it's fixed, so you can see I didn't take out my other stitches. I probably will, but honestly, if someone is looking at the stitches on the inside of a pillowcase, I will mock them. That is all. I'm going to give it a good press and we're done. We have our final pillowcase here with a little pop of color. The inside do looking nice. Here's what the final seam looks like on the inside. It's really nice-looking. This is something that you'll be proud of and it will be handed down because it will last a really long time. Here's the seam allowance on the other side, and now you're ready to take the world pillowcase, something by storm. I hope you loved selling up your burrito pillowcase. Personally, I go back and forth between which ones I want to do. I still have to think a little bit with the burrito, but I'm pretty sure that if I just did it that way all the time, it would become second nature and I can just have a little churn factory going. Might suck all the joy, but they'd be cute.
11. Final Thoughts: You made it, congrats. In this class, we've covered everything from different types of sewing machines, to different types of notions, to different types of fabric, to basic sewing skills, and really we're just barely covering the surface. There's so much more out there that you can learn if you just keep going. If I wanted to have one takeaway from this class, it's to never stop sewing so that you never stop growing. It just takes baby steps and we're all making progress. Not perfection, right? You feel me? Take a moment, upload your projects to the Class Project section, because I want to see them. I want to see what you've been working so hard on. I hope that you enjoyed this class, if you have a minute I would really love it if you could take time out of your busy day and leave a review. Just give me some feedback on what you thought. You can also follow me to see future classes. Thanks for being here. See you soon. Hello, darkness mode. I don't know if it's working or not, we'll find out. I'm still recording.
 Jessica Pierce, Sewing Pattern Designer and Artist