Transcripts
1. Introduction: So it can be a greater journey that is unique and
person for everyone. It is an essential life
skill and a wonderful hobby. Learning to sue with
a practical project, such as an apron increases the knowledge and
confidence with the craft. A prince, or a part of
everyday life that provides the perfect combination of
stay and functionality. They make a perfect
heart touching gift for a friend
or a family member. This class will
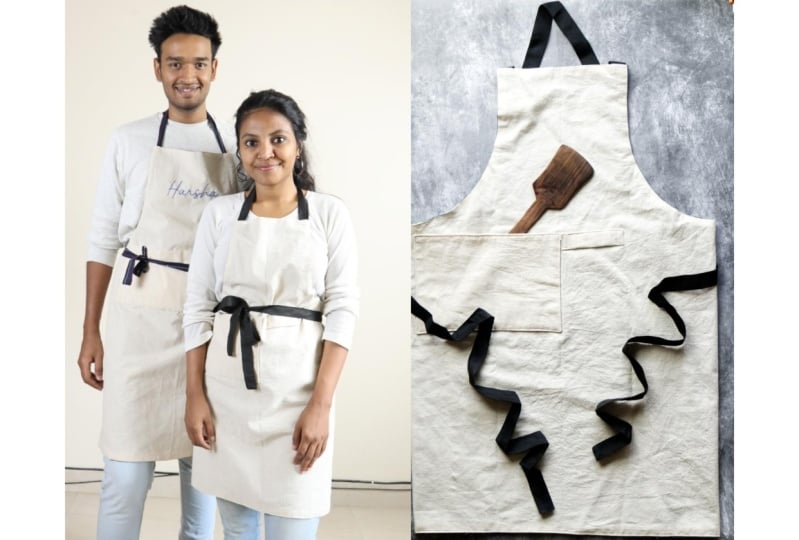
teach you to make your own personalized aprons for yourself or your loved ones. I'm Claudia of fashion and lifestyle accessory
designer from India. I have helped students
across the globe to discover the creativity through
various classes that feature craft and design. In this class, you
will learn to sue a double-sided apron with different styles
and functionality. So they can be used
for multiple purposes. This apron can also be modified and used
as a half a proton. I present some of my best
suing hacks and techniques that result in superior finishing with the
least amount of steps. Or an exciting idea for
starting a small business. Extensive customization
even allows you to make matching
aprons for your family. Crafting improves focus and can make a person
emotionally and spiritually content by giving a feeling of being totally
present at the moment, there is always a joy in making handmade
items by yourself. Through this class,
I look forward to sharing the joy of
creation to everyone. Join now and let's get started.
2. Your Class Project: The class project is to
create a nephron using the design concepts and the sewing techniques that
you'll learn in this class. This project allows you to gain practical knowledge and
understanding on design, answering allo your
creativity to flow, to create your own apron
that expresses your style. This class comes with
guides and worksheets to make your class project and effective
learning experience. Please feel free to
refer to the glass and use the worksheets as
you make you a prompt. After completing
the class project, you can chat an image of your project with the
Skillshare community. I believe your project
will be a great source of inspiration for fellow
students of this class. I look forward to seeing
your class project soon.
3. Craft Supplies Required: In this video, let's discuss the craft supplies
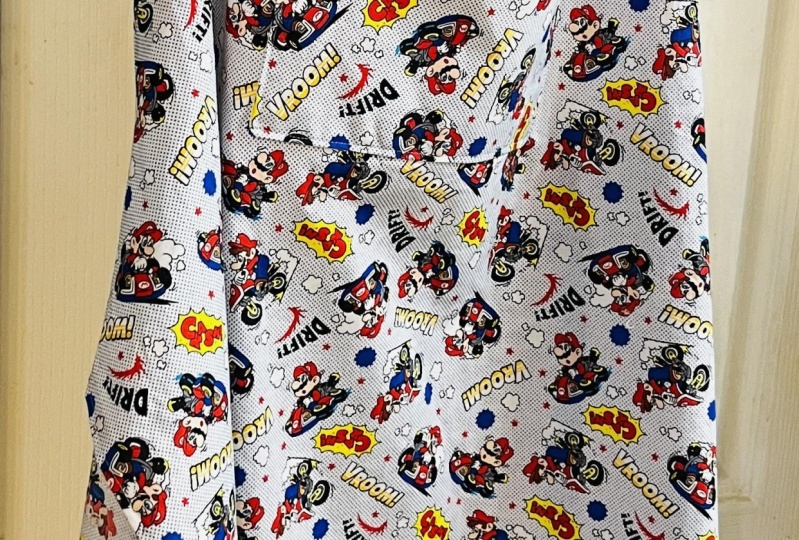
required for this project. Printed cotton fabric 1 yd. Foresight here,
plain cotton fabric, 1 yd for site B, fabric can be chosen as
per your requirements. And according to
your measurement, the amount of fabric, mainly sewing machine, measuring tape,
scissors for fabric. Scissors for paper. Thread, sewing pins, pattern-making
paper or newspaper. Iron and ironing board. Market. Ruler, set squared, sweat
as needle or safety pin, 1 " canvas whipping or any other one-inch
width ribbon for using it as the neck and
dying straps of the epsilon. Fabrics traps can be made if wanted in a particular print.
4. Choosing the Fabric: Different varieties of
fabric enable us to make our apron as per
our usage requirements. Some of you may use your
apron for gardening, while others may use it
for cooking or painting. Defining the usage of the apron will help us to choose
the right fabric. E.g. water resistant fabric
might help gardeners. In this lesson, let's see how we can choose the right
fabric for April, print for heavy usage. If you want to use
your Apple for heavy usage that needs
some water resistance, like gardening or cleaning. Recommended options or nylon
or Lacks coded Canvas. A print for medium usage. If you want to use your app for cooking, painting,
or woodworking, recommended options or
medium weight Canvas, denim, apron for light usage. If you want to use your oven for baking or added
light purposes. Options are lightweight
cotton fabric and whatever your
type of usage may be, always opt for tight over and fabrics that are a little dense. Urban fabrics increase the
durability of your apron. I'm going to make
this apron as a gift. I have so hand printed fabric locally to give an extra
personal touch to my apron.
5. Pattern Making for Custom Measurements: Suing sets two sets, an apron that fits
our size perfectly. In this lesson, let's discuss measurements
and pattern-making. I have created and shared a worksheet to simplify
dimensioning process. This can be downloaded from
the resources section. To make a custom epsilon, we need to take four
measurements, a, B, C, and D, as shown in this diagram. E is the chest length, b is the body height, c is the body width, and d is the top height. Follow the markings of this diagram to get the
correct measurements. Now, I have taken my measurements and
recorded in the worksheet. Notice that there are simple calculations to
get the best results. You can use this worksheet to record and calculate
your measurements. Suppose you're planning to
give this apron as a gift. Or if you find yourself in a situation where measuring
may be difficult, then feel free to refer to
the size chat provided. You may choose to
change the height of the apron as per
your preference. Once we get all the
four measurements, we can plan the
pattern-making process, visualised this diagram as a piece of fabric
folded into half. Since it is folded fabric, we will one day be mocking the pattern for half
a foreign body. We will be dividing
the values of a and C by keeping the
other values constant. I have filled out the
final calculations. Now we have finished
planning and recorded our measurements
in our worksheet. We can make this pattern in
the pattern making paper. First, I will start
with a rectangle of body height by half body
with, with my measurements. By connecting these two points, I have a rectangle.
From the top. I will mark half chest length. Now from top corner, I will mark top height and draw a perpendicular line. Here. I'm marking the midpoint
from the mid point, I'm rounding this coordinate using dashed lines
as shown here. Once I'm satisfied with my girl, I will finalize with
a thicker line. Now, you can go ahead and mark few details
on your pattern. Like grain line for line, seem elements and date and any other details
you wish to add. This will be useful in future. Now, I'm cutting the pattern
using my crafting scissors. We have now made
the patent ready. We can keep this back
aside for a short way. We will use this pattern after we finish designing our apron.
6. Designing the Apron: By making an apron, get the ability to design it, is selling in a perfect blend of aesthetics and functionality. In this lesson, let's
discuss the design process. I have my design, your apron worksheet
printed on an A4 sheet so I can fill and sketch out
my ideas down the design. Your apron worksheet
can be downloaded from the resources
section of this class. This worksheet allows us to put our ideas in an
organized method. The first one is
usage of the heparin. I'm going to choose medium. Since we will be making
a double-sided apron, I'm choosing a printed
fabric, foresight. And for side B, I'm choosing a plain
color or a fabric. I'm now going to
cut a small piece of fabric to sample my swatch. Swatches are extremely useful in design visualization
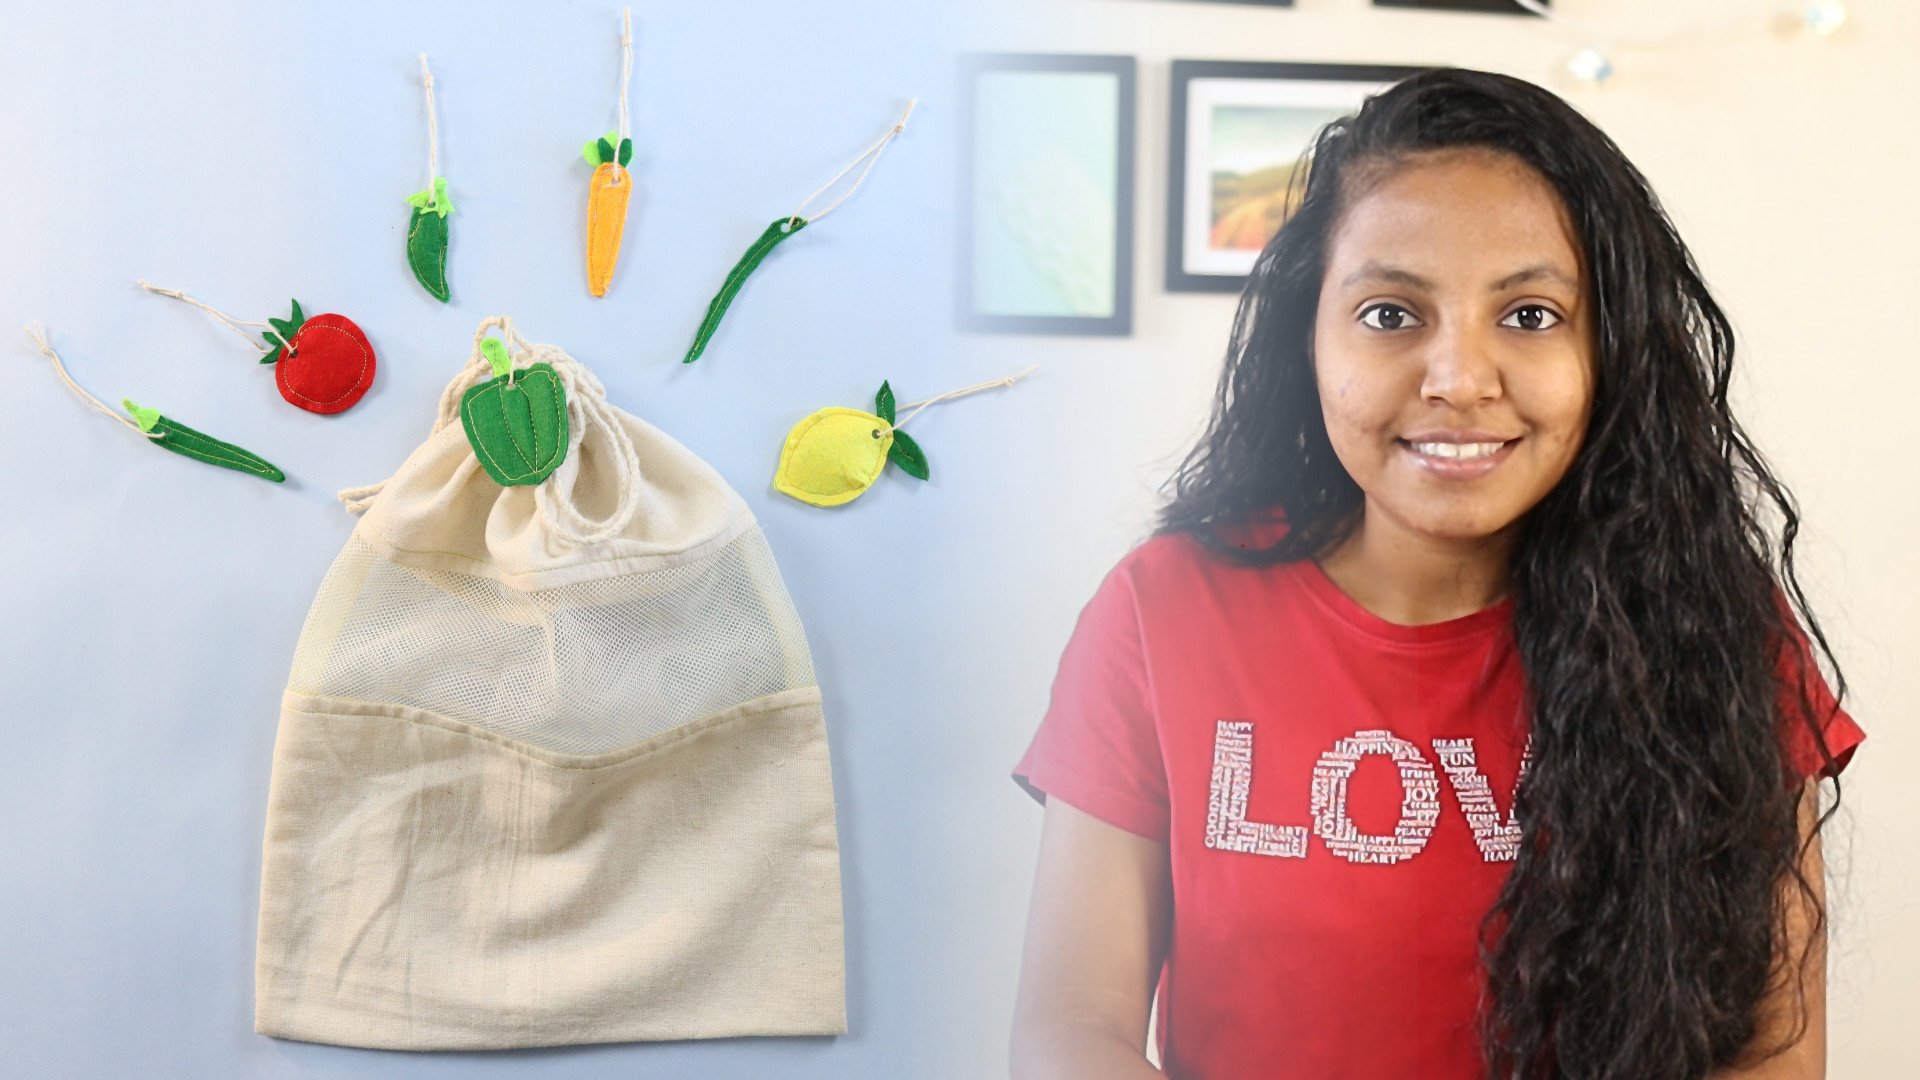
and documentation. Pockets and loops are really
nice to have on aprons. They add functionality
and aesthetic values. Our apron for the pocket shape, I'm going with a rectangular
pocket for a geometric look, I like to have one single
large pocket for both sides, a and b. I would like to
have three loops in total, two loops on site
and one loop on side B. Straps are the fastness
that we use to tie our apron. They can be personalized
based on a preference. Using Canvas webpage for plant steps and printed
plot for matching straps. I would choose Canvas
where being here. And for this trap color, I haven't go with black. Under the note section, I'm writing down
other details in terms of design
and functionality. We can now use the sketch
zone to draw our pockets, loops, and other design ideas. This worksheet gives us an advanced picture on
how I look and function. This drawing will serve as a guide while making our apron. Can notice here, I have sketched two loops
and enlarge pocket. On this side, I'm
also writing down the materials that
I'll be using. Writing and sketching out
ideas helps us to ideate, communicate, and
document our design. We have filled out our
design worksheet and are able to visualize
our design concept. We can now go ahead and make the patents for the
loops and pockets. In the next lesson.
7. Pattern Making for Attachments: Once we have successfully
completed the design worksheet, we have got all the information
like number of pockets, pockets says, and loops. We can now get started
with the pattern-making. I have provided templates for different pockets and loops
along with their sizes. Choose the one according to your design and print
it out on an A4 sheet. Use a pair of
crafting scissors to cut the pattern along the
cut lines to use them. Please feel free to experiment
and draw your own patents. You may use my
template as a guide. I have cut out three
total patterns out of paper along the cut
lines as shown here. We have patterns
for an apron body, the attachments like
pockets and loops. In the next lesson, we will learn how we can
transfer this to our fabric.
8. Tips & Best Practices for Fabric Preparation: Before getting to cutting, it is very important that
your fabric is prepared. We have to get rid of any fabric stiffening agents before we
start with the swing process, the first step is
to soak the fabric in warm water with
mild detergent. I recommend soaking for up
to 20 min and then washing it that only once the fabric
is dried, he presses. This step will get rid of
free goods and allow us to get a neat and clean
fabric surface to work on.
9. Cutting the Fabric: In this lesson,
let's see how we can cut our fabric according
to our pattern. First, I will fold
the fabric into half. Since we're working with
two sites, a and B, I'll place the other fabric folded top and match
the bottom fabric. I have aligned the folded edge
of both fabrics exactly on top of each other using suing
pens, secure them together. This way, we can cutoff for
the fabrics at the same time. Now, I'll place
the paper pattern over the top of
the fabric stack. Again, using so intense, I would say cure
the paper pattern. Similarly, I have placed the
pocket pattern over the top. Notice that I have aligned the fabric direction for both the patterns
using a marker. Let's start tracing the
pattern on the cloth. This is a recent bike. I have placed the plain cloth on top or the print that one. It shows my marker
lines very clearly. Similarly, embracing all
add-on deep pocket pack and removing the paper pattern will reveal a marker lines. I haven't put the pins back to hold the fabric
stacked together. Again. It is always a best practice to pin
all the corners together. I will start cutting on the mark lines using a
pair of fabric scissors. Similarly, I will
also cut the bucket. We can remove all
depends as we no longer need the fabrics
to stay together. Using this technique, we have cut both sides
of the fabric. Let's now cut the EU. For apron. I won't be needing one loop for my side b on a single layer of fabric and begin cutting
along the edge as shown here. Using the same template. I will cut two loops out of
Canvas webbing, foresight, ie, the template helps me to
measure the exact length. Aspect. Design worksheet. I have got all the pieces cut
and ready to be stitched.
10. Sewing the Attachments: In this lesson, let's see how we can stitch the attachments. First, we'll start
with the pockets. First. Keep both
pieces such that you're facing the wrong
side of the fabric. I have been a label called w r to denote the wrong
side of the fabric. This practice helps
you from getting confused between the
right and wrong side. From the top for the flap of ten MM and heat press
it on both pieces, aligned both fabrics on top
of each other together. Note that your right side of the fabric is facing each other. Let's add pins to keep the
fabric pieces together. Notice the stitch
lines shown here. I'm going to stitch on
three sides of the pocket, leaving the top side
and stitched for now. I'm using a masking tape to mark ten m m distance
from the need. This will make the
stitching process easier. Eyelid start touching on all the three sides
of the pocket. I will remove all the pens before flipping right-side out. Peaks is fabric in the corners to make the
flipping process neat. Now, we can flip the right side out with the pair of scissors, gently, poke on the corners
to flip them out completely. Now, I haven't heat press the pocket to get
can leak result. The next step is to stitch
the open edge together. Using the same process. I have stitch two
pockets for both sides. With the help of
the loop template. I'm just folding the clot. As for default lens. Now, I will fold the fabric into half
to complete my loop. Let's attach a pin and begins to chin all
of the open edges. Now, we can attach this
loop to the apron. You can notice that I
have pinned all the loops and pockets to the right
side of the efferent body. You can see the stitch
lines as shown here, using the same techniques I
have stitched the pocket, any loop on the
other side as well.
11. Sewing the Apron Body: In this lesson,
let's see how we can attach both sides of
the apron together. From the bottom full
half-inch of fabric flap. Notice that I'm facing the
wrong side of the fabric. Heat pressed the flap to
make default form and crisp. Repeat this flap on the
other side as well. Now, let's flip the
upper hand side. We have to align site a Inside, be on top of each
other such that the right side with attachments
are facing each other. Elaine, all these sites, so they match amongst perfectly
on top of each other. We can use pins to security fabric pieces
together in place. We have to make stitches on
the edges as shown here. Notice that some areas have
gaps in this stitch lines. These cats are no stitch areas. We will be using this gap
to insert this trap later. They won't be stitches
in these two areas. We can now begin stitching. You can notice from
my stitch lines that I have left some areas
without teaching. Since we have stitched
the pieces together, we can remove all depends. Now and then flip the
apron inside out. Now we have got a neat finished apron
covering all the raw edges. As you can see that
the nose area has become a passage for
our strap to enter. We can now stitch the open
bottom edge together. Continue this ditch all
around the apron except the gnostic area to get a neat top stitch
around our apron. You can see that we still have got the passage
for this trap. In the next lesson, let's insert these traps
and finish our apron.
12. Finishing the Apron: We can now insert the
strap into our April. I'm using 1 " canvas
webbing SS trap. We need about 100 " of strap to insert it through
the apron and to tie them. We can use a sweater needed to insert this
trap into the loop. Alternatively, you
can use safety pin. For this purpose, I'm
inserting the strap from this side and taking
it out through the top. And from the top
through these sites. This one just send
in a strap that is adjustable as
per our reference. If you wish to have your
strap in printed cloth, then you can make your
own fabric strap by following simple techniques
for making fabrics trap, we would need three
inch strips of printed fabric as
per our strap land. And small quote-unquote. I'm using two strips for
the demonstration purpose. Let's join the fabrics together by placing the right
sides together. Open the scene as shown here. And he proceeded
to make it flat. In this similar envy, attach fabric strips together as per the required
length of this trap. For the NTS drip
into half from the top and form and place the
cotton cord has shown here. Start making these
stitches length. From there you can access
the cotton quad, gently, open the folded fabric slightly and pulling
the cotton cord. This will flip this
trap right side out. We have to repeat the same process till you
finish the anterior strap. You can see that I'm
forcing my stitching and bullying the code on completion. Simply cut off the cot
and caught from the end. Now we have a fabrics tab ready. He dressed and finish
them before you use.
13. Conclusion : We have come to the
end of the class. Further customizations
can be added by using painting, patchwork,
embroidery techniques. I had gifted this electron to my husband with his name written using
embroidery techniques. I hope you have enjoyed the lessons and
learned something new. If you liked this class, please show your support
by reviewing my class. Your reviews and feedbacks
are very crucial for me to provide a better
learning experience. Go ahead and make your everyone, I'm really looking forward to seeing your work on
the project section. Thank you for joining
this class by and cheers.
 Cloudia David, Co-Founder | Entrepreneur | Designer