Transcripts
1. Primadonna Introduction: Hi there. My name is Britney
King of Throdora Gowns. I'm a bridal gown
designer and dressmaker. There are some jaw dropping beautifully constructed
gowns on the red carpet. You might think they are
impossible to make, don't you? Or maybe you find the
patterns too time consuming to work on and wish
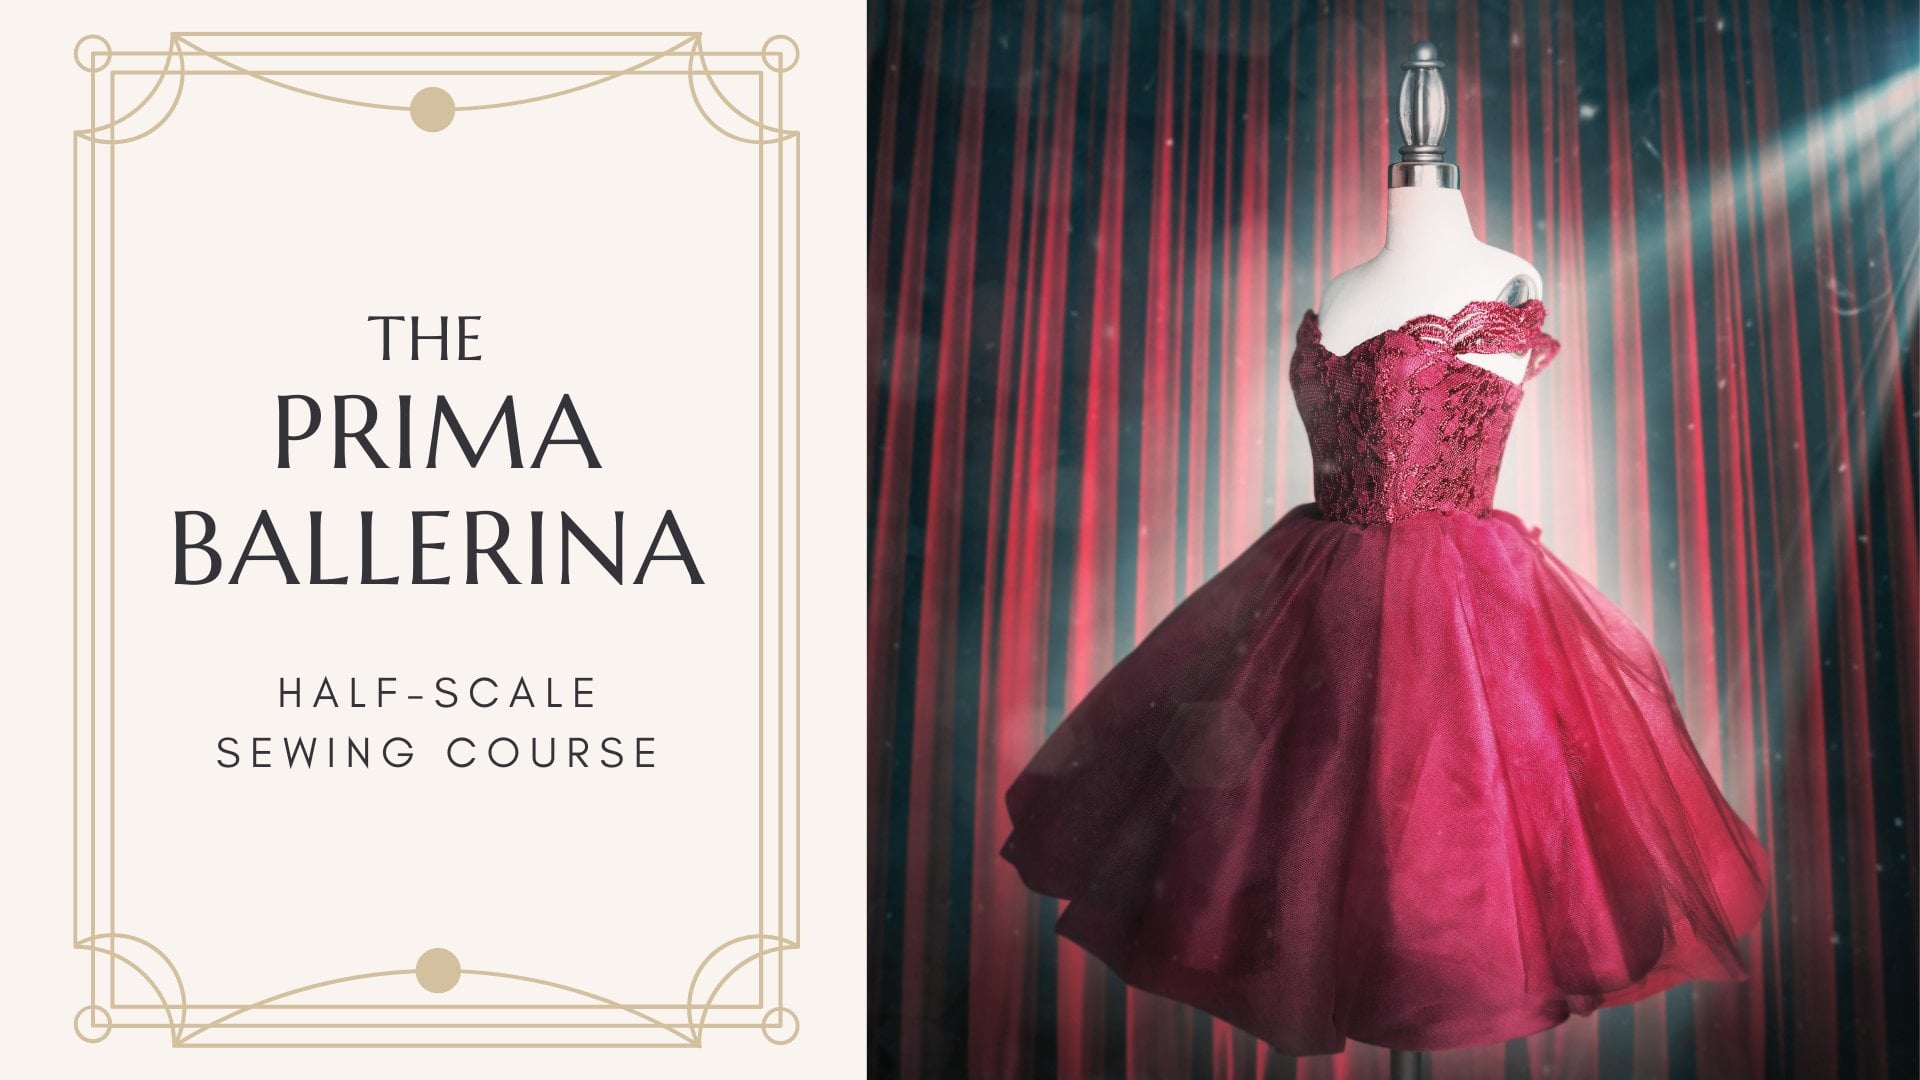
there were an easier, more affordable way to learn. Well, if this sounds like you, then the prima donna half scale sewing course is right for you. This course is a
step by step walk through of constructing
a true to scale miniature dress with a printable PDF pattern materialist and
fabric layo guide. You will be sewing up a storm in no time
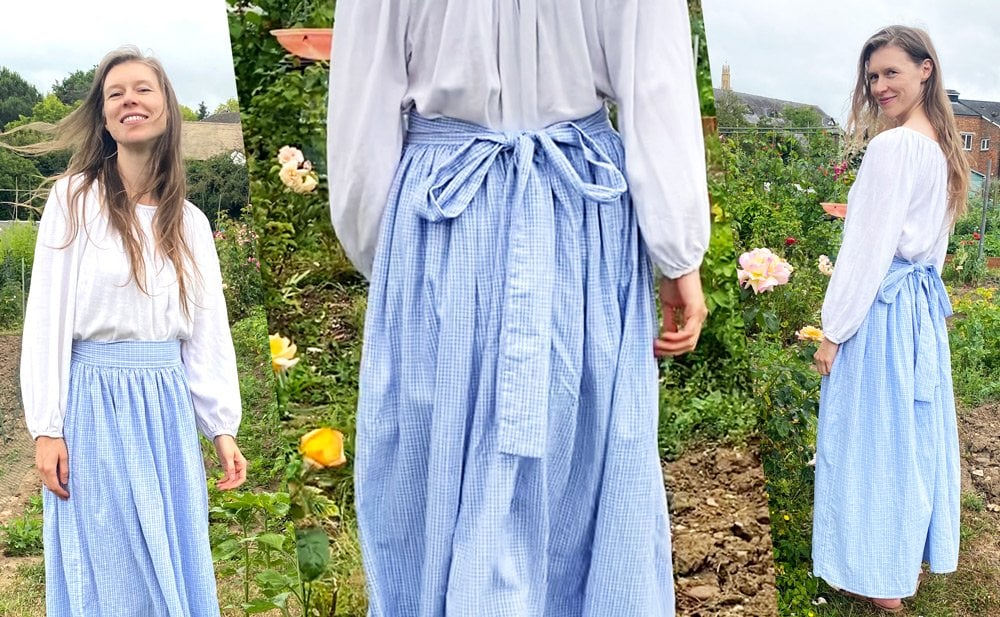
in the prima donna, you will learn how to make your own half scale
version of this dress. The techniques include a
sweetheartneck line underlining and interlining foundation
draped side skirt with pleats, boning, subtle bus
shaping with horsehair, Brad hand sewn him with lining
and an invisible zipper. Skill levels of all types
will learn something new from sewing the prima donna
half scale evening gown. I've recommended some
basic sewing tools and notions in the
course description. Remember, every small step
leads to some progress. All you have to do is start, are you up for the challenge? Then let's get sewing.
2. Lesson One: Layout & Cutting: Hey there and welcome to the pre Madonna half
scale sewing course. The very first thing we need to do is cut out your
pattern pieces. You're going to use
those layout guides provided to you in
the instructions. And that will give you the right pieces you need
to cut out for each fabric. So we're starting out
with our main fabric, the one that's going to be
on the outermost layer. You can trace, you can pin, or you can use pattern
weights like I use here. I just find it easier to control the pattern pieces
and keep them down. Do that for each pattern piece, lay them double-layered
with the fabric. Salvage to salvage and
cut out each piece. I've saved some
fabric here by just folding over a little
piece of the salvage, keeping it on grain, and cutting out this one
remaining bonus piece. The next fabric we need
to cut out is the lining. So gather up your pieces that you need for that and pin them or put pattern weights down on the placement that the
layout guide suggests. This is just the bodice. I'm cutting out, making
sure the green line on each piece is parallel to
the salvage or the fold. This next fabric we need
to do is the underlining. That is your feasible knit. That is going to just provide that extra structure to
the broadest pieces. Cut out each piece that
you need for that. The final fabric is
the interior lining. Now these are two
separate pieces. There are slightly
different from your regular pattern pieces. We've just got a
nice little dart. So you're going
to fold over some of your cotton interfacing. And you're going to
need to notch click, you're not just there
and transfer that dot. So to do the other side, I like to put a pin
through that dot and then flip over and mark
that dot right there. That's it for lesson one. I will see you in the next one.
3. Lesson Two: Bodice Seams: Welcome to lesson two
of the prima Donna. And today we're going to start putting our bodies
pieces together. But first, we have to
apply that fusing, the interfacing of your thesis. So when you do this, you want to press firmly
glycoside down on the piece and use a
little bit of steam. Don't go overboard with
pressing that iron. Just do enough to
get that glute to melt and stick to your piece? Yeah. I'll do that with each
of these bottom pieces. This is the center front. We're just print nice
and firmly on those. You're going to
want to stay stitch your front bodice curves with a short stitch about an eighth of an inch
away from the edge. That's going to provide
some staying power, some stretch prevention there. Then we want to clip ever so slightly just to the stitches. Make sure that you
use the end of your scissors
because this bodice is so curvy and small and
the size of the pieces. You really want them based
those princess seems together. So that's why I'm going
in with a nice basting stitch further away from
my actual seem a line. And I'm doing that before ISO, the princess line here. So they're pre clipped. It's going to make it much
easier to so that seam, do that on the other side. And you're ready to
clip the opposite side, the princess line there. Now you'll just get
to give it a nice pressed open those
up without warping. Be very careful. Use the
tip of your iron for that. Now, we're doing the
center back as well. Those princess seems the same process if your allowance
kinda overlaps, I like to cut these
little triangles out that helps them lay flatter when you iron and you
get a nice seam line there. And I didn't pre base to this, so those ones are far easier. Next is our side
seam for our bodice. So just a straight stitch, very easy to do. I like to pin beforehand
and do a nice backstitch. Remove your pins. As you saw a theme. These are a quarter-inch seems remember they're half scale, so half inch on a full-size, quarter-inch for our
little half scale. Next is our inner lining piece. So you remember these are
the cotton interfacing. And we're going to
just sew up this dart. So you want to start by
matching the dart legs. And then you're going to angle your stitch line to that point. I like to do a little
backstitch there at the point and then you would tie your thread ends
at that dark point. So same process for the back. Match your dart legs, backstitch and angle
your presser foot. You can draw a line if you want. If you don't, trust yourself
with the angles there, that helps guide your
presser foot along. There. I'm tying the
thread ends and I will go ahead and press this guy
open, it's complete. Except for the same apparently. Do that pressing,
get those dirt. It's nice and flat. I have that seam
allowance open there. So you just want to
press that open. And then at the very top, you just want to
press it to the side. And I like to go to
the side, same side. So press them towards
the side seam. There we have it. That's awesome too. I'll see you in the next one.
4. Lesson Two Pt. 2: Bodice Seams: Welcome back to the prima Donna, and today we are continuing
work on the bodice. And we'll start
by stay stitching the neck lines on the
front and the back. Just like we did with
the princess, seems. This is the front facing piece, but it's in the lining. So we're going to stay
stitch those princess seems there on the
front and the back. And do the same
thing we did before, which is clipping using are
very tip of the scissors. And putting the lining now to those princess seems in
the same manner as before. The lining has a little
bit more give to it. So it's a little bit easier, especially with those pre
clipped curves there because it is a very deep curve on
these princess CAMs. So you can, if you want, if you're finding it a
little too difficult to stop what you're doing and
do a quick basting on that. I did that here as well. So backstitch and repeat
on the other side. And then you'll get
to these side seam. There we go. You can
go ahead and clip the lining to make sure
it stays nice and flat. For this one, I'm going to
press toward the side seam. And that is to prevent the bulk. That's why we're
doing lining on here. Instead of double,
double layer of fabric, it just creates a
nice smooth surface. So I'm going to stay stitch
the arm hole as well and do the stay stitching on the front neck line on
our actual main fabric. So we have a nice
little bodice here. I'll stay stitch every curve. And we're ready to put that
all those pieces together. So the inner lining and the
lining is now going to go on. But first we based
the inner lining to the wrong side
of the main bodice. Not your typical
way to do lining. This is just pretty much
backing that bodice, giving it that extra
layer of support. So it prevents stretching. It's going to help
with the boning in it. It's all going to come together, nice and smooth too. So a really important
feature on high-end dresses. So we'll do a basting
stitch this time. No hands stitching needed. Just do a long stitch, straight stitch all along the
top of your bodice there. I like to go a little bit
in from my regular seems, so I'm going right at the
edge of my presser foot, which was about 1
eighth of an inch. And that just prevents removing those
stitches in the end, which can be time-consuming. So thanks guys, and I'll
see you in the next one.
5. Lesson Three: Skirt Seams & Draped Side Panels: Welcome to lesson three
of the prima Donna. Feel free to pause on this
little instructional graphic. You're going to want
to identify each of your skirt pieces so you know
which ones you're matching. The scenes to. The notches
are really important. To help you identify that. We're going to start with
the center front and do a regular quarter inch
seam all the way down. Using pins to keep it nice
and smooth and no puckers. And do the same with
the center back. Match notches, right
sides to right size, just like a regular theme. We're gonna do that
here and do that with the remaining side
skirts as well. After you've done that, you're going to press
all those scenes open so that they're
nice and flat. Next, we're going to start
on the draping pieces. You've cut four of these, you're going to
pin each together, right sides to write sides. And I'm starting with the very wide curved
bottom of each. So you're going to end up
with two separate drapes. They're going to
be double layered. And I'm just painting
along this curve. And we're gonna do a
regular stitch on those. So a ham allowance is bigger than a
regular seam allowance. So our hems or half an
inch on these guys. And that is what we're doing. We're going to then press this open after we've sonar seems, remember to remove your pins. That's always a good
little reminder here. To let you know. It can be dangerous going
over occasionally, I do. It's always a good
habit to get into. So to achieve that
really crisp outer edge, you're going to want
to press Open first on the wrong side and then give it a gentle press on the
right side as well. Use a pressing cloth
if your fabric is delicate or I've been iron shoe, those are handy as well. Here I am now basting the top
edge of the drape pieces. This is going to help us keep
those layers together so we can create the pleats in them because the
material is thick. If you're Materials center, it might be easy to do. So doing pleats, refer
back to the pattern. Discreetly mark your
front and your back. Check that your
notches are visible. Fold by joining each notch in the direction of the
arrows on your pattern piece. That's why you want to look at your pattern piece for reference here that we're working
with half scale. Keep in mind that any slight adjustment is
going to throw it off. So be very accurate and where your notches are and
where you're putting them. Because otherwise, even
the slightest eighth of an inch off is going to make a huge skew in that length of the drape because it's got to
fit the bodice right here. I am carefully pinning
these together, always pin first and then check on your skirt as well to
make sure that there's yes, there's still going to
fit that you've draped. You've pleated enough
of the material, it gets a very thick. So if you need to
lower your feed dogs, that could be possible. So keep that in mind
and always test first. You should end up with these two smaller
plates in the middle of the drape to complete it and see I'm bending my pins a little bit because it is super thick. My material is just the material
that I chose to do this. But now we're going to be
based those together and watch your underside very closely because
they might pucker. You can always undo that portion a little bit
after you're done and re so. But be careful when
you saw pretty much. So pin that drape. They should match the
markings on your pattern. Before you move on to basting
those drapes to the skirt, you want to check that both sides of your
garment or matching. So hold up your skirt and just judge and
measure if you need to, that they are both
at the same space, space away from each other. You don't want one panel being off off-center
a little bit. Your eye is going
to be drawn to it. If they're perfect and
they are looking similar. Go ahead and based your drape
to the waste of your skirt. And we will move on
to the skirt lining. So you want to do it
just like before. I'm starting here at
the fronts, I guess. Doing a regular side seam here. Sewing each panel together
with a regular seem. Lining is much more slippy, slippery are much, much harder
than the heavier satin. So with that, you want to keep your fabric taut between
your hands as you're sewing. And use more pins
if you need to and always go slow when you're
doing a difficult fabric, lining or chiffon or anything. Very slippery. And now we're going to
do the center vaccine. And this actually you want
a slightly lower down. It's where the marking
is for your zipper. And then that opening will fold under and we'll enclose the
zipper at a later point. So your center back is going to start a little
bit lower and just finish off like a regular
seem at the end here. Was a backstitch. Thanks guys. And I will
see you in the next part.
6. Lesson Four: Sleeves & Boning: Welcome to lesson four
of the prima Donna. We're about halfway through.
Can you believe it? This lesson is going to focus on the shoulder straps and
the boning of the spot us. To do that, we're going to match both pieces of our
shoulder strap. We're going to have four pieces. They're going to make them too. So we're going to do a
regular seen on the tops and bottoms and we're going to
trim the fusing side down. So I'm trimming quite a bit about half the seam
allowance to make it easier and less bulky
when we turn it around. So the ends are left open, the top and bottom are so on. Now, the task is flipping
them right-side out. I think out of this whole dress, I think the shoulder straps, probably the toughest part. I don't know why. Maybe
not for you, but for me. It was. So next, we want to use our dots that we have
on our pattern piece. Match them up and do a little stitch it
together so it's about quarter inch
from the center back. And you want to
make sure that is right because that's gonna
be your seam allowance. So you want your strap to be right at that edge
of the seam allowance. So you'll get something like matching those dots is
absolutely key here. Now before you do
the other side, always check for evenness. Make sure those shoulder straps are hitting at the same spot. You don't want uneven straps. Next we're doing
something a little differently you probably
haven't seen before. Which is, we're going to use
horsehair braid to create some softer boning for those really curvy parts
of our princess seem. So we're gonna do
that by stretching out a piece and
placing it on top of an unstretched peas
cut to length of your seam and do a single stitch down the
middle of that new piece. So it creates this nice, softer boning that you can
shave easily by steaming. So right where that curve on
the princess seam is going, I'm going to curve
that and match it up to my seam and check the length of it and
making sure it's correct. To make that edge nice and soft, I'm going to do a little bit of fusing of that knit
fusing that we used. Just to seal the
ends and make it more comfortable if it
should have poke at you. I'm go ahead and pin those
horsehair breeds to your siem. And this is all on
the lining as well. So you always want your boning to be farthest away
from the body. It makes it less noticeable
and more comfortable. Then we're gonna do a stitch on the right side of
the lining down. Like kind of an edge
stitch on the lining side. There we go. We've got some nice horse
hair shaping there that's going to support
that Princess seem. Now we're gonna do
our regular boning. The total length is the same. The total seem length
minus our seam allowance. So I always measure
up a quarter-inch, pin that as a marking and then cut my my bone into length here. This one is only going
up to the curve. It's just going to support
that bottom of the bodice. There doesn't need to go all the way up the curve for
these back pieces. This next one is the side
back and the side seam. And you're going to do
that on the other side. And we're done this lesson. I'll see you next time.
7. Lesson Four Pt.2: Attaching the Bodice Layers: Welcome back to the prima Donna. Today we are going
to continue with the bodice and we are
doing the lining. First. We want to make sure
that inner lining is based it to the center back. And now we'll take our
two sections are main bought us and our
lining sections. We're going to slap
them together. Right side to right side. I'm starting with
the arms psi here, matching up the seams and
the same lines around the curves using
lots and lots of pins to create a
smooth seam line. And we're going to go ahead and I'm doing it
section by section. So we're going to start
with this arm psi here. Being careful not
to get any puckers. If you do, it's
really easy to unpick those stitches where it
is puckering and redo. Next step, we're going
to do the neck line. It's easier to do this
bodice and sections. We can make sure we can
pin the straps out of the way and do our
neck line here. So I'm pinning the curve around right at the
center front there. The more pins you use, the least likely it will pucker. And now I'm going to
mark the center point, so measure a quarter inch down. So this will be your pivot
point where you want a back stitch a little
bit to reinforce that point because
we're going to have to clip to it so that we can turn it nicely and press it so that it's nice and crisp. So I'm doing my quarter
inch seam here, going nice and slow, checking the back, making
sure there's no puckers. Next we're going to
do something else, grading and clipping, which is kind of what we did on the sleeve for trimming that interfacing side down
to about one nth, 1 eighth of an inch. And that just gets
rid of the bulk. And at the corners we do like a little triangle clipping
right to the corner. Here. I'm doing that clip to
the center point there. Do not clip through the stitching that will
defeat the purpose. So, so be very careful
with your scissors. I'm doing that
through both layers of the neck line and arm psi it pretty much
anywhere where there's a curve clipping, excess seam allowance
where I can and this will be the center back there
doing the grading on that. After it's all clipped, you can work on pressing this and flipping it
to the right side. I like to roll with my
fingers and get it nice. Use use the tip of your
iron to press down firmly to get a nice
progress there. The next task is to under
stitch the neck line. Feel free to pause
the video to read the little description of
what under stitching is. It's a really great way to secure the lining from
shifting and moving as you, as you where your garments
so you're stitching through the facing
and seam allowances, staying close to the
seam line there. Just remember to take
your time with this. It is not a race. And I will see you
in the next part.
8. Lesson Five: Zipper & Attaching the Skirt: Welcome to lesson five
of the prima Donna. This is the lesson where we join our bodies and our
skirt together as one. We're going to start that by pinning our bodies to our skirt. Matching each theme
with the bodice seems so your side seam is going to match
your skirt side seam, and so on and so forth. It's going to be a very thick piece just sold through
because of the draping. It all depends on the
fabric choice, of course. But lower your feed
dogs if necessary. And if your machine has that capability for sewing
really thick stuff, always refer to your instruction
manual for your machine. And if you need to do that, you can always test
it out first and see what happens and
adjust if necessary. So here I am sewing the
bodice apart from the lining. Lining is flipped up there, so it's just the main bodice to the skirt and no skirt
lining. Nobody lining. And there we go. And now we're just gonna
give it a little bit of a press up towards the waist. Next we're going
to do the zipper, and it's an invisible zipper. So we want to base it
first on the right side, teeth facing towards the bodice, not the seam allowance. And it is wider than our
actual seam allowance, so the tape will
overextend at the waist. You want to trim any allowance
so that it reduces bulk. And we're going to use our
invisible zipper foot. Now this is a special
foot and you want to read the
instructions on yours. It comes in very handy. I'm rolling the teeth as I go. I get as close as possible so it creates a nice invisible zipper. For the other side, we want to make sure
it's positioned evenly. So we pin first and the top
and waste seem should match. And you do that by
checking before you line them up top edge
and also zip them up. So you can see here I'm doing
that and I'm making sure those waste seam lines
match as best you can. That's pretty good
and makes sure the tops and up at the
same level as well. Then you're good to
go to based first and do your zipper
foot action there. And it's, once you practice this zipper foot
enough, it gets easier. And the zipper foot
is a plastic one. It's universals. So just find the right
one for your machine and practice if you need
to first auto spare, scrap piece of fabric. There we have it. It's all zipped up and ready to have some
pressing if we want. But you can go on ahead to finishing the center
back seam the air. And to do this, we
pan below the zipper. And I'm using a zipper foot
with the needle closest to my seam allowance
so it will get as close as possible to the zipper. And believe it or not, it
does not actually have to join your other stitching
for the zipper. Just needs to be as
close as possible. Give it a backstitch
and you're good to go. You're going to do a
single line of basting now at the very
bottom of your skirt, which will be the Him. This will be used to pull on threads to gather it so that it reduces
the seam allowance. Access, right to pin your hem. I'm just going around
the skirt matching the seam allowance or the
seam lines to each seam line. I'm using my fingers
to find the middle, stretching it a
little bit so I can see where it actually is. And I'm painting in that
if there is excess, you're going to take a
metal needle and pull on your basting threads so
that they slightly gather. Not huge puckers just slightly
take out that access. Once you've gone all the
way around the skirt, you're going to want
to shrink out that access using an iron and some steam so that all
lives and nice and flat and it's not
going anywhere. Now we're gonna
do our skirt hem, which remember is half an inch and go along the edge
of your garment. They're going over your
gathered sections, removing your pins and
sewing the entire skirt. Now that the skirt
bottom is done, we're going to do
another quick press over top of the new
stitching line, just making sure
those gathers or down and everything's
looking nice and crisp. But when we turn it
to the right side, so we're folding in the lining and it's going to look
like this bubble, this bubble shape at the bottom. But we're going to
just get it all, even getting shake it out a
little bit so it settles. And we'll iron that
at a later point. But first we need to pin that skirt lining to our
bodies and our skirt. So we're gonna do
that by matching upper seems again
just like how we attach the skirt to
the bodice originally. And we're going
to, so as before, over-the-top our previous
waste stitching at a regular stitch length
and seam allowance, just securing that skirt
lining to one piece. Now you might think, oh, where's the bottom
lining gonna go? But that is at a later point. We will leave about
half an inch at both ends so that we'll have room to turn under the lining. That's it, guys. I will see you in the next part.
9. Lesson 5 Pt.2: Final Finishing: Welcome to the final
lesson of prima Donna. We're going to be finishing
your dress today. The first step is to hang
and settle that ham. I like to give it a little tug, very gently, pull
it down and pin. And you'll, once you've pinned all the way around
the skirt hem, you're going to want to
give it another press? Yes. Another press. Just with those pins in
there and making sure that the crease on the Hamline
is nice and crisp. For the bodice, we're
going to turn up that lining edge and
give it a casual, a little press so that it
creates a crease there. This will make it easier
for us to pin and hand stitch to the
waist on the inside. Next step, we want to take
the bodice and the lining. We're going to flip them back facing each other right
sides to write sides. And we're going to pin them, extending all the seam
allowances except for the him of the earth,
him, the waistline. Seeing there that we turned up. We're going to pin those together and we're
going to stitch with a zipper foot this
time so that we get close, close as we can because
the zipper is right there. And that should give us a
nice seem to press down. Like a bat, looks great and clean and saves us from doing
some more hands stitching, which you'll get plenty of practice in this dress
because now we have to do the waste and the best way to finish the waste
is to hand stitch. And we start by painting
and matching our seams, making sure the bodice seems match the correct skirt scheme. And continuing all the way
down the rest of the body, just tucking in the
skirt lining there, making sure that's
going to be easy to also hand stitch
when it comes time. Give that a nice pin and secure. Alright, there, yes. Now, the Fell stitch, you use a short needle. You work from right to left, needle out through the
lining and then start to start at your next stitch
above your previous ones. So there I've pulled through. I'm going to start
on the lining side, on the skirt side. In this case, making sure
you're binding stays down. Then I'm going to pull
through to the bodice. Pull your thread. My next stitch, we'll
go right above, but on the skirt side, then Through the bottom lining, see how that alternates. So I'll go skirt bought
a skirt bought us, and so on, so forth. It creates this very, very miniscule stitch, but
it's still very sturdy. It's kind of like
the slip stitch, but less steps, 11, less step. And you'll continue
down your waist. Seeing here, doing
the Fell stitch and repeating it on your lining
up towards or actually, sorry, down to your skirt. Were alongside your zipper
there doing the same thing. So I'm going zipper than skirt mining and then going right above my last
stitch in the zipper, going through the skirt mining. So once you practice it, you'll get the hang of it
and it goes super-fast. And congratulations, you've just finished
the prima Donna dress. Please share your projects in the project section
of the course. And I'm so glad
you made it here. So happy that you've
taken this course. And thanks for watching, and I'll see you
in the next one.
 Britney King, Maker Mentor at Threadora Gowns