Transcripts
1. Introduction: Learning to sew is
empowering and liberating. Each sewing project leaves
you with a feeling of being content and totally
present in the mom. Sewing is also a wonderful way of self expression
and individual. Imagine tweaking
that favorite dress until it fits you just
right, like a warm heart. Sewing isn't just about
thread and means. It is mindfulness practice. When you focus on
those tines stitches, the world faith survey. It's like meditation with
the side of creativity. Hello, I'm Claudia. I'm a designer and a
sewing enthusiast. I've been learning to sew
since I was 9-years-old. I was introduced to this
amazing craft by my mother, who is a professional
seamstress. Ever since then, I
have been in love with making accessories
and custom dresses. Welcome to my class where I
introduce the ABCs of sewing. If you're dreaming
of yourself sewing, But don't know where to start. Then this class is for you. I take you through all the essentials starting
from setting a needle. At the end of the class, you will have the confidence to handle basic sewing projects, such as realations, or
making simple items, such as pillow
covers and Mpkins. Sewing gives you
the satisfaction of making things my own hands. It's like a warm cup
of t after a long day. The hum of Sewing Mission, the joy of completing a
project, it's pure magic. Come on. Let's begin this
exciting journey together.
2. Class Project: Sewing is a practical skill. The more sewing
projects you try, the better you get with time. I have come up with a
simple class project, so you can learn practical. This class covers basic
sewing techniques. That can be used in a
variety of projects. Your class project is to make
any simple sewing project, such as a dress alteration, making a napkin or any
other project that you prefer using the techniques
learned in this class. Please suload a picture of your project in the
Skillshare project section. So I can give my feedback. And the community can get
inspired by your work. I would love to see what
you create to this class. Let's begin.
3. Why Should You Learn to Sew: Here, there, fellow
fabric enthusiast. Welcome to our sewing journal. Today, we are diving
into the magical world of stitches, buttons,
and creativity. In this lesson, let's
see why learning sewing is like adding litter
to our life. Picture this. Your favorite dress meets a little twe Ty
its too or to sn. Learning sewing
gives you the power to alter and customize
your clothes. So you can say goodbye
to ill fitting outfits. Now, let's talk about self
expression and individuality. Your sewing machine becomes your paintbrush and your fabric? Is your canvas. This is
great for handmade gifts. Nothing says I
care, like a scar. You stitch with love. Your loved ones will
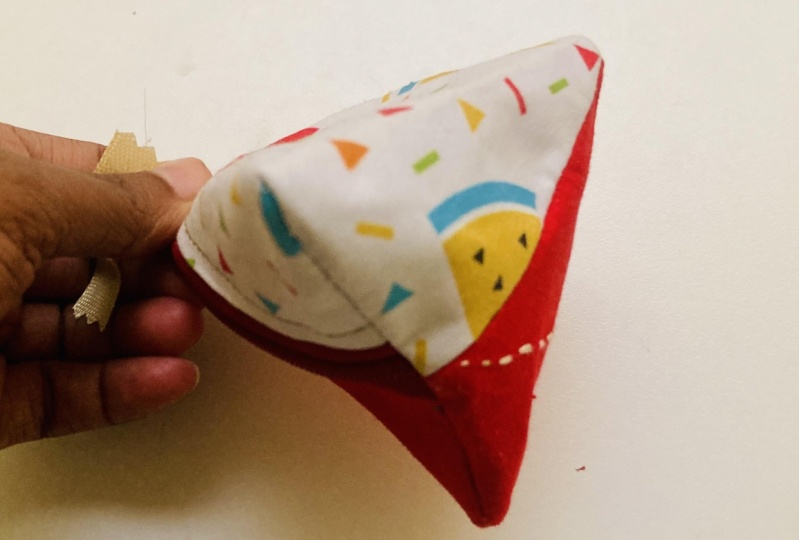
cherish them forever. Like I have made a
stuffed toy using my hand sewing techniques
for my furry friend Bio. The fact that he loves
to play with the boy, I had made gives me a feeling of happiness that is hard to
describe in playing words. Sewing has a dozen
other benefits, like being eco friendly
and affordable. Besides, sewing is a super
enjoyable hobby. All right. In the next lesson, let's discuss the tools we
need to get started.
4. Essential Tools to Start Sewing: When diving into the
world of sewing, we will focus on the absolute
must haves. The tools. That will kick start
your sewing journey without overwhelming you. Ready, let's get
started. Cutting tools. Let's start with the cuttings. This is the most popular type of shear used for cutting
large pieces of fabric. The length of the
blade can vary 8-12 ". Next, we have the snips, a small spring loaded tool that easily cuts the
ends of the thread. It is very useful handy tool. That can make precise cuts. Although it can cut, it's only recommended for cutting threads and not fabrics. Next, we have the taking sheds. Similar in the size
to the cutting sheds, but with a blade that cuts
with a zig zac pattern. This is very useful for neatening seams and
decorative edges. Next, we have the seam ripper, a sharp pointed hook to
slide under a stitch with a small cutting blade
at the base cut the thread. Next, we have the
rotatory cutter. This tool is available with different sizes
of retrib blades. They are invaluable for cutting. Multiple straight edges. However, this must
always be used with a cutting mat underneath to protect the
surface underneath. Cutting mat is one of the most important
cuttings available. This is a self haling mat. Next, we have the paper
cutting scissors. Use these to cut around
patting pieces thin paper. Always use separate
scissors for cutting paper. Be cutting paper will dull
the blades of fabric shares. With this, we conclude
the basic cutting tools. Let's look at the
next set of tools. Measuring and marking tools. First, let's begin with
the measuring tape. This is available in
different colors and widths. I recommend going
for a width of 1.5 centimeter as this is the width of standard
seam elements. This will prove to be
useful along so in journey. Next, we have the rule. On many occasions, a
ruler comes in hand. The longer, the
size, the better. So you can measure
large pieces of fabric. Next, we have the set squares. Set squares are
used for draping. It is used as a guy when drawing geometric shapes such as
squares and rectangles. These nifty tools are like the secret source for creating
toad backs and cushions. It's your trusty guy
to geometric glo. Without it, your
squares might end up looking more
like parle grams. Grab your set squares to
make some geometric git. Next, we have the Es chop. This is also known
as the French stock. This chalk Zs to mark, and as of from the Next, we have the fabric chalk pencil. This is also a marking
available in different colors. Is easy to use in great
for recise markings. With this, we conclude the basic measuring
and marking tools. Let's see the next set of tools. Needles, pins, and clips. Pins are used to hold fabrics
together before sewing. A good collection of
needles are required to tackle any kind of
hand sewing project. Wire needle threader
is a handy gadget that is very useful in
threading the needles PC. Fabric clips are
helpful in holding fabrics together
temporary threads. A high quality
pollster thread is suitable to sew all
types of fabrics, garments, and soft furnishings. It is the most popular
type of thread. Embry threads are often made with the ration
to make them shrink. They are suitable for
creative stitches. Resting tools. In sewing, ssing is a very important step. A well pressed fabric results in a neat and
professional finish. The two essential tools for pressing iron iron and
a stable ironing board. A good quality steamin
is an essential asset. Choose a reasonably heavy
ion that has t. Next, we have the sewing mission. A sewing mission will
quickly speed up any job from a quick repair alterations
or any sewing projects. Sewing missions are available in different price ranges as
per their applications. Choose one that matches your application and
fits your budget. Here is the list of all the essential tools listed
as per their categories.
5. Tips To Help You Learn Sewing: In this lesson, let's discuss
some tips to learn sewing. Sewing becomes a lot easier. If you know, why would
you like to sew? Hence, I advise you to create and maintain a sewing
journal where you write, why you want to learn sewing. You can also use this journal to record your notes on
sewing experiences. Writing motivates you and programs your subconscious mind. This will make you learn quick. Ask yourself, what would
you like to do first? If you already knew
sewing, today. This question will help
you set your sewing goal. Sewing is a craft that
demands commitment. You can learn sewing easily
if you learn it for yourself. Learning sewing for
anything other than yourself can make your journey
difficult and frustrated. All right. Now let's continue
with that next lesson.
6. Know Your Fabric: Fabric is our main
material to work on. It's like a blank
canvas for an artist. Each type of fabric will
have different properties. Knowing the fabric well is crucial in your
sewing journey. There are two major
kinds of fabric. They are natural fabric, and manmade fabric, also
known as synthetic fabric. Natural fabrics are
derived from plants, animals, while manmade fabrics are manufactured in industries. For beginners, I recommend
choosing cotton over other fabrics because they are lightweight and
easy to handle. Then the fabric lights. Cotton fabrics also come in
various colors and prints, making it ideal for sewing
and craft projects. Raw edge and selvage. This standing flaw edge and
selvage is crucial in sewing. When we say raw edge, it meets the edge where
the fabric has been cut. This edge is most likely
to fray or wear out. Selvage runs across the
entire length of the fabric. This edge on fray or wear out. Right side and wrong side. A piece of fabric
will have two sides. Printed cotton fabric has a very distinctive
right and wrong side. The right side is much vibrant with the
pattern more defined. With plain colored fabric, the right and wrong sides
might not be evident, but we need to decide which side would be
treated as right side. Finding fabrics. Fabric is easily available
in craft shops and markets. You can also find them on. It is sold by length, and it comes in
different widths. Alternatively, you can
also cycle and reuse fabric from the clothes you
no longer need Interfacings. Have you observed that
the collar in our shirt stiffer and has more structure when compared to other
parts of the shirt? Well, this is because
of the interfacing. A interfacing is a
piece of fabric that is attached to the main fabric to give its support or structure. A fusible interface contains
a heat activated adds. This can be bonded to
the fabric by applying heat using an ion fabric
preparation and care. A well prepared fabric
is much easier to handle and results in a
superior sewing finish. Hence, it's important
to wash your fabric, dry them out completely, heat press them neatly before approaching any
kind of sewing project. Doing this write can make your sewing journey
enjoyable and rewarding. Remember the fabric s
canvas for the art of soil. With this, we
conclude this lesson. Here you can find the list of all the topics we have learned.
7. Getting Started With Hand Sewing: And sewing is a very
important process to learn. This is because we cannot complete the entire
sewing by machine. Some jobs like finishing and adding buttons need
to be done by hand. I find hand sewing incredibly
beneficial because it helps me reduce
the stress through its calming repetitive motions. It also keeps me
mindful and focused. As each stitch requires
my full attention, allowing me to stay
present in the moment. Plus, the creative freedom it offers is immensely
satisfying and therapeutic, making it a wonderful
way to express myself. Let's quickly learn
about the tools we need to start sewing by hand. Needle threader needles. Thread scissors. Threading a needle. First, you will need to cut the end of the thread using sharp scissors. Push the thread through
the eye of the needle. Pull the shorter end
of the thread to around 30 centimetres in length. Cut the thread and
make a simple not. Now we are ready
to start sewing. If threading is
challenging for you, try using a needle threader or a magnifying glass to
make the process easier. Make sure to keep
the thread short to a 30 centimeter because a longer thread can become
tangled and slow you down. All right. We can now learn the basic stitches by
hand basic hand stitches. Now, I will guide you through the steps to create a
perfect running stitch. Grab a piece of fabric and a threaded needle
along with the no. Begin by pushing the needle up through the back
of the fabric. Pull the thread through
until the knot is snug and locks against the
fabric on the back side. Then push the needle
down through the fabric, a short distance away
from the starting point. Now we have got a dashed line. Continue this process,
moving the thread up and down through the
fabric along a straight line. A running stitch
resembles a dashed line. Try keeping your
stitches even in length. This is to ensure a
net and strong stitch. When you want to end and
close the running stitch, flip the fabric and pierce the needle through the
fabric near the stitch. Well the needle is halfway
through the fabric. Wind the t thread two or three
times around the needle. And gently pull the needle. This make a small knot to
secure the read in place. And there you have it a simple yet effective
running stitch. That makes perfect. So keep sewing and sew
you will master this. Let's learn the basic
hand stitch over stitch. Over stitch is generally used
to sew the edges together. I would like to demonstrate the over stitch on a
small piece of fabric. I have folded the edges
from both the sides. And finally, I'll
fold this into half. Now let's use this fabric
to learn the over stitch. Insert the needle
through the folded edge. Make sure that your thread
has a knot at the end. If you notice that the knot
is hidden beneath the fold, hiding the knot is a good
practice while sewing by hand. Now, insert the thread
through the other edge, a little forward diagonal. Repeat this process again. This will result in
a diagonal stitch, sewing the two edges
firmly together. Notice the distance between the stitches can
easily be controlled. You can make the stitches closer or further part
depending on your needs. When you want to end and
close the over stitch, knock the thread by
winding it two or three times around the needle and gently pull the needle
out to lock the thread. For these types of stretches, insert the needle a
little far away through the edge on moat and cut
off the loose thread. This will hide the thread
beneath the folds. And there we have a neat
and secure over stitch. The last stitch on our
list of hand stitches, is a slip stitch. A slip stitch is a special stitch where you
don't see a stitch lines. It's like a hidden stitch. I have the fabric with
the edges folded. From the back side, I insert the needle through the folded edge and
pull the thread out. Now, insert the needle along the folded edge of the other side and
pull out the needle. The edges are joined together, but the stitches
are barely visible. Continue the stitch by inserting the needle through the
edge on the opposite side. Try keeping an even distance
between the stitches. Go for a closer distance to have a stronger stitch and the stitch by the thread
before cutting it. Now, you can see that
stitches are invisible. Since we made the stitches
on the edges of both sides. The slip stitch
is very useful in making fabric toys
or in any case, where you require the
stitches to be hidden. All right. We have come to
the end of this lesson. In the next lesson,
we will learn about sewing buttons
and buttonholes.
8. Sewing a Button & Buttonhole: Let's know about the dual
magic nature of buttons. Buttons help us hold two
pieces of fabric together. Imagine your shirt button or a button that helps
you close a bag. You see, buttons are not
just functional flushes. They are style statements and
add beauty to our product. Let's see how we can attach
buttons to a fabric. Attaching buttons. Insert the needle through
the wrong side of the fabric and completely pull the thread until
the knot locks. I recommend using
a double thread to have a stronger attachment. Insert the thread
into any one of the holes in the button
and pull out the thread. Now insert the thread into the opposite
hole of the button. You will now have a loop that
locks the button in place. Again, from the bottom, insert the needle through the other hole and pull
it out towards you. Finally, insert the thread into the remaining
opposite hole. This way, you'll have two loops crossing each other
resembling the letter ix. Repeat this process three times. Each diagonal stitch
must be repeated thrice to get a strong
hold of the button. We want to make
sure that we want our buttons to last
through our daily lives. Hence, repeating this step and using a double thread
is highly advised. Once we are done, we can lock
the stitch the usual way. Just grab some fabric
with the needle and wind the thread thrice and pull
the needle to form a knot. Now we have fixed our button. Next, let's see how we
can make buttonhole. Sewing a buttonhole. First, place the button
on top of the fabric. Using a pencil, make a mark slightly larger across the
diameter of the button. Draw a line between
the two marked points. This will be a slit where we
will be cutting the fabric. Now, we will draw a rectangle, a little away from
the slit line. This rectangle needs to
enclose a buttonhole slit. We will be making a running
stitch along this rectangle. Here, you can see
the marked rectangle enclosing the buttonhole. Make running stitches
along the rectangle. This running stitch
defines the edge of the buttonhole while also preventing the
fabric from framing. Fold the button hole into
half with lots of care, make a cut along
the marked line. Be sure not to cut through
the randing stitch. To make the buttonhole stitch. Insert the needle
in the beginning of the button hole on
the marked rectangle. Hold the thread out completely. Insert the needle just near the first stitch on the
same rectangular line. Plot the needle
through the slit. While pulling out, just make
sure that the thread that is forming a loop should be below the needle to
form the stitch. Repeat this step
over and over again, until the whole slit gets
covered with the stitches. Make sure to make the
stitches as close as possible to stop the
edges from framing. Now, our button hole is ready
for our buttons to fit in. All right. With this, we conclude all the basic
hand sewing techniques. Let's move to using the sewing
machine, the next lesson.
9. Understanding The Sewing Machine: The swing mission is a tool. We will be using most
of our time sewing. In this lesson, let's
understand the sowing mission. First, let's see how to choose one that is
beginner friendly. Budget friendly, get
level. First things first. Let's talk about budget. As beginners, we want a mission that don't
break the bank, but still delivers quality. Look for models
in the mid range. We strike a great balance. Durability matters. A durable sewing mission is
like a steady pair of jeans. It will last two years. Check reviews, ask fellow Swiss, and choose a brand
known for reliability. Keep it simple. Don't let all those
buttons intimidate you. Opt for a
straightforward mission with essential features. Versatility is key. A dream mission should handle
basic stitches like a chap. Check for straight stitch, the zia stitch, and the
elusive button hole stitch. So there you have choosing
the right sewing mission. Doesn't have to be overwhelming. Remember, budget friendly, durable, simple, con versatile. Now go there and find
your perfect mission. Components of a sewing mission. A sewing mission has a
variety of components. Missions come in many
different styles, but they all work
in a similar way. Let's discuss the
major components. First, is the needle, the needle plate, and
the pressure foot. These are the main parts that meet your fabric
to do the sewing. Below the pressure foot, you can find tiny teeth like
structure called feed dogs. That works with the
presser foot to move the fabric through the
machine while the stitch. Next, we have the
stitch selector, a knob that controls
the stitch style. Notice the illustration
marked on the knob to help you choose your
preferred stitch style. Next, we have the
tension control. This controls the thread tension or the thread tightness
or looseness. Next, we have the thread guides. These guides are super important as guide the thread
to the needle. The thread starts
from the pole spindle and runs to the needle
through the thread guides. Next, we have the
thread take up lever. This lever moves
up and down while sewing to help you control
the flow of the thread. Next, we have the
presser foot lever. Use this lever to rise and
lower the presser foot. Lift this up to insert
and remove fabric. This needs to be down
while stitching. The ver stitch
selector when engaged or pull down, will
stitch backwards. This is useful in
making lock stitches. The foot pedal must be placed on the floor and must be
pressed with the foot. This controls the speed of the motor based on your
in with your feet. Next, we have the hand wheel. Use this wheel to move the
needle pen down manually. This wheel spins automatically
when the motor is running. Open the banner under the needle plate to
reveal the babin case. This is where you can find the babin ds a small
spool of thread. We have covered all the basic components of
a sewing mission. However, your mission
may vary slightly. Hence, it's always
a good idea to read the instruction manual
before starting. In the next lesson, we will get our hands on the machine
and start sewing.
10. Getting Started With Your Sewing Machine: In this lesson, let's set
up the swing mission. So we can begin with a swing. First, let's start with
the sitting position. Place your mission on a firm
workplace such as a table. You want to make sure that the table is steady
and not warping. See to it that you are
sitting comfortablely, and the machine is at the
right height for you. Place the foot pedal where
you can reach it comfortably. Once we are done setting
up a sewing table, we can fill the
thread in the bobbin. So we get our bottom thread. Different machines will have a different arrangement
for filling a bobbin. But the principle is the same
across different machines. First, place the spool of
thread on the spindle. Gently, take the loose
end of the thread and thread around the
bobbin winder thread kite. Grab your bobbin and bring
the end of the thread into the small hole in the bobbin and pull out the thread a
little through the hole. Place the bobbin on the
bobbin winding spindle. Push the bobbin
towards the stopper. The bobbin is now ready to roll. Gently press the foot pedal. You can see the bobbin starting
to fill up with thread. Always fill the bobbin evenly
and don't overfill it. Over filling and uneven
bobbins can cause problems. Could get stuck, or you end
up making uneven stitches. Hence, always make sure to fill the bobbin even
without overfilling. Once the bobbin is filled, take your foot off the pedal and push the bobbin
away from the stopper. Now, you can remove the bobbin
and cut off the thread. After filling the bobbin, it's now time to load the
bobbin into the bobbin case, and then into the
sowing machine. First, place the bobbin
into the bobbin case. Hold the end of the thread and pull it into the
bobbin case slot. Draw the thread under
the tension spring, and into the delivery eye. At this stage, if
you pull the thread, the bobbin will rotate
to deliver more thread. Leave a ten centimeter
free thread and cut off the excess thread. Slide the tension
table to remove it. Open the car to reveal
the bobbin section. When inserting the bobbin, match the hole in
the bobbin section. Gently press the bob
in case to engage it. We can close the cover and slide back the
extension table now. Next step will be to
thread the machine, so we will get a top thread. We will now see how to
thread the machine. Threading the machine will vary as per different machines. Check out your
instruction manual to know the correct way to
thread your machine. Here, I'm just
threading my machine by getting it into
the thread guides and passing it into
the take up lever before inserting
it into my needle. Hold the end of the thread
after inserting it into the needle and rotate the handmade manually to
draw up the bobbin thread. You can now notice the
bobbin thread coming out. Carefully pull out
the bobbin thread. Lift the presser foot and take go the threads
backward as seen here. Now, we have got the top
thread from the threads pole, and we have got the bot
thread from the bobbin. Always make sure that both the threads are matching to the color
of your fabric. This way, you will
get a good finish. Now, let's load a small piece of fabric so we can make
our first stitches. Lift the presser foot and
place the fabric in place, hold the ends of the thread and carefully press
on the foot pedal. Always place the hands away from the needle to
avoid any accidents. Go slow with your measure. It will take some time to build your skills
with the foot pedal. Always be extra careful while
pressing the foot pedal. A gentle press is
enough to get started. We will now learn
the rivers stitch. This is also the way in which you can log the
stitches in place. The ver stitch is made
when you want to end the stitch before cutting off the threat to do
the river stitch. We will hold down on the
reverse stitch liver. Pressing the reverse
stitch liver will make your machines
stitch in reverse. As a general practice, place both of your
hands resembling a triangular shape
away from the needle. This position will
help you to take control on your fabric
safely while sewing. Now we will see how
to stitch corners. Insert the needle into the fabric by rotating
the hand wheel manually. While the needle
is th the fabric, lift the pressor foot
and gently rotate the fabric with the
needle, Spivot. Now place back the pressor
foot and continue sewing. This technique makes it
easy to stitch corners. Here, I have made
a few stitches on a spare piece of fabric to
get started with the measure. Try making a few
stitches and share here first stitches in the
class project section. Now we know how to set
up our sewing machine. Load a piece of fabric
and make some stitches. It's your turn to practice some stitches on a
spare piece of cloth. Practice making
straight stitches, stitching corners,
river stitches, loading, and
removing the fabric. We will learn more sewing
skills in the upcoming lessons.
11. Tips & Basic Care of Your Sewing Machine: A sewing machine
is a device that lasts for years,
maintained properly. In this lesson, let's discuss the basic sewing
machine maintenance. Always cover the machine with a desk cover when not in use. These machines have got a handful of tiny puts
working together. You don't want test to
get inside your machine. The bobbing section
needs to be cleaned, sometimes due to small threads getting stuck
inside the compart. Use the paint brush to brush off the test and thread pieces. Sewing machine have mechanical
parts working together. It's advised to lubricate the machine often to
ensure smooth operation. Use machine oils that is mentioned in your
instruction manual, and lubricate as needed. Saying machines
need to be serviced regularly based on
the usage case. I recommend servicing at
least once every year. This way, you can ensure your machine is
functioning properly. With this, I'll conclude some of the EC ways in which we can take care of
our sowing mission. In the next lesson,
let's get some practice.
12. Beginner's Sewing Practice Activity: Whether you are brand new to the world of needle
and thread or dusting off your testy sewing
mission. There a long gap. I have an activity for you. That will help you gain confidence and control
with your sewing mission. I have included this
activity sheet, this PDF in the
resources section. Just download and print
it out to get started. To perform this exercise, you need to stitch on top
of the printed lines. First, on the top of my page, the straight line stitch guide. So I'm making straight running
stitches on top of them. Similarly, I'm working on
the curved lines guide. Trying to stitch on top of these guides will give a good
handover stitching curves. Working with a fast motor can be challenging at tight curves. Whenever you want
precise control, take your feet off the pedal and use the hand wheel
and continue with care. This activity sheet is based on progressive levels
of difficulty. The top straight stitches are easier than the bottom
curved stitches. By doing this activity, I recommend you to print
multiple copies of this sheet. So you can practice
once every day till you gain confidence and control over a sewing with your mision. If you'd like to
see your progress, try doing this activity while marking the date
on top of the page. This way, you will be able to measure your improvement
over your sewing skills. Remember, we are not talking
about perfection here. Consistency is the key. Just make a few, not so perfect
stitches every day. You will soon be impressed
by your own props.
13. Basic Sewing Techniques: In this lesson, let's see the most simple
sewing techniques. These techniques can be used extensively in a variety
of sewing projects. The first one, the C Hamtitch. But Htitch is the most important elementary
finishing stitch in sewing. It secures fabric raw edges
while adding a polished. While there are many different
kinds of hem stitch. We will see how to do an EC one. This is called as a
double folded hem stitch. To demonstrate, I have taken a small piece of fabric
with the raw edge. We will be doing
a 1 " thick hem. So I will be taking a
quarter inch for Sonos. I will press the fabric meat, so we get good results. With the rooder,
I will measure 1 " plus a quarter
inch from the side. I will start folding the
fabric just like this. After folding, it's a good
practice to verify or recheck if our fold measures up to one
and a quarter inches. Once the fold measures
up perfectly, he press the fold to get to form crease and fold on the fabric. Folds that are heat
pressed properly will have a nice
crease when opened. Since this is a double
fold hem stitch, I will fold the fabric to about a quarter
inch from the edge. This is why we had taken
a quarter inch extra. Again, heat press the fold. Now we can fold the fabric to
get it ready for stitching. Using pins, I will
secure the fabric, so it becomes easy while stitch. Start making the stitch
on the folded edge. As you can see here, the pins are holding
the fabric in place, making my sawing process easier. Just remove the pin one by one as you progress
through the edge. Now we have a nicely
finished edge. H stitches are used in many
parts of garment production. You can find these stitches on the bottom edge of your
shirt and sleeve edges. We saw how to finish a raw edge. Now, let's talk about joining two pieces of fabric together. Introducing the French se. French seams look really neat, as they enclose the raw edges within the seam due
to this reason. A French seam is sewn twice. Let's see how we can
sew a French seam. Here, I have taken
two pieces of fabric. We will be sewing them together using the French same technique. Begin by placing the fabric
on top of the other. Make sure that the
wrong sides of the fabric are
facing each other. The right side of the top
fabric will be facing you. Use pins to secure the fabric, so it won't move
while stitching. Now, I'll make the stitch
near the edge of the fabric. Remove the pins as we will be opening the fold to
heat press the same. While heat pressing, make sure to press on the
other side as well. Fold the fabric the other way, keeping the same
as the phone line, such that the right side of
the fabric are facing each other or the wrong side of
the top fabric facing you. He press the fold one more time. We will be making a
stitch on this line. This way, the raw edge will
be enclosed inside the same. Now we have finished
the French same. If I open up the fold, you can see a neat finishing on the right side of the fabric. On the wrong side, you can see a neat finished seam with the raw edges concealed
within the sea. Friend seams are wonderful because they look so
neat and finished. They make your projects appear
clean and professional. Now let's see how we can beautify this by
learning another stitch. The top stitch. Since this
is a decorative stitch, we will do the top stitch
on top of the frien seam. I will keep my fabric
with the fn seam. Align the edge of the seam
to the presser potter. This way, a top stitch will
have upset from the fen sm, giving it an addition
to the aesthetics. Stitch with care and
go slowly and gently. Notice how I have my fingers
away from the needle area, also pulling the
sides but gently. Now we have made the
top stitch like this. I think it looks very beautiful and adds up to the
look of the same. For a better look, I'm going
to lock the stitch manually instead of locking the stitch through the river stitch method. This is just a
different approach. You may also choose the
reverse stitch method. Here, I have two loose
s threads hanging out. I'm just going to not these
streads by hand three times. Here, you can note
that I have used the reverse lock stitch at the bottom and the manual
knotting method at the top. Now we can simply cut off the excess thread
after the knot. You can see the beauty
of the lock stitch here. As you can see, top
stitches can be used in conjunction with the frenzy for aesthetic
improvement of the seam. Now we have learned the most important techniques
through this lesson. You can now join two
fabrics with the frenzy. Finish the raw
edges with the Ham stitch and decorate the
seams with the top stitch. In the next lesson,
let's discuss some simple sewing projects
for you to get started.
14. Simple Sewing Projects to Get Started: Sewing is a practical skill that gets better with practice. With projects, we can
get the practice. We need to advance
fast sewing skills. Let's look at some
projects that can help you advance your skills and also
benefit in your daily life. First, we will start by
fitting an oversized t shirt. Fitting a loose t shirt is a great way to put us beginner
sewing skills to use. Fitting, improves how
the T shirt would look on us and extend
the life of the T shirt. T shirts tend to get loose
over a short period of time, and most of us might have an old loose t shirt or an
oversized one in our close. Or it. Let's begin. Here, I have taken
a loose t shirt, and I have flipped the
t shirt inside out. Because we will be making
the stitches on the inside, so it don't show
from the outside. I have also he
pressed the T shirt. If you notice, I have
pinned both sides of the T shirt together by
aligning the edges perfectly. That is the front
and back sides of the t shirt must overlap
one over the other. This is the most important
step in this process. We will be marking the amount of tightening in inches that we
need from the side edges. I will start
measuring and marking multiple points 1 " away from the edge
towards rough center. This measurement
has to be done from the base of the arm till
the end of the T shirt. Repeat the step on the
other side as well. We can start stitching
on the line, removing the pins
one after the other. Repeat this step
on the other side. This way, we have tightened
and fitted the t shirt by 2 " by tightening 1 " on
both sides. There you go. You see how easy it is to
fit an oversized T shirt. If you like this exercise, with your T shirt and post a picture of it in the
class project section. Next, we will shorten
the length of our old pan to
convert tinto shots. You can follow this
technique to reduce your pant lengths as
per your preference. This pant measures
at 39 " in length. Now, I would like
to convert this to about 21 " to make
it into a shots. From the bottom, I will measure 16.5 " and make a marking. We will be cutting the
pant on this line. After cutting at
the desired length, retain the cut piece to use as a reference to cut the
other leg of the plant. Just fold the edges, use clips to hold
them in place and make a double hand stitch
to finish these shots. Repeat this step on the other
leg as well to complaint. Now I have altered my pant into a shot. That
was simple right. Now, let's see another example where we make something new, instead of altering something. Let's make a napkin. I have taken a square
piece of fabric. We will be finishing the edges by making a double
hold and stitch. Start folding the edges. You can note that I have made a DII guide for seam elements. Using a piece of
cod stock paper, I have marked the common
measurements like quarter inch, half an inch, and a full
inch from the guide. I will fold the fabric using the guide and just make
a double hams stitch. Just make sure to heat press
the fabric after every fold. Special attention
has to be given at the corners because the folds
overlap on the corners. So just make sure the
corners fold are neat. Use clips to hold the four
corners before stitching. You might have to adjust the folds a little bit before
clipping them together. Feed the fabric in and
just make simple stitches over the fold to get a double
and finish for the napkin. T finish corners, make a diagonal stitch like the
marking I'm making here. I have now completed
making a napkin that is really to be
part of our daily life. Those were some of the
beginning sewing projects. That is fun and can easily build your first steps
in your sewing journey. I now ask you to try
any of the project and share an image of your result in the skill
share project section. I would love to see
what you can create.
15. Conclusion & Best Practices: Hope you have
enjoyed this class. I would love to know what
you think about this class. Please write a review on how this class helped you
on your sewing journey. This way, you can help
me gain insights into my teaching and enable me to improve my
classes in the future. I would like to wrap
up my class with a few best practices that
will help you learn sewing. Sewing is a skill that needs to be practiced often
to get better. When starting to learn sewing, try to plan a short
amount of time every day. This can be as long
as you would like. Say about 30 minutes to
an hour, for example. Try to have a sewing
ritual every day, preferably at the same time. To make this easier,
try habit stacking. Start sewing as soon
as you finish any of your existing daily habits
that you already have. Say you can sew for
30 minutes as soon as you finish dinner
or start sewing, as soon as you have your
daily morning coffee. Choose a time that's
comfortable for you. Habit stacking is a very
powerful method that will help you start a new
habit into your life. Finally, don't compare
your results with others. Just commit yourself
and practice sewing just for a few
minutes every day. You will get better day by day. Over a period of time, you may compare your results with yourself to see
the improvement. Keeping yourself motivated is very important to
create a sewing habit. Celebrate your small
sewing accomplishments. With your sewing skills, make yourself something or gift something you have made
to your loved ones. These are some of the easiest ways to celebrate
your sewing journey. With this, I wrap up. I'm waiting to see your project and your review of my class. Thank you for joining Back. See you soon in the next class.
 Cloudia David, Co-Founder | Entrepreneur | Designer