Transcripts
1. Introduction: Are you ready to dive
into the vibrant world of watercolor and bring the beauty of the ocean into your art? Hi, I'm Louise De Massey, a professional watercolor
artist and educator. I'm thrilled to invite you
on a painting adventure. In this class, we will explore the delicate art of
painting seashells. We'll delve into essential watercolor
techniques that will not only enhance your skills but also unlock your
creative potential. Whether you're looking to refine your technique or embrace the
spontaneity of watercolors, This tutorial has
something for everyone, from the gentle curves of a simple shell to the intricate details of
a more complex shell. I'll guide you step by step through three
stunning projects. With my background in education and a passion
for watercolor art, I'm here to support
your journey, offering tips and encouragement
every step of the way. You'll learn how
to wet your paper. You'll learn about painting with different paint
consistencies. You'll learn how to
paint wet on wet, confidently using
different techniques. But most of all,
you'll have fun, whether you're
seeking inspiration, looking to improve, or just want to create
something beautiful. Let's make it happen together. I can't wait to see the
stunning seashells you'll.
2. The Class Project: Welcome to the class. Thank
you so much for joining. The techniques we will
use to paint the shells are all fundamental techniques
that you need to learn. If you want painting watercolor, it will be good for
you to practice them. When you finish the class, you will have these beautiful shell paintings to be proud of. When you've finished
your paintings, I'd love you to share them with me and all the other students. That way we can all inspire one another and see how
we're progressing. You can upload photos of your paintings on the
projects and resources page.
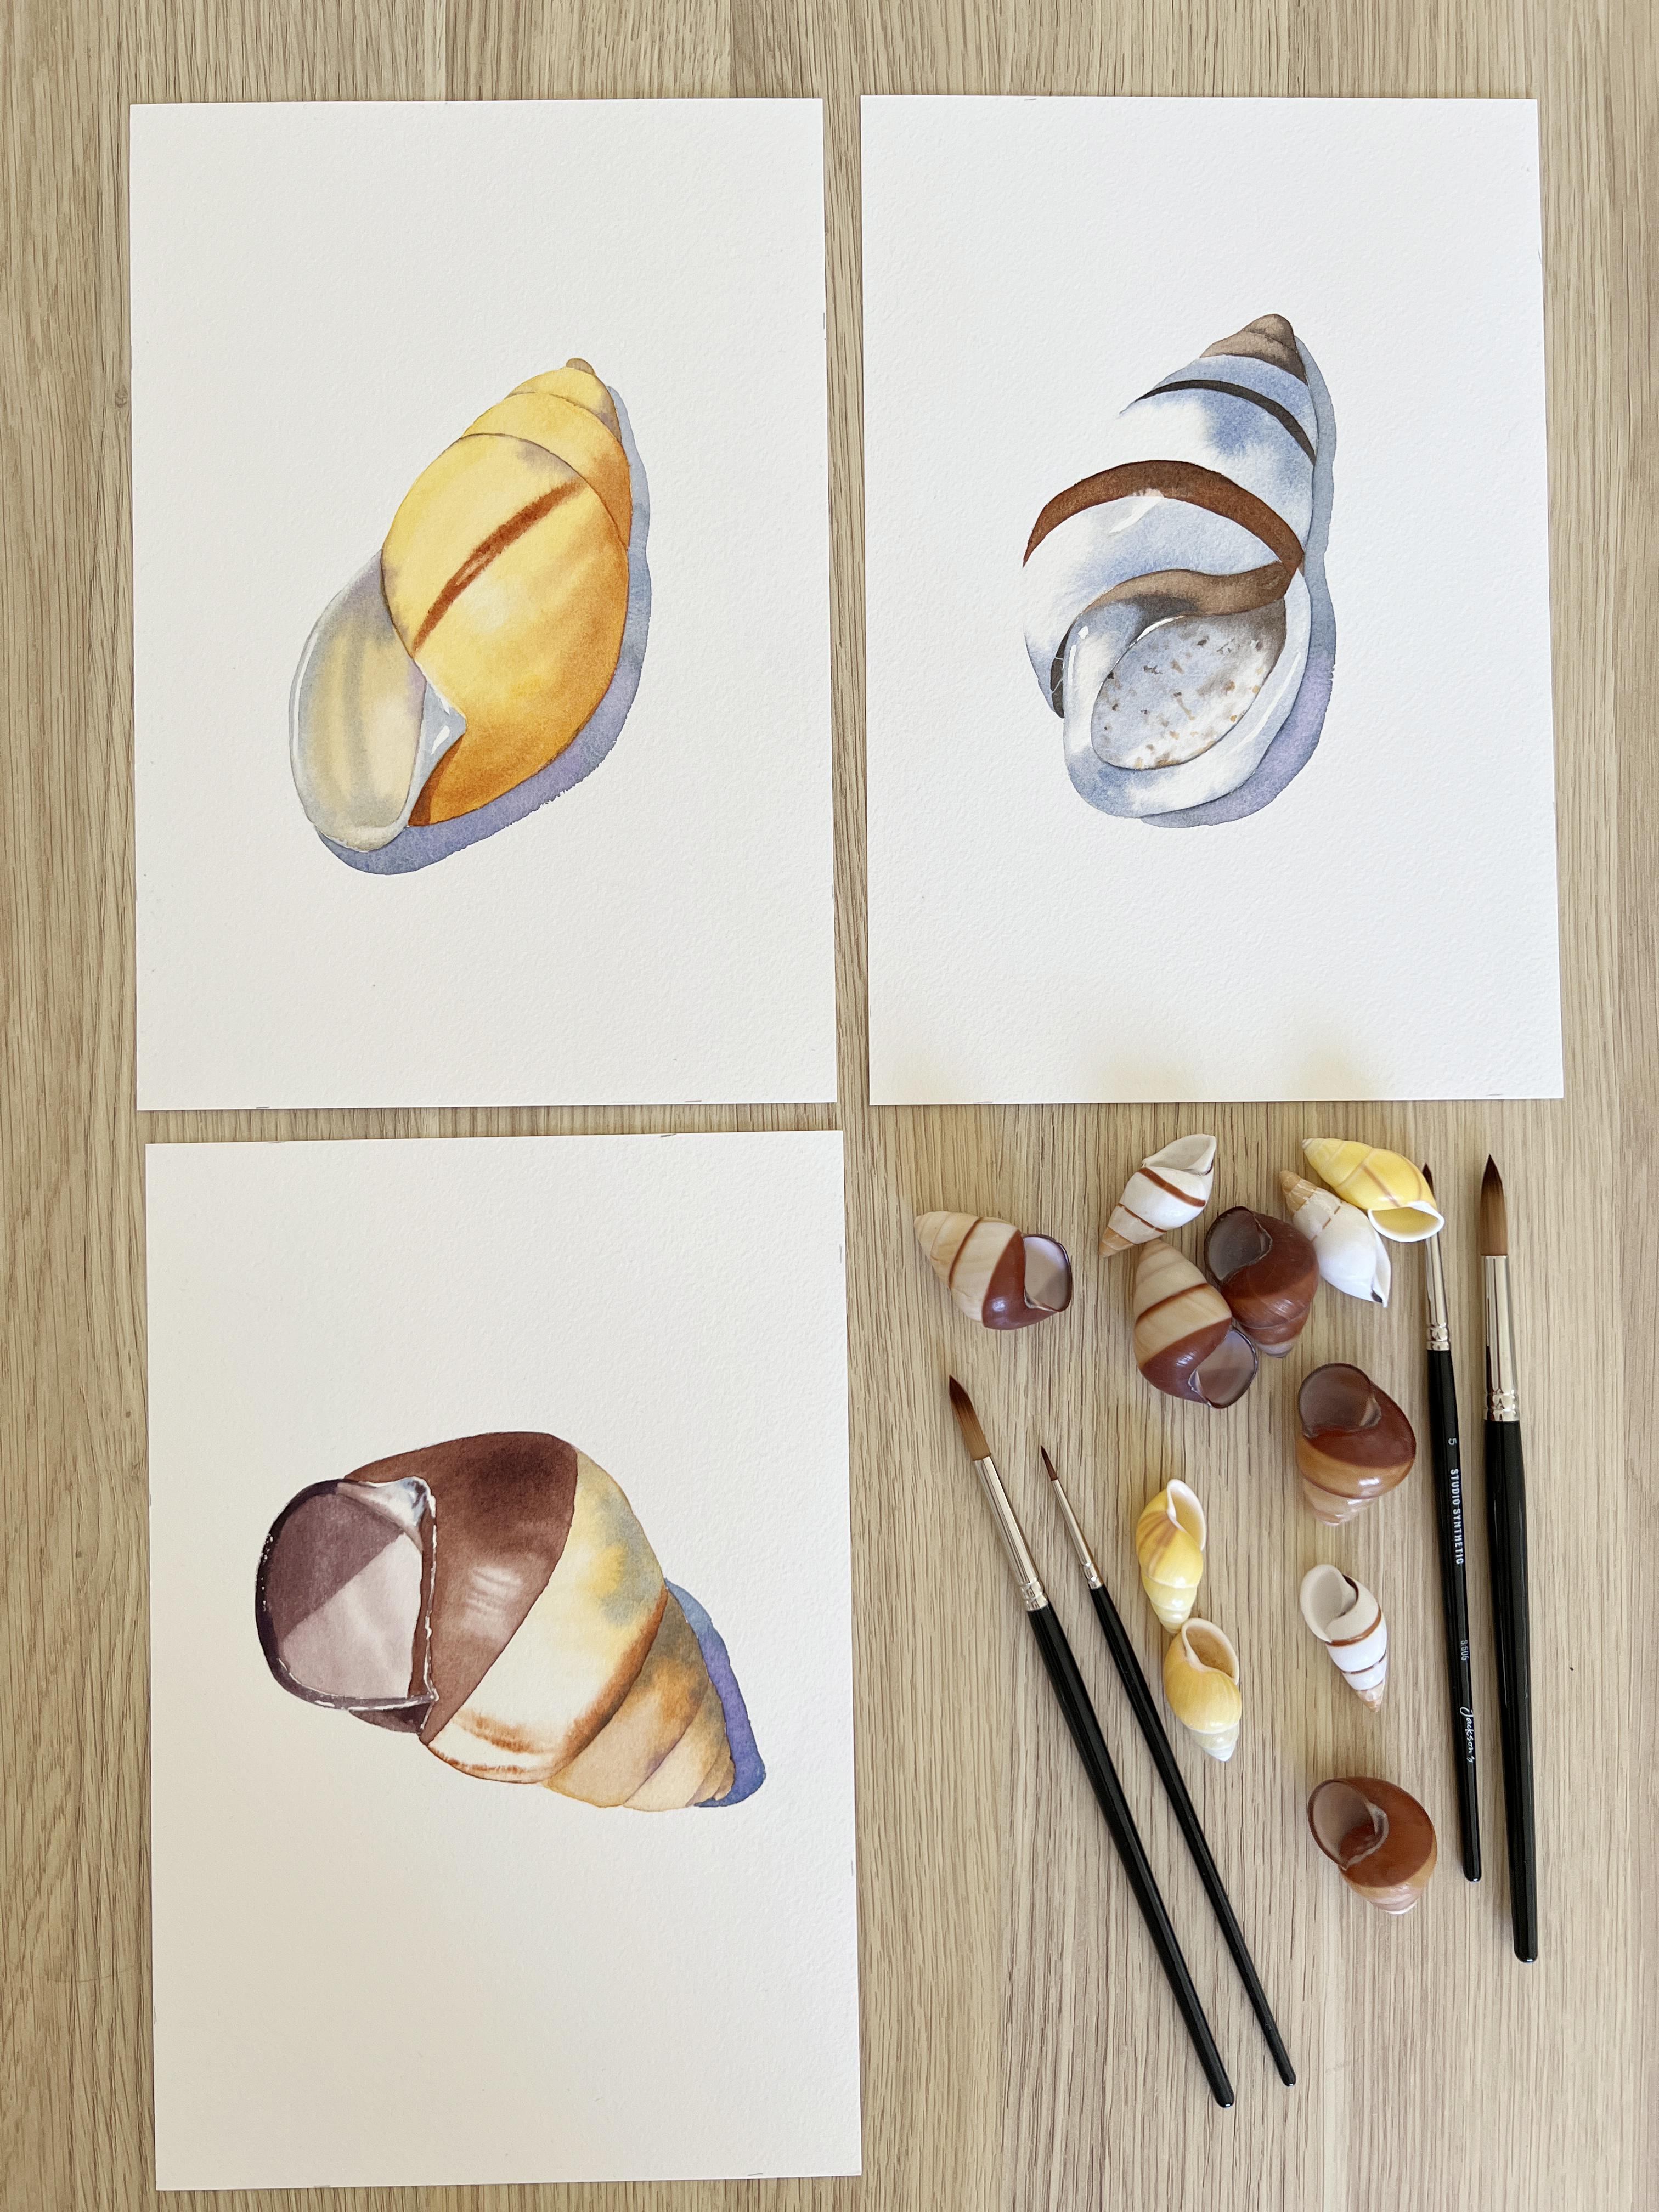
3. The Supplies : In this video, I'm going
to quickly run through all of the supplies that I
used to complete the painting. The supplies are also listed on the supplies list
for you to download. I'll start with the paints. I used a limited palette of four Windsor
and Newton colors. I prefer to use tube paints because I'm familiar with them. I find it easier to mix with
freshly squeezed pigment. I also find it easier to adjust the consistency of
the paint mixture when I use tube paints. The first color I used
was Indian yellow, which is a warm,
transparent yellow. The second color
was Windsor violet, which is also a warm
transparent color. I used French ultramarine,
which is a warm, transparent blue
and burnt sienna. A warm, transparent,
earthy color. If you don't have Windsor
and Newton paints on the supplies list, you'll find some suggested
color alternatives In both Daniel Smith
and Schminker paints. The brushes I use to
paint the shells are the Jackson's synthetic
round brushes. These are series 505. I normally use natural
hair brushes when I paint, but they can be quite
expensive to buy. I've used these less
expensive brushes and they perform quite well. They have good snap, and
they release the paint well. I used a 158 and a 12. Now for the paper, I recommend all my students use 100%
cotton watercolor paper. For this tutorial, I used as
cold press watercolor paper. I took two sheets of three sized paper and
cut them in half, which gave me three
separate paintings. If you prefer, you can
paint all of the shells on one piece of three sized
paper, like I've done here. Now I'll show you some of the other things that I used
to complete the paintings. These are the
palettes that I used. A little ceramic
palette that holds the paint and a larger
ceramic mixing palette. This is an inexpensive
kitchen platter that I bought for about
five or $6 I used some Windsor and Newton masking fluid and an old synthetic
liner brush to apply it. I used a small rosemary and co eradicator brush to create some highlights
after the painted dried. This is a small flat
chiseled brush that I use all the time to create high
lights and to tidy up edges. I used some sale transfer paper to transfer the line drawing
to the watercolor paper. I taped the line drawing in
place with some masking tape. I like to use two large water
containers when I paint. One I use for cleaning the
paint out of my brush, and the other I
try to keep clean. So I've got some clean water
to wet the paper with. It's handy to have some tissues close by in case
of any accidents. I always have an old towel
beside me when I paint, so that I can wipe
my brush on it. I use a needable eraser to
lighten the line drawing. A normal plastic eraser is great for removing
masking fluid. I also like to have a
hair dryer nearby so that I can speed up the drying
process of the paper.
4. Some Watercolour Techniques to Practice: Before we start
painting the shells, I want to show you some of the techniques we will be using. If you haven't done
much painting, you can practice
these techniques before you start your paintings. The first technique I will show you is how to wet the paper. I take one of my brushes, I dip it in my water container and then I go straight
onto my paper. Here. I'm using one of my watercolor journals to
demonstrate The brush I use is as large as
possible for the area that I'm painting because I want
to apply the water quickly, I don't want the
paper to start to dry before I get it all wet. Having said that, even though I try to wet
it fairly quickly, I need to wet it carefully. Because wherever
the paper is wet, that's where the
paint will flow. When I wet the paper, I try to give it even
coverage and I don't want puddles of water sitting above
the surface of the paper. I spread it out with my brush. I make sure it's evenly covered. This is a close up look at how my paper looks when
it's ready to paint on. It has a glossy sheen
on the surface, but the water isn't
sitting in puddles. Above the paper
here in the corner, I can see that the water
is starting to accumulate. I use my brush to spread it out. It's accumulating
there because I'm painting in my
journal and the page has curved slightly most of the time when I'm
painting the sea shells. This is what my paper will
look like when it's wet. If it looks anything
different to this, I will tell you as we go, the longer you wait
to apply the paint, the drier the paper becomes. You'll notice that the sheen on the surface won't
be quite as shiny. There are times when you might want to paint on paper
that looks less shiny. When it becomes drier like this, the paint won't spread as far. But because the paper is damp, the paint edges will
be soft and fuzzy. If I paint on paper
that is damp, so less shiny than
when it's really wet. I will tell you in the video,
so don't worry about that. You will need to wet the paper and wait a few minutes
for it to soak in. I think I do that when I
paint the final seashell. Another thing I want
you to be aware of is your paint consistency
when you're painting. This is important because
it affects the way the paint moves and
behaves on the wet paper. When I mix paint colors, I prefer to use freshly
squeezed pigment rather than pigment
that has hardened on my palette because
I can scoop it up on my brush without having
to wet the pigment first. Here I'm mixing burnt sienna and French ultramarine together
and my brush is damp. When I'm happy with
the color I've mixed, then I add a small
amount of water, just a little bit at a time, tiny bit more. When I pick my palette up, that paint will move
on the palette. That's the consistency of the paint that I use
most of the time. But there are times when
I want thicker pigment. When I want the pigment
to be quite thick, I make sure my brush
isn't too wet. When I start mixing, I use the freshly
squeezed pigment again because it's
easier to pick it up. I wiped the brush on
the towel between colors rather than
dipping it in the water. If I do dip it in the
water to clean it, I make sure I dry it off. Then when I arrive at
the color that I want, I'll put a tiny bit of water, not a lot, just a tiny
little drop on my brush. That mixture is quite a lot thicker than that first mixture because I've kept
the water out of it. When I pick my palette
up, it doesn't move. As I said, the consistency of the paint effects how the paint
behaves on the wet paper. I'm wetting the paper here with some water so
I can show you. The watery mixture on my
palette has already hardened, so I've got to add a
bit more water to it. When I paint that
on the wet paper, it moves, it bleeds
over the wet paper. It can create some
beautiful effects. Now, I'll use the
thicker pigment, just picking it up
with my damp brush. This time it's not
going to move as far. The marks that I make on the
paper will keep their shape. But because the paper is wet, it's still giving me fuzzy edges on those marks that I've made. There are times when I want the paint to flow over the paper freely and there are
times when I want the paint to stay in place
and not move too far. I can make that happen with the consistency of
the paint mixture. If I want loose
expressive marks and I want the paint to bleed
or creep over the paper, I'll use paint that has
some water mixed with it. If I want the marks I make with the paint to stay in
place on the wet paper, I'll use thicker pigment. All of this I will demonstrate
when we start painting. Now I want to show you a few of the techniques we will use
when we paint the seashells, just in case you want
to practice first. The first technique
you can practice is sweeping your brush over
wet paper confidently. I'm back to my
journal here and I'm wetting a section of
the paper with water. I'll pick up some of the paint. I want the paint to flow
over the wet paper, so it needs to have a bit
of water mixed into it. If I'm not sure how wet my brush is before
I touch my paper, sometimes I might
gently dab it on the cloth just to make sure it's not overflowing
with moisture. Now, I'm going to
do some sweeping strokes with the brush. This is going onto
the wet paper, I'm using the side of the brush. Nice long sweeping strokes. Just getting a bit more paint. Just practice that to
get a feel for it. If you haven't done
this thing before, try to use your
brush confidently. And this is what I'm doing
here on Seashell One, I'm working on the
wet paper and I'm moving the brush in
long, sweeping strokes. Here's another thing you can
practice also on wet paper. Here, I'm wetting
the paper again, just a small section of it. I want you to imagine
that I want to leave a high light in the
middle of that section, so I'm not going
to put any paint in that middle section here. I'll pick up some paint again. I'll mix some water with it because I want it to
flow on the paper, so you'll be reserving a
high light on white paper. So here I'm painting the paint onto the
section that I've wet. But in the middle,
I'm going to leave the paint off to
create a highlight. So you'll see the white
of the paper showing. This is how I created the highlights on
shells one and three. Although on shell one, I think I lost
quite a lot of it. So the paint drifted into
the highlighted area and I ended up with not
much of a highlight which can happen because
the paper is wet. Don't be concerned if you try this and you end up
losing the high light, it's nothing to
be worried about. That's what I'm doing here. On shell three, I'm
painting on the wet paper, but I'm going to leave a
little highlight there. That's something else you can practice When I paint the cast shadows that
the shells are making, I use a technique
called charging, where you drop one color into
another color that's wet. If you're working on dry
paper like I am here, you have to work fairly
quickly because you don't want that first color to dry before you drop the
second color onto it. Now I choose another color. It should be a similar
consistency to that first color. Then I drop that
onto the wet paint. It's as simple as
that. It's just dropping one color into
another color that's wet. Here's another
technique that you can practice that has to do
with paint consistency. The first shell we will
paint has a stripe on it. I painted on wet paper
with thick pigment. Here, I'm wetting the paper
with water so I can show you. Now I'll get some
thicker pigment. I make sure my brush
isn't too wet. When I pick up the paint, then I add a tiny
bit of water to it. The paper isn't as wet as
it was when I first wet it. It started to soak in a little. The shine is beginning
to go off the surface. Then when I put that thick
pigment on the paper, it stays in place. But it still gives me
those fuzzy edges. If you find it spreads too far, you either need to
wait until the water has absorbed into the
paper a little more, or you need to thicken
up your paint mixture. Also, be aware of the amount of moisture that
you have in the brush. Maybe you need to
dab your brush on your towel to practice that. On wet paper. You want the mark you
make to keep its shape, but you want it to
have fuzzy edges. On seashell two, I paint one
of the stripes on dry paper. I used a dark mixture of frenchaltrimarine
and burnt sienna. Here I've got the
Frenchaltrimarine. Now I'll put some
burnt sienna into it, that gives me a dark
chocolate brown color. Now if I use the paint at this consistency on the
dry paper, it's too thick. If I go over here
onto the dry paper, what happens is the
paint brush skips over the surface of the paper and it creates more of a
dry brush effect, which is not really
what I was looking for. To remedy that, I add a
touch of water to it. Again, not a lot. Maybe not as much as I've got here in the blue
puddle of paint. But I do need the paint
to flow off the brush. I don't want to fight with it. Let's have a look at that
on the dry paper now. Because I've got a bit
of water mixed into it, it flows easily off the brush. Practice that a few
times holding the brush upright and then pushing down on the bristles
to flatten them out. There's a few
things that you can practice if you need
to, but don't worry. I will walk you through
each shell step by step. In the next video, we will
start painting Seashell One.
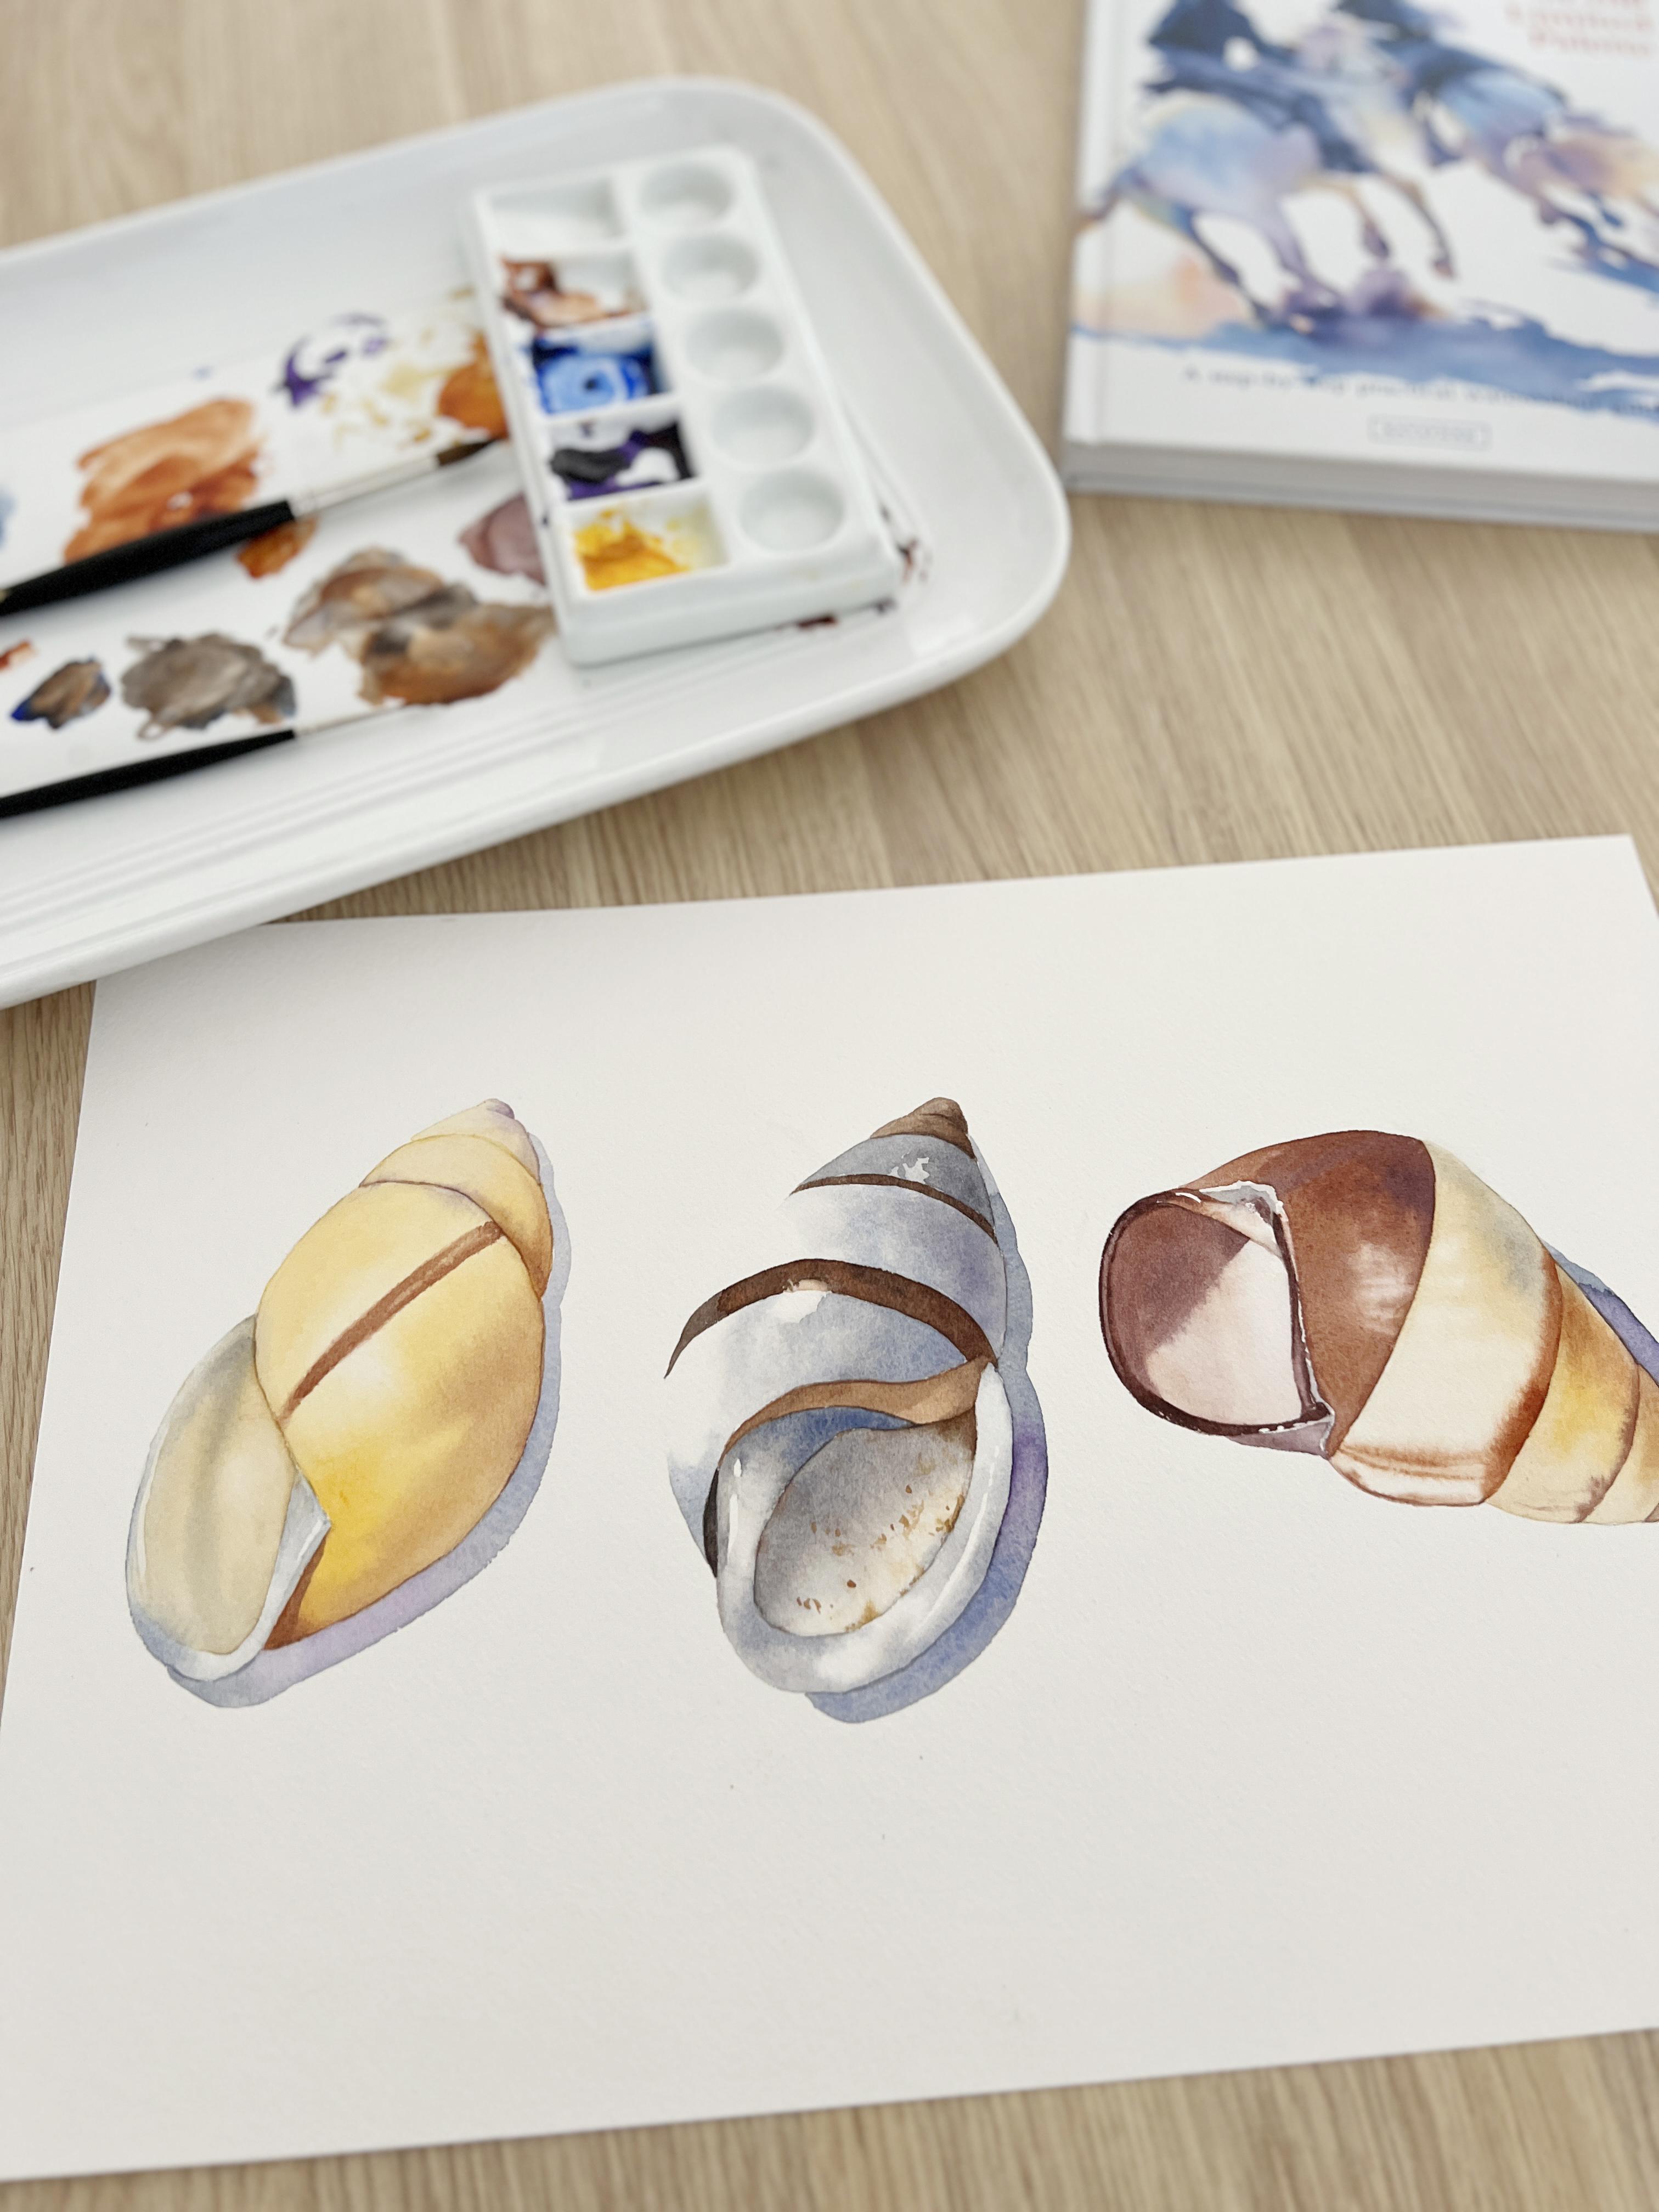
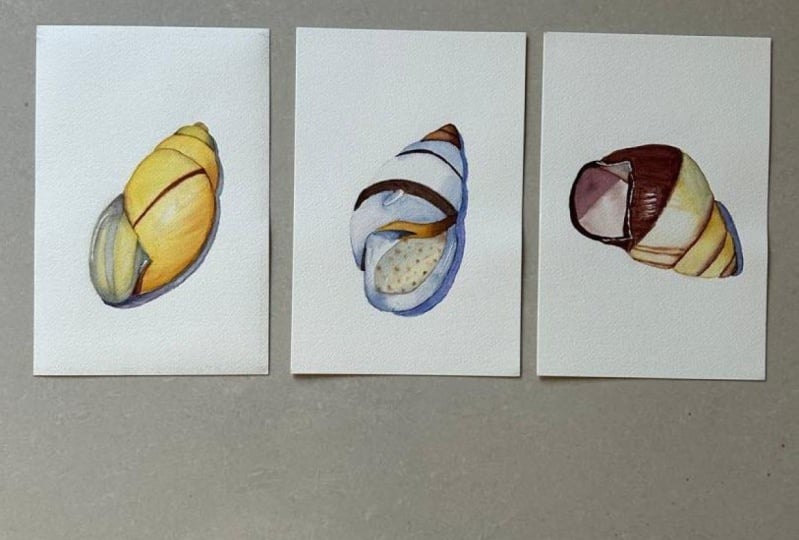
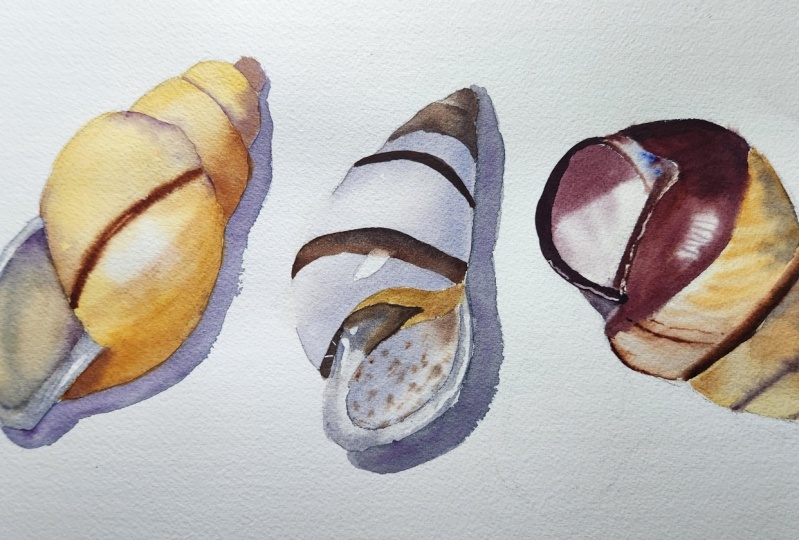
5. Seashell One - Initial Washes : All right, I hope
you've got your paints ready because we are
going to start painting. I've divided each
seashell into two parts. In this video, we will
start painting this shell. This is a piece of cold
press watercolor paper. I've stretched the
paper and I've attached it to some gator board. Stretching the paper keeps
it flat while I work on it. If you don't know how to
stretch watercolor paper, I've written a blog post to
demonstrate how I do it. I've linked to the blog post on the supplies list for you. This is an three size piece
of paper cut in half, which makes it an four
size piece of paper. I've got the paper in
portrait orientation. To transfer the line drawing
to the watercolor paper, I will use some saral paper. Saral paper is a wax free, fine art transfer paper. I've got the paper in
portrait orientation, but you could easily
place the paper in landscape orientation
if you prefer. I position the line drawing
on the paper where I want it, then I tape it into place
with some masking tape. I place the sale paper
underneath the line drawing, and then I use an
ordinary pencil to trace over the lines. I check to see that I've got everything and then I can
remove the line drawing. I use a needable eraser to
lighten the line slightly. I want to be able to see them, but I don't want
them to be too dark because they might show
through the paint. In some places I'm going to use some Windsor and Newton masking fluid to mask some little high lights that
I can see on the shell. Because masking fluid can
be hard on your brushes, I like to use an old synthetic
liner brush to apply it. All I do is dip the brush
into the bottle and then I run it along the dry paper
along the front of the shell. There I can see a
white high light also on this part of the shell. I can see another one just
here now that needs to dry. Now, before I can do anything, I'll be painting with my
board on a slight angle. I've got a really thick
book sitting underneath it, but if you prefer to have your board flat on the
table, that's fine too. All right, let's get
the paints ready. These are all Windsor
and Newton colors. The first one is
transparent yellow, Windsor violet,
French ultramarine. This is a color that I use all
the time and burnt sienna, which is another color
that I use all the time. Okay, the first
thing I'm going to do is use the number 12 brush. That's the largest
brush to paint some water onto this main
section of the shell. I'll be working wet on wet. I'm going to try and leave that little high
light that you can see on the lightest part of the shell there by
painting around it. I use my large brush
to do this because I can get the water on the paper
quicker with this brush. And I make sure that the paper is evenly covered with water. I don't want the water to
be sitting above the paper, so I don't want any
puddles lying anywhere. I'm going to use Indian Yellow to paint the first
wash on the shell. I mix a tiny bit
of water with it, not too much because I don't
want to dilute the color. I don't want it to be too pale. Still, using the
number 12 brush. I'll start down the
bottom here because it's a bit darker there than the
other side of the shell. It's painting straight
onto the wet paper. When I paint, I'm looking at the outside edge of the shell. I'm not too worried
about what's going on on the other
part of the shell, it's just the edge that I'm
focused on at the moment. I'm going to try and follow
my pencil line as best I can. If you go over your pencil line a little bit there like I did, don't panic, it
doesn't really matter. I'll be painting a
shadow there later on. The shadow will
probably cover that. I'm painting all of the outer part of the shell
in the Indian yellow. Again, here I'm looking at
the outside edge along here. I'm not concerning myself
with what's happening here. I know I've got time to
fix that later because the papers we Okay. Now I can think about that highlighted section that's there where there's no color. So I can try and paint
around that as best I can. Now the paint will creep
because the paper is wet. But hopefully, I'll be able to reserve a little bit of
the white of the paper there if it gets away
from you and you find that the paint completely
covers that area. Don't panic, it's no big deal. Just do the best you can, okay? Now I need to let that sit
and dry before I move on. So here's a photo of my
painting at this stage. This is Seashell
one, progress photo, one that you can download now. I'm going to mix some gray from French ultramarine
and burnt sienna. This is the French ultramarine. I'll be using more of the blue
than I will burnt sienna. I want to cool gray, I need a bit more of the blue. I find the burnt sienna
tends to overpower it a bit. I'll add a touch of
water to it because I want the paint to flow
on the wet paper. Okay, now my shell is dry. All the yellow is dry now. And using my number eight brush, I'm wetting the inside
part of the shell. I'll take the water over to the pencil line on
the right hand side. So that a pencil line that looks like a J there beside my brush. So just take the water down to that pencil line
that looks like a J there over the top of
the masking fluid. The paper is dry, just here. All that area there is dry. Now I pick up the gray
mixture that I just mixed. Now this gray will
sit underneath the yellow that I'll be
painting on later. Here. I'm painting in those little
shadow areas that I can see. I could have used
darker yellow here, but I want to stick with the
colors that I've chosen. Now I'm going to paint
a long sweeping stroke down towards the
bottom of the shell. And then I'll do the same
thing here on this outer edge. Follow the outer edge
with you, brush, curve it round the bottom and
then I'll take it up onto the dry area down the bottom
here where my brush is now. The papers, I didn't wet that
section. I'll take it over. The little patch of
masking fluid that's there now. It will bleed a little bit into that wet area,
but that's okay. I'm not too worried about that. Okay. So that needs to
dry now before I move on. So I'll take a photo of my
painting again for you. This is Seashell One,
Progress photo two. Okay. That area there is now, so I'm going to use my
number eight brush again to wet the inside part where the yellow is on
the reference photo. Again, here I will only wet
down to that pencil line, so I won't go past it. I don't want the yellow to go onto this gray section here. I usually wait for the paint to dry by itself and then I use a hair dryer on it to
make sure that it's completely dry before I layer
over the top like this. If you don't wait for the
paper to completely dry, you end up disturbing that previous layer that
you've just painted. All right. Now here's my yellow. Just mix a bit of water with it because it's dry
on the pellet now. And I want a tiny little bit of the Windsor violet just to neutralize the yellow and
dull it down slightly. I might get a tiny bit more. Okay, that goes onto the wet paper over the top of the gray that
we painted earlier. I don't want the yellow to
go all the way to the edge. So I will stop it short of the edge because
the paper is wet. It will give me a soft edge
where it meets the gray. I won't get an ugly hard edge there as you paint. Watch for little tie lines
or water lines forming here. I use my slightly damp brush just to clean away
that tide line. In doing so, I made the paint bleed down
onto the gray area, but I'm not concerned
about that. I'll just let it do what
it wants to do there. Now, I'm getting a little tiny
bit of the Windsor Violet. It's a very strong color. I don't want to l it I'll mix some water with
it to tone it down. It's getting the excess
paint off my brush there. And then I dabbed the excess. I'm going to paint that
just up here in the corner. Now, I can't really see violet there on the
reference photo, but because violet and yellow
are complimentary colors, I thought it would
look nice if I put a little bit of violet here
and there on this shell. Just a little bit more. That looked a bit
too pale to me. I thought I'd try it a
bit darker than that. It was so pale that
by the time it dries, you probably wouldn't see it. I dropped a bit more in there. Okay. I'm going to let
that dry and I'll take a photo of my painting
again for you. Here it is. This is Seashell One, progress photo three
that you can download, that's the shell all washed in. In the next video, we'll add
some detail over the top.
6. Seashell One - Adding Details: There's a shell all washed in. Now we'll start to add some detail to give
the shell more form. Using the number one brush, I'm going to get
some of the violet. All I'm going to do
is paint that on dry paper over the top of this little back
section of the shell, just to change the
color slightly. All right, now I
need to add a shadow on the right hand side
of this segment here. So I use the number eight brush to wet the paper
with some water. I'll work on the wet paper
again so that the paint will bleed and creep and give me a soft edge
where it finishes. Now I want some burnt sienna. I'll mix a touch of water with
it just so that it flows. I'll paint that on this right hand side where
it's a bit darker there. On the reference photo, I've
got a puddle of paint there. So I tap the excess
moisture out of my brush and use it to sop that little
bit of excess paint. Now, I'll use my eraser, the plastic one, to
remove the masking fluid. When you use masking fluid
in a watercolor painting, after removing the
masking fluid, you often need to integrate the preserved high lights
into the painting. And that might involve gently adjusting the edges
and tones around the masked areas just
to ensure that they blend harmoniously with
the surrounding elements. To help me do that, I'm going to use my small eradicator brush. This is a Rosemary and
Co eradicator brush. It's a little stiff brush. I can use it to gently rub over the dry paper. My brush is wet. The paper is dry, and I gently rub at the edge
of those highlights. Just to soften them slightly and blend them down
into the painting. I can use a tissue to take off a little bit
of paint there as well that softened
those edges there. I don't need to do anything
to that other highlight. I think that one's
fine. I'll take a photo of my painting
again now for you. This is Seashell One, progress photo four
that you can download. Now I want to make this segment at the back
look a little more rounded. So I do the same thing that I did with the segment in front. I wet it with water first
using my number one brush. This time I thought I'd use violet instead of burnt sienna. I paint that on the right hand
side where the shadow is. There's actually another segment in there on the reference photo, but I'm only going to
paint these three. I didn't think it
was necessary to include the other one here. I'm running the paint along the pencil line between
the two segments, just there it was a bit dry, so I'm adding a bit more water just to spread the paint out. Then I dropped a bit more
of the violet there. I was a bit concerned that it wasn't going to
be dark enough. Okay. Switching to my number
12, brush the big one. I need to get some water
on this one because this big segment here needs
a shadow on the bottom edge. It also needs a stripe
down the middle. I gently wet all
over with water, make sure it's
evenly covered and there's no puddles
lying anywhere. I'll get some bent N now, and I'm using the
number eight brush now now I want it to flow, so I add a tiny bit of water to it and I paint that on
down the bottom here. And I'll run it up
that right hand edge. I need some more
paint on my brush. So the water on the
paper is giving me those soft paintages
that I'm after, a few little shaped
following strokes there. And now a bit more color
down the bottom there. Now it looks a bit dry up here. I'm painting a bit more water there because I want to
paint some violet there. Using the little
number one brush, I pick up some violet. I'll paint that just up
here along that edge, allow it to bleed
over the paper, creates a little shadow there, softening that edge
there at the front. And this one here does with
a damp brush. All right? To paint that stripe down the middle of the
shell, I need thick, creamy paint with no
water in it to get yourself some freshly
squeezed paint if your pigment has gone hard. The reason I want it to be creamy like this is because I don't want
it to spread too far. I'm painting on the wet paper, or it's more damp now than wet. I want soft edges, but I don't want the paint
to spread out of control. I want that stripe to
look like a stripe, just a bit more pigment there, so that it doesn't
dry too light. Deepening the color there. You can see that that
has given me those soft, fuzzy edges along the edge, but it hasn't spread too far. It's kept its shape. That's brought me
to Seashell one, progress photo five
that you can download. I've got my small
eradicator brush now. It's wet with a bit of water. The paper is dry just bringing back that edge right
at the top there. Gently rub at the
paint, softens it, then I can use a tissue
to remove excess. And then I used it down the bottom here along
this edge as well. I also ran it along
that edge there. Now, looking at this shadow just here on the side
of this segment, I feel that mine's not
quite dark enough, which sometimes happens
after the paint is dried. It looks okay when it's wet, but once it's dried,
it's too pale. Here, I'm going to give it
a second layer of paint. You don't need to do this
if you're happy with yours. I just want to show
you that you can. I've wet it with water there. Just a bit more water
now, the ben Sienna. Then I took my eradicator brush and I took off a
little high light on that stripes it say brush
is wet, papers dry. Switching to my number one
brush and some burnt sienna. There's a little cast
shadow I want to paint on just down the bottom here. That's on dry paper with the number one brush to cool
that shadow down slightly. I thought I'd paint a touch of the Windsor violet into it. While it's wet, take the paint out of my brush and use it
to spread the paint out. I have to work quickly
before the paint dries back to my number 12
brush and some clean water. Just gently painting over
that section of the shell, the lighter section
with some water. If I can finish
the water against that line that runs
down the middle, I shouldn't get a tide line. It's always a good
idea when you're re wetting painted work to try and finish the water in a
light section rather than a dark section just to
minimize those tide lines. Here I've got a bit of
the Windsor violet on my little number one
brush, spreading it out. Now it's just helping to make that edge look
a little more rounded. It's looking a bit flat. Going back to the gray mixture using the number eight brush, just putting a bit
of water with it. This is for the cast
shadow beside the shell. Now remember that
was a mixture of French ultramarine
and burnt sienna. But it has more of the
French ultramarine in it. And I'm painting
on dry paper here. I just want to follow the
edge of the shell with my brush and create a
little shadow there. This helps to ground the shell and stop it from looking like
it's floating in the air. You don't want to use a
tiny little brush for this. Use a brush that's a fairly
good size so that you can put the paint on in more
or less one stroke without having to go back over the top of it all the time. As I said, this is
my number eight Now, I could have painted a
shadow on wet paper here, and the shadow would have
had soft paint edges. But I think it was easier just to paint it on the
dry paper like this. Then for interest, I picked up a bit of the Windsor violet. I charged that into
the wet paint. That's the first
shell finished there. It is cut off the board in the next video will
start shell number two.
7. Seashell Two - Painting the Lightest Tones: Okay, let's start,
See shell number two. Now there's more wet on wet practice for
you with this one. This shell has got two
dark stripes on it. One of the stripes we paint on dry paper and the other
one on wet paper. I've transferred my
drawing to the paper using the same method I
used for the first shell. With this line drawing, you'll
notice that I have a line missing here and a little
line missing there. That's because I'm
going to leave a lost edge in those places. I won't be putting
any paint there. And that will help to create depth and make the shell
look more rounded. Using the number 12 brush, I'll wet the outside of the shell even though the shell
has a lot of white on it. There are some shadows on
the right hand side that I need to paint in
with this shell. I'm going to leave the
little high light dry. I'll paint around the high
light with the first shell. We wet all of the paper. And when we put the paint on, we avoided the high light. And we let the paint creep, creating soft edges around
the edge of the high light. This one will do it differently
when you wet the paper. Don't wet that high
light in the middle. I went around the
high light that I had drawn and then I took the wet brush and I shaved a little bit of the top
section of the high light off. That's what I'll do
now is my brush. Take the water into
the high light and make it slightly smaller
than the way I've drawn it. There's a little
patch of dry paper just there where
the high light is. You'll see when I put the paint on what I'm talking about, I'll use the number
eight brush to pick up some of
the gray mixture. Remember the gray is a mix of French ultramarine
and burnt sienna. Okay, number eight,
brush gray paint. I run it down the side
where the shadow is. I paint in that right edge. Again, I'm looking at
the side of the shell. I'm not worrying about what the paint's doing on the wet paper. Take it across the front up to the edge of
the high light. I'll be leaving the
white of the paper showing in quite a few
areas on the shelf. I'll take it to the edge of the pencil line there,
down the bottom here. I've got some water accumulating because
my boards on an angle. So I'm just using the brush
to sop some of it back up. Now, a bit more paint. Just where the pencil
lines are down the bottom. Then I wipe the paint
out of my brush. And then I use it
just to fix edges, make sure the paint is
sitting the way I want it to. I don't have any
paint on the brush, I'm just moving
the paint around. And then I put a little
bit more paint along the top edge of the high
light just to touch. That's enough. I've
got to let that dry. Now you can see that I've left the paint off the external
edge on the left hand side, so there's no paint along here. Here's a photo of my painting
that you can download. This is Seashell Two,
progress photo one. Before I go any further, I need to mask of the little highlights that are sitting around the
edge of the shell. There's another high light on the right hand side,
a long, thin one. I should have painted
these in before I started, but I forgot about them. Well, let that dry
now. All right. Using the number eight brush, I'm going to paint the
inside part of the shell. If you're masking
fluids, not dry yet. Just be careful that you don't
disturb it with your hand. This is water that's going on
that middle inside section. I use the gray mixture again and then I start to paint in that shadow
that runs along the top. I've got a little tiny hair
there, I can't get it. I have to leave it there, just allowing the paint to
bleed on the wet paper. The front section
of it is lighter, so I won't put any paint there, but I can see a little shadow running along the front rim. For that, I will switch to my little number one brush because I don't want to
put too much paint there. I run that along the
pencil line, let it bleed. And then that leaves me with that white paper showing
there at the front. Now I want brown for that. I use Ben Siena, but I'm going to mix a bit of French oltrmarine into
it to deepen the color, slightly, take the red away. So I don't want to
gray, I want to brown. So I have to use more
of the Ben Siena. When I made the gray, I used more of the French Tri Marine. That's given me an earthy
brown color that I can use right at the top here to
deep in the shadow a bit. The paper is still wet from when I wet it at the beginning. Now I thought I'd paint some of those little speckly
marks that you can see using the same color
scribbling with the brush. Try and paint them
in quickly so that they don't look too forced. Just a few little
dabs here and there. You don't need a lot of paint on your brush when you do this. And then I checked my edges, made sure they were okay,
and then I let it dry. I took a photo of my painting
at this stage for you. This is Seashell Two,
Progress photo two. Now I want to paint in the brown areas that
are on this shelf. For that, I use the
French ultramarine and Bon Sienna mixed together. But it's got more of the Bon Sienna because I want
a brown rather than a gray. I'll use my number
five brush to do this. Switching to the five now I'll start with the
section at the back here. So those two little
segments there, I'll paint on dry paper. I'll paint them both
together at the same time. I'll use my pencil here to re, draw in that line there
between the two segments, because that's where I
need to paint a stripe. Make sure I've got it
in the right spot. Now I need a really dark brown for the stripes on the shell. I use the freshly
squeezed pigment and I pick it up
with my damp brush. When you use fresh pigment, it's easier to mix a
dark color like this. I want the paint to
flow off the brush, so I need to put a tiny
bit of water into it. Otherwise it's too sticky. All right. The
number five brush, now on dry paper, I paint in that stripe
that runs along that segment there
all I'm doing is painting on top of that
pencil line that's there. Practice on a bit of scrap
paper first if you need to. With the larger stripe. I thought it would be easier
if I wet it with water. Number five, weighting
the stripe with water. Now I'm going to
put a bit more of the burnt siana
into that mixture. I want it a bit redder. And then holding the brush up on its tip number five brush, I start to paint in that
stripe that's there. The moisture on the
paper is going to give me a bit more time
to get the paint on. There can be a bit more careful. I don't have to rush to get it finished before
the paint starts to dry. I curved it around the top of that little high
light that's there. I want to make sure that I put the paint on dark
enough because I don't want to have
to come and give it a second layer of paint.
If I can help it, then I go back to it and
just check the shape of it. Might be a bit too
thin, just here. So I extend it out a
little bit further. Just do the best you can. That brings me to another
progress photo of my painting. This is Seashell Two, progress photo three
that you can download. In the next video, we
will complete the shell.
8. Seashell Two - Finishing Details: This is where we
finished in part one. In this video, we will start by painting the front
edge of the shell, and then we'll add more
detail to finish it off. I'll start by wetting the front edge of the
shell with some water. Just make sure your
masking fluid is dry. When you do this, I'm using
the number eight brush. I haven't wet the top area
where you see it's brown. I've only wet up to
the pencil line, that looks like a V shape. Okay, so that's wet with water. Now, now I want some more gray. My gray is just about finished, so I mixed together French
ultramarine with Ben Siena, mix a touch of water
with it as well. I'll use my number five brush, I think, to put the paint on. Okay, painting on the wet paper. I start in that V section
and it's quite dark. I do come back at the end of the painting and
I add a bit more color there running along the front here, I'm going to leave some of the white of
the paper showing. I won't completely cover
it with the gray paint. I use the reference
photo as a guide. I have to look carefully. I can see a little bit of
gray where my brush is now. It seems to be darker
along the front edge. So I'll run some paint
along there as well. I take it up to the high light, otherwise you won't
see the high light. When I remove the masking fluid, I'll put a bit in front of
the high light as well. Okay, so I've left white there
and I've left white there. Now I want some of the brown. So that was the burn Siena mixed with a bit of
French ultramarine. And I'm going to paint
this brown section here. Now. The gray is still wet. The gray area, the brown will
bleed into it a little bit, but that's okay because I don't really want a hard
sharp edge there. I thought if the brown bleeds into it a little
bit, all the better. The brown, I am painting on
dry paper, but as I said, where it touches the
gray on the rim, it might bleed into it slightly. So don't be concerned
if it does. So of course, if your gray
has dried, it won't do that. Okay. I might get a slightly
darker brown now as well. In my little paint mixture here. I've got a little dark patch
still using the same colors, but there's a bit
more pigment there. I dropped that on their wall. That brown is still wet and then the two
values blend together. And I can't really see that darker color there
on the reference photo. I'm just trying to make my shell look a bit more interesting. Okay, using the
number five brush, I'm going to add a little
shadow on these segments here. So that's some water first, switching to the
number one brush, and I get some more
of that dark paint. So French ultramarine,
Ben Siena, more of the Ben Sienna. Tiny bit of water because
I want the paint to flow. And then I'll paint that
on the right hand edge. The wet paper gives me those soft paint edges
that I'm looking for. I'm going to use a bit
of the brown mixture to extend the shell down
low near the front here, just on dry paper. And then I'll get my hair
dryer out and I'll dry off that back section so that I
can finish that last segment. I wet it with the
number five brush and then I switch to
the number one to paint on that darker
brown onto the wet paper. Everything is dry now. And I'm using my plastic
eraser to remove the masking fluid from the front and any pencil
lines that I can still see. Now, I said I didn't want to add another layer to
this stripe earlier, but I've decided to
wet it with water. In doing so, that will
deposit a little bit of paint on that little
high light that's there. Then while it's wet, I'm going to put
some darker paint above the high light area. You can see just by brushing some water over that I've
disturbed the pigment. And it's deposited some paint
on that little highlight. And if you look at
the reference photo, that little highlight has got a very pale brown color on it. Now, while that's wet, I pick up some of the dark brown and all darken above
the high light. It looks a bit darker there
to me on the reference photo. This is the little
number one brush. I'll pull a bit of paint down into the high light like it is on the
reference photo. And then down the bottom here, there's another
little brown stripe. I use that dark brown mixture in the number one brush on
dry paper here as well. Just following what I see
on the reference photo, I've got some fresh water and some fresh paint and now I'm going to mix the
dark brown again. So that's the mixture
of Ben Siena and French ultramarine with
more of the Ben Siena. When I get the color, I won't, I'll add a touch of water to it. That's pretty close. I mentioned that this area here
could be a bit darker. I was going to add some
paint over the top here. I'm waiting with water in
the number eight brush now, switching to the
number one brush, use some of that darker brown. I want it to flow, so I'm
adding a bit of water to it. Just here, dark in that area, I'm using the dark brown, but you could also
use a dark gray here just to make sure
it's dark enough. I drop a bit more
pigment in there. Now I get my small eradicator
brush wet with water. And I rub it gently over the dry paper just
to try and make those little highlighted
spots look like they belong softening
those outer edges. All right, now I need to mix some gray again for the cast
shadow beside the shell. For that, I use the French ultramarine
mix with Ban Siena again, but this time it's got more of the French ultramarine
in the mixture. I add some water to it because I don't want it to be too dark. And this is my
number eight brush. Touch more water, I
think. All right. On the dry paper now I run this color down
beside the shell. It's working it down carefully. Making sure the
brush is nice and wet because you don't
want it to dry out. The paint shouldn't really drag, it should just flow
off the brush. Keep reloading as you need more. Remember not to use a
little tiny brush for this, then once you've got
it where you want it, if you're quick you can get some violet and
drop that in there. All right. One last thing
to finish off this shell. I thought I'd add
a few more dots on dry paper to the
inside part of the shell. For that, I thought I'd use the Indian yellow mixed
with burnt sienna, using the number one brush. Okay, dry paper. Just a few little
marks here and there. I'll put this color in the light area and I might darken it to paint a few
more in the shadow area. Now, I'll switch to the darker brown mixture that I'll paint in here where the shadow is just a few
little spots here and there. I don't want to overdo
it in some places. I just painted over the little marks that
were already there, the little squiggly
scribbly marks. In doing that, I thought
I could probably deepen this shadow in here
just a bit more. I've got the number eight
brush and some water there. And then I used that darker
brown color there as well. Just too deep in that shadow. I looked a bit pale. And I checked my edges and then I was finished. And there it is,
cut off the board. In the next video, we'll
start the final shell.
9. Seashell Three - Painting the Initial Washes: I think this shell is a
little more difficult than the first two shells
because there's a bit more detail around the opening of the shell
that we need to paint. But that's okay
because we will take our time and I'll walk you
through it step by step. On the rim of this shell, I see a few highlight areas that I'd like to reserve
with the masking fluid. I use my old liner
brush to paint it on, and as I mentioned in
Seashell tutorial one, to load the brush, all I do is dip it straight into the bottle and wipe
it on the rim. It's running it down
the pencil line there. I can see some little high
lights along the edge. Down the bottom there, there is a larger high
light on the shell, but I won't be putting
masking fluid on that. Here you can see where I've
applied the masking fluid. I need to let that dry now
before I do anything else. Before I wet the paper, I'll get my paint ready. I'm looking for a
color like this. I've given myself a fresh
squared of paint on my palette. This is Indian yellow, and I'll mix some burnt
sienna into that. Now I don't want it to
be too dark at first, I mix some water into
a section of it. Now I've got a thinner section just here with water
mixed into it, and a thicker section here without the
water mixed into it, without disturbing
the masking fluid. I'll make sure these
lines aren't too dark. I'll be working on the
back section of the shell. I wet it with water. This is the number eight
brush that I'm using. I'll work on the four
segments at the back. First, I'll use the paint that has been thinned with water because I don't want
the color to be too dark. This is the number eight
brush that I'm using. I could paint this on dry paper, but because it's the
middle of summer here and it's very hot, I prefer to wet the paper because it gives me more
time to put the paint on. I have to also use the darker pigment on here
to create the shadow. I don't want the paper to
dry before I get that on. Okay. Now I use the
thicker pigment. I might put a bit more
but CNer into it though. And tiny bit of water because I want it to
flow on the wet paper. I don't want it to sit in place. On this side of the shell, I can see a shadow. So that's where I paint
this darker pigment. Okay. I'm going to let that dry before I do anything else. That section has dried now. I'll work on this
middle section. I'm wetting it with water. I think my brush might have a tiny bit of paint still in it, so the water looks
a bit yellow there. But that's all right. This
is the number eight brush. This section, I'm
going to be leaving the white of the paper
showing in a few areas using the Indian yellow
mixed with the Bent Siena. I'll start up the top here, following the shape
of the shell. A bit more paint now and now I'm going to sweep some color over the
shell like this. It might help you if you turn your board here and
pull these strokes towards yourself for interest. And to cool it down slightly, I'm going to drop some
of the gray mixture in there, just here. The paper is still wet. You can see it listening, that's just as I said, to add a bit of
interest to that area and to cool it down so that it looks like
it's further away. I'm getting some burnt sienna
now for the other side. I want the paint
to be a little bit thicker this time because I
want it to stay in place. I don't want it to spread
all over the paper. I'm going to run it along the base here where you
see that darker stripe. I'm still using the
number eight brush here, but now I'm going to switch
to my number one brush, still using that thick pigment. And I can finish off
the edges with this. Now I want to sweep it across the shell to
paint those stripes. And also this edge, I'll reload my brush
in the pigment. Now I'll paint in those other
stripes that I can see. Try and follow the shape of
the shell as you can see. Because the paint is
thicker and creamier, it tends to hold its shape more so than the paint that's got
the water mixed with it. I thought I might mix
a darker color again, using the creamy pigment, French ultramarine burnt sienna. A dark chocolate brown color. I'll use the little zero brush so there's no water
mixed into it. It's just the moisture that
was on my brush there. I thought I'd deepen
that bottom edge and you can see that
the paper is still wet. I'll take a photo
of my painting now. This is Seashell Three
Progress photo one that you can download now. I'm going to mix some of
the Windsor violet with Ben Sienna just to make sort
of a marone brown color. That's Ben Sienna. This
is Windsor violet. Windsor violets are
very strong color. I think I've put a
bit too much there. Back into the Ben Sienna. Little bit of water here. I'm using my eraser
just to soften some of those pencil ines number eight brush now. And I wet that brown section of the shell over the top of
the high light as well. Make sure the rest
of the shell is dry. I pick up that color that I mixed and I paint onto
the wet paper with it. I'll paint in that top edge. Sometimes when you get
into a tight spot, it's better to wipe your
brush on your towel. Just get rid of the
excess paint here. I'll take it down
the front edge, that's where the
masking fluid is. You'll notice that I'm trying to avoid that high
light that sits there. Let's get a bit more paint. And now I'm adding a bit more of the paint
to my mixture because I want a darker color still using the violet
and the bent sienna. But I'm adding more pigment to my mixture and a bit of water because I need
it to flow as well. I will deepen the color
here a little bit. Again, I was concerned that
once this layer had dried, that it wouldn't be dark enough. I didn't want to have
to come back and paint another layer of
paint over the top. I thought maybe if I just
darken this top section, that will be all I
need to have to do. I'll wipe my brush on my tail to get rid of
the excess pigment. And then I use the
brush to spread it out so that it's not
accumulating in one spot. Now I'll switch to my
little number one brush. Some more of that color. I'll use it to paint the little strips of color
through the high light. While I wait for that to dry, I thought I'd paint
a little bit of color along the edge
of these segments. Down below here,
I've got water on my brush and I'm painting it
onto that one segment there. Now, switching to the
number one brush, I'm using some of
that mixture there, but I'll add some water to it. I'll paint that along the pencil line and allow it
to bleed over the wet paper. That gives me a little
shadow along that ch, and it helps to separate the
segments from one another. Just there the paper
was a bit dry, so I picked up a bit of
water to soften the painted. I'll skip a segment
and I'll paint this little one here some water. Again, that's the
number eight brush. Switching to the
number one brush, then I paint that
along the pencil line. This time I'm on the right
hand side of the pencil line. On the segment above
that I just painted, I was on the left hand
side of the pencil line. Left hand side here,
right hand side here. Leave that segment to dry. And when it is, you can
paint in the bottom segment, I've just wet it with water. And I do the same thing here. I've got that same
paint mixture, the number one brush, and I run it along the right
hand side of the penciline. Here's a photo of my
painting at this stage. This is a shell three
progress photo two. In the next video,
we'll finish the shell.
10. Seashell Three - Adding Details to Finish: This is where we
finished in part one. In this video, we'll paint the opening of the
shell and the lip, and we'll also add some
finishing details. Before I paint the
opening of the shell, I'm doing some
repair work on mine. There was an edge
down the bottom here that I wasn't happy with. I've just wet that area with
water and I'll use some of the Indian yellow
burnt sienna mixture there just to tidy up that edge. There's no need to do this. If you're happy with your edges. I'm going to mix
some thicker paint. Now, for the lip or the
outer edge of the shell, I've just squeezed some fresh burnt sienna
onto my palette. You can see it on my
brush, it's quite thick. There's a little bit of moisture in my brush, but not a lot. Instead of washing the brush out and adding more
moisture to it, I wipe the brush
on the towel and I pick up a small amount
of the Windsor violet. I don't need a lot because
it's a strong color. And then with the damp brush, I mix them together, that gives me that thick mixture of paint with hardly
any moisture in it. Now, I've got two puddles of paint that are a similar color. This one over here
has got the water mixed with it and it
moves on the palette. This one over here
is quite thick, it doesn't move on the palette. My paints ready now for
the opening of the shell. I'll use my number eight
brush to wet this area here. Just taking it up to that
pencil line there and not all the way to the outer edge for keeping it within
that inner section. You can see that dark
area at the top. But I also need some color on
this lighter area as well, and I need to keep
that color quite pale. I will take some of this
watery mixture here, pull it aside, and I might add a tiny bit
more burnt sienna to it, so that it's not too violet. And also some water, because
I want it to be pale. Now, I'm going to sweep my brush over that
opening section there. Just a few strokes,
the paint will bleed. Just let it do what
it wants to do. Then I quickly wash
the brush out, dry on the towel, and then I use it to spread the
paint out where I want it. Now I have to paint in that
dark section at the top, but I don't want the paint to move too far over the wet paper. So I need to wait
just a little while until the sheen starts to go off the surface of the paper. I want the paper
to still be wet, but I don't want it to be
really wet like it is now. I've waited a few minutes
and you can see that the paper has started
to lose its shine. If you look at the
shell on the left, the opening still has a
slight sheen on the surface. But the shell on the
right, it's still wet. But the sheen has flattened slightly. That's what
you're looking for. You're looking for paper
that's still damp, but it's not glossy like it
is when it's really wet. It'll only take a few
minutes to reach this stage. I use that pigment over here with the
water mixed into it. I paint that onto
the damp paper. Still using the
number eight brush. Because the paper is damp, I'll get that fuzzy edge
along the bottom of the shape where it meets the lighter color,
which is what I want. I don't really want a
hard line across there. If I had painted that on while the paper was still
quite glossy, the paint would have spread too far and I would have
lost that shape. It's curving it down
a little bit there. Now, I'll get the really
thick pigment over here. I'm going to paint the edge, the lip of the shell. You can see how
thick that pigment is because it's skipping
over the paper there. I will dip my brush in the water just a little bit and pick up
a touch more paint. Hopefully, it won't skip over
the paper quite so much. I'm holding the handle of the paint brush
perpendicular to the paper, so it's almost straight
up in the air So that I can access the tip
or point of the brush. Now I'm going to take the
paint out of my brush. I wash it out, give
it a quick dab on the towel and I can finish off this edge here just with
the slightly damp brush. And now I get a bit
more of that paint. And I'll continue on
down the bottom edge. If you find it's too sticky, dip your paint brush
in your water and pick a little bit more
paint up there. I'm painting over
the masking fluid. I'll take a photo of my painting now before I go any further. This is the final
progress photo. This is Seashell Three. Progress photo three
that you can download. I'll add some burnt sienna to that mixture to make it a
bit more brown looking. I'm still using the
number eight brush. I'll paint in that
front section, and this is on dry
paper as well. To get into the
nooks and crannies, you might find it
easier to switch down to a smaller
brush like I do. This is the size number one. This little section here. I'll paint some water on. First I'll use this
mixture again. I'll get a bit of
water on my brush, and then I'll spread
that paint out now. Now I'll get a bit
of that thicker, darker pigment just there. I'll deepen the
color at the front. I'll paint two little
lines as well. I quite like this
blue gray here, but I feel that it needs to continue down the
side of the shell. So I'm going to wet
this section here with some water and paint some
of the gray there as well. Using the number eight brush, I wet that section with water. I pick up some of
the gray mixture. Remember that was a mixture of the French altramarine
and burnt sienna, but it has more of the
French Altra marine in it. In fact, I might put a touch more of the
French ultramarine in it just to make it
a bit more blue. Sitting on top of that orange, brown color, it doesn't
look very gray. I'm going to give that
some time to dry. Now, my painting has dried and I'm removing the masking fluid
now with the eraser. I've got the little
number five brush now, and I'm wetting that top
section with some water. And I'll use the
number one brush now. And some of that
mixture there with the burnt sienna
and Windsor violet. I run that along the front
edge, allow it to bleed. Now some of the gray
mixture up the top, the paper is still wet. I dip my brush in my
water container quickly, and I spread it out a bit. And now some of
that mixture here, I paint that little dark
section that you see there, dabbing it onto the wet paper. Now some more of that color to make this edge
that is left behind from the masking fluid look like it's part of the painting. I brush some of that color
over here and there on the dry paper to break it up so that it doesn't look like it's standing out quite so much. There's something else
I want to show you now. Sometimes you might
put your paint on your paper a bit too
dark, just there. I'm not extremely happy
with how dark the color is. I feel that I could go a tiny
bit lighter to fix that. I can use a wet brush to paint over the top
of the dry paper. I have to use the brush gently so that I
don't disturb the paint. Then I can grab a
tissue or a piece of paper towel and gently
dab at that darker area. I've got a tissue in my
hand now and I'm dabbing at that dark section and
you can see it takes a tiny bit of paint off
and lines it slightly. The last thing to do is
paint the cast shadow. I use the French ultramarine
mixed with Ben Siena. Little bit more of
the blue though, and I don't want
it to be too dark. So I mix some mortar
with it as well. Using the number eight brush, I paint the shadow down the
side that's on dry paper. Make sure your paint is wet enough that it flows
with your brush. Try not to fuss with it
too much for interest. I get a bit of the Windsor
Violet, not too dark. Mix some water with it. I drop that in there before it dries. You'll be happy to
know that that's the third shell completed there. It is cut off my board. There's all three of
them side by side.
11. Conclusion and Thank you.: I hope you found joy and learned valuable skills while painting
the sea shells with me. I always encourage
my students to embrace experimentation and perseverance in
watercolor painting. While it may not be the
easiest medium to master, it is incredibly
rewarding and fun. I'm eagerly looking forward to seeing your beautiful
shell painting. Don't forget to share them by uploading them to the
project and resources page. Thank you for joining me
on this artistic journey. I hope to see you in another
one of my classes soon.
 Louise De Masi, Artist - capturing beauty with watercolour