Transcripts
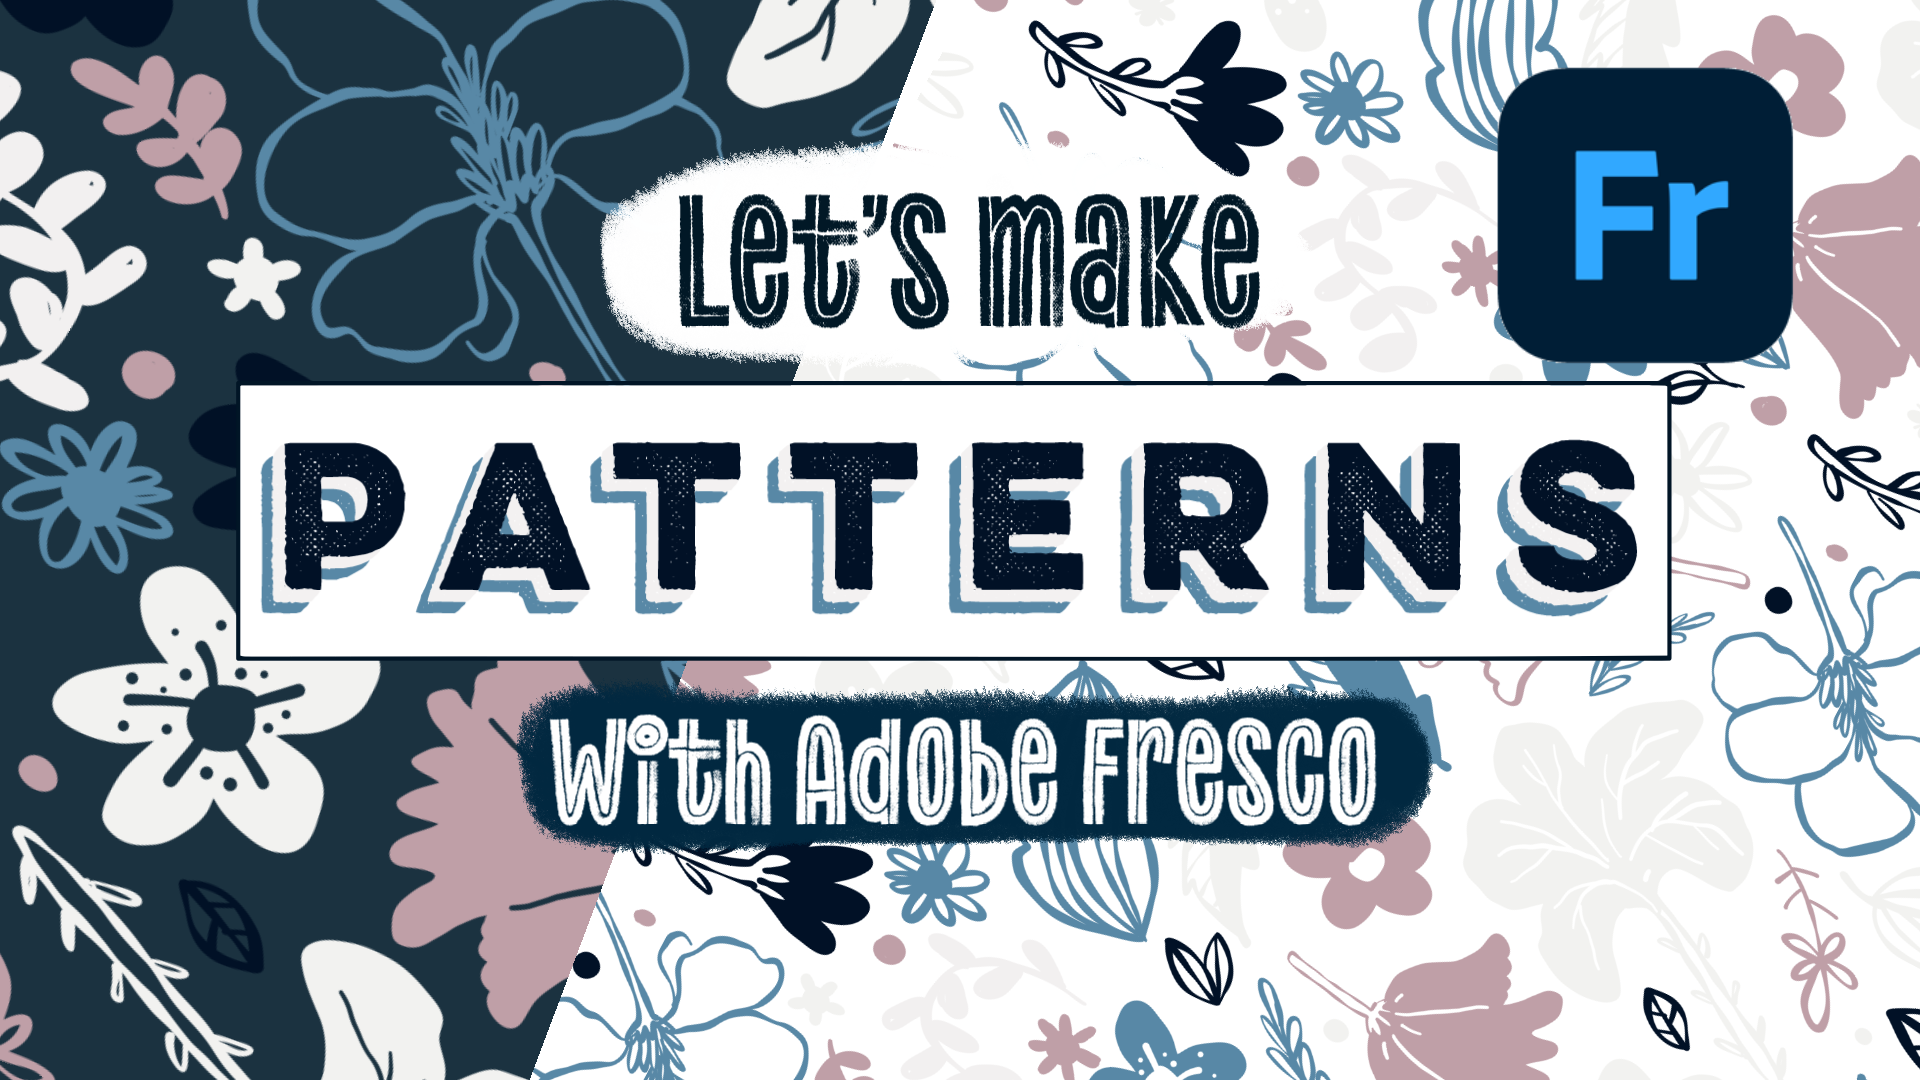
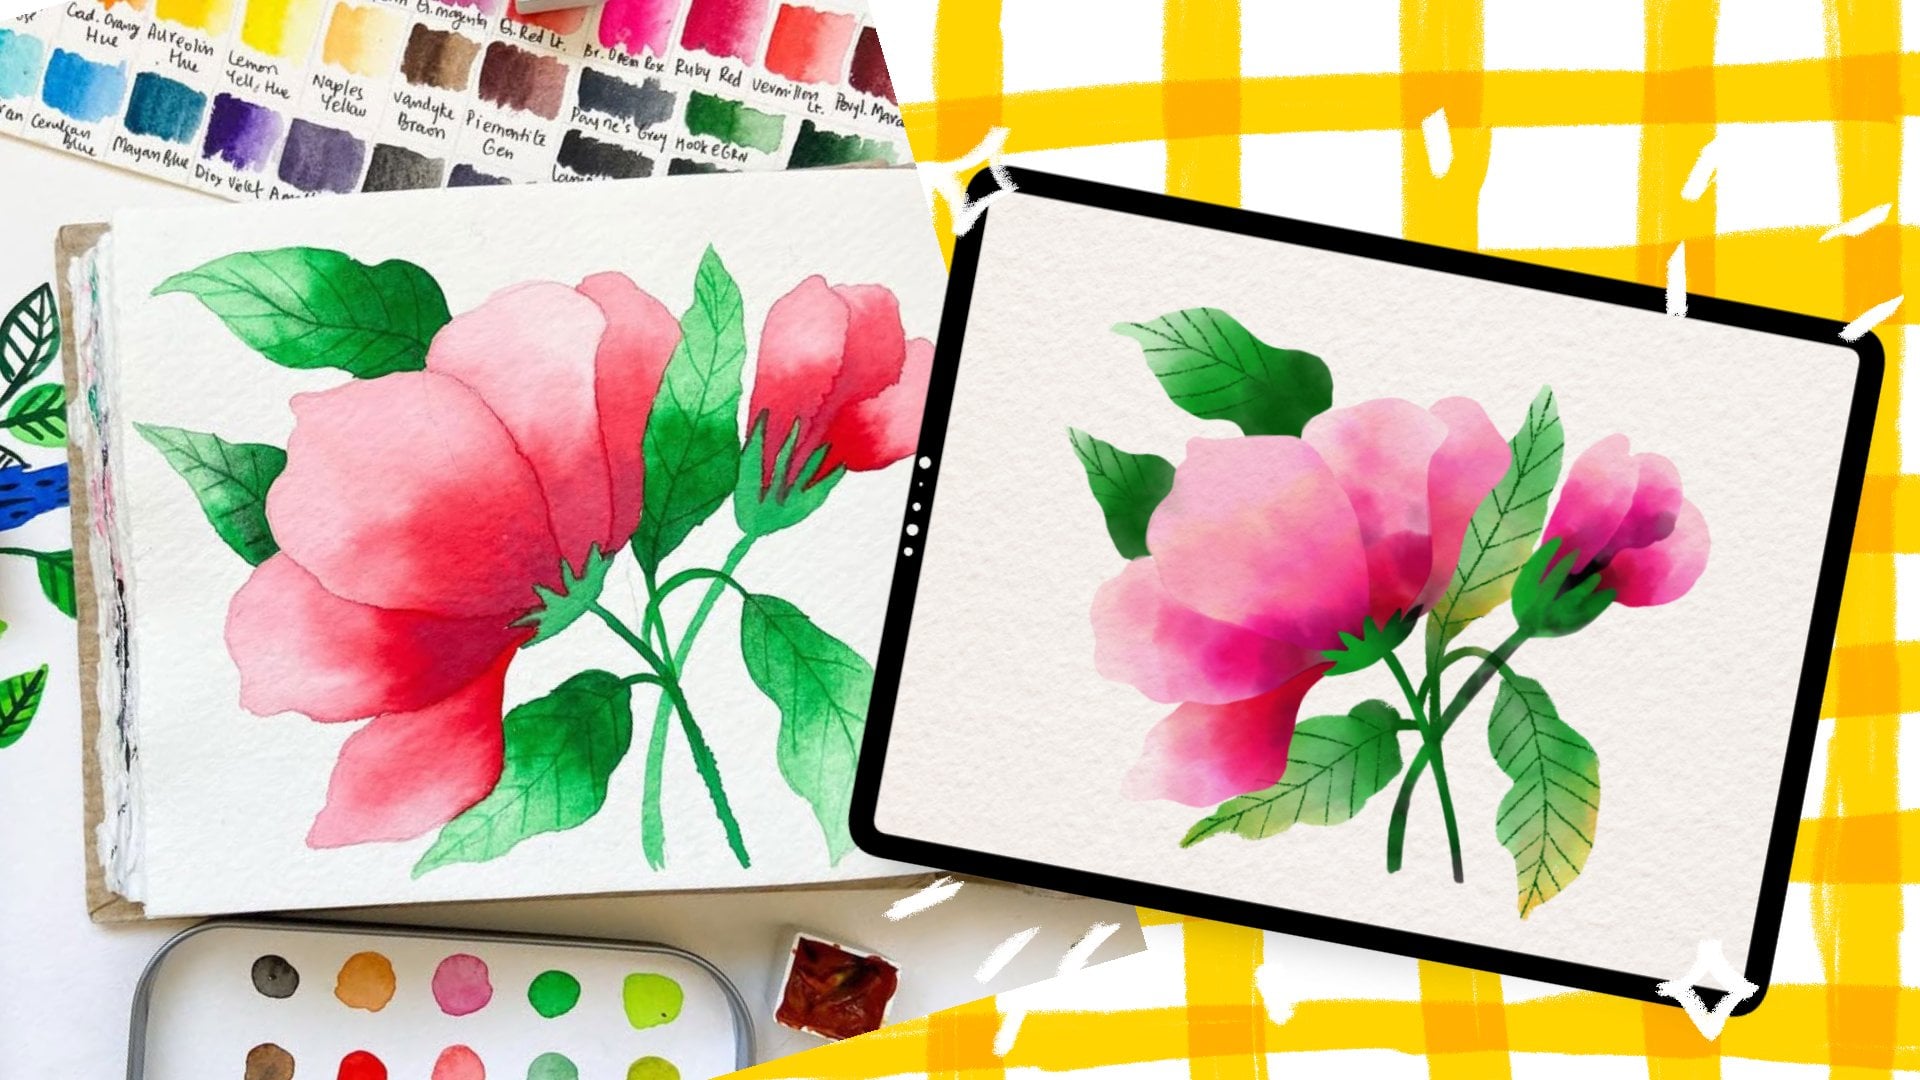
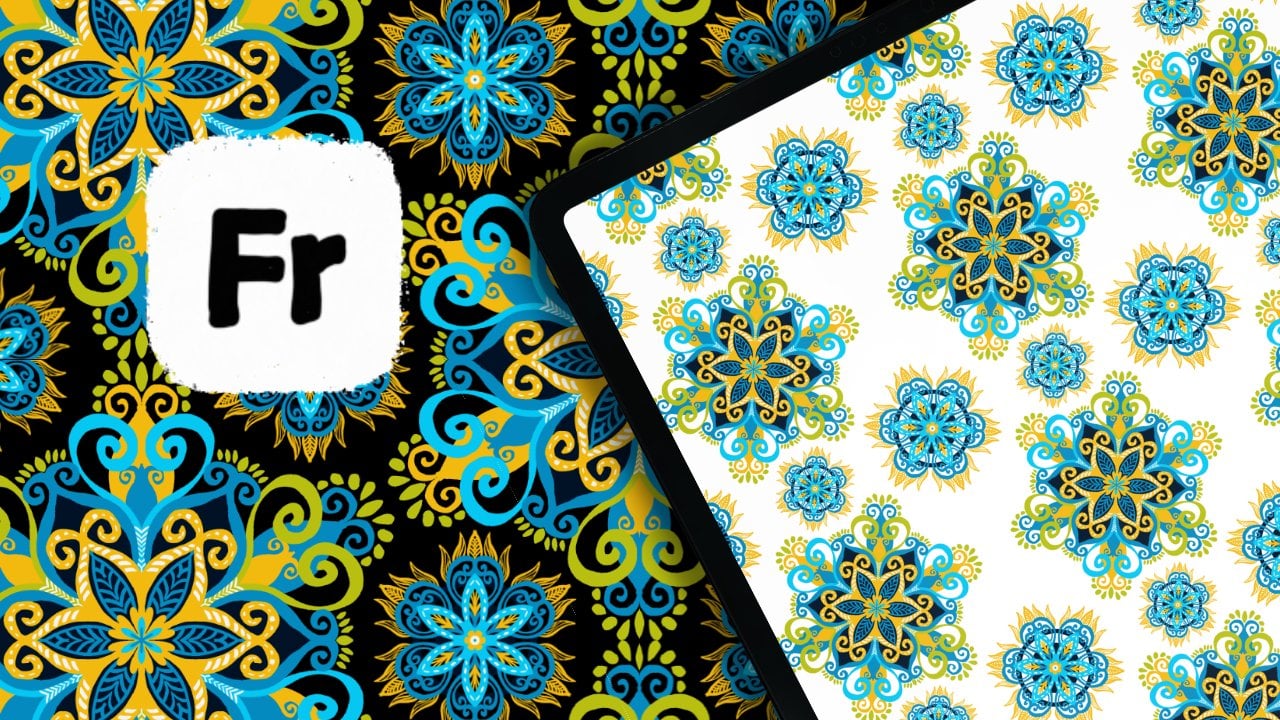
1. Welcome!: Welcome to the
world of patterns. Have you ever admired a perfectly repeating
pattern design and wondered how you could create
one yourself? Hi there. I'm Ahuni a digital
artist and designer. And in this class, I'm going
to show you how to create seamless repeating patterns
using Adobe Fresco. You learn how to
create and refine your own unique patterns, perfect for anything from fabric design to
digital wallpapers. We'll start by
covering the basics, how to set up your canvas, choosing the right brushes
and sketch out your ideas. Then we'll dive
into the fun part, building your pattern,
testing the repeat, and finally making it seamless. We'll also learn how to create
multiple color schemes for the same pattern using just
a by the end of this course, you'll have all the
skills you need to create professional great patterns
that repeat perfectly. Ready to use in your
creative projects or even sell online. Grab your iPad or any device
that Adobe Fresco works on and let's bring your patterns to life.
See you in class.
2. New Update: So as of May 2026, Fresco has changed its UI. That means it might
look a little different than what you see
in the next few lessons. I thought I'll make a update
video for my Fresco classes. So here you go. As
soon as you come in, if I click on Home, this
is how it looks like. Used to see your custom
sizes and stuff over here, but now it looks something
like this, but that's okay. You can click on Create New and create a new document as usual, click on your files, and this is how the homepage looks like. Create new. You have an extra
bit here called the social. You have some social
media templates there, so you can use that. I'll just go to digital
and current screen size. The first thing you notice
as soon as we move here is that the toolbar has completely moved from
left hand side to top. I know I'm not too
happy about this, but yeah, we'll just
work with it, I guess. On the left side now you
have the brush settings. So this is the smoothing
which used to, this is the smoothing,
you go up and down. This is basically the flow
or the opacity of the brush, like if you have some charcoal pencil
and then yeah let's make it black,
and then you do this. This is like you
keep it all high, and then if you keep it all low, you see it's not
flowing so well. This is the flow of the brush, and this is basically the size of the
brush that you have. Again, click and hole and everything else works
exactly the same. The settings are almost
the same as well. I don't think we need
to worry about that. And on the top bar, you have all the other tools
that you used to have. This one is pose. It is a new thing which
is not covered in any of my tutorials, so I'm not going
to go into that. But basically, you have
everything in here, the last tool,
everything's up here. The shapes are still here. Text is again here, and then this is to add your images or photos
and things like that. The eyedropper tool is here and the color palette
is over here. You might see that
the undo buttons have moved here instead of here, but that's fine because your
two fingertaps still work. Also one thing is when you
click on something else other than the brush,
this panel disappears. They used to be your animation
or motion panel here, which has moved up and they used to be shapes like
a ruler and stuff and that has moved into this
bit here or drawing aids. That's what it is, and you have all the drawing
aids over here. Then you have your
symmetry here and the perspective
grid and the grids. When you turn it on, you can have grids and
snapping is here, so you snap everything, I guess. Apart from that, everything
else is exactly the same. And when you go up, you
get a full screen mode. The only disadvantage I've seen is that when you're
on the brush mode, before even if you were in the full screen
mode and drawing, your brush, this was a floating thing which you can move everywhere
anywhere you wanted, but they have disabled that. That means when you go
to full screen mode, your brush settings disappear. So if you want to go back and adjust your brush
size or something, you have to go back in, which I think is not a good thing. The motion settings
are still here, so that hasn't changed as well. And the most important thing that I want to include
is the brushes. Instead of having three
separate brushes, they merge them into
one single brush. This was done a while ago
when you click on brush, you need to go to all brushes, and then you can choose
what brushes that you want, pixel brushes, and then you can see all the subheadings
or whatever. All the brushes are here, but only thing is it's
all bundled up together and that's the most annoying
bit for me at least. I guess that's it. That's
the main change to the UI, and since this was a
significant change, I thought I will add
a updated video. I hope you go ahead and
enjoy the next lesson.
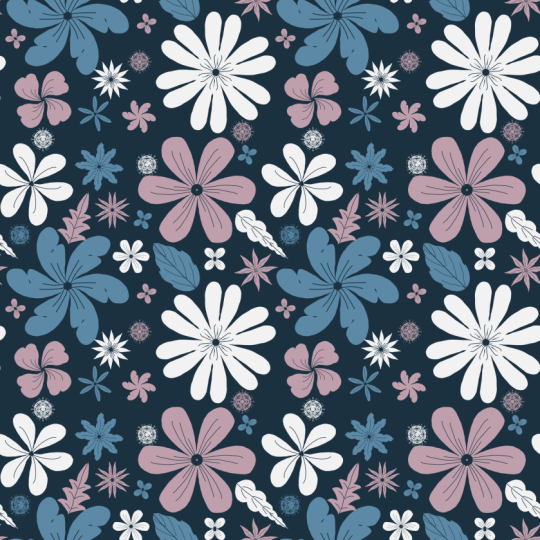
3. Setting Up: Hi, Ann. Welcome to
this first lesson. So before we begin to create this pattern that
you see on the screen, we have to make
sure that we know how to set up our Fresco. Let me quickly show
you a few things that we'll be using in
our class today. When you open up Fresco, you might see this screen
where it says it's at home, so it's showing all
your files over here. What I want you to do is
click on your files here. And in here, I want you
to go ahead and click on New Folder and create a new folder with any
name that you would like. Let's just say pattern. And maybe give some two because I have
Pattern one already. So click on Save it's going
to create this folder here. Now you can click on it
to go inside the folder, and we'll be creating
all our files inside this folder so that we can stay a little bit
more organized. The difference
between your files since home is when
you click on Home, it just shows all the files, but does not show you
a particular folder. Like, it takes all the
files which is inside the folder and puts it out
and shows it like this. But if you click on your files, it shows you the folders
and the files as well. So whatever is inside the folder is going to be
inside the folder. Let me just click that.
Now, once you're here, you're going to start
creating your document. And to do that,
click on Create New, and I want you to go into
digital and click on Square. This part is really important. So when you're drawing
out making your elements for your pattern or
making your pattern tile, this has to be square
so that it can repeat very nicely along your art booe. So we're going to start
up with the square. Of course, you can
experiment with rectangle shapes much later, but it's going to be
a little trickier to manage it when you want
it to be repeated. So the easiest way is to
start with the square, and that's what we're going
to do today. Click on square. So this is your artboard, and you can zoom in and out by using your two
fingers like this. And these are your
pixel brushes, which we're not going
to be using today, but you're most welcome
to do that, as well. This is your watercolor
and oil painting brushes. Again, you can use this to
make your artwork as well, and this is the vector brushes. We'll be using vector
brushes today because I like how vector brushes
can be scaled up and down, and still you won't
lose any information. So you can make your
pattern as big as you want, as tiny as you want, and still
it'll be nice and crisp. Ready to be put on any surface. So that is going to
be my choice today, and I'm going to go into
jitter and light jitter brush. The only reason I'm choosing
this is because I like the thick and thin that it comes
without a lot of effort. So that's why we're going to
be using our brush today. And two finger tap will undo your artwork and
three finger will redo it. So you can also find the undo and redo buttons right here, so you don't have to
worry too much about it. And this is the brush
setting spanner. So this tells you the
size of the brush. You can either do up
and down to adjust it. But if you feel like you
can djit it really well, you can click and hold, and you can type in the
number that you want. Let me just put in as 25. This is the smoothing.
By default, it's set to somewhere
in between, maybe 50s or whatever.
Does not matter. I just don't want you to
put it too high or too low because the smoothing
actually helps you. This is at 100 now, and you can see there's
a kind of a lag between your brush
and the artwork, and that makes it
a little harder to make or fine
tune your drawings. So I generally don't
like doing that. But if you think that
you have too much of a shaky hand and you
need a little help, go ahead and adjust
it to your liking. There's nothing wrong
with it. I'm going to put it around 50s. When I say I'm going
to put it around 50s, it doesn't matter if it's 52 or 58, it doesn't
matter, really. Even with the brush
number, when I say, I'm going to put it at 28, does not mean you
have to set it at 28. You can meet 20 or 30. It doesn't really
matter so much. And this is draw inside, which
we're not going to touch. It is a completely different
topic, so not for today. And these are the
brush settings. We're not going to
change this as well. Just to make sure that you
have the same setting as me, click on this resit button here, so it goes back to the original
setting. At ten to 12. So I'm going to put
it back to about 25. Maybe I'll just do this. There you go. That's our brush. Okay, next lesson is all about bringing in the colors. So
let's go ahead and do that.
4. Bringing in the Colors: It's time to bring in
the color palette. So now, there are two options to bring in the color palette. I'm going to share PNG or a
JPAC with all the colors. So all you have to do
is download it onto your iPad or any device
that you're using Frescon. Click on the images,
go to photos or files wherever you have saved it, and bring that image in. And once it's here, click on TA. So after you do that, if you go to Reasons,
you will see the colors. You might get a bit
too many colors because that's the
problem, but that's okay. And if you don't see this
automatically coming in, don't worry. There's
a setting here. Click on settings, app settings. And in general,
you can see or to create color palette and
make sure it's turned on. And once you turn it on, go back and bring the image again. And you'll get all these colors. So you have all these colors, and that might be
a little too much. So you could either use that or you can pick and
choose the colors. So pick a color. You're already on
a vector brush. So go ahead and make some mark on your. You can even put a dot. That doesn't matter. Click and hold the next color
and put a dot. Let's do for all the colors. Okay, now let's go into colors and resins and you
see these colors. I'm just going to quickly check that it's the exact same color, and it seems like, yeah, the exact same color. So you have imported the
color palette right now. The third option is to get the colors from
the Adobe color. I will share the link to
the color theme on Adobe. So all you have to do is
go to the Adobe website. That is color.adobe.com. You'll find the link to do that. And I'll also share the
link to the color theme. And once you click
on that color theme, I think you will be
taken to this page. Make sure you're logged
into your Adobe account, the same one as the one that
you've logged into Fresco. Once you have it, click
on Add to Library, it's going to get added to your recent library
that you've used. If you have multiple libraries, it'll just get added. See it has added to my draw
daily because that was the last library that I
used. It's quite quick. That is one as soon
as you do this, if you go in here and you
click on your color palettes, click on A, and you click on that particular
library that you have, and you will see it right there. If you don't have
any libraries here, it's going to create
a library called your library or give you an
option to create your own. So that's how we bring in
the colors for the artwork. Let's go to the next lesson
where we draw our elements.
5. Drawing the Elements: Mm. So once you have this, I'm going to click
on this eye button to hide everything because
I don't need it anymore. Now let's go up here
and click on this plus to create a
completely new layer. You're on your vector brush
that we already serected. Now we're going to go
ahead and choose a color. I want to choose. Let
me just bring this up. These are HSB sliders
which tell you the colors that you have picked. You can change these numbers by clicking and holding
and you can type in and it'll create a
completely different color how move this to change colors. Anyway, I'm going to
go into my reasons, and these are the colors that I hand picked I'm going
to be using that. I'll use this blue color. One is 2358 and 25. I'll click on my fill tool
and fill it in with a vector. Now, plus, to get
on a new layer, let's go ahead and
choose the white. Oh, yeah, let's choose white. Oh, it's not white. It's white. See where it is on
the wheel anyway. And then we're going to
go into our vector brush. So when you click on this brush, it'll automatically take you to the last brush that
you have selected, so you don't have
to go ahead and change any settings anywhere. That's perfect. Or. Let's
go ahead and draw a flower. So you can go ahead and draw whatever kind
of element that you want, but I'm just going to go draw some flower
kind of thinking. And let's put that.
I'm going to use the fill tool and
fill it in like this. Go back to my brush, fix this a little bit,
and make a stock. Make things like this. Okay. And now I want to
add some things in here. And then I'm going to go into eraser and I will
choose the basic round. Let's reduce this. This is 500. So make sure it's about 25, the same as the brush. And then I'm going
to go ahead and make some pains like this. Okay. I think our first
element is ready. Next, click on Plus to
create a new layer. You want your elements to be on completely different layers. This is because later we're
going to try and arrange these elements to look and
feel better on the board. So go back to your brush, and now we'll choose the pink, and now I'm going to
draw one more flour. Now I'm going to make
one more because I want it to be
filled with elements, so click and duplicate layer. And this one, I'll take the
fill tool and fill this part. But again, I'll go to eraser. My eraser settings are set. So I'm going to
go ahead and make that dent here like that. Oh, just hide this
because, you know, you are drawing on that, so it might show up. Use your two finger to
undo anything, go back, hide, and go to your
layer, and let's erase. There you go. So
now, I'll unhide it. Now, plus to create one more. So we're going to go ahead
and choose this blue here. Go back to your vector brush,
and we'll make a leaf. And I'll use the fill
tool on one side, and I'll use the
brush on the other. Plus, and I'm going to
make a blue flower, something like this, I guess. Okay. And I think
this is done as well, and I want plus and
create one more. I have to do the
next element now, so I need a new layer, but I want to show you
guys what happens if you draw something on the same layer, and then
you want to edit it. You don't have to
erase it, so let's go ahead and choose this pink, and I'm going to go
ahead and draw a flower. Maybe like this.
Let's fill it in. And then you realize, oops, I did this on the same layer. So what you're going
to do is click on your Lasso tool and make
sure you're on Lasso, and you're going to go and
carefully select that flower. It doesn't matter.
There's nothing here. Remember, don't select the other element
that you've already on. Once you do that, you'll
get something like this, or you might get marching ants, which looks like now
you click on the layer, click on cut selection. It's going to disappear.
Now, click on the layer again and
say paste selection, and it's going to paste it on a completely different layer,
and then click on Tang. We can add few more
things, so plus, and I'm going to choose that of white or whatever that white is, and I will draw Ops go to your brush and
draw more flowers. And then this time, don't
worry about how you have organized your elements because we're going to move
them around completely. So use your eraser, and that's not good. We're going to move the elements later depending on
how we want it. Obviously, when you're drawing, you're not too
particular about things and you tend to
draw it everywhere. So that's the main reason you need to have them
on separate layers, plus maybe a pink one and brush, and maybe a How about that? Does it look nice?
Okay. That's good. Maybe one of these white. So what you can do is
you can just go ahead, click on the layer and
click on Duplicate layer, and now choose the
color that you want. Use the fill tool and put it in. Because it's a vector brush, it recolors really nicely. And you might think, Oh,
where did my blue one go? It's right behind
that. Don't worry. Now, plus, I want one more. I like the white. I guess
I'm going to keep that. And I'm going to make a flower. But fill this up. You can add more elements,
but let's stop at this. So next, we're going to go
ahead and arrange this around the art pot so that
we can make a pet.
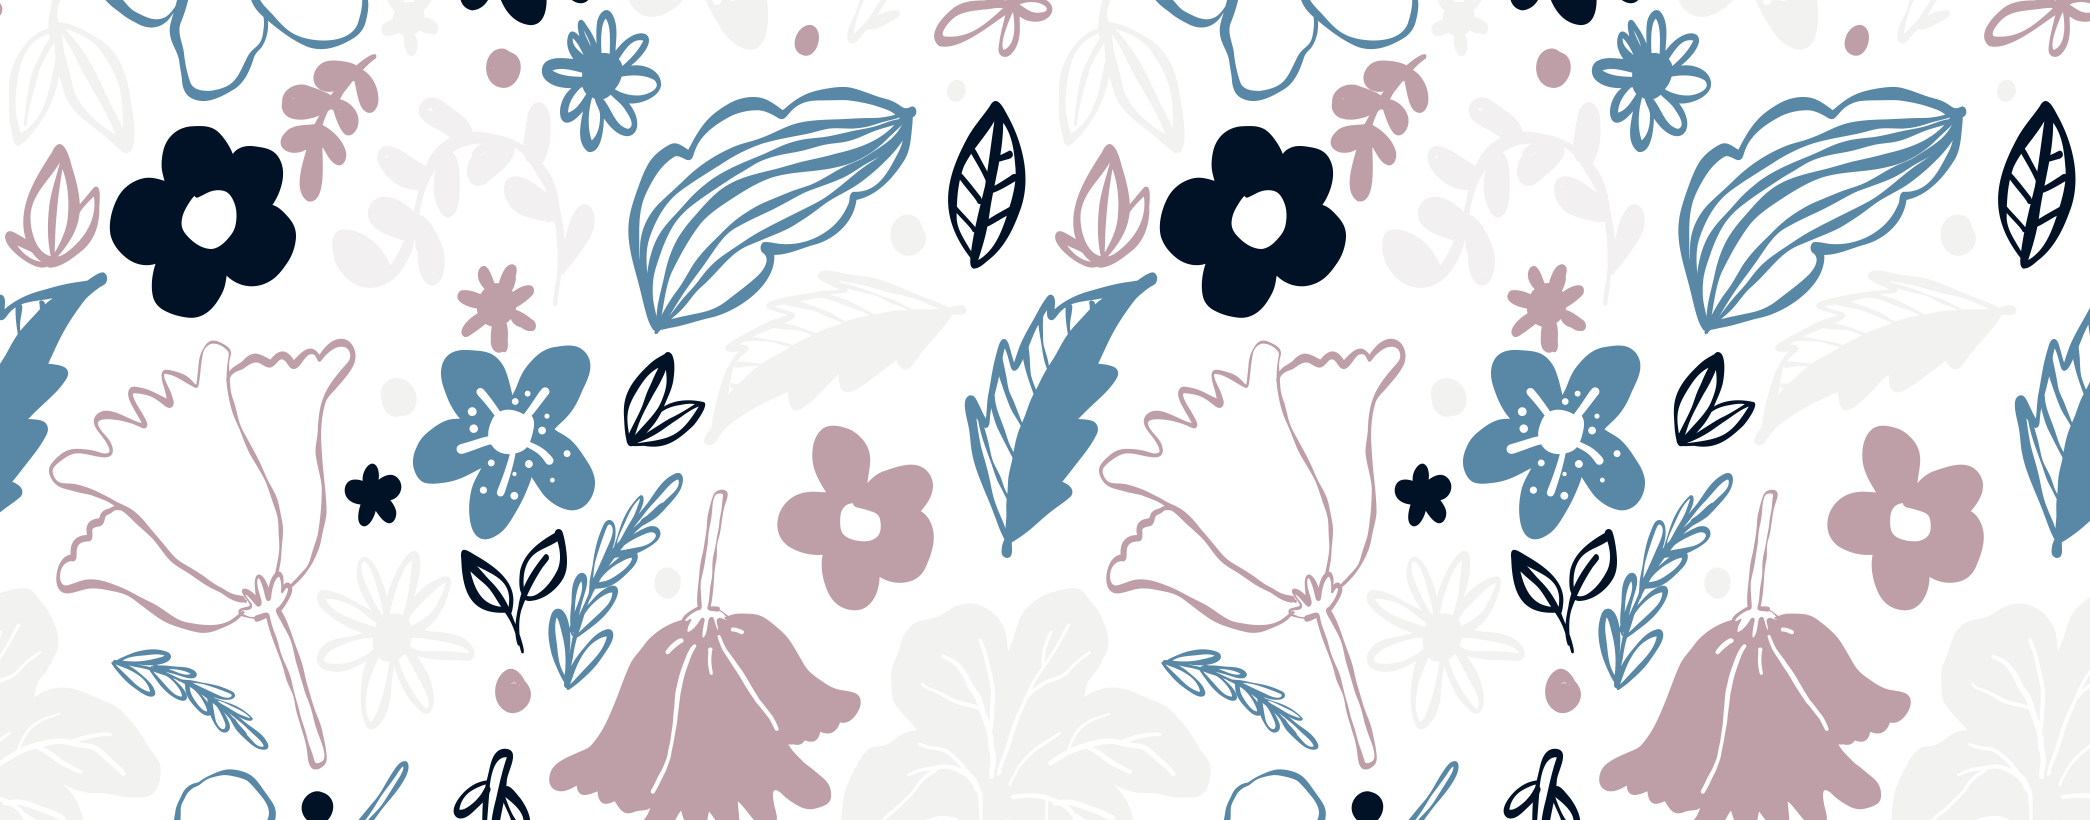
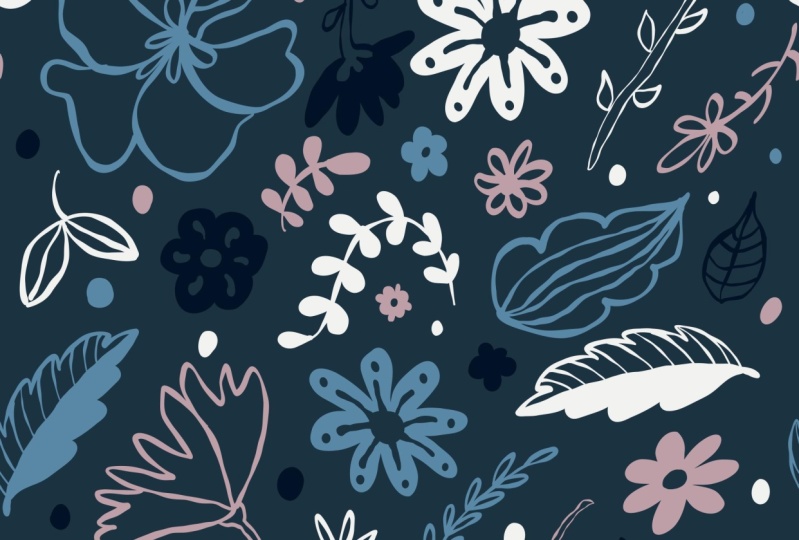
6. Arranging the Elements: Okay, so let's go ahead
and arrange this. One thing is you know
the way you arrange your artwork will change
your pattern completely. So we're just going to
try and do our best. So you have all the elements
in separate layers. This is the main flower, so I'm going to go into
that white flower right now and click on
the Transform tool. Once you do that, you get
this transform option and you can make it bigger or smaller by using the corner
anchor points, and then you can move
them however you want. I'm just going to keep this in the center because I
think I like it over. Next, let's go to
the next layer. You don't have to click on Done and go back to the
transform tool. Once you're in the
transform tool, you can just click
on different layers. Now, I'm going to go into the layer with this flower here. Use this anchor point here to
rotate it however you want. Going to rotate it over there. You can also use your
skew right now and skew it however you
want, or distort. And you can experiment
with things so that your elements look a little different from the
other elements. I'm going to go
into the next one. Probably bring it
somewhere here. I still have to adjust
this, by the way. I'm going to go into Transform, go back to transform.
Don't forget that. Okay. And then let's
click on this. Make this one here. Yeah. And put this here. Then let's go and choose that white,
which is right there. Which one is that? This one? Nope. I think it's on the
top. There you go, yeah. Gonna bring it up here and make it smaller and turn it around and
keep it here for now. No problem. And
then the blue one, I feel like it needs
to be a little tiny and maybe upside down. Maybe that will look better. And we need some white
over here, right? So let's go to that other
flower that we want this. I want the other
one. Where is it? Up. I'm going to bring it up here, and this one, I'm
going to put it back. I just want you to go
and arrange this like, however you see fit, however you want your
artwork to look like, okay? There's one more trick I
want to show the white one. You can flip it upside down. You can flip it left
and right like this, like that, and then you can
move it wherever you want. I wanted it to be here, but then too much white
together, I guess. So let's make it up here now. Let's make it here like that. And I'm going to arrange
this flower a little bit I kind of don't like
how it is right now. Maybe arrange it like that. And take your own sweet time to adjust things to make
sure that you've got, you know, things looking like
you want it to look like. It's really important
at this stage that you kind of match it perfectly. And, yeah, there you go. Let me click on done
and take a look at it. I feel like there
could be something here because it looks a
little empty, doesn't it? Maybe I'm going to
duplicate this layer, and then bring that over here. Get smaller and
bring it in here. A little bit of moving
this flower here. Okay, I'm never
satisfied with how they look until I actually start
working on the pattern. So maybe this one. We never move this, so let's
move it a little bit. Done. So we have arranged the
elements, and that's wonderful. And now we're going to
go ahead and go out. I'm going to click here
on these three dots here and click on Duplicate. So this one is our
original file, so I'm going to click
on three dots and rename this as elements. Safe. So you should not
be modifying this file. So if anything goes
wrong in other files, it doesn't matter
because you still have all your elements
right in place. Now we'll click on the new one, which you can rename as one. I'm going to click
on that. So next we're going to go
ahead and prepare this file so that it becomes a seamless repeating
pattern tile.
7. Making the Pattern Tile: Okay, so this is
a different file. That's the file number
one that we have opened. And we're going to go ahead
and arrange the elements here to create a
seamless pattern. So first of all, I
want you to go ahead and group all these
elements together. So let's go ahead and
group all the elements. So all you have to do is
click on these three dots, click on select multiple, and we're going to choose all the elements that
you've created. Do not leave even
a single one out. Once you have all
of them, click on this folder icon, and
they will get crude. But now it's just
the elements and you have the background layer
in a separate layer. I want you to go ahead and group the background
layer as well. And this is really important because when you click
on your transform tool, it'll select only the area
where your elements are. And that is going to be a little tricky when you have to make
it into a perfect pattern. So what we're going to do is we're going to group
this one as well. Click and hold and drop it in, or you could have
grouped it in in the initial stage itself. So it's on the top, so it
looks like that. Double click. You can click and hold and bring it all the way back down. And you might be
wondering, What if I want to change my background
color in the end? No problem, because
we're not going to be merging any layers
until the end so that you still have an option to create multiple copies
of the file that you've created and go and hide this background layer and
put in different colors. So you can create
this same pattern in multiple color schemes. Yeah, it's still possible. So if you're in the group, click on this arrow to
get out of the group. To go inside the group,
just double click it. And if you want to get out, you can click on this arrow here. Before we begin
arranging these things, I want you to go into this
setting here called precision, click on Snapping and make sure your alignment
guides are on. What this does is, it shows up some alignment guides
on the artboard. So when you're moving things, it'll show you exactly
where the center is, and that's really important. So go back here. So click and we're going to
duplicate this layer group. We have two now and
we're going to move one of these to the left and
the other one to the right. Doesn't matter which
one, I will hide the other so that you
see what I'm doing. Let's go to the top and
click on Transform tool. Now you see it's collecting
the entire artboard, and now we're going
to slowly move it. Let me bring it up here, make it smaller so
that you can see it, and we're going to move
it slowly and you see those blue lines there's only one now because we can
see the horizontal one, and you see it snaps at
the vertical line as well. And once you have this, let go. Oops, not proper. There you go, and let go. Make sure you do this
slowly and carefully. You have to see
both the vertical and the horizontal line as well, and only then you need to
stop and click on Dong. Okay, you can still
see the other part. That's because I have not
turned on the outboard prev, so I'm going to go
ahead and turn it on so that you can
see only the half. Now the next one,
I'll turn it on. Before I proceed, I want
to make a copy of it, so click and duplicate
layer group. Next, I'm going to go ahead
and hide the other copy. I want to use my
elements later on, if I want to copy
and paste and stuff, so I'm going to
keep a copy there, and I'll go to the one
which I just duplicated. I'm going to move this
to the right now. And if you go up a little, you see that line disappears, you should make
sure that you can see that blue horizontal line. And as soon as you see the
vertical line as well, let go and click on Done. So a lot of times,
you'll be able to see a line when you're
zoomed out like this. But it doesn't matter
because when you zoom in, you can't see this
line, actually, it is perfectly align. But if you see this
line as a thick line, that means that something isn't right and you haven't
moved it perfectly. So make sure that you
go ahead and fix that. So now we have these two ready, and now it's time
to merge these two. So now click select multiple. Click the other one and
make it into a folder. That's it's group together. And now click on plus, and we are going to make
some new elements here. You can create your
own new elements or you can just bring
in the elements here, like unhide, double click. You can go ahead and click. Let's do copy layer, and you can go out and come
here and say paste layer. And then it's going
to come up and you can place it anywhere you want. And let's flip it a little bit, done and maybe give it a new
color. This one, I guess. So I have the flower there, and then you can go
to any new layer and create your own elements, and that's what
we're going to do. I will choose this really dark
blue that I have. Cancel. Go to your vector brush again. Make sure you're still
on your vector brush. And then we're going to make some new elements. Like that. Maybe. I don't know. I'm just drawing things
now without any plans. And you can always make
dogs and stuff as well. So And you don't have to choose a different
color like this. You can still use the ones
that you're already using. And in case I forgot to mention, we're going to go ahead and fill this area right here,
this gap right here. We're not going to mess
with these things as much, but we're just going to
fill in this area right now and maybe take some white
or whatever that color is. I guess that should be okay. Kate, I don't want you to move too much into all these edges, but if you want, you can. Like that. Okay, so I
think this one is ready. Now what I want to
do is I want you to group all these new elements
that you've created. I would have ideally created
it on a different layer, but I forgot, but that's okay. So we're going to group
these three things. That's the left
part, right part, and the center part
that we just drew. Let's go ahead and do that. Select, select multiple,
select and fold it up. Alright, so now I
want you to create a duplicate of
this entire thing. So now if I uncheck it, you see, it's all
grouped together. So click and duplicate
layer group. So now we're going
to move one of them up and one of them down. So remember what we did
in the initial thing. We moved it left and right. Now we're going to
move up and down. So let's go ahead and hide the below one so that you
don't get confused. Click on your transform tool. I know it's selecting a lot because we're using
vector brushes. Whatever you drew is
still sitting outside. So if you're using
a pixel brush, it gets cut to the artboard,
but vector brushes. That doesn't happen. It's
still sitting outside. But don't worry.
When you export it, you'll just get this tie. Now, I'm going to make
it really small so that it's easy for me to move. And you see what's happening. Don't move it around and let go. Done. So we're going to come
to the bottom part now, use the transform tool
again and slowly Snap. Tap. So there you go. You have some space right
here and we're going to fill this space up
with more elements. You can choose to, again,
bring in the older elements, but I'm going to go ahead
and use new elements now. So I have my brush and
probably choose this blue, and I have this particular leaf that I've been thinking
about drawing. And to do that, I'm going
to go on top and plus, and now we're going
to draw maybe a white one or that off white. I hope I used off white and not white because
let's just see what the color is
61 and 975 and 95. Okay, I'll just
use that, I guess. And then I should have drawn
this on a different layer. I'm going to go
ahead and do that. I will try to select only that. The reason I'm doing that
is because I feel like, um, I might regret my decision, I want to move it a
little bit that side, make this smaller or something. So yeah, new layer is
always a good idea. Let's go to brush again and
I'll choose this color. That's my favorite kind
of flower to draw. And, um, go in here. And then let's do some white. We're not using the pink much, so let's go ahead and
use that one now. Is it too busy? Maybe,
but it doesn't matter. Okay, so I have all
these elements ready, and now I'm going to
group all these together, so click select multiple and then click all
of the things. That is the top part,
the bottom part, all the new elements that
you drew and fold it up. So this is your paten tile, but we're going to test it now. So I want you to go ahead
and click on this outside. It might take some time because
the file is really huge. I'm going to click
and duplicate this, and we're going to
rename this as the tile. Because this is our
patent tile and click and we're going to delete that layer
which we had kept as a backup. We don't need it. Delete layer group.
And now here, this is where you can
change the color. So I want you to go
in Double click, and you see the backgrounds
here, so double click. And wherever you see the
background, go inside, go inside, and search for the background
layer and hide it. Go back. This one has. And go hide it. Let's do the same thing, and we're going to do that until all the background disappears. I know it is annoying, but this will make it
easier when you have to. No, I think I left
one. Oh, no. Okay. So go back all the way out, and this is your
original pattern tile. So I'm going to click and duplicate this because I
don't want to lose it. So I'll go here and
hide it, and this one, I'm going to click and
merge layers in the group. So this is your pattern, so if you hide in
the next video, we're going to go here
and test our pattern.
8. Testing the Pattern : Okay, so now that we have the patetile created,
it's time to test it. So I want to export this with a transparent
background as a PNG. So I'm going to go back here and uncheck or hide my
background layer, and you can barely see
things, but that's okay. Click on Share, Publish
and Export, Export As, and make sure you
select a PNG and export it and save image. Click on T. Now let's go back, create new, and we're
going to create a square. You can create a
bigger square if you want a bigger pattern
doesn't really matter. I'm just testing
it out. Click on images, photos, and bring it in. D. This is a transparent image. If you go back here
and click on this, you'll see that it has
the heckcud background. That's perfect. But I'm
going to keep it on so that it's much easier
for me to look at things. Now we're going to go ahead and duplicate this layer four times. And now we're going
to move each one of these layers to the
corners of this square. So click on Transform. Use your corner here and move and make sure you let go once both alignment cards are good. Guides are good. Next one. Next one. And the last
one is to the coma. There you go, tongue.
Now you can zoom in and check for any lines,
which we don't see. This is the right
center of the pattern. And this is your pattern. And if I uncheck it, here's your transparent pattern. So our patent works
completely fine, and now it's time to export
them in different formats and different color
schemes. Let's go.
9. Exporting the Pattern: Let's go back to
our original file where we have created
our paten tile. So now, if you want to
upload it to a website which already does the
pattern creation for you like red bubble, et cetera, you just have
to export this tile. You don't need to create
a pattern and Export, so that's what we're
going to do now. If you want to add
different colors, create a new layer and you can add any
color that you want. Obviously, some color
that's not in here, vector. Okay, there you go. And
this is your pattern tile. You click on Share,
publish Export, Export as you can
give it as JPEG as well and click on Export
and you can save the image. And then you can upload it to any of these websites
as you want. And now our website ask
you to upload a pattern, you're going to go ahead and do the exact steps that you
did to test your pattern. That is you're going to
create this one right here. And if you want to
make it even bigger, you can always go ahead
and make it bigger, export this as a tile, and then use it
bigger and bigger. And then you can give
different colors here and export it as a PNG. Since we have used vectors, the images are going
to be nice and crisp, so you don't have to
worry about that. And next, I'm going to
show you how you can use the huge saturation option here to create multiple color themes for your same pattern. Let's go.
10. Color Variations: So now we're going
to learn how to use the same pattern to create completely
different color schemes. So once you're here, I'm at the pattern tile foam file
that is called the tile. I'm going to go ahead and click on this button here that says Hue saturation and
hue or saturation. It's called appearances. So I'm going to
just click on that. And when you click
on it like this, it applies to the elements and the background
layer if you have any. If you want to change the
color of just the elements, you'll have to click
on this clipping mask and then make it clipped
to that particular layer. But I want to change
the background as well because I think
they go well together. So we're going to
go ahead and move this to create different
schemes for us. You can hide, make
the saturation, make it all nice and
gray. I like it. So yeah, you can create
different themes like this and click on Share and share it as a different
pattern tile.
11. Tips for Pixel Brush Patterns: Till now, we have been
working with vector brushes, so we had a completely
different approach to exporting with
vector brushes. You had to export it as
an image and then use it. But that's fine with
vectors because they scale well and you don't
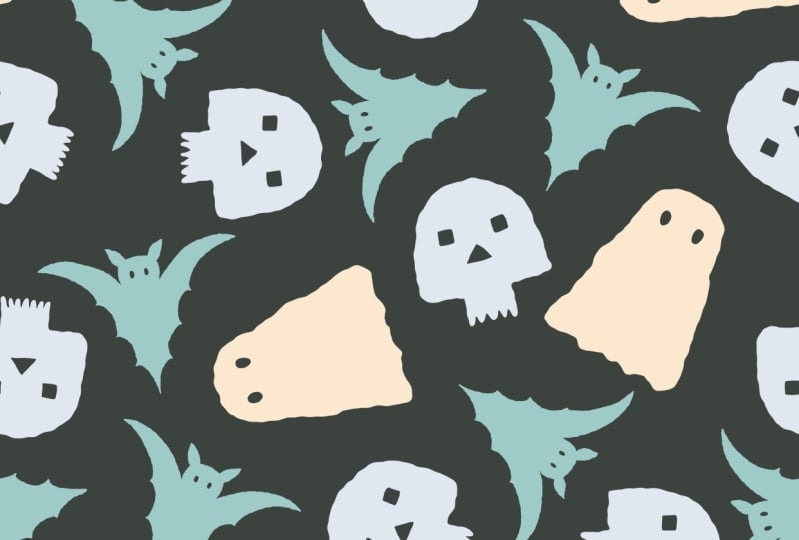
lose a lot of information. But when it comes to pixel
brushes, that's not the case, and the pixel brushes behave differently when you're
working on an art form. For example, here I have a pattern tile that I've
created using my pixel brushes. And when I go into my settings here and turn off the
artboard preview, I don't see anything
outside this arbole because pixel brushes get cut as soon as they go
outside the artboard, unlike the vector brushes. That makes it simpler to make your pattern
scale much bigger. The best way to
create patterns using a pixel brush is not
exporting it as an image. Now, if you want to upload to red bubble sites like Redbubble, which allow you to
create pattern. Yes, go ahead and
export this as a PNG, the same way you did for
a vector brush pattern. But if you want to create
a pattern out of this, do not export this as a PNG. Instead, there is a better
method. Let's do that. This is my pattern
tile over here. I'm going to click on this
three dots and duplicate. I'm not going to move my
original pattern tile. It's going to be
exactly like that. Now click on that, the new
file that you created, and we're going to
go into settings and here we're going to change. And in here, we're going to change it to whatever we want. This could be remember
it has to be a square, otherwise your pattern
might not work well. And you also need to increase it double times
every single time. That means if it's 2,100, multiply by two, that's 4,200, so that's
what we're going to. I'm going to lock this so
that when I change this, this is going to change as well. So click here and say 4200. Okay. That's good. Okay. And now you have this. Click on Tab. Now, click on
my pattern, where is it? So it's not grouped so
quickly, let me group it. It Okay, so I just merged everything and deleted all the other
layers, anyway. So once you have this,
you're going to click on your transform tool and
move it to the corner and make sure you go ahead
and move it so that you can see both the horizontal
and the vertical lights. Click on done. Now we're going
to go ahead and duplicate this three more times so
that you have four of them, and then use your transform
tool and move it here. So you can duplicate this one
and then do that as well, but I like to have it as four tiny squaes so that it's
much easier for me to move. And then the last one. God quanta. So now you
have created a pattern. Again, there's no line
here, as you can see. Now you have created a
pattern that is 4,200 into 4,200 pixels and make
sure you merge all this. That's select multiple,
and we're just going to merge all
this together, click and merge selected.
And there you go. And then once you have this, this is your bigger pattern. As you can see, your things
are still as it were. They haven't lost any
information because you didn't resize the
actual pattern tile, but you actually expanded
it to create a bigger one. Once you have your pattern
ready, you can click on Share, publish on X Export As, and you can create PNG
or JPEG and export it, and then upload it to
any place that you want. That's the tip for working
with pixel brushes.
12. Tips for Working Bigger Sizes: Here's a tip for working with bigger size patterns
where you have to create really huge artwork. When you click on Create New and then you go into
digital and square, there's an option here
which shows a tiny arrow, and you can see new size from format, and we're
going to click on that. And in here, you can start off by giving a bigger size square. That is you start off
your pattern tile, bigger size so that
it's much more easier so that you don't lose any information and
things like that, especially when working
with pixel brushes. So you can click on this lock here because you want your
artboard to be square and then you can start
off with a 3,000 pixel square or any
size that you want. And there's also print size. You can increase the print
size to say 300 DPI, which makes it really
sharp and really good. And yeah, you can always save
this size here, by the way, and you can give
Misquare or anything, any name that you want right here and click on
Create Document. Now you're going
to start designing the first lesson from this class is going to begin
with this bigger square. You're going to start
drawing all your elements, arranging them,
making into a tile, et cetera with this
bigger square. And that will help you create a better pattern
tile to begin with, so that later on,
it doesn't matter. You can make bigger and
bigger patterns and still have it neat and crispy. Next time when you go
to Click on Create New and you want to click on Square, you can just go to saved and you'll see M
square right there, and your new square
will also get created. So that's all the tips I
have for you today for working with patterns
in AutobFRsc h
13. Final Thoughts: So now that you know how to create patterns
with Ado V Fresco, I would like to see
what you guys create. If you do create something, don't hesitate to share it in the project section so that
I can see and comment on it. If you're on social media
that is Instagram or Threads, I um print me some color, so don't forget to tag me
if you share it on there. And if you share it as a story, don't forget to tag me so
that I get to see it as well, and maybe share to
my story as well. Well, that's it
for now. I'll see you in the next class. Bye.
 Ashwini Pandeshwar, Artist, master procrastinator